The Indian Weekender Friday, 23 October 2020
Weekly Kiwi-Indian publication printed and distributed free every Friday in Auckland, New Zealand
Weekly Kiwi-Indian publication printed and distributed free every Friday in Auckland, New Zealand
- No tags were found...

You also want an ePaper? Increase the reach of your titles
YUMPU automatically turns print PDFs into web optimized ePapers that Google loves.
18<br />
FEATURES<br />
<strong>Friday</strong>, <strong>October</strong> <strong>23</strong>, <strong>2020</strong> <strong>The</strong> <strong>Indian</strong> <strong>Weekender</strong><br />
BLACK CHICKPEAS<br />
CHANA KEBAB<br />
INGREDIENTS:<br />
• 1cup - chickpeas<br />
• 1tsp - salt<br />
• 1/2tsp - oil<br />
• FOR KEBABS<br />
• 2 - potatoes, medium<br />
• 1tsp - mango powder<br />
• 1/2tsp - red chilli powder<br />
• 1tsp - coriander powder<br />
• 1/2tsp - salt or according to taste<br />
• 1tbsp - coriander, chopped<br />
• 2tsp - oil<br />
• 1tsp - cumin seeds<br />
• 1 - onion, small chopped<br />
• 2-3 - green chilli, chopped<br />
• 1tsp - ginger paste<br />
• 1cup - breadcrumbs<br />
• Oil for frying the kebabs<br />
METHOD:<br />
• Rinse chickpeas throughly under running<br />
water.<br />
• Transfer the chickpeas to a bowl and soak<br />
them overnight in 3 cups of water. By the<br />
morning, the chickpeas will swell and double<br />
in size.<br />
• Drain that water and rinse the chickpeas once<br />
again under running water.<br />
• Add the chickpeas in a pressure cooker and<br />
add enough water to cover them.<br />
• Add salt and oil to the chickpeas, mix well to<br />
combine and cook over medium flame for 20-<br />
25 minutes. Chana Kabab<br />
• Drain the water from the cooked chickpeas<br />
and transfer them to a mixing bowl.<br />
• Mash some of the black chickpeas with a<br />
potato masher.<br />
• Boil the potatoes, peel the outer skin and<br />
mash them.<br />
• Add mashed potatoes to the chickpeas and<br />
mix well with the fork.<br />
• Add mango powder, red chilli powder,<br />
coriander powder, salt and chopped fresh<br />
coriander, to the potato mixture and mix well<br />
again. Set aside.<br />
• Heat oil in a heavy base fry pan over medium<br />
flame.<br />
• Add cumin seeds, when they start to splatter,<br />
add chopped onions, chopped green chilies<br />
and ginger paste, sauté for 3-4 minutes or<br />
until the onions are translucent.<br />
• Add this onion mixture to the chickpea<br />
mixture. Mix until well blended.<br />
• Add in breadcrumbs, mix until thoroughly<br />
blended.<br />
• To make the kebabs; grease your hands with<br />
little oil, take a hand full of kabab mixture and<br />
shape it into a round disk (kabab).<br />
• Repeat the process until all the kebabs have<br />
been assembled.<br />
• Heat oil (in tablespoons) in a skillet over<br />
medium flame.<br />
• Add chickpea kababs to the skillet and<br />
shallow fry them until both the sides are<br />
golden brown and crisp. It will take about 2-3<br />
minutes on each side.<br />
• Transfer kebabs onto a kitchen paper towel.<br />
• Repeat the process until all the kababs are<br />
done.<br />
• Serve with a cup of tea and a chutney on the<br />
side.<br />
• Serves - 5-6<br />
Green Chutney<br />
Ingredients:<br />
• 1cup - coriander leaves<br />
• 1inch - ginger<br />
• 8 - garlic cloves<br />
• 6-8 - green chillies<br />
• 2tbsp - lemon juice<br />
• 1 - tomato, large<br />
METHOD:<br />
• Grind everything together into<br />
a fine paste using little water if<br />
needed in tablespoons.<br />
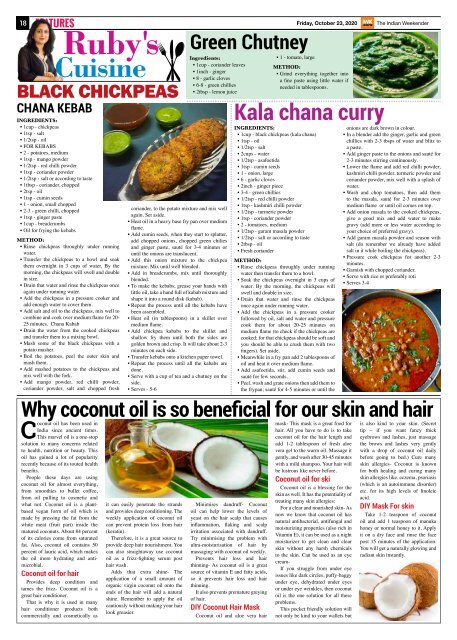
Kala chana curry<br />
INGREDIENTS:<br />
• 1cup - black chickpeas (kala chana)<br />
• 1tsp - oil<br />
• 1/2tsp - salt<br />
• 2cups - water<br />
• 1/2tsp - asafoetida<br />
• 1tsp - cumin seeds<br />
• 1 - onion, large<br />
• 6 - garlic cloves<br />
• 2inch - ginger piece<br />
• 3-4 - green chillies<br />
• 1/2tsp - red chilli powder<br />
• 1tsp - kashmiri chilli powder<br />
• 1/2tsp - turmeric powder<br />
• 1tsp - coriander powder<br />
• 2 - tomatoes, medium<br />
• 1/2tsp - garam masala powder<br />
• 1/2tsp - salt or according to taste<br />
• 2tbsp - oil<br />
• Fresh coriander<br />
METHOD:<br />
• Rinse chickpeas throughly under running<br />
water then transfer them to a bowl.<br />
• Soak the chickpeas overnight in 3 cups of<br />
water. By the morning, the chickpeas will<br />
swell and double in size.<br />
• Drain that water and rinse the chickpeas<br />
once again under running water.<br />
• Add the chickpeas in a pressure cooker<br />
followed by oil, salt and water and pressure<br />
cook them for about 20-25 minutes on<br />
medium flame (to check if the chickpeas are<br />
cooked; for that chickpeas should be soft and<br />
you should be able to crush them with two<br />
fingers). Set aside.<br />
• Meanwhile in a fry pan add 2 tablespoons of<br />
oil and heat it over medium flame.<br />
• Add asafoetida, stir, add cumin seeds and<br />
sauté for few seconds.<br />
• Peel, wash and grate onions then add them to<br />
the frypan; sauté for 4-5 minutes or until the<br />
onions are dark brown in colour.<br />
• In a blender add the ginger, garlic and green<br />
chillies with 2-3 tbsps of water and blitz to<br />
a paste.<br />
• Add ginger paste to the onions and sauté for<br />
2-3 minutes stirring continuously.<br />
• Lower the flame and add red chilli powder,<br />
kashmiri chilli powder, turmeric powder and<br />
coriander powder, mix well with a splash of<br />
water.<br />
• Wash and chop tomatoes, then add them<br />
to the masala, sauté for 2-3 minutes over<br />
medium flame or until oil comes on top.<br />
• Add onion masala to the cooked chickpeas,<br />
give a good mix and add water to make<br />
gravy (add more or less water according to<br />
your choice of preferred gravy).<br />
• Add garam masala powder and season with<br />
salt (do remember we already have added<br />
salt in it while boiling the chickpeas).<br />
• Pressure cook chickpeas for another 2-3<br />
minutes.<br />
• Garnish with chopped coriander.<br />
• Serve with rice or preferably roti<br />
• Serves 3-4<br />
Why coconut oil is so beneficial for our skin and hair<br />
Coconut oil has been used in<br />
India since ancient times.<br />
This marvel oil is a one-stop<br />
solution to many concerns related<br />
to health, nutrition or beauty. This<br />
oil has gained a lot of popularity<br />
recently because of its touted health<br />
benefits.<br />
People these days are using<br />
coconut oil for almost everything,<br />
from smoothies to bullet coffee,<br />
from oil pulling to cosmetic and<br />
what not. Coconut oil is a plantbased<br />
vegan form of oil which is<br />
made by pressing the fat from the<br />
white meat (fruit part) inside the<br />
matured coconuts. About 84 percent<br />
of its calories come from saturated<br />
fat. Also, coconut oil contains 50<br />
percent of lauric acid, which makes<br />
the oil more hydrating and antimicrobial.<br />
Coconut oil for hair<br />
Provides deep condition and<br />
tames the frizz- Coconut oil is a<br />
great hair conditioner.<br />
That is why it is used in many<br />
hair conditioner products both<br />
commercially and cosmetically as<br />
it can easily penetrate the strands<br />
and provides deep conditioning. <strong>The</strong><br />
weekly application of coconut oil<br />
can prevent protein loss from hair<br />
(keratin).<br />
<strong>The</strong>refore, it is a great source to<br />
provide deep hair nourishment. You<br />
can also straightaway use coconut<br />
oil as a frizz-fighting serum post<br />
hair wash.<br />
Adds that extra shine- <strong>The</strong><br />
application of a small amount of<br />
organic virgin coconut oil onto the<br />
ends of the hair will add a natural<br />
shine. Remember to apply the oil<br />
cautiously without making your hair<br />
look greasier.<br />
Minimises dandruff- Coconut<br />
oil can help lower the levels of<br />
yeast on the hair scalp that causes<br />
inflammation, flaking and scalp<br />
irritation associated with dandruff.<br />
Try minimising the problem with<br />
ultra-moisturisation of hair by<br />
massaging with coconut oil weekly.<br />
Prevents hair loss and hair<br />
thinning- As coconut oil is a great<br />
source of vitamin E and fatty acids,<br />
so it prevents hair loss and hair<br />
thinning.<br />
It also prevents premature greying<br />
of hair.<br />
DIY Coconut Hair Mask<br />
Coconut oil and aloe vera hair<br />
mask- This mask is a great food for<br />
hair. All you have to do is to take<br />
coconut oil for the hair length and<br />
add 1-2 tablespoon of fresh aloe<br />
vera gel to the warm oil. Massage it<br />
gently, and wash after 30-45 minutes<br />
with a mild shampoo. Your hair will<br />
be lustrous like never before.<br />
Coconut oil for ski<br />
Coconut oil is a blessing for the<br />
skin as well. It has the potentiality of<br />
treating many skin allergies:<br />
For a clear and nourished skin- As<br />
now we know that coconut oil has<br />
natural antibacterial, antifungal and<br />
moisturizing properties (also rich in<br />
Vitamin E), it can be used as a night<br />
moisturizer to get clean and clear<br />
skin without any harsh chemicals<br />
to the skin. Can be used as an eye<br />
cream-<br />
If you struggle from under eye<br />
issues like dark circles, puffy-baggy<br />
under eye, dehydrated under eyes<br />
or under eye wrinkles, then coconut<br />
oil is the one solution for all these<br />
problems.<br />
This pocket friendly solution will<br />
not only be kind to your wallets but<br />
is also kind to your skin. (Secret<br />
tip – if you want fancy thick<br />
eyebrows and lashes, just massage<br />
the brows and lashes very gently<br />
with a drop of coconut oil daily<br />
before going to bed.) Cure many<br />
skin allergies- Coconut is known<br />
for both healing and curing many<br />
skin allergies like, eczema, psoriasis<br />
(which is an autoimmune disorder)<br />
etc. for its high levels of linoleic<br />
acid.<br />
DIY Mask For skin<br />
Take 1-2 teaspoon of coconut<br />
oil and add 1 teaspoon of manuka<br />
honey or normal honey to it. Apply<br />
it on a dry face and rinse the face<br />
post 15 minutes of the application.<br />
You will get a naturally glowing and<br />
radiant skin instantly.<br />