You also want an ePaper? Increase the reach of your titles
YUMPU automatically turns print PDFs into web optimized ePapers that Google loves.
H O W T O U S E Y O U R<br />
C A M E R A ’ S A P E R T U R E<br />
S E T T I N G S<br />
a S u m m e r a n a g u i d e<br />
e v e r y t h i n g y o u n e e d t o k n o w t o<br />
u n d e r s t a n d a p e r t u r e , a n d h o w a n d w h e n t o<br />
u s e i t<br />
w r i t t e n b y R h i a n n o n D ' A v e r c
T A B L E O F C O N T E N T S<br />
h e r e ' s w h a t t h i s g u i d e w i l l c o v e r<br />
<strong>Aperture</strong>, f-s<strong>to</strong>p, exposure, white balance – all of these terms<br />
can seem pretty mystifying when you’re using a DSLR for the<br />
first time. If you just keep your camera set in au<strong>to</strong> mode, you<br />
could get away with never knowing what they mean, but you’ll<br />
also never be able <strong>to</strong> control your camera, get it <strong>to</strong> produce<br />
the results you want, or create pieces of art.<br />
Any usage, from professional portraits right down <strong>to</strong> vacation<br />
snaps can benefit from some professional knowledge. Let's<br />
get started learning what aperture means, how <strong>to</strong> use the<br />
aperture settings on your camera, and what results you can<br />
get.<br />
w h a t i s<br />
a p e r t u r e ?<br />
2 3<br />
w h a t i s<br />
a n f -<br />
s t o p ?<br />
4<br />
6<br />
h o w d o i<br />
p i c k t h e<br />
r i g h t<br />
a p e r t u r e ?<br />
t a k e y o u r<br />
l e a r n i n g<br />
f u r t h e r<br />
5 s e l f - t e s t<br />
q u i z<br />
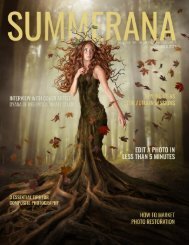
Previous page: Image<br />
<strong>by</strong> Sergey Causelove<br />
1
What is<br />
<strong>Aperture</strong>?<br />
Here’s the million-dollar question: just what is aperture,<br />
anyway? <strong>Aperture</strong> is the name given <strong>to</strong> a hole or opening<br />
allowing light <strong>to</strong> pass through – so, in this context, it<br />
refers <strong>to</strong> the size of the opening in your lens. You can<br />
actually change this setting in the camera, just like how<br />
the iris in your eye changes size depending on the<br />
environment.<br />
If you look in<strong>to</strong> your lens, without the camera body<br />
attached, you’ll see a hole right at the far side of it. It<br />
looks more or less circular, and when you twist the F-s<strong>to</strong>p<br />
ring on your lens, you’ll see the blades of the shutter<br />
making that hole bigger and smaller.<br />
When we talk about camera settings, we usually use F-<br />
s<strong>to</strong>p <strong>to</strong> define how closed or open the aperture is. The<br />
reason we need <strong>to</strong> talk about F-s<strong>to</strong>p at all is because it<br />
controls something really important: your depth of field.<br />
Imagine a grid stretching out in front of your camera – flat<br />
across the ground and going out as far as you can see in<br />
the distance. This is your ‘field’. Now, imagine selecting<br />
a band across the middle of the field that will be in focus,<br />
while everything else is out of focus. The size of this band<br />
is your ‘depth of field’. Since it goes out straight from your<br />
lens, anything which is in the same band of your field will<br />
be in focus, whether they are <strong>to</strong> the left of frame, the<br />
right, or in the center.<br />
And it’s not only the depth of field which is affected <strong>by</strong><br />
the aperture, either – it also affects the amount of light<br />
coming in<strong>to</strong> your camera’s sensor. Think about it: smaller<br />
hole for the light <strong>to</strong> get through means less light overall,<br />
right?<br />
“smaller hole for the light <strong>to</strong><br />
get through = less light<br />
overall”<br />
Images <strong>by</strong> Leung Cho Pan, teamtime at Getty Images, and Irmoske at Getty Images<br />
2
What is an<br />
F-S<strong>to</strong>p?<br />
Now that we know a bit about aperture and how it works,<br />
we also need <strong>to</strong> talk about a term that is very important in<br />
pho<strong>to</strong>graphy: F-S<strong>to</strong>p, or F-Number. But what is an F-S<strong>to</strong>p?<br />
The first thing you need <strong>to</strong> know is that the numbers work<br />
the opposite of how you might think. The smaller the<br />
number, the larger your aperture actually is. So, f11 will be a<br />
lot smaller than f2.8. Why do we use such an illogical<br />
system? Well, when you know the reason, you’ll see that it’s<br />
anything but illogical: we’re talking in fractions.<br />
Let’s go back <strong>to</strong> that visual depth of field grid we were<br />
looking at. Now you should be able <strong>to</strong> see the whole field<br />
and divide it <strong>by</strong> fractions. An F-number of f/1.4 covers most<br />
of the field in front of you. A sixteenth of the field,<br />
however, at f16, is a much smaller chunk of the grid.<br />
By the way, there are a lot of ways <strong>to</strong> write F-numbers.<br />
You might see F11, f11, F/11, F11.0, or f/11. They all mean the<br />
same thing – it’s just down <strong>to</strong> a personal preference of how<br />
you might want <strong>to</strong> write them!<br />
In most cases, cameras will offer settings that cover the<br />
following range, from largest aperture <strong>to</strong> smallest:<br />
In other words, an F-s<strong>to</strong>p of f8 is actually one-eighth of<br />
your aperture, so you just have <strong>to</strong> put your elementary<br />
math <strong>to</strong> play here <strong>to</strong> remember that a fraction of oneeleventh<br />
is a lot smaller than a fraction of one-third! Now<br />
here’s another trick <strong>to</strong> remember: a large aperture will give<br />
you a large amount of blur in the foreground and<br />
background. Get it?<br />
f1.4 – f2 – f2.8 – f4 – f5.6 –<br />
f8 – f11 – f16 – f22 – f32<br />
Image <strong>by</strong> Tippappatt at Getty Images, Redpho<strong>to</strong>grapher at Getty Images, and Volokhatiuk at Getty Images<br />
3
<strong>How</strong> Do I Pick<br />
the Right<br />
<strong>Aperture</strong>?<br />
This is the bit you’ve been waiting <strong>to</strong> sink your teeth in<strong>to</strong>:<br />
how do you pick the right aperture, knowing what you<br />
know now about how it works? Well, switch your camera<br />
in<strong>to</strong> either <strong>Aperture</strong> Mode or full Manual Mode and let’s<br />
play around.<br />
There are two things you need <strong>to</strong> consider when setting<br />
your aperture:<br />
(If you don’t know how <strong>to</strong> do this, don’t worry – we’ll<br />
explain it in other <strong>Summerana</strong> guides!)<br />
The general rule for light is that the darker the<br />
environment is, the larger your aperture will need <strong>to</strong> be in<br />
order <strong>to</strong> capture a properly exposed image. But you can<br />
also under-or-over-expose the image on purpose – that’s<br />
the beauty of coming away from au<strong>to</strong>matic mode!<br />
There are limitations <strong>to</strong> which F-s<strong>to</strong>p you can select, and<br />
these are usually determined <strong>by</strong> your lens. Some lenses<br />
simply can’t go as wide as others! Cheaper lenses might<br />
only be able <strong>to</strong> go down <strong>to</strong> f4, while <strong>to</strong>p-of-the-range<br />
options can take you down <strong>to</strong> f1.4. That’s why you might<br />
not see all options available <strong>to</strong> you when going through<br />
your settings.<br />
1. <strong>Your</strong> desired depth of field<br />
2. The amount of light available<br />
If the depth of field is your priority – for example, when<br />
you need everything <strong>to</strong> be in focus, or you’re trying <strong>to</strong><br />
create a lovely detail shot which blurs out everything else<br />
– then you can use your ISO and shutter speed settings<br />
<strong>to</strong> try and compensate the required amount of light.<br />
Images <strong>by</strong> Radu Bercan, Gorlov at Getty Images, and Madisonwi at Getty Images<br />
4
Self-Test Quiz<br />
Check your learning with our self-test quiz! Can you remember the<br />
answers? If you can’t, you’ll find them in the pages of this guide.<br />
1. What is the definition of aperture?<br />
2. What kind of mathematical figure does the F-s<strong>to</strong>p<br />
represent?<br />
3. With a larger F-number, will you get a larger or<br />
smaller depth of field?<br />
4. For an image that is almost all in focus, which F-s<strong>to</strong>p<br />
should you choose?<br />
5. What’s the difference between F11 and f/11.0?<br />
6. What other settings can you change <strong>to</strong> compensate<br />
for light when you have chosen a specific F-s<strong>to</strong>p?<br />
7. When setting up a shot, you find out that you can’t<br />
go any further down than f.4. Why might this be?<br />
8. What two reasons would make you want <strong>to</strong> change<br />
your F-s<strong>to</strong>p?<br />
Images <strong>by</strong> Kostas Kalomiris with Getty Images, Salman Hussain with Getty Images, and Sve<strong>to</strong>graphy with Getty<br />
Images<br />
5
Take <strong>Your</strong> Learning Further<br />
Point your camera at any subject you like – it really<br />
doesn’t matter what it is. Now your challenge is <strong>to</strong> try and<br />
capture different types of focus. Try shooting with a small<br />
F-s<strong>to</strong>p <strong>to</strong> get as much of the image as possible in focus.<br />
Now try narrowing your depth of field with a large F-s<strong>to</strong>p,<br />
which will get you a large amount of background blur.<br />
Compensate for the changes in light <strong>by</strong> adjusting your<br />
shutter speed and ISO (or using <strong>Aperture</strong> Mode so the<br />
camera will fix those for you). Do this until you feel<br />
confident that you can capture the depth of field that you<br />
want every time!<br />
If you loved this guide <strong>by</strong><br />
<strong>Summerana</strong>, head <strong>to</strong><br />
<strong>Summerana</strong>.com for more!<br />
About the writer<br />
Rhiannon D’Averc is a fashion and portrait pho<strong>to</strong>grapher, as well as the published author of more than 50 books. She is the<br />
Chief Edi<strong>to</strong>r of London Runway, an indie fashion magazine. Find more of her work on Twitter <strong>by</strong> following @rhiannondaverc.<br />
6