
Create successful ePaper yourself
Turn your PDF publications into a flip-book with our unique Google optimized e-Paper software.
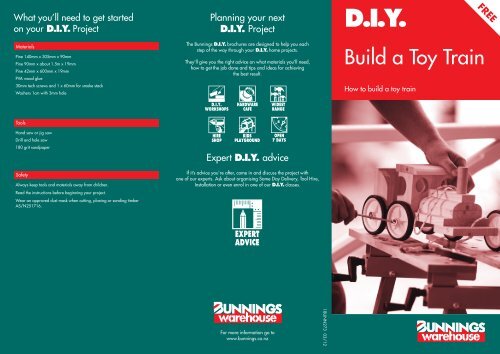
What you’ll need to get started<br />
on your D.I.Y. Project<br />
Materials<br />
Pine 140mm x 305mm x 90mm<br />
Pine 90mm x about 1.5m x 19mm<br />
Pine 42mm x 600mm x 19mm<br />
PVA wood glue<br />
30mm tech screws and 1 x 60mm for smoke stack<br />
Washers 1cm with 3mm hole<br />
Tools<br />
Hand saw or jig saw<br />
Drill and hole saw<br />
180 grit sandpaper<br />
Safety<br />
Always keep tools and materials away from children.<br />
Read the instructions before beginning your project.<br />
Wear an approved dust mask when cutting, planing or sanding timber<br />
AS/N251716.<br />
Planning your next<br />
D.I.Y. Project<br />
The <strong>Bunnings</strong> D.I.Y. brochures are designed to help you each<br />
step of the way through your D.I.Y. home projects.<br />
They’ll give you the right advice on what materials you’ll need,<br />
how to get the job done and tips and ideas for achieving<br />
the best result.<br />
Expert D.I.Y. advice<br />
If it’s advice you’re after, come in and discuss the project with<br />
one of our experts. Ask about organising Same Day Delivery, Tool Hire,<br />
Installation or even enrol in one of our D.I.Y. classes.<br />
For more information go to<br />
www.bunnings.co.nz<br />
1BUNN273 03/12<br />
D.I.Y.<br />
Build a Toy Train<br />
How to build a toy train<br />
FREE
How to D.I.Y.<br />
Build a Toy Train<br />
Your child will spend hours<br />
playing with this toy train.<br />
We recommend you paint<br />
the train in a very colourful<br />
and creative manner . High<br />
gloss premium paint will<br />
give you the best results.<br />
Please Note:<br />
Information in this brochure is <strong>Bunnings</strong>’ opinion and we don’t warrant<br />
the accuracy or completeness of that information. <strong>Bunnings</strong> excludes all<br />
liability in relation to the statements in this brochure.<br />
Where to begin<br />
Cut 140x19mm pine to length 305mm<br />
Cut 90mmx19mm into 6 blocks 140mm long.<br />
Cut one of the 6 blocks length ways into three pieces, each at 19mm x 30mm<br />
to be used as axles. Screw or nail and glue to base block (see Fig 1) .<br />
Fig. 1<br />
With 35mm diam. hole saw cut out circles as indicated. Save circle cut out<br />
for smoke stack (see Fig 2) .<br />
25<br />
mm<br />
20<br />
mm<br />
25<br />
mm<br />
80<br />
mm<br />
Fig. 2<br />
25<br />
mm<br />
30<br />
mm<br />
25<br />
mm<br />
Cut 42mm x 19mm into 4 lengths, 90mm long (see Fig 3) .<br />
With two of these use 60mm hole saw and cut windows (see Fig 4).<br />
Round off other 2 pieces as shown.<br />
With 60mm hole saw cut 6 wheels from 90mm x 19mm pine.<br />
Assemble all components as shown in complete picture using PVA wood<br />
glue and nails or tech screws. Pre-drill all tech screw holes. Place washers<br />
on each side of wooden wheels.<br />
Paint in bright premium colours.<br />
Fig. 3<br />
Fig. 4<br />
For further expert advice consult the qualified Team Members at your<br />
local <strong>Bunnings</strong> <strong>Warehouse</strong>.