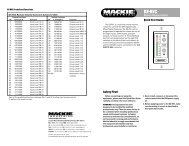
TT Control Software and Drivers Installation Instructions - Mackie
TT Control Software and Drivers Installation Instructions - Mackie
TT Control Software and Drivers Installation Instructions - Mackie

Create successful ePaper yourself
Turn your PDF publications into a flip-book with our unique Google optimized e-Paper software.
<strong>TT</strong>24 Firmware/<strong>Software</strong> <strong>Installation</strong>/Upgrade <strong>Instructions</strong><br />
Use these instructions to install the <strong>TT</strong> <strong>Control</strong> software application <strong>and</strong> Windows<br />
drivers on your computer (PC), to upgrade the <strong>TT</strong>24 firmware <strong>and</strong> <strong>TT</strong> <strong>Control</strong><br />
software, to upgrade an attached DS3232 Digital Snake, <strong>and</strong> to upgrade the<br />
firmware for the <strong>TT</strong>24 expansion cards.<br />
Contents<br />
<strong>TT</strong> <strong>Control</strong> <strong>Software</strong> <strong>and</strong> <strong>Drivers</strong> <strong>Installation</strong> <strong>Instructions</strong> .............. 1<br />
Installing the <strong>TT</strong> <strong>Control</strong> Driver (Windows 2000) ........................ 2<br />
Installing the <strong>TT</strong> <strong>Control</strong> Driver (Windows XP) ........................... 6<br />
Installing the <strong>TT</strong> <strong>Control</strong> Application (Win 2000/XP) .................. 9<br />
<strong>TT</strong>24 Firmware <strong>and</strong> <strong>TT</strong> <strong>Control</strong> <strong>Software</strong> Upgrade <strong>Instructions</strong> ..... 11<br />
DS3232 Digital Snake Firmware Upgrade <strong>Instructions</strong> ................... 14<br />
<strong>TT</strong>24 Expansion Card Firmware Upgrade <strong>Instructions</strong> .................. 17<br />
<strong>TT</strong> <strong>Control</strong> <strong>Software</strong> <strong>and</strong> <strong>Drivers</strong> <strong>Installation</strong> <strong>Instructions</strong><br />
• Note: The <strong>TT</strong>24 digital live console can be used straight out of the box,<br />
without the need for a computer.<br />
• The console comes with a CD-ROM containing a copy of our <strong>TT</strong> <strong>Control</strong><br />
software. This exp<strong>and</strong>s the control possibilities of the console, <strong>and</strong> allows<br />
you to control it with a computer. The software operation, details, <strong>and</strong><br />
computer hookups are described in the quick-start guide <strong>and</strong> owner’s<br />
manual.<br />
• The CD-ROM also includes a demo copy of Tracktion, located in the<br />
“Goodies” folder. This is our acclaimed <strong>and</strong> easy-to-use professional<br />
recording <strong>and</strong> MIDI production software application.<br />
• The following instructions show how to install the drivers <strong>and</strong> the <strong>TT</strong><br />
<strong>Control</strong> software.<br />
System Requirements for <strong>TT</strong> <strong>Control</strong>:<br />
• Video monitor resolution 1024 x 768 or better<br />
• Speed 600 MHz minimum<br />
• 100 MB free disk space<br />
• Windows 2000 or XP
<strong>TT</strong>24 Firmware/<strong>Software</strong> <strong>Installation</strong>/Upgrade <strong>Instructions</strong><br />
Installing the <strong>TT</strong> <strong>Control</strong> <strong>Drivers</strong> (Windows 2000)<br />
1. Verify that your computer meets the system requirements, <strong>and</strong> place the<br />
CD in your computer’s CD drive.<br />
2. Connect the <strong>TT</strong>24 console to your computer with the included USB cable.<br />
Power on the console.<br />
3. On your computer, a “Found<br />
New Hardware” dialog will<br />
appear for the <strong>TT</strong>24.<br />
After a short delay, the “Found<br />
New Hardware” Wizard will<br />
run. Click Next.<br />
4. Choose “Search for a suitable<br />
driver for my device,” <strong>and</strong> click<br />
Next.<br />
2
<strong>TT</strong>24 Firmware/<strong>Software</strong> <strong>Installation</strong>/Upgrade <strong>Instructions</strong><br />
5. Check only “CD-ROM drives”<br />
<strong>and</strong> click Next.<br />
6. The <strong>TT</strong>24 drivers will be<br />
located automatically on the<br />
CD. Click Next.<br />
7. The drivers will be installed<br />
<strong>and</strong> you will be prompted when<br />
the installation is successful.<br />
Click Finish.<br />
8. A “Found New Hardware”<br />
dialog box will appear for the<br />
<strong>TT</strong>24 USB Serial Port.
<strong>TT</strong>24 Firmware/<strong>Software</strong> <strong>Installation</strong>/Upgrade <strong>Instructions</strong><br />
After a short delay, as if<br />
by magic, the “Found New<br />
Hardware” Wizard will run.<br />
Click Next.<br />
9. Choose “Search for a suitable<br />
driver for my device” <strong>and</strong> click<br />
Next.<br />
10. Check only “CD-ROM drives”<br />
<strong>and</strong> click Next.<br />
4
<strong>TT</strong>24 Firmware/<strong>Software</strong> <strong>Installation</strong>/Upgrade <strong>Instructions</strong><br />
11. The <strong>TT</strong>24 USB serial port<br />
drivers will be located<br />
automatically on the CD. Click<br />
Next.<br />
12. The drivers will be installed,<br />
<strong>and</strong> all being well, you will be<br />
prompted that installation was<br />
successful. Click Finish.<br />
Now it’s time to install the <strong>TT</strong><br />
<strong>Control</strong> application, so skip to<br />
page 9.<br />
13. (Optional) Press the new<br />
driver in place, taking care not<br />
to damage your nails in the<br />
process.<br />
Driver reconing
<strong>TT</strong>24 Firmware/<strong>Software</strong> <strong>Installation</strong>/Upgrade <strong>Instructions</strong><br />
Installing the <strong>TT</strong> <strong>Control</strong> <strong>Drivers</strong> (Windows XP)<br />
1. Verify that your computer meets the system requirements below, <strong>and</strong> place<br />
the CD in your computer’s CD drive.<br />
2. Connect the <strong>TT</strong>24 console to your computer with the included USB cable.<br />
Power on the console.<br />
3. A “Found New Hardware”<br />
dialog will appear for the <strong>TT</strong>24.<br />
Soon, the “Found New<br />
Hardware” Wizard will run.<br />
Select “Install from a list or<br />
specific location,” <strong>and</strong> click<br />
Next.<br />
4. Choose “Search for the best<br />
driver in these locations,”<br />
<strong>and</strong> check only the “Search<br />
removable media” check box.<br />
Click Next.
<strong>TT</strong>24 Firmware/<strong>Software</strong> <strong>Installation</strong>/Upgrade <strong>Instructions</strong><br />
5. The <strong>TT</strong>24 drivers will be<br />
located automatically on the<br />
CD. If you are warned that the<br />
software has not passed the<br />
Windows Logo Testing, click<br />
Continue Anyway.<br />
6. The drivers will be installed<br />
<strong>and</strong> you will be prompted that<br />
installation was successful.<br />
Click Finish.<br />
7. Another Found New Hardware<br />
Wizard will run. Select “Install<br />
from a list or specific location”<br />
<strong>and</strong> click Next.
<strong>TT</strong>24 Firmware/<strong>Software</strong> <strong>Installation</strong>/Upgrade <strong>Instructions</strong><br />
8. Choose “Search for the best<br />
driver in these locations,”<br />
<strong>and</strong> check only the “Search<br />
removable media” check box.<br />
Click Next.<br />
9. The <strong>TT</strong>24 drivers will be<br />
located automatically on the<br />
CD. If you are warned that the<br />
software has not passed the<br />
Windows Logo Testing, click<br />
Continue Anyway.<br />
10. The drivers will be installed<br />
<strong>and</strong> you will be prompted that<br />
the installation was successful.<br />
Click Finish.<br />
Now it’s time to install the <strong>TT</strong><br />
<strong>Control</strong> application, as shown<br />
on the next page.
<strong>TT</strong>24 Firmware/<strong>Software</strong> <strong>Installation</strong>/Upgrade <strong>Instructions</strong><br />
Installing the <strong>TT</strong> <strong>Control</strong> Application (Windows 2000 <strong>and</strong> Windows XP)<br />
Note: Check the <strong>Mackie</strong> website prior to installing the <strong>TT</strong> <strong>Control</strong> application<br />
from the CD to see if there is a newer version available for download. If so,<br />
download the newer version <strong>and</strong> skip to page 11, “<strong>TT</strong>24 Firmware <strong>and</strong> <strong>TT</strong> <strong>Control</strong><br />
<strong>Software</strong> Upgrade <strong>Instructions</strong>.”<br />
1. Launch: Your CD/DVD Drive\tt<br />
control\setup.exe<br />
2. The installer will launch<br />
<strong>and</strong> will eventually display<br />
this window (Windows 2000<br />
shown). Click Next.<br />
3. Read <strong>and</strong> accept the license<br />
agreement (if you agree the<br />
agreement is agreeable). Then<br />
click Next.<br />
4. Enter your name, organization<br />
<strong>and</strong> shoe size. Choose who you<br />
would like to be able to use the<br />
application, <strong>and</strong> click Next.
<strong>TT</strong>24 Firmware/<strong>Software</strong> <strong>Installation</strong>/Upgrade <strong>Instructions</strong><br />
5. Choose the installation folder;<br />
we recommend using the<br />
default location. Click Next.<br />
6. Verify the installation settings<br />
<strong>and</strong> click Install when ready.<br />
7. The installation will proceed.<br />
Click Finish to quit the installer<br />
<strong>and</strong> launch <strong>TT</strong> <strong>Control</strong>.<br />
8. The <strong>TT</strong> <strong>Control</strong> application<br />
will launch <strong>and</strong> can now be<br />
used with your <strong>TT</strong>24 console.<br />
Check out the owner’s manual<br />
<strong>and</strong> quick-start guide for more<br />
details of the software.<br />
9. Put on your best duds <strong>and</strong> stride out boldly into the street. Tell everyone<br />
that you are having a lovely day with your new <strong>TT</strong>24 console <strong>and</strong> the <strong>TT</strong><br />
control software.<br />
0
<strong>TT</strong>24 Firmware/<strong>Software</strong> <strong>Installation</strong>/Upgrade <strong>Instructions</strong><br />
<strong>TT</strong>24 Firmware <strong>and</strong> <strong>TT</strong> <strong>Control</strong> <strong>Software</strong><br />
Upgrade <strong>Instructions</strong><br />
The following instructions will help you upgrade the <strong>TT</strong>24 firmware file to<br />
the latest version. Check our website periodically to see if a newer version is<br />
available: http://www.mackie.com/products/tt24/software.html<br />
You will also need to upgrade the <strong>TT</strong> <strong>Control</strong> PC application, or the following<br />
error message may appear:<br />
WARNING: This procedure will erase all internal memory on the <strong>TT</strong>24. If you<br />
have presets <strong>and</strong> snapshots that you want to save, you must use the “Backup<br />
Console” utility (in the <strong>TT</strong> <strong>Control</strong> File menu) before upgrading the firmware.<br />
Refer to “6.15.3 Backup <strong>and</strong> Restore Console” in the <strong>TT</strong>24 Owner’s Manual<br />
(Version 1.3).<br />
Procedure<br />
1. Download the latest version of the <strong>TT</strong> <strong>Control</strong> setup from the <strong>Mackie</strong><br />
website: http://www.mackie.com/products/tt24/software.html<br />
Note that this installer also includes the latest versions of the firmware files<br />
for the <strong>TT</strong>24, expansion cards, <strong>and</strong> DS3232 Digital Snake.<br />
2. Uninstall the <strong>TT</strong> <strong>Control</strong> application you are currently using. To do this, go<br />
to Windows Start\Programs\tt control <strong>and</strong> run “uninstall”.
<strong>TT</strong>24 Firmware/<strong>Software</strong> <strong>Installation</strong>/Upgrade <strong>Instructions</strong><br />
3. Run the setup file you downloaded in step 2 to install the new version of<br />
the application. We suggest that you install the <strong>TT</strong> <strong>Control</strong> application to its<br />
default location.<br />
4. With the <strong>TT</strong>24 turned on <strong>and</strong> the <strong>TT</strong>24 connected to the PC via USB, open<br />
the <strong>TT</strong> <strong>Control</strong> application on your computer <strong>and</strong> select “Menu” from the<br />
upper right of the GUI. From the list, select “<strong>TT</strong>24 Options.”<br />
5. Select “Browse.” A file browser will open showing the latest version of<br />
<strong>TT</strong>24 firmware. It has an extension of .tt24bin. Select it <strong>and</strong> click “Open.”<br />
2<br />
Browse
<strong>TT</strong>24 Firmware/<strong>Software</strong> <strong>Installation</strong>/Upgrade <strong>Instructions</strong><br />
6. As stated above, this process will erase your console’s memory, so backup<br />
any necessary data first. Verify the file path in the “Flash Upgrade” box is<br />
correct <strong>and</strong> press the “Upgrade <strong>TT</strong>24” button. You will see a warning NOT<br />
to touch the <strong>TT</strong>24 while it is being flashed (or not to flash the <strong>TT</strong> while it is<br />
being updated). You will see a progress meter on the LCD, <strong>and</strong> you should<br />
NOT touch the console until it is done.<br />
Upgrade <strong>TT</strong>24<br />
7. Once the flash is complete, the LCD will need to be calibrated. It displays<br />
the calibration targets, <strong>and</strong> you must touch the center of each target. Once<br />
that is complete, you are done.
<strong>TT</strong>24 Firmware/<strong>Software</strong> <strong>Installation</strong>/Upgrade <strong>Instructions</strong><br />
DS3232 Digital Snake Firmware Upgrade <strong>Instructions</strong><br />
The following instructions will help you upgrade the DS3232 Digital Snake<br />
firmware file to the latest version. The DS3232 should be upgraded BEFORE<br />
upgrading the U100 card to which it is connected.<br />
Procedure<br />
1. Download the latest version of the <strong>TT</strong> <strong>Control</strong> software installer <strong>and</strong><br />
upgrade your <strong>TT</strong> <strong>Control</strong> software <strong>and</strong> console firmware as described in<br />
the previous section: http://www.mackie.com/products/tt24/software.html<br />
If you do not have the latest versions installed, the upgrade may fail or you<br />
may see the following warning when you open the <strong>TT</strong> <strong>Control</strong> application:<br />
2. With the <strong>TT</strong>24 turned on <strong>and</strong> the <strong>TT</strong>24 connected to the PC via USB, open<br />
the <strong>TT</strong> <strong>Control</strong> application on your computer <strong>and</strong> select “Menu” from the<br />
upper right of the GUI. From the list, select “Expansion Card Options<br />
> Network Snake Firmware Upgrade Slot A/B.” Select Card A or B,<br />
whichever card your snake is connected to (Card A is the top slot <strong>and</strong> Card<br />
B is the bottom slot).<br />
4
<strong>TT</strong>24 Firmware/<strong>Software</strong> <strong>Installation</strong>/Upgrade <strong>Instructions</strong><br />
3. Select “Browse.” A file browser will open showing the latest versions of the<br />
expansion card firmware files. Select the U100 file for the DS3232 <strong>and</strong> click<br />
“Open.” Note: The U100 <strong>and</strong> the DS3232 use the same firmware file.<br />
Browse<br />
4. Double-check to make sure the filename in the “Network Snake Upgrade”<br />
box is correct, <strong>and</strong> press the “Upgrade Snake” button.<br />
Upgrade Snake
<strong>TT</strong>24 Firmware/<strong>Software</strong> <strong>Installation</strong>/Upgrade <strong>Instructions</strong><br />
5. A dialog box opens asking you to confirm the upgrade, warning that this<br />
procedure will reboot your <strong>TT</strong>24. Click “Yes” to continue.<br />
6. You will see a warning NOT to touch the <strong>TT</strong>24 while the card is being<br />
upgraded. Click “OK” to continue.<br />
7. The upgrade procedure will continue. You will see a progress meter on the<br />
Touchscreen <strong>and</strong> on the computer display as the snake is upgraded. You<br />
should NOT touch the console or the DS3232 until the procedure is done<br />
<strong>and</strong> the <strong>TT</strong>24 is rebooted.<br />
8. After this procedure is completed <strong>and</strong> the <strong>TT</strong>24 <strong>and</strong> DS3232 reboot, follow<br />
the procedure in the next section for the U100 card <strong>and</strong> any other card<br />
installed in the console.
<strong>TT</strong>24 Firmware/<strong>Software</strong> <strong>Installation</strong>/Upgrade <strong>Instructions</strong><br />
<strong>TT</strong>24 Expansion Card Firmware Upgrade <strong>Instructions</strong><br />
The following instructions will help you upgrade the <strong>TT</strong>24 Expansion Card<br />
firmware file to the latest version. If you are using a DS3232 Digital Snake, you<br />
must ugrade it before the U100 card to which it is attached as described in the<br />
previous section.<br />
Procedure<br />
1. Download the latest version of the <strong>TT</strong> <strong>Control</strong> software installer <strong>and</strong><br />
upgrade your <strong>TT</strong> <strong>Control</strong> software <strong>and</strong> console firmware as described in<br />
the previous section: http://www.mackie.com/products/tt24/software.html<br />
If you do not have the latest versions installed, the upgrade may fail or you<br />
may see the following warning when you open the <strong>TT</strong> <strong>Control</strong> application:<br />
2. With the <strong>TT</strong>24 turned on <strong>and</strong> the <strong>TT</strong>24 connected to the PC via USB, open<br />
the <strong>TT</strong> <strong>Control</strong> application on your computer <strong>and</strong> select “Menu” from the<br />
upper right of the GUI. From the list, select “Expansion Card Options ><br />
Card A/B Firmware Upgrade.” Select Card A or B, whichever card you are<br />
upgrading (Card A is the top slot <strong>and</strong> Card B is the bottom slot).
<strong>TT</strong>24 Firmware/<strong>Software</strong> <strong>Installation</strong>/Upgrade <strong>Instructions</strong><br />
3. Select “Browse.” A file browser will open showing the latest versions of the<br />
expansion card firmware files. Select the appropriate file for the card you<br />
are upgrading <strong>and</strong> click “Open.”<br />
Browse<br />
4. Double-check to make sure the filename in the “Card Upgrade” box is<br />
correct, <strong>and</strong> press the “Upgrade Card” button.<br />
Upgrade Card
<strong>TT</strong>24 Firmware/<strong>Software</strong> <strong>Installation</strong>/Upgrade <strong>Instructions</strong><br />
5. A dialog box opens asking you to confirm the upgrade, warning that this<br />
procedure will reboot your <strong>TT</strong>24. Click “Yes” to continue.<br />
6. You will see a warning NOT to touch the <strong>TT</strong>24 while the card is being<br />
upgraded. Click “OK” to continue.<br />
7. The upgrade procedure will continue. You will see a progress meter on<br />
the Touchscreen <strong>and</strong> on the computer display as the card is upgraded. You<br />
should NOT touch the console until the procedure is done <strong>and</strong> the <strong>TT</strong>24 is<br />
rebooted.<br />
8. After the procedure is completed <strong>and</strong> the <strong>TT</strong>24 reboots, repeat the process<br />
for the other card installed in the console, if necessary. Once complete,<br />
close the Expansion Card Upgrade window <strong>and</strong> begin using the <strong>TT</strong>24 with<br />
its new <strong>and</strong> improved expansion card.<br />
Part No. SW0196 Rev. C 01/08<br />
©2005-2008 LOUD Technologies Inc.<br />
All Rights Reserved.