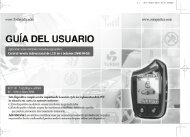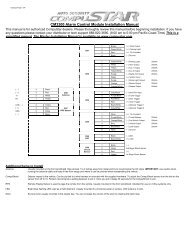
User Manual - Compustar.com
User Manual - Compustar.com
User Manual - Compustar.com

Create successful ePaper yourself
Turn your PDF publications into a flip-book with our unique Google optimized e-Paper software.
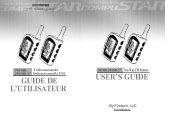
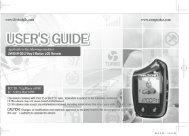
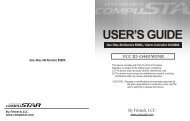
<strong>User</strong> <strong>Manual</strong><br />
By Firstech LLC, Version: 1.3<br />
Applicable to the following remote(s);<br />
P2WSSR (2 Way Spread Spectrum Remote)<br />
P2W900FMR (2 Way 900MHz Remote)<br />
This device <strong>com</strong>plies with Part 15 of the FCC rules. Operation is subject to the following conditions;<br />
(1) This device may not cause harmful interference.<br />
(2) This device may accept any interference received, including interference that may cause undesired operation.<br />
CAUTION: Changes or modifications not expressly approved by the party responsible for <strong>com</strong>pliance could void the<br />
user’s authority to operate this device.<br />
WWW.COMPUSTAR.COM<br />
1
Introduction ............................................................................................................................................... 3<br />
Kit(s) Contents .......................................................................................................................................... 3<br />
Warranty Coverage ................................................................................................................................... 3<br />
Remote Reference .................................................................................................................................... 4<br />
Quick Reference ........................................................................................................................................ 5<br />
Valet Mode .............................................................................................................................................. 5<br />
Remote Maintenance – Battery Replacement ......................................................................................... 5<br />
Programming the Clock (LCD Remotes Only) ......................................................................................... 5<br />
2 Way Remote Button Functions ............................................................................................................. 6<br />
1 Way Remote Button Functions ............................................................................................................. 7<br />
Remote LCD (liquid crystal display) Diagram and Icons ...................................................................... 8<br />
General System Functions ..................................................................................................................... 10<br />
Active Lock/Arm and Unlock/Disarm ..................................................................................................... 11<br />
Passive Lock/Arm .................................................................................................................................. 11<br />
Automatic Transmission Remote-Start Function ................................................................................... 11<br />
<strong>Manual</strong> Transmission Remote-Start Function (Reservation Mode) ....................................................... 11<br />
Trunk Release ....................................................................................................................................... 12<br />
Auxiliary Outputs/Window Roll-Down/Sliding Doors .............................................................................. 12<br />
Temperature and Battery Query ............................................................................................................ 13<br />
Silent Arm/Disarm ................................................................................................................................. 13<br />
Remote Mute/Vibration Mode ................................................................................................................ 13<br />
Shock Sensor On/Off ............................................................................................................................ 13<br />
Advanced System Functions ................................................................................................................. 14<br />
Drive Lock/Ignition Controlled Door Locks ............................................................................................ 14<br />
Turbo Timer Mode ................................................................................................................................. 14<br />
2 nd Car Mode (Multiple Vehicle Control) ................................................................................................ 14<br />
Remote Alarm Clock ............................................................................................................................. 14<br />
Car Call/RPS (Remote Paging Sensor)................................................................................................. 15<br />
RPS (Remote Paging Sensor) Unlock/Disarm ...................................................................................... 15<br />
Secure Valet Switch .............................................................................................................................. 16<br />
Timer Start Mode ................................................................................................................................... 16<br />
Auto Mode ............................................................................................................................................. 16<br />
Anti Jacking Mode ................................................................................................................................. 17<br />
Remote Coding / Programming Routine(s) .......................................................................................... 18<br />
Programming P2W9000R ..................................................................................................................... 18<br />
Programming P2WSSR ......................................................................................................................... 18<br />
Remote Start Error Diagnostic .............................................................................................................. 19<br />
Alarm Diagnostic .................................................................................................................................... 19<br />
Limited Lifetime Warranty ...................................................................................................................... 20<br />
Notes: ....................................................................................................................................................... 21<br />
2
Introduction<br />
Thank you for purchasing a CompuStar Pro system for your vehicle. In order to truly enjoy the benefits<br />
of this system, we re<strong>com</strong>mend that you fully review the following manual. Please note that this manual<br />
applies to the PRO 2WSSR and 2W9000FMR systems, regardless of whether you purchased the alarm<br />
only, starter only or alarm/starter <strong>com</strong>bination. There are certain features listed in this manual that may<br />
not be available for your system. There may also be features listed in this manual that require additional<br />
installation or programming before they can be<strong>com</strong>e active. If you have any questions, please contact<br />
the original place of purchase. For further information you may also contact our customer support center<br />
by calling 888-820-3690.<br />
*Only available in Canada<br />
Warranty Coverage<br />
Kit(s) Contents<br />
Caution: The Manufactures warranty will be voided if this product is installed by anyone other than an<br />
authorized CompuStar Pro dealer. For <strong>com</strong>plete warranty details visit www.<strong>com</strong>pustar.<strong>com</strong> or the last<br />
page of this manual.<br />
Warranty registration can be <strong>com</strong>pleted online by visiting www.<strong>com</strong>pustar.<strong>com</strong>. Please <strong>com</strong>plete the<br />
registration form within 10 days of purchase. We no longer include a mail-in warranty registration card<br />
with each unit – registration must be done online. To verify that an authorized dealer installed your<br />
system, we highly re<strong>com</strong>mend that you keep a copy of the original proof of purchase, such as the dealer<br />
invoice in a safe place.<br />
3
Remote Reference<br />
P1WSSR (1-Way Spread Spectrum)<br />
Optional (not included w/unit)<br />
P1W900FMR (1-Way 900MHz)<br />
4<br />
P2WSSR (2-Way Spread Spectrum)<br />
Applicable to the following models;<br />
- P2WSS-AS (alarm and remote start)<br />
- P2WSS-A (alarm w/out remote start)<br />
- P2WSS-S (remote start w/out alarm)<br />
P2W9000R (2-Way 900MHz)<br />
Applicable to the following models;<br />
- P2W9000-AS (alarm and remote start)<br />
- P2W9000-A (alarm w/out remote start)<br />
- P2W9000-S (remote start w/out alarm)
Quick Reference<br />
Valet Mode<br />
When servicing or loaning your vehicle to others, the CompuStar Pro system should be in Valet mode.<br />
Valet mode prevents the system from remote starting and disables all alarm functions.<br />
IMPORTANT: While in Valet mode the CompuStar will still lock and unlock power lock systems.<br />
The system can be put into valet one of two ways;<br />
1. Turn the vehicles key to the ignition “on” position and tap buttons (I + III) simultaneously for<br />
0.5 seconds. The parking lights will flash once and the LCD will display Z’s above the vehicle<br />
image to confirm the system is in valet mode. Repeat this process to take the system out of<br />
valet mode. The parking lights will flash twice and Z’s will disappear to confirm the system is out of valet<br />
mode.<br />
2. If you don’t have your remote control, you can put the system into valet by turning the ignition key “on”<br />
and then “off” five times within 10 seconds. The parking lights will flash once to confirm the system is in<br />
valet mode. Shortly after the first flash, the parking lights will flash twice. A remote control is required to<br />
take the system out of valet mode. IMPORTANT: If your system is set up for a secure valet option, you<br />
will not be able to put the system into valet until the proper code has been entered to the secure valet<br />
switch (see page 13 for details).<br />
Remote Maintenance – Battery Replacement<br />
The only regular maintenance this system requires is remote control battery replacement.<br />
No programming is required when replacing the battery.<br />
Two-Way Remotes: Models P2WSSR, P2W9000FMR<br />
First, release the battery cover lock located on the back of the remote. Once the lock is released, gently<br />
slide the battery cover off to expose the battery. The P2WSSR requires one AA battery and the<br />
P2W9000FMR requires one AAA battery. IMPORTANT: Be sure to observe correct polarity when<br />
installing the battery.<br />
One-Way Remotes: P1WSSR, 1W900FMR<br />
First, remove the small Phillips screw located on the back of the remote. Once the screw has been<br />
removed, gently pull the remote apart being careful to not touch the circuit board. The P1WSSR and<br />
1W900FMR require two 2025 batteries. These specialty batteries can be purchased from your local<br />
CompuStar dealer or an electronics store.<br />
Programming the Clock (LCD Remotes Only)<br />
STEP 1: Enter remote programming mode by holding down buttons (II + III) for 2.5 seconds. The remote<br />
will beep once and the LCD will read “Prog” to indicate that you have successfully entered programming<br />
mode.<br />
STEP 2: Three seconds after entering programming mode the time icon will flash<br />
indicating to set the time. Adjust the time settings by tapping button (I) to change the hour<br />
and tapping button (II) to adjust the minutes.<br />
STEP 3: Once the desired time has been set, exit remote programming by holding down buttons (II + III)<br />
for 2.5 seconds. The remote will beep three times indicating that you have successfully exited<br />
programming mode.<br />
5
2 Way Remote Button Functions<br />
Button Duration<br />
I<br />
II<br />
III<br />
IV<br />
I + II<br />
I + III<br />
I + IV<br />
II + III<br />
II + IV<br />
III + IV<br />
0.5<br />
seconds<br />
2.5<br />
seconds<br />
0.5<br />
seconds<br />
2.5<br />
seconds<br />
0.5<br />
seconds<br />
2.5<br />
seconds<br />
double<br />
tap<br />
0.5<br />
seconds<br />
2.5<br />
seconds<br />
Additional<br />
Programming<br />
Required<br />
Function / Description<br />
no Lock/Arm and Unlock/Disarm.<br />
Option 2-11 Run time extender. Resets remote start and turbo run-time while vehicle is remote started.<br />
no Aux 1. Triggers the auxiliary 1 output (most <strong>com</strong>monly used for rear defrost or window roll-down).<br />
no Activates the remote start. Repeat and remote start will shut off.<br />
no Aux 2. Triggers the auxiliary 2 output (most <strong>com</strong>monly used for rear defrost or window roll-down).<br />
no Trunk pop. Triggers the trunk release output and opens the vehicles trunk.<br />
no Turns on the CompuGLO backlight (LCD remotes only).<br />
no<br />
Car Check (updates vehicle status on remote pager) / Secure Auxiliary / Temperature Display / Vehicle<br />
Voltage Display / Remote Voltage Display<br />
no Locks out button functions to prevent accidental button presses.<br />
4 seconds no Panic/vehicle locater (flashes vehicles parking lights and sounds siren and horn).<br />
0.5<br />
seconds<br />
2.5<br />
seconds<br />
0.5<br />
seconds<br />
2.5<br />
seconds<br />
0.5<br />
seconds<br />
2.5<br />
seconds<br />
0.5<br />
seconds<br />
2.5<br />
seconds<br />
0.5<br />
seconds<br />
2.5<br />
seconds<br />
0.5<br />
seconds<br />
2.5<br />
seconds<br />
no Turns siren on/off (Note: With the siren off, it will still sound in the event the alarm is triggered).<br />
no Option programming menu 1. For use during installation.<br />
no Valet mode (see page 5 for details)<br />
no Turns the shock sensor on/off.<br />
Option 1-9 Drive lock. Activates ignition controlled door locks.<br />
no Option programming menu 2. For use during installation.<br />
no Activates passive arming (vehicle will arm/lock 30 seconds after the vehicle is disarmed)<br />
no<br />
Option 2-6<br />
Accesses remote option programming (clock, alarm clock, vibrate mode, mute and programmed remote<br />
start timing)<br />
Activates timer start mode. Timer start mode has multiple programmable settings: duration settings,<br />
temperature settings and self start settings.<br />
no Initiates parking timer - similar to a stop watch function.<br />
Option 2-2<br />
no<br />
Activates the built-in Turbo timer function. Additional installation is required when using this feature on<br />
automatic transmission vehicles.<br />
Puts the remote in 2nd car mode. 2nd Car mode allows one remote to control two vehicles. Note: The<br />
remote must be programmed to the 2nd Car in order for this feature to be active.<br />
6
1 Way Remote Button Functions<br />
Button Duration<br />
Additional<br />
Programming<br />
Required<br />
0.5 seconds no Lock/Arm<br />
Function / Description<br />
3.5 seconds no Panic/vehicle locater (flashes vehicles parking lights and sounds siren and horn).<br />
0.5 seconds no Unlock/Disarm<br />
0.5 seconds no<br />
Aux 1. Triggers the auxiliary 1 output (most <strong>com</strong>monly used for rear defrost or window<br />
roll-down).<br />
2.5 seconds no Trunk pop. Triggers the trunk release output and opens the vehicles trunk.<br />
0.5 seconds no<br />
Aux 2. Triggers the auxiliary 2 output (most <strong>com</strong>monly used for rear defrost or window<br />
roll-down).<br />
2.5 seconds no Activates the remote start. Repeat and remote start will shut off.<br />
0.5 seconds no<br />
Turns siren on/off (Note: With the siren off, it will still sound in the event the alarm is<br />
triggered).<br />
2.5 seconds no Option programming menu 1 - Installers Only.<br />
0.5 seconds no Valet mode (see page 5 for details)<br />
2.5 seconds no Turns the shock sensor on/off.<br />
0.5 seconds Option 1-9 Drive lock. Activates ignition controlled door locks.<br />
2.5 seconds no Option programming menu 2 - Installers Only.<br />
0.5 seconds no Activates passive arming (vehicle will arm/lock 30 seconds after the vehicle is disarmed)<br />
0.5 seconds Option 2-6<br />
0.5 seconds Option 2-2<br />
Activates timer start mode. Timer start mode has multiple programmable settings:<br />
duration settings, temperature settings and self start settings.<br />
Activates the built-in Turbo timer function. Additional installation is required when using<br />
this feature on automatic transmission vehicles.<br />
2.5 seconds no Car Check (updates vehicle status on remote pager) / Secure Auxiliary<br />
If you would like additional information on the functionality of your 1-way <strong>com</strong>panion remote, please visit<br />
the support page at www.<strong>com</strong>pustar.<strong>com</strong> to download the full user manual.<br />
7
Remote LCD (liquid crystal display) Diagram and Icons<br />
Your remote pager will indicate the status of your vehicle while in range. The unique LCD design will<br />
visually display such icons as lock/unlock status, remote start confirmation and remaining run-time,<br />
impact/shock notification, battery voltage, temperature display and much more.<br />
*The above LCD layout and icons may vary slightly from the actual layout and icons displayed on your remote pager.<br />
Common Icons –<br />
Lock/Arm – Unlock/Disarm<br />
This icon indicates whether the system is locked/armed or unlocked/disarmed. While armed, the system will<br />
monitor the doors, trunk, hood, shock sensor, and aux inputs. If any of these inputs are triggered while the<br />
system is armed, the alarm will be triggered.<br />
Trunk Release<br />
This icon will be displayed when the trunk release function has been activated. By default, the system will be<br />
disarmed and the doors will unlock before the trunk is released.<br />
Signal Strength<br />
This icon is displayed if the last <strong>com</strong>munication to the vehicle was successful.<br />
Valet Mode<br />
This icon will be displayed while you are in Valet mode. While in valet mode, the system will not perform any<br />
functions other than lock and unlock. The alarm will not arm or disarm while locking or unlocking. If any other<br />
function is attempted, “Sleep” will be displayed. The system will not monitor the alarm triggers while in Valet<br />
mode.<br />
Battery Indicator<br />
This icon displays the remaining battery life left in 25% increments.<br />
Clock<br />
Displays current time, remote start runtime, turbo mode time remaining, inside temperature of the vehicle,<br />
battery voltage of the vehicle, battery voltage of the remote and failure of signal transfer.<br />
8
Starter Icons –<br />
Engine Running<br />
This icon will be displayed while the vehicle is running after it has been remote started.<br />
Start Availability<br />
This icon will be displayed when the vehicle is ready to be remote-started. If this icon is not displayed, you will<br />
not be able to remote-start the vehicle.<br />
Timer Mode<br />
This icon will be displayed when Timer mode is active. Timer mode can be set up to start the vehicle every 1.5,<br />
3, or once very 24 hours.<br />
Cold/Hot Start<br />
This icon will be displayed if Cold Start mode is currently active. Cold Start mode will start the vehicle if the<br />
vehicle reaches a preset hot or cold temperature. These temperatures can be adjusted by the installer.<br />
Alarm Icons –<br />
Siren<br />
This icon will be displayed if the siren is turned on. Turning the siren off only applies to the chirps when arming,<br />
disarming, or remote-starting. The siren will still sound if the alarm is triggered.<br />
Hood<br />
This icon will be displayed if the hood is opened while the system is armed. The remote will beep rapidly while<br />
displaying this icon. This means that the alarm was triggered. If this icon appears while trying to remote-start the<br />
vehicle, it means that the vehicle will not start because the hood is open.<br />
Impact<br />
This icon will be displayed if an impact to the vehicle is detected while the system is armed. The remote will<br />
beep rapidly while displaying this icon if the impact is hard; this means that the alarm was triggered. If it beeps<br />
slowly while displaying this icon, that means that the impact was soft and that the alarm simply gave four<br />
warning chirps.<br />
Door<br />
This icon will be displayed if the door is opened while the system is armed. The remote will beep rapidly while<br />
displaying this icon. This means that the alarm was triggered. If this icon appears while trying to remote-start the<br />
vehicle, it means that the vehicle will not start because the door is open.<br />
Advanced Icons –<br />
Trunk<br />
This icon will be displayed if the trunk is opened while the system is armed. The remote will beep rapidly while<br />
displaying this icon. This means that the alarm was triggered. If this icon appears while trying to remote-start the<br />
vehicle, it means that the vehicle will not start because the trunk is open.<br />
Car Call<br />
This icon will be displayed while someone is attempting to contact you using the RPS sensor. To trigger the<br />
RPS sensor, you must knock on the windshield where the sensor is located. Something that creates a higher<br />
pitch, like a key, is better suited to trigger the RPS.<br />
Passive Mode<br />
This icon will be displayed if Passive mode is currently active. Passive mode will automatically arm the system<br />
30 seconds after the last door is closed or 30 seconds after the system was disarmed if no door was opened.<br />
This mode is ignored while the ignition is on with the key.<br />
Drive Lock<br />
This icon will be displayed if Drive Lock mode is currently active. Drive Lock mode will lock the doors<br />
automatically if the ignition is on and the brake is pressed or if the ignition is on and the engine exceeds the idle<br />
RPM multiplied by 2, depending on the options set by the installer. The doors will be unlocked when the ignition<br />
is turned off. In a manual transmission vehicle the doors will unlock when the emergency brake is set.<br />
Turbo Mode<br />
This icon will be displayed if Turbo mode is currently active. While Turbo mode is active, the vehicle will remain<br />
running for a preset time after the emergency brake has been set and the key has been removed from the<br />
ignition.<br />
9
2 nd Car Mode<br />
This will be displayed while you are in 2 nd Car mode. 2 nd Car mode allows you to control another vehicle with the<br />
same system installed in it. The remote needs to be coded to the other vehicle in 2 nd Car mode for this feature to<br />
work.<br />
Vibration<br />
This icon will be displayed if the remote is set to vibrate only. While the remote is set to vibrate only the remote<br />
will not beep, even if the alarm is triggered. The remote will still vibrate in this mode.<br />
Alarm Clock<br />
This icon will be displayed if the Alarm Clock function is turned on. When the clock reaches the preset time, the<br />
remote will beep and flash the alarm clock icon. Press button IV for 0.5 sec. to silence the remote.<br />
Shock Sensor Bypassed<br />
This icon will be displayed when the shock sensor is bypassed by pressing buttons I+III for 2.5 sec. Impact to<br />
the vehicle will not be detected at this time. This icon is always displayed on starter only systems because there<br />
is no shock sensor.<br />
Aux Mode (Alarm or alarm/starter systems only.)<br />
This icon will be displayed while you are in Aux mode. During this time, you can activate auxiliary outputs 1 or 2<br />
by pressing button II or III. Aux outputs can be used to activate various systems or functions in a vehicle.<br />
Voltage<br />
This icon will be displayed while the remote is reporting the voltage of the vehicle or remote battery.<br />
Temperature<br />
This icon will be displayed while the remote is reporting the temperature of the vehicle.<br />
General System Functions<br />
The remote transmitter functions have been predetermined and programmed from the factory. The four<br />
button configuration allows for many functions to be performed through a series of tapping, holding and /<br />
or multiple presses of buttons. Although CompuStar PRO remotes have numerous button functions and<br />
capabilities, please keep in mind that the most <strong>com</strong>mon functions are performed in one simple step.<br />
Sending Commands<br />
When in range, and a <strong>com</strong>mand has been sent, the remote pager backlight will illuminate, the remote will<br />
beep and the appropriate icon will be displayed. For example, to send a remote start <strong>com</strong>mand from the<br />
pager, hold down button (II) for 2.5 seconds. The backlight will illuminate and the remote will beep once<br />
to confirm the <strong>com</strong>mand has been sent and that the remote is in range. Once the vehicle has<br />
successfully remote started, the remote will receive a <strong>com</strong>mand indicating the vehicle is running.<br />
Receiving Commands<br />
The remote pager will receive <strong>com</strong>mands indicating the status of the vehicle, confirmation of sending<br />
<strong>com</strong>mands and alarm notifications. For example, after sending the lock <strong>com</strong>mand, the pager will be<br />
updated with the lock icon to confirm the vehicle has been successfully locked/armed. To see if your<br />
pager is in range to receive <strong>com</strong>mands, tap button (IV) for 0.5 seconds – if the pager backlight<br />
illuminates and beeps, the pager is in range to receive <strong>com</strong>mands.<br />
P2WSSR Auto Synchronization (Sync)<br />
The P2WSSR uses one of fifty different frequencies each time the remote and antenna <strong>com</strong>municate. If<br />
the remote fails to <strong>com</strong>municate with vehicle after sending a <strong>com</strong>mand, the system may be out of sync.<br />
The remote will auto sync if it fails <strong>com</strong>municate after 8 sending <strong>com</strong>mands or more. During auto sync,<br />
the remote automatically and quickly transmits a lot of frequencies in search for the location of the<br />
antenna. You will know the system is in auto sync because the remote will display “sync” for 5 to 8<br />
seconds. To re-sync manually, remove and re-insert the battery from the remote while in range of the<br />
vehicle.<br />
10
Active Lock/Arm and Unlock/Disarm<br />
Tap button (I) for 0.5 seconds to lock/arm and unlock/disarm. If your vehicle is locked, tap<br />
button (I) to unlock; if your vehicle is unlocked, tap button (I) to lock.<br />
IMPORTANT: If the alarm has been triggered (Siren is going off), you must wait until the remote pager<br />
has been paged before disarming the alarm – the first button tap will shut off the alarm and the second<br />
will unlock/disarm the system.<br />
Passive Lock/Arm<br />
The system can be configured to passively lock and arm the vehicle. Put the system in<br />
passive by taping buttons (II+III) simultaneously for 0.5 seconds. The remote will beep once<br />
and the passive icon will illuminate to indicate the system is in passive lock and arming<br />
mode.<br />
While in passive mode, the system will lock and arm the alarm 30 seconds after the last door is closed.<br />
As an indicator that the vehicle is going to passively lock and arm, the remote and siren will chirp once<br />
and the parking lights will flash once at both 10 and 20 seconds prior to passively locking and arming. If<br />
you want the system to passively arm and not passively lock, ask your local CompuStar dealer to turn<br />
Option 1-8 to setting II.<br />
Automatic Transmission Remote-Start Function<br />
Press button (II) for 2.5 seconds to remote-start an automatic transmission vehicle. If you are in range<br />
and if the vehicle is ready to remote start, the remote will beep once and the CompuGLO backlight will<br />
light up to indicate that the remote-start <strong>com</strong>mand has been successfully transmitted.<br />
If you are in range and the remote beeps three times, there is a remote start error. Refer to the “remote<br />
start error diagnostic” on page 18 of this manual for details.<br />
Upon receiving confirmation that your vehicle is running, the LCD will flash the exhaust icon<br />
and the clock icon will begin to show the amount of run-time remaining. The remote-start runtime<br />
can be programmed for 15, 25, 45 or 3 minutes - ask your local CompuStar dealer to<br />
adjust Option 2-7 if you would like a run-time other than 15 minutes (default).<br />
IMPORTANT: Your vehicle’s key must be inserted into the ignition and turned to the “on” position prior<br />
to driving your vehicle. If the foot brake is depressed prior to the key being in the “on” position, the<br />
vehicle will shut off.<br />
<strong>Manual</strong> Transmission Remote-Start Function (Reservation Mode)<br />
In order to remote-start a manual transmission vehicle, the system must first be set in Reservation Mode.<br />
Reservation Mode must be set each and every time you want to remote-start a manual transmission<br />
vehicle. The purpose of Reservation Mode is to leave the transmission in neutral before exiting the<br />
vehicle.<br />
IMPORANT;<br />
• The transmission must be left in the neutral position.<br />
• The vehicles windows must be rolled up.<br />
• The vehicles door-pins must be in working order.<br />
• Do not install this remote-start on a manual transmission vehicle that has a convertible or<br />
removable top.<br />
• Do not set reservation mode or remote-start with people in the vehicle.<br />
11
Activating Reservation Mode<br />
STEP 1: While the vehicle is running, place the transmission in neutral, set the emergency / parking<br />
brake, and remove pressure from the foot brake.<br />
STEP 2: Remove the key from the vehicle’s ignition. The vehicle’s engine should remain running even<br />
after the key has been removed. If the vehicle does not remain running visit your local authorized<br />
CompuStar dealer for service.<br />
STEP 3: Exit the vehicle and close the door. The vehicle’s engine should shut off within 10 seconds<br />
upon closing the last door. If the vehicle’s engine does not shut off, your door trigger may be functioning<br />
improperly. Do not use the remote-start feature and take your vehicle to a local authorized CompuStar<br />
dealer for service.<br />
Once the vehicle shuts off your system is in reservation mode and the vehicle is ready to<br />
safely remote start. When in reservation mode, a start availability icon will be displayed on<br />
the remote LCD<br />
IMPORTANT: By default, the system will lock/arm the vehicle upon setting reservation mode. Take care<br />
to not lock your keys inside the vehicle.<br />
Cancelling Reservation Mode<br />
Reservation mode will be cancelled for the following reasons;<br />
• You did not activate the parking brake prior to turning off the ignition.<br />
• You pressed the foot brake after the key was removed from the ignition.<br />
• You released the parking brake after the key was removed from the ignition.<br />
• You entered valet mode, opened the vehicles door, hood, trunk or set off the alarm.<br />
Reservation Mode Settings<br />
Reservation mode settings can be programmed with Option 1-6. It is re<strong>com</strong>mended that reservation<br />
mode settings are programmed by your local authorized CompuStar dealer.<br />
Default 1: Locks doors when reservation mode is set.<br />
Option 2: Does not lock doors when reservation mode is set.<br />
Option 3: Reservation mode sets 10 seconds after the last door is closed, as opposed to immediately.<br />
This option will allow you to access the vehicles rear doors, trunk or hatch prior to the system setting<br />
reservation and passively locking/arming.<br />
Trunk Release<br />
Hold button (III) for 2.5 seconds to release the trunk or hatch. If you are in range, the remote<br />
will beep once and the trunk icon will illuminate indicating that the trunk release <strong>com</strong>mand has<br />
been successfully transmitted. IMPORTANT: Trunk release is an optional vehicle feature that may<br />
require additional parts and labor.<br />
Auxiliary Outputs/Window Roll-Down/Sliding Doors<br />
Your system is equipped with two additional outputs that can be configured to control windows, open<br />
power sliding doors, open a power sliding moon roof, or even turn on a rear defroster. These outputs<br />
can be configured for pulsed, timed or latched settings. Your authorized CompuStar dealer can set<br />
these outputs up accordingly. Using auxiliary outputs to control additional vehicle functions will require<br />
additional parts and can be rather labor extensive.<br />
12
Tap button (II) for 0.5 seconds to trigger auxiliary output 1. Tap button (III) for 0.5 seconds to<br />
trigger auxiliary output 2. The remote will beep once and the aux icon will illuminate indicating<br />
that the auxiliary outputs have been triggered.<br />
By default, the system is in secure auxiliary mode, which requires you to tap button (IV) for 0.5 seconds<br />
prior to triggering auxiliary 1 or 2. To turn off secure auxiliary, ask your authorized CompuStar dealer to<br />
turn on Option 4-5 to setting II.<br />
Temperature and Battery Query<br />
When in range of your vehicle, the remote will display the vehicle’s temperature, battery voltage<br />
and remote battery voltage upon taping button (IV). The temperature will be displayed after<br />
taping button (IV) for 0.5 seconds. Tab button (IV) a second time within four seconds to display<br />
the vehicle’s battery voltage. Tab button (IV) a third time within four seconds to display the<br />
remote’s battery voltage.<br />
If you tap button (IV) and you do not get any response from the remote, the remote pager is most likely<br />
out of range to receive <strong>com</strong>mands.<br />
Silent Arm/Disarm<br />
Upon lock/arm and unlock/disarm, you can eliminate vehicle’s audible confirmation by muting<br />
the siren. Normally, the siren will chirp once to indicate the system is locked/armed and twice<br />
to indicate the system is unlocked/disarmed. To mute the siren tap buttons (I+II) simultaneously for 0.5<br />
seconds. When the siren is muted, the siren icon will no longer be displayed on the LCD. IMPORTANT:<br />
Even when the siren is muted, it will still go off in the event the alarm is triggered.<br />
Remote Mute/Vibration Mode<br />
All CompuStar PRO two-way LCD remotes have the option to be muted. To make the remote silent you<br />
must turn on vibration mode;<br />
STEP 1: Enter remote programming mode by holding down buttons (II + III) simultaneously for 2.5<br />
seconds. The remote will beep once and the LCD will read “Pro9” to indicate that you have successfully<br />
entered programming mode.<br />
STEP 2: Scroll through the remote options by taping button (IV) for 0.5 seconds. To set<br />
vibration mode tap button (IV) five times, or until the vibration mode icon is flashing. If<br />
programming the P2WSHLCDR, simply tap button (IV) one time for 0.5 seconds after entering remote<br />
programming mode.<br />
STEP 3: Once the vibration icon is flashing, turn the feature on or off by taping button (I) for 0.5 seconds.<br />
Exit remote programming by holding down buttons (II + III) simultaneously for 2.5 seconds. The remote<br />
will beep three times indicating that you have successfully exited programming. The vibration icon will<br />
remain illuminated on the LCD indicating the remote is in remote mute/vibration mode.<br />
Shock Sensor On/Off<br />
Hold buttons (I+III) simultaneously for 2.5 seconds to turn on and off the shock sensor. The<br />
remote will beep twice and the shock sensor icon will illuminate to confirm the shock sensor is<br />
off. The remote will beep once and the shock sensor icon will disappear to confirm the shock<br />
sensor is on. IMPORTANT: Turning off the shock sensor also turns off the optional sensor.<br />
13
Adjusting the shock sensor sensitivity is done at the actual sensor, which is generally mounted<br />
somewhere under the vehicle’s dashboard. The higher the number on the dial means greater sensitivity<br />
to impact. The re<strong>com</strong>mended dial setting for most vehicles is somewhere between 2 & 4. If you are<br />
testing your sensor, please note that the shock sensor does not recognize impact for 30 seconds after<br />
the system has been armed.<br />
Advanced System Functions<br />
The following section reviews advanced system functions. Many of these functions require multiple<br />
steps or additional programming by your local authorized CompuStar dealer to be active.<br />
Drive Lock/Ignition Controlled Door Locks<br />
Tap buttons (I+IV) simultaneously for 0.5 seconds to turn on and off drive lock (also known as<br />
ignition controlled door locks). The remote will beep once and the drive lock icon will<br />
illuminate to confirm that drive lock mode is activated. The remote will beep twice and the drive lock icon<br />
will disappear to confirm drive lock is off.<br />
IMPORTANT: Drive lock mode requires that the dealer turn on Option 1-9. Drive lock has two settings;<br />
Default 1: Off<br />
Option 2: Locks the doors when the ignition is on and after the brake is depressed.<br />
Option 3: locks the doors when the RPM’s have reached two times that of idle speed (this setting<br />
requires that a tachometer wire is connected).<br />
With both settings, the doors will unlock when the ignition is turned off. If using this feature on a manual<br />
transmission vehicle, the doors will unlock upon setting the emergency / parking brake.<br />
Turbo Timer Mode<br />
The built-in turbo timer keeps the vehicles engine running for either 1, 2 or 4 minutes<br />
(programmable from dealer with Option 2-2) after the vehicle key has been removed from the<br />
ignition. This feature will keep oil running through the turbo system to allow for appropriate<br />
cooling time. Tap buttons (III+IV) simultaneously for 0.5 seconds to turn on or off turbo mode.<br />
The remote will beep once and the turbo icon will illuminate to confirm that turbo mode is activated. The<br />
remote will beep twice and icon will disappear to confirm turbo mode is off.<br />
IMPORTANT: To utilize this feature, the emergency / parking brake wire must be connected to the<br />
CompuStar system. Consult your local authorized CompuStar dealer for installation.<br />
2 nd Car Mode (Multiple Vehicle Control)<br />
The P2W9000FM remotes have the ability to operate a 2 nd vehicle. Press buttons (III+IV)<br />
simultaneously for 2.5 seconds to turn on or off 2 nd car mode. The remote will beep once and<br />
the 2 nd car icon will illuminate to confirm that 2 nd car mode is activated. The remote will beep<br />
twice and the icon will disappear to confirm 2 nd car mode is off.<br />
IMPORTANT: 2 nd car mode requires the remote to be programmed to a 2 nd vehicle that is equipped with<br />
either a P2W9000FM-AS, P2W9000FM-A or P2W9000FM-S, P2WSS-AS, P2WSS-A or P2WSS-S.<br />
Remote Alarm Clock<br />
All CompuStar PRO two-way LCD remotes have a built-in alarm clock. This alarm clock feature is similar<br />
to ordinary alarm clocks in that the remote (not the car) will beep at a programmed timed. To program<br />
the alarm clock perform the followings steps;<br />
14
STEP 1: Enter remote programming mode by holding down buttons (II + III) simultaneously for 2.5<br />
seconds. The remote will beep once and the LCD will read “Pro9” to indicate that you have successfully<br />
entered programming mode.<br />
STEP 2: Scroll through the remote options by taping button (IV) for 0.5 seconds. To set the<br />
alarm clock tap button (IV) two times, or until the timer and clock icons are flashing.<br />
STEP 3: Once the timer and clock icons are flashing, set the desired alarm clock time by taping button (I)<br />
for 0.5 seconds to adjust the hour and button (II) for 0.5 seconds to adjust the minute.<br />
STEP 4: Once the time is set, tap button (IV) for 0.5 seconds to scroll to the next remote option. By<br />
default the alarm mode is off. Tap button (I) for 0.5 seconds to turn the alarm clock mode on.<br />
STEP 5: Exit remote programming by holding down buttons (II + III) simultaneously for 2.5 seconds. The<br />
remote will beep three times indicating that you have successfully exited programming. The alarm clock<br />
icon will remain illuminated on the LCD indicating the remote is in alarm clock mode.<br />
Car Call/RPS (Remote Paging Sensor)<br />
The car call/RPS feature uses a remote paging sensor that is designed to be mounted on the inside of<br />
the windshield. After the RPS has been triggered, the car call icon will illuminate and the remote will ring<br />
several times if the remote is in range to receive <strong>com</strong>mands. To trigger the car call or RPS sensor, you<br />
must knock on the windshield in front of the RPS at least two times. The switch on the RPS will adjust<br />
paging sensitivity – the smaller the dot represents the least sensitive setting. Use a key or pen for best<br />
results. If you do not want the remote to receive pages from the RPS, follow the below steps to turn the<br />
feature off;<br />
STEP 1: Enter remote programming mode by holding down buttons (II + III) simultaneously for 2.5<br />
seconds. The remote will beep once and the LCD will read “Prog” to indicate that you have successfully<br />
entered programming mode.<br />
STEP 2: Scroll through the remote options by taping button (IV) for 0.5 seconds. Tap button<br />
(IV) four times, or until the car call icon is flashing.<br />
STEP 3: Once the car call icon is flashing, you can turn the feature off by tapping button (I) for 0.5<br />
seconds. Repeat this step to turn the car call feature back on.<br />
STEP 4: Exit remote programming by holding down buttons (II + III) simultaneously for 2.5 seconds. The<br />
remote will beep three times indicating that you have successfully exited programming. The car call icon<br />
will no longer be illuminated on the LCD indicating that the remote is not in car call mode.<br />
RPS (Remote Paging Sensor) Unlock/Disarm<br />
Basic RPS and car call functions do not require programming, however in order for the sensor to<br />
unlock/disarm the vehicle you must perform the following procedures;<br />
STEP 1: Disarm/unlock the alarm (remote must be programmed first)<br />
STEP 2: Turn ignition key to the “on” position and the leave the driver’s door open.<br />
STEP 3: Knock on the windshield in front of the RPS a total of 10 times (each time you knock the LED on<br />
the RPS will flash RED). The LED will begin to flash rapidly in BLUE with successful <strong>com</strong>pletion of this<br />
step.<br />
15
STEP 4: Enter the first digit of the desired four-digit pass code by knocking on the windshield in front of<br />
the RPS the desired number of times. For example, to enter 3, knock on the sensor 3 times (each time<br />
you knock the LED will flash RED) then wait.<br />
STEP 5: The LED on the RPS will confirm your first number by flashing BLUE slowly. Once the LED<br />
begins to flash rapidly in BLUE, enter your second number by repeating step 4.<br />
STEP 6: Repeat steps 4 & 5 to enter all four numbers.<br />
STEP 7: Turn the ignition OFF - the RPS disarm/unlock feature is now programmed. Follow steps 3 – 5<br />
to enter your disarm/unlock code.<br />
Secure Valet Switch<br />
The optional Secure Valet Switch prevents the alarm from being put into valet mode through cycling the<br />
ignition on/off five times. The Secure Valet Switch is more secure than traditional toggle / valet switches<br />
because it requires a two-digit code. IMPORTANT: The first two-digits of the RPS unlock/disarm pass<br />
code will be the default pass code for the secure valet – you do not need to program them<br />
independently. If you are not using the RPS unlock, following the below procedures to program your<br />
secure valet pass code;<br />
STEP 1: Turn on Option 3-10-III. (Dealer programmed option)<br />
STEP 2: Turn ignition key to the “on” position.<br />
STEP 3: Hold down the valet switch for 1.5 seconds. The LED on the valet switch will begin to flash<br />
rapidly with successful <strong>com</strong>pletion of this step.<br />
STEP 4: Enter the first digit of the desired two-digit pass code by depressing the switch the number of<br />
times that coordinates with the desired first number. For example, to enter 3, depress the switch 3 times,<br />
then wait.<br />
STEP 5: The LED will confirm the first number by flashing BLUE slowly. Once the LED begins to flash<br />
rapidly, enter your second number by repeating step 4.<br />
STEP 6: Turn the ignition off - the Secure Valet Switch is now programmed. Follow steps 3 – 5 to enter<br />
your Secure Valet code.<br />
Timer Start Mode<br />
Timer start mode is used to cool or warm the vehicle without manually starting with the key or<br />
from the CompuStar remote. While engaged, timer start will activate even while the remote is<br />
out of range. Tap buttons (II+IV) simultaneously for 0.5 seconds to activate timer start mode. The<br />
remote will beep once and the timer start icon will illuminate just above the clock icon. Repeat the same<br />
step to turn off timer start mode. Timer start mode will be cancelled any time the vehicle is started<br />
manually or remotely. To change from the default setting to optional settings, see your local CompuStar<br />
dealer.<br />
Default 1: Will start every 3 hours for a 24 hour cycle, or until the vehicle is remote started or started by<br />
key, and run for 4 minutes (8 minutes for diesel).<br />
Option 2: Will start every 1.5 hours for a 24 hour cycle, or until the vehicle is remote started or started by<br />
key, and run for 4 minutes (8 minutes for diesel).<br />
Option 3: Will start at the time specified on the 2 way remote once within 24 hours and run for either 15,<br />
25, 45 or 4 minutes (see your local dealer to change the run-time options).<br />
16
Option 4: Will start at the time specified on the 2 way remote once within 24 hours every day. This<br />
option requires a cold or hot temperature setting as a safety feature. In other words, prior to starting at<br />
specified time, the system will only start if it is below the cold temperature settings or above the hot<br />
temperature settings.<br />
To program a specified start time, used for Option 3 and 4, perform the following steps;<br />
STEP 1: Enter remote programming mode by holding down buttons (II + III) simultaneously for 2.5<br />
seconds. The remote will beep once and the LCD will read “Prog” to indicate that you have successfully<br />
entered programming mode.<br />
STEP 2: Scroll through the remote options by taping button (IV) for 0.5 seconds. To set the<br />
timer start time tap button (IV) one time, or until the timer and the exhaust icons are flashing.<br />
STEP 3: Once the timer and clock icons are flashing, set the desired start time by tapping button (I)<br />
for 0.5 seconds to adjust the hour and button (II) for 0.5 seconds to adjust the minute.<br />
STEP 4: Exit remote programming by holding down buttons (II + III) simultaneously for 2.5 seconds. The<br />
remote will beep three times indicating that you have successfully exited programming. Remember, after<br />
you set the time, you must be in timer mode before the vehicle will start. Tap buttons (II+IV)<br />
simultaneously for 0.5 seconds to activate timer start mode. The remote will beep once and the timer<br />
start icon will illuminate just above the clock icon.<br />
Cold/Hot Start Mode<br />
Cold/hot start mode works in conjunction with timer start mode (see above) and the temperature sensor.<br />
It allows you to configure your timer start feature to check the vehicles temperature prior to starting. All<br />
of these options require programming from your local CompuStar dealer.<br />
Cold Start Settings (Option 2-8); Hot Start Settings (Option 2-9);<br />
Default 1: Off Default 1: Off<br />
Option 2: -10º C / 14º F Option 2: 30º C / 86º F<br />
Option 3: -5º C / 14º F Option 3: 35º C / 95º F<br />
Option 4: 0º C / 32º F Option 4: 40º C / 104º F<br />
Auto Mode<br />
Auto Mode is only available in certain markets and is not available in the U.S. When the system is in<br />
Auto Mode, the system will detect the remote as you walk up to your vehicle and automatically<br />
unlock/disarm. The system will also detect the remote as you walk away from your vehicle and<br />
automatically lock/arm. Hold down button (I) for 2.5 seconds to activate Auto Mode. The remote will<br />
beep once and the auto icon will illuminate.<br />
If you would like to increase the Auto Mode range, which will cause the system to unlock/disarm and<br />
lock/arm at a greater distance from the vehicle, simply hold down button (I) a second time for 2.5<br />
seconds. The Auto Mode icon will now flash to indicate you have increased the Auto sensing range.<br />
IMPORTANT: If you find that you are remaining on the border of range between your remote and<br />
vehicle, and your CompuStar is continually unlocking/disarming or locking/arming, you will want to turn<br />
Auto Mode off or engage the third optional setting. While in the third setting, the system will only<br />
unlock/disarm or lock/arm twice within a two minute period. Hold down button (I) a third time for 2.5<br />
seconds to turn on the third setting. The Auto Mode icon will now flash rapidly to indicate you are in the<br />
third setting.<br />
17
Turn Auto Mode off by holding down button (I) a fourth time for 2.5 seconds. The remote will beep twice<br />
and the Auto Mode icon will disappear.<br />
Anti Jacking Mode<br />
The CompuStar systems have a built in mode that would require you to keep your remote separate from<br />
your key chain. This feature also requires additional labor. Please consult your installer for more details.<br />
The Anti Jacking mode allows you to safely disable your vehicle once a thief has driven off with your<br />
property. If you are car jacked and still have your remote, you can panic the system by holding button IV<br />
down for 4 seconds. The siren will sound for 30 seconds and the motor of the vehicle will shut down.<br />
Remote Coding / Programming Routine(s)<br />
IMPORTANT: Every CompuStar Pro remote must be coded to the system prior to performing any<br />
operations. Remote coding is typically done at your local CompuStar dealer.<br />
Programming P2W9000R<br />
STEP 1: Activate Valet/Programming mode by manually turning the ignition key on and off (between the<br />
Acc & On positions) five times within 10 seconds. The vehicle’s parking lights will flash once with the<br />
successful <strong>com</strong>pletion of this step.<br />
STEP 2: Within a 5 second period after cycling the ignition for the 5 th time, press button (I) on two-way<br />
remotes or the (lock) button on one-way remotes for 0.5 seconds. The parking lights will flash once to<br />
confirm the transmitter has been coded.<br />
Programming P2WSSR<br />
STEP 1: Remove the AA battery from the remote.<br />
Exiting Programming: Programming is a timed sequence. The<br />
parking lights will flash twice signaling the end of programming mode.<br />
Programming Multiple Remotes: After the confirmation flash given in<br />
step 2, code additional remotes by pressing button (I) on two-way<br />
remotes or the (lock) button on one-way remotes. The parking lights<br />
will flash once confirming each additional remote. All systems (except<br />
the P2WSSR), can recognize up to three remotes.<br />
STEP 2: Activate Valet/Programming mode by manually turning the ignition on and off (between Acc &<br />
On) five times within 10 seconds. The parking lights will flash once with successful <strong>com</strong>pletion of this<br />
step.<br />
STEP 3: Within a 10 second period after cycling the ignition for the 5 th time, insert the AA battery into the<br />
remote. The parking lights will flash once to confirm this step.<br />
STEP 4: Wait several seconds for the parking lights to flash twice and the remote LCD to activate. The<br />
transmitter has now been coded.<br />
Programming Multiple Remotes: After the confirmation flash given in step 3, program another remote<br />
by pressing the (lock) button for 0.5 seconds. The parking lights will flash once confirming that the<br />
18
emote has been learned. The P2WSSR can recognize two remotes; 2 two-way remotes or 1 two-way<br />
remote and 1 one-way remote. When using 2 two-way remotes, the second remote will need to be resynced<br />
to the antenna prior to operation (see page 10).<br />
Remote Start Error Diagnostic<br />
If the remote start fails to start the vehicle, the parking lights will flash three times immediately. Following<br />
those three flashes the parking lights will flash again corresponding to the error table. The remotes will<br />
also display to error number, “Str ER ##” on the LCD.<br />
Number of<br />
Parking Light<br />
Remote Start Error<br />
Flashes<br />
1 Motor running<br />
2 Key in ignition on position<br />
3 Door open (manual transmission only)<br />
4 Trunk open<br />
5 Foot brake on<br />
6 Hood open<br />
7 Reservation off (manual transmission only)<br />
8 Tach or voltage sensing failure<br />
We re<strong>com</strong>mend that you do not attempt any repairs on your remote starter. Contact your dealer or call<br />
us directly.<br />
Alarm Diagnostic<br />
While the alarm is armed, the LED will blink slowly. While the siren is going off, the LED will indicate the<br />
specific zone that was triggered.<br />
Priority Situation LED On Duty<br />
1 Door/Hood/Trunk/Key Triggered 2 flash, rest, then repeat<br />
2 2 nd Shock Triggered 3 flash, rest, then repeat<br />
3 Optional Sensor Triggered 4 flash, rest, then repeat<br />
4 PANIC 5 flash , rest, then repeat<br />
Upon disarming the alarm after it has been triggered, the amount of siren chirps will indicate the specific<br />
zone.<br />
# of<br />
Chirps<br />
Situation<br />
4 Option Sensor Triggered<br />
5 2 nd Shock Triggered<br />
6 Door/Hood/Trunk/Key Triggered<br />
19
Limited Lifetime Warranty<br />
Firstech, LLC Warrants to the original purchaser that this product shall be free of defects in material and<br />
workmanship under normal use and circumstances for the period of time that the original owner of this<br />
product owns the vehicle in which it is installed; except that the remote controller unit for the period of<br />
one year from the date of installation to the original owner of this product. When the original purchaser<br />
returns the product to the retail store where it was purchased or prepaid postal to Firstech, LLC., 21911<br />
68th Avenue South, Kent, WA 98032, USA within the warranty period, and if the product is defective,<br />
Firstech, LLC, will at its option repair or replace such.<br />
TO THE MAXIMUM EXTENT ALLOWED BY LAW, ANY AND ALL WARRANTIES ARE EXCLUDED BY<br />
THE MANUFACTURER AND EACH ENTITY PARTICIPATING IN THE STREAM OF COMMERCE<br />
THEREWITH. THIS EXCLUSION INCLUDES BUT IS NOT LIMITED TO, THE EXCLUSION OF ANY<br />
AND ALL WARRANTY OF MERCHANTABILITY AND/OR ANY AND ALL WARRANTY OF FITNESS<br />
FOR A PARTICULAR PURPOSE AND/OR ANY AND ALL WARRANTY OF NON-INFRINGEMENT OR<br />
PATENTS, IN THE UNITED STATES OF AMERICA AND/OR ABROAD. NEITHER THE<br />
MANUFACTURER OF ANY ENTITIES CONNECTED THEREWITH SHALL BE RESPONSIBLE OR<br />
LIABLE FOR ANY DAMAGES WHATSOEVER, INCLUDING BUT NOT LIMITED TO, ANY<br />
CONSEQUENTIAL DAMAGES, INCIDENTAL DAMAGES, DAMAGES FOR LOSS OF TIME, LOSS OF<br />
EARNINGS, COMMERCIAL LOSS, LOSS OF ECONOMIC OPPORTUNITY AND THE LIKE.<br />
NOTWITHSTANDING THE ABOVE, MANUFACTURER DOES OFFER A LIMITED WARRANTY TO<br />
REPLACE OR REPAIR THE CONTROL MODULE AS DESCRIBED ABOVE.<br />
Some states do not allow limitations on how long an implied warranty will last or the exclusion or<br />
limitation on how long an implied warranty will last or the exclusion or limitation of incidental or<br />
consequential damages. This warranty gives you specific legal rights, and you may also have other<br />
rights, which vary State to State.<br />
Firstech, LLC. is not RESPONSIBLE OR LIABLE FOR ANY DAMAGES WHATSOEVER, INCLUDING<br />
BUT NOT LIMITED TO, ANY CONSEQUENTIAL DAMAGES, INCIDENTAL DAMAGES, DAMAGES<br />
FOR LOSS OF TIME, LOSS OF EARNINGS, COMMERCIAL LOSS, LOSS OF ECONOMIC<br />
OPPORTUNITY AND THE LIKE that may or may not resulted from the operation of <strong>Compustar</strong>. NOT<br />
WITH STANDING THE ABOVE, MANUFACTURER DOES OFFER A LIMITED WARRANTY TO<br />
REPLACE OR REPAIR THE CONTROL MODULE AS DESCRIBED ABOVE.<br />
Your Warranty<br />
The product's warranty is automatically void if the date code or serial number is defaced, missing or<br />
altered. This warranty will not be valid unless you have <strong>com</strong>pleted the registration card at<br />
www.<strong>com</strong>pustar.<strong>com</strong> within 10 days of purchase.<br />
20
Notes:<br />
___________________________________________________________________________________<br />
___________________________________________________________________________________<br />
___________________________________________________________________________________<br />
___________________________________________________________________________________<br />
___________________________________________________________________________________<br />
___________________________________________________________________________________<br />
___________________________________________________________________________________<br />
___________________________________________________________________________________<br />
___________________________________________________________________________________<br />
___________________________________________________________________________________<br />
___________________________________________________________________________________<br />
___________________________________________________________________________________<br />
___________________________________________________________________________________<br />
___________________________________________________________________________________<br />
___________________________________________________________________________________<br />
___________________________________________________________________________________<br />
___________________________________________________________________________________<br />
___________________________________________________________________________________<br />
___________________________________________________________________________________<br />
___________________________________________________________________________________<br />
___________________________________________________________________________________<br />
___________________________________________________________________________________<br />
___________________________________________________________________________________<br />
___________________________________________________________________________________<br />
___________________________________________________________________________________<br />
___________________________________________________________________________________<br />
___________________________________________________________________________________<br />
21
___________________________________________________________________________________<br />
___________________________________________________________________________________<br />
___________________________________________________________________________________<br />
___________________________________________________________________________________<br />
___________________________________________________________________________________<br />
___________________________________________________________________________________<br />
___________________________________________________________________________________<br />
___________________________________________________________________________________<br />
___________________________________________________________________________________<br />
___________________________________________________________________________________<br />
___________________________________________________________________________________<br />
___________________________________________________________________________________<br />
___________________________________________________________________________________<br />
___________________________________________________________________________________<br />
___________________________________________________________________________________<br />
___________________________________________________________________________________<br />
___________________________________________________________________________________<br />
___________________________________________________________________________________<br />
___________________________________________________________________________________<br />
___________________________________________________________________________________<br />
___________________________________________________________________________________<br />
___________________________________________________________________________________<br />
___________________________________________________________________________________<br />
___________________________________________________________________________________<br />
___________________________________________________________________________________<br />
___________________________________________________________________________________<br />
___________________________________________________________________________________<br />
22
www.<strong>com</strong>pustar.<strong>com</strong><br />
Toll Free: 888-820-3690<br />
21911 68 th Ave S<br />
Kent, WA 98032<br />
23