
Create successful ePaper yourself
Turn your PDF publications into a flip-book with our unique Google optimized e-Paper software.
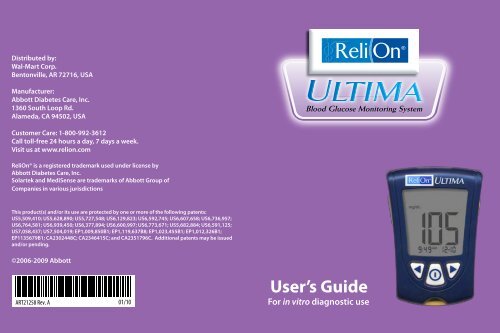
Distributed by:<br />
Wal-Mart Corp.<br />
Bentonville, AR 72716, USA<br />
Manufacturer:<br />
Abbott Diabetes Care, Inc.<br />
1360 South Loop Rd.<br />
Alameda, CA 94502, USA<br />
Customer Care: 1-800-992-3612<br />
Call toll-free 24 hours a day, 7 days a week.<br />
Visit us at www.relion.com<br />
<strong>ReliOn</strong>® is a registered trademark used under license by<br />
Abbott Diabetes Care, Inc.<br />
Solartek and MediSense are trademarks of Abbott Group of<br />
Companies in various jurisdictions<br />
This product(s) and/or its use are protected by one or more of the following patents:<br />
US5,509,410; US5,628,890; US5,727,548; US6,129,823; US6,592,745; US6,607,658; US6,736,957;<br />
US6,764,581; US6,939,450; US6,377,894; US6,600,997; US6,773,671; US5,682,884; US6,591,125;<br />
US7,058,437; US7,504,019; EP1,009,850B1; EP1,119,637B8; EP1,023,455B1; EP1,012,326B1;<br />
EP1135679B1; CA2302448C; CA2346415C; and CA2351796C. Additional patents may be issued<br />
and/or pending.<br />
©2006-2009 Abbott<br />
ART21258 Rev. A 01/10<br />
User’s Guide<br />
For in vitro diagnostic use<br />
ART21258_Rev-A-CVR.indd 1 1/6/10 9:09:34 AM
Table of Contents<br />
Welcome 1<br />
1 Important Things to Know about Your<br />
Blood Glucose Monitoring System 3<br />
Intended Use 3<br />
How Your Blood Glucose Monitoring System Works 4<br />
System Kit Contents 4<br />
Getting to Know Your Monitor’s Features 5<br />
2 Setting Up Your Monitor 7<br />
Buttons to Use 7<br />
Setup Options 7<br />
How to Set the Beeper, Date, Time, & View<br />
Measurement Unit 8<br />
Set Beeper 8<br />
Set Time 9<br />
Set Date 10<br />
Set Time Format 12<br />
Set Date Format 12<br />
Blood Glucose Measurement Unit 13<br />
3 Calibrating Your Monitor 14<br />
Why Calibrate Your Monitor? 14<br />
When to Calibrate Your Monitor 14<br />
What You Will Need 14<br />
How to Calibrate Your Monitor 14<br />
How to Recall the LOT Number 17<br />
4 Monitoring Your Blood Glucose 18<br />
What You Will Need 18<br />
Important Information about Monitoring<br />
Your Blood Glucose 18<br />
How to Monitor Your Blood Glucose 19<br />
Understanding Your Result 24<br />
ART21258_Rev-A-Man.indd 1 1/12/10 3:38:13 PM
ART21258_Rev-A-Man.indd 2 1/12/10 3:38:13 PM
5 <strong>Do</strong>ing A Control Solution Test 27<br />
Why <strong>Do</strong> A Control Solution Test? 27<br />
When Is <strong>Do</strong>ing A Control Solution Test Recommended? 27<br />
Important Information about Control Solution Testing 27<br />
What You Will Need 28<br />
How to <strong>Do</strong> Control Solution Testing 28<br />
Understanding Your Result 32<br />
6 Reviewing & Using Your Results 33<br />
What Can Your Monitor Show You? 33<br />
How to See Results in Memory 34<br />
How to See Averages 36<br />
Transferring Your Results to a Computer 37<br />
7 Understanding & Troubleshooting<br />
Error Messages 38<br />
What An Error Message Means &<br />
What You Need to <strong>Do</strong> 38<br />
8 Your Monitor’s Specifications & Limitations 42<br />
Important Information about Using Blood 44<br />
Samples from the Forearm, Upper Arm,<br />
or Base of the Thumb<br />
9 Caring For Your Monitor 45<br />
Cleaning Your Monitor 45<br />
Replacing Your Monitor’s Battery 45<br />
10 Support 48<br />
ART21258_Rev-A-Man.indd 3 1/12/10 3:38:13 PM
Welcome<br />
Thank you for choosing the <strong>ReliOn</strong>® Ultima Blood Glucose<br />
Monitoring System.<br />
Important steps for using the System are inside this guide.<br />
Please read it carefully.<br />
Your new Blood Glucose Monitoring System is an important<br />
tool that can help you better manage your diabetes. Blood<br />
glucose results can help you understand your diabetes and<br />
what happens with:<br />
• Food<br />
• Exercise<br />
• Stress and illness<br />
• Diabetes medications<br />
Always monitor your blood glucose according to your<br />
healthcare professional’s recommendations.<br />
1<br />
ART21258_Rev-A-Man.indd 4 1/12/10 3:38:13 PM
We offer Customer Care. If you have any questions, call<br />
Customer Care at 1-800-992-3612. We are available toll-free<br />
24 hours a day, 7 days a week.<br />
Please read the following items before using your Blood<br />
Glucose Monitoring System:<br />
• User guide<br />
• Blood glucose test strip instructions for use<br />
• Lancing device instructions for use and other information<br />
• Warranty card<br />
IMPORTANT:<br />
Any user guide text shown in a shaded box like this<br />
one is important information. Please pay special<br />
attention to these boxes.<br />
ART21258_Rev-A-Man.indd 5 1/12/10 3:38:13 PM<br />
2
Important<br />
Information<br />
▼<br />
CHAPTER 1<br />
Important Things<br />
to Know about<br />
Your Blood Glucose<br />
Monitoring System<br />
Intended Use<br />
Your System:<br />
• Is indicated for home (lay user) or<br />
professional use in the management<br />
of patients with diabetes.<br />
• Is for use outside the body (in vitro<br />
diagnostic use).<br />
• Is for monitoring glucose in fresh whole<br />
blood (for example, from the fingertip).<br />
• Is for use with <strong>ReliOn</strong>® Ultima Blood Glucose Test Strips.<br />
Potential Infection Risk:<br />
Healthcare professionals performing<br />
blood tests with this system on multiple<br />
patients must always wear gloves and<br />
should follow the infection control<br />
policies and procedures approved by<br />
their facility.<br />
IMPORTANT:<br />
3<br />
Questions?<br />
Call Customer Care:<br />
1-800-992-3612<br />
24 hours a day, 7 days a week<br />
Observe caution when using around children. Small<br />
parts may constitute a choking hazard.<br />
ART21258_Rev-A-Man.indd 6 1/12/10 3:38:13 PM
▼<br />
▼<br />
How Your Blood Glucose Monitoring<br />
System Works<br />
When you insert a test strip into your monitor, the<br />
Apply Sample message shows on your monitor’s<br />
display window. When a blood sample or control<br />
solution sample is applied to the test strip, the<br />
glucose reacts with the chemicals on the test strip.<br />
This reaction produces a small electrical current that is<br />
measured. The result shows on your monitor’s display<br />
window.<br />
Blood Glucose Monitoring System Kit Contents<br />
Blood Glucose Monitor<br />
User’s Guide<br />
– Contains system information and directions.<br />
Carrying Case<br />
– Use this to store and carry your monitor and other<br />
monitoring supplies.<br />
Logbook<br />
– Use this to record your test results, activities and<br />
medications.<br />
Lancing Device, Lancets and Instructions for Use<br />
– Use this to obtain a blood drop.<br />
Blood Glucose Test Strips and Instructions for Use<br />
Items <strong>not</strong> included:<br />
Solartek or MediSense Control Solutions<br />
Data Management System<br />
4<br />
Important<br />
Information<br />
ART21258_Rev-A-Man.indd 7 1/12/10 3:38:13 PM
Important<br />
Information<br />
▼<br />
Getting to Know Your Monitor’s Features<br />
Display Window<br />
This shows:<br />
• Blood glucose results.<br />
• Glucose LOT numbers.<br />
• Previous test results and<br />
error messages.<br />
• Blood glucose averages.<br />
Display Check<br />
<strong>Do</strong> <strong>not</strong> use the monitor if the<br />
monitor Display Check does <strong>not</strong><br />
exactly match the picture here (for<br />
example, if you see a "3" instead<br />
of an "8"). The monitor may show<br />
an incorrect result when you use<br />
it. Please call Customer Care for<br />
assistance.<br />
IMPORTANT:<br />
Each time you turn your monitor<br />
on, a full display shows. This is<br />
called a Display Check. Look at the<br />
Display Check each time it appears<br />
on your monitor’s display window,<br />
especially before you check your<br />
blood glucose. The Display Check<br />
shows on the display window<br />
briefly.<br />
5<br />
Back<br />
Button<br />
Strip<br />
Port<br />
Display<br />
Window<br />
Mode<br />
Button Forward<br />
Button<br />
Backlight<br />
Button<br />
ART21258_Rev-A-Man.indd 8 1/12/10 3:38:14 PM
IMPORTANT: Avoid getting dust, dirt, blood, control solution,<br />
water, or any other substance in the monitor's test strip port.<br />
Strip Port<br />
This is where you insert:<br />
• A blood glucose test strip<br />
• A glucose calibrator<br />
Mode Button<br />
Use this button to:<br />
• Turn monitor ON and OFF<br />
• Access monitor setup options<br />
• Access and save monitor settings<br />
• Access previous results and averages<br />
Forward Button<br />
Back Button<br />
Use these buttons to:<br />
• Review and select monitor settings<br />
• Review results and averages<br />
Backlight Button<br />
Use this button to:<br />
• Turn backlight ON and OFF<br />
Battery Compartment<br />
This is where the battery is installed.<br />
• If your monitor does <strong>not</strong> turn on, check that<br />
your battery is installed properly.<br />
• For new battery installation, see Chapter 9.<br />
6<br />
Important<br />
Information<br />
ART21258_Rev-A-Man.indd 9 1/12/10 3:38:15 PM
Setting Up<br />
Your Monitor<br />
▼ ▼<br />
Setting Up Your<br />
Monitor<br />
Buttons to Use<br />
Mode Button<br />
Forward Button<br />
Back Button<br />
CHAPTER 2<br />
Setup Options<br />
Set Beeper<br />
If the beeper is set ON, it will beep when:<br />
• The calibrator is fully inserted<br />
• The test countdown starts<br />
• The test countdown finishes<br />
Set Time, Set Date<br />
If your meter has a battery tab, pull it<br />
out. You will be prompted to set the<br />
time and date the first time you turn on<br />
your meter (see Set Time and Set Date<br />
sections in this chapter).<br />
Important: Set the correct time and date before you<br />
use the monitor for the first time. This will help you keep<br />
records of when you monitor and will help you and your<br />
healthcare professional make informed decisions about<br />
your care. You must set the time and date to review<br />
averages.<br />
You may need to re-set the time and date:<br />
• After you replace the battery<br />
• When you travel between time zones or when the time<br />
zone you are in changes<br />
In "Set Date", you set the year, month, and day.<br />
7<br />
Questions?<br />
Call Customer Care:<br />
1-800-992-3612<br />
24 hours a day, 7 days a week<br />
ART21258_Rev-A-Man.indd 10 1/12/10 3:38:16 PM
▼<br />
Set Time Format<br />
In "Set Time Format", you choose how the time shows on<br />
the monitor’s display window.<br />
Set Date Format<br />
In "Set Date Format", you choose how the month and day<br />
show on the monitor’s display window.<br />
Measurement Unit<br />
Blood glucose measurement unit is factory-set in mg/dL.<br />
How to Set the Beeper, Date, Time, &<br />
View Measurement Unit<br />
Before you start, please <strong>not</strong>e: "Press and<br />
Hold" means that you press the button in for<br />
at least 2 seconds. "Press and Release" means<br />
that you press the button and let it go quickly.<br />
Press and Hold the button to turn the<br />
monitor off and save your settings at any<br />
time. The monitor automatically turns off after<br />
30 seconds of no action.<br />
If you like the setting that you see on your<br />
monitor and do <strong>not</strong> want to change it, Press<br />
and Release the button to move to the<br />
next setup option.<br />
Set Beeper<br />
The means the beeper is ON.<br />
The means the beeper is OFF.<br />
8<br />
Beeper ON<br />
Beeper OFF<br />
Setting Up<br />
Your Monitor<br />
ART21258_Rev-A-Man.indd 11 1/12/10 3:38:17 PM
Setting Up<br />
Your Monitor<br />
1 To<br />
2 To<br />
3 Press<br />
Set Time<br />
Hour:<br />
turn your monitor ON, Press<br />
and Hold the button.<br />
The beeper ON message shows<br />
on the display window. The<br />
musical <strong>not</strong>es flash on and off,<br />
and the monitor beeps.<br />
change the beeper setting,<br />
Press and Release the button<br />
or the button once.<br />
and Release the button<br />
to save the beeper setting and to<br />
move to Set Time (Hour).<br />
The Hour flashes on and off.<br />
1<br />
Press and Release the button to<br />
move the hour forward.<br />
2<br />
If you go past the correct hour, Press<br />
and Release the button to move<br />
the hour back.<br />
3<br />
Press and Release the button to<br />
save the hour and to move to<br />
Set Minutes.<br />
9<br />
ART21258_Rev-A-Man.indd 12 1/12/10 3:38:18 PM
Minutes:<br />
The Minutes flash on and off.<br />
1<br />
Press and Release the button to<br />
move the minutes forward.<br />
2<br />
If you go past the correct minute,<br />
Press and Release the button to<br />
move the minutes back.<br />
3<br />
Press and Release the button to<br />
save the minutes and to move to Set<br />
Date.<br />
Set Date<br />
Year:<br />
The Year flashes on and off.<br />
1<br />
Press and Release the button to<br />
move the year forward.<br />
2<br />
If you go past the correct year, Press<br />
and Release the button to move<br />
the year back.<br />
3<br />
Press and Release the button to<br />
save the year and to move to Set<br />
Month.<br />
10<br />
Setting Up<br />
Your Monitor<br />
ART21258_Rev-A-Man.indd 13 1/12/10 3:38:19 PM
Setting Up<br />
Your Monitor<br />
Month:<br />
The Month flashes on and off.<br />
1<br />
Press and Release the button to<br />
move the month forward.<br />
2<br />
If you go past the correct month,<br />
Press and Release the button to<br />
move the month back.<br />
3<br />
Press and Release the button to save<br />
the month and to move to Set Day.<br />
Day:<br />
The Day flashes on and off.<br />
1<br />
Press and Release the button to<br />
move the day forward.<br />
2<br />
If you go past the correct day, Press<br />
and Release the button to move<br />
the day back.<br />
3<br />
Press and Release the button to<br />
save the day and to move to Set<br />
Time Format.<br />
11<br />
ART21258_Rev-A-Man.indd 14 1/12/10 3:38:19 PM
Set Time Format<br />
You have two choices:<br />
Choice #1: For the 12-hour format,<br />
AM or PM shows.<br />
Choice #2: For the 24-hour format,<br />
AM or PM does <strong>not</strong> show.<br />
1<br />
To change the Time Format,<br />
Press and Release the button<br />
or the button once.<br />
2<br />
Press and Release the button<br />
to save the Time Format and to<br />
move to Set Date Format.<br />
Set Date Format<br />
You have two choices:<br />
Choice #1: For the month-day format,<br />
"-" shows with the date.<br />
Example: "25 May" shows as "5-25"<br />
Choice #2: For the day.month format,<br />
"•" shows with the date.<br />
Example: "25 May" shows as "25.5"<br />
1<br />
To change the Date Format, Press<br />
and Release the button or the<br />
button once.<br />
2<br />
Press and Release the button to<br />
save the Date Format and to move<br />
to Measurement Unit.<br />
12<br />
Choice #1<br />
Choice #2<br />
Setting Up<br />
Your Monitor<br />
ART21258_Rev-A-Man.indd 15 1/12/10 3:38:20 PM
Setting Up<br />
Your Monitor<br />
▼<br />
Blood Glucose Measurement Unit<br />
Consult your healthcare professional<br />
if you have any questions about the<br />
blood glucose measurement unit.<br />
This screen shows the blood glucose<br />
measurement unit (mg/dL).<br />
Press and Release the button to<br />
return to Set Beeper.<br />
Press and Hold the button to turn<br />
your monitor off.<br />
You have successfully set up your monitor.<br />
13<br />
ART21258_Rev-A-Man.indd 16 1/12/10 3:38:21 PM
Questions?<br />
Call Customer Care:<br />
1-800-992-3612<br />
24 hours a day, 7 days a week<br />
CHAPTER 3<br />
Calibrating Your Monitor<br />
Why Calibrate Your Monitor?<br />
Your monitor must be calibrated so that it can<br />
recognize the test strip you are using. Calibration<br />
ensures that your results are accurate.<br />
When to Calibrate Your Monitor<br />
• When you use the monitor for the first time.<br />
• EACH time you open and use a new box of blood<br />
glucose test strips.<br />
What You Will Need<br />
• Blood Glucose Monitor<br />
• For glucose calibration:<br />
- Blood glucose test strip<br />
- Blood glucose test strip instructions for use<br />
- Blood glucose test strip calibrator<br />
How to Calibrate Your Monitor<br />
When you insert a test strip for the first time,<br />
the display window shows:<br />
This means the monitor is <strong>not</strong> calibrated for<br />
blood glucose monitoring. ➡<br />
IMPORTANT:<br />
• Use only the calibrator that is packaged in the box of<br />
test strips you are using.<br />
• <strong>Do</strong> <strong>not</strong> use test strips that have expired. Check the<br />
expiration date on the test strip foil packet and test<br />
strip box. If only the year and month are shown, the<br />
expiration date is the last day of the month.<br />
▼<br />
▼<br />
▼<br />
▼<br />
14<br />
Calibrating<br />
Your Monitor<br />
ART21258_Rev-A-Man.indd 17 1/12/10 3:38:21 PM
Calibrating<br />
Your Monitor<br />
1<br />
Remove the glucose calibrator package from the<br />
new box of test strips.<br />
2<br />
Open the calibrator package. Find the<br />
three raised bumps on the calibrator<br />
package. Peel the clear cover away<br />
from the three raised bumps.<br />
3<br />
Hold the calibrator with the LOT 00000<br />
number facing you.<br />
4 Insert<br />
5 Check<br />
the calibrator into the strip port.<br />
Push it in until it stops.<br />
The Display Check shows on the display<br />
window, followed by the time, month,<br />
and day.<br />
Next, the LOT number shows on the<br />
display window:<br />
LOT 00000<br />
Then you hear the beeper, if the beeper is ON.<br />
that LOT 00000 appears on the monitor<br />
display window and test strip calibrator. This lot<br />
number WILL NOT match the test strip instructions<br />
or test strip foil packet.<br />
15<br />
ART21258_Rev-A-Man.indd 18 1/12/10 3:38:22 PM
When the LOT number on the monitor display<br />
window and test strip calibrator both<br />
read LOT 00000:<br />
What It Means:<br />
Calibration is complete.<br />
What to <strong>Do</strong>:<br />
You may now monitor your blood glucose.<br />
When the LOT number on the monitor display<br />
window and calibrator DO NOT match:<br />
What It Means:<br />
Your monitor may <strong>not</strong> be calibrated correctly.<br />
What to <strong>Do</strong>:<br />
• Check that the calibrator is labeled LOT 00000.<br />
• Try to calibrate again.<br />
IMPORTANT: If the LOT numbers on the monitor<br />
display window and calibrator still do <strong>not</strong> match, contact<br />
Customer Care. <strong>Do</strong> <strong>not</strong> attempt to monitor your blood<br />
glucose. Your monitor may show an incorrect result.<br />
6 Remove<br />
the calibrator from the monitor and store<br />
it in your monitor’s carrying case.<br />
IMPORTANT: <strong>Do</strong> <strong>not</strong> throw the calibrator away until you<br />
have used all of the test strips in the box.<br />
If you have any trouble calibrating your system, please<br />
contact Customer Care.<br />
16<br />
Calibrating<br />
Your Monitor<br />
ART21258_Rev-A-Man.indd 19 1/12/10 3:38:23 PM
Calibrating<br />
Your Monitor<br />
▼<br />
How to Recall the LOT Number<br />
1<br />
To recall the LOT 00000 number, Press and Hold the<br />
button. While holding the button, Press and<br />
Hold the button.<br />
The Display Check shows on the display<br />
window, then the LOT 00000 number<br />
shows with the time, month, and day of<br />
the most recent glucose calibration.<br />
Note: If the LOT number that shows on your monitor’s<br />
display window is <strong>not</strong> correct:<br />
What It Means:<br />
Your monitor may <strong>not</strong> be calibrated correctly.<br />
What To <strong>Do</strong>:<br />
• Re-calibrate your monitor.<br />
• Check that you are using the calibrator that came in<br />
the box of test strips you are using.<br />
Remember, improper calibration will cause<br />
incorrect results.<br />
2 Press<br />
and Hold the button to<br />
turn your monitor off.<br />
17<br />
ART21258_Rev-A-Man.indd 20 1/12/10 3:38:27 PM
Questions?<br />
Call Customer Care:<br />
1-800-992-3612<br />
24 hours a day, 7 days a week<br />
▼<br />
▼<br />
What You Will Need<br />
CHAPTER 4<br />
Monitoring Your<br />
Blood Glucose<br />
• Blood glucose test strip with its instructions for use<br />
• Blood glucose monitor<br />
• Lancing device and a new, sterile lancet<br />
Important Information about Monitoring Your<br />
Blood Glucose<br />
• <strong>Do</strong> <strong>not</strong> use out-of-date test strips. Check the<br />
expiration date printed on the test strip box and on<br />
each test strip foil packet. If only the month and year<br />
are printed on the test strip, then the expiration date<br />
is the last day of that month.<br />
• For more detailed information<br />
about your test strip, please<br />
read its instructions for use<br />
before monitoring.<br />
• Use the test strip<br />
immediately when you take<br />
it out of its foil packet.<br />
• <strong>Do</strong> <strong>not</strong> use a wet, bent, scratched, or damaged test<br />
strip.<br />
• <strong>Do</strong> <strong>not</strong> use the test strip if its foil packet has a<br />
puncture or tear in it.<br />
18<br />
Example:<br />
Expiration date<br />
March 31, 2011<br />
Monitoring<br />
Blood Glucose<br />
ART21258_Rev-A-Man.indd 21 1/12/10 3:38:28 PM
Monitoring<br />
Blood Glucose<br />
monitor and test strip to reach the recommended<br />
operating temperature range of the test strip. The<br />
test strip operating temperature range is in the<br />
"Limitations of Procedure" section of the blood<br />
glucose test strip instructions for use.<br />
• Read the lancing device instructions for use.<br />
How to Monitor Your Blood Glucose<br />
Getting Started<br />
1<br />
Prepare your lancing device.<br />
2<br />
Wash your hands using warm<br />
soapy water and dry them<br />
completely.<br />
3<br />
Remove the test strip from its<br />
foil packet.<br />
▼ • Before you monitor your blood glucose, allow your<br />
4 Insert<br />
Blood Glucose<br />
Sensor Electrode<br />
Abbott Diabetes Care Ltd.<br />
Range Road<br />
Witney, Oxon, OX29 0YL<br />
Made in UK.<br />
30˚C<br />
Blood Glucose<br />
Sensor Electrode<br />
Abbott Diabetes Care Ltd.<br />
Range Road<br />
Witney, Oxon, OX29 0YL<br />
Made in UK.<br />
4˚C<br />
the three black lines at the<br />
end of the test strip into the strip<br />
port.<br />
19<br />
ART21258_Rev-A-Man.indd 22 1/12/10 3:38:33 PM
5 Push<br />
the test strip in until it stops.<br />
The monitor turns on automatically.<br />
These items show on the display<br />
window, one after the other:<br />
• Display Check – Remember to<br />
make sure that all items in the<br />
picture here show on the display<br />
window. (See Chapter 1 for more<br />
information about the Display<br />
Check.)<br />
• Time, month, and day (if set)<br />
If date and time are <strong>not</strong> set, dashes<br />
will show instead of numbers.<br />
• LOT 00000 number for the calibrator<br />
you are using.<br />
• Apply Sample message, which<br />
tells you that the monitor is ready<br />
for you to apply blood to the<br />
blood glucose test strip.<br />
20<br />
Monitoring<br />
Blood Glucose<br />
ART21258_Rev-A-Man.indd 23 1/12/10 3:38:35 PM
Monitoring<br />
Blood Glucose<br />
Obtaining A Blood Drop<br />
Use your lancing device to obtain a blood drop.<br />
Recommendations for Obtaining a Blood Drop<br />
• To obtain a sample from an<br />
alternative site (forearm, upper<br />
arm, or base of the thumb), use<br />
an appropriate alternative site<br />
lancing device.<br />
Fingertip sampling<br />
• Before you obtain a blood sample<br />
from the fingertip, forearm, upper<br />
arm, or base of the thumb, make<br />
sure the sample site is clean, dry,<br />
and warm. To warm the sample<br />
site, wash it in warm water, rub<br />
the skin vigorously for a few<br />
seconds, or apply a warm pad to it.<br />
• Hang your arm down before<br />
pricking your finger or the base of<br />
the thumb to help blood flow.<br />
• To obtain a blood sample from the<br />
arm, use a fleshy area away from<br />
bone. Avoid areas where there is a<br />
lot of hair.<br />
• Avoid squeezing the puncture site.<br />
• Apply the blood sample to the test<br />
strip immediately.<br />
21<br />
Forearm sampling<br />
Upper arm sampling<br />
Base of thumb<br />
sampling<br />
ART21258_Rev-A-Man.indd 24 1/12/10 3:38:36 PM
Lancets and Lancing Device<br />
• Lancets are for one-time use only. Use a new lancet<br />
each time you monitor.<br />
• Discard your used lancet properly. Put it in an<br />
empty puncture-resistant container, such as a<br />
plastic milk carton or detergent bottle.<br />
• Never share your lancing device or lancet with<br />
a<strong>not</strong>her person.<br />
Applying the Blood Drop to the<br />
Test Strip<br />
1<br />
Touch the blood drop to the<br />
white area at the end of the test<br />
strip. The blood is drawn into the<br />
test strip.<br />
2 Continue<br />
Note: If the monitor shuts off before you apply<br />
blood to the test strip, remove the test strip from<br />
the monitor and try again.<br />
to touch the blood drop to the<br />
end of the test strip until the monitor begins<br />
the test. The monitor begins the test when:<br />
• You hear the beeper, if the beeper<br />
is ON.<br />
• The display window shows the<br />
status bar.<br />
• Then the display window shows<br />
the countdown.<br />
Note: <strong>Do</strong> <strong>not</strong> remove the test strip<br />
from the monitor or disturb the test<br />
strip during the countdown.<br />
22<br />
Monitoring<br />
Blood Glucose<br />
Status bar<br />
Countdown<br />
ART21258_Rev-A-Man.indd 25 1/12/10 3:38:37 PM
Monitoring<br />
Blood Glucose<br />
Important:<br />
If the countdown does <strong>not</strong> start:<br />
What It Means:<br />
You might <strong>not</strong> have applied<br />
enough blood to the test strip.<br />
What to <strong>Do</strong>:<br />
Apply a second drop of blood to<br />
the test strip. Refer to your test<br />
strip instructions for use for the<br />
number of seconds you have to<br />
apply a second drop.<br />
• If the countdown still does <strong>not</strong> start,<br />
or if the number of seconds you<br />
have to apply a second drop have<br />
passed, discard the test strip, turn<br />
off your monitor, and try again with<br />
a new test strip.<br />
3 At<br />
the end of the countdown:<br />
• If the beeper is ON, listen for<br />
the beeper.<br />
• The blood glucose result<br />
shows on the display window.<br />
• The result is stored in your<br />
monitor’s memory. You may<br />
also write the result in your<br />
logbook.<br />
23<br />
Correct<br />
ART21258_Rev-A-Man.indd 26 1/12/10 3:38:37 PM<br />
✔
▼<br />
Shutting Off Your Monitor<br />
1<br />
Removing the test strip from the strip port turns off the<br />
monitor. You can use the opened foil packet to remove<br />
and discard your used test strip.<br />
2<br />
Discard the test strip properly.<br />
Note: You may also turn the<br />
monitor off by Pressing and<br />
Holding the button. If you<br />
do <strong>not</strong> turn your monitor off<br />
or pull the test strip out, the<br />
monitor shuts off automatically<br />
after 60 seconds.<br />
Understanding Your Result<br />
"LO" Result<br />
What It Means:<br />
Your monitor has determined that your<br />
blood glucose result is lower than 20 mg/dL<br />
or there may be a problem with the test strip.<br />
What to <strong>Do</strong>:<br />
Monitor your blood glucose again with a<br />
new test strip. If LO shows on the display<br />
window again, contact your healthcare<br />
professional immediately.<br />
24<br />
Monitoring<br />
Blood Glucose<br />
ART21258_Rev-A-Man.indd 27 1/12/10 3:38:40 PM
Monitoring<br />
Blood Glucose<br />
Result 300 mg/dL or Higher<br />
When your blood glucose result is 300 mg/dL<br />
or higher, KETONES? flashes on and off on the<br />
display window.<br />
What to <strong>Do</strong>:<br />
Monitor your blood glucose again with<br />
a new test strip. If the message appears<br />
again, follow your healthcare professional's<br />
instructions.<br />
"HI" Result<br />
What It Means:<br />
Your monitor has determined that<br />
your blood glucose result is higher<br />
than 500 mg/dL or there may be a<br />
problem with the test strip.<br />
What to <strong>Do</strong>:<br />
Monitor your blood glucose again with a<br />
new test strip. If HI shows on the display<br />
window again, contact your healthcare<br />
professional immediately.<br />
25<br />
ART21258_Rev-A-Man.indd 28 1/12/10 3:38:41 PM
"E-4" Result<br />
What It Means:<br />
Your blood glucose may be too high to<br />
be read by the system, or there may be<br />
a problem with the test strip.<br />
What to <strong>Do</strong>:<br />
Monitor your blood glucose again with<br />
a new test strip. If E-4 shows on the<br />
display window again, contact your<br />
healthcare professional immediately.<br />
Important:<br />
It is recommended that you repeat the blood glucose<br />
test with a new test strip when:<br />
• LO shows on the display window.<br />
• You obtain a low blood glucose result, but you do <strong>not</strong> have<br />
symptoms of low blood glucose.<br />
• Your monitor displays a blood glucose result that is unusually<br />
low, lower than 50 mg/dL.<br />
• HI shows on the display window.<br />
• You obtain a high blood glucose result, but you do <strong>not</strong> have<br />
symptoms of high blood glucose.<br />
• Your monitor displays a result that is unusually high, higher<br />
than 300 mg/dL.<br />
• You question your result.<br />
Important:<br />
A result that is incorrect may have a serious medical outcome.<br />
Consult your healthcare professional before changing your<br />
diabetes medication program.<br />
26<br />
Monitoring<br />
Blood Glucose<br />
ART21258_Rev-A-Man.indd 29 1/12/10 3:38:41 PM
Control Solution<br />
Testing<br />
▼<br />
▼<br />
▼<br />
<strong>Do</strong>ing A Control<br />
Solution Test<br />
CHAPTER 5<br />
Why <strong>Do</strong> A Control Solution Test?<br />
The control solution test tells you that your monitor and<br />
test strips are working correctly. A control solution test is<br />
similar to when you monitor your blood glucose, except<br />
you use a Solartek or MediSense Control Solution. You do<br />
<strong>not</strong> use a drop of blood in a control solution test.<br />
When Is <strong>Do</strong>ing A Control Solution Test<br />
Recommended?<br />
• When your test results do <strong>not</strong> agree with how<br />
you feel<br />
• When you open a new box of test strips<br />
• When you want to confirm that your monitor<br />
and test strips are working properly<br />
Important Information about Control<br />
Solution Testing<br />
• For more detailed information about control<br />
solutions, read the control solution instructions for use.<br />
• <strong>Do</strong> <strong>not</strong> use the control solution if the expiration<br />
date has passed. Check the expiration date printed<br />
on the control solution bottle.<br />
• When you open a control solution bottle for the<br />
first time, count forward 90 days and write this date<br />
on the control solution bottle using a pen that<br />
won’t smear or wipe off. Throw away any remaining<br />
solution after this date.<br />
• The results obtained from control testing do<br />
<strong>not</strong> reflect your personal blood glucose levels in<br />
any way.<br />
27<br />
Questions?<br />
Call Customer Care:<br />
1-800-992-3612<br />
24 hours a day, 7 days a week<br />
ART21258_Rev-A-Man.indd 30 1/12/10 3:38:41 PM
▼ ▼<br />
▼<br />
• <strong>Do</strong> <strong>not</strong> swallow the control solution.<br />
• <strong>Do</strong> <strong>not</strong> inject the control solution or use the<br />
control solution as eye drops.<br />
For Healthcare Professionals:<br />
• Use two levels of Solartek or MediSense Control<br />
Solution to do control solution tests with each new<br />
box of test strips.<br />
• Ensure that quality control is performed in accordance<br />
with Federal, state and local guidelines.<br />
What You Will Need<br />
• Blood Glucose Monitor<br />
• Blood glucose test strip and its instructions for use<br />
• Solartek or MediSense Control Solutions and<br />
instructions for use<br />
How to <strong>Do</strong> Control Solution Testing<br />
Getting Started<br />
1<br />
Wash your hands using warm<br />
soapy water and dry them<br />
completely.<br />
2<br />
Check that the LOT number on the test strip<br />
instructions for use matches the test strip foil<br />
packet.<br />
3<br />
Remove the test strip<br />
from its foil packet.<br />
28<br />
30˚C<br />
4˚C<br />
Control<br />
Solution Testing<br />
ART21258_Rev-A-Man.indd 31 1/12/10 3:38:44 PM
Control Solution<br />
Testing<br />
4 Insert<br />
5 Push<br />
the three black lines at the<br />
end of the test strip into the strip<br />
port.<br />
the test strip in until it<br />
stops.<br />
The monitor turns on automatically.<br />
These items show on the display<br />
window, one after the other:<br />
• Display Check – Remember to<br />
make sure that all items in the<br />
picture here show on the display<br />
window. (See Chapter 1 for more<br />
information about the Display<br />
Check.)<br />
• Time, month, and day (if set)<br />
If date and time are <strong>not</strong> set, dashes<br />
will show instead of numbers.<br />
• LOT 00000 number for the calibrator<br />
you are using.<br />
• Apply Sample message, which tells<br />
you that the monitor is ready for<br />
you to apply control solution to<br />
the test strip.<br />
29<br />
ART21258_Rev-A-Man.indd 32 1/12/10 3:38:47 PM
6 To<br />
mark the test as a control test, Press and<br />
Release the button once. shows on<br />
the display window.<br />
Important: If you do <strong>not</strong> mark the test as a<br />
control test, it will be saved in your monitor’s memory<br />
as one of your personal blood glucose results. This could<br />
affect your blood glucose averages.<br />
Applying Control Solution to the Test Strip<br />
1<br />
Turn the control solution bottle upside down<br />
three to four times to mix the solution.<br />
2<br />
Remove the cap.<br />
3<br />
Apply a drop of control solution<br />
to the test strip in the area<br />
shown here. The control solution<br />
is drawn into the test strip.<br />
4<br />
Continue<br />
to touch the control solution to the test<br />
strip until the monitor begins the test.<br />
The monitor begins the test when:<br />
• You hear the beeper, if the beeper is ON.<br />
• The display window shows the status bar.<br />
• Then the display window shows the countdown.<br />
Countdown<br />
30<br />
Status bar<br />
Control<br />
Solution Testing<br />
ART21258_Rev-A-Man.indd 33 1/12/10 3:38:49 PM
Control Solution<br />
Testing<br />
Note: <strong>Do</strong> <strong>not</strong> remove the test strip from the monitor<br />
or disturb it during the countdown.<br />
Important: If the countdown does <strong>not</strong> start:<br />
What It Means:<br />
You might <strong>not</strong> have applied enough<br />
control solution to the test strip.<br />
What to <strong>Do</strong>:<br />
Apply a second drop of control solution<br />
to the test strip. Refer to your test strip<br />
instructions for use for the number of<br />
seconds you have to apply a second drop.<br />
• If the countdown still does <strong>not</strong> start, or if the number<br />
of seconds you have to apply a second drop have<br />
passed, discard the test strip, turn off your monitor,<br />
and try again with a new test strip.<br />
5 At<br />
the end of the countdown:<br />
• If the beeper is ON, listen for the beeper.<br />
• The control result shows on the display window.<br />
• The result is stored in your monitor’s memory<br />
as a control result. In your logbook, record the<br />
result as a control result.<br />
Shutting Off Your Monitor<br />
1<br />
Removing the test strip from the<br />
strip port turns off the monitor.<br />
You can use the opened foil<br />
packet to remove and discard<br />
your used test strip.<br />
31<br />
ART21258_Rev-A-Man.indd 34 1/12/10 3:38:51 PM
▼<br />
2<br />
Discard the test strip properly.<br />
Note: You may also turn the monitor<br />
off by Pressing and Holding the<br />
button. If you do <strong>not</strong> turn your<br />
monitor off or pull the test strip out,<br />
the monitor shuts off automatically<br />
after 60 seconds.<br />
Understanding Your Result<br />
Compare the control result to the "Expected Results for<br />
Use with Solartek or MediSense Control Solutions" range printed<br />
on:<br />
• The blood glucose test strip instructions for use, for<br />
glucose control solution testing.<br />
If the control result falls within the range:<br />
What It Means<br />
Your monitor and test strips are working correctly.<br />
If the control result does <strong>not</strong> fall within the range:<br />
What It Means<br />
Your monitor and test strips may <strong>not</strong> be working correctly.<br />
What to <strong>Do</strong><br />
Repeat the test with a new test strip and ensure the<br />
control solution testing instructions are followed<br />
completely. If the result is still <strong>not</strong> within the printed<br />
range, contact Customer Care.<br />
32<br />
Control<br />
Solution Testing<br />
ART21258_Rev-A-Man.indd 35 1/12/10 3:38:52 PM
Reviewing Results<br />
Your Results<br />
▼ Reviewing & Using<br />
CHAPTER 6<br />
What Can Your Monitor Show You?<br />
Memory<br />
Your monitor has a memory that stores up to 450<br />
events. This is a combination of control results, your<br />
personal blood glucose results, and other monitor<br />
information.<br />
You can review up to 450 of your most recent events<br />
on your monitor’s display window.<br />
Glucose Averages<br />
You can view the average of all your blood glucose<br />
results from the last 7, 14, or 30 days. If you marked<br />
your control solution tests, the averages do <strong>not</strong><br />
include control solution results. (For more information<br />
on marking control solution tests, see Chapter 5.)<br />
Important:<br />
• To review blood glucose averages, you must set the<br />
date and time before monitoring.<br />
• If you do <strong>not</strong> mark control solution tests, this may<br />
affect your glucose averages.<br />
• Blood glucose averages do <strong>not</strong> include<br />
glucose control results, or results that<br />
do <strong>not</strong> show the time, month, and<br />
day.<br />
• When there are no previous results<br />
or blood glucose averages to review,<br />
the display window shows three dashes.<br />
33<br />
Questions?<br />
Call Customer Care:<br />
1-800-992-3612<br />
24 hours a day, 7 days a week<br />
➡<br />
ART21258_Rev-A-Man.indd 36 1/12/10 3:38:52 PM
▼<br />
How to See Results in Memory<br />
1<br />
Begin with your monitor turned off. Make sure<br />
there is <strong>not</strong>hing in the strip port.<br />
2 Press<br />
and Release the button.<br />
• The Display Check shows on the<br />
display window.<br />
• Then your most recent result<br />
shows with its unit on the<br />
monitor’s display window, along<br />
with the time, month, and day<br />
that you got the result. (To set the<br />
correct date and time, follow the<br />
steps in Chapter 2.)<br />
A blood glucose result in Memory<br />
will show with the letters MEM.<br />
34<br />
Blood Glucose<br />
result in Memory<br />
ART21258_Rev-A-Man.indd 37 1/12/10 3:38:52 PM<br />
Reviewing Results
Reviewing Results<br />
A control solution result in Memory<br />
shows with a control bottle, as long<br />
as you marked the test as a control<br />
solution test.<br />
3 To<br />
4 When<br />
5 To<br />
review previous results,<br />
Press and Release the<br />
button once per result.<br />
you reach the last result<br />
in Memory, the display window<br />
shows three dashes.<br />
return to a result you<br />
previously reviewed, Press and<br />
Release the button once<br />
per result.<br />
35<br />
Control solution<br />
result in Memory<br />
ART21258_Rev-A-Man.indd 38 1/12/10 3:38:53 PM
▼<br />
How to See Averages<br />
Important:<br />
• Results that show as LO during blood glucose<br />
monitoring are included as 20 mg/dL in blood glucose<br />
averages.<br />
• Results that show as HI during blood glucose monitoring<br />
are included as 500 mg/dL in blood glucose averages.<br />
1 While<br />
2 Press<br />
3 Press<br />
in Memory, Press and<br />
Release the button at any<br />
time to see the 7-Day average<br />
of your blood glucose results.<br />
Note: n means how many tests were performed<br />
within the 7-, 14-, or 30-Day average period.<br />
and Release the<br />
button once to see the<br />
14-Day average of your<br />
blood glucose results.<br />
and Release the<br />
button again to see the 30-Day<br />
average of your blood glucose<br />
results. If you Press and Release<br />
the button again, the display<br />
window shows the 7-Day<br />
average.<br />
ART21258_Rev-A-Man.indd 39 1/12/10 3:38:54 PM<br />
36<br />
Reviewing Results
Reviewing Results<br />
▼<br />
4 Press<br />
5 Press<br />
and Release the<br />
button at any time to return<br />
to Memory.<br />
and Hold the button<br />
to turn off your monitor.<br />
Otherwise, the monitor turns<br />
off after 30 seconds.<br />
Transferring Your Results to a Computer<br />
<strong>Do</strong>wnload of test results to a<br />
computer requires a compatible<br />
data management system. For more<br />
information, please go to our website<br />
or call Customer Care.<br />
37<br />
ART21258_Rev-A-Man.indd 40 1/12/10 3:38:55 PM
Questions?<br />
Call Customer Care:<br />
1-800-992-3612<br />
24 hours a day, 7 days a week<br />
CHAPTER 7<br />
Understanding &<br />
Troubleshooting<br />
Error Messages<br />
There are times when error messages may show on<br />
your monitor’s display window.<br />
In the next few pages, we describe the error messages<br />
that may show on your monitor’s display window,<br />
what they mean, and what you need to do.<br />
Message<br />
What It What You<br />
Means Need to <strong>Do</strong><br />
Temperature is<br />
too hot or too<br />
cold for the<br />
system to work<br />
properly.<br />
38<br />
• Move your monitor<br />
and test strips to<br />
a location where<br />
the temperature<br />
is appropriate and<br />
monitor again with<br />
a new test strip. You<br />
may have to wait<br />
for your monitor<br />
to adjust to the<br />
new temperature.<br />
Refer to your test<br />
strip instructions<br />
for use for the<br />
appropriate operating<br />
temperature range.<br />
• If the error message<br />
appears again, contact<br />
Customer Care.<br />
ART21258_Rev-A-Man.indd 41 1/12/10 3:38:56 PM<br />
Error Messages
Error Messages<br />
Message<br />
What It What You<br />
Means Need to <strong>Do</strong><br />
Monitor error.<br />
There may be a<br />
problem with the<br />
test strip.<br />
Blood glucose<br />
result may be too<br />
high to be read by<br />
the system.<br />
OR<br />
There may be a<br />
problem with the<br />
blood glucose<br />
test strip.<br />
39<br />
• Turn the monitor off,<br />
then repeat previous<br />
monitoring steps.<br />
• If the error message<br />
appears again, contact<br />
Customer Care.<br />
• Review the monitoring<br />
instructions.<br />
• Monitor again with a<br />
new test strip.<br />
• If the error message<br />
appears again, contact<br />
Customer Care.<br />
• Monitor again with<br />
a new test strip.<br />
• If the error<br />
message appears<br />
again, contact<br />
your healthcare<br />
professional<br />
immediately.<br />
ART21258_Rev-A-Man.indd 42 1/12/10 3:38:56 PM
Message What It What You<br />
Means Need to <strong>Do</strong><br />
Blood applied to<br />
test strip too soon.<br />
Calibration/Test<br />
strip error.<br />
Test strip error.<br />
Test trip may be<br />
damaged, used,<br />
or the monitor<br />
does <strong>not</strong><br />
recognize it.<br />
40<br />
• Review the monitoring<br />
instructions.<br />
• Monitor again with a<br />
new test strip.<br />
• If the error message<br />
appears again, contact<br />
Customer Care.<br />
• Repeat the calibration<br />
using the calibrator bar<br />
that came with the test<br />
strip you are using.<br />
• Check the date setting on<br />
your monitor.<br />
• Check the expiration<br />
date on the test strip foil<br />
packet.<br />
• If the error message<br />
appears again,<br />
contact Customer<br />
Care.<br />
• Monitor again using<br />
a test strip designed<br />
for use with the <strong>ReliOn</strong>®<br />
Ultima monitor.<br />
• If the error message<br />
appears again, contact<br />
Customer Care.<br />
ART21258_Rev-A-Man.indd 43 1/12/10 3:38:57 PM<br />
Error Messages
Error Messages<br />
Message<br />
What It What You<br />
Means Need to <strong>Do</strong><br />
Monitor error.<br />
Monitor error.<br />
41<br />
• Remove test strip, turn<br />
monitor off, and try to<br />
monitor again.<br />
• If the error message<br />
appears again, contact<br />
Customer Care.<br />
• Remove test strip, turn<br />
monitor off, and try to<br />
monitor again.<br />
• If the error message<br />
appears again, contact<br />
Customer Care.<br />
ART21258_Rev-A-Man.indd 44 1/12/10 3:38:57 PM
Questions?<br />
Call Customer Care:<br />
1-800-992-3612<br />
24 hours a day, 7 days a week<br />
Size<br />
Length:<br />
Width:<br />
Thickness:<br />
CHAPTER 8<br />
Your Monitor’s<br />
Specifications<br />
& Limitations<br />
2.94" (7.47 cm)<br />
2.10" (5.33 cm) (top)<br />
1.70" (4.32 cm) (bottom)<br />
0.64" (1.63 cm)<br />
Weight 1.41-1.62 ounces (40-46 grams)<br />
Power Source One CR 2032 Lithium (coin cell)<br />
battery<br />
Battery Life Approximately 1,000 tests<br />
Memory Up to 450 events including control<br />
results, personal blood glucose results,<br />
and other monitor information<br />
Storage<br />
Temperature<br />
Monitor:<br />
Test Strips:<br />
Control Solution:<br />
Blood Glucose<br />
Assay Range<br />
Control Solution<br />
Range<br />
-13º to 131ºF (–25º to 55ºC)<br />
See test strip instructions for use<br />
See control solution instructions<br />
for use<br />
See blood glucose test strip<br />
instructions for use<br />
See blood glucose test strip<br />
instructions for use<br />
42<br />
Specifications<br />
& Limitations<br />
ART21258_Rev-A-Man.indd 45 1/12/10 3:38:57 PM
Specifications<br />
& Limitations<br />
Functions - Blood glucose monitoring<br />
- Memory 450 events<br />
- Glucose averaging: 7-Day, 14-Day, and<br />
30-Day Averages<br />
- Control solution marking and testing<br />
- Backlight: If ON – Stays ON during<br />
countdown; turns OFF 30 seconds<br />
after result is displayed. If OFF – Stays<br />
OFF during countdown; stays OFF<br />
during data upload<br />
- Beeper: If ON – Beeps when<br />
countdown starts and finishes<br />
Data port Yes<br />
Monitor<br />
Operating Range<br />
Temperature:<br />
Relative Humidity:<br />
System Operating<br />
Range<br />
Temperature:<br />
Relative Humidity:<br />
50º to 122ºF (10º to 50ºC)<br />
10% to 90%, non-condensing<br />
The system operating range is the<br />
operating range of the test strip<br />
you are using. See "Limitations of<br />
Procedure" section in test strip<br />
instructions for use.<br />
10% to 90%, non-condensing<br />
43<br />
ART21258_Rev-A-Man.indd 46 1/12/10 3:38:57 PM
▼Important Information about Using Blood<br />
Samples from the Forearm, Upper Arm, or Base<br />
of the Thumb:<br />
• Contact your healthcare professional before you<br />
begin using any one of these alternative sites to test<br />
your blood glucose.<br />
• Sampling from any one of these alternative sites may<br />
cause minor bruising and may leave marks that go<br />
away in a short time.<br />
• There may be times when alternative site results are<br />
different from fingertip results. This happens when<br />
blood glucose levels change rapidly (for example,<br />
after you eat a meal, after you take insulin, or during<br />
or after exercise).<br />
• Use alternative sites to monitor your blood glucose<br />
before, or more than two hours after, you eat a meal,<br />
take insulin, or exercise.<br />
• <strong>Do</strong> <strong>not</strong> use blood samples from alternative sites<br />
when:<br />
1. You think your blood glucose is low or is<br />
changing rapidly,<br />
2. You have been diagnosed with hypoglycemic<br />
unawareness,<br />
3. The results from alternative sites do <strong>not</strong> match<br />
the way you feel,<br />
4. It is within two hours of eating a meal, taking<br />
insulin, or exercising.<br />
44<br />
Specifications<br />
& Limitations<br />
ART21258_Rev-A-Man.indd 47 1/12/10 3:38:57 PM
Caring for<br />
Your Monitor<br />
▼<br />
▼<br />
Caring For<br />
Your Monitor<br />
CHAPTER 9<br />
Cleaning Your Monitor<br />
Store your monitor in its carrying case.<br />
If the surface of your monitor gets dirty, you may clean it.<br />
Use a damp cloth and mild soap.<br />
Healthcare professionals: Acceptable cleaning solutions<br />
include 10% Bleach, 70% Alcohol, or 10% Ammonia.<br />
IMPORTANT:<br />
<strong>Do</strong> <strong>not</strong> try to clean the strip port.<br />
<strong>Do</strong> <strong>not</strong> pour liquid into the strip port or buttons.<br />
<strong>Do</strong> <strong>not</strong> place your monitor in water or any other bath.<br />
Replacing Your Monitor’s Battery<br />
When your monitor needs its batteries replaced, the<br />
display window shows one of two things:<br />
This means the battery is low.<br />
You may still use your monitor and<br />
the results will be accurate. However, ➡<br />
the backlight is <strong>not</strong> usable. It is<br />
recommended that you replace the<br />
battery at this time.<br />
This means the battery must be<br />
replaced. The monitor is <strong>not</strong> usable.<br />
The monitor turns off automatically. ➡<br />
IMPORTANT:<br />
<strong>Do</strong> <strong>not</strong> remove the old battery until<br />
you have a new battery to install. It may<br />
be necessary to reset the time and<br />
date once you install a new battery.<br />
45<br />
Questions?<br />
Call Customer Care:<br />
1-800-992-3612<br />
24 hours a day, 7 days a week<br />
ART21258_Rev-A-Man.indd 48 1/12/10 3:38:58 PM
1 Gently<br />
2 Lift<br />
3 Pull<br />
4 Insert<br />
How to Replace Your Meter’s Battery<br />
If your meter has a plastic tab,<br />
use these directions.<br />
push<br />
the battery<br />
cover in and<br />
up with your<br />
thumb.<br />
the<br />
battery<br />
cover out of<br />
the monitor.<br />
on the<br />
plastic tab<br />
sticking out<br />
of the meter<br />
to remove<br />
the old<br />
battery.<br />
a new<br />
CR 2032<br />
Lithium<br />
(coin cell)<br />
battery with<br />
the plus<br />
sign (+)<br />
facing up.<br />
1 Gently<br />
2 Lift<br />
3 To<br />
4 Insert<br />
46<br />
If your meter has no plastic tab<br />
follow these directions.<br />
push<br />
the battery<br />
cover in and<br />
up with your<br />
thumb.<br />
the<br />
battery cover<br />
out of the<br />
monitor.<br />
remove<br />
the battery,<br />
push the<br />
battery<br />
upward to<br />
release the<br />
battery.<br />
a new<br />
CR 2032<br />
Lithium<br />
(coin cell)<br />
battery with<br />
the plus<br />
sign (+)<br />
facing up.<br />
Caring for<br />
Your Monitor<br />
ART21258_Rev-A-Man.indd 49 1/12/10 3:38:58 PM
Caring for<br />
Your Monitor<br />
5 Place<br />
6 Gently<br />
7 Press<br />
8 Check<br />
9 Be<br />
the <strong>not</strong>ches on the battery cover<br />
into the appropriate molded areas.<br />
push the battery cover in<br />
and down until you hear a click.<br />
and Hold the button<br />
to turn your monitor on. If your<br />
monitor does <strong>not</strong> turn on, review<br />
the battery installation steps and<br />
reinstall the battery.<br />
the date and time on your<br />
monitor. You may automatically<br />
be prompted to reset the time<br />
and date when you first press the<br />
button to turn your monitor<br />
on. (See Chapter 2, Setting Up Your<br />
Monitor).<br />
sure to discard the old battery<br />
in compliance with your local<br />
government’s regulations.<br />
47<br />
ART21258_Rev-A-Man.indd 50 1/12/10 3:38:59 PM
Questions?<br />
Call Customer Care:<br />
1-800-992-3612<br />
24 hours a day, 7 days a week<br />
▼<br />
Support<br />
CHAPTER 10<br />
Support<br />
We are committed to providing you with support. If you<br />
have any questions and/or need assistance, call Customer<br />
Care: 1-800-992-3612, 24 hours a day, 7 days a week.<br />
ART21258_Rev-A-Man.indd 51 1/12/10 3:38:59 PM<br />
48<br />
Support
ART21258_Rev-A-Man.indd 52 1/12/10 3:38:59 PM