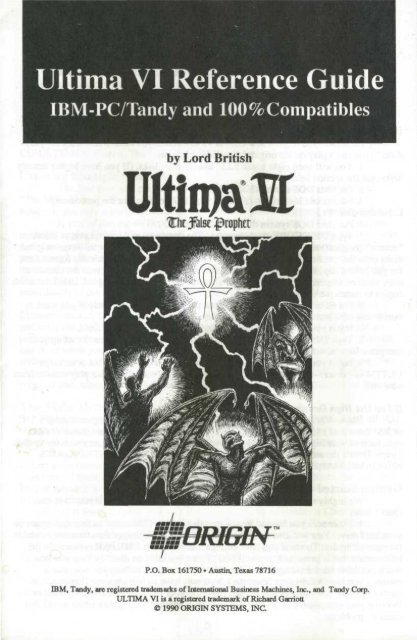
Ultima VI Reference Guide IBM-PC/Tandy and 100 ... - Abandonia
Ultima VI Reference Guide IBM-PC/Tandy and 100 ... - Abandonia
Ultima VI Reference Guide IBM-PC/Tandy and 100 ... - Abandonia

Create successful ePaper yourself
Turn your PDF publications into a flip-book with our unique Google optimized e-Paper software.
<strong>Ultima</strong> <strong>VI</strong> <strong>Reference</strong> <strong>Guide</strong><br />
<strong>IBM</strong>-<strong>PC</strong>/<strong>T<strong>and</strong>y</strong> <strong>and</strong> <strong>100</strong>% Compatibles<br />
by Lord British<br />
tkjalseipropta:<br />
P.O. Box 161750 • Austin, Texas 78716<br />
<strong>IBM</strong>, <strong>T<strong>and</strong>y</strong>, are registered trademarks of International Business Machines, Inc., <strong>and</strong> <strong>T<strong>and</strong>y</strong> Corp.<br />
ULTIMA <strong>VI</strong> is a registered trademark of Richard Garriott<br />
© 1990 ORIGIN SYSTEMS, INC.
<strong>Ultima</strong> <strong>VI</strong> <strong>Reference</strong> <strong>Guide</strong><br />
<strong>IBM</strong>-<strong>PC</strong>/<strong>T<strong>and</strong>y</strong> <strong>and</strong> <strong>100</strong>% Compatibles<br />
by Lord British<br />
Getting Started — Floppy Drive Systems (No Hard Drive)<br />
Each time you begin a new <strong>Ultima</strong> <strong>VI</strong> adventure, you must create a set of "play<br />
disks" (you can't play on the original disks). Here's how:<br />
1. You will need eight blank 5.25" low-density disks. (If you have higher density<br />
disks, see the section below.)<br />
2. Put your DOS system disk in Drive A.<br />
3. Format one blank disk. (Refer to your DOS manual for the procedure.)<br />
Label this disk "PLAYER."<br />
4. Put your DOS system disk back in Drive A.<br />
5. Type DISKCOPY A: A:. The computer will prompt you to insert<br />
"source" (original) <strong>and</strong> "target" (blank) disks. One disk at a time, copy the seven original<br />
disks onto the remaining seven blank disks. The computer will automatically format them<br />
for you before copying. After each disk has been copied, you will be given the chance to<br />
copy another. Repeat this procedure until all seven disks have been copied. Label the seven<br />
copies to match the originals.<br />
6. Put all of the original disks back in the box <strong>and</strong> use them only if you want to<br />
start a new adventure from the beginning. Play only on copied disks.<br />
7. Insert your copy of the disk entitled "ENDGAME" into Drive A.<br />
8. Type INSTALL. Follow the directions on the screen to set up your<br />
computer for optimal play.<br />
9. Insert your copy of the disk entitled "PROGRAM" into Drive A <strong>and</strong> type<br />
ULTIMA6 to begin play. (Do this any time you want to begin a play session from<br />
now on.)<br />
If You Use High Density Floppy Disks<br />
<strong>Ultima</strong> <strong>VI</strong> comes on low density, 360K disks. If you have a higher density 5 1/4"<br />
or 3.5" drive <strong>and</strong> a low density floppy drive, you can copy two original <strong>Ultima</strong> <strong>VI</strong> disks<br />
onto each of your high-density disks. This will allow you to play the game with fewer diskswaps.<br />
Here's the most efficient combination of disks: PROGRAM/INTRO, GAME/<br />
ENDGAME, MAP/PLAYER, POPULACE A/POPULACE B.<br />
Getting Started — Hard Drive Systems<br />
We highly recommend playing <strong>Ultima</strong> <strong>VI</strong> off of a hard drive if you have one.<br />
Here's how:<br />
1. Make sure you have at least 4 megabytes (4194304 bytes) of free disk space on<br />
your hard drive. You will also need at least 530K (542720 bytes) of free memory available<br />
for your computer. To see if you have enough memory, type CHKDSK. In the<br />
information that is presented, you will find "Bytes available on disk" (telling you how<br />
much available hard drive space you have) <strong>and</strong> "Bytes free" (telling you how much<br />
memory you have left in your computer). You may have to free-up some disk space or<br />
memory before you can proceed further. (Refer to your DOS manual for the procedure.)<br />
Booting your computer with an "MS-DOS System Master" floppy disk often solves this<br />
memory problem.
2. Insert the disk entitled "ENDGAME" into floppy Drive A.<br />
3. Type A:.<br />
4. If your hard drive is device C, type COPYU6 A: C:.<br />
If your hard drive is device D, type COPYU6 A: D:.<br />
5. Follow the directions on screen until all disks have been copied. This will<br />
create a subdirectory entitled "ULTIMA6" on your hard drive <strong>and</strong> copy all of the<br />
<strong>Ultima</strong> <strong>VI</strong> disks to that subdirectory.<br />
6. You will automatically be taken to the INSTALL program. Follow the<br />
directions on the screen to set up your computer for optimal play.<br />
7. After installation is complete, type ULTIMA6 to begin play. The<br />
next time you want to start a play session, enter the ULTTMA6 subdirectory by typing<br />
CD\ULTIMA6. Then type ULTIMA6 to begin play.<br />
Creating Multiple Characters<br />
The first time you play <strong>Ultima</strong> <strong>VI</strong>, you will have to create a character (see<br />
"The Main Menu," below). After you've played with that character for a while,<br />
however, you may want to create a new one with a different name <strong>and</strong> characteristics.<br />
If you're playing on floppy disks, this is simple. Run the INSTALL program<br />
again (by typing INSTALL, as above). After you answer all of the questions about your<br />
computer system, you will be given three options. To create a new character while<br />
preserving your old one (along with your old character's last saved game position),<br />
insert a new Player disk in your floppy drive <strong>and</strong> select option 1. (If you use your old<br />
Player disk at this point, your old character <strong>and</strong> saved game will be lost). Go<br />
immediately to the main menu <strong>and</strong> select Create a Character (see below).<br />
Hard drive owners can save alternate characters by renaming their existing<br />
<strong>Ultima</strong>6 directory (using any of a number of commercially available utility programs)<br />
<strong>and</strong> using the COPYU6 comm<strong>and</strong> to recopy the game. If your hard drive has multiple<br />
partitions (in other words, if it has both a C <strong>and</strong> a D drive), you can install the game on<br />
one drive when you begin <strong>and</strong> on another if you want to try a different character<br />
without erasing your original character <strong>and</strong> saved game. If you don't mind erasing your<br />
character <strong>and</strong> saved game, you can always begin again by running the INSTALL<br />
program <strong>and</strong>, when you reach the main menu, selecting Create a Character (see below).<br />
The Main Menu<br />
When you type "<strong>Ultima</strong>6," an introductory sequence will begin. Read all text<br />
messages that appear <strong>and</strong> press any key or click in the message box to move on to the next<br />
message or screen. (Press if you want to bypass this sequence altogether.)<br />
When this is over, the main menu will appear, listing five options — Introduction,<br />
Create a Character, Transfer a Character, Acknowledgements, <strong>and</strong> Journey Onward. To<br />
select one of these options, click on it with the mouse. From the keyboard, use the arrow<br />
keys or numeric keypad to highlight the one you want then press return, or type the first<br />
letter of the option's name.<br />
The first time you play, you will want to go directly to Create a Character. Here,<br />
you can type in your character's name <strong>and</strong> select his or her Sex <strong>and</strong> Portrait. Go on to the<br />
next portion of the character creation system by clicking on the Continue box (or by typing<br />
"C"). This will take you to a series of questions. Answer by selecting the A or B response<br />
to each question. The way in which you answer determines the kind of character you get.<br />
When your character is complete, you will automatically be taken to the<br />
Introduction. This will tell you what the game is about. If you want to watch this again<br />
later, select Introduction from the menu.
If you've played <strong>Ultima</strong> IV or <strong>Ultima</strong> V, you may want to bring your character from<br />
one of those games over to <strong>Ultima</strong> <strong>VI</strong>. Transfer a Character allows you to do that.<br />
Select this option <strong>and</strong> follow the directions on the screen, then click on the Transfer<br />
button <strong>and</strong> you're ready to use your old character in your new game.<br />
Acknowledgements tells you who did what in the creation of <strong>Ultima</strong> <strong>VI</strong>.<br />
Journey Onward takes you directly into the <strong>Ultima</strong> <strong>VI</strong> game. Select this option<br />
when you're ready to play.<br />
Screen Layout<br />
The game screen is divided into four regions — the map, the status display, the<br />
message scroll, <strong>and</strong> the comm<strong>and</strong> icons.<br />
Comm<strong>and</strong><br />
Icons<br />
/ / / i i i i \ \ \<br />
ACT LGDMURB<br />
Message Scroll<br />
The Map<br />
The largest region, in the upper left, is the map. This shows the world you are<br />
moving through, with the view centered on you (or another member of your party if it's<br />
their turn).<br />
With a mouse, move your characters around by positioning the pointer over the map<br />
until it becomes an arrow pointing in the direction you wish to move. Then click the left<br />
button. Some actions ask you for a target location. (You may have to say where you want<br />
to drop an item, for example). To select a location, click on it with the left mouse button.<br />
If you want to use the keyboard, move by pressing one of the arrow keys, or one of<br />
the eight keys around the 5 on the numeric keypad. These keys are also used to select<br />
target locations — move the crosshairs on the screen to the desired location <strong>and</strong> press<br />
to initiate the action.<br />
You can pass your turn <strong>and</strong> do nothing by positioning the mouse pointer over your<br />
character <strong>and</strong> clicking the left mouse button or by pressing the space bar.<br />
The Status Display<br />
In the upper right-h<strong>and</strong> corner of the screen is the status display. At the top of the<br />
display, the current position of Britannia's sun <strong>and</strong> the positions <strong>and</strong> phases of the two<br />
moons in the sky are shown.<br />
Beneath this is a roster of all the members of your party, along with each character's<br />
figure <strong>and</strong> current hit points. A character whose hit points are printed in red is hurt badly;<br />
one whose hit points are green is poisoned. (CGA <strong>and</strong> Hercules cards will differ slightly.)<br />
When a party has more than five characters, arrows appear at the top <strong>and</strong> bottom of<br />
this part of the screen. Click on these arrows to scroll up <strong>and</strong> down through the list of<br />
party members. The + <strong>and</strong> - keys can also be used.<br />
If you click on a character's name, or press a function key (F1-F8), you will be<br />
shown their portrait <strong>and</strong> statistics. The higher a stat, the better. Strength determines how<br />
much a character can carry, <strong>and</strong> how effectively they can strike with bludgeoning<br />
weapons. Dexterity determines how quick they are (faster characters get to move <strong>and</strong>/or
attack more often), <strong>and</strong> how effective they are with non-bludgeoning weapons as well as<br />
crossbows, bows, <strong>and</strong> other missile weapons. Intelligence determines the character's<br />
bargaining ability <strong>and</strong> effectiveness as a spellcaster.<br />
The next two stats show pairs of numbers — the current number of points the<br />
character has, <strong>and</strong> the maximum possible. Magic points determine how many spells can<br />
be cast. For instance, a spell of the fourth circle uses four magic points. Health<br />
determines how much damage the character can take before being killed. Each hour, you<br />
recover a number of magic points equal to your current level. Health can only be<br />
regained by rest or healing.<br />
The next statistic in the list is Level, which indicates how powerful a character has<br />
become through experience gained in past adventures. The last stat, Experience,<br />
determines when a player is ready to progress to the next level by meditating at a shrine.<br />
To view a character's Inventory, click on one of the figures to the left of the roster.<br />
Readied Items<br />
Icons (Left to Right)<br />
1. (-) Show previous character<br />
2. (F10) Return to party display<br />
3. (*) Switch between portrait<br />
<strong>and</strong> inventory<br />
4. (+) Show next character<br />
5. (~) Change combat mode<br />
12345<br />
Inventory<br />
Combat Mode<br />
On the left side of the inventory display is a figure showing all equipment that is<br />
readied for immediate use — either held in the character's h<strong>and</strong>s, or being worn. If you<br />
are holding something that requires both h<strong>and</strong>s, such as a crossbow, you will not be<br />
allowed to put anything in the other h<strong>and</strong>. Below this figure is the current weight of all<br />
Equipped (E:) items, <strong>and</strong> the maximum weight the character can have readied, measured<br />
in stones (s).<br />
On the right side of the inventory display are all other items carried by the character.<br />
The total weight of his inventory (I:) is listed here, along with the maximum weight the<br />
character can carry. To ready or unready an item, just click on it with the left mouse<br />
button. To look inside a container in your inventory, such as a bag or a chest, just click<br />
on it Click on it again to return to the main inventory display.<br />
At the lower right, the character's current combat mode is displayed (see "Begin/<br />
Break Off Combat," below).<br />
At the lower left of the status display are five buttons. From left to right, their<br />
functions are: show previous character, return to party display, switch between portrait<br />
<strong>and</strong> inventory displays, show next character, <strong>and</strong> change combat mode.<br />
To use the inventory display from the keyboard, press the key to move the<br />
crosshairs to the status display. You can then move to any item or button with the arrow<br />
or numeric keypad keys, <strong>and</strong> press to select it. Pressing the key again<br />
will return the crosshairs to the map. The function keys Fl through F8 will switch the<br />
display to show the different members of your party. (If you don't know the position of<br />
a character in your roster, the + <strong>and</strong> - keys allow you to show the next <strong>and</strong> previous<br />
characters.) F10 will return to the main party display. The asterisk (*) key will toggle<br />
between a character's portrait <strong>and</strong> inventory displays.<br />
The Message Scroll<br />
At the lower right of the screen is the message scroll. All text describing things you<br />
see <strong>and</strong> hear, as well as the results of your actions, is displayed here. When a message is<br />
4
too long to fit on the scroll, a flashing, downward-pointing arrow appears at the bottom<br />
of the scroll. Press the space bar or click in the message scroll to view the rest of the<br />
message.<br />
The Comm<strong>and</strong> Icons<br />
Underneath the map are ten comm<strong>and</strong> buttons. The main comm<strong>and</strong>s in <strong>Ultima</strong> <strong>VI</strong><br />
can be selected either with the mouse or the keyboard. To use a comm<strong>and</strong> from the<br />
keyboard, simply press the first letter of its name. With the mouse, move the pointer to<br />
the comm<strong>and</strong> button you want to use <strong>and</strong> click the left mouse button. Then select the<br />
object or person you want to use the comm<strong>and</strong> on.<br />
For frequently used comm<strong>and</strong>s, such as Get, Look, Attack or Move, you can set up<br />
a default comm<strong>and</strong> for use with the right mouse button. Click the right button on a<br />
comm<strong>and</strong>, <strong>and</strong> a blue line will appear under it. From then on, clicking the right button on<br />
any shape on the map or in your inventory display will execute that comm<strong>and</strong> on that<br />
object. You can change the default comm<strong>and</strong> at any time. For all functions other than<br />
executing the default comm<strong>and</strong>, the left mouse button should be used. The ten main<br />
comm<strong>and</strong>s are:<br />
ATTACK (A) is used to fight monsters, animals, or people, or to attempt to destroy<br />
objects. After choosing the Attack comm<strong>and</strong>, choose a target on the map that is in range<br />
of the weapon you have readied.<br />
CAST (C) allows you to cast magic spells. You must have a spellbook readied, <strong>and</strong><br />
have enough magic points <strong>and</strong> reagents available to cast the desired spell. When a<br />
character tries to Cast a spell, the spellbook will be shown in the status display, listing<br />
the names of all the spells they have learned. Each name is followed by the number of<br />
times that spell can be cast with the reagents in inventory. To page through the spells,<br />
click on the blue arrow buttons below the list or use the left <strong>and</strong> right arrow keys on the<br />
keyboard.<br />
You cast a spell by clicking on its name, or by selecting it with the up <strong>and</strong> down<br />
arrows <strong>and</strong> pressing . Typing the first letter of each syllable of the spell also<br />
works. For instance, to cast the Repel Undead spell — An Xen Corp — you could type<br />
AXC <strong>and</strong> press . Some spells require you to specify whom or what you are<br />
casting them on. Simply select a target on the map or in your inventory.<br />
There is one special spell, the Help spell, which requires no reagents. This will<br />
return you instantly to Lord British's Castle. It should only be used in the most desperate<br />
of situations, however, as it will usually cost your party many experience points.<br />
TALK (T) lets you converse with the people you encounter in the game. You can<br />
also speak with some shrines <strong>and</strong> statues, <strong>and</strong> with the other members of your party. You<br />
must select the character on the map you wish to speak with. Their portrait will appear in<br />
the status display while they are speaking.<br />
You talk by typing single words on the keyboard <strong>and</strong> pressing . All words<br />
may be abbreviated to the first four letters (e.g., "elephant" may be abbreviated to<br />
"elep").<br />
Most people will respond to the words "name," "job," <strong>and</strong> "bye." (The "bye"<br />
comm<strong>and</strong> ends a conversation. You can accomplish the same thing by pressing <br />
without typing anything.) Some people will also respond to the words "join" <strong>and</strong> "leave,"<br />
allowing you to add members to your party (up to a maximum of eight) or remove them.<br />
During the course of conversation, people give you an idea of what they're<br />
interested in talking about. If you have the help function on, as it is when you start the<br />
game, the subjects they want to talk about will appear in a different color on the screen;<br />
if help is off, you'll have to figure out the key words in their conversations. (Note that the<br />
help function is not available on CGA cards.)You can turn help on or off by pressing<br />
control-H. However, be aware that some people will respond to other subjects, if you ask<br />
them. 5
LOOK (L) allows you to identify anyone or anything in the location you select, on<br />
the map or in your inventory. This comm<strong>and</strong> can be used to read books, signs, <strong>and</strong><br />
gravestones, or to examine paintings. It will also give information on the effectiveness of<br />
weapons <strong>and</strong> armor. When you use the Look comm<strong>and</strong> on an object you are adjacent to,<br />
you will search it. This will reveal the contents of chests, bags, crates, barrels, etc. It will<br />
also let you find hidden items or secret doors.<br />
GET (G) lets you pick up an object on the map. You must be st<strong>and</strong>ing next to it. If<br />
it isn't too heavy, it will be put into your inventory.<br />
DROP (D) can be used to lighten your load by getting rid of items you no longer<br />
need. First select the item in your inventory, then choose a spot on the map to place it.<br />
MOVE (M) is used to push an item or to move it between characters in the party.<br />
If you select an item on the map, you can sometimes push it to an adjacent square to<br />
get it out of your way. If it's something alive, though, it may not always let you! Moving<br />
an item into a square with a chest, barrel, or crate will place the item inside it.<br />
This comm<strong>and</strong> can also be used to move things in <strong>and</strong> out of containers or from one<br />
character to another. To move an item to another character, click on them on the map.<br />
When you buy a new spell, you must move it into your spellbook before you can cast it.<br />
USE (U) operates any object that has some function. Among other things, it will let<br />
you open <strong>and</strong> close doors <strong>and</strong> chests, enter or exit ships, climb ladders, milk cows, mount<br />
horses, light or extinguish fires, look into telescopes or crystal balls, ring bells, eat or<br />
drink food <strong>and</strong> beverages, or play musical instruments. When using a musical instrument,<br />
you play it with the numbers 0 through 9, <strong>and</strong> press when finished.<br />
REST (R) lets your party set up a camp <strong>and</strong> recover health <strong>and</strong> magic points. You<br />
will be asked how many hours you wish to rest, from 1 to 9, <strong>and</strong> who will st<strong>and</strong> guard.<br />
Select a character on the map display, or press to have no guard. A character<br />
will not regain hit points if they are out of food, or if they st<strong>and</strong> guard. If you are<br />
ambushed while resting, however, your party will not be awakened unless you have<br />
someone on guard! You can only rest on l<strong>and</strong>. At sea, this comm<strong>and</strong> repairs your frigate.<br />
Multiple "Rests" may be required to repair a ship completely.<br />
BEGIN/BREAK OFF COMBAT (B) switches back <strong>and</strong> forth between party mode<br />
<strong>and</strong> combat mode. In party mode, the members of your party automatically follow you<br />
around. In combat, each character will behave according to the combat mode you have<br />
selected for them on their inventory display. Characters in Front, Rear, or Flank modes<br />
will position themselves in a formation centered around you. Characters in Assault mode<br />
will attack the nearest enemy, while those in Retreat mode will avoid combat. Characters<br />
in Berserk mode will charge <strong>and</strong> attack the strongest foe. Lastly, if you select Comm<strong>and</strong><br />
mode for a character, you can control their actions each turn, just as you do for your own<br />
character. You can change a character's combat mode at any time, even in the middle of<br />
a battle.<br />
Keyboard Comm<strong>and</strong>s<br />
• Control-S saves the game. You will be asked if you really want to save the game. Type " Y" (Yes) to<br />
save or "N" (No) to cancel the comm<strong>and</strong> <strong>and</strong> keep playing.<br />
• Control-R restores the game to the last saved position. As in the case of the Save comm<strong>and</strong>, you will<br />
be asked to reply "Y" or "N."<br />
• Con trol-Q quits the game <strong>and</strong> exits to DOS. Make sure you have saved the game first if you want to<br />
return to the same position later!<br />
• Control-H toggles help mode on/off.<br />
• Control-Z toggles sound <strong>and</strong> music on/off.<br />
• 1 through 8 place a member of the party in solo mode. In this mode, you can move that character<br />
around <strong>and</strong> perform whatever actions you wish, while the rest of the party remains motionless. Note<br />
that you can't talk to people or use ladders, dungeon entrances, or moongates in solo mode — you<br />
must be in party mode.<br />
• 0 (zero) exits solo mode <strong>and</strong> returns to party mode.<br />
• Escape aborts most functions.
Spell List<br />
All known spells of the Eight Circles of Magic are listed below. The first column gives each<br />
spell's English language name/effect. The second column lists the magical syllables that form the<br />
spell's incantation. (Remember, you can cast a spell by typing the first letter of each syllable.) The<br />
last column tells you which reagents are necessary to cast the spell. These are abbreviated as<br />
follows:<br />
As<br />
Ga<br />
Gi<br />
Ma<br />
The 1st Circle<br />
Create Food<br />
Detect Magic<br />
Detect Trap<br />
Dispel Magic<br />
Douse<br />
Harm<br />
Heal<br />
Help<br />
Ignite<br />
In Mani Ylem<br />
WisOrt<br />
WisJux<br />
An Jux Ort<br />
An Flam<br />
An Mani<br />
In Mani<br />
Kal Lor<br />
In Flam<br />
Light In Lor<br />
The 2nd Circle<br />
Infra vision<br />
Magic Arrow<br />
Poison<br />
Reappear<br />
Sleep<br />
Telekinesis<br />
Trap<br />
Unlock Magic<br />
Untrap<br />
Vanish<br />
The 3rd Circle<br />
Curse<br />
Dispel Field<br />
Fireball<br />
Great Light<br />
Magic Lock<br />
Mass Awaken<br />
Mass Sleep<br />
Peer<br />
Protection<br />
Repel Undead<br />
The 4th Circle<br />
Animate<br />
Conjure<br />
Disable<br />
Fire Field<br />
Great Heal<br />
Locate<br />
Mass Dispel<br />
Poison Field<br />
Sleep Field<br />
Wind Change<br />
Quas Lor<br />
OrtJux<br />
In Nox For<br />
In Ylem<br />
InZu<br />
Ort For Ylem<br />
In Jux<br />
Ex Por<br />
An Jux<br />
An Ylem<br />
An Sanct<br />
An Grav<br />
For Flam<br />
Vas Lor<br />
An For<br />
An Vas Zu<br />
VasZu<br />
Vas Wis Ylem<br />
In Sanct<br />
An Xen Corp<br />
Sulfurous Ash Mo<br />
Garlic Ni<br />
Ginseng Pe<br />
M<strong>and</strong>rake Root Si<br />
Ga.Gi.Ma<br />
Ni,As<br />
Ni,As<br />
Ga,Gi<br />
Ga,Pe<br />
Ni,Si<br />
Gi,Si<br />
<br />
As,Pe<br />
As<br />
Ni,As<br />
As,Pe<br />
Ni.Mo.Pe<br />
Si,Mo,Pe<br />
Ni,Si,Pe<br />
Mo,Ma,Pe<br />
Si,Ni<br />
AsJ<strong>VI</strong>o<br />
AS.MO<br />
Ga,Mo,Pe<br />
As.Ni.Ga<br />
Pe,As<br />
As,Pe<br />
As,Ma<br />
As.Mo.Ga<br />
Gi,Ga<br />
Gi,Ni,Si<br />
Ni,Ma<br />
As.Gi.Ga<br />
Ga,As<br />
Ort Ylem As.Ma.Mo<br />
KalXen Si,Ma<br />
An Vas Mani Ni,Si,Ma<br />
In Flam Grav Pe.As.Si<br />
Vas Mani Gi,Si,Ma<br />
In Wis Ni<br />
Vas An Jux Art Gas,Gi,Ni<br />
In Nox Grav Ni,Si,Pe<br />
In Zu Grav Gi,Si,Pe<br />
Rel Hur As,Mo<br />
The 5th Circle<br />
Energy Field In Sanct Grav<br />
Explosion Vas For Ham<br />
Insect Swarm KalBetXen<br />
Invisibility Sanct Lor<br />
Lightning Ort Grav<br />
Paralyze An Xen Por<br />
Pickpocket For Ylem<br />
Reveal<br />
An Sanct LOT<br />
Seance Kal Mani Corp<br />
X-ray Wis Ylem<br />
The 6th Circle<br />
Charm An Xen Ex<br />
Clone<br />
In Quas Xen<br />
Confuse Vas Quas<br />
Flame Wind FlamHur<br />
Hailstorm Kal Des Ylem<br />
Mass Protect Vas In Sanct<br />
Negate Magic An Ort<br />
Poison Wind Nox Hur<br />
Replicate In Quas Ylem<br />
Web<br />
In Des POT<br />
The 7th Circle<br />
Chain Bolt<br />
Enchant<br />
Energy Wind<br />
Fear<br />
Gate Travel<br />
Kill<br />
Mass Curse<br />
Mass Invis.<br />
Wing Strike<br />
Wizard Eye<br />
Blood Moss<br />
Nightshade<br />
Black Pearl<br />
Spider's Silk<br />
Vas Ort Grav<br />
In Ort Ylem<br />
Grav Hur<br />
Quas Corp<br />
Vas Rel Por<br />
In Corp<br />
Vas An Sanct<br />
Vas Sanct Lor<br />
Kal Ort Xen<br />
POT Ort Wis<br />
The 8th Circle<br />
Death Wind<br />
Eclipse<br />
Mass Charm<br />
Mass KM<br />
Resurrect<br />
Slime<br />
Summon<br />
Time Stop<br />
Corp Hur<br />
Vas An Lor<br />
Vas An Xen Ex<br />
Vas Corp<br />
In Mani Corp<br />
Vas Rel Xen<br />
Kal Xen Corp<br />
AnTym<br />
Tremor Vas POT Ylem<br />
Ma,Si,Pe<br />
Ma,As,Pe,Mo<br />
Mo,Si,As<br />
Ni,Mo<br />
Pe,Ma,As'<br />
Si.As.Ni.Pe<br />
Mo.Si.Ni<br />
Si.Ni.Ma<br />
Mo,Ma,Ni.Si,As<br />
Ma,As<br />
Pe,Ni,Si<br />
As,Si,Mo,Gi,Ni,Ma<br />
Ma,Ni<br />
As.Mo.Ma<br />
Mo.Pe.Ma<br />
As.Gi.Ga.Ma<br />
Ga.Ma.As<br />
Ni.As.Mo<br />
As,Si,Mo.Gi,Ni<br />
Si<br />
Pe,Ma,As,Mo<br />
Si.Ma.As<br />
Ma,Ni,As,Mo<br />
Ni.Ma.Ga<br />
As.Pe.Ma<br />
Pe.Ni.As<br />
As.Ni.Ga.Ma<br />
Ma,Ni,Mo,Pe<br />
Mo,Si.Ma,As<br />
Mo,Ni,Ma,As,Pe,Si<br />
Ma.Ni.As.Mo<br />
Ma,As,Ni,Ga,Mo<br />
Pe.Ni.Si.Ma<br />
Pe,Ni,Ma,As<br />
Ga,Gi,Si,As,Mo,Ma<br />
Mo.Ni.Ma<br />
Ma,Ga,Mo,Si<br />
Ma.Ga.Mo<br />
Mo.As.Ma<br />
ORI-3289-B