Scanning with SilverFast Ai - Academics
Scanning with SilverFast Ai - Academics
Scanning with SilverFast Ai - Academics

Create successful ePaper yourself
Turn your PDF publications into a flip-book with our unique Google optimized e-Paper software.
<strong>Scanning</strong> <strong>with</strong> <strong>SilverFast</strong> <strong>Ai</strong><br />
Epson Perfection 4180 Photo and Expression 10000 XL<br />
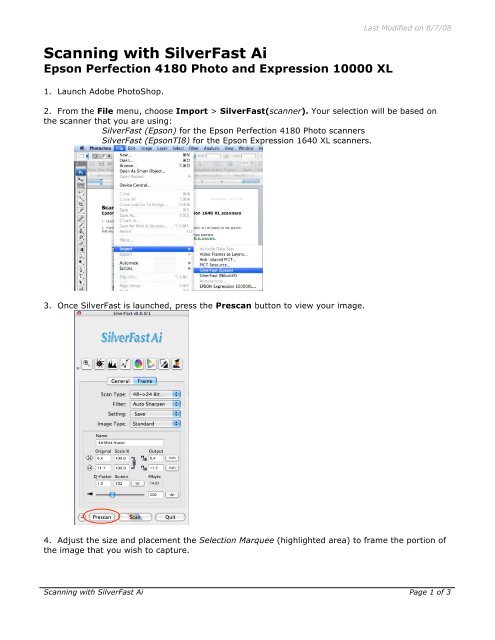
1. Launch Adobe PhotoShop.<br />
Last Modified on 8/7/08<br />
2. From the File menu, choose Import > <strong>SilverFast</strong>(scanner). Your selection will be based on<br />
the scanner that you are using:<br />
<strong>SilverFast</strong> (Epson) for the Epson Perfection 4180 Photo scanners<br />
<strong>SilverFast</strong> (EpsonTI8) for the Epson Expression 1640 XL scanners.<br />
3. Once <strong>SilverFast</strong> is launched, press the Prescan button to view your image.<br />
4. Adjust the size and placement the Selection Marquee (highlighted area) to frame the portion of<br />
the image that you wish to capture.<br />
<strong>Scanning</strong> <strong>with</strong> <strong>SilverFast</strong> <strong>Ai</strong> Page 1 of 3
Last Modified on 8/7/08<br />
5. Under Scan Type: choose 42->24 Bit Color for a color image and 16-8 Bit Grayscale for<br />
grayscale.<br />
6. Now you must adjust the image quality for type of image you are scanning. There are 2 ways to<br />
do this:<br />
a. Click the Auto-Adjust button. This will automatically adjust the<br />
highlights, shadows, brightness, and contrast of the image.<br />
-OR-<br />
b. Manually adjust the brightness, contrast, levels, curves, color, etc.<br />
by clicking on the Histogram, Gradation-Adjustment, and Color<br />
Correction buttons and adjusting the levels in those menus.<br />
7. If you are scanning a newspaper, magazine, or art print, you should descreen the scanned<br />
image for maximum image quality and sharpness. Select USM & Descreening in the Filter field.<br />
The USM & Descreening dialog box will appear. Next to Screen, identify what type of print your<br />
document is.<br />
If you want, you can click Prescan and then click the little<br />
box onto part of your scanned image to see a preview of<br />
what the descreening process will do to the image.<br />
<strong>Scanning</strong> <strong>with</strong> <strong>SilverFast</strong> <strong>Ai</strong> Page 2 of 3
Last Modified on 8/7/08<br />
8. Adjust the size of your image. The resolution should be 300 dpi at 100% of the image size. You<br />
may also wish to scale the image at this point. Do this by entering a percentage in the appropriate<br />
box.<br />
9. When all of your settings are the way you want them, click the Scan button. This will scan your<br />
image into PhotoShop.<br />
For questions or comments regarding this document, please email docxteam@hamilton.edu.<br />
<strong>Scanning</strong> <strong>with</strong> <strong>SilverFast</strong> <strong>Ai</strong> Page 3 of 3