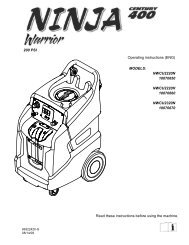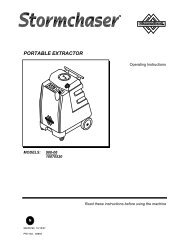
PORTABLE EXTRACTOR - Carpet Cleaning Equipment
PORTABLE EXTRACTOR - Carpet Cleaning Equipment
PORTABLE EXTRACTOR - Carpet Cleaning Equipment

You also want an ePaper? Increase the reach of your titles
YUMPU automatically turns print PDFs into web optimized ePapers that Google loves.
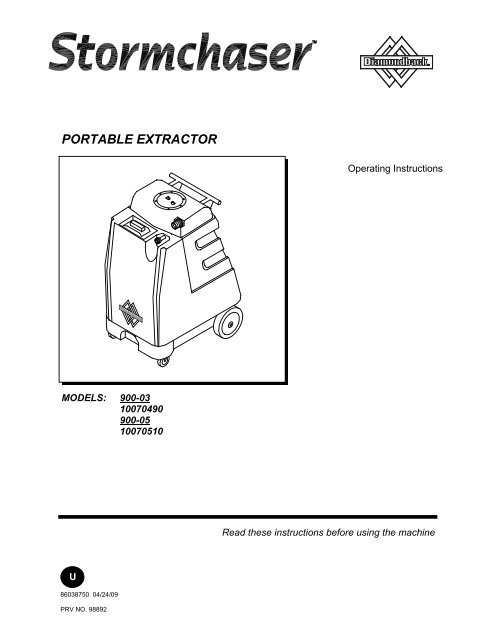
<strong>PORTABLE</strong> <strong>EXTRACTOR</strong><br />
MODELS: 900-03<br />
10070490<br />
900-05<br />
10070510<br />
U<br />
86038750 04/24/09<br />
PRV NO. 98892<br />
Operating Instructions<br />
Read these instructions before using the machine
MACHINE DATA LOG/OVERVIEW<br />
2<br />
MODEL _______________________________________<br />
DATE OF PURCHASE __________________________<br />
SERIAL NUMBER ______________________________<br />
SALES REPRESENTATIVE # _____________________<br />
DEALER NAME ________________________________<br />
OPERATIONS GUIDE NUMBER ___________________<br />
PUBLISHED __________________________________________<br />
YOUR DEALER<br />
Name: __________________________________________________________________________________________________<br />
Address: _______________________________________________________________________________________________<br />
For the name and address of your dealer contact: Windsor Industries<br />
Phone Number: _________________________________________________________________________________________<br />
OVERVIEW<br />
The Stormchaser is an electric powered carpet extractor intended for commercial use. This<br />
appliance applies a cleaning solution to the carpet and then vacuums the soiled water back<br />
into the recovery tank.<br />
STORMCHASER W/HEAT 86038750 03/05/07
Machine Data Log/Overview.........................2<br />
Table of Contents..........................................3<br />
HOW TO USE THIS MANUAL<br />
How to use this Manual.................................1-1<br />
SAFETY<br />
Important Safety Instructions ........................2-1<br />
Hazard Intensity Level. .................................2-2<br />
Safety Label Location. ..................................2-3<br />
Grounding Instructions..................................2-4<br />
OPERATIONS<br />
Technical Specifications. ..............................3-1<br />
Controls.........................................................3-2<br />
Machine Operation........................................3-3<br />
Pre-Run Machine Inspection......................3-3<br />
<strong>Equipment</strong> Set-Up......................................3-3<br />
Heater Operation .......................................3-3<br />
Priming the Pump ......................................3-3<br />
Emptying & <strong>Cleaning</strong> Tanks.......................3-4<br />
Shut Down and Storage..............................3-4<br />
MAINTENANCE<br />
Daily Maintenance ........................................4-1<br />
Periodic Maintenance ...................................4-1<br />
Monthly Maintenance....................................4-1<br />
Semi-annually ...............................................4-1<br />
Lubrication ....................................................4-1<br />
Storage .........................................................4-1<br />
Heater Model Storage...................................4-1<br />
Solution Pump Replacement ........................4-2<br />
Vacuum Motor Replacement ........................4-2<br />
Pump Replacement Kits ...............................4-3<br />
Pressure Regulator .......................................4-4<br />
Machine Troubleshooting..............................4-5<br />
GROUP PARTS LIST<br />
STORMCHASER W/HEAT 86038750 03/05/07<br />
TABLE OF CONTENTS<br />
Control Panel Group .....................................5-1<br />
Frame Group (100 psi) .................................5-3<br />
Frame Group (200 psi) .................................5-5<br />
Pump and Heater Group (100 psi)................5-7<br />
Pump and Heater Group (200 psi)................5-9<br />
Recovery Tank Group................................. 5-11<br />
Vacuum Motor Group (Upper) .................... 5-13<br />
Vacuum Motor Group (Lower) .................... 5-15<br />
Wiring Diagram (100 psi) ............................ 5-17<br />
Wiring Diagram (200 psi) ............................ 5-18<br />
Suggested Spare Parts............................... 5-19<br />
Notes .......................................................... 5-20<br />
Warranty. .................................................... 5-21<br />
3
HOW TO USE THIS MANUAL<br />
This manual contains the following sections:<br />
1-1<br />
- HOW TO USE THIS MANUAL<br />
- SAFETY<br />
- OPERATIONS<br />
- MAINTENANCE<br />
- PARTS LIST<br />
The HOW TO USE THIS MANUAL section will tell<br />
you how to find important information for ordering<br />
correct repair parts.<br />
Parts may be ordered from authorized dealers.<br />
When placing an order for parts, the machine model<br />
and machine serial number are important. Refer to<br />
the MACHINE DATA box which is filled out during<br />
the installation of your machine. The MACHINE<br />
DATA box is located on the inside of the front cover<br />
of this manual.<br />
MODEL _____________________________________<br />
DATE OF PURCHASE ________________________<br />
SERIAL NUMBER ____________________________<br />
SALES REPRESENTATIVE # ___________________<br />
DEALER NAME ______________________________<br />
OPERATIONS GUIDE NUMBER __________________<br />
PUBLISHED ________________________________<br />
The model and serial number of your machine is on<br />
the inside of the control panel.<br />
STORMCHASER W/HEAT 86038750 03/05/07<br />
The SAFETY section contains important information<br />
regarding hazard or unsafe practices of the<br />
machine. Levels of hazards is identified that could<br />
result in product or personal injury, or severe injury<br />
resulting in death.<br />
The OPERATIONS section is to familiarize the<br />
operator with the operation and function of the<br />
machine.<br />
The MAINTENANCE section contains preventive<br />
maintenance to keep the machine and its<br />
components in good working condition. They are<br />
listed in this general order:<br />
- Service Schedule<br />
- Lubrication<br />
- Storage<br />
- Vacuum Motor Replacement<br />
- Solution Pump Replacement<br />
- Pump Kits<br />
- Pressure Regulator (200PSI model only)<br />
- Troubleshooting<br />
The PARTS LIST section contains assembled parts<br />
illustrations and corresponding parts list. The parts<br />
lists include a number of columns of information:<br />
- REF – column refers to the reference<br />
number on the parts illustration.<br />
- PART NO. – column lists the part<br />
number for the part.<br />
- PRV NO. – reference number.<br />
- QTY – column lists the quantity of the<br />
part used in that area of the machine.<br />
- DESCRIPTION – column is a brief<br />
description of the part.<br />
- SERIAL NO. FROM – column indicates<br />
the first machine the part number is<br />
applicable to. When the machine design<br />
has changed, this column will indicate<br />
serial number of applicable machine.<br />
The main illustration shows the most<br />
current design of the machine. The<br />
boxed illustrations show older designs. If<br />
column has an asterisk (*), call<br />
manufacturer for serial number.<br />
- NOTES – column for information not<br />
noted by the other columns.<br />
NOTE: If a service or option kit is installed on your<br />
machine, be sure to keep the KIT INSTRUCTIONS<br />
which came with the kit. It contains replacement<br />
parts numbers needed for ordering future parts.
SAFETY INSTRUCTIONS<br />
IMPORTANT SAFETY INSTRUCTIONS<br />
When using an electrical appliance, basic precaution<br />
must always be followed, including the following:<br />
! WARNING:<br />
READ ALL INSTRUCTIONS BEFORE USING THIS MACHINE.<br />
This machine is for commercial use.<br />
To reduce the risk of fire, electric shock, or injury:<br />
Connect to a properly grounded outlet. See Grounding Instructions.<br />
Do not leave the machine unattended. Unplug machine from outlet when not in use and before<br />
maintenance or service.<br />
Use only indoors. Do not use outdoors or expose to rain.<br />
Do not allow machine to be used as a toy. Close attention is necessary when used by or near<br />
children.<br />
Use only as described in this manual. Use only manufacturer’s recommended components and<br />
attachments.<br />
Do not use damaged electrical cord or plug. Follow all instructions in this manual concerning grounding<br />
the machine. If the machine is not working properly, has been dropped, damaged, left outdoors, or<br />
dropped into water, return it to an authorized service center.<br />
Do not pull or carry machine by electrical cord, use as a handle, close a door on cord, or pull cord<br />
around sharp edges or corners.<br />
Do not run machine over cord. Keep cord away from heated surfaces.<br />
Do not unplug machine by pulling on cord. To unplug, grasp the electrical plug, not the electrical cord.<br />
Do not handle the electrical plug or machine with wet hands.<br />
Do not operate the machine with any openings blocked. Keep openings free of debris that may reduce<br />
airflow.<br />
This machine is intended for cleaning carpet only.<br />
Do not vacuum anything that is burning or smoking, such as cigarettes, matches, or hot ashes.<br />
This machine is not suitable for picking up health endangering dust.<br />
Turn off all controls before unplugging.<br />
Machine can cause a fire when operating near flammable vapors or materials. Do not operate this<br />
machine near flammable fluids, dust or vapors.<br />
This machine is suitable for commercial use, for example in hotels, schools, hospitals,<br />
factories, shops and offices for more than normal housekeeping purposes.<br />
Maintenance and repairs must be done by qualified personnel.<br />
If foam or liquid comes out of machine, switch off immediately.<br />
SAVE THESE INSTRUCTIONS<br />
STORMCHASER W/HEAT 86038750 03/05/07 2-1
HAZARD INTENSITY LEVEL<br />
The following symbols are used throughout this guide as indicated in their descriptions:<br />
HAZARD INTENSITY LEVEL<br />
There are three levels of hazard intensity identified by signal words -WARNING and CAUTION and FOR<br />
SAFETY. The level of hazard intensity is determined by the following definitions:<br />
! WARNING<br />
WARNING - Hazards or unsafe practices which COULD result in severe personal injury or death.<br />
! CAUTION<br />
CAUTION - Hazards or unsafe practices which could result in minor personal injury or product or property<br />
damage.<br />
FOR SAFETY: To Identify actions which must be followed for safe operation of equipment.<br />
Report machine damage or faulty operation immediately. Do not use the machine if it is not in proper<br />
operating condition. Following is information that signals some potentially dangerous conditions to the<br />
operator or the equipment. Read this information carefully. Know when these conditions can exist. Locate<br />
all safety devices on the machine. Please take the necessary steps to train the machine operating<br />
personnel.<br />
FOR SAFETY:<br />
DO NOT OPERATE MACHINE:<br />
Unless Trained and Authorized.<br />
Unless Operation Guide is Read and understood.<br />
In Flammable or Explosive areas.<br />
In areas with possible falling objects.<br />
WHEN SERVICING MACHINE:<br />
Avoid moving parts. Do not wear loose clothing; jackets, shirts, or sleeves when working on the<br />
machine.<br />
.<br />
2-2<br />
STORMCHASER W/HEAT 86038750 03/05/07
STORMCHASER W/HEAT 86038750 03/05/07<br />
SAFETY LABEL LOCATION<br />
NOTE: These drawings indicate the location of safety labels on the machine. If at any time the labels become<br />
illegible, promptly replace them.<br />
LABEL WARNING<br />
86242230<br />
PRV NO. 500009<br />
LABEL CIRCUIT INTERRUPTER<br />
86200570<br />
PRV NO. 170-41(2)<br />
-WARNING-<br />
LABEL HEATER MATE WARNING TAG<br />
86200000<br />
PRV NO. 170-31<br />
2-3
GROUNDING INSTRUCTIONS<br />
THIS PRODUCT IS FOR COMMERCIAL USE<br />
ONLY.<br />
ELECTRICAL:<br />
In the USA this machine operates on a<br />
standard 15 amp 115V, 60 hz, A.C. power<br />
circuit . The amp, hertz, and voltage are listed<br />
on the data label found on each machine.<br />
Using voltages above or below those indicated<br />
on the data label will cause serious damage to<br />
the motors.<br />
EXTENSION CORDS:<br />
If an extension cord is used, the wire size must<br />
be at least one size larger than the power cord<br />
on the machine, and must be limited to 50 feet<br />
(15.5m) in length.<br />
GROUNDING INSTRUCTIONS:<br />
This appliance must be grounded. If it should<br />
malfunction or break down, grounding provides<br />
a path of least resistance for electric current to<br />
reduce the risk of electric shock. This<br />
appliance is equipped with a cord having an<br />
equipment-grounding conductor and grounding<br />
plug. The plug must be inserted into an<br />
appropriate outlet that is properly installed and<br />
grounded in accordance with all local codes<br />
and ordinances.<br />
This appliance is for use on a nominal 120-volt<br />
circuit, and has a grounded plug that looks like<br />
the plug in “Fig. A”. A temporary adaptor that<br />
looks like the adaptor in “Fig . C” may be used<br />
to connect this plug to a 2-pole receptacle as<br />
shown in “Fig. B”, if a properly grounded outlet<br />
is not available. The temporary adaptor should<br />
be used only until a properly grounded outlet<br />
(Fig. A) can be installed by a qualified<br />
electrician. The green colored rigid ear, lug, or<br />
wire extending from the adaptor must be<br />
connected to a permanent ground such as a<br />
properly grounded outlet box cover. Whenever<br />
the adaptor is used, it must be held in place by<br />
a metal screw.<br />
2-4<br />
STORMCHASER W/HEAT 86038750 03/05/07<br />
Improper connection of the equipmentgrounding<br />
conductor can result in a risk of<br />
electric shock. Check with a qualified<br />
electrician or service person if you are in<br />
doubt as to whether the outlet is properly<br />
grounded. Do not modify the plug provided<br />
with the appliance - if it will not fit the outlet,<br />
have a proper outlet installed by a qualified<br />
electrician.
THIS PAGE LEFT BLANK INTENTIONALLY<br />
STORMCHASER W/HEAT 86038750 03/05/07 2-5
TECHNICAL SPECIFICATIONS<br />
ITEM MEASURE<br />
ELECTRICAL 115 Volt, 60 hz<br />
Vacuum Motor Dual 2 stage<br />
Solution Pump 100 psi<br />
200 psi<br />
Solution Capacity 16 gal (60 L)<br />
Recovery Capacity 14 gal (53 L)<br />
Weight- Empty 95 lbs (43.1 kg)<br />
Weight-Full Solution 230 lbs (104.3 kg)<br />
Height 37 inches (93.98 cm)<br />
Length 27 inches (68.58 cm)<br />
Width 20 inches (50.80 cm)<br />
Power cord 22 feet (6.71 m)<br />
HEIGHT<br />
3-1<br />
LENGTH<br />
STORMCHASER W/HEAT 86038750 10/15/07<br />
WIDTH
1<br />
2<br />
1. Pump Switch<br />
2. Vacuum #1 Switch<br />
3. Vacuum #2 Switch<br />
4. Heater Toggle Switch<br />
5. Heat Indicator Light<br />
CONTROLS<br />
STORMCHASER W/HEAT 86038750 03/05/07 3-2<br />
5<br />
4<br />
3
MACHINE OPERATION<br />
PRE-RUN INSPECTION<br />
1. Check all fittings and connectors for proper<br />
assembly.<br />
2. Check all hoses for leaks. Repair or replace any<br />
damaged hoses.<br />
3. Check power cord(s) for any damage. If<br />
damaged, replace.<br />
EQUIPMENT SET-UP<br />
1. Plug power cord from machine into properly<br />
grounded wall outlet.<br />
2. Turn vacuum motor switch on and off to make<br />
sure there is electrical power at machine.<br />
3. Connect vac hose to machine. Slide the swivel<br />
cuff over the outlet on the tank.<br />
4. Connect the hose to your machine and wand.<br />
Pull back the knurled collar on the quick<br />
disconnect coupler and push onto the connection<br />
on the chassis. To avoid leaks, check to be that<br />
a positive connection was made.<br />
5. Pour clean, hot water into the solution tank.<br />
To avoid possible tank distortion, water<br />
temperature must not exceed 140 F (60C).<br />
6. Add a non-foaming cleaning solution concentrate,<br />
for use in hot water extractors at the proportions<br />
noted on the container (See list below), into<br />
solution tank. NOTE: When using powder<br />
cleaner, pre-mix with hot water in a clean<br />
container before adding to the solution tank.<br />
7. Turn pump and vacuum switch(s) to the on<br />
position. NOTE: Pump may have to be primed<br />
for solution flow. (See Priming the Pump)<br />
8. Start cleaning.<br />
To prevent possible disease hazard, before<br />
attempting to clean bodily fluids spills, you must<br />
kill any viruses, germs or bacteria present in the<br />
bodily fluid.<br />
SUITABLE INCOMPATIBLE<br />
CHEMICALS CHEMICALS<br />
Alkalis Aldehydes<br />
Clorox II Bleach* Aromatic Hydrocarbons<br />
Defoaming Agents Butyls<br />
Detergents Carbon Tetrachloride<br />
Hydroxides Clorox*<br />
Oxygen Bleaches Chlorinated Bleaches<br />
Soaps Chlorinated Hydrocarbons<br />
Sta-Puf Fabric D-Limonene<br />
Softener* Lysol*<br />
Vinegar Methyls (MEK)<br />
Perchlorethylene (perc)<br />
Phenols<br />
Trichlorethylene<br />
*Registered Trademark<br />
3-3<br />
STORMCHASER W/ HEAT 86038750 04/24/09<br />
HEATER OPERATION<br />
The disconnect<br />
fittings on the heater<br />
will become<br />
extremely hot during operation. Allow<br />
sufficient time to cool, or run solution<br />
through the machine with the heater turned<br />
off before disconnecting the or performing<br />
any maintenance on the heater.<br />
Before disconnecting the heater, open wand valve to<br />
relieve the system of all pressure by depressing the<br />
valve trigger.<br />
DO NOT spray water directly on to the heater. To<br />
clean, unplug the unit and wipe with a damp cloth.<br />
Make certain that the<br />
solution tank is filled<br />
adequately before<br />
plugging in the machine and heater.<br />
1. Plug the machine and heater into separate<br />
grounded circuits. The heater draws 15 amps of<br />
current.<br />
2. Turn the solution pump ON. Turn the heater<br />
switch ON. The solution pump must be turned on<br />
BEFORE the heater is turned on.<br />
On initial start-up the 1850 watt heater will take a<br />
few minutes to reach operating temperature.<br />
3. When turning the machine and heater OFF,<br />
make certain that you turn the heater off FIRST.<br />
PRIMING THE PUMP<br />
1. Connect priming hose to solution output on<br />
machine.<br />
2. Run open end of priming hose to vacuum intake.<br />
3. Turn pump and both vacuums on and seal off<br />
hose going into vacuum in take.<br />
4. Do this for 30 seconds or until pump is putting out<br />
a steady flow of water.
EMPTYING AND CLEANING<br />
Always use defoamer<br />
if foaming occurs.<br />
Foam will suspend large particles that may<br />
damage vacuum(s) as well as allow liquid<br />
into the vacuum motor(s) without activating<br />
the float shutoff.<br />
1. Before proceeding, make certain that the<br />
nozzle is functioning properly.<br />
a. To check, hold the wand about one foot<br />
above the surface to be cleaned and<br />
open the wand valve. A full spray should<br />
be observed from the nozzle.<br />
b. If the nozzle is not showing a full spray<br />
pattern, adjust nozzle for proper pattern,<br />
clean, or replace nozzle.<br />
2. Normally, chemical is applied on the push<br />
stroke while vacuuming is done on the pull<br />
stroke. For heavily soiled carpets the hand<br />
tool may be used in the scrubbing manner,<br />
applying chemical in both the push and pull<br />
stroke. ALWAYS FINISH UP AN AREA WITH A<br />
VACUUM PULL STROKE.<br />
3. When cleaning, keep the working opening<br />
(wand mouth) flat on the surface being<br />
cleaned. Keep the wand moving when the<br />
valve is open.<br />
4. The shutoff float inside the recovery tank will<br />
impede the vacuum flow when the tank is<br />
full. When this occurs, empty the recovery<br />
tank. Do this by opening the dump valve<br />
located at the back of the machine. NOTE:<br />
Dispose of waste in a proper manner which<br />
would not violate any Local, State or Federal<br />
law.<br />
5. Once the recovery tank has been emptied,<br />
you may once again proceed with cleaning.<br />
!<br />
Operating Vacuum after<br />
shutoff has activated could draw water directly into<br />
the vac motor. This will cause damage to the motor,<br />
therefore voiding your warranty.<br />
!<br />
CAUTION<br />
CAUTION<br />
ALWAYS TEST CARPET FOR<br />
COLOR FASTNESS IN AN INCONSPICUOUS PLACE. Also, to<br />
avoid prolonged drying times, do not spray too much<br />
solution in any one area.<br />
SHUT DOWN AND STORAGE<br />
MACHINE OPERATION<br />
1. Turn Switch OFF. Empty recovery tank<br />
completely and rinse several times to<br />
remove any dirt or debris that may be left<br />
behind.<br />
2. Drain any unused cleaning solution from<br />
solution tank and rinse with clean water to<br />
remove any suds left behind by the cleaning<br />
chemicals. NOTE: Dispose of waste in a<br />
proper manner which would not violate any<br />
Local, State or Federal law<br />
3. Run a small amount of clean water through<br />
pump if chemicals were used. This will help<br />
insure the life of your pump.<br />
4. Check the spray jet on the cleaning tool for<br />
full spray pattern and inspect vac head for<br />
any obstructions.<br />
5. Remove as much moisture from system<br />
before storing in cold climates. Excess water<br />
may freeze during storage and crack internal<br />
components, causing damage to the unit.<br />
WARNING<br />
!<br />
Before making any<br />
adjustments or performing<br />
any maintenance to your machine, disconnect the<br />
power cord from the electrical source.<br />
STORMCHASER W/ HEAT 86038750 03/05/07 3-4
MAINTENANCE<br />
DAILY MAINTENANCE<br />
4-1<br />
Unplug power cord(s)<br />
before servicing or<br />
making any repairs.<br />
1. Flush the entire system, including floor tool,<br />
hand tool, etc., with 1 to 3 gallons of clean, hot<br />
water.<br />
2. Vacuum out the solution tank.<br />
3. Rinse tank with fresh water. Periodically inspect<br />
the recovery tank and decontaminate if<br />
necessary, using a Hospital Grade Virucide or a<br />
1-10 bleach to water solution. Wastewater<br />
should be disposed of properly.<br />
4. Occasionally check filter screen at the bottom of<br />
the solution tank and rinse clean with hot water if<br />
necessary.<br />
5. Inspect hoses for wear. Frayed or cracked<br />
hoses should be replaced to avoid vacuum or<br />
solution pressure loss.<br />
6. Inspect power cord for wear or damage. This<br />
cable will lie on wet carpet. To prevent electrical<br />
shock replace cords that are frayed or have<br />
cracked insulation immediately.<br />
7. Clean all dirt and obstructions from drain valve<br />
and gaskets to prevent possible leakage and<br />
premature wear.<br />
8. Run clean water through solution pump when<br />
work is complete.<br />
9. Empty both tanks and rinse, run vacuum (s) for<br />
at least one minute to dry motor(s).<br />
10. Store with access covers removed to allow tanks<br />
to dry.<br />
PERIODIC MAINTENANCE<br />
1. Twice a month, flush a white vinegar solution<br />
(one quart vinegar to two gallons water) or antibrowning<br />
solution (mixed as directed) through<br />
the extractor. This will prevent build-up of<br />
alkaline residue in the system.<br />
2. If spray jet becomes clogged, remove the spray<br />
tip, wash it thoroughly, and blow dry. NOTE: DO<br />
NOT USE PINS, WIRE, ETC. TO CLEAN NOZZLE AS<br />
THIS COULD DESTROY THE SPRAY PATTERN.<br />
3. Apply silicone lubricant to solution nipple.<br />
4. Periodically inspect all hoses, electrical cable<br />
and connections on your machine. Frayed or<br />
cracked hoses should be repaired or replaced to<br />
eliminate vacuum or solution pressure loss. If<br />
the cable insulation on the power cord is broken<br />
or frayed, repair or replace immediately. Don’t<br />
take chances with electrical fire or shock.<br />
5. Clean outside of all tanks and check for<br />
damage.<br />
MONTHLY MAINTENANCE<br />
STORMCHASER W/HEAT 86038750 03/05/07<br />
1. Check all bearings for noise and wear.<br />
2. Check all gaskets for wear and leakage.<br />
3. Check pump pressure; observe spray pattern<br />
and check gauge if necessary.<br />
4. Check overall performance of machine.<br />
SEMI-ANNUALLY<br />
1. Check vacuum motor brushes.<br />
LUBRICATION<br />
For hose fitting lubrication, use a light silicone<br />
lubricant which will not damage o-rings.<br />
STORAGE<br />
Thoroughly clean machine if it is to be stored.<br />
Protect this machine from freezing while in storage.<br />
HEATER MODEL STORAGE<br />
Be sure to thoroughly drain water out of heater lines<br />
prior to storage in colder climates. This heater will<br />
freeze and possibly crack, voiding your warranty.
Only qualified maintenance personnel are to<br />
perform the following repairs.<br />
SOLUTION PUMP REPLACEMENT<br />
1. Turn off all switches and unplug the machine.<br />
2. Remove knobs holding recovery tank to solution<br />
tank.<br />
3. Remove recovery tank to gain access to the<br />
pump in base of solution tank.<br />
4. Remove solution hoses from fittings on pump.<br />
Disconnect wires.<br />
5. Remove the screws that fasten the pump to the<br />
solution tank.<br />
6. Reverse process to install new replacement<br />
pump.<br />
VACUUM MOTOR REPLACEMENT<br />
1. Turn off all switches and unplug machine.<br />
2. Remove knobs holding recovery tank to solution<br />
tank.<br />
3. Tip recovery tank to expose one vacuum while<br />
other is located in base of solution tank.<br />
4. Locate the proper vacuum motor wires and<br />
disconnect.<br />
5. Unfasten screws holding vacuum to plate.<br />
6. Remove the vacuum motor.<br />
7. Reverse process to install vacuum motor<br />
replacement.<br />
Vacuum Motor Carbon Brushes Replacement (Windsor)<br />
Carbon<br />
Brushes<br />
End Cap<br />
WARNING: The green<br />
ground wire must be<br />
attached for safe operation.<br />
See wiring diagram.<br />
If armature commutator is grooved, extremely pitted or not<br />
concentric, the motor will need to be replaced or sent to a<br />
qualified service center.<br />
Important:<br />
These brushes wear quicker as the length shortens due to<br />
increased heat. Spring inside brush housing will damage<br />
motor if brushes are allowed to wear away completely.<br />
3<br />
8 [9.5mm]<br />
Periodically check the length of the carbon brushes. Replace<br />
both carbon brushes when either is less than 3/8" (9.5mm)<br />
long.<br />
MAINTENANCE<br />
Vacuum Motor Carbon Brushes Replacement (Ametek)<br />
End Cap<br />
Carbon<br />
Brushes<br />
WARNING: The green<br />
ground wire must be<br />
attached for safe operation.<br />
See wiring diagram.<br />
Note: When replacing carbon brushes loosen wire terminal<br />
BEFORE removing screws on bracket.<br />
Wire<br />
Terminal<br />
Note:<br />
Place<br />
stop in<br />
groove.<br />
If armature commutator is grooved, extremely pitted or not<br />
concentric, the motor will need to be replaced or sent to a<br />
qualified service center.<br />
Wire Terminal<br />
Important:<br />
These brushes wear quicker as the length shortens due to<br />
increased heat. Spring inside brush housing will damage<br />
motor if brushes are allowed to wear away completely.<br />
3/8 (9.5mm)<br />
Periodically check the length of the carbon brushes. Replace<br />
both carbon brushes when either is less than 3/8" (9.5mm)<br />
long.<br />
STORMCHASER W/HEAT 86038750 03/05/07 4-2
MAINTENANCE<br />
4-3<br />
PUMP REPLACEMENT KITS<br />
100 PSI<br />
86161980<br />
PRV NO. 42-809332<br />
WAS 250-67<br />
Switch Asm<br />
Pump Head Replacement<br />
86251040<br />
PUMP REPLACEMENT PRV NO. KITS 65187<br />
200 PSI<br />
CAM & BEARING KIT<br />
86201170<br />
PRV NO. 250-79G<br />
PLUNGER & SEALS KIT<br />
86201150<br />
PRV NO. 250-79E<br />
Bypass Valve Asm<br />
86258830<br />
PRV NO. 84161<br />
STORMCHASER W/HEAT 86038750 03/05/07<br />
Diaphragm<br />
6235100<br />
PRV NO. 29206<br />
VALVE & O-RINGS KIT<br />
86201160<br />
PRV NO. 250-79F
PRESSURE REGULATOR (200PSI MODEL ONLY)<br />
STORMCHASER W/HEAT 86038750 03/05/07<br />
MAINTENANCE<br />
For best results with the pressure regulator, we recommend that you clean and lubricate<br />
the piston and u-cup with Superlube lubricant monthly or when pressure drop seems excessive.<br />
1. Turn unit off before lubricating.<br />
2. Remove cap, spring and spring retainer plate.<br />
3. With fingertips remove piston and u-cup.<br />
4. Wipe piston and u-cup clean of any film or scale.<br />
5. Lubricate the piston and u-cup with Superlube.<br />
6. Reassemble regulator.<br />
7. With pump ON, re-adjust pressure regulator for normal operation.<br />
LUBRICATE U-CUP WITH SUPERLUBE MONTHLY.<br />
OUT<br />
IN<br />
U-CUP<br />
PISTON<br />
SPRING RETAINER PLATE<br />
SPRING<br />
(BLUE- 200 PSI)<br />
CAP<br />
4-4
TROUBLESHOOTING<br />
PROBLEM CAUSE SOLUTION<br />
Loss of Power<br />
Dead electrical circuit<br />
Faulty power cord<br />
Check building circuit breaker or fuse box.<br />
Replace<br />
<strong>Equipment</strong> not grounding Follow grounding instructions exactly<br />
Electrical shock<br />
Receptacle not grounded<br />
Internal wiring problem<br />
Contact an electrician to check building’s wiring<br />
Have a trained service technician check machine’s<br />
wiring<br />
Vac motor speed varies or<br />
doesn’t run<br />
Worn motor brushes<br />
Motor worn out<br />
Faulty switch<br />
Replace<br />
Replace<br />
Replace<br />
Loose vacuum dome Center and seal dome over tank<br />
Crack in dome of poor joint Replace or repair using acrylic plastic cement only<br />
Lint or dirt clogging vacuum<br />
screen<br />
With power off clean screen<br />
Loss of vacuum<br />
Loose cuffs on vacuum<br />
hose<br />
Tighten cuffs turning counterclockwise<br />
Vac motor seals leaking Replace<br />
Floor tool vac chamber<br />
clogged<br />
Wash out with hose. Pick lint out with a wire<br />
Vac motor, hose, or dome<br />
gasket<br />
Replace<br />
Pump inlet screen plugged Clean inlet screen<br />
Pump runs no solution<br />
Pump air locked<br />
Press trigger to open valve on cleaning wand to<br />
relieve air<br />
Internal or external solution<br />
line damaged and leaking<br />
Replace<br />
Pump not primed Prime the pump with provided hose (pg 3-3)<br />
Pump runs, loss of<br />
Internal pump components<br />
wearing out<br />
Replace, see pump kit components (pg 4-3)<br />
pressure Check valves in pump head Take piston from BPR and lubricate with Superlube. If<br />
for particles or cuts in seals problem still exists change BPR kit<br />
Pump will not run<br />
Unit not plugged in<br />
Loose wiring<br />
Connect unit to 3 prong grounded outlet<br />
See dealer<br />
Solution hose fitting hard<br />
to connect<br />
Corrosion on fittings.<br />
Clean with steel wool. Soak in acetic acid (white<br />
vinegar). Lubricate lightly with silicone base lubricant.<br />
<strong>Carpet</strong> not getting clean Severe soil conditions<br />
Make several passes at right angles to each other.<br />
Use a pre-spray.<br />
<strong>Carpet</strong> too wet Over saturation<br />
Adjust solution pressure to lower settings. Make<br />
several passes without spray<br />
Leaving carpet too wet Check for loss of vac pressure<br />
<strong>Carpet</strong> browning<br />
Too much chemical<br />
Light carpet with no brown<br />
prevention<br />
Check label for correct solution concentration<br />
Go over carpet with browning prevent only<br />
Solution hose connection Check for positive connection<br />
Solution not flowing Faulty pump Repair or replace<br />
properly<br />
Faulty floor tool valve Repair or replace<br />
Faulty pump switch Repair<br />
4-5 STORMCHASER W/HEAT 86038750 03/05/07
THIS PAGE LEFT BLANK INTENTIONALLY<br />
STORMCHASER W/HEAT 86038750 03/05/07 4-6