FR - Mode d’emploi - LaBina One

Create successful ePaper yourself
Turn your PDF publications into a flip-book with our unique Google optimized e-Paper software.
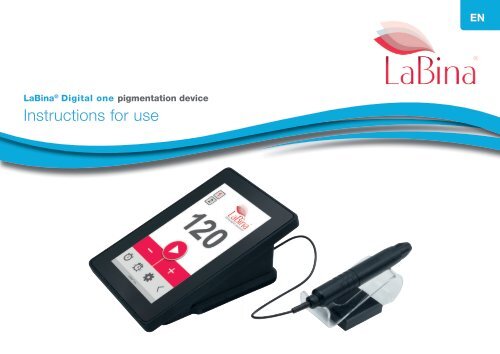
<strong>LaBina</strong> ® Digital one pigmentation device<br />
Instructions for use<br />
EN
General information<br />
Proper use<br />
These instructions for use contain information on the safe and intended use of the<br />
<strong>LaBina</strong> ® Digital <strong>One</strong> pigmentation device and the <strong>LaBina</strong> ® needle cartridges with<br />
safety membrane provided for this purpose.<br />
This product is aimed at people who directly or indirectly carry out permanent<br />
make-up treatments. This includes all people who are responsible for assembling,<br />
operating, servicing, maintaining or cleaning the pigmentation device.<br />
To use the pigmentation device and the needle cartridges safely and as intended<br />
and to avoid the risk of any malfunctions or damage to the pigmentation device or<br />
needle cartridge, please observe the operating instructions.<br />
We recommend that the currently applicable safety and hygiene regulations and<br />
all other regulations for pigmenting or tattooing applicable in your country are also<br />
observed. This also applies to the regulations on the use of cleaning and disinfecting<br />
products as well as occupational safety.<br />
For information on the use of needle cartridges as well as the accessories and<br />
consumables, please refer to the associated instructions for use.<br />
Area of application<br />
The <strong>LaBina</strong> ® <strong>One</strong> pigmentation device is intended exclusively for the production<br />
of permanent make-up. Permanent make-up is generally referred to as cosmetic<br />
tattoos in which microscopically fine ink pigments are injected into the top layers<br />
of skin using a special needle. The inks fade after 2-5 years, depending on the<br />
condition of the skin.<br />
In the permanent make-up segment, the pigmentation device is intended for<br />
pigmenting eyebrows, eyelid lines and lips. Any use other than this shall be deemed<br />
not to be intended and therefore cannot justify any warranty claims. Tattoos can<br />
generally involve all parts of the body, permanent make-up is mainly intended for<br />
areas of skin on the face. The needle penetration depth for permanent make-up<br />
is also less than for tattoos. After using the pigmentation device, the used needle<br />
cartridge must be disposed of in a needle disposal container. The needle cartridge<br />
may only be used for one single treatment. Reconditioning or resterilisation is not<br />
permitted.<br />
Liability<br />
Unauthorised changes to the pigmentation device, its accessories and consumables<br />
exclude the manufacturer from any liability for damage resulting from this.<br />
Incorrect use also applies if the pigmentation device is used differently to as<br />
described in these instructions for use, or if the operating conditions are not<br />
complied with.<br />
PERMANENT-Line GmbH & Co. KG also assumes no liability for damages caused<br />
by improper use and/or incorrect operation.<br />
2
General safety instructions<br />
Qualified personnel<br />
For safety reasons, the <strong>LaBina</strong> ® pigmentation device should only be used by trained<br />
qualified personnel. <strong>One</strong> exception is training when participants are supervised and<br />
instructed by an expert during use.<br />
People (including children) with physical, sensory or mental disabilities are<br />
prohibited from using the pigmentation device, as they may have difficulties in<br />
reacting appropriately when hazards occur.<br />
Safety<br />
Intended use also includes compliance with the safety regulations mentioned in<br />
these instructions for use and the usual accident prevention measures. The <strong>LaBina</strong> ®<br />
pigmentation device can only then be guaranteed to work safely.<br />
These instructions for use must be read carefully and stored in a safe place. They<br />
must be made available to people using, cleaning, storing or transporting the<br />
pigmentation device.<br />
All the instructions in these instructions for use are adapted to the use of needle<br />
cartridges from <strong>LaBina</strong> ® .<br />
• The <strong>LaBina</strong> ® PERFORMANCE handpiece is compatible with many of the competitor<br />
needle cartridges on the market. Please note that the use of incompatible<br />
needle cartridges may result in functional restrictions and increased wear of the<br />
handpiece.<br />
• We recommend that you only use original needle cartridges from <strong>LaBina</strong> ® because<br />
they are adapted to the handpiece.<br />
• When using handpieces from other manufacturers, please note that the needle<br />
length may need to be adjusted differently to as described in these instructions for<br />
use. In this case, please always follow the instructions in the device manufacturer’s<br />
instructions for use.<br />
Also note:<br />
• Consideration should be given to the regulations for pigmenting in the respective<br />
country.<br />
• <strong>LaBina</strong> ® pigmentation devices must not be manipulated or modified.<br />
• The conditions for use, transport and storage must be complied with.<br />
• When using the pigmentation device, care must be taken that the needle<br />
cartridges used are equipped with an internal membrane which reliably ensures<br />
that no pigment ink, lymph or blood can enter the handpiece from the cartridge<br />
and thus be transferred to another customer.<br />
• The handpiece shown in the instructions for use is the <strong>LaBina</strong> ® PERFORMANCE,<br />
which is supplied together with the <strong>LaBina</strong> ® <strong>One</strong> control unit.<br />
<br />
Visionblue<br />
Universal<br />
Tattoo & PMU<br />
Docking System<br />
3
Product icons<br />
Icons in these instructions for use<br />
The icons described below can be found in these instructions for use, on the pigmentation device, AC adapter, needle cartridge and their packaging. The icons<br />
provide information about the correct and safe use of the product.<br />
Icon<br />
Meaning<br />
Icon<br />
Meaning<br />
Reference to the product’s instructions for use<br />
Observe the temperature limit<br />
Contact details for the product manufacturer<br />
Product manufacturing date<br />
Observe the humidity limit<br />
The product meets the requirements of the EMC Directive 2014/30/EU<br />
and the Low Voltage Directive 2014/35/EU<br />
Do not reuse the product<br />
The product meets the requirements of standard<br />
DIN EN 61140 protection class II<br />
Do not resterilise the product<br />
The product may only be used indoors<br />
The product complies with WEEE Directive 2012/19/EU for waste<br />
electrical and electronic equipment<br />
Indicates the polarity of the output connector on the AC adapter<br />
connector cable. The centre (also called tip) is positive (+) and the<br />
cylinder (ring) negative (−)<br />
Voluntary testing of the product / production site according to TÜV<br />
Süd’s test and certification regulations in Germany<br />
The product complies with the requirements of Article 20 of the<br />
Product Safety Act (ProdSG)<br />
Store the product in a dry place<br />
Hazards to people and the environment from biological substances or<br />
organisms<br />
Expiry date / Product can be used until date:<br />
Sterilised with ethylene oxide<br />
No reproducible germs such as microorganisms and viruses<br />
Warning against cuts or needle-prick injuries<br />
Product is unusable if the packaging is damaged<br />
Internationally recognised, voluntary labelling of packaging and<br />
materials used in them for recycling<br />
The housing offers protection against coarse dust and drops of water<br />
Catalogue number, order number<br />
Device meets the requirements of the RoHS 2 Directive<br />
Batch number as reference number for unique identification
Safety instructions and warnings<br />
The safety instructions and warnings draw attention to the risk of personal injury<br />
or damage to property and are structured as follows:<br />
The following icons are used to highlight the instructions in these<br />
instructions for use.<br />
Element<br />
Signal word<br />
Type of danger<br />
Consequences of disregarding<br />
the danger<br />
Averting the danger<br />
Meaning<br />
The signal word is a labelling element that indicates the<br />
extent of the danger. It is intended to alert the reader to<br />
a potential danger.<br />
Identifies the type and source of the danger<br />
Describes the possible consequences of non-compliance<br />
Indicates how to avoid the danger<br />
Icon<br />
Meaning<br />
Meaning of the individual signal words:<br />
Observe safety instructions and their measures. It is always<br />
used where there are risks for the user or the device if the<br />
safety instructions are not observed.<br />
Useful information and recommendation for trouble-free<br />
and efficient use.<br />
Signal words according to DIN EN 82079<br />
Signal word<br />
Meaning<br />
DANGER<br />
Degree of danger<br />
WARNING<br />
CAUTION<br />
DANGER<br />
WARNING<br />
CAUTION<br />
is a signal word for serious hazard categories. It denotes an<br />
imminent hazardous situation. If this is not avoided, it will<br />
lead to death or the severest injuries.<br />
denotes a possibly imminent hazardous situation. If this is<br />
not avoided, it will also lead to death or the severest injuries.<br />
identifies a possible hazardous situation that may lead to<br />
minor or moderate injuries if it is not avoided.<br />
Personal injury<br />
NOTE<br />
Damage to property<br />
NOTE<br />
means less serious hazardous categories. It is used to<br />
draw attention to possible risks that may lead to damage<br />
to the environment, property or equipment. Follow the<br />
instructions to play it safe.<br />
The safety instructions and warnings are indicated by icons in these instructions<br />
for use. The warning icon highlights the safety instruction and specifies the type<br />
of hazard. The safety instructions and warnings must be observed to prevent<br />
personal injury, damage to property and accidents.<br />
5
Transport inspection<br />
Technical details<br />
The pigmentation device is packed in a stable and transport-proof box. After<br />
receiving the goods, check that the delivery is complete and intact<br />
Despite careful checks, the goods may be damaged during transport. If the goods<br />
are damaged or incomplete, please contact the manufacturer or the authorised<br />
dealer immediately.<br />
No warranty can be given for complaints later on.<br />
Pigmentation device scope of supply:<br />
Quantity Article name Item number<br />
1 Control unit 230.135<br />
1 Handpiece 2811926<br />
1 Handpiece holder 2310176<br />
1 Foot pedal 2301403<br />
1 AC adapter HNP 18-150V2<br />
1 Instructions for use GebrAnw.<strong>LaBina</strong>-<strong>One</strong><br />
Control unit<br />
AC adapter HNP 12-120 12 volts DC<br />
Mains connection voltage<br />
Dimensions<br />
Handpiece<br />
Handpiece drive<br />
Precision DC motor<br />
90-264 volts AC<br />
200 x 125 x 80 mm<br />
Operating speed 50-150 Hz 50-150 strokes<br />
per second<br />
Mains connection voltage ???<br />
Needle cartridge connection Diameter: 11 mm<br />
Max. penetration depth<br />
<strong>Mode</strong> of operation<br />
Approx. 2.0 mm<br />
Continuous operation<br />
Dimensions Length | Diameter: L: 135 mm | Ø: 20 mm<br />
Weights<br />
Control unit<br />
600 g<br />
Handpiece Device with cable 120 g<br />
Handpiece holder<br />
110 g<br />
AC adapter Device with cable 115 g<br />
Foot pedal Device with cable 155 g<br />
Instructions for use<br />
Outer packaging<br />
Total weight:<br />
70 g<br />
350 g<br />
1.520 g<br />
We reserve the right to make changes at any time during the manufacture of the<br />
devices to adapt to technical progress.<br />
6
Scope of delivery<br />
Foot pedal<br />
AC adapter<br />
Control unit<br />
Handpiece<br />
Handpiece holder<br />
7
Using the pigmentation device for the first time<br />
Setting up the control unit<br />
Always place the control unit and the handpiece with the handpiece holder on a<br />
secure, firm and level surface.<br />
It must be guaranteed that the pigmentation device can always be operated<br />
during use<br />
.<br />
NOTE: Protect the pigmentation device from being dropped<br />
Damage may occur as a result of the control unit or handpiece<br />
being dropped.<br />
Connecting the AC adapter<br />
Figure:<br />
Back of the control unit<br />
WARNING: Risk of short circuit and electric shock<br />
Due to excessive mains voltage, faulty electrical installation or<br />
improper handling.<br />
Only connect the control unit to a properly installed power socket.<br />
The mains voltage must always match the input mains voltage shown on the AC<br />
adapter type plate!<br />
Only connect the AC adapter to an easy to access power socket so you can<br />
quickly disconnect the power supply in the event of a malfunction.<br />
Do not use any damaged equipment or accessories. Damage to cables or the<br />
equipment significantly increases the risk of electric shock.<br />
Ensure that all plugs and cables are clean and dry. Never connect the pigmentation<br />
device cables using damp hands.<br />
Connecting the foot pedal (optional)<br />
Connect the power supply for the control unit in the following order:<br />
Plug the connector from the AC adapter power cable into the green power<br />
connection socket on the back of the control unit.<br />
Then plug the supplied AC adapter into the power socket (230 V).<br />
CAUTION: Tripping hazard due to cables<br />
People may stumble over loose cables and injure themselves.<br />
Figure:<br />
Back of the control unit<br />
Plug the foot switch connector into the green foot pedal connection socket.<br />
The handpiece is activated (turned on) by pressing the foot pedal. The handpiece<br />
remains activated until the foot pedal is no longer pressed.<br />
The connecting cables from the pigmentation device must be laid so that no one<br />
can trip over them.<br />
8
NOTE: Prevent damage to the pigmentation device<br />
Condensate can damage the device<br />
If the pigmentation device is moved from a very cold environment (e.g. after<br />
transport in winter) into a considerably warmer environment, condensate can form<br />
in the device in the event of large differences in temperature.<br />
The electronics may be damaged or the functional range impaired due to moisture<br />
in the device.<br />
If there are large differences in temperature, wait until the pigmentation device<br />
has reached room temperature (at least 3 hours for every 10°C difference in<br />
temperature).<br />
Ensure that the pigmentation device and its accessories are dry before using<br />
them for the first time.<br />
Ensure that the ambient temperature and relative humidity are maintained in<br />
order to use the pigmentation device as intended.<br />
Pigmentation device Operation Transport / storage<br />
Ambient temperature<br />
Relative humidity<br />
Connecting handpieces to the control unit<br />
Figure:<br />
Back of the control unit<br />
Plug the <strong>LaBina</strong> ® <strong>One</strong> handpiece connector into the green handpiece connection<br />
socket (connection for handpiece 1).<br />
Figure:<br />
Back of the control unit<br />
Handpieces with HiSence connection are plugged into the green<br />
handpiece connection socket (connection for handpiece 2).<br />
1<br />
2<br />
120<br />
Note: The selection option for the handpieces is only shown on the pigmentation<br />
device display if two handpieces are connected at the same time. The number of<br />
the activated handpiece lights up red.<br />
9
Using the pigmentation device for the first time<br />
Turning on the device<br />
Figure:<br />
Back of the control unit<br />
w Start the control unit by pressing the green On / Off key. The front panel lights<br />
up.<br />
w Turn off the control unit by pressing the greenOn / Off key again.<br />
NOTE: Protect the pigmentation device from excessive<br />
voltage Disconnect the control unit and mains adapter from the<br />
power supply, when it is not needed.<br />
Keys<br />
Always start the handpiece with the needle<br />
cartridge inserted to prevent damage to the<br />
handpiece.<br />
Speed keys<br />
Start key<br />
Start the handpiece<br />
Pause key<br />
Handpiece paused<br />
Minus key<br />
Reduce stroke speed<br />
Plus key<br />
Increase stroke speed<br />
120<br />
If the pigmentation device is not required for a long time, it is recommend that you<br />
disconnect the control unit’s mains adapter from the power supply.<br />
Display dimming in standby mode<br />
To extend the display life and comply with the energy saving guidelines, the device<br />
has a screen saver and an automatic<br />
standby function.<br />
The screen saver dims the screen after 10 minutes of no button being pressed<br />
or handpiece being used. The automatic standby function takes effect after 60<br />
minutes of no button being pressed or handpiece being used. To restart the control<br />
unit, press the On / Off key on the back.<br />
Date and time<br />
11:06<br />
04.05.2023<br />
11:06<br />
04.05.2023<br />
<strong>LaBina</strong> ® <strong>One</strong><br />
w Pressing the Start key starts the selected handpiece and needle stroke. The<br />
needle in the needle cartridge moves at the stroke speed shown on the display.<br />
The Start key icon automatically changes to a pause icon.<br />
w Pressing the Pause keystops the handpiece and the needle stops moving in the<br />
needle cartridge. The Pause key icon changes back to the Start icon.<br />
w The desired working speed can be set by pressing the Minus key and Plus key.<br />
10
Additional features for the pigmentation device<br />
Time measurement<br />
Opening the submenu<br />
Pressing the green<br />
Arrow key opens the submenu:<br />
Using the stopwatch<br />
Open the time measurement by<br />
pressing the Stopwatch key.<br />
The following menu items can be found<br />
in the submenu<br />
Timer<br />
Time measurement<br />
Timer / stopwatch<br />
Settings<br />
11:06<br />
04.05.2023<br />
<strong>LaBina</strong> ® <strong>One</strong><br />
The time measurement starts when<br />
the Start key is pressed.<br />
The time from the beginning of the<br />
measurement shown on the time<br />
display.<br />
The time measurement pauses<br />
or ends when the Pause key is<br />
01:24,56<br />
pressed.<br />
Reset the time display to 0 by<br />
pressing the Stopwatch key.<br />
Pressing the Back key closes the<br />
time measurement and takes you<br />
back to the submenu default view.<br />
00:00,00<br />
00:43,17<br />
00:00,00<br />
00:00,00<br />
Closing the submenu<br />
Pressing the Arrow key closes the<br />
submenu.<br />
<strong>LaBina</strong> ® <strong>One</strong><br />
NOTE: Using the stopwatch<br />
The stopwatch can be used to measure treatment times.<br />
11
Timer<br />
Opening the timer menu<br />
Pressing the Alarm key opens the<br />
timer feature.<br />
The default display for the timer is the<br />
last selected timer time.<br />
Setting the timer time<br />
Pressing the Timer key again<br />
changes the display to the timer time<br />
setting feature.<br />
00:30,00<br />
00:30,00<br />
Starting the timer<br />
Pressing the Start key starts the time<br />
display running backwards from the<br />
defined time.<br />
Pausing the timer<br />
Pressing the Pause key pauses the<br />
time display.<br />
Restarting the timer<br />
By pressing the Start key again<br />
the time display continues running<br />
backwards.<br />
01:30,00<br />
01:29,57<br />
01:29,56<br />
Use the Left and Right keys to<br />
select the digit to be changed.<br />
The underscore acts as the cursor<br />
and moves to the selected position<br />
with each tap of the key.<br />
00:30,00<br />
End of the timer<br />
Just before the timer ends, the control<br />
unit issues a beep in the last three<br />
seconds.<br />
Use the Up and Down keys to<br />
change the values at the cursor<br />
position.<br />
Once the timer has expired, the time<br />
display jumps back to the last stored<br />
value.<br />
01:30,00<br />
Press the Confirm key to accept<br />
the set values.<br />
01:30,00<br />
01:30,00<br />
NOTE: Using the timer<br />
The timer can be used to measure the anaesthetic exposure time.<br />
12
Basic settings<br />
Showing basic settings<br />
The following settings are shown<br />
in the submenu by pressing the<br />
Settings key and changes can be<br />
made, if necessary.<br />
Setting audible sounds<br />
Pressing the Loudspeaker key, gives<br />
you the option of turning the device’s<br />
audible sounds on or off.<br />
The currently selected state is indicated<br />
by the Loudspeaker icon.<br />
AM<br />
PM<br />
Setting the date/time<br />
After pressing the Clock key, the<br />
settings menu opens to set the date<br />
and time.<br />
Use the Left and Right keys to select<br />
the digit to be changed, with the<br />
underscore moving to the selected<br />
position as the cursor.<br />
Use the Up and Down keys to<br />
change the values at the cursor<br />
position.<br />
The Back key on the left can be used<br />
to discard the changes made.<br />
The Confirm key is used to apply the<br />
changes, with the seconds being set<br />
to zero.<br />
11:12<br />
04.05.2023<br />
11:13<br />
04.05.2023<br />
11:12<br />
04.05.2023<br />
11:13<br />
AM<br />
PM<br />
AM<br />
PM<br />
Operating time<br />
Press the Info key to show the<br />
operating time for the individual<br />
handpieces.<br />
Under the name: SW-Vers., the<br />
installed software version of the<br />
pigmentation device is shown.<br />
Displaying the time<br />
The manufacturer displays the time<br />
in the default format as a 24-hour<br />
display.<br />
By pressing the green key, the time<br />
and date display can be switched to<br />
the Anglo-American preferred option<br />
of 12-hour display with AM/PM.<br />
AM<br />
PM<br />
AM<br />
PM<br />
1 > 00034:04,58<br />
2 > 00001:14,36<br />
SW-Vers.: 00.10 23.11.2022<br />
24h<br />
AM<br />
PM<br />
04.05.2023<br />
13
Needle combinations<br />
1-long-slim<br />
3-long-slim<br />
1-long-fine<br />
3-long-fine<br />
5-long-fine<br />
5-long-basic<br />
1-long-basic<br />
3-long-basic<br />
1-long-bold<br />
3-long-bold<br />
5-long-bold<br />
3-medium-slim-tx<br />
3-medium-fine-tx<br />
5-medium-basic-tx<br />
1-short-fat-tx<br />
slim<br />
<br />
0,18 mm<br />
# 06<br />
fine<br />
<br />
0,25 mm<br />
# 08<br />
basic<br />
<br />
0,30 mm<br />
# 10<br />
basic<br />
<br />
0,30 mm<br />
# 10<br />
bold<br />
<br />
0,35 mm<br />
# 12<br />
slim<br />
<br />
0,18 mm<br />
# 06<br />
fine<br />
<br />
0,25 mm<br />
# 08<br />
basic<br />
<br />
0,30 mm<br />
# 10<br />
fat<br />
<br />
0,40 mm<br />
# 14<br />
long<br />
long<br />
long<br />
long<br />
long<br />
<br />
<br />
<br />
<br />
<br />
<br />
<br />
<br />
<br />
medium medium medium<br />
short<br />
Round Liner<br />
Long Taper<br />
Bug Pin - Polished<br />
Round Liner<br />
Long Taper<br />
Standard - Polished<br />
Round Shader<br />
Medium Taper<br />
Bug Pin - Textured<br />
Round Liner<br />
Short Taper<br />
Standard - Textured<br />
14
ITEM<br />
Item name<br />
REF<br />
Item number<br />
Gauge<br />
Sizes<br />
diameter<br />
Needle<br />
number<br />
Type<br />
needle type<br />
Taper<br />
pinpoint<br />
Finish<br />
top<br />
Point<br />
pinhead<br />
Grind<br />
needle cut<br />
1-long-slim 06-18-1-RLLT # 06 0,18 mm 1 Round Liner Long Taper Polished Bug Pin 5 mm<br />
3-long-slim 06-18-3-RLLT # 06 0,18 mm 3 Round Liner Long Taper Polished Bug Pin 5 mm<br />
1-long-fine 08-25-1-RLLT # 08 0,25 mm 1 Round Liner Long Taper Polished Bug Pin 5 mm<br />
3-long-fine 08-25-3-RLLT # 08 0,25 mm 3 Round Liner Long Taper Polished Bug Pin 5 mm<br />
5-long-fine 08-25-5-RLLT # 08 0,25 mm 5 Round Liner Long Taper Polished Bug Pin 5 mm<br />
5-long-basic 10-30-5-RLLT # 10 0,30 mm 5 Round Liner Long Taper Polished Bug Pin 5 mm<br />
1-long-basic 10-30-1-RLLT # 10 0,30 mm 1 Round Liner Long Taper Polished Standard 5 mm<br />
3-long-basic 10-30-3-RLLT # 10 0,30 mm 3 Round Liner Long Taper Polished Standard 5 mm<br />
1-long-bold 12-35-1-RLLT # 12 0,35 mm 1 Round Liner Long Taper Polished Standard 5 mm<br />
3-long-bold 12-35-3-RLLT # 12 0,35 mm 3 Round Liner Long Taper Polished Standard 5 mm<br />
5-long-bold 12-35-5-RLLT # 12 0,35 mm 5 Round Liner Long Taper Polished Standard 5 mm<br />
3-medium-slim-tx 06-18-3-RSMT # 06 0,18 mm 3 Round Shader Medium Taper Textured Bug Pin 2,5 mm<br />
3-medium-fine-tx 08-25-3-RSMT # 08 0,25 mm 3 Round Shader Medium Taper Textured Bug Pin 2,5 mm<br />
5-medium-basic-tx 10-30-5-RSMT # 10 0,30 mm 5 Round Shader Medium Taper Textured Bug Pin 2,5 mm<br />
1-short-fat-tx 14-40-1-RLST # 14 0,40 mm 1 Round Liner Short Taper Textured Standard 2 mm<br />
Needle size <br />
The specified needle size refers to the point at<br />
which it begins to taper.<br />
Type of taper and length<br />
The information relates to the length of the pointed<br />
part of the needle and to how steep the angle in<br />
the taper is. The taper shape determines the size<br />
of the skin opening and thus how much pigment<br />
ink can be applied under the skin in one go.<br />
A long taper carries less pigment than a short<br />
taper. Although a long-cut taper carries fewer<br />
pigments, it causes fewer injuries to the skin, but<br />
may feel sharp. The extremely thin tip creates a<br />
smaller hole in the skin.<br />
A short taper can carry more pigment ink than a<br />
medium or long taper. Although a short-cut needle<br />
dispenses more pigments, the needle may cause<br />
more damage to the skin, as the needle leaves a<br />
larger hole in the skin.<br />
Long Taper - Bug Pin<br />
Optimised for fine, precise pigmentation<br />
Long Taper - Standard - Polished<br />
Optimised for fine lines and shading<br />
Medium Taper - Bug Pin - Textured<br />
Optimised for large filling areas and shading<br />
Short Taper - Standard - Textured<br />
Optimiert für breitere Pigmentierungen<br />
15
Operating information<br />
Removing the needle cartridge from the packaging<br />
Needle cartridges are packaged individually in sterile blister packs.<br />
Do not open the needle cartridge blister pack until just before the treatment is to<br />
be carried out.<br />
Hands must be sterilised and unused disposable gloves must be worn to remove<br />
the needle cartridge.<br />
Needle cartridges out of damaged or already opened blister packs may no longer<br />
be used because it can no longer be guaranteed that the needle cartridge is<br />
sterile.<br />
Inserting the needle cartridge into the handpiece<br />
NOTE: Preventing damage to the handpiece<br />
Ensure that the pigmentation device is turned off before inserting a<br />
needle cartridge into the handpiece.<br />
Applying slight pressure, insert the dark green needle cartridge into the handpiece<br />
opening as far as it will go. The cartridge is now securely in place in the handpiece.<br />
Checking the needle cartridge before use<br />
After inserting the needle cartridge and before beginning each treatment, check<br />
that the cartridge is securely fixed in the handpiece.<br />
Putting down the handpiece<br />
DANGER: Transfer of dirt and germs<br />
Always only place the handpiece with inserted needle cartridge on<br />
the handpiece holder provided for this purpose.<br />
Make sure that the needle cartridge and handpiece do not come into contact<br />
with anything that it is not intended for. This will prevent the needle cartridge<br />
from becoming contaminated and prevent people and objects from coming into<br />
contact with any blood and lymphatic fluid possibly stuck on the cartridge or<br />
handpiece.<br />
Turn the needle cartridge a quarter of the way clockwise until you feel resistance.<br />
16
Using the needle cartridge<br />
Warning: Needle-prick injuries<br />
There is a risk of a puncture injury.<br />
CAUTION: Skin traumatisation<br />
Skin traumatisation due to excessive working speed.<br />
Do not touch the cartridge’s taper when the handpiece is off or on.<br />
Hold the handpiece firmly in your hands before turning it on. When you start the<br />
motor in the handpiece, there may be some jerky movements in the handpiece<br />
for a short time, these may result in people injuring themselves. There is also the<br />
risk that the handpiece may be damaged by being dropped.<br />
Setting the needle length<br />
Set the handpiece’s stroke speed to average on the control unit and then press<br />
the On button on the pigmentation device. Observe how far the needle comes<br />
out of the needle nozzle.<br />
Unscrew the cap which the needle cartridge was inserted into until the needle<br />
sticks out as far as to suit your requirements.<br />
+<br />
+<br />
w If the working speed is too high, the risk of additional skin injuries increases.<br />
When choosing the working speed, consider the condition of the customer’s<br />
skin and the thickness of the skin in the area to be treated.<br />
Filling the pigment ink into the needle cartridge<br />
The pigment ink can either be filled through the filling opening in the needle cartridge<br />
or drawn up through the taper.<br />
CAUTION: Taper damage<br />
Product damage due to impact with hard surfaces.<br />
If you are using an ink pot, the taper may be damaged when sucking up the ink.<br />
When inserting the needle into the ink, make sure that the taper does not touch<br />
the edge or bottom of the ink pot.<br />
Needles that have come into contact with the ink pot must not be used. If the<br />
taper is damaged, the customer’s skin is injured more and it is to be expected<br />
that the best treatment result cannot be achieved using a damaged taper.<br />
+<br />
–<br />
–<br />
17
Operating information<br />
Removing the needle cartridge from the handpiece<br />
NOTE: Preventing damage to the handpiece<br />
Ensure that the pigmentation device is turned off<br />
before removing a needle cartridge from the handpiece.<br />
DANGER: Transmission of diseases<br />
No more treatments using a previously used<br />
needle cartridge.<br />
Check whether the pigmentation device is turned off before removing a needle<br />
cartridge from the handpiece.<br />
To remove the needle cartridge from the handpiece, turn the cartridge a quarter<br />
of the way clockwise until it can be removed from the handpiece.<br />
The use of contaminated needles can lead to the transmission of diseases. <strong>LaBina</strong> ®<br />
needle cartridges are intended for single use.<br />
Disposing of the needle cartridge<br />
DANGER: Transmission of diseases<br />
If a previously used needle causes a puncture injury, diseases can<br />
be transmitted between people.<br />
w After removing the needle cartridge, check whether the needle has been fully<br />
retracted into the plastic shaft of the needle cartridge.<br />
Used needle cartridges which are<br />
no longer required for the current<br />
treatment must be disposed of<br />
immediately after being removed<br />
from the handpiece.<br />
A suitable container must be<br />
used for storage and subsequent<br />
disposal in accordance with the<br />
applicable regulations. Make sure<br />
no one can injure themselves on<br />
the needles<br />
18
Cleaning<br />
NOTE: Risk of short circuit<br />
Always disconnect the device from the power supply before cleaning.<br />
If the device is not disconnected from the power supply during cleaning, there is a<br />
risk of electronic damage to the device.<br />
If liquids such as cleaning or disinfecting products get inside the handpiece, control<br />
unit or AC adapter during cleaning, a short circuit or functional impairments may<br />
occur due to premature wear as a result of corrosion of the mechanical components.<br />
Ensure that no liquids get into the control unit, handpiece and AC adapter.<br />
Never immerse the control unit, handpiece or AC adapter in cleaning or<br />
disinfecting products.<br />
NOTE: Damage to the device due to liquids<br />
Damage caused by unsuitable cleaning and disinfecting products<br />
and improper use.<br />
Cleaning surfaces<br />
Dust and fingerprints can be removed from the display using a<br />
lint-free microfibre cloth. Clean the display using slow, circular movements without<br />
applying much pressure to the display.<br />
Disinfecting surfaces<br />
Disinfect all contaminated surfaces before and after each use. Use a soft, lint-free<br />
cloth that leaves no traces of any fibres.<br />
Disinfect the control unit, handpiece and handpiece holder using a mild disinfectant<br />
with no aldehyde, which is suitable for disinfecting sensitive surfaces.<br />
We recommend using Bacillol ® 30 or the Bacillol ® 30 quick surface disinfecting<br />
wipes.<br />
It is possible to use other disinfectants (observe the user instructions and ask the<br />
supplier if necessary).<br />
If unsuitable cleaning and disinfecting products are used (product not compatible<br />
with the surfaces to be cleaned) and if these products are used incorrectly, the<br />
surfaces may be damaged.<br />
Never clean the control unit, handpiece or AC adapter in an autoclave or ultrasonic<br />
bath.<br />
Use a mild detergent for sensitive surfaces for cleaning.<br />
Only use cleaning or disinfecting products that are approved for the materials to<br />
be cleaned according to your country’s regulations.<br />
19
General safety instructions<br />
General customer hygiene<br />
• The area to be pigmented must be cleansed of make-up and then disinfected or<br />
treated with an antiseptic. The disinfectant exposure time should be taken into<br />
account. Sterile swabs should be used.<br />
• The skin should be cleansed during and after treatment using sterile water or<br />
sterile solutions. When choosing suitable disinfectants, observe the applicable<br />
guidelines in the respective country.<br />
• If there are injuries to the skin or mucosa, the wound must be treated with an<br />
antiseptic.<br />
• The customer is given a protective cap and is covered with towels or disposable<br />
towels. A towel is placed under the head.<br />
• Wear disposable gloves for all applications.<br />
Hygienic requirements at the workplace<br />
• Treatment rooms should have wall surfaces and floors with impervious sealed<br />
joints that are easy to clean and disinfect.<br />
• Cables should be covered by plaster and routed in exterior ducts that are easy to<br />
clean. Cavities must be sealed.<br />
• All installations must be designed so that disinfection measures can be carried<br />
out simply and effectively.<br />
• Ventilation and air-conditioning systems should comply with the recognised rules<br />
of sound engineering practice and be maintained according to the manufacturer’s<br />
instructions and applicable regulations in the respective country.<br />
• All surfaces in the treatment room such as the treatment couch, shelves, floors<br />
and walls should be easy to clean and free of dust or impurities.<br />
• Smoking, eating and drinking should be avoided in treatment rooms.<br />
• The only utensils that should be found at the workplace are those required for<br />
pigmenting.<br />
• A washbasin in the treatment room is part of the basic equipment. However, in<br />
order to avoid contamination of the workplace with spray, this hand washing area<br />
should be at least one metre from the beauty therapist’s seat or a splash guard<br />
should be provided.<br />
• Liquid soap, hand disinfectants belong in dispensers and disposable towels are<br />
used. Avoid hand soaps due to an increased risk of germs.<br />
• Disposable sheets must be used for the treatment couch and instrument tray, and<br />
disposed of immediately after treatment.<br />
• Collect towels in a sealed container and then wash them separately at 90 degrees<br />
Celsius.<br />
• Wear disposable gloves while pigmenting.<br />
• Needle cartridges should not come into contact with contaminated objects,<br />
such as clothing. Contaminated needle cartridges must not be used but must be<br />
disposed of immediately. The respective country’s regulations must be observed.<br />
Other hygiene and safety regulations<br />
Professional pigmentation specialists are obliged to observe the hygiene regulations<br />
according to the state of the scientific and technical knowledge at the time Different<br />
laws and regulations apply in the individual countries. The aim is to prevent the<br />
transmission of pathogens and reduce the risk of injury.<br />
20
Informing the customer before starting treatment<br />
The customer should be fully informed about the possible risks of pigmentation<br />
before treatment. We recommend documenting the treatment together with details<br />
of the inks used and the needle cartridge and pigment ink batch numbers.<br />
Customer’s state of health:<br />
In principle, the customer should feel well and healthy before any treatment.<br />
However, there are medical conditions that mean that treatment should not be<br />
performed or at least should be postponed.<br />
Health impairments that rule out treatment:<br />
Pigmentation should not be performed if the following contraindications are present:<br />
Infectious diseases, a severe cold, fever, conjunctivitis, facial shingles, neuritis,<br />
pregnancy and lactation, infections caused by bacteria, viruses and fungi, blood<br />
coagulation disorders, skin diseases in the area to be treated (for example, eczema,<br />
keloids, pigment spots), various skin changes, for example: warts, moles and<br />
unstable scars in the area to be pigmented. Furthermore, pigmentation should<br />
not be performed on persons with acute cardiovascular problems or epilepsy.<br />
In principle, it is no problem to perform a treatment in case of HIV or hepatitis,<br />
however, the customer is asked to inform the practitioner before the treatment.<br />
Alcohol and drugs must not be consumed before and during the treatment.<br />
Performing a treatment only after consulting doctors:<br />
In the case of the following illnesses and taking certain medications, a doctor<br />
should be consulted before the planned treatment:<br />
• Cancer or chemotherapy or radiation in the past twelve months<br />
• Taking blood thinners (e.g. Marcumar, Eliquis, Aspirin), beta blockers, or antibiotics<br />
• Autoimmune diseases (except alopecia)<br />
• Cardiovascular diseases or diabetes (requiring insulin)<br />
In these cases, it is necessary to consult a doctor and seek their approval of the<br />
treatment.<br />
Refusing treatment<br />
If the professional pigmentation specialist has even the slightest doubt that the<br />
safety of the customer to be treated cannot be ensured due to comorbidities or the<br />
current state of health, the treatment must not be performed, or it must be stopped<br />
immediately.<br />
Discontinuing treatment<br />
The pigmentation should be stopped immediately in the event of:<br />
• Excessive pain<br />
• Severe wound secretion<br />
• Circulatory problems, dizziness and fainting<br />
21
Information to be passed onto the customer<br />
Planning the treatment<br />
We recommend that you inform the customer of the following points even before<br />
treatment:<br />
• <strong>LaBina</strong> ® needle cartridges are made of stainless steel, which contains a small<br />
amount of nickel. <strong>LaBina</strong> ® is not aware of any case so far where pigmenting using<br />
these needles has caused allergic reactions. However, it cannot guarantee this<br />
as no studies have been carried out. Therefore, people with a nickel allergy are<br />
advised to talk to their doctor or, in case of doubt, refrain from treatment.<br />
• After treatment, the treated area should not be touched and should be protected<br />
from contamination and sunlight. Visits to swimming pools and saunas, hair<br />
removal or chemical and abrasive peels should also be avoided. Self-tanning<br />
products may only be applied after a few days. We recommend waiting a few<br />
days before applying creams, lotions and oils.<br />
• Swelling or redness is to be expected in the treated areas for two to three days. If<br />
this lasts longer, a doctor should be consulted.<br />
• If the customer is prone to herpes infections, a doctor should be consulted to<br />
clarify whether a prophylaxis two to three days before the treatment is appropriate.<br />
• The customer should avoid household tasks such as cleaning garages and cellars,<br />
where contamination with dirt and germs is possible.<br />
• With all treatments the fresh drawing looks roughly one shade more intense than<br />
agreed on together before the treatment. This lasts for 3 to 5 days due to the<br />
scab. The reason for this is that in the first few days after the beauty treatment<br />
excess ink remains in the dry, absorbent top layer of the skin. But it gradually<br />
drops off. The inks only shimmer subtly through the skin once a new top layer<br />
has formed over the embedded pigments after about a week when the maximum<br />
natural colour effect then develops.<br />
• In Germany, the following applies: If medical costs arise as a result of the<br />
treatment, these are to be met by the customer themselves. If a permanent<br />
make-up treatment results in medical treatment, the statutory health insurance<br />
companies may require their members to contribute to the costs on the basis<br />
of Article 52 II SGB V (German Social Insurance Code). This states: “If insured<br />
persons have contracted a disease through a medically unnecessary aesthetic<br />
operation, tattoo or piercing, the health insurance company shall contribute an<br />
appropriate amount to the costs and shall refuse or recover the sickness benefit<br />
in whole or in part for the duration of this treatment.”<br />
22
Side effects of a permanent make-up treatment<br />
Possible reactions after treatment<br />
After a permanent make-up treatment, temporary unpleasant side effects may occur in the first few hours or days. It makes sense to choose a time for treatment when shortterm<br />
limitations will be least disruptive to the normal daily routine.<br />
Common reactions:<br />
• Swelling and redness: In contrast to the insensitive brow area, eyelids and lips<br />
are sometimes slightly swollen and slightly red after treatment. People with a<br />
sluggish lymphatic flow tend to react to the pigmentation with slight swelling, but<br />
this disappears on its own after a few hours. After treatment in the eye and mouth<br />
areas, we recommend the customer cools the pigmented area slightly several<br />
times and moves around as much as possible. This stimulates the natural lymph<br />
flow.<br />
• Minor bleeding: Localised bleeding may occur in the area of the tattooed/<br />
pigmented skin.<br />
• Mild pain: The customer may experience mild pain on the first day after the<br />
pigmentation.<br />
• Temporary inflammatory reactions: Erythema and/or oedemas may occur for up<br />
to six days. Skin irritations usually disappear within two days.<br />
• Skin scab and peeling: These reactions may last for up to a week.<br />
Rare reactions:<br />
• Formation of herpes simplex virus blisters: Customers who have had lip blisters<br />
(herpes simplex) one or more times during their lifetime may get herpes a few<br />
days after permanent make-up treatment on the lips and/or around the mouth.<br />
The herpes viruses responsible for the blisters lie dormant in the customer’s body.<br />
Once they have been triggered by the treatment, it takes about three days before<br />
the typical symptoms appear. The occurrence of lip herpes may be reduced by<br />
taking preventive tablets before treatment.<br />
• Allergic or allergic-like reactions: These may occur in rare cases, sometimes<br />
proving to be severe (granulomas, permanent skin changes, pigment disorders,<br />
dryness, sensitivity, peeling, swelling, etc.). Skin irritation (redness, reaction to<br />
the products used, conjunctivitis, injury to the top layer of skin) is also possible.<br />
• Hyperpigmentation: Hyperpigmentation may occur due to the body’s own<br />
pigments, particularly with darker skin types.<br />
• Heating the pigmented area using PET and MRI irradiation, if the customer has<br />
been pigmented with a pigment ink that contains iron oxide beforehand.<br />
23
Conduct in the event of an emergency due to needle-prick injury<br />
Providers of permanent make-up, like tattoo artists in Germany, are obliged to<br />
train themselves in first aid measures for injuries that may typically occur in their<br />
respective specialist area.<br />
We recommend that you keep proof of your training handy, as well as a first aid kit<br />
that is regularly checked to ensure it is complete and everything works. Both must<br />
be presented in the event of a check.<br />
Warning: Needle-prick injury<br />
There is a risk of infection.<br />
Risk number 1 in pigmenting or tattooing is an unintentional needle-prick injury for<br />
the beauty therapist or tattooist and the customer, which poses a risk of infection<br />
with hepatitis B, C and HIV.<br />
Risk number 2 is spatter (blood and other body fluids) on mucous membranes such<br />
as the mouth, nose or eyes.<br />
In both cases, immediate action should be taken and a doctor should be consulted<br />
after first aid is administered.<br />
The following emergency procedures are well established:<br />
1. Stop pigmenting or tattooing immediately.<br />
2. Change your gloves.<br />
3. If the skin is intact, wash the area of the needle-prick injury under running hot<br />
water using mild liquid soap and treat with antiseptics for skin that are effective<br />
in combating viruses.<br />
4. If the skin is damaged, gently rinse the area of the needle-prick injury using an<br />
antiseptic for skin that is effective in combating viruses.<br />
5. In the case of puncture wounds, stimulate the bleeding by pressing on the<br />
tissue around the needle-prick injury, then rinse with an antiseptic for skin that<br />
is effective in combating viruses for at least ten minutes.<br />
6. Do not use brushes to treat the skin.<br />
7. If eyes or nose are affected by the needle-prick injury, rinse with 2.5% PVP<br />
iodine solution for at least ten minutes, if this is not available, use water (be<br />
aware of iodine intolerances).<br />
8. If the needle is contaminated with oral mucosa, rinse with 2.5% PVP iodine<br />
solution or with water (be aware of iodine intolerances).<br />
9. Apply a plaster to any cuts or puncture sites that have been caused.<br />
10. If there is contamination of intact skin over a large area, the clothing must be<br />
removed and everything must be washed with plenty of water. It is important<br />
that a doctor is contacted as soon as possible after the incident (emergency<br />
ambulance). Prophylactic treatment should be given within one hour and no<br />
later than 72 hours after the incident. The incident must be documented by<br />
everyone involved. The company owner must also be informed of the incident<br />
in a timely manner.<br />
24
Warranty ∙ Complaints ∙ Repairs<br />
Environmental protection and recycling<br />
As the manufacturer, PERMANENT-Line GmbH & Co. KG, Mengeringhäuser Str.<br />
15, 34454 Bad Arolsen, Germany provides a warranty of 24 months for the whole<br />
device. Warranty claims only exist for defects and malfunctions due to material<br />
defects and processing defects.<br />
Please note the following:<br />
Any interference by unqualified or unauthorised persons or improper use leads to<br />
the loss of warranty.<br />
Excluded from warranty:<br />
• Visible damage, such as scratches or discolouration, e.g. due to incorrect cleaning.<br />
• Damage caused by the device being dropped and vandalism.<br />
• Improper handling, e.g. broken cable due to bending.<br />
• Damage and consequential damage resulting from improper use or nonobservance<br />
of the instructions for use.<br />
• Damage caused by liquids or dirt getting inside the handpiece, control unit or AC<br />
adapter.<br />
Procedure in case of a pending repair or inspection<br />
Please inform the dealer who you purchased the pigmentation device from by<br />
telephone or email if you have the impression that the pigmentation device is not<br />
working properly. Repairs may only be carried out by the manufacturer.<br />
If the problem cannot be solved after consultation with your distributor, please<br />
send the pigmentation device directly to the manufacturer.<br />
After the manufacturer has received the defective device, they will be happy to<br />
send you an equivalent device as a free loan for the duration of the inspection /<br />
repairs. This service is free of charge and non-binding.<br />
If any repair costs are incurred, you will be sent a quote by the manufacturer that<br />
you must accept and approve, before the repairs can be carried out. Repairs can<br />
take up to 6 weeks.<br />
NOTE: Recycling packaging<br />
Products that display this icon can be reused.<br />
The product is packed carefully and ecologically-friendly for transport. Recycle<br />
reusable packaging to help protect the environment.<br />
NOTE: Recycling waste equipment<br />
Products that display this icon may not be treated as normal household<br />
waste.<br />
In accordance with the applicable regulations for waste electrical and electronic<br />
equipment (recycling of valuable recyclable materials) and for the protection of the<br />
environment or the health of people, these must be delivered to an acceptance<br />
point for the recycling of electrical and electronic equipment or sent back to the<br />
manufacturer or distributor of this device, who will dispose of it properly and<br />
professionally.<br />
25
EC declaration of conformity<br />
EG-Konformitätserklärung mit gefordertem Inhalt gemäß ISO/IEC 17050-1<br />
EC Declaration of Conformity with required content in accordance with ISO/IEC 17050-1<br />
Der Hersteller<br />
The manufacturer:<br />
PERMANENT-Line GmbH & Co. KG<br />
Mengeringhäuser Str. 15<br />
34454 Bad Arolsen Deutschland<br />
erklärt hiermit, dass das folgendes Produkt:<br />
declares that the following product:<br />
Produktbezeichnung:<br />
Product designation: Permanent Make-up Gerät<br />
Produktname:<br />
Product name: <strong>LaBina</strong> <strong>One</strong><br />
<strong>Mode</strong>llbezeichnung:<br />
<strong>Mode</strong>l designation: 230.135<br />
Artikelnummer:<br />
Item number: 2452826<br />
den grundlegenden Anforderungen entspricht, die in den nachfolgend<br />
bezeichneten Harmonisierungsrechtsvorschriften festgelegt sind:<br />
complies with the essential requirements of the following harmonization Iegislation:<br />
Folgende harmonisierte Normen wurden angewandt:<br />
The following harmonised standards were applied:<br />
EN 60335-1:2012<br />
+ AC:2014<br />
+ A11:2014<br />
+ A13:2017<br />
+ A1:2019<br />
+ A2:2019<br />
+ A14:2019<br />
EN IEC 61000-6-3:2021<br />
EN IEC 61000-6-1:2019<br />
Sicherheit elektrischer Geräte für den<br />
Hausgebrauch und ähnliche Zwecke<br />
Teil 1: Allgemeine Anforderungen<br />
Elektromagnetische Verträglichkeit (EMV)<br />
Teil 6-3: Fachgrundnormen - Störaussendung<br />
von Geräten in Wohnbereichen<br />
Elektromagnetische Verträglichkeit (EMV)<br />
Teil 6-1: Fachgrundnormen - Störfestigkeit für<br />
Wohnbereich, Geschäfts- und Gewerbebereiche<br />
sowie Kleinbetriebe<br />
2014/30/EU<br />
2014/35/EU<br />
2011/65/EU<br />
2006/42/EG<br />
EMV-Richtlinie<br />
Niederspannungsrichtlinie<br />
RoHS-Richtlinie<br />
Maschinenrichtlinie<br />
Diese Erklärung wird im Namen des Herstellers abgegeben von:<br />
Marcus Schneider<br />
Position: Unterschriftsberechtigter Geschäftsführer<br />
Datum: Bad Arolsen, den 01.06.2023<br />
26
Online instructions for use<br />
27
<strong>LaBina</strong> ® ist eine Handelsmarke von:<br />
PERMANENT-Line GmbH & Co. KG<br />
Mengeringhäuser Straße 15<br />
34454 Bad Arolsen, Germany<br />
+49 5691 89530<br />
Info@<strong>LaBina</strong>24.de<br />
www.PermanentLine.de<br />
<strong>LaBina</strong>24de<br />
<strong>LaBina</strong>24_de<br />
www.<strong>LaBina</strong>24.de
![[VI] Danh mục sản phẩm - Mt.Derm Hợp đồng cho mượn các thiết bị phun xăm LaBina Và Kim đạn](https://img.yumpu.com/68637279/1/190x135/vi-danh-muc-san-pham-mtderm-hop-ong-cho-muon-cac-thiet-bi-phun-xam-labina-va-kim-an.jpg?quality=85)
![[TR] Ürün kataloğu - Mt.Derm LaBina pigmentasyon cihazları için kira sözleşmeleri ve İğne modülleri](https://img.yumpu.com/68637273/1/190x135/tr-urun-katalogu-mtderm-labina-pigmentasyon-cihazlar-icin-kira-sozlesmeleri-ve-igne-modulleri.jpg?quality=85)
![[RU] каталог продукции - Mt.Derm машинки татуажа и Модули игл](https://img.yumpu.com/68637266/1/190x135/ru-mtderm-.jpg?quality=85)
![[PT] Catálogo de produtos - Mt.Derm Dispositivos de pigmentação e Módulos de agulha](https://img.yumpu.com/68637260/1/190x135/pt-catalogo-de-produtos-mtderm-dispositivos-de-pigmentacao-e-modulos-de-agulha.jpg?quality=85)
![[PL] Katalog produktów - Mt.Derm urządzeń do pigmentacji oraz Moduły igłowe firmy](https://img.yumpu.com/68637257/1/190x135/pl-katalog-produktow-mtderm-urzadzen-do-pigmentacji-oraz-moduly-iglowe-firmy.jpg?quality=85)
![[NL] Productcatalogus - Mt.Derm Pigmenteerapparaten en Naaldmodule](https://img.yumpu.com/68637250/1/190x135/nl-productcatalogus-mtderm-pigmenteerapparaten-en-naaldmodule.jpg?quality=85)
![[IT] Catalogo prodotti - Mt.Derm comodato per dermografi e Moduli ago](https://img.yumpu.com/68637246/1/190x135/it-catalogo-prodotti-mtderm-comodato-per-dermografi-e-moduli-ago.jpg?quality=85)
![[FR] Catalogue de produits - Mt.Derm Appareils de pigmentation et Module d’aiguille](https://img.yumpu.com/68637234/1/190x135/fr-catalogue-de-produits-mtderm-appareils-de-pigmentation-et-module-daiguille.jpg?quality=85)
![[ES] Catálogo de productos - Mt.Derm Aparatos de pigmentación y Módulos de aguja](https://img.yumpu.com/68637125/1/190x135/es-catalogo-de-productos-mtderm-aparatos-de-pigmentacion-y-modulos-de-aguja.jpg?quality=85)
![[EN] Product catalogue - Mt.Derm pigmentation device and Needle cartridges](https://img.yumpu.com/68637090/1/190x135/en-product-catalogue-mtderm-pigmentation-device-and-needle-cartridges.jpg?quality=85)
![[DE] Produktkatalog - Mt.Derm Pigmentiergeräte und Nadelmodule](https://img.yumpu.com/68637081/1/190x135/de-produktkatalog-mtderm-pigmentiergerate-und-nadelmodule.jpg?quality=85)