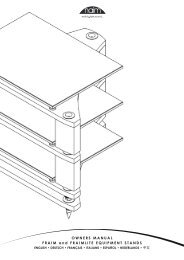
Owners Manual - 2004 - Naim Audio
Owners Manual - 2004 - Naim Audio
Owners Manual - 2004 - Naim Audio

You also want an ePaper? Increase the reach of your titles
YUMPU automatically turns print PDFs into web optimized ePapers that Google loves.
W O R L D C L A S S H I F I<br />
O W N E R S M A N U A L<br />
Speakers: SL2, allæ, Ariva, axent, axess, n-SATS, n-CENT, n-SUB.
IMPORTANT<br />
In order to comply with current European safety regulations<br />
it is essential that the <strong>Naim</strong> loudspeaker connectors supplied<br />
with amplifiers and loudspeakers are used.<br />
Do not under any circumstances allow anyone to modify your<br />
<strong>Naim</strong> equipment without first checking with the factory, your<br />
dealer, or your distributor. Unauthorised modifications will<br />
invalidate your guarantee.<br />
For your own safety do not under any circumstances open<br />
<strong>Naim</strong> equipment without first disconnecting it from the mains.<br />
Warning: an apparatus with CLASS I construction shall be<br />
connected to a mains socket outlet with a protective earthing<br />
connection.<br />
Where the mains plug or an appliance coupler is used as the<br />
disconnect device, the disconnect device shall remain readily<br />
operable. To disconnect the equipment from the mains remove<br />
the mains plug from the mains outlet.<br />
The following label is attached to all mains powered<br />
equipment:<br />
NOTE<br />
WA R N I N G<br />
THIS APPARATUS<br />
MUST BE EARTHED<br />
This equipment has been tested and found to comply with the<br />
relevant EMC and Safety Standards, and, where applicable,<br />
also complies with the limits for a class B digital device,<br />
pursuant to Part 15 of the FCC Rules.<br />
These limits are designed to provide reasonable protection<br />
against harmful interference in a residential installation.<br />
This equipment generates, uses and can radiate radio<br />
frequency and, if not installed and used in accordance<br />
with the instructions, may cause harmful interference to<br />
radio communications. However, there is no guarantee that<br />
interference will not occur in a particular installation. If<br />
this equipment does cause harmful interference to radio or<br />
television reception, which can be determined by turning<br />
off and on, the user is encouraged to try to correct the<br />
interference by one or more of the following measures:<br />
• Reorient or relocate the receiving antenna.<br />
• Increase the separation between the equipment and the<br />
receiver.<br />
• Connect the equipment into an outlet on a circuit different<br />
from that to which the receiver is connected.<br />
• Consult your <strong>Naim</strong> dealer or an experienced radio/TV<br />
technician for help.<br />
Contents<br />
Page Section<br />
1 1 Equipment Installation<br />
2 Connections<br />
3 Mains Power Connection<br />
2 4 General Installation<br />
3 5 SL2<br />
6 6 allæ<br />
8 7 Ariva<br />
10 8 axent and axess<br />
12 9 n-SATS<br />
14 10 n-CENT<br />
15 11 n-SUB<br />
19 12 Declaration of Conformity
Introduction<br />
<strong>Naim</strong> <strong>Audio</strong> products are conceived with performance as the top priority.<br />
Careful installation will help ensure that their full potential is achieved.<br />
This manual covers the SL2, allæ, Ariva, axent, axess, n-SATS and n-CENT<br />
loudspeakers and the n-SUB active sub-woofer. It begins with general<br />
installation notes and statutory safety warnings for all <strong>Naim</strong> <strong>Audio</strong><br />
products. Product specific information begins in Section 5.<br />
1 Equipment Installation<br />
Normally your <strong>Naim</strong> <strong>Audio</strong> equipment will have been installed by the dealer who sold<br />
it to you - even if you live outside their immediate vicinity. In any event however<br />
your dealer is responsible for making sure that the system performs as it should.<br />
Information given here is not intended to reduce this responsibility in any way.<br />
2 Connections<br />
It is important for both safety and performance that<br />
the standard cables supplied are not modified.<br />
2.1 Interconnect Cables<br />
If options are available with your equipment and installation,<br />
DIN interconnect sockets should be used in preference to RCA<br />
Phono sockets. One end of each <strong>Naim</strong> interconnect cable is<br />
marked with a band to establish its correct orientation. The band<br />
denotes the end that connects to the signal source.<br />
Interconnect plugs and sockets should be kept clean and free<br />
from corrosion. The easiest way to clean them is to switch off<br />
the equipment, pull the plugs out of their sockets, and push<br />
them back in again. Contact cleaners and “enhancers” should<br />
not be used as the film they tend to deposit may degrade the<br />
sound.<br />
2.2 Loudspeaker Cables<br />
Loudspeaker cables are vitally important and your dealer should<br />
make them up to suit your installation. The cables should<br />
each be at least 3.5 metres long and of equal length. The<br />
recommended maximum is normally 20 metres although longer<br />
cables may be viable with some <strong>Naim</strong> amplifiers. Contact your<br />
dealer or <strong>Naim</strong> <strong>Audio</strong> for advice.<br />
Many <strong>Naim</strong> amplifiers are designed only to work with <strong>Naim</strong><br />
loudspeaker cable and using alternatives may degrade the<br />
performance or even damage the amplifier. <strong>Naim</strong> loudspeaker<br />
cable is directional and should be oriented so that the printed<br />
arrow points towards the speakers. The amplifier/loudspeaker<br />
connectors supplied are designed to make a robust electromechanical<br />
connection and to comply with European safety<br />
regulations. They should be used in preference to alternatives.<br />
3 Mains Power Connection<br />
Where fused plugs are used 13 amp fuses should be<br />
fitted. Fuses of a lower rating will fail after a period<br />
of use. Do not wire voltage dependent resistors or<br />
noise suppressors into mains plugs. They degrade the<br />
mains supply and the sound.<br />
3.1 Mains Plug Wiring<br />
In some territories a mains plug may need to be<br />
fitted to the supplied mains lead. As the colours of<br />
the wires in the mains lead may not correspond with<br />
the coloured markings identifying the terminals in the<br />
plug proceed as follows:<br />
The wire which is coloured GREEN-AND-YELLOW must be<br />
connected to the terminal in the plug which is marked by the<br />
letter E or by the safety earth symbol or coloured GREEN or<br />
GREEN and YELLOW.<br />
The wire which is coloured BLUE must be connected to the<br />
terminal in the plug which is marked with the letter N or<br />
coloured BLACK.<br />
The wire which is coloured BROWN must be connected to the<br />
terminal in the plug which is marked with the letter L or coloured<br />
RED.<br />
3.2 Non-rewirable Mains Plugs<br />
If a non-rewirable plug is cut from a mains lead (for whatever<br />
purpose) the plug MUST be disposed of in a way to render it<br />
totally useless. Considerable shock hazard exists if the cut-off<br />
plug is inserted into a mains outlet.<br />
3.3 Mains Circuits and Cables<br />
A hi-fi system usually shares a mains circuit with other<br />
household equipment some of which can cause distortion of the<br />
mains waveform. This distortion can in turn lead to a mechanical<br />
hum from power amplifier and power supply transformers.<br />
<strong>Naim</strong> transformers are large in size with heavy gauge windings,<br />
making them relatively sensitive to such distortion, and it may<br />
be necessary to take account of transformer hum when siting<br />
your equipment.<br />
Transformer hum is not transmitted through the speakers and<br />
has no effect on the performance of the system; however, a<br />
separate mains circuit may reduce it. Such a circuit (ideally with<br />
a 30 or 45 Amp rating) will also improve system performance.<br />
Advice on the installation of a separate mains circuit should be<br />
sought from a qualified electrician.<br />
Do not substitute alternative mains leads and plugs to<br />
those supplied. They are selected to offer the best possible<br />
performance.<br />
1
2<br />
Introduction<br />
4 General Installation<br />
<strong>Naim</strong> equipment is designed to offer the finest<br />
performance possible avoiding compromise wherever<br />
practical. This can lead to circumstances that may<br />
be unfamiliar. The notes that follow contain advice<br />
specifically related to <strong>Naim</strong> equipment as well as<br />
more general warnings about the use of domestic<br />
audio products. Please read them carefully.<br />
4.1 Siting The Equipment<br />
In order to reduce the risk of hum audible from the<br />
loudspeakers, power supplies and power amplifiers should be<br />
located a reasonable distance away from other equipment. The<br />
maximum separation distance for connected equipment is that<br />
allowed by the standard interconnect lead.<br />
Some <strong>Naim</strong> equipment is extremely heavy. Check the weight of<br />
the equipment prior to lifting and if necessary use more than<br />
one person so that it can be moved safely. Ensure that your<br />
equipment rack or table can easily support the weight and is<br />
stable.<br />
Some speakers and stands are intended to be used with floor<br />
spikes fitted. Care should be taken when siting and moving them<br />
to avoid personal injury or damage to cables and surfaces. Floor<br />
protectors are available from your local dealer or distributor to<br />
protect non carpeted floors.<br />
4.2 Switching On<br />
Source components and power supplies should be switched on<br />
before the power amplifiers. Always switch amplifiers off and<br />
wait a minute before connecting or disconnecting any leads.<br />
Always use the power switch on the product rather than a mains<br />
outlet switch.<br />
A “thump” may be heard from the loudspeakers as power<br />
amplifiers are switched on. This is normal, will not cause any<br />
loudspeaker damage and does not point to any fault or problem.<br />
A mild “pop” may also be heard shortly after power amplifiers<br />
are switched off.<br />
4.3 Running In<br />
<strong>Naim</strong> equipment takes a considerable time to run in before<br />
it performs at its best. The duration varies, but under some<br />
conditions the sound may continue to improve for over a month.<br />
Better and more consistent performance will be achieved if<br />
the system is left switched on for long periods. It is worth<br />
remembering however that equipment left connected to the<br />
mains can be damaged by lightning.<br />
4.4 Radio Interference<br />
In some circumstances, depending on where you live and the<br />
earthing arrangements in your home, you may experience<br />
radio frequency interference. Controls on broadcasting in some<br />
territories allow very high levels of radio frequency radiation<br />
and both the choice and exact siting of equipment may be<br />
critical. Susceptibility to radio frequency interference is related<br />
to the wide internal bandwidth necessary for high sound quality.<br />
Systems incorporating moving coil phono preamplifiers and<br />
active crossovers are more likely to suffer. A radio frequency<br />
filter kit is available for some <strong>Naim</strong> equipment but sound quality<br />
will be progressively compromised as more elements of the<br />
kit are fitted. In situations of extreme radio interference <strong>Naim</strong><br />
equipment may be unsuitable.<br />
4.5 Non-standard Cables<br />
Use of non-standard speaker cables or interconnects may<br />
invalidate your guarantee.<br />
4.6 Lightning Precautions<br />
Your <strong>Naim</strong> hi-fi system can be damaged by lightning. Power<br />
amplifiers are particularly at risk and should be turned off and<br />
disconnected from the mains when there is risk of lightning<br />
strike. For complete protection all mains plugs and any aerial<br />
cables should be disconnected when not in use.<br />
4.7 Liquid Precautions<br />
Equipment must not be exposed to dripping or splashing and no<br />
objects filled with liquid, such as vases, should be placed on the<br />
equipment.<br />
4.8 Equipment Fuses<br />
Mains powered <strong>Naim</strong> <strong>Audio</strong> equipment is fitted with a mains<br />
input fuse on the rear panel adjacent to the mains input socket.<br />
Replace it if necessary only with the spare fuse supplied or<br />
with identical fuses. Repeated failure of this fuse points to an<br />
equipment or system fault that should be investigated by your<br />
dealer or at the factory by <strong>Naim</strong> itself.<br />
4.9 Problems?<br />
Consumer protection varies from country to country. In<br />
most territories a dealer must be prepared to take back<br />
any equipment he has sold if it cannot be made to work<br />
satisfactorily. A problem may be due to a fault in the system or<br />
its installation so it is essential to make full use of your dealer’s<br />
diagnostic skills. Please contact your local distributor, or <strong>Naim</strong><br />
<strong>Audio</strong> directly, if any difficulties cannot be resolved.<br />
Some <strong>Naim</strong> equipment is made in special versions for<br />
different territories and this makes it impracticable to arrange<br />
international guarantees. Please establish the local guarantee<br />
arrangements with your dealer. Contact <strong>Naim</strong> <strong>Audio</strong> directly for<br />
help and advice if necessary.<br />
4.10 Repairs and Updates<br />
It is essential that repairs and updates are only carried out<br />
by an authorised <strong>Naim</strong> dealer or at the factory by <strong>Naim</strong> itself.<br />
Many components are custom made, tested or matched and<br />
appropriate replacements are often unobtainable from other<br />
sources.<br />
Direct contact to <strong>Naim</strong> for service or update information should<br />
be made initially through the Service Department:<br />
Tel: +44 (0)1722 332266<br />
Email: service@naim-uk.com<br />
Please quote the product serial number (found on its rear panel)<br />
in all correspondence.
SL2<br />
5 Introduction and Positioning<br />
<strong>Naim</strong> loudspeakers are precision acoustic instruments that will only achieve optimal<br />
performance if installed and set up carefully. Please read these instructions before<br />
unpacking, installing and using the loudspeakers. Please also retain the packaging<br />
for future use.<br />
The performance of any loudspeaker will be influenced by the room and position in which it is<br />
located. Even small changes of loudspeaker position can significantly influence the sound. Choose<br />
a site where the loudspeakers can be located between 1.2m and 4m apart (4ft and 13ft), clear of<br />
room corners, and where each loudspeaker is between 10cm and 45cm (4” and 18”) away from a<br />
solid rear wall. The distance between the speakers and the rear wall is the aspect of positioning most<br />
likely to require adjustment as you become familiar with the characteristics of the loudspeakers in<br />
your room.<br />
The SL2 is not magnetically shielded and should be kept well away from CRT displays. Should a<br />
display suffer picture distortion caused by the proximity of an SL2 contact your dealer or installer for<br />
advice.<br />
Loudspeakers, like many hi-fi components, will take time to stabilise and “run-in” and can be<br />
expected to improve with use even over a period of weeks. For this reason it is prudent not to finalise<br />
SL2 positioning until the system has been operating for at least one week.<br />
5.1 Unpacking SL2<br />
To minimise the risk of accident and damage, SL2 components<br />
should be removed from the packaging one speaker at a time<br />
and in the following order. Components referred to in the<br />
following paragraphs can be identified through Diagram 5.3.<br />
Remove the central packing piece and Tweeter Suspension<br />
Assembly. Separate the two and place the Tweeter Suspension<br />
Assembly to one side.<br />
Remove the card shield containing the Grille. Place the Grille to<br />
one side. Also remove the card packing piece that protects the<br />
curved top of the Upper Cabinet.<br />
Carefully lift the Upper Cabinet out of the carton and place it to<br />
one side. Take care not to damage either the drive unit or the<br />
aluminium plate on the underside of the cabinet.<br />
Now lift the Lower Cabinet, together with its foam end-caps<br />
out of the carton. Stand it on the floor, plinth lowermost, and<br />
remove the top foam end-cap. Turn the cabinet upside down<br />
being careful not to damage the aluminium plate. Finally remove<br />
the sprung foam end-cap by pulling its sides outward and lifting<br />
it over the plinth.<br />
5.2 Assembling and Installing SL2<br />
Stage 1<br />
With each Lower Cabinet upside down the floor spikes can be<br />
fitted. Screw a spike and lock-nut into each threaded hole in the<br />
plinth. If the loudspeakers are to stand on a thick carpet, leave a<br />
generous length of spike protruding past the lock-nut. If they are<br />
to stand on thinly carpeted or plain floor, the spike length should<br />
be reduced. In either case, best results will be achieved when<br />
the spike length is set to the minimum required for the spike<br />
lock-nuts to sit just above the carpet pile.<br />
Stage 2<br />
Take each Tweeter Suspension Assembly in turn and offer it up to<br />
the Tweeter Mounting Points on the rear of each Plinth. Attach<br />
it using the bolts and allen key supplied. The Tweeter Suspension<br />
Assembly should be fixed as close to vertical as possible. Use<br />
the back of the Lower Cabinet as a guide.<br />
Now move each Lower Cabinet with the Tweeter Suspension<br />
Assembly attached into the appropriate position. Take care not<br />
to place them so close to the wall that the rear spikes foul any<br />
carpet gripper that may be fitted. Also leave some space for final<br />
adjustment of the Tweeter Suspension Assembly and for the<br />
connecting cables.<br />
Adjust the spikes so that the cabinets are upright (a small<br />
spirit level will help) and do not rock. Tighten the lock-nuts with<br />
an appropriate spanner. Check again, once the lock-nuts are<br />
tightened, that the cabinets do not rock on the spikes.<br />
Note: With thick carpet and underlay it can be difficult to ensure<br />
that the spikes are resting on the floor. Small slits cut into the carpet<br />
once the loudspeaker position is finalised will help.<br />
Note: If you intend to install the SL2 on a non-carpeted floor the<br />
spikes should be used in conjunction with <strong>Naim</strong> Floor Protectors<br />
(see Diagram 5.4) and set up so that just the tip extends beyond<br />
the lock nut. Your retailer or distributor will be able to supply Floor<br />
Protectors.<br />
Stage 3<br />
The pack containing this manual also contains Cabinet Interface<br />
Pins and Cabinet Spacers. Fit a Pin and a Spacer to the three<br />
holes in the aluminium top surface of each Lower Cabinet.<br />
There are two holes at the front and one at the back. Spare Pins<br />
and Spacers are included in the pack. The Pins should be a<br />
loose fit in the holes. See Diagram 5.5<br />
Now take each Upper Cabinet in turn and carefully lower it<br />
onto the appropriate Lower Cabinet locating the Pins in the<br />
corresponding holes on its underside. At the same time as<br />
each Upper Cabinet is lowered onto each Lower Cabinet, the<br />
tweeters must be inserted through the apertures of the Upper<br />
Cabinets. The loose fit of the Pins allows some adjustment of<br />
the alignment of the two cabinets. See Diagram 5.6<br />
3
4<br />
SL2<br />
5.3 SL2 Components<br />
Tweeter Suspension<br />
Assembly<br />
Passive Crossover<br />
Unit<br />
Tweeter Mounting<br />
Points<br />
5.4 Floor Protectors<br />
<strong>Naim</strong> Floor Protectors can be<br />
used to if the SL2 is to be<br />
installed on a non-carpeted floor.<br />
Grille<br />
Upper Cabinet<br />
Lower Cabinet<br />
Plinth<br />
Note: The metal bar across<br />
the rear underside of the<br />
SL2 that attaches the Lower<br />
Cabinet to the Plinth is<br />
intended to be slightly loose.<br />
5.5 SL2 Assembly<br />
Tweeter Suspension<br />
Assembly<br />
Pin<br />
Spacer
SL2<br />
It is vitally important for correct operation of SL2 that the Upper<br />
Cabinets are located properly on the Lower Cabinets, that the<br />
Pins are in place and that the two cabinets only touch via the<br />
spacers.<br />
The alignment of the Tweeter within the Upper Cabinets can<br />
be adjusted via either the two bolts connecting the Tweeter<br />
Suspension Assembly to the Plinth or the four screws that attach<br />
the Tweeter Adjustment Panel around the front face of the<br />
Tweeter. If the four adjustment panel bolts are loosened they<br />
should be re-tightened as securely as possible. As well as being<br />
adjusted to sit centrally when viewed from the front, and flush<br />
with the front panel, the Tweeter must oscillate freely without<br />
touching any part of either cabinet.<br />
Finally fit a Grille to each SL2 by aligning it with the top of the<br />
Lower Cabinet before pushing it gently against the fixing tape<br />
on the Upper Cabinet. The lower edge of the Grille should not<br />
5.6 SL2 Assembly<br />
Upper<br />
Cabinet<br />
Tweeter<br />
Adjustment Panel<br />
touch the Lower Cabinet. The card spacing jig packed with this<br />
manual can be used to support the bottom edge of the Grille as<br />
it is fitted. Seen from the side, the Grille should continue the<br />
curved form of the front of the Lower Cabinet.<br />
5.7 Connection<br />
If the loudspeakers are to be used with <strong>Naim</strong> amplification, <strong>Naim</strong><br />
loudspeaker cable will produce the best results and is necessary<br />
with some amplifiers. Cable lengths to both loudspeakers should<br />
be equal and be between 3.5 metres and 20 metres (11.5ft and<br />
66ft). Your local retailer will be able to make up cables of the<br />
appropriate length.<br />
If the SL2 is to be used in an active system, speaker cables with<br />
their custom <strong>Naim</strong> plugs should be connected to the appropriate<br />
input sockets on the back of the Tweeter Suspension Arm<br />
(HF) and Upper Cabinet (LF). Ensure that each positive plug<br />
- identified by a rib on the side of the cable and a tag marked<br />
“pos” on the side of the connector body - is inserted to the red<br />
input sockets.<br />
If the SL2 is to be used in a passive system, the Passive<br />
Crossover Units must be mounted to the back of each Lower<br />
Cabinet. Screws and decoupling grommets are supplied in the<br />
pack that contains the passive crossovers. Tighten the screws<br />
so that the screw heads just touch the decoupling grommets<br />
without compressing them.<br />
The output cables from the Passive Crossover Units must be<br />
connected to the input sockets on the back of the speaker,<br />
the longer cable to the sockets on the back of each Tweeter<br />
Suspension Assembly and the shorter cable to the sockets<br />
on each Upper Cabinet. The cables should be dressed such<br />
that they do not touch any other SL2 component and such<br />
that the output plugs align naturally with input sockets. Stress<br />
in the cables will interfere with the decoupling between SL2<br />
components.<br />
Finally the amplifier output speaker cables, with their custom<br />
<strong>Naim</strong> plugs, should be connected to the input sockets on the<br />
back of the Passive Crossover Units. Ensure that each positive<br />
plug - identified by a rib on the side of the cable and a tag<br />
marked “pos” on the side of the connector body - is inserted to<br />
the red input sockets.<br />
SL2 Specification<br />
Frequency Response: 30Hz - 20kHz<br />
Sensitivity: 88dB/1W/1m<br />
Power Handling: 150 Watts (music programme)<br />
Impedance: 6Ω (nominal)<br />
Dimensions (H x W x D): 1027 x 282 x 310mm<br />
Weight (unpacked): 25.4kg<br />
Standard Finishes: Cherry, Maple, Black<br />
5
6<br />
allæ<br />
6 Introduction and Positioning<br />
<strong>Naim</strong> loudspeakers are precision acoustic instruments that will only achieve optimal<br />
performance if installed and set up carefully. Please read these instructions before<br />
installing and using the loudspeakers. Please also retain the packaging for future<br />
use.<br />
The performance of any loudspeaker will be influenced by the room and position in which it is<br />
located. Even small changes of loudspeaker position can significantly influence the sound. Choose<br />
a site where the loudspeakers can be located between 1.2m and 4m apart (4ft and 13ft), clear of<br />
room corners, and where each loudspeaker is between 10cm and 45cm (4” and 18”) away from a<br />
solid rear wall. The distance between the speakers and the rear wall is the aspect of positioning most<br />
likely to require adjustment as you become familiar with the characteristics of the loudspeakers in<br />
your room.<br />
The allæ is not magnetically shielded and should be kept well away from CRT displays. Should a<br />
display suffer picture distortion caused by the proximity of allæ contact your dealer or installer for<br />
advice.<br />
Loudspeakers, like many hi-fi components, will take time to stabilise and “run-in” and can be<br />
expected to improve with use even over a period of weeks. For this reason it is prudent not to finalise<br />
allæ positioning until the system has been operating for at least one week.<br />
6.1 Installation<br />
Stage 1<br />
Each allæ loudspeaker comprises two separate cabinet<br />
components, the Upper Cabinet, containing the bass/mid<br />
driver, and the Lower Cabinet, containing the tweeter. These<br />
Components can be identified through diagram 6.3.<br />
To begin installation, first fit the floor spikes and lock-nuts to the<br />
base of each Lower Cabinet plinth. The cabinets can safely be<br />
turned upside-down to aid fitting the spikes. If the loudspeakers<br />
are to stand on a thick carpet, leave a generous length of<br />
spike protruding past the lock-nut. If they are to stand on thinly<br />
carpeted or plain floor, the spike length should be reduced. In<br />
either case, best results will be achieved when the spike length<br />
is set to the minimum required for the spike lock-nuts to sit just<br />
above the carpet pile or floor surface.<br />
Note: The metal bar across the rear underside of the allæ that<br />
attaches the Lower Cabinet to the Plinth is intended to be slightly<br />
loose.<br />
With the floor spikes fitted, each Lower Cabinet can be<br />
placed in the appropriate position. Take care not to place the<br />
loudspeakers so close to the wall that the rear spikes foul any<br />
carpet gripper that may be fitted. With the cabinets in position,<br />
adjust the spikes so that the cabinets are upright (a small<br />
spirit level will help) and do not rock. Tighten the lock-nuts with<br />
an appropriate spanner. Check again, once the lock-nuts are<br />
tightened, that the cabinets do not rock on the spikes.<br />
Note: With thick carpet and underlay it can be difficult to ensure<br />
that the spikes are resting on the floor. Small slits cut into the carpet<br />
once the loudspeaker position is finalised will help.<br />
Note: If you intend to install the allæ on a non-carpeted floor the<br />
spikes should be used in conjunction with <strong>Naim</strong> Floor Protectors<br />
(see Diagram 6.4) and set up so that just the tip extends beyond<br />
the lock nut. Your retailer or distributor will be able to supply Floor<br />
Protectors.<br />
Stage 2<br />
The pack containing this manual also contains six small<br />
Precision Interface Pins (PIPS). Fit three PIPS in the three<br />
holes in the top surface of each Lower Cabinet. There are two<br />
holes at the front and one at the back. The PIPS should be a<br />
loose fit in the holes.<br />
Take each Upper Cabinet in turn and carefully lower it onto<br />
the appropriate Lower Cabinet locating the PIPS in the<br />
corresponding holes on its underside. The loose fit of the PIPS<br />
allows some adjustment of the alignment of the two cabinets.<br />
Stage 3<br />
Remove the protective tape from the high frequency drivers<br />
mounted in the front of each Lower Cabinet. Fit the grilles to<br />
the front of each Upper Cabinet by locating the grille studs in<br />
the corresponding holes in the cabinet.
allæ<br />
6.2 Connection<br />
If the loudspeakers are to be used with <strong>Naim</strong> amplification, <strong>Naim</strong><br />
loudspeaker cable will produce the best results and is necessary<br />
with some amplifiers. Cable lengths to both loudspeakers should<br />
be equal and be between 3.5 metres and 20 metres (11.5ft and<br />
66ft). Your local retailer will be able to make up cables of the<br />
appropriate length.<br />
Connect the cables from the passive crossover units mounted<br />
on the back of the Lower Cabinets to the input sockets on each<br />
cabinet. Each longer cable should be connected to the sockets<br />
on the back of the Upper Cabinets and each shorter cable to<br />
the sockets on the back of the Lower Cabinet. Finally connect<br />
the amplifier output speaker cables with their custom <strong>Naim</strong> plugs<br />
to the input sockets on the back of the passive crossover units.<br />
Ensure that each positive plug - identified by a rib on the side of<br />
the cable and a tag marked “pos” on the side of the connector<br />
body - is inserted to the red input sockets.<br />
If the allæ is to be used in an active system the passive<br />
crossover units should be removed and the Upper Cabinet<br />
(LF) and Lower Cabinet (HF) input sockets connected via<br />
loudspeaker cables with custom <strong>Naim</strong> plugs directly to the<br />
appropriate power amplifier.<br />
6.3 allæ Components<br />
Upper Cabinet<br />
Lower Cabinet<br />
PIP<br />
6.4 Floor Protectors<br />
allæ Specification<br />
<strong>Naim</strong> Floor Protectors can be<br />
used to if the allæ is to be<br />
installed on a non-carpeted floor.<br />
Frequency Response: 30Hz - 20kHz<br />
Sensitivity: 88dB/1W/1m<br />
Power Handling: 150 Watts (music programme)<br />
Impedance: 6Ω (nominal)<br />
Dimensions (H x W x D): 940 x 240 x 280mm<br />
Weight (unpacked): 17.6kg<br />
Finishes: Cherry, Maple, Black<br />
7
8<br />
Ariva<br />
7 Introduction and Positioning<br />
<strong>Naim</strong> loudspeakers are precision acoustic instruments that will only achieve optimal<br />
performance if installed and set up carefully. Please read these instructions before<br />
installing and using the loudspeakers. Please also retain the packaging for future<br />
use.<br />
The performance of any loudspeaker will be influenced by the room and position in which it is<br />
located. Even small changes of loudspeaker position can significantly influence the sound. Choose<br />
a site where the loudspeakers can be located between 1.2m and 4m apart (4ft and 13ft), clear of<br />
room corners, and where each loudspeaker is between 10cm and 60cm (4” and 24”) away from a<br />
solid back wall. It is not necessary to angle the loudspeakers inwards towards the listening position.<br />
The distance from the back wall is the aspect of positioning most likely to require adjustment as you<br />
become familiar with the characteristics of the loudspeakers in your room. Further from the wall the<br />
speakers will generate less low frequency energy.<br />
The Ariva is not magnetically shielded and should be kept well away from CRT displays. Should a<br />
display suffer picture distortion caused by the proximity of Ariva contact your dealer or installer for<br />
advice.<br />
Loudspeakers, like many hi-fi components, will take time to stabilise and “run-in” and can be<br />
expected to improve with use even over a period of weeks. For this reason it is prudent not to finalise<br />
Ariva positioning until they have been operating for at least one week.<br />
7.1 Installation<br />
Stage 1<br />
Each Ariva loudspeaker comprises a separate plinth and<br />
cabinet. These components can be identified from the diagrams<br />
opposite.<br />
To begin installation, first fit four floor spikes and lock-nuts to<br />
the underside of each plinth. Leave just enough spike length<br />
extending below the lock nut to account for the thickness of<br />
carpet and underlay. Best results will be achieved when the<br />
spike length is set to the minimum required for the lock-nuts to<br />
sit just above the carpet pile. Do not fully tighten the lock-nuts<br />
at this stage.<br />
Note: If you intend to install the Ariva on a non-carpeted floor the<br />
spikes should be used in conjunction with <strong>Naim</strong> Floor Protectors<br />
(see Diagram 7.3) and set up so that just the tip extends beyond<br />
the lock nut. Your retailer or distributor will be able to supply Floor<br />
Protectors.<br />
With floor spikes fitted, but not tightened, place each plinth on<br />
the floor in the intended loudspeaker position. Use the supplied<br />
allen key, via the access hole in the top surface of the plinth<br />
(see Diagram 7.3), to adjust each spike so that the plinth is<br />
both level and does not rock. Use a spirit level to confirm the<br />
plinth is level and tighten each lock-nut using a 10mm spanner.<br />
Note: With thick carpet and underlay it can be difficult to ensure<br />
that the spikes are resting on the floor. Small slits cut into the<br />
carpet once the loudspeaker position is finalised will help.<br />
Stage 2<br />
Each plinth is fitted with three upward facing decoupling domes.<br />
These domes locate in to the corresponding spherical recesses<br />
in the underside of the Ariva cabinets. To complete the Ariva<br />
installation carefully line-up and lower each cabinet on to its<br />
plinth so that it locates securely (see Diagram 7.4).<br />
7.2 Connection<br />
If the loudspeakers are to be used with <strong>Naim</strong> amplification,<br />
<strong>Naim</strong> loudspeaker cable will produce the best results and<br />
is necessary with some amplifiers. Cable lengths to both<br />
loudspeakers should be equal and be between 3.5 metres and<br />
20 metres (11.5ft and 66ft). Your local retailer will be able to<br />
make up cables of the appropriate length.<br />
Connect the loudspeaker cables with their custom <strong>Naim</strong> plugs<br />
to the input sockets located on the rear of each Ariva cabinet.<br />
Ensure that each positive plug - identified by a rib on the side of<br />
the cable and a tag marked “pos” on the side of the connector<br />
body - is inserted to the red input sockets.
Ariva<br />
7.3 Plinth Installation<br />
floor spike<br />
adjustment access<br />
7.4 Cabinet to Plinth Assembly<br />
Lower the cabinet on to the<br />
plinth.<br />
tilt buffer<br />
floor spike<br />
location dome<br />
Plinth and cabinet to line-up.<br />
<strong>Naim</strong> Floor Protectors can be<br />
used to if the Ariva is to be<br />
installed on a non-carpeted floor.<br />
Ariva Specification<br />
Use the supplied allen key via the<br />
access hole in the top surface of<br />
the plinth to adjust the spikes.<br />
Frequency Response: 35Hz - 20kHz<br />
Sensitivity: 90dB/1W/1m<br />
Power Handling: 150 Watts (music programme)<br />
Impedance: 4Ω (nominal)<br />
Dimensions (H x W x D): 880 x 230 x 310mm<br />
Weight (unpacked): 18.6kg<br />
Finishes: Cherry, Maple, Black<br />
9
10<br />
axent, axess<br />
8 Introduction and Installation<br />
<strong>Naim</strong> loudspeakers are precision acoustic instruments that will only achieve optimal<br />
performance if installed and set up carefully. Please read these instructions before<br />
installing and using the loudspeakers. Please also retain the packaging for future<br />
use.<br />
The performance of any loudspeaker will be influenced by the room in which it is located and<br />
even small changes of loudspeaker position can significantly influence the sound. Alignment with<br />
the listening position and proximity to room boundaries will in particular influence the subjective<br />
performance. The position of a centre channel loudspeaker tends to be influenced by the type<br />
and location of the associated video screen. However, the influence of the room boundaries and<br />
alignment to the listening position should still be taken into account.<br />
The axent and axess are designed to reproduce full bandwidth, full power signals and are intended<br />
to be positioned centrally just below the screen. If the location of the loudspeaker results in too<br />
much bass some adjustment of low frequency equalisation via the AV processor may be necessary.<br />
Best results from axent and axess are likely to be gained if they are directly coupled to the floor via<br />
a rigid, spiked stand. Both speakers are equipped with spike location pads on the underside to help<br />
enable such mounting. If however the screen stand is also to carry the speaker it is advisable to at<br />
least decouple the screen, perhaps with compliant pads, so that vibration from the speaker does not<br />
disturb the picture.<br />
The axent and axess are magnetically shielded. However, the extreme sensitivity of some CRT tubes<br />
to low levels of magnetic flux may mean that, in rare cases, the shielding may not be sufficient.<br />
Should your screen suffer picture distortion caused by the proximity of a centre speaker contact your<br />
dealer or installer for advice.<br />
Loudspeakers, like many hi-fi components, will take time to stabilise and “run-in” and can be<br />
expected to improve with use even over a period of weeks. For this reason it is prudent not to finalise<br />
axent and axess positioning until they have been operating for at least one week.<br />
8.1 Connection<br />
If the axent or axess are to be used with <strong>Naim</strong> amplification,<br />
<strong>Naim</strong> loudspeaker cable will produce the best results and is<br />
necessary with some amplifiers. Cable length should be between<br />
3.5 metres and 20 metres (11.5ft and 66ft). Your local retailer<br />
will be able to make up cables of the appropriate length.<br />
Connect the loudspeaker cables with their custom <strong>Naim</strong> plugs to<br />
the input sockets located on the rear of the enclosure. Ensure<br />
that the positive plug - identified by a rib on the side of the<br />
cable and a tag marked “pos” on the side of the connector body<br />
- is inserted to the red input socket.<br />
8.2 Tweeter Adjustment<br />
The tweeter is mounted on an adjustable suspension plate. It<br />
is important both that the tweeter “bounces” freely on the plate<br />
and that it is held in line with the front panel of the enclosure.<br />
If the tweeter does not bounce or it is not held in the correct<br />
position (i.e. the plate appears bent), the plate can be adjusted.<br />
Carefully remove, one at a time, the appropriate fixing screws<br />
and gently bend the appropriate arm or arms of the plate to<br />
correct the bend. Replace the screws, tightened as lightly as<br />
possible to ensure security, and re-test the “bounce”. Repeat<br />
the exercise if necessary. Diagram 8.3 opposite illustrates the<br />
tweeter suspension plate correctly and incorrectly adjusted.
axent, axess<br />
8.3 Tweeter Adjustment<br />
Incorrect Adjustment<br />
Correct Adjustment<br />
axent Specification<br />
Frequency Response: 40Hz - 20kHz<br />
Sensitivity: 89dB/1W/1m<br />
Power Handling: 150 Watts (music programme)<br />
Impedance: 6Ω (nominal)<br />
Dimensions (H x W x D): 175 x 940 x 440mm<br />
Weight (unpacked): 27.4kg<br />
Finishes: Cherry, Maple, Black<br />
axess Specification<br />
Frequency Response: 45Hz - 20kHz<br />
Sensitivity: 89dB/1W/1m<br />
Power Handling: 150 Watts (music programme)<br />
Impedance: 6Ω (nominal)<br />
Dimensions (H x W x D): 175 x 536 x 451mm<br />
Weight (unpacked): 16.6kg<br />
Finishes: Cherry, Maple, Black<br />
11
12<br />
n-SATS<br />
9 Introduction and Installation<br />
<strong>Naim</strong> loudspeakers are precision acoustic instruments that will only achieve optimal<br />
performance if installed and set up carefully. Please read these instructions before<br />
installing and using the loudspeakers. Please also retain the packaging for future<br />
use.<br />
n-SATS are primarily intended to be used in home theatre and multi-channel audio surround channel<br />
applications located behind or adjacent to the listening position. n-SATS can also be used as main<br />
speakers in small-scale conventional stereo audio systems. In either application best results will be<br />
achieved if n-STAND floor-stands are used.<br />
Like any loudspeakers the performance of n-SATS will be influenced by the room and position in<br />
which they are located. Even small changes of position can significantly influence the sound. Choose<br />
a site where they can be located between 1.2m and 4m apart (4ft and 13ft), clear of room corners,<br />
and where each loudspeaker is between 5cm and 60cm (2” and 24”) away from a solid back wall. It<br />
is not necessary to angle the loudspeakers inwards towards the listening position.<br />
The distance from the back wall is the aspect of positioning most likely to require adjustment as<br />
you become familiar with the characteristics of n-SATS in your room. The use of floor-stands rather<br />
than wall brackets provides more opportunity for positioning adjustment. Further from the wall the<br />
speakers will generate less low frequency energy.<br />
n-SATS are magnetically shielded. However, the extreme sensitivity of some CRT displays to low<br />
levels of magnetic flux may mean that, in rare cases when n-SATS are located relatively close to a<br />
display, the shielding may not be sufficient. Should a display suffer picture distortion caused by the<br />
proximity of n-SATS contact your dealer or installer for advice.<br />
Loudspeakers, like many hi-fi components, will take time to stabilise and “run-in” and can be<br />
expected to improve with use even over a period of weeks. For this reason it is prudent not to finalise<br />
positioning until they have been operating for at least one week.<br />
9.1 n-STAND Installation<br />
The n-STAND is a dedicated floor-stand for n-SATS. It must not<br />
be used to support any other loudspeaker.<br />
To begin n-STAND installation, first attach each base to an<br />
upright with the four small cap-head screws using the allen key<br />
supplied (see Diagram 9.3). Once the stand uprights and bases<br />
are securely attached, fit four floor spikes and lock-nuts (see<br />
Diagram 9.3) to the underside of each base. Leave just enough<br />
spike length extending below the lock nut to account for the<br />
thickness of carpet and underlay. Best results will be achieved<br />
when the spike length is set to the minimum required for the<br />
lock-nuts to sit just above the carpet pile. Do not fully tighten<br />
the lock-nuts at this stage.<br />
Note: If you intend to install the n-STAND on a non-carpeted floor<br />
the spikes should be used in conjunction with <strong>Naim</strong> Floor Protectors<br />
(see Diagram 9.3) and set up so that just the tip extends beyond<br />
the lock nut. Your retailer or distributor will be able to supply Floor<br />
Protectors.<br />
With floor spikes fitted, but not tightened, place each stand on<br />
the floor in the intended loudspeaker position. Use the supplied<br />
allen key via the access holes in the base to adjust each spike<br />
so that the plinth is both level and does not rock. Use a spirit<br />
level to confirm the plinth is level and tighten each lock-nut<br />
using a 10mm spanner.<br />
Note: With thick carpet and underlay it can be difficult to ensure<br />
that the spikes are resting on the floor. Small slits cut into the<br />
carpet once the loudspeaker position is finalised will help.<br />
Mounting lugs must be attached to the rear of n-SATS before<br />
they can be mounted on n-STANDS. First remove the two buttonhead<br />
screws on the rear of each n-SATS using the supplied 3mm<br />
allen key. Replace the buttton-heads with the supplied mounting<br />
lugs and cap-heads. Tighten the cap-head screws with the allen<br />
key (see Diagram 9.4).<br />
With the mounting lugs fitted, n-SATS can be lowered onto<br />
n-STANDS so that the lugs engage with the stand cradle. A<br />
central grub screw in the stands can be adjusted to ensure that<br />
the n-SATS sits vertically (see Diagram 9.4).<br />
Note: An n-SERIES wall bracket is available that enables n-SATS to<br />
be wall mounted. Contact your dealer or local distributor for more<br />
information.<br />
9.2 Connection<br />
If n-SATS are to be used with <strong>Naim</strong> amplification, <strong>Naim</strong><br />
loudspeaker cable will produce the best results and is necessary<br />
with some amplifiers. Cable length should be between 3.5<br />
metres and 20 metres (11.5ft and 66ft). Your local retailer will<br />
be able to make up cables of the appropriate length.<br />
Connect the loudspeaker cables with their custom <strong>Naim</strong> plugs to<br />
the input sockets located on the rear of the enclosures. Ensure<br />
that the positive plug - identified by a rib on the side of the cable<br />
and a tag marked “pos” on the side of the connector body - is<br />
inserted to the red input socket.<br />
The n-STAND incorporates optional cable dressing pins that<br />
enable the loudspeaker cable to be routed down the stand<br />
upright and dressed in place. This is illustrated in Diagram 9.4
n-SATS<br />
9.3 n-STAND Construction<br />
Use the supplied allen key to<br />
adjust each floor spike from the<br />
top. Tighten the lock-nuts once<br />
the stand is level.<br />
floor spike<br />
floor<br />
protector<br />
<strong>Naim</strong> Floor Protectors can be<br />
used to if the n-STAND is to be<br />
installed on a non-carpeted floor.<br />
n-SATS Specification<br />
Attach the base to the upright<br />
using the four small cap-head<br />
screws and the supplied allen<br />
key.<br />
floor spike<br />
adjustment<br />
Frequency Response: 50Hz - 20kHz<br />
Sensitivity: 87dB/1W/1m<br />
Power Handling: 100 Watts (music programme)<br />
Impedance: 6Ω (nominal)<br />
Dimensions (H x W x D): 285 x 200 x 208mm<br />
Weight (unpacked): 5.5kg<br />
Finishes: Cherry, Maple, Black Lacquer<br />
Lower the n-SATS speaker on<br />
to the n-STAND cradle and<br />
adjust to sit vertically with the<br />
central grub screw.<br />
9.4 n-STAND Installation<br />
Route the speaker cable<br />
up the stand upright and<br />
dress with the dressing<br />
pins.<br />
Note: Dressing the cables<br />
too tightly in the stand<br />
upright may degrade the<br />
n-SATS performance.<br />
Leave some slack -<br />
especially between the<br />
speaker terminals and the<br />
first dressing pin. A small<br />
improvement in n-SATS<br />
subjective performance<br />
may be perceived by<br />
leaving the loudspeaker<br />
cables undressed.<br />
Remove the two button-head<br />
screws and replace them with<br />
cap-head screws and mounting<br />
lugs.<br />
13
14<br />
n-CENT<br />
10 Introduction and Installation<br />
<strong>Naim</strong> loudspeakers are precision acoustic instruments that will only achieve optimal<br />
performance if installed and set up carefully. Please read these instructions before<br />
installing and using the loudspeakers. Please also retain the packaging for future<br />
use.<br />
The performance of any loudspeaker will be influenced by the room in which it is located and<br />
even small changes of loudspeaker position can significantly influence the sound. Alignment with<br />
the listening position and proximity to room boundaries will in particular influence the subjective<br />
performance. The position of a centre channel loudspeaker tends to be influenced by the type<br />
and location of the associated video screen. However, the influence of the room boundaries and<br />
alignment to the listening position should still be taken into account.<br />
The n-CENT is designed to reproduce full bandwidth, full power signals and is intended to be<br />
positioned centrally just above or below the screen. If the location of the loudspeaker results in too<br />
much bass some adjustment of low frequency equalisation via the AV processor may be necessary.<br />
Best results from the n-CENT are likely to be gained if it is directly coupled to the floor via a rigid,<br />
spiked stand. If the screen stand is however also to carry the n-CENT it is advisable to decouple it<br />
from the screen with the supplied adhesive rubber feet so that vibration from the speaker does not<br />
disturb the picture.<br />
The n-CENT is magnetically shielded. However, the extreme sensitivity of some CRT tubes to low<br />
levels of magnetic flux may mean that, in rare cases, the shielding may not be sufficient. Should your<br />
screen suffer picture distortion caused by the proximity of a centre speaker contact your dealer or<br />
installer for advice.<br />
Loudspeakers, like many hi-fi components, will take time to stabilise and “run-in” and can be<br />
expected to improve with use even over a period of weeks. For this reason it is prudent not to finalise<br />
positioning until it has been operating for at least one week.<br />
10.1 Installation<br />
The adhesive rubber feet supplied with n-CENT will reduce<br />
vibration transferred to other equipment. Use the template<br />
enclosed with this manual to fit the feet in position.<br />
An n-SERIES wall bracket is available that enables n-CENT to be<br />
wall mounted. Contact your dealer or local distributor for more<br />
information.<br />
Mounting lugs must be attached to the rear of the n-CENT<br />
before it can be attached to the wall bracket. First remove the<br />
two button-head screws on the rear of the n-CENT using the<br />
supplied 3mm allen key. Replace the buttton-heads with the<br />
supplied mounting lugs and cap-heads. Tighten the cap-head<br />
screws with the allen key.<br />
With the mounting lugs fitted, the n-CENT can be lowered onto<br />
the wall bracket so that the lugs engage with the cradle. A<br />
central grub screw in the bracket can be adjusted to ensure that<br />
the n-CENT sits vertically.<br />
10.2 Connection<br />
If the n-CENT is to be used with <strong>Naim</strong> amplification, <strong>Naim</strong><br />
loudspeaker cable will produce the best results and is necessary<br />
with some amplifiers. Cable length should be between 3.5<br />
metres and 20 metres (11.5ft and 66ft). Your local retailer will<br />
be able to make up cables of the appropriate length.<br />
Connect the loudspeaker cables with their custom <strong>Naim</strong> plugs to<br />
the input sockets located on the rear of the enclosure. Ensure<br />
that the positive plug - identified by a rib on the side of the cable<br />
and a tag marked “pos” on the side of the connector body - is<br />
inserted to the red input socket.<br />
n-CENT Specification<br />
Frequency Response: 50Hz - 20kHz<br />
Sensitivity: 87dB/1W/1m<br />
Power Handling: 120 Watts (music programme)<br />
Impedance: 6Ω (nominal)<br />
Dimensions (H x W x D): 160 x 430 x 300mm<br />
Weight (unpacked): 10.0kg<br />
Finishes: Cherry, Maple, Black Lacquer
n-SUB<br />
11 Introduction<br />
<strong>Naim</strong> loudspeakers are precision acoustic instruments that will only achieve optimal<br />
performance if installed and set up carefully. Please read these instructions before<br />
installing and using the n-SUB. Please also retain the packaging. The n-SUB is very<br />
heavy and care should be taken when lifting or moving it. Do not connect the n-SUB<br />
to the mains wall socket until all other connections are made. Take great care when<br />
moving and handling the n-SUB that cables are not damaged by its floor spikes.<br />
The n-SUB is an active sub-woofer primarily intended to be used in conjunction with n-SATS and the<br />
n-CENT in home theatre and multi-channel audio applications. The n-SUB can also be used however<br />
with n-SATS in a stereo satellite/sub-woofer (2.1) loudspeaker system.<br />
A variety of n-SUB set up parameters can be defined and stored as presets. These enable<br />
n-SUB performance to be adjusted for different programme material types, personal preferences and<br />
listening levels etc (i.e Stereo or AV setups). Up to six presets can be stored. Preset selection or realtime<br />
adjustment of n-SUB can be carried out from either its control panel or the remote handset.<br />
Loudspeakers, like many hi-fi components, will take time to stabilise and “run-in” and can be<br />
expected to improve with use even over a period of weeks. For this reason it is prudent not to finalise<br />
positioning until they have been operating for at least one week.<br />
11.1 n-SUB Installation<br />
11.1.1 n-SUB Positioning<br />
In principle there is significant freedom of position of a subwoofer<br />
in a listening room. In practice, however, the performance<br />
of the n-SUB will be fundamentally influenced by the room and<br />
position in which it is located. Small changes of position, or the<br />
resonant characteristics of items in the immediate vicinity of the<br />
n-SUB, can significantly influence its performance.<br />
Initially choose a site for the n-SUB along one of the walls of the<br />
listening room well away, but not equi-distant, from the corners.<br />
It is not necessary that the n-SUB be positioned along the same<br />
wall as the main loudspeakers. Locate the n-SUB such that its<br />
control panel is facing out from the wall. Leave a gap of between<br />
100mm (4”) and 150mm (6”) between the rear panel (driver<br />
panel) and the wall. Chose a solid, rather than a partition, wall<br />
and keep the n-SUB clear of any significant resonant objects -<br />
large furniture panels, heating radiators, etc.<br />
The n-SUB is not magnetically shielded and should be kept<br />
a minimum of 2m away from CRT displays (plasma, LCD or<br />
DLP displays are not affected). Should a display suffer picture<br />
distortion caused by the proximity of the n-SUB contact your<br />
dealer or installer for advice.<br />
The n-SUB amplifier is cooled by air flow entering through<br />
perforations in its underside and exiting through a vent above the<br />
display window. This air flow must not be restricted.<br />
A cable clamp is supplied in the pack containing this manual<br />
intended to hold the mains cable in position and to help prevent<br />
it from being damaged by floor spikes. It can be fitted as<br />
appropriate in any of the 3 positions shown in Diagram 11.9<br />
depending on the positioning of the n-SUB relative to the wall<br />
and mains socket.<br />
11.1.2 n-SUB Floor Spikes<br />
With the initial position decided begin n-SUB installation by<br />
fitting the four floor spikes and lock-nuts to the underside of<br />
the enclosure. Adjust the spike length to hold the n-SUB at least<br />
20mm above the floor covering<br />
Note: If you intend to install the n-SUB on a non-carpeted floor the<br />
spikes should be used in conjunction with <strong>Naim</strong> Floor Protectors<br />
(see Diagram 11.8). Your retailer or distributor will be able to supply<br />
Floor Protectors.<br />
With the floor spikes fitted, but not tightened, place the n-SUB<br />
on the floor in the intended position. Adjust the spikes so that<br />
the n-SUB does not rock and is level. Tighten each lock-nut<br />
using a 10mm spanner.<br />
Note: With thick carpet and underlay it can be difficult to ensure<br />
that the spikes are resting on the floor. Small slits cut into the carpet<br />
once the loudspeaker position is finalised will help.<br />
11.2 n-SUB Connections<br />
The n-SUB carries a comprehensive set of signal and control<br />
connections appropriate for integration with a variety of system<br />
types and installations. The connection sockets (and mains<br />
power input socket) can all be found on the underside of the<br />
enclosure and are illustrated in Diagram 11.6. The n-SUB can be<br />
turned up-side-down to aid access to the sockets.<br />
DO NOT CONNECT n-SUB TO THE MAINS WALL SOCKET UNTIL<br />
ALL CONNECTIONS ARE MADE AND IT IS RETURNED TO AN<br />
UPRIGHT POSITION. TAKE GREAT CARE WHEN RETURNING<br />
THE N-SUB TO THE UPRIGHT POSITION THAT CABLES ARE NOT<br />
DAMAGED BY THE FLOOR SPIKES.<br />
11.2.1 n-SUB Inputs<br />
The n-SUB provides one mono and one stereo line level input on<br />
RCA Phono sockets along with one stereo set of “speaker-level”<br />
4mm input sockets.<br />
The mono line level input should be used for AV systems where<br />
an AV processor provides a mono sub-woofer (LFE) output.<br />
The stereo line level input should be used when only an auxiliary<br />
stereo output is available from, for example, a preamplifier. The<br />
stereo channels are combined to mono within the n-SUB.<br />
Note: Do not use an amplifier “tape output” to connect to Input<br />
2. The volume level from tape outputs does not vary with volume<br />
control position.<br />
15
16<br />
n-SUB<br />
Note: A special 4-pin DIN to stereo RCA Phono Plug lead is required<br />
for connection to <strong>Naim</strong> preamplifiers (usually via the preamplifier<br />
power supply). It incorporates resistors in the signal path to<br />
protect the preamplifier from the high capacitance inherent in the<br />
necessarily long lead.<br />
Connect to the speaker level inputs using <strong>Naim</strong> speaker plugs<br />
via cables connected to the main (front left and right) speaker<br />
terminals. The stereo channels are combined to mono within<br />
the n-SUB. Speaker terminal “piggy-back” connectors and<br />
appropriate made-up cables will be available from your local<br />
<strong>Naim</strong> dealer or distributor.<br />
USE OF THE SPEAKER LEVEL INPUTS WITH A NAIM NAP 500,<br />
OR ANY OTHER “BRIDGED” POWER AMPLIFIER, REQUIRES<br />
SPECIAL CONNECTION CABLES. CONTACT YOUR DEALER OR<br />
LOCAL DISTRIBUTOR FOR MORE INFORMATION.<br />
Note: The decision to use either the line level or speaker level<br />
inputs when the n-SUB is not connected via an AV decoder can be<br />
made on the grounds of sound quality. It is impossible to predict<br />
which option will sound best in a particular system and installation,<br />
however the speaker level option, by virtue of higher signal levels<br />
being more robust over long lead lengths, is potentially superior.<br />
Input sockets can be selected either directly from the n-SUB<br />
control panel or included in a setup preset. See Section 11.3.<br />
An RC5 control input is also provided on the n-SUB connection<br />
panel. This input can be used for wired remote control if the<br />
n-SUB is to be used out of line-of-sight in an installed audio<br />
system or if the n-SUB is one of a daisy-chained group.<br />
11.2.2 n-SUB Outputs<br />
The n-SUB is fitted with a mono signal output and an RC5<br />
control output, both on RCA Phono sockets. These output<br />
sockets are intended to enable “daisy-chaining” of one or more<br />
n-SUBs in systems where multiple sub-woofers are required.<br />
If these sockets are used take care to ensure that they are<br />
connected correctly.<br />
11.2.3 Earth Terminal<br />
An external earth (ground) terminal and earth selection switch<br />
are fitted to the underside of the n-SUB. Use of the earth<br />
terminal may help alleviate audible hum from earth loops by<br />
disconnecting the signal and mains earths. If hum is a problem,<br />
connect the earth terminal with a single cable to the preamplifier<br />
earth terminal and move the switch to the “External” position.<br />
Note: Do not switch the earth selection to External without an<br />
external earth connected.<br />
11.3 n-SUB Configuration and Operation<br />
With all input and output connections made and the n-SUB<br />
positioned appropriately it is ready for configuration and<br />
operation.<br />
Note: The n-SUB may be configured and operated from either its<br />
control panel or from the remote handset, however the handset<br />
provides enhanced functionality and direct access to gain and<br />
display control.<br />
To select and adjust a parameter use the handset mode5or<br />
mode6 keys (control panel: mode) to select. Once a parameter<br />
is selected use the handset up or down keys (control panel: up<br />
or down buttons) to adjust.<br />
The handset and control panel mute function mutes and restores<br />
the n-SUB output.<br />
The handset gain5 and gain6 keys provide direct control of<br />
n-SUB volume level. The handset disp key switches the control<br />
panel display on and off. The handset info key scrolls through<br />
and displays the parameter settings for the currently selected<br />
preset.<br />
Note: Multiple daisy-chained n-SUBs should be initially configured<br />
from each control panel rather than from the remote handset. This<br />
removes the possibility of handset commands intended for one n-<br />
SUB changing a previously defined configuration for another. Section<br />
11.4.5 covers the configuration of multiple n-SUBs, and the use of<br />
Lock Mode, in more detail.<br />
11.3.1 n-SUB Presets<br />
When first switched on from the control panel power button the<br />
display will show P1 and the preset mode indicator will illuminate.<br />
P1 indicates that preset P1 is loaded.<br />
Note: If the n-SUB has not been previously used, all presets will<br />
contain the same default settings and values. If the n-SUB has<br />
been previously used some values and settings may vary from the<br />
defaults. To restore the factory defaults across all presets, press and<br />
hold the handset disp key for six seconds or switch the n-SUB off<br />
and then on while pressing the control panel mute button.<br />
n-SUB presets contains a value or setting for each of the six<br />
variable parameters. These are gain, low pass filter frequency<br />
(freq), invert, input, lock, and label. The function of each is<br />
described in Section 11.4.1 to Section 11.4.6.<br />
To save a configuration preset once each parameter has been<br />
adjusted use the handset mode5 or mode6 keys (control<br />
panel: mode) to select save, then use the handset up or down<br />
keys (control panel: up or down buttons) to select a preset<br />
number (1 to 6). Save the preset by pressing the handset save<br />
or mode5 keys (control panel: mode button). If the preset<br />
selected as the save location is the currently selected one it will<br />
be displayed with dashes either side (-3-).<br />
Note: The handset save key can be used at any time to modify an<br />
existing preset following a parameter adjustment. Simply press and<br />
hold save.<br />
To reset the currently selected preset to the factory default<br />
parameter values select save as described above and press and<br />
hold the handset disp key for six seconds.<br />
11.4 n-SUB Configuration Parameters<br />
11.4.1 Gain<br />
Gain sets the volume level of the n-SUB. The adjustment range<br />
is 10 to 99 and the factory default setting is 40. See Section<br />
11.5 for further guidance on setting this parameter.<br />
11.4.2 Freq<br />
Freq sets the upper filter frequency. This should generally be set<br />
as appropriate for the type of system and satellite speakers the<br />
n-SUB is to be integrated with. The adjustment range is 20Hz to
n-SUB<br />
250Hz and the factory default setting is 60Hz. See Section 11.5<br />
for further guidance on setting this parameter.<br />
11.4.3 Invert<br />
Invert switches (inverts) the acoustic phase (polarity) of the<br />
n-SUB. Inverting phase can be of value when deciding on the<br />
optimum position for a sub-woofer. It is worth experimenting with<br />
phase inversion before ruling out a particular sub-woofer position<br />
for reasons of poor integration with the satellite speakers. The<br />
options are yes or no and the factory default setting is no.<br />
11.4.4 Input<br />
Input selects one of the three n-SUB inputs described in Section<br />
11.2.1. The options are AV, AMP or AUX and the factory default<br />
setting is AV.<br />
11.4.5 Lock<br />
Lock mode prevents n-SUB parameters other than gain, mute<br />
and preset selection from being changed, thus ensuring that<br />
inadvertent adjustments are not made and that daisy-chained<br />
n-SUB arrays remain synchronised.<br />
To lock a single n-SUB use the handset mode5 or mode6<br />
keys (control panel: mode) to select lock followed by the<br />
handset up or down keys (control panel: up or down buttons)<br />
to select 1. When lock mode is active the lock indicator remains<br />
illuminated.<br />
Note: Settings cannot be adjusted from the control panel when lock<br />
mode is operational.<br />
With multiple n-SUBs, lock mode must be configured from the<br />
control panel for each n-SUB in turn. Use the control panel<br />
mode button to select lock, followed by the up or down buttons<br />
to select a different lock number, from 1 to 6 for each n-SUB.<br />
Note: While there is no technical limit on the number of n-SUBs<br />
that can be daisy-chained, six is the recommended practical<br />
maximum.<br />
Once an n-SUB has been allocated a lock number it can be<br />
temporarily unlocked for adjustment (and re-locked) by pressing<br />
and holding the appropriate handset numeric key (control panel:<br />
press and hold the mode button). The lock indicator will flash to<br />
indicate that it is temporarily unlocked.<br />
Note: Individual locking and unlocking enables subsequent<br />
adjustments to specific daisy-chained n-SUBs to be made without<br />
changing the settings of the other n-SUBs.<br />
To permanently unlock an n-SUB it must first be temporarily<br />
unlocked, then the handset mode5 or mode6 keys (control<br />
panel: mode) used to select lock, followed by the handset up or<br />
down keys (control panel: up or down buttons) to select OFF.<br />
11.4.6 Label<br />
A three character alpha-numeric display label can be defined for<br />
each n-SUB preset. Use the handset mode5or mode6 keys<br />
(control panel: mode) to select label, followed by the handset<br />
mute key to select the character position and the up or down<br />
keys (control panel: up or down buttons) to select an alphanumeric<br />
character.<br />
11.5 n-SUB Gain, Filter Frequency and Polarity<br />
Setting n-SUB gain, filter (freq) and polarity (invert) parameters<br />
will require some careful listening and experimentation if<br />
optimum subjective performance is to be achieved. Try to put<br />
yourself in the position of the film sound designer or music mix<br />
engineer and aim for a sound that is consistent, well balanced<br />
and free of undue bass or midrange emphasis. It may be useful<br />
to listen with and without the n-SUB by using its mute function.<br />
Note: Don’t use the mute function rapidly and repeatedly in order<br />
to judge the n-SUB’s contribution to the sound. Listen to a few<br />
minutes of material with the n-SUB operating and then repeat<br />
the same few minutes with it muted. Use a variety of programme<br />
material but make sure it has an adequate level of low bass.<br />
11.5.1 AV System<br />
When connected to an AV processor, such as the <strong>Naim</strong> AV2,<br />
the n-SUB filter should always be set at its maximum - 250Hz.<br />
This is because the processor’s sub-woofer (LFE) channel itself<br />
incorporates low pass filtering. n-SUB gain should be set such<br />
that low frequency effects do not dominate but integrate within<br />
the context of the film. Only use the invert function if it proves<br />
difficult to achieve a satisfactory result through adjusting the<br />
gain. If the invert function still results in no improvement, the<br />
n-SUB should be moved to an alternative location in the room.<br />
Note: Ensure that the processor’s “midnight” or “bass mix”<br />
functions are not operational when setting up the n-SUB.<br />
Note: Different gain settings for music only and audio-visual<br />
programme material via an AV processor may be appropriate. Use<br />
the n-SUB’s preset feature to save appropriate settings.<br />
11.5.2 n-SUB with n-SATS - Stereo Music System<br />
For n-SUB integration with one pair of n-SATS in a conventional<br />
stereo audio system, initially set the filter to 60Hz (the default<br />
value). Optimum n-SUB gain will depend on the room acoustic<br />
and the position of the speakers within it. An n-SUB close to the<br />
listening position should, in theory, require less gain, however,<br />
if close to the listening position means the n-SUB is relatively<br />
distant from the walls, increased gain will likely be required.<br />
Aim to set the gain such that bass elements of the music are<br />
properly integrated. If bass subjectively draws attention to itself,<br />
the n-SUB gain is probably too high. Only use the n-SUB’s invert<br />
function if it proves difficult to achieve a satisfactory result<br />
through adjusting the gain. If the invert function still results in<br />
no improvement the n-SUB should be moved to an alternative<br />
location in the room.<br />
Once the gain is set, it may be worthwhile experimenting with<br />
small changes in filter frequency to fine tune the integration<br />
between n-SUB and n-SATS.<br />
11.5.3 n-SUB with alternative speakers - Stereo Music<br />
System<br />
Larger satellite loudspeakers than the n-SATS will most likely<br />
require the n-SUB filter to be reduced. For medium sized standmount<br />
loudspeakers begin with a setting of around 50Hz. For<br />
floor-stand loudspeakers initially set the filter to around 40Hz.<br />
Gain and invert should be set as described above.<br />
17
18<br />
n-SUB<br />
11.6 n-SUB Connection Panel<br />
mains<br />
input<br />
data RS232 in/out<br />
11.7 n-SUB Control Panel<br />
external earth<br />
mono out<br />
mono in<br />
Ch 2 right in<br />
Ch 1 left in<br />
RC5 out<br />
RC5 in<br />
earth switch<br />
speaker<br />
level inputs<br />
Note: The RS232 sockets<br />
enable connection to custom<br />
install RS232 controllers.<br />
Please contact your dealer for<br />
the appropriate connection<br />
cables. These sockets are not<br />
intended for direct connection<br />
to computer networks.<br />
11.8 Floor Protectors<br />
11.9 n-SUB Cable Clamp<br />
180mm<br />
from back<br />
25mm<br />
from side<br />
193mm<br />
from side<br />
Fit the supplied Cable Clamp as<br />
appropriate in one of the three<br />
positions shown by the crosshatched<br />
squares .<br />
n-SUB Specification<br />
<strong>Naim</strong> Floor Protectors can be<br />
used to if the n-SUB is to be<br />
installed on a non-carpeted floor.<br />
Inputs 2 x line level, 1 x speaker level<br />
Frequency Response: 20Hz - 250Hz<br />
Power Output: 350 Watts<br />
Dimensions (H x W x D): 385 x 385 x 393mm<br />
Weight (unpacked): 29.6kg<br />
Finishes: Cherry, Maple, Black Lacquer<br />
Mains Supply: 100-120V or 220-240V, 50/60Hz
12 Declaration of conformity to appropriate standards<br />
Manufacturer <strong>Naim</strong> <strong>Audio</strong> Limited, Southampton Road, Salisbury, England, SP1 2LN<br />
Products SL2, allæ, Ariva, axent, axess, n-SATS, n-CENT, n-SUB<br />
Safety EN 60065<br />
EMC<br />
Emissions Tested to: EN 55013 - Sound and television broadcast receivers and associated equipment<br />
BS EN 61000-3-2: 2001 - Limits for harmonic current emissions (equipment input currents up to and<br />
including 16 A per phase)<br />
Immunity Tested to: EN55020 - Electromagnetic immunity of broadcast receivers and associated equipment<br />
In accordance with: CISPR 16-1 - Radio disturbance and immunity measuring apparatus<br />
CISPR 16-2 Methods of measurement of disturbances and immunity<br />
IEC 801-2 8kV (air gap) 4kV (contact) (performance criterion B)<br />
IEC 801-3 3V/m 20dB (performance criterion A)<br />
IEC 801-4 1kV (AC lines) 0.5kV (signal lines) (performance criterion B)<br />
19
<strong>Naim</strong> <strong>Audio</strong> Limited, Southampton Road, Salisbury, England SP1 2LN<br />
Telephone: +44 (0) 1722 332266 Fax: +44 (0) 1722 412034 www.naim-audio.com<br />
Part No. OWMSP 12-001-0033<br />
Drawing No. NA401001-400/2