

WH300 Architecture
WH300 Architecture
WH300 Architecture

You also want an ePaper? Increase the reach of your titles
YUMPU automatically turns print PDFs into web optimized ePapers that Google loves.
Appro <strong>WH300</strong> User’s Guide 0<br />
Rev. 2.0<br />
1/23/06<br />
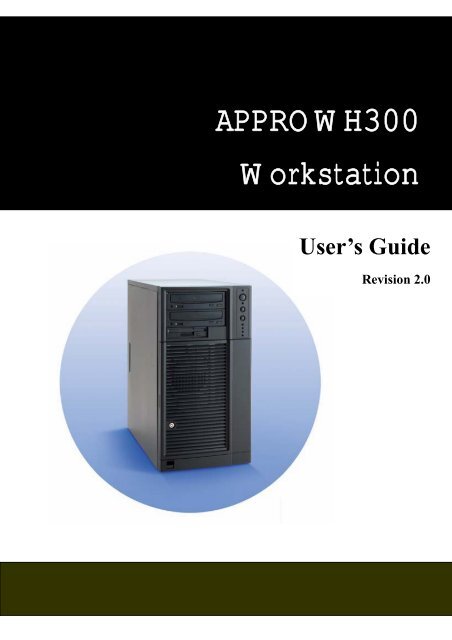
APPRO <strong>WH300</strong><br />
Workstation<br />
User’s Guide<br />
Revision 2.0
Appro <strong>WH300</strong> User’s Guide 1<br />
Rev. 2.0<br />
1/23/06<br />
___________________________________________________________________________________________________<br />
The information in this User’s Guide has been carefully reviewed and is believed to be accurate. The vendor assumes no<br />
responsibility for any inaccuracies that may be contained in this document, makes no commitment to update or to keep<br />
current the information in this Guide, or to notify any person or organization of the updates. NOTE: For any up-to-date<br />
version of this document, please see our web site at www.uniwide.co.kr.<br />
Uniwide Technologies, Inc. reserves the right to make changes to the product described in this manual at any time and<br />
without notice. This product, including software, if any, and documentation may not, in whole or in part, be copied,<br />
photocopied, reproduced, translated or reduced to any medium or machine without written consent.<br />
___________________________________________________________________________________________________<br />
Unless you request and receive written permission from Uniwide Technologies, Inc, you may not copy any part of this<br />
document.<br />
Information in this document is subject to change without notice. Other products and companies referred to herein are<br />
trademarks or registered trademarks of their respective companies or mark holders.<br />
Copyright © by Uniwide Technologies, Inc.<br />
All rights reserved.
Contents<br />
Chapter 1: Introduction<br />
Overview..……………………………………………………………………………... 4<br />
Features. ……………………………………………………………………………….. 4<br />
Specifications. …………………………………………………………………………. 5<br />
Chapter 2: Important Safety Information<br />
2.1 Intended Application Uses....…………………………………….. 6<br />
2.2 Safety Instructions & Information..………………………………. 6<br />
2.3 Checking the Power Cord..……………………………………….. 7<br />
2.4 Earth-Ground Socket Outlets..…………………………………… 7<br />
2.5 Before you remove the Access Covers…………………………… 8<br />
2.6 Fans………………………….…………………………………… 8<br />
2.7 Electrostatic Discharge (ESD) ..………………………………… 9<br />
2.8 Cooling and Airflow……..……………………………………… 9<br />
Chapter 3: Installation<br />
3.1 Parts List.…………………… …………………………………… 10<br />
3.2 Optional Items...………………..…………………………………. 11<br />
3.3 Installing Peripherals……………………………………………… 11<br />
3.4 Remove the Access Cover………………………………………… 12<br />
3.5 Remove the Front Bezel..…….…………………………………… 12<br />
3.6 Install a 3.5-inch Floppy Drive…………………………………… 13<br />
3.7 Peripheral Devices.. ………………………………………………. 14<br />
3.7.1 Device Installation Considerations… …………………….14<br />
3.7.2 IDE Requirements…..…………………………………… 14<br />
3.7.3 Installing a 5.25-inch Removable Media Device..……….. 15<br />
3.7.4 Installing a 3.5-inch Hard Drive..………………………… 16<br />
3.7.5 Installing an Add-in Board..……………………………… 22<br />
3.8 Installing the Front Bezel..………. ………………………………. 24<br />
3.9 Install the Access Cover.…………………………………………. 24<br />
Appro <strong>WH300</strong> User’s Guide 2<br />
Rev. 2.0<br />
1/23/06
Chapter 4: <strong>WH300</strong> Maintenance<br />
4.1 Replacing a Front System Fan.…………………………………… 26<br />
4.1.1 Hot-Swap Drive Bay.……………………………………. 26<br />
4.2 Replacing a Rear System Fan..…………………………………… 27<br />
4.3 Replacing the Power Supply……………………………………… 28<br />
Chapter 5: <strong>WH300</strong> <strong>Architecture</strong><br />
5.1 Appro <strong>WH300</strong> front view………………………………………… 31<br />
5.2 Front Panel Controls and Indicators……………………………… 32<br />
5.3 Appro <strong>WH300</strong> rear view…………………………………………. 33<br />
Appendix Reference<br />
A Power Supply Specifications……………………………………... 34<br />
B System Environmental Specifications……………………………. 35<br />
C Contacting Uniwide.……………………………………………… 36<br />
Appro <strong>WH300</strong> User’s Guide 3<br />
Rev. 2.0<br />
1/23/06
Chapter 1<br />
Introduction<br />
1.1 Overview<br />
The Appro <strong>WH300</strong> workstation is designed for the power-user. It offers excellent<br />
performance, system expandability, speed and efficiency when working with demanding<br />
compute-intensive applications. It delivers two x16 PCI Express graphics capabilities for<br />
content creation, animation, 3D modeling and CAD to meet all your design and analysis<br />
needs. It provides robust memory and storage in a flexible pedestal design.<br />
The workstation supports the requirements of the most demanding professional users of<br />
advanced 3D workstations. This workstation is ideal for complex and demanding graphics<br />
applications such as Mechanical Computer Aided Design (MCAD) and Engineering<br />
(MCAE) for automotive and aerospace, petroleum exploration and production, scientific<br />
visualization, designers, digital content creation artists, 3D modeling and CAD.<br />
The Appro <strong>WH300</strong> workstation runs 32-bit applications faster while you migrate to 64-bit<br />
computing for long-term investment protection. This dual AMD Opteron processor<br />
workstation platform is expected to help users increase project productivity through<br />
exceptional application, visualization and data-throughput at outstanding price to<br />
performance ratio.<br />
1.2 Features<br />
� Dual AMD Opteron processors<br />
� Up to 16GB of random access memory<br />
� Two x16 PCI Express slot graphics capabilities<br />
� FDD and CD/DVD drive options<br />
� Up to 6 internal, fixed HDDs<br />
� Optional 6x hot-swap SCSI kit or 6x SATA hot-swap kit<br />
� Supports ATi®, Nvidia and other graphics solutions<br />
� Choice of Windows or Linux operating systems<br />
Appro <strong>WH300</strong> User’s Guide 4<br />
Rev. 2.0<br />
1/23/06
1.3 Specifications<br />
Processors Dual AMD Opteron processors<br />
Appro <strong>WH300</strong> User’s Guide 5<br />
<strong>WH300</strong><br />
Chipset NVIDIA nForce TM Professional 2200/2050 + AMD 8131 PCI-X Tunnel<br />
Memory Type Registered ECC DDR 333/ 400<br />
Memory Capacity Up to 16GB in 8 DIMM sockets<br />
Floppy-Drive 1.44MB FDD (optional)<br />
CD ROM CD/DVD ROM (optional)<br />
Disk Controller<br />
Drive Bays – Int.<br />
Single Channel ATA-133 controller<br />
Two integrated dual port SATAII controller<br />
Up to 6 internal, fixed HDDs – SATA, SCSI<br />
6x hot-swappable SCSI kit or 6x hot-swappable SATA kit<br />
Drive Bays – Ext. 2x 5.25” external drive bays, 1x 3.5” external drive bay<br />
Maximum<br />
Storage Capacity<br />
Graphics N/A<br />
3.0TB SATA, 1.8TB SCSI<br />
Network Interface Two IEEE 820.3 NVIDIA MAC Gigabit Port<br />
Input/Output One serial port, one 1394 port, four USB ports, KBD/MIC, audio<br />
Expansion Slot<br />
Two x16 PCI-E slot, one 64bit/133MHz PCI-X slot<br />
Two 64bit/100MHz PCI-X slots, one 32bit/33MHz PCI slot<br />
Power Supply 110-220VAC,auto-sensing, 600W single, fixed PS<br />
AC Amperage 10A at 110VAC; 5A @ 220VAC<br />
Cooling Two system fans<br />
Weight Installed: 30-50 lbs., Shipping: 55 lbs. max.<br />
Dimensions<br />
Temperature<br />
17.8”H x 9.3”W x 19.0”D<br />
(452mm x 236mm x 483mm)<br />
Operating: 10ºC to 35ºC<br />
Storage: 70º C max.<br />
Rev. 2.0<br />
1/23/06
Chapter 2<br />
Important Safety Information<br />
Only a technically qualified person shall access, integrate, configure, and service this<br />
product.<br />
2.1 Intended Application Uses<br />
Appro <strong>WH300</strong> User’s Guide 6<br />
Rev. 2.0<br />
1/23/06<br />
This product was evaluated as Information Technology Equipment (ITE), which may be installed<br />
in offices, schools, computer rooms, and similar commercial type locations. The suitability of<br />
this product for other Product Categories and Environment (such as medial, industrial, alarm<br />
systems, and test equipment), other than an ITE application, may require further evaluation.<br />
2.2 Safety Instructions and Information<br />
To avoid personal injury or property damage, before you begin installing the product,<br />
read, observe, and adhere to all of the following safety instructions and information.<br />
The following safety symbols may be used throughout this product guide, and may be<br />
marked on the product and or its packaging.<br />
Table 1. Safety Symbols<br />
CAUTION<br />
WARNING<br />
Indicates the presence of a hazard that may cause minor personal injury or property<br />
damage if the CAUTION is ignored.<br />
Indicates the presence of a hazard that may result in serious injury or death if the<br />
WARNING is ignored.<br />
Indicates potential hazard if hazard symbol is ignored.<br />
Indicates shock hazards that result in serious injury or death if safety instructions are not<br />
followed.<br />
Indicates hot components or surfaces.<br />
Indicates do not touch fan blades, may result in injury.
2.3 Checking the Power Cord<br />
Appro <strong>WH300</strong> User’s Guide 7<br />
Rev. 2.0<br />
1/23/06<br />
CAUTION<br />
To avoid electrical shock, check the power cord(s) that will be used with the product:<br />
� Do not attempt to modify or use the AC power cord(s) if they are not the exact type<br />
required.<br />
� If a power cord is not compatible with the AC wall outlet in your region, get one<br />
that meets the following criteria:<br />
⎯ The power cord must be properly rated for the AC voltage in your region.<br />
⎯ The power cord plug cap must have an electrical current rating that is at least<br />
125% of the electrical current rating of the product.<br />
⎯ The power cord plug cap that plugs into the wall socket-outlet must have a<br />
grounding-type male plug designed for use in your region.<br />
⎯ The power cord must have safety certifications for your region, and shall be<br />
marked with the certification markings.<br />
⎯ The power cord plug cap that plugs into the AC receptacle on the power<br />
supply must be an IEC 320, sheet C13, type female connector.<br />
⎯ In Europe, the power cord must be less than 4.5 meters (14.76 feet) long, and<br />
it must be flexible (harmonized) or VDE certified cordage to comply<br />
with the chassis’ safety certifications.<br />
� The power supply cord(s) is the main disconnect device to AC power. The socket<br />
outlet(s) shall be near the equipment and shall be readily accessible for<br />
disconnection.<br />
2.4 Earth-Ground Socket Outlets<br />
CAUTION<br />
To avoid electrical shock, the system power cord(s) must be plugged into socketoutlet(s)<br />
that is provided with a suitable earth ground. The system will be provided<br />
with the following marking:<br />
Connect only to properly earthed socket outlet.
2.5 Before You Remove the Access Covers<br />
2.6 Fans<br />
Appro <strong>WH300</strong> User’s Guide 8<br />
Rev. 2.0<br />
1/23/06<br />
CAUTION<br />
To avoid personal injury or property damage, the following safety instructions apply<br />
whenever accessing inside the product:<br />
� Turn off all peripheral devices connected to this product.<br />
� Turn off the system by pressing the power button on the front of the product.<br />
� Disconnect the AC power by unplugging all AC power cords from the system or<br />
wall outlet.<br />
� Disconnect all cables and telecommunication lines that are connected to the<br />
system.<br />
� Retain all screws or other fasteners when removing access cover(s). Upon<br />
completion of accessing inside the product, refasten access cover with original<br />
screws or fasteners.<br />
� Do not access inside power supply. There are no serviceable parts in the power<br />
supply.<br />
� Return to manufacturer for servicing.<br />
CAUTION<br />
To avoid injury do not contact moving fan blades.
2.7 Electrostatic Discharge (ESD)<br />
CAUTION<br />
Appro <strong>WH300</strong> User’s Guide 9<br />
Rev. 2.0<br />
1/23/06<br />
Perform the procedures in this product guide only at an electrostatic discharge (ESD)<br />
workstation, because the server components can be extremely sensitive to ESD. If no<br />
such station is available, you can reduce the risk of electrostatic discharge ESD<br />
damage by doing the following:<br />
� Wear an antistatic wrist strap and attach it to a metal part of the server.<br />
� Touch the metal on the server chassis before touching the server components.<br />
� Keep part of your body in contact with the metal server chassis to dissipate the<br />
static charge while handling the components.<br />
� Avoid moving around unnecessarily.<br />
� Hold the server components (especially boards) only by the edges.<br />
� Place the server components on a grounded, static-free surface. Use a<br />
conductive foam pad if available but not the component wrapper.<br />
� Do not slide the components over any surface.<br />
2.8 Cooling and Airflow<br />
CAUTION<br />
For proper cooling and airflow, always install all access covers before turning on the<br />
system. Operating the system for longer than five minutes without the covers in<br />
place can cause overheating and damage to system components.
Chapter 3<br />
Installation<br />
3.1 Parts List<br />
Ⓐ<br />
Ⓑ<br />
Ⓒ<br />
Ⓓ<br />
Ⓔ<br />
Ⓕ<br />
Ⓖ<br />
Ⓗ<br />
Ⓘ<br />
Appro <strong>WH300</strong> User’s Guide 10<br />
A Appro <strong>WH300</strong> Workstation<br />
Accessory Kit box contains:<br />
B 4x SATA data cable<br />
C 2x SATA power adapter<br />
D 1x system board manual<br />
E 1x system board quick ref. guide<br />
F 1x driver CD<br />
G 1x NVIDIA NVRAID driver disk<br />
H 1x LSI 53C1030 driver disk<br />
I 2x Front bezel keys<br />
J 1x SLI bridge board<br />
(Not pictured)<br />
K Power cord (Not pictured)<br />
Rev. 2.0<br />
1/23/06
3.2 Optional Items<br />
Appro <strong>WH300</strong> User’s Guide 11<br />
Rev. 2.0<br />
1/23/06<br />
Appro <strong>WH300</strong> can be ordered with multiple optional components; depending on what options<br />
were ordered, your kit may contain some or all of the following:<br />
Part # Orderable<br />
Qty<br />
Description<br />
22501-0001-00 0 or 1 3.5” 1.44MB Floppy Disk Drive<br />
Varies 1 to 6 3.5” Hard Disk Drive (SATA, or SCSI)<br />
Varies 0 or 1 5.25” CD/DVD ROM drive<br />
Varies 0 or 1 5.25” Tape Back-up drive<br />
Varies 0 or 1 PCI-Express Graphics Video Card<br />
Varies 0 or 1 RAID Card<br />
22302-0187-00 0 or 1 6x hot-swappable SCSI kit<br />
22302-0186-00 0 or 1 6x hot-swappable SATA kit<br />
3.3 Installing Peripherals<br />
Appro <strong>WH300</strong> should come pre-configured per your specific configuration, however Uniwide<br />
understands that the owner may want to update or upgrade the product from time to time. These<br />
instructions are meant to be helpful guidelines for those of you that wish to upgrade their<br />
workstation. Uniwide recommends that the product be returned to uniwide for any significant<br />
configuration changes to ensure continued warranty coverage. Please note that if the workstation<br />
is opened by non-uniwide certified technician, it can void the product warranty. Please contact<br />
Uniwide’s Technical Support prior to making any significant configuration change. Only<br />
technically qualified personnel should integrate this assembly.<br />
Peripherals<br />
i) 5.25-inch Removable Media Drive Bays<br />
The upper bays are designed for removable media peripherals. You can install up to<br />
two half-height peripherals.<br />
ii) 3.5-inch Hard Drive Bays<br />
The chassis supports up to six drives depending on the power budget. The drives are<br />
installed into a removable hard drive bay cage that is located beneath the floppy drive
Appro <strong>WH300</strong> User’s Guide 12<br />
Rev. 2.0<br />
1/23/06<br />
bay. The hard drive bay cage is not externally accessible.<br />
iii) Optional 3.5-inch Hot Swap Drive Bay<br />
The optional hot swap drive bay upgrade kit supports either up to six 3.5-inch SCSI<br />
or six 3.5-inch SATA hot-swap hard drives. Depending on the model chosen, up to<br />
six bays are included with the upgrade kit. If no drive is installed in a carrier, a<br />
plastic air baffle must be installed to ensure proper hard drive cooling.<br />
The hot swap drive bay accepts 1-inch peripherals that consume up to 18 Watts of<br />
power.<br />
3.4 Remove the Access Cover<br />
Observe the safety and ESD precautions at the beginning of this manual. Before removing the<br />
left side cover, power down the server and unplug all peripheral devices and the AC power<br />
cable.<br />
1. If the shipping screws are installed, remove them (letter A in the figure below).<br />
2. Push in on latch with your right hand, and with your left hand, grasp the rear cover<br />
clasp.( letter B in figure below)<br />
3. Slide left side cover rearward to remove from chassis (letter C in the figure), Set the cover<br />
aside..<br />
3.5 Remove the Front Bezel<br />
1. Disengage the two bezel tabs from the left side a chassis. See letter A in the figure.<br />
2. Rotate the left side of the front bezel assembly outward slightly. See letter B in the figure.
3. Disengage the three clips that attach the right side of the front bezel assembly to the<br />
chassis and remove. See letter C in the figure.<br />
Appro <strong>WH300</strong> User’s Guide 13<br />
Rev. 2.0<br />
1/23/06<br />
3.6 Install a 3.5-inch Floppy Drive<br />
1. Use the finger cutouts on the EMI shield to grasp the shield and remove it from the chassis.<br />
2. Remove the EMI shield from the 3.5-in device drive Bay (letter A in the following figure).<br />
Move latch to the “unlock” position (letter B in the figure)..<br />
3. Insert floppy drive into 3.5-inch Device Drive Bay (letter C in the figure)
Appro <strong>WH300</strong> User’s Guide 14<br />
Rev. 2.0<br />
1/23/06<br />
4. Line up holes in floppy drive with holes in chassis (letter D in the figure). Move latch to<br />
the “lock” position (letter E).<br />
5. Connect power (P5 connector from power supply) and data cables to the rear of the floppy<br />
drive (letter F in the figure below).<br />
3.7 Peripheral Drives<br />
3.7.1 Device Installation Considerations<br />
The number of devices you can install depends on:<br />
� The number supported by the bus on your server board and/or add-on controller<br />
card<br />
� The number of physical drive bays available<br />
� The combination of SCSI and IDE devices<br />
� The amount of power required by other components in your workstation.<br />
3.7.2 IDE Requirements<br />
If no drives are present on an IDE channel, the cable must be removed. If only one<br />
drive is installed, it should be connected at the end of the cable.<br />
� NOTE<br />
To disable the IDE controller: If you plan to disable the<br />
IDE controller to reuse the interrupt for that controller, you<br />
must physically unplug the IDE cable from the board<br />
connector if a cable is present. Simply disabling the drive
Appro <strong>WH300</strong> User’s Guide 15<br />
by configuring the SSU option does not make the interrupt<br />
available.<br />
Rev. 2.0<br />
1/23/06<br />
3.7.3 Installing a 5.25-inch Removable Media Device<br />
Two 5.25-inch half-height bays provide space for tape backup, CD-ROM, or other<br />
removable media drives.<br />
� NOTE<br />
Save the EMI shields: EMI integrity and cooling are both<br />
protected by having drives installed in the bays or EMI<br />
shields covering the bays. When you install a drive, save the<br />
shield to reinstall in case you should later remove the drive<br />
and not reinstall one in the same bay.<br />
1. Remove the EMI shield from the 5.25-in device drive bay (letter A in the<br />
following figure). Move latch to the “unlock” position (letter B in the figure).<br />
2. Insert CD-ROM or DVD-ROM drive into the 5.25-in device drive bay (letter C in<br />
the following figure).<br />
3. Line up holes in CD-ROM drive with holes in chassis (letter D in the figure).<br />
Move latch to the “lock” position (letter E in the figure below).<br />
4. Connect power (P3 or P4 connector from the power supply) and data cables to the<br />
rear of the CD-ROM or DVD-ROM drive (letter F in the figure).
3.7.4 Installing 3.5-inch Hard Drive<br />
Six 3.5-inch half-height bays provide space for hard drives.<br />
� NOTE<br />
The drive bay cage can only be fully populated with six hard<br />
drives if the power budget has the capacity for it. Before<br />
installing more than four hard drives, calculate the power<br />
used by each installed device and compare it to the allowed<br />
power budget. Or if uncertain, please consult an Uniwide<br />
Technical Support Engineer. When installing more than four<br />
drives a Y-cable may be needed for the power connectors.<br />
1. Loosen thumb screw and remove the drive cage EMI shield (letter A in the<br />
following figure)..<br />
Appro <strong>WH300</strong> User’s Guide 16<br />
Rev. 2.0<br />
1/23/06
Appro <strong>WH300</strong> User’s Guide 17<br />
Rev. 2.0<br />
1/23/06<br />
2. Remove any PCI add-in boards that use the PCI card guide.<br />
3. Remove the PCI card guide by pressing in on the blue tabs (letter A in the<br />
following figure) and pulling the PCI card guide outward (letter B in the figure).<br />
4. Route the required power cables (connectors P8-P13) from behind the PCI card<br />
guide through the cable routing area at the bottom of the fixed drive cage..
Appro <strong>WH300</strong> User’s Guide 18<br />
Rev. 2.0<br />
1/23/06<br />
5. Pull the drive latch forward to unlatch the drive locking assembly for the drive<br />
bay you want to install a hard drive in..<br />
6. Insert fixed hard drive into drive bay and push until it stops. Ensure that the<br />
power and data connector end of the hard drive is facing forward..
7. Push drive latch in to lock hard drive into drive bay..<br />
Appro <strong>WH300</strong> User’s Guide 19<br />
Rev. 2.0<br />
1/23/06<br />
Warning: Drive bay slots 1, 3, and 5 MUST be populated first. Failure to do so<br />
could result inthermal issues within the chassis.
Appro <strong>WH300</strong> User’s Guide 20<br />
Rev. 2.0<br />
1/23/06<br />
8. Install power (letter A in the following figure) and data (letter B in the figure)<br />
cables to each of the installed drives. The cables route through the oval opening<br />
at the bottom of the fixed drive cage..<br />
9. Re-attach the drive cage EMI shield to the chassis and tighten the thumb screw.
Appro <strong>WH300</strong> User’s Guide 21<br />
Rev. 2.0<br />
1/23/06<br />
10. Re-install the PCI card guide. Insert tabs on left side of PCI card guide into slots<br />
in chassis (letter A in the following figure). Swing PCI card guide into chassis<br />
until right-side blue tabs snap into place (letter B in the figure).
Appro <strong>WH300</strong> User’s Guide 22<br />
Rev. 2.0<br />
1/23/06<br />
3.7.5 Installing an Add-in Board<br />
You may want to install an operating system before installing any add-in boards. If so,<br />
skip this step and return to it when you are ready.<br />
CAUTIONS<br />
Do not overload the server board by installing add-in<br />
boards that draw excessive current.<br />
Add-in boards can be extremely sensitive to ESD and always<br />
require careful handling. After removing the board from its<br />
protective wrapper or from the server board, place it<br />
component side up on a grounded, static free surface or<br />
conductive foam pad if available. Do not slide the board<br />
over any surface.<br />
1. Open the back panel PCI Add-in Card Retention Device by pressing open from<br />
the inside of the chassis.<br />
2. Remove the PCI slot shield, if it has not already been removed, by pushing the<br />
shield out from the inside of the chassis.
Appro <strong>WH300</strong> User’s Guide 23<br />
Rev. 2.0<br />
1/23/06<br />
3. Remove a PCI add-in board from its protective wrapper. Be careful not to touch<br />
the components or gold-edge connectors. Place board on an anti-static surface.<br />
Record the type and serial number of the add-in board in your equipment log. Set<br />
jumpers or switches on the board according to the manufacturer’s instructions..<br />
4. Hold the PCI add-in board by its top edge or upper corners. Firmly press the addin<br />
board into an expanision slot on the server board (letter A in the following<br />
figure). Close the back panel PCI Add-in Card Retention Device (letter B in the<br />
figure).<br />
5. Repeat the previous steps until all PCI add-in boards are installed.<br />
6. Attach cables, if necessary.
Appro <strong>WH300</strong> User’s Guide 24<br />
Rev. 2.0<br />
1/23/06<br />
3.8 Install the Front Bezel<br />
1. Line up the three clips on the right-side of the front bezel assembly with the<br />
corresponding slots on the right-side of the chassis (letter A in the following figure).<br />
2. Engage the clips with the slots . See letter B in the figure.<br />
3. Rotate the left side of the the front bezel assembly towards the chassis. See letter C in the<br />
figure.<br />
4. Snap the two bezel tabs into the corresponding recesses at the left edge of the chassis<br />
front panel. See letter D in the figure<br />
3.9 Install the Access Cover<br />
Warning: This chassis must be operated with the left side cover installed to ensure proper<br />
cooling.<br />
1. Slide the left side cover on the chassis and latch securely (see letter A in the following<br />
figure).<br />
2. Replace screws (see letter B in the figure).
Appro <strong>WH300</strong> User’s Guide 25<br />
Rev. 2.0<br />
1/23/06
Chapter 4<br />
<strong>WH300</strong> Maintenance<br />
Appro <strong>WH300</strong> User’s Guide 26<br />
Rev. 2.0<br />
1/23/06<br />
Replacing Fans<br />
The chassis contains two replaceable system fans. The power supply fan(s) are not replaceable.<br />
Your replacement fan should be the same size and type as the fan you are removing.<br />
4.1 Replacing a Front System Fan<br />
4.1.1 Hot-Swap Drive Bay<br />
When the hot-swap drive bay is installed, the front system fan is located on the hotswap<br />
drive bay.<br />
1. Remove the left access cover.<br />
2. Disconnect the fan cable from the server board.<br />
3. Remove the system fan from its snap-in bracket by pressing the two bracket<br />
tabs outward<br />
4. Attach the fan to the fan bracket by placing two corners of the fan into the<br />
two holding slots on the fan bracket. Press the fan into the fan bracket until is<br />
clicks into place.<br />
Caution: Ensure that the label and directional airflow arrow on fan are pointed out<br />
(away from the backplane).
5. Connect the fan cable to the server board.<br />
6. Replace the access cover.<br />
Appro <strong>WH300</strong> User’s Guide 27<br />
Rev. 2.0<br />
1/23/06<br />
4.2 Replacing a Rear System Fan<br />
1. Remove the left side cover.<br />
2. Disconnect the fan power cable from the server board (see letter A in the following figure).<br />
3. Remove the system fan from its snap-in bracket by pressing the two bracket tabs outward<br />
(see letter B in the figure).<br />
4. Install the new system fan in the snap-in bracket.<br />
5. Reconnect the fan cable to the server board.<br />
6. Install the left side cover.
4.3 Replacing the Power Supply<br />
WARNINGS<br />
Hazardous conditions, power supply: Hazardous voltage, current,<br />
and energy levels are present inside the power supply. There are<br />
no user-serviceable parts inside it; servicing should be done by<br />
technically qualified personnel.<br />
To replace the power supply:<br />
1. Disconnect the A/C power from the power supply.<br />
2. Remove the left access cover.<br />
3. Disconnect all of the power cables inside the chassis.<br />
4. Rotate the blue locking mechanism (see letter A in the following figure to the open<br />
position).<br />
5. Once the fixed power supply is loose, push the power supply against the blue locking<br />
mechanism and then lift the power supply out of the chassis.<br />
Appro <strong>WH300</strong> User’s Guide 28<br />
Rev. 2.0<br />
1/23/06
Appro <strong>WH300</strong> User’s Guide 29<br />
Rev. 2.0<br />
1/23/06<br />
6. Insert new fixed power supply in chassis. Ensure that the blue locking mechanism is still in<br />
the open position. Make sure that the new fixed power supply rests on the small metal shelf<br />
on the side wall of the chassis (see letter A in the following figure).<br />
7. Rotate the blue locking mechanism to the locked position (see letter A in the following<br />
figure).
8. Connect the power cables to the server board and peripherals.<br />
9. Replace the access cover.<br />
10. Connect the A/C power to the power supply.<br />
Appro <strong>WH300</strong> User’s Guide 30<br />
Rev. 2.0<br />
1/23/06
Chapter 5<br />
<strong>WH300</strong> <strong>Architecture</strong><br />
5.1 Appro <strong>WH300</strong> front view<br />
A. 5.25-inch removable media drive bays<br />
B. Front panel controls and indicators<br />
C. 3.5-inch removable media drive bay<br />
D. Internal hard drive bay cage (behind door)<br />
E. Security lock<br />
F. USB port<br />
Appro <strong>WH300</strong> User’s Guide 31<br />
Rev. 2.0<br />
1/23/06
LED Description<br />
5.2 Front Panel Controls and Indicators<br />
A. Power LED<br />
B. Power button<br />
C. NOT USED<br />
D. Reset button<br />
E. NOT USED<br />
F. NOT USED<br />
G. Hard drive activity LED<br />
H. NOT USED<br />
LED Name Color Condition Description<br />
Power LED Green ON Power on<br />
OFF Power off<br />
Hard Drive activity Green BLINK Hard drive activity<br />
OFF No activity<br />
Appro <strong>WH300</strong> User’s Guide 32<br />
Rev. 2.0<br />
1/23/06
5.3 Appro <strong>WH300</strong> rear view<br />
A. Power supply<br />
B. AC input power connector<br />
Appro <strong>WH300</strong> User’s Guide 33<br />
C. Alternate external SCSI knockout – NOT USED<br />
D. Fan<br />
E. I/O ports<br />
F. Alternate Serial B port knockout – NOT USED<br />
G. PCI Add-in Card slots<br />
H. PCI Tool-less Card Retention Mechanisms<br />
I. External SCSI knockout – NOT USED<br />
J. Serial B port knockout – NOT USED<br />
Rev. 2.0<br />
1/23/06
Appendix A<br />
Power Supply Specifications<br />
600Watt Single Power Supply Input Voltages<br />
600 Watt Power Supply<br />
� 100-127 V∼ at 50/60 Hz; 10 A max.<br />
� 200-240 V∼ at 50/60 Hz; 5 A max.<br />
600W Single Power Supply Output Voltages<br />
600 Watt Power Supply<br />
Appro <strong>WH300</strong> User’s Guide 34<br />
Rev. 2.0<br />
1/23/06<br />
The table below lists the total wattage available from the power subsystem for each voltage.<br />
If you configure your system heavily, ensure that your loads do not exceed the combined total<br />
wattage of 600 Watts..<br />
Power Supply System Output Capability<br />
Voltage Maximum Current<br />
+3.3 V 20 A<br />
+5.0 V 24 A<br />
+5 V Standby 2 A<br />
+12.0 V 43 A<br />
–12.0 V 0.5 A<br />
CAUTION<br />
Do not exceed a combined power output of 300 Watts for the +5 V and<br />
+3.3 V outputs. Exceeding a recommended power output may cause<br />
power supplies to overheat and malfunction.<br />
The expansion slots on the server board are rated for no more than 25 Watts for any one slot.<br />
The average current usage per slot should not exceed 13 Watts.
Appendix B<br />
System Environmental Specifications<br />
Environmental Specifications<br />
Temperature<br />
Humidity<br />
Shock<br />
Non-operating<br />
Operating<br />
Non-operating<br />
Operating<br />
Packaged<br />
–40 ° to 70 °C.<br />
Appro <strong>WH300</strong> User’s Guide 35<br />
5 ° to 35 °C; derated 0.5 °C for every 1000 ft (305 m) to a maximum<br />
of 10,000 ft.<br />
95% relative humidity (non-condensing) at 30 °C.<br />
2.0 g, 11 msec, 1/2 sine<br />
Operational after an 18” free fall.<br />
Acoustic noise 50 dBA in a typical office ambient temperature (65-75 °F). Your selection of<br />
peripherals may change the noise level.<br />
Electrostatic discharge (ESD) Tested to 15 kilovolts (kV); no component damage.<br />
Rev. 2.0<br />
1/23/06
Appendix C<br />
Contacting UNIWIDE<br />
How to Obtain Warranty Service<br />
To obtain warranty service for this product, please contact UNIWIDE.<br />
Appro <strong>WH300</strong> User’s Guide 36<br />
Rev. 2.0<br />
1/23/06<br />
Korea – Call uniwide at 82-31-450-0505 during the warranty period during normal business<br />
hours (Pacific Time), excluding holidays. Please be prepared to provide: (1) Organization name,<br />
your name, address, and telephone numbers; (2) model name and serial number of the Product;<br />
(3) an explanation of the problem. The customer service representative may need additional<br />
information from you depending on the nature of the problem.<br />
Outside of Korea – Call 82-31-450-0556<br />
Returning a Defective Product<br />
Before returning any product, call the RMA department at Appro. If the Customer Support<br />
representative verifies that your product is defective, you will receive a Return Merchandise<br />
Authorization(RMA) number to place on the outer package of the product. Uniwide cannot<br />
accept any product without an RMA number on the package.<br />
Technical Support<br />
Phone: 82-31-450-0505<br />
Fax: 82-31-450-0529<br />
For the latest Statement of Limited Warranty, please visit Uniwide’s website at<br />
http://www.uniwide.co.kr/support/main.php3