POSITION PAPER • The Parrallel Squat - Bigger Faster Stronger
POSITION PAPER • The Parrallel Squat - Bigger Faster Stronger
POSITION PAPER • The Parrallel Squat - Bigger Faster Stronger

Create successful ePaper yourself
Turn your PDF publications into a flip-book with our unique Google optimized e-Paper software.
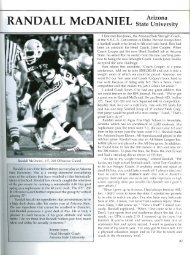
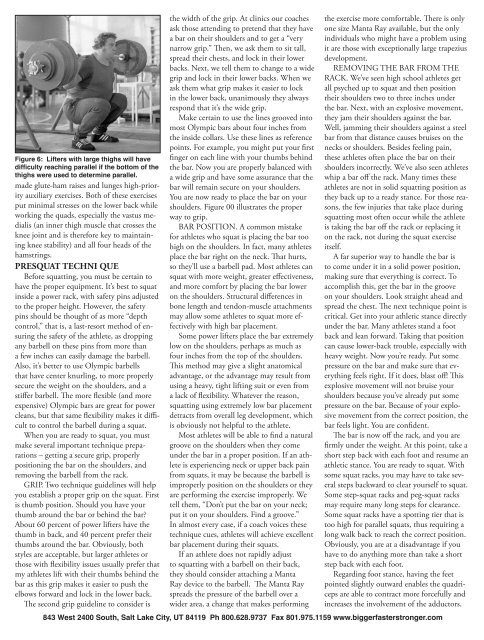
Figure 6: Lifters with large thighs will have<br />
difficulty reaching parallel if the bottom of the<br />
thighs were used to determine parallel.<br />
made glute-ham raises and lunges high-priority<br />
auxiliary exercises. Both of these exercises<br />
put minimal stresses on the lower back while<br />
working the quads, especially the vastus medialis<br />
(an inner thigh muscle that crosses the<br />
knee joint and is therefore key to maintaining<br />
knee stability) and all four heads of the<br />
hamstrings.<br />
PRESQUAT TECHNI QUE<br />
Before squatting, you must be certain to<br />
have the proper equipment. It’s best to squat<br />
inside a power rack, with safety pins adjusted<br />
to the proper height. However, the safety<br />
pins should be thought of as more “depth<br />
control,” that is, a last-resort method of ensuring<br />
the safety of the athlete, as dropping<br />
any barbell on these pins from more than<br />
a few inches can easily damage the barbell.<br />
Also, it’s better to use Olympic barbells<br />
that have center knurling, to more properly<br />
secure the weight on the shoulders, and a<br />
stiffer barbell. <strong>The</strong> more flexible (and more<br />
expensive) Olympic bars are great for power<br />
cleans, but that same flexibility makes it difficult<br />
to control the barbell during a squat.<br />
When you are ready to squat, you must<br />
make several important technique preparations<br />
– getting a secure grip, properly<br />
positioning the bar on the shoulders, and<br />
removing the barbell from the rack.<br />
GRIP. Two technique guidelines will help<br />
you establish a proper grip on the squat. First<br />
is thumb position. Should you have your<br />
thumb around the bar or behind the bar?<br />
About 60 percent of power lifters have the<br />
thumb in back, and 40 percent prefer their<br />
thumbs around the bar. Obviously, both<br />
styles are acceptable, but larger athletes or<br />
those with flexibility issues usually prefer that<br />
my athletes lift with their thumbs behind the<br />
bar as this grip makes it easier to push the<br />
elbows forward and lock in the lower back.<br />
<strong>The</strong> second grip guideline to consider is<br />
the width of the grip. At clinics our coaches<br />
ask those attending to pretend that they have<br />
a bar on their shoulders and to get a “very<br />
narrow grip.” <strong>The</strong>n, we ask them to sit tall,<br />
spread their chests, and lock in their lower<br />
backs. Next, we tell them to change to a wide<br />
grip and lock in their lower backs. When we<br />
ask them what grip makes it easier to lock<br />
in the lower back, unanimously they always<br />
respond that it’s the wide grip.<br />
Make certain to use the lines grooved into<br />
most Olympic bars about four inches from<br />
the inside collars. Use these lines as reference<br />
points. For example, you might put your first<br />
finger on each line with your thumbs behind<br />
the bar. Now you are properly balanced with<br />
a wide grip and have some assurance that the<br />
bar will remain secure on your shoulders.<br />
You are now ready to place the bar on your<br />
shoulders. Figure 00 illustrates the proper<br />
way to grip.<br />
BAR <strong>POSITION</strong>. A common mistake<br />
for athletes who squat is placing the bar too<br />
high on the shoulders. In fact, many athletes<br />
place the bar right on the neck. That hurts,<br />
so they’ll use a barbell pad. Most athletes can<br />
squat with more weight, greater effectiveness,<br />
and more comfort by placing the bar lower<br />
on the shoulders. Structural differences in<br />
bone length and tendon-muscle attachments<br />
may allow some athletes to squat more effectively<br />
with high bar placement.<br />
Some power lifters place the bar extremely<br />
low on the shoulders, perhaps as much as<br />
four inches from the top of the shoulders.<br />
This method may give a slight anatomical<br />
advantage, or the advantage may result from<br />
using a heavy, tight lifting suit or even from<br />
a lack of flexibility. Whatever the reason,<br />
squatting using extremely low bar placement<br />
detracts from overall leg development, which<br />
is obviously not helpful to the athlete.<br />
Most athletes will be able to find a natural<br />
groove on the shoulders when they come<br />
under the bar in a proper position. If an athlete<br />
is experiencing neck or upper back pain<br />
from squats, it may be because the barbell is<br />
improperly position on the shoulders or they<br />
are performing the exercise improperly. We<br />
tell them, “Don’t put the bar on your neck;<br />
put it on your shoulders. Find a groove.”<br />
In almost every case, if a coach voices these<br />
technique cues, athletes will achieve excellent<br />
bar placement during their squats.<br />
If an athlete does not rapidly adjust<br />
to squatting with a barbell on their back,<br />
they should consider attaching a Manta<br />
Ray device to the barbell. <strong>The</strong> Manta Ray<br />
spreads the pressure of the barbell over a<br />
wider area, a change that makes performing<br />
the exercise more comfortable. <strong>The</strong>re is only<br />
one size Manta Ray available, but the only<br />
individuals who might have a problem using<br />
it are those with exceptionally large trapezius<br />
development.<br />
REMOVING THE BAR FROM THE<br />
RACK. We’ve seen high school athletes get<br />
all psyched up to squat and then position<br />
their shoulders two to three inches under<br />
the bar. Next, with an explosive movement,<br />
they jam their shoulders against the bar.<br />
Well, jamming their shoulders against a steel<br />
bar from that distance causes bruises on the<br />
necks or shoulders. Besides feeling pain,<br />
these athletes often place the bar on their<br />
shoulders incorrectly. We’ve also seen athletes<br />
whip a bar off the rack. Many times these<br />
athletes are not in solid squatting position as<br />
they back up to a ready stance. For those reasons,<br />
the few injuries that take place during<br />
squatting most often occur while the athlete<br />
is taking the bar off the rack or replacing it<br />
on the rack, not during the squat exercise<br />
itself.<br />
A far superior way to handle the bar is<br />
to come under it in a solid power position,<br />
making sure that everything is correct. To<br />
accomplish this, get the bar in the groove<br />
on your shoulders. Look straight ahead and<br />
spread the chest. <strong>The</strong> next technique point is<br />
critical. Get into your athletic stance directly<br />
under the bar. Many athletes stand a foot<br />
back and lean forward. Taking that position<br />
can cause lower-back trouble, especially with<br />
heavy weight. Now you’re ready. Put some<br />
pressure on the bar and make sure that everything<br />
feels right. If it does, blast off! This<br />
explosive movement will not bruise your<br />
shoulders because you’ve already put some<br />
pressure on the bar. Because of your explosive<br />
movement from the correct position, the<br />
bar feels light. You are confident.<br />
<strong>The</strong> bar is now off the rack, and you are<br />
firmly under the weight. At this point, take a<br />
short step back with each foot and resume an<br />
athletic stance. You are ready to squat. With<br />
some squat racks, you may have to take several<br />
steps backward to clear yourself to squat.<br />
Some step-squat racks and peg-squat racks<br />
may require many long steps for clearance.<br />
Some squat racks have a spotting tier that is<br />
too high for parallel squats, thus requiring a<br />
long walk back to reach the correct position.<br />
Obviously, you are at a disadvantage if you<br />
have to do anything more than take a short<br />
step back with each foot.<br />
Regarding foot stance, having the feet<br />
pointed slightly outward enables the quadriceps<br />
are able to contract more forcefully and<br />
increases the involvement of the adductors.<br />
843 West 2400 South, Salt Lake City, UT 84119 Ph 800.628.9737 Fax 801.975.1159 www.biggerfasterstronger.com