Contents - Cobra Electronics Corporation
Contents - Cobra Electronics Corporation
Contents - Cobra Electronics Corporation
You also want an ePaper? Increase the reach of your titles
YUMPU automatically turns print PDFs into web optimized ePapers that Google loves.
1<br />
Introduction<br />
<strong>Contents</strong><br />
Introduction .............................................................................................. 2<br />
Important Information and Customer Assistance ....................................... 3<br />
Components ............................................................................................. 4<br />
Features ................................................................................................... 5<br />
Registration and Downloading .................................................................. 6<br />
Installation ................................................................................................ 7<br />
Operating Instructions ............................................................................. 12<br />
Troubleshooting ...................................................................................... 16<br />
Limited 1-Year Warranty ......................................................................... 17<br />
Product Service and Trademark Acknowledgement ................................. 18
Introduction<br />
Introduction<br />
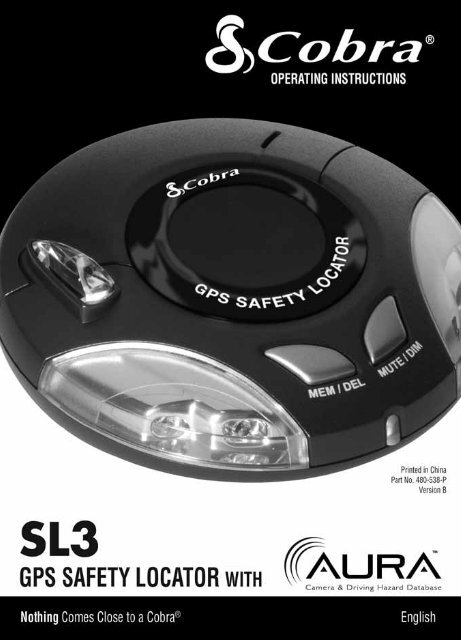
Thank you for purchasing the <strong>Cobra</strong> SL3 GPS Safety Locator.<br />
This user manual aims to provide you with installation and user instructions for the SL3<br />
GPS Safety Locator.<br />
Utilizing the very latest Global Positioning Satellite (GPS) technology, <strong>Cobra</strong> has created the SL3,<br />
which has been specifically designed to help you drive safely in today’s driving environment by<br />
alerting you quickly and easily to the presence of red light cameras, speed cameras, accident<br />
“hot spots” and known speed traps.<br />
AURA Camera and Driving Hazard Database<br />
The AURA database contains the geographical coordinates of all “fixed” speed/red light camera<br />
monitoring systems, many officially designated accident “hot spots” and known speed trap<br />
locations. The AURA database is constantly monitored and updated by our data collection team,<br />
ensuring that you are alerted to every potentially hazardous stretch of road or danger spot. The<br />
SL3 connects quickly and easily to your PC so that you can download and update the database<br />
in a matter of minutes. Please note that a certain level of System Software is required on your<br />
PC, see the section on System Software in this manual for further details. Once the database<br />
has been downloaded, your SL3 compares your position using it’s built-in GPS antenna, with<br />
the position of every known “fixed” speed monitoring/red light camera system, accident “hot<br />
spot” and known speed trap locations alerting you both audibly and visually via a loud piezo<br />
beeper and a LED display ensuring your highest concentration at all times.<br />
Drive Safely with AURA<br />
The <strong>Cobra</strong> SL3 has been designed and manufactured to help enhance road safety and should<br />
not be used as a license to speed or a substitute for concentration. Driving within the posted<br />
speed limit while carefully observing current road conditions and local regulations is essential.<br />
Nothing Comes Close to a <strong>Cobra</strong> ®<br />
2
3<br />
Introduction<br />
Important Information<br />
Important Information and<br />
Customer Assistance<br />
Safe Driving<br />
Motorists, as well as operators of emergency or service vehicles, are expected to exercise all<br />
due caution while using this product, and to obey all applicable traffic laws.<br />
Security of Your Vehicle<br />
Before leaving your vehicle, always remember to conceal your GPS Safety Locator in order to<br />
reduce the possibility of break-in and theft.<br />
Customer Assistance<br />
Should you encounter any problems with this product, or not understand its many features,<br />
please refer to this owner’s manual. If you require further assistance after reading this manual,<br />
<strong>Cobra</strong> <strong>Electronics</strong> offers the following customer assistance services:<br />
For Assistance in the U.S.A.<br />
Automated Help Desk English only. 24 hours a day, 7 days a week 773-889-3087 (phone).<br />
Customer Assistance Operators English and Spanish. 8:00 a.m. to 5:30 p.m. Central Time<br />
Mon. through Fri. (except holidays) 773-889-3087 (phone).<br />
Questions English and Spanish. Faxes can be received at 773-622-2269 (fax).<br />
Technical Assistance English only. www.cobra.com (on-line: Frequently Asked Questions).<br />
English and Spanish. productinfo@cobra.com (e-mail).<br />
For Assistance Outside the U.S.A.<br />
Contact Your Local Dealer<br />
©2009 <strong>Cobra</strong> <strong>Electronics</strong> <strong>Corporation</strong><br />
6500 West Cortland Street<br />
Chicago, Illinois 60707 USA<br />
www.cobra.com
Introduction<br />
Components<br />
Components<br />
The following components come as standard with your <strong>Cobra</strong> SL3 GPS Safety Locator:<br />
1 x SL3 system<br />
1 x Windshield bracket with suction cups<br />
1 pair x Hook & Loop fastener<br />
1 x Coiled 12V power cord with cigarette lighter socket adaptor<br />
1 x USB - PC connecting cable<br />
Nothing Comes Close to a <strong>Cobra</strong> ®<br />
4
5<br />
Introduction<br />
2<br />
3<br />
9<br />
4<br />
Features<br />
DC12V<br />
1. Mute/Dim Button<br />
6. Bracket Mounting Slot<br />
2. Memory/Delete Button 7. 12V Power Input Socket<br />
3. Zone 1 Alert* (Green LED) 8. USB Socket<br />
4. Zone 2 Alert* (Amber LED) 9. Power On/Off/Volume Control<br />
5a. Zone 3 Alert* (Red LED)<br />
5b. GPS Status Indicator * Refer to “Alerts” section of the manual for Zone.<br />
-Flashing Red: establishing<br />
satellite connection when singly lit.<br />
-Green: satellite connection established.<br />
4<br />
5a,<br />
5b<br />
7<br />
6<br />
1<br />
8<br />
3
Introduction<br />
Registration<br />
Registration and<br />
Downloading<br />
IMPORTANT PLEASE READ BEFORE USING YOUR COBRA SL3!<br />
Registering your <strong>Cobra</strong> SL3:<br />
The database built into your <strong>Cobra</strong> SL3 is populated with the latest data available during<br />
production. However, you will need to register your SL3 to receive your one (1) year free<br />
database “update” subscription to the AURA Camera and Driving Hazard Database. Please<br />
note that the database may not be 100% up-to-date due to the time elapsed between<br />
production and your purchase of the SL3. Therefore it is recommended that you register your<br />
product and periodically perform AURA database updates to ensure that your SL3 works as<br />
effectively as possible.<br />
Register On-line:<br />
Go to the official AURA website http://aura.cobra.com and register on-line. Your unit and your<br />
one (1) year free subscription to AURA will be activated immediately upon registration.<br />
Downloading<br />
1. First time registration: go to http://aura.cobra.com,<br />
select the SL3 model, complete the registration form<br />
and click “Register”.<br />
2. Click on “Update My Data” and follow the<br />
online instructions.<br />
(Caution: Do not plug in the SL3 into your PC’s USB port<br />
until the GPS data updater is installed.)<br />
3. Once installed, proceed to launch the updater<br />
and follow on screen instructions.<br />
Caution: While updating your SL3, do not plug unit in<br />
using the 12v power supply. The USB port will supply all<br />
necessary power.<br />
For future updates, simply plug your GPS Locator into your<br />
PC’s USB drive for automatic update of new data.<br />
Minimum system requirements:<br />
• Windows ® XP or Vista.<br />
• USB 1.1 or above.<br />
• Access to the Internet.<br />
NOTE: This device complies with part 15 of FCC rules: Operation is subject to the<br />
following two conditions: (1) This device may not cause harmful interference,<br />
and (2) This device must accept any interference received including intererence<br />
that may cause undesired operation.<br />
Nothing Comes Close to a <strong>Cobra</strong> ®<br />
6
7<br />
Mounting<br />
Installation<br />
Installation<br />
Once you have performed a download it is time to install the <strong>Cobra</strong> SL3 into your vehicle. The<br />
most important aspect of this installation is ensuring that the SL3 is positioned in such a way<br />
that it has a clear view of the sky while ensuring that the device is situated so that it does not<br />
interfere with the vehicle controls, jeopardize passenger or driver safety.<br />
For best results, mount the SL3 on to the vehicles dashboard so that the top of the unit has a<br />
clear view of the sky. When positioning your SL3 ensure that it is located in such a way that<br />
you can easily view the LED display without having to take your eyes from the road and so<br />
that you can reach the controls safely.<br />
Please also be aware that you will need to be able to remove the device to perform downloads.<br />
Once you have found a suitable location for your SL3, secure it in place with the 'Hook and Loop'<br />
fastener or suction cup bracket provided, remembering to clean the area where the fastener or<br />
bracket is going to be positioned to ensure a good contact.<br />
More in depth mounting instructions are provided below.<br />
PLEASE NOTE: Be careful to choose a location that does not block the driver’s view or<br />
endanger the driver or passengers should your vehicle suddenly come to a stop or be involved<br />
in an accident.
Mounting<br />
Installation<br />
Installing your <strong>Cobra</strong> SL3 using the Hook and Loop fastener<br />
The <strong>Cobra</strong> SL3 can be installed anywhere on the dashboard as long as the built-in GPS antenna<br />
has a clear view of the sky, you can easily see the LED display, and you can operate the<br />
controls safely. You will also need to be sure that you can connect the power connection cable.<br />
Your SL3 can be installed easily with the Hook and Loop fastener if you have a sufficiently flat<br />
area on your dashboard. Follow these instructions to mount the control panel in this manner.<br />
• Use a damp cloth to thoroughly clean the bottom of the SL3 and the area where you intend<br />
to mount your unit.<br />
• With the two parts of the Hook & Loop fastener still fastened together, peel the backing<br />
tape from the softer ‘Loop’ side of the fastener and apply it to the bottom of your SL3 unit.<br />
• Next, while the two parts are still fastened, remove the backing tape from the “Hook” side<br />
and position the unit onto the desired area.<br />
• Finally, plug the smaller plug on one end of the power cable into the socket marked DC12V<br />
on the back off the SL3 and plug the larger plug into the cigarette lighter socket of your<br />
vehicle. Your SL3 is now ready for use.<br />
Nothing Comes Close to a <strong>Cobra</strong> ®<br />
8
9<br />
Mounting<br />
Installation<br />
Installing your <strong>Cobra</strong> SL3 using the Windshield Suction Cup bracket<br />
If you prefer, you can mount your SL3 to the inside of your vehicle’s windshield using the suction<br />
cup bracket provided. Simply select a position within the windshield so that the top of the<br />
unit has a clear view of the sky, remembering that you need to connect the power connection<br />
cable, as well as ensuring that you can read the LED display and reach the controls safely.<br />
Follow these instructions to mount the unit in this way<br />
• Install the suction cups onto the bracket by fitting them into its holes.<br />
• Clean the area where you wish to position the bracket thoroughly with a glass cleaner.<br />
• Carefully bend the bracket of the SL3 so that when it is mounted on to the windshield the<br />
Control Panel is facing in the desired direction.<br />
• Slide the SL3 onto the bracket until it is secure and the unit is positioned in as horizontal a<br />
position as possible.<br />
• To remove the SL3, simply slide the unit off the bracket from the front.<br />
• Finally, plug the smaller plug on one end of the power cable into the socket marked DC12V<br />
on the back off the SL3 and plug the larger plug into the cigarette lighter socket of your<br />
vehicle. Your SL3 is now ready for use.
Power Connection<br />
Power Connection<br />
Installation<br />
Using the cigarette lighter socket<br />
The <strong>Cobra</strong> SL3 comes with a power cable designed to plug into your vehicles cigarette lighter<br />
socket. Take the power cord and plug the smaller end into the DC 12V input socket on the back<br />
of the SL3 and the cigarette lighter adapter in your vehicles cigarette lighter socket.<br />
DC12V<br />
Please Note: Do not leave your SL3 plugged into the cigarette lighter socket when you start<br />
your vehicle. The cigarette lighter socket is prone to power surges that may damage your unit.<br />
If the device does not power up, please check that the cigarette lighter socket is clean of any<br />
debris, remembering not to insert any metal objects into the socket. Check that the cigarette<br />
lighter adapter is inserted all the way into the socket and that the fuse in the cigarette lighter<br />
adapter is operational. If your SL3 will still not power up, please check that the cigarette lighter<br />
in your vehicle is functioning correctly.<br />
Replacing the Fuse<br />
If the detector stops operating, the fuse in the cigarette lighter plug may be blown. If it has<br />
blown, follow these steps to replace it with a 2 amp, 5 x 20mm, fast-acting fuse.<br />
Caution: Using a fuse that does not meet these ratings or defeating fuse protection can<br />
damage your unit, the power cable, or the vehicles electrical system.<br />
1. Hold the ring near the tip of the cigarette lighter plug, then carefully unscrew the ring by<br />
turning it counterclockwise.<br />
Nothing Comes Close to a <strong>Cobra</strong> ®<br />
10
Power Connection<br />
11<br />
Installation<br />
Caution: If you must use pliers to loosen the ring, be careful not to crush the tip. Never use<br />
pliers or other tools to retighten the ring on the cigarette lighter plug.<br />
2. Pull the ring straight out, then remove the metal tip, spring and old fuse.<br />
3. Check the fuse to see if it has blown. If it has, replace it.<br />
4. Replace the metal tip and spring inside the ring, then place the fuse inside the cigarette<br />
lighter plug and screw the ring back onto the plug. Make sure the metal tip is visible when<br />
you reassemble the cigarette lighter plug.
Operation<br />
Operating Instructions<br />
Starting Up<br />
After you have successfully installed your <strong>Cobra</strong> SL3 it is time to perform the first start up. First,<br />
make sure your vehicle is parked in as open a space as possible, clear of tall trees and buildings<br />
so that the built-in GPS antenna has a clear view of the sky above. Next, power the unit up by<br />
turning the on/off/volume towards you. The SL3 will go through a brief self test procedure and<br />
then the central red LED will flash indicating that the unit is searching for a satellite connection.<br />
The SL3 needs to acquire a minimum of 4 satellites to work effectively. Once this has been<br />
achieved the LED will turn green and will stop flashing. Once the solid green LED is displayed<br />
your SL3 is ready for use and will now automatically alert you of any locations stored in<br />
it’s database.<br />
If the GPS Safety Locator has never been used before or has not been used for over a week,<br />
the first “cold” start up could take somewhere between 5 to 30 minutes. Once initialized,<br />
subsequent start ups will take as little as 60 seconds.<br />
1. Mute Button<br />
If during an alert you decide that you would like to mute it, simply press the ‘Mute’ button<br />
briefly. The LEDs will continue to display a visual alert but no sound will be heard. After you<br />
have travelled out of range of the location the device will automatically reset so that next time<br />
you encounter a location you will receive both audible and visual alerts as normal.<br />
GPS SAFETY LOCATOR<br />
2. Setting Brightness<br />
You can adjust the brightness of the display on your SL3 by pressing the MUTE/DIM button<br />
when the unit is not detecting or locating a signal. There are 2 levels of brightness to choose<br />
from bright or dimmed.<br />
GPS SAFETY LOCATOR<br />
Nothing Comes Close to a <strong>Cobra</strong> ®<br />
12
13<br />
Operation<br />
Operating Instructions<br />
3. Adjusting the volume<br />
The SL3 has an adjustable volume for controlling the loudness of the audible alert. To increase<br />
the volume simply turn the volume control on the right hand side of the device, towards you. To<br />
decrease the volume of the alert turn the volume control away from you.<br />
OFF • 2 •<br />
4. Adding your own locations<br />
It is possible to add your own personal locations to your SL3. To add a new location make sure<br />
you are stationary and parked in a safe, legal manner then press the ‘MEM/DEL’ button (see<br />
below) for approximately 2 seconds. It is possible to store up to 1,000 of your own coordinates.<br />
When your SL3 detects one of your own co-ordinates the led display and beeper will alert you.<br />
GPS SAFETY LOCATOR<br />
5. Deleting your own locations<br />
There are two ways to delete locations you have saved and stored yourself. You can delete<br />
them independently by pressing and holding the MEM/DEL button for approximately 2 seconds<br />
while you are at that particular location and receiving a User Saved alert. Secondly you can<br />
delete all your saved locations at the same time by pressing and holding the MEM/DEL button<br />
and the MUTE/DIM button together as you power the unit up. Finally power your SL3 off and<br />
then on again. Once a user location has been deleted it cannot be recovered except by<br />
re-marking it.<br />
GPS SAFETY LOCATOR
Operation<br />
Operating Instructions<br />
Alerts<br />
The <strong>Cobra</strong> SL3 responds to four types of alerts: Speed Trap, Photo Enforcement (Red Light<br />
and Speed Cameras), Caution Areas (high accident locations) and User Points. The audio<br />
alerts are sounded whenever the SL3 crosses the boundries as shown in Table 1 and Figure 1.<br />
The Audio Warnings are shown in Table 2.<br />
DIRECTION<br />
OF TRAVEL<br />
SPEED RANGE<br />
Table 1<br />
ZONE BOUNDARY<br />
MPH 1 2 3<br />
1 - 45 1000 ft. 500 ft. 150 ft.<br />
Greater than 45 2500 ft. 1250 ft. 400 ft.<br />
Figure 1<br />
DISTANCE TO LOCATION<br />
ZONE 1 ZONE 2 ZONE 3<br />
Table 2<br />
ALERT TYPE AUDIO ALERT SOUNDED*<br />
Known Speed Traps 1 Beep<br />
Photo Enforcement Area 2 Pulses<br />
Caution Area 3 Buzzes<br />
User Location 4 Chirps<br />
LOCATION<br />
Nothing Comes Close to a <strong>Cobra</strong> ®<br />
* Upon unit power-up, all alert tones will be played in the order shown on this table as part of a<br />
unit self-test.<br />
14
15<br />
Operation<br />
Operating Instructions<br />
Alerts (continued)<br />
Visually, the zones are indicated with the 5 LEDs flashing while within the zones:<br />
ZONE 1: Outer green LEDs flash.<br />
ZONE 2: Outer green and middle<br />
amber LEDs flash.<br />
ZONE 3: The green, amber and<br />
center red LEDs all flash.
Operation<br />
Troubleshooting<br />
Troubleshooting<br />
The unit cannot be switched on<br />
Check that the cigarette lighter adapter is well inserted into the cigarette lighter socket and that<br />
the cigarette light socket is functioning properly. Check that the lighter socket is clean and free<br />
from debris. Also check that the fuse in the cigarette lighter adaptor is functioning correctly.<br />
The unit cannot acquire satellites<br />
Check that the <strong>Cobra</strong> SL3’s built-in GPS antenna has a clear view of the sky above. If this is the<br />
first time you have powered up your SL3, please remember that the first ‘cold’ start may take<br />
between 15-30 minutes to acquire sufficient satellites for operation. Disconnect and re-connect<br />
the power to the unit and start the power up procedure again.<br />
The satellite signal temporarily or permanently drops out<br />
This may happen temporarily in areas where there are a significant number of tall buildings<br />
or trees or while driving through a tunnel. The signal should only be lost for a few seconds<br />
and will be quickly reacquired. Check that the device has not moved and that the built-in GPS<br />
antenna still has a good clear view of the sky above. Very occasionally you may experience bad<br />
satellite coverage that may lead to you losing a signal. This should last no longer than a few<br />
short minutes.<br />
The device does not appear to alert properly at camera locations<br />
Have you performed an update recently? If not, perform a fresh update to ensure that you have<br />
all the latest coordinates stored on your device. Visit http://aura.cobra.com for the latest<br />
database.<br />
Nothing Comes Close to a <strong>Cobra</strong> ®<br />
16
17<br />
Warranty<br />
Limited 1-Year Warranty<br />
For Products Purchased In The U.S.A.<br />
<strong>Cobra</strong> <strong>Electronics</strong> <strong>Corporation</strong> warrants that its SL3 GPS Safety Locators, and the com po nent parts<br />
thereof, will be free of defects in workmanship and materials for period of one (1) year from the<br />
date of first consumer purchase. This war ran ty may be enforced by the first consumer pur chas er,<br />
pro vid ed that the product is utilized within the U.S.A.<br />
<strong>Cobra</strong> will, without charge, repair or replace, at its option, de fec tive SL3 GPS Safety Locators,<br />
products or com po nent parts upon de liv ery to the <strong>Cobra</strong> Factory Service Department, ac com pa nied<br />
by proof of the date of first consumer pur chase, such as a du pli cat ed copy of a sales receipt.<br />
You must pay any initial shipping charges required to ship the product for warranty service, but the<br />
return charges will be at <strong>Cobra</strong>’s expense, if the product is repaired or replaced under warranty.<br />
This warranty gives you specific rights, and you may also have other rights which vary from state<br />
to state.<br />
Exclusions: This limited warranty does not apply:<br />
1) To any product dam aged by accident.<br />
2) In the event of misuse or abuse of the product or as a result of un au tho rized alterations or repairs.<br />
3) If the serial number has been altered, defaced or re moved.<br />
4) If the owner of the product resides outside the U.S.A.<br />
All implied warranties, including war ran ties of mer chant abil i ty and fitness for a par tic u lar purpose<br />
are limited in duration to the length of this warranty.<br />
<strong>Cobra</strong> shall not be liable for any incidental, con se quen tial or oth er dam ag es; including, without<br />
lim i ta tion, damages re sult ing from loss of use or cost of in stal la tion.<br />
Some states do not allow limitations on how long an implied warranty lasts and/or do not allow the<br />
ex clu sion or limitation of incidental or con se quen tial dam ag es, so the above lim itations may not<br />
apply to you.
Service Info<br />
Product Service and<br />
Trademark Acknowledgement<br />
Product Service<br />
If you have any questions about operation or installing your new <strong>Cobra</strong> product, or if you are<br />
missing parts…<br />
Please call <strong>Cobra</strong> first! DO NOT RETURN THIS PRODUCT TO THE STORE! See customer<br />
assistance on page A1.<br />
If you suspect that your unit requires service, please call 773-889-3087 BEFORE shipping it to<br />
<strong>Cobra</strong>. This will ensure that you receive service as quickly as possible.<br />
If you are asked to send your unit to the <strong>Cobra</strong> factory, please follow these steps:<br />
1) Send the complete unit, including power cord. (It is not necessary to include the<br />
mounting bracket.)<br />
2) For warranty repair, enclose some form of proof-of-purchase, such as a photocopy or carbon<br />
copy of a sales receipt. If you send the original receipt, it cannot be returned.<br />
3) Enclose a typed or clearly written description of the problem you are having with your unit,<br />
plus the name and address where you want the unit returned.<br />
4) Pack the unit securely to prevent damage during transit. If possible, use the original<br />
packing materials.<br />
5) Ship prepaid and insured using a traceable carrier such as United Parcel Service (UPS),<br />
Federal Express, or Priority mail with delivery confirmation.<br />
Ship to: <strong>Cobra</strong> Factory Service, <strong>Cobra</strong> <strong>Electronics</strong> <strong>Corporation</strong>, 6500 West Cortland<br />
Street, Chicago, IL 60707 U.S.A.<br />
6) Please allow three (3) to four (4) weeks before contacting us about the status of your service.<br />
Call 773-889-3087 for assistance. If your unit is under warranty, it will either be repaired or<br />
replaced upon receipt, depending on the model. If your unit is out of warranty, you will receive<br />
a letter informing you of the repair or replacement charge.<br />
Trademark Acknowledgement<br />
<strong>Cobra</strong> ® , Nothing Comes Close to a <strong>Cobra</strong> ® and the snake design are registered trademarks of<br />
<strong>Cobra</strong> <strong>Electronics</strong> <strong>Corporation</strong>.<br />
<strong>Cobra</strong> <strong>Electronics</strong> <strong>Corporation</strong> and AURA are trademarks of <strong>Cobra</strong> <strong>Electronics</strong><br />
<strong>Corporation</strong>, USA.<br />
Nothing Comes Close to a <strong>Cobra</strong> ®<br />
18
The <strong>Cobra</strong> line of quality products includes:<br />
CB Radios<br />
microTALK ® Radios<br />
Radar/Laser Detectors<br />
Safety Alert ® Traffic Warning System<br />
HighGear ® Accessories<br />
<strong>Cobra</strong>Marine ® VHF Radios<br />
Power Inverters<br />
Accessories<br />
Nothing Comes Close to a <strong>Cobra</strong> ®<br />
For more information or to<br />
order any of our products,<br />
please visit our website:<br />
www.cobra.com


