

supplement - Honda Marine
supplement - Honda Marine
supplement - Honda Marine

You also want an ePaper? Increase the reach of your titles
YUMPU automatically turns print PDFs into web optimized ePapers that Google loves.
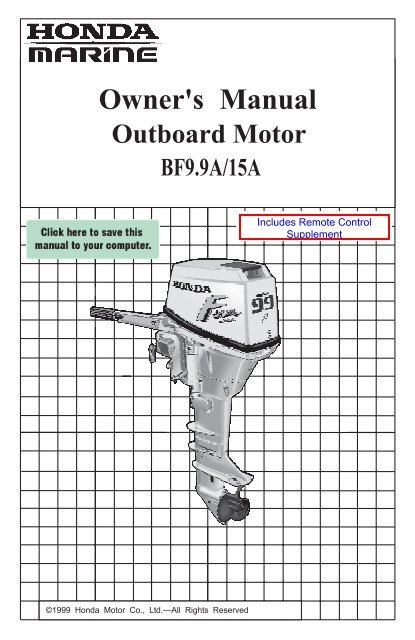
Owner's Manual<br />
Outboard Motor<br />
BF9.9A/15A<br />
©1999 <strong>Honda</strong> Motor Co., Ltd.—All Rights Reserved
The engine exhaust from this product<br />
contains chemicals known to the State<br />
of California to cause cancer, birth<br />
defects or other reproductive harm. I<br />
Keep this owner’s manual handy, so you can refer to it at any time.<br />
This owner’s manual is considered a permanent part of the outboard motor<br />
and should remain with the outboard motor if resold.<br />
The information and specifications included in this publication were in effect<br />
at the time of approval for printing. <strong>Honda</strong> Motor Co., Ltd. reserves the right,<br />
however, to discontinue or change specifications or design at any time without<br />
notice and without incurring any obligation whatever. No part of this publica-<br />
tion may be reproduced without written permission.
INTRODUCTION<br />
Congratulations on your selection of a <strong>Honda</strong> outboard motor. We are certain<br />
you will be pleased with your purchase of one of the finest outboard motors on<br />
the market.<br />
We want to help you get the best results from your new outboard motor and<br />
to operate it safely. This manual contains the information on how to do that;<br />
please read it carefully.<br />
As you read this manual, you will find information preceded by a m<br />
symbol. That information is intended to help you avoid damage to your<br />
outboard motor, other property, or the environment.<br />
We suggest you read the warranty policy to fully understand its coverage and<br />
your responsibilities of ownership. The warranty policy is a separate document<br />
that should have been given to you by your dealer.<br />
When your outboard motor needs scheduled maintenance, keep in mind that<br />
your <strong>Honda</strong> servicing dealer is specially trained in servicing <strong>Honda</strong> outboard<br />
motors. Your <strong>Honda</strong> servicing dealer is dedicated to your satisfaction and will<br />
be pleased to answer your questions and concerns.<br />
Best Wishes,<br />
<strong>Honda</strong> Motor Co., Ltd.<br />
1
INTRODUCTION<br />
A FEW WORDS ABOUT SAFETY<br />
Your safety and the safety of others are very important. And using this<br />
outboard motor safely is an important responsibility.<br />
To help you make informed decisions about safety, we have provided<br />
operating procedures and other information on labels and in this manual. This<br />
information alerts you to potential hazards that could hurt you or others.<br />
Of course, it is not practical or possible to warn you about all the hazards<br />
associated with operating or maintaining a outboard motor. You must use your<br />
own good judgment.<br />
You will find important safety information in a variety of forms, including:<br />
l Safety Labels - on the outboard motor.<br />
l Safety Messages- preceded by a safety alert symbol A and one of three<br />
signal words, DANGER, WARNING, or CAUTION.<br />
These signal words mean:<br />
You WILL be KILLED or SERIOUSLY HURT if you<br />
don’t follow instructions.<br />
You CAN be KILLED or SERIOUSLY HURT if you<br />
don’t follow instructions.<br />
You CAN be HURT if you don’t follow instructions.<br />
l Safety Headings - such as IMPORTANT SAFETY INFORMATION.<br />
l Safety Section - such as OUTBOARD MOTOR SAFETY.<br />
l Instructions - how to use this outboard motor correctly and safely.<br />
This entire book is filled with important safety information - please read it<br />
carefully.<br />
2
CONTENTS<br />
OUTBOARD MOTOR SAFETY .................................................................. 7<br />
IMPORTANT SAFETY INFORMATION ................................................. 7<br />
Operator Responsibility ..................................................................... 7<br />
Refuel With Care ............................................................................... 8<br />
Carbon Monoxide Hazard .................................................................. 8<br />
SAFETY LABEL LOCATIONS ............................................................... 9<br />
CONTROLS & FEATURES ...................................................................... 10<br />
COMPONENT & CONTROL LOCATIONS .......................................... 10<br />
CONTROLS ......................................................................................... 12<br />
Engine Stop Switch .......................................................................... 12<br />
Choke Knob ..................................................................................... 12<br />
Throttle Grip ..................................................................................... 13<br />
Throttle Friction Knob ...................................................................... 13<br />
Gearshift Lever ................................................................................ 14<br />
Recoil Starter Grip ........................................................................... 14<br />
Electric Starter Button ...................................................................... 14<br />
Steering Friction Bolt ....................................................................... 15<br />
Tilt Lever .......................................................................................... 15<br />
Transom Angle Adjusting Rod ......................................................... 16<br />
Engine Cover Lock Lever ................................................................ 16<br />
Fuel Priming Bulb ............................................................................ 17<br />
Fuel Cap Vent Knob ....................................................................... .17<br />
FEATURES .......................................................................................... 17<br />
Fuel Gauge ...................................................................................... 17<br />
Oil Pressure Indicator Light ............................................................. 17<br />
Water Check Hole.. .......................................................................... 17<br />
Anode .............................................................................................. 18<br />
Overrev Limiter ................................................................................ 18<br />
3
CONTENTS<br />
INSTALLATION ........................................................................................ 19<br />
INSTALLATION POSITION ................................................................. 19<br />
INSTALLATION HEIGHT ..................................................................... 19<br />
OUTBOARD MOTOR ATTACHMENT.. .............................................. .20<br />
MOTOR ANGLE FOR CRUISING ....................................................... 21<br />
MOTOR ANGLE ADJUSTMENT ......................................................... 21<br />
BATTERY CONNECTIONS ................................................................. 22<br />
Models With Electric Starter ............................................................ 22<br />
Models Without Electric Starter ...................................................... .22<br />
Battery Installation ........................................................................... 23<br />
EMERGENCY PROCEDURES.. ......................................................... .23<br />
Connections to the Battery ............................................................. .24<br />
BEFORE OPERATION ............................................................................. 25<br />
ARE YOU READY TO GET UNDER WAY? ........................................ 25<br />
Knowledge ....................................................................................... 25<br />
Safety Apparel ................................................................................ .25<br />
IS YOUR OUTBOARD MOTOR READY TO GO?. ............................. .25<br />
Safety Inspection ............................................................................ .26<br />
Maintenance Inspection .................................................................. .26<br />
OPERATION ............................................................................................. 27<br />
SAFE OPERATING PRECAUTIONS.. ................................................ .27<br />
BREAK-IN PROCEDURE ................................................................... .27<br />
PORTABLE FUEL TANK PLACEMENT AND CONNECTIONS.. ....... .27<br />
Fuel Tank Placement ....................................................................... 27<br />
Fuel Hose Connections ................................................................... 28<br />
Fuel Priming .................................................................................... .28<br />
STARTING THE ENGINE ................................................................... .29<br />
EMERGENCY STARTING ................................................................... 33
CONTENTS<br />
STOPPING THE ENGINE ................................................................... .34<br />
Emergency Engine Stopping .......................................................... .34<br />
Normal Engine Stopping ................................................................. .34<br />
GEAR SHIFTING ................................................................................ .35<br />
STEERING .......................................................................................... .36<br />
CRUISING ........................................................................................... .37<br />
TILTING THE OUTBOARD MOTOR .................................................. .38<br />
SERVICING YOUR HONDA OUTBOARD MOTOR ................................ 40<br />
THE IMPORTANCE OF MAINTENANCE.. ......................................... .40<br />
MAINTENANCE SAFETY ................................................................... .41<br />
Safety Precautions.. ........................................................................ .41<br />
TOOL KIT AND SPARE PARTS ........ . ................................................ .42<br />
MAINTENANCE SCHEDULE ............................................................. .43<br />
REFUELING ........................................................................................ .44<br />
FUEL RECOMMENDATIONS.. ........................................................... .45<br />
COOLING SYSTEM CLEANING AND FLUSHING.. ........................... .45<br />
Cleaning and Flushing With the Flush Kit.. ..................................... .46<br />
Cleaning and Flushing Without the Flush Kit.. ................................ .46<br />
ENGINE OIL LEVEL CHECK .............................................................. .47<br />
ENGINE OIL CHANGE ........................................................................ 48<br />
ENGINE OIL RECOMMENDATIONS ................................................. .49<br />
GEAR OIL LEVEL CHECK .................................................................. 49<br />
GEAR OIL CHANGE ........................................................................... .50<br />
LUBRICATION .................................................................................... .51<br />
SPARK PLUG SERVICE .................................................................... .52<br />
FUEL FILTER REPLACEMENT .......................................................... .53<br />
RECOIL STARTER ROPE INSPECTION ................ i.. ........................ .55<br />
ANODE REPLACEMENT ................................................................... .55<br />
PROPELLER REPLACEMENT ........................................................... .56<br />
5
CONTENTS<br />
HELPFUL TIPS & SUGGESTIONS ......................................................... 57<br />
STORING YOUR OUTBOARD MOTOR.. ...........................................<br />
Storage Preparation .........................................................................<br />
.57<br />
57<br />
Storage Precautions ........................................................................ 59<br />
Removal From Storage .................................................................... 60<br />
TRANSPORTING ................................................................................ .60<br />
TAKING CARE OF UNEXPECTED PROBLEMS .................................... 61<br />
ENGINE WILL NOT START.. .............................................................. .61<br />
ENGINE OVERHEATS ........................................................................ 62<br />
BATTERY DOES NOT CHARGE AND ELECTRIC STARTER<br />
(applicable models) DOES NOT OPERATE ........................................<br />
Fuse Replacement ...........................................................................<br />
SUBMERGED MOTOR .......................................................................<br />
.63<br />
63<br />
.64<br />
TECHNICAL & CONSUMER INFORMATION ......................................... 66<br />
TECHNICAL INFORMATION ............................................................... 66<br />
Serial Number Locations ................................................................ .66<br />
Carburetor Modification for High Altitude Operation ....................... .67<br />
Oxygenated Fuels ........................................................................... .68<br />
Emission Control System Information .............................................. 69<br />
Specifications .................................................................................. .71<br />
WIRING DIAGRAMS.. .......................................................................... 74<br />
CONSUMER INFORMATION .............................................................. 76<br />
<strong>Honda</strong> Publications .......................................................................... 76<br />
Warranty Service Information .......................................................... 77<br />
INDEX .......................................................................................................<br />
QUICK REFERENCE INFORMATION . . . . . . . . . . . . . . . . . . . . . . . . . . . Inside back cover<br />
6<br />
78
OUTBOARD MOTOR SAFETY<br />
IMPORTANT SAFETY INFORMATION<br />
<strong>Honda</strong> BF9.9A and BF15A outboard motors are designed for use with boats<br />
that have a suitable manufacturer’s power recommendation, and other uses<br />
can result in injury to the operator or damage to the outboard motor and other<br />
property.<br />
Most accidents can be prevented if you follow all instructions in this manual<br />
and on the outboard motor. The most common hazards are discussed below,<br />
along with the best way to protect yourself and others.<br />
Operator Responsibility<br />
It is the operator’s responsbility to provide the necessary safeguards to<br />
protect people and property. Know how to stop the engine quickly in case<br />
of emergency. Understand the use of all controls.<br />
Stop the engine immediately if anyone falls overboard, and do not run the<br />
engine while the boat is near anyone in the water.<br />
Always stop the engine if you must leave the controls for any reason.<br />
Attach the emergency stop switch lanyard securely to the operator.<br />
Always wear a PERSONAL FLOTATION DEVICE (PFD) while on the boat.<br />
Familiarize yourself with all laws and regulations relating to the boating and<br />
the use of outboard motors.<br />
Be sure that anyone who operates the outboard motor receives proper<br />
instruction.<br />
Be sure the outboard motor is properly mounted on the boat.<br />
Do not remove the engine cover while the engine is running.<br />
Do not attempt to modify the outboard motor.<br />
Do not remove any labels, covers, or safety devices; they are installed for<br />
your safety.<br />
7
OUTBOARD MOTOR SAFETY<br />
Refuel With Care<br />
Gasoline is extremely flammable, and gasoline vapor can explode. Refuel<br />
outdoors, in a well-ventilaed area, with the engine stopped. Never smoke<br />
near gasoline, and keep other flames and sparks away.<br />
Remove any portable fuel tank from the boat for refueling. Keep the<br />
portable fuel tank away from the battery or other potential spark sources.<br />
Refuel carefully to avoid spilling fuel. Avoid overfilling the fuel tank.<br />
After refueling, tighten the filler cap securely. If any fuel is spilled, make sure<br />
the area is dry before starting the engine.<br />
Carbon Monoxide Hazard<br />
Exhaust gas contains poisonous carbon monoxide. Avoid inhalation of<br />
exhaust gas. Never run the engine in a closed garage or confined area.<br />
8
SAFETY LABEL LOCATIONS<br />
OUTBOARD MOTOR SAFETY<br />
The labels shown here contain important safety information. Please read them<br />
carefully. These labels are considered permanent parts of your outboard<br />
motor. If a label comes off or becomes hard to read, contact an authorized<br />
<strong>Honda</strong> servicing dealer for a replacement.<br />
I DO NOT OPERATE WITH ENGINE COVER REMOVED.<br />
I CHECK OIL LEVEL BEFORE STARTING.<br />
I FLUSH THE SYSTEM THOROUGHLY WITH FRESH WATER<br />
AITER EACH USE IN SALT WATER.
CONTROLS & FEATURES<br />
COMPONENT & CONTROL LOCATIONS<br />
ENGINE COVER<br />
WATER CHECK HOLE<br />
ENGINE OIL DRAIN PLUG<br />
ANTICAVITATION PLATE<br />
10<br />
‘Tq<br />
?!i@<br />
VENT KNOB FUEL GAUGE<br />
FUEL CAP<br />
PRIMING BULB<br />
\<br />
/<br />
I<br />
STARTER GRIP<br />
EMERGENCY STOP SWITCH<br />
LANYARD<br />
‘CLAMP SCREW<br />
TlLT LEVER<br />
FUEL HOSE CONNECTOR
THROlTLE GRIP<br />
THROlTLE FRICTION KNOB<br />
TILLER HANDLE<br />
STERN BRACKET<br />
TRANSOM ANGLE<br />
ADJUSTING ROD<br />
GEAR OIL LEVEL PLUG<br />
WATER INTAKE SCREEN<br />
GEAR OIL DRAIN PLUG<br />
OIL PRESSURE INDICATOR LIGHT<br />
ENGINE STOP SWITCH<br />
CHOKE KNOB<br />
CONTROLS & FEATURES<br />
OIL FILLER CAP<br />
OIL LEVER DIPSTICK<br />
ENGINE COVER LOCK LEVER<br />
FLUSHING PORT<br />
EXHAUST PORT<br />
FUEL HOSE CONNECTOR (MALE)<br />
11
CONTROLS & FEATURES<br />
CONTROLS<br />
Engine Stop Switch<br />
The engine stop switch has controls<br />
for normal engine stopping and<br />
emergency engine stopping.<br />
In normal operation, press the en-<br />
gine stop button to stop the engine.<br />
A clip and lanyard system stops the<br />
engine automatically if the operator<br />
falls away from the controls.<br />
The switch clip must be inserted in the engine stop switch in order for the<br />
engine to start and run. The other end of the lanyard attaches to the operator’s<br />
wrist. If the operator falls away from the controls, the lanyard pulls the clip out<br />
of the switch.<br />
Always attach the lanyard to your wrist before operating the outboard motor.<br />
A spare switch clip is supplied with the tool kit.<br />
Choke Knob<br />
Thechokeknobopensandcloses<br />
the choke valve in the carburetor.<br />
The CLOSED position enriches the<br />
fuel mixture for starting.<br />
The OPEN position provides the<br />
correct fuel mixture for operation<br />
after starting, and for restarting a<br />
warm engine.<br />
12<br />
CHOKE KNOB
Throttle Grip<br />
The throttle grip controls engine<br />
speed.<br />
An index mark on the tiller arm<br />
indicates throttle position.<br />
The BF9.9A gearshift mechanism<br />
limits throttle grip movement when<br />
the gearshift lever (p. 14) is in the N<br />
(neutral) position.<br />
The BF15A gearshift mechanism<br />
limits throttle grip movement when<br />
the gearshift lever (p. 14) is in the R<br />
(reverse) or N (neutral) position.<br />
Throttle Friction Knob<br />
The throttle friction knob adjusts<br />
resistance to throttle grip rotation.<br />
Turn the knob clockwise to increase<br />
friction for holding a throttle setting<br />
while cruising.<br />
Turn the knob counterclockwise to<br />
decrease friction for easy throttle<br />
grip rotation.<br />
CONTROLS & FEATURES<br />
INDEX MARK<br />
THROlTLE<br />
FRICTION<br />
KNOB ,<br />
TODECREASE<br />
FRICTION<br />
TO INCREASE<br />
13
CONTROLS & FEATURES<br />
Gearshift Lever<br />
The gearshift lever is used to select<br />
F (forward), N (neutral), or R (re-<br />
verse) gears.<br />
The engine can be started with the<br />
gearshift lever in the N (neutral)<br />
position only.<br />
If the gearshift lever is in the F<br />
(forward) or R (reverse) position,<br />
the recoil starter will not operate,<br />
and the electric starter button (ap-<br />
plicable models) is blocked.<br />
R @ever@ N (neutral)<br />
Recoil Starter Grip RECOIL STARTER GRIP<br />
Pull the starter grip to operate the<br />
recoil starter for starting the engine<br />
manually.<br />
Electric Starter Button (models<br />
equipped with electric<br />
starter)<br />
Press the starter button to start the<br />
motor.<br />
14<br />
ELECTRIC STARTER BUllON<br />
k .
Steering Friction Bolt<br />
The steering friction bolt adjusts<br />
steering resistance.<br />
Turn the bolt clockwise to increase<br />
friction for holding a steady course<br />
while cruising or to prevent the out-<br />
board motor from swinging while<br />
trailering the boat.<br />
Turn the bolt counterclockwise to<br />
reduce steering friction.<br />
Tilt Lever<br />
The tilt lever enables the outboard<br />
motor to be raised for shallow water<br />
operation, beaching, launching, or<br />
mooring.<br />
To tilt, move the lever to the TILT<br />
position, then raise the outboard<br />
motor until the tilt mechanism en-<br />
gages at 30”, 45” or 70” (p. 38).<br />
To return the outboard motor to the<br />
normal running position, move the<br />
tilt lever to the RUN position, raise<br />
the outboard motor slightly to disen-<br />
gage the tilt mechanism, then slowly<br />
lower the engine.<br />
CONTROLS & FEATURES<br />
TODECREASE<br />
m FRICTION<br />
15
CONTROLS & FEATURES<br />
Transom Angle Adjusting Rod<br />
The transom angle adjusting rod is<br />
used to adjust the angle of the out-<br />
board motor in the normal operating<br />
position (see page 21).<br />
To adjust, first tilt the outboard mo-<br />
tor, so it is not resting on the rod.<br />
Push the rod in, and turn the end of<br />
the rod up, so the latch will fall into<br />
line with the rod.<br />
Remove the rod, and reinsert it in<br />
the desired position.<br />
\ ’<br />
TRANSOM ANGLE<br />
ADJUSTING ROD<br />
To remove (unlocked)<br />
Push the rod in, and turn the end of<br />
the rod down, so the latch will fall to<br />
.<br />
the locked position. Then release<br />
the rod.<br />
?‘k<br />
To lock LATCH<br />
(locked)<br />
Engine Cover Lock Lever ENGINE COVER<br />
LOCK LEVER<br />
The engine cover lock lever fastens<br />
the cover to the outboard motor.<br />
To remove the cover, move the<br />
lever to the unlocked position, then<br />
lift off the cover.<br />
To install the cover, position the<br />
cover on the outboard motor, then<br />
move the lever to the locked posi-<br />
tion.<br />
16
Fuel Priming Bulb<br />
A priming bulb is built into the fuel<br />
hose that connects the portable fuel<br />
tank to the outboard motor.<br />
Before operating the outboard mo-<br />
tor, squeeze the priming bulb until it<br />
feels firm. This will ensure that fuel<br />
is supplied to the engine (see page<br />
28).<br />
Fuel Cap Vent Knob<br />
The cap is provided with a vent<br />
knob to seal the portable fuel tank<br />
for carrying it to and from the boat.<br />
Open the vent knob 2 or 3 turns<br />
before operating the outboard mo-<br />
tor (see page 28).<br />
FEATURES<br />
Fuel Gauge<br />
A fuel gauge is built into the cap of<br />
the portable fuel tank (see page<br />
44).<br />
Oil Prssure Indicator Light<br />
The oil pressure indicator light<br />
should remain lit while the engine is<br />
running. The light indicates that oil<br />
pressure is OK (see page 31).<br />
Water Check Hole<br />
Water should flow from the water<br />
check hole while the engine is run-<br />
ning. This shows that water is circu-<br />
lating through the engine cooling<br />
system (see page 32).<br />
CONTROLS & FEATURES<br />
VENT KNOB<br />
FUEL GAUGE<br />
WATER<br />
CHECK<br />
HOLE<br />
\<br />
RIMING BULB<br />
FUEL<br />
TANK<br />
CAP<br />
OIL PRESSURE<br />
INDICATOR LIGHT<br />
17
CONTROLS & FEATURES<br />
Anode<br />
The anode is a sacrificial material<br />
which helps to protect the outboard<br />
motor from corrosion.<br />
Overrev Limiter<br />
The engine is equipped with an overrev limiter to prevent the possibility of<br />
mechanical damage from excessive engine speed.<br />
The overrev limiter may be activated during operation, limiting engine speed,<br />
if the outoard motor is tilted excessively, or when ventilation occurs during a<br />
sharp turn.<br />
If the overrev limiter is activated, check the height and angle of the outboard<br />
motor.<br />
Excessive tilt angle during operation can cause propeller ventilation, over-<br />
heating, and water pump damage.<br />
18
INSTALLATION<br />
It is your responsibility to choose a boat suitable for the outboard motor.<br />
INSTALLATION POSITION<br />
Install at the stern, at the center line<br />
of the boat.<br />
INSTALLATION HEIGHT<br />
For proper propeller depth and en-<br />
gine cooling, the boat and outboard<br />
motor transom height must match.<br />
Three outboard motor transom<br />
heights are available. Match your<br />
boat’s transom height to the out-<br />
board motor transom height shown<br />
below.<br />
The anticavitation plate should be 0<br />
- 2 in (0 - 50 mm) below the bottom<br />
of the boat. With the boat in the<br />
water, loaded and motor off, the<br />
anticavitation plate should be about<br />
3.9 in (100 mm) below the surface<br />
of the water.<br />
Running the outboard motor with-<br />
out suff icient cooling water will dam-<br />
age the water pump and overheat<br />
the engine.<br />
Do not exceed the boat manu-<br />
facturer’s power recommendation.<br />
Damage and injury may result.<br />
STERNCENTER<br />
ANTlCAVlTATldN PLATE<br />
19
OUTBOARD MOTOR AlTACHMENT<br />
Attach the stern bracket to the tran-<br />
som and tighten the clamp screws.<br />
l Before operating the boat, check<br />
the tightness of the clamp screws.<br />
l Tie a rope through the hole in the<br />
stem bracket and secure the other<br />
end of the rope to the boat. This<br />
will prevent accidental loss of the<br />
motor.<br />
To prevent the outboard motor from<br />
falling accidentally, you may further<br />
secure the stern bracket to the tran-<br />
som board with commercially avail-<br />
able bolts, nuts and washers.<br />
After attaching the stern bracket to<br />
the transom board, be sure to apply<br />
sealant (THREEBOND 1216 or<br />
equivalent) to the bolt holes.<br />
This modification should be made<br />
by your authorized <strong>Honda</strong> marine<br />
dealer.<br />
20<br />
/ & SCREW<br />
SAFETY ROPE<br />
STERN<br />
BRACKET WASHER<br />
WAgHER TRANSOM BOARD
MOTOR ANGLE FOR CRUISING<br />
Adjust the motor so the propeller<br />
shaft is parallel with the water sur-<br />
face.<br />
INSTALLATION<br />
INCORRECT - INCORRECT ---<br />
CAUSES BOAT TO CAUSES BOAT TO<br />
“SQUAT” “PLOW”<br />
MOTOR ANGLE ADJUSTMENT<br />
If the propeller shaft is not parallel<br />
with the water surface, adjust by<br />
changing the transom angle adjust-<br />
ing rod position.<br />
There are four adjusting stages.<br />
1. Push in (A) the adjusting rod,<br />
twist upwards (B) and pull out to<br />
remove.<br />
2. Inserting the rod in the proper<br />
hole, twist it down to lock.<br />
) NOTICE 1<br />
To prevent damage to the motor or<br />
boat, make sure the transom angle<br />
adjusting bolt is locked.<br />
GIVES MAXIMUM<br />
PERFORMANCE<br />
TRANSOM ANGLE<br />
ADJUSTING ROD<br />
UNLOCKED<br />
TO CHANGE POSITION<br />
):I:<br />
TO LOCK LOCKED POSITION<br />
21<br />
.
INSTALLATION<br />
BATTERY CONNECTIONS<br />
<strong>Honda</strong> BF9.9A and BF15A outboard motors produce a 12-volt, 6-ampere<br />
battery-chaging current and are equipped for connection to a 12-volt battery.<br />
The battery-charging circuit is protected by a 15-ampere fuse located in the<br />
engine compartment.<br />
The outboard motor’s 12-volt output is intended for battery charging only.<br />
Lights and electrical accessories for the boat should be connected to the<br />
battery.<br />
WIRES TO BOAT LIGHTING<br />
AND ELECTRICAL ACCESSORIES<br />
BAlTERY CABLES 1 P-VOLT BAlTERY<br />
FROM OUTBOARD MOTOR<br />
Models With Electric Starter<br />
These models are equipped with battery cables. The positive (+) cable has a<br />
red band at the battery connector. The negative (-) cable has a black band at<br />
the battery connector.<br />
For electric starter operation, use a 12-volt battery with an ampere-hour rating<br />
of at least 40 Ah.<br />
Models Without Electric Starter<br />
These models are equipped with a 12-volt dc battery-charging receptacle and<br />
a plug which can be wired to a 12-volt battery to power lights and electrical<br />
accessories for the boat.<br />
22
INSTALLATION<br />
The receptacle is provided with a rubber cap, which should be attached when<br />
the plug is removed, in order to keep the receptacle clean and dry.<br />
To prepare the outboard motor for<br />
connection to a battery, pull the<br />
. plug out of its rubber boot, route<br />
suitable electrical wires through the<br />
boot, and screw them to the plug<br />
positive (+) and negative (-) termi-<br />
nals. Coat the plug terminals with<br />
grease, and reinstall the plug in the<br />
rubber boot.<br />
Battery Installation<br />
/<br />
PLUG<br />
NEGATIVE (-)<br />
\<br />
RUBBER<br />
TERMINAL<br />
BOOT<br />
Place the battery in a corrosion-resistant battery box that is securely mounted<br />
in a location away from the fuel tank and protected from water and direct<br />
sunlight.<br />
The battery contains sulfuric acid (electrolyte),<br />
which is highly corrosive and poisonous.<br />
Getting electrolyte in your eyes or on your<br />
skin can cause serious burns.<br />
Wear protective clothing and eye protection<br />
when working near the battery.<br />
EMERGENCY PROCEDURES<br />
Eyes - Flush with water from a cup or other container for at least 15 minutes<br />
(water under pressure can damage the eye). Immediately call a physician,<br />
local poison control center, or 911.<br />
Skin - Remove contaminated clothing. Flush the skin with large quantities of<br />
water. Call a physician immediately.<br />
Swallowing - Drink water or milk. Call your local poison control center or a<br />
physician immediately.<br />
23
INSTALLATION<br />
Connections to the Battery<br />
Connect the positive (+) battery cable to the positive (+) battery terminal, then<br />
connect the negative (-) battery cable to the negative (-) battery terminal.<br />
The negative (-) battery cable should always be removed from the battery<br />
when connecting or disconnecting the positive (+) battery cable, so tools<br />
cannot cause a short circuit if they touch a grounded part while being used on<br />
the positive (+) battery terminal fitting.<br />
Be careful to avoid connecting the battery in reverse polarity, as that will<br />
damage the battery-charging system in the outboard motor.<br />
. BLACK<br />
NEGATIVE (-)<br />
TERMINAL
BEFORE OPERATION<br />
ARE YOU READY TO GET UNDERWAY?<br />
Your safety is your responsibility. A little time spent in preparation will<br />
significantly reduce your risk of injury.<br />
Knowledge<br />
Read and understand this manual. Know what the controls do and how to<br />
operate them.<br />
Familiarize yourself with the outboard motor and its operation before you get<br />
underway. Know what to do in case of emergencies.<br />
Familiarize yourself with all laws and regulations relating to boating and the<br />
use of outboard motors.<br />
Safety Apparel<br />
Always wear a PFD while on the boat. Attach the emergency stop switch<br />
lanyard securely to your PFD or your wrist.<br />
IS YOUR OUTBOARD MOTOR READY TO GO?<br />
For your safety, and to maximize the service life of your equipment, it is very<br />
important to take a few moments before you operate the outboard motor to<br />
check its condition. Be sure to take care of any problem you find, or have your<br />
servicing dealer correct it, before you operate the outboard motor.<br />
Improperly maintaining this out-<br />
board motor, or failing to correct a<br />
problem before operation, could<br />
cause a malfunction in which you<br />
could be seriously injured.<br />
Always perform a preoperation<br />
inspection before each operation,<br />
and correct any problem.
BEFORE OPERATION<br />
Safety Inspection<br />
l Look around for signs of oil or gasoline leaks. Make sure the fuel tank is in<br />
good condition and properly secured in the,boat (see page 27). Check that<br />
the fuel hose is undamaged and properly connected (see page 28). Wipe<br />
up any spills before starting the engine.<br />
l Check the stern bracket to be sure the outboard motor is securely installed.<br />
l Check that all controls are operating properly.<br />
l Replace any damaged parts.<br />
l Check that all fasteners are in place and securely tightened.<br />
Maintenance Inspection<br />
26<br />
Check the engine oil level (see page 47). Running the engine with a low oil<br />
level can cause engine damage.<br />
Check to be sure the propeller is undamaged, and the retaining nut is<br />
secured with a cotter pin (see page 56).<br />
Check that the anode is securely attached to the anticavitation plate and is<br />
not excessively worn (see page 55). The anode helps to protect the<br />
outboard motor from corrosion.<br />
Make sure the tool kit and spare parts are onboard (see page 42).<br />
Replace any missing items.<br />
Check the fuel level in the fuel tank (see page 44).
OPERATION<br />
SAFE OPERATING PRECAUTIONS<br />
To safely realize the full potential of this outboard motor, you need a complete<br />
understanding of its operation and a certain amount of practice with its<br />
controls.<br />
Before operating the outboard motor for the first time, please review the<br />
MPORTANT SAFETY /NFORMAT/ON on page 7 and the chapter titled<br />
BEFORE OPERATION.<br />
For your safety, avoid starting or operating the engine in an enclosed area.<br />
Your engine’s exhaust contains poisonous carbon monoxide gas which can<br />
collect rapidly in an enclosed area and cause illness or death.<br />
BREAK-IN PROCEDURE<br />
Proper break-in procedure allows the moving parts to wear in smoothly for best<br />
performance and long service life.<br />
For the first 10 hours, run the outboard motor at low speed, and avoid full-<br />
throttle operation.<br />
PORTABLE FUEL TANK PLACEMENT AND CONNECTIONS<br />
Fuel Tank Placement<br />
Place the portable fuel tank in a well-ventilated location, away from direct<br />
sunlight.<br />
Gasoline is highly flammable<br />
and explosive.<br />
You can be burned or seriously<br />
injured when handling fuel.<br />
l Stop the engine and keep heat,<br />
sparks, and flame away.<br />
l Handle fuel only outdoors.<br />
l Wipe up spills immediately.<br />
27
OPERATION<br />
To ensure that the outboard motor<br />
will be able to draw fuel from the<br />
tank, place the tank within 6 feet of<br />
the outboard motor and not more<br />
than 3 feet below the fuel connector<br />
on the outboard motor.<br />
Secure the portable fuel tank in the<br />
boat, so it won’t move around and<br />
become damaged.<br />
Before use, open the fuel tank vent<br />
by turning the vent knob at least 2 or<br />
3 turns counterclockwise.<br />
Fuel Hose Connections<br />
Connect the fuel hose to the tank<br />
and the outboard motor, as shown.<br />
Be sure both connectors snap se-<br />
curely into place.<br />
Fuel Priming<br />
Hold the priming bulb with the outlet<br />
end higher than the inlet end.<br />
Squeeze the primer bulb several<br />
times, until it feels firm, indicating<br />
that fuel has reached the carbure-<br />
tor.<br />
Check to be sure there are no fuel<br />
leaks before starting the engine.<br />
Do not squeeze the priming bulb<br />
when the engine is running, be-<br />
cause that could flood the carbure-<br />
tor.<br />
28<br />
FUEi HOSE CONNECTOR<br />
FOR FUEL TANK<br />
VENT KNOB<br />
FUEL<br />
TANK<br />
CAP<br />
FUEL HOSE CONNECTOR<br />
FOR OUTBOARD MOTOR<br />
PRIMING BULB<br />
INiET<br />
(from fuel tank)
STARTING THE ENGINE<br />
OPERATION<br />
1. Put the emergency engine stop switch clip in the engine stop switch, and<br />
attach the lanyard to your wrist.<br />
The engine will not start or run, unless the clip is in the switch.<br />
The emergency engine stop switch clip and lanyard system is a safety<br />
device that will stop the engine if you fall away from the controls while<br />
operating the boat.<br />
Always attach the lanyard to your wrist before starting the engine.<br />
2. Check the position of the gear-<br />
shift lever. It must be in the N<br />
(neutral) position for starting.<br />
If the.gearshift lever is in the F<br />
(forward) or R (reverse) position,<br />
the recoil starter will not operate,<br />
and the electric starter button<br />
(applicable models) is blocked.<br />
EMERGENCY<br />
ENGINE STOP<br />
SWITCH CLIP<br />
\<br />
LANYARD<br />
ENGINE<br />
STOP<br />
SWITCH<br />
N (neutral)
3. Align the throttle grip START position with the mark on the tiller handle.<br />
MARK<br />
START<br />
THROlTLE GRIP<br />
4. To start a cold engine, pull out the choke knob. To restart a warm engine,<br />
leave the choke knob pushed in.<br />
5. Operate the starter.<br />
USING THE RECOIL STARTER<br />
CHOKE KNOB<br />
Pull the recoil starter grip slowly until you feel resistance, then pull briskly.<br />
pis7E-j<br />
l Do not allow the starter grip to snap back against the engine. Return it<br />
gently to prevent damage to the starter.<br />
l Do not pull the starter grip while the engine is running, as that may damage<br />
the starter.<br />
STARTER GRIP<br />
30<br />
J
USING THE ELECTRIC STARTER (applicable models)<br />
Press the starter button to operate the electric starter.<br />
1 NOTICE ]<br />
ELECTRIC STARTER BUlTON<br />
OPERATION<br />
GEAR SHIFT LEVER<br />
l Do not use the starter motor for more than 5 seconds. If the engine fails to<br />
start, release the starter button, and wait at least 10 seconds before<br />
operating the starter motor again.<br />
l Do not press the electric starter button while the engine is running. This may<br />
damage the starter.<br />
6. After starting, check the oil pressure indicator light. The light should be on<br />
while the engine is running. If the light is off, stop the engine immediately,<br />
check the engine oil level, and inspect the engine for oil leaks.<br />
If the engine fails to start, check the emergency stop switch clip.<br />
If the oil level is OK, but the light stays off while the engine is running, take<br />
the motor to an authorized <strong>Honda</strong> marine dealer immediately.<br />
OIL PRESSURE INDICATOR LIGHT<br />
I<br />
31
OPERATION<br />
7. After starting, be sure water is flowing out of the water check hole.<br />
If water does not flow out, or if steam comes out, stop the engine. check to see<br />
if the screen in the cooling water inlet is obstructed. Do not operate the engine<br />
until the problem has been corrected.<br />
WATER<br />
CHECK<br />
8. If the choke was used, push it in gradually as the engine warms up.<br />
9. Before leaving the dock, check the operation of the emergency stop switch.<br />
32
EMERGENCY STARTING<br />
If the recoil starter is not working properly, the engine can be started with the<br />
spare starter rope in the tool kit.<br />
6MM BOLTS<br />
1. Remove the engine cover.<br />
2. Remove the recoil starter by re-<br />
moving the three 6 mm bolts.<br />
3. Disconnect the neutral starter<br />
cable.<br />
4. Follow steps 1 through 4 of the<br />
normal engine starting procedure<br />
(p. 29 & 30).<br />
5. Wind the spare rope clockwise<br />
around the pulley, and then pull<br />
it straight out to start the engine.<br />
Keep clear of moving parts.<br />
6. Leave the recoil starter off and<br />
reinstall engine cover.<br />
Exposed moving parts can cause<br />
injury. Use extreme care when<br />
installing the engine cover. Do not<br />
operate the outboard motor without<br />
the engine cover.<br />
STARTER CABLE<br />
STARTER ROPE<br />
33
STOPPING THE ENGINE<br />
Emergency Engine Stopping<br />
Disengage the emergency engine stop switch clip from the engine stop switch<br />
by pulling the lanyard.<br />
It is a good idea to stop the engine with the emergency engine stop switch<br />
lanyard from time to time to be sure that the switch is operating properly.<br />
ENGINE STOP<br />
SWITCH EMERGENCY ENGINE STOP<br />
SWITCH LANYARD<br />
Normal Engine Stopping<br />
1. Turn the throttle grip to the SLOW position, and move the gearshift lever to<br />
the N (neutral) position.<br />
THROTTL<br />
2. Push the engine stop switch button until the engine stops.<br />
,<br />
NEUTRAL<br />
3. Remove the emergency engine stop switch lanyard and store it.<br />
STOP BUlTON<br />
ARSHIFT LEVER<br />
In the event that the engine does not stop when you push the engine stop<br />
switch, pull the emergency engine stop switch lanyard. If the engine continues<br />
to run, pull the choke knob to stop the engine.<br />
34
GEAR SHIFTING<br />
OPERATION<br />
Put the tilt lever in the RUN position to prevent the outboard motor from tilting<br />
up when operating in reverse (refer to page 38).<br />
The gearshift lever has 3 positions : FORWARD, NEUTRAL, and REVERSE.<br />
An indicator at the base of the gearshift lever aligns with letters F, N, or R on<br />
the engine case to show the gear that has been selected.<br />
Turn the throttle grip to SLOW to decrease engine speed before moving the<br />
gearshift lever.<br />
( NOTICE (<br />
When operating in reverse, proceed with caution to avoid hitting any underwa-<br />
ter obstructions with the propeller.<br />
The BF9.9A gear shift mechanism limits throttle opening in the N (neutral)<br />
position. The BF15A gear shift mechanism limits throttle opening in the N<br />
(neutral) and R (reverse) positions. Both outboard motors allow the throttle to<br />
be opened to FAST with the gear shift lever in the F (forward) position.<br />
THROTTLE GRIP<br />
RWARD<br />
NEUTRAL<br />
REVERSE<br />
RSHIFT LEVER<br />
35
STEERING<br />
To turn to the right, swing the tiller handle to the left. To turn to the left, swing<br />
the tiller handle to the right.<br />
Boats equipped with a remote control steering wheel are controlled in the<br />
same way as a car.<br />
RIGHT TURN LEFT TURN<br />
TILLER<br />
HANDL<br />
Swing the tiller handle to the left. Swing the tiller handle to the right.<br />
The steering friction should be adjusted so that stable boat operation is<br />
maintained with a minimum of operator effort.<br />
36<br />
STEERING FRICTION BOLT<br />
TODECREASE<br />
m FRICTION
With the gearshift lever in the for-<br />
ward position F, turn the throttle grip<br />
toward FAST to increase speed.<br />
For normal cruising, open the throttle<br />
about 314.<br />
To hold the throttle at a steady set-<br />
ting, turn the throttle friction knob<br />
clockwise. To free the throttle grip<br />
for manual speed control, turn the<br />
friction knob counterclockwise.<br />
This outboard motor is provided with<br />
an overrev limiter in order to pre-<br />
vent a breakdown due to excessive<br />
engine speed. If for example, the<br />
outboard motor is tilted excessively,<br />
or ventilation occurs during a sharp<br />
turn, the engine may overrev, acti-<br />
vating the overrev limiter, causing<br />
engine speed to become unstable.<br />
If the engine speed becomes un-<br />
stable when the outboard motor is<br />
run with the grip near the “fullyopen”<br />
position, return the grip to the “low<br />
speed”side until the speed becomes<br />
stable.<br />
For best performance, passengers<br />
and equipment should be distrib-<br />
uted evenly to balance the boat.<br />
THROTTLE /<br />
FRICTION KNOB<br />
OPERATION<br />
GEAdSHlFT LEVER<br />
TO DECREASE<br />
FRICTION<br />
THROlTLE GRIP<br />
TO INCREASE<br />
37
OPERATION<br />
TILTING THE OUTBOARD MOTOR<br />
Tilt the motor to prevent the propeller and gear case from hitting bottom when<br />
the boat is beached or stopped in shallow water.<br />
1. Stop the engine and put the gearshift lever into NEUTRAL.<br />
2. Pull the tilt lever toward you, set the lever in the TILT position, and raise the<br />
engine to either the 30°, 45” or 70” tilt position.<br />
Do not use the throttle grip to tilt the outboard motor.<br />
LT LEVER<br />
70” (when mooring) 45” 30” (when cruising in shallow water)<br />
3. To return the engine to the normal RUN position, move the tilt lever away<br />
from you until it stops, tilt the engine up slightly, then lower the engine<br />
slowly.<br />
1 NOTICE 1<br />
l Make sure water comes out from the cooling water check hole.<br />
l When the outboard motor is tilted, cruise at low speed.<br />
l Never operate in reverse when the outboard motor is tilted, because the<br />
outboard motor will rise suddenly.<br />
38
OPERATION<br />
(NOTICE1<br />
To avoid damaging the motor, be very careful when mooring a boat, especially<br />
when its motor is tilted up, Don’t allow the motor to strike against the pier or<br />
other boats.<br />
39
SERVICING YOUR I-IONDAOUTBOARD MOTOR<br />
THE IMPORTANCE OF MAINTENANCE<br />
Good maintenance is essential for safe, economical, and trouble-free opera-<br />
tion. It will also help reduce air pollution.<br />
Improperly maintaining this outboard<br />
motor, or failure to correct a problem before<br />
operation, can cause a malfunction in which<br />
you can be seriously hurt or killed.<br />
Always follow the inspection and mainte-<br />
nance recommendations and schedules in<br />
this owner’s manual.<br />
To help you properly care for your outboard motor, the following pages include<br />
a maintenance schedule, routine inspection procedures, and simple mainte-<br />
nance procedures using basic hand tools. Other service tasks that are more<br />
difficult, or require special tools, are best handled by professionals and are<br />
normally performed by a <strong>Honda</strong> technician or other qualified mechanic.<br />
The maintenance schedule applies to normal operating conditions. If you<br />
operate your outboard motor under unusual conditions, consult an authorized<br />
<strong>Honda</strong> marine dealer for recommendations applicable to your individual<br />
needs and use.<br />
Remember that your authorized <strong>Honda</strong> marine dealer knows your outboard<br />
motor best and is fully equipped to maintain and repair it.<br />
To ensure the best quality and reliability, use only new, genuine <strong>Honda</strong> parts<br />
or their equivalents for repair and replacement.<br />
Maintenance, replacement, or repair of emission control devices<br />
and systems may be performed by any engine repair establish-<br />
ment or individual, using parts that are “certified” to EPA stan-<br />
dards.<br />
40
SERVICING YOUR HONDAOUTBOARD MOTOR<br />
MAINTENANCE SAFETY<br />
Some of the most important safety precautions follow. However, we cannot<br />
warn you of every conceivable hazard that can arise in performing mainte-<br />
nance. Only you can decide whether or not you should perform a given task.<br />
Safety Precautions<br />
Failure to properly follow maintenance<br />
instructions and precautions can cause you<br />
to be seriously hurt or killed.<br />
Always follow the procedures and precau-<br />
tions in the owner’s manual.<br />
l Make sure the engine is off before you begin any maintenance or repairs.<br />
This will eliminate several potential hazards:<br />
- Carbon monoxide poisoning from engine exhaust.<br />
Be sure there is adequate ventilation whenever you operate the engine.<br />
- Burns from hot parts.<br />
Let the engine and exhaust system cool before touching.<br />
- Injury from moving parts.<br />
Do not run the engine unless instructed to do so.<br />
l Read the instructions before you begin, and make sure you have the tools<br />
and skills required.<br />
l To reduce the possibility of fire or explosion, be careful when working<br />
around gasoline. Use only a nonflammable solvent, not gasoline, to clean<br />
parts. Keep cigarettes, sparks, and flames away from all fuel-related parts.<br />
41
SERVICING YOUR HONDAOUTBOARD MOTOR<br />
TOOL KIT AND SPARE PARTS<br />
The following tools and spare parts are supplied with the outboard motor for<br />
maintenance, adjustment, and emergency repairs.<br />
Tool Kit<br />
42<br />
9 X 12 mm WRENCH<br />
10 X 12 mm WRENCH<br />
9 mm WRENCH<br />
-1<br />
FLAT SCREWDRIVER<br />
6 n<br />
PHILIPS SCREWDRIVER<br />
OIL CHECK SCREWDRIVER<br />
SPARE kJSE (ELECTRIC<br />
STARTER MODEL ONLY)<br />
bl STARTER ROPE<br />
PLIERS<br />
C 0 3<br />
SCREWDRIVER HANDLE<br />
0<br />
1 c<br />
TOOL BAG<br />
19X19mm SPARE SPARK<br />
SOCKET WRENCH PLUG<br />
EMERGENCY STOP<br />
SWITCH CLIP<br />
Water mouth nut<br />
Water mouth seat<br />
ose joint
SERVICING YOUR HONDA OUTBOARD MOTOR<br />
MAINTENANCE SCHEDULE<br />
ITEM Perform at every indicated<br />
month or operating hour interval,<br />
. Engine oil<br />
l Gear case oil<br />
Check level 0<br />
Change 0<br />
Check level<br />
Change 0<br />
Check for water<br />
contamination<br />
Starter rope Check<br />
Carburetor linkage Check 0 (2)<br />
. Valve clearance Check-Readjust 0 (2)<br />
l Spark plug Check-Clean<br />
1 Propeller (cotter pin) Check 0<br />
1 Anode Check<br />
1 Lubrication Grease<br />
1 Fuel tank Clean<br />
1 Fuel filter Replace<br />
l Thermostat<br />
Fuel line<br />
Check<br />
l Emission-related items.<br />
0<br />
I 011)<br />
I<br />
0<br />
0<br />
0<br />
0<br />
Check 0 Every 2 years (2)<br />
(Replace if necessary)<br />
NOTE: (1) Lubricate more frequently when used in salt water.<br />
(2) These items should be serviced by an authorized <strong>Honda</strong> marine<br />
dealer, unless the owner has the proper tools and is mechanically<br />
proficient. See the <strong>Honda</strong> Shop Manual.<br />
(3) For professional commercial use, log hours of operation to<br />
determine proper maintenance intervals.<br />
I<br />
43
SERVICING YOUR HONDAOUTBOARD MOTOR<br />
REFUELING<br />
Fuel tank capacity<br />
3.2 US gal (12.0 4, 2.6 Imp gal)<br />
FUEL GAUGE<br />
SAFE FILL LEVEL<br />
Check the fuel gauge and refill the tank to the SAFE FILL LEVER mark if<br />
necessary<br />
I<br />
Gasoline is highly flammable and explosive.<br />
You can be burned or seriously injured when<br />
handling fuel.<br />
l Stop the engine and keep heat, sparks,<br />
and flame away.<br />
l Handle fuel only outdoors.<br />
l Wipe up spills immediately.<br />
FUEL CAP<br />
VENT KNOB<br />
SE<br />
OPEN<br />
Remove the fuel tank from the boat for refilling. Turn the vent knob counter-<br />
clockwise to the open position and remove the fuel cap.<br />
Refuel in a well-ventilated area. Fill the fuel tank up to teh SAFE FILL LEVEL<br />
mark only. Inspect the condition of the fuel cap gasket and replace if<br />
necessary.<br />
After refilling, install and tighten the fuel ca securely. turn the vent knob<br />
clockwise to the closed posrtion. Return the uel tank to the boat.<br />
P<br />
44
SERVICING YOUR HONDA OUTBOARD MOTOR<br />
FUEL RECOMMENDATIONS<br />
Use unleaded gasoline with a pump octane rating of 86 or higher.<br />
These outboard motors are certified to operate on unleaded gasoline. Un-<br />
leaded gasoline P reduces fewer engine and spark plug deposits and extends<br />
exhaust system ife.<br />
Never use stale or contaminated gasoline or an oil/gasoline mixture. Avoid<br />
getting dirt or water in the fuel tank.<br />
Occasionally you may hear Ii ht “spark knock” or “pinging” (metallic rapping<br />
noise) while operating under \ eavy loads. This is no cause for concern.<br />
If spark knock or pinging occurs at a steady engine speed, under normal load,<br />
change brands of gasoline. If spark knock or pinging persists, see an<br />
authorized <strong>Honda</strong> marine dealer.<br />
Running the engine with persistent spark knock or pinging can cause engine<br />
damage.<br />
Running the engine with persistent spark knock or pinging is misuse., and the<br />
Distributor’s Limited Warranty does not cover parts damaged by misuse.<br />
COOLING SYSTEM CLEANING AND FLUSHING<br />
After each use in salt water or dirty water, thoroughly clean and flush the<br />
outboard motor.<br />
l For safety, the propeller must be removed.<br />
l Be sure the outboard motor is securely<br />
mounted, and do not leave it unattended<br />
while running.<br />
l Keep children and pets away from the area,<br />
and stay clear of moving parts during this<br />
procedure.<br />
Running the engine without water can cause serious en ine damage due to<br />
overheating. Be sure that water flows from the water c f eck hole while the<br />
en ine is running. If not, stop the engine and determine the cause of the<br />
pro % lem.<br />
45
SERVICING YOUR #ONDAOUTBOARD MOTOR<br />
Cleaning and Flushing With the Flush Kit<br />
1.<br />
2.<br />
3.<br />
Wash the outside of the outboard<br />
motor with clean, fresh water.<br />
Remove the flush bolt.<br />
Flush the cooling system, using<br />
the water hose flush kit and a<br />
water hose.<br />
a. Attach a hose from a fresh<br />
water faucet to the water<br />
hose connector of the flush<br />
kit.<br />
b. Remove the propeller.<br />
c. Turn on the fresh water sup-<br />
ply to the hose.<br />
d. Start the engine and run in<br />
neutral at idle for at least 10<br />
minutes.<br />
Cleaning and Flushing Without the Flush Kit<br />
1. Wash the outside of the outboard<br />
motor with clean, fresh water.<br />
2.<br />
3.<br />
Remove the propeller.<br />
Stand the motor in a suitable<br />
container of water. The water<br />
level must be at least 2 inches<br />
above the anticavitation plate.<br />
WATER HOSE CONNECTOR<br />
4. Start the engine and run slowly<br />
for at least 10 minutes. ANTICAVITATION PLATE<br />
46
SERVICING YOUR HONDA OUTBOARD MOTOR<br />
ENGINE OIL LEVEL CHECK<br />
Check the engine oil level with the engine stopped and the outboard motor in<br />
a vertical position.<br />
1. Move the engine cover lock lever down to unlock the cover, and remove the<br />
cover.<br />
2. Remove the dipstick and wipe it clean.<br />
3. Insert the dipstickall the way in, then remove it and check the oil level shown<br />
on the dipstick.<br />
4. If the oil level is low, remove the oil filler cap, and add oil to reach the upper<br />
limit mark shown on the dipstick. Use the oil recommended on page 49.<br />
Running the engine with a low oil level can cause engine damage.<br />
5. Install the oil filler cap and tighten it securely.<br />
6. Install the engine cover, and lock it by moving the lever up.<br />
ENGINE COVER LOCK LEVER<br />
LO’i’ER LIMIT<br />
MARK<br />
I<br />
OIL FILLER CAP<br />
OIL LEVEL<br />
DIPSTICK<br />
47
SERVICING YOUR #ONDAOUTBOARD MOTOR<br />
ENGINE OIL CHANGE<br />
Drain the used oil while the engine is warm. Warm oil drains quickly and<br />
completely.<br />
1. Move the engine cover lock lever (page 47) down to unlock the cover, and<br />
remove the cover.<br />
2. Place a suitable container below the engine oil drain location to catch the<br />
used oil, then remove the oil filler cap and the drain plug.<br />
3. Allow the used oil to drain completely, then reinstall the drain plug, and<br />
tighten it securely.<br />
1 NOTICE 1<br />
Improper disposal of engine oil can be harmful to the environment. If you<br />
change your own oil, please dispose of the used oil properly. Put it in a<br />
sealed container, and take it to a recycling center. Do not discard it in a trash<br />
bin or dump it on the ground.<br />
4. With the outboard motor in a vertical position, fill to the upper limit mark on<br />
the dipstick (p. 47) with the recommended oil (p. 49).<br />
Engine oil capacity: 1.2 US qt (1.1 e, 1 .O Imp qt)<br />
5. Install the oil filler cap and tighten it securely.<br />
6. Install the engine cover, and lock it by moving the lever up.<br />
OIL FILLER CAP<br />
DRAIi PLUG
SERVICING YOUR HONDA OUTBOARD MOTOR<br />
ENGINE OIL RECOMMENDATIONS<br />
Oil is a major factor affecting perfor-<br />
mance and service life. Use 4-stroke<br />
automotive detergent oil.<br />
SAE low-30 is recommended for<br />
general use.<br />
SAE Viscosity Grades<br />
s<br />
-20 0 20 40 60 60 100 ‘F<br />
I I I I I I I 1<br />
-30 -20 -10 0 10 20 30 40%<br />
AMBIENT TEMPERATURE<br />
The SAE oil viscosity and service classification are in the API label on the oil<br />
container. <strong>Honda</strong> recommends that you use API SERVICE category SF or<br />
SG.<br />
GEAR OIL LEVEL CHECK<br />
Check the oil level when the motor is in the vertical position. Remove the level<br />
plug and see if oil flows out.<br />
If no oil flows out, use a commercially available oil pump or squeeze tube to<br />
fill the gear case with the gear oil recommended on page 50. Pump or squeeze<br />
fresh oil through the OIL DRAIN plug hole until oil begins flowing out through<br />
the OIL LEVEL plug hole.<br />
If there is water in the oil, the water will flow out first when the drain plug is<br />
removed, or the oil will be a milky color. If water is detected in the oil, the<br />
outboard motor should be inspected by an authorized <strong>Honda</strong> Outboard Motor<br />
dealer.<br />
49
SERVICING YOUR HONDAOUTBOARD MOTOR<br />
GEAR OIL CHANGE<br />
Recommended oil : <strong>Marine</strong> SAESO hypoid gear oil<br />
API Service Classification (GL-4 or GL-5)<br />
Oil Capacity : 0.25 US qt (0.24 J!, 0.21 Imp qt)<br />
Remove the level plug and drain plug and allow the gear oil to thoroughly drain<br />
into a suitable container.<br />
Pump or squeeze the recommended gear oil through the OIL DRAIN plug hole<br />
until oil starts flowing out through the OIL LEVEL plug hole.<br />
Use new sealing washers. Install the oil level plug first and then the oil drain<br />
plug. Tighten securely.<br />
50<br />
DRAIN PLUG<br />
OIL PU_MP<br />
OIL LEVEL PLUG<br />
SQUEEZE<br />
TUBE
SERVICING YOUR HONDA OUTBOARD MOTOR<br />
LUBRICATION<br />
Apply marine anticorrosion grease to the following areas:<br />
SHIFT SHAFT AND PIVOT<br />
[THR~ITLE CABLE AND PIVOT<br />
iANDLE PIVOT<br />
:LAMP SCREWS<br />
I GEAR SHIFT ARM<br />
ir<br />
:OVER LOCK LEVER<br />
TILT LINKAGE<br />
SWIVEL CASE<br />
1 PROPELLER SHAFT<br />
Apply anticorrosion oil to pivot surfaces where grease cannot penetrate.<br />
51
SERVICING YOUR HONDA OUTBOARD MOTOR<br />
SPARK PLUG SERVICE<br />
Recommended spark plugs:<br />
BF9.9A: DR-5HS (NGK), XlGFSR-U (DENSO)<br />
BF15A: DR-6HS (NGK), X20FSR-U (DENSO)<br />
To ensure proper engine operation, the spark plugs must be properly gapped<br />
and free of deposits.<br />
1. Remove the engine cover.<br />
2. Remove the spark plug caps.<br />
3. Use the wrench supplied in the tool kit to remove the spark plugs.<br />
SPARK PLUG WRENCH<br />
SPARK PLUG CAP<br />
4. Visually inspect the spark plugs. Discard the spark plugs if there is apparent<br />
wear, or if the insulators are cracked or chipped. Clean the spark plugs with<br />
a wire brush if they are to be reused.<br />
5. Measure the plug gaps with a feeler gauge.<br />
,Correct as necessary by carefully bending the side electrode.<br />
The gaps should be:<br />
0.024 - 0.028 in (0.60 - 0.70 mm)<br />
52<br />
0.024 - 0.026 in<br />
(0.60 - 0.70 mm)
SERVICING YOUR HONDAOUTBOARD MOTOR<br />
6. Thread the plugs in by hand to prevent cross threading.<br />
7. After the spark plugs are seated, tighten with a spark plug wrench to<br />
compress the washers.<br />
If installing new spark plugs, tighten l/2 turn after the spark plugs seat to<br />
compress the washers. If reinstalling used spark plugs, tighten l/8-1/4 turn<br />
after the spark plugs seat to compress the washers.<br />
pmiq<br />
l The spark plugs must be securely tightened. Improperly tightened plugs<br />
can become very hot and may cause engine damage.<br />
l Use only the recommended spark plugs or equivalent. Spark plugs which<br />
have an improper heat range may cause engine damage.<br />
FUEL FILTER REPLACEMENT<br />
The fuel filter is located between the fuel coupling and the fuel pump. Water<br />
or sediment accumulated in the fuel filter can cause loss of power or hard<br />
starting. To prevent engine malfunction, replace the fuel filter regularly.<br />
Gasoline is highly flammable and explosive.<br />
You can be burned or seriously injured when<br />
handling fuel.<br />
l Keep heat, sparks and flame away.<br />
l Handle fuel only outdoors.<br />
l Wipe up spills immediately.<br />
53
SERVICING YOUR HONDAOUTBOARD MOTOR<br />
1. Disconnect the fuel tank line from the motor.<br />
2. Remove the engine cover, and remove the fuel filter. Before removing the<br />
filter, place clamps on the fuel tubes on each side of the filter to prevent fuel<br />
leakage.<br />
3. Install the new fuel filter, so that the arrow on the fuel filter is on the fuel pump<br />
side. Fuel flow will be impeded if the filter is installed backward.<br />
CARBURETOR<br />
arrow mark indicates<br />
flow direction.<br />
FUEL FILTER<br />
FUEL<br />
/<br />
PUMP<br />
4. If loss of power or hard starting is found to be caused by excessive water<br />
or sediment accumulated in the fuel filter, inspect the fuel tank. Clean the<br />
fuel tank if necessary.<br />
5. Remove the clamps used to close the fuel tubes. Connect the fuel tank line<br />
to the motor. Turn the fuel tank vent knob counterclockwise to the open<br />
position, pump the primer bulb, and check for leaks.<br />
54
SERVICING YOUR HONDA OUTBOARD MOTOR<br />
RECOIL STARTER ROPE INSPECTION<br />
Inspect the recoil starter rope, and<br />
replace it if it becomes frayed.<br />
Always keep the tool kit’s emer-<br />
gency starter rope onboard in case<br />
the recoil starter rope fails.<br />
ANODE REPLACEMENT<br />
The anode is a sacrificial material<br />
which helps to protect the outboard<br />
motor from corrosion.<br />
Replace the anode when it has been<br />
reduced to about half its original<br />
side, or if it is crumbling.<br />
Painting or coating the anode will<br />
defeat its purpose and will lead to<br />
rust and corrosion damage to the<br />
outboard motor. The anode must<br />
be exposed to the water.<br />
STARTER ROPE<br />
ANODE<br />
BOLT<br />
55
SERVICING YOUR HONDA OUTBOARD MOTOR<br />
PROPELLER REPLACEMENT<br />
If the propeller is damaged by striking a rock, or other obstacle, replace the<br />
propeller as follows.<br />
1. Remove the cotter pin, then remove the 14 mm castle nut, plain washer,<br />
and the propeller.<br />
2. Install the new propeller in the reverse sequence to removal. Be sure to<br />
replace the cotter pin with a new one.<br />
56<br />
MARINE GREASE<br />
PROPELLER<br />
I<br />
CASTLE NUT<br />
PLAIN WASHER<br />
/<br />
COTTER PIN
HELPFULTIPS & SUGGESTIONS<br />
STORING YOUR OUTBOARD MOTOR<br />
Storage Preparation<br />
Proper storage preparation is essential for keeping your pump troublefree and<br />
looking good. The following steps will help to keep rust and corrosion from<br />
impairing your outboard motor’s function and appearance, and will make the<br />
engine easier to start when you use the outboard motor again.<br />
Cleaning and Flushing<br />
Wash the outside of the outboard motor with clean, fresh water, and flush the<br />
cooling system as described on page 46.<br />
Disengage the emergency engine stop switch clip from the engine stop switch,<br />
and pull the recoil starter rope several times to expel any water remaining in<br />
the water pump.<br />
Touch up any damaged paint, and coat areas that may rust with a light film of<br />
oil. Lubricate controls with a silicone spray lubricant.<br />
Fuel<br />
Gasoline will oxidize and deteriorate in storage. Old gasoline will cause hard<br />
starting, and it leaves gum deposits that clog the fuel system. If the gasoline<br />
in your fuel tank and carburetor deteriorates during storage, you may need to<br />
have the carburetor and other fuel system component serviced or replaced.<br />
The length of time that gasoline can be left in your fuel tank and carburetor<br />
without causing functional problems will vary with such factors as gasoline<br />
blend, your storage temperatures, and whether the fuel tank is partially or<br />
completely filled. The air in a partially filled fuel tank promotes fuel deteriora-<br />
tion. Very warm storage/temperatures accelerate fuel deterioration. Fuel<br />
deterioration problems may occur within a few months, or even less if the<br />
gasoline was not fresh when you filled the fuel tank.<br />
The Distributor’s Limited Warranty does not cover fuel system damage or<br />
engine performance problems resulting from neglected storage preparation.
HELPFUL TIPS & SUGGESTIONS<br />
1. Disconnect the fuel hose from the outboard motor.<br />
2. With the outboard motor in a vertical position, place an approved gasoline<br />
container below the fuel drain outlet, and use a funnel to avoid spilling fuel.<br />
Loosen the drain screw to drain fuel from the carburetor.<br />
I<br />
Gasoline is highly flammable<br />
and explosive.<br />
You can be burned or<br />
seriously Injured when<br />
handling fuel.<br />
l Keep heat, sparks, and<br />
flame away.<br />
l Handle fuel only outdoors.<br />
l Wipe up spills lmmedi-<br />
ately.<br />
DRAIN SCREW<br />
3. After the fuel has drained from the carburetor, tighten the drain screw<br />
securely.<br />
4. Drain the fuel tank into an approved gasoline container, or if you need to<br />
store fuel in the portable fuel tank, you can extend fuel storage life by filling<br />
the fuel tank with fresh gasoline and adding a fuel stabilizer that is<br />
formulated for that purpose. Firmly close the fuel cap vent knob.<br />
Engine Oil<br />
1. Change the engine oil (see page 48).<br />
2. Remove the spark plugs (see page 52).<br />
3. Pour a tablespoon (5 - 10 cc) of clean engine oil into each cylinder.<br />
4. Pull the starter rope several times to distribute the oil in the cylinders.<br />
5. Reinstall the spark plugs.<br />
58
Storage Precautions<br />
HELPFUL TIPS & SUGGESTIONS<br />
Select a well-ventilated storage area. If possible, avoid storage areas with high<br />
humidity.<br />
If your portable fuel tank contains gasoline, store it away from any appliance<br />
that operates with a flame, such as a furnace, water heater, or clothes dryer.<br />
Also avoid any area with a spark-producing electric motor, or where power<br />
tools are operated.<br />
Store the outboard motor either vertically, or horizontally with the tiller handle<br />
side down, as shown.<br />
If storing horizontally, be sure to fold the tiller handle, so the outboard motor<br />
rests on it’s case protectors. Be sure all water has drained from the outboard<br />
motor before placing it on its side, so no residual water can enter the engine<br />
exhaust port.<br />
Any other storage position may cause damage or oil leakage.<br />
CASE PROTECTORS<br />
Cover the outboard motor to keep out dust. Do not use sheet plastic as a dust<br />
cover. A nonporous cover will trap moisture, promoting rust and corrosion.<br />
59
HELPFUL TIPS & SUGGESTIONS<br />
Removal From Storage<br />
Check your outboard motor as described in the BEFORE OfERATlON<br />
chapter of this manual.<br />
If the cylinder was coated with oil during storage preparation, the engine may<br />
smoke briefly at startup. This is normal.<br />
TRANSPORTING<br />
When trailering a boat with the outboard motor attached, leave the engine in<br />
the normal running position, if possible, and tighten the steering friction bolt<br />
securely (p. 36).<br />
If there is insufficient road clearance in the normal running position, then tilt the<br />
outboard motor, leave the tilt lever in the tilt position, and use a motor support<br />
device, such as a transom-saver bar, or remove the outboard motor from the<br />
boat.<br />
To transport the outboard motor when removed from the boat, secure it in<br />
either the vertical or horizontal position shown on page 59.<br />
To carry, hold the outboard motor by the carrying handle, or hold by the<br />
carrying handle and the lug beneath engine cover lock lever as shown below.<br />
\ CARRYING HANDLE<br />
Lifting the outboard motor by the engine cover, or using the installed outboard<br />
motor as a handle or lever to move the boat, can damage the outboard motor.
TAKING CARE OF UNEXPECTED PROBLEMS<br />
ENGINE WILL NOT START<br />
1. Is the emergency stop switch clip in place?<br />
2. Is the gearshift lever in neutral?<br />
3. Is there fuel in the fuel tank?<br />
4. Is the fuel tank vent knob turned to open?<br />
5. Is the fuel system primed by squeezing the primer bulb?<br />
6. Is fuel reaching the carburetor?<br />
Loosen the carburetor drain screw to see if there is fuel in the carburetor float<br />
bowl.<br />
If any fuel is spilled, make sure the<br />
area is dry before testing the spark<br />
plug or starting the engine. Spilled<br />
fuel or fuel vapor may ignite.<br />
61
TAKING CARE OF UNEXPECTED PROBLEMS<br />
7. Are the spark plugs firing?<br />
a. Remove and inspect the spark plugs. clean and dry the plugs, and check<br />
the electrode gaps (p. 52).<br />
b. Install the spark plugs in their caps, and ground the side electrode to any<br />
engine ground away from the spark plug holes.<br />
‘c. With recoil starter<br />
Put the gearshift lever in the “NEUTRAL” position, pull the starter grip<br />
hard, and check to see whether or not a spark appears across the gap<br />
of the spark plug.<br />
With electric starter (applicable models)<br />
Put the gear lever in the “NEUTRAL” position, operate the starter motor,<br />
and check whether or not a spark appears across the gap of the spark<br />
Plug*<br />
If the spark plugs are OK, reinstall them, and try to start the engine.<br />
If a spark does not appear, either replace the spark plugs or contact your<br />
authorized <strong>Honda</strong> marine motor dealer.<br />
ENGINE OVERHEATS<br />
1. Is the water intake screen clogged?<br />
2. Is the thermostat faulty?<br />
3. Is the water level correct?<br />
62
TAKING CARE OF UNEXPECTED PROBLEMS<br />
BATTERY DOES NOT CHARGE AND ELECTRIC STARTER<br />
(applicable models) DOES NOT OPERATE<br />
The battery-charging circuit (all models) and the electric starter relay circuit<br />
(applicable models) are protected by a 15ampere fuse.<br />
If the fuse burns out, running the engine will not charge the battery (all models),<br />
and the electric starter (applicable models) will not operate.<br />
Fuse Replacement<br />
1. With the engine stopped, remove<br />
the engine cover.<br />
2. Remove the fuse holder from the<br />
fuse bracket. Pull the rubber<br />
cover off the end of the fuse<br />
holder, and unscrew the fuse<br />
holder cap.<br />
3. Remove and inspect the fuse. If<br />
the fuse is burnt out, install a<br />
replacement 15 A fuse. The out-<br />
board motor is supplied with a<br />
spare 15 A fuse, which is located<br />
below the fuse holder.<br />
Never use a fuse with a rating<br />
greater than 15 amperes. Seri-<br />
ous damage to the electrical sys-<br />
tem could result.<br />
4. Reinstall the fuse holder and<br />
engine cover.<br />
FUSk HOLDER<br />
15 A FUSE<br />
FUSE BRACKET<br />
Before further operation, try to determine and correct the electrical problem<br />
that caused the fuse to burn out. An uncorrected electrical problem may cause<br />
the fuse to burn out again.<br />
63
TAKING CARE OF UNEXPECTED PROBLEMS<br />
SUBMERGED MOTOR<br />
A submerged motor must be serviced immediately after it is recovered from<br />
the water in order to minimize corrosion.<br />
If there is a <strong>Honda</strong> marine dealership nearby, take the motor immediately to<br />
the dealer. If you are far from a dealership, proceed as follows:<br />
1. Remove the engine cover, and rinse the motor with fresh water to remove<br />
salt water, sand, mud, etc.<br />
2. Loosen the carburetor drain screw (p. 58) drain the contents of the<br />
carburetor into a suitable container, then tighten the drain screw.<br />
3. Change the engine oil (p. 48). If there was water in the engine crankcase,<br />
or the used engine oil showed signs of water contaminaton, then a second<br />
engine oil change should be performed after running the engine for l/2<br />
hour.<br />
4. Remove the spark plugs. Disengage the emergency engine stop switch clip<br />
from the engine stop switch and pull the recoil starter several times to<br />
completely expel water from the cylinders.<br />
64
TAKING CARE OF UNEXPECTED PROBLEMS<br />
l When cranking the engine with an open ignition circuit (spark plugs<br />
removed from the ignition circuit), disengage the emergency engine stop<br />
switch clip from the engine stop switch to prevent electrical damage to the<br />
ignition system.<br />
l If the engine was running when it submerged, there may be mechanical<br />
damage, such as bent connecting rods. If the engine binds when cranked,<br />
do not attempt to run the engine until it has been repaired.<br />
5. Pour a teaspoon of engine oil into each spark plug hole, then pull the recoil<br />
starter several times to lubricate the inside of the cylinders. Reinstall the<br />
spark plugs and engage the emergency engine stop switch clip with the<br />
engine stop switch.<br />
6. Attempt to start the engine.<br />
l If the engine fails to start, remove the spark plugs, clean and dry the<br />
electrodes, then reinstall the spark plugs and attempt to start the engine<br />
again.<br />
l If the engine statrs, and no mechanical damage is evident, continue to<br />
run the engine for l/2 hour or longer (be sure the water level is at least<br />
2 inches above the anticavitation plate).<br />
7. As soon as possible, take the motor to a <strong>Honda</strong> marine dealer for inspection<br />
and service.
TECHNICAL & CONSUMER INFORMATION<br />
TECHNICAL INFORMATION<br />
Serial Number Locations<br />
ENGINE SERIAL NUMBER<br />
FRAME SERIAL NUMBER<br />
Record the engine and frame serial numbers in the space below. You will need<br />
these serial numbers when ordering parts, and when making technical or<br />
waranty inquiries (see page 77).<br />
Engine serial number:<br />
Frame serial number:<br />
66
TECHNICAL .& CONSUMER INFORMATION<br />
Carburetor Modification for High Altitude Operation<br />
At high altitude, the standard carburetor air-fuel mixture will be too rich.<br />
Performance will decrease, and fuel consumption will increase. A very rich<br />
mixture will also foul the spark plug and cause hard starting.<br />
High altitude performance can be improved by specific modifications to the<br />
carburetor. If you always operate your engine at altitudes above 5,000 feet<br />
(1,500 meters), have an authorized <strong>Honda</strong> marine dealer perform this carbu-<br />
retor modification.<br />
Even with carburetor modification, engine horsepower will decrease about<br />
3.5%for each 1 ,OOO-foot (300-meter) increase in altitude. The effect of altitude<br />
on horsepower will be greater than this if no carburetor modification is made.<br />
When the carburetor has been modified for high altitude operation, the air-fuel<br />
mixture will be too lean for low altitude use. Operation at altitudes below 5,000<br />
feet (1,500 meters) with a modified carburetor may cause the engine to<br />
overheat and result in serious engine damage. For use at low altitudes, have<br />
an authorized <strong>Honda</strong> marine dealer return the carburetor to original factory<br />
specifications.<br />
67
TECHNICAL & CONSUMER INFORMATION<br />
Oxygenated Fuels<br />
Some conventional gasolines are being blended with alcohol or an ether<br />
compound. These gasolines are collectively referred to as oxygenated fuels.<br />
To meet clean air standards, some areas of the United States and Canada use<br />
oxygenated fuels to help reduce emissions.<br />
If you use an oxygenated fuel, be sure it is unleaded and meets the minimum<br />
octane rating requirement.<br />
Before using an oxygenated fuel, try to confirm the fuel’s contents. Some<br />
states/provinces require this information to be posted on the pump.<br />
The following are the EPA-approved percentages of oxygenates:<br />
ETHANOL<br />
MTBE<br />
METHANOL<br />
(ethyl or grain alcohol) 10% by volume<br />
You may use gasoline containing up to 10% ethanol by<br />
volume. Gasoline containing ethanol may be marketed<br />
under the name “Gasohol”.<br />
(Methyl Tertiary Butyl Ether) 15% by volume<br />
You may use gasoline containing up to 15% MTBE by<br />
volume.<br />
(methyl or wood alcohol) 5% by volume<br />
You may use gasoline containing up to 5% methanol by<br />
volume, as long as it also contains cosolvents and corrosion<br />
inhibitors to protect the fuel system. Gasoline containing<br />
more than 5% methanol by volume may cause starting and/<br />
or performance problems. It may also damage metal, rub-<br />
ber, and plastic parts of your fuel system.<br />
If you notice any undesirable operating symptoms, try another service station,<br />
or switch to another brand of gasoline.<br />
Fuel system damage or performance problems resulting from the use of an<br />
oxygenated fuel containing more than the percentages of oxygenates men-<br />
tioned above are not covered under warranty.<br />
68
TECHNICAL & CONSUMER INFORMATION<br />
Emission Control System Information<br />
Source of Emissions<br />
The combustion process produces carbon monoxide, oxides of nitrogen, and<br />
hydrocarbons. Control of hydrocarbons and oxides of nitrogen is very impor-<br />
tant because, under certain conditions, they react to form photochemical<br />
smog when subjected to sunlight. Carbon monoxide does not react in the<br />
same way, but it is toxic.<br />
<strong>Honda</strong> utilizes lean carburetor settings and other systems to reduce the<br />
emissions of oxides of nitrogen, and hydrocarbons.<br />
The U.S. Clean Air Act<br />
EPA regulations require all manufacturers to furnish written instructions<br />
describing the operation and maintenance of emission control systems.<br />
The following instructions and procedures must be followed in order to keep<br />
the emissions from your <strong>Honda</strong> engine within the emission standards.<br />
Tampering and Altering<br />
Tampering with or altering the emission control system may increase emis-<br />
sions beyond the legal limit. Among those acts that constitute tampering are:<br />
l Removal or alteration of any part of the intake, fuel, or exhaust systems.<br />
l Altering or defeating the governor linkage or speed-adjusting mechanism<br />
to cause the engine to operate outside its design parameters.<br />
69
TECHNICAL & CONSUMER INFORMATION<br />
Problems That May Affect Emissions<br />
If you are aware of any of the following symptoms, have your engine inspected<br />
and repaired by your servicing dealer.<br />
l Hard starting or stalling after starting.<br />
l Rough idle.<br />
l Misfiring or backfiring under load.<br />
l Afterburning (backfiring).<br />
l Black exhaust smoke or high fuel consumption.<br />
Replacement Parts<br />
The emission control systems on your <strong>Honda</strong> engine were designed, built, and<br />
certified to conform with EPA emission regulations. We recommend the use<br />
of genuine <strong>Honda</strong> parts whenever you have maintenance done. These<br />
original-design replacement parts are manufactured to the same standards as<br />
the original parts, so you can be confident of their performance. The use of<br />
replacement parts that are not of the original design and quality may impair the<br />
effectiveness of your emission control system.<br />
A manufacturer of an aftermarket part assumes the responsibility that the part<br />
will not adversely affect emission performance. The manufacturer or rebuilder<br />
of the part must certify that use of the part will not result in a failure of the engine<br />
to comply with emission regulations.<br />
Maintenance<br />
Follow the maintenance schedule on page 26. Remember that this schedule<br />
is based on the assumption that your machine will be used for its designed<br />
purpose. Sustained high-load or high-temperature operation, will require<br />
more frequent service.<br />
70
I<br />
Specifications<br />
TECHNICAL & CONSUMER INFORMATION<br />
Model BF9.9A<br />
Descriotion code BABS<br />
Rated power<br />
7.4 kW (9.9 HP)<br />
Full throttle range<br />
4,500 - 5,500 rpm<br />
Engine type<br />
4-stroke OHC in-line twin cylinder<br />
Displacement<br />
17.1 cu-in (280 cm3)<br />
Spark plug gap<br />
0.024 - 0.028 in (0.60 - 0.70 mm)<br />
Starter system<br />
With recoil starter (without electric starter)<br />
Recoil starter & electric starter (with electric starter)<br />
Ignition system<br />
C.D.I.<br />
Lubrication system<br />
Trochoid pump pressure lubrication<br />
Specified oil<br />
Engine: API standard (SF or SG) SAE 1 OW-30<br />
Gear case: <strong>Marine</strong> SAE 90 hypoid gear oil<br />
API Service Classification (GL-4 or GL-5)<br />
Oil capacity<br />
Engine: 1.2 US qt, (1 .l J?, 1 .O Imp qt)<br />
Gear case: 0.25 US qt, (0.24 J?, 0.21 Imp qt)<br />
D.C. OUtDUt<br />
12V - 6A/6.000min-’ (ram)<br />
Cooling system<br />
Water cooling with thermostat (volumetric pump)<br />
Exhaust system<br />
Underwater exhaust<br />
Spark plug<br />
DRdHS (NGK), XlGFSR-U (DENSO)<br />
Fuel pump<br />
Diaphragm type fuel pump<br />
Fuel<br />
Automotive gasoline (86 pump octane)<br />
Tank capacity<br />
3.2 US gal (12.0 J?, 2.6 Imp gal)<br />
Steering equipment<br />
Tiller handle<br />
Tilt angle<br />
3-stage adjustment (30”, 45” and 70”)<br />
Angle of rotation<br />
40” (both sides)<br />
Dimensions<br />
S Model L Model X Model<br />
Length 21.7 in (550 mm) 21.7 in (550 mm) 21.7 in (550 mm)<br />
Height 41.3 in (1,050 mm) 46.5 in (1,180 mm) 52.0 in (1,320 mm<br />
Width 12.6 in (320 mm) 12.6 in (320 mm) 12.6 in (320 mm)<br />
Outboard motor<br />
transom heiaht<br />
17.3 in (440 mm) 22.4 in (570 mm) 28.0 in (710 mm)<br />
Standard propeller S Model 9-l/2 x 9-l/2 in (3-240 x 240 mm)<br />
(No. of blades-diameter x pitch) L, X Model 9-l/2 x 8-5/8 in (3-240 x 220 mm)<br />
Gear change Forward-Neutral Reverse (dog type)<br />
Dry weight S Model L Model X Model<br />
without electric starter 93.7 Ibs (42.5 kg) 95.9 Ibs (43.5 kg) 102.5 Ibs (46.5 kg<br />
with electric starter 101.4 Ibs (46.0 kg 103.6 Ibs (47.0 kg) 110.2 Ibs (50.0 kg<br />
<strong>Honda</strong> outboards are power rated in accordance with NMMA procedures and<br />
using the ICOMIA standard 28/23.<br />
71
TECHNICAL & CONSUMER INFORMATION<br />
<strong>Honda</strong> outboards are power rated in accordance with NMMA procedures and<br />
using the ICOMIA standard 28/23.<br />
72
TECHNICAL & CONSUMER INFORMATION<br />
BF9.9A & BF15A Tuneup<br />
Spark plug gap<br />
Idle speed<br />
Valve clearance<br />
(cold)<br />
1 0.024-0.028 in (0.60-0.70 mm)<br />
1,100 f 50 rpm<br />
Intake: 0.12 f 0.02 mm<br />
Exhaust: 0.15 f 0.02 mm<br />
( Other specifications 1 No other adjustments needed.<br />
1 See page 52.<br />
See shop manual.<br />
See shop manual.<br />
73
SPARK PLUG<br />
REMOTE CONTROL<br />
BOX COP) ENGINE STOP SWITCH<br />
GROUND<br />
FL<br />
a<br />
!<br />
EXCW<br />
COIL FLYWHEEL<br />
-<br />
PULSER COIL - CAM PULLEY<br />
1 COIL IZV IOA COP)<br />
” LI<br />
I<br />
CHARGE RECEPTACLE<br />
(CHARGING ONLY)
75<br />
3 t<br />
P I<br />
Models Equipped With an Electric Starter<br />
,TECHNlCAL & CONSUMER INFORMATION
TECHNICAL & CONSUMER INFORMATION<br />
CONSUMER INFORMATION<br />
<strong>Honda</strong> Publications<br />
These publications will give you additional information for maintaining and<br />
repairing your outboard motor. You may order them from your <strong>Honda</strong> outboard<br />
motor dealer.<br />
Shop Manual<br />
This manual covers complete maintenance and overhaul procedures.<br />
It is intended to be used by a skilled technician.<br />
Parts Catalog<br />
This manual provides complete, illustrated parts lists.<br />
76
TECHNICAL & CONSUMER INFORMATION<br />
Warranty Service Information<br />
<strong>Honda</strong> marinedealership personnel are trained professionals. They should be<br />
able to answer any question you may have. If you encounter a problem that<br />
your dealer does not solve to your satisfaction, please discuss it with the<br />
dealership’s management. The Service Manager or General Manager can<br />
help. Almost all problems are solved in this way.<br />
If you are dissatisfied with the decision made by the dealership’s manage-<br />
ment, contact the <strong>Honda</strong> <strong>Marine</strong> Customer Relations Office. You can write:<br />
American <strong>Honda</strong> Motor Co., Inc.<br />
<strong>Marine</strong> Division<br />
Customer Relations Office<br />
4900 Marconi Drive<br />
Alpharetta, Georgia 30005-8847<br />
Or telephone: (770) 497-6400<br />
When you write or call, please give us this information:<br />
l Model and serial number (see page 66)<br />
l Name of the dealer who sold the outboard motor to you<br />
l Name and address of the dealer who services your outboard motors<br />
l Date of purchase<br />
l Your name, address, and telephone number<br />
l A detailed description of the problem<br />
77
IMDEX<br />
A<br />
Anode . . . . . . . . . . . . . . . . . . . . . . . . . . . . . . . . . . . . . . . . . . . . . . . . . . . . . . . . . . . . . . . . . . . . . . . . . . . . . . . . . . . . . . . . . . . . . . . . . . . . . . . . . . . . . . . . . . . . . . . . ......... 18<br />
ANODE REPLACEMENT . . . . . . . . . . . . . . . . . . . . . . . . . . . . . . . . . . . . . . . . . . . . . . . . . . . . . . . . . . . . . . . . . . . . . . . . . . . . . . . . . . . . . . . . . . . . . . . . . . 55<br />
B<br />
BATTERY CONNECTIONS .............................................................................................. .22<br />
BEFORE OPERATION ..................................................................................................... .25<br />
ARE YOU READY TO GET UNDER WAY? ................................................................. .25<br />
Knowledge .................................................................................................................. 25<br />
Safety Apparel ............................................................................................................ 25<br />
IS YOUR OUTBOARD MOTOR READY TO GO?. ....................................................... .25<br />
Maintenance Inspection ............................................................................................. .26<br />
Safety Inspection ....................................................................................................... .26<br />
BREAK-IN PROCEDURE ............. ................................................................................. 27<br />
C<br />
Choke Knob ...................................................................................................................... .12<br />
CONTENTS ........................................................................................................................ .3<br />
CONTROLS & FEATURES.. .............................................................................................. 10<br />
COMPONENT & CONTROL LOCATIONS .................................................................... 10<br />
CONTROLS ................................................................................................................... 12<br />
Choke Knob ............................................................................................................... .I2<br />
Electric Starter Button ................................................................................................. 14<br />
Engine Cover Lock Lever ........................................................................................... 16<br />
Engine Stop Switch.. ................................................................................................... 12<br />
Fuel Cap Vent Knob ................................................................................................... 17<br />
Fuel Priming Bulb ....................................................................................................... 17<br />
Gear Shift Lever.. ........................................................................................................ 14<br />
Recoil Starter Grip ...................................................................................................... 14<br />
Steering Friction Bolt .................................................................................................. 15<br />
Throttle Friction Knob ................................................................................................. 13<br />
Throttle Grip ................................................................................................................ 13<br />
Tilt Lever ..................................................................................................................... 15<br />
Transom Angle Adjusting Rod .................................................................................... 16<br />
FEATURES .................................................................................................................... 17<br />
Anode ......................................................................................................................... 18<br />
Fuel Gauge ................................................................................................................. 17<br />
Oil Pressure Indicator Light ........................................................................................ 17<br />
Overrev Limiter ........................................................................................................... 18<br />
Water Check Hole.. ..................................................................................................... 17<br />
CRUISING.. ................................................................................................................... .37<br />
Carbon Monoxide Hazard ................................................................................................ 8<br />
E<br />
Electric Starter Button .............. . ......................................................................................... 14<br />
Emergency Engine Stopping ............................................................................................ .34<br />
EMERGENCY STARTING ................................................................................................ .33<br />
Emission Control System Information ............................................................................... .69
INDEX<br />
Engine Cover Lock Lever. .................................................................................................. 16<br />
ENGINE OIL CHANGE ...................................................................................................... 48<br />
ENGINE OIL LEVEL CHECK.. ........................................................................................... 47<br />
ENGINE OIL RECOMMENDATIONS.. .............................................................................. 49<br />
ENGINE WILL NOT START.. ............................................................................................. 61<br />
Engine Stop Switch ............................................................................................................ 12<br />
F<br />
FEATURES ........................................................................................................................ 17<br />
Anode ............................................................................................................................. 18<br />
Fuel Gauge .................................................................................................................... 17<br />
Oil Pressure Indicator Light ............................................................................................ 17<br />
Overrev Limiter ............................................................................................................... 18<br />
Water Check Hole .......................................................................................................... 17<br />
FUEL FILTER REPLACEMENT.. ...................................................................................... .53<br />
FUEL RECOMMENDATIONS.. ......................................................................................... .45<br />
Fuel Cap Vent Knob ........................................................................................................... 17<br />
Fuel Gauge ........................................................................................................................ 17<br />
Fuel Hose Connections.. ................................................................................................... .28<br />
Fuel Priming ...................................................................................................................... .28<br />
Fuel Priming Bulb ............................................................................................................... 17<br />
Fuel Tank Placement ........................................................................................................ .27<br />
G<br />
GEAR OIL CHANGE ......................................................................................................... .50<br />
GEAR OIL LEVEL CHECK ............................................................................................... .49<br />
GEAR SHIFTING .............................................................................................................. .35<br />
Gearshift Lever.. ................................................................................................................. 14<br />
H<br />
HELPFUL TIPS AND SUGGESTIONS ............................................................................. .57<br />
STORING YOUR OUTBOARD MOTOR.. ..................................................................... .57<br />
Removal From Storage.. ............................................................................................ .60<br />
Storage Precautions .................................................................................................. .59<br />
Storage Preparation.. ................................................................................................. .57<br />
<strong>Honda</strong> Publications ........................................................................................................... .76<br />
I<br />
INTRODUCTION.. ................................................................................................................ 1<br />
IMPORTANT SAFETY INFORMATION .............................................................................. .7<br />
INSTALLATION.. ................................................................................................................ 19<br />
BATTERY CONNECTIONS .......................................................................................... .22<br />
INSTALLATION HEIGHT .............................................................................................. .I9<br />
INSTALLATION POSITION ........................................................................................... 19<br />
MOTOR ANGLE ADJUSTMENT .................................................................................. .21<br />
MOTOR ANGLE FOR CRUISING ................................................................................ .21<br />
OUTBOARD MOTOR All-ACHMENT.. ........................................................................ .20<br />
79
INDEX<br />
L<br />
LUBRICATION . . . . . . . . . . . . . . . . . . . . . . . . . . . . . . . . . . . . . . . . . . . . . . . . . . . . . . . . . . . . . . . . . . . . . . . . . . . . . . . . . . . . . . . . . . . . . . . . . . . . . . . . . . . . . . . . . . . 51<br />
M<br />
Maintenance Inspection ..................................................................................................... 26<br />
MAINTENANCE SAFETY. ................................................................................................. 41<br />
Safety Precautions ......................................................................................................... 41<br />
MAINTENANCE SCHEDULE ........................................................................................... .43<br />
MOTOR ANGLE ADJUSTMENT ...................................................................................... .21<br />
MOTOR ANGLE FOR CRUISING .................................................................................... .21<br />
N<br />
Normal Engine Stopping ................................................................................................... .34<br />
0<br />
Oil Pressure Indicator Light ................................................................................................ 17<br />
OPERATION ..................................................................................................................... .27<br />
BREAK-IN PROCEDURE ............................................................................................. .27<br />
CRUISING ...................................................................................................................... 37<br />
EMERGENCY STARTING ............................................................................................. 33<br />
GEAR SHIFTING .......................................................................................................... .35<br />
PORTABLE FUEL TANK PLACEMENT AND CONNECTIONS ................................... .27<br />
Fuel Hose Connections ............................................................................................. .28<br />
Fuel Priming.. ............................................................................................................. .28<br />
Fuel Tank Placement.. .................... ............................................................................ 27<br />
SAFE OPERATING PRECAUTIONS.. .......................................................................... .27<br />
STARTING THE ENGINE ............................................................................................. .29<br />
STEERING ..................................................................................................................... 36<br />
STOPPING THE ENGINE.. ........................................................................................... .34<br />
Emergency Engine Stopping ..................................................................................... .34<br />
Normal Engine Stopping ............................................................................................ .34<br />
TILTING THE OUTBOARD MOTOR ............................................................................ .38<br />
OUTBOARD MOTOR ATTACHMENT.. ............................................................................ .20<br />
Overrev Limiter.. ................................................................................................................. 18<br />
Oxygenerated Fuels ........................................................................................................... 68<br />
P<br />
PORTABLE FUEL TANK .................................................................................................. .27<br />
Fuel Hose Connections ................................................................................................. .28<br />
Fuel Priming ................................................................................................................... 28<br />
Fuel Tank Placement .................................................................................................... .27<br />
PROPELLER REPLACEMENT ........................................................................................ .56<br />
Q<br />
QUICK REFERENCE INFORMATION . . . . . . . . . . . . . . . . . . . . . . . . . . . . . . . . . . . . . . . . . . . . . . . . . . . . . . Inside back cover<br />
80
INDEX<br />
R<br />
Recoil Starter Grip.. ............................................................................................................ 14<br />
RECOIL STARTER ROPE INSPECTION ......................................................................... .55<br />
REFUELING.. .................................................................................................................... .44<br />
Removal From Storage ..................................................................................................... .60<br />
S<br />
SAFE OPERATING PRECAUTIONS.. .............................................................................. .27<br />
SAFETY, A FEW WORDS ABOUT.. ................................................................................... .2<br />
Safety Inspection.. ............................................................................................................. .26<br />
SAFETY, OUTBOARD MOTOR ......................................................................................... .7<br />
IMPORTANT SAFETY INFORMATION .......................................................................... .7<br />
Carbon Monoxide Hazard ............................................................................................ .8<br />
Operator Responsibility ............................................................................................... .7<br />
Refuel With Care .........................................................................................................<br />
SAFETY LABEL LOCATIONS ........................................................................................ .9<br />
SPARK PLUG SERVICE .................................................................................................. .52<br />
STARTING THE ENGINE ................................................................................................. .29<br />
STEERING ........................................................................................................................ .36<br />
STOPPING THE ENGINE.. ............................................................................................... .34<br />
STORING YOUR OUTBOARD MOTOR ........................................................................... .57<br />
Serial Number Locations.. .................................................................................................<br />
Specifications .................................................................................................................... .71<br />
Steering Friction Bolt .......................................................................................................... 15<br />
Storage Precautions.. ........................................................................................................ .59<br />
Storage Preparation .......................................................................................................... .57<br />
SUBMERGED MOTOR ..................................................................................................... .64<br />
T<br />
TAKING CARE OF UNEXPECTED PROBLEMS ............................................................. .61<br />
TECHNICAL & CONSUMER INFORMATION .................................................................. .66<br />
TECHNICAL INFORMATION.. .......................................................................................... .66<br />
THE IMPORTANCE OF MAINTENANCE.. ....................................................................... .40<br />
Throttle Friction Knob ......................................................................................................... 13<br />
Throttle Grip ....................................................................................................................... 13<br />
TILTING THE OUTBOARD MOTOR ................................................................................ .38<br />
Tilt Lever ............................................................................................................................ 15<br />
TOOL KIT AND SPARE PARTS ....................................................................................... .42<br />
TRANSPORTING.. ............................................................................................................ .60<br />
Transom Angle Adjusting Rod ........................................................................................... 16<br />
W<br />
Warranty Service Information . . . . . . . . . . . . . . . . . . . . . . . . . . . . . . . . . . . . . . . . . . . . . . . . . . . . . . . . . . . . . . . . . . . . . . . . . . . . . . . . . . . . . . . . . . . . . 77<br />
Water Check Tube . . . . . . . . . . . . . . . . . . . . . . . . . . . . . . . . . . . . . . . . . . . . . . . . . . . . . . . . . . . . . . . . . . . . . . . . . . . . . . . . . . . . . . . . . . . . . . . . . . . . . . . . . . . . . 17<br />
WIRING DIAGRAMS . . . . . . . . . . . . . . . . . . . . . . . . . . . . . . . . . . . . . . . . . . . . . . . . . . . . . . . . . . . . . . . . . . . . . . . . . . . . . . . . . . . . . . . . . . . . . . . . . . . . . . . . . . 74<br />
.8<br />
.66<br />
81
82<br />
MEMO
MEMO<br />
83
84<br />
MEMO
QUICK REFERENCE INFORMATION<br />
Fuel<br />
Engine Oil<br />
Gear Oil<br />
Spark Plug<br />
Carburetor<br />
Maintenance<br />
We<br />
Unleaded gasoline with a pump octane<br />
rating of 86 or higher (page 45)<br />
Capacity 3.2 US gal (12.0 Q)<br />
Type<br />
SAE lOW-30, API SF or SG, for general<br />
use (page 49)<br />
Capacity 1.2 us qt (1 .l e)<br />
Type<br />
<strong>Marine</strong> SAE 90 hypoid, API GL-4 or GL-5<br />
Capacity 0.25 US qt (0.24 Q)<br />
Type<br />
BF9.9A: DR-SHS (NGK), Xl GFSR-U (DENSO)<br />
BF15A: DR-6HS (NGK), X20FSR-U (DENSO)<br />
Gap 0.024-0.028 in (0.60-0.70 mm) (page52)<br />
Idle speed 1,100 f 50 rpm<br />
Check engine oil level (page 47).<br />
Before Check fuel hose (page 28).<br />
each use Check propeller and cotter pin (page 56).<br />
Check anode (page 55)<br />
Change engine oil (page 48).<br />
Change gear oil (page 50).<br />
First 20 Check carburetor linkage.<br />
hours Check/adjust valve clearance.<br />
Grease lubrication points (page 51).<br />
Refer to the<br />
Subsequent page 43.<br />
maintenance schedule on
Owner's Manual<br />
Outboard Motor<br />
BFg.yA/15A<br />
I I I I I I I I I I I I I I I I I I I I I<br />
@ 1993 American <strong>Honda</strong> Motor Co., Inc. - All Rights Reserved<br />
I I I I I I I I I I I I I<br />
Thank you for purchasing a <strong>Honda</strong> Outboard Motor.<br />
This owners manual <strong>supplement</strong> covers specific information about the <strong>Honda</strong><br />
remote control equipped BF9.9A and BF15A outboard motors. Refer to the<br />
BF9.9A/15A owner’s manual for all other information.<br />
The owner’s manual and this <strong>supplement</strong> contain information on how to operate<br />
your new outboard motor safely. Please read them carefully.<br />
Keep the owners manual and this <strong>supplement</strong> handy, so you can refer to them<br />
at any time, and be sure they accompany the outboard motor if you sell it.<br />
We recommend that you read the warranty policy to fully understand your rights<br />
and responsibilities. The warranty policy is a separate document provided by<br />
your dealer.<br />
The information in this publication was in effect at the time of approval for<br />
printing. American <strong>Honda</strong> Motor Co., Inc. reserves the right to discontinue or<br />
change specifications or design at any time without notice and without incurring<br />
any obligation whatever. No part of this publication may be reproduced without<br />
written permission.<br />
01993 American <strong>Honda</strong> Motor Co., Inc. - All Rights Reserved<br />
1
CONTENTS<br />
2. COMPONENT IDENTIFICATION ............................ 3<br />
3. INSTALLATION (see remote control installation instructions)<br />
4. PRE-OPERATION CHECKS ................................ 4<br />
5. STARTING THE ENGINE .................................. 5<br />
6. OPERATION ............................................ 17<br />
7. STOPPING THE ENGINE .................................. 18<br />
12. WIRING DIAGRAM ....................................... 19<br />
13. OPTIONAL PARTS ....................................... 20<br />
The- B sections required no changes from the BF9.9A/15A<br />
owners manual. These sections are not covered in this <strong>supplement</strong>.<br />
The NON-HIGHLIGHTED sections contain only new information about a Re-<br />
mote Control Equipped BF9.9A/15A.<br />
Refer to the BF9.9A/15A owner’s manual for all other information.<br />
2
SPARE<br />
STOP S<br />
REMOTE C<br />
HARNESS<br />
EMERGENCY<br />
2. COMPONENT IDENTIFICATION<br />
NEUTRAL<br />
RELEASE LEVER<br />
SWITCH LANYARD EMERGENCY STOP<br />
SWITCH CLIP<br />
OIL PRESSURE<br />
INDICATOR LIGHT<br />
CHOKE/FAST<br />
EMERGENCY<br />
ENGINE STOP<br />
SWITCH 2<br />
EMERGENCY<br />
ENGINE STOP<br />
3
3. PRE-OPERATION CHECKS<br />
Steering friction bolt<br />
Operate the steering wheel right and left and check for the amount of drag felt.<br />
Adjust the steering friction bolt so that a slight amount of drag is felt. The steering<br />
should move smoothly and freely.<br />
STEERING FRICTION BOLT<br />
Remote control friction adjustment<br />
Operate the remote control lever into forward and reverse gears and check for<br />
the amount of drag felt.<br />
Adjust the remote control friction adjuster so that a slight amount of drag is felt.<br />
The remote control lever should move smoothly and freely.<br />
CONTROL<br />
FRICTION<br />
ADJUSTER %<br />
DECREASE<br />
In addition to the above items review the pre-operation check list shown in the<br />
BF9.9N15A owner’s manual page 14.<br />
4
Controls<br />
Remote control lever<br />
The remote control lever controls gear<br />
selection and throttte opening positions.<br />
It is necessary to pull up the neutral<br />
release lever to operate the remote control<br />
lever.<br />
5. STARTING THE ENGINE<br />
REMOTE CONTROL LEVER<br />
REMOTE CONTROL<br />
NEUTRAL RELEASE<br />
LEVER<br />
F (forward):<br />
Moving the lever to the F position (approximately 30” from the N position)<br />
will engage the forward gear. Moving the lever farther from the F position will<br />
increase the throttle opening and the boat forward speed.<br />
N (neutral):<br />
The engine idles and the transmission gears are disengaged.<br />
R (reverse):<br />
Moving the lever to the R position (approximately 30” from the N position)<br />
will engage the reverse gear. Moving the lever farther from the R position will<br />
increase the throttle opening and the boat reverse speed.<br />
5
5. STARTING THE ENGINE<br />
Neutral release lever<br />
The neutral release lever is on the re-<br />
mote control lever to prevent an acci-<br />
dental gear engagement.<br />
The remote control lever will not engage<br />
forward or reverse gear unless the neu-<br />
tral release lever is pulled up.<br />
Ignition switch<br />
The remote control box is equipped with<br />
a key type ignition switch.<br />
Key positions:<br />
START<br />
To activate the starter motor and<br />
start the engine. The remote con-<br />
trol lever must be in the neutral po-<br />
sition.<br />
ON<br />
To run the engine after starting.<br />
The battery will discharge if the key<br />
is left in this position with the en-<br />
gine not running.<br />
OFF<br />
To stop the engine (IGNITION<br />
OFF).<br />
6<br />
RELEASE<br />
LEVER
Emergency stop switch lanyard<br />
5. STARTING THE ENGINE<br />
The emergency stop switch lanyard is provided to stop the engine immediately<br />
in the event the operator should fall overboard or away from the controls.<br />
The emergency stop switch clip must be engaged with the emergency<br />
engine stop switch or the engine will not start. When the emergency stop<br />
switch clip becomes disengaged from the emergency engine stop switch the<br />
engine will stop immediately.<br />
The emergency engine stop switch should not be used to normally stop the<br />
engine. Use the ignition switch to normally stop the engine.<br />
Attach the emergency stop switch lanyard securely to the operator when<br />
operating the outboard motor.<br />
EMERGENCY<br />
A spare emergency stop switch clip is<br />
provided on the remote control box.<br />
SPARE EMERGENCY<br />
STOP SWITCH CLIP
5. STARTING THE ENGINE<br />
Choke/Fast idle lever<br />
The choke/fast idle lever provides two functions:<br />
1. Electric choke solenoid activation for easy engine start up.<br />
2. Engine fast idle.<br />
The choke/fast idle lever will not move unless the remote control lever is in the<br />
N (neutral) position. Conversely, the remote control lever will not move unless<br />
the choke/fast idle lever in the lowest position.<br />
Lift and hold the choke/fast idle lever up fully, this will provide a rich fuel mixture<br />
and the correct fast idle. Do not run the engine while holding the lever in the<br />
choke position.<br />
Gradually lower the choke/fast idle lever to the lowest position to decrease the<br />
choke and fast idle.<br />
Manual choke knob<br />
N<br />
(neutral)<br />
n CHOKE<br />
A manual choke knob is provided on the<br />
left side of the motor which can be used<br />
in the event the battery is discharged.<br />
When recoil starting, pull the choke<br />
knob and a rich fuel mixture will be<br />
provided to the engine. After the engine<br />
starts, be sure to push in the choke<br />
knob.<br />
R<br />
MAXIMUM FAST IDLE<br />
EST POSITION<br />
IDLE<br />
CHOKE KNOB
Oil pressure indicator light<br />
The green oil pressure indicator light<br />
turns OFF when the oil level is low<br />
and/or the engine lubrication system is<br />
faulty.<br />
5. STARTING THE ENGINE<br />
9
5. STARTING THE ENGINE<br />
Fuel line connection<br />
Refer to the BF9.9A/15A owner’s manual page 15.<br />
Electric starting (ignition key)<br />
The anti-ventilation plate must be lowered into the water and be at least 2<br />
inches below the surface. Running the outboard motor out of the water will<br />
damage the water pump and overheat the engine.<br />
l.Engage<br />
switch<br />
the emergency stop<br />
clip located at one end of<br />
EMERGENCY<br />
ENGINE<br />
the emergency stop switch lanyard<br />
with the emergency engine stop<br />
switch 1. Attach the other end of<br />
the emergency engine stop switch<br />
lanyard securely to the operator.<br />
The engine will not start unless<br />
the emergency stop switch clip is<br />
engaged with the emergency en- EMERGENCY STOP SWITCH LANYARD<br />
gine stop switch. SWITCH CLIP<br />
If the operator does not attach the emergency stop switch lanyard, and<br />
is thrown from his seat or out of the boat, the out-of-control boat can<br />
seriously injure the operator, passengers, or bystanders. Always prop-<br />
erly attach the lanyard before starting the motor.<br />
A spare emergency stop switch clip<br />
is provided on the remote control<br />
box.<br />
10
2. Move the control lever to the N<br />
(neutral) position.<br />
The engine will not start unless the<br />
control lever is in the N (neutral)<br />
position.<br />
3. When the engine is cold and/or the<br />
ambient temperature is low, lift and<br />
hold the choke/fast idle lever up<br />
fully. This will provide a rich fuel<br />
mixture and the correct fast idle.<br />
When the engine is warm, it may be<br />
necessary to raise the choke/fast<br />
idle lever slightly. Hold it in this po-<br />
sition.<br />
The choke/fast idle lever will not<br />
move unless the control lever is in<br />
the N (neutral) position.<br />
4. While holding the choke/fast idle<br />
lever in the up position, turn ,the<br />
ignition key to the START position<br />
and release the key when the<br />
engine starts. The starter motor<br />
consumes a large amount of<br />
current. Do not run it continuously<br />
for more than 5 seconds at a time.<br />
If the engine does not start within<br />
5 seconds wait at least 10 seconds<br />
before using the starter motor<br />
again.<br />
5. STARTING THE ENGINE<br />
N<br />
(neytral)<br />
CHOKE/FAST IDLE LEVER<br />
KEY<br />
ON<br />
MAXIMUM’FAST<br />
Do not turn the ignition key to the start position while the engine is run-<br />
ning. This can damage the starter motor and flywheel.<br />
11
5. STARTING THE ENGINE<br />
5. After starting the engine, return the<br />
lever slowly to the position where<br />
the engine does not stall. Hold the<br />
lever in position.<br />
The control lever will not move un-<br />
less the choke/fast idle lever is re-<br />
turned to the lowest position.<br />
CHOKE’FAST<br />
6. After the engine starts, verify water is flowing through the water check hole.<br />
The amount of water coming out of the water check hole will vary due to<br />
thermostat operation. Stop the engine if water does not come out the water<br />
check hole or if you see steam. Check the water intake screens and the water<br />
check hole port and if necessary remove any obstructions. If the problem<br />
continues, contact yourclosest authorized <strong>Honda</strong> <strong>Marine</strong> or <strong>Honda</strong> Outboard<br />
Motor dealer.<br />
X<br />
WATER<br />
CHECK<br />
HOLE O.K.<br />
Running the outboard motor with an obstruction in the cooling system can<br />
damage the water pump and overheat the engine.<br />
12
5. STARTING THE ENGINE<br />
7. With the engine running, check to see if the green engine oil pressure indicator<br />
light turns ON.<br />
Stop the engine if the oil pressure indicator light does not turn ON. Check the<br />
engine oil level. If the oil level is normal and the oil pressure indicator light<br />
does not turn ON, contact your closest authorized <strong>Honda</strong> <strong>Marine</strong> or <strong>Honda</strong><br />
Outboard Motor dealer.<br />
NORMAL<br />
ABNORMAL<br />
OIL PRESSURE<br />
INDICATOR LIGHT<br />
: GREEN LIGHT ON<br />
: GREEN LIGHT OFF<br />
13
5. STARTING THE ENGINE<br />
Recoil starting<br />
If the electric starting system will not start the engine. The engine can be started<br />
using the recoil starter.<br />
N<br />
1. Move the control lever to the N (neutral)<br />
(neutral) position.<br />
2.Turn the ignition key to the ON<br />
position. Engage the emergency<br />
stop switch clip, located at one end<br />
of the emergency stop switch<br />
lanyard, with emergency engine<br />
stop switch 1.<br />
3. Engage an emergency stop switch<br />
clip with emergency engine stop<br />
switch 2.<br />
14<br />
CONTR<br />
LEVER<br />
EMERGENCY ST0<br />
SWITCH LANYARD<br />
EMERGENCY ENGINE<br />
STOP SWITCH 2<br />
EMERGENCY<br />
ENGINE STOP<br />
CHl
4. If the engine is cold and/or the<br />
ambient temperature is low, pull<br />
and hold the manual choke knob<br />
out. The choke knob is located on<br />
the front of the outboard motor.<br />
If the fuel system is working prop-<br />
erly, it should only be necessary to<br />
pull the recoil starter 1 or 2 times<br />
with the choke knob out.<br />
5. Lift the choke/fast idle lever. The<br />
choke/fast idle lever will stay up in<br />
the fast idle position.<br />
6. Pull the recoil starter rope slowly<br />
until resistance is felt, then pull<br />
briskly.<br />
7.If it was necessary to use the _<br />
manual choke knob to start the<br />
engine, slowly return it to its initial<br />
position.<br />
8. Slowly return the choke/fast idle<br />
lever to the lowest position to<br />
where the engine does not stall.<br />
5. STARTING THE ENGINE<br />
;NOB<br />
CHOKE/FAST<br />
9. After the engine starts, monitor the water discharge and the oil pressure<br />
indicator light.<br />
15
5. STARTING THE ENGINE<br />
Electric starting (starter button)<br />
If the choke solenoid kit is not installed or not working, the engine can be started<br />
using the starter button on the side of the engine.<br />
1. Perform steps 1 - 5 in this <strong>supplement</strong> (pages 14,15).<br />
2. Press the electric starter button and start the engine.<br />
3. Perform steps 7 - 9 in this <strong>supplement</strong> (page 15).<br />
Emergency starting<br />
If the electric starting system and/or the recoil starter will not start the engine.<br />
The engine can be started using the spare starter rope from the tool kit.<br />
1. Perform steps 1 - 5 in this <strong>supplement</strong> (pages 14,15).<br />
2. Perform steps 1 - 4 in the BF9.9AI15A owner’s manual (page 20).<br />
3. Perform steps 7 - 9 in this <strong>supplement</strong> (page 15).<br />
4. Perform step 5 in the BF9.9N15A owner’s manual (page 20).<br />
16
Gear shifting<br />
6. OPERATION<br />
While pulling up the neutral release CONTROL<br />
lever, move the control lever 30” toward<br />
F (forward) or 30” toward R (reverse) to NEUTRAL<br />
engage the desired gear. RELEASE<br />
LEVER<br />
Moving the control lever farther from 30” will increase throttle opening and boat<br />
speed.<br />
N N<br />
F (neutral) (neutral) R<br />
The control lever will not move unless the neutral release lever is pulled up and<br />
the choke/fast idle lever is in the lowest position.<br />
For optimum fuel economy, limit throttle opening to Vs.<br />
17
7. STOPPING THE ENGINE<br />
Emergency engine stop<br />
Disengage the emergency stop switch EMERGENCY ENGINE<br />
clip from either emergency engine stop STOP SWITCH 1<br />
switch 1 or 2 by pulling the emergency<br />
stop switch lanyard.<br />
It is a good idea to stop the engine with<br />
the emergency stop switch lanyard from<br />
time to time to be sure that the switch is<br />
operating properly.<br />
Normal engine stop<br />
1. Move the control lever to the N<br />
(neutral) position.<br />
2.Turn the ignition key to the OFF<br />
position.<br />
18<br />
When the boat is not in use, remove<br />
and store the ignition key.<br />
EMERGENCY STOP SWITCH CLIP<br />
CONTRO<br />
LEVER<br />
IGNITION KEY<br />
@e&al)
12. WIRING DIAGRAM
13. OPTIONAL PARTS<br />
Steering lube Seal<br />
(Anodized Aluminum or Stainless Steel)<br />
There are additional optional parts available. See your authorized <strong>Honda</strong><br />
<strong>Marine</strong> or <strong>Honda</strong> Outboard Motor dealer for a complete list.<br />
20
31 ZV46QA 2509307<br />
00X31-ZV4-6OOA PRINTED IN U.S.A.<br />
I I I I I I I
31ZV4631<br />
00X31-ZV4-6310<br />
Printed on<br />
Recycled Paper<br />
KINKOS<br />
EM 50.2002.08<br />
PRINTED IN U.S.A.
