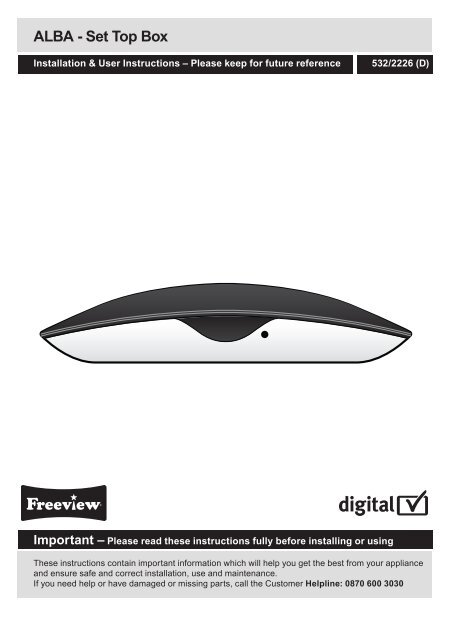
ALBA - Set Top Box - Digital UK
ALBA - Set Top Box - Digital UK
ALBA - Set Top Box - Digital UK

You also want an ePaper? Increase the reach of your titles
YUMPU automatically turns print PDFs into web optimized ePapers that Google loves.
<strong>ALBA</strong> - <strong>Set</strong> <strong>Top</strong> <strong>Box</strong><br />
Installation & User Instructions – Please keep for future reference 532/2226 (D)<br />
Important – Please read these instructions fully before installing or using<br />
These instructions contain important information which will help you get the best from your appliance<br />
and ensure safe and correct installation, use and maintenance.<br />
If you need help or have damaged or missing parts, call the Customer Helpline: 0870 600 3030
1<br />
Contents<br />
Safety Information 2<br />
Safety warning 2<br />
2-core plug information 2<br />
Functions & Controls 3<br />
Installation 4<br />
Making the connections 4<br />
Connection to a TV 4<br />
Remote control battery installation 4<br />
User Instructions 5-13<br />
Getting started 5<br />
System power ON / OFF 5<br />
Switching between Radio & TV 5<br />
Volume controls 5<br />
Using subtitles 5<br />
Using digital text 5<br />
The info banner 6<br />
Quick station select menu 6<br />
Last program recall 6<br />
Audio & language selection 6<br />
Electronic program guide 7<br />
Wake up timer 7<br />
<strong>Digital</strong> TV 7<br />
Channel manager 8<br />
Channel organiser 8<br />
Channel sorting 9<br />
Channel grouping 9<br />
Delete all 10<br />
Installation 10<br />
Configuration 11<br />
OSD <strong>Set</strong>tings 11<br />
TV <strong>Set</strong>tings 11<br />
System <strong>Set</strong>tings 11<br />
Time <strong>Set</strong>tings 11-12<br />
Wake Up Timer <strong>Set</strong>tings 12<br />
Parental Lock 13<br />
Factory Default 13<br />
Version 13<br />
Care and Maintenance 14<br />
Troubleshooting 14<br />
Technical Specifications 15<br />
Disposal information 15<br />
Guarantee 16<br />
Product Codes<br />
CDVB5
Safety Information<br />
Important – Please read these instructions fully before installation<br />
Safety Warning Safety Warning<br />
• Attempts to repair this will invalidate the warranty.<br />
• Refer repairs to this CDVB5 to a qualified service<br />
personnel only.<br />
• Do not disassemble this CDVB5.<br />
• There are dangerous-voltage parts inside that<br />
may cause electric shock even after power is<br />
disconnected.<br />
• Store your CDVB5 in a clean, dry environment.<br />
• Unplug the CDVB5 immediately if it gets wet, and<br />
consult a servicing technician.<br />
• Always unplug the CDVB5 before cleaning it.<br />
• Wipe dust off the cabinet of the CDVB5 with a clean,<br />
dry and soft cloth.<br />
• Do not place any objects on top of the CDVB5.<br />
• Avoid exposing your CDVB5 directly to sunlight or<br />
other heat sources.<br />
• Put your CDVB5 in a well-ventilated area away from<br />
high humidity.<br />
• Do not expose this CDVB5 to rain or moisture,<br />
dripping or splashing.<br />
• For stubborn stains use a damp (not dripping) cloth.<br />
• Do not use any cleaning solutions on this CDVB5.<br />
Safety Tips<br />
If smoke, abnormal noise or odour comes out of the<br />
CDVB5, unplug from the mains supply immediately and<br />
contact the retailer. Never try to repair the CDVB5 on<br />
your own. Always contact the dealer.<br />
NOTE: This manual contains for-reference-only graphics<br />
and information that are subject to change without notice.<br />
EN 060065<br />
As per the EN 60065 norm requirements, please pay<br />
particular attention to the following safety guidelines.<br />
Do not obstruct the air vents with objects such as<br />
newspapers, table cloths, curtains etc.<br />
Allow at least 5 cm around the product to allow enough<br />
ventilation.<br />
Do not place the product on or near flammable objects<br />
such as lit candles. The device may not be exposed to<br />
dripping or splashing and no object filled with liquid, such<br />
as vases, must be put on the device. If the mains power<br />
supply is used as the on / off control, it must be easily<br />
accessible.<br />
Please respect the environment and the law : do not throw<br />
batteries with the household rubbish ; take them back to<br />
your retailer and dispose of them in the correct container.<br />
Electrical Information<br />
This CDVB5 is fitted with a BS1363/A 13 amp plug.<br />
If it is not suitable for your supply sockets it must be<br />
removed and replaced with an appropriate plug. If the plug<br />
becomes damaged and/or needs to be replaced please<br />
follow the wiring instructions below. The plug removed<br />
must be disposed of immediately. It must not be plugged<br />
into a supply socket as this will be an electrical hazard.<br />
If the fuse needs to be replaced it must be of the same<br />
rating and ASTA approved to BS1362. If the plug is<br />
changed, a fuse of the appropriate rating must be fitted in<br />
the plug, adapter or at the distribution board. If the fuse in<br />
a moulded plug is replaced, the fuse cover must be refitted<br />
before the appliance can be used.<br />
2-Core plug<br />
WARNING: Do not connect either wire to the earth<br />
terminal.<br />
This symbol indicates that this 2-core appliance is<br />
Class II and does not require an earth connection.<br />
E<br />
L<br />
BLUE TO<br />
FUSE<br />
NEUTRAL<br />
N<br />
BROWN<br />
TO LIVE<br />
CORD<br />
GRIP<br />
CAUTION: Dangerous voltages exist inside this unit. Do not<br />
remove cover (or back). no user serviceable parts inside refer<br />
servicing to qualified service personnel. Disconnect from<br />
mains supply when not in use.<br />
The wires in this mains lead are coloured in accordance with<br />
the following wiring codes:<br />
Blue........................................................Neutral<br />
Brown..........................................................Live<br />
The wires in this mains lead must be connected to the terminals<br />
in the plug as follows:<br />
Blue Wire...........................................N or Black<br />
Brown Wire...........................................L or Red<br />
Only a 3 Amp fuse should be fitted in the plug.<br />
WARNING: Under no circumstances must the live or neutral<br />
wires be connected to the earth terminal in a 3- pin mains<br />
plug.<br />
2
3<br />
Functions<br />
Please familiarize yourself with the parts and accessories listed below<br />
Parts included Features & Functions<br />
1 x Main Unit 1 x Remote Control<br />
2 x AAA batteries<br />
MAIN UNIT<br />
1. Remote sensor<br />
3<br />
2. LED indicator<br />
3. Antenna input<br />
4. Loop output<br />
5. Scart socket<br />
6. Mains cable<br />
4 5 6<br />
1<br />
1<br />
3 4 5 6<br />
3 4 5 6<br />
REMOTE CONTROL<br />
7. POWER/STANDBY button<br />
8. Numeric keypad<br />
9. FAVOURITE PROGRAM button<br />
10. EPG button<br />
11. SUBTITLE button<br />
12. MENU button<br />
13. ZOOM button<br />
14. SCROLL UP button<br />
15. SCROLL LEFT button<br />
16. SCROLL DOWN button<br />
17. CHANNEL + button<br />
18. CHANNEL - button<br />
19. FAV / DAILY button<br />
1<br />
2<br />
2<br />
2<br />
7<br />
7<br />
8<br />
1 2 3<br />
LANG<br />
8<br />
7<br />
89<br />
10 9<br />
11<br />
12<br />
10<br />
11<br />
ASPECT<br />
1 POWER 2 3<br />
4 5 6 MUTE<br />
ASPECT<br />
TV/RADIO<br />
4 5 6<br />
7 8 9<br />
TV/RADIO LANG<br />
FAV<br />
RECALL INFO<br />
71<br />
82<br />
93<br />
0<br />
ASPECT<br />
EPG FAV SUBTITLE RECALL INFO<br />
4 05<br />
6<br />
MENU EPG SUBTITLE ZOOM TEXT TV/RADIO EXIT<br />
7 8 9<br />
MENU ZOOM TEXT EXIT<br />
22 23<br />
23 21<br />
24<br />
24 25 22<br />
26<br />
27 25 23<br />
28 26<br />
27 29 24 28<br />
FAV<br />
RECALL INFO<br />
12 13 9<br />
13 14<br />
10<br />
14<br />
12 15<br />
15 13 16<br />
16 14 17<br />
17 15 18<br />
18<br />
19 16<br />
19 20 17<br />
20 18<br />
0<br />
EPG SUBTITLE<br />
11 MENU<br />
Group<br />
ZOOM TEXT<br />
ENTER Group<br />
EXIT 28<br />
19<br />
20<br />
POWER<br />
POWER<br />
ENTER<br />
MUTE<br />
MUTE<br />
LANG<br />
CH- CH+ GroupVOL-<br />
VOL+<br />
CH- CH+ ENTERVOL-<br />
VOL+<br />
FAV. DEL. MOVE LOCK<br />
FAV. DEL. MOVE LOCK<br />
DAILY P.INFO TIMER<br />
CH- CH+ VOL- VOL+<br />
DAILY P.INFO TIMER<br />
FAV. DEL. MOVE LOCK<br />
DAILY P.INFO TIMER<br />
21<br />
21<br />
22<br />
29 25 30<br />
26<br />
27<br />
30<br />
29 31<br />
31 30<br />
32<br />
32 31 33<br />
33<br />
34<br />
34 32 35<br />
35 33<br />
34<br />
35<br />
20. DEL button<br />
21. MUTE button<br />
22. LANGUAGE button<br />
23. ASPECT RATIO button: Press to cycle between<br />
4:3LB, 4:3PS & 16:9 aspect ratios.<br />
24. TV/RADIO button<br />
25. INFO button<br />
26. RECALL button<br />
27. NEXT / ZOOM+ button<br />
28. PREV / ZOOM- button<br />
29. EXIT button<br />
30. TEXT button<br />
31. SCROLL RIGHT button<br />
32. VOLUME - button<br />
33. VOLUME + button<br />
34. LOCK / TIMER button<br />
35. MOVE / PROGRAM INFO button
Installation<br />
Important – Please read these instructions fully before using<br />
Making the connections<br />
PVR/VCR<br />
AERIAL<br />
How do I connect the CDVB5 to my TV set?<br />
1. Put the CDVB5 on a firm, level surface with at<br />
least 10 centimetres gap around all the sides and<br />
close to the TV you are going to connect it to.<br />
2. Turn off the mains socket your TV is plugged into<br />
or pull the plug out of the socket.<br />
3. Take the aerial lead out of the TV and connect it<br />
to the ANT IN connector on the back panel of the<br />
CDVB5.<br />
4. Connect a scart connector at each end (not<br />
supplied) between the SCART-TV socket on the<br />
back panel of the CDVB5 and the Scart socket<br />
on your TV, if there is more than one Scart<br />
connector on the TV, look in your TV instruction<br />
manual to check which one you should use.<br />
6. Plug the mains lead into the mains socket.<br />
7. Plug the TV back into the mains socket.<br />
NOTE: The CDVB5 will not work if you do not have<br />
the scart-to-scart cable connected.<br />
If you have damaged or missing parts,<br />
call the Customer Helpline: 0870 600 3030<br />
TV<br />
SCART TO SCART CABLE<br />
Fitting the batteries in the remote<br />
1. Remove the battery cover. Insert two size AAA<br />
batteries so that the ‘+’ and ‘-’ marks match the<br />
‘+’ and ‘-’ marks inside the unit.<br />
2. Replace the battery cover.<br />
+<br />
- -<br />
+<br />
4
5<br />
User Instructions<br />
Getting started<br />
1. The first time you power on the CDVB5 when<br />
connected correctly you will see the following<br />
screen.<br />
2. Use the / buttons to navigate up or down<br />
and the / buttons to change the options.<br />
3. When complete press the ENTER button.<br />
You will be asked if you want to complete the<br />
installation. Use the / buttons to select YES<br />
and then press the ENTER button to finish the<br />
installation.<br />
4. A channel search will automatically begin and list<br />
all the available stations.<br />
If multiple transmitters are available select which<br />
you wish to use from the pop up menu.<br />
System power ON / OFF<br />
1. To power the system ON or OFF press the<br />
POWER button on the remote control.<br />
Switching between Radio & TV<br />
1. Pressing the TV/RADIO button switches<br />
between the TV station list & the radio station<br />
list.<br />
Volume controls<br />
You can change the volume of your CDVB5 by<br />
using the VOL+ and VOL- buttons on the remote<br />
control. VOL+ will increase the volume and VOL-<br />
will decrease the volume. To turn the volume off,<br />
press the MUTE button on the remote control. To<br />
turn it back on, press the MUTE button again.<br />
Using subtitles<br />
To use subtitles, press the SUBTITLE button on the<br />
remote control. When activated the screen below<br />
will be shown.<br />
Use the button to enable subtitles and select from<br />
the available languages using the / buttons.<br />
Press the ENTER button to activate.<br />
NOTE: DON’T FORGET! Subtitles are only shown<br />
when they are broadcast with the programme. Not<br />
all programmes have subtitles.<br />
Using digital text<br />
Many digital channels also provide digital text.<br />
For example this could be information about<br />
programmes, the weather, news and many other<br />
topics.<br />
1. To use digital text, press the TEXT button on the<br />
remote control. An example is shown below.<br />
2. To exit digital text press the EXIT button.
User Instructions<br />
The info banner<br />
The info banner can be accessed when your are<br />
watching a TV programme.<br />
1. Press the INFO button once to display the<br />
current and next program on the current channel.<br />
2. Press the INFO button again to display more<br />
detail of the current program in view.<br />
The info banner gives you technical details about<br />
the station being viewed, along with signal strength<br />
and quality markers.<br />
Quick station select menu<br />
1. Pressing the ENTER button in either TV or Radio<br />
mode will display the QUICK SELECT menu.<br />
2. Use the / buttons to navigate the channel<br />
list and press the ENTER button to select a<br />
station.<br />
3. To exit the QUICK SELECT menu press the<br />
EXIT button.<br />
Quick station select menu<br />
NOTE: You can customise the quick select<br />
menu further using channel grouping to assign<br />
descriptions to channels & also add a favourite<br />
mark to filter channels based on your favourites.<br />
These are explained later in the manual.<br />
4. Once set up you can filter the favourite channels<br />
by pressing the FAV button.<br />
5. Once set up you can view channels based on<br />
their descriptions using the / buttons.<br />
Each press will scroll to a new category. EG:<br />
News, Science & Sports etc.<br />
Last program recall<br />
It is possible to return to the previous stations<br />
viewed by simply pressing the RECALL button<br />
on the remote. To return back to the initial station<br />
press the RECALL button again.<br />
Audio & language selection<br />
When viewing a station pressing the LANG button<br />
on the remote will display the language selection<br />
screen.<br />
6
1. Use the / buttons to navigate to the<br />
language you wish to hear and press the ENTER<br />
button to select.<br />
2. You can also select between STEREO, RIGHT<br />
or LEFT channel audio by pressing the /<br />
buttons to cycle through the options. Press the<br />
ENTER button to select and view the channel.<br />
7<br />
User Instructions<br />
Audio & language selection Wake up timer<br />
Electronic program guide<br />
The EPG (Electronic Program Guide) is an<br />
on-screen TV guide. it shows all scheduled<br />
programmes seven days in advance for every<br />
available channel.<br />
1. Press the EPG button to display the guide.<br />
2. Use the / buttons to select a channel. Press<br />
the ENTER button to activate that channel.<br />
3. Press the button to switch to the program<br />
list. Scroll through the programs on the selected<br />
channel using the / buttons.<br />
4. To scroll through the days use the /<br />
buttons to cycle from todays day through to the<br />
same day next week.<br />
5. Press the EPG or EXIT button to close the<br />
electronic program guide.<br />
6. Pressing the P.INFO button (yellow) will display<br />
detailed information about the currently selected<br />
program. Press EXIT to return to the EPG.<br />
1. The wakeup timer function can be activated from<br />
the EPG menu. Highlight the program you wish<br />
to use as the wakeup program and press the<br />
TIMER (blue) button to display the wakeup timer<br />
settings. Further details on page 12.<br />
2. The default settings will be set based on the<br />
program you selected in the EPG. If you need to<br />
edit the settings use the / / / buttons.<br />
When editing the date a calendar screen will be<br />
displayed. Select the required date and press the<br />
ENTER button.<br />
3. When finished setting the details press the<br />
ENTER button to store the wake up function.<br />
The program will then be displayed in green text<br />
on the EPG.<br />
4. The TIMER NO option at the top of the list allows<br />
up to 8 wake up functions to be set.<br />
<strong>Digital</strong> TV<br />
Press the MENU button to display the following<br />
screen. Use ENTER to activate <strong>Digital</strong> TV options.<br />
Below is the <strong>Digital</strong> TV menu.<br />
Channel manager<br />
The channel manager offers several methods of<br />
organising channels. Such as marking favourite<br />
channels and adding descriptions to channels.<br />
Channel organiser<br />
1. Select the CHANNEL ORGANISER option from<br />
the Channel manager menu.
User Instructions<br />
<strong>Digital</strong> TV <strong>Digital</strong> TV<br />
2. You will note the key for the coloured button<br />
commands on the bottom panel of the interface.<br />
RED: Favourite, YELLOW: Move, BLUE: Lock &<br />
GREEN: Delete.<br />
<strong>Set</strong>ting favourite channels<br />
1. Use the / buttons to scroll through the list of<br />
available channels.<br />
2. When selected press the RED button to assign<br />
that channel as a FAVOURITE. Press again to<br />
remove the function.<br />
Delete a channel<br />
1. Use the / buttons to scroll through the list of<br />
available channels.<br />
2. When selected press the GREEN button to<br />
earmark that channel for deletion from the<br />
channel list.<br />
3. Continue steps 1-2 until you have marked all the<br />
channels you wish to be deleted.<br />
4. Press the EXIT button, select YES from the<br />
option menu, then press ENTER to delete the<br />
marked channels.<br />
Move a channel<br />
It is possible to re-arrange the order channels are<br />
displayed in the EPG.<br />
1. Use the / buttons to scroll through the list of<br />
available channels.<br />
2. When selected press the YELLOW button to<br />
activate the move function.<br />
3. Use the / buttons to scroll through the list of<br />
channels until you reach the required new<br />
location.<br />
4. Press the ENTER button to re-locate the channel<br />
listing.<br />
NOTE: the channel will be re-located above the<br />
selected channel in the list.<br />
Lock a channel<br />
This function will add a parental lock to assigned<br />
channels.<br />
1. Use the / buttons to scroll through the list of<br />
available channels.<br />
2. When selected press the BLUE button to<br />
activate the lock function.<br />
3. A 4 digit pass code is required to proceed with<br />
this function. The default code is ‘0000’.<br />
4. When entered the channel will display a padlock<br />
icon to indicate it is locked. You can proceed<br />
to press the BLUE button adding locks to other<br />
channels.<br />
5. Press the EXIT button when finished.<br />
6. Any locked stations, selected for viewing will<br />
8
9<br />
User Instructions<br />
<strong>Digital</strong> TV <strong>Digital</strong> TV<br />
require the 4 digit pass code.<br />
Rename a channel<br />
1. Press either / to rename the selected<br />
channel.<br />
2. Use the numeric keypad to assign a new name.<br />
Press each number repeatedly to cycle through<br />
the characters assigned to that number. The<br />
on- screen key shows a visible reference.<br />
3. After adding each letter or number wait for a few<br />
seconds before adding another.<br />
4. Press the ENTER button to store the new name.<br />
Channel sorting<br />
The channel sorting function allows you to filter the<br />
way located channels are sorted. For example how<br />
they are listed A-Z or Z-A.<br />
1. Select the CHANNEL SORTING option from<br />
the Channel manager menu.<br />
FIRST OPTION: Select between <strong>UK</strong> and All Area.<br />
SECOND OPTION: Select between ALL , FTA<br />
(Free to Air) and Scramble ( all pay per view<br />
channels ).<br />
THIRD OPTION: Select from A to Z ( stations A<br />
through to Z ), Z to A ( stations Z through to A ),<br />
LCN+ ( Logical Channel Number order ) or LCN- (<br />
Logical Channel Number in reverse order ).<br />
Channel grouping<br />
Channel grouping allows you to assign descriptions<br />
to each channel to enable listing by genre.<br />
1. Select the CHANNEL GROUPING option from<br />
the Channel manager menu.<br />
2. Use the / buttons to scroll through the list of<br />
available channels.<br />
3. When selected choose which description ( on the<br />
right of the display ) matches the station and<br />
press the corresponding numeric key. EG: ESPN<br />
I would like assigned to SPORT so press the 4<br />
button.<br />
4. Once all descriptions are assigned press the<br />
EXIT button to store and exit the menu.<br />
Delete all<br />
You my need to delete the TV or radio channel<br />
database, for example you have moved or removed<br />
some channels or you wish to start from scratch<br />
organising them.
User Instructions<br />
<strong>Digital</strong> TV <strong>Digital</strong> TV<br />
1. Select the DELETE ALL option from the Channel<br />
manager menu.<br />
2. A 4 digit pass code is required to proceed with<br />
this function. The default code is ‘0000’.<br />
3. Once the pass code has been entered you will<br />
have a choice of “All TV Channels” or “All Radio<br />
Channels”. Press ENTER to make the selection.<br />
and confirm by selecting YES and pressing<br />
ENTER again.<br />
4. Press the EXIT button once complete to return to<br />
the Channel Manager screen.<br />
Installation<br />
There are two methods of installation as follows:<br />
Auto search<br />
When selected the AUTO SEARCH function starts<br />
automatically. Any stations found will be added to<br />
the channel list for radio & TV.<br />
NOTE: If your location falls between transmitters,<br />
then you will be requested to select one after the<br />
scan is complete.<br />
Manual search<br />
The manual search function requires some<br />
knowledge of digital TV or a specific channels<br />
settings.<br />
1. <strong>Set</strong> the CHANNEL NAME value to the Channel<br />
number you wish to search.<br />
2. Press the ENTER button and wait for the search<br />
to commence. If the display returns back to the<br />
Installation screen immediately then no stations<br />
where found on that Channel number.<br />
3. If stations are found on the Channel number<br />
the channel list will be built until all are found.<br />
Then the display will return to the Installation<br />
screen.<br />
The configuration menu allows you to alter the<br />
default settings of the CDVB5.<br />
OSD <strong>Set</strong>tings<br />
OSD: Use the / buttons to cycle through<br />
various coloured versions of the graphic interface.<br />
OSD Timeout: <strong>Set</strong>s the duration the On-Screen<br />
display stays visible for when not in use. The<br />
10
default is 6 seconds. Use the / buttons to cycle<br />
through the options 1-6 seconds.<br />
OSD Trans: Controls the translucency of the<br />
interface. Use the / buttons to cycle through<br />
the options 10% - 60%.<br />
OSD Language, Audio Language & Subtitle<br />
Language: Use the / buttons to enter the<br />
language selection options. Then use the /<br />
buttons to select the language you require from<br />
English, Gaelic or Welsh. Press the ENTER button<br />
to store the setting.<br />
TV <strong>Set</strong>tings<br />
Aspect Ratio: This setting controls how the picture<br />
fits the screen depending on the TV used. Press<br />
the / buttons to cycle through 16:9, 4:3LB (<br />
letter box ) or 4:3PS ( Pan & Scan ).<br />
Video Output: Press the / buttons to cycle<br />
through the two options of RGB or CVBS<br />
depending on what signal your TV requires.<br />
Brightness: Use the / buttons to enter the<br />
Brightness level options. Then use the /<br />
buttons to select from 0% to 100%. Press ENTER<br />
to apply the brightness level setting.<br />
Contrast: Use the / buttons to enter the<br />
Contrast level options. Then use the / buttons<br />
to select from 0% to 100%. Press ENTER to apply<br />
the contrast level setting.<br />
HUE: Use the / buttons to enter the Hue level<br />
options. Then use the / buttons to select from<br />
-6 to +6. Press ENTER to apply the hue level.<br />
11<br />
User Instructions<br />
Configuration Configuration<br />
Saturation: Use the / buttons to enter the<br />
Saturation level options. Then use the /<br />
buttons to select from 0 to 12. Press ENTER to<br />
apply the saturation level setting.<br />
System <strong>Set</strong>tings<br />
EQ <strong>Set</strong>up: The sound can be altered with EQ<br />
presets. Use the / buttons to cycle through the<br />
options of: Standard, Classic, Rock, Jazz & Pop.<br />
Surround: The surround setting adds a spatial EQ<br />
effect to the sound to simulate an environment. Use<br />
the / buttons to cycle through the options of:<br />
Off, Concert, Church, Passive & Live.<br />
LCN: Means Logical Channel Number and<br />
denotes wether the stations are listed by channel<br />
number IE: BBC, BBC2 etc or by station order.<br />
Area: <strong>Set</strong> the country location. Use the /<br />
buttons to select.<br />
Parental Rating: Restrictions based on age can<br />
be set here by setting an age limit. Any programs<br />
exceeding that age will require the pass code to<br />
view.<br />
When selected a 4 digit pass code is required to<br />
proceed with the function. The default code is<br />
‘0000’. You can then use the / buttons to select<br />
the age. Press ENTER to store the setting.<br />
Auto Standby: The auto standby function shuts the<br />
unit down into the standby mode when left unused<br />
for 3 hours. Use the / buttons to select ON or<br />
OFF.<br />
When set to ON you will see a pop up appear<br />
after 3 hours asking if you’d like to stop the auto<br />
standby process. Simply select NO and press the<br />
ENTER button to remain viewing.<br />
Channel Update: This function keeps channel<br />
listings current if any alterations are made to the<br />
transmission.<br />
OAD Upgrade: Enabling this option allows<br />
software updates to be applied over transmissions.<br />
The Manual option stops any updates being applied<br />
unless performed manually. Auto allows updates to<br />
be applied when the unit is on or in standby mode.
The <strong>Set</strong>up Menu<br />
Configuration Configuration<br />
Time <strong>Set</strong>tings<br />
Timer Mode: When set to AUTO the system’s time<br />
settings will be obtained from the transmission<br />
signal. To set manually use the / buttons to<br />
select MANUAL.<br />
1. Scroll down to the DATE setting using the /<br />
buttons. Press the / buttons to activate the<br />
calendar screen, where you use a combination of<br />
the / / / buttons to navigate the calendar<br />
until you find the correct date. Press the ENTER<br />
button to store the date.<br />
2. After scrolling down to the TIME setting use the<br />
/ buttons to select the digit you wish to<br />
change. Press the relevant numeric key for the<br />
number you wish to enter. Press either /<br />
buttons to store the setting.<br />
3. GMT OFFSET is only available when the TIMER<br />
MODE is set to AUTO. Use the / / /<br />
buttons to set your GMT offset zone. Leaving<br />
on AUTO sets the zone depending on the<br />
transmission.<br />
4. The SUMMER TIME setting is only available<br />
when the GMT OFFSET option is set to anything<br />
but AUTO. Use the / buttons to cycle<br />
between ON & OFF.<br />
Wake Up Timer <strong>Set</strong>tings<br />
The wake up timer allows you to set a reminder<br />
when a program is about to start, or for timer<br />
recording to a PVR or VCR device.<br />
• Timer NO: This allows you to set up to 8 wake<br />
up timers.<br />
• Timer Mode: <strong>Set</strong> to OFF, ONCE, DAILY,<br />
WEEKLY or YEARLY.<br />
• Wakeup Mode: Select from OFF, MESSAGE,<br />
CHANNEL or ON.<br />
• Wakeup Channel: Select the channel you wish<br />
to view.<br />
• Wakeup Date: Use the displayed calendar to<br />
select the date for the wake up operation.<br />
• On Time: <strong>Set</strong>s the time the wake up operation<br />
will start.<br />
• Duration: <strong>Set</strong>s the duration the wake up<br />
operation stays active for.<br />
Example 1: You are watching a program on BBC1,<br />
but wish to view a program later on BBC2 at<br />
2.30pm which runs for 30 mins.<br />
1. The settings would be as follows:<br />
Timer No 1<br />
TImer Mode Once<br />
Wakeup Mode Channel<br />
Wakeup Channel BBC2<br />
Wakeup Date 11.04.2010<br />
On Time 14:30<br />
Duration 00:30<br />
2. Press the EXIT button a number of times to<br />
return to the TV and save the setting you just set.<br />
You can now continue to watch the TV.<br />
3. When the timer reaches the programmed time<br />
the set top box will change to the chosen channel<br />
and display it for the selected duration.<br />
4. When the 30 minutes duration comes to an end<br />
the set top box will revert back to the channel you<br />
where watching prior to the wake up operation.<br />
Example 2: You wish to make a recording of a<br />
12
13<br />
User Instructions<br />
Configuration Configuration<br />
program to a PVR or VCR via the scart socket<br />
while your out. The selected program is on BBC2 at<br />
3.30pm and lasts for 2 hours.<br />
1. The settings would be as follows:<br />
Timer No 1<br />
TImer Mode Once<br />
Wakeup Mode Channel<br />
Wakeup Channel BBC2<br />
Wakeup Date 11.04.2010<br />
On Time 15:30<br />
Duration 02:00<br />
2. Press the EXIT button a number of times to<br />
return to the TV and save the setting you just set.<br />
You can now continue to watch the TV or press<br />
the STANDBY button.<br />
3. When the timer reaches the programmed time<br />
the set top box will change to the chosen channel<br />
and display it for the selected duration.<br />
Parental Lock<br />
Use this screen to change the default Parental lock<br />
code of ‘0000’ to whatever code you wish.<br />
1. When selected, the initial option is to enter the<br />
existing pass code. if you have not changed it,<br />
enter the following ‘0000’.<br />
2. Next enter your new pass code.<br />
3. Enter the new pass code again to ensure you<br />
entered the correct code in the second option.<br />
4. The new pass code has been set.<br />
NOTE: If you cannot remember your newly set pass<br />
code then the default override pass code is ‘8888’.<br />
Factory Default<br />
Should you wish to restore the unit back to the<br />
factory default settings.<br />
1. Select Factory Default from the <strong>Digital</strong> TV<br />
menu.<br />
2. Enter the pass code. The default is ‘0000’.<br />
3. Select YES from the pop up options screen<br />
asking do you want to perform the operation.<br />
Press the ENTER button to initiate.<br />
4. The display will show “factory Default” and<br />
return to the Initial install screen outlined on page<br />
5 of this manual.<br />
5. Perform the steps on page 5 to begin the initial<br />
setup again.<br />
Version<br />
If for any reason you wish to check the software<br />
version of your unit activate this function for details.
Care and Maintenance<br />
Important: Always unplug the appliance from the power socket during cleaning and<br />
maintenance.<br />
• Never use any sharp instruments or abrasive substances, soap, household cleaner, detergent or wax<br />
polish for cleaning.<br />
• Clean the external surfaces with a damp soft cloth only. Never use abrasive products or solvents as it<br />
may damage the appliance.<br />
Troubleshooting<br />
In the unlikely event of difficulties with your appliance please follow the trouble shooting guide below.<br />
If the problem persists, contact the retailer if the machine is still under guarantee.<br />
Customer helpline: 0870 600 3030<br />
Problem Cause Solution<br />
No display on the TV screen. • No power<br />
• Make sure the mains plug is correctly<br />
connected to the socket.<br />
• Cable unplugged<br />
• Check cable connections in both the TV &<br />
unit.<br />
“No Signal” • Is the aerial installation working?<br />
• The aerial cable may not be<br />
connected.<br />
• The transmission signal may not<br />
be broadcasting.<br />
• The program setup is incorrect.<br />
The unit plays a strange<br />
sound<br />
The remote does not<br />
respond<br />
• Multiple audio tracks can<br />
sometimes cause this<br />
interference.<br />
• The batteries may be inserted<br />
incorrectly.<br />
• The batteries may be dead.<br />
• Re-install the aerial setup.<br />
• Check the cables.<br />
• Try again later.<br />
• Check the settings in the installation menu.<br />
• Change the audio track using the LANG<br />
button on the remote control.<br />
• Check the polarities match & the batteries<br />
are correctly inserted.<br />
• Replace the batteries.<br />
Forgotten the Pass Code • Use the default override code ‘8888’.<br />
The unit asks to shutdown<br />
every 3 hours<br />
• The Auto Standby function is ON. • Disable the Auto Standby function in the<br />
configuration options.<br />
14
Tuner Input Level<br />
Input Impedance<br />
Channel Decoding Waveform<br />
Demodulation<br />
FEC<br />
Mode<br />
Guard<br />
Demultiplexer Standard<br />
Input Max. Bit Stream Rate<br />
Video Decoding Standard<br />
Aspect Ratio<br />
Video Resolution<br />
Audio Decoding Standard<br />
Output Mode<br />
Sampling Frequency<br />
Memory Flash Memory<br />
SDRAM<br />
Outputs 1 x Scart<br />
1 x RF Loop through<br />
Input 1 x RF coaxial<br />
15<br />
Technical Specifications<br />
-77 ~-20dBm<br />
75Ω<br />
COFDM<br />
QPSK,16QAM,64QAM<br />
1/2, 2/3, 3/4, 5/6. 7/8<br />
2K, 8K<br />
1/4, 1/8, 1/16, 1/32<br />
ISO/IEC 13818-1<br />
60Mbps(Serial)/7.5MBps(Parallel)<br />
ISO/IEC 13818-2, MPEG-2 MP@ML<br />
4:3, 16:9<br />
720 576 (PAL), 720 480 (NTSC)<br />
ISO/IEC 13818-3<br />
Left channel, Right channel, Stereo<br />
32, 44.1, 48KHz<br />
16MB<br />
8X16MB<br />
We apologise for any inconvenience caused by any minor inconsistencies in these instructions,<br />
which may occur as a result of product improvements and development.<br />
This appliance complies with the following EEC directives:<br />
2006/95/EEC Low voltage directive<br />
2004/108/EEC EMC directive<br />
Disposal Information<br />
The symbol on the product or its packaging indicates that this product may not be treated<br />
as household waste. Instead it should be handed over to the applicable collection point for<br />
the recycling of electrical and electronic equipment. By ensuring this product is disposed of<br />
correctly, you will help prevent potential negative consequences for the environment and human<br />
health, which could otherwise be caused by inappropriate waste handling of this product. For<br />
more detailed information about recycling this product, please contact your local council office,<br />
your household waste disposal service or the shop where the product was purchased.<br />
Battery Disposal Information<br />
Your product contains a built-in rechargable battery covered by the European Directive 2006/66/EC. To<br />
safeguard the functionality and safety of your product, always take your product to an official collection<br />
point or service centre where a professional can remove the battery.<br />
Please inform yourself about the local rules on separate collection of batteries because the correct<br />
disposal will help prevent negative consequences for the environmental and human health. Please do not<br />
dispose of your batteries with your normal household waste.<br />
Always bring your product to a professional to remove the battery.
Guarantee<br />
PRODUCT GUARANTEE<br />
This product is guaranteed against manufacturing defects for a period of<br />
Year<br />
This product is guaranteed for twelve months from the date of original purchase.<br />
Any defect that arises due to faulty materials or workmanship will either be replaced,<br />
refunded or repaired free of charge where possible during this period by the dealer from<br />
whom you purchased the unit.<br />
The guarantee is subject to the following provisions:<br />
� The guarantee does not cover accidental damage, misuse, cabinet parts, knobs or<br />
consumable items.<br />
� The product must be correctly installed and operated in accordance with the instructions<br />
contained in this manual.<br />
� It must be used solely for domestic purpose.<br />
� The guarantee will be rendered invalided if the product is re-sold or has been damaged by<br />
inexpert repair.<br />
� Specifications are subject to change without notice.<br />
� The manufacturer disclaims any liability for the incidental or consequential damages.<br />
� The guarantee is in addition to, and does not diminish your statutory or legal rights.<br />
Guarantor: Home Retail Group<br />
489 - 499 Avebury Boulevard<br />
Central Milton Keynes<br />
MK9 2NW<br />
16