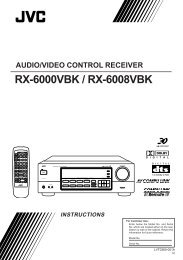
rx-8000vbk instructions audio/video control receiver - JVC
rx-8000vbk instructions audio/video control receiver - JVC
rx-8000vbk instructions audio/video control receiver - JVC

You also want an ePaper? Increase the reach of your titles
YUMPU automatically turns print PDFs into web optimized ePapers that Google loves.
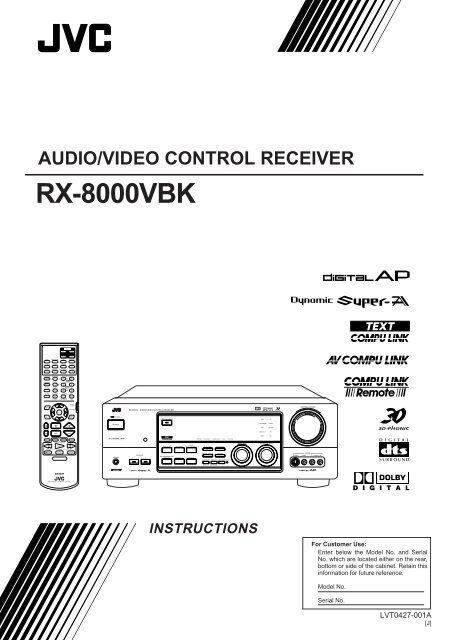
AUDIO/VIDEO CONTROL RECEIVER<br />
RX-8000VBK<br />
TV VOL CHANNEL VOLUME<br />
TV/VIDEO VCR 1 TAPE/MD MUTING<br />
CONTROL<br />
/REW<br />
PLAY<br />
TV<br />
FF/<br />
RM-SRX8000J REMOTE CONTROL<br />
AUDIO<br />
DVD DVD MUILTI CD TAPE/MD<br />
TV/DBS VIDEO PHONO FM/AM<br />
VCR 1 CDR/VCR 2 ANALOG/DIGITAL SLEEP<br />
SURROUND CNTR TONE<br />
ON/OFF<br />
CENTER<br />
1 2 3<br />
SURROUND TEST<br />
MENU<br />
REAR-L<br />
MODE 4 5 6<br />
ENTER<br />
CD-DISC EFFECT REAR-R<br />
7/P 8 9<br />
SOUND SEA MODE SUBWOOFER<br />
10 0 +10<br />
RETURN FM MODE 100+<br />
MENU<br />
EXIT<br />
SET<br />
CATV/DBS VCR 1<br />
AUDIO/<br />
TV/VCR<br />
CATV/DBS<br />
TEXT<br />
DISPLAY<br />
DOWN TUNING<br />
UP<br />
REC STOP PAUSE<br />
STANDBY<br />
POWER<br />
PHONES<br />
COMPULINK<br />
Remote<br />
RX-8000V AUDIO/VIDEO CONTROL RECEIVER<br />
SPEAKERS<br />
1 2<br />
SURROUND ON/OFF<br />
DSP MODE<br />
BALANCE/SURROUND<br />
ADJUST<br />
SEA MODE<br />
SEA ADJUST SETTING<br />
THEATER LIVE CLUB DANCE CLUB HALL PAVILION<br />
INPUT<br />
ANALOG/DIGITAL FM/AM TUNING TUNER PRESET<br />
TUNER/SEA MEMORY FM MODE<br />
SOUND SELECT BASS BOOST ONE TOUCH OPERATION<br />
INPUT ATT. SOURCE NAME<br />
MULTI JOG<br />
INSTRUCTIONS<br />
DVD<br />
TV SOUND/DBS PHONO<br />
VCR 1<br />
TAPE/MD<br />
CDR/VCR 2 FM<br />
VIDEO<br />
D I G I T A L<br />
CD<br />
AM<br />
SOURCE SELECTOR<br />
–<br />
MASTER VOLUME<br />
S-VIDEO<br />
VIDEO<br />
VIDEO AUDIO<br />
L R<br />
+<br />
For Customer Use:<br />
Enter below the Model No. and Serial<br />
No. which are located either on the rear,<br />
bottom or side of the cabinet. Retain this<br />
information for future reference.<br />
Model No.<br />
Serial No.<br />
D I G I T A L<br />
LVT0427-001A<br />
[J]
G-1<br />
CAUTION<br />
RISK OF ELECTRIC SHOCK<br />
DO NOT OPEN<br />
CAUTION: TO REDUCE THE RISK OF ELECTRIC SHOCK.<br />
DO NOT REMOVE COVER (OR BACK)<br />
NO USER SERVICEABLE PARTS INSIDE.<br />
REFER SERVICING TO QUALIFIED SERVICE PERSONNEL.<br />
Warnings, Cautions and Others<br />
The lightning flash with arrowhead symbol,<br />
within an equilateral triangle is intended to<br />
alert the user to the presence of uninsulated<br />
"dangerous voltage" within the product's<br />
enclosure that may be of sufficient<br />
magnitude to constitute a risk of electric<br />
shock to persons.<br />
The exclamation point within an equilateral<br />
triangle is intended to alert the user to the<br />
presence of important operating and<br />
maintenance (servicing) <strong>instructions</strong> in the<br />
literature accompanying the appliance.<br />
WARNING: TO REDUCE THE RISK OF FIRE<br />
OR ELECTRIC SHOCK, DO NOT EXPOSE<br />
THIS APPLIANCE TO RAIN OR MOISTURE.<br />
CAUTION<br />
To reduce the risk of electrical shocks, fire, etc.:<br />
1. Do not remove screws, covers or cabinet.<br />
2. Do not expose this appliance to rain or moisture.<br />
Wall or obstructions<br />
Caution: Proper Ventilation<br />
To avoide risk of electric shock and fire and to protect from damage.<br />
Locate the apparatus as follows:<br />
Front: No obstructions open spacing.<br />
Sides: No obstructions in 10 cm from the sides.<br />
Top: No obstructions in 10 cm from the top.<br />
Back: No obstructions in 15 cm from the back<br />
Bottom: No obstructions, place on the level surface.<br />
In addition, maintain the best possible air circulation as illustrated.<br />
Spacing 15 cm or more<br />
Caution –– POWER switch!<br />
Disconnect the mains plug to shut the power off completely. The<br />
POWER switch in any position does not disconnect the mains line.<br />
The power can be remote <strong>control</strong>led.<br />
Caution –– SPEAKER LOAD SELECTOR switch!<br />
Match the position of SPEAKER LOAD SELECTOR switch on the<br />
back panel to the impedance of the speaker connected, to protect<br />
from overheating.<br />
For U.S.A.<br />
This equipment has been tested and found to comply with the limits<br />
for a Class B digital device, pursuant to part 15 of the FCC Rules.<br />
These limits are designed to provide reasonable protection against<br />
harmful interference in a residential installation.<br />
This equipment generates, uses and can radiate radio frequency<br />
energy and, if not installed and used in accordance with the<br />
<strong>instructions</strong>, may cause harmful interference to radio<br />
communications. However, there is no guarantee that interference<br />
will not occur in a particular installation. If this equipment does cause<br />
harmful interference to radio or television reception, which can be<br />
determined by turning the equipment off and on, the user is<br />
encouraged to try to correct the interference by one or more of the<br />
following measures:<br />
Reorient or relocate the receiving antenna.<br />
Increase the separation between the equipment and <strong>receiver</strong>.<br />
Connect the equipment into an outlet on a circuit different from that<br />
to which the <strong>receiver</strong> is connected.<br />
Consult the dealer or an experienced radio/TV technician for help.<br />
RX-8000VBK<br />
Floor<br />
Front<br />
Stand height 15 cm or more
Table of Contents<br />
Parts Identification ...................................... 2<br />
Getting Started ........................................... 3<br />
Before Installation ...................................................................... 3<br />
Checking the Supplied Accessories ........................................... 3<br />
Connecting the FM and AM Antennas ....................................... 3<br />
Connecting the Speakers ............................................................ 4<br />
Connecting Audio/Video Components ....................................... 5<br />
Connecting the Power Cord ....................................................... 9<br />
Putting Batteries in the Remote Control .................................... 9<br />
Basic Operations ....................................... 10<br />
Turning the Power On and Off (Standby) ................................ 10<br />
Selecting the Source to Play ..................................................... 10<br />
Adjusting the Volume ............................................................... 11<br />
Selecting the Front Speakers .................................................... 11<br />
Muting the Sound ..................................................................... 12<br />
Reinforcing the Bass ................................................................ 12<br />
Attenuating the Input Signal .................................................... 12<br />
Adjusting the Subwoofer Output Level.................................... 12<br />
Basic Settings ........................................... 13<br />
Recording a Source .................................................................. 13<br />
Adjusting the Front Speaker Output Balance ........................... 13<br />
Changing the Source Name ...................................................... 13<br />
Setting the Subwoofer Information .......................................... 14<br />
Setting the Speakers for the DSP Modes ................................. 14<br />
Digital Input (DIGITAL IN) Terminal Setting ......................... 16<br />
Selecting the Analog or Digital Input Mode ............................ 16<br />
Showing the Text Information on the Display ......................... 17<br />
Storing the Basic Settings and Adjustments — One Touch<br />
Operation ........................................................................... 18<br />
Using the Sleep Timer .............................................................. 18<br />
Receiving Radio Broadcasts ........................ 19<br />
Tuning in Stations Manually .................................................... 19<br />
Using Preset Tuning ................................................................. 19<br />
Selecting the FM Reception Mode ........................................... 20<br />
Assigning Names to Preset Stations ......................................... 20<br />
Using the SEA Modes ................................ 21<br />
Selecting Your Favorite SEA Mode ........................................... 21<br />
Creating Your Own SEA Mode ................................................ 21<br />
Using the DSP Modes ................................ 22<br />
Available DSP Modes According to the Speaker Arrangement .. 24<br />
Adjusting the 3D-PHONIC Modes .......................................... 25<br />
Adjusting the DAP Modes ....................................................... 25<br />
Adjusting the Surround Modes ................................................ 26<br />
Activating the DSP Modes ....................................................... 29<br />
Using the DVD MULTI Playback Mode .......... 31<br />
Activating the DVD MULTI Playback Mode .......................... 31<br />
Using the On-Screen Menus ........................ 33<br />
Selecting the Source to Play ..................................................... 33<br />
Selecting Different Sources for Picture and Sound .................. 33<br />
Activating the DSP Modes ....................................................... 33<br />
Selecting the Analog or Digital Input Mode .............................. 33<br />
Adjusting the Front Speaker Output Balance ........................... 34<br />
Reinforcing the Bass ................................................................ 34<br />
Attenuating the Input Signal .................................................... 34<br />
Adjusting the Subwoofer Output Level.................................... 34<br />
Adjusting the DSP Modes ........................................................ 34<br />
Adjusting the DVD MULTI Playback Mode ........................... 35<br />
Selecting Your Favorite SEA Mode ......................................... 35<br />
Creating Your Own SEA Mode ................................................ 35<br />
Setting the Basic Setting Items ................................................ 36<br />
Operating the Tuner .................................................................. 36<br />
Storing the Preset Stations ....................................................... 37<br />
Assigning Names to Preset Stations ......................................... 37<br />
COMPU LINK Remote Control System ......... 38<br />
TEXT COMPU LINK Remote Control System .. 39<br />
7 Showing the Disc Information on the TV Screen................. 40<br />
7 Searching for a Disc (Only for the CD player) .................... 41<br />
7 Entering the Disc Information .............................................. 42<br />
AV COMPU LINK Remote Control System .... 44<br />
Operating <strong>JVC</strong>’s Audio/Video Components ... 46<br />
Operating Audio Components .................................................. 46<br />
Operating Video Components .................................................. 48<br />
Operating Other Manufacturers’ Video<br />
Equipment ............................................ 49<br />
Troubleshooting ......................................... 52<br />
Specifications ............................................ 53<br />
1
2<br />
Parts Identification<br />
Become familiar with the buttons and <strong>control</strong>s on the <strong>receiver</strong> before use.<br />
Refer to the pages in parentheses for details.<br />
1<br />
2<br />
3<br />
4<br />
5<br />
6<br />
7<br />
8<br />
9<br />
p<br />
1 2 3 4 5 67 8 9 p<br />
STANDBY<br />
POWER<br />
PHONES<br />
COMPULINK<br />
Remote<br />
q<br />
TV VOL<br />
RX-8000V AUDIO/VIDEO CONTROL RECEIVER<br />
SPEAKERS<br />
1 2<br />
w<br />
CHANNEL VOLUME<br />
TV/VIDEO VCR 1 TAPE/MD MUTING<br />
/REW<br />
CONTROL<br />
PLAY<br />
TV<br />
FF/<br />
RM-SRX8000J REMOTE CONTROL<br />
AUDIO<br />
TV/CATV/DBS VCR 1<br />
DVD DVD MUILTI CD TAPE/MD<br />
TV/DBS VIDEO PHONO FM/AM<br />
VCR 1 CDR/VCR 2 ANALOG/DIGITAL SLEEP<br />
SURROUND CNTR TONE CENTER<br />
ON/OFF<br />
MENU<br />
SURROUND TEST REAR-L<br />
MODE<br />
CD-DISC<br />
ENTER<br />
EFFECT REAR-R<br />
SOUND SEA MODE SUBWOOFER<br />
10 0 +10<br />
RETURN FM MODE 100+<br />
MENU<br />
EXIT<br />
SET<br />
CATV/DBS VCR 1<br />
1 2 3<br />
4 5 6<br />
7/P 8 9<br />
AUDIO/<br />
TV/VCR<br />
CATV/DBS<br />
TEXT<br />
DISPLAY<br />
DOWN TUNING<br />
UP<br />
REC STOP PAUSE<br />
e<br />
SURROUND ON/OFF<br />
DSP MODE<br />
BALANCE/SURROUND<br />
ADJUST<br />
q<br />
w<br />
e<br />
r<br />
t<br />
y<br />
u<br />
i<br />
o<br />
;<br />
r<br />
SEA MODE<br />
SEA ADJUST SETTING<br />
t<br />
THEATER LIVE CLUB DANCE CLUB HALL PAVILION<br />
INPUT<br />
ANALOG/DIGITAL FM/AM TUNING TUNER PRESET<br />
TUNER/SEA MEMORY FM MODE<br />
SOUND SELECT BASS BOOST ONE TOUCH OPERATION<br />
INPUT ATT. SOURCE NAME<br />
y u i o<br />
Remote Control<br />
;<br />
a<br />
MULTI JOG<br />
s<br />
1 TV POWER button (48, 49)<br />
2 CATV/DBS POWER button (50)<br />
3 Source selecting buttons (10)<br />
DVD, DVD MULTI, CD, TAPE/MD, TV/DBS,<br />
VIDEO, PHONO, FM/AM, VCR 1, CDR/VCR 2<br />
4 SURROUND ON/OFF button (26, 29)<br />
5 SURROUND MODE button (25)<br />
6 CD-DISC button (47)<br />
7 SOUND button (21, 25, 32)<br />
8 On-screen operation buttons (33, 40)<br />
MENU, SET, EXIT, %, fi, @, #<br />
9 TV VOL +/– buttons (48, 49)<br />
p Operating buttons for <strong>audio</strong>/<strong>video</strong> components<br />
(46 – 48, 51)<br />
q AUDIO POWER buttons (10)<br />
w VCR 1 POWER button (48, 51)<br />
e SLEEP button (18)<br />
r ANALOG/DIGITAL button (17)<br />
t • 10 keys for selecting preset channels (20)<br />
• 10 keys for adjusting sound (21, 25 – 28, 32)<br />
• 10 keys for operating <strong>audio</strong>/<strong>video</strong> components<br />
(46 – 51)<br />
y Remote <strong>control</strong> mode selector (10, 46, 49)<br />
u TEXT DISPLAY button (40)<br />
i CHANNEL +/– button (48 – 51)<br />
o VOLUME +/– button (11)<br />
; MUTING button (12)<br />
DVD<br />
TV SOUND/DBS PHONO<br />
VCR 1<br />
TAPE/MD<br />
CDR/VCR 2 FM<br />
VIDEO<br />
D I G I T A L<br />
CD<br />
AM<br />
SOURCE SELECTOR<br />
d<br />
–<br />
MASTER VOLUME<br />
S-VIDEO<br />
VIDEO<br />
VIDEO L AUDIO R<br />
f<br />
Front Panel<br />
1 POWER button and STANDBY lamp (10)<br />
2 Remote sensor (9)<br />
3 SURROUND ON/OFF button and lamp (27, 29)<br />
4 SEA MODE button (21)<br />
5 INPUT ANALOG/DIGITAL button (17)<br />
6 FM/AM TUNING button (19) *<br />
7 FM MODE button (20)<br />
8 Display (10)<br />
9 Source lamps (10)<br />
p MASTER VOLUME <strong>control</strong> (11)<br />
q PHONES jack (12)<br />
w SPEAKERS 1/2 buttons and lamps (11)<br />
e DSP MODE button (25)<br />
r BALANCE/SURROUND ADJUST button<br />
(12, 13, 25) *<br />
t SEA ADJUST button (21) *<br />
y SETTING button (14 – 17) *<br />
u TUNER/SEA MEMORY button (19 – 21)<br />
i SOUND SELECT/INPUT ATT. button<br />
(11, 12)<br />
o BASS BOOST/SOURCE NAME button<br />
(12, 13)<br />
; ONE TOUCH OPERATION button and lamp<br />
(18)<br />
a TUNER PRESET button (20) *<br />
s MULTI JOG <strong>control</strong><br />
What this <strong>control</strong> actually does depends on<br />
which function you are trying to adjust. Before<br />
using this <strong>control</strong>, select the function by pressing<br />
one of the buttons marked with *.<br />
d SOURCE SELECTOR <strong>control</strong> (10)<br />
f VIDEO input jacks (7)<br />
+
Getting Started<br />
This section explains how to connect <strong>audio</strong>/<strong>video</strong> components and speakers to the <strong>receiver</strong>, and how to connect the<br />
power supply.<br />
Before Installation<br />
General<br />
• Be sure your hands are dry.<br />
• Turn the power off to all components.<br />
• Read the manuals supplied with the components you are going to<br />
connect.<br />
Locations<br />
• Install the <strong>receiver</strong> in a location that is level and protected from<br />
moisture.<br />
• The temperature around the <strong>receiver</strong> must be between –5˚ C and<br />
35˚ C (23˚ F and 95˚ F).<br />
• Make sure there is good ventilation around the <strong>receiver</strong>. Poor<br />
ventilation could cause overheating and damage the <strong>receiver</strong>.<br />
Handling the <strong>receiver</strong><br />
• Do not insert any metal object into the <strong>receiver</strong>.<br />
• Do not disassemble the <strong>receiver</strong> or remove screws, covers, or<br />
cabinet.<br />
• Do not expose the <strong>receiver</strong> to rain or moisture.<br />
Checking the Supplied Accessories<br />
Check to be sure you have all of the following items, which are<br />
supplied with the <strong>receiver</strong>.<br />
The number in the parentheses indicates quantity of the pieces<br />
supplied.<br />
• Remote Control (1)<br />
• Batteries (2)<br />
• AM Loop Antenna (1)<br />
• FM Antenna (1)<br />
If anything is missing, contact your dealer immediately.<br />
Connecting the FM and AM<br />
Antennas<br />
FM Antenna Connections<br />
A<br />
AM<br />
LOOP<br />
AM<br />
LOOP<br />
ANTENNA<br />
FM 75<br />
COAXIAL<br />
AM<br />
EXT<br />
AM<br />
EXT<br />
FM Antenna<br />
AM<br />
LOOP<br />
ANTENNA<br />
ANTENNA Extend the supplied FM antenna horizontally.<br />
FM 75<br />
COAXIAL<br />
A. Using the Supplied FM Antenna<br />
The FM antenna provided can be connected to the FM 75Ω<br />
COAXIAL terminal as temporary measure.<br />
B. Using the Standard Type Connector (Not Supplied)<br />
A standard type connector should be connected to the FM 75Ω<br />
COAXIAL terminal.<br />
Note:<br />
If reception is poor, connect the outdoor antenna.<br />
Before attaching a 75Ω coaxial cable (the kind with a round wire going<br />
to an outdoor antenna), disconnect the supplied FM antenna.<br />
B<br />
FM 75<br />
COAXIAL<br />
AM<br />
EXT<br />
Outdoor FM Antenna Cable<br />
3
AM Antenna Connections<br />
4<br />
1<br />
Snap the tabs on the loop into the<br />
slots of the base to assemble the<br />
AM loop.<br />
AM Loop Antenna<br />
Outdoor single vinyl-covered wire<br />
Turn the loop until you have the best reception.<br />
Notes:<br />
ANTENNA<br />
FM 75<br />
COAXIAL<br />
AM<br />
LOOP<br />
• Make sure the antenna conductors do not touch any other<br />
terminals, connecting cords and power cord. This could cause poor<br />
reception.<br />
• If reception is poor, connect an outdoor single vinyl-covered wire to<br />
the AM EXT terminal. (Keep the AM loop antenna connected.)<br />
Connecting the Speakers<br />
You can connect the following speakers:<br />
• Two pairs of front speakers to produce normal stereo sound.<br />
• One pair of rear speakers to enjoy the surround effect.<br />
• One center speaker to produce more effective surround effect (to<br />
emphasize human voices).<br />
• One subwoofer to enhance the bass.<br />
IMPORTANT:<br />
After connecting the speakers listed above, set the speaker<br />
setting information properly to obtain the best possible DSP<br />
effect. For details, see page 14.<br />
For each speaker (except for a subwoofer), connect the (–) and (+)<br />
terminals on the rear panel to the (–) and (+) terminals marked on<br />
the speakers. For connecting a subwoofer, see page 5.<br />
CAUTION:<br />
AM<br />
EXT<br />
2 3<br />
Use speakers with the SPEAKER IMPEDANCE indicated by the<br />
speaker terminals.<br />
Basic connecting procedure<br />
1<br />
1 Cut, twist and remove the insulation at the end of<br />
each speaker signal cable (not supplied).<br />
2 Turn the knob counterclockwise.<br />
3 Insert the speaker signal cable.<br />
4 Turn the knob clockwise.<br />
2<br />
1<br />
RIGHT<br />
Connecting the front speakers<br />
You can connect two pairs of front speakers (one pair to the FRONT<br />
SPEAKERS 1 terminals, and another pair to the FRONT<br />
SPEAKERS 2 terminals).<br />
Right speaker<br />
1<br />
2<br />
Right speaker<br />
IMPORTANT:<br />
+ –+ –<br />
RIGHT LEFT<br />
3<br />
1<br />
RIGHT<br />
FRONT SPEAKERS 1 Left speaker<br />
FRONT SPEAKERS<br />
1<br />
2<br />
4<br />
4 ~ 6<br />
8 ~ 16<br />
SPEAKER<br />
LOAD<br />
SELECTOR<br />
1<br />
RIGHT<br />
LOW<br />
HIGH<br />
FRONT SPEAKERS 2 Left speaker<br />
To obtain the best possible output power from the <strong>receiver</strong>, and to<br />
prevent the <strong>receiver</strong> from being overheated, the <strong>receiver</strong> has the<br />
SPEAKER LOAD SELECTOR which has to be set as follows:<br />
• Set it to the HIGH position when the impedance of the front<br />
speakers connected is within the range of 8 ohms to 16 ohms.<br />
• Set it to the LOW position when the impedance of the front<br />
speakers connected is within the range of 4 ohms to 6 ohms.
Connecting the rear and center speakers<br />
Connect rear speakers to the REAR SPEAKERS terminals and a<br />
center speaker to the CENTER SPEAKER terminals.<br />
Left rear<br />
speaker<br />
Center speaker<br />
Right rear<br />
speaker<br />
Connecting the subwoofer speaker<br />
You can enhance the bass by connecting a subwoofer.<br />
Connect the input jack of a powered subwoofer to the<br />
SUBWOOFER OUT jack on the rear panel, using a cable with RCA<br />
pin plugs (not supplied).<br />
Powered subwoofer<br />
CENTER<br />
SPEAKER<br />
SUBWOOFER<br />
OUT<br />
Connecting Audio/Video Components<br />
You can connect the following <strong>audio</strong>/<strong>video</strong> components to this<br />
<strong>receiver</strong>. Refer also to the manuals supplied with your components.<br />
+<br />
–<br />
REAR<br />
SPEAKERS<br />
RIGHT LEFT<br />
Audio Components Video Components<br />
• Turntable • DVD player*<br />
• CD player* • TV*<br />
• Cassette deck • DBS tuner*<br />
or MD recorder* • VCR(s)<br />
• CD recorder* • Video camera<br />
* You can connect these components using the methods described in<br />
“Analog connections” (to the right) or in “Digital connections” (see<br />
page 8).<br />
+<br />
–<br />
Analog connections<br />
Audio component connections<br />
Use the cables with RCA pin plugs (not supplied).<br />
Connect the white plug to the <strong>audio</strong> left jack, and the red plug to the<br />
<strong>audio</strong> right jack.<br />
CAUTION:<br />
If you connect a sound-enhancing device such as a graphic equalizer<br />
between the source components and this <strong>receiver</strong>, the sound output<br />
through this <strong>receiver</strong> may be distorted.<br />
Turntable<br />
Turntable<br />
To <strong>audio</strong> output<br />
RIGHT LEFT<br />
AUDIO<br />
PHONO<br />
CD<br />
OUT<br />
(REC)<br />
TAPE<br />
/MD<br />
IN<br />
(PLAY)<br />
Note:<br />
Any turntables incorporating a small-output cartridge such as an MC<br />
(moving-coil) type must be connected to this <strong>receiver</strong> through a<br />
commercial head amplifier or step-up transformer. Direct connection<br />
may result in insufficient volume.<br />
CD player<br />
CD player<br />
To <strong>audio</strong> output<br />
If an earth cable is provided for your<br />
turntable, connect the cable to the<br />
screw marked (H) on the rear panel.<br />
RIGHT LEFT<br />
AUDIO<br />
PHONO<br />
CD<br />
OUT<br />
(REC)<br />
TAPE<br />
/MD<br />
IN<br />
(PLAY)<br />
5
6<br />
Cassette deck or MD recorder<br />
To <strong>audio</strong> input<br />
To <strong>audio</strong> input<br />
Cassette deck<br />
RIGHT LEFT<br />
MD recorder<br />
AUDIO<br />
PHONO<br />
CD<br />
OUT<br />
(REC)<br />
TAPE<br />
/MD<br />
IN<br />
(PLAY)<br />
To <strong>audio</strong> output<br />
To <strong>audio</strong> output<br />
Note:<br />
You can connect either a cassette deck or an MD recorder to the<br />
TAPE/MD jacks. When connecting an MD recorder to the TAPE/MD<br />
jacks, change the source name, which will be shown on the display<br />
when selected as the source, to “MD.” See page 13 for details.<br />
CD recorder<br />
To <strong>audio</strong> input<br />
AUDIO<br />
CD recorder<br />
RIGHT LEFT<br />
If your <strong>audio</strong> components have a COMPU LINK or TEXT<br />
COMPU LINK jack<br />
• See also page 38 for detailed information about the connection and<br />
the COMPU LINK remote <strong>control</strong> system.<br />
• See also page 39 for detailed information about the connection and<br />
the TEXT COMPU LINK remote <strong>control</strong> system.<br />
Video component connections<br />
Use the cables with RCA pin plugs (not supplied).<br />
Connect the white plug to the <strong>audio</strong> left jack, the red plug to the<br />
<strong>audio</strong> right jack, and the yellow plug to the <strong>video</strong> jack.<br />
If your <strong>video</strong> components have S-<strong>video</strong> (Y/C-separation) terminals,<br />
connect them using S-<strong>video</strong> cables (not supplied). Connecting these<br />
<strong>video</strong> components through the S-<strong>video</strong> input/output terminals will<br />
give you better picture playback (or recording) quality.<br />
DVD<br />
TV SOUND<br />
/DBS<br />
OUT<br />
(REC)<br />
VCR 1<br />
IN<br />
(PLAY)<br />
OUT<br />
(REC)<br />
CDR<br />
/VCR 2<br />
IN<br />
(PLAY)<br />
MONITOR<br />
OUT<br />
To <strong>audio</strong> output<br />
VIDEO<br />
VIDEO S-VIDEO<br />
IMPORTANT:<br />
This <strong>receiver</strong> is equipped with both the composite <strong>video</strong> and S-<strong>video</strong><br />
input/output terminals for connecting <strong>video</strong> components.<br />
You do not have to connect both the composite <strong>video</strong> and S-<strong>video</strong><br />
terminals.<br />
However, remember that the <strong>video</strong> signals from the composite<br />
<strong>video</strong> input terminals are output only through the composite<br />
<strong>video</strong> output terminals, while the ones from the S-<strong>video</strong> input<br />
terminals are output only through the S-<strong>video</strong> output terminals.<br />
Therefore, if a recording <strong>video</strong> component and a playing <strong>video</strong><br />
component are connected to the <strong>receiver</strong> through the different <strong>video</strong><br />
terminals, you cannot record the picture from the playing component<br />
on the recording component. In addition, if the TV and a playing <strong>video</strong><br />
component are connected to the <strong>receiver</strong> through the different <strong>video</strong><br />
terminals, you cannot view the playback picture from the playing<br />
component on the TV.<br />
To view and record the playback picture from the <strong>video</strong><br />
component connected to the CDR/VCR 2 jacks, you must<br />
connect the TV and the recording <strong>video</strong> component through the<br />
composite <strong>video</strong> terminals.<br />
VCR<br />
A<br />
AUDIO<br />
A<br />
B<br />
B<br />
RIGHT LEFT<br />
S-VHS (or VHS) VCR<br />
DVD<br />
TV SOUND<br />
/DBS<br />
OUT<br />
(REC)<br />
VCR 1<br />
IN<br />
(PLAY)<br />
OUT<br />
(REC)<br />
CDR<br />
/VCR 2<br />
IN<br />
(PLAY)<br />
MONITOR<br />
OUT<br />
VHS VCR<br />
Å To left/right channel <strong>audio</strong> output<br />
ı To left/right channel <strong>audio</strong> input<br />
Ç To S-<strong>video</strong> output<br />
Î To composite <strong>video</strong> output<br />
‰ To composite <strong>video</strong> input<br />
Ï To S-<strong>video</strong> input<br />
VIDEO<br />
VIDEO S-VIDEO<br />
C<br />
E F<br />
D<br />
E<br />
D
Video camera<br />
The VIDEO input jacks on the front panel are convenient when<br />
connecting and disconnecting the equipment frequently.<br />
S-VIDEO<br />
VIDEO<br />
VIDEO L AUDIO R<br />
TV and/or DBS tuner<br />
To <strong>audio</strong><br />
output<br />
To <strong>audio</strong><br />
output<br />
To <strong>audio</strong><br />
output<br />
AUDIO RIGHT<br />
RIGHT LEFT<br />
To S-<strong>video</strong> output<br />
To composite<br />
<strong>video</strong> output<br />
When connecting the TV, DO NOT connect the<br />
TV’s <strong>video</strong> output to these <strong>video</strong> input terminals.<br />
DBS<br />
TV<br />
Connect the TV to the MONITOR<br />
OUT jack to view the playback<br />
picture from the other connected<br />
<strong>video</strong> components.<br />
To composite <strong>video</strong> input<br />
To S-<strong>video</strong> input<br />
DBS tuner<br />
AUDIO RIGHT<br />
RIGHT LEFT<br />
To composite <strong>video</strong> output<br />
DVD<br />
TV SOUND<br />
/DBS<br />
OUT<br />
(REC)<br />
VCR 1<br />
IN<br />
(PLAY)<br />
OUT<br />
(REC)<br />
CDR<br />
/VCR 2<br />
IN<br />
(PLAY)<br />
MONITOR<br />
OUT<br />
TV SOUND<br />
/DBS<br />
OUT<br />
(REC)<br />
IN<br />
(PLAY)<br />
OUT<br />
(REC)<br />
IN<br />
(PLAY)<br />
VIDEO<br />
VIDEO S-VIDEO<br />
VIDEO<br />
VIDEO S-VIDEO<br />
To S-<strong>video</strong> output<br />
Note:<br />
When connecting the DBS tuner to the TV SOUND/DBS jacks,<br />
change the source name, which will be shown on the display when<br />
selected as the source, to “DBS.” See page 13 for details.<br />
DVD<br />
VCR 2<br />
DVD player<br />
• When you connect the DVD player with stereo output jacks:<br />
A DVD player B C<br />
AUDIO<br />
RIGHT LEFT<br />
Å To front left/right channel <strong>audio</strong> output (or to <strong>audio</strong> mixed<br />
output if necessary)<br />
ı To S-<strong>video</strong> output<br />
Ç To composite <strong>video</strong> output<br />
SUB<br />
WOOFER<br />
A<br />
D<br />
AUDIO<br />
CENTER<br />
DVD<br />
E<br />
RIGHT LEFT<br />
DVD<br />
DVD<br />
DVD<br />
DVD<br />
TV SOUND<br />
/DBS<br />
OUT<br />
(REC)<br />
VCR 1<br />
IN<br />
(PLAY)<br />
OUT<br />
(REC)<br />
CDR<br />
/VCR 2<br />
IN<br />
(PLAY)<br />
MONITOR<br />
OUT<br />
VIDEO<br />
VIDEO S-VIDEO<br />
• When you connect the DVD player with its analog discrete output<br />
(5.1 CH reproduction) jacks:<br />
B DVD player C<br />
Å To center channel <strong>audio</strong> output<br />
ı To subwoofer <strong>audio</strong> output<br />
Ç To S-<strong>video</strong> output<br />
Î To front left/right channel <strong>audio</strong> output<br />
‰ To rear left/right channel <strong>audio</strong> output<br />
Ï To composite <strong>video</strong> output<br />
VIDEO<br />
VIDEO S-VIDEO<br />
F<br />
7
Digital connections<br />
This <strong>receiver</strong> is equipped with four DIGITAL IN terminals — one<br />
digital coaxial terminal and three digital optical terminals, and one<br />
DIGITAL OUT terminal.<br />
You can connect any digital equipment such as —<br />
• DBS tuner,<br />
• Digital TV broadcast tuner,<br />
• DVD player,<br />
• CD player,<br />
• CD recorder, and<br />
• MD recorder.<br />
IMPORTANT:<br />
• When connecting the DVD player, digital TV broadcast tuner or DBS<br />
tuner using the digital terminals, you also need to connect it to the<br />
<strong>video</strong> jack (either composite <strong>video</strong> terminal or S-<strong>video</strong> terminal) on<br />
the rear. Without connecting it to the <strong>video</strong> jack, you can view no<br />
playback picture.<br />
• After connecting the components using the DIGITAL IN terminals,<br />
set the following correctly if necessary.<br />
– Set the digital input (DIGITAL IN) terminal setting correctly. For<br />
details, see “Digital Input (DIGITAL IN) Terminal Setting” on page<br />
16.<br />
– Select the digital input mode correctly. For details, see “Selecting<br />
the Analog or Digital Input Mode” on page 16.<br />
8<br />
Digital input terminals<br />
DBS tuner<br />
DBS<br />
CD player<br />
DVD player<br />
CD recorder MD recorder<br />
Digital coaxial cable (not supplied)<br />
between digital coaxial terminals<br />
Digital optical cable (not supplied)<br />
between digital optical terminals<br />
When the component has a digital<br />
coaxial output terminal, connect it to the<br />
DIGITAL 1 (DVD) terminal, using the<br />
digital coaxial cable (not supplied).<br />
When the component has a digital<br />
optical output terminal, connect it to the<br />
DIGITAL 2 (CD), DIGITAL 3 (TV) or<br />
DIGITAL 4 (CDR) terminal, using the<br />
digital optical cable (not supplied).<br />
Before connecting a digital<br />
optical cable, unplug the<br />
protective plug.<br />
DVD<br />
DIGITAL IN<br />
PCM / DOLBY DIGITAL<br />
/ DTS<br />
DIGITAL 1 (DVD)<br />
DIGITAL 2 (CD)<br />
DIGITAL 3 (TV)<br />
DIGITAL 4 (CDR)<br />
Notes:<br />
• When shipped from the factory, the DIGITAL IN terminals have<br />
been set for use with the following components.<br />
– DIGITAL 1 (coaxial): For DVD player<br />
– DIGITAL 2 (optical): For CD player<br />
– DIGITAL 3 (optical): For digital TV broadcast tuner<br />
– DIGITAL 4 (optical): For CD recorder<br />
• When you want to operate the CD player, CD recorder, or MD<br />
recorder using the COMPU LINK remote <strong>control</strong> system, connect<br />
the target component also as described in “Analog connections”<br />
(see pages 5 and 6).<br />
• When you want to operate the DVD player using the AV COMPU<br />
LINK remote <strong>control</strong> system, connect the DVD player also as<br />
described in “Analog connections” (see page 7).<br />
Digital output terminal<br />
CD recorder<br />
Digital optical cable (not supplied)<br />
between digital optical terminals<br />
When the digital recording<br />
equipment such as an MD recorder<br />
has a digital optical input terminal,<br />
connecting it to the DIGITAL OUT<br />
terminal enables you to perform<br />
digital-to-digital recording.<br />
MD recorder<br />
DIGITAL OUT<br />
PCM/DOLBY DIGITAL/DTS
Connecting the Power Cord<br />
Before plugging the <strong>receiver</strong> into an AC outlet, make sure that all<br />
connections have been made.<br />
Plug the power cord into an AC outlet.<br />
Keep the power cord away from the connecting cables and the<br />
antenna. The power cord may cause noise or screen interference. We<br />
recommend that you use a coaxial cable to connect the antenna,<br />
since it is well-shielded against interference.<br />
Note:<br />
The preset settings such as preset channels and sound adjustment<br />
may be erased in a few days in the following cases:<br />
– When you unplug the power cord.<br />
– When a power failure occurs.<br />
CAUTIONS:<br />
• Do not touch the power cord with wet hands.<br />
• Do not pull on the power cord to unplug the cord. When<br />
unplugging the cord, always grasp the plug so as not to damage<br />
the cord.<br />
Putting Batteries in the Remote Control<br />
Before using the remote <strong>control</strong>, put two supplied batteries first.<br />
When using the remote <strong>control</strong>, aim the remote <strong>control</strong> directly at<br />
the remote sensor on the <strong>receiver</strong>.<br />
1<br />
2<br />
3<br />
R6P(SUM-3)/AA(15F)<br />
1. On the back of the remote <strong>control</strong>, remove the<br />
battery cover.<br />
2. Insert batteries. Make sure to match the polarity:<br />
(+) to (+).<br />
3. Replace the cover.<br />
If the range or effectiveness of the remote <strong>control</strong> decreases, replace<br />
the batteries. Use two R6P(SUM-3)/AA(15F) type dry-cell batteries.<br />
CAUTION:<br />
Follow these precautions to avoid leaking or cracking cells:<br />
• Place batteries in the remote <strong>control</strong> so they match the polarity:<br />
(+) to (+).<br />
• Use the correct type of batteries. Batteries that look similar may<br />
differ in voltage.<br />
• Always replace both batteries at the same time.<br />
• Do not expose batteries to heat or flame.<br />
9
10<br />
Basic Operations<br />
The following operations are commonly used when you play any sound source.<br />
IMPORTANT:<br />
When using the remote <strong>control</strong>, check to see if its<br />
remote <strong>control</strong> mode selector is set to the correct<br />
position:<br />
To operate this <strong>receiver</strong>, set it to “AUDIO/TV/<br />
VCR.”<br />
Turning the Power On and Off (Standby)<br />
On the front panel:<br />
To turn on the power, press POWER.<br />
The STANDBY lamp goes off. The name of the<br />
current source (or station frequency) appears on<br />
the display.<br />
Current source name appears<br />
Current volume level is shown here<br />
To turn off the power (into standby mode),<br />
press POWER again.<br />
The STANDBY lamp lights up. A small amount<br />
of power is consumed in standby mode. To turn<br />
the power off completely, unplug the AC power<br />
cord.<br />
From the remote <strong>control</strong>:<br />
To turn on the power, press AUDIO<br />
POWER.<br />
The STANDBY lamp goes off. The name of<br />
the current source (or station frequency)<br />
appears on the display.<br />
To turn off the power (into standby mode), press AUDIO POWER<br />
again. The STANDBY lamp lights up.<br />
Selecting the Source to Play<br />
On the front panel:<br />
Turn SOURCE SELECTOR until the source<br />
name you want appears on the display.<br />
• As you turn the selector, the source changes as<br />
follows:<br />
CD O PHONO O TAPE (or MD) O FM O<br />
AM O DVD O DVD MULTI O<br />
TV SOUND (or DBS) O VCR 1 O<br />
CDR/VCR 2 O VIDEO O<br />
(back to the beginning)<br />
The selected source lamp also lights up.<br />
• The DVD lamp lights up both for “DVD” and<br />
“DVD MULTI.”<br />
TV<br />
CATV/BDS<br />
AUDIO/<br />
TV/VCR<br />
CATV/DBS<br />
STANDBY<br />
POWER<br />
STANDBY<br />
POWER<br />
AUDIO<br />
VCR 1<br />
SOURCE SELECTOR<br />
DVD<br />
TV SOUND/DBS PHONO<br />
VCR 1<br />
TAPE/MD<br />
CDR/VCR 2 FM<br />
VIDEO<br />
CD<br />
AM<br />
From the remote <strong>control</strong>:<br />
Press one of the source selecting buttons.<br />
DVD DVD MUILTI CD TAPE/MD<br />
TV/DBS VIDEO PHONO FM/AM<br />
VCR 1 CDR/VCR 2<br />
Selected source name appears<br />
DVD Select the DVD player.<br />
DVD MULTI Select the DVD player for viewing the digital <strong>video</strong><br />
disc using the analog discrete output mode (5.1CH<br />
reproduction) on the DVD player.<br />
To enjoy the DVD MULTI playback, see page 31.<br />
CD * Select the CD player.<br />
TAPE/MD * Select the cassette deck (or the MD recorder).<br />
TV/DBS Select TV sounds (or the DBS tuner).<br />
VIDEO Select <strong>video</strong> component connected to the VIDEO<br />
jacks.<br />
PHONO * Select the turntable.<br />
FM/AM * Select an FM or AM broadcast.<br />
• Each time you press the button, the band alternates<br />
between FM and AM.<br />
VCR 1 Select the <strong>video</strong> component connected to the VCR 1<br />
jacks.<br />
CDR/VCR 2 * Select the CD recorder or <strong>video</strong> component<br />
connected to the CDR/VCR 2 jacks.<br />
Notes:<br />
• When connecting an MD recorder (to the TAPE/MD jacks), and a<br />
DBS tuner (to the TV SOUND/DBS jacks), change the source name<br />
shown on the display. For details, see page 13.<br />
• When you press one of the source selecting buttons on the remote<br />
<strong>control</strong> marked above with an asterisk (*), the <strong>receiver</strong><br />
automatically turns on.
Signal and speaker indicators on the display<br />
• The signal indicators light up to indicate the incoming channel<br />
signals.<br />
– Only the indicators for the incoming signals light up.<br />
• The frame of the signal indicator (except for “LFE” and “S”)<br />
lights up if the corresponding speaker is set to “LARGE” or<br />
“SMALL” (for subwoofer, “YES”).<br />
– The frames of “L” and “R” indicators always light up.<br />
L: • When digital input is selected: Lights up when the left<br />
channel signal comes in.<br />
• When analog input is selected: Always lights up.<br />
R: • When digital input is selected: Lights up when the right<br />
channel signal comes in.<br />
• When analog input is selected: Always lights up.<br />
C: Lights up when the center channel signal comes in.<br />
LS: Lights up when the left rear channel signal comes in.<br />
RS: Lights up when the right rear channel signal comes in.<br />
S: Lights up when the monaural rear channel signal comes in.<br />
LFE: Lights up when the LFE channel signal comes in.<br />
Notes:<br />
L<br />
• When “SUBWOOFER” is set to “YES,” SUBWFR lights up.<br />
• When you select “DVD MULTI,” all the signal indicators except “S”<br />
light up.<br />
Selecting different sources for picture and<br />
sound<br />
You can watch picture from a <strong>video</strong> component while listening to<br />
sound from another component.<br />
On the front panel:<br />
1. Press SOUND SELECT (INPUT<br />
ATT.) briefly while viewing the<br />
picture from a <strong>video</strong> component<br />
such as the VCR or DVD player,<br />
etc.<br />
“SOUND SELECT” appears on the display.<br />
2. Turn SOURCE SELECTOR to<br />
select the sound (except the TV<br />
sound), while the indication of the<br />
above step is still on the display.<br />
C<br />
SUBWFR<br />
LS<br />
S<br />
From the remote <strong>control</strong>:<br />
Press one of the <strong>audio</strong> source selecting buttons (CD, TAPE/MD,<br />
PHONO, FM/AM, TV/DBS*), while viewing the picture from a<br />
<strong>video</strong> component such as the VCR or DVD player, etc.<br />
Notes:<br />
• Once you have selected a <strong>video</strong> source, pictures of the selected<br />
source are sent to the TV until you select another <strong>video</strong> source.<br />
* The TV/DBS button only works for selecting “DBS” as the source<br />
but not for selecting “TV SOUND.” When you use the DBS tuner,<br />
change the source name correctly (see page 13).<br />
R<br />
LFE<br />
RS<br />
SOUND SELECT<br />
INPUT ATT.<br />
SOURCE SELECTOR<br />
Adjusting the Volume<br />
On the front panel:<br />
To increase the volume, turn MASTER<br />
VOLUME clockwise.<br />
To decrease the volume, turn it<br />
counterclockwise.<br />
• When you turn MASTER VOLUME rapidly,<br />
the volume level also changes rapidly.<br />
• When you turn MASTER VOLUME slowly,<br />
the volume level also changes slowly.<br />
From the remote <strong>control</strong>:<br />
To increase the volume, press VOLUME +.<br />
To decrease the volume, press VOLUME –.<br />
CAUTION:<br />
Always set the volume to the minimum before starting any source. If<br />
the volume is set at its high level, the sudden blast of sound energy<br />
can permanently damage your hearing and/or ruin your speakers.<br />
Note:<br />
The volume level can be adjusted within the range of “0” (minimum) to<br />
“90” (maximum).<br />
Selecting the Front Speakers<br />
On the front panel ONLY:<br />
When you have connected two pairs of the front speakers, you can<br />
select which to use.<br />
Press SPEAKERS 1 or SPEAKERS 2 to select<br />
the speaker to use.<br />
• Each time you press the button, the lamp on<br />
the respective button turns on and off. When<br />
the lamp on either button lights up, the<br />
respective speakers are activated.<br />
VOLUME<br />
IMPORTANT:<br />
You can activate two pairs of the front speakers at the same time only<br />
when the SPEAKER LOAD SELECTOR on the rear panel is set to<br />
“HIGH” and when no signals are sent to the center and rear speakers.<br />
Otherwise, activating one pair of the speakers deactivates the other.<br />
Note:<br />
If you use any of the DSP modes other than the 3D-PHONIC modes<br />
with both front speakers activated, the speakers connected to the<br />
FRONT SPEAKERS 2 terminals are deactivated.<br />
–<br />
MASTER VOLUME<br />
SPEAKERS<br />
1 2<br />
+<br />
11
Listening only with headphones<br />
You can listen with the headphones without deactivating both pairs<br />
of speakers; however, if you want to use the HEADPHONE mode<br />
(see below), you must turn off both pairs of speakers.<br />
1. Connect a pair of headphones to the PHONES jack on the front<br />
panel.<br />
2. Press SPEAKERS 1 and/or 2 so that no lamps on the buttons are<br />
turned on.<br />
This cancels the surround mode or DSP mode currently selected,<br />
and activates the HEADPHONE mode (see below).<br />
• The HEAD PHONE indicator lights up on the display.<br />
HEADPHONE mode:<br />
This mode can reproduce the LFE channel signals, mixing them<br />
with the front channel signals. So you will not miss the<br />
subwoofer sounds even if you listen to a source using the<br />
headphones.<br />
Notes:<br />
• While in the headphones mode, you cannot use any other DSP<br />
modes (see page 22.)<br />
• Activating the speaker cancels the headphones mode and turns on<br />
the DSP mode previously selected.<br />
CAUTION:<br />
Be sure to turn down the volume before connecting or putting on<br />
headphones, as high volume can damage both the headphones and<br />
your hearing.<br />
Muting the Sound<br />
From the remote <strong>control</strong> ONLY:<br />
Press MUTING to mute the sound through all<br />
speakers and headphones connected.<br />
“MUTING” appears on the display and the<br />
volume turns off (the volume level indicator goes<br />
off).<br />
To restore the sound, press MUTING again so that “OFF” appears<br />
on the display.<br />
• Turning MASTER VOLUME on the front panel or pressing<br />
VOLUME +/– on the remote <strong>control</strong> also restores the sound.<br />
Reinforcing the Bass<br />
You can boost the bass level.<br />
On the front panel ONLY:<br />
Press BASS BOOST (SOURCE NAME)<br />
BASS BOOST<br />
briefly to select the bass boost function.<br />
• Each time you press the button, the bass boost<br />
SOURCE NAME<br />
function turns on (“BASSBOOST ON”) and<br />
off (“BASSBOOST OFF”).<br />
– Select “BASSBOOST ON” to activate the bass boost function.<br />
The BASS BOOST indicator lights up on the display.<br />
– Select “BASSBOOST OFF” to cancel it.<br />
The indicator goes off.<br />
Note:<br />
This function affects the front speaker sounds only.<br />
12<br />
MUTING<br />
Attenuating the Input Signal<br />
When the input level of the playing source is too high, the sounds<br />
will be distorted. If this happens, you need to attenuate the input<br />
signal level to prevent the sound distortion.<br />
On the front panel ONLY:<br />
Press and hold INPUT ATT. (SOUND<br />
SELECT) so that the ATT indicator lights up<br />
on the display.<br />
• Each time you press and hold the button, the<br />
Input Attenuator mode turns on (“INPUT ATT<br />
ON”) or off (“INPUT NORMAL”).<br />
Notes:<br />
• This function is available only for the sources connected using the<br />
analog terminals.<br />
• This function takes effect when the DSP mode is in use.<br />
• When selecting “DVD MULTI” as the source, this effect does not<br />
work.<br />
Adjusting the Subwoofer Output Level<br />
You can adjust the subwoofer output level if you have selected<br />
“YES” for the “SUBWOOFER” (see page 14).<br />
Once it has been adjusted, the <strong>receiver</strong> memorizes the adjustment.<br />
Before you start, remember....<br />
• There is a time limit in doing the following steps. If the setting is<br />
canceled before you finish, start from step 1 again.<br />
• When the front speakers are all deactivated, the subwoofer level<br />
cannot be adjusted.<br />
On the front panel:<br />
1. Press BALANCE/SURROUND<br />
ADJUST repeatedly until<br />
“SUBWFR LEVEL” appears on<br />
the display.<br />
The display changes to show the current setting.<br />
2. Turn MULTI JOG to adjust the<br />
subwoofer output level (–10 dB to<br />
+10 dB).<br />
From the remote <strong>control</strong>:<br />
1. Press SOUND.<br />
The 10 keys are activated for sound adjustments.<br />
2. Press SUBWOOFER –/+ to adjust<br />
the subwoofer output level (–10 dB<br />
to +10 dB).<br />
SOUND SELECT<br />
INPUT ATT.<br />
BALANCE/SURROUND<br />
ADJUST<br />
MULTI JOG<br />
SOUND<br />
SUBWOOFER<br />
0 +10<br />
FM MODE 100+
Basic Settings<br />
Some of the following settings are required after connecting and positioning your speakers in your listening room, while<br />
others will make operations easier.<br />
IMPORTANT:<br />
When using the remote <strong>control</strong>, check to see if its<br />
remote <strong>control</strong> mode selector is set to the correct<br />
position:<br />
To operate this <strong>receiver</strong>, set it to “AUDIO/TV/<br />
VCR.”<br />
Recording a Source<br />
For analog-to-analog recording<br />
You can record any analog source through the <strong>receiver</strong> to —<br />
• the cassette deck (or MD recorder) connected to the TAPE/MD<br />
jacks,<br />
• the VCR connected to the VCR 1 jacks, and<br />
• the CD recorder (or VCR) connected to the CDR/VCR2 jacks<br />
— at the same time.<br />
For digital-to-digital recording<br />
You can record the currently selected digital input through the<br />
<strong>receiver</strong> to a digital recording device connected to the DIGITAL<br />
OUT terminal.<br />
Notes:<br />
• Analog-to-digital and digital-to-analog recordings are not possible.<br />
• The output volume level, bass boost (see page 12), SEA modes<br />
(see page 21), and DSP modes (see page 22) cannot affect the<br />
recording.<br />
• The test tone signal (see page 26, 28) does not come out through<br />
the DIGITAL OUT terminal.<br />
Adjusting the Front Speaker Output<br />
Balance<br />
If the sounds you hear from the front right and left speakers are<br />
unequal, you can adjust the speaker output balance.<br />
Before you start, remember....<br />
• There is a time limit in doing the following steps. If the setting is<br />
canceled before you finish, start from step 1 again.<br />
On the front panel ONLY:<br />
1. Press BALANCE/SURROUND<br />
ADJUST repeatedly until “L/R<br />
BALANCE” appears on the<br />
display.<br />
The display changes to show the current setting.<br />
2. Turn MULTI JOG to adjust the<br />
balance.<br />
• Turning it clockwise decreases the left<br />
channel output.<br />
• Turning it counterclockwise decreases the<br />
right channel output.<br />
AUDIO/<br />
TV/VCR<br />
CATV/DBS<br />
BALANCE/SURROUND<br />
ADJUST<br />
MULTI JOG<br />
Changing the Source Name<br />
When you have connected an MD recorder to the TAPE/MD jacks<br />
or the DBS tuner to the TV SOUND/DBS jacks on the rear panel,<br />
change the source name which will be shown on the display when<br />
you select the MD recorder or DBS tuner as the source.<br />
On the front panel ONLY:<br />
1. When changing the source name<br />
from “TAPE” to “MD”:<br />
• Turn SOURCE SELECTOR<br />
until “TAPE” appears.<br />
When changing the source name from “TV<br />
SOUND” to “DBS”:<br />
• Turn SOURCE SELECTOR until “TV<br />
SOUND” appears.<br />
2. Press and hold SOURCE NAME<br />
(BASS BOOST) until “ASSGN.<br />
MD” or “ASSGN. DBS” appears<br />
on the display.<br />
SOURCE SELECTOR<br />
BASS BOOST<br />
SOURCE NAME<br />
To change the source name to “TAPE” or “TV SOUND,” repeat<br />
the same procedure above — in step 1, select “MD” or “DBS” then<br />
press and hold SOURCE NAME (BASS BOOST).<br />
Notes:<br />
• You can only assign the correct source name to “TAPE/MD” and<br />
“TV SOUND/DBS,” but not to “CDR/VCR 2.”<br />
• Without changing the source name, you can still use the connected<br />
components. However, there may be some inconvenience.<br />
– “TAPE” or “TV SOUND” will appear on the display when you<br />
select the MD recorder or DBS tuner.<br />
– You cannot use the digital input (see page 16) for the MD<br />
recorder.<br />
– You cannot use the COMPU LINK remote <strong>control</strong> system (see<br />
page 38) to operate the MD recorder.<br />
13
Setting the Subwoofer Information<br />
Register whether or not you have connected a subwoofer.<br />
Before you start, remember....<br />
• There is a time limit in doing the following steps. If the setting is<br />
canceled before you finish, start from step 1 again.<br />
On the front panel:<br />
1. Press SETTING repeatedly until<br />
“SUBWOOFER” appears on the<br />
display.<br />
The display changes to show the current setting.<br />
2. Turn MULTI JOG to register<br />
whether you have connected a<br />
subwoofer or not.<br />
• As you turn it, the subwoofer setting alternates between<br />
“YES” and “NO.”<br />
14<br />
YES: Select this when a subwoofer is used. SUBWFR<br />
up on the display (see page 11).<br />
lights<br />
NO: Select this when no subwoofer is used.<br />
Setting the Speakers for the DSP Modes<br />
To obtain the best possible surround sound of the DSP modes, you<br />
have to register the information about the speakers arrangement after<br />
all connections are completed.<br />
Before you start, remember....<br />
• There is a time limit in doing the following steps. If the setting is<br />
canceled before you finish, start from step 1 again.<br />
Front, Center, and Rear Speaker Setting<br />
Register the sizes of all the connected speakers.<br />
• When you change your speakers, you need to register the<br />
information about the speakers again.<br />
On the front panel ONLY:<br />
1. Press SETTING repeatedly until<br />
“FRONT SPK” (Front Speaker),<br />
“CENTER SPK” (Center<br />
Speaker) or “REAR SPK” (Rear<br />
Speaker) appears on the display.<br />
The display changes to show the current setting.<br />
2. Turn MULTI JOG to select the<br />
appropriate item about the speaker<br />
selected in the above step.<br />
• As you turn it, the display changes to show the following:<br />
LARGE SMALL NONE<br />
SETTING<br />
MULTI JOG<br />
SETTING<br />
MULTI JOG<br />
LARGE: Select this when the speaker size is relatively large.<br />
SMALL: Select this when the speaker size is relatively small.<br />
NONE: Select this when you have not connected a speaker.<br />
(Not selectable for the front speakers)<br />
3. Repeat steps 1 and 2 to select the appropriate<br />
items for the other speakers.<br />
Notes:<br />
• Keep the following comment in mind as reference when adjusting.<br />
– If the size of the cone speaker unit built in your speaker is greater<br />
than 4 3 /4 inches (12 cm ), select “LARGE,” and if it is smaller<br />
than 4 3 /4 inches (12 cm ), select “SMALL.”<br />
• If you have selected “NO” for the subwoofer setting, you can only<br />
select “LARGE” for the front speaker setting.<br />
• If you have selected “SMALL” for the front speaker setting, you<br />
cannot select “LARGE” for the center and rear speaker settings.<br />
Center Delay Time Setting<br />
Register the delay time of the sound from the center speaker,<br />
comparing to that of the sound from the front speakers.<br />
If the distance from your listening point to the center speaker is<br />
equal to that to the front speakers, select 0 msec. As the distance to<br />
the center speaker becomes shorter, increase the delay time.<br />
• 1 msec increase (or decrease) in delay time corresponds to 11 13 /16<br />
inches (30 cm) decrease (or increase) in distance.<br />
• When shipped from the factory, delay time is set to 0 msec.<br />
On the front panel ONLY:<br />
1. Press SETTING repeatedly until<br />
“CENTER DELAY” appears on<br />
the display.<br />
The display changes to show the current setting.<br />
2. Turn MULTI JOG to select the<br />
delay time of the center speaker<br />
output.<br />
• Turn it clockwise to increase the delay time from 0 msec (“C.<br />
DELAY: 0ms”) to 5 msec (“C. DELAY: 5ms”).<br />
• Turn it counterclockwise to decrease the delay time from 5<br />
msec (“C. DELAY: 5ms”) to 0 msec (“C. DELAY: 0ms”).<br />
Notes:<br />
• Center delay time setting is not valid for the DVD MULTI playback<br />
mode.<br />
• You cannot adjust the center delay time when you have set<br />
“CENTER SPK” to “NONE.”<br />
Rear Delay Time Setting<br />
Register the delay time of the sound from the rear speakers,<br />
comparing to that of the sound from the front speakers.<br />
If the distance from your listening point to the rear speakers is equal<br />
to that to the front speakers, select 0 msec. As the distance to the<br />
rear speakers becomes shorter, increase the delay time.<br />
• 1 msec increase (or decrease) in delay time corresponds to 11 13 /16<br />
inches (30 cm) decrease (or increase) in distance.<br />
• Rear delay time for Dolby Digital and DTS Digital Surround is to<br />
be set to 5 msec.<br />
• When shipped from the factory, delay time is set to 5 msec.<br />
On the front panel ONLY:<br />
1. Press SETTING repeatedly until<br />
“REAR DELAY” appears on the<br />
display.<br />
The display changes to show the current setting.<br />
SETTING<br />
MULTI JOG<br />
SETTING
2. Turn MULTI JOG to select the<br />
delay time of the rear speaker<br />
output.<br />
• Turn it clockwise to increase the delay time from 0 msec (“R.<br />
DELAY: 0ms”) to 15 msec (“R. DELAY: 15ms”).<br />
• Turn it counterclockwise to decrease the delay time from 15<br />
msec (“R. DELAY: 15ms”) to 0 msec (“R. DELAY: 0ms”).<br />
Notes:<br />
• Rear delay time setting is not valid for the DVD MULTI playback<br />
mode.<br />
• You cannot adjust the rear delay time when you have set “REAR<br />
SPK” to “NONE.”<br />
Crossover Frequency Setting<br />
Small speakers cannot reproduce the bass sound very well. So, if<br />
you have used a small speaker for any of the front, center, and rear<br />
channels, this <strong>receiver</strong> automatically reallocate the bass elements,<br />
originally assigned to the channel for which you have connected the<br />
small speaker, to another channel (for which you have connected the<br />
large speaker).<br />
To use this function properly, you need to set the crossover<br />
frequency level according to the size of the small speaker connected.<br />
• If you have selected “LARGE” for all speakers (see page 14), this<br />
function is set to “OFF” and cannot be adjusted.<br />
On the front panel ONLY:<br />
1. Press SETTING repeatedly until<br />
“CROSSOVER FRQ” (Crossover<br />
Frequency) appears on the display.<br />
The display changes to show the current setting.<br />
2. Turn MULTI JOG to select the<br />
crossover frequency level<br />
according to the size of the small<br />
speaker connected.<br />
• As you turn it, the display changes to show the following:<br />
80Hz 100Hz 120Hz<br />
Note:<br />
MULTI JOG<br />
SETTING<br />
MULTI JOG<br />
• Use the following comments as reference when adjusting.<br />
80Hz: Select this when the cone speaker unit built in the<br />
speaker is about 4 3 /4 inches (12 cm).<br />
100Hz: Select this when the cone speaker unit built in the<br />
speaker is about 3 15 /16 inches (10 cm).<br />
120Hz: Select this when the cone speaker unit built in the<br />
speaker is about 3 3 /16 inches (8 cm).<br />
Crossover frequency setting is not valid for the DVD MULTI playback<br />
mode, 3D-PHONIC mode, and HEADPHONE mode.<br />
Low Frequency Effect Attenuator Setting<br />
If the bass sound is distorted while playing back a source using<br />
Dolby Digital or DTS Digital Surround, follow the procedure below.<br />
On the front panel ONLY:<br />
1. Press SETTING repeatedly until<br />
“LFE ATT” (Low Frequency<br />
Effect Attenuator) appears on the<br />
display.<br />
The display changes to show the current setting.<br />
2. Turn MULTI JOG to select the<br />
low frequency effect attenuator<br />
level.<br />
• As you turn it, the display changes to show the following:<br />
0dB 10dB<br />
Note:<br />
0dB: Normally select this.<br />
10dB: Select this when the bass sound is distorted.<br />
Low frequency effect attenuator setting is not valid for the DVD MULTI<br />
playback mode.<br />
Dynamic Range Compression Setting<br />
You can compress the dynamic range (difference between maximum<br />
sound and minimum sound) of the reproduced sound. This is useful<br />
when enjoying surround sound at night.<br />
• This function takes effect only when playing back a source using<br />
Dolby Digital.<br />
On the front panel ONLY:<br />
1. Press SETTING repeatedly until<br />
“D. RANGE COMP.” (Dynamic<br />
Range Compression) appears on<br />
the display.<br />
The display changes to show the current setting.<br />
2. Turn MULTI JOG to select the<br />
appropriate item about the<br />
compression level.<br />
• As you turn it, the display changes to show the following:<br />
OFF MID MAX<br />
Note:<br />
SETTING<br />
MULTI JOG<br />
SETTING<br />
MULTI JOG<br />
OFF: Select this when you want to enjoy surround with its<br />
full dynamic range. (No effect applied.)<br />
MID: Select this when you want to reduce the dynamic<br />
range a little. (Factory setting).<br />
MAX: Select this when you want to apply the compression<br />
effect fully. (Useful at night).<br />
Dynamic Range Compression setting is not valid for the DTS Digital<br />
Surround and DVD MULTI playback mode.<br />
15
Digital Input (DIGITAL IN) Terminal<br />
Setting<br />
When you use the digital input terminals, you have to register what<br />
components are connected to which terminals (DIGITAL IN 1/2/3/<br />
4).<br />
Before you start, remember...<br />
• There is a time limit in doing the following steps. If the setting is<br />
canceled before you finish, start from step 1 again.<br />
On the front panel ONLY:<br />
To set the DIGITAL 1 terminal<br />
1. Press SETTING repeatedly until<br />
“COAX. DIG. IN” appears on the<br />
display.<br />
The display changes to show the current setting.<br />
16<br />
SETTING<br />
MULTI JOG<br />
2. Turn MULTI JOG to select the<br />
appropriate digital terminal<br />
setting.<br />
• As you turn it, the display changes to show the following:<br />
1 DVD “ 1 MD “ 1 CDR “ 1 TV (or 1 DBS*) “<br />
1 CD “ (back to the beginning)<br />
* If you have changed the source name from “TV SOUND” to<br />
“DBS,” “DBS” appears.<br />
To set the DIGITAL 2/3/4 terminal<br />
1. Press SETTING repeatedly until<br />
“OPT. DIG. IN” appears on the<br />
display.<br />
The display changes to show the current setting.<br />
DIGITAL 2 terminal setting<br />
DIGITAL 3 terminal setting<br />
2. Turn MULTI JOG to select the<br />
appropriate digital terminal<br />
settings.<br />
• As you turn it, the display changes to show<br />
the following:<br />
When the DIGITAL 1 is set to “DVD”<br />
2 CD 3 MD 4 CDR “<br />
2 MD 3 TV (or 2 DBS*) 4 CDR “<br />
2 CD 3 TV (or 2 DBS*) 4 CDR “<br />
2 CD 3 TV (or 2 DBS*) 4 MD “<br />
(back to the beginning)<br />
When the DIGITAL 1 is set to “MD”<br />
2 DVD 3 TV (or 2 DBS*) 4 CDR “<br />
2 CD 3 TV (or 2 DBS*) 4 CDR “<br />
2 CD 3 TV (or 2 DBS*) 4 DVD “<br />
2 CD 3 DVD 4 CDR “<br />
(back to the beginning)<br />
SETTING<br />
DIGITAL 4 terminal setting<br />
MULTI JOG<br />
When the DIGITAL 1 is set to “CDR”<br />
2 CD 3 TV (or 4 DBS*) 4 MD “<br />
2 CD 3 MD 4 DVD “<br />
2 MD 3 TV (or 4 DBS*) 4 DVD “<br />
2 CD 3 TV (or 4 DBS*) 4 DVD “<br />
(back to the beginning)<br />
When the DIGITAL 1 is set to “TV” or “DBS”<br />
2 CD 3 DVD 4 CDR “ 2 CD 3 DVD 4 MD “<br />
2 CD 3 MD 4 CDR<br />
(back to the beginning)<br />
“ 2 MD 3 DVD 4 CDR “<br />
When the DIGITAL 1 is set to “CD”<br />
2 MD 3 TV (or 3 DBS*) 4 CDR “<br />
2 DVD 3 TV (or 3 DBS*) 4 CDR “<br />
2 DVD 3 TV (or 3 DBS*) 4 MD “<br />
2 DVD 3 MD 4 CDR “<br />
(back to the beginning)<br />
* If you have changed the source name from “TV SOUND” to<br />
“DBS,” “DBS” appears.<br />
Note:<br />
When shipped from the factory, the DIGITAL IN terminals can be used<br />
as the digital input for the following components.<br />
• DIGITAL 1 (coaxial): For DVD player<br />
• DIGITAL 2 (optical): For CD player<br />
• DIGITAL 3 (optical): For digital TV broadcast tuner<br />
• DIGITAL 4 (optical): For CD recorder<br />
Selecting the Analog or Digital Input<br />
Mode<br />
When you have connected digital source components using the<br />
digital terminals (see page 8), you need to change the input mode for<br />
these components to the appropriate digital input mode correctly —<br />
AUTO/PCM, DOLBY DIGITAL, or DTS.<br />
Before you start, remember...<br />
• The digital input (DIGITAL IN) terminal setting should be<br />
correctly done for the sources you want to select the digital<br />
input mode for. Without setting this digital input terminal<br />
correctly, you cannot change the input mode from analog input to<br />
digital input even if you follow the procedure below.<br />
On the front panel:<br />
1. Turn SOURCE SELECTOR until<br />
the source (CD, MD, TV SOUND,<br />
DBS, DVD, or CDR/VCR2)* for<br />
which you want to change the<br />
input mode appears on the display.<br />
SOURCE SELECTOR<br />
Note:<br />
* Among the sources listed above, you can select the digital input<br />
only for the sources which you have selected the digital input<br />
terminals for. (See “Digital Input (DIGITAL IN) Terminal Setting.”)
2. Press INPUT ANALOG/DIGITAL<br />
repeatedly until the digital input<br />
mode you want appears on the<br />
display.<br />
• Each time you press the button, the input mode changes as<br />
follows:<br />
ANALOG<br />
DTS<br />
(Digital)<br />
Normally select “AUTO/PCM,” so the <strong>receiver</strong> automatically<br />
detects the incoming digital signal format. (The DIGITAL<br />
AUTO indicator lights up on the display.)<br />
– When the <strong>receiver</strong> can recognize the digital signal format<br />
coming into the <strong>receiver</strong>, the frame of the digital signal<br />
indicator for the detected signal lights up automatically.<br />
– When the <strong>receiver</strong> cannot recognize the incoming signal<br />
format correctly, the frame of the digital signal indicator<br />
flashes.<br />
If this happens, select the same digital input mode with the<br />
incoming digital signal — either “DOLBY DIGITAL” or<br />
“DTS.”<br />
To change the input mode back to analog input, select<br />
“ANALOG.”<br />
From the remote <strong>control</strong>:<br />
1. Press the source selecting button<br />
(CD, TAPE/MD, TV/DBS, DVD,<br />
or CDR/VCR2)* for which you<br />
want to change the input mode.<br />
Note:<br />
* Among the sources listed above, you can select the digital input<br />
only for the sources which you have selected the digital input<br />
terminals for. (See “Digital Input (DIGITAL IN) Terminal Setting.”)<br />
2. Press ANALOG/DIGITAL to<br />
change the input mode.<br />
• Each time you press the button, the<br />
input mode changes as follows:<br />
ANALOG<br />
DTS<br />
(Digital)<br />
AUTO/PCM<br />
(Digital)<br />
DOLBY DIGITAL<br />
(Digital)<br />
AUTO/PCM<br />
(Digital)<br />
INPUT<br />
ANALOG/DIGITAL<br />
DVD DVD MUILTI CD TAPE/MD<br />
TV/DBS VIDEO PHONO FM/AM<br />
VCR 1 CDR/VCR 2<br />
ANALOG/DIGITAL<br />
DOLBY DIGITAL<br />
(Digital)<br />
Notes:<br />
• Noise may come out of the speakers while searching or skipping a<br />
multi-sound source encoded with Dolby Digital or DTS Digital<br />
Surround. If this happens, select “DOLBY DIGITAL” or “DTS” for<br />
digital input mode.<br />
• When you change the source, the digital input mode will be<br />
automatically reset to “AUTO/PCM.”<br />
Showing the Text Information on the<br />
Display<br />
When you have connected an MD recorder or CD player equipped<br />
with TEXT COMPU LINK remote <strong>control</strong> system (see page 39),<br />
you can show the text information, such as disc title or track title,<br />
on the display of this <strong>receiver</strong>. To show it on the display, follow the<br />
procedure below.<br />
Before you start, remember....<br />
• There is a time limit in doing the following steps. If the setting is<br />
canceled before you finish, start from step 1 again.<br />
On the front panel only:<br />
1. Press SETTING repeatedly until<br />
“FL DISPLAY” appears on the<br />
display.<br />
The display changes to show the current setting.<br />
MULTI JOG<br />
2. Turn MULTI JOG to select either<br />
the source name or the text<br />
information to be shown on the<br />
display.<br />
• As you turn it, the display changes to show the following:<br />
Note:<br />
NORMAL TEXT<br />
NORMAL: Source name appears during play.<br />
TEXT: Text information appears during play.<br />
SETTING<br />
Though you have selected “TEXT,” the source name such as “CD” or<br />
“MD” appears if a playing disc has no text information.<br />
17
Storing the Basic Settings and<br />
Adjustments — One Touch Operation<br />
<strong>JVC</strong>’s One Touch Operation function is used to assign and store<br />
different sound settings for each different playing source. By using<br />
this function, you do not have to change the settings every time you<br />
change the source. The stored settings for the newly selected source<br />
are automatically recalled.<br />
The following can be stored for each source:<br />
• Volume level (see page 11)<br />
• Bass boost (see page 12)<br />
• Input attenuator mode (see page 12)<br />
• Subwoofer output level (see page 12)<br />
• Balance (see page 13)<br />
• SEA modes (see page 21)<br />
• DSP modes<br />
– 3D-PHONIC mode settings (see page 25)<br />
– DAP mode settings (see page 25)<br />
– Surround mode settings (see page 26)<br />
• DVD MULTI playback mode settings (see page 31)<br />
On the front panel ONLY:<br />
To store the sound settings<br />
1. Press ONE TOUCH OPERATION.<br />
The ONE TOUCH OPERATION lamp lights<br />
up, then the previously memorized settings<br />
are recalled.<br />
2. Adjust the sound using the functions listed above.<br />
The newly adjusted settings are memorized.<br />
To recall the sound settings<br />
With the ONE TOUCH OPERATION lamp lit, the settings for the<br />
currently selected source are recalled when the source is selected.<br />
To cancel the One Touch Operation function<br />
Press ONE TOUCH OPERATION so that the lamp goes off.<br />
(Even though the One Touch Operation function is canceled, the<br />
recalled sound effects remain active.)<br />
Notes:<br />
• If the source is FM or AM, you can assign a different setting for<br />
each band.<br />
• The DSP modes and DVD MULTI playback mode cannot be used<br />
at the same time.<br />
18<br />
ONE TOUCH OPERATION<br />
Using the Sleep Timer<br />
Using the Sleep Timer, you can fall asleep to music and know the<br />
<strong>receiver</strong> will turn off by itself rather than play all night.<br />
From the remote <strong>control</strong> ONLY:<br />
Press SLEEP repeatedly.<br />
The SLEEP indicator lights up on the display,<br />
and the shut-off time changes as follows (in<br />
minutes):<br />
When the shut-off time comes<br />
The <strong>receiver</strong> turns off automatically.<br />
SLEEP<br />
10 20 30 40 50 60 70 80 90<br />
00 (Canceled)<br />
To check or change the time remaining until the shut-off time<br />
Press SLEEP once.<br />
The remaining time until the shut-off time appears in minutes.<br />
• To change the shut-off time, press SLEEP repeatedly.<br />
To cancel the Sleep Timer<br />
Press SLEEP repeatedly until “SLEEP 00min.” appears on the<br />
display. (The SLEEP indicator goes off.)<br />
• Turning off the power also cancels the Sleep Timer.
Receiving Radio Broadcasts<br />
You can browse through all the stations or use the preset function to go immediately to a particular station.<br />
IMPORTANT:<br />
When using the remote <strong>control</strong>, check to see if its<br />
remote <strong>control</strong> mode selector is set to the correct<br />
position:<br />
To operate this <strong>receiver</strong>, set it to “AUDIO/TV/<br />
VCR.”<br />
Tuning in Stations Manually<br />
On the front panel:<br />
1. Turn SOURCE SELECTOR to<br />
select the band (FM or AM).<br />
The last received station of the selected band<br />
is tuned in.<br />
2. Press FM/AM TUNING.<br />
3. Turn MULTI JOG until you find<br />
the frequency you want.<br />
• Turning it clockwise increases the<br />
frequency.<br />
• Turning it counterclockwise decreases the<br />
frequency.<br />
• When you turn MULTI JOG quickly, the<br />
frequency keeps changing until a station is<br />
tuned in.<br />
From the remote <strong>control</strong>:<br />
1. Press FM/AM to select the band.<br />
• Each time you press the button, the band<br />
alternates between FM and AM.<br />
2. Press TUNING UP or TUNING<br />
DOWN repeatedly until you find<br />
the frequency you want.<br />
• When you hold the button (and release it),<br />
the frequency keeps changing until a<br />
station is tuned in.<br />
AUDIO/<br />
TV/VCR<br />
CATV/DBS<br />
TUNING<br />
Note:<br />
When a station of sufficient signal strength is tuned in, the TUNED<br />
indicator lights up on the display.<br />
When an FM stereo program is received, the STEREO indicator also<br />
lights up.<br />
/REW<br />
DOWN<br />
SOURCE SELECTOR<br />
FM/AM TUNING<br />
MULTI JOG<br />
FM/AM<br />
FF/<br />
UP<br />
TUNING<br />
Using Preset Tuning<br />
Once a station is assigned to a channel number, the station can be<br />
quickly tuned. You can preset up to 30 FM and 15 AM stations.<br />
To store the preset stations<br />
Before you start, remember...<br />
• There is a time limit in doing the following steps. If the setting is<br />
canceled before you finish, start from step 1 again.<br />
On the front panel ONLY:<br />
1. Tune in the station you want to preset (see<br />
“Tuning in Stations Manually”).<br />
• If you want to store the FM reception mode for this station,<br />
select the FM reception mode you want. See “Selecting the<br />
FM Reception Mode” on page 20.<br />
2. Press TUNER/SEA MEMORY.<br />
“CH-” appears and the channel number position starts flashing<br />
on the display for about 10 seconds.<br />
3. Turn MULTI JOG to select a<br />
channel number while the channel<br />
number position is flashing.<br />
Note:<br />
You can use the 10 keys on the remote <strong>control</strong> to select the preset<br />
number. When using the 10 keys, be sure that they are activated<br />
for the tuner, not for the CD and others. (See page 46.)<br />
4. Press TUNER/SEA MEMORY<br />
again while the selected channel<br />
number is flashing on the display.<br />
The selected channel number stops flashing.<br />
The station is assigned to the selected channel number.<br />
5. Repeat steps 1 to 4 until you store<br />
all the stations you want.<br />
TUNER/SEA MEMORY<br />
MULTI JOG<br />
TUNER/SEA MEMORY<br />
To erase a stored preset station<br />
Storing a new station on a used number erases the previously stored<br />
one.<br />
19
To tune in a preset station<br />
On the front panel:<br />
1. Turn SOURCE SELECTOR to<br />
select the band (FM or AM).<br />
The last received station of the selected band<br />
is tuned in.<br />
2. Press TUNER PRESET.<br />
3. Turn MULTI JOG until you find<br />
the channel you want.<br />
• Turning it clockwise increases the channel<br />
numbers.<br />
• Turning it counterclockwise decreases the<br />
channel numbers.<br />
From the remote <strong>control</strong>:<br />
1. Press FM/AM.<br />
• Each time you press the button, the band<br />
alternates between FM and AM.<br />
2. Press the 10 keys to select a preset<br />
channel number.<br />
• For channel number 5, press 5.<br />
• For channel number 15, press +10 then 5.<br />
• For channel number 20, press +10 then 10.<br />
• For channel number 30, press +10, +10,<br />
then 10.<br />
Note:<br />
When you use the 10 keys on the remote <strong>control</strong>, be sure that they<br />
are activated for the tuner, not for the CD and others. (See page 46.)<br />
Selecting the FM Reception Mode<br />
When an FM stereo broadcast is hard to<br />
receive or noisy<br />
You can change the FM reception mode while receiving an FM<br />
broadcast.<br />
• You can store the FM reception mode for each preset station.<br />
Press FM MODE on the front panel or on the remote <strong>control</strong>.<br />
• Each time you press the button, the FM reception mode alternates<br />
between “AUTO MUTING” and “MONO.”<br />
20<br />
FM MODE<br />
SUBWOOFER<br />
0<br />
FM MODE<br />
SOURCE SELECTOR<br />
TUNER PRESET<br />
MULTI JOG<br />
FM/AM<br />
CNTR TONE CENTER<br />
1 2 3<br />
MENU<br />
TEST REAR-L<br />
4 5 6<br />
ENTER<br />
EFFECT REAR-R<br />
7/P 8 9<br />
SEA MODE SUBWOOFER<br />
10 0 +10<br />
RETURN FM MODE 100+<br />
On the front panel On the remote <strong>control</strong><br />
AUTO MUTING: When a program is broadcasted in stereo,<br />
you will hear stereo sound; when in monaural, you will<br />
hear monaural sounds. This mode is also useful to<br />
suppress static noise between stations. The AUTO<br />
MUTING indicator lights up on the display.<br />
MONO: Reception will be improved although you will lose the<br />
stereo effect. In this mode, you will hear noise while<br />
tuning into the stations. The AUTO MUTING indicator<br />
goes off on the display.<br />
Note:<br />
When using the FM MODE button on the remote <strong>control</strong>, be sure that<br />
the 10 keys are activated for the tuner, not for the CD and others.<br />
(See page 46.)<br />
Assigning Names to Preset Stations<br />
You can assign a name of up to four characters to each preset<br />
station. When a preset station is tuned in, its assigned name will<br />
appear on the display.<br />
Before you start, remember...<br />
• There is a time limit in doing the following steps. If the setting is<br />
canceled before you finish, start from step 1 again.<br />
• You can use the following characters: Space (_), A – Z, and 0 – 9.<br />
On the front panel ONLY:<br />
1. Tune in a preset station.<br />
See the left.<br />
2. Press TUNER/SEA MEMORY.<br />
The preset channel number starts flashing for<br />
about 10 seconds.<br />
• If you turn MULTI JOG while the preset channel number is<br />
flashing, you can change the preset channel number.<br />
3. Press TUNER PRESET, while the<br />
preset channel number is flashing.<br />
The first character position starts flashing.<br />
4. Turn MULTI JOG to select the<br />
first character, while the first<br />
character position is flashing.<br />
5. Press TUNER PRESET, while a<br />
character you want is flashing.<br />
The next character position starts flashing.<br />
6. Repeat steps 4 and 5 to enter up to four<br />
characters.<br />
7. Press TUNER/SEA MEMORY<br />
while the last selected character is<br />
flashing after you have assigned a<br />
name.<br />
To erase the input characters<br />
Insert spaces using the same procedure described above.<br />
TUNER/SEA MEMORY<br />
TUNER PRESET<br />
MULTI JOG<br />
TUNER PRESET<br />
TUNER/SEA MEMORY
Using the SEA Modes<br />
The SEA (Sound Effect Amplifier) modes give you <strong>control</strong> of the way your music sounds.<br />
IMPORTANT:<br />
When using the remote <strong>control</strong>, check to see if its<br />
remote <strong>control</strong> mode selector is set to the correct<br />
position:<br />
To operate this <strong>receiver</strong>, set it to “AUDIO/TV/<br />
VCR.”<br />
Selecting Your Favorite SEA Mode<br />
On the front panel:<br />
Press SEA MODE repeatedly until the SEA<br />
mode you want appears on the display.<br />
• Each time you press the button, the SEA mode<br />
changes as follows:<br />
SEA ROCK: Gives a heavy sound. Both high and low<br />
frequencies are boosted.<br />
SEA MUSICAL: Enhances the mid-frequency range, which<br />
the human voice is mostly made up of.<br />
SEA MOVIE: Adds breadth to sounds so you feel like<br />
you are in a movie theater.<br />
SEA COUNTRY: Enhances the high-frequency range so that<br />
instruments such the violin and banjo are<br />
emphasized.<br />
SEA JAZZ: Gives a feeling of a live atmosphere.<br />
Good for acoustic music.<br />
SEA USERMODE: Your original SEA adjustment (see the<br />
right).<br />
SEA OFF: No SEA mode is applied (see below).<br />
Notes:<br />
• The SEA modes cannot be used for recording.<br />
• When the SEA mode is turned on, the SEA indicator lights up on<br />
the display.<br />
• When the SEA mode is used with the DAP mode (see page 25),<br />
sounds may be distorted. If this happens, turn off the DAP mode or<br />
decrease the effect level of the DAP mode.<br />
To cancel the SEA mode<br />
Press SEA MODE repeatedly until “SEA OFF” appears. The SEA<br />
indicator goes off from the display.<br />
From the remote <strong>control</strong>:<br />
1. Press SOUND.<br />
The 10 keys are activated for sound adjustments.<br />
2. Press SEA MODE repeatedly until<br />
the SEA mode you want appears<br />
on the display.<br />
AUDIO/<br />
TV/VCR<br />
CATV/DBS<br />
SEA ROCK SEA MUSICAL SEA MOVIE<br />
SEA OFF<br />
SEA USERMODE<br />
SEA MODE<br />
SEA COUNTRY<br />
SEA JAZZ<br />
SOUND<br />
SEA MODE<br />
10<br />
RETURN<br />
To cancel the SEA mode<br />
Press SEA MODE repeatedly until “SEA OFF” appears in step 2<br />
above. The SEA indicator goes off from the display.<br />
Creating Your Own SEA Mode<br />
You can adjust and store your own SEA adjustment into memory<br />
(SEA USERMODE).<br />
Before you start, remember...<br />
• There is a time limit in doing the following steps. If the setting is<br />
canceled before you finish, start from step 1 again.<br />
On the front panel ONLY:<br />
If you do not want to store your adjustment, but rather want to adjust<br />
the SEA temporarily, skip step 4 below.<br />
1. Press SEA ADJUST repeatedly<br />
until the frequency range (100Hz,<br />
1kHz or 10kHz) you want appears<br />
on the display.<br />
2. Turn MULTI JOG to adjust the<br />
SEA level of the selected frequency<br />
range.<br />
• Turning it clockwise increases the level.<br />
• Turning it counterclockwise decreases the level.<br />
3. Repeat step 1 and 2 to adjust other frequency<br />
ranges if necessary.<br />
4. Press TUNER/SEA MEMORY.<br />
Your adjustment is stored into the SEA<br />
USERMODE.<br />
To recall your own SEA adjustment<br />
Press SEA MODE repeatedly until “SEA USERMODE” appears.<br />
To erase a stored adjustment<br />
Storing a new adjustment into SEA USERMODE erases the<br />
previously stored one.<br />
SEA ADJUST<br />
MULTI JOG<br />
TUNER/SEA MEMORY<br />
21
22<br />
Using the DSP Modes<br />
The built-in Surround Processor provides three types of the DSP (Digital Signal Processor) mode — 3D-PHONIC mode,<br />
DAP (Digital Acoustic Processor) mode and Surround mode.<br />
3D-PHONIC modes<br />
The 3D-PHONIC mode gives you such a nearly surround effect as is<br />
reproduced through the Dolby Surround decoder, which is widely<br />
used to reproduce sounds with a feeling of movement like those<br />
experienced in movie theaters. The 3D-PHONIC mode is the result<br />
of research on sound localization technology carried out at <strong>JVC</strong> for<br />
many years. This mode can be used when the front speakers are<br />
connected to this <strong>receiver</strong> (without respect to the rear/center<br />
speaker connection).<br />
3D ACTION: Best for action and war movies — where the<br />
action is fast and explosive.<br />
3D THEATER: Reproduces the sound field of a large theater. This<br />
mode can be selected when only front speakers are<br />
connected to this <strong>receiver</strong> and “REAR SPK” and<br />
“CENTER SPK” are set to “NONE” (see page 14).<br />
DAP modes<br />
The sound heard in a concert hall or club consists of direct sound<br />
and indirect sound — early reflections and reflections from behind.<br />
Direct sounds reach the listener directly without any reflection. On<br />
the other hand, indirect sounds are delayed by the distances of the<br />
ceiling and walls. These direct sounds and indirect sounds are the<br />
most important elements of the acoustic surround effects. The DAP<br />
mode can create these important elements, and gives you a real<br />
“being there” feeling. This mode can be used when the front<br />
speakers are connected to this <strong>receiver</strong> (without respect to the<br />
rear/center speaker connection).<br />
You can select one of the following to your preference while playing<br />
an analog or linear PCM source.<br />
LIVE CLUB: Gives the feeling of a live music club with a low<br />
ceiling.<br />
DANCE CLUB: Gives a throbbing bass beat.<br />
HALL: Gives clear vocal and the feeling of a concert hall.<br />
PAVILION: Gives the spacious feeling of a pavilion with a high<br />
ceiling.<br />
Early reflections<br />
Direct sounds<br />
Reflections from<br />
behind
Surround modes<br />
With this <strong>receiver</strong>, you can use three types of the Surround mode.<br />
Following modes cannot be used when only the front speakers<br />
are connected to this <strong>receiver</strong> (without the rear speakers or<br />
center speaker).<br />
Dolby Surround (Dolby Digital and Dolby Pro Logic)*<br />
Used to watch the soundtracks of software encoded with Dolby<br />
Digital (bearing the mark ) or with Dolby Surround<br />
D I G I T A L<br />
(bearing the mark DOLBY SURROUND ).<br />
Dolby Surround encoding format records the left front channel, right<br />
front channel, center channel, and rear channel (total 4 channels)<br />
signals into 2 channels. The Doby Pro Logic decoder built in this<br />
<strong>receiver</strong> decode these 2 channel signals into original 4 channel<br />
signals — matrix-based multichannel reproduction, and allows you<br />
to enjoy the realistic stereo sounds in your listening room.<br />
On the other hand, Dolby Digital encoding method (so called a<br />
discrete 5.1 channel digital <strong>audio</strong> format) records and compresses<br />
the left front channel, right front channel, center channel, left rear<br />
channel, right rear channel, and LFE channel (total 6 channels, but<br />
LFE channel is counted as 0.1 channel, therefore called 5.1<br />
channels) signals digitally. Each channel is completely independent<br />
from other channel signals to avoid interference, therefore, you can<br />
obtain much better sound quality with much stereo and surround<br />
effects.<br />
The Dolby Digital decoder built in this <strong>receiver</strong> can create much<br />
more realistic sound field in your listening room. You may feel as if<br />
you were in a real theater.<br />
In addition, Dolby Digital enables stereo rear sounds, and sets the<br />
cutoff frequency of the rear treble at 20 kHz, comparing to 7 kHz for<br />
Dolby Pro Logic. These facts enhance the sound movement and<br />
being-there feelings much more than Dolby Pro Logic.<br />
• To enjoy the software encoded with Dolby Digital, you must<br />
connect the source component using the digital terminal on the<br />
rear of this <strong>receiver</strong>. (See page 8.)<br />
DTS Digital Surround**<br />
DTS Digital Surround is another discrete 5.1 channel digital <strong>audio</strong><br />
format available on CD, LD, and DVD software.<br />
Comparing to Dolby Digital, <strong>audio</strong> compression rate is relatively<br />
low. This fact allows DTS Digital Surround format to have more<br />
data recorded than Dolby Digital even using the same media, and to<br />
add breadth and depth to the reproduced sounds. As a result, DTS<br />
Digital Surround features natural, solid and clear sound.<br />
• To enjoy the software encoded with DTS Digital Surround, you<br />
must connect the source component using the digital terminal on<br />
the rear of this <strong>receiver</strong>. (See page 8.)<br />
<strong>JVC</strong> Theater Surround<br />
In order to reproduce a more realistic sound field in your listening<br />
room while playing soundtracks of software encoded with Dolby<br />
Surround (bearing the mark DOLBY SURROUND ).<br />
Notes:<br />
• The DSP modes have no effect on monaural sources.<br />
• When you select “DVD MULTI” as the source to play, you cannot<br />
select or adjust the DSP modes.<br />
• The Ÿ PRO LOGIC indicator lights up when the Dolby Pro Logic<br />
decoder built in this <strong>receiver</strong> is activated.<br />
DVD MULTI Playback Mode<br />
This <strong>receiver</strong> provides the DVD MULTI playback mode for<br />
reproducing the analog discrete 5.1 channel output mode of the<br />
DVD player or other equipment.<br />
You can adjust the DVD MULTI playback mode while playing<br />
back a <strong>video</strong> software such as a DVD using the analog discrete<br />
5.1 channel output mode.<br />
• For the DVD MULTI playback mode connection, see page 7.<br />
• For details on the DVD MULTI playback mode, see page 31.<br />
* Manufactured under license from Dolby Laboratories. “Dolby,” “Pro<br />
Logic,” and the double-D symbol are trademarks of Dolby<br />
Laboratories. Confidential Unpublished Works. ©1992–1997 Dolby<br />
Laboratories, Inc. All rights reserved.<br />
**Manufactured under license from Digital Theater Systems, Inc. US<br />
Pat. No. 5,451,942 and other world-wide patents issues and<br />
pending. “DTS” and “DTS Digital Surround” are trademarks of<br />
Digital Theater Systems, Inc. ©1996 Digital Theater Systems, Inc.<br />
All rights reserved.<br />
23
Available DSP Modes According to the Speaker Arrangement<br />
Available DSP modes will vary depending on how many speakers are used with this <strong>receiver</strong>.<br />
Make sure that you have set the speaker information correctly (see page 14).<br />
24<br />
Front<br />
speaker<br />
Front<br />
speaker<br />
Front<br />
speaker<br />
Rear<br />
speaker<br />
Front<br />
speaker<br />
Rear<br />
speaker<br />
Speaker arrangements<br />
TV Front<br />
speaker<br />
TV<br />
Center speaker<br />
TV Front<br />
speaker<br />
TV<br />
Center speaker<br />
Front<br />
speaker<br />
Rear<br />
speaker<br />
Front<br />
speaker<br />
Rear<br />
speaker<br />
Available DSP modes<br />
Each time you press DSP MODE on the front panel or SURROUND MODE on<br />
the remote <strong>control</strong>, the DSP modes change as follows:<br />
• 3D THEATER<br />
• LIVE CLUB<br />
• DANCE CLUB<br />
• HALL<br />
• PAVILION<br />
• 3D ACTION<br />
• DSP OFF (DSP mode is canceled)<br />
Each time you press DSP MODE on the front panel or SURROUND MODE on<br />
the remote <strong>control</strong>, the DSP modes change as follows:<br />
By pressing DSP MODE:<br />
• THEATER<br />
• LIVE CLUB<br />
• DANCE CLUB<br />
• HALL<br />
• PAVILION<br />
• 3D ACTION<br />
• DSP OFF (DSP mode is canceled)<br />
To activate the Surround<br />
mode, press SURROUND ON/<br />
OFF button so that the lamp on<br />
the button lights up.<br />
By pressing SURROUND MODE:<br />
• SURROUND ON<br />
(DOLBY PRO LOGIC, DOLBY<br />
DIGITAL*, or DTS SURROUND**)<br />
• THEATER<br />
• LIVE CLUB<br />
• DANCE CLUB<br />
• HALL<br />
• PAVILION<br />
• 3D ACTION<br />
• DSP OFF (DSP mode is canceled)<br />
To activate the Surround<br />
mode, you can also use the<br />
SURROUND ON/OFF button.<br />
* Activated automatically only when “AUTO/PCM” is selected as the digital input<br />
and playback source is encoded with Dolby Digital.<br />
** Activated automatically only when “AUTO/PCM” is selected as the digital input<br />
and playback source is encoded with DTS Digital Surround.<br />
Notes:<br />
• If Surround mode is canceled while playing back a multichannel source such as<br />
Dolby Digital and DTS Digital Surround, all channel signals are mixed with left<br />
and right front channel and are output through the front speakers.<br />
• While playing back a multichannel source such as Dolby Digital and DTS Digital<br />
Surround, Theater Surround, DAP modes, and 3D-PHONIC modes cannot be<br />
used. On the other hands, if you select a Dolby Digital and DTS Digital<br />
Surround as the source to play while using any of Theater Surround, DAP<br />
modes, and 3D-PHONIC modes, the currently selected mode will be canceled<br />
and Dolby Digital or DTS Digital Surround mode will be activated.
IMPORTANT:<br />
When using the remote <strong>control</strong>, check to see if its<br />
remote <strong>control</strong> mode selector is set to the correct<br />
position:<br />
To operate this <strong>receiver</strong>, set it to “AUDIO/TV/<br />
VCR.”<br />
Adjusting the 3D-PHONIC Modes<br />
Once you have adjusted the 3D-PHONIC modes, the adjustment is<br />
memorized for each 3D-PHONIC mode.<br />
Before you start, remember...<br />
• Make sure that you have set the speaker information correctly<br />
(see page 14).<br />
• There is a time limit in doing the following steps. If the setting is<br />
canceled before you finish, start from step 1 again.<br />
On the front panel:<br />
1. Press DSP MODE repeatedly until<br />
“3D ACTION” or “3D<br />
THEATER” appears on the<br />
display.<br />
The 3D-PHONIC, DSP, and Ÿ PRO LOGIC indicators also<br />
light up on the display.<br />
2. Adjust the effect level.<br />
1) Press BALANCE/SURROUND<br />
ADJUST repeatedly until “DSP<br />
EFFECT” appears on the display.<br />
The display changes to show the current<br />
setting.<br />
2) Turn MULTI JOG to select the effect<br />
level.<br />
• As you turn it, the effect level changes<br />
as follows:<br />
As the number increases, the selected 3D-PHONIC mode<br />
becomes stronger.<br />
From the remote <strong>control</strong>:<br />
1. Press SURROUND MODE<br />
SURROUND<br />
MODE<br />
repeatedly until “3D ACTION” or<br />
“3D THEATER” appears on the<br />
display.<br />
The 3D-PHONIC, DSP, and Ÿ PRO LOGIC indicators also<br />
light up on the display.<br />
2. Press SOUND.<br />
The 10 keys are activated for sound adjustments.<br />
AUDIO/<br />
TV/VCR<br />
CATV/DBS<br />
DSP MODE<br />
BALANCE/SURROUND<br />
ADJUST<br />
MULTI JOG<br />
DSP EFFECT 1 DSP EFFECT 2 DSP EFFECT 3<br />
DSP EFFECT 5 DSP EFFECT 4<br />
SOUND<br />
3. Press EFFECT to select an effect<br />
level you want.<br />
• Each time you press the button, the effect<br />
level changes as follows:<br />
DSP EFFECT 1 DSP EFFECT 2 DSP EFFECT 3<br />
DSP EFFECT 5 DSP EFFECT 4<br />
As the number increases, the selected 3D-PHONIC mode<br />
becomes stronger.<br />
Adjusting the DAP Modes<br />
Once you have adjusted the DAP modes, the adjustment is<br />
memorized for each DAP mode.<br />
Before you start, remember...<br />
• Make sure that you have set the speaker information correctly<br />
(see page 14).<br />
• There is a time limit in doing the following steps. If the setting is<br />
canceled before you finish, start from step 1 again.<br />
• You cannot adjust the rear speaker output level when you have set<br />
“REAR SPK” to “NONE.” See page 14.<br />
• When the DAP mode is used with the SEA mode (see page 21),<br />
sounds may be distorted. If this happens, turn off the SEA mode.<br />
On the front panel:<br />
1. Press DSP MODE repeatedly until<br />
the DAP mode — LIVE CLUB,<br />
DANCE CLUB, HALL, or<br />
PAVILION — appears on the<br />
display.<br />
The DSP indicator also lights up on the display.<br />
• When you have set “REAR SPK” to “NONE,” the 3D-<br />
PHONIC indicator also lights up.<br />
2. Adjust the speaker output levels.<br />
1) Press BALANCE/SURROUND<br />
ADJUST repeatedly until one of the<br />
indications appears on the display.<br />
“REAR L LEVEL”:<br />
To adjust the left rear speaker level.<br />
“REAR R LEVEL”:<br />
To adjust the right rear speaker level.<br />
2) Turn MULTI JOG to adjust the<br />
selected speaker output level (from –10<br />
dB to +10 dB).<br />
3) Repeat 1) and 2) to adjust the other<br />
speaker output level.<br />
EFFECT<br />
7/P<br />
DSP MODE<br />
BALANCE/SURROUND<br />
ADJUST<br />
MULTI JOG<br />
25
3. Adjust the effect level.<br />
1) Press BALANCE/SURROUND<br />
ADJUST repeatedly until “DSP<br />
EFFECT” appears on the display.<br />
The display changes to show the current<br />
setting.<br />
2) Turn MULTI JOG to select the effect<br />
level.<br />
• As you turn it, the effect level changes<br />
as follows:<br />
26<br />
As the number increases, the selected DAP mode becomes<br />
stronger.<br />
From the remote <strong>control</strong>:<br />
1. Press SURROUND MODE<br />
repeatedly until the DAP mode —<br />
LIVE CLUB, DANCE CLUB,<br />
HALL, or PAVILION — appears<br />
on the display.<br />
The DSP indicator also lights up on the display.<br />
• When you have set “REAR SPK” to “NONE,” the 3D-<br />
PHONIC indicator also lights up.<br />
2. Press SOUND.<br />
The 10 keys are activated for sound adjustments.<br />
3. Adjust the speaker output levels.<br />
• To adjust the left rear speaker level, press<br />
REAR•L –/+ (from –10 dB to +10 dB).<br />
• To adjust the right rear speaker level, press<br />
REAR•R –/+ (from –10 dB to +10 dB).<br />
4. Press EFFECT to select an effect<br />
level you want.<br />
• Each time you press the button, the effect<br />
level changes as follows:<br />
BALANCE/SURROUND<br />
ADJUST<br />
MULTI JOG<br />
DSP EFFECT 1 DSP EFFECT 2 DSP EFFECT 3<br />
DSP EFFECT 5 DSP EFFECT 4<br />
SURROUND<br />
MODE<br />
SOUND<br />
REAR•L<br />
5 6<br />
ENTER<br />
REAR•R<br />
8 9<br />
EFFECT<br />
7/P<br />
DSP EFFECT 1 DSP EFFECT 2 DSP EFFECT 3<br />
DSP EFFECT 5<br />
DSP EFFECT 4<br />
As the number increases, the selected DAP mode becomes<br />
stronger.<br />
Adjusting the Surround Modes<br />
Once you have adjusted the Surround modes, the adjustment is<br />
memorized for each Surround mode.<br />
Dolby and DTS Surround adjustments<br />
Before you start, remember...<br />
• Make sure that you have set the speaker information correctly<br />
(see page 14).<br />
• There is a time limit in doing the following steps. If the setting is<br />
canceled before you finish, start from step 1 again.<br />
• You cannot adjust the rear speaker output levels when you have set<br />
“REAR SPK” to “NONE.” See page 14.<br />
• You cannot adjust the center speaker output level and center tone<br />
when you have set “CENTER SPK” to “NONE.” See page 14.<br />
From the remote <strong>control</strong>:<br />
1. Press SURROUND ON/OFF to<br />
SURROUND<br />
ON/OFF<br />
activate an appropriate Surround<br />
mode — PRO LOGIC, DOLBY<br />
DIGITAL or DTS SURROUND.<br />
• Each time you press the button, the Surround mode turns on<br />
and off alternately.<br />
• When “PRO LOGIC” is selected, the Ÿ PRO LOGIC<br />
indicator lights up on the display.<br />
Note:<br />
You can also press SURROUND MODE to activate an appropriate<br />
Surround mode.<br />
2. Press SOUND.<br />
The 10 keys are activated for sound adjustments.<br />
3. Press TEST to check the speaker<br />
output balance.<br />
“TEST TONE L” starts flashing on the<br />
display, and a test tone comes out of the<br />
speakers in the following order:<br />
TEST TONE L<br />
(Left front speaker)<br />
TEST TONE LS<br />
(Left rear speaker)<br />
TEST TONE C<br />
(Center speaker)<br />
SOUND<br />
TEST<br />
4<br />
TEST TONE R<br />
(Right front speaker)<br />
TEST TONE RS<br />
(Right rear speaker)
Notes:<br />
• You can adjust the speaker output levels without outputting the<br />
test tone.<br />
• No test tone comes out of the center speaker when “CENTER<br />
SPK” is set to “NONE” (see page 14).<br />
• No test tone comes out of the rear speakers when “REAR SPK”<br />
is set to “NONE” (see page 14).<br />
• If the TV is turned on and the proper <strong>video</strong> input is selected on<br />
the TV, the test tone screen will appear on the TV.<br />
4. Adjust the speaker output levels.<br />
• To adjust the center speaker level, press CENTER –/+ (from –<br />
10 dB to +10 dB).<br />
• To adjust the left rear speaker level, press REAR•L –/+ (from<br />
–10 dB to +10 dB).<br />
• To adjust the right rear speaker level, press REAR•R –/+ (from<br />
–10 dB to +10 dB).<br />
CENTER<br />
2 3<br />
MENU<br />
5. Press TEST again to stop the test tone.<br />
6. Press CNTR TONE to select the<br />
center tone level you want.<br />
The center tone adjustment affects the midfrequency<br />
range, which the human voice is<br />
mostly made up of.<br />
• Each time you press the button, the display changes to show<br />
the following:<br />
CENTER FLAT<br />
(Canceled)<br />
REAR•L<br />
5 6<br />
ENTER<br />
REAR•R<br />
8 9<br />
CENTER SHARP1 CENTER SHARP2<br />
CENTER SOFT 1<br />
TEST<br />
4<br />
CNTR TONE<br />
1<br />
CENTER SOFT 2<br />
To make the dialogue clearer, select “CENTER SHARP1”<br />
(little) or “CENTER SHARP2” (much).<br />
To make the dialogue softer, select “CENTER SOFT 1” (little)<br />
or “CENTER SOFT 2” (much).<br />
When “CENTER FLAT” is selected, no adjustment is applied.<br />
On the front panel:<br />
You can also use the buttons on the front panel to adjust the<br />
Surround modes. However, no test tone is available when using the<br />
buttons on the front panel. So, make adjustments while listening to<br />
the sound of the source played back.<br />
1. Press SURROUND ON/OFF to<br />
activate an appropriate Surround<br />
mode — PRO LOGIC, DOLBY<br />
DIGITAL or DTS SURROUND.<br />
• Each time you press the button, the Surround mode turns on<br />
and off alternately.<br />
• When “PRO LOGIC” is selected, the Ÿ PRO LOGIC<br />
indicator lights up on the display.<br />
2. Adjust the speaker output levels.<br />
1) Press BALANCE/SURROUND<br />
ADJUST repeatedly until one of the<br />
indications appears on the display.<br />
“CENTER LEVEL”:<br />
To adjust the center speaker level.<br />
“REAR L LEVEL”:<br />
To adjust the left rear speaker level.<br />
“REAR R LEVEL”:<br />
To adjust the right rear speaker level.<br />
2) Turn MULTI JOG to adjust the<br />
selected speaker output level (from –10<br />
dB to +10 dB).<br />
3) Repeat 1) and 2) to adjust the other<br />
speaker output levels.<br />
3. Adjust the center tone.<br />
1) Press BALANCE/SURROUND<br />
ADJUST repeatedly until “CENTER<br />
TONE” appears on the display.<br />
The display changes to show the current<br />
setting.<br />
2) Turn MULTI JOG to select the center<br />
tone level you want.<br />
• As you turn it, the display changes to<br />
show the following:<br />
CENTER FLAT<br />
(Canceled)<br />
SURROUND ON/OFF<br />
BALANCE/SURROUND<br />
ADJUST<br />
MULTI JOG<br />
BALANCE/SURROUND<br />
ADJUST<br />
MULTI JOG<br />
CENTER SHARP1 CENTER SHARP2<br />
CENTER SOFT 1<br />
CENTER SOFT 2<br />
To make the dialogue clearer, select “CENTER SHARP1”<br />
(little) or “CENTER SHARP2” (much).<br />
To make the dialogue softer, select “CENTER SOFT 1” (little)<br />
or “CENTER SOFT 2” (much).<br />
When “CENTER FLAT” is selected, no adjustment is applied.<br />
27
<strong>JVC</strong> Theater Surround adjustments<br />
Before you start, remember...<br />
• Make sure that you have set the speaker information correctly<br />
(see page 14).<br />
• There is a time limit in doing the following steps. If the setting is<br />
canceled before you finish, start from step 1 again.<br />
• You cannot adjust the rear speaker output levels when you have set<br />
“REAR SPK” to “NONE.” See page 14.<br />
• You cannot adjust the center speaker output level and center tone<br />
when you have set “CENTER SPK” to “NONE.” See page 14.<br />
From the remote <strong>control</strong>:<br />
SURROUND<br />
1. Press SURROUND MODE<br />
MODE<br />
repeatedly until “THEATER”<br />
appears on the display.<br />
The Ÿ PRO LOGIC and DSP indicators also light up on the<br />
display.<br />
2. Press SOUND.<br />
The 10 keys are activated for sound adjustments.<br />
3. Press TEST to check the speaker<br />
output balance.<br />
“TEST TONE L” starts flashing on the<br />
display, and a test tone comes out of the<br />
speakers in the following order:<br />
Notes:<br />
• You can adjust the speaker output levels without outputting the<br />
test tone.<br />
• No test tone comes out of the center speaker when “CENTER<br />
SPK” is set to “NONE” (see page 14).<br />
• No test tone comes out of the rear speakers when “REAR SPK”<br />
is set to “NONE” (see page 14).<br />
• If the TV is turned on and the proper <strong>video</strong> input is selected on<br />
the TV, the test tone screen will appear on the TV.<br />
4. Adjust the speaker output levels.<br />
• To adjust the center speaker level, press CENTER –/+ (from –<br />
10 dB to +10 dB).<br />
• To adjust the left rear speaker level, press REAR•L –/+ (from<br />
–10 dB to +10 dB).<br />
• To adjust the right rear speaker level, press REAR•R –/+ (from<br />
–10 dB to +10 dB).<br />
28<br />
TEST TONE L<br />
(Left front speaker)<br />
TEST TONE LS<br />
(Left rear speaker)<br />
CENTER<br />
2 3<br />
MENU<br />
TEST TONE C<br />
(Center speaker)<br />
REAR•L<br />
5 6<br />
ENTER<br />
SOUND<br />
TEST<br />
4<br />
TEST TONE R<br />
(Right front speaker)<br />
TEST TONE RS<br />
(Right rear speaker)<br />
REAR•R<br />
8 9<br />
5. Press TEST again to stop the test tone.<br />
6. Press CNTR TONE to select the<br />
center tone level you want.<br />
The center tone adjustment affects the midfrequency<br />
range, which the human voice is<br />
mostly made up of.<br />
• Each time you press the button, the display changes to show<br />
the following:<br />
CENTER FLAT<br />
(Canceled)<br />
To make the dialogue clearer, select “CENTER SHARP1”<br />
(little) or “CENTER SHARP2” (much).<br />
To make the dialogue softer, select “CENTER SOFT 1” (little)<br />
or “CENTER SOFT 2” (much).<br />
When “CENTER FLAT” is selected, no adjustment is applied.<br />
7. Press EFFECT to select an effect<br />
level you want.<br />
• Each time you press the button, the effect<br />
level changes as follows:<br />
TEST<br />
4<br />
CNTR TONE<br />
1<br />
CENTER SHARP1 CENTER SHARP2<br />
CENTER SOFT 1<br />
CENTER SOFT 2<br />
EFFECT<br />
7/P<br />
DSP EFFECT 1 DSP EFFECT 2 DSP EFFECT 3<br />
DSP EFFECT 5 DSP EFFECT 4<br />
As the number increases, <strong>JVC</strong> Theater Surround becomes<br />
stronger.
On the front panel:<br />
You can also use the buttons on the front panel to adjust the<br />
Surround modes. However, no test tone is available when using the<br />
buttons on the front panel. So, make adjustments while listening to<br />
the sound of the source played back.<br />
1. Press DSP MODE repeatedly until<br />
“THEATER” appears on the<br />
display.<br />
The Ÿ PRO LOGIC and DSP indicators also light up on the<br />
display.<br />
2. Adjust the speaker output levels.<br />
1) Press BALANCE/SURROUND<br />
ADJUST repeatedly until one of the<br />
indications appears on the display.<br />
“CENTER LEVEL”:<br />
To adjust the center speaker level.<br />
“REAR L LEVEL”:<br />
To adjust the left rear speaker level.<br />
“REAR R LEVEL”:<br />
To adjust the right rear speaker level.<br />
2) Turn MULTI JOG to adjust the<br />
selected speaker output level (from –10<br />
dB to +10 dB).<br />
3) Repeat 1) and 2) to adjust the other<br />
speaker output levels.<br />
3. Adjust the center tone.<br />
1) Press BALANCE/SURROUND<br />
ADJUST repeatedly until “CENTER<br />
TONE” appears on the display.<br />
The display changes to show the current<br />
setting.<br />
2) Turn MULTI JOG to select the center<br />
tone level you want.<br />
• As you turn it, the display changes to<br />
show the following:<br />
CENTER FLAT<br />
(Canceled)<br />
DSP MODE<br />
BALANCE/SURROUND<br />
ADJUST<br />
MULTI JOG<br />
BALANCE/SURROUND<br />
ADJUST<br />
MULTI JOG<br />
CENTER SHARP1 CENTER SHARP2<br />
CENTER SOFT 1<br />
CENTER SOFT 2<br />
To make the dialogue clearer, select “CENTER SHARP1”<br />
(little) or “CENTER SHARP2” (much).<br />
To make the dialogue softer, select “CENTER SOFT 1” (little)<br />
or “CENTER SOFT 2” (much).<br />
When “CENTER FLAT” is selected, no adjustment is applied.<br />
4. Adjust the effect level.<br />
1) Press BALANCE/SURROUND<br />
ADJUST repeatedly until “DSP<br />
EFFECT” appears on the display.<br />
The display changes to show the current<br />
setting.<br />
2) Turn MULTI JOG to select the effect<br />
level.<br />
As you turn it, the effect level changes as<br />
follows:<br />
As the number increases, <strong>JVC</strong> Theater Surround becomes<br />
stronger.<br />
Activating the DSP Modes<br />
You can use only one DSP mode at a time. When a DSP mode is<br />
activated, another DSP mode is canceled if in use.<br />
For Dolby Pro Logic, Dolby Digital, and DTS<br />
Digital Surround<br />
1. Press SURROUND ON/OFF so that the lamp on<br />
the front panel button lights up.<br />
• Each time you press the button, the Dolby/DTS Surround turns<br />
on and off alternately.<br />
SURROUND ON/OFF<br />
On the front panel<br />
2. Select and play a sound source.<br />
• To enjoy Dolby Pro Logic, play back a software encoded with<br />
Dolby Surround and labeled with DOLBY SURROUND mark.<br />
• To enjoy Dolby Digital, play back a software encoded with<br />
Dolby Digital and labeled with D I G I T A L<br />
SURROUND<br />
ON/OFF<br />
On the remote <strong>control</strong><br />
mark.<br />
• To enjoy DTS Digital Surround, play back a software encoded<br />
with DTS Digital Surround and labeled with mark.<br />
To cancel the Dolby/DTS Surround mode<br />
Press SURROUND ON/OFF again so that the lamp on the front<br />
panel button goes off. (“SURROUND OFF” appears on the display.)<br />
SURROUND ON/OFF<br />
SURROUND<br />
ON/OFF<br />
BALANCE/SURROUND<br />
ADJUST<br />
MULTI JOG<br />
DSP EFFECT 1 DSP EFFECT 2 DSP EFFECT 3<br />
DSP EFFECT 5 DSP EFFECT 4<br />
On the front panel On the remote <strong>control</strong><br />
29
For the other DSP modes<br />
On the front panel:<br />
1. Press DSP MODE repeatedly until<br />
the mode you want appears on the<br />
display.<br />
• Each time you press the button, the DSP<br />
modes change. (See page 24 for more<br />
details.)<br />
2. Select and play a sound source.<br />
• To enjoy 3D-PHONIC and <strong>JVC</strong> Theater Surround, play back a<br />
software encoded with Dolby Surround and labeled with<br />
DOLBY SURROUND mark.<br />
To cancel the DSP mode<br />
Press DSP MODE repeatedly until “DSP OFF”<br />
appears on the display.<br />
From the remote <strong>control</strong>:<br />
1. Press SURROUND MODE<br />
repeatedly until the DSP mode you<br />
want appears on the display.<br />
• Each time you press the button, the DSP<br />
modes change.<br />
2. Select and play a sound source.<br />
• To enjoy 3D-PHONIC and <strong>JVC</strong> Theater Surround, play back a<br />
software encoded with Dolby Surround and labeled with<br />
DOLBY SURROUND mark.<br />
To cancel the DSP mode<br />
Press SURROUND MODE repeatedly until<br />
“DSP OFF” appears on the display.<br />
30<br />
DSP MODE<br />
DSP MODE<br />
SURROUND<br />
MODE<br />
SURROUND<br />
MODE<br />
––––––––––––––– MEMO –––––––––––––––<br />
Use this column to write down your DSP mode adjustments for<br />
your future reference.
Using the DVD MULTI Playback Mode<br />
This <strong>receiver</strong> provides the DVD MULTI playback mode for reproducing the analog discrete output mode of the DVD<br />
player. Before playing back a DVD, refer also to the manual supplied with the DVD player.<br />
IMPORTANT:<br />
When using the remote <strong>control</strong>, check to see if its<br />
remote <strong>control</strong> mode selector is set to the correct<br />
position:<br />
To operate this <strong>receiver</strong>, set it to “AUDIO/TV/<br />
VCR.”<br />
Activating the DVD MULTI Playback Mode<br />
You can adjust the DVD MULTI playback mode while playing back<br />
a DVD using the analog discrete output mode on the DVD player.<br />
Once you have made adjustments, the <strong>receiver</strong> memorizes the<br />
adjustments until you change them. You also need to set the DVD<br />
player to the analog discrete output mode.<br />
Before you start, remember...<br />
• There is a time limit in doing the following steps. If the setting is<br />
canceled before you finish, start from step 1 again.<br />
On the front panel:<br />
1. Turn SOURCE SELECTOR until<br />
“DVD MULTI” appears on the<br />
display.<br />
Note:<br />
When you select “DVD MULTI” as the source to play, the DSP<br />
mode is canceled temporarily, and the SURROUND ON/OFF and<br />
DSP MODE buttons do not work.<br />
2. Select the analog discrete output mode on the<br />
DVD player, and start playing a DVD.<br />
• Refer to the manual supplied with the DVD player.<br />
If you need to make any adjustment, go to the following<br />
steps.<br />
3. Adjust the speaker output levels.<br />
1) Press BALANCE/SURROUND<br />
ADJUST repeatedly until one of the<br />
indications appears on the display.<br />
“CENTER LEVEL”:<br />
To adjust the center speaker level.<br />
“REAR L LEVEL”:<br />
To adjust the left rear speaker level.<br />
“REAR R LEVEL”:<br />
To adjust the right rear speaker level.<br />
2) Turn MULTI JOG to adjust the<br />
selected speaker output level (from –10<br />
dB to +10 dB).<br />
3) Repeat 1) and 2) to adjust the other<br />
speaker output levels.<br />
AUDIO/<br />
TV/VCR<br />
CATV/DBS<br />
SOURCE SELECTOR<br />
BALANCE/SURROUND<br />
ADJUST<br />
MULTI JOG<br />
4. Adjust the center tone.<br />
1) Press BALANCE/SURROUND<br />
ADJUST repeatedly until “CENTER<br />
TONE” appears on the display.<br />
The display changes to show the current<br />
setting.<br />
2) Turn MULTI JOG to select the center<br />
tone level you want.<br />
The center tone adjustment affects the<br />
mid-frequency range, which the human<br />
voice is mostly made up of.<br />
• As you turn it, the display changes to<br />
show the following:<br />
CENTER FLAT<br />
(Canceled)<br />
BALANCE/SURROUND<br />
ADJUST<br />
MULTI JOG<br />
CENTER SHARP1 CENTER SHARP2<br />
CENTER SOFT 1<br />
CENTER SOFT 2<br />
To make the dialogue clearer, select “CENTER SHARP1”<br />
(little) or “CENTER SHARP2” (much).<br />
To make the dialogue softer, select “CENTER SOFT 1” (little)<br />
or “CENTER SOFT 2” (much).<br />
When “CENTER FLAT” is selected, no adjustment is applied.<br />
31
From the remote <strong>control</strong>:<br />
1. Press DVD MULTI so that “DVD<br />
MULTI” appears on the display.<br />
Note:<br />
When you select “DVD MULTI” as the source to play, the DSP<br />
mode is canceled temporarily, and the SURROUND ON/OFF and<br />
SURROUND MODE buttons do not work.<br />
2. Select the analog discrete output mode on the<br />
DVD player, and start playing a DVD.<br />
• Refer to the manual supplied with the DVD player.<br />
If you need to make any adjustment, go to the following<br />
steps.<br />
3. Press SOUND.<br />
The 10 keys are activated for adjusting the sound.<br />
4. Adjust the speaker output levels.<br />
• To adjust the center speaker level, press CENTER –/+ (from –<br />
10 dB to +10 dB).<br />
• To adjust the left rear speaker level, press REAR•L –/+ (from<br />
–10 dB to +10 dB).<br />
• To adjust the right rear speaker level, press REAR•R –/+ (from<br />
–10 dB to +10 dB).<br />
5. Press CNTR TONE to select the<br />
center tone level you want.<br />
• Each time you press the button, the display<br />
changes to show the following:<br />
32<br />
CENTER<br />
2 3<br />
MENU<br />
CENTER FLAT<br />
(Canceled)<br />
REAR•L<br />
5 6<br />
ENTER<br />
To make the dialogue clearer, select “CENTER SHARP1”<br />
(little) or “CENTER SHARP2” (much).<br />
To make the dialogue softer, select “CENTER SOFT 1” (little)<br />
or “CENTER SOFT 2” (much).<br />
When “CENTER FLAT” is selected, no adjustment is applied.<br />
DVD MUILTI ––––––––––––––– MEMO –––––––––––––––<br />
SOUND<br />
REAR•R<br />
8 9<br />
CNTR TONE<br />
1<br />
CENTER SHARP1 CENTER SHARP2<br />
CENTER SOFT 1<br />
CENTER SOFT2<br />
Use this column to write down your DVD MULTI playback<br />
mode adjustments for your future reference.
Using the On-Screen Menus<br />
You can use the Menus on the TV screen to <strong>control</strong> the <strong>receiver</strong>.<br />
To use this function, you need to connect the TV to the MONITOR OUT jack on the rear panel (see page 7), and set the<br />
TV’s input mode to the proper position to which the <strong>receiver</strong> is connected.<br />
• When the TV’s input mode is incorrect; for example, a different <strong>video</strong> input or TV tuner mode is selected, you<br />
cannot show the Menus on the TV screen.<br />
Selecting Different Sources for Picture and<br />
On-Screen Operation buttons (on the remote <strong>control</strong>)<br />
Sound (Also see page 11)<br />
1. Press MENU.<br />
The MAIN MENU appears on the TV.<br />
• Pressing one of the % / fi / @ / # buttons also displays the<br />
TV AUDIO<br />
MAIN MENU.<br />
CATV/DBS VCR 1<br />
DVD DVD MUILTI CD TAPE/MD<br />
TV/DBS VIDEO PHONO FM/AM<br />
VCR 1 CDR/VCR 2 ANALOG/DIGITAL SLEEP<br />
SURROUND CNTR TONE<br />
ON/OFF<br />
CENTER<br />
1 2 3<br />
SURROUND TEST<br />
MENU<br />
REAR-L<br />
MODE 4 5 6<br />
ENTER<br />
CD-DISC EFFECT REAR-R<br />
7/P 8 9<br />
SOUND SEA MODE SUBWOOFER<br />
10 0 +10<br />
RETURN MODE FM 100+<br />
MENU<br />
EXIT<br />
TV VOL CHANNEL VOLUME<br />
TV/VIDEO VCR 1 TAPE/MD MUTING<br />
CONTROL<br />
/REW<br />
SET<br />
PLAY<br />
FF/<br />
DOWN TUNING<br />
UP<br />
REC STOP PAUSE<br />
RM-SRX8000J REMOTE CONTROL<br />
AUDIO/<br />
TV/VCR<br />
CATV/DBS<br />
TEXT<br />
DISPLAY<br />
MENU<br />
EXIT<br />
Selecting the Source to Play (Also see page 10)<br />
1. Press MENU.<br />
The MAIN MENU appears on the TV.<br />
• Pressing one of the % / fi / @ / # buttons also displays the<br />
MAIN MENU.<br />
Notes:<br />
• “INPUT” appears only when the digital input (DIGITAL IN)<br />
terminal setting have been correctly done for the digital source<br />
currently selected. (See page 16.)<br />
• The on-screen display will disappear if no operation is done for<br />
about 1 minute.<br />
2. Press % / fi to move to “SOURCE.”<br />
3. Press @ / # to select the source.<br />
4. When you finish, press EXIT.<br />
The menu disappears from the TV.<br />
SET<br />
TEXT<br />
DISPLAY<br />
Shows the buttons you<br />
can use on the current<br />
menu.<br />
In this case, use % / fi to<br />
move up and down,<br />
and @ / # to select,<br />
adjust or set the item.<br />
2. Press % / fi to move<br />
to “VISUAL.”<br />
3. Press @ / # to select a<br />
different <strong>video</strong> source.<br />
4. When you finish, press EXIT.<br />
The menu disappears from the TV.<br />
Activating the DSP Modes (Also see page 29)<br />
1. Press MENU.<br />
The MAIN MENU appears on the TV.<br />
• Pressing one of the % / fi / @ / # buttons also displays the<br />
MAIN MENU.<br />
2. Press % / fi to move<br />
to “MODE.”<br />
3. Press @ / # to select the<br />
DSP mode you want to<br />
use.<br />
4. When you finish, press EXIT.<br />
The menu disappears from the TV.<br />
Selecting the Analog or Digital Input Mode<br />
(Also see page 16)<br />
This selection is only possible when the digital input (DIGITAL IN)<br />
terminal setting have been correctly done for the digital source<br />
currently selected.<br />
1. Press MENU.<br />
The MAIN MENU appears on the TV.<br />
• Pressing one of the % / fi / @ / # buttons also displays the<br />
MAIN MENU.<br />
2. Press % / fi to move<br />
to “INPUT.”<br />
3. Press @ / # to select the<br />
digital or analog input<br />
you want.<br />
For details, see page 16.<br />
4. When you finish, press EXIT.<br />
The menu disappears from the TV.<br />
33
Adjusting the Front Speaker Output Balance<br />
(Also see page 13)<br />
1. Press MENU.<br />
The MAIN MENU appears on the TV.<br />
• Pressing one of the % / fi / @ / # buttons also displays the<br />
MAIN MENU.<br />
2. Press % / fi to move to “SOUND<br />
CONTROL,” then press @ / #.<br />
The SOUND CONTROL menu appears.<br />
3. Press % / fi to move<br />
to “BAL.” (Balance).<br />
4. Press @ / # to adjust<br />
the balance.<br />
5. When you finish, press EXIT repeatedly until the<br />
menu disappears from the TV.<br />
Reinforcing the Bass<br />
(Also see page 12)<br />
1. Press MENU.<br />
The MAIN MENU appears on the TV.<br />
• Pressing one of the % / fi / @ / # buttons also displays the<br />
MAIN MENU.<br />
2. Press % / fi to move to “SOUND<br />
CONTROL,” then press @ / #.<br />
The SOUND CONTROL menu appears.<br />
3. Press % / fi to move<br />
to “BASS BOOST.”<br />
4. Press @ / # to turn the<br />
bass boost function<br />
“ON” or “OFF.”<br />
5. When you finish, press EXIT repeatedly until the<br />
menu disappears from the TV.<br />
Attenuating the Input Signal<br />
(Also see page 12)<br />
1. Press MENU.<br />
The MAIN MENU appears on the TV.<br />
• Pressing one of the % / fi / @ / # buttons also displays the<br />
MAIN MENU.<br />
2. Press % / fi to move to “SOUND<br />
CONTROL,” then press @ / #.<br />
The SOUND CONTROL menu appears.<br />
3. Press % / fi to move<br />
to “INPUT ATT.”<br />
4. Press @ / # to turn the<br />
Input Attenuator mode<br />
“ATT ON” or<br />
“NORMAL.”<br />
5. When you finish, press EXIT repeatedly until the<br />
menu disappears from the TV.<br />
34<br />
Adjusting the Subwoofer Output Level<br />
(Also see page 12)<br />
1. Press MENU.<br />
The MAIN MENU appears on the TV.<br />
• Pressing one of the % / fi / @ / # buttons also displays the<br />
MAIN MENU.<br />
2. Press % / fi to move to “SOUND<br />
CONTROL,” then press @ / #.<br />
The SOUND CONTROL menu appears.<br />
3. Press % / fi to move<br />
to “SUBWFR LEVEL.”<br />
4. Press @ / # to adjust<br />
the subwoofer output<br />
level.<br />
5. When you finish, press EXIT repeatedly until the<br />
menu disappears from the TV.<br />
Adjusting the DSP Modes<br />
(Also see pages 25 – 29)<br />
1. Press MENU.<br />
The MAIN MENU appears on the TV.<br />
• Pressing one of the % / fi / @ / # buttons also displays the<br />
MAIN MENU.<br />
2. Press % / fi to move to “MODE.”<br />
3. Press @ / # to select the<br />
DSP mode you want to<br />
adjust.<br />
• In this example,<br />
“THEATER” is selected.<br />
4. Press % / fi to move<br />
to “SOUND<br />
CONTROL,” then<br />
press @ / #.<br />
The SOUND CONTROL<br />
menu appears.<br />
5. Press % / fi to move<br />
to “SURROUND<br />
LEVEL,” then press<br />
@ / #.<br />
The SURROUND LEVEL<br />
menu appears.<br />
6. Press % / fi to move to the item you want to<br />
set or adjust, then press @ / #.<br />
On these adjustment menus, you can do the following:<br />
For 3D-PHONIC (3D ACTION, 3D THEATER):<br />
“DSP EFFECT”: Select the effect level.
For DAP (LIVE CLUB, DANCE CLUB, HALL, PAVILION):<br />
“REAR L LEVEL”: Adjust the left rear speaker output<br />
level. *<br />
“REAR R LEVEL”: Adjust the right rear speaker output<br />
level. *<br />
“DSP EFFECT”: Select the effect level.<br />
For Dolby Pro Logic:<br />
“TEST TONE”: Output a test tone.<br />
“CENTER LEVEL”: Adjust the center speaker output<br />
level. **<br />
“REAR L LEVEL”: Adjust the left rear speaker output<br />
level. *<br />
“REAR R LEVEL”: Adjust the right rear speaker output<br />
level. *<br />
“CENTER TONE”: Select the center tone level. **<br />
For Dolby Digital and DTS Digital Surround:<br />
“TEST TONE”: Output a test tone.<br />
“CENTER LEVEL”: Adjust the center speaker output<br />
level. **<br />
“REAR L LEVEL”: Adjust the left rear speaker output<br />
level. *<br />
“REAR R LEVEL”: Adjust the right rear speaker output<br />
level. *<br />
“CENTER TONE”: Select the center tone level. **<br />
For <strong>JVC</strong> Theater Surround:<br />
“TEST TONE”: Output a test tone.<br />
“CENTER LEVEL”: Adjust the center speaker output<br />
level. **<br />
“REAR L LEVEL”: Adjust the left rear speaker output<br />
level. *<br />
“REAR R LEVEL”: Adjust the right rear speaker output<br />
level. *<br />
“CENTER TONE”: Select the center tone level. **<br />
“DSP EFFECT”: Select the effect level.<br />
Notes:<br />
* Not displayed when “REAR SPK” is set to “NONE” (see page<br />
14).<br />
**Not displayed when “CENTER SPK” is set to “NONE” (see<br />
page 14).<br />
7. When you finish, press EXIT repeatedly until the<br />
menu disappears from the TV.<br />
Adjusting the DVD MULTI Playback Mode<br />
(Also see page 31)<br />
1. Press MENU.<br />
The MAIN MENU appears on the TV.<br />
• Pressing one of the % / fi / @ / # buttons also displays the<br />
MAIN MENU.<br />
2. Press % / fi to move to “SOURCE.”<br />
3. Press @ / # to select “DVD MULTI.”<br />
4. Press % / fi to move to “SOUND<br />
CONTROL,” then press @ / #.<br />
The SOUND CONTROL menu appears.<br />
5. Press % / fi to move<br />
to “SURROUND<br />
LEVEL,” then press<br />
@ / #.<br />
The SURROUND LEVEL<br />
menu appears.<br />
6. Press % / fi to move to the item you want to<br />
set or adjust, then press @ / #.<br />
On this adjustment menu, you can do the following:<br />
“CENTER LEVEL”: Adjust the center speaker output level.<br />
“REAR L LEVEL”: Adjust the left rear speaker output<br />
level.<br />
“REAR R LEVEL”: Adjust the right rear speaker output<br />
level.<br />
“CENTER TONE”: Select the center tone level.<br />
7. When you finish, press EXIT repeatedly until the<br />
menu disappears from the TV.<br />
Selecting Your Favorite SEA Mode<br />
(Also see page 21)<br />
1. Press MENU.<br />
The MAIN MENU appears on the TV.<br />
• Pressing one of the % / fi / @ / # buttons also displays the<br />
MAIN MENU.<br />
2. Press % / fi to move to “SOUND<br />
CONTROL,” then press @ / #.<br />
The SOUND CONTROL menu appears.<br />
3. Press % / fi to move<br />
to “SEA,” then press @<br />
/ #.<br />
The SEA menu appears.<br />
4. Press % / fi to move<br />
to “SEA MODE.”<br />
5. Press @ / # to select the SEA mode you want.<br />
6. When you finish, press EXIT repeatedly until the<br />
menu disappears from the TV.<br />
Creating Your Own SEA Mode<br />
(Also see page 21)<br />
1. Press MENU.<br />
The MAIN MENU appears on the TV.<br />
• Pressing one of the % / fi / @ / # buttons also displays the<br />
MAIN MENU.<br />
2. Press % / fi to move to “SOUND<br />
CONTROL,” then press @ / #.<br />
The SOUND CONTROL menu appears.<br />
3. Press % / fi to move to “SEA,” then press<br />
@ / #.<br />
The SEA menu appears.<br />
35
4. Press % / fi to move<br />
to “SEA ADJUST.”<br />
The SEA ADJUST menu<br />
appears.<br />
5. Press % / fi / @ / # to<br />
adjust the SEA mode as<br />
you want.<br />
@ / # : Select the frequency ranges.<br />
% / fi : Adjust the frequency levels.<br />
6. Press SET to store the setting into the SEA<br />
USERMODE.<br />
• If you press EXIT, without pressing SET in this step, you can<br />
return to the SEA menu. (The adjustment you have made is<br />
active but not stored.)<br />
7. When you finish, press EXIT repeatedly until the<br />
menu disappears from the TV.<br />
Setting the Basic Setting Items (Also see<br />
pages 13 – 17)<br />
1. Press MENU.<br />
The MAIN MENU appears on the TV.<br />
• Pressing one of the % / fi / @ / # buttons also displays the<br />
MAIN MENU.<br />
2. Press % / fi to move<br />
to “SETTING,” then<br />
press @ / #.<br />
The SETTING 1 or SETTING<br />
2 menu appears.<br />
3. Press % / fi to move<br />
to the item you want to<br />
set or adjust, then press<br />
@ / #.<br />
• To go to the SETTING 2<br />
menu, move to “NEXT<br />
PAGE,” then press @ / #.<br />
• To go back to the SETTING<br />
1 menu, move to<br />
“PREVIOUS PAGE,” then<br />
press @ / #.<br />
On the SETTING 1 and 2 menus, you can do the following:<br />
36<br />
“SUBWOOFER”: Set the subwoofer information (see<br />
page 14).<br />
“FRONT SPK”: Set the front speaker information (see<br />
page 14).<br />
“CENTER SPK”: Set the center speaker information (see<br />
page 14).<br />
“REAR SPK”: Set the rear speaker information (see<br />
page 14).<br />
“CNTR DELAY”: Adjust the delay time of the center<br />
speaker output (see page 14). *<br />
“REAR DELAY”: Adjust the delay time of the rear<br />
speaker output (see page 14). **<br />
“CROSSOVER”: Set the crossover frequency<br />
(see page 15).<br />
“LFE ATT.”: Set the low frequency effect attenuator<br />
level (see page 15).<br />
“COMP.”: Set the dynamic range compression<br />
(see page 15).<br />
“COAX. IN”: Set the digital input terminal 1<br />
(see page 16).<br />
“OPT. IN”: Set the digital input terminal 2/3/4<br />
(see page 16).<br />
“FL DISP.”: Shows the disc text information on the<br />
display (see page 17).<br />
Notes:<br />
* Not adjustable when “CENTER SPK” is set to “NONE” (see<br />
page 14).<br />
**Not adjustable when “REAR SPK” is set to “NONE” (see page<br />
14).<br />
4. When you finish, press EXIT repeatedly until the<br />
menu disappears from the TV.<br />
Operating the Tuner (Also see pages 19 and 20)<br />
1. Press MENU.<br />
The MAIN MENU appears on the TV.<br />
• Pressing one of the % / fi / @ / # buttons also displays the<br />
MAIN MENU.<br />
2. Press % / fi to move<br />
to “TUNER<br />
CONTROL,” then<br />
press @ / #.<br />
The TUNER CONTROL menu<br />
appears.<br />
3. Press % / fi to move to the item you want to<br />
set or adjust, then press @ / #.<br />
On the TUNER CONTROL menu, you can do the following:<br />
“PRESET CH”: Select a preset channel station.<br />
“BAND”: Select the band.<br />
“FREQUENCY”: Tune in a station manually.<br />
“FM MODE”: Select the FM reception mode.*<br />
“PRESET MEMORY”: See “Storing the Preset Stations” on<br />
the next page.<br />
Note:<br />
* Not displayed when an AM station is selected.<br />
4. When you finish, press EXIT repeatedly until the<br />
menu disappears from the TV.
Storing the Preset Stations (Also see page 19)<br />
1. Press MENU.<br />
The MAIN MENU appears on the TV.<br />
• Pressing one of the % / fi / @ / # buttons also displays the<br />
MAIN MENU.<br />
2. Press % / fi to move to “TUNER<br />
CONTROL,” then press @ / #.<br />
The TUNER CONTROL menu appears.<br />
3. Tune into a station on the TUNER CONTROL<br />
menu, referring to “Operating the Tuner” on the<br />
previous page.<br />
4. Press % / fi to move<br />
to “PRESET<br />
MEMORY,” then press<br />
@ / #.<br />
The PRESET MEMORY<br />
menu appears.<br />
5. Press @ / # to select a<br />
preset station number<br />
you want.<br />
6. Press SET to store the setting.<br />
7. When you finish, press EXIT repeatedly until the<br />
menu disappears from the TV.<br />
Assigning Names to Preset Stations<br />
(Also see page 20)<br />
1. Press MENU.<br />
The MAIN MENU appears on the TV.<br />
• Pressing one of the % / fi / @ / # buttons also displays the<br />
MAIN MENU.<br />
2. Press % / fi to move to “TUNER<br />
CONTROL,” then press @ / #.<br />
The TUNER CONTROL menu appears.<br />
3. Press % / fi to move to “PRESET CH.”<br />
4. Press @ / # to select a preset station.<br />
5. Press % / fi to move<br />
to “PRESET<br />
MEMORY,” then press<br />
@ / #.<br />
The PRESET MEMORY<br />
menu appears.<br />
6. Press % / fi to move<br />
to “PRESET NAME,”<br />
then press SET.<br />
The character entry screen<br />
appears.<br />
7. Press % / fi / @ / # to<br />
move in front of a<br />
character you want.<br />
You can also select the following:<br />
: To enter space<br />
: To erase the character<br />
: To go back to the previous character position or go<br />
to the next character position<br />
8. Press SET to enter the<br />
selected character.<br />
9. Repeat steps 7 and 8 to<br />
enter up to four<br />
characters.<br />
10.Press % / fi / @ / # to<br />
move to “PRESET<br />
NAME,” then press<br />
SET to store the setting.<br />
The TUNER CONTROL menu<br />
appears again.<br />
11.When you finish, press EXIT repeatedly until the<br />
menu disappears from the TV.<br />
37
38<br />
COMPU LINK Remote Control System<br />
The COMPU LINK remote <strong>control</strong> system allows you to operate <strong>JVC</strong> <strong>audio</strong> components through the remote sensor on<br />
the <strong>receiver</strong>.<br />
To use this remote <strong>control</strong> system, you need to connect <strong>JVC</strong> <strong>audio</strong><br />
components through the COMPU LINK jacks (see below) in<br />
addition to the connections using cables with RCA pin plugs (see<br />
pages 5 and 6).<br />
• Make sure that the AC power cords of these components are<br />
unplugged before connection. Plug the AC power cords only after<br />
all connections are complete.<br />
COMPU LINK – 4<br />
(SYNCHRO)<br />
CD player<br />
CD recorder<br />
Cassette deck<br />
or<br />
MD recorder<br />
Turntable<br />
Notes:<br />
• There are four versions of COMPU LINK remote <strong>control</strong> system.<br />
This <strong>receiver</strong> is equipped with the fourth version — COMPU LINK-<br />
4. This version is added systematic operations with the CD recorder<br />
to the previous version — COMPU LINK-3.<br />
• If your <strong>audio</strong> component has two COMPU LINK jacks, you can use<br />
either one. If it has only one COMPU LINK jack, connect it so that it<br />
is the last item in the series of components. (For example, the<br />
turntable or CD player in the diagram above.)<br />
• To operate the cassette deck or MD recorder using the COMPU<br />
LINK remote <strong>control</strong> system, set the source name correctly. (See<br />
page 13.)<br />
• Refer also to the manuals supplied with your <strong>audio</strong> components.<br />
This remote <strong>control</strong> system allows you to use four functions listed<br />
below.<br />
Remote Control through the Remote Sensor on the<br />
Receiver<br />
You can <strong>control</strong> the connected <strong>audio</strong> components through the remote<br />
sensor on the <strong>receiver</strong> using this remote <strong>control</strong>. Aim the remote<br />
<strong>control</strong> directly at the remote sensor on the <strong>receiver</strong>. For details, see<br />
pages 46 and 47.<br />
Automatic Source Selection<br />
When you press the play (3) button on a connected component or<br />
on its own remote <strong>control</strong>, the <strong>receiver</strong> automatically turns on and<br />
changes the source to the component. On the other hand, if you<br />
select a new source on the <strong>receiver</strong> or on the remote <strong>control</strong>, the<br />
selected component begins playing immediately.<br />
In both cases, the previously selected source continues playing<br />
without sound for a few seconds.<br />
Automatic Power On/Off (Standby): only possible<br />
with the COMPU LINK-3 and COMPU LINK--4<br />
connection<br />
The connected components turn on and off (standby) along with the<br />
<strong>receiver</strong>.<br />
When you turn on the <strong>receiver</strong>, one of the connected component will<br />
turn on automatically, depending on which component has been<br />
previously selected.<br />
When you turn off the <strong>receiver</strong>, the connected components will turn<br />
off (standby).<br />
Synchronized Recording<br />
Synchronized recording means the cassette deck (or MD recorder)<br />
starts recording as soon as a CD or a record begins playing.<br />
• When using a CD recorder for synchronized recording, refer to the<br />
manual supplied with it.<br />
To use synchronized recording, follow these steps:<br />
1. Put a tape in the cassette deck (or an MD in the<br />
MD recorder), and a disc in the CD player (or a<br />
record on the turntable).<br />
2. Press the record () button and the pause (8)<br />
button on the cassette deck (or MD recorder) at<br />
the same time.<br />
This puts the cassette deck (or MD recorder) into recording<br />
pause.<br />
If you do not press the record () button and pause (8) button at<br />
the same time, the synchronized recording feature will not<br />
operate.<br />
3. Press the play (3) button on the CD player or on<br />
the turntable.<br />
The source changes on the <strong>receiver</strong>, and as soon as play starts,<br />
the cassette deck (or MD recorder) starts recording. When the<br />
play ends, the cassette deck (or MD recorder) enters recording<br />
pause, and stops about 4 seconds later.<br />
Notes:<br />
• During synchronized recording, the selected source cannot be<br />
changed.<br />
• If the power of any component is shut off during synchronized<br />
recording, the COMPU LINK remote <strong>control</strong> system may not<br />
operate properly. In this case, you must start again from the<br />
beginning.
TEXT COMPU LINK Remote Control System<br />
The TEXT COMPU LINK remote <strong>control</strong> system has been newly developed to deal with the disc information recorded in<br />
the CD Text* and MDs. Using these information in the discs, you can operate the CD player or MD recorder equipped<br />
with the TEXT COMPU LINK remote <strong>control</strong> system through the <strong>receiver</strong>.<br />
CONNECTIONS:<br />
To use this remote <strong>control</strong> system, you need to connect the CD<br />
player and/or MD recorder you want to operate, following the<br />
procedures below.<br />
1. If you have already plugged your CD player, MD<br />
recorder, and this <strong>receiver</strong> into the AC outlets,<br />
unplug their AC power cords first.<br />
2. Connect your CD player, MD recorder, and this<br />
<strong>receiver</strong> as follows, through the COMPU LINK<br />
jacks and TEXT COMPU LINK jacks.<br />
1) COMPU LINK jacks: Use the cables with the monaural<br />
mini-plugs (not supplied with this <strong>receiver</strong>).<br />
CD player<br />
MD recorder<br />
COMPU LINK – 4<br />
(SYNCHRO)<br />
2) TEXT COMPU LINK jacks: Use the cables with the<br />
stereo mini-plugs (not supplied with this <strong>receiver</strong>).<br />
CD player<br />
MD recorder<br />
TEXT<br />
COMPU LINK<br />
3. Connect your CD player, MD recorder and this<br />
<strong>receiver</strong>, using the cables with RCA pin plugs (see<br />
pages 5 and 6).<br />
4. Plug the AC power cords of these components<br />
above into the AC outlets.<br />
5. When turning on these components for the first<br />
time, turn on the connected components first,<br />
then turn on this <strong>receiver</strong>.<br />
FUNCTIONS:<br />
This remote <strong>control</strong> system allows you to use the functions listed<br />
below.<br />
Displaying the Disc Information on the TV screen<br />
Disc information such as its performer and disc title (and track titles<br />
only when a CD Text is selected) is shown on the TV screen.<br />
Disc Search: Only for CD Player<br />
This remote <strong>control</strong> system can allow you to search discs by the<br />
performer, disc title, and music genre.<br />
With this disc search, you can easily find the disc you want to play.<br />
Disc Title Input:<br />
If your CD player or MD recorder has the disc memory function,<br />
you can input the following information about the normal <strong>audio</strong> CDs<br />
or MDs on the TV screen.<br />
• For CDs: Performer, disc title, and music genre<br />
• For MDs: Disc title and song titles<br />
*What is a CD Text?<br />
In a CD Text, some information about the disc (its disc title, performer,<br />
composer, arranger, etc.) is recorded.<br />
Notes:<br />
• If your <strong>audio</strong> component has two COMPU LINK jacks, you can use<br />
either one. If it has only one COMPU LINK jack, connect it so that it<br />
is the last item in the series of components. (For example, the CD<br />
player in the diagram to the left.)<br />
• If your <strong>audio</strong> component has two TEXT COMPU LINK jacks, you<br />
can use either one. If it has only one TEXT COMPU LINK jack,<br />
connect it so that it is the last item in the series of components. (For<br />
example, the CD player in the diagram to the left.)<br />
• “TEXT COMPULINK SOURCE NOT CONNECTED” appears on the<br />
display in the following cases:<br />
– When the connections explained to the left are not correctly done.<br />
– When you try to use the TEXT COMPULINK function a few<br />
seconds after you turn on the connected equipment. This is not a<br />
malfunction of the units.<br />
• Refer also to the manuals supplied with your CD player or MD<br />
recorder.<br />
IMPORTANT:<br />
If you turn on the <strong>receiver</strong> before turning on the other components<br />
after connecting the components, the TEXT COMPU LINK remote<br />
<strong>control</strong> system does not work correctly.<br />
If this happens:<br />
1. Turn off all the components including this <strong>receiver</strong>.<br />
2. Turn on the connected components.<br />
3. Turn on this <strong>receiver</strong>.<br />
39
40<br />
OPERATIONS<br />
To use this remote <strong>control</strong> system, you need to connect the TV to the<br />
MONITOR OUT jack on the rear panel (see page 7), and set the<br />
TV’s input mode to the proper position to which the <strong>receiver</strong> is<br />
connected. Make sure you have connected the CD player or<br />
MD recorder equipped with the TEXT COMPU LINK<br />
remote <strong>control</strong> system. If not, you cannot use the<br />
following functions.<br />
On-Screen Operation buttons (on the remote <strong>control</strong>)<br />
TV VOL CHANNEL VOLUME<br />
TV/VIDEO VCR 1 TAPE MUTING<br />
CONTROL<br />
Showing the Disc Information on the TV<br />
Screen<br />
Press TEXT DISPLAY while “CD” or “MD” is<br />
selected as the source.<br />
The Disc Information screen appears on the TV.<br />
1<br />
2<br />
3<br />
4<br />
5<br />
/REW<br />
PLAY<br />
STANDBY ON<br />
TV/CATV/DBS VCR 1<br />
POWER POWER<br />
DVD DVD MUILTI CD TAPE/MD<br />
TV/DBS VIDEO PHONO FM/AM<br />
VCR 1 CDR/VCR 2 ANALOG/DIGITAL SLEEP<br />
SURROUND CNTR TONE<br />
ON/OFF<br />
CNTR<br />
1 2 3<br />
SURROUND TEST<br />
MENU<br />
REAR-L<br />
MODE 4 5 6<br />
ENTER<br />
DISC EFFECT REAR-R<br />
7/P 8 9<br />
SOUND SEA MODE SUBWOOFER<br />
10 0 +10<br />
RETURN FM MODE/MUTING 100+<br />
MENU<br />
EXIT<br />
SET<br />
FF/<br />
DOWN TUNING<br />
UP<br />
REC STOP PAUSE<br />
RM-SRX8000J REMOTE CONTROL<br />
AUDIO/<br />
TV/VCR<br />
CATV/DBS<br />
TEXT<br />
DISPLAY<br />
MENU<br />
EXIT<br />
SET<br />
TEXT<br />
DISPLAY<br />
6<br />
7<br />
8<br />
9<br />
1 Source name: CD or MD<br />
2 Select or , then press SET to change the disc.<br />
3 Track numbers and track titles.<br />
• The current playing (selected) track is indicated in<br />
yellow.<br />
• When you move to a track number, you can<br />
change the track information by pressing @ / #. Each<br />
time you press the button, track information alternates<br />
between its track title and its performer. (You can also<br />
start playing the track by pressing SET.)<br />
4 Select this (move in front), then press SET to go to<br />
the DISC SEARCH screen (see page 41).<br />
5 Select this (move in front), then press SET to go to<br />
the TITLE INPUT screen (see page 42).<br />
6 This appears only when a CD Text is selected.<br />
7 Disc information such as the disc title, performer, and<br />
music genre.<br />
When this is selected ( in front), you can change the<br />
disc information by pressing @ / #. Each time you press<br />
the button, disc information (see “Note on 7”) changes.<br />
8 Select or , then press SET to change the track.<br />
9 Usable buttons and their functions for the current<br />
selection.<br />
Indication here will be changed according to what is<br />
currently selected ( in front) on the screen. See “Note<br />
on 9.”<br />
Note on 7:<br />
The following information will appear on the display:<br />
• For CD Texts — Disc title, Performer, Genre, Song writer,<br />
Composer, Arranger, Message<br />
Only recorded information will be shown. If there is no data, “NO<br />
DATA” will appear.<br />
• For MDs — Disc title<br />
If there is no data, “NO DATA” will appear.<br />
Note on 9:<br />
For example, the SET button will be used to start play (PLAY), to go to<br />
the next screen (ENTER), and to determine the selection (ENTER).<br />
To exit from the Disc information screen:<br />
Press EXIT.<br />
Notes:<br />
• The on-screen display will disappear in the following cases:<br />
– if no operation is done for about 10 minutes.<br />
– if you do any operation other than explained in this section.<br />
• To <strong>control</strong> the MD recorder using the TEXT COMPU LINK remote<br />
<strong>control</strong> system, you have to change the source name shown on the<br />
display from “TAPE” to “MD.” (See page 13.)<br />
• Some special characters and marks cannot be displayed correctly.
Searching for a Disc (Only for the CD player)<br />
Search for a disc by its performer:<br />
1. Press TEXT DISPLAY while “CD” is selected as<br />
the source.<br />
The Disc Information screen appears on the TV.<br />
2. Press % / fi to move<br />
to “SEARCH,” then<br />
press SET.<br />
The DISC SEARCH screen<br />
appears .<br />
3. Press % / fi to move<br />
to “PERFORMER”,<br />
then press SET.<br />
The PERFORMER SEARCH<br />
screen appears.<br />
4. Press % / fi / @ / # to move in front of the<br />
first character of the performer you want to<br />
search, then press SET.<br />
To correct the incorrect entry, press % / fi / @ / # to move<br />
in front of the correct character, then press SET.<br />
Note:<br />
Symbols such as @, # or $ cannot be available for search.<br />
5. Press SET again.<br />
Disc search starts, then the<br />
SEARCH RESULT screen,<br />
showing the performers,<br />
appears.<br />
6. On the SEARCH RESULT screen, you can do the<br />
following:<br />
• Changing the indication of the disc information: Press % /<br />
fi to move to a searched disc, then press @ / #. Each time<br />
you press @ / #, the disc information alternates between its<br />
performer and its disc title.<br />
• Starting a disc play and going to the Disc Information<br />
screen (see page 40): Press % / fi to move to a searched<br />
disc, then press SET.<br />
• Showing unseen disc information (if more than 5 discs are<br />
listed as a result of the search): Press % / fi until they<br />
appear.<br />
• Going back to the PERFORMER SEARCH screen: Press<br />
EXIT.<br />
Search for a disc by its disc title:<br />
1. Press TEXT DISPLAY while “CD” is selected as<br />
the source.<br />
The Disc Information screen appears on the TV.<br />
2. Press % / fi to move<br />
to “SEARCH,” then<br />
press SET.<br />
The DISC SEARCH screen<br />
appears.<br />
3. Press % / fi to move<br />
to “DISC TITLE,<br />
then press SET.<br />
The DISC TITLE SEARCH<br />
screen appears.<br />
4. Press % / fi / @ / # to move in front of the<br />
first character of the disc title you want to search,<br />
then press SET.<br />
To correct the incorrect entry, press % / fi / @ / # to move<br />
in front of the correct character, then press SET.<br />
Note:<br />
Symbols such as @, # or $ cannot be available for search.<br />
5. Press SET again.<br />
Disc search starts, then the<br />
SEARCH RESULT screen,<br />
showing the disc titles,<br />
appears.<br />
6. On the SEARCH RESULT screen, you can do the<br />
following:<br />
• Changing the indication of the disc information: Press % /<br />
fi to move to a searched disc, then press @ / #. Each time<br />
you press @ / #, the disc information alternates between its<br />
disc title and its performer.<br />
• Starting a disc play and going to the Disc Information<br />
screen (see page 40): Press % / fi to move to a searched<br />
disc, then press SET.<br />
• Showing unseen disc information (if more than 5 discs are<br />
listed as a result of the search): Press % / fi until they<br />
appear.<br />
• Going back to the DISC TITLE SEARCH screen: Press<br />
EXIT.<br />
41
Search for a disc by its genre:<br />
1. Press TEXT DISPLAY while “CD” is selected as<br />
the source.<br />
The Disc Information screen appears on the TV.<br />
2. Press % / fi to move<br />
to “SEARCH,”<br />
then press SET.<br />
The DISC SEARCH screen<br />
appears.<br />
3. Press % / fi to move<br />
to “GENRE”, then<br />
press SET.<br />
The GENRE SEARCH<br />
screen appears.<br />
4. Press % / fi to move to the genre you want to<br />
search, then press SET.<br />
To show the unseen genres, press % / fi until they appear.<br />
Disc search starts, then the<br />
SEARCH RESULT screen,<br />
showing the disc titles,<br />
appears.<br />
5. On the SEARCH<br />
RESULT screen, you<br />
can do the following:<br />
• Changing the indication of the disc information: Press % /<br />
fi to move to a searched disc, then press @ / #. Each<br />
time you press @ / #, the disc information alternates<br />
between its disc title and its performer.<br />
• Starting a disc play and going to the Disc Information<br />
screen (see page 40): Press % / fi to move to a searched<br />
disc, then press SET.<br />
• Showing unseen disc information (if more than 5 discs are<br />
listed as a result of the search): Press % / fi until they<br />
appear.<br />
• Going back to the GENRE SEARCH screen: Press EXIT.<br />
42<br />
Entering the Disc Information<br />
For the CD Player with the disc memory function:<br />
You can use the disc memory function through this <strong>receiver</strong>.<br />
The disc information (its performer, disc title, and music genre) of<br />
normal <strong>audio</strong> CDs will be stored into the memory built in the CD<br />
player.<br />
For the disc memory function, refer to the manual supplied with your<br />
CD player.<br />
• The performer, disc title, and music genre information are usually<br />
recorded in a CD Text. However, if a CD Text has no genre<br />
information recorded in the disc itself, you can input its music<br />
genre by yourself.<br />
Note:<br />
You can enter the TITLE INPUT screens for a CD Text and input its<br />
titles. However, you cannot store the titles you have input for a CD<br />
Text.<br />
Example: Entering the following information for Disc 1<br />
Performer: “MICHAEL”<br />
Disc title: “MY FAVORITE”<br />
1. Press TEXT DISPLAY while “CD” is selected as<br />
the source.<br />
The Disc Information screen appears on the TV.<br />
2. Press % / fi to move<br />
to “TITLE INPUT,”<br />
then press SET.<br />
The TITLE INPUT:<br />
PERFORMER screen appears.<br />
3. Press % / fi / @ / # to move in front of a<br />
character you want, then press SET to enter the<br />
character.<br />
• If the current CD is a CD Text, go to step 5 without entering the<br />
performer.<br />
To use the lower case letters, press % / fi / @ / # to move<br />
to , then press SET.<br />
To use the upper case letters again, press % /<br />
fi / @ / # to move to , then press SET.
4. Repeat step 3 until you<br />
finish putting a<br />
performer name (up to<br />
32 characters).<br />
To insert a space, press % / fi<br />
/ @ / # to move to<br />
, then press SET.<br />
To correct an incorrect character:<br />
1) Press % / fi / @ / # to move to + or =, then press<br />
SET until the incorrect character is selected.<br />
2) Press % / fi / @ / # to move<br />
to erase the character.<br />
to , then press SET<br />
3) Press % / fi / @ / # to move in front of the correct<br />
character, then press SET to enter the correct character.<br />
5. Press % / fi / @ / # to<br />
move to “DISC 1:<br />
MICHAEL (in this<br />
example),” then press<br />
SET.<br />
The TITLE INPUT: DISC<br />
TITLE screen appears.<br />
6. Enter the disc title,<br />
referring to steps 3 and<br />
4.<br />
• If the current CD is a CD<br />
Text, go to the next step<br />
without entering the disc<br />
title.<br />
7. Press % / fi / @ / # to<br />
move to “DISC 1:<br />
MY FAVORITE (in this<br />
example),” then press<br />
SET.<br />
The TITLE INPUT: DISC 1<br />
GENRE screen appears.<br />
8. Press % / fi to move to the genre you want,<br />
then press SET.<br />
The Disc Information screen appears again.<br />
To show the unseen genres, press % / fi until they appear.<br />
For the MD recorder:<br />
You can write the disc information (disc title and song titles) into the<br />
disc. You can only write the song title for the song currently<br />
selected.<br />
• If you have the CD-MD combination deck, you can also enter the<br />
disc information (its performer, disc title, and its music genre) of<br />
normal <strong>audio</strong> CDs into the memory built in the CD-MD<br />
combination deck. (To do this, follow the procedure of “For the<br />
CD Player with the disc memory function” to the left.)<br />
• If you change the disc or song title with more than 32 characters,<br />
the characters following 32nd will be erased from the title.<br />
1. Press TEXT DISPLAY while “MD” is selected as<br />
the source.<br />
The Disc Information screen appears on the TV.<br />
2. Press % / fi to move<br />
to “TITLE INPUT,”<br />
then press SET.<br />
The DISC TITLE INPUT<br />
screen appears.<br />
3. Enter the title, referring<br />
to steps 3 and 4 of “For<br />
the CD Player with the<br />
disc memory function”<br />
to the left.<br />
• You can enter up to 32<br />
characters for the disc title.<br />
4. Press % / fi / @ / # to<br />
move to the disc title<br />
you have just entered,<br />
then press SET.<br />
The disc title is stored into the<br />
memory, and the SONG<br />
TITLE INPUT screen for the<br />
currently selected song<br />
appears.<br />
• You can enter a song title for the song currently selected<br />
(indicated in yellow on the TV screen).<br />
5. Enter the song title, referring to steps 3 and 4 of<br />
“For the CD Player with the disc memory<br />
function” to the left.<br />
• You can enter up to 32 characters for the song title.<br />
6. Press % / fi / @ / # to move to the song title<br />
you have just entered, then press SET.<br />
The song title is stored into the memory, and the Disc<br />
Information screen appears again.<br />
43
CASE1: If the components are equipped with the S-<strong>video</strong><br />
terminals<br />
44<br />
AV COMPU LINK Remote Control System<br />
The AV COMPU LINK remote <strong>control</strong> system allows you to operate <strong>JVC</strong> <strong>video</strong> components (TV, VCR, and DVD player)<br />
through the <strong>receiver</strong>.<br />
To use this remote <strong>control</strong> system, you need to connect the <strong>video</strong> components you want to operate, following the diagrams below and the<br />
procedure on the next page.<br />
CONNECTIONS 1:<br />
VHS<br />
VCR 1<br />
AV<br />
COMPU LINK<br />
IMPORTANT:<br />
DVD player<br />
AV<br />
COMPU LINK<br />
Connect to the terminal indicated in the<br />
illustration.<br />
DO NOT connect to the TV terminal.<br />
CONNECTIONS 2:<br />
To Video input 1<br />
AV<br />
COMPU LINK<br />
CASE3: If only the VCR is equipped with the S-<strong>video</strong><br />
terminal<br />
TV<br />
DVD<br />
OUT<br />
(REC)<br />
VCR 1<br />
IN<br />
(PLAY)<br />
MONITOR<br />
OUT<br />
To Video input 1<br />
To Video input 2<br />
VIDEO<br />
VIDEO S-VIDEO<br />
DVD<br />
OUT<br />
(REC)<br />
VCR 1<br />
IN<br />
(PLAY)<br />
MONITOR<br />
OUT<br />
VIDEO<br />
VIDEO S-VIDEO<br />
DVD<br />
DO NOT use these <strong>video</strong> terminals.<br />
DVD player<br />
S-VHS<br />
DVD<br />
VCR<br />
DO NOT use these <strong>video</strong> terminals.<br />
DVD player<br />
S-VHS<br />
DVD<br />
VCR<br />
TV<br />
If the AV COMPU LINK terminal<br />
on the TV is “RECEIVER/AMP”<br />
RECEIVER/AMP<br />
EX<br />
(VCR)<br />
AV<br />
COMPU LINK<br />
RECEIVER/<br />
AMP<br />
If the AV COMPU LINK terminal<br />
on the TV is “AV COMPU LINK<br />
EX”<br />
AV<br />
COMPU LINK EX<br />
CAUTION:<br />
The AV COMPU LINK remote<br />
<strong>control</strong> system cannot <strong>control</strong> the<br />
DBS tuner connected to the TV<br />
SOUND/DBS jacks, and <strong>video</strong><br />
components connected to the<br />
VIDEO and CDR/VCR 2 jacks on<br />
the <strong>receiver</strong>.<br />
Notes:<br />
• When connecting only the<br />
VCR 1 or DVD player to this<br />
<strong>receiver</strong>, connect it directly to<br />
the <strong>receiver</strong> using cable with<br />
the monaural mini-plugs.<br />
• Refer also to the manuals<br />
supplied with your <strong>video</strong><br />
components.<br />
CASE2: If the components are not equipped with the S<strong>video</strong><br />
terminals<br />
DO NOT use these <strong>video</strong> terminals.<br />
DVD player<br />
VHS<br />
DVD<br />
VCR<br />
DVD<br />
OUT<br />
(REC)<br />
VCR 1<br />
IN<br />
(PLAY)<br />
MONITOR<br />
OUT<br />
VIDEO<br />
VIDEO S-VIDEO<br />
CASE4: If only the DVD player is equipped with the S-<strong>video</strong><br />
terminal<br />
DO NOT use these <strong>video</strong> terminals.<br />
DVD player<br />
VHS<br />
DVD<br />
VCR<br />
DVD<br />
OUT<br />
(REC)<br />
VCR 1<br />
IN<br />
(PLAY)<br />
MONITOR<br />
OUT<br />
VIDEO<br />
VIDEO S-VIDEO<br />
TV<br />
To Video input 2<br />
TV<br />
To Video input 2<br />
To Video input 1
1. If you have already plugged your VCR 1 (VCR<br />
connected to the VCR 1 jacks), DVD player, TV,<br />
and this <strong>receiver</strong> into the AC outlets, unplug their<br />
AC power cords first.<br />
2. Connect your VCR 1, DVD player, TV, and this<br />
<strong>receiver</strong> as follows, using the cables with the<br />
monaural mini-plugs (not supplied).<br />
• See “CONNECTIONS 1” on the previous page.<br />
3. Connect the <strong>audio</strong> input/output jacks on VCR 1,<br />
DVD player, TV, and this <strong>receiver</strong> using the<br />
cables with RCA pin plug.<br />
• See pages 6 and 7.<br />
4. Connect the <strong>video</strong> input/output jacks on VCR 1,<br />
DVD player, TV, and this <strong>receiver</strong>, using the<br />
cables with RCA pin plug or with<br />
S-<strong>video</strong> plug.<br />
• See “CONNECTIONS 2” on the previous page.<br />
5. Plug the AC power cords of the components into<br />
the AC outlets.<br />
6. When turning on the TV for the first time after<br />
the AV COMPU LINK connection, turn the TV<br />
volume to the minimum using the TV volume<br />
<strong>control</strong> on the TV.<br />
7. Turn on the other connected components first,<br />
then turn on this <strong>receiver</strong>.<br />
• When turning on the VCR 1, use the remote <strong>control</strong> supplied<br />
with this <strong>receiver</strong> (press VCR 1 POWER).<br />
The AV COMPU LINK remote <strong>control</strong> system allows you to use the<br />
five basic functions listed below.<br />
Remote Control of the TV, DVD player, and VCR<br />
Using This Remote Control<br />
See page 48 for details.<br />
For the DVD player and the VCR:<br />
• Aim the remote <strong>control</strong> directly at the remote sensor on each<br />
component.<br />
For the TV having AV COMPU LINK terminal “RECEIVER/<br />
AMP”:<br />
• Aim the remote <strong>control</strong> directly at the remote sensor on the<br />
<strong>receiver</strong>.<br />
For the TV having AV COMPU LINK terminal “AV COMPU<br />
LINK EX”:<br />
• Aim the remote <strong>control</strong> directly at the remote sensor on the TV.<br />
One-Touch Video Play<br />
Simply by inserting a <strong>video</strong> cassette without its safety tab into the<br />
VCR 1 (the VCR connected to the VCR 1 jacks), you can enjoy the<br />
<strong>video</strong> playback without setting other switches manually. The<br />
<strong>receiver</strong> automatically turns on and changes the source to “VCR 1.”<br />
The TV automatically turns on and changes the input mode to the<br />
position so that you can view the playback picture.<br />
When you insert a <strong>video</strong> cassette with its safety tab, press the play<br />
(3) button on the VCR 1 or on the remote <strong>control</strong>. So, you can get<br />
the same result.<br />
One-Touch DVD Play<br />
Simply by starting playback on the DVD player, you can enjoy the<br />
DVD playback without setting other switches manually.<br />
• When the DVD player is connected through the analog input jacks<br />
on this <strong>receiver</strong> (and analog input is selected), the <strong>receiver</strong><br />
automatically turns on and changes the source to “DVD” or<br />
“DVD MULTI.”<br />
• When the DVD player is connected through the digital input<br />
terminal on this <strong>receiver</strong> (and digital input is selected), the<br />
<strong>receiver</strong> automatically turns on and changes the source to “DVD<br />
DIGITAL.”<br />
The TV automatically turns on and changes the input mode to the<br />
position so that you can view the playback picture.<br />
Automatic Selection of TV’s Input Mode<br />
• When you select “TV SOUND” (or “TV DIGITAL”) as the source<br />
to play on the <strong>receiver</strong>, the TV automatically changes the input<br />
mode to the TV tuner so that you can watch TV.<br />
• When you select “CDR/VCR 2” as the source to play on the<br />
<strong>receiver</strong>, the TV automatically changes the input mode to the<br />
Video Input 2 so that you can watch the playback picture.<br />
• When you select “DVD” (or “DVD DIGITAL”), “DVD MULTI,”<br />
“VCR 1,” “VIDEO” or “DBS” (or “DBS DIGITAL”) as the source<br />
to play on the <strong>receiver</strong>, the TV automatically changes the input<br />
mode to the appropriate position (either Video Input 1 or Video<br />
Input 2) so that you can view the playback picture.<br />
Note:<br />
When you select “TV SOUND” (or “TV DIGITAL”) as the source on the<br />
<strong>receiver</strong>, you cannot see the menu on the TV screen since the AV<br />
COMPU LINK remote <strong>control</strong> system automatically changes the TV’s<br />
input mode to the TV tuner.<br />
If you do not mind stopping listening to the TV sounds, you can then<br />
show the on-screen displays after changing the TV’s input mode to<br />
the appropriate position (either Video Input 1 or Video Input 2) the<br />
<strong>receiver</strong> is connected to.<br />
Automatic Power On/Off<br />
The TV, VCR 1 (the VCR connected to the VCR 1 jacks), and DVD<br />
player turn on and off along with the <strong>receiver</strong>.<br />
When you turn on the <strong>receiver</strong>;<br />
• If the previously selected source is “VCR 1,” the TV and VCR 1<br />
will turn on automatically.<br />
• If the previously selected source is “VIDEO,” “CDR/VCR 2,” “TV<br />
SOUND” (or “TV DIGITAL”) or “DBS” (or “DBS DIGITAL”),<br />
only the TV will turn on automatically.<br />
• If the previously selected source is “DVD” (or “DVD DIGITAL”)<br />
or “DVD MULTI,” the TV and DVD player will turn on<br />
automatically.<br />
When you turn off the <strong>receiver</strong>, the TV, VCR 1 and the DVD player<br />
will turn off.<br />
Note:<br />
If you turn off the <strong>receiver</strong> while recording on the VCR 1, the VCR 1<br />
will not turn off, but continue recording.<br />
45
46<br />
Operating <strong>JVC</strong>’s Audio/Video Components<br />
You can operate <strong>JVC</strong>’s <strong>audio</strong> and <strong>video</strong> components with this <strong>receiver</strong>’s remote <strong>control</strong>, since <strong>control</strong> signals for <strong>JVC</strong><br />
components are preset in the remote <strong>control</strong>.<br />
Operating Audio Components<br />
IMPORTANT:<br />
To operate <strong>JVC</strong>’s <strong>audio</strong> components using this remote <strong>control</strong>:<br />
• You need to connect <strong>JVC</strong> <strong>audio</strong> components through the COMPU<br />
LINK jacks (see page 38) in addition to the connections using<br />
cables with RCA pin plugs (see pages 5 and 6).<br />
• Aim the remote <strong>control</strong> directly at the remote sensor on the<br />
<strong>receiver</strong>.<br />
• If you use the buttons on the front panel or the menu function to<br />
choose a source, the remote <strong>control</strong> will not operate that source.<br />
To operate a source with the remote <strong>control</strong>, the source must be<br />
selected using source selecting buttons on the remote <strong>control</strong>.<br />
• To operate the cassette deck or MD recorder using the COMPU<br />
LINK remote <strong>control</strong> system, set the source name correctly. (See<br />
page 13.)<br />
• Refer also to the manuals supplied with your components.<br />
TV VOL<br />
CHANNEL VOLUME<br />
TV/VIDEO VCR 1 TAPE/MD MUTING<br />
/REW<br />
CONTROL<br />
PLAY<br />
TV<br />
FF/<br />
DOWN TUNING<br />
UP<br />
REC STOP PAUSE<br />
RM-SRX8000J REMOTE CONTROL<br />
AUDIO<br />
TV/CATV/DBS VCR 1<br />
DVD DVD MUILTI CD TAPE/MD<br />
TV/DBS VIDEO PHONO FM/AM<br />
VCR 1 CDR/VCR 2 ANALOG/DIGITAL SLEEP<br />
SURROUND CNTR TONE CENTER<br />
ON/OFF<br />
SURROUND TEST<br />
MENU<br />
REAR-L<br />
MODE<br />
CD-DISC<br />
ENTER<br />
EFFECT REAR-R<br />
SOUND SEA MODE SUBWOOFER<br />
10 0 +10<br />
RETURN FM MODE 100+<br />
MENU<br />
EXIT<br />
SET<br />
CATV/DBS VCR 1<br />
1 2 3<br />
4 5 6<br />
7/P 8 9<br />
AUDIO/<br />
TV/VCR<br />
CATV/DBS<br />
TEXT<br />
DISPLAY<br />
AUDIO/<br />
TV/VCR<br />
CATV/DBS<br />
Check to see if its remote<br />
<strong>control</strong> mode selector is set<br />
to the correct position.<br />
To operate the <strong>audio</strong><br />
system, TVs, VCRs, and<br />
DVD players, set it to<br />
“AUDIO/TV/VCR.”<br />
Tuner<br />
You can always perform the following operations (with the remote<br />
<strong>control</strong> mode selector set to “AUDIO/TV/VCR”):<br />
FM/AM: Alternates between FM and AM.<br />
After pressing FM/AM (with the remote <strong>control</strong> mode selector set to<br />
“AUDIO/TV/VCR”), you can perform the following operations:<br />
1 – 10, +10: Selects a preset channel number directly.<br />
For channel number 5, press 5.<br />
For channel number 15, press +10, then 5.<br />
For channel number 20, press +10, then 10.<br />
TUNING UP/TUNING DOWN:<br />
Tunes into stations.<br />
FM MODE: Changes the FM reception mode.<br />
Sound <strong>control</strong> section (Amplifier)<br />
You can always perform the following operations (with the remote<br />
<strong>control</strong> mode selector set to “AUDIO/TV/VCR”):<br />
SURROUND ON/OFF: Turns on or off the Surround modes –<br />
Dolby Pro Logic, Dolby Digital, and DTS Digital<br />
Surround.<br />
SURROUND MODE: Selects the DSP modes.<br />
After pressing SOUND (with the remote <strong>control</strong> mode selector set to<br />
“AUDIO/TV/VCR”), you can perform the following operations:<br />
SEA MODE: Changes the SEA modes.<br />
SUBWOOFER – / +: Adjusts the subwoofer output level.<br />
CENTER – / +: Adjusts the center speaker output level.<br />
REAR•L – / +: Adjusts the left rear speaker output level.<br />
REAR•R – / +: Adjusts the right rear speaker output level.<br />
EFFECT: Selects the effect level.<br />
TEST: Turns on or off the test tone output.<br />
CNTR TONE: Selects the center tone.<br />
Note:<br />
After adjusting sounds, press the corresponding source selecting<br />
button or CD-DISC to operate your target source by using the 10<br />
keys; otherwise, the 10 keys cannot be used for operating your target<br />
source.<br />
CD player<br />
After pressing CD (with the remote <strong>control</strong> mode selector set to<br />
“AUDIO/TV/VCR”), you can perform the following operations on<br />
the CD player:<br />
PLAY: Starts playing.<br />
4: Returns to the beginning of the current (or<br />
previous) track.<br />
¢: Skips to the beginning of the next track.<br />
STOP: Stops playing.<br />
PAUSE: Pauses playing. To release it, press PLAY.<br />
1 – 10, +10: Selects a track number directly.<br />
For track number 5, press 5.<br />
For track number 15, press +10, then 5.<br />
For track number 20, press +10, then 10.<br />
For track number 30, press +10, +10, then 10.
CD player-changer<br />
After pressing CD-DISC (with the remote <strong>control</strong> mode selector set<br />
to “AUDIO/TV/VCR”), you can perform the following operations<br />
on a CD player-changer:<br />
PLAY: Starts playing.<br />
4: Returns to the beginning of the current (or previous)<br />
track.<br />
¢: Skips to the beginning of the next track.<br />
STOP: Stops playing.<br />
PAUSE: Pauses playing. To release it, press PLAY.<br />
1 – 6, 7/P: Selects the number of a disc installed in a CD<br />
player-changer.<br />
After pressing CD (with the remote <strong>control</strong> mode selector set to<br />
“AUDIO/TV/VCR”), you can perform the following operations on<br />
the CD player-changer:<br />
1 – 10, +10: Selects a track number directly.<br />
For track number 5, press 5.<br />
For track number 15, press +10, then 5.<br />
For track number 20, press +10, then 10.<br />
For track number 30, press +10, +10, then 10.<br />
If your CD changer is of 200-disc loading capability (except for<br />
XL-MC100 and XL-MC301)<br />
you can do the following operations using the number buttons after<br />
pressing CD.<br />
1. Select a disc number.<br />
2. Then select a track number (always enter two digits).<br />
3. Start playback.<br />
EXAMPLES:<br />
• Selecting disc number 3, track number 2, and starting playback.<br />
Press 3, then, 0, 2, then 3.<br />
• Selecting disc number 10, track number 5, and starting playback.<br />
Press 1, 0, then, 0, 5, then 3.<br />
• Selecting disc number 105, track number 12, and starting<br />
playback.<br />
Press 1, 0, 5, then 1, 2 then 3.<br />
CD recorder<br />
After pressing CDR/VCR 2 (with the remote <strong>control</strong> mode selector<br />
set to “AUDIO/TV/VCR”), you can perform the following<br />
operations on a CD recorder:<br />
PLAY: Starts playing.<br />
4: Returns to the beginning of the current (or<br />
previous) track.<br />
¢: Skips to the beginning of the next track.<br />
STOP: Stops playing.<br />
PAUSE: Pauses playing. To release it, press PLAY.<br />
1 – 10, +10: Selects a track number directly.<br />
For track number 5, press 5.<br />
For track number 15, press +10, then 5.<br />
For track number 20, press +10, then 10.<br />
For track number 30, press +10, +10, then 10.<br />
Note:<br />
When you start recording on the CD recorder, use the buttons on the<br />
CD recorder itself or on the remote <strong>control</strong> supplied with it.<br />
Turntable<br />
After pressing PHONO (with the remote <strong>control</strong> mode selector set to<br />
“AUDIO/TV/VCR”), you can perform the following operations on a<br />
turntable:<br />
PLAY: Starts playing.<br />
STOP: Stops operations.<br />
Cassette deck<br />
After pressing TAPE/MD or TAPE/MD CONTROL (with the<br />
remote <strong>control</strong> mode selector set to “AUDIO/TV/VCR”), you can<br />
perform the following operations on a cassette deck:<br />
PLAY: Starts playing.<br />
1: Fast winds the tape from right to left.<br />
¡: Fast winds the tape from left to right.<br />
STOP: Stops operations.<br />
PAUSE: Pauses playing. To release it, press PLAY.<br />
REC: Press this button with the PLAY button to start<br />
recording.<br />
Press this button with the PAUSE button to enter<br />
recording pause.<br />
MD recorder<br />
After pressing TAPE/MD or TAPE/MD CONTROL (with the<br />
remote <strong>control</strong> mode selector set to “AUDIO/TV/VCR”), you can<br />
perform the following operations on the MD recorder:<br />
PLAY: Starts playing.<br />
4: Returns to the beginning of the current (or previous)<br />
track.<br />
¢: Skips to the beginning of the next track.<br />
STOP: Stops playing.<br />
PAUSE: Pauses playing. To release it, press PLAY.<br />
REC: Press this button with the PLAY button to start<br />
recording.<br />
Press this button with the PAUSE button to enter<br />
recording pause.<br />
Note:<br />
You can use either TAPE/MD button or the TAPE/MD CONTROL<br />
button to activate the buttons listed above. If you press TAPE/MD, the<br />
playing source also changes. On the other hand, if you press TAPE/<br />
MD CONTROL, the playing source does not change.<br />
47
Operating Video Components<br />
IMPORTANT:<br />
To operate <strong>JVC</strong>’s <strong>video</strong> components using this remote <strong>control</strong>:<br />
• You need to connect <strong>JVC</strong> <strong>video</strong> components through the AV<br />
COMPU LINK terminals (see page 44) in addition to the<br />
connections using cables with RCA pin plugs (see pages 6 and 7).<br />
• Some <strong>JVC</strong> VCRs can accept two types of the <strong>control</strong> signals —<br />
remote code “A” and “B.” Before using this remote <strong>control</strong>, make<br />
sure that the remote <strong>control</strong> code of the VCR connected to the<br />
VCR 1 jacks is set to code “A.”<br />
• When using the remote <strong>control</strong>:<br />
– For the DVD player and VCR operations, aim the remote <strong>control</strong><br />
directly at the remote sensor on each component, not on the<br />
<strong>receiver</strong>.<br />
– For the TV operations:<br />
7 If the TV has the AV COMPU LINK terminal “RECEIVER/<br />
AMP,” aim the remote <strong>control</strong> directly at the remote sensor on<br />
the <strong>receiver</strong>.<br />
7 If the TV has the AV COMPU LINK terminal “AV COMPU<br />
LINK EX,” aim the remote <strong>control</strong> directly at the remote<br />
sensor on the TV.<br />
48<br />
TV VOL<br />
CHANNEL VOLUME<br />
TV/VIDEO VCR 1 TAPE/MD MUTING<br />
/REW<br />
CONTROL<br />
PLAY<br />
TV<br />
FF/<br />
DOWN TUNING<br />
UP<br />
REC STOP PAUSE<br />
RM-SRX8000J REMOTE CONTROL<br />
AUDIO<br />
TV/CATV/DBS VCR 1<br />
DVD DVD MUILTI CD TAPE/MD<br />
TV/DBS VIDEO PHONO FM/AM<br />
VCR 1 CDR/VCR 2 ANALOG/DIGITAL SLEEP<br />
SURROUND CNTR TONE CENTER<br />
ON/OFF<br />
SURROUND TEST<br />
MENU<br />
REAR-L<br />
MODE<br />
CD-DISC<br />
ENTER<br />
EFFECT REAR-R<br />
SOUND SEA MODE SUBWOOFER<br />
10 0 +10<br />
RETURN FM MODE 100+<br />
MENU<br />
EXIT<br />
SET<br />
CATV/DBS VCR 1<br />
1 2 3<br />
4 5 6<br />
7/P 8 9<br />
AUDIO/<br />
TV/VCR<br />
CATV/DBS<br />
TEXT<br />
DISPLAY<br />
AUDIO/<br />
TV/VCR<br />
CATV/DBS<br />
Check to see if the remote<br />
<strong>control</strong> mode selector is set<br />
to the correct position.<br />
To operate the <strong>audio</strong><br />
system, TVs, VCRs, and<br />
DVD players, set it to<br />
“AUDIO/TV/VCR.”<br />
VCR 1 (VCR connected to the VCR 1 jacks)<br />
You can always perform the following operations (with the remote<br />
<strong>control</strong> mode selector set to “AUDIO/TV/VCR”):<br />
VCR 1 POWER: Turns on or off the VCR 1.<br />
After pressing VCR 1 or VCR 1 CONTROL (with the remote<br />
<strong>control</strong> mode selector set to “AUDIO/TV/VCR”), you can perform<br />
the following operations on the VCR:<br />
1 – 9, 0: Selects the TV channels on VCR.<br />
PLAY: Starts playing.<br />
1: Rewinds a tape.<br />
¡: Fast winds a tape.<br />
STOP: Stops operations.<br />
PAUSE: Pauses playing. To release it, press PLAY.<br />
REC: Press this button with the PLAY button to start<br />
recording.<br />
Press this button with the PAUSE button to enter<br />
recording pause.<br />
CHANNEL +/–: Changes the TV channels on the VCR.<br />
Note:<br />
You can use either VCR 1 button or the VCR 1 CONTROL button to<br />
activate the buttons listed above. If you press VCR 1, the playing<br />
source also changes. On the other hand, if you press VCR 1<br />
CONTROL, the playing source does not change.<br />
DVD player<br />
After pressing DVD or DVD MULTI (with the remote <strong>control</strong> mode<br />
selector set to “AUDIO/TV/VCR”), you can perform the following<br />
operations on a DVD player:<br />
PLAY: Starts playing.<br />
4: Returns to the beginning of the current (or previous) track.<br />
¢: Skips to the beginning of the next track.<br />
STOP: Stops playing.<br />
PAUSE: Stops playing temporarily. To release it, press PLAY.<br />
After pressing DVD or DVD<br />
MULTI, these buttons can be used<br />
for the DVD menu operations.<br />
CENTER<br />
2 3<br />
MENU<br />
TEST REAR-L<br />
Note:<br />
4 5<br />
ENTER<br />
6<br />
For detailed menu operations, refer to the<br />
<strong>instructions</strong> supplied with the discs or the<br />
DVD player.<br />
8<br />
REAR-R<br />
TV<br />
You can always perform the following operations (with the remote<br />
<strong>control</strong> mode selector set to “AUDIO/TV/VCR”):<br />
TV POWER: Turns on or off the TV.<br />
TV VOL +/–: Adjusts the volume.<br />
TV/VIDEO: Sets the input mode (either TV or VIDEO).<br />
After pressing TV/DBS (with the remote <strong>control</strong> mode selector set<br />
to “AUDIO/TV/VCR”), you can perform the following operations<br />
on a TV:<br />
CHANNEL +/–: Changes the channels.<br />
1 – 9, 0, 100+: Selects the channels.<br />
RETURN: Alternates between the previously selected channel<br />
and the current channel.
Operating Other Manufacturers’ Video Equipment<br />
This remote <strong>control</strong> supplied with the <strong>receiver</strong> can transmit <strong>control</strong><br />
signals for other manufacturers’ VCRs, TVs, DVD players, CATV<br />
converters and DBS tuners. By changing the transmittable signals<br />
from preset ones to the other manufacturers’, you can operate the<br />
other manufacturer’s components using this remote <strong>control</strong>.<br />
When operating the other manufacturers’ components, refer also to<br />
the manuals supplied with them. To operate these components with<br />
the remote <strong>control</strong>, first you need to set the manufacturer’s code<br />
each for VCR, TV, DVD players, CATV converters, and DBS tuner.<br />
TV VOL<br />
CHANNEL VOLUME<br />
TV/VIDEO VCR 1 TAPE/MD MUTING<br />
/REW<br />
CONTROL<br />
PLAY<br />
TV<br />
FF/<br />
DOWN TUNING<br />
UP<br />
REC STOP PAUSE<br />
RM-SRX8000J REMOTE CONTROL<br />
AUDIO<br />
TV/CATV/DBS VCR 1<br />
DVD DVD MUILTI CD TAPE/MD<br />
TV/DBS VIDEO PHONO FM/AM<br />
VCR 1 CDR/VCR 2 ANALOG/DIGITAL SLEEP<br />
SURROUND CNTR TONE CENTER<br />
ON/OFF<br />
MENU<br />
SURROUND TEST REAR-L<br />
MODE<br />
CD-DISC<br />
ENTER<br />
EFFECT REAR-R<br />
SOUND SEA MODE SUBWOOFER<br />
10 0 +10<br />
RETURN FM MODE 100+<br />
MENU<br />
EXIT<br />
SET<br />
CATV/DBS VCR 1<br />
1 2 3<br />
4 5 6<br />
7/P 8 9<br />
AUDIO/<br />
TV/VCR<br />
CATV/DBS<br />
TEXT<br />
DISPLAY<br />
AUDIO/<br />
TV/VCR<br />
CATV/DBS<br />
Check to see if the remote<br />
<strong>control</strong> mode selector is set<br />
to the correct position.<br />
To operate the <strong>audio</strong><br />
system, TVs, VCRs, and<br />
DVD players, set it to<br />
“AUDIO/TV/VCR.”<br />
To operate the CATV<br />
converter and DBS tuner,<br />
set it to “CATV/DBS.”<br />
To change the transmittable signals for<br />
operating another manufacturer’s TV<br />
1. Set the remote <strong>control</strong> mode to “AUDIO/TV/<br />
VCR.”<br />
2. Press and hold TV POWER.<br />
3. Press TV/DBS.<br />
4. Enter manufacturer’s code (two digits) using<br />
buttons 1–9, and 0.<br />
See the list below to find the code.<br />
Examples: For a <strong>JVC</strong> product, press 0, 1.<br />
For a SANYO product, press 1, 3.<br />
5. Release TV POWER.<br />
The following buttons can be used for operating the TV (with<br />
the remote <strong>control</strong> mode selector set to “AUDIO/TV/VCR”):<br />
TV POWER Turns on and off the TV.<br />
TV VOL +/– Adjusts the volume.<br />
TV/VIDEO Sets the input mode (either TV<br />
or VIDEO).<br />
After pressing TV/DBS (with the remote <strong>control</strong> mode selector<br />
set to “AUDIO/TV/VCR”), you can perform the following<br />
operations on a TV:<br />
CHANNEL +/– Changes the channels.<br />
1 – 10, 0, 100+ (+10) Selects the channels.<br />
The 100+ (+10) button will function<br />
as the ENTER button if your TV<br />
requires pressing ENTER after<br />
selecting a channel number.<br />
Note:<br />
Refer to the manual supplied with your TV.<br />
6. Try to operate your TV by pressing TV POWER.<br />
When your TV turns on or off, you have entered the correct<br />
code.<br />
If there are more than one code listed for your brand of TV,<br />
try each one until the correct one is entered.<br />
Manufacturer Code Manufacturer Code<br />
<strong>JVC</strong> 01 SAMSUNG 12<br />
HITACHI 10 SANYO 13<br />
MAGNAVOX 02 SHARP 06<br />
MITSUBISHI 03 SONY 07<br />
PANASONIC 04, 11 TOSHIBA 08<br />
RCA 05 ZENITH 09<br />
Manufacturers’ codes are subject to change without notice.<br />
If they are changed, this remote <strong>control</strong> cannot operate the<br />
equipment.<br />
49
To change the transmittable signals for<br />
operating a CATV converter<br />
1. Set the remote <strong>control</strong> mode to “CATV/DBS.”<br />
2. Press and hold CATV/DBS POWER.<br />
3. Press TV/DBS.<br />
4. Enter manufacturer’s code (two digits) using<br />
buttons 1–9, and 0.<br />
See the list below to find the code.<br />
Examples: For an RCA product, press 1, 9.<br />
For a SONY product, press 2, 0.<br />
5. Release CATV/DBS POWER.<br />
After setting the remote <strong>control</strong> mode selector to “CATV/DBS,”<br />
you can perform the following operations on the CATV<br />
convertor :<br />
50<br />
CATV/DBS POWER Turns on and off the CATV converter.<br />
CHANNEL +/– Changes the channels.<br />
1 – 10, 0, 100+ (+10) Selects the channels.<br />
The 100+ (+10) button will function as<br />
the ENTER button if your equipment<br />
requires pressing ENTER after<br />
selecting a channel number.<br />
Notes:<br />
• Refer to the manual supplied with your CATV converter.<br />
• You cannot set the remote <strong>control</strong> mode selector both for the<br />
CATV converter and the DBS tuner at the same time.<br />
6. Try to operate your CATV converter by pressing<br />
CATV/DBS POWER.<br />
When your CATV converter turns on or off, you have entered<br />
the correct code.<br />
If there are more than one code listed for your brand of<br />
CATV converter , try each one until the correct one is entered.<br />
Manufacturer Codes<br />
GI JERROLD 01, 02, 03, 04, 05,<br />
06, 07, 08<br />
HAMLIN/REGAL 15, 16, 17, 18<br />
PIONEER 13, 14<br />
RCA 19<br />
SCIENTIFIC ATLANTA 09, 10<br />
SONY 20<br />
ZENITH 11, 12<br />
Manufacturers’ codes are subject to change without<br />
notice. If they are changed, this remote <strong>control</strong> cannot<br />
operate the equipment.<br />
To change the transmittable signals for<br />
operating a DBS tuner<br />
1. Set the remote <strong>control</strong> mode to “CATV/DBS.”<br />
2. Press and hold CATV/DBS POWER.<br />
3. Press TV/DBS.<br />
4. Enter manufacturer’s code (two digits) using<br />
buttons 1–9, and 0.<br />
See the list below to find the code.<br />
Examples: For a <strong>JVC</strong> product, press 2, 1.<br />
For an RCA, press 2, 9.<br />
5. Release CATV/DBS POWER.<br />
After setting the remote <strong>control</strong> mode selector to “CATV/DBS,”<br />
you can perform the following operations on the DBS tuner:<br />
CATV/DBS POWER Turns on and off the DBS tuner.<br />
CHANNEL +/– Changes the channels.<br />
1 – 10, 0, 100+ (+10) Selects the channels.<br />
The 100+ (+10) button will function as<br />
the ENTER button if your equipment<br />
requires pressing ENTER after<br />
selecting a channel number.<br />
Notes:<br />
• Refer to the manual supplied with your DBS tuner.<br />
• You cannot set the remote <strong>control</strong> mode selector both for the<br />
CATV converter and the DBS tuner at the same time.<br />
6. Try to operate your DBS tuner by pressing<br />
CATV/DBS POWER.<br />
When your DBS tuner turns on or off, you have entered the<br />
correct code.<br />
Manufacturer Codes<br />
<strong>JVC</strong> 21<br />
ECHOSTAR 22<br />
GI 23<br />
HITACHI 24<br />
HTS 25<br />
HUGHES<br />
NETWORK SYSTEMS<br />
26<br />
PANASONIC 27<br />
PRIME STAR 28<br />
RCA 29, 30<br />
SONY 31<br />
TOSHIBA 32<br />
Manufacturers’ codes are subject to change without<br />
notice. If they are changed, this remote <strong>control</strong> cannot<br />
operate the equipment.
To change the transmittable signals for<br />
operating another manufacturer’s VCR<br />
1. Set the remote <strong>control</strong> mode to “AUDIO/TV/<br />
VCR.”<br />
2. Press and hold VCR 1 POWER.<br />
3. Press VCR 1.<br />
4. Enter manufacturer’s code (two digits) using<br />
buttons 1–9, and 0.<br />
See the list below to find the code.<br />
Examples: For a <strong>JVC</strong> product, press 0, 1.<br />
For an NEC product, press 2, 5.<br />
5. Release VCR 1 POWER.<br />
The following button can be used for operating the VCR (with<br />
the remote <strong>control</strong> mode selector set to “AUDIO/TV/VCR”):<br />
VCR 1 POWER Turns on and off the VCR.<br />
After pressing VCR 1 or VCR 1 CONTROL (with the remote<br />
<strong>control</strong> mode selector set to “AUDIO/TV/VCR”), you can<br />
perform the following operations on the VCR 1:<br />
CHANNEL +/– Changes the TV channels on the VCR.<br />
1 – 10, 0, 100+ (+10) Selects the TV channels.<br />
The 100+ (+10) button will function<br />
as the ENTER button if your VCR<br />
requires pressing ENTER after<br />
selecting a channel number.<br />
PLAY Starts playback.<br />
1 Rewinds a <strong>video</strong> tape.<br />
¡ Fast winds a <strong>video</strong> tape.<br />
STOP Stops operation.<br />
PAUSE Pauses.<br />
REC: Starts recording or enters recording pause.<br />
Notes:<br />
• Refer to the manual supplied with your VCR.<br />
• You can use either VCR 1 button or the VCR 1 CONTROL<br />
button to activate the buttons listed above. If you press VCR 1,<br />
the playing source also changes. On the other hand, if you<br />
press VCR 1 CONTROL, the playing source does not change.<br />
6. Try to operate your VCR by pressing VCR 1<br />
POWER.<br />
When your VCR turns on or off, you have entered the correct<br />
code.<br />
If there are more than one code listed for your brand of<br />
VCR, try each one until the correct one is entered.<br />
Manufacturer Codes Manufacturer Codes<br />
<strong>JVC</strong> 01, 02, 03 PHILIPS 09<br />
EMERSON 11, 26 RCA 05, 06<br />
FISHER 29 SAMSUNG 24<br />
FUNAI 10, 14, 15, 16 SANYO 21, 22, 23<br />
GOLD STAR 12 SHARP 27, 28<br />
HITACHI 04 SHINTOM 30<br />
MITSUBISHI 13 SONY 18, 19, 20<br />
NEC 25 ZENITH 08<br />
PANASONIC 07, 17<br />
Manufacturers’ codes are subject to change without notice. If they<br />
are changed, this remote <strong>control</strong> cannot operate the equipment.<br />
To change the transmittable signals for<br />
operating a DVD player<br />
1. Set the remote <strong>control</strong> mode to “AUDIO/TV/<br />
VCR.”<br />
2. Press and hold VCR 1 POWER.<br />
3. Press DVD.<br />
4. Enter manufacturer’s code (two digits) using<br />
buttons 1–9, and 0.<br />
See the list below to find the code.<br />
Examples: For a <strong>JVC</strong> product, press 0, 1.<br />
For a SONY product, press 0, 5.<br />
5. Release VCR 1 POWER.<br />
After pressing DVD or DVD MULTI (with the remote <strong>control</strong><br />
mode selector set to “AUDIO/TV/VCR”), you can perform the<br />
following operations on a DVD player:<br />
PLAY: Starts playing.<br />
4: Returns to the beginning of the current (or previous)<br />
track.<br />
¢: Skips to the beginning of the next track.<br />
STOP: Stops playing.<br />
PAUSE: Stops playing temporarily. To release it, press PLAY.<br />
After pressing DVD, these buttons<br />
can be used for the DVD menu<br />
operations.<br />
Note:<br />
4 5<br />
ENTER<br />
6<br />
For detailed menu operations, refer to the<br />
<strong>instructions</strong> supplied with the discs or the<br />
DVD player.<br />
8<br />
REAR-R<br />
Note:<br />
Refer to the manual supplied with your DVD player.<br />
6. Try to operate your DVD player by pressing one<br />
of the above buttons.<br />
• DO NOT forget to turn on the DVD player before pressing<br />
one of the above buttons.<br />
Manufacturer Codes<br />
<strong>JVC</strong> 01<br />
PANASONIC 02<br />
PHILIPS 07<br />
PIONEER 03<br />
SONY 05<br />
TOSHIBA 04<br />
YAMAHA 06<br />
CENTER<br />
2 3<br />
MENU<br />
TEST REAR-L<br />
Manufacturers’ codes are subject to change without<br />
notice. If they are changed, this remote <strong>control</strong> cannot<br />
operate the equipment.<br />
51
52<br />
Troubleshooting<br />
Use this chart to help you solve daily operational problems. If there is any problem you cannot solve, contact your <strong>JVC</strong><br />
service center.<br />
PROBLEM<br />
The display does not light up.<br />
No sound from speakers.<br />
Sound from one speaker only.<br />
Continuous hiss or buzzing during FM<br />
reception.<br />
Occasional cracking noise during FM<br />
reception.<br />
No colors on the on-screen display.<br />
Howling during record playing.<br />
“OVERLOAD” starts flashing on the<br />
display.<br />
Remote <strong>control</strong> does not work.<br />
POSSIBLE CAUSE<br />
The power cord is not plugged in.<br />
Speaker signal cables are not connected.<br />
The SPEAKERS 1 and 2 buttons are not<br />
set correctly.<br />
An incorrect source is selected.<br />
Muting is activated.<br />
Speaker signal cables are not connected<br />
properly.<br />
The balance is set to one extreme.<br />
Incoming signal is too weak.<br />
The station is too far away.<br />
An incorrect antenna is used.<br />
Antennas are not connected properly.<br />
Ignition noise from automobiles.<br />
The color system of the connected TV is<br />
not NTSC.<br />
Your turntable is too close to speakers.<br />
Speakers are overloaded because of high<br />
volume.<br />
Speakers are overloaded because of short<br />
circuit of speaker terminals.<br />
The remote <strong>control</strong> mode selector is not<br />
set correctly.<br />
There is an obstruction in front of the<br />
remote sensor on the <strong>receiver</strong>.<br />
Batteries are weak.<br />
SOLUTION<br />
Plug the power cord into an AC outlet.<br />
Check speaker wiring and reconnect if<br />
necessary.<br />
Press SPEAKERS 1 and 2 correctly.<br />
Select the correct source.<br />
Press MUTING to cancel the mute.<br />
Check speaker wiring and reconnect if<br />
necessary.<br />
Adjust the balance properly (see page 13).<br />
Connect an outdoor FM antenna or contact<br />
your dealer.<br />
Select a new station.<br />
Check with your dealer to be sure you have<br />
the correct antenna.<br />
Check connections.<br />
Move the antenna farther from automobile<br />
traffic.<br />
Connect an NTSC TV.<br />
Move speakers away from the turntable.<br />
1. Press POWER on the front panel to turn off<br />
the <strong>receiver</strong>.<br />
2. Stop the playback source.<br />
3. Turn on the <strong>receiver</strong> again, and adjust the<br />
volume.<br />
Press POWER on the front panel, then check<br />
the speaker wiring.<br />
If “OVERLOAD” does not disappear, unplug<br />
the AC power cord, then plug it back again.<br />
If speaker wiring is not short-circuited, contact<br />
your dealer.<br />
Set the selector correctly either to “AUDIO/<br />
TV/VCR” or to “CATV/DBS.”<br />
Remove the obstruction.<br />
Replace batteries.
Amplifier<br />
Specifications<br />
Output Power<br />
At Stereo operation:<br />
Front channels: 120 W per channel, min. RMS, driven into 8 Ω, 20<br />
Hz to 20 kHz with no more than 0.02% total<br />
harmonic distortion.<br />
120 W per channel, min. RMS, driven into 4 Ω, 20 Hz to 20 kHz<br />
with no more than 0.08% total harmonic distortion.<br />
At Surround operation:<br />
Front channels: 100 W per channel, min. RMS, driven into 8 Ω at 1 kHz with no<br />
more than 0.8% total harmonic distortion.<br />
Center channel: 100 W, min. RMS, driven into 8 Ω at 1 kHz, with no more than<br />
0.8% total harmonic distortion.<br />
Rear channels 100 W per channel, min. RMS, driven into 8 Ω at 1 kHz, with no<br />
more than 0.8% total harmonic distortion.<br />
Audio<br />
Audio Input Sensitivity/Impedance (1 kHz): PHONO (MM): 2.5 mV/47 kΩ<br />
CD, TAPE/MD, TV SOUND/DBS, VCR 1, CDR/VCR 2, VIDEO, DVD:<br />
200 mV/47 kΩ<br />
Audio Input (DIGITAL IN)* : Coaxial: DIGITAL 1 (DVD): 0.5 V(p-p)/75 Ω<br />
Optical: DIGITAL 2 (CD), DIGITAL 3 (TV), DIGITAL 4 (CDR):<br />
–21 dBm to –15 dBm (660 nm ±30 nm)<br />
*Corresponding to Linear PCM, Dolby Digital, and DTS Digital Surround (with sampling frequency — 32 kHz, 44.1 kHz, 48 kHz).<br />
Audio Output Level: TAPE/MD, VCR 1, CDR/VCR 2: 200 mV<br />
Digital output: Optical: DIGITAL OUTPUT<br />
Signal wave length: 660 nm<br />
Output level: –21 dBm to –15 dBm<br />
Signal-to-Noise Ratio (’66 IHF/’78 IHF): PHONO: 70 dB/78 dB (at REC OUT)<br />
CD, TAPE/MD, TV SOUND/DBS, VCR 1, CDR/VCR 2, VIDEO, DVD:<br />
92 dB/80 dB<br />
Frequency Response (8 Ω) PHONO: 20 Hz to 20 kHz (±1 dB)<br />
RIAA Phono Equalization:<br />
CD, TAPE/MD, TV SOUND/DBS, VCR 1, CDR/VCR 2, VIDEO, DVD:<br />
20 Hz to 100 kHz (+1 dB, –3 dB)<br />
±1.0 dB (20 Hz to 20 kHz)<br />
Bass boost: +6 ±1.0 dB at 100 Hz (Volume <strong>control</strong> at –30 dB)<br />
SEA: Center frequencies: 100 Hz, 1 kHz, 10 kHz<br />
Control range: ±10 dB ±2 dB<br />
Video<br />
Video Input Sensitivity/Impedance:<br />
Composite <strong>video</strong>: TV SOUND/DBS, VCR 1, CDR/VCR 2, VIDEO, DVD: 1 V(p-p)/75 Ω<br />
S-<strong>video</strong>: TV SOUND/DBS, VCR 1, VIDEO, DVD:(Y: luminance): 1 V(p-p)/75 Ω<br />
Video Output Level:<br />
(C: chrominance, burst): 0.286 V(p-p)/75 Ω<br />
Composite <strong>video</strong>: VCR 1, CDR/VCR 2, MONITOR OUT: 1 V(p-p)/75 Ω<br />
S-<strong>video</strong>: VCR 1, MONITOR OUT: (Y: luminance): 1 V(p-p)/75 Ω<br />
(C: chrominance, burst): 0.286 V(p-p)/75 Ω<br />
Synchronization: Negative<br />
Signal-to-Noise Ratio: 45 dB<br />
On-Screen Color System: NTSC<br />
53
FM tuner (IHF)<br />
54<br />
Tuning Range: 87.5 MHz to 108.0 MHz<br />
Usable Sensitivity: Monaural: 12.8 dBf (1.2 µV/75 Ω)<br />
50 dB Quieting Sensitivity: Monaural: 21.3 dBf (3.2 µV/75 Ω)<br />
Stereo: 41.3 dBf (31.5 µV/75 Ω)<br />
Signal-to-Noise Ratio (IHF-A weighted): Monaural: 78 dB at 85 dBf<br />
Stereo: 73 dB at 85 dBf<br />
Total Harmonic Distortion: Monaural: 0.4% at 1 kHz<br />
Stereo: 0.6% at 1 kHz<br />
Stereo Separation at REC OUT: 35 dB at 1 kHz<br />
Alternate Channel Selectivity: 45 dB: (±400 kHz)<br />
Frequency Response: 30 Hz to 15 kHz: (+0.5 dB, –3 dB)<br />
AM tuner<br />
General<br />
Tuning Range: 530 kHz to 1,710 kHz<br />
Usable Sensitivity: Loop antenna 400 µV/m<br />
Signal-to-Noise Ratio 50 dB (100 mV/m)<br />
Power Requirements: AC 120V , 60 Hz<br />
Power Consumption: 320 watts/420 VA (at operation)<br />
2 watts (in standby mode)<br />
Dimensions (W x H x D): 435 mm x 157 mm x 412.5 mm<br />
(17 3 /16 in. x 6 3 /16 in. x 16 1 /4 in.)<br />
Mass: 11.9 kg (26.3 lbs)<br />
Designs & specifications are subject to change without notice.
QUALITY SERVICE<br />
HOW TO LOCATE YOUR <strong>JVC</strong> SERVICE CENTER<br />
TOLL FREE : 1-800-537-5722<br />
http://www.jvcservice.com<br />
Dear customer:<br />
In order to receive the most satisfaction from your purchase, read the instruction booklet before operating the unit. In the event that repair<br />
is necessary, or for the address nearest your location, please refer to the factory service center list below or within the Continental<br />
United States, Call 1-800-537-5722 for your authorized servicer. Remember to retain your Bill of Sale for Warranty Service.<br />
10 New Maple Avenue<br />
Pine Brook, NJ 07058-9641<br />
(973) 396-1000<br />
5665 Corporate Avenue<br />
Cypress, CA 90630-0024<br />
(714) 229-8011<br />
13 Cummings Park<br />
Woburn, MA 01801<br />
(781) 376-9100<br />
<strong>JVC</strong> SERVICE & ENGINEERING<br />
COMPANY OF AMERICA<br />
DIVISION OF <strong>JVC</strong> AMERICAS CORP.<br />
FACTORY SERVICE CENTER LOCATIONS<br />
Sophisticated electronic products may require occasional service. Just as quality is a keyword in the engineering and production of<br />
the wide array of <strong>JVC</strong> products, service is the key to maintaining the high level of performance for which <strong>JVC</strong> is world famous. The<br />
<strong>JVC</strong> service and engineering organization stands behind our products.<br />
(1099)<br />
If you ship the product • • •<br />
1500 Lakes Parkway<br />
Lawrenceville, GA 30243-5857<br />
(770) 339-2582<br />
2969 Mapunapuna Place<br />
Honolulu, HI 96819-2040<br />
(808) 833-5828<br />
8192 State Road 84<br />
Davie, FL 33324<br />
(954) 472-1960<br />
Pack your <strong>JVC</strong> unit in the original carton or one of equivalent<br />
size and strength. Enclose, with the unit, a letter stating the<br />
problem or symptom that exists and also a copy of the<br />
receipt or bill of sale you received when you purchased your<br />
<strong>JVC</strong> unit. Print your home return address on the outside<br />
and the inside of the carton. Send to the appropriate <strong>JVC</strong><br />
Factory Service Center as listed above.<br />
NATIONAL HEADQUARTERS<br />
<strong>JVC</strong> SERVICE & ENGINEERING COMPANY OF AMERICA<br />
DIVISION OF <strong>JVC</strong> AMERICAS CORP.<br />
1700 Valley Road<br />
Wayne, NJ 07470<br />
ACCESSORIES<br />
To purchase accessories for your <strong>JVC</strong> product, you may contact your local <strong>JVC</strong> Dealer.<br />
Or from the 48 Continental United States call toll free : 800-882-2345<br />
705 Enterprise Street<br />
Aurora, IL 60504-8149<br />
(630) 851-7855<br />
10700 Hammerly, Suite 110<br />
Houston, TX 77043<br />
(713) 935-9331<br />
890 Dubuque Avenue<br />
South San Francisco, CA 94080-1804<br />
(650) 871-2666<br />
Don’t service it yourself.<br />
CAUTION<br />
—<strong>JVC</strong><br />
To prevent electrical shock, do not open the cabinet. No user<br />
serviceable parts inside.<br />
Refer servicing to qualified service personnel.
LIMITED WARRANTY AUDIO-2<br />
<strong>JVC</strong> COMPANY OF AMERICA warrants this product and all parts thereof, except as set forth below ONLY TO THE ORIGINAL<br />
PURCHASER AT RETAIL to be FREE FROM DEFECTIVE MATERIAL AND WORKMANSHIP from the date of original retail<br />
purchase for the period as shown below. (“The Warranty Period.”)<br />
THIS LIMITED WARRANTY IS VALID ONLY IN THE FIFTY(50) UNITED STATES, THE DISTRICT OF COLUMBIA AND IN<br />
COMMONWEALTH OF PUERTO RICO.<br />
WHAT WE WILL DO:<br />
If this product is found to be defective, <strong>JVC</strong> will repair or replace defective parts at no charge to the original owner. Such<br />
repair and replacement services shall be rendered by <strong>JVC</strong> during normal business hours at <strong>JVC</strong> authorized service centers.<br />
Parts used for replacement are warranted only for the remainder of the Warranty Period. All products and parts thereof may be<br />
brought to a <strong>JVC</strong> authorized service center on a carry-in basis except for Television sets having a screen size 25 inches and<br />
above which are covered on an in-home basis.<br />
WHAT YOU MUST DO FOR WARRANTY SERVICE:<br />
Return your product to a <strong>JVC</strong> authorized service center with a copy of your bill of sale. For your nearest <strong>JVC</strong> authorized<br />
service center, please call toll free: (800)537-5722.<br />
If service is not available locally, box the product carefully, preferably in the original carton, and ship, insured, with a copy of<br />
your bill of sale plus and letter of explanation of the problem to the nearest <strong>JVC</strong> Factory Service Center, the name and location<br />
of which will be given to you by the toll-free number.<br />
If you have any questions concerning your <strong>JVC</strong> Product, please contact our Customer Relations Department.<br />
WHAT IS NOT COVERED:<br />
This limited warranty provided by <strong>JVC</strong> does not cover:<br />
1. Products which have been subject to abuse, accident, alteration, modification, tampering, negligence, misuse, faulty<br />
installation, lack of reasonable care, or if repaired or serviced by anyone other than a service facility authorized by <strong>JVC</strong> to<br />
render such service, or if affixed to any attachment not provided with the products, or if the model number or serial number<br />
has been altered, tampered with, defaced or removed;<br />
2. Initial installation and installation and removal for repair;<br />
3. Operational adjustments covered in the Owner’s Manual, normal maintenance, <strong>video</strong> and <strong>audio</strong> head cleaning;<br />
4. Damage that occurs in shipment, due to act of God, and cosmetic damage;<br />
5. Signal reception problems and failures due to line power surge;<br />
6. Video Pick-up Tubes/CCD Image Sensor, Cartridge, Stylus(Needle) are covered for 90 days from the date of purchase;<br />
7. Accessories;<br />
8. Batteries (except the Rechargeable Batteries are covered for 90 days from the date of purchase);<br />
There are no express warranties except as listed above.<br />
THE DURATION OF ANY IMPLIED WARRANTIES, INCLUDING THE IMPLIED WARRANTY OF MERCHANTABILITY, IS<br />
LIMITED TO THE DURATION OF THE EXPRESS WARRANTY HEREIN.<br />
<strong>JVC</strong> SHALL NOT BE LIABLE FOR THE LOSS OF USE OF THE PRODUCT, INCONVENIENCE, LOSS OR ANY OTHER<br />
DAMAGES, WHETHER DIRECT, INCIDENTAL OR CONSEQUENTIAL (INCLUDING, WITHOUT LIMITATION, DAMAGE TO<br />
TAPES, RECORDS OR DISCS) RESULTING FROM THE USE OF THIS PRODUCT, OR ARISING OUT OF ANY BREACH OF<br />
THIS WARRANTY. ALL EXPRESS AND IMPLIED WARRANTIES, INCLUDING THE WARRANTIES OF MERCHANTABILITY<br />
AND FITNESS FOR PARTICULAR PURPOSE, ARE LIMITED TO THE WARRANTY PERIOD SET FORTH ABOVE.<br />
Some states do not allow the exclusion of incidental or consequential damages or limitations on how long an implied<br />
warranty last, so these limitations or exclusions may not apply to you. This warranty gives you specific legal rights and you<br />
may also have other rights which vary from state to state.<br />
<strong>JVC</strong> COMPANY OF AMERICA 1700 Valley Road<br />
DIVISION OF <strong>JVC</strong> AMERICAS CORP. Wayne, NJ 07470<br />
REFURBISHED PRODUCTS CARRY A SEPARATE WARRANTY, THIS WARRANTY DOES NOT APPLY. FOR DETAILS OF<br />
REFURBISHED PRO DUCT WARRANTY, PLEASE REFER TO THE REFURBISHED PRODUCT WARRANTY INFORMATION<br />
PACKAGED WITH EACH REFURBISHED PRODUCT.<br />
For customer use:<br />
PARTS LABOR<br />
2YR 2YR<br />
Enter below the Model No. and Serial No. which is located either on the rear, bottom or side of the cabinet. Retain this<br />
information for future reference.<br />
Model No.: Serial No.:<br />
Purchase date: Name of dealer:
EN<br />
VICTOR COMPANY OF JAPAN, LIMITED<br />
<strong>JVC</strong><br />
0100HIMMDWJEIN