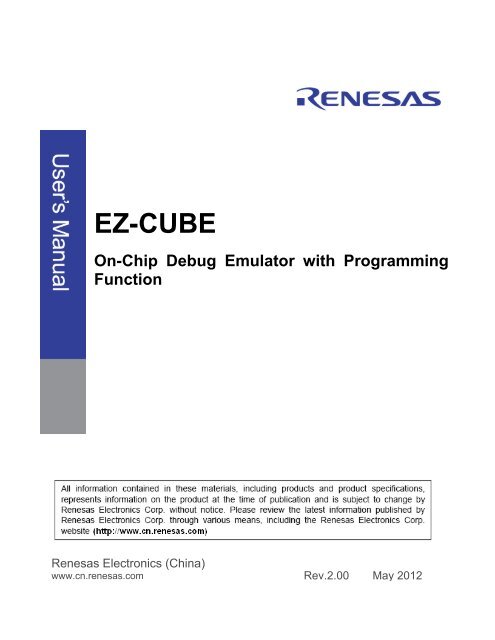
EZ-CUBE On-Chip Debug Emulator with Programming Function
EZ-CUBE On-Chip Debug Emulator with Programming Function
EZ-CUBE On-Chip Debug Emulator with Programming Function

You also want an ePaper? Increase the reach of your titles
YUMPU automatically turns print PDFs into web optimized ePapers that Google loves.
<strong>EZ</strong>-<strong>CUBE</strong><br />
<strong>On</strong>-<strong>Chip</strong> <strong>Debug</strong> <strong>Emulator</strong> <strong>with</strong> <strong>Programming</strong><br />
<strong>Function</strong><br />
Renesas Electronics (China)<br />
www.cn.renesas.com<br />
Rev.2.00 May 2012
Notice<br />
1. All information included in this document is current as of the date this document is issued. Such information, however,<br />
is subject to change <strong>with</strong>out any prior notice. Before purchasing or using any Renesas Electronics products listed herein,<br />
please confirm the latest product information <strong>with</strong> a Renesas Electronics sales office. Also, please pay regular and careful<br />
attention to additional and different information to be disclosed by Renesas Electronics such as that disclosed through our<br />
website.<br />
2. Renesas Electronics does not assume any liability for infringement of patents, copyrights, or other intellectual property<br />
rights of third parties by or arising from the use of Renesas Electronics products or technical information described in this<br />
document.<br />
No license, express, implied or otherwise, is granted hereby under any patents, copyrights or other intellectual property<br />
rights of Renesas Electronics or others.<br />
3. You should not alter, modify, copy, or otherwise misappropriate any Renesas Electronics product, whether in whole or<br />
in part.<br />
4. Descriptions of circuits, software and other related information in this document are provided only to illustrate the<br />
operation of semiconductor products and application examples. You are fully responsible for the incorporation of these<br />
circuits, software, and information in the design of your equipment. Renesas Electronics assumes no responsibility for any<br />
losses incurred by you or third parties arising from the use of these circuits, software, or information.<br />
5. When exporting the products or technology described in this document, you should comply <strong>with</strong> the applicable export<br />
control laws and regulations and follow the procedures required by such laws and regulations. You should not use<br />
Renesas Electronics products or the technology described in this document for any purpose relating to military<br />
applications or use by the military, including but not limited to the development of weapons of mass destruction. Renesas<br />
Electronics products and technology may not be used for or incorporated into any products or systems whose<br />
manufacture, use, or sale is prohibited under any applicable domestic or foreign laws or regulations.<br />
6. Renesas Electronics has used reasonable care in preparing the information included in this document, but Renesas<br />
Electronics does not warrant that such information is error free. Renesas Electronics assumes no liability whatsoever for<br />
any damages incurred by you resulting from errors in or omissions from the information included herein.<br />
7. Renesas Electronics products are classified according to the following three quality grades: “Standard”, “High Quality”,<br />
and “Specific”. The recommended applications for each Renesas Electronics product depends on the product’s quality<br />
grade, as indicated below. You must check the quality grade of each Renesas Electronics product before using it in a<br />
particular application. You may not use any Renesas Electronics product for any application categorized as “Specific”<br />
<strong>with</strong>out the prior written consent of Renesas Electronics. Further, you may not use any Renesas Electronics product for<br />
any application for which it is not intended <strong>with</strong>out the prior written consent of Renesas Electronics. Renesas Electronics<br />
shall not be in any way liable for any damages or losses incurred by you or third parties arising from the use of any<br />
Renesas Electronics product for an application categorized as “Specific” or for which the product is not intended where<br />
you have failed to obtain the prior written consent of Renesas Electronics. The quality grade of each Renesas Electronics<br />
product is “Standard” unless otherwise expressly specified in a Renesas Electronics data sheets or data books, etc.<br />
“Standard”: Computers; office equipment; communications equipment; test and measurement equipment; audio<br />
and visual equipment; home electronic appliances; machine tools; personal electronic equipment; and<br />
industrial robots.<br />
“High Quality”: Transportation equipment (automobiles, trains, ships, etc.); traffic control systems; anti-disaster systems;<br />
anticrime systems; safety equipment; and medical equipment not specifically designed for life support.<br />
“Specific”: Aircraft; aerospace equipment; submersible repeaters; nuclear reactor control systems; medical<br />
equipment or systems for life support (e.g. artificial life support devices or systems), surgical implantations,<br />
or healthcare intervention (e.g. excision, etc.), and any other applications or purposes that pose a direct<br />
threat to human life.<br />
8. You should use the Renesas Electronics products described in this document <strong>with</strong>in the range specified by Renesas<br />
Electronics, especially <strong>with</strong> respect to the maximum rating, operating supply voltage range, movement power voltage<br />
range, heat radiation characteristics, installation and other product characteristics. Renesas Electronics shall have no<br />
liability for malfunctions or damages arising out of the use of Renesas Electronics products beyond such specified ranges.<br />
9. Although Renesas Electronics endeavors to improve the quality and reliability of its products, semiconductor products<br />
have specific characteristics such as the occurrence of failure at a certain rate and malfunctions under certain use<br />
conditions. Further, Renesas Electronics products are not subject to radiation resistance design. Please be sure to<br />
implement safety measures to guard them against the possibility of physical injury, and injury or damage caused by fire in<br />
the event of the failure of a Renesas Electronics product, such as safety design for hardware and software including but<br />
not limited to redundancy, fire control and malfunction prevention, appropriate treatment for aging degradation or any<br />
other appropriate measures. Because the evaluation of microcomputer software alone is very difficult, please evaluate the<br />
safety of the final products or system manufactured by you.<br />
10. Please contact a Renesas Electronics sales office for details as to environmental matters such as the environmental<br />
compatibility of each Renesas Electronics product. Please use Renesas Electronics products in compliance <strong>with</strong> all<br />
applicable laws and regulations that regulate the inclusion or use of controlled substances, including <strong>with</strong>out limitation, the<br />
EU RoHS Directive. Renesas Electronics assumes no liability for damages or losses occurring as a result of your<br />
noncompliance <strong>with</strong> applicable laws and regulations.<br />
11. This document may not be reproduced or duplicated, in any form, in whole or in part, <strong>with</strong>out prior written consent of<br />
Renesas Electronics.<br />
12. Please contact a Renesas Electronics sales office if you have any questions regarding the information contained in<br />
this document or Renesas Electronics products, or if you have any other inquiries.<br />
(Note 1) “Renesas Electronics” as used in this document means Renesas Electronics Corporation and also includes its<br />
majorityowned subsidiaries.<br />
(Note 2) “Renesas Electronics product(s)” means any product developed or manufactured by or for Renesas Electronics.<br />
User’s Manual
Preface<br />
The <strong>EZ</strong>-<strong>CUBE</strong> emulator (YRCN<strong>EZ</strong><strong>CUBE</strong>01) is designed for use <strong>with</strong> the MCU’s made by Renesas Electronics.<br />
You can download the latest manuals from the Renesas Tools homepage (http://www.cn.renesas.com/tool).<br />
Important<br />
Before using the emulator, be sure to read this user’s manual carefully. Keep this user’s manual, and refer to it when<br />
you have questions about the emulator.<br />
<strong>Emulator</strong>:<br />
"<strong>Emulator</strong>" in this user’s manual collectively refers to the <strong>EZ</strong>-<strong>CUBE</strong> emulator manufactured by Renesas Electronics<br />
Corporation.<br />
"<strong>Emulator</strong>" herein encompasses neither the customer's user system nor the host machine.<br />
Purpose of use of the emulator:<br />
This emulator is a device to support the development of systems that uses the Renesas microcomputers. It provides<br />
support for system development in both software and hardware. The emulator is not guaranteed for use in the<br />
production line. Be sure to use the emulator correctly according to said purpose of use. Please avoid using the<br />
emulator other than for its intended purpose of use.<br />
For those who use the emulator:<br />
The emulator can only be used by those who have carefully read the user’s manual and know how to use it.<br />
Use of the emulator requires basic knowledge of electric circuits, logical circuits, and MCUs.<br />
When using the emulator:<br />
(1)The emulator is a development-support unit for use in your program development and evaluation stages. When a<br />
program you have finished developing is to be incorporated in a mass-produced product, the judgment as to<br />
whether it can be put to practical use is entirely your own responsibility, and should be based on evaluation of the<br />
device on which it is installed and other experiments.<br />
(2)In no event shall Renesas Electronics Corporation be liable for any consequence arising from the use of the<br />
emulator.<br />
(3)Renesas Electronics Corporation strives to provide workarounds for and correct trouble <strong>with</strong> products malfunctions.<br />
However, this does not necessarily mean that Renesas Electronics Corporation guarantees the provision of a<br />
workaround or correction under any circumstances.<br />
(4)The emulator covered by this document has been developed on the assumption that it will be used for program<br />
development and evaluation in laboratories.<br />
(5)Renesas Electronics Corporation cannot predict all possible situations and possible cases of misuse that carry a<br />
potential for danger. Therefore, the warnings in this user's manual and the warning labels attached to the emulator<br />
do not necessarily cover all such possible situations and cases. The customer is responsible for correctly and<br />
safely using the emulator.<br />
(6)Renesas Electronics Corporation will not assume responsibility of direct or indirect damage caused by an<br />
accidental failure or malfunction in the emulator.<br />
When disposing of the emulator:<br />
Penalties may be applicable for incorrect disposal of this waste, in accordance <strong>with</strong> your national legislation.<br />
Usage restrictions:<br />
The emulator has been developed as a means of supporting system development by users. Therefore, do not use it<br />
as an embedded device in other equipment. Also, do not use it to develop systems or equipment for use in the<br />
User’s Manual
following fields.<br />
(1) Transportation and vehicular<br />
(2) Medical (equipment that has an involvement in human life)<br />
(3) Aerospace<br />
(4) Nuclear power control<br />
(5) Undersea repeaters<br />
(6) Military related business or development of Weapon of Mass Destruction<br />
About product changes:<br />
We are constantly making efforts to improve the design and performance of our product. Therefore, the specification<br />
or design of the emulator, or this user's manual, may be changed <strong>with</strong>out prior notice.<br />
About rights:<br />
(1) We assume no responsibility for any damage or infringement on patent rights or any other rights arising from the<br />
use of any information, products or circuits presented in this user’s manual.<br />
(2) The information or data in this user’s manual does not implicitly or otherwise grant a license to patent rights or any<br />
other rights belonging to Renesas or to a third party.<br />
(3) This user’s manual and the emulator are copyrighted, <strong>with</strong> all rights reserved by Renesas. This user’s manual may<br />
not be copied, duplicated or reproduced, in whole or part, <strong>with</strong>out prior written consent from Renesas.<br />
About diagrams:<br />
Some diagrams in this user’s manual may differ from the objects they represent.<br />
Terminology<br />
The meanings of the terms used in this manual are described in the table below.<br />
Term Meaning<br />
<strong>EZ</strong>-<strong>CUBE</strong> Generic name of <strong>EZ</strong>-<strong>CUBE</strong><br />
Target device This is the device to be emulated.<br />
Target system This is the system to be debugged (user-created system).<br />
It includes software and hardware created by the user.<br />
CubeSuite+ for It is an integrated development environment (China Version).<br />
China<br />
Firmware Program embedded in the device for controlling <strong>EZ</strong>-<strong>CUBE</strong><br />
RFP Renesas Flash Programmer, GUI software used to perform flash<br />
programming.<br />
Write<strong>EZ</strong>5 GUI software used to perform flash programming<br />
User’s Manual
CAUTION<br />
Caution to Be Taken for System Malfunctions:<br />
If the emulator malfunctions because of interference like external noise, do the following to remedy the trouble.<br />
(1) Exit the emulator debugger, and shut OFF the emulator and the user system.<br />
(2) After a lapse of 10 seconds, turn ON the power of the emulator and the user system again, then launch the<br />
emulator debugger.<br />
Note<br />
Renesas Electronics (China) does not assume any liability for the user does not follow the user manual for the use of<br />
non-normal and non-practice due to loss of product failure and other related.<br />
User’s Manual
CONTENTS<br />
CHAPTER 1 OVERVIEW..........................................................................................7<br />
1.1 Features .............................................................................................................................. 7<br />
1.2 Notes Before Using <strong>EZ</strong>-<strong>CUBE</strong> ............................................................................................ 8<br />
1.3 Hardware Specifications...................................................................................................... 9<br />
1.4 Firmware Update ................................................................................................................. 9<br />
1.5 Standard configuration ...................................................................................................... 10<br />
CHAPTER 2 NAMES AND FUNCTIONS OF HARDWARE ...................................11<br />
2.1 Part Names and <strong>Function</strong>s of <strong>EZ</strong>-<strong>CUBE</strong>........................................................................... 11<br />
CHAPTER 3 HOW TO USE <strong>EZ</strong>-<strong>CUBE</strong> WITH 78K0 MICROCONTROLLER ..........14<br />
3.1 Target System Design .............................................................................................................. 15<br />
3.1.1 Pin assignment............................................................................................................. 15<br />
3.1.2 Circuit connection examples ........................................................................................ 16<br />
3.1.3 Connection of reset pin ................................................................................................ 18<br />
3.1.4 Cautions on target system design................................................................................ 19<br />
3.1.5 Mounting connector onto target system....................................................................... 20<br />
3.2 <strong>On</strong>-<strong>Chip</strong> <strong>Debug</strong>ging .................................................................................................................. 21<br />
3.2.1 <strong>Debug</strong> functions ........................................................................................................... 21<br />
3.2.2 System configuration.................................................................................................... 22<br />
3.2.3 System startup procedure............................................................................................ 23<br />
3.2.4 System shutdown procedure ....................................................................................... 24<br />
3.2.5 Clock setting................................................................................................................. 24<br />
3.2.6 Securing of user resources and setting of security ID ................................................. 25<br />
3.3 Flash <strong>Programming</strong> ........................................................................................................... 32<br />
3.3.1 Specifications of programming function....................................................................... 32<br />
3.3.2 System configuration.................................................................................................... 32<br />
3.3.3 System startup procedure............................................................................................ 33<br />
3.3.4 Usage examples .......................................................................................................... 34<br />
3.3.5 System shutdown procedure ....................................................................................... 39<br />
3.3.6 Cautions on flash programming ................................................................................... 39<br />
CHAPTER 4 HOW TO USE <strong>EZ</strong>-<strong>CUBE</strong> WITH 78K0R MICROCONTROLLER .........40<br />
4.1 Target System Design .............................................................................................................. 41<br />
4.1.1 Pin assignment............................................................................................................. 42<br />
4.1.2 Circuit connection example.......................................................................................... 43<br />
4.1.3 Connection of reset pin ................................................................................................ 44<br />
4.1.4 Mounting connector onto target system....................................................................... 44<br />
4.2 <strong>On</strong>-<strong>Chip</strong> <strong>Debug</strong>ging .................................................................................................................. 45<br />
4.2.1 <strong>Debug</strong> functions ........................................................................................................... 45<br />
User’s Manual
4.2.2 System configuration ....................................................................................................46<br />
4.2.3 System startup procedure.............................................................................................47<br />
4.2.4 System shutdown procedure ........................................................................................48<br />
4.2.5 Securing of user resources and setting of security ID and on-chip debug option byte 49<br />
4.2.6 Cautions on debugging.................................................................................................53<br />
4.3 Flash <strong>Programming</strong> .................................................................................................................54<br />
4.3.1 Specifications of programming function........................................................................54<br />
4.3.2 System configuration ....................................................................................................54<br />
4.3.3 System startup procedure.............................................................................................55<br />
4.3.4 Usage examples ...........................................................................................................56<br />
4.3.5 System shutdown procedure ........................................................................................60<br />
4.3.6 Cautions on flash programming....................................................................................60<br />
CHAPTER 5 HOW TO USE <strong>EZ</strong>-<strong>CUBE</strong> WITH R8C MICROCONTROLLER............. 61<br />
5.1 Target System Design...............................................................................................................62<br />
5.1.1 Pin assignment .............................................................................................................63<br />
5.1.2 Circuit connection example...........................................................................................64<br />
5.1.3 Connection of pin..........................................................................................................64<br />
5.1.4 Mounting connector onto target system .......................................................................65<br />
5.2 <strong>On</strong>-<strong>Chip</strong> <strong>Debug</strong>ging...................................................................................................................66<br />
5.2.1 <strong>Debug</strong> functions............................................................................................................66<br />
5.2.2 System configuration ....................................................................................................67<br />
5.2.3 System startup procedure.............................................................................................68<br />
5.2.4 System shutdown procedure ........................................................................................69<br />
5.2.5 Notes on Using the <strong>EZ</strong>-<strong>CUBE</strong> <strong>Emulator</strong>.....................................................................69<br />
5.3 Flash <strong>Programming</strong> ...................................................................................................................80<br />
5.3.1 Specifications of programming function........................................................................80<br />
5.3.2 System configuration ....................................................................................................80<br />
5.3.3 System startup procedure.............................................................................................81<br />
5.3.4 Usage examples ...........................................................................................................82<br />
5.3.5 System shutdown procedure ........................................................................................87<br />
5.3.6 Cautions on flash programming....................................................................................87<br />
CHAPTER 6 HOW TO USE <strong>EZ</strong>-<strong>CUBE</strong> WITH RL78 MICROCONTROLLER ........... 88<br />
6.1 Target System Design...............................................................................................................89<br />
6.1.1 Pin assignment .............................................................................................................89<br />
6.1.2 Circuit connection example...........................................................................................90<br />
6.1.3 Connection of reset pin.................................................................................................91<br />
6.1.4 Mounting connector onto target system .......................................................................92<br />
6.2 <strong>On</strong>-<strong>Chip</strong> <strong>Debug</strong>ging...................................................................................................................93<br />
6.2.1 <strong>Debug</strong> functions............................................................................................................93<br />
6.2.2 System configuration ....................................................................................................93<br />
6.2.3 System startup procedure.............................................................................................94<br />
6.2.4 System shutdown procedure ........................................................................................96<br />
6.2.5 Securing of user resources and setting of security ID and on-chip debug option byte 97<br />
6.2.6 Cautions on debugging...............................................................................................101<br />
User’s Manual
6.3 Flash <strong>Programming</strong>............................................................................................................... 102<br />
6.3.1 Specifications of programming function..................................................................... 102<br />
6.3.2 System configuration.................................................................................................. 102<br />
6.3.3 System startup procedure.......................................................................................... 103<br />
6.3.4 Usage examples ........................................................................................................ 104<br />
6.3.5 System shutdown procedure ..................................................................................... 109<br />
6.3.6 Cautions on flash programming ................................................................................. 109<br />
CHAPTER 7 HOW TO USE <strong>EZ</strong>-<strong>CUBE</strong> WITH V850 MICROCONTROLLER .....110<br />
7.1 Target System Design..................................................................................................... 111<br />
7.1.1 Pin assignment........................................................................................................... 111<br />
7.1.2 Circuit connection examples ...................................................................................... 112<br />
7.1.3 Connection of reset pin .............................................................................................. 113<br />
7.1.4 Mounting connector onto target system..................................................................... 114<br />
7.2 <strong>On</strong>-<strong>Chip</strong> <strong>Debug</strong>ging ................................................................................................................ 115<br />
7.2.1 <strong>Debug</strong> functions ......................................................................................................... 115<br />
7.2.2 System configuration.................................................................................................. 115<br />
7.2.3 System startup procedure.......................................................................................... 116<br />
7.2.4 System shutdown procedure ..................................................................................... 117<br />
7.2.5 Securing of user resources and setting of security ID ............................................... 118<br />
7.2.6 Cautions on debugging .............................................................................................. 123<br />
7.3 Flash <strong>Programming</strong> ......................................................................................................... 124<br />
7.3.1 Specifications of programming function..................................................................... 124<br />
7.3.2 System configuration.................................................................................................. 124<br />
7.3.3 System startup procedure.......................................................................................... 125<br />
7.3.4 Usage examples ........................................................................................................ 126<br />
7.3.5 System shutdown procedure ..................................................................................... 131<br />
7.3.6 Cautions on flash programming ................................................................................. 131<br />
User’s Manual
CHAPTER 1 OVERVIEW<br />
CHAPTER 1 OVERVIEW<br />
<strong>EZ</strong>-<strong>CUBE</strong> is an on-chip debug emulator <strong>with</strong> flash programming function, which is used for debugging and<br />
programming a program to be embedded in on-chip flash memory microcontrollers.<br />
1.1 Features<br />
• <strong>On</strong>-chip debugging<br />
Can debug <strong>with</strong> the target microcontroller connected to the target system.<br />
• Flash memory programming<br />
Can write programs to the on-chip flash memory of microcontrollers.<br />
• USB connection<br />
Can be connected to the host machine via USB interface 2.0.<br />
Since <strong>EZ</strong>-<strong>CUBE</strong> operates on power supplied via USB, an external power supply is unnecessary.<br />
• Variety of supported devices and expandability<br />
<strong>EZ</strong>-<strong>CUBE</strong> supports a wide variety of Renesas Electronics 8- bit to 32-bit on-chip flash memory<br />
microcontrollers.<br />
- 78K0 Microcontrollers<br />
- 78K0R Microcontrollers<br />
- R8C Microcontrollers<br />
- RL78 Microcontrollers<br />
- V850 Microcontrollers<br />
User’s Manual 7
1.2 Notes Before Using <strong>EZ</strong>-<strong>CUBE</strong><br />
78K0<br />
78K0R<br />
R8C<br />
RL78<br />
V850<br />
CHAPTER 1 OVERVIEW<br />
Chapters 1 and 2 present an overview and the basic specifications of <strong>EZ</strong>-<strong>CUBE</strong>, and the following chapters<br />
provide separate descriptions for the target devices and the purpose of use. To utilize this manual effectively,<br />
refer to the following table and see the relevant chapter for your target device and purpose of use.<br />
Table 1-1. Chapters Corresponding to Usage<br />
Target Device Purpose of Use Relevant Chapter<br />
CHAPTER 3 HOW TO USE <strong>EZ</strong>-<strong>CUBE</strong> WITH<br />
78K0 MICROCONTROLLER<br />
Target system design 3.1 Target System Design<br />
<strong>On</strong>-chip debugging 3.2 <strong>On</strong>-<strong>Chip</strong> <strong>Debug</strong>ging<br />
Flash memory programming 3.3 Flash <strong>Programming</strong><br />
CHAPTER 4 HOW TO USE <strong>EZ</strong>-<strong>CUBE</strong> WITH<br />
78K0R MICROCONTROLLER<br />
Target system design 4.1 Target System Design<br />
<strong>On</strong>-chip debugging 4.2 <strong>On</strong>-<strong>Chip</strong> <strong>Debug</strong>ging<br />
Flash memory programming 4.3 Flash <strong>Programming</strong><br />
CHAPTER 5 HOW TO USE <strong>EZ</strong>-<strong>CUBE</strong> WITH<br />
R8C MICROCONTROLLER<br />
Target system design 5.1 Target System Design<br />
<strong>On</strong>-chip debugging 5.2 <strong>On</strong>-<strong>Chip</strong> <strong>Debug</strong>ging<br />
Flash memory programming 5.3 Flash <strong>Programming</strong><br />
CHAPTER 6 HOW TO USE <strong>EZ</strong>-<strong>CUBE</strong> WITH<br />
RL78 MICROCONTROLLER<br />
Target system design 6.1 Target System Design<br />
<strong>On</strong>-chip debugging 6.2 <strong>On</strong>-<strong>Chip</strong> <strong>Debug</strong>ging<br />
Flash memory programming 6.3 Flash <strong>Programming</strong><br />
CHAPTER 7 HOW TO USE <strong>EZ</strong>-<strong>CUBE</strong> WITH<br />
V850 MICROCONTROLLER<br />
Target system design 7.1 Target System Design<br />
<strong>On</strong>-chip debugging 7.2 <strong>On</strong>-<strong>Chip</strong> <strong>Debug</strong>ging<br />
Flash memory programming 7.3 Flash <strong>Programming</strong><br />
User’s Manual 8
1.3 Hardware Specifications<br />
CHAPTER 1 OVERVIEW<br />
This section describes the <strong>EZ</strong>-<strong>CUBE</strong> hardware specifications.<br />
The specifications related to the on-chip debug and flash memory programming functions are described in the<br />
following chapters.<br />
<strong>EZ</strong>-<strong>CUBE</strong><br />
Table 1-2. Hardware Specifications<br />
Classification Item Specifications<br />
Host machine interface<br />
Target interface<br />
Operating power supply Supplied via USB interface (5 V)<br />
Operating environment<br />
conditions<br />
Storage environment<br />
conditions<br />
Temperature: ±0 to +40°C<br />
Humidity: 40 to 80% RH (no condensation)<br />
Temperature: -15 to +60°C<br />
External dimensions 59 × 35 × 13 mm<br />
Weight Approximately 40 g<br />
Humidity: 40 to 80% RH (no condensation)<br />
Target host machine IBM PC/AT TM compatibles<br />
Target OS Windows XP, Vista, Windows 7 Note<br />
USB 2.0<br />
USB cable 1 m<br />
Note: Write<strong>EZ</strong>5 does not support Windows 7.<br />
1.4 Firmware Update<br />
Current consumption 500 mA max.<br />
Target cable length 8-pin cable<br />
Supply voltage 5.0 V±0.3V (typ.)<br />
Supply current 100 mA max.<br />
Voltage range 2.7 to 5.5 V<br />
(1) Installation of the USB driver<br />
This USB driver is required to connect the host machine and <strong>EZ</strong>-<strong>CUBE</strong>. Download it from the CD. Please<br />
install this USB driver at first.<br />
(2) Connecting the USB cable<br />
Connect <strong>EZ</strong>-<strong>CUBE</strong> to the host machine. Do not connect <strong>EZ</strong>-<strong>CUBE</strong> to the target system. The mode LED<br />
glows red after connection.<br />
(3) Startup of <strong>EZ</strong>-<strong>CUBE</strong> firmware update tool<br />
Start the <strong>EZ</strong>-<strong>CUBE</strong> firmware update tool (QB<strong>EZ</strong>UTL.exe).<br />
User’s Manual 9
CHAPTER 1 OVERVIEW<br />
(4) Select firmware<br />
Click the […] button. Select firmware of <strong>EZ</strong>-<strong>CUBE</strong> (*.hex) and click the [OK] button.<br />
(5) Update firmware<br />
Click the [Start] button. Start to update the <strong>EZ</strong>-<strong>CUBE</strong> firmware. If firmware update is finished, the following<br />
dialog box appears.<br />
(6) Quit <strong>EZ</strong>-<strong>CUBE</strong> firmware update tool<br />
Click the [Exit] button. Quit <strong>EZ</strong>-<strong>CUBE</strong> firmware update tool.<br />
(7) Unplugging the USB cable<br />
Unplug the USB cable from <strong>EZ</strong>-<strong>CUBE</strong> or the host machine.<br />
1.5 Standard configuration<br />
<strong>EZ</strong>-<strong>CUBE</strong>, USB cable, target cable and CD.<br />
User’s Manual 10
CHAPTER 2 NAMES AND FUNCTIONS OF HARDWARE<br />
This chapter describes the part names and functions of <strong>EZ</strong>-<strong>CUBE</strong> and its accessories.<br />
The part names described in this chapter are used throughout this document. This chapter provides an<br />
overview of the various functions. Reading it through, the reader will gain a basic grasp of <strong>EZ</strong>-<strong>CUBE</strong>. While<br />
reading this chapter, also check if the hardware has a defect.<br />
2.1 Part Names and <strong>Function</strong>s of <strong>EZ</strong>-<strong>CUBE</strong><br />
Figure 2-1 shows the part names of the <strong>EZ</strong>-<strong>CUBE</strong> main unit. For their functions, refer to (1) to (9) below.<br />
Target<br />
interface<br />
connector<br />
Mode LED<br />
SW switch<br />
Figure 2-1. Part Names of <strong>EZ</strong>-<strong>CUBE</strong><br />
External X'tal socket<br />
USB interface<br />
connector<br />
(1) SW-1 switch<br />
The position of this switch depends on the target devices. The detail describes, please see the follow chapter.<br />
This switch is set to ″M2″ at shipment.<br />
(2) SW-2 switch<br />
This switch is used to set clock. Table 2-1 describes the setting details. This switch is set to ″Int. Clock″ at<br />
shipment.<br />
Table 2-1. Setting of Clock Select Switch<br />
Setting Description<br />
Int. Clock<br />
Ext. Clock<br />
When this SW-2 is turned to Int. Clock position, 8MHz fixed freq. is to be supplied to<br />
the target board.<br />
If the other freq. is required, it should be turned to Ext. Clock position (Ext. X'tal<br />
should be connected in this case).<br />
(3) SW-3 switch<br />
This switch is used to set run mode of program. Table 2-2 describes the setting details. This switch is set to<br />
″ <strong>Debug</strong> Mode ″ at shipment.<br />
User’s Manual 11
CHAPTER 2 NAMES AND FUNCTIONS OF HARDWARE<br />
Table 2-2. Setting of Program Run Select Switch<br />
Setting Description<br />
<strong>Debug</strong> Mode<br />
Stand Alone<br />
(4) SW-4 switch<br />
<strong>On</strong> "<strong>Debug</strong>" position, the user's program will run when RUN command is issued from<br />
the debugger GUI.<br />
<strong>On</strong> "Stand Alone" position, the user's program is automatically run when the reset is<br />
released even the cables from <strong>EZ</strong>-<strong>CUBE</strong> is connected to the target board.<br />
This switch is used to set the power supplied to the target system. Table 2-3 describes the setting details.<br />
This switch is set to ″5″ at shipment.<br />
Caution Do not change the switch setting while the USB cable is connected.<br />
5<br />
T<br />
Table 2-3. Setting of Power Select Switch<br />
Setting Description<br />
5 V±0.3V is supplied from <strong>EZ</strong>-<strong>CUBE</strong> to the target system Note .<br />
The supplied power is fed back to <strong>EZ</strong>-<strong>CUBE</strong> and used only for power detection.<br />
Power supply of the target system is used.<br />
<strong>EZ</strong>-<strong>CUBE</strong> only detects the power for the target system.<br />
Note The maximum rating of the current is 100mA, so do not use <strong>EZ</strong>-<strong>CUBE</strong> <strong>with</strong> the target system <strong>with</strong> the<br />
higher current rating. The power is always supplied after <strong>EZ</strong>-<strong>CUBE</strong> is connected to the host<br />
machine.<br />
(5) SW-5 switch<br />
The position of this switch depends on the target devices. The detail describes, please see the follow chapter.<br />
This switch is set to ″Other″ at shipment.<br />
(6) USB interface connector<br />
This is a connector used to connect <strong>EZ</strong>-<strong>CUBE</strong> <strong>with</strong> the host machine, via a USB cable.<br />
A USB 2.0 compliant mini-B connector is employed.<br />
(7) Target interface connector<br />
This is a connector used to connect <strong>EZ</strong>-<strong>CUBE</strong> <strong>with</strong> the target system, via a 8-pin (2*4pin) target cable.<br />
(8) Using the Ext. oscillator connected<br />
SW-2 set for Ext. Clock.<br />
Connect an oscillator or oscillation circuit on the External X'tal socket. (Select for “Clock board” in the<br />
Configuration dialog box of the debugger.) For the operation this step, refer to the user's manual for<br />
CubeSuite+.<br />
Figure 2-2. Mounting Diagram<br />
User’s Manual 12
(9) Mode LED<br />
CHAPTER 2 NAMES AND FUNCTIONS OF HARDWARE<br />
The appearance of the mode LED changes according to the status of hardware and software, as shown in<br />
Table 2-4.<br />
Mode LED<br />
Color<br />
Appearance USB<br />
- Extinguished<br />
Table 2-4. Mode LED Status<br />
Connection<br />
Not<br />
connected<br />
Description<br />
Not yet started<br />
Software Operation<br />
Red Glowing Power or the CPU is in the break<br />
Connected<br />
mode.<br />
Green Glowing<br />
A debugger has been started<br />
User’s Manual 13
CHAPTER 3 HOW TO USE <strong>EZ</strong>-<strong>CUBE</strong> WITH 78K0 MICROCONTROLLER<br />
This chapter describes how to use <strong>EZ</strong>-<strong>CUBE</strong> when performing on-chip debugging and flash programming for a<br />
78K0 microcontroller.<br />
<strong>On</strong>-chip debugging is a method to debug a microcontroller mounted on the target system, using a debug function<br />
implemented in the device. Since debugging is performed <strong>with</strong> the target device operating on the board, this method<br />
is suitable for field debugging.<br />
Flash programming is a method to write a program to the flash memory embedded in a device. Erasing, writing and<br />
verifying the program can be performed on-board <strong>with</strong> the device.<br />
Please update firmware for 78K0 at first. Refer to description (1) to (3) on the following order. For detail, refer to 1.4<br />
Firmware Update.<br />
(1) Connect <strong>EZ</strong>-<strong>CUBE</strong> to the host machine. Do not connect <strong>EZ</strong>-<strong>CUBE</strong> to the target system.<br />
(2) Start the <strong>EZ</strong>-<strong>CUBE</strong> firmware update tool”QB<strong>EZ</strong>UTL.exe”. Select firmware of 78K0 (78K0_OCD_FW.hex).<br />
(3) Click the [Start] button. Start to update the <strong>EZ</strong>-<strong>CUBE</strong> firmware.<br />
Read the following chapters if you are using <strong>EZ</strong>-<strong>CUBE</strong> for the first time <strong>with</strong> a 78K0 microcontroller as the target<br />
device.<br />
3.1 Target System Design<br />
For communication between <strong>EZ</strong>-<strong>CUBE</strong> and the target system, communication circuits must be mounted on the<br />
target system. This section describes the circuit design and mounting of connectors.<br />
3.2 <strong>On</strong>-<strong>Chip</strong> <strong>Debug</strong>ging<br />
This section describes the system configuration and startup method to perform on-chip debugging <strong>with</strong><br />
<strong>EZ</strong>-<strong>CUBE</strong>.<br />
3.3 Flash <strong>Programming</strong><br />
This section describes the system configuration and startup method to perform flash programming <strong>with</strong><br />
<strong>EZ</strong>-<strong>CUBE</strong>.<br />
User’s Manual 14
3.1 Target System Design<br />
CHAPTER 3 HOW TO USE <strong>EZ</strong>-<strong>CUBE</strong> WITH 78K0 MICROCONTROLLER<br />
This section describes the target system circuit design required for on-chip debugging and flash programming.<br />
Figure 3-1 present overviews of the <strong>EZ</strong>-<strong>CUBE</strong> communication interface. For communication between <strong>EZ</strong>-<strong>CUBE</strong><br />
and the target system, communication circuits must be mounted on the target system, as shown on the left side of<br />
the figure. Refer to this section to design circuits appropriately.<br />
Target device<br />
Target system<br />
Figure 3-1. Outline of Communication Interface for <strong>On</strong>-<strong>Chip</strong> <strong>Debug</strong>ging<br />
UART<br />
communication<br />
Communication circuits<br />
must be mounted on<br />
.<br />
the target system. .<br />
RENESAS<br />
<strong>EZ</strong>-<strong>CUBE</strong><br />
<strong>EZ</strong>-<strong>CUBE</strong><br />
USB<br />
Communication<br />
Host machine<br />
3.1.1 Pin assignment<br />
This section describes the interface signals used between <strong>EZ</strong>-<strong>CUBE</strong> and the target system. Table 3-1 lists the<br />
pin assignment when a 8-pin target cable is used. Table 3-2 describes the functions of each pin.<br />
Pin No. Pin name Note<br />
1 GND<br />
2 RESET_IN<br />
3 Vdd<br />
4 FLMD0<br />
5 CLK<br />
6 RxD.<br />
7 RESET_OUT<br />
8 TxD<br />
Note Signal names in <strong>EZ</strong>-<strong>CUBE</strong><br />
Table 3-1. Pin Assignment When Using 8-Pin Target Cable<br />
Target interface<br />
connector<br />
7<br />
8<br />
5<br />
6 4<br />
User’s Manual 15<br />
3<br />
1<br />
2
Pin Name IN/OUT Note<br />
CHAPTER 3 HOW TO USE <strong>EZ</strong>-<strong>CUBE</strong> WITH 78K0 MICROCONTROLLER<br />
Table 3-2. Pin <strong>Function</strong>s<br />
Description<br />
RESET_IN IN Pin used to input reset signal from the target system<br />
RESET_OUT<br />
OUT Pin used to output reset signal to the target device<br />
CLK OUT Pin used to output clock signal to the target device<br />
FLMD0 OUT Pin used to set the target device to debug mode or programming<br />
mode<br />
RxD IN Pin used to receive command/data from the target device<br />
TxD OUT Pin used to transmit command/data to the target device<br />
N ote As seen from <strong>EZ</strong>-<strong>CUBE</strong>.<br />
3.1.2 Circuit connection examples<br />
The circuit design on the target system varies depending on the used connector and interface signals.<br />
The following (1) to (2) are the major purpose of use. Confirm the purpose, refer to Table 3-1 and see the<br />
relevant<br />
circuit connection example for specifications.<br />
Caution The constants described in the circuit connection example are reference values. If you perform<br />
flash programming aiming at mass production, thoroughly evaluate whether the specifications of<br />
the target device are satisfied.<br />
(1) Used to perform on-chip debugging.<br />
(2) Used to perform flash programming.<br />
User’s Manual 16
CHAPTER 3 HOW TO USE <strong>EZ</strong>-<strong>CUBE</strong> WITH 78K0 MICROCONTROLLER<br />
Figure 3-2. When <strong>Debug</strong>ging is Performed<br />
Notes 1. This connection is designed assuming that the RESET signal is output from the N-ch open-drain buffer<br />
(output resistance: 100Ω or less). For details, refer to 3.1.3 Connection of reset pin .<br />
2. OCD1A may be a different name, depending on the device used. For details, refer to the user's manual<br />
for the target device.<br />
User’s Manual 17
CHAPTER 3 HOW TO USE <strong>EZ</strong>-<strong>CUBE</strong> WITH 78K0 MICROCONTROLLER<br />
Figure 3-3. When <strong>Programming</strong> is Performed<br />
Notes 1. This connection is designed assuming that the RESET signal is output from the N-ch open-drain buffer<br />
(output resistance: 100 Ω or less). For details, refer to 3.1.3 Connection of reset pin.<br />
2. Connect TxD (transmit side) of the target device to RxD (receive side) of the target connector, and TxD<br />
(transmit side) of the target connector to RxD (receive side) of the target device.<br />
3.1.3 Connection of reset pin<br />
This section describes the connection of the reset pin, for which special attention must be paid, in circuit<br />
connection examples shown in the previous section.<br />
During on-chip debugging, a reset signal from the target system is input to <strong>EZ</strong>-<strong>CUBE</strong>, masked, and then output<br />
to the target device. Therefore, the reset signal connection varies depending on whether <strong>EZ</strong>-<strong>CUBE</strong> is connected.<br />
For flash programming, the circuit must be designed so that the reset signals of the target system and <strong>EZ</strong>-<strong>CUBE</strong><br />
do not conflict.<br />
Automatically switching the reset signal via resistor (recommended; described in recommended circuit<br />
connection in the previous section).<br />
Figure 3-4 illustrates the reset pin connection described in 3.1.2 Circuit connection examples. This<br />
connection is designed assuming that the reset circuit on the target system contains an N-ch open-drain buffer<br />
(output resistance: 100Ω or less). The VDD or GND level may be unstable when the logic of RESET_IN/OUT of<br />
<strong>EZ</strong>-<strong>CUBE</strong> is inverted, so observe the conditions described below in Remark.<br />
User’s Manual 18
CHAPTER 3 HOW TO USE <strong>EZ</strong>-<strong>CUBE</strong> WITH 78K0 MICROCONTROLLER<br />
Figure 3-4. Circuit Connection <strong>with</strong> Reset Circuit That Contains Buffer<br />
<strong>EZ</strong>-<strong>CUBE</strong><br />
RESET_OUT<br />
RESET_IN<br />
R1<br />
Target device<br />
_RESET<br />
R2<br />
VDD V<br />
Reset connector<br />
Buffer<br />
Remark Make the resistance of at least R1 ten times that of R2, R1 being 10 kΩ or more.<br />
Pull-up resistor R2 is not required if the buffer of the reset circuit consists of CMOS output.<br />
The circuit enclosed by a dashed line is not required when only flash programming is performed.<br />
Figure 3-5 illustrates the circuit connection for the case where the reset circuit on the target system contains<br />
no buffers and the reset signal is only generated via resistors or capacitors. Design the circuit, observing the<br />
conditions described below in Remark.<br />
Figure 3-5. Circuit Connection <strong>with</strong> Reset Circuit That Contains No Buffers<br />
<strong>EZ</strong>-<strong>CUBE</strong><br />
RESET_OUT<br />
RESET_IN<br />
_RESET<br />
R1 R2<br />
V DD<br />
V DD<br />
Target device Reset connector<br />
Remark Make the resistance of at least R1 ten times that of R2, R1 being 10 kΩ or more.<br />
The circuit enclosed by a dashed line is not required when only flash programming is performed.<br />
3.1.4 Cautions on target system design<br />
Note the following cautions when designing the target system.<br />
• Do not place X1/OCD1A and X2/OCD1B next to each other on the target system. If the layout requires this,<br />
they should be made as short as possible.<br />
• Make the distance between the target connector and the target device as short as possible.<br />
• Since the X1/OCD1A and X2/OCD1B lines are used for clock supply, be sure to shield them, such as <strong>with</strong> a<br />
GND pattern.<br />
• Before shipping the product, use jumpers or other means to physically separate the X1/OCD1A and<br />
X2/OCD1B pins from the target connector in order to ensure normal clock oscillation.<br />
• When debugging, remove capacitors, feedback resistors, and other elements for the resonator in order to<br />
prevent signal degradation due to the load placed on the X1/OCD1A and X2/OCD1B pins.<br />
User’s Manual 19
CHAPTER 3 HOW TO USE <strong>EZ</strong>-<strong>CUBE</strong> WITH 78K0 MICROCONTROLLER<br />
3.1.5 Mounting connector onto target system<br />
The connector must be mounted on the target system for connecting <strong>EZ</strong>-<strong>CUBE</strong> <strong>with</strong> the target system. 2.54<br />
mm pitch 8-pin general-purpose connector can be used.<br />
Compact connectors and loose-wire cables are also available as options.<br />
User’s Manual 20
3.2 <strong>On</strong>-<strong>Chip</strong> <strong>Debug</strong>ging<br />
CHAPTER 3 HOW TO USE <strong>EZ</strong>-<strong>CUBE</strong> WITH 78K0 MICROCONTROLLER<br />
This section describes the system configuration, startup/shutdown procedure and cautions for debugging when<br />
on-chip debugging is performed <strong>with</strong> <strong>EZ</strong>-<strong>CUBE</strong>.<br />
3.2.1 <strong>Debug</strong> functions<br />
Table 3-3 lists the debug functions when a 78K0 microcontroller is the target device.<br />
Table 3-3. <strong>Debug</strong> <strong>Function</strong>s<br />
<strong>Function</strong>s Specifications<br />
Target device 78K0<br />
78K0/Kx2, Lx3<br />
Security 10-byte ID code authentication<br />
Download Available<br />
Execution Go, Step In, Step Over, CPU Reset, Restart<br />
Hardware break 1 point<br />
Software break Multiple points<br />
User spaces used for debugging Internal ROM: 256 to 400 bytes<br />
<strong>Function</strong> pins used for debugging X1, X2<br />
Internal RAM: 7 to 9 bytes<br />
depending on the device used<br />
User’s Manual 21
3.2.2 System configuration<br />
CHAPTER 3 HOW TO USE <strong>EZ</strong>-<strong>CUBE</strong> WITH 78K0 MICROCONTROLLER<br />
Figure 3-6 illustrates the system configuration for on-chip debugging.<br />
Target device<br />
Target device<br />
Host machine<br />
Products <strong>with</strong> USB ports<br />
Software<br />
Figure 3-6. System Configuration for <strong>On</strong>-<strong>Chip</strong> <strong>Debug</strong>ging<br />
<strong>EZ</strong>-<strong>CUBE</strong><br />
Includes CubeSuite+ for China, USB driver, and so on.<br />
USB cable (accessory)<br />
<strong>EZ</strong>-<strong>CUBE</strong> (this product)<br />
8-pin target cable (accessory)<br />
User’s Manual 22
3.2.3 System startup procedure<br />
CHAPTER 3 HOW TO USE <strong>EZ</strong>-<strong>CUBE</strong> WITH 78K0 MICROCONTROLLER<br />
This section describes the system startup procedure. Observe the following order.<br />
(1) Preparation and installation of software<br />
The following software is required to perform on-chip debugging. For details on preparation and installation of<br />
software, refer to the setup manual supplied <strong>with</strong> <strong>EZ</strong>-<strong>CUBE</strong>.<br />
• CubeSuite+ for China<br />
• USB driver<br />
(2) Switch setting<br />
SW-1: Select switch to ″M2″.<br />
SW-2: Depend on the user system environment.<br />
SW-3: Select switch to ″<strong>Debug</strong> Mode″.<br />
SW-4: Depend on the user system environment.<br />
SW-5: Select switch to ″Other″.<br />
Caution 1. Do not change the switch setting while the USB cable is connected.<br />
2. The maximum rating of the current is 100 mA, so do not use <strong>EZ</strong>-<strong>CUBE</strong> <strong>with</strong> the target<br />
system <strong>with</strong> the higher current rating. The power is always supplied after <strong>EZ</strong>-<strong>CUBE</strong> is<br />
connected to the host machine.<br />
(3) Connecting the target system<br />
Connect <strong>EZ</strong>-<strong>CUBE</strong> to the target system.<br />
Perform connection before the power to the target system is turned on.<br />
(4) Connecting the USB cable<br />
Connect <strong>EZ</strong>-<strong>CUBE</strong> to the host machine, before the power to the target system is turned on.<br />
The mode LED glows red after connection.<br />
(5) Applying power to target system<br />
Turn on power to the target system. This step is not necessary if the power select switch is set to ″5″.<br />
(6) <strong>Debug</strong>ger startup<br />
Start the debugger.<br />
For the operation after this step, refer to the user's manual for CubeSuite+.<br />
If the debugger does not start normally or the operation is unstable, the possible causes may be the following.<br />
• Communication error between <strong>EZ</strong>-<strong>CUBE</strong> and target system<br />
Whether firmware is update.<br />
Whether switch is selected normally.<br />
Whether communication is performed normally.<br />
• The user resource has not been secured or the security ID has not been set<br />
To perform debugging <strong>with</strong> <strong>EZ</strong>-<strong>CUBE</strong>, the user resource must be secured and the security ID must be set.<br />
For details, refer to 3.2.6 Securing of user resources and setting of security ID.<br />
• Unsupported software (debugger, device file, or firmware) is used<br />
The software used may not support debugging of the target device.<br />
• Defect of <strong>EZ</strong>-<strong>CUBE</strong><br />
<strong>EZ</strong>-<strong>CUBE</strong> may have a defect.<br />
User’s Manual 23
CHAPTER 3 HOW TO USE <strong>EZ</strong>-<strong>CUBE</strong> WITH 78K0 MICROCONTROLLER<br />
3.2.4 System shutdown procedure<br />
Terminate debugging and shutdown the system in the following order.<br />
If the following order is not observed, the target system or <strong>EZ</strong>-<strong>CUBE</strong> may be damaged.<br />
(1) <strong>Debug</strong>ger termination<br />
Terminate the debugger.<br />
(2) Target system power shutdown<br />
Shutdown the power supplied to the target system. This step is not necessary if the power select switch is<br />
set to ″5″.<br />
(3) Unplugging the USB cable<br />
Unplug the USB cable from <strong>EZ</strong>-<strong>CUBE</strong> or the host machine.<br />
(4) Unplugging the target cable<br />
Unplug the target cable from <strong>EZ</strong>-<strong>CUBE</strong> or the target system.<br />
3.2.5 Clock setting<br />
<strong>EZ</strong>-<strong>CUBE</strong> can supply a clock to be used as the high-speed system clock (4, 8, or 16 MHz).<br />
Select SW-2 is “Int. Clock”<br />
Remove the oscillator or oscillation circuit (Selected for ”Generate by emulator” in the Configuration dialog box<br />
of the debugger).<br />
For the settings, refer to the user's manual for CubeSuite+.<br />
User’s Manual 24
CHAPTER 3 HOW TO USE <strong>EZ</strong>-<strong>CUBE</strong> WITH 78K0 MICROCONTROLLER<br />
3.2.6 Securing of user resources and setting of security ID<br />
<strong>EZ</strong>-<strong>CUBE</strong> uses the user memory spaces (shaded portions in Figure 3-7) to implement communication <strong>with</strong> the<br />
target device, or each debug functions. The areas marked <strong>with</strong> a dot (•) are always used for debugging, and other<br />
areas are used for each debug function used. Refer to the descriptions of (a) to (e) on the following pages and<br />
secure these spaces in the user program or using the compiler options.<br />
Figure 3-7. Reserved Area Used by <strong>EZ</strong>-<strong>CUBE</strong><br />
User’s Manual 25
CHAPTER 3 HOW TO USE <strong>EZ</strong>-<strong>CUBE</strong> WITH 78K0 MICROCONTROLLER<br />
(a) <strong>Debug</strong> monitor area (this area must be secured)<br />
Addresses 0x02, 0x03 and area starting from address 0x8F must be secured to embed the debug monitor<br />
program.<br />
If this area is rewritten by flash self programming, on-chip debugging can no longer be performed.<br />
[How to secure areas]<br />
When using Renesas Electronics compiler, addresses 0x02, 0x03 and area starting from address can be<br />
secured for debug monitoring, using the linker option (-go). Figure 3-8 shows the Linker Options dialog box of<br />
CubeSuite+. Select the ″Use on-chip debug″ check box as shown in the figure below. Set the size to 256<br />
bytes (in actuality, 257 bytes from 0x8F to 0x18F are secured).<br />
Figure 3-8. Link Options Setting (<strong>Debug</strong> Monitor Area)<br />
User’s Manual 26
(b) Option byte area (essential)<br />
CHAPTER 3 HOW TO USE <strong>EZ</strong>-<strong>CUBE</strong> WITH 78K0 MICROCONTROLLER<br />
This is the area for the security setting to prevent the flash memory from being read by an unauthorized person.<br />
The target device operates in accordance <strong>with</strong> the set value, as shown below.<br />
Table 3-4. Option Byte Setting and Operation<br />
Set Value Description Remark<br />
0x00 <strong>Debug</strong>ging is unavailable even if an on-chip debug emulator<br />
(such as <strong>EZ</strong>-<strong>CUBE</strong>) is connected.<br />
0x02 The on-chip flash memory is not erased no matter how many<br />
times the security ID code authentication fails.<br />
0x03 All on-chip flash memory areas are erased if the security ID<br />
code authentication fails.<br />
This setting is available<br />
only for flash programming.<br />
Other than above Setting prohibited -<br />
[How to set]<br />
Describe the code for setting the option byte in the user program. Refer to the following and add a code to<br />
the assembler source.<br />
Example When setting 0x02<br />
SSS CSEG AT 084H; ″SSS″ is an arbitrary symbol name (eight characters or less)<br />
DB 2H<br />
Caution If address 0x84 is overwritten by 0x00 by self programming, communication is disabled, and<br />
debugging and connection can no longer be performed even if the debugger is restarted. In<br />
such as case, erase the memory via flash programming.<br />
(c) Security ID area (essential)<br />
This is the area for the security setting to prevent the flash memory from being read by an unauthorized person.<br />
The security ID functions as a password for starting the debugger. The debugger starts only when the<br />
security ID that is input during debugger startup and the security ID embedded in this area match.<br />
[How to set]<br />
Figure 3-9 shows the Linker Options dialog box of CubeSuite+. Select the ″Security ID″ check box as shown<br />
in the figure below and set an arbitrary ID code (10 bytes).<br />
User’s Manual 27<br />
-<br />
-
CHAPTER 3 HOW TO USE <strong>EZ</strong>-<strong>CUBE</strong> WITH 78K0 MICROCONTROLLER<br />
Figure 3-9. Linker Option Setting (Security ID)<br />
(d) Stack area for debugging (this area must be secured)<br />
This area requires 7 to 9 bytes as the stack area for debugging. Since this area is allocated immediately<br />
before the stack area, the address of this area varies depending on the stack increase and decrease.<br />
Figure 3-10 illustrates the case where the stack area is increased when the internal high-speed RAM starts<br />
from 0xFB00.<br />
0xFEDF<br />
0xFB00<br />
Figure 3-10. Variation of Address of Stack Area for <strong>Debug</strong>ging<br />
<br />
7 bytes<br />
Stack area<br />
Stack area for<br />
debugging<br />
Available space<br />
in internal highspeed<br />
RAM<br />
0xFEDF<br />
0xFB00<br />
7 bytes<br />
0xFEDF<br />
0xFB07<br />
0xFB00<br />
7 bytes<br />
User’s Manual 28
CHAPTER 3 HOW TO USE <strong>EZ</strong>-<strong>CUBE</strong> WITH 78K0 MICROCONTROLLER<br />
The size of this area also varies depending on whether software breaks or pseudo real-time RAM monitor is<br />
used.<br />
Table 3-5. Size of Stack Area for <strong>Debug</strong>ging<br />
Item Size of Stack Area for <strong>Debug</strong>ging<br />
Standard 7 bytes<br />
When software breaks are used 9 bytes<br />
[How to secure areas]<br />
Refer to the address range shown below and set the stack pointer.<br />
Example When internal high-speed RAM starts from 0xFB00<br />
- Standard<br />
Within the range 0xFB07 to 0xFEDF Note<br />
- When software breaks are used (also refer to (e))<br />
Within the range 0xFB09 to 0xFEDF Note<br />
Note Because the area 0xFEDF is used by <strong>EZ</strong>-<strong>CUBE</strong> during a break, set the initial value of the stack<br />
pointer to 0xFEDF, not 0xFEE0 (when the initial value is set to 0xFEDF, the actual value used for the<br />
stack is 0xFEDE, so there will be no problems).<br />
Furthermore, 0xFEDF is prohibited for use as stack area, but it can be used as variable area.<br />
(e) Software break area<br />
This area is used for software breaks.<br />
[How to secure areas]<br />
Refer to the following and secure the area.<br />
SSS CSEG AT 07EH; ″SSS″ is an arbitrary symbol name (eight characters or less)<br />
DB 0FFH, 0FFH<br />
User’s Manual 29
3.2.7 Cautions on debugging<br />
CHAPTER 3 HOW TO USE <strong>EZ</strong>-<strong>CUBE</strong> WITH 78K0 MICROCONTROLLER<br />
This section describes cautions on performing on-chip debugging for a 78K0 microcontrollers.<br />
Be sure to read the following to use <strong>EZ</strong>-<strong>CUBE</strong> properly.<br />
(1) Handling of device that was used for debugging<br />
Do not mount a device that was used for debugging on a mass-produced product, because the flash memory<br />
was rewritten during debugging and the number of rewrites of the flash memory cannot be guaranteed.<br />
(2) Overwriting flash memory during on-chip debugging<br />
If the following operations are performed during on-chip debugging, the flash memory in the device is<br />
overwritten.<br />
Downloading a program<br />
Manipulation in Memory Fill dialog box<br />
Manipulation in Memory Copy dialog box<br />
Manipulation to change memory in Memory window<br />
<strong>On</strong>line assembly in Assemble window<br />
Settings when using software breaks<br />
It takes time from completion of flash memory programming until the control is passed to GUI.<br />
(3) Software break<br />
During program running, do not rewrite the data at the address where a software break is set. This includes<br />
self programming and rewriting to RAM. If performed, the instruction placed at the address may be invalid.<br />
(4) Boot swapping during self programming<br />
The boot swapping function cannot be emulated. This is because boot swapping moves the memory spaces<br />
used for debugging, and thus the debug communication can no longer be performed.<br />
(5) Break function for stack pointer initialization failure<br />
This function executes a break when an interrupt occurs or a PUSH instruction is executed while the initial<br />
setting has not been made for the stack pointer.<br />
If the manipulation or instruction shown below is executed immediately after a reset operation, the break<br />
function for stack pointer initialization failure becomes invalid.<br />
• Setting a software break<br />
• Write to the stack pointer from the Register window<br />
• Write to the flash memory from the Memory window, etc<br />
If a software break occurs while the initial setting has not been made for the stack pointer, the message<br />
″Uninitialized Stack Pointer″ is displayed on the status bar.<br />
The subsequent operations are not performed normally, so make sure to set the SP value in the user program.<br />
(6) Caution on downloading a HEX file<br />
When downloading a HEX file, do not set specify a filling value other than 0xFF for the object converter option<br />
(-U).<br />
(7) Caution on performing step execution<br />
Some SFRs (special function registers) remain stopped during step execution. In such a case, execute the<br />
instruction <strong>with</strong> the real-time execution function.<br />
User’s Manual 30
(8) Caution on mounting a clock<br />
CHAPTER 3 HOW TO USE <strong>EZ</strong>-<strong>CUBE</strong> WITH 78K0 MICROCONTROLLER<br />
When a clock is mounted, power supply may not become the GND level even if the power to the target system<br />
is shut down.<br />
(9) Emulation of POC function<br />
The POC function of the target device cannot be emulated. Make sure that the power to the target system is<br />
not shut down during debugging<br />
User’s Manual 31
3.3 Flash <strong>Programming</strong><br />
CHAPTER 3 HOW TO USE <strong>EZ</strong>-<strong>CUBE</strong> WITH 78K0 MICROCONTROLLER<br />
This section describes the system configuration and startup/shutdown procedure when flash programming is<br />
performed for a 78K0 microcontroller, using <strong>EZ</strong>-<strong>CUBE</strong>.<br />
3.3.1 Specifications of programming function<br />
Host interface<br />
Target interface<br />
Table 3-6. Specifications of <strong>Programming</strong> <strong>Function</strong><br />
<strong>Function</strong>s Specifications<br />
Target system voltage<br />
Clock supply<br />
Power supply<br />
Acquisition of device-specific<br />
information<br />
Security flag setting<br />
Standalone operation<br />
3.3.2 System configuration<br />
USB 2.0<br />
UART<br />
2.7 to 5.5 V (depends on the target device)<br />
8MHz clock can be supplied<br />
Clock mounted on the target system can be used<br />
5 ±0.3 V (maximum current rating: 100 mA)<br />
Parameter file for Renesas Electronics is used<br />
Available<br />
Unavailable (must be connected to host machine)<br />
Figure 3-11 illustrates the system configuration for flash programming.<br />
Target device<br />
Host machine<br />
Products <strong>with</strong> USB ports<br />
Software<br />
Figure 3-11. System Configuration for Flash <strong>Programming</strong><br />
<strong>EZ</strong>-<strong>CUBE</strong><br />
Includes the RFP, USB driver, and so on.<br />
USB cable (accessory)<br />
<strong>EZ</strong>-<strong>CUBE</strong> (this product)<br />
8-pin target cable (accessory)<br />
User’s Manual 32
3.3.3 System startup procedure<br />
CHAPTER 3 HOW TO USE <strong>EZ</strong>-<strong>CUBE</strong> WITH 78K0 MICROCONTROLLER<br />
This section describes the system startup procedure. Observe the following order.<br />
(1) Preparation and installation of software<br />
The following software is required to perform flash programming. For details on preparation and installation of<br />
software, refer to the setup manual supplied <strong>with</strong> <strong>EZ</strong>-<strong>CUBE</strong>.<br />
• RFP<br />
• USB driver<br />
(2) Switch setting<br />
SW-1: Select switch to ″M1″.<br />
SW-2: Depend on the user system environment.<br />
SW-3: Select switch to ″<strong>Debug</strong> Mode″.<br />
SW-4: Depend on the user system environment.<br />
SW-5: Select switch to ″Other″.<br />
Caution 1. Do not change the switch setting while the USB cable is connected.<br />
2. The maximum rating of the current is 100 mA, so do not use <strong>EZ</strong>-<strong>CUBE</strong> <strong>with</strong> the target<br />
system <strong>with</strong> the higher current rating. The power is always supplied after <strong>EZ</strong>-<strong>CUBE</strong> is<br />
connected to the host machine.<br />
(3) Connecting the target system<br />
Connect <strong>EZ</strong>-<strong>CUBE</strong> to the target system, before the power to the target system is turned on.<br />
(4) Connecting the USB cable<br />
Connect <strong>EZ</strong>-<strong>CUBE</strong> to the host machine, before the power to the target system is turned on.<br />
The power is always supplied after <strong>EZ</strong>-<strong>CUBE</strong> is connected to the host machine <strong>with</strong> the USB cable.<br />
Caution Do not change the switch setting while the USB cable is connected.<br />
(5) Applying power to target system<br />
Turn on power to the target system. This step is not necessary if the power select switch is set to ″5″.<br />
(6) RFP startup<br />
Start the RFP. For detailed usage of the RFP, refer to the RFP User's Manual.<br />
User’s Manual 33
3.3.4 Usage examples<br />
CHAPTER 3 HOW TO USE <strong>EZ</strong>-<strong>CUBE</strong> WITH 78K0 MICROCONTROLLER<br />
This section describes a series of basic operations using the RFP, using the UPD78F0513D as an example.<br />
The operations from execution of the [Autoprocedure (EP)] command to programming for the target device are<br />
described. For other commands and their applications, refer to the RFP User's Manual.<br />
The conditions used for a series of operations in this section are as follows.<br />
<br />
Target device: UPD78F0513D<br />
Power supply voltage: 5 V±0.3V (supplied from <strong>EZ</strong>-<strong>CUBE</strong>)<br />
Communication channel: UART, 115,200 bps<br />
<br />
Switches: SW-1: M1<br />
<br />
SW-2: Int.Clock<br />
SW-3: <strong>Debug</strong> Mode<br />
SW-4: 5<br />
SW-5: Other<br />
Clock setting: 8 MHz, x1<br />
Operation mode: chip<br />
Program file: sample.hex<br />
Command option: [Blank check before Erase] selected<br />
[Verify after Program] selected<br />
User’s Manual 34
CHAPTER 3 HOW TO USE <strong>EZ</strong>-<strong>CUBE</strong> WITH 78K0 MICROCONTROLLER<br />
(1) Setting of programming environment<br />
Set the programming environment, following the steps to described below.<br />
<strong>On</strong> the taskbar, click the Start button, point to [All Programs], [Renesas Electronics CubeSuite+],<br />
[<strong>Programming</strong> Tools], [Renesas Flash Programmer Vx.xx], and then click [Renesas Flash Programmer<br />
Vx.xx [Basic mode]]. The [Welcome!] dialog box will open. Select [Create new workspace.] and then click<br />
the Next button to open the [Create a new workspace] dialog box.<br />
Figure 3-12. [Welcome!] Dialog Box<br />
In the [Using Target Microcontroller:] list box, select “UPD78F0513D”. Enter any text string (such as<br />
“sample” in this case) in the [Workspace Name:] box, and specify any folder in the [Folder:] box.<br />
Clicking the Next button displays the [Select Communication Interface] dialog box.<br />
Figure 3-13. Parameter File Select Dialog Box<br />
User’s Manual 35
CHAPTER 3 HOW TO USE <strong>EZ</strong>-<strong>CUBE</strong> WITH 78K0 MICROCONTROLLER<br />
Select “Tool”, in the [Select Communication Interface] dialog box. For <strong>EZ</strong>-<strong>CUBE</strong>, the area is<br />
fixed to “PC port No.(Renesas Virtual UART)”.<br />
Clicking the Next button displays the [Setting Oscillator] dialog box.<br />
Figure 3-14. [Select Communication Interface] Dialog Box<br />
Select “Frequency” from the [Supply Oscillator] list box. For <strong>EZ</strong>-<strong>CUBE</strong>, the [Supply Oscillator] area is<br />
fixed to “8MHz”.<br />
Clicking the Next button.<br />
Figure 3-14. [Setting Oscillator] Dialog Box<br />
User’s Manual 36
CHAPTER 3 HOW TO USE <strong>EZ</strong>-<strong>CUBE</strong> WITH 78K0 MICROCONTROLLER<br />
“<strong>Chip</strong>” is the default value for [Operation mode] under the [Target] category, and the default value for “Blank<br />
Check before Erase” in the [Command Options] category is “Valid”. And the default value for “Verify after<br />
Program” in the [Command Options] category is “Valid”.<br />
Clicking the Complete button saves the project file and displays the main window.<br />
(2) Selection of program file<br />
Figure 3-15. [Information Settings] Dialog Box<br />
Select the program file, following the steps to described below.<br />
Click the Browse… button in “User/Data area:” of the program file area to open the [Open File] dialog box.<br />
Select “sample.hex” in the [Open File] dialog box, and then click the Open button to open the main<br />
window.<br />
User’s Manual 37
CHAPTER 3 HOW TO USE <strong>EZ</strong>-<strong>CUBE</strong> WITH 78K0 MICROCONTROLLER<br />
(3) Execution of [Autoprocedure (E.P)] command<br />
Click the [Microcontroller] menu and select the [Autoprocedure (E.P)] command. A check mark is then<br />
placed on the left of the command, and the command is assigned to the Start button. After clicking the Start<br />
button, execute the following commands in the following order for UPD78F0513D: [Blank Check] command,<br />
[Erase] command (if there are no blanks), [Program] command, and [Verify] command.<br />
Figure 3-16. Completion of [Autoprocedure (E.P)] Command Execution<br />
User’s Manual 38
3.3.5 System shutdown procedure<br />
CHAPTER 3 HOW TO USE <strong>EZ</strong>-<strong>CUBE</strong> WITH 78K0 MICROCONTROLLER<br />
Terminate flash programming and shutdown the system in the following order.<br />
If the following order is not observed, the target system or <strong>EZ</strong>-<strong>CUBE</strong> may be damaged.<br />
(1) Terminating the RFP<br />
Terminate the RFP if you are not going to perform programming to other devices.<br />
(2) Target system power shutdown<br />
Shutdown the power supplied to the target system. This step is not necessary if the power select switch is<br />
set to ″ 5 ″.<br />
(3) Unplugging the USB cable<br />
Unplug the USB cable from <strong>EZ</strong>-<strong>CUBE</strong> or the host machine.<br />
When the power select switch is set to ″T″, the step of (4) Unplugging the target cable can be performed<br />
before this step.<br />
(4) Unplugging the target cable<br />
Unplug the target cable from <strong>EZ</strong>-<strong>CUBE</strong> or the target system.<br />
3.3.6 Cautions on flash programming<br />
This section describes the cautions for flash programming. Be sure to read the following for the proper use of<br />
<strong>EZ</strong>-<strong>CUBE</strong>.<br />
• To improve the writing quality, fully understand, verify, and evaluate the following items before using <strong>EZ</strong>-<strong>CUBE</strong>.<br />
- Circuits are designed as described in the user's manuals for the device and <strong>EZ</strong>-<strong>CUBE</strong>.<br />
- The device, RFP and <strong>EZ</strong>-<strong>CUBE</strong> are used as described in each user's manual.<br />
- The power supplied to the target system is stable.<br />
User’s Manual 39
CHAPTER 4 HOW TO USE <strong>EZ</strong>-<strong>CUBE</strong> WITH 78K0R MICROCONTROLLER<br />
This chapter describes how to use <strong>EZ</strong>-<strong>CUBE</strong> when performing on-chip debugging and flash programming for a<br />
78K0R microcontroller.<br />
<strong>On</strong>-chip debugging is a method to debug a microcontroller mounted on the target system, using a debug function<br />
implemented in the device. Since debugging is performed <strong>with</strong> the target device operating on the board, this method<br />
is suitable for field debugging.<br />
Flash programming is a method to write a program to the flash memory embedded in a device. Erasing, writing<br />
and verifying the program can be performed on-board <strong>with</strong> the device.<br />
Please update firmware for 78K0R at first. Refer to description (1) to (3) on the following order. For detail, refer to<br />
1.4 Firmware update.<br />
(1) Connect <strong>EZ</strong>-<strong>CUBE</strong> to the host machine. Do not connect <strong>EZ</strong>-<strong>CUBE</strong> to the target system.<br />
(2) Start the <strong>EZ</strong>-<strong>CUBE</strong> firmware update tool”QB<strong>EZ</strong>UTL.exe”. Select firmware of 78K0R (78K0R_OCD_FW.hex).<br />
(3) Click the [Start] button. Start to update the <strong>EZ</strong>-<strong>CUBE</strong> firmware.<br />
Read the following chapters if you are using <strong>EZ</strong>-<strong>CUBE</strong> for the first time <strong>with</strong> a 78K0R microcontroller as the target<br />
device.<br />
4.1 Target System Design<br />
For communication between <strong>EZ</strong>-<strong>CUBE</strong> and the target system, communication circuits must be mounted on the<br />
target system. This section describes the circuit design and mounting of connectors.<br />
4.2 <strong>On</strong>-<strong>Chip</strong> <strong>Debug</strong>ging<br />
This section describes the system configuration and startup method to perform on-chip debugging <strong>with</strong><br />
<strong>EZ</strong>-<strong>CUBE</strong>.<br />
4.3 Flash <strong>Programming</strong><br />
This section describes the system configuration and startup method to perform flash programming <strong>with</strong><br />
<strong>EZ</strong>-<strong>CUBE</strong>.<br />
User’s Manual 40
4.1 Target System Design<br />
CHAPTER 4 HOW TO USE <strong>EZ</strong>-<strong>CUBE</strong> WITH 78K0R MICROCONTROLLER<br />
This section describes the target system circuit design required for on-chip debugging and flash programming.<br />
Figure 4-1 presents an overview of the <strong>EZ</strong>-<strong>CUBE</strong> communication interface. As shown on the left side of the<br />
figure, <strong>EZ</strong>-<strong>CUBE</strong> performs serial communication <strong>with</strong> the target device on the target system. For this<br />
communication, communication circuits must be mounted on the target system. Refer to this section to design<br />
circuits appropriately.<br />
Target device<br />
Target system<br />
Figure 4-1. Outline of Communication Interface<br />
UART communication<br />
(1-wire/2-wire mode) Note<br />
Communication circuits<br />
must be mounted on<br />
.<br />
the target system. .<br />
RENESAS<br />
<strong>EZ</strong>-<strong>CUBE</strong><br />
<strong>EZ</strong>-<strong>CUBE</strong><br />
USB<br />
communication<br />
Host machine<br />
Note 1-wire mode: Single-wire UART communication using TOOL0 pin<br />
2-wire mode: Single-wire UART communication using TOOL0 and TOOL1 pins<br />
Communication<br />
Mode<br />
Table 4-1. Differences Between 1-Wire Mode and 2-Wire Mode<br />
Flash <strong>Programming</strong><br />
<strong>Function</strong><br />
<strong>Debug</strong>ging <strong>Function</strong><br />
1-wire mode Available • User resources secured for debugging<br />
Internal ROM: 1036 bytes<br />
Internal RAM: 6 bytes (stack)<br />
2-wire mode Available • User resources secured for debugging<br />
Internal ROM: 100 bytes<br />
Internal RAM: 6 bytes (stack)<br />
User’s Manual 41
4.1.1 Pin assignment<br />
CHAPTER 4 HOW TO USE <strong>EZ</strong>-<strong>CUBE</strong> WITH 78K0R MICROCONTROLLER<br />
This section describes the interface signals used between <strong>EZ</strong>-<strong>CUBE</strong> and the target system. Table 4-2 lists the<br />
pin assignment. Table 4-3 describes the functions of each pin. The pin assignment varies between 1-wire and<br />
2-wire modes, so design the circuit appropriately according to the circuit connection examples described on the<br />
following sections.<br />
Pin No. Pin name Note<br />
1 GND<br />
2 RESET_IN<br />
3 Vdd<br />
4 FLMD0<br />
5 CLK<br />
6 RxD.<br />
7 RESET_OUT<br />
8 TxD<br />
Note Signal names in <strong>EZ</strong>-<strong>CUBE</strong><br />
Note 1<br />
Pin Name IN/OUT<br />
Table 4-2. Pin Assignment<br />
Target<br />
interface<br />
connector<br />
Table 4-3. Pin <strong>Function</strong>s<br />
7<br />
8<br />
5<br />
Description<br />
RESET_IN IN Pin used to input reset signal from the target system<br />
RESET_OUT OUT Pin used to output reset signal to the target device<br />
3<br />
6 4<br />
FLMD0 OUT Pin used to set the target device to debug mode or programming mode<br />
RXD IN/OUT Pin used to transmit/receive command/data between the target device<br />
TXD IN/OUT Pin used to transmit/receive command/data between the target device<br />
CLK IN Pin used to input handshake signal from the target device<br />
Note As seen from <strong>EZ</strong>-<strong>CUBE</strong><br />
User’s Manual 42<br />
1<br />
2
4.1.2 Circuit connection example<br />
CHAPTER 4 HOW TO USE <strong>EZ</strong>-<strong>CUBE</strong> WITH 78K0R MICROCONTROLLER<br />
Refer to Figure 4-2 and design an appropriate circuit.<br />
Caution The constants described in the circuit connection example are reference values. If you perform<br />
flash programming aiming at mass production, thoroughly evaluate whether the specifications of<br />
the target device are satisfied.<br />
Figure 4-2. Recommended Circuit Connection<br />
Notes 1. This connection is designed assuming that the RESET signal is output from the N-ch open-drain<br />
buffer (output resistance: 100Ω or less). For details, refer to 4.1.3 Connection of reset pin<br />
2. The circuit enclosed by a dashed line is not required when only flash programming is performed.<br />
3. This connection is required for 2-wire communication, but not for 1-wire communication. This pin<br />
is left open when <strong>EZ</strong>-<strong>CUBE</strong> is not connected, so connect a pull-up or pull-down resistor to this pin<br />
before using.<br />
User’s Manual 43
4.1.3 Connection of reset pin<br />
CHAPTER 4 HOW TO USE <strong>EZ</strong>-<strong>CUBE</strong> WITH 78K0R MICROCONTROLLER<br />
This section describes the connection of the reset pin, for which special attention must be paid, in the circuit<br />
connection example shown in the previous section.<br />
During on-chip debugging, a reset signal from the target system is input to <strong>EZ</strong>-<strong>CUBE</strong>, masked, and then output<br />
to the target device. Therefore, the reset signal connection varies depending on whether <strong>EZ</strong>-<strong>CUBE</strong> is connected.<br />
For flash programming, the circuit must be designed so that the reset signals of the target system and <strong>EZ</strong>-<strong>CUBE</strong><br />
do not conflict.<br />
Recommend automatically switching the reset signal via series resistor.<br />
Figure 4-3 illustrates the reset pin connection described in 4.1.2 Circuit connection example.<br />
This connection is designed assuming that the reset circuit on the target system contains an N-ch open-drain<br />
buffer (output resistance: 100Ω or less). The VDD or GND level may be unstable when the logic of<br />
RESET_IN/OUT of <strong>EZ</strong>-<strong>CUBE</strong> is inverted, so observe the conditions described below in Remark.<br />
Figure 4-3. Circuit Connection <strong>with</strong> Reset Circuit That Contains Buffer<br />
<strong>EZ</strong>-<strong>CUBE</strong><br />
RESET_OUT<br />
RESET_IN<br />
R1<br />
Target device<br />
_RESET<br />
R2<br />
VDD V<br />
Reset connector<br />
Buffer<br />
Remark Make the resistance of at least R1 ten times that of R2, R1 being 10 kΩ or more.<br />
Pull-up resistor R2 is not required if the buffer of the reset circuit consists of CMOS output.<br />
The circuit enclosed by a dashed line is not required when only flash programming is performed.<br />
Figure 4-4 illustrates the circuit connection for the case where the reset circuit on the target system contains<br />
no buffers and the reset signal is only generated via resistors or capacitors. Design the circuit, observing the<br />
conditions described below in Remark.<br />
Figure 4-4. Circuit Connection <strong>with</strong> Reset Circuit That Contains No Buffers<br />
<strong>EZ</strong>-<strong>CUBE</strong><br />
RESET_OUT<br />
RESET_IN<br />
_RESET<br />
R1 R2<br />
VDD DD<br />
V DD<br />
Target device Reset connector<br />
Remark Make the resistance of at least R1 ten times that of R2, R1 being 10 kΩ or more.<br />
The circuit enclosed by a dashed line is not required when only flash programming is performed.<br />
4.1.4 Mounting connector onto target system<br />
The connector must be mounted on the target system for connecting <strong>EZ</strong>-<strong>CUBE</strong> <strong>with</strong> the target system. 2.54<br />
mm pitch 8-pin general-purpose connector can be used.<br />
Compact connectors and loose-wire cables are also available as options.<br />
User’s Manual 44
4.2 <strong>On</strong>-<strong>Chip</strong> <strong>Debug</strong>ging<br />
CHAPTER 4 HOW TO USE <strong>EZ</strong>-<strong>CUBE</strong> WITH 78K0R MICROCONTROLLER<br />
This section describes the system configuration, startup/shutdown procedure and cautions for debugging when<br />
on-chip debugging is performed <strong>with</strong> <strong>EZ</strong>-<strong>CUBE</strong>.<br />
4.2.1 <strong>Debug</strong> functions<br />
Table 4-4 lists the debug functions when a 78K0R microcontroller is the target device.<br />
Table 4-4. <strong>Debug</strong> <strong>Function</strong>s<br />
<strong>Function</strong>s Specifications<br />
Target device 78K0R<br />
78K0R/Kx3,Lx3<br />
Security 10 byte ID code authentication<br />
Download Available<br />
Execution Go, Step In, Step Over, CPU Reset, Restart<br />
Hardware break 1 point (commonly used by execution and access)<br />
Software break Multiple points<br />
User spaces used for debugging 1-wire mode:Internal ROM: 1036 bytes, Internal RAM: 6 bytes Note<br />
<strong>Function</strong> pins used for debugging 1-wire mode: TOOL0<br />
2-wire mode:Internal ROM: 100 bytes, Internal RAM: 6 bytes Note<br />
2-wire mode: TOOL0, TOOL1<br />
Note For details, refer to 4.2.5 Securing of user resources and setting of security ID and on-chip debug option<br />
byte.<br />
User’s Manual 45
4.2.2 System configuration<br />
CHAPTER 4 HOW TO USE <strong>EZ</strong>-<strong>CUBE</strong> WITH 78K0R MICROCONTROLLER<br />
Figure 4-5 illustrates the system configuration for on-chip debugging.<br />
Target device<br />
Target device<br />
Host machine<br />
Products <strong>with</strong> USB ports<br />
Software<br />
Figure 4-5. System Configuration for <strong>On</strong>-<strong>Chip</strong> <strong>Debug</strong>ging<br />
<strong>EZ</strong>-<strong>CUBE</strong><br />
Includes CubeSuite+ for China, USB driver, and so on.<br />
USB cable (accessory)<br />
<strong>EZ</strong>-<strong>CUBE</strong> (this product)<br />
8-pin target cable (accessory)<br />
User’s Manual 46
4.2.3 System startup procedure<br />
CHAPTER 4 HOW TO USE <strong>EZ</strong>-<strong>CUBE</strong> WITH 78K0R MICROCONTROLLER<br />
This section describes the system startup procedure. Observe the following order.<br />
(1) Preparation and installation of software<br />
The following software is required to perform on-chip debugging. For details on preparation and installation of<br />
software, refer to the setup manual supplied <strong>with</strong> <strong>EZ</strong>-<strong>CUBE</strong>.<br />
• CuebSuite+ for China<br />
• USB driver<br />
(2) Switch setting<br />
SW-1: Select switch to ″M2″.<br />
SW-2: Depend on the user system environment.<br />
SW-3: Select switch to ″<strong>Debug</strong> Mode″.<br />
SW-4: Depend on the user system environment.<br />
SW-5: Select switch to ″Other″.<br />
Caution 1. Do not change the switch setting while the USB cable is connected.<br />
2. The maximum rating of the current is 100 mA, so do not use <strong>EZ</strong>-<strong>CUBE</strong> <strong>with</strong> the target<br />
system <strong>with</strong> the higher current rating. The power is always supplied after <strong>EZ</strong>-<strong>CUBE</strong> is<br />
connected to the host machine.<br />
(3) Connecting the target system<br />
Connect <strong>EZ</strong>-<strong>CUBE</strong> to the target system, before the power to the target system is turned on.<br />
(4) Connecting the USB cable<br />
Connect <strong>EZ</strong>-<strong>CUBE</strong> to the host machine, before the power to the target system is turned on.<br />
The mode LED glows red after connection.<br />
(5) Applying power to target system<br />
Turn on power to the target system. This step is not necessary if the power select switch is set to ″5″.<br />
(6) <strong>Debug</strong>ger startup<br />
Start the debugger.<br />
For the operation after this step, refer to the user's manual for CuebSuite+.<br />
If the debugger does not start normally or the operation is unstable, the possible causes may be the following.<br />
Communication error between <strong>EZ</strong>-<strong>CUBE</strong> and target system<br />
Whether firmware is update.<br />
Whether switch is selected normally.<br />
Whether communication is performed normally.<br />
• The user resource has not been secured or the security ID has not been set<br />
To perform debugging <strong>with</strong> <strong>EZ</strong>-<strong>CUBE</strong>, the user resource must be secured and the security ID must be set.<br />
For details, refer to 4.2.5 Securing of user resources and setting of security ID.<br />
• Unsupported software (debugger, device file, or firmware) is used<br />
The software used may not support debugging of the target device.<br />
• Defect of <strong>EZ</strong>-<strong>CUBE</strong><br />
<strong>EZ</strong>-<strong>CUBE</strong> may have a defect.<br />
User’s Manual 47
4.2.4 System shutdown procedure<br />
CHAPTER 4 HOW TO USE <strong>EZ</strong>-<strong>CUBE</strong> WITH 78K0R MICROCONTROLLER<br />
Terminate debugging and shutdown the system in the following order.<br />
If the following order is not observed, the target system or <strong>EZ</strong>-<strong>CUBE</strong> may be damaged.<br />
(1) <strong>Debug</strong>ger termination<br />
Terminate the debugger.<br />
(2) Target system power shutdown<br />
Shutdown the power supplied to the target system. This step is not necessary if the power select switch is<br />
set to ″5″.<br />
(3) Unplugging the USB cable<br />
Unplug the USB cable from <strong>EZ</strong>-<strong>CUBE</strong> or the host machine.<br />
(4) Unplugging the target cable<br />
Unplug the target cable from <strong>EZ</strong>-<strong>CUBE</strong> or the target system.<br />
User’s Manual 48
CHAPTER 4 HOW TO USE <strong>EZ</strong>-<strong>CUBE</strong> WITH 78K0R MICROCONTROLLER<br />
4.2.5 Securing of user resources and setting of security ID and on-chip debug option byte<br />
The user must prepare the following to perform communication between <strong>EZ</strong>-<strong>CUBE</strong> and the target device and<br />
implement each debug function. If Renesas Electronics assembler or compiler is used, the items can be set by<br />
using linker options. Refer to the descriptions on the following pages and set these items.<br />
• Securing of memory space<br />
The shaded portions in Figure 4-6 are the areas reserved for placing the debug monitor program, so user<br />
programs or data cannot be allocated in these spaces. These spaces must be secured so as not to be<br />
used by the user program. Moreover, this area must not be rewritten by the user program.<br />
Internal ROM space<br />
1024 bytes<br />
10 bytes<br />
10 bytes<br />
1 byte<br />
2 bytes<br />
Note<br />
Figure 4-6. Memory Spaces Where <strong>Debug</strong> Monitor Programs Are Allocated<br />
Internal ROM end address<br />
(a) <strong>Debug</strong> monitor area<br />
D8H<br />
D7H<br />
(a) <strong>Debug</strong> monitor area<br />
CEH<br />
CDH<br />
(c) Security ID area<br />
C4H<br />
C3H (b) <strong>On</strong>-chip debug option byte area<br />
03H<br />
(a) <strong>Debug</strong> monitor monitor area<br />
02H<br />
Internal RAM space<br />
6 bytes<br />
Internal RAM end address<br />
(d) Stack area for debugging<br />
: Area used for on-chip debugging<br />
Note In debugging, reset vector is rewritten to address allocated to a monitor program.<br />
• Setting of security ID and on-chip debug option byte<br />
The security ID or on-chip debug option byte must be embedded in the area filled <strong>with</strong> yellow (0xC3 and<br />
0xC4 to 0xCD) in Figure 4-6, to prevent the memory from being read by an unauthorized person.<br />
User’s Manual 49
CHAPTER 4 HOW TO USE <strong>EZ</strong>-<strong>CUBE</strong> WITH 78K0R MICROCONTROLLER<br />
(a) Securing of debug monitor area<br />
This is the area to which the debug monitor program is to be allocated. The monitor program performs<br />
initialization processing for debug communication interface and RUN or break processing for the CPU.<br />
This user programs or data must not be placed in an area of 22 bytes near the on-chip debug option<br />
byte, and an area of 1,024 bytes before the internal ROM end address. In addition, reset vector is<br />
rewritten to address allocated to a monitor program.<br />
[How to secure areas]<br />
This is the area to which the debug monitor program is to be allocated. However To avoid problems that<br />
may occur during the debugger startup, it is recommended to secure this area in advance, using the<br />
compiler. Figure 4-7 shows example for securing the area, using the CubeSuite+. Set in “device” in link<br />
options tab as figure 4-7.<br />
(b) <strong>On</strong>-chip debug option byte area<br />
This is the area for the security setting to prevent the flash memory from being read by an unauthorized<br />
person. The debugger manipulates the target device in accordance <strong>with</strong> the set value, as shown<br />
below.<br />
Table 4-5. <strong>On</strong>-<strong>Chip</strong> <strong>Debug</strong> Option Byte Setting and Operation<br />
Set Value Description Remark<br />
0x04 <strong>Debug</strong>ging is disabled even if an on-chip debug This setting is available only<br />
emulator (such as <strong>EZ</strong>-<strong>CUBE</strong>) is connected.<br />
for flash programming and self<br />
programming.<br />
0x85 The on-chip flash memory is not erased no matter<br />
how many times the security ID code authentication<br />
fails.<br />
-<br />
0x84 All on-chip flash memory areas are erased if the<br />
security ID code authentication fails.<br />
-<br />
Other than above Setting prohibited -<br />
Caution Values can be set only to bits 7 and 0 (OCDENSET and OCDERSD). Be sure to write<br />
000010B to bits 6 to 1.<br />
Remark Values set to bits 3 to 1 are changed during on-chip debugging, so values of these bits are<br />
undefined after setting. However, be sure to set these bits to initial values (0, 1, 0).<br />
[How to set]<br />
The following shows a setting example when using Renesas Electronics assembler or compiler. Set a<br />
value for the Control Value text box under the ″ Use on-chip debug [-go]″ check box as shown in the<br />
figure below.<br />
Example Setting 0x84 for control value<br />
User’s Manual 50
CHAPTER 4 HOW TO USE <strong>EZ</strong>-<strong>CUBE</strong> WITH 78K0R MICROCONTROLLER<br />
Figure 4-7. <strong>On</strong>-<strong>Chip</strong> <strong>Debug</strong> Option Byte and Monitor Area Setting Example<br />
Caution If bit 7 (OCDENSET) of the on-chip debug option byte area (address 0xC3) is set to ″0″ by flash<br />
programming or self programming, debugging is disabled and the debugger can no longer start<br />
unconditionally. To enable debugging, erase the flash memory by flash programming.<br />
(c) Security ID area<br />
This is the area for the security setting to prevent the flash memory from being read by an unauthorized person.<br />
The security ID functions as a password for starting the debugger. The debugger starts only when the<br />
security ID that is input during debugger startup and the security ID embedded in this area match. If the ID<br />
codes do not match, the debugger manipulates the target device in accordance <strong>with</strong> the value set to the<br />
on-chip debug option byte area (refer to Table 4-5).<br />
[How to set]<br />
An ID code is generated in the security ID area by setting the security ID when using Renesas Electronics<br />
assembler or compiler. Set in “device” in the common options tab as figure 4-8.<br />
User’s Manual 51
CHAPTER 4 HOW TO USE <strong>EZ</strong>-<strong>CUBE</strong> WITH 78K0R MICROCONTROLLER<br />
Figure 4-8. Security ID Setting Example<br />
Caution If you have forgotten the security ID, erase the flash memory by flash programming or self<br />
programming and then set the security ID again.<br />
(d) Securing of stack area for debugging<br />
This area requires 6 bytes as the stack area for debugging. Since this area is allocated immediately before<br />
the stack area, the address of this area varies depending on the stack increase and decrease. That is, 6<br />
extra bytes are consumed for the stack area used.<br />
Figure 4-9 illustrates the case where the stack area is increased when the internal high-speed RAM starts from<br />
0xFCF00.<br />
0xFFEDF<br />
0xFCF00<br />
6bytes<br />
[How to secure areas]<br />
Figure 4-9. Variation of Address of Stack Area for <strong>Debug</strong>ging<br />
<br />
Stack area<br />
Stack area for<br />
debugging<br />
Available space<br />
In internal highspeed<br />
RAM<br />
0xFFEDF<br />
0xFCF00<br />
6 bytes<br />
0xFFEDF<br />
0xFCF06<br />
0xFCF00<br />
6 bytes<br />
Set the stack pointer by estimating the stack area consumed by the user program + 6 bytes. Make sure that<br />
the stack pointer does not extend beyond the internal high-speed RAM start address.<br />
Remark Refer to the self programming manual for how to secure the stack area for self programming.<br />
User’s Manual 52
4.2.6 Cautions on debugging<br />
CHAPTER 4 HOW TO USE <strong>EZ</strong>-<strong>CUBE</strong> WITH 78K0R MICROCONTROLLER<br />
This section describes cautions on performing on-chip debugging for a 78K0R microcontroller.<br />
Be sure to read the following to use <strong>EZ</strong>-<strong>CUBE</strong> properly.<br />
(1) Handling of device that was used for debugging<br />
Do not mount a device that was used for debugging on a mass-produced product, because the flash memory<br />
was rewritten during debugging and the number of rewrites of the flash memory cannot be guaranteed.<br />
Moreover, do not embed the debug monitor program into mass-produced products.<br />
(2) Flash self programming<br />
If a space where the debug monitor program is allocated is rewritten by flash self programming, the debugger<br />
can no longer operate normally. This caution also applies to boot swapping for such an area.<br />
(3) Operation after reset<br />
After an external pin reset or internal reset, the monitor program performs debug initialization processing.<br />
Consequently, the time from reset occurrence until user program execution differs from that in the actual<br />
device operation.<br />
(4) <strong>Debug</strong>ging <strong>with</strong> real machine running <strong>with</strong>out using <strong>EZ</strong>-<strong>CUBE</strong><br />
If debugging is performed <strong>with</strong> a real machine running, <strong>with</strong>out using <strong>EZ</strong>-<strong>CUBE</strong>, write the user program using<br />
the RFP. Programs downloaded by the debugger include the monitor program, and such a program<br />
malfunctions if it includes processing to make the TOOL0 pin low level.<br />
(5) Operation when debugger starts<br />
When the debugger is started, if the Target Device Connection setting in the Configuration dialog box of the<br />
debugger is different from the setting for the previous debugging, the internal flash memory is erased.<br />
(6) <strong>Debug</strong>ging after program is written by flash programming<br />
If a program is written to the internal flash memory using the RFP, on-chip debugging is disabled even if it is<br />
enabled in the on-chip debugging option byte setting. To perform debugging of the target device after that,<br />
erase the internal flash memory using the RFP and then download the program using the debugger.<br />
(7) LVI default start function setting (address C1H)<br />
The LVI setting at address C1H in the internal flash memory during debugging is set as follows.<br />
- When <strong>EZ</strong>-<strong>CUBE</strong> is connected: The LVI default start function is available.<br />
- When <strong>EZ</strong>-<strong>CUBE</strong> is not connected: The LVI default start function is unavailable.<br />
(8) <strong>On</strong>-chip debugging option byte setting (address C3H)<br />
The on-chip debugging option byte setting is rewritten arbitrarily by the debugger.<br />
(9) <strong>Debug</strong>ging in 1-wire mode<br />
Note the following points when debugging is performed in 1-wire mode (selected by choosing TOOL0 in the<br />
Connection <strong>with</strong> Target Board area in the Communication method dialog box of the debugger).<br />
When the internal high-speed oscillator is used for the CPU operating clock, breaks may not occur normally if<br />
the frequency variation between debugger startup and break occurrence (except for when changing the<br />
register) is too large. This situation may occur when the variation of operating voltage or temperature is too<br />
large.<br />
User’s Manual 53
4.3 Flash <strong>Programming</strong><br />
CHAPTER 4 HOW TO USE <strong>EZ</strong>-<strong>CUBE</strong> WITH 78K0R MICROCONTROLLER<br />
This section describes the system configuration and startup/shutdown procedure when flash programming is<br />
performed for a 78K0R microcontroller, using <strong>EZ</strong>-<strong>CUBE</strong>.<br />
4.3.1 Specifications of programming function<br />
Table 4-6. Specifications of <strong>Programming</strong> <strong>Function</strong><br />
<strong>Function</strong>s Specifications<br />
Host interface USB 2.0<br />
Target interface UART (1-wire mode)<br />
Target system voltage 2.7 to 5.5 V (depends on the target device)<br />
Clock supply Internal high-speed oscillation clock is used<br />
Power supply 5 V ±0.3 V (maximum current rating: 100 mA)<br />
Acquisition of device-specific<br />
information<br />
Security flag setting Available<br />
Parameter file for Renesas Electronics is used<br />
Standalone operation Unavailable (must be connected to host machine)<br />
4.3.2 System configuration<br />
Figure 4-10 illustrates the system configuration for flash programming.<br />
Target device<br />
Host machine<br />
Products <strong>with</strong> USB ports<br />
Software<br />
Figure 4-10. System Configuration for Flash <strong>Programming</strong><br />
<strong>EZ</strong>-<strong>CUBE</strong><br />
Includes the RFP, USB driver, and so on.<br />
USB cable (accessory)<br />
<strong>EZ</strong>-<strong>CUBE</strong> (this product)<br />
8-pin target cable (accessory)<br />
User’s Manual 54
4.3.3 System startup procedure<br />
CHAPTER 4 HOW TO USE <strong>EZ</strong>-<strong>CUBE</strong> WITH 78K0R MICROCONTROLLER<br />
This section describes the system startup procedure. Observe the following order.<br />
(1) Preparation and installation of software<br />
The following software is required to perform flash programming. For details on preparation and installation of<br />
software, refer to the setup manual supplied <strong>with</strong> <strong>EZ</strong>-<strong>CUBE</strong>.<br />
• RFP<br />
• USB driver<br />
(2) Switch setting<br />
SW-1: Select switch to ″M2″.<br />
SW-2: Depend on the user system environment.<br />
SW-3: Select switch to ″<strong>Debug</strong> Mode″.<br />
SW-4: Depend on the user system environment.<br />
SW-5: Select switch to ″Other″<br />
Caution 1. Do not change the switch setting while the USB cable is connected.<br />
2. The maximum rating of the current is 100 mA, so do not use <strong>EZ</strong>-<strong>CUBE</strong> <strong>with</strong> the target<br />
system <strong>with</strong> the higher current rating. The power is always supplied after <strong>EZ</strong>-<strong>CUBE</strong> is<br />
connected to the host machine.<br />
(3) Connecting the target system<br />
Connect <strong>EZ</strong>-<strong>CUBE</strong> to the target system, before the power to the target system is turned on.<br />
(4) Connecting the USB cable<br />
Connect <strong>EZ</strong>-<strong>CUBE</strong> to the host machine, before the power to the target system is turned on.<br />
The power is always supplied after <strong>EZ</strong>-<strong>CUBE</strong> is connected to the host machine <strong>with</strong> the USB cable.<br />
Caution Do not change the switch setting while the USB cable is connected.<br />
(5) Applying power to target system<br />
Turn on power to the target system. This step is not necessary if the power select switch is set to ″5″.<br />
(6) RFP startup<br />
Start the RFP.<br />
For detailed usage of the RFP, refer to the RFP User's Manual.<br />
User’s Manual 55
4.3.4 Usage examples<br />
CHAPTER 4 HOW TO USE <strong>EZ</strong>-<strong>CUBE</strong> WITH 78K0R MICROCONTROLLER<br />
This section describes a series of basic operations using the RFP, using the UPD78F1166 as an example. The<br />
operations from execution of the [Autoprocedure (E.P)] command to programming for the target device are<br />
described. For other commands and their applications, refer to the RFP User's Manual.<br />
The conditions used for a series of operations in this section are as follows.<br />
<br />
Target device: UPD78F1166<br />
Power supply voltage: 5 V±0.3V (supplied from <strong>EZ</strong>-<strong>CUBE</strong>)<br />
<br />
Switches: SW-1: M2<br />
<br />
Operation mode: chip<br />
SW-2: Int.Clock<br />
SW-3: <strong>Debug</strong> Mode<br />
SW-4: 5<br />
SW-5: Other<br />
Program file: sample.hex<br />
Command options: [Blank check before Erase] selected<br />
[Verify after Program] selected<br />
User’s Manual 56
CHAPTER 4 HOW TO USE <strong>EZ</strong>-<strong>CUBE</strong> WITH 78K0R MICROCONTROLLER<br />
(1) Setting of programming environment<br />
Set the programming environment, following the steps to described below.<br />
<strong>On</strong> the taskbar, click the Start button, point to [All Programs], [Renesas Electronics CubeSuite+],<br />
[<strong>Programming</strong> Tools], [Renesas Flash Programmer Vx.xx], and then click [Renesas Flash Programmer<br />
Vx.xx [Basic mode]]. The [Welcome!] dialog box will open. Select [Create new workspace.] and then click<br />
the Next button to open the [Create a new workspace] dialog box.<br />
Figure 4-11. [Welcome!] Dialog Box<br />
In the [Using Target Microcontroller:] list box, select “UPD78F1166”. Enter any text string (such as<br />
“sample” in this case) in the [Workspace Name:] box, and specify any folder in the [Folder:] box.<br />
Clicking the Next button displays the [Select Communication Interface] dialog box.<br />
Figure 4-12. Parameter File Select Dialog Box<br />
User’s Manual 57
CHAPTER 4 HOW TO USE <strong>EZ</strong>-<strong>CUBE</strong> WITH 78K0R MICROCONTROLLER<br />
Select “Tool”, in the [Select Communication Interface] dialog box. For <strong>EZ</strong>-<strong>CUBE</strong>, the area is<br />
fixed to “PC port No.(Renesas Virtual UART)”.<br />
Clicking the Next button displays the [Setting Oscillator] dialog box.<br />
Figure 4-13. [Select Communication Interface] Dialog Box<br />
“<strong>Chip</strong>” is the default value for [Operation mode] under the [Target] category, and the default value for “Blank<br />
Check before Erase” in the [Command Options] category is “Valid”. And the default value for “Verify after<br />
Program” in the [Command Options] category is “Valid”.<br />
Clicking the Complete button saves the project file and displays the main window.<br />
Figure 4-14. [Information Settings] Dialog Box<br />
User’s Manual 58
(2) Selection of program file<br />
CHAPTER 4 HOW TO USE <strong>EZ</strong>-<strong>CUBE</strong> WITH 78K0R MICROCONTROLLER<br />
Select the program file, following the steps to described below.<br />
Click the Browse… button in “User/Data area:” of the program file area to open the [Open File] dialog box.<br />
Select “Sample.hex” in the [Open File] dialog box, and then click the Open button to open the main<br />
window.<br />
(3) Execution of [Autoprocedure (E.P)] command<br />
Click the [Microcontroller] menu and select the [Autoprocedure (E.P)] command. A check mark is then<br />
placed on the left of the command, and the command is assigned to the Start button. After clicking the Start<br />
button, execute the following commands in the following order for UPD78F1166: [Blank Check] command,<br />
[Erase] command (if there are no blanks), [Program] command, and [Verify] command.<br />
Figure 4-15. Completion of [Autoprocedure (E.P)] Command Execution<br />
User’s Manual 59
4.3.5 System shutdown procedure<br />
CHAPTER 4 HOW TO USE <strong>EZ</strong>-<strong>CUBE</strong> WITH 78K0R MICROCONTROLLER<br />
Terminate flash programming and shutdown the system in the following order.<br />
If the following order is not observed, the target system or <strong>EZ</strong>-<strong>CUBE</strong> may be damaged.<br />
(1) Terminating the RFP<br />
Terminate the RFP if you are not going to perform programming to other devices.<br />
(2) Target system power shutdown<br />
Shutdown the power supplied to the target system. This step is not necessary if the power select switch is<br />
set to ″5″.<br />
(3) Unplugging the USB cable<br />
Unplug the USB cable from <strong>EZ</strong>-<strong>CUBE</strong> or the host machine.<br />
When the power select switch is set to ″T″, the step of (4) Unplugging the target cable can be performed<br />
before this step.<br />
(4) Unplugging the target cable<br />
Unplug the target cable from <strong>EZ</strong>-<strong>CUBE</strong> or the target system.<br />
4.3.6 Cautions on flash programming<br />
This section describes the cautions for flash programming. Be sure to read the following for the proper use of<br />
<strong>EZ</strong>-<strong>CUBE</strong>.<br />
• To improve the writing quality, fully understand, verify, and evaluate the following items before using <strong>EZ</strong>-<strong>CUBE</strong>.<br />
- Circuits are designed as described in the user's manuals for the device and <strong>EZ</strong>-<strong>CUBE</strong>.<br />
- The device, RFP and <strong>EZ</strong>-<strong>CUBE</strong> are used as described in each user's manual.<br />
- The power supplied to the target system is stable.<br />
User’s Manual 60
CHAPTER 5 HOW TO USE <strong>EZ</strong>-<strong>CUBE</strong> WITH R8C MICROCONTROLLER<br />
This chapter describes how to use <strong>EZ</strong>-<strong>CUBE</strong> when performing on-chip debugging and flash programming for a<br />
R8C microcontroller.<br />
<strong>On</strong>-chip debugging is a method to debug a microcontroller mounted on the target system, using a debug function<br />
implemented in the device. Since debugging is performed <strong>with</strong> the target device operating on the board, this method<br />
is suitable for field debugging.<br />
Flash programming is a method to write a program to the flash memory embedded in a device. Erasing, writing<br />
and verifying the program can be performed on-board <strong>with</strong> the device.<br />
Please update firmware for R8C at first. Refer to description (1) to (3) on the following order. For detail, refer to 1.4<br />
Firmware update.<br />
(1) Connect <strong>EZ</strong>-<strong>CUBE</strong> to the host machine. Do not connect <strong>EZ</strong>-<strong>CUBE</strong> to the target system.<br />
(2) Start the <strong>EZ</strong>-<strong>CUBE</strong> firmware update tool”QB<strong>EZ</strong>UTL.exe”. Select firmware of R8C (R8C_OCD_FW.hex).<br />
(3) Click the [Start] button. Start to update the <strong>EZ</strong>-<strong>CUBE</strong> firmware.<br />
Read the following chapters if you are using <strong>EZ</strong>-<strong>CUBE</strong> for the first time <strong>with</strong> a R8C microcontroller as the target<br />
device.<br />
5.1 Target System Design<br />
For communication between <strong>EZ</strong>-<strong>CUBE</strong> and the target system, communication circuits must be mounted on the<br />
target system. This section describes the circuit design and mounting of connectors.<br />
5.2 <strong>On</strong>-<strong>Chip</strong> <strong>Debug</strong>ging<br />
This section describes the system configuration and startup method to perform on-chip debugging <strong>with</strong><br />
<strong>EZ</strong>-<strong>CUBE</strong>.<br />
5.3 Flash <strong>Programming</strong><br />
This section describes the system configuration and startup method to perform flash programming <strong>with</strong><br />
<strong>EZ</strong>-<strong>CUBE</strong>.<br />
User’s Manual 61
5.1 Target System Design<br />
CHAPTER 5 HOW TO USE <strong>EZ</strong>-<strong>CUBE</strong> WITH R8C MICROCONTROLLER<br />
This section describes the target system circuit design required for on-chip debugging and flash programming.<br />
Figure 5-1 presents an overview of the <strong>EZ</strong>-<strong>CUBE</strong> communication interface. As shown on the left side of the<br />
figure, <strong>EZ</strong>-<strong>CUBE</strong> performs serial communication <strong>with</strong> the target device on the target system. For this<br />
communication, communication circuits must be mounted on the target system. Refer to this section to design<br />
circuits appropriately.<br />
Target device<br />
Target system<br />
Figure 5-1. Outline of Communication Interface<br />
communication<br />
(MODE/RESET)<br />
Communication circuits<br />
must be mounted on<br />
.<br />
the target system. .<br />
RENESAS<br />
<strong>EZ</strong>-<strong>CUBE</strong><br />
<strong>EZ</strong>-<strong>CUBE</strong><br />
USB<br />
communication<br />
Host machine<br />
User’s Manual 62
5.1.1 Pin assignment<br />
CHAPTER 5 HOW TO USE <strong>EZ</strong>-<strong>CUBE</strong> WITH R8C MICROCONTROLLER<br />
This section describes the interface signals used between <strong>EZ</strong>-<strong>CUBE</strong> and the target system. Table 5-1 lists the<br />
pin assignment. Table 5-2 describes the functions of each pin.<br />
Pin No. Pin name Note<br />
1 GND<br />
2 RESET_IN<br />
3 Vcc<br />
4 N.C<br />
5 N.C<br />
6 N.C<br />
7 N.C<br />
8 MODE<br />
Note Signal names in <strong>EZ</strong>-<strong>CUBE</strong><br />
Pin Name IN/OUT Note<br />
Table 5-1. Pin Assignment<br />
Target interface<br />
connector<br />
Table 5-2. Pin <strong>Function</strong>s<br />
7<br />
8<br />
5<br />
Description<br />
3<br />
6 4<br />
GND P Ground potential<br />
Target Vcc (5V) P (OUT) Positive power supply<br />
MODE IN/OUT Pin used to transmit/receive command/data between the target device<br />
RESET_IN IN/OUT Pin used to input reset signal from the target system<br />
Note As seen from <strong>EZ</strong>-<strong>CUBE</strong><br />
User’s Manual 63<br />
1<br />
2
5.1.2 Circuit connection example<br />
CHAPTER 5 HOW TO USE <strong>EZ</strong>-<strong>CUBE</strong> WITH R8C MICROCONTROLLER<br />
Refer to Figure 5-2 and design an appropriate circuit.<br />
Caution The constants described in the circuit connection example are reference values. If you perform<br />
flash programming aiming at mass production, thoroughly evaluate whether the specifications of<br />
the target device are satisfied.<br />
Vcc<br />
MODE (Pin8)<br />
RESET<br />
Vss<br />
5.1.3 Connection of pin<br />
Figure 5-2. Recommended Circuit Connection<br />
Vcc<br />
Vcc<br />
Vcc<br />
User logic<br />
circuit<br />
2.54 mm pitch 8-pin<br />
general-purpose connector<br />
Pull-up resistor 4.7KΩ ±10%<br />
Pull-up resistor<br />
4.7KΩ or more<br />
User System<br />
*<br />
MODE<br />
RESET<br />
*: Buffer <strong>with</strong> Open-Collector<br />
(1) MODE pin<br />
The <strong>EZ</strong>-<strong>CUBE</strong> emulators use the MODE pin for MCU control and forced break control.<br />
Do not connect a capacitor etc. to this pin.<br />
Figure 5-3. Connection of the <strong>Emulator</strong> and the MODE Pin<br />
MCU<br />
User’s Manual 64
(2)RESET# pin<br />
CHAPTER 5 HOW TO USE <strong>EZ</strong>-<strong>CUBE</strong> WITH R8C MICROCONTROLLER<br />
The RESET#<br />
pin is used by the emulator for outputting “L” and monitoring pin states. Therefore, use an<br />
open-collector<br />
output buffer or a CR reset circuit as the reset circuit for the user system. The recommended pull-up<br />
value is 4.7 kΩ or more.<br />
The MCU can be reset<br />
by outputting “L” from the emulator. However, if the reset IC output is “H”, the<br />
user<br />
system reset circuit cannot be set to “L”. As such, the emulator will not operate normally.<br />
(3)Other<br />
pins<br />
Figure 5-4. Connection of the <strong>Emulator</strong> and the RESET Pin<br />
- Connect Vss<br />
and Vcc to the Vss and Vcc of the MCU, respectively.<br />
- The amount of voltage input to Vcc must be <strong>with</strong>in the specified range<br />
of the MCU.<br />
- Do not connect anything to the N.C. pin<br />
5.1.4 Mounting connector onto target system<br />
The<br />
connector must be mounted on the target system for connecting <strong>EZ</strong>-<strong>CUBE</strong> <strong>with</strong> the target system. 2.54<br />
mm pitch 8-pin general-purpose connector can be used.<br />
Compact connectors and loose-wire cables are also available as options.<br />
User’s Manual 65
5.2 <strong>On</strong>-<strong>Chip</strong> <strong>Debug</strong>ging<br />
CHAPTER 5 HOW TO USE <strong>EZ</strong>-<strong>CUBE</strong> WITH R8C MICROCONTROLLER<br />
This section describes the system configuration, startup/shutdown procedure and cautions for debugging when<br />
on-chip debugging is performed <strong>with</strong> <strong>EZ</strong>-<strong>CUBE</strong>.<br />
5.2.1 <strong>Debug</strong> functions<br />
Table 5-3 lists the debug functions when a R8C microcontroller is the target device.<br />
Table 5-3. <strong>Debug</strong> <strong>Function</strong>s<br />
<strong>Function</strong>s Specifications<br />
Target device R8C/3x Series R8C/35M Group<br />
Operation mode Single mode<br />
Operating frequency range<br />
Download Available<br />
R8C/3x Series R8C/L3AM, LA8A Group<br />
Maximum operating frequency :20MHz<br />
Minimum operating frequency :32.768KHz<br />
Execution Go, Step In, Step Over, CPU Reset, Restart<br />
Break functions<br />
Break function<br />
- Hardware break (before break), 8 points<br />
- Date access break (1 points)<br />
- Event A:Comparison and access condition (R, W, R/W) can be set.<br />
- Software breakpoint (up to 256 points)<br />
- Forced break<br />
Cause of break Cause of break display<br />
User interface 1-wire clock asynchronous series interface (Use MODE pin <strong>with</strong> communication)<br />
MCU resources to be used<br />
Target system voltage<br />
- ROM: 2KB[*1]<br />
- Stack 8 bytes<br />
- Hardware break (before break) - BRK interrupt<br />
- Vector area (BRK instruction, address match, single-step, address break)<br />
2.7 to 5.5 V (depends on the target device)<br />
User’s Manual 66
5.2.2 System configuration<br />
CHAPTER 5 HOW TO USE <strong>EZ</strong>-<strong>CUBE</strong> WITH R8C MICROCONTROLLER<br />
Figure 5-5 illustrates the system configuration for on-chip debugging.<br />
Target device<br />
Target device<br />
Host machine<br />
Products <strong>with</strong> USB ports<br />
Software<br />
Figure 5-5. System Configuration for <strong>On</strong>-<strong>Chip</strong> <strong>Debug</strong>ging<br />
<strong>EZ</strong>-<strong>CUBE</strong><br />
Includes CubeSuite+ for China, USB driver, and so on.<br />
USB cable (accessory)<br />
<strong>EZ</strong>-<strong>CUBE</strong> (this product)<br />
8-pin target cable (accessory) or target connector (sold separately)<br />
User’s Manual 67
5.2.3 System startup procedure<br />
CHAPTER 5 HOW TO USE <strong>EZ</strong>-<strong>CUBE</strong> WITH R8C MICROCONTROLLER<br />
This section describes the system startup procedure. Observe the following order.<br />
(1) Preparation and installation of software<br />
The following software is required to perform on-chip debugging. For details on preparation and installation of<br />
software, refer to the setup manual supplied <strong>with</strong> <strong>EZ</strong>-<strong>CUBE</strong>.<br />
• CuebSuite+ for China<br />
• USB driver<br />
(2) Switch setting<br />
SW-1: Select switch to ″M2″.<br />
SW-2: Select switch to ″Int. Clock″.<br />
SW-3: Select switch to ″<strong>Debug</strong> Mode″.<br />
SW-4: Depend on the user system environment.<br />
SW-5: Select switch to ″R8C″.<br />
Caution 1. Do not change the switch setting while the USB cable is connected.<br />
2. The maximum rating of the current is 100 mA, so do not use <strong>EZ</strong>-<strong>CUBE</strong> <strong>with</strong> the target<br />
system <strong>with</strong> the higher current rating. The power is always supplied after <strong>EZ</strong>-<strong>CUBE</strong> is<br />
connected to the host machine.<br />
(3) Connecting the target system<br />
Connect <strong>EZ</strong>-<strong>CUBE</strong> to the target system, before the power to the target system is turned on.<br />
(4) Connecting the USB cable<br />
Connect <strong>EZ</strong>-<strong>CUBE</strong> to the host machine, before the power to the target system is turned on.<br />
The mode LED glows red after connection.<br />
(5) Applying power to target system<br />
Turn on power to the target system. This step is not necessary if the power select switch is set to ″5″.<br />
(6) <strong>Debug</strong>ger startup<br />
Start the debugger.<br />
For the operation after this step, refer to the user's manual for CubeSuite+.<br />
If the debugger does not start normally or the operation is unstable, the possible causes may be the following.<br />
• Communication error between <strong>EZ</strong>-<strong>CUBE</strong> and target system<br />
Whether firmware is update.<br />
Whether switch is selected normally.<br />
Whether communication is performed normally.<br />
• Unsupported software (debugger, device file, or firmware) is used<br />
The software used may not support debugging of the target device.<br />
• Defect of <strong>EZ</strong>-<strong>CUBE</strong><br />
<strong>EZ</strong>-<strong>CUBE</strong> may have a defect.<br />
User’s Manual 68
5.2.4 System shutdown procedure<br />
CHAPTER 5 HOW TO USE <strong>EZ</strong>-<strong>CUBE</strong> WITH R8C MICROCONTROLLER<br />
Terminate debugging and shutdown the system in the following order.<br />
If the following order is not observed, the target system or <strong>EZ</strong>-<strong>CUBE</strong> may be damaged.<br />
(1) <strong>Debug</strong>ger termination<br />
Terminate the debugger.<br />
(2) Target system power shutdown<br />
Shutdown the power supplied to the target system. This step is not necessary if the power select switch is<br />
set to ″5″.<br />
(3) Unplugging the USB cable<br />
Unplug the USB cable from <strong>EZ</strong>-<strong>CUBE</strong> or the host machine.<br />
(4) Unplugging the target cable<br />
Unplug the target cable from <strong>EZ</strong>-<strong>CUBE</strong> or the target system.<br />
5.2.5 Notes on Using the <strong>EZ</strong>-<strong>CUBE</strong> <strong>Emulator</strong><br />
5.2.5.1 MCU resources used by the emulator<br />
(1) Program area for the emulator<br />
Table 5-4 list the program area for the emulator. Do not change this area, otherwise the emulator will not<br />
control the MCU. In this case, disconnect the debugger and then reconnect it.<br />
Table 5-4. Program Area for the <strong>Emulator</strong><br />
Notes 1. The emulator rewrites the OFS, OFS2 and ID code areas<br />
2. Start the debugger. Right-click on [R8C <strong>EZ</strong>-<strong>CUBE</strong> <strong>Emulator</strong> (<strong>Debug</strong>ging Tool)] on [Project Tree], and<br />
select [Property] of the R8C <strong>EZ</strong>-<strong>CUBE</strong> <strong>Emulator</strong>. Select the [<strong>Debug</strong> Tool Setting] tab. It is located under<br />
[System]. Specify the area which will not be used by the user system.<br />
(2) Pins used by the <strong>EZ</strong>-<strong>CUBE</strong> emulator<br />
The emulator controls the MCUs by using the following pins depending on the usage.<br />
- RESET# pin and MODE pin<br />
User’s Manual 69
(3) Interrupts (unusable)<br />
CHAPTER 5 HOW TO USE <strong>EZ</strong>-<strong>CUBE</strong> WITH R8C MICROCONTROLLER<br />
The BRK instruction interrupt, address match interrupt, single-step interrupt and address break interrupt<br />
are used by the <strong>EZ</strong>-<strong>CUBE</strong> emulator program.<br />
Therefore, make sure the user program does not use any of these interrupts. The emulator changes these<br />
interrupt vector values to the values to be used by the emulator. No problems occur if the interrupt vector<br />
values are written in the user program. These vector addresses cannot be rewritten in the [Memory] panel.<br />
(4) Stack area used by the <strong>EZ</strong>-<strong>CUBE</strong> emulator<br />
The emulator uses up to 8 bytes of the stack pointer (ISP) during a user program break. Therefore, set<br />
aside 8 bytes for the stack area.<br />
(5) SFRs used by the <strong>EZ</strong>-<strong>CUBE</strong> emulator program<br />
The SFRs listed in Table 5-5 are used by the <strong>EZ</strong>-<strong>CUBE</strong> emulator program as well as the user program.<br />
- Do not change the value in the [Memory] panel, etc., by other than the user program. If register<br />
contents are referred to, a value that has been set in the <strong>EZ</strong>-<strong>CUBE</strong> emulator program will be read out.<br />
Table 5-5 SFRs Used by the <strong>EZ</strong>-<strong>CUBE</strong> <strong>Emulator</strong> Program (1)<br />
The SFRs listed in Table 5-6 are used by the <strong>EZ</strong>-<strong>CUBE</strong> emulator program, not the user program. Do not<br />
change the values, otherwise the <strong>EZ</strong>-<strong>CUBE</strong> cannot control the MCU.<br />
Table 5-6 SFRs Used by the <strong>EZ</strong>-<strong>CUBE</strong> <strong>Emulator</strong> Program (2)<br />
Notes 1. When debugging <strong>with</strong> the <strong>EZ</strong>-<strong>CUBE</strong> emulator, the high-speed on-chip oscillator does not stop<br />
although the options for high-speed on-chip oscillator enable bit are available and FRA00 can be<br />
set to “high-speed on-chip oscillator off”. To check the functions of low power consumption etc. <strong>with</strong><br />
high-speed on-chip oscillator off, make the evaluation <strong>with</strong> the final products or system<br />
manufactured by you in which only the user program is written to the MCU and the emulator is<br />
disconnected.<br />
If the high-speed on-chip oscillator frequency or the frequency control register needs to be<br />
changed, be sure to do that change in the user program. If such changes are made in the [Memory]<br />
panel, etc., the <strong>EZ</strong>-<strong>CUBE</strong> emulator will become uncontrollable.<br />
2. Not applicable for the R8C/LA8A.<br />
3. <strong>On</strong>ly applicable for the R8C/L3AM. The bit value is always “1” when the register is used by<br />
the <strong>EZ</strong>-<strong>CUBE</strong> emulator.<br />
User’s Manual 70
(6) Option function select area<br />
CHAPTER 5 HOW TO USE <strong>EZ</strong>-<strong>CUBE</strong> WITH R8C MICROCONTROLLER<br />
The <strong>EZ</strong>-<strong>CUBE</strong> emulator sets each of bit 0 and bit 7 of the option function select register (OFS: 0FFFFh)<br />
to 1b. Although these addresses can be rewritten and the changed values can be referred to in the<br />
[Memory] panel, etc., the changed values for bit 0 is invalid.<br />
- b0: Watchdog timer start select bit 1: Watchdog timer is stopped after reset.<br />
- b7: Count source protection mode after reset select bit 1: Count source protect mode disabled<br />
after reset<br />
Also, the emulator sets the lower 4 bits of the option function select register 2 (OFS2: 0FFDBh) to<br />
1111b.<br />
- b1, b0: Watchdog timer underflow period set bit 11: 3FFFh<br />
- b3, b2: Watchdog timer refresh acknowledgement period set bit 11: 100%<br />
Watchdog timer:<br />
During the user program halt, the <strong>EZ</strong>-<strong>CUBE</strong> emulator program refreshes the watchdog timer. Note<br />
that if the user program uses the watchdog timer, the watchdog timer will be refreshed by the<br />
<strong>EZ</strong>-<strong>CUBE</strong> emulator program during the user program halt, making the refresh timing differ from the<br />
actual operational timing.<br />
Also, note that the watchdog timer is not refreshed during the execution of the user program.<br />
Count source protection mode:<br />
Count source protection mode cannot be debugged <strong>with</strong> the <strong>EZ</strong>-<strong>CUBE</strong> emulator.<br />
(7) Registers initialized by the <strong>EZ</strong>-<strong>CUBE</strong> emulator<br />
When the system is launched, the emulator initializes the CPU registers as shown in Table 5-7.<br />
(8) RAM initialization<br />
Table 5-7 <strong>EZ</strong> <strong>Emulator</strong> Register Initial Values<br />
Note that the <strong>EZ</strong>-<strong>CUBE</strong> emulator initializes part of the MCU's internal RAM area (00400h-004FFh) <strong>with</strong><br />
"00h" at startup.<br />
(9) MCU reserved area<br />
The addresses not defined in the MCU hardware manual are a reserved area. Do not change the content<br />
of the reserved area.<br />
If changed, the <strong>EZ</strong>-<strong>CUBE</strong> emulator will not control the MCU.<br />
User’s Manual 71
CHAPTER 5 HOW TO USE <strong>EZ</strong>-<strong>CUBE</strong> WITH R8C MICROCONTROLLER<br />
- The value of this area is undefined when referenced in the [Memory] panel.<br />
- In this area, the [Memory] panel's search, compare and move functions do not work normally.<br />
(10) DTC during a user program halt (It corresponds excluding the R8C/LA8A group. )<br />
When the user program halts, data transfer using DTC is prohibited.<br />
However, the DTC interrupt request itself does not stop. Therefore, the DTC interrupt request occurred<br />
during the user program halt will be executed when the user program is restarted.<br />
(11) Note on internal power low consumption<br />
Make sure that bit 0 of voltage detect register 2 (VCA2) for the <strong>EZ</strong>-<strong>CUBE</strong> emulator is set to "0: Low<br />
consumption disabled".<br />
If "1" is selected, the emulator will not control the MCU.<br />
(12) <strong>Debug</strong>ging the functions to reduce power consumption<br />
When debugging the low-current-consumption read mode, do not operate windows until the program<br />
stops at the breakpoint by setting the breakpoint at the line of the program which will be executed after the<br />
mode is cancelled.<br />
When debugging the function to stop the flash memory, do not operate windows until the program stops<br />
at the breakpoint by setting the breakpoint at the line of the program which will be executed after the<br />
function is cancelled.<br />
(13) Notes on accessing the SFR areas<br />
You can reference or set the contents of the SFR areas in the [Memory] panel or the [IO] panel. Note the<br />
followings.<br />
- When accessing the special registers<br />
You may not be able to access some special registers successfully during the user program halt Note .<br />
These registers include:<br />
- Access prohibited addresses<br />
- Registers for which access order is specified from high-order byte to low-order byte<br />
- Registers that can be accessed only by a specific instruction<br />
- Registers whose bus width specification does not match the bus width set in the [Memory] panel<br />
- Registers that can be accessed on conditions (one of which is that fOCO-F must be faster than the<br />
CPU clock to access the register)<br />
Note Follow the instructions in the hardware manual of the target MCU to access to the SFR areas.<br />
5.2.5.2 Reset<br />
(1) Reset function<br />
The power-on reset and the voltage monitor 0 cannot be used. If either reset is executed, the<br />
<strong>EZ</strong>-<strong>CUBE</strong> emulator becomes uncontrollable.<br />
Do not stop the user program while the reset pin remains in the "L" state. A timeout error will occur.<br />
(2) Reset vector address<br />
During a debug <strong>with</strong> the <strong>EZ</strong>-<strong>CUBE</strong> emulator, the reset vector addresses are used by a program for<br />
the emulator. While the user program is halted, the values set in a downloaded program or the [Memory]<br />
panel can be referenced. But, when the user program is being run, the values set by a program for the<br />
emulator are displayed. If a reset vector address value is set while the user program is halted, only the<br />
User’s Manual 72
CHAPTER 5 HOW TO USE <strong>EZ</strong>-<strong>CUBE</strong> WITH R8C MICROCONTROLLER<br />
emulator's internal cache is updated.<br />
(3) Behavior after a reset<br />
If the MCU is reset while the user program is being run, the <strong>EZ</strong>-<strong>CUBE</strong> emulator program is entered into<br />
temporarily before the user program restarts (see Table 5-8). Therefore, there is a time lag until the user<br />
program starts after a reset. Also, note that the behavior is different between a hardware reset (RESET#)<br />
and other resets, as shown in the table below Note1 .<br />
Table 5-8 Behavior when the MCU Is Reset during the Execution of the User Program and It Is Restarted<br />
Notes 1. Hardware break points (before break) can be set or deleted during the execution of the user<br />
program, but hardware breaks (before break) that are set during the execution of the user<br />
program are initialized by a reset.<br />
2. If a watchdog timer reset or an S/W reset is made during the execution of the user program,<br />
hardware breaks (before break) (Channel 0 to Channel 3) are disabled (no break occurs)<br />
because the SFRs are initialized.<br />
(4) Watchdog timer reset<br />
The watchdog timer continues counting even while the user program is halted, <strong>with</strong> its counts<br />
refreshed in a program for the emulator.<br />
Therefore, if an underflow or other abnormal condition occurs immediately after the user program<br />
breaks, causing the watchdog timer to be reset immediately before it is refreshed, the emulator may<br />
become uncontrollable.<br />
(5) Reset-related limitations<br />
Do not perform a hardware reset (RESET#) while the user program is halted. The <strong>EZ</strong>-<strong>CUBE</strong> emulator<br />
will not control the MCU. Note that if a reset is asserted from the MCU pin while the user program is halted,<br />
the contents of the CPU registers are not initialized and their values as of the time the user program has<br />
stopped or those set in the CPU register panel are prioritized.<br />
(6) Contentions<br />
If contention occurs between a reset (hardware reset (RESET#), watchdog timer reset, etc.) and<br />
operations by the <strong>EZ</strong>-<strong>CUBE</strong> emulator (memory access in the [Memory] panel, etc.), the emulator may run<br />
out of control. Error messages such as a timeout error are displayed.<br />
Also, a message box asking whether to issue a system reset or not is displayed. Clicking the [Yes]<br />
button initializes the emulator and stops the user program. Clicking the [No] button neither initializes the<br />
emulator nor stops the user program. After clicking either button, you can continue the debugging.<br />
Caution If the automatic memory update is enabled in the [Memory] or [Watch] panel, do not perform a<br />
hardware reset to the MCU. Otherwise communications <strong>with</strong> the MCU will be lost and the <strong>EZ</strong><br />
–<strong>CUBE</strong> emulator will run out of control.<br />
User’s Manual 73
CHAPTER 5 HOW TO USE <strong>EZ</strong>-<strong>CUBE</strong> WITH R8C MICROCONTROLLER<br />
5.2.5.3 Internal ROM Area (Flash Memory)<br />
(1) Changing the Internal ROM Area<br />
When changing the contents of the MCU's internal ROM <strong>with</strong>out downloading from the emulator<br />
debugger, only the <strong>EZ</strong>-<strong>CUBE</strong> emulator's internal cache is updated and the changed contents are reflected<br />
in the MCU immediately before the user program starts running.<br />
(2) Notes on debugging in CPU rewrite mode<br />
(a) Unrewritable area in CPU rewrite mode<br />
When debugging in CPU rewrite mode, do not rewrite CPU for the internal ROM area containing the<br />
following areas. If these areas are rewritten, the <strong>EZ</strong>-<strong>CUBE</strong> emulator will not control the MCU. CPU rewrite<br />
can be executed only for the data area.<br />
- Fixed interrupt vector area<br />
- Area containing the emulator program<br />
- Block 3 in program ROM (except for the R8C/LA8A. See the table below.)<br />
MCUs Applicable areas<br />
4 KB ROM version -<br />
8 KB ROM version -<br />
16 KB ROM version -<br />
24 KB ROM version Block 3: 0A000h-0BFFFh<br />
32 KB ROM version -<br />
48 KB ROM version Block 3: 08000h-0BFFFh<br />
64 KB ROM version Block 3: 08000h-0BFFFh<br />
96 KB ROM version -<br />
128 KB ROM version -<br />
(b) Operation in CPU rewrite mode<br />
- When debugging in the CPU rewrite mode, do not halt the user program while the CPU rewrite<br />
mode is enabled or while in the erase suspend state. And do not perform a step execution of the instruction<br />
which enables a CPU rewrite mode or enters an erase-suspend state. If halted, the <strong>EZ</strong>-<strong>CUBE</strong> emulator<br />
may not control the MCU. In addition, disable the automatic update in the [Watch] panel or fix the display in<br />
the [Memory] panel before running the program so memory accesses do not occur during an execution.<br />
- To check the internal ROM area after rewriting the internal ROM in the CPU rewrite mode, halt the<br />
user program after disabling the CPU rewrite mode and refer to the [Memory] panel, etc. If CPU rewrite can<br />
be executed for the data flash area, and erase process can be suspended, do not use S/W breaks.<br />
- When rewriting the flash memory in the program area, start the debugger. Right-click on [R8C <strong>EZ</strong><br />
–<strong>CUBE</strong> <strong>Emulator</strong> (<strong>Debug</strong>ging Tool)] on [Project Tree], and select [Property] of the R8C <strong>EZ</strong>-<strong>CUBE</strong> <strong>Emulator</strong>.<br />
Select the [<strong>Debug</strong> Tool Setting] tab. "<strong>Debug</strong>ging the program re-writing the internal flash“ is located under<br />
[System]. Then, select "Yes".<br />
Caution 1. When [<strong>Debug</strong>ging the program re-writing the internal flash.] is selected, do not rewrite<br />
User’s Manual 74
CHAPTER 5 HOW TO USE <strong>EZ</strong>-<strong>CUBE</strong> WITH R8C MICROCONTROLLER<br />
the internal ROM area in the [Memory] panel, etc. Also note that a S/W break cannot be<br />
used when [<strong>Debug</strong>ging the program re-writing the internal flash.] is selected.<br />
2. When debugging a program in CPU rewrite mode, memory reference or modification<br />
functions can be used. However, do not use these functions in the following condition.<br />
• While write instruction is being executed to the register which requires continuous writing<br />
(ex. FMR13 bit) The MCU does not recognize the writing is continuously executed if the<br />
write instruction is interrupted by the memory reference or modification process.<br />
(3) Note on rewriting flash memory by the <strong>EZ</strong> emulator<br />
Do not reset nor execute debugging operations to the MCU while the internal ROM (flash memory) is being<br />
written by the <strong>EZ</strong>-<strong>CUBE</strong> emulator. If the MCU is reset or debugged when rewriting the flash memory, the user<br />
program or the <strong>EZ</strong>-<strong>CUBE</strong> emulator program may be disrupted.<br />
Flash memory rewrite occurs:<br />
- When downloading the user program<br />
- After setting software breaks in the internal ROM area and performing an operation for executing<br />
the user program<br />
- After canceling software breaks in the internal ROM area and performing an operation for<br />
executing the user program<br />
- After rewriting the value of the internal ROM area in the [Memory] panel and performing an<br />
operation for executing the user program<br />
(4) Flash memory during the user program execution<br />
While the user program is being run, the internal ROM area cannot be changed in other than the user<br />
program (in the memory panel, etc.).<br />
(5) MCUs used for debugging<br />
When debugging, the Flash memory is frequently rewritten by the <strong>EZ</strong>-<strong>CUBE</strong> emulator. Therefore, do not<br />
use an MCU that has been used for debugging in products. Also, as the <strong>EZ</strong>-<strong>CUBE</strong> emulator program is written<br />
to the MCU while debugging, do not save the contents of the MCU Flash memory which were used for<br />
debugging nor use them as the ROM data for products.<br />
(6) Flash memory ID code<br />
This MCU function prevents the Flash memory from being read out by anyone other than the user.<br />
The ID code written to the ID code area of the MCU (see Table 5-9) must match the one entered for the<br />
"ID code" in the [Connect Settings] tab, otherwise the debugger cannot be launched. Note that when the ID<br />
code is FFh, FFh, FFh, FFh, FFh, FFh, FFh, the ID code is regarded as undefined. In this case, the ID code is<br />
automatically authenticated.<br />
The values written into the ID code area differs depending on the mode.<br />
- [<strong>Debug</strong>ging mode] : FFh, FFh, FFh, FFh, FFh, FFh, FFh (regardless of the contents of the<br />
downloaded user program)<br />
Caution If the ID code written to the ID code area of the MCU matches the one entered for the [ID Code]<br />
in the [Flash] Category displayed at emulator debugger startup, the <strong>EZ</strong> emulator writes FFh, FFh,<br />
FFh, FFh, FFh, FFh, FFh to the ID code area.<br />
User’s Manual 75
CHAPTER 5 HOW TO USE <strong>EZ</strong>-<strong>CUBE</strong> WITH R8C MICROCONTROLLER<br />
Table 5-9 ID Code Storage Area<br />
Address Description<br />
FFDFh First byte of ID code<br />
FFE3h Second byte of ID code<br />
FFEBh Third byte of ID code<br />
FFEFh Fourth byte of ID code<br />
FFF3h Fifth byte of ID code<br />
FFF7h Sixth byte of ID code<br />
FFFBh Seventh byte of ID code<br />
5.2.5.4 Operation during a user program halt<br />
(1) Operation clock during a user program halt<br />
When the user program halts, the emulator changes the CPU clock to the internal high-speed on-chip<br />
oscillator clock to operate.<br />
However, the peripheral features operate <strong>with</strong> the clock specified by the user program.<br />
(2) Peripheral I/Os during a user program halt<br />
During a user program halt, the maskable interrupt request cannot be accepted, because the emulator<br />
disables interrupts. However, since peripheral I/Os continue to run, the interrupt request is accepted<br />
immediately after the user program execution is started.<br />
For example, a timer interrupt is not accepted although the timer continues to count when a user<br />
program is stopped by a break after the timer started.<br />
(3) [CPU Register] panel and [Memory] panel during a user program halt<br />
If the CPU register values are changed in the [CPU Register] panel or the flash memory contents are<br />
changed in the [Memory] panel, only the values of the emulator's internal cache are reflected while the user<br />
program is halted. The changed register values or memory contents are reflected in the MCU immediately<br />
before the user program starts running.<br />
5.2.5.5 Final evaluation of the program<br />
Before entering the mass-production phase, be sure to perform a final evaluation of the program singly,<br />
<strong>with</strong>out the <strong>EZ</strong>-<strong>CUBE</strong> emulator connected.<br />
5.2.5.6 <strong>Debug</strong> functions<br />
(1) Memory access<br />
Checksum<br />
The vector area, ID code area and the OFS, OFS2 areas have their values rewritten by the emulator, so<br />
be aware that their checksums do not match. For the reset vector addresses also, although downloaded<br />
values are displayed in the [Memory] panel, etc., be aware that they are the emulator's internal values in the<br />
cache, and that the values set in the actual flash memory are those that were specified in the emulator.<br />
(2) Software break functions<br />
(a) Setting-inhibited area<br />
Software breaks cannot be specified in other than the MCU's internal RAM and internal ROM areas.<br />
User’s Manual 76
CHAPTER 5 HOW TO USE <strong>EZ</strong>-<strong>CUBE</strong> WITH R8C MICROCONTROLLER<br />
(b) Notes on software breakpoints<br />
When you change a program in the [Editor] panel and download that program for the MCU, the addresses<br />
at which you've set software breaks may not be corrected normally, depending on changed contents. For this<br />
reason, it is possible that the addresses at which software breaks are set will shift.<br />
After the user program is downloaded, check again the addresses at which software breaks are set.<br />
(c) Memory reference during the user program execution<br />
When the instruction of the address where a S/W breakpoint was placed is displayed in the [Memory] panel,<br />
what is displayed is not “BRK” instruction (00h).<br />
(d) User program execution from the address at which a software break is set<br />
When the user program is executed from the address at which a software break is set, the relevant address<br />
(i.e., the user program start address) is stepped through before the user program is run. Therefore, the<br />
program behaves differently, <strong>with</strong> regard to the execution time and interrupts, than it would when no software<br />
breaks are set.<br />
(3) Step execution<br />
(a) Limitations during the step execution<br />
During stepped execution, software breaks and on-chip breaks are invalid.<br />
(b) Step out execution<br />
Stepping out of a function that uses a jump instruction (i.e. not a subroutine-return instruction) to return<br />
to the origin of the call is not possible.<br />
(c) Note on using automatic memory update<br />
When the automatic memory update is enabled in the [Memory] or [Watch] panel, do not execute step<br />
out or multiple-step. Otherwise, it will take longer to update memory data and the operation will be delayed.<br />
(d) Exceptional step execution<br />
ⅰ ) Software interrupt instruction<br />
Step execution cannot be performed in the internal processing of instructions (undefined, overflow,<br />
BRK and INT) which generate a software interrupt continuously in the program (see Figure 5-6).<br />
ⅱ ) INT instruction<br />
Figure 5-6 Example of Software Interrupt Instruction<br />
User’s Manual 77
CHAPTER 5 HOW TO USE <strong>EZ</strong>-<strong>CUBE</strong> WITH R8C MICROCONTROLLER<br />
To debug the user program <strong>with</strong> the INT instruction, set a software break for the internal processing<br />
of the INT instruction and execute the program <strong>with</strong> the GO command (see Figure 5-7).<br />
ⅲ ) Other: Flag manipulating instructions<br />
Figure 5-7 Example of INT Instruction<br />
The following instructions, when single-stepped, only manipulate a flag in the <strong>EZ</strong>-<strong>CUBE</strong> emulator,<br />
<strong>with</strong> no MCU operations involved.<br />
Therefore, when these instructions are executed, be aware that the Start/Stop function does not work.<br />
LDC src, FLG<br />
STC FLG, dest<br />
LDINTB src<br />
(4) Other debug functions<br />
(a) "Go to Here" function<br />
The "Go to Here " function is actualized using an hardware break (before break) . When you execute the "Go<br />
to Here" command, all the hardware break point (before break) and on-chip breaks you set become invalid.<br />
<br />
When executing the program in steps from the address at which it stopped after being executed as specified by<br />
[Go To Here] function, and there exist a hardware break set at that address, step execution may not be possible<br />
(the PC will not advance).<br />
Cancel the hardware break before performing step execution.<br />
In addition to the [Go To Here] function, there are cases where you must cancel the hardware break before<br />
performing step execution from the address at which the program has stopped. Those cases involve the use of the<br />
following two functions.<br />
・ CPU reset that is performed when [Yes] is selected in the [Execute to the specified symbol after CPU<br />
Reset] property<br />
・ [Step Over]<br />
As shown below, if, while a hardware break is set to the address following a JSR (or JSRI, INT, INTO, UND)<br />
instruction, the step over execution of instruction (a) is performed, the subsequent attempt to perform the step<br />
execution of instruction (b) fails.<br />
JSR SUB
CHAPTER 5 HOW TO USE <strong>EZ</strong>-<strong>CUBE</strong> WITH R8C MICROCONTROLLER<br />
If, while a hardware break is set to an RTS instruction (return-from-subroutine instruction), a [Return Out]<br />
function is used in the sub routine, the program may break at the RTS instruction.<br />
Do not set a hardware break to an RTS instruction when using the [Return Out] function.<br />
(b) <strong>Debug</strong>ging in stop mode or wait mode<br />
When debugging in stop mode or wait mode, do not operate windows until the program stops at the<br />
breakpoint by setting the breakpoint at the line of the program which will be executed after the stop mode or wait<br />
mode is cancelled.<br />
And do not perform a step execution of the instruction shifting to stop mode or wait mode.<br />
Also, if memory contents are referenced or changed during the stop mode or wait mode, the program.after<br />
exiting the stop or wait mode and accessing the MCU memory.restarts from the instruction next to the one by<br />
which it was placed into the stop or wait mode. If the program enters the stop or wait mode in the middle of a<br />
memory access, a reference or a change of memory contents may not be performed normally.<br />
Therefore, disable the automatic update in the [Memory] panel or [Watch] panel or fix the display in the<br />
[Memory] panel before running the program, and do not make refresh operations during an execution so memory<br />
accesses do not occur during user program execution.<br />
When the program is forcibly stopped in stop mode or wait mode, these modes will be cancelled.<br />
(c) Watch dog timer in user system<br />
If the reset circuit of the user system has a watchdog timer, disable it when using the emulator.<br />
(d) Hardware breakpoint change executing program<br />
Do not set or delete a hardware break point (before break) during program execution to reset a pin from<br />
the target board.<br />
If the pin is reset during program execution, the hardware break you set will not occur and the hardware<br />
break you delete will occur.<br />
If the pin is not reset during program execution, the hardware break will occur properly according to<br />
hardware break settings.<br />
<strong>On</strong>ce the program is halted after setting or deleting a hardware break point, the hardware break occurs<br />
as you set even when the pin is reset.<br />
5.2.5.7 Communication Baud Rate<br />
- When you have selected the [Data flash area] for the debug monitor location, use a 250000 bps or lower<br />
communication baud rate.<br />
- The baud rate of 57600 bps or below is designated for checking purpose in case there is a failure in the<br />
connection <strong>with</strong> the emulator.<br />
With such a low baud rate, it takes a long time to write into the flash memory of the target MCU, and the<br />
emulator debugger may appear to be giving no response.<br />
Also note if the data of 1024 bytes or larger is handled when displaying the memory contents or in memory<br />
fill function, a time-out error may occur because the communication takes up much time.<br />
User’s Manual 79
5.3 Flash <strong>Programming</strong><br />
CHAPTER 5 HOW TO USE <strong>EZ</strong>-<strong>CUBE</strong> WITH R8C MICROCONTROLLER<br />
This section describes the system configuration and startup/shutdown procedure when flash programming is<br />
performed for a R8C microcontroller, using <strong>EZ</strong>-<strong>CUBE</strong>.<br />
5.3.1 Specifications of programming function<br />
Table 5-10. Specifications of <strong>Programming</strong> <strong>Function</strong><br />
<strong>Function</strong>s Specifications<br />
Host interface USB 2.0<br />
Target interface UART (1-wire mode)<br />
Target system voltage 2.7 to 5.5 V (depends on the target device)<br />
Clock supply Internal high-speed oscillation clock is used<br />
Power supply 5 V ±0.3 V (maximum current rating: 100 mA)<br />
Acquisition of device-specific<br />
information<br />
Security flag setting Available<br />
Parameter file for Renesas Electronics is used (*.PRR)<br />
Standalone operation Unavailable (must be connected to host machine)<br />
Note: Write<strong>EZ</strong>5 does not support Windows 7.<br />
5.3.2 System configuration<br />
Figure 5-8 illustrates the system configuration for flash programming.<br />
Target device<br />
Host machine<br />
Products <strong>with</strong> USB ports<br />
Software<br />
Figure 5-8. System Configuration for Flash <strong>Programming</strong><br />
<strong>EZ</strong>-<strong>CUBE</strong><br />
Includes the Write<strong>EZ</strong>5 USB driver, parameter files, and so on.<br />
USB cable (accessory)<br />
<strong>EZ</strong>-<strong>CUBE</strong> (this product)<br />
8-pin target cable (accessory) or target connector (sold separately)<br />
User’s Manual 80
5.3.3 System startup procedure<br />
CHAPTER 5 HOW TO USE <strong>EZ</strong>-<strong>CUBE</strong> WITH R8C MICROCONTROLLER<br />
This section describes the system startup procedure. Observe the following order.<br />
(1) Preparation and installation of software<br />
The following software is required to perform flash programming. For details on preparation and installation of<br />
software, refer to the setup manual supplied <strong>with</strong> <strong>EZ</strong>-<strong>CUBE</strong>.<br />
• Write<strong>EZ</strong>5<br />
• USB driver<br />
• Parameter file<br />
(2) Switch setting<br />
SW-1: Select switch to ″M2″.<br />
SW-2: Select switch to ″Int. Clock″.<br />
SW-3: Select switch to ″<strong>Debug</strong> Mode″.<br />
SW-4: Depend on the user system environment.<br />
SW-5: Select switch to ″R8C″<br />
Caution 1. Do not change the switch setting while the USB cable is connected.<br />
2. The maximum rating of the current is 100 mA, so do not use <strong>EZ</strong>-<strong>CUBE</strong> <strong>with</strong> the target<br />
system <strong>with</strong> the higher current rating. The power is always supplied after <strong>EZ</strong>-<strong>CUBE</strong> is<br />
connected to the host machine.<br />
(3) Connecting the target system<br />
Connect <strong>EZ</strong>-<strong>CUBE</strong> to the target system, before the power to the target system is turned on.<br />
(4) Connecting the USB cable<br />
Connect <strong>EZ</strong>-<strong>CUBE</strong> to the host machine, before the power to the target system is turned on.<br />
The power is always supplied after <strong>EZ</strong>-<strong>CUBE</strong> is connected to the host machine <strong>with</strong> the USB cable.<br />
Caution Do not change the switch setting while the USB cable is connected.<br />
(5) Applying power to target system<br />
Turn on power to the target system. This step is not necessary if the power select switch is set to ″5″.<br />
(6) Write<strong>EZ</strong>5 startup<br />
Start the Write<strong>EZ</strong>5.<br />
For detailed usage of the Write<strong>EZ</strong>5, refer to the Write<strong>EZ</strong>5 User's Manual.<br />
User’s Manual 81
5.3.4 Usage examples<br />
CHAPTER 5 HOW TO USE <strong>EZ</strong>-<strong>CUBE</strong> WITH R8C MICROCONTROLLER<br />
This section describes a series of basic operations using the Write<strong>EZ</strong>5, using the R5F21356M as an example.<br />
The operations from execution of the [Autoprocedure (EPV)] command to programming for the target device are<br />
described. For other commands and their applications, refer to the Write<strong>EZ</strong>5 User's Manual.<br />
The conditions used for a series of operations in this section are as follows.<br />
<br />
Target device: R5F21356M<br />
Power supply voltage: 5 V±0.3V (supplied from <strong>EZ</strong>-<strong>CUBE</strong>)<br />
<br />
Switches: SW-1: M2<br />
<br />
SW-2: Int.Clock<br />
SW-3: <strong>Debug</strong> Mode<br />
SW-4: 5<br />
SW-5: R8C<br />
Parameter file: R5F21356M.prr<br />
Clock setting: None (internal high-speed oscillation clock is used)<br />
Operation mode: chip<br />
Program file: sample.hex<br />
Command options: [Blank check before Erase] selected<br />
[Read verify after Program] selected<br />
User’s Manual 82
CHAPTER 5 HOW TO USE <strong>EZ</strong>-<strong>CUBE</strong> WITH R8C MICROCONTROLLER<br />
(1) Setting of programming environment<br />
Set the programming environment, following the steps to described below.<br />
Click the [Device] menu on the menu bar and then click [Setup...].<br />
The Device Setup dialog box appears, in which the [Standard] tab is active.<br />
Figure 5-9. [Standard] Tab of Device Setup Dialog Box<br />
Click the PRM File Read button to open the Parameter File Select dialog box. Select the parameter<br />
file for the target device and then click the Open button.<br />
Set the items in the [Host Connection], [Operation Mode] and [Supply Oscillator] areas, in accordance<br />
<strong>with</strong> your programming environment. The following figure shows an example.<br />
Figure 5-10. [Standard] Tab of Device Setup Dialog Box After Setting<br />
Switch to the [Advanced] tab. Set the items in the [Command options] and [Security flag settings] areas,<br />
in accordance <strong>with</strong> your programming environment. For detail, refer to the Write<strong>EZ</strong>5 User's Manual.<br />
User’s Manual 83
CHAPTER 5 HOW TO USE <strong>EZ</strong>-<strong>CUBE</strong> WITH R8C MICROCONTROLLER<br />
By clicking the OK button, the programming environment is set and the Device Setup dialog box is<br />
closed. The main window appears as follows.<br />
Figure 5-11. Completion of <strong>Programming</strong> Environment Setting<br />
User’s Manual 84
(2) Selection of program file<br />
CHAPTER 5 HOW TO USE <strong>EZ</strong>-<strong>CUBE</strong> WITH R8C MICROCONTROLLER<br />
Select the program file, following the steps to described below.<br />
Click the [File] menu on the menu bar and then click [Load...].<br />
The program file select dialog box appears.<br />
Select the program file for the target device and then click the Open button.<br />
Figure 5-12. Completion of Program File Selection<br />
User’s Manual 85
CHAPTER 5 HOW TO USE <strong>EZ</strong>-<strong>CUBE</strong> WITH R8C MICROCONTROLLER<br />
(3) Execution of [Autoprocedure (EPV)] command<br />
Click the [Device] menu on the menu bar and then click [Autoprocedure (EPV)].<br />
The [Blank Check], [Erase] (if the flash memory in the target device is not blank), [Program], and [Verify]<br />
commands are executed for the target device sequentially. When the command execution is completed<br />
normally, the following window appears.<br />
Figure 5-13. Completion of [Autoprocedure (EPV)] Command Execution<br />
User’s Manual 86
5.3.5 System shutdown procedure<br />
CHAPTER 5 HOW TO USE <strong>EZ</strong>-<strong>CUBE</strong> WITH R8C MICROCONTROLLER<br />
Terminate flash programming and shutdown the system in the following order.<br />
If the following order is not observed, the target system or <strong>EZ</strong>-<strong>CUBE</strong> may be damaged.<br />
(1) Terminating the Write<strong>EZ</strong>5<br />
Terminate the Write<strong>EZ</strong>5 if you are not going to perform programming to other devices.<br />
Remark When the Write<strong>EZ</strong>5 is terminated, the setting information is saved. Due to this file, the same<br />
setting is maintained when the Write<strong>EZ</strong>5 is started the next time.<br />
(2) Target system power shutdown<br />
Shutdown the power supplied to the target system. This step is not necessary if the power select switch is<br />
set to ″5″.<br />
(3) Unplugging the USB cable<br />
Unplug the USB cable from <strong>EZ</strong>-<strong>CUBE</strong> or the host machine.<br />
When the power select switch is set to ″T″, the step of (4) Unplugging the target cable can be performed<br />
before this step.<br />
(4) Unplugging the target cable<br />
Unplug the target cable from <strong>EZ</strong>-<strong>CUBE</strong> or the target system.<br />
5.3.6 Cautions on flash programming<br />
This section describes the cautions for flash programming. Be sure to read the following for the proper use of<br />
<strong>EZ</strong>-<strong>CUBE</strong>.<br />
• To improve the writing quality, fully understand, verify, and evaluate the following items before using <strong>EZ</strong>-<strong>CUBE</strong>.<br />
- Circuits are designed as described in the user's manuals for the device and <strong>EZ</strong>-<strong>CUBE</strong>.<br />
- The device, Write<strong>EZ</strong>5 and <strong>EZ</strong>-<strong>CUBE</strong> are used as described in each user's manual.<br />
- The power supplied to the target system is stable.<br />
User’s Manual 87
CHAPTER 6 HOW TO USE <strong>EZ</strong>-<strong>CUBE</strong> WITH RL78 MICROCONTROLLER<br />
This chapter describes how to use <strong>EZ</strong>-<strong>CUBE</strong> when performing on-chip debugging and flash programming for a<br />
RL78 microcontroller.<br />
<strong>On</strong>-chip debugging is a method to debug a microcontroller mounted on the target system, using a debug function<br />
implemented in the device. Since debugging is performed <strong>with</strong> the target device operating on the board, this method<br />
is suitable for field debugging.<br />
Flash programming is a method to write a program to the flash memory embedded in a device. Erasing, writing<br />
and verifying the program can be performed on-board <strong>with</strong> the device.<br />
Please update firmware for RL78 at first. Refer to description (1) to (3) on the following order. For detail, refer to 1.4<br />
Firmware update.<br />
(4) Connect <strong>EZ</strong>-<strong>CUBE</strong> to the host machine. Do not connect <strong>EZ</strong>-<strong>CUBE</strong> to the target system.<br />
(5) Start the <strong>EZ</strong>-<strong>CUBE</strong> firmware update tool”QB<strong>EZ</strong>UTL.exe”. Select firmware of RL78 (RL78_OCD_FW.hex).<br />
(6) Click the [Start] button. Start to update the <strong>EZ</strong>-<strong>CUBE</strong> firmware.<br />
Read the following chapters if you are using <strong>EZ</strong>-<strong>CUBE</strong> for the first time <strong>with</strong> a RL78 microcontroller as the target<br />
device.<br />
6.1 Target System Design<br />
For communication between <strong>EZ</strong>-<strong>CUBE</strong> and the target system, communication circuits must be mounted on the<br />
target system. This section describes the circuit design and mounting of connectors.<br />
6.2 <strong>On</strong>-<strong>Chip</strong> <strong>Debug</strong>ging<br />
This section describes the system configuration and startup method to perform on-chip debugging <strong>with</strong><br />
<strong>EZ</strong>-<strong>CUBE</strong>.<br />
6.3 Flash <strong>Programming</strong><br />
This section describes the system configuration and startup method to perform flash programming <strong>with</strong><br />
<strong>EZ</strong>-<strong>CUBE</strong>.<br />
User’s Manual 88
6.1 Target System Design<br />
CHAPTER 6 HOW TO USE <strong>EZ</strong>-<strong>CUBE</strong> WITH RL78 MICROCONTROLLER<br />
This section describes the target system circuit design required for on-chip debugging and flash programming.<br />
Figure 6-1 presents an overview of the <strong>EZ</strong>-<strong>CUBE</strong> communication interface. As shown on the left side of the<br />
figure, <strong>EZ</strong>-<strong>CUBE</strong> performs serial communication <strong>with</strong> the target device on the target system. For this<br />
communication, communication circuits must be mounted on the target system. Refer to this section to design<br />
circuits appropriately.<br />
Target device<br />
Target system<br />
Figure 6-1. Outline of Communication Interface<br />
UART communication<br />
Communication circuits<br />
must be mounted on<br />
.<br />
the target system. .<br />
RENESAS<br />
<strong>EZ</strong>-<strong>CUBE</strong><br />
<strong>EZ</strong>-<strong>CUBE</strong><br />
USB<br />
communication<br />
Host machine<br />
6.1.1 Pin assignment<br />
This section describes the interface signals used between <strong>EZ</strong>-<strong>CUBE</strong> and the target system. Table 6-1 lists the<br />
pin assignment. Table 6-2 describes the functions of each pin.<br />
Pin No. Pin name Note<br />
1 GND<br />
2 RESET_IN<br />
3 Vdd<br />
4 FLMD0<br />
5 CLK<br />
6 RxD.<br />
7 RESET_OUT<br />
8 TOOL0<br />
Note Signal names in <strong>EZ</strong>-<strong>CUBE</strong><br />
Table 6-1. Pin Assignment<br />
Target interface<br />
connector<br />
7<br />
8<br />
5<br />
3<br />
6 4<br />
User’s Manual 89<br />
1<br />
2
Pin Name IN/OUT Note<br />
CHAPTER 6 HOW TO USE <strong>EZ</strong>-<strong>CUBE</strong> WITH RL78 MICROCONTROLLER<br />
Table 6-2. Pin <strong>Function</strong>s<br />
Description<br />
RESET_IN IN Pin used to input reset signal from the target system<br />
RESET_OUT OUT Pin used to output reset signal to the target device<br />
FLMD0 OUT Pin used to set the target device to debug mode or programming mode<br />
RXD IN/OUT Pin used to transmit/receive command/data between the target device<br />
TOOL0 IN/OUT Pin used to transmit/receive command/data between the target device<br />
CLK IN Pin used to input handshake signal from the target device<br />
N ote As seen from <strong>EZ</strong>-<strong>CUBE</strong><br />
6.1.2<br />
Circuit connection example<br />
Refer to Figure 6-2 and Figure 6-3<br />
design an appropriate circuit.<br />
Caution<br />
The constants described in the circuit connection example are reference values. If you perform<br />
flash programming aiming at mass production, thoroughly evaluate whether the specifications of<br />
the target device are satisfied.<br />
Figure 6-2. RL78/G12(20pin,24pin) Recommended Circuit Connection<br />
User’s Manual 90
CHAPTER 6 HOW TO USE <strong>EZ</strong>-<strong>CUBE</strong> WITH RL78 MICROCONTROLLER<br />
Figure 6-3. RL78/G12(30pin), RL78/G13, RL78/G14, RL78/I1A Recommended Circuit Connection<br />
6.1.3 Connection of reset pin<br />
This section describes the connection of the reset pin, for which special attention must be paid, in the circuit<br />
connection<br />
example shown in the previous section.<br />
During on-chip debugging, a reset signal from the target<br />
system is input to <strong>EZ</strong>-<strong>CUBE</strong>, masked, and then output<br />
to the target device. Therefore, the reset signal connection varies depending on whether <strong>EZ</strong>-<strong>CUBE</strong> is connected.<br />
For flash programming, the circuit must be designed so that the reset signals of the target system and <strong>EZ</strong>-<strong>CUBE</strong><br />
do not conflict.<br />
Recommend automatically switching the reset signal via series resistor.<br />
Figure 6-4 illustrates the reset pin connection described in 6.1.2 Circuit connection<br />
example.<br />
This connection is designed assuming that the reset circuit on the target system contains an N-ch<br />
open-drain<br />
buffer<br />
(output resistance: 100Ω or less). The VDD or GND level may be unstable when the logic of<br />
RESET_IN/OUT of <strong>EZ</strong>-<strong>CUBE</strong> is inverted, so observe the conditions described below in Remark.<br />
Remark<br />
Figure 6-4. Circuit Connection <strong>with</strong> Reset Circuit That Contains Buffer<br />
<strong>EZ</strong>-<strong>CUBE</strong><br />
Target device<br />
Reset connector<br />
RESET_OUT<br />
_RESET<br />
VDD V<br />
V DD<br />
RESET_IN<br />
R1<br />
Make the resistance of at least R1 ten times that of R2, R1 being 10 kΩ or more.<br />
Pull-up resistor R2 is not required if the buffer of the reset circuit consists of CMOS output.<br />
The circuit enclosed by a dashed line is not required when only flash programming is performed.<br />
R2<br />
Buffer<br />
User’s Manual 91
CHAPTER 6 HOW TO USE <strong>EZ</strong>-<strong>CUBE</strong> WITH RL78 MICROCONTROLLER<br />
Figure 6-5 illustrates the circuit connection for the case where the reset circuit on the target system contains<br />
no buffers and the reset signal is only generated via resistors or capacitors. Design the circuit, observing the<br />
conditions described below in Remark.<br />
Remark<br />
Figure 6-5. Circuit Connection <strong>with</strong> Reset Circuit That Contains No Buffers<br />
<strong>EZ</strong>-<strong>CUBE</strong><br />
RESET_OUT<br />
RESET_IN<br />
Make the resistance of at least R1 ten times that of R2, R1 being 10 kΩ or more.<br />
The circuit enclosed by a dashed line is not required when only flash programming is performed.<br />
6.1.4 Mounting connector onto target system<br />
The connector must be mounted on the target system<br />
for connecting <strong>EZ</strong>-<strong>CUBE</strong> <strong>with</strong> the target system. 2.54<br />
mm pitch 8-pin general-purpose connector can be used.<br />
Target device Reset connector<br />
_RESET<br />
R1 R2<br />
Compact connectors and loose-wire cables are also available as options.<br />
VDD DD<br />
User’s Manual 92
6.2 <strong>On</strong>-<strong>Chip</strong> <strong>Debug</strong>ging<br />
CHAPTER 6 HOW TO USE <strong>EZ</strong>-<strong>CUBE</strong> WITH RL78 MICROCONTROLLER<br />
This section describes the system configuration, startup/shutdown procedure and cautions for debugging when<br />
on-chip debugging is performed <strong>with</strong> <strong>EZ</strong>-<strong>CUBE</strong>.<br />
6.2.1 <strong>Debug</strong> functions<br />
Table 6-3 lists the debug functions when a RL78 microcontroller is the target device.<br />
Table 6-3. <strong>Debug</strong> <strong>Function</strong>s<br />
<strong>Function</strong>s Specifications<br />
Target device RL78<br />
RL78/G12,G13,G14,I1A<br />
Security 10 byte ID code authentication<br />
Download Available<br />
Execution Go, Step In, Step Over, CPU Reset, Restart<br />
Hardware break 1 point<br />
Software break Multiple points<br />
User spaces used for debugging 1-wire mode:Internal ROM: 1024 bytes + 22 bytes, Internal RAM: 6 bytes Note<br />
<strong>Function</strong> pins used for debugging TOOL0<br />
Note For details, refer to 6.2.5 Securing of user resources and setting of security ID and on-chip debug option<br />
byte.<br />
6.2.2 System configuration<br />
Figure 6-6 illustrates the system configuration for on-chip debugging.<br />
Target device<br />
Target device<br />
Host machine<br />
Products <strong>with</strong> USB ports<br />
Software<br />
Figure 6-6. System Configuration for <strong>On</strong>-<strong>Chip</strong> <strong>Debug</strong>ging<br />
<strong>EZ</strong>-<strong>CUBE</strong><br />
Includes CubeSuite+ for China, USB driver, and so on.<br />
USB cable (accessory)<br />
<strong>EZ</strong>-<strong>CUBE</strong> (this product)<br />
8-pin target cable (accessory)<br />
User’s Manual 93
6.2.3 System startup procedure<br />
CHAPTER 6 HOW TO USE <strong>EZ</strong>-<strong>CUBE</strong> WITH RL78 MICROCONTROLLER<br />
This section describes the system startup procedure. Observe the following order.<br />
(1) Preparation and installation of software<br />
The following software is required to perform on-chip debugging. For details on preparation and installation of<br />
software, refer to the setup manual supplied <strong>with</strong> <strong>EZ</strong>-<strong>CUBE</strong>.<br />
• CuebSuite+ for China<br />
• USB driver<br />
(2) Switch setting<br />
For RL78/G12(20pin, 24pin)<br />
SW-1: Select switch to ″M2″.<br />
SW-2: Select switch to ″Int. Clock″.<br />
SW-3: Select switch to ″<strong>Debug</strong> Mode″.<br />
SW-4: Depend on the user system environment.<br />
SW-5: Select switch to ″R8C″.<br />
For RL78/G12(30pin), RL78/G13, RL78/G14, RL78/I1A<br />
SW-1: Select switch to ″M2″.<br />
SW-2: Select switch to ″Int. Clock″.<br />
SW-3: Select switch to ″<strong>Debug</strong> Mode″.<br />
SW-4: Depend on the user system environment.<br />
SW-5: Select switch to ″Other″.<br />
Caution 1. Do not change the switch setting while the USB cable is connected.<br />
2. The maximum rating of the current is 100 mA, so do not use <strong>EZ</strong>-<strong>CUBE</strong> <strong>with</strong> the target<br />
system <strong>with</strong> the higher current rating. The power is always supplied after <strong>EZ</strong>-<strong>CUBE</strong> is<br />
connected to the host machine.<br />
(3) Connecting the target system<br />
Connect <strong>EZ</strong>-<strong>CUBE</strong> to the target system, before the power to the target system is turned on.<br />
User’s Manual 94
(4) Connecting the USB cable<br />
CHAPTER 6 HOW TO USE <strong>EZ</strong>-<strong>CUBE</strong> WITH RL78 MICROCONTROLLER<br />
Connect <strong>EZ</strong>-<strong>CUBE</strong> to the host machine, before the power to the target system is turned on.<br />
The mode LED glows red after connection.<br />
(5) Applying power to target system<br />
Turn on power to the target system. This step is not necessary if the power select switch is set to ″5″.<br />
(6) <strong>Debug</strong>ger startup<br />
Start the debugger.<br />
For the operation after this step, refer to the user's manual for CuebSuite+.<br />
If the debugger does not start normally or the operation is unstable, the possible causes may be the following.<br />
Communication error between <strong>EZ</strong>-<strong>CUBE</strong> and target system<br />
Whether firmware is update.<br />
Whether switch is selected normally.<br />
Whether communication is performed normally.<br />
• The user resource has not been secured or the security ID has not been set<br />
To perform debugging <strong>with</strong> <strong>EZ</strong>-<strong>CUBE</strong>, the user resource must be secured and the security ID must be set.<br />
For details, refer to 6.2.5 Securing of user resources and setting of security ID.<br />
• Unsupported software (debugger, device file, or firmware) is used<br />
The software used may not support debugging of the target device.<br />
• Defect of <strong>EZ</strong>-<strong>CUBE</strong><br />
<strong>EZ</strong>-<strong>CUBE</strong> may have a defect.<br />
User’s Manual 95
6.2.4 System shutdown procedure<br />
CHAPTER 6 HOW TO USE <strong>EZ</strong>-<strong>CUBE</strong> WITH RL78 MICROCONTROLLER<br />
Terminate debugging and shutdown the system in the following order.<br />
If the following order is not observed, the target system or <strong>EZ</strong>-<strong>CUBE</strong> may be damaged.<br />
(1) <strong>Debug</strong>ger termination<br />
Terminate the debugger.<br />
(2) Target system power shutdown<br />
Shutdown the power supplied to the target system. This step is not necessary if the power select switch is<br />
set to ″5″.<br />
(3) Unplugging the USB cable<br />
Unplug the USB cable from <strong>EZ</strong>-<strong>CUBE</strong> or the host machine.<br />
(4) Unplugging the target cable<br />
Unplug the target cable from <strong>EZ</strong>-<strong>CUBE</strong> or the target system.<br />
User’s Manual 96
CHAPTER 6 HOW TO USE <strong>EZ</strong>-<strong>CUBE</strong> WITH RL78 MICROCONTROLLER<br />
6.2.5 Securing of user resources and setting of security ID and on-chip debug option byte<br />
The user must prepare the following to perform communication between <strong>EZ</strong>-<strong>CUBE</strong> and the target device and<br />
implement each debug function. If Renesas Electronics assembler or compiler is used, the items can be set by<br />
using linker options. Refer to the descriptions on the following pages and set these items.<br />
• Securement of memory space<br />
The shaded portions in Figure 6-7 are the areas reserved for placing the debug monitor program, so user<br />
programs or data cannot be allocated in these spaces. These spaces must be secured so as not to be<br />
used by the user program. Moreover, this area must not be rewritten by the user program.<br />
Figure 6-7. Memory Spaces Where <strong>Debug</strong> Monitor Programs Are Allocated<br />
Note 1. In debugging, reset vector is rewritten to address allocated to a monitor program.<br />
2. When the self programming is executed, it will be 12 bytes.<br />
• Setting of security ID and on-chip debug option byte<br />
This is the area for the security setting to prevent the flash memory from being read by an unauthorized person.<br />
The security ID functions as a password for starting the debugger. The debugger starts only when the<br />
security ID that is input during debugger startup and the security ID embedded in this area match. If the ID<br />
codes do not match, the debugger manipulates the target device in accordance <strong>with</strong> the value set to the<br />
on-chip debug option byte area (refer to Table 6-4).<br />
[How to set]<br />
An ID code is generated in the security ID area by setting the security ID when using Renesas Electronics<br />
assembler or compiler. Select the ″Security ID″ check box and set an arbitrary ID code (10 bytes) as<br />
shown in the figure below.<br />
User’s Manual 97
<strong>On</strong>-chip debug option byte area<br />
CHAPTER 6 HOW TO USE <strong>EZ</strong>-<strong>CUBE</strong> WITH RL78 MICROCONTROLLER<br />
Figure 6-8. Security ID Setting Example<br />
This is the area for the security setting to prevent the flash memory from being read by an unauthorized person.<br />
The debugger manipulates the target device in accordance <strong>with</strong> the set value, as shown below.<br />
Table 6-4. <strong>On</strong>-<strong>Chip</strong> <strong>Debug</strong> Option Byte Setting and Operation<br />
Set Value Description Remark<br />
0x04 <strong>Debug</strong>ging is disabled even if an on-chip debug This setting is available only<br />
emulator (such as <strong>EZ</strong>-<strong>CUBE</strong>) is connected.<br />
for flash programming and self<br />
programming.<br />
0x85 The on-chip flash memory is not erased no matter<br />
how many times the security ID code authentication<br />
fails.<br />
-<br />
0x84 All on-chip flash memory areas are erased if the<br />
security ID code authentication fails.<br />
-<br />
Other than above Setting prohibited -<br />
[How to set]<br />
The following shows a setting example when using Renesas Electronics assembler or compiler. Set a value<br />
for the Control Value text box under the ″ Use on-chip debug [-go]″ check box as shown in the figure below.<br />
Example Setting 0x85 for control value<br />
User’s Manual 98
(a) Securing of debug monitor area<br />
CHAPTER 6 HOW TO USE <strong>EZ</strong>-<strong>CUBE</strong> WITH RL78 MICROCONTROLLER<br />
Figure 6-9. <strong>On</strong>-<strong>Chip</strong> <strong>Debug</strong> Option Byte Setting Example<br />
This is the area to which the debug monitor program is to be allocated. The monitor program performs<br />
initialization processing for debug communication interface and RUN or break processing for the CPU.<br />
This user programs or data must not be placed in an area of 22 bytes near the on-chip debug option byte, and an<br />
area of 512 bytes before the internal ROM end address. In addition, reset vector is rewritten to address allocated<br />
to a monitor program.<br />
[How to secure areas]<br />
It is not necessarily required to secure this area if the user program does not use this area.<br />
However To avoid problems that may occur during the debugger startup, it is recommended to secure this<br />
area in advance, using the compiler. Figure 6-10 shows example for securing the area, using the CubeSuite+.<br />
Set in “device” in link options tab as figure 6-10.<br />
Figure 6-10 Example for securing the debug monitor area<br />
User’s Manual 99
CHAPTER 6 HOW TO USE <strong>EZ</strong>-<strong>CUBE</strong> WITH RL78 MICROCONTROLLER<br />
(b) Securement of stack area for debugging<br />
This area requires 4 bytes as the stack area for debugging. Since this area is allocated immediately before<br />
the stack area, the address of this area varies depending on the stack increase and decrease. That is, 4<br />
extra bytes are consumed for the stack area used.<br />
Figure 6-11 illustrates the case where the stack area is increased when the internal high-speed RAM starts<br />
from 0xFCF00.<br />
[How to secure areas]<br />
Figure 6-11. Variation of Address of Stack Area for <strong>Debug</strong>ging<br />
Set the stack pointer by estimating the stack area consumed by the user program + 4 bytes. Make sure that<br />
the stack pointer does not extend beyond the internal high-speed RAM start address.<br />
Remark Refer to the self programming manual for how to secure the stack area for self programming.<br />
User’s Manual 100
6.2.6 Cautions on debugging<br />
CHAPTER 6 HOW TO USE <strong>EZ</strong>-<strong>CUBE</strong> WITH RL78 MICROCONTROLLER<br />
This section describes cautions on performing on-chip debugging for a RL78 microcontroller.<br />
Be sure to read the following to use <strong>EZ</strong>-<strong>CUBE</strong> properly.<br />
(1) Handling of device that was used for debugging<br />
Do not mount a device that was used for debugging on a mass-produced product, because the flash memory<br />
was rewritten during debugging and the number of rewrites of the flash memory cannot be guaranteed.<br />
Moreover, do not embed the debug monitor program into mass-produced products.<br />
(2) Flash self programming<br />
If a space where the debug monitor program is allocated is rewritten by flash self programming, the debugger<br />
can no longer operate normally. This caution also applies to boot swapping for such an area.<br />
(3) Operation after reset<br />
After an external pin reset or internal reset, the monitor program performs debug initialization processing.<br />
Consequently, the time from reset occurrence until user program execution differs from that in the actual<br />
device operation.<br />
(4) <strong>Debug</strong>ging <strong>with</strong> real machine running <strong>with</strong>out using <strong>EZ</strong>-<strong>CUBE</strong><br />
If debugging is performed <strong>with</strong> a real machine running, <strong>with</strong>out using <strong>EZ</strong>-<strong>CUBE</strong>, write the user program using<br />
the RFP. Programs downloaded by the debugger include the monitor program, and such a program<br />
malfunctions if it includes processing to make the TOOL0 pin low level.<br />
(5) Operation when debugger starts<br />
When the debugger is started, if the Target Device Connection setting in the Configuration dialog box of the<br />
debugger is different from the setting for the previous debugging, the internal flash memory is erased.<br />
(6) <strong>Debug</strong>ging after program is written by flash programming<br />
If a program is written to the internal flash memory using the RFP, on-chip debugging is disabled even if it is<br />
enabled in the on-chip debugging option byte setting. To perform debugging of the target device after that,<br />
erase the internal flash memory using the RFP and then download the program using the debugger.<br />
User’s Manual 101
6.3 Flash <strong>Programming</strong><br />
CHAPTER 6 HOW TO USE <strong>EZ</strong>-<strong>CUBE</strong> WITH RL78 MICROCONTROLLER<br />
This section describes the system configuration and startup/shutdown procedure when flash programming is<br />
performed for a RL78 microcontroller, using <strong>EZ</strong>-<strong>CUBE</strong>.<br />
6.3.1 Specifications of programming function<br />
Table 6-5. Specifications of <strong>Programming</strong> <strong>Function</strong><br />
<strong>Function</strong>s Specifications<br />
Host interface USB 2.0<br />
Target interface UART (1-wire mode)<br />
Target system voltage 2.7 to 5.5 V (depends on the target device)<br />
Clock supply Internal high-speed oscillation clock is used<br />
Power supply 5 V ±0.3 V (maximum current rating: 100 mA)<br />
Acquisition of device-specific<br />
information<br />
Security flag setting Available<br />
Parameter file for Renesas Electronics is used<br />
Standalone operation Unavailable (must be connected to host machine)<br />
6.3.2 System configuration<br />
Figure 6-12 illustrates the system configuration for flash programming.<br />
Target device<br />
Host machine<br />
Products <strong>with</strong> USB ports<br />
Software<br />
Figure 6-12. System Configuration for Flash <strong>Programming</strong><br />
<strong>EZ</strong>-<strong>CUBE</strong><br />
Includes the RFP USB driver, and so on.<br />
USB cable (accessory)<br />
<strong>EZ</strong>-<strong>CUBE</strong> (this product)<br />
8-pin target cable (accessory)<br />
User’s Manual 102
6.3.3 System startup procedure<br />
CHAPTER 6 HOW TO USE <strong>EZ</strong>-<strong>CUBE</strong> WITH RL78 MICROCONTROLLER<br />
This section describes the system startup procedure. Observe the following order.<br />
(1) Preparation and installation of software<br />
The following software is required to perform flash programming. For details on preparation and installation of<br />
software, refer to the setup manual supplied <strong>with</strong> <strong>EZ</strong>-<strong>CUBE</strong>.<br />
• RFP<br />
• USB driver<br />
(2) Switch setting<br />
For RL78/G12(20pin, 24pin)<br />
SW-1: Select switch to ″M2″.<br />
SW-2: Select switch to ″Int. Clock″.<br />
SW-3: Select switch to ″<strong>Debug</strong> Mode″.<br />
SW-4: Depend on the user system environment.<br />
SW-5: Select switch to ″R8C″.<br />
For RL78/G12(30pin), RL78/G13, RL78/G14, RL78/I1A<br />
SW-1: Select switch to ″M2″.<br />
SW-2: Select switch to ″Int. Clock″.<br />
SW-3: Select switch to ″<strong>Debug</strong> Mode″.<br />
SW-4: Depend on the user system environment.<br />
SW-5: Select switch to ″Other″.<br />
Caution 1. Do not change the switch setting while the USB cable is connected.<br />
2. The maximum rating of the current is 100 mA, so do not use <strong>EZ</strong>-<strong>CUBE</strong> <strong>with</strong> the target<br />
system <strong>with</strong> the higher current rating. The power is always supplied after <strong>EZ</strong>-<strong>CUBE</strong> is<br />
connected to the host machine.<br />
(3) Connecting the target system<br />
Connect <strong>EZ</strong>-<strong>CUBE</strong> to the target system, before the power to the target system is turned on.<br />
(4) Connecting the USB cable<br />
Connect <strong>EZ</strong>-<strong>CUBE</strong> to the host machine, before the power to the target system is turned on.<br />
The power is always supplied after <strong>EZ</strong>-<strong>CUBE</strong> is connected to the host machine <strong>with</strong> the USB cable.<br />
Caution Do not change the switch setting while the USB cable is connected.<br />
(5) Applying power to target system<br />
Turn on power to the target system. This step is not necessary if the power select switch is set to ″5″.<br />
(6) RFP startup<br />
Start the RFP.<br />
For detailed usage of the RFP, refer to the RFP User's Manual.<br />
User’s Manual 103
6.3.4 Usage examples<br />
CHAPTER 6 HOW TO USE <strong>EZ</strong>-<strong>CUBE</strong> WITH RL78 MICROCONTROLLER<br />
This section describes a series of basic operations using the RFP, using the R 5 F 100LE as an example. The<br />
operations from execution of the [Autoprocedure (E.P)] command to programming for the target device are<br />
described. For other commands and their applications, refer to the RFP User's Manual.<br />
The conditions used for a series of operations in this section are as follows.<br />
<br />
Target device: R5F100LE<br />
Power supply voltage: 5 V±0.3V (supplied from <strong>EZ</strong>-<strong>CUBE</strong>)<br />
<br />
Switches: SW-1: M2<br />
<br />
Voltage 5<br />
Operation mode: chip<br />
SW-2: Int.Clock<br />
SW-3: <strong>Debug</strong> Mode<br />
SW-4: 5<br />
SW-5: Other<br />
Program file: sample.hex<br />
Command options: [Blank check before Erase] selected<br />
[Verify after Program] selected<br />
User’s Manual 104
CHAPTER 6 HOW TO USE <strong>EZ</strong>-<strong>CUBE</strong> WITH RL78 MICROCONTROLLER<br />
(1) Setting of programming environment<br />
Set the programming environment, following the steps to described below.<br />
<strong>On</strong> the taskbar, click the Start button, point to [All Programs], [Renesas Electronics CubeSuite+],<br />
[<strong>Programming</strong> Tools], [Renesas Flash Programmer Vx.xx], and then click [Renesas Flash Programmer<br />
Vx.xx [Basic mode]]. The [Welcome!] dialog box will open. Select [Create new workspace.] and then click<br />
the Next button to open the [Create a new workspace] dialog box.<br />
Figure 6-13. [Welcome!] Dialog Box<br />
In the [Using Target Microcontroller:] list box, select “R5F100LE”. Enter any text string (such as “sample”<br />
in this case) in the [Workspace Name:] box, and specify any folder in the [Folder:] box.<br />
Clicking the Next button displays the [Select Communication Interface] dialog box.<br />
Figure 6-14. Parameter File Select Dialog Box<br />
User’s Manual 105
CHAPTER 6 HOW TO USE <strong>EZ</strong>-<strong>CUBE</strong> WITH RL78 MICROCONTROLLER<br />
Select “Tool”, in the [Select Communication Interface] dialog box. For <strong>EZ</strong>-<strong>CUBE</strong>, the area is<br />
fixed to “PC port No.(Renesas Virtual UART)”.<br />
Clicking the Next button displays the [Setting Oscillator] dialog box.<br />
Figure 6-15. [Select Communication Interface] Dialog Box<br />
Select the [Power target from the emulator] check box, and then select “5.0 V” for [Supply voltage].<br />
Clicking the OK button displays the [Mode Pin Settings at Connection] dialog box.<br />
Figure 6-16. [Setting Power Supply] Dialog Box<br />
“<strong>Chip</strong>” is the default value for [Operation mode] under the [Target] category, and the default value for “Blank<br />
Check before Erase” in the [Command Options] category is “Valid”. And the default value for “Verify after<br />
Program” in the [Command Options] category is “Valid”.<br />
Clicking the Complete button saves the project file and displays the main window.<br />
User’s Manual 106
(2) Selection of program file<br />
CHAPTER 6 HOW TO USE <strong>EZ</strong>-<strong>CUBE</strong> WITH RL78 MICROCONTROLLER<br />
Figure 6-17. [Information Settings] Dialog Box<br />
Select the program file, following the steps to described below.<br />
Click the Browse… button in “User/Data area:” of the program file area to open the [Open File] dialog box.<br />
Select “sample.hex” in the [Open File] dialog box, and then click the Open button to open the main<br />
window.<br />
User’s Manual 107
CHAPTER 6 HOW TO USE <strong>EZ</strong>-<strong>CUBE</strong> WITH RL78 MICROCONTROLLER<br />
(3) Execution of [Autoprocedure (E.P)] command<br />
Click the [Microcontroller] menu and select the [Autoprocedure (E.P)] command. A check mark is then<br />
placed on the left of the command, and the command is assigned to the Start button. After clicking the Start<br />
button, execute the following commands in the following order for R 5 F 100LE: [Blank Check] command,<br />
[Erase] command (if there are no blanks), [Program] command, and [Verify] command.<br />
Figure 6-18. Completion of [Autoprocedure (E.P)] Command Execution<br />
User’s Manual 108
6.3.5 System shutdown procedure<br />
CHAPTER 6 HOW TO USE <strong>EZ</strong>-<strong>CUBE</strong> WITH RL78 MICROCONTROLLER<br />
Terminate flash programming and shutdown the system in the following order.<br />
If the following order is not observed, the target system or <strong>EZ</strong>-<strong>CUBE</strong> may be damaged.<br />
(1) Terminating the RFP<br />
Terminate the RFP if you are not going to perform programming to other devices.<br />
(2) Target system power shutdown<br />
Shutdown the power supplied to the target system. This step is not necessary if the power select switch is<br />
set to ″5″.<br />
(3) Unplugging the USB cable<br />
Unplug the USB cable from <strong>EZ</strong>-<strong>CUBE</strong> or the host machine.<br />
When the power select switch is set to ″T″, the step of (4) Unplugging the target cable can be performed<br />
before this step.<br />
(4) Unplugging the target cable<br />
Unplug the target cable from <strong>EZ</strong>-<strong>CUBE</strong> or the target system.<br />
6.3.6 Cautions on flash programming<br />
This section describes the cautions for flash programming. Be sure to read the following for the proper use of<br />
<strong>EZ</strong>-<strong>CUBE</strong>.<br />
• To improve the writing quality, fully understand, verify, and evaluate the following items before using <strong>EZ</strong>-<strong>CUBE</strong>.<br />
- Circuits are designed as described in the user's manuals for the device and <strong>EZ</strong>-<strong>CUBE</strong>.<br />
- The device, RFP and <strong>EZ</strong>-<strong>CUBE</strong> are used as described in each user's manual.<br />
- The power supplied to the target system is stable.<br />
User’s Manual 109
CHAPTER 7 HOW TO USE <strong>EZ</strong>-<strong>CUBE</strong> WITH V850 MICROCONTROLLER<br />
This chapter describes how to use <strong>EZ</strong>-<strong>CUBE</strong> when performing on-chip debugging and flash programming for a<br />
V850 microcontroller.<br />
<strong>On</strong>-chip debugging is a method to debug a microcontroller mounted on the target system, using a debug<br />
function implemented in the device. Since debugging is performed <strong>with</strong> the target device operating on the board,<br />
this method is suitable for field debugging.<br />
Flash programming is a method to write a program to the flash memory embedded in a device. Erasing,<br />
writing and verifying the program can be performed on-board <strong>with</strong> the device.<br />
Please update firmware at first. Follow step (1)-(3). For detail on update firmware, refer to 1.4 Firmware<br />
Update.<br />
(1) Connect <strong>EZ</strong>-<strong>CUBE</strong> to the host machine. Do not connect <strong>EZ</strong>-<strong>CUBE</strong> to the target system.<br />
(2) Start the <strong>EZ</strong>-<strong>CUBE</strong> firmware update tool”QB<strong>EZ</strong>UTL.exe”. Select firmware of V850” V850_OCD_FW.hex”.<br />
(3) Click the [Start] button. Start to update the <strong>EZ</strong>-<strong>CUBE</strong> firmware.<br />
Read the following chapters if you are using <strong>EZ</strong>-<strong>CUBE</strong> for the first time <strong>with</strong> a V850 microcontroller as the target<br />
device.<br />
7.1 Target System Design<br />
For communication between <strong>EZ</strong>-<strong>CUBE</strong> and the target system, communication circuits must be mounted on<br />
the target system. This section describes the circuit design and mounting of connectors.<br />
7.2 <strong>On</strong>-<strong>Chip</strong> <strong>Debug</strong>ging<br />
This section describes the system configuration and startup method to perform on-chip debugging <strong>with</strong><br />
<strong>EZ</strong>-<strong>CUBE</strong>.<br />
7.3 Flash <strong>Programming</strong><br />
This section describes the system configuration and startup method to perform flash programming <strong>with</strong><br />
<strong>EZ</strong>-<strong>CUBE</strong>.<br />
User’s Manual 110
7.1 Target System Design<br />
CHAPTER 7 HOW TO USE <strong>EZ</strong>-<strong>CUBE</strong> WITH V850 MICROCONTROLLER<br />
This section describes the target system circuit design required for on-chip debugging and flash programming.<br />
Figure 7-1 presents an overview of the <strong>EZ</strong>-<strong>CUBE</strong> communication interface. As shown on the left side of the<br />
figure, <strong>EZ</strong>-<strong>CUBE</strong> performs serial communication <strong>with</strong> the target device on the target system. For this<br />
communication, communication circuits must be mounted on the target system. Refer to this section to design<br />
circuits appropriately.<br />
UART are supported as communication modes.<br />
The pins used for serial communication are basically the same as those of the flash memory programmer<br />
(such as <strong>EZ</strong>-<strong>CUBE</strong>), but some devices do not support some of them.<br />
Target device<br />
7.1.1 Pin assignment<br />
Figure 7-1. Outline of Communication Interface<br />
This section describes the interface signals used between <strong>EZ</strong>-<strong>CUBE</strong> and the target system. Table 7-1 lists the<br />
pin assignment. Table 7-2 describes the functions of each pin.<br />
Pin No. Pin Name Note<br />
1 GND<br />
2 RESET_IN<br />
3 VDD<br />
4 FLMD0<br />
5 CLK<br />
6 RxD<br />
7 RESET_OUT<br />
8 TxD<br />
Note Signal names in <strong>EZ</strong>-<strong>CUBE</strong><br />
Communication circuits<br />
must be mounted on<br />
the target system. .<br />
Renesas<br />
<strong>EZ</strong>-<strong>CUBE</strong><br />
Serial communication<br />
(UART)<br />
Target system Host machine<br />
<strong>EZ</strong>-<strong>CUBE</strong><br />
Table 7-1. Pin Assignment<br />
Target interface<br />
connector<br />
USB<br />
communication<br />
7<br />
8<br />
5<br />
3<br />
6 4<br />
1<br />
2<br />
User’s Manual 111
Pin Name IN/OUT Note<br />
CHAPTER 7 HOW TO USE <strong>EZ</strong>-<strong>CUBE</strong> WITH V850 MICROCONTROLLER<br />
Table 7-2. Pin <strong>Function</strong>s<br />
Description<br />
RESET_IN IN Pin used to input reset signal from the target system<br />
RESET_OUT OUT Pin used to output reset signal to the target device<br />
CLK OUT Pin used to output clock signal to the target device<br />
FLMD0 OUT Pin used to set the target device to debug mode or<br />
programming mode<br />
RxD IN Pin used to receive command/data from the target device<br />
TxD OUT Pin used to transmit command/data to the target device<br />
Note As seen from <strong>EZ</strong>-<strong>CUBE</strong><br />
7.1.2 Circuit connection examples<br />
The circuit design on the target system varies depending on the communication interface mode. Refer to the<br />
following table and see the relevant circuit connection example.<br />
Caution The constants described in the circuit connection example are reference values. If you perform<br />
flash programming aiming at mass production, thoroughly evaluate whether the specifications of<br />
the target device are satisfied.<br />
Figure 7-2. Recommended Circuit Connection<br />
Notes 1. This connection is designed assuming that the RESET signal is output from the N-ch open-drain buffer<br />
(output resistance: 100Ω or less). For details, refer to 7.1.3 Connection of reset pin.<br />
2. Connect TxD (transmit side) of the target device to RxD (receive side) of the target connector, and TxD<br />
(transmit side) of the target connector to RxD (receive side) of the target device. Read the serial interface<br />
pin names on the target device side as those for flash programming supported by the target device.<br />
User’s Manual 112
7.1.3 Connection of reset pin<br />
CHAPTER 7 HOW TO USE <strong>EZ</strong>-<strong>CUBE</strong> WITH V850 MICROCONTROLLER<br />
This section describes the connection of the reset pin, for which special attention must be paid, in circuit<br />
connection examples shown in the previous section.<br />
During on-chip debugging, a reset signal from the target system is input to <strong>EZ</strong>-<strong>CUBE</strong>, masked, and then<br />
output to the target device. Therefore, the reset signal connection varies depending on whether <strong>EZ</strong>-<strong>CUBE</strong> is<br />
connected.<br />
For flash programming, the circuit must be designed so that the reset signals of the target system and<br />
<strong>EZ</strong>-<strong>CUBE</strong> do not conflict.<br />
Automatically switching the reset signal via series resistor (recommended; described in recommended<br />
circuit connection in the previous section)<br />
Figure 7-3 illustrates the reset pin connection described in 7.1.2 Circuit connection examples.<br />
This connection is designed assuming that the reset circuit on the target system contains an N-ch open-drain<br />
buffer (output resistance: 100Ω or less). The VDD or GND level may be unstable when the logic of<br />
RESET_IN/OUT of <strong>EZ</strong>-<strong>CUBE</strong> is inverted, so observe the conditions described below in Remark.<br />
Figure 7-3. Circuit Connection <strong>with</strong> Reset Circuit That Contains Buffer<br />
<strong>EZ</strong>-<strong>CUBE</strong><br />
RESET_OUT<br />
RESET_IN<br />
R1<br />
Target Device<br />
_RESET<br />
R2<br />
VDD V<br />
Reset connector<br />
Buffer<br />
Remark Make the resistance of at least R1 ten times that of R2, R1 being 10 kΩ or more.<br />
V DD<br />
Pull-up resistor R2 is not required if the buffer of the reset circuit consists of CMOS output.<br />
The circuit enclosed by a dashed line is not required when only flash programming is performed.<br />
Figure 7-4 illustrates the circuit connection for the case where the reset circuit on the target system contains<br />
no buffers and the reset signal is only generated via resistors or capacitors. Design the circuit, observing<br />
the conditions described below in Remark.<br />
Figure 7-4. Circuit Connection <strong>with</strong> Reset Circuit That Contains No Buffers<br />
<strong>EZ</strong>-<strong>CUBE</strong><br />
RESET_OUT<br />
RESET_IN<br />
R1<br />
Target Device<br />
_RESET<br />
Reset connector<br />
R2<br />
V DD<br />
Remark Make the resistance of at least R1 ten times that of R2, R1 being 10 kΩ or more.<br />
The circuit enclosed by a dashed line is not required when only flash programming is performed.<br />
User’s Manual 113
CHAPTER 7 HOW TO USE <strong>EZ</strong>-<strong>CUBE</strong> WITH V850 MICROCONTROLLER<br />
7.1.4 Mounting connector onto target system<br />
The connector must be mounted on the target system for connecting <strong>EZ</strong>-<strong>CUBE</strong> <strong>with</strong> the target system. A 2.54<br />
mm pitch 8-pin general-purpose connector can be used.<br />
Compact connectors and loose-wire cables are also available as options.<br />
User’s Manual 114
7.2 <strong>On</strong>-<strong>Chip</strong> <strong>Debug</strong>ging<br />
CHAPTER 7 HOW TO USE <strong>EZ</strong>-<strong>CUBE</strong> WITH V850 MICROCONTROLLER<br />
This section describes the system configuration, startup/shutdown procedure and cautions for debugging when<br />
on-chip debugging is performed <strong>with</strong> <strong>EZ</strong>-<strong>CUBE</strong>.<br />
7.2.1 <strong>Debug</strong> functions<br />
Table 6-3 lists the debug functions when a V850 microcontroller is the target device and the debugger is used.<br />
Table 7-3. <strong>Debug</strong> <strong>Function</strong>s<br />
<strong>Function</strong>s Specifications<br />
Target Device V850<br />
V850ES/Jx3,V850ES/Jx3-L<br />
Security 10-byte ID code authentication<br />
Download Available<br />
Execution Go, Step In, Step Over, CPU Reset, Restart<br />
Hardware break 1 point<br />
Software break Multiple points<br />
RAM monitoring Available<br />
<strong>Function</strong> pins used for debugging RXD, TXD<br />
7.2.2 System configuration<br />
Figure 7-5 illustrates the system configuration for on-chip debugging.<br />
Target device<br />
Target device<br />
Host machine<br />
Products <strong>with</strong> USB ports<br />
Software<br />
Figure 7-5. System Configuration for <strong>On</strong>-<strong>Chip</strong> <strong>Debug</strong>ging<br />
<strong>EZ</strong>-<strong>CUBE</strong><br />
Includes CubeSuite+ for China, USB driver, and so on.<br />
USB cable (accessory)<br />
<strong>EZ</strong>-<strong>CUBE</strong> (this product)<br />
8-pin target cable (accessory)<br />
User’s Manual 115
7.2.3 System startup procedure<br />
CHAPTER 7 HOW TO USE <strong>EZ</strong>-<strong>CUBE</strong> WITH V850 MICROCONTROLLER<br />
This section describes the system startup procedure. Observe the following order.<br />
(1) Preparation and installation of software<br />
The following software is required to perform on-chip debugging. For details on preparation and installation of<br />
software, refer to the setup manual supplied <strong>with</strong> <strong>EZ</strong>-<strong>CUBE</strong>.<br />
• CuebSuite+<br />
• USB driver<br />
(2) Switch setting<br />
SW-1: Select switch to ″M1″.<br />
SW-2: Depend on the user system environment.<br />
SW-3: Select switch to ″<strong>Debug</strong> Mode″.<br />
SW-4: Depend on the user system environment.<br />
SW-5: Select switch to ″Other″.<br />
Caution 1. Do not change the switch setting while the USB cable is connected.<br />
2. The maximum rating of the current is 100 mA, so do not use <strong>EZ</strong>-<strong>CUBE</strong> <strong>with</strong> the target<br />
system <strong>with</strong> the higher current rating. The power is always supplied after <strong>EZ</strong>-<strong>CUBE</strong> is<br />
connected to the host machine.<br />
(3) Connecting the target system<br />
Connect <strong>EZ</strong>-<strong>CUBE</strong> to the target system, before the power to the target system is turned on.<br />
(4) Connecting the USB cable<br />
Connect <strong>EZ</strong>-<strong>CUBE</strong> to the host machine, before the power to the target system is turned on.<br />
The mode LED glows red after connection.<br />
(5) Applying power to target system<br />
Turn on power to the target system. This step is not necessary if the power select switch is set to ″5″.<br />
(6) <strong>Debug</strong>ger startup<br />
Start the debugger.<br />
For the operation after this step, refer to the user's manual for the CubeSuite+.<br />
If the debugger does not start normally or the operation is unstable, the possible causes may be the following.<br />
• Communication error between <strong>EZ</strong>-<strong>CUBE</strong> and target system<br />
Whether firmware is update.<br />
Whether switch is selected normally.<br />
Whether communication is performed normally.<br />
• The user resource has not been secured or the security ID has not been set<br />
To perform debugging <strong>with</strong> <strong>EZ</strong>-<strong>CUBE</strong>, the user resource must be secured and the security ID must be set.<br />
For details, refer to 7.2.5 Securing of user resources and setting of security ID.<br />
• Unsupported software (debugger, device file, or firmware) is used<br />
The software used may not support debugging of the target device.<br />
• Defect of <strong>EZ</strong>-<strong>CUBE</strong><br />
<strong>EZ</strong>-<strong>CUBE</strong> may have a defect.<br />
User’s Manual 116
7.2.4 System shutdown procedure<br />
CHAPTER 7 HOW TO USE <strong>EZ</strong>-<strong>CUBE</strong> WITH V850 MICROCONTROLLER<br />
Terminate debugging and shutdown the system in the following order.<br />
If the following order is not observed, the target system or <strong>EZ</strong>-<strong>CUBE</strong> may be damaged.<br />
(1) <strong>Debug</strong>ger termination<br />
Terminate the debugger.<br />
(2) Target system power shutdown<br />
Shutdown the power supplied to the target system. This step is not necessary if the power select switch is<br />
set to ″5″.<br />
(3) Unplugging the USB cable<br />
Unplug the USB cable from <strong>EZ</strong>-<strong>CUBE</strong> or the host machine.<br />
(4) Unplugging the target cable<br />
Unplug the target cable from <strong>EZ</strong>-<strong>CUBE</strong> or the target system.<br />
User’s Manual 117
CHAPTER 7 HOW TO USE <strong>EZ</strong>-<strong>CUBE</strong> WITH V850 MICROCONTROLLER<br />
7.2.5 Securing of user resources and setting of security ID<br />
The user must prepare the following to perform communication between <strong>EZ</strong>-<strong>CUBE</strong> and the target device and<br />
implement each debug function. Refer to the descriptions on the following pages and set these items in the user<br />
program or using the compiler options.<br />
• Securement of memory space<br />
The shaded portions in Figure 7-6 are the areas reserved for placing the debug monitor program, so user<br />
programs and data cannot be allocated in these spaces. These spaces must be secured so as not to be used<br />
by the user program.<br />
Figure 7-6. Memory Spaces Where <strong>Debug</strong> Monitor Programs Are Allocated<br />
• Securement of serial interface for communication<br />
The register settings, concerning UART used for communication between <strong>EZ</strong>-<strong>CUBE</strong> and the target device,<br />
performed by the debug monitor program must not be changed.<br />
• Security ID setting<br />
The ID code must be embedded in the area filled <strong>with</strong> yellow (0x70 to 0x79) in Figure 7-6, to prevent the<br />
memory from being read by an unauthorized person.<br />
User’s Manual 118
(a) Reset vector<br />
CHAPTER 7 HOW TO USE <strong>EZ</strong>-<strong>CUBE</strong> WITH V850 MICROCONTROLLER<br />
A reset vector includes the jump instruction for the debug monitor program.<br />
[How to secure areas]<br />
It is not necessary to secure this area intentionally. When downloading a program, however, the debugger<br />
rewrites the reset vector in accordance <strong>with</strong> the following cases. If the rewritten pattern does not match the<br />
following cases, the debugger generates an error.<br />
• When two nop instructions are placed in succession from address 0<br />
Before writing After writing<br />
0x0 nop → Jumps to debug monitor program at 0x0<br />
0x2 nop<br />
0x4 xxxx<br />
0x4 xxxx<br />
• When two 0xFFFF are successively placed from address 0 (already erased device)<br />
Before writing After writing<br />
0x0 0xFFFF → Jumps to debug monitor program at 0x0<br />
0x2 0xFFFF<br />
0x4 xxxx<br />
0x4 xxxx<br />
• The jr instruction is placed at address 0 (when using Renesas Electronics compiler)<br />
Before writing After writing<br />
0x0 jr disp22 → Jumps to debug monitor program at 0x0<br />
0x4 jr disp22 - 4<br />
• The jump instruction for the debug monitor program is placed at address 0<br />
Before writing After writing<br />
Jumps to debug monitor program at 0x0 → No change<br />
User’s Manual 119
CHAPTER 7 HOW TO USE <strong>EZ</strong>-<strong>CUBE</strong> WITH V850 MICROCONTROLLER<br />
(b) Securement of area for debug monitor program<br />
The shaded portions in Figure 6-6 are the areas where the debug monitor program is allocated. The monitor<br />
program performs initialization processing for debug communication interface and RUN or break processing<br />
for the CPU. The internal ROM area must be filled <strong>with</strong> 0xFF. This area must not be rewritten by the user<br />
program.<br />
[How to secure areas]<br />
It is not necessarily required to secure this area if the user program does not use this area.<br />
To avoid problems that may occur during the debugger startup, however, it is recommended to secure this<br />
area in advance, using the compiler.<br />
The following shows examples for securing the area, using the Renesas Electronics compiler. Add the<br />
assemble source file and link directive code, as shown below.<br />
• Assemble source (Add the following code as an assemble source file.)<br />
-- Secures 2 KB space for monitor ROM section<br />
.section "MonitorROM", const<br />
.space 0x800, 0xff<br />
-- Secures interrupt vector for debugging<br />
.section "DBG0"<br />
.space 4, 0xff<br />
-- Secures interrupt vector for serial communication<br />
-- Change the section name according to serial communication mode used<br />
.section "INTCSI00"<br />
.space 4, 0xff<br />
-- Secures 16 byte space for monitor ROM section<br />
.section "MonitorRAM", bss<br />
.lcomm monitorramsym, 16, 4 /* defines monitorramsym symbol */<br />
• Link directive (Add the following code to the link directive file.)<br />
The following shows an example when the internal ROM end address is 0x6ffff and internal RAM end<br />
address is 0x6ffefff.<br />
MROMSEG : !LOAD ?R V0x03f800{<br />
MonitorROM = $PROGBITS ?A MonitorROM;<br />
};<br />
MRAMSEG : !LOAD ?RW V0x03ffeff0{<br />
MonitorRAM = $NOBITS ?AW MonitorRAM;<br />
};<br />
User’s Manual 120
CHAPTER 7 HOW TO USE <strong>EZ</strong>-<strong>CUBE</strong> WITH V850 MICROCONTROLLER<br />
(c) Securement of communication serial interface<br />
UART is used for communication between <strong>EZ</strong>-<strong>CUBE</strong> and the target system. The settings related to the serial<br />
interface modes are performed by the debug monitor program, but if the setting is changed by the user<br />
program, a communication error may occur.<br />
To prevent such a problem from occurring, communication serial interface must be secured in the user<br />
program.<br />
[How to secure communication serial interface]<br />
Create the user program observing the following points.<br />
• Serial interface registers<br />
Do not set the registers related to UART in the user program.<br />
• Interrupt mask register<br />
When UART is used, do not mask receive end interrupts Note .<br />
Note Do not mask receive error interrupts.<br />
• Port registers<br />
When UART is used, do not set port registers to make the TxD and RxD pins invalid.<br />
(d) Security ID setting<br />
This setting is required to prevent the memory from being read by an unauthorized person. Embed a security<br />
ID at addresses 0x70 to 0x79 in the internal flash memory. The debugger starts only when the security ID<br />
that is set during debugger startup and the security ID set at addresses 0x70 to 0x79 match.<br />
If bit 7 of address 0x79 is ″0″, however, debugging is disabled. In such a case, there are no methods to start<br />
the debugger. <strong>Debug</strong>ging is mainly disabled for mass-produced devices.<br />
If the user has forgotten the security ID or to enable debugging, erase the flash memory and set the security ID<br />
again.<br />
[How to set security ID]<br />
Embed a security ID at addresses 0x70 to 0x79 in the user program.<br />
If the security ID is embedded as follows, for example, the security ID set by the debugger is<br />
″126456789ABCDEF126D4″ (not case-sensitive).<br />
User’s Manual 121
CHAPTER 7 HOW TO USE <strong>EZ</strong>-<strong>CUBE</strong> WITH V850 MICROCONTROLLER<br />
Address Value [7:0]<br />
0x70 0x12<br />
0x71 0x64<br />
0x72 0x56<br />
0x76 0x78<br />
0x74 0x9A<br />
0x75 0xBC<br />
0x76 0xDE<br />
0x77 0xF1<br />
0x78 0x26<br />
0x79 0xD4<br />
If Renesas Electronics compiler is used, the security ID can be set using the Compiler Common Options<br />
menu.<br />
Figure 7-7. Setting Security ID<br />
User’s Manual 122
7.2.6 Cautions on debugging<br />
CHAPTER 7 HOW TO USE <strong>EZ</strong>-<strong>CUBE</strong> WITH V850 MICROCONTROLLER<br />
This section describes cautions on performing on-chip debugging for a V850 microcontroller.<br />
Be sure to read the following to use <strong>EZ</strong>-<strong>CUBE</strong> properly.<br />
(1) Handling of device that was used for debugging<br />
Do not mount a device that was used for debugging on a mass-produced product, because the flash memory<br />
was rewritten during debugging and the number of rewrites of the flash memory cannot be guaranteed.<br />
Moreover, do not embed the debug monitor program into mass-produced products.<br />
(2) When breaks cannot be executed<br />
Forced breaks cannot be executed if one of the following conditions is satisfied.<br />
• Interrupts are disabled (DI)<br />
• Interrupts issued for the serial interface, which is used for communication between <strong>EZ</strong>-<strong>CUBE</strong> and the target<br />
device, are masked<br />
• Standby mode is entered while standby release by a maskable interrupt is prohibited<br />
• Mode for communication between <strong>EZ</strong>-<strong>CUBE</strong> and the target device is UART, and the main clock has been<br />
stopped<br />
(3) Device <strong>with</strong> which the debugger startup is slowed<br />
When the debugger is started for the first time, chip erasure and writing of debug monitor program are<br />
performed. The device require about a dozen seconds for these operations.<br />
(4) Writing of debug monitor program<br />
If the CPU operating clock setting is changed by the debugger, the debugger rewrites the debug monitor<br />
program. At this time, it takes about a dozen seconds for this operation. When using Renesas Electronics<br />
debugger, this specification applies when the setting in the Clock area in the Configuration dialog box.<br />
(5) Flash self programming<br />
If a space where the debug monitor program is allocated is rewritten by flash self programming, the debugger<br />
can no longer operate normally.<br />
(6) Emulation of POC function<br />
The POC function of the target device cannot be emulated. Make sure that the power to the target system is<br />
not shut down during debugging.<br />
(7) Operation after reset<br />
After an external pin reset or internal reset, the monitor program performs debug initialization processing.<br />
Consequently, the time from reset occurrence until user program execution differs from that in the actual<br />
device operation.<br />
(8) <strong>Debug</strong>ging <strong>with</strong> real machine running <strong>with</strong>out using <strong>EZ</strong>-<strong>CUBE</strong><br />
If debugging is performed <strong>with</strong> a real machine running, <strong>with</strong>out using <strong>EZ</strong>-<strong>CUBE</strong>, write the user program using<br />
the RFP. Programs downloaded by the debugger include the monitor program, and such a program<br />
malfunctions if it is not controlled via <strong>EZ</strong>-<strong>CUBE</strong>.<br />
User’s Manual 123
7.3 Flash <strong>Programming</strong><br />
CHAPTER 7 HOW TO USE <strong>EZ</strong>-<strong>CUBE</strong> WITH V850 MICROCONTROLLER<br />
This section describes the system configuration and startup/shutdown procedure when flash programming is<br />
performed for a V850 microcontroller, using <strong>EZ</strong>-<strong>CUBE</strong>.<br />
7.3.1 Specifications of programming function<br />
Host interface<br />
Target interface<br />
Table 7-4. Specifications of <strong>Programming</strong> <strong>Function</strong><br />
<strong>Function</strong>s Specifications<br />
Target system voltage<br />
Clock supply<br />
Power supply<br />
Acquisition of device-specific<br />
information<br />
Security flag setting<br />
Standalone operation<br />
7.3.2 System configuration<br />
USB 2.0<br />
UART<br />
2.7 to 5.5 V (depends on the target device)<br />
8MHz clock can be supplied<br />
Clock mounted on the target system can be used<br />
5 V±0.3V (maximum current rating: 100 mA)<br />
Parameter file for Renesas Electronics is used<br />
Available<br />
Unavailable (must be connected to host machine)<br />
Figure 7-8 illustrates the system configuration for flash programming.<br />
Target device<br />
Host machine<br />
Products <strong>with</strong> USB ports<br />
Software<br />
Figure 7-8. System Configuration for Flash <strong>Programming</strong><br />
<strong>EZ</strong>-<strong>CUBE</strong><br />
Includes the RFP, USB driver, and so on.<br />
USB cable (accessory)<br />
<strong>EZ</strong>-<strong>CUBE</strong> (this product)<br />
8-pin target cable (accessory)<br />
User’s Manual 124
7.3.3 System startup procedure<br />
CHAPTER 7 HOW TO USE <strong>EZ</strong>-<strong>CUBE</strong> WITH V850 MICROCONTROLLER<br />
This section describes the system startup procedure. Observe the following order.<br />
(1) Preparation and installation of software<br />
The following software is required to perform flash programming. For details on preparation and installation of<br />
software, refer to the setup manual supplied <strong>with</strong> <strong>EZ</strong>-<strong>CUBE</strong>.<br />
• RFP<br />
• USB driver<br />
(2) Switch setting<br />
SW-1: Select switch to ″M1″.<br />
SW-2: Depend on the user system environment.<br />
SW-3: Select switch to ″<strong>Debug</strong> Mode″.<br />
SW-4: Depend on the user system environment.<br />
SW-5: Select switch to ″Other″<br />
Caution 1. Do not change the switch setting while the USB cable is connected.<br />
2. The maximum rating of the current is 100 mA, so do not use <strong>EZ</strong>-<strong>CUBE</strong> <strong>with</strong> the target<br />
system <strong>with</strong> the higher current rating. The power is always supplied after <strong>EZ</strong>-<strong>CUBE</strong> is<br />
connected to the host machine.<br />
(3) Connecting the target system<br />
Connect <strong>EZ</strong>-<strong>CUBE</strong> to the target system, before the power to the target system is turned on.<br />
(4) Connecting the USB cable<br />
Connect <strong>EZ</strong>-<strong>CUBE</strong> to the host machine, before the power to the target system is turned on.<br />
The power is always supplied after <strong>EZ</strong>-<strong>CUBE</strong> is connected to the host machine <strong>with</strong> the USB cable.<br />
Caution Do not change the switch setting while the USB cable is connected.<br />
(5) Applying power to target system<br />
Turn on power to the target system. This step is not necessary if the power select switch is set to ″5″.<br />
(6) RFP startup<br />
Start the WriteRFP. For detailed usage of the Write<strong>EZ</strong>5, refer to the RFP User's Manual.<br />
User’s Manual 125
7.3.4 Usage examples<br />
CHAPTER 7 HOW TO USE <strong>EZ</strong>-<strong>CUBE</strong> WITH V850 MICROCONTROLLER<br />
This section describes a series of basic operations using the RFP, using the UPD70F3717 as an example. The<br />
operations from execution of the [Autoprocedure (E.P)] command to programming for the target device are<br />
described. For other commands and their applications, refer to the RFP User's Manual.<br />
The conditions used for a series of operations in this section are as follows.<br />
<br />
Target device: UPD70F3717<br />
Power supply voltage: 3.3 V<br />
Communication channel: UART 38,400 bps<br />
<br />
Switches: SW-1: M1<br />
<br />
SW-2: Int.Clock<br />
SW-3: <strong>Debug</strong> Mode<br />
SW-4: T<br />
SW-5: Other<br />
Clock setting: 5 MHz, x4 (oscillator on the target system side)<br />
Operation mode: chip<br />
Program file: sample.hex<br />
Command options: [Blank check before Erase] selected<br />
[Verify after Program] selected<br />
User’s Manual 126
CHAPTER 7 HOW TO USE <strong>EZ</strong>-<strong>CUBE</strong> WITH V850 MICROCONTROLLER<br />
(1) Setting of programming environment<br />
Set the programming environment, following the steps to described below.<br />
<strong>On</strong> the taskbar, click the Start button, point to [All Programs], [Renesas Electronics CubeSuite+],<br />
[<strong>Programming</strong> Tools], [Renesas Flash Programmer Vx.xx], and then click [Renesas Flash Programmer<br />
Vx.xx [Basic mode]]. The [Welcome!] dialog box will open. Select [Create new workspace.] and then click<br />
the Next button to open the [Create a new workspace] dialog box.<br />
Figure 7-9. [Welcome!] Dialog Box<br />
In the [Using Target Microcontroller:] list box, select “UPD70F3717”. Enter any text string (such as<br />
“sample” in this case) in the [Workspace Name:] box, and specify any folder in the [Folder:] box.<br />
Clicking the Next button displays the [Select Communication Interface] dialog box.<br />
Figure 7-10. Parameter File Select Dialog Box<br />
User’s Manual 127
CHAPTER 7 HOW TO USE <strong>EZ</strong>-<strong>CUBE</strong> WITH V850 MICROCONTROLLER<br />
Select “Tool”, in the [Select Communication Interface] dialog box. For <strong>EZ</strong>-<strong>CUBE</strong>, the area is<br />
fixed to “PC port No.(Renesas Virtual UART)”.<br />
Clicking the Next button displays the [Setting Oscillator] dialog box.<br />
Figure 7-11. [Select Communication Interface] Dialog Box<br />
Set the items in the [Supply Oscillator] areas, in accordance <strong>with</strong> your programming environment. The following<br />
figure shows an example.<br />
Figure 7-12. [Setting Power Supply] Dialog Box<br />
User’s Manual 128
CHAPTER 7 HOW TO USE <strong>EZ</strong>-<strong>CUBE</strong> WITH V850 MICROCONTROLLER<br />
“<strong>Chip</strong>” is the default value for [Operation mode] under the [Target] category, and the default value for “Blank<br />
Check before Erase” in the [Command Options] category is “Valid”. And the default value for “Verify after<br />
Program” in the [Command Options] category is “Valid”.<br />
Clicking the Complete button saves the project file and displays the main window.<br />
(2) Selection of program file<br />
Figure 7-13. [Information Settings] Dialog Box<br />
Select the program file, following the steps to described below.<br />
Click the Browse… button in “User/Data area:” of the program file area to open the [Open File] dialog box.<br />
Select “sample.hex” in the [Open File] dialog box, and then click the Open button to open the main<br />
window.<br />
User’s Manual 129
CHAPTER 7 HOW TO USE <strong>EZ</strong>-<strong>CUBE</strong> WITH V850 MICROCONTROLLER<br />
(3) Execution of [Autoprocedure (E.P)] command<br />
Click the [Microcontroller] menu and select the [Autoprocedure (E.P)] command. A check mark is then<br />
placed on the left of the command, and the command is assigned to the Start button. After clicking the Start<br />
button, execute the following commands in the following order for U P D 7 0 F 3717: [Blank Check] command,<br />
[Erase] command (if there are no blanks), [Program] command, and [Verify] command.<br />
Figure 7-14. Completion of [Autoprocedure (E.P)] Command Execution<br />
User’s Manual 130
7.3.5 System shutdown procedure<br />
CHAPTER 7 HOW TO USE <strong>EZ</strong>-<strong>CUBE</strong> WITH V850 MICROCONTROLLER<br />
Terminate flash programming and shutdown the system in the following order.<br />
If the following order is not observed, the target system or <strong>EZ</strong>-<strong>CUBE</strong> may be damaged.<br />
(1) Terminating the RFP<br />
Terminate the RFP if you are not going to perform programming to other devices.<br />
(2) Target system power shutdown<br />
Shutdown the power supplied to the target system. This step is not necessary if the power select switch is<br />
set to ″5″.<br />
(3) Unplugging the USB cable<br />
Unplug the USB cable from <strong>EZ</strong>-<strong>CUBE</strong> or the host machine.<br />
When the power select switch is set to ″T″, the step of (4) Unplugging the target cable can be performed<br />
before this step.<br />
(4) Unplugging the target cable<br />
Unplug the target cable from <strong>EZ</strong>-<strong>CUBE</strong> or the target system.<br />
7.3.6 Cautions on flash programming<br />
This section describes the cautions for flash programming. Be sure to read the following for the proper use of<br />
<strong>EZ</strong>-<strong>CUBE</strong>.<br />
• To improve the writing quality, fully understand, verify, and evaluate the following items before using <strong>EZ</strong>-<strong>CUBE</strong>.<br />
- Circuits are designed as described in the user's manuals for the device and <strong>EZ</strong>-<strong>CUBE</strong>.<br />
- The device, RFP and <strong>EZ</strong>-<strong>CUBE</strong> are used as described in each user's manual.<br />
- The power supplied to the target system is stable.<br />
User’s Manual 131