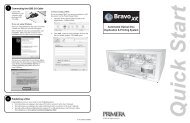
Bravo Disc Publisher Manual - Primera
Bravo Disc Publisher Manual - Primera
Bravo Disc Publisher Manual - Primera

Create successful ePaper yourself
Turn your PDF publications into a flip-book with our unique Google optimized e-Paper software.
USER’S MANUAL<br />
Automated Optical <strong>Disc</strong><br />
Duplication & Printing System<br />
100303-510141-(04)<br />
© 2002 All rights reserved.
Notices: The information in this document is subject to change without notice. NO WARRANTY OF<br />
ANY KIND IS MADE WITH REGARD TO THIS MATERIAL, INCLUDING, BUT NOT LIMITED TO,<br />
THE IMPLIED WARRANTIES OF MERCHANTABILITY AND FITNESS FOR A PARTICULAR<br />
PURPOSE. No liability is assumed for errors contained herein or for incidental or consequential<br />
damages in connection with the furnishing, performance, or use of this material. This document<br />
contains proprietary information that is protected by copyright. All rights are reserved. No part of<br />
this document may be photocopied, reproduced, or translated into another language without prior<br />
written consent.<br />
Trademark Acknowledgments: Windows is a registered trademark of Microsoft Corporation. All<br />
other trademarks are the property of their respective owners. FireWire is a registered trademark of<br />
Apple Computer.<br />
Printing History<br />
Edition 1.4, #100303, ©Copyright 2002, All rights reserved.<br />
FCC Compliance Statement: This device complies with part 15 of the FCC rules. Operation is subject<br />
to the following two conditions: (1) this device may not cause harmful interference, and (2) this device<br />
must accept any interference received, including interference that may cause undesired operation.<br />
For Users in the United States: This product is intended to be supplied by a UL listed Direct Plug-In<br />
Power Supply marked "Class 2"or a UL listed ITE Power Supply marked "LPS" with output rated<br />
12VDC, 4.5A or higher. This equipment has been tested and found to comply with the limits for a Class<br />
B digital device, pursuant to Part 15 of the FCC Rules. These limits are designed to provide reasonable<br />
protection against harmful interference in a residential installation. This equipment generates, uses,<br />
and can radiate radio frequency energy and, if not installed and used in accordance with the<br />
instructions, may cause harmful interference to radio communications. However, there is no guarantee<br />
that interference will not occur in a particular installation. If this equipment does cause harmful<br />
interference to radio or television reception, which can be determined by turning the equipment off<br />
and on, the user is encouraged to try to correct the interference by one or more of the following<br />
measures:<br />
• Re-orient or relocate the receiving antenna.<br />
• Increase the separation between the equipment and receiver.<br />
• Connect the equipment into an outlet on a circuit different from that to which the receiver<br />
is connected.<br />
• Consult the dealer or an experienced radio/TV technician for help.<br />
Use of shielded cables is required to comply with the Class B limits of Part 15 of the FCC Rules. You<br />
are cautioned that any changes or modifications not expressly approved in this manual could void<br />
your authority to operate and/or obtain warranty service for this equipment.<br />
For Users in Canada: This digital apparatus does not exceed the Class B limits for radio noise for<br />
digital apparatus set out on the Radio Interference Regulations of the Canadian Department of<br />
Communications. Le present appareil numerique n'emet pas de bruits radioelectriques depassant les<br />
limites applicables aux appareils numeriques de la class B prescrites dans le Reglement sur le<br />
brouillage radioelectrique edicte par le ministere des Communications du Canada.<br />
CAUTION!<br />
TO PREVENT FIRE OR SHOCK HAZARD, DO NOT EXPOSE THE UNIT TO RAIN OR<br />
MOISTURE. TO REDUCE THE RISK OF ELECTRIC SHOCK, DO NOT REMOVE EXTERIOR PANELS.<br />
NO USER-SERVICEABLE PARTS INSIDE. REFER SERVICING TO QUALIFIED SERVICE<br />
PERSONNEL. OPERATE THE UNIT WITH ONLY THE PROPER ELECTRICAL SPECIFICATIONS AS<br />
LABELED ON THE PRINTER AND AC ADAPTER.<br />
CAUTION!<br />
THIS PRODUCT CONTAINS A LASER DIODE OF A HIGHER CLASS THAN 1. TO ENSURE<br />
CONTINUED SAFETY, DO NOT REMOVE ANY COVERS OR ATTEMPT TO GAIN ACCESS TO THE<br />
INSIDE OF THIS PRODUCT. REFER ALL SERVICING TO QUALIFIED PERSONNEL. THE<br />
FOLLOWING LABEL APPEARS INSIDE YOUR UNIT:<br />
CLASS 1 LASER PRODUCT<br />
LASER KLASSE 1<br />
CAUTION!<br />
USE OF CONTROLS OR ADJUSTMENTS OR PERFORMANCE OF PROCEDURES OTHER THAN<br />
THOSE SPECIFIED HEREIN MAY RESULT IN HAZARDOUS RADIATION.<br />
ii
Table of Contents<br />
Section 1: Getting Started...............................................................................1<br />
A. Choosing a Good Location ................................................................1<br />
B. Unpacking and Inspection.................................................................2<br />
C. Identifying the Parts ...........................................................................2<br />
D. System Requirements.........................................................................4<br />
E. Overview of Operation ......................................................................5<br />
Section 2: Hardware and Software Set-Up .................................................8<br />
QuickStart Installer ....................................................................................8<br />
Step 1: Applying Power.............................................................................8<br />
Step 2: Loading Media...............................................................................9<br />
Step 3: Installing Ink Cartridges ............................................................10<br />
Step 4: Connecting the FireWire Cable .................................................10<br />
Step 5: Connecting the USB Cable.........................................................11<br />
Step 6: Installing the Software Suite......................................................12<br />
Step 7: Publishing <strong>Disc</strong>s ..........................................................................12<br />
Section 3: Creating <strong>Disc</strong>s ..............................................................................17<br />
A. Setting up the <strong>Publisher</strong>’s Printer Driver .....................................17<br />
B. Using SureThing ...............................................................................23<br />
C. Using Other Graphics Programs ....................................................25<br />
D. Using PrimoDVD to Create Your <strong>Disc</strong>s.........................................26<br />
E. Using Kiosk Mode ............................................................................29<br />
F. Copying an Audio <strong>Disc</strong>....................................................................30<br />
Section 4: Interpreting the <strong>Publisher</strong>’s Indicator Lights........................33<br />
Section 5: Maintenance and Troubleshooting ..........................................34<br />
A. Cleaning the <strong>Publisher</strong>.....................................................................34<br />
B. Performing a Robotic Self-Test ........................................................34<br />
C. Software Test......................................................................................35<br />
D. Recording Errors...............................................................................37<br />
E. Cleaning the Ink Cartridges ............................................................39<br />
F. Clearing a Media Jam.......................................................................39<br />
G. Technical Support..............................................................................39<br />
Section 6: Technical Specifications .............................................................40<br />
Index..................................................................................................................41<br />
iii
iv<br />
Interactive Feature in this<br />
PDF Document<br />
There are interactive features that will allow you to<br />
jump to different locations within the document. Each<br />
listing in the Table of Contents is interactive. Place the<br />
cursor on either the words or the page number. A<br />
small hand with a pointing finger icon appears. Click<br />
on the line with the icon and the document will jump to<br />
that page. If you want to return to the Table of<br />
Contents, move the icon to the top of the page and<br />
click on the arrow marked TOC. Navigating through<br />
the Index is similar. Place the icon on one of the<br />
listings or page numbers, click on it, and it will move to<br />
that page. The text relating to the Index listing will<br />
appear in red. Returning to the Index can be done by<br />
clicking on the arrow marked Index.
Section 1: Getting Started<br />
THANK YOU…<br />
...for purchasing the <strong>Bravo</strong>TM <strong>Disc</strong> <strong>Publisher</strong>. <strong>Bravo</strong> is the<br />
perfect all-in-one solution for producing professional looking<br />
CD-R and DVD-R discs. A wide variety of disc formats are<br />
supported, including audio CDs, Video CDs, data discs and<br />
more. Operation is simple and completely automatic once a<br />
job has been started.<br />
To begin using your <strong>Disc</strong> <strong>Publisher</strong>, please read this manual<br />
carefully. This Operator's <strong>Manual</strong> is a complete step-by-step<br />
guide to quickly and easily create discs with your new Optical<br />
<strong>Disc</strong> <strong>Publisher</strong>.<br />
A separate User's Guide is provided with your <strong>Publisher</strong> that<br />
explains the operation of the PrimoDVD Software.<br />
NOTE ON TERMS AND CONVENTIONS:<br />
From this point forward, the following terms and conventions<br />
will apply:<br />
The <strong>Bravo</strong> <strong>Disc</strong> <strong>Publisher</strong> will be abbreviated simply as<br />
the <strong>Publisher</strong>.<br />
Optical discs, which can include many different types of<br />
discs including CD-Rs, CD-RWs, DVD-Rs and more are all<br />
referred to as CDs or discs. Please note that in order to<br />
copy and record DVDs, you will need to have purchased<br />
the DVD-R version of the <strong>Publisher</strong>.<br />
A. CHOOSING A GOOD LOCATION<br />
• Place the <strong>Publisher</strong> in a location with adequate air<br />
circulation to prevent internal heat build up. You will need<br />
at least 24" (61 cm) of overhead space to allow the top<br />
cover to open freely.<br />
• Do not place the <strong>Publisher</strong> near heat sources such as<br />
radiators or air ducts, or in a place subject to direct<br />
sunlight, excessive dust, mechanical vibration or shock.<br />
Getting Started 1
B. UNPACKING AND INSPECTION<br />
While unpacking your <strong>Publisher</strong>, inspect the carton to ensure<br />
that no damage has occurred during shipping. Make sure that<br />
all supplied accessories are included with your unit. The<br />
following items should be included:<br />
• Optical <strong>Disc</strong> <strong>Publisher</strong><br />
• Gray Plastic Input and Output Bins<br />
• Switching Power Supply with Power Cord<br />
• One Three-Color (CMY) Ink Cartridge<br />
• One Monochrome Black Ink Cartridge<br />
• QuickStart Installer <strong>Disc</strong> (for use with both CD-R and<br />
DVD-R models)<br />
• IEEE 1394 FireWire Cable (Black)<br />
• USB Interface Cable (Beige)<br />
• Warranty Card<br />
• This Operator's <strong>Manual</strong>, Quick Start Guide and Other<br />
Printed Information<br />
Save the carton and packing materials. They will come in<br />
handy later if you ever need to transport the <strong>Publisher</strong> and/or<br />
any of its parts and accessories.<br />
C. IDENTIFYING THE PARTS<br />
Front Cover<br />
Control Panel<br />
Ink Cartridge<br />
Carrier<br />
Robotic <strong>Disc</strong><br />
Transporter<br />
Output Bin<br />
Front Panel and Top<br />
This illustration shows the <strong>Publisher</strong>, its Control Panel, Buttons,<br />
LED indicator lights, Input and Output Bins and other<br />
components.<br />
Color Ink Cartridge<br />
Monochrome Black Cartridge Reject Area<br />
2 Getting Started<br />
LED Status Lights<br />
Power Button<br />
Ink Cartridge<br />
Button<br />
Input Bin<br />
CD Tray Button<br />
CD/DVD Recorder
The Robotic <strong>Disc</strong> Transporter moves discs from the Input Bin,<br />
to a CD/DVD Recorder, to the printer, and finally to the<br />
Output Bin.<br />
The CD/DVD Recorder is automatically loaded and unloaded<br />
by the <strong>Publisher</strong>’s Robotic <strong>Disc</strong> Transporter.<br />
The Recorder Tray Button manually opens or closes the<br />
Recorder Tray. In normal operation, the in/out movement of<br />
the Recorder Tray is controlled automatically and this button is<br />
not used.<br />
The Control Panel contains LED Status Lights and Buttons to<br />
control the <strong>Publisher</strong>.<br />
The LED Status Lights indicate that Power is ON. They also<br />
blink in certain patterns to indicate an error or other condition<br />
of the <strong>Publisher</strong>. See Section 4 for a full explanation of the LED<br />
Status Light conditions.<br />
The Power Button turns the <strong>Publisher</strong>'s power ON and OFF.<br />
When the front cover is opened, the Ink Cartridge Button is<br />
used to position the Cartridge Carrier for easy ink cartridge<br />
replacement.<br />
The Input/Output Bins are situated under the top cover of the<br />
<strong>Publisher</strong>. The bins will hold up to 25 discs. The right-side bin<br />
is the Input Bin for blank media; the left-side bin is the Output<br />
Bin for finished discs.<br />
The Reject Area is where discs are dropped if they do not pass<br />
a software verification test. The discs slide down the ramp out<br />
in front of your <strong>Publisher</strong>.<br />
The Front Cover is a durable plastic cover that will protect the<br />
<strong>Publisher</strong> from dust and interference.<br />
The Ink Cartridge Carrier holds both a color ink cartridge<br />
(left-side pen) and a monochrome ink cartridge (right-side<br />
pen).<br />
Getting Started 3
IEEE 1394<br />
FireWire Port<br />
Rear Panel<br />
This illustration shows the input ports found on the rear panel<br />
of the <strong>Publisher</strong>:<br />
The FireWire (IEEE 1394) Port receives data that is to be passed<br />
on to the recording drive.<br />
The USB Interface is connected to an open USB port on your<br />
PC with a standard USB cable, included with your <strong>Publisher</strong>.<br />
The Power Input Port connects to the included 100V~240V 12V<br />
switching power supply.<br />
D. SYSTEM REQUIREMENTS<br />
Before getting started, it is important for you to verify that<br />
your PC meets the minimum system requirements. Here's<br />
what you need in order to successfully copy discs at 8x or<br />
above with the PrimoDVD 2.0 software:<br />
• 450 MHz or faster Pentium III/ IV processor running<br />
Windows 2000 or XP.<br />
• 256MB or greater RAM<br />
• Free hard drive space of at least 2 GB (up to 5 GB for DVD<br />
if recording the entire disc)<br />
• Available PCI Slot for FireWire (IEEE 1394) adapter card or<br />
built in FireWire Port<br />
• Available USB Port<br />
If your PC does not have at least these minimum system<br />
requirements, you probably do not want to install the FireWire<br />
board and software on that PC. System performance will more<br />
than likely not be acceptable.<br />
4 Getting Started<br />
USB Port Power Input Port
E. OVERVIEW OF OPERATION<br />
Your new <strong>Publisher</strong> is an automated, precision device intended<br />
for continuous-duty publishing of discs. The following is a<br />
description of the complete process of duplicating and printing<br />
a CD/DVD job on your <strong>Publisher</strong>:<br />
1. Up to 25 blank discs may be loaded at one time into the<br />
Input Bin.<br />
2. The <strong>Publisher</strong> has an integrated Robotic <strong>Disc</strong> Transporter<br />
that "picks" one disc one at a time from the Input Bin.<br />
3. The Recorder Tray opens automatically and the Robotic<br />
<strong>Disc</strong> Transporter places a disc into the recorder.<br />
Getting Started 5
4. The Recorder Tray then automatically shuts.<br />
Through software control, you can perform a test on each<br />
disc before recording. If a disc does not pass (meaning that<br />
all or part of that disc is not recordable), the Robotic <strong>Disc</strong><br />
Transporter picks it out of the CD Tray and sends it to the<br />
Reject Area.<br />
5. The Recorder is now writing to the disc. If you were to<br />
fully record a CD with data, audio, video or music<br />
(650 MB), recording time is about 3 ½ minutes each.<br />
A full DVD records in about 30 minutes. Most jobs don't<br />
fill the entire disc, so recording time is usually less than<br />
this. After recording, the Recorder Tray opens<br />
automatically. The Robotic <strong>Disc</strong> Transporter will lift the<br />
disc out of the Recorder Tray. The Recorder Tray will<br />
close, and the Printer Tray will open. The Robotic <strong>Disc</strong><br />
Transporter will lower the disc into the Printer Tray, and<br />
the Printer Tray will then automatically close.<br />
6. If publishing more than one disc, the Robotic <strong>Disc</strong><br />
Transporter will load the Recording Drive with a blank<br />
disc from the Input Bin to start recording the next round.<br />
7. Once recording has started on the next round, printing will<br />
start with the recorded disc from the previous round. This<br />
simultaneous printing and recording greatly increases the<br />
throughput of your <strong>Publisher</strong>.<br />
6 Getting Started
8. Print time varies according to which print mode has been<br />
selected (section 3-A). In most cases, print time takes no<br />
more than 2 minutes. After printing the first disc, the<br />
<strong>Publisher</strong>'s Printer <strong>Disc</strong> Tray opens automatically. The<br />
Robotic <strong>Disc</strong> Transporter moves the finished disc to the<br />
Output Bin.<br />
9. The process starts over and repeats until all blank discs are<br />
gone or the number you have specified via software are<br />
copied and printed.<br />
10. Now that you understand the order of operation, it is time<br />
to set up your <strong>Publisher</strong>.<br />
Getting Started 7
Section 2: Hardware and Software<br />
Set-Up<br />
This section will describe the step-by-step process of setting<br />
up your <strong>Publisher</strong>. This includes information on how to<br />
load the supplies (ink and disc media) necessary to start<br />
producing discs.<br />
QUICKSTART INSTALLER<br />
The Installer <strong>Disc</strong> has a QuickStart menu that will guide you<br />
through the process of setting up your duplicator. Please refer<br />
to the following for more information on each step:<br />
1. Place the Optical <strong>Disc</strong> <strong>Publisher</strong> Installer CD in your CD-<br />
Rom Drive. The Installer application should automatically<br />
launch in a few moments. If it does, proceed to Step 2. If it<br />
does not automatically launch, follow these steps:<br />
• Double-click the My Computer Icon, then double-click<br />
the icon of the appropriate CD drive containing the<br />
Software Installer disc<br />
• Double-Click INSTALL.exe<br />
2. In the Installer Application, click the QuickStart Install<br />
button. The QuickStart Install will guide you step-by-step<br />
through the installation process. As you complete each<br />
step, click Next.<br />
Step 1: Applying Power<br />
• Locate the power adapter supplied with your <strong>Publisher</strong>.<br />
• Plug the adapter into a surge protected outlet, and plug<br />
the 1/8” power plug into the power port on the rear<br />
panel of the <strong>Publisher</strong>.<br />
8 Hardware and Software Set-Up
Step 2: Loading Media (<strong>Disc</strong>s)<br />
NOTE: Your <strong>Publisher</strong> can print directly onto virtually any brand of<br />
printable-surface CD/DVD media. Since different brands of discs<br />
have different printable coatings, however, you may need to adjust the<br />
printer driver settings to accommodate your specific brand of<br />
CD/DVD media. Refer to Section 3 for further printer driver<br />
information.<br />
Due to the wide variety of printable-surface CD/DVD media, you<br />
may find that certain brands of discs provide higher print quality<br />
than others. For maximum print quality, use CD/DVD media<br />
authorized by <strong>Primera</strong>.<br />
Refer to the following steps when loading discs in to the<br />
<strong>Publisher</strong>:<br />
• Open the front cover of the <strong>Publisher</strong><br />
• The <strong>Publisher</strong> will automatically position the cartridge<br />
carrier and Robotic <strong>Disc</strong> Transporter to the center position<br />
allowing for easy access to the bins.<br />
Hardware and Software Set-Up 9
• Load the Input Bin (the bin located on the right-hand side<br />
of the <strong>Publisher</strong>) with 25 blank discs and place the bins on<br />
the mounting pegs.<br />
Step 3: Installing Ink Cartridges<br />
• Press the Ink Cartridge Button to move the Ink<br />
Cartridge Carrier to the load position and open the ink<br />
cartridge covers<br />
• Remove each ink cartridge from its packaging<br />
• Slowly remove the tape covering<br />
the cartridge's print head, being<br />
careful to avoid damaging the<br />
barcode label on the underside of<br />
the cartridge.<br />
DO NOT TOUCH THE COPPER AREA!<br />
• Insert the ink cartridges into the carrier, copper end first<br />
and snap the cartridge cover in place. Insert the color<br />
in the left holder, monochrome black in the right<br />
cartridge holder.<br />
• Close the <strong>Publisher</strong>’s front cover.<br />
Step 4: Connecting the FireWire Cable<br />
The black IEEE 1394 FireWire cable carries the data that will be<br />
sent to the recorder when producing discs. If necessary, install<br />
a compatible FireWire board in your PC. Please refer to the<br />
manufacturers instructions for proper installation of the<br />
FireWire board. Connect the 6 Pin FireWire cable included with<br />
your <strong>Publisher</strong>. Connect the other end to the FireWire board's<br />
output port on your PC.<br />
10 Hardware and Software Set-Up<br />
Color Black
Step 5: Connecting the USB Cable<br />
Connect the <strong>Publisher</strong> to your PC with your beige USB Cable.<br />
After a few moments, Windows will tell you it has found new<br />
hardware and is looking for software to install it.<br />
Hardware and Software Set-Up 11
Select "Install the software automatically" and click Next.<br />
You may see a notice like the one shown here stating that the<br />
Optical <strong>Disc</strong> has not passed Windows Logo Testing. Click<br />
Install Anyway to continue installing the printer driver for<br />
your <strong>Publisher</strong>.<br />
Step 6: Installing the Software Suite<br />
After the printer driver software for the <strong>Publisher</strong> has installed,<br />
click Next and you will see a screen to select the language for<br />
the software. Select a language and you will be guided through<br />
installing both SureThing CD Labeler and PrimoDVD 2.0.<br />
Once installation has completed, reboot your computer.<br />
Congratulations, your <strong>Publisher</strong> has been successfully<br />
installed!<br />
Step 7: Publishing <strong>Disc</strong>s<br />
This step is a walk-through of how to create a basic data disc<br />
with your <strong>Publisher</strong>. More detailed information on the<br />
applications that are used to operate your <strong>Publisher</strong> is available<br />
in Section 3.<br />
12 Hardware and Software Set-Up
A. Launch PrimoDVD 2.0<br />
Primo DVD 2.0 can be launched from your Start menu.<br />
If you have more than one recordable drive installed on<br />
your PC, the following screen will appear when you<br />
launch Primo:<br />
Clicking the Open/Close button will help you identify the<br />
drive installed in your <strong>Publisher</strong>. Select this drive from the<br />
list and click OK.<br />
B. Once Primo DVD 2.0 is opened, you will see a dialog box<br />
allowing you to launch SureThing CD Labeler. Click the<br />
YES button to design a label for your disc.<br />
Hardware and Software Set-Up 13
The SureThing <strong>Disc</strong> Labeler software included with your<br />
<strong>Publisher</strong> is a great tool for creating professional looking<br />
discs. You can use SureThing's Smart Designs to quickly<br />
label a disc, or easily import your own design in many<br />
popular file formats. The On-Line Help section will<br />
provide complete instructions on all the features in this<br />
package. The following is a tutorial on creating a basic<br />
disc design:<br />
1. Click New...<br />
2. Select CD Color Printer under Label Products and click<br />
Next.<br />
3. Click Browse to look through the many built-in<br />
backgrounds included with SureThing, or click Clear if<br />
you would like to import your own background or design.<br />
Click Next.<br />
14 Hardware and Software Set-Up
4. Check Use Smart Designs to browse through different<br />
built-in designs. Deselect this option if you would like to<br />
create your own layout. When finished, click Next.<br />
5. Click Finish. You should now see your basic layout.<br />
Simply double click on text boxes to modify the standard<br />
text with your information. If you want to import your<br />
own graphics, click Photos/Clipart to browse for images.<br />
Many standard clipart symbols are included with your<br />
software.<br />
6. Once you are happy with your design, save it as a<br />
SureThing Design (*.STD) file format.<br />
7. Close SureThing CD Labeler. For optimal performance,<br />
SureThing CD Labeler must not be running when you are<br />
publishing discs in Primo DVD 2.0.<br />
C. Now that you have designed the label to be printed on<br />
your disc, it is time to select the information you wish to<br />
write to your disc. In Primo DVD 2.0 click File, then New<br />
Job, then Data <strong>Disc</strong>. The Data <strong>Disc</strong> option will allow you to<br />
select files on your hard drive for recording. If you are<br />
recording a disc image or audio disc, refer to Section 3 for<br />
more information on those types of recording jobs. For this<br />
tutorial we are focusing on the Data <strong>Disc</strong>.<br />
Hardware and Software Set-Up 15
Right click in the Data Job Window and select Add Files<br />
or Folders. Select the information you wish to be recorded<br />
on your disc.<br />
D. Once you have selected the content of the disc, you will<br />
need to select the label you designed. Check the Print<br />
check box, and click the button to browse to the<br />
*.STD file you created.<br />
E. Select the number of copies you wish to create.<br />
F. Select the <strong>Publisher</strong> drive from the list of drives on the<br />
left side of the screen by double clicking on the <strong>Publisher</strong><br />
Drive Icon<br />
G. Click the Record Button to start your job. Your <strong>Publisher</strong><br />
will now record and print your discs.<br />
16 Hardware and Software Set-Up
Section 3: Creating <strong>Disc</strong>s<br />
There are two main components to creating discs, printing and<br />
burning. SureThing CD Labeler is used to design the printing<br />
on your discs. PrimoDVD 2.0 controls the recording and<br />
allows you to select the image to be printed to your discs. Both<br />
applications will be described in detail in this section.<br />
A. SETTING UP THE PUBLISHER'S PRINTER DRIVER<br />
Once the <strong>Publisher</strong> software has been successfully installed,<br />
you will want to take a moment to familiarize yourself with the<br />
printer driver settings for your <strong>Publisher</strong>. These settings affect<br />
the print quality of your discs. The default settings of the<br />
<strong>Publisher</strong> printer driver will fit most printing needs. Please<br />
refer to the following steps to change or verify your printer<br />
driver options:<br />
1. Click the Start button. For Windows 2000 point to Settings<br />
and click on Printers. For XP Professional click on Printers<br />
and Faxes. For XP Home click on Control Panel, then click<br />
on Printers and Other Hardware, then click on Printers<br />
and Faxes.<br />
Click on the <strong>Disc</strong> <strong>Publisher</strong> icon with the right mouse<br />
button and select Printing Preferences.<br />
Creating <strong>Disc</strong>s 17
NOTE: Most applications allow you to change these same printer driver<br />
options from their "Print" and/or "Printer Setup" screens. This means<br />
that you don't have to go back to the main printer setup window each<br />
time you want to change a setting or option in the printer driver.<br />
These applications will usually give you the same choices and options,<br />
but in a slightly altered format. Some applications do not save your<br />
printer driver option changes, but instead only use your changes for<br />
the current image.<br />
Paper Size<br />
The paper size option will be set to CD for printing onto<br />
printable surface CDs and DVDs.<br />
Resolution<br />
Select the appropriate print quality option for your image. Keep<br />
in mind that Normal 600 provides the lowest quality but fastest<br />
print, and that Super Photo 2400 provides the highest quality<br />
but slowest print. You may wish to experiment with these<br />
options to see which one is best for your particular CD media<br />
and print quality requirements.<br />
Cartridge Type<br />
The Color + Black setting will print discs using both the color<br />
and black cartridges. When using the Color + Black setting, be<br />
sure to perform the Alignment Calibration print described later<br />
in this section. Please note that the Calibration Alignment will<br />
need to be done after installing a new cartridge as alignment<br />
may vary from one cartridge to the next. Select Color to print<br />
using only the color cartridge. The Monochrome Black setting<br />
prints using the Monochrome Black cartridge only.<br />
Color Matching<br />
Click on the Color Matching down arrow and choose the color<br />
matching option that's right for you. Select None if you are<br />
more interested in print speed rather than color accuracy, if you<br />
have already color corrected your image for printing, or if you<br />
are using some other third party color matching software.<br />
Select Algebraic if you would like the printer driver to make<br />
very simple color balance adjustments based on an RGB color<br />
model. This option gives you more natural looking images<br />
without actually utilizing any specific color matching software.<br />
Select PrimaColor to enable color-matching profiles written<br />
specifically for the <strong>Publisher</strong> by Candela Color Management<br />
18 Creating <strong>Disc</strong>s
System. This setting automatically adjusts the color of your<br />
image according to predetermined printer profiles and default<br />
system profiles. This results in a very precise color match when<br />
attempting to print photographic images.<br />
Dither Mode<br />
Dither Mode refers to the method used by your printer when<br />
arranging the dots of ink to make an image on your disc. Select<br />
Optimize for photos if printing a design primarily composed<br />
of photographic images. Select Optimize for graphics if mainly<br />
printing text, lines, and graphics.<br />
Ink Saturation<br />
This option controls the ink saturation of the printed image.<br />
When printing onto the printer manufacturer's TuffCoat CD<br />
media, this option can be left at its default setting of 50%.<br />
When printing onto other brands of printable CD media, you<br />
may need to adjust this control in order to optimize the ink<br />
saturation for the printable surface of your specific CD media.<br />
Click on the up and down arrows to change the ink saturation<br />
setting. Lower numbers reduce the overall ink saturation,<br />
while higher numbers increase it.<br />
Inner Diameter<br />
This value changes the size of the non-printed center. Larger<br />
numbers cause the non-printed center to be larger and smaller<br />
numbers make the non-printed center smaller. This number is<br />
incremented by 0.1mm so a change of 10 for inner diameter<br />
changes the diameter by 1mm.<br />
Inner Diameter Non-Printed Diameter<br />
440 1.733” (44mm) (Default)<br />
383 1.507” (38.3mm) (TuffCoatTM) 150 0.591” (15mm) (Physical Center)<br />
Centering Test Print<br />
NOTE: Your printer comes from the factory pre-calibrated to print the image<br />
in the center of the CD. You can use this adjustment if you need to<br />
fine-tune this location.<br />
If you ever wish to verify your factory-calibrated Vertical and<br />
Horizontal calibration settings, you can run a simple<br />
calibration procedure to assure that your images will be<br />
Creating <strong>Disc</strong>s 19
centered when printed on a CD. To do this, refer to the<br />
following steps:<br />
1. Verify that a disc and a color ink cartridge are installed in<br />
the <strong>Publisher</strong>. It is important to use the same disc you<br />
normally use for your publishing because different brands<br />
of discs may vary slightly in size. Also, verify that the<br />
<strong>Publisher</strong> is powered ON and that it is connected to your<br />
computer.<br />
2. Click on the Centering Properties Test Print button. The<br />
printer will begin printing the calibration test print.<br />
3. When the print is complete, rotate disc 180º<br />
and put the disc back in the input bin and<br />
repeat step 2 using the same disc.<br />
4. When the second run of the print is compete,<br />
you should have a test print that looks something like the<br />
following:<br />
20 Creating <strong>Disc</strong>s<br />
-15<br />
-12<br />
-9<br />
-6<br />
-3<br />
0<br />
3<br />
6<br />
9<br />
12<br />
Horizontal Calibration<br />
Find the number whose lines touch 15<br />
-15 -12 -9 -6 -3 0 3 6 9 12 15<br />
-15-12 -9 -6 -3 0 3 6 9 12 15<br />
Find the number<br />
whose lines touch<br />
Vertical Calibration<br />
12<br />
15<br />
9<br />
6<br />
3<br />
0<br />
-3<br />
-6<br />
-9<br />
-12<br />
-15<br />
5. Along the Vertical axis of the printed disc, find the number<br />
whose lines touch. For example, in the above illustration,<br />
the number would be -6 Enter that number into the Vertical<br />
box of the Calibration window and -9 would be entered for<br />
the Horizontal axis.<br />
-15<br />
-12<br />
-9<br />
-6<br />
-3<br />
0<br />
3<br />
6<br />
9<br />
12<br />
15<br />
-15<br />
-12<br />
-9<br />
-6<br />
-3<br />
0<br />
3<br />
6<br />
9<br />
12<br />
15<br />
Vertical Calibration<br />
Find the number<br />
whose lines touch<br />
-15-12 -9 -6 -3 0 3 6 9 12 15<br />
-15 -12 -9 -6 -3 0 3 6 9 12 15<br />
Horizontal Calibration<br />
Find the number whose lines touch
6. Select the OK button. Your images should now be centered<br />
when printed on a disc.<br />
After your selections have been made, close out of the printer<br />
setup window. You are now ready to go to an application<br />
program and print. All printer driver selections will stay the<br />
same until you change them.<br />
Enable Ink Low Warning<br />
This setting lets you enable or disable the warning from the<br />
printer to tell you when the ink cartridges are getting low.<br />
Ink Levels and Cartridge Maintenance<br />
Select this button to display the current ink levels as well as<br />
options for cleaning and changing cartridges.<br />
Select Clean button to send a simple test pattern to the printer.<br />
Be sure to have a disc in the <strong>Bravo</strong>’s input bin and the front<br />
cover closed. The test pattern, shown below, purges ink<br />
through nozzles of your ink cartridge to clear any blockages.<br />
The test pattern will show if the nozzles require any further<br />
cleaning.<br />
Clogged Head<br />
Needs Cleaning<br />
Clean Head<br />
Functioning Properly<br />
If the Yellow, Magenta, Cyan or Black diagonal lines printed on<br />
the disc show breaks, repeat the cleaning procedure. If nozzles<br />
still appear to be clogged, remove the cartridge and gently<br />
wipe the nozzle area sideways with a clean water-dampened<br />
cloth. If after several cleanings a color still does not appear on<br />
the test print, the cartridge may be damaged or empty and<br />
may need to be replaced.<br />
Creating <strong>Disc</strong>s 21
Select the Change button to install a fresh, new ink cartridge or<br />
to switch back and forth between previously used cartridges.<br />
After the cartridge has been replaced according to the<br />
instructions in Section 2-C, select either the New Cartridge<br />
Installed button or the Old Cartridge Installed button<br />
accordingly. These selections are necessary for the printer to<br />
accurately keep track of ink cartridge ink levels.<br />
<strong>Disc</strong> Output Location<br />
This can be set either Normal (Left Bind acts as output), or<br />
Kiosk (finished discs deposited out the Front Exit). The default<br />
is Normal (Left Bin). Note that this will only have an effect<br />
when doing printing only − this will have no affect when<br />
recording and printing through PrimoDVD. In PrimoDVD,<br />
click Robotics then Options and select Kiosk Mode check box.<br />
Enable Bi-di Printing<br />
When enabled the <strong>Bravo</strong> will print bi-directional for faster<br />
printing. The default is uni-directional printing. When you<br />
enable bi-directional printing, you should perform the<br />
Alignment Calibration described later in this section. Please<br />
note that the calibration is stored on your computer, so if you<br />
move to a new computer you must repeat the calibration.<br />
Alignment Calibration<br />
The Alignment Calibration allows you you create a test print<br />
that will provide you with values to configure your printer for<br />
Bi-Di- Printing and to align the color and black cartridges for<br />
Color+Black printing. If Bi-Di Printing is enabled, or if you use<br />
Color+Black as a cartridge type in the driver settings, it is<br />
important to perform this calibration every time you change a<br />
cartridge. To print, click the Alignment Calibration Properties<br />
button then click Yes.. The print will look like this:<br />
22 Creating <strong>Disc</strong>s<br />
B<br />
0<br />
1<br />
2<br />
3<br />
4<br />
5<br />
6<br />
7<br />
8<br />
9<br />
10<br />
11<br />
0 2 4 6 8 10 12 14<br />
C<br />
A<br />
0 2 4 6 8 10 12 14<br />
D<br />
0 2 4 6 8 10 12 14<br />
12<br />
13<br />
14<br />
15
B. USING SURETHING<br />
The SureThing <strong>Disc</strong> Labeler software included with your<br />
<strong>Publisher</strong> is a great tool for creating professional looking discs.<br />
You can use SureThing's Smart Designs to quickly label a disc,<br />
or easily import your own design in many popular file formats.<br />
The On-Line Help section will provide complete instructions<br />
on all the features in this package. The following is a tutorial<br />
on creating a basic disc design:<br />
1. Click New...<br />
2. Select CD Color Printer under Label Products and click<br />
Next.<br />
Creating <strong>Disc</strong>s 23
24 Creating <strong>Disc</strong>s<br />
3. Click Browse to look through the many built-in<br />
backgrounds included with SureThing, or click Clear if<br />
you would like to import your own background or design.<br />
Click Next.<br />
4. Check Use Smart Designs to browse through different<br />
built-in designs. Deselect this option if you would like to<br />
create your own layout. When finished, click Next.
5. Click Finish. You should now see your basic layout.<br />
Simply double click on text boxes to modify the standard<br />
text with your information. If you want to import your<br />
own graphics, click Photos/Clipart to browse for images.<br />
Many standard clipart symbols are included with your<br />
software.<br />
6. Once you are happy with your design, save it as a<br />
SureThing Design (*.STD) format.<br />
7. Close SureThing CD Labeler. For optimal performance,<br />
SureThing CD Labeler must not be running when you are<br />
publishing discs in Primo DVD 2.0.<br />
C. USING OTHER GRAPHICS PROGRAMS<br />
While SureThing will handle most labeling needs, some people<br />
prefer to use other graphic programs. Because of this we offer<br />
the flexibility to create print files (*.PRN) from any application.<br />
Your <strong>Publisher</strong> will support two types of print files in<br />
PrimoDVD 2.0:<br />
• *.STD - SureThing CD Labeler<br />
• *.PRN - Print files created through the <strong>Publisher</strong><br />
Printer Driver<br />
Creating <strong>Disc</strong>s 25
*.STD files<br />
As described earlier, these are files created in SureThing CD<br />
Labeler. This is the recommended file type for printing as it<br />
offers the most flexibility.<br />
.PRN files<br />
These are files created from virtually any Windows graphics<br />
application. Instead of printing to a printer, you print to file.<br />
In some programs, you can print directly from that software's<br />
Print screen, through the correct printer driver software for the<br />
brand and model of printer you've installed on your <strong>Publisher</strong>,<br />
to a *.prn file. Adobe Illustrator and CorelDRAW! are examples<br />
of such programs. Most of the popular, higher-end graphics<br />
applications give you this option of printing directly to a file.<br />
If your graphics software does not allow a direct print to a file,<br />
you will need to go into your Windows Control Panel, Printers<br />
where you will be able to select File from your list of available<br />
printer ports. This will enable the driver to print to a PRN file<br />
from any application.<br />
Note: You must change the port back to the USB port before you can print.<br />
D. USING PRIMODVD TO CREATE YOUR DISCS<br />
Now that you have a design for your disc, you are ready<br />
to publish.<br />
The example given in this chapter is for a simple audio CD<br />
copying job using PrimoDVD software. Please refer to the<br />
Software User's Guide included on the PrimoDVD Installation<br />
<strong>Disc</strong> in Adobe Acrobat format for instructions on performing<br />
other types of copying jobs. It is highly suggested that you<br />
print this manual before using the software. There is also online<br />
help available from the PrimoDVD software's Help<br />
screens.<br />
26 Creating <strong>Disc</strong>s
Drive Status<br />
Window<br />
Job Set-Up<br />
Window<br />
Job Status<br />
Window<br />
Operating Screens<br />
To keep things simple, there is really only one main operating<br />
screen you'll need to know about in order to run the<br />
PrimoDVD Software. It is called the Application Window and<br />
it looks like this:<br />
Under this window there are several adjustable-size windows<br />
that indicate what you've set-up and what's happening: the<br />
Drive Status Window, the Job Status Window, and the Job<br />
Setup Window. A sub-Window called the Activity Log is also<br />
available, but it is hidden upon initial boot-up of the software.<br />
Here's a short explanation of each Window:<br />
• Drive Status Window. Lists all of the available drives for<br />
your computer. Usually, your configuration has just two<br />
drives: the internal drive in your PC and the CD Recorder<br />
installed in your <strong>Publisher</strong>.<br />
• Job Set-Up Window. This is the space where the Job Setup<br />
Panel for each job is displayed. When you select a job by<br />
clicking on File: New from the File pull-down menu, a<br />
different type of Job Panel will appear in the Job Set-Up<br />
Window depending upon the type of job selected. Each<br />
Job Panel contains all of the necessary information to run<br />
that job, including source file name, number of copies to<br />
make, etc. In addition, the Job Panels report status<br />
information during the running of the job.<br />
Creating <strong>Disc</strong>s 27
• Job Status Window. As each Job Panel is formed, an entry<br />
is made in the Job Status Window at the lower left side of<br />
the main Application Window. When jobs are started, this<br />
list displays the status of each job, including the number of<br />
discs copied and the number remaining. This window<br />
may be hidden by clicking on the Show Job List Panel<br />
under the View menu.<br />
One other sub-window available is called the Activity Log<br />
Panel. It records all user actions and system responses during<br />
the recording process by time of occurrence. If a problem<br />
occurs while you're not present in front of the computer, you<br />
can browse the log to find out details that may no longer be<br />
present on the main screen. The Log may be viewed by<br />
clicking on View: Show Log. The log may be saved (this<br />
happens automatically every time you exit the software).<br />
Emptying the log will delete all entries permanently.<br />
Overview of Recording<br />
Three basic recording operations are available: (1) actual<br />
recording, (2) test recording, and (3) verifying.<br />
Actual recording is self-explanatory. <strong>Disc</strong>s will be recorded<br />
without any testing beforehand. If you have used the<br />
<strong>Publisher</strong> successfully before with a particular brand of media<br />
that is highly reliable, you may choose to record without<br />
testing or verifying. This will deliver the highest throughput<br />
rate of finished discs.<br />
Test recording performs all of the operations of recording with<br />
the drive's laser turned on to reading power. A test recording<br />
run will determine if the data source will keep up with the<br />
recorder's demand.<br />
Verifying will compare the data recorded to the original data.<br />
This ensures that the recorded data exactly matches the<br />
original. Note that is will take about twice as long to Record<br />
and Verify as compared to just Record. All discs that do not<br />
verify properly will be rejected.<br />
28 Creating <strong>Disc</strong>s
After your job(s) have been set up, each one may be started by<br />
clicking on the red "Record" button at the top of the Job Setup<br />
Panel. Here's what the Job Setup Panel looks like:<br />
While jobs are running, they may be paused or stopped by<br />
clicking on the appropriate buttons on the Job Setup Panel.<br />
The Pause Button will allow the current recording to finish,<br />
then suspends operations on that job. Recording is resumed by<br />
clicking the Pause Button again.<br />
The Stop Button will abort any recording in progress and cause<br />
the <strong>Publisher</strong> to transport the disc to the Reject Area. It will<br />
also terminate that job.<br />
Record, Stop and Pause actions for the currently selected<br />
(highlighted) job may also be selected from the Toolbar at the<br />
top of the main Application Screen.<br />
E. USING KIOSK MODE<br />
Record Pause Stop<br />
Kiosk Mode allows you to use both of <strong>Bravo</strong>'s Bins as input,<br />
doubling your disc capacity from 25 discs to 50 discs. In this<br />
mode, the finished discs will be deposited out through the<br />
front "reject area" of the <strong>Bravo</strong>. In Kiosk mode all discs would<br />
be ejected in this manner. Rejects can be identified in the stack<br />
because they will not be printed in the same manner as<br />
successfully recorded discs. <strong>Primera</strong> Technology offers an<br />
optional Kiosk Mode Kit that contains a third output bin to<br />
collect the discs. This optional bin hangs off of the edge of a<br />
Creating <strong>Disc</strong>s 29
table and attaches just under the front lip of the <strong>Bravo</strong>. This<br />
kit is available through your reseller. Kiosk mode is enabled<br />
as follows:<br />
1. In PrimoDVD 2.0 click Robotics then Options from the<br />
main menu.<br />
2. In the Options dialog box, check the option labeled Enable<br />
Kiosk Mode.<br />
3. If you would like the <strong>Bravo</strong> to physically print the word<br />
"Reject" on rejected discs, select the Print "Reject" option.<br />
Otherwise, rejected discs will simply be ejected with no<br />
printing at all.<br />
F. COPYING AN AUDIO DISC<br />
Now, you're ready to start an actual recording job. In this<br />
example, we'll perform a simple audio disc copy. More detailed<br />
information regarding other types of jobs (data discs, Video CD,<br />
etc.) can be found in the Primo DVD’s User's Guide and in the<br />
Help files included on the main Application Screen Toolbar.<br />
Follow these steps to set-up and perform an audio CD<br />
copy job:<br />
1. Launch the PrimoDVD Software from your Windows<br />
Desktop or program files.<br />
30 Creating <strong>Disc</strong>s
2. Insert the master disc into your PC's CD drive. In the<br />
drive list on the left of the screen, select the PC's CD drive<br />
by clicking on it. Press F4 or, click the <strong>Disc</strong> Explorer<br />
button.<br />
3. The <strong>Disc</strong> Explorer Window will be displayed. Check in the<br />
<strong>Disc</strong> Explorer that the source disc is correctly read. (Click<br />
on the Force Refresh button if the Auto Refresh checkbox<br />
is not checked).<br />
4. To copy the entire CD, press the big Global-Image button.<br />
In the panel that appears at the bottom of the <strong>Disc</strong> Explorer<br />
enter the file name that will contain the disc image. ( uses<br />
a .GI extension). Then press Build.<br />
Please note that this method of building a disc image creates a<br />
saved file on your computer's hard drive. These files can be<br />
very large, up to 700MB for a CD and 4.7GB for a DVD. You<br />
may want to create only a temporary image that is<br />
automatically deleted after your copy job is done. To do this<br />
instead, build your job image file using the <strong>Disc</strong>-to-<strong>Disc</strong> option<br />
from the main File: New Job drop-down menu.<br />
Be sure to click the checkbox that reads Make a Temporary<br />
Image on the Hard <strong>Disc</strong> and Copy From There. The job will<br />
build automatically, make the number of copies you've<br />
specified, and delete the disc image afterwards.<br />
To copy specific tracks from the CD, highlight the desired<br />
tracks then click the Extract Track button. This will allow you<br />
to take the individual tracks from the disc and convert them to<br />
Wave files. This is useful for making a compilation disc of<br />
tracks from different CDs. When creating an Audio Job from<br />
the Application Window, WAV files are converted to CD Audio<br />
on the fly.<br />
Wait until the image is completely built and then close the <strong>Disc</strong><br />
Explorer dialog.<br />
From the Menu bar, select File: New Job: Global-Image or<br />
Other Image Job. A Job Window will now open in the right<br />
side of the application.<br />
In the Image Job dialog box, enter the name of the .GI file you<br />
just created into the Image field name. A drop-down box will<br />
contain all the recent images you created and you can easily<br />
select from this list if you choose.<br />
Creating <strong>Disc</strong>s 31
Also in the Image Job dialog box, check the box labeled Print if<br />
you have a printer installed and wish to print a print image<br />
onto each disc after it has been recorded. There are two types<br />
of files supported:<br />
*.prn files you've previously created using almost any<br />
Windows graphics application,<br />
*.std files created using SureThing CD labeler.<br />
In the drop down box to the right of the Print checkbox, you<br />
can select any recently used *.prn or *.std files. Or, click the<br />
box next to the print dialog box to browse for saved .std or .prn<br />
files. Find the file you wish to print, highlight it, and click<br />
Open. Or, double-click on it. The file appears in the Image Job<br />
Window print dialog box with its path. To select a *.STD file,<br />
click Browse and change Files of Type to All Files and browse<br />
to the desired *.std file.<br />
In the Drive List, highlight the recorder icon. This is where the<br />
software will send the job for recording. Right click on the<br />
icon and select Select/Deselect as Recorder.<br />
In the Image Job dialog box, set the number of copies, the<br />
speed (if you select a speed that the recorder does not support,<br />
it will default to the immediate lower one), and the action you<br />
desire: Test, Test and Record, Record, Verify and Record, etc.<br />
Press the red Record button to start recording your copies.<br />
If everything worked right, the <strong>Publisher</strong> should now be<br />
recording and printing your discs.<br />
32 Creating <strong>Disc</strong>s
Section 4: Interpreting the<br />
<strong>Publisher</strong>'s Indicator Lights<br />
The Power and Busy LED indicator lights located on the top of<br />
the <strong>Publisher</strong> can tell you a lot about what is happening inside<br />
the <strong>Publisher</strong>. To accurately interpret what it means when these<br />
lights are on, off, or flashing, please refer to the following:<br />
Power LED<br />
Ink Cartridge<br />
LED <strong>Publisher</strong><br />
on solid off Is ready to receive job<br />
on solid on solid Has received a job and is<br />
waiting for the Robotic<br />
<strong>Disc</strong> Transporter to load<br />
a disc<br />
both lights are blinking Waiting for a cartridge to<br />
alternately with one another be installed and the lid to<br />
be closed. (See section 2-A).<br />
on solid flashing rapidly The printer tray or ink<br />
cartridge carrier has<br />
stalled. Press the Ink button<br />
to retry the operation.<br />
flashing rapidly on solid The <strong>Publisher</strong> has a<br />
cartridge problem. Check<br />
to make certain that the<br />
cartridges are installed<br />
correctly and that the bar<br />
code labels on the<br />
underside of the cartridge<br />
are not damaged.<br />
repeating pattern of both lights This indicates low ink warning.<br />
flashing in unison, then one If the left light stays solid after<br />
light momentarily on solid. the flash, the Color cartridge is<br />
low. If the right light stays on<br />
after the flash, the Black<br />
Monochrome cartridge should<br />
be replaced.<br />
Interpreting the <strong>Publisher</strong>’s Indicator Lights 33
Section 5: Maintenance and<br />
Troubleshooting<br />
The <strong>Publisher</strong> is designed to operate for extended periods of<br />
time with very little attention. In fact, no regular maintenance<br />
is recommended other than cleaning the outside case.<br />
NOTE: Do NOT attempt to oil or grease the <strong>Publisher</strong>'s Robotic Arm shaft<br />
or other components. You will likely cause more harm than good!<br />
Any moving parts are designed to operate for the life of the machine<br />
with no additional lubrication required.<br />
A. CLEANING THE PUBLISHER<br />
Use a clean, lint-free rag with a small amount of ammonia<br />
window cleaner to clean the <strong>Publisher</strong>'s outside case and trays.<br />
This type of cleaner is very effective on inks that may<br />
accumulate on the printer tray. Stronger cleaning solutions are<br />
NOT recommended because they may damage the paint and<br />
plastic materials from which the parts are manufactured.<br />
Always disconnect your <strong>Publisher</strong>’s power cords before<br />
cleaning. Resume operation only after the surfaces are<br />
completely dry.<br />
B. PERFORMING A ROBOTIC SELF-TEST<br />
To ensure that everything is working properly, a Self-Test<br />
feature is built in to your <strong>Publisher</strong>. In this mode, the Robotic<br />
<strong>Disc</strong> Transporter will go through the motions of picking and<br />
placing a disc to ensure proper working order. This test may be<br />
performed without connecting the <strong>Publisher</strong> to the PC.<br />
Perform the test by doing the following steps:<br />
• Load some discs into the Input Bin<br />
• Make sure the <strong>Publisher</strong>’s front cover is closed<br />
• With the <strong>Publisher</strong> turned on, press the<br />
Cartridge Button<br />
• While holding the Cartridge Button, press the<br />
Power Button until the robotics start to move.<br />
• Release both buttons<br />
• To stop the test, wait until the disc has moved to the<br />
Output Bin and press the Power Button.<br />
34 Maintenance and Troubleshooting
C. SOFTWARE TEST<br />
Select the<br />
<strong>Publisher</strong><br />
Drive<br />
This will confirm that the hardware, software and your PC are<br />
all communicating properly with each other properly. Follow<br />
the procedures listed on the following pages.<br />
1. Launch the software from your Windows Desktop or<br />
program menu. The main Application Window will<br />
appear. Select the <strong>Publisher</strong> Drive by clicking on its icon<br />
on the left hand side of the screen.<br />
2. From the main Application Window, click on Robotics.<br />
Maintenance and Troubleshooting 35
3. In the drop-down menu, go to Services.<br />
4. Click on Check Communications. You will see a dialog<br />
box stating, "Communication OK. System Idle." If you<br />
do not see this, make sure that all cables are connected<br />
securely.<br />
5. Click OK to get back to the main screen.<br />
6. Click on Robotics again.<br />
7. Select <strong>Manual</strong> Movements.<br />
8. Load at least 4-5 discs into the Input Bin.<br />
9. Click on Start Test. The robotic arm will move through its<br />
entire sequence automatically. If you specified more than<br />
one disc, it will continue until the number you specified is<br />
completed or it runs out of discs.<br />
36 Maintenance and Troubleshooting
D. RECORDING ERRORS<br />
If discs are not being recorded properly or are not passing<br />
verification, you will want to consult the error log. This is<br />
available in PrimoDVD by clicking View, Activity Log then<br />
selecting the option to Show At Top or Show at Right from<br />
the drop-down Menu.<br />
This will show a history of tasks performed by PrimoDVD.<br />
If there are errors, you will see them in this list. For more<br />
information on recording errors, you can consult the<br />
PrimoDVD manual included with the <strong>Publisher</strong>. The most<br />
common error is Buffer Under run. This occurs when data<br />
cannot be sent fast enough to keep up with the recording<br />
drive. Try the following steps if you are receiving buffer<br />
under run errors.<br />
Maintenance and Troubleshooting 37
Click Tools, Options and check the box labeled Enable Burn<br />
Proof. This option enables the drive to slow down its recording<br />
speed to match the data.<br />
Click Robotics, Options and deselect Record and Print<br />
Simultaneously. This will cause your jobs to take longer, but<br />
will free more computer resources for recording.<br />
38 Maintenance and Troubleshooting
Examine the type of recording job you attempting. If you’re<br />
attempting to record directly from a CD Reader to the<br />
<strong>Publisher</strong>, the reader or the bus inside your computer may not<br />
be able to keep up with recording at 16x speed. Try creating a<br />
global image (GI) of the disc as described earlier in this manual<br />
and you will most likely have greater success.<br />
E. CLEANING THE INK CARTRIDGES<br />
It may be necessary to clean the ink cartridge nozzles if the<br />
printer portion of your <strong>Publisher</strong> does not seen to be laying<br />
down ink evenly or if you suspect an cartridge nozzle has<br />
become slightly dried out or clogged. Refer to section 3-A for<br />
more information on performing a clean function through the<br />
<strong>Publisher</strong>'s printer driver.<br />
F. CLEARING A MEDIA JAM<br />
If a disc should become jammed inside the printing area of the<br />
<strong>Publisher</strong>, with the lid closed press the Cartridge Button. This<br />
will eject the Printer Tray. Then open the lid. The Cartridge<br />
Carrier will move to the center position automatically.<br />
WAIT FOR THE CARTRIDGE CARRIER TO STOP MOVING!<br />
Then carefully move the cartridge carrier assembly to the left<br />
to gain access to the printer tray.<br />
G. TECHNICAL SUPPORT<br />
If you have difficulties in operating your <strong>Publisher</strong>, the<br />
procedures in this manual and the PrimoDVD software<br />
User's Guide should, in most cases, solve the problem. If you<br />
still have difficulty, contact the technical support number<br />
listed on the insert included in the supply pack that came<br />
with your <strong>Publisher</strong>.<br />
Maintenance and Troubleshooting 39
Section 6: Technical Specifications<br />
Model Optical <strong>Disc</strong> <strong>Publisher</strong><br />
Configurations CD-R <strong>Publisher</strong><br />
DVD-R <strong>Publisher</strong><br />
Printing Method Ink-Jet<br />
Printing Resolution 2400 x 1200 dpi, 1200 x 1200 dpi,<br />
1200 x 600 dpi, 600 x 600 dpi<br />
Ink Types Dual Cartridges: One 3-color (CMY)<br />
cartridge, and one Black<br />
Monochrome (K)<br />
Media Types Printable Surface CD-R, CD-RW,<br />
DVD-R, DVD RAM<br />
Maximum print width 4.724" (120mm)<br />
Minimum System Intel ® Processor 700 Mhz or higher,<br />
256MB RAM minimum, 512 MB<br />
recommended, available PCI slot,<br />
IEEE 1394 FireWire, one free USB port<br />
<strong>Disc</strong> Capacity 25 disc input, 25 disc output<br />
Recordable Formats CD-R: CD-Audio (CD-DA), CD-ROM,<br />
CD-I, Video-CD, MP3 to CD-Audio<br />
(on the fly, no hard drive overhead<br />
required)<br />
Operating Systems Windows XP and Windows 2000<br />
Interface Robotic Control and Printing: USB port<br />
Image Data for recorder: IEEE1394<br />
FireWire<br />
Power Requirement 100-240 VAC, 50/60 Hz, 60 watts<br />
Weight 18 lbs. (8.2kg)<br />
Dimensions 17.25"W x 7.25"H x 16"D<br />
(438mmW x 184mmH x406mmD)<br />
Certifications Emissions: FCC Class B, CE<br />
Safety UL, UL-C, CE<br />
Warranty One year return-to-depot<br />
40 Technical Specifications
Index<br />
Activity Log ..................................................................................27, 28, 37<br />
Algebraic....................................................................................................18<br />
Alignment Calibration ......................................................................18, 22<br />
Application Window.............................................................27, 28, 31, 35<br />
Audio Job, Running .................................................................................30<br />
Buffer Under run......................................................................................37<br />
Cartridge Type....................................................................................18, 22<br />
CD Tray....................................................................................................... 6<br />
Centering Test Print .................................................................................19<br />
Color Matching.........................................................................................18<br />
Connections, Rear Panel............................................................................4<br />
Controls, Front Panel .................................................................................2<br />
<strong>Disc</strong> Output Location ..............................................................................22<br />
Dither Mode..............................................................................................19<br />
Drive Status Window ..............................................................................27<br />
Enable Ink Low Warning ........................................................................21<br />
Identifying the Parts ..................................................................................2<br />
Ink Levels and Cartridge Maintenance ................................................21<br />
Ink Saturation ...........................................................................................19<br />
Input Bin ...........................................................2, 3, 5, 6, 10, 20, 21, 34, 36<br />
Inner Diameter..........................................................................................19<br />
Job Set-Up Window .................................................................................27<br />
Job Status Window.............................................................................27, 28<br />
LED Status Lights.......................................................................................3<br />
Output Bin ....................................................................................2, 3, 7, 34<br />
Overview of Operation .............................................................................5<br />
Paper Size ..................................................................................................18<br />
Power Input.................................................................................................4<br />
PrimoDVD Software................................................................1, 26, 30, 39<br />
Print Files...................................................................................................25<br />
Printer Driver Software.....................................................................12, 26<br />
PRN Files.............................................................................................26, 32<br />
Reject Area ........................................................................................3, 6, 29<br />
Resolution............................................................................................18, 40<br />
Specifications ............................................................................................40<br />
STD File .........................................................................................16, 26, 32<br />
System Requirements ................................................................................4<br />
Technical Support.....................................................................................39<br />
Troubleshooting........................................................................................34<br />
Index 41
Printed in the United States of America<br />
P/N 510141