
Create successful ePaper yourself
Turn your PDF publications into a flip-book with our unique Google optimized e-Paper software.
www.hughes-and-kettner.com<br />
2.3<br />
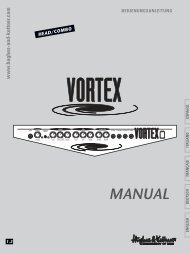
HEAD/COMBO<br />
BEDIENUNGSANLEITUNG<br />
MANUAL<br />
DEUTSCH<br />
ENGLISH
zenTera - MANUAL<br />
2<br />
IMPORTANT:<br />
Before powering up please read<br />
the Important Safety Instructions<br />
on page 57 - 59!<br />
WICHTIG:<br />
Bitte lesen Sie vor der Inbetriebnahme<br />
unbedingt die Sicherheitshinweise<br />
auf Seite 57 - 59!<br />
zenTera - MANUAL<br />
1. FOREWORD . . . . . . . . . . . . . . . . . . . . . . . . . . . . . . . . . . . . . . . . . . . . . . . . . . . . . . . . . . . . . .4<br />
2. BEFORE POWERING UP . . . . . . . . . . . . . . . . . . . . . . . . . . . . . . . . . . . . . . . . . . . . . . . . . . . . .5<br />
3. OVERVIEW . . . . . . . . . . . . . . . . . . . . . . . . . . . . . . . . . . . . . . . . . . . . . . . . . . . . . . . . . . . . . . .5<br />
4. FRONT PANEL . . . . . . . . . . . . . . . . . . . . . . . . . . . . . . . . . . . . . . . . . . . . . . . . . . . . . . . . . . . . .6<br />
4.1 KNOB FUNCTIONS . . . . . . . . . . . . . . . . . . . . . . . . . . . . . . . . . . . . . . . . . . . . . . . . . . . . . . . . .7<br />
4.2 EFFECTS . . . . . . . . . . . . . . . . . . . . . . . . . . . . . . . . . . . . . . . . . . . . . . . . . . . . . . . . . . . . . . . . .10<br />
4.3 PRE EFFECT MODE . . . . . . . . . . . . . . . . . . . . . . . . . . . . . . . . . . . . . . . . . . . . . . . . . . . . . . . .10<br />
4.4 TABLE OF INS FX EXAMPLES . . . . . . . . . . . . . . . . . . . . . . . . . . . . . . . . . . . . . . . . . . . . . . . . .10<br />
4.5 TABLE OF MOD FX, DELAY AND REVERB FX EXAMPLES . . . . . . . . . . . . . . . . . . . . . . . . . . .11<br />
5. AMP MODELS . . . . . . . . . . . . . . . . . . . . . . . . . . . . . . . . . . . . . . . . . . . . . . . . . . . . . . . . . . .12<br />
6. REAR PANEL . . . . . . . . . . . . . . . . . . . . . . . . . . . . . . . . . . . . . . . . . . . . . . . . . . . . . . . . . . . . .14<br />
7. SPECIAL FUNCTIONS . . . . . . . . . . . . . . . . . . . . . . . . . . . . . . . . . . . . . . . . . . . . . . . . . . . . . .16<br />
7.1 WAH WAH . . . . . . . . . . . . . . . . . . . . . . . . . . . . . . . . . . . . . . . . . . . . . . . . . . . . . . . . . . . . . . .16<br />
7.2 GLOBAL EQ . . . . . . . . . . . . . . . . . . . . . . . . . . . . . . . . . . . . . . . . . . . . . . . . . . . . . . . . . . . . .16<br />
7.3 TUNER . . . . . . . . . . . . . . . . . . . . . . . . . . . . . . . . . . . . . . . . . . . . . . . . . . . . . . . . . . . . . . . . . .16<br />
7.4 STORE . . . . . . . . . . . . . . . . . . . . . . . . . . . . . . . . . . . . . . . . . . . . . . . . . . . . . . . . . . . . . . . . . .17<br />
7.5 FOOTSWITCH . . . . . . . . . . . . . . . . . . . . . . . . . . . . . . . . . . . . . . . . . . . . . . . . . . . . . . . . . . . .17<br />
7.6 TAP . . . . . . . . . . . . . . . . . . . . . . . . . . . . . . . . . . . . . . . . . . . . . . . . . . . . . . . . . . . . . . . . . . . .17<br />
7.7 PEDAL ASSIGN . . . . . . . . . . . . . . . . . . . . . . . . . . . . . . . . . . . . . . . . . . . . . . . . . . . . . . . . . . .18<br />
8. THE SYSTEM MENU . . . . . . . . . . . . . . . . . . . . . . . . . . . . . . . . . . . . . . . . . . . . . . . . . . . . . . . .18<br />
8.1 MEMORY PROTECTION . . . . . . . . . . . . . . . . . . . . . . . . . . . . . . . . . . . . . . . . . . . . . . . . . . . .18<br />
8.2 MODE . . . . . . . . . . . . . . . . . . . . . . . . . . . . . . . . . . . . . . . . . . . . . . . . . . . . . . . . . . . . . . . . . .19<br />
8.3 WAKE UP . . . . . . . . . . . . . . . . . . . . . . . . . . . . . . . . . . . . . . . . . . . . . . . . . . . . . . . . . . . . . . . .19<br />
8.4 READ VALUES . . . . . . . . . . . . . . . . . . . . . . . . . . . . . . . . . . . . . . . . . . . . . . . . . . . . . . . . . . . .19<br />
9. MIDI . . . . . . . . . . . . . . . . . . . . . . . . . . . . . . . . . . . . . . . . . . . . . . . . . . . . . . . . . . . . . . . . . . .20<br />
9.1 MIDI SETUP BASE CHANNEL . . . . . . . . . . . . . . . . . . . . . . . . . . . . . . . . . . . . . . . . . . . . . . . . .20<br />
9.2 MIDI PROGCHG . . . . . . . . . . . . . . . . . . . . . . . . . . . . . . . . . . . . . . . . . . . . . . . . . . . . . . . . . .20<br />
9.3 MIDI SETUP DEVICE ID . . . . . . . . . . . . . . . . . . . . . . . . . . . . . . . . . . . . . . . . . . . . . . . . . . . . .20<br />
9.4 MIDI SYSEX SEND . . . . . . . . . . . . . . . . . . . . . . . . . . . . . . . . . . . . . . . . . . . . . . . . . . . . . . . . .21<br />
9.5 MIDI SYSEX RECEIVE . . . . . . . . . . . . . . . . . . . . . . . . . . . . . . . . . . . . . . . . . . . . . . . . . . . . . . .21<br />
9.6 MIDI DUMP . . . . . . . . . . . . . . . . . . . . . . . . . . . . . . . . . . . . . . . . . . . . . . . . . . . . . . . . . . . . . .21<br />
9.7 MIDI IMPORT . . . . . . . . . . . . . . . . . . . . . . . . . . . . . . . . . . . . . . . . . . . . . . . . . . . . . . . . . . . . .21<br />
9.8 MIDI MAPPING . . . . . . . . . . . . . . . . . . . . . . . . . . . . . . . . . . . . . . . . . . . . . . . . . . . . . . . . . . .21<br />
10. FOOTSWITCH ASSIGN . . . . . . . . . . . . . . . . . . . . . . . . . . . . . . . . . . . . . . . . . . . . . . . . . . . . .21<br />
11. VOLUME PEDAL . . . . . . . . . . . . . . . . . . . . . . . . . . . . . . . . . . . . . . . . . . . . . . . . . . . . . . . . . .22<br />
11.1 VOLUME PEDAL RANGE MINIMUM / MAXIMUM . . . . . . . . . . . . . . . . . . . . . . . . . . . . . . . . .22<br />
11.2 CV PED TYPE . . . . . . . . . . . . . . . . . . . . . . . . . . . . . . . . . . . . . . . . . . . . . . . . . . . . . . . . . . . . .22<br />
11.3 CV PED CALIB MIN/MAX . . . . . . . . . . . . . . . . . . . . . . . . . . . . . . . . . . . . . . . . . . . . . . . . . . .22<br />
11.4 Z-BOARD BANK CHANGE . . . . . . . . . . . . . . . . . . . . . . . . . . . . . . . . . . . . . . . . . . . . . . . . . .22<br />
11.5 Z-BOARDCALIB . . . . . . . . . . . . . . . . . . . . . . . . . . . . . . . . . . . . . . . . . . . . . . . . . . . . . . . . . . .23<br />
12. SOFTWARE VERSION . . . . . . . . . . . . . . . . . . . . . . . . . . . . . . . . . . . . . . . . . . . . . . . . . . . . . .23<br />
13. MY zenTera ® . . . . . . . . . . . . . . . . . . . . . . . . . . . . . . . . . . . . . . . . . . . . . . . . . . . . . . . . . . . .23<br />
14. MAINTENANCE AND SERVICE . . . . . . . . . . . . . . . . . . . . . . . . . . . . . . . . . . . . . . . . . . . . . . .23<br />
15. TROUBLESHOOTING . . . . . . . . . . . . . . . . . . . . . . . . . . . . . . . . . . . . . . . . . . . . . . . . . . . . . . .24<br />
16. TECHNICAL DATA . . . . . . . . . . . . . . . . . . . . . . . . . . . . . . . . . . . . . . . . . . . . . . . . . . . . . . . .25<br />
17. AC POWER . . . . . . . . . . . . . . . . . . . . . . . . . . . . . . . . . . . . . . . . . . . . . . . . . . . . . . . . . . . . .26<br />
18. MIDI IMPLEMENTATION CHART . . . . . . . . . . . . . . . . . . . . . . . . . . . . . . . . . . . . . . . . . . . . . .51<br />
3<br />
ENGLISH
4<br />
zenTera - MANUAL<br />
1. FOREWORD<br />
Congratulations and thank you!<br />
We’re delighted that you opted<br />
for the zenTera ® !<br />
The zenTera ® converges the most frequently<br />
played amps and effects in the history of guitar<br />
amplification in an easy-to-handle combo or<br />
head, delivering mind-bendingly authentic tone.<br />
The secret to the zenTera ® 's unprecedented sonic<br />
sorcery is Dynamic Sector Modeling (DSM). We<br />
poked and probed every group of components<br />
(sectors) in the original amps and analyzed and<br />
modeled the dynamic interaction between them.<br />
We found that tone is the product of the musical<br />
quality of the individual sectors and their dynamic<br />
reciprocation. The zenTera ® is able to faithfully<br />
replicate each amp, the full <strong>sw</strong>eep of its dynamic<br />
range, its inherent sonic personality, and all its<br />
unique sound-shaping options. Another zenTera ®<br />
innovation is the preamp section’s 24-bit A/D<br />
converter. Tweaked specifically for processing<br />
guitar signals, it enables the zenTera ® to handle<br />
signal peaks of up to 116 decibels. That makes the<br />
zenTera ® the world's first digital amp to match tube<br />
amps’ ability to handle the guitar’s full dynamic<br />
range. But that's not all: In the engine room of the<br />
zenTera ® there toil not one but two of the latestgeneration<br />
32-bit floating point DSPs. Their<br />
computing power is what translates the technology<br />
of DSM into soul stirring, to-die-for tone.<br />
And they ensure that the zenTera ® reproduces<br />
signals without any perceptible latency. But the<br />
bottom line is tone, and zenTera ® delivers it in<br />
truckloads replete with dynamics galore and<br />
utterly true responsiveness to your touch. You have<br />
17 different amp models at your fingertips. Each<br />
selected amp type's tone controls respond faithfully<br />
as if you were tweaking your tone on the<br />
original. This lets you dial in every sound <strong>sw</strong>iftly and<br />
intuitively just like you would of an analog amp.<br />
But there's more cooking in the zenTera ® 's sonic<br />
kitchen - a smorgasbord of studio-quality effects,<br />
emulations of vintage stomp boxes and a faithfully<br />
replicated spring reverb. Like the amp's parameters,<br />
these effects handle intuitively, without the<br />
nerve-racking tedium of stepping through menus.<br />
All settings may be stored as presets in 128 slots<br />
(100 user presets + 28 factory sounds) and called<br />
up via the front panel, foot<strong>sw</strong>itch or MIDI controllers.<br />
With this array of user-friendly features, the<br />
zenTera ® handles like a dream, satisfying even the<br />
most discerning demands for ease of use. The<br />
zenTera ® packs a powerful punch, courtesy of its<br />
brawny 2x100 W stereo power amp. It cuts<br />
through the din at any stage volume, enabling<br />
you to make your musical statement under even<br />
the most demanding conditions. An analog and<br />
digital recording output, a built-in tuner, a tap<br />
function that lets you sync up delay time, a serial<br />
FX loop, a variable headphones out and many<br />
other practical appointments put a remarkable<br />
range of features at your fingertips. And for utmost<br />
handling convenience, we developed the<br />
Z-Board – a remote control for <strong>sw</strong>itching the key<br />
functions of Hughes & Kettner ® DSM Series amps.<br />
With the zenTera ® , you've bought a stake in the<br />
future. Its MIDI interface lets you upload software<br />
upgrades at any time and even <strong>sw</strong>ap sounds and<br />
system settings with other zenTera ® owners.<br />
Here's wishing you lots of fun with the TONE<br />
of your zenTera ® !<br />
GLOSSARY OF SYMBOLS<br />
W Turn knob<br />
r Tap knob or button (click)<br />
s Tap knob or button twice (double-click)<br />
t Hold knob or button pressed for a bit longer<br />
(click and hold briefly)<br />
zenTera - MANUAL<br />
2. BEFORE POWERING UP<br />
• Check and make sure that the local current and<br />
the amp's AC power rating are identical before<br />
you plug the zenTera ® 's mains cord into an AC<br />
outlet. Ensure that air can circulate freely<br />
around your amp's ventilation ducts. Place the<br />
amp on a stable platform in a location<br />
protected from mechanical and thermal<br />
influences that could endanger the operating<br />
safety of the amp or the safety of anyone<br />
nearby. The manufacturer is not liable for any<br />
damage to the amp due to improper use.<br />
3. OVERVIEW<br />
The zenTera ® ’s user panel is essentially divided into<br />
two segments:<br />
• amp section<br />
• effect section<br />
The layout of the amp section should look familiar<br />
to you - it is arranged much like that of an analog<br />
amp. The GAIN, BASS, MID, TREBLE, PRESENCE and<br />
VOLUME knobs rotate to far left and far right<br />
positions. You can dial in values from 0 to 10. Only<br />
the AMP TYPE knob is a rotary encoder with an<br />
infinite control range. The knobs of the selected<br />
amp type respond just like those on the original<br />
model. In this respect the zenTera ® handles exactly<br />
like its analog forebears. In some cases, it gives<br />
you additional tweaking options beyond those of<br />
the original. You’ll find that the extra soundshaping<br />
options come in handy and that they<br />
Caution! Note that the zenTera ® should not be<br />
exposed to extreme cold over longer periods.<br />
It is possible that low temperature can drain the<br />
internal battery’ s charge. The battery powers the<br />
system when it is <strong>sw</strong>itched off and it is constantly<br />
recharged when the amp is powered up.<br />
TUNER STORE<br />
INPUT GAIN AMP TYPE BASS MID TREBLE PRESENCE VOLUME PRESET MOD FX DELAY REVERB TYPE PARA 1 PARA 2 MASTER<br />
POWER<br />
amp section effect section<br />
make musical sense. The effect section puts an<br />
arsenal of delay, modulation and reverb effects at<br />
your disposal. You'll find it easy to dial in sounds<br />
without a great deal of editing. Activate the<br />
desired effect subsection by tapping MOD FX,<br />
DELAY or REVERB. Twist the TYPE knob to activate<br />
the various effect models and PARA 1 and PARA 2<br />
to set effect parameters. All effects can be set to<br />
PRE (like a stomp box that plugs into the front end<br />
input) or POST (in front of the power amp, giving<br />
you stereo effects) preamp. Tap the TYPE knob to<br />
<strong>sw</strong>itch the given effect PRE or POST preamp.<br />
5<br />
ENGLISH
6<br />
zenTera - MANUAL<br />
4. FRONT PANEL<br />
Powering Up<br />
Activate the zenTera ® by flipping the POWER<br />
<strong>sw</strong>itch located on the far right. The zenTera ®<br />
comes on line with the factory setting Preset 1,<br />
LUKE DELSOLO HOT PLEXI. The LED above the TAP<br />
button flashes.<br />
The zenTera ® Display<br />
The zenTera ® display responds immediately to<br />
each handling operation and menu change. This<br />
means that it always indicates the parameter that<br />
you are currently editing and jumps to the next<br />
display as soon as you activate another knob or<br />
menu. The value in the second line of the display<br />
(smaller numbers) always indicates the preset’s<br />
stored value. The larger numbers (on the right)<br />
indicate the current value.<br />
The one exception: The amp’s master level (as<br />
determined by the MASTER knob on the far right)<br />
is independent of all other settings and is not<br />
indicated in the display.<br />
In standard mode, the zenTera ® display indicates<br />
the name of the preset, its memory slot, the name<br />
of the amp simulation, as well as any effect<br />
subsections that you may have activated. The<br />
following diagram should clear up any questions<br />
you might have about what’s what in the display.<br />
Large numerical display: number of the current<br />
preset (User-Presets 1 - 100, Factory-Presets P1 -<br />
P28).<br />
Top text line: name of the preset<br />
Bottom text line: selected AMP TYPE<br />
• PRESET: Lights up when the amp is in standard<br />
display mode. The bar below PRESET illuminates<br />
when you edit a preset’s settings. Double-click<br />
PRESET to compare the stored preset to the edited<br />
preset.<br />
• INS-FX: Lights up if one of the PRE effects is<br />
activated for this preset. If you elect to use a wahwah,<br />
the bar below INS-FX lights up as soon as the<br />
wah-wah is activated via the connected pedal<br />
(for more on this see section 7.1 WAH WAH).<br />
• DELAY: Lights up when one of the delay effects is<br />
activated in the preset. If you choose to patch in<br />
the effect via the PRE circuit, the bar below DELAY<br />
lights up.<br />
• MOD FX: Lights up when one of the modulation<br />
effects is activated in the preset. If you choose to<br />
patch in the effect via the PRE circuit, the bar<br />
below MOD FX lights up.<br />
• REVERB: Lights up when one of the reverb<br />
effects is activated in the preset. If you choose to<br />
patch in the effect via the PRE circuit, the bar<br />
below REVERB lights up.<br />
When you edit (W) one of the active preset’s<br />
parameters, say BASS, the word BASS and the<br />
stored value are displayed in the lower text line.<br />
The large numerical display on the right indicates<br />
the current value. The bar below PRESET lights up.<br />
Note: To compare the stored preset with the<br />
current setting, double-click sPRESET. The bar<br />
below PRESET extinguishes and the most recently<br />
stored preset appears. Another double-click <strong>sw</strong>itches<br />
the display back to your edited settings (the<br />
bar below PRESET lights up again).<br />
zenTera - MANUAL<br />
INPUT GAIN AMP TYPE BASS MID TREBLE PRESENCE VOLUME PRESET MOD FX DELAY REVERB TYPE PARA 1 PARA 2 MASTER<br />
POWER<br />
4.1 KNOB FUNCTIONS<br />
INPUT:<br />
Connect your electric guitar or pick-up-equipped<br />
acoustic guitar to this input (it accepts all input<br />
levels). INPUT SENSITIVITY lets you do just that -<br />
adjust input sensitivity. Lots of amps are equipped<br />
with jacks offering high and low input sensitivity.<br />
On the zenTera ® , you can <strong>sw</strong>itch between the two<br />
options by means of an analog stage located in<br />
front of the input transformer.<br />
Double-click sAMP TYPE to select HI input<br />
sensitivity, double-click again to select LOW input<br />
sensitivity. Each option has a distinct sonic<br />
personality. Experiment to find out which option<br />
works best for the sounds you are after. If your axe<br />
is equipped with powerful pick-ups, LOW is<br />
generally your better bet.<br />
GAIN: This knob serves different purposes<br />
depending on the selected amp type. Some of<br />
the original models (BLACK FACE, TWEED DELUXE)<br />
are not equipped with a master volume. For these<br />
models, GAIN serves as a volume knob. For<br />
models that are equipped with both gain and<br />
master knobs, the zenTera ® ’s GAIN and MASTER<br />
knobs serve the same purposes as their counterparts<br />
on the originals.<br />
TUNER STORE<br />
AMP TYPE:<br />
This knob performs four functions:<br />
s Double-click it to select input sensitivity.<br />
W Twist it to select an amp type (see section 5<br />
AMP MODELS).<br />
r Tap it to access PRE EFFECT MODE (see section<br />
4.3 PRE EFFECT MODE)<br />
t Press and hold to bypass pre effects by setting<br />
them to BYPASS PRE EFFECT.<br />
BASS, MID, TREBLE, PRESENCE:<br />
Depending on the selected amp type, these<br />
knobs work like those on the original amp.<br />
Because some of the original amps don’t have a<br />
presence knob or a 3-band EQ, the zenTera ® ’s<br />
knobs are assigned special functions to replicate<br />
all of the originals’ tweaking options (for an indepth<br />
explanation of this, see section 5. AMP<br />
MODELS).<br />
VOLUME:<br />
Controls preset volume. Unlike the MASTER knob<br />
setting, this parameter is storable. This lets you dial<br />
in the desired balance of relative levels for all<br />
presets.<br />
7<br />
ENGLISH
8<br />
zenTera - MANUAL<br />
PRESET:<br />
W Twist this knob to select from among the 128<br />
possible presets. Presets are activated as soon<br />
as you dial them in, meaning that you don’t<br />
have to confirm your selection. Memory slots 1<br />
to 100 are designed to accommodate user<br />
presets that you can edit and store. A bar<br />
appears under PRESET when you edit a preset’s<br />
settings. Slots 101 to 128 (display numbers P1 to<br />
P28) are factory presets that you can copy but<br />
not overwrite.<br />
s Double-click PRESET to activate the COMPARE<br />
function. This lets you compare a stored preset<br />
with the current setting. Another double-click<br />
resets the display to the current setting.<br />
t Press and hold the knob to <strong>sw</strong>itch the GLOBAL<br />
EQ on and off (for more on this, see section 7.2<br />
GLOBAL EQ).<br />
MOD FX: This knob performs three functions.<br />
r Tap it to activate the effect subsection without<br />
affecting the given effect’s volume level. (The<br />
activated effect is factory set to POST; see<br />
section 3 below and section TYPE for more<br />
on this).<br />
W Turn the knob to activate the respective effect<br />
subsection AND control the volume of the<br />
effect that you are blending in with the dry<br />
signal just as you would the mix knob of a<br />
parallel FX loop.<br />
t Press and hold it to activate BYPASS<br />
MODULATION – that is, to bypass the effect. This<br />
lets you A/B the sound with and without effect.<br />
Tap it again to reactivate the effect.<br />
Table of MOD FX modulation effects:<br />
• CHORUS M(ono)<br />
• CHORUS ST(ereo)<br />
• FLANGER 1 M(ono)<br />
• FLANGER 1 ST(ereo)<br />
• FLANGER 2 M(ono)<br />
• FLANGER 2 ST(ereo)<br />
• PHASER<br />
• PHASER XL<br />
Select individual effects using TYPE (see the section<br />
TYPE).<br />
DELAY: This knob also performs three functions.<br />
r Tap it to activate the effect subsection without<br />
affecting the given effect’s volume level. (The<br />
activated effect is factory set to POST; see<br />
section 3 below and section TYPE for more<br />
on this).<br />
W Turn the knob to activate the respective effect<br />
subsection AND control the volume of the<br />
effect that you are blending in with the dry<br />
signal just like you would the mix knob of a<br />
parallel FX loop.<br />
t Press and hold it to activate BYPASS DELAY –<br />
that is, to bypass the effect. This lets you A/B<br />
the sound with and without effect. Tap it again<br />
to reactivate the effect.<br />
Table of DELAY effects:<br />
• ECHO<br />
• PINGPONG<br />
• TAPE ECHO<br />
• TAPE HALLO<br />
• TAPE MULTI<br />
• HOLD ECHO<br />
• HOLDPINGPONG<br />
• HOLD TAPE<br />
Select individual effects using TYPE (see the section<br />
TYPE).<br />
REVERB: This knob also performs three functions.<br />
r Tap it to activate the effect subsection without<br />
affecting the given effect’s volume level. (The<br />
activated effect is factory set to POST; see<br />
section 3 below and section TYPE for more<br />
on this).<br />
zenTera - MANUAL<br />
W Turn the knob to activate the respective effect<br />
subsection AND control the volume of the<br />
effect that you are blending in with the dry<br />
signal just like you would the mix knob of a<br />
parallel FX loop.<br />
t Press and hold it to activate BYPASS REVERB –<br />
that is, to bypass the effect. This lets you A/B<br />
the sound with and without effect. Tap it again<br />
to reactivate the effect.<br />
Table of REVERB effects:<br />
• HALL REV<br />
• SPRING REV<br />
• GARAGE REV<br />
• STAGE REV<br />
• SMALL REV<br />
• BRIGHT REV<br />
• NORMAL REV<br />
• WARM REV<br />
Select individual effects using TYPE (see the section<br />
TYPE).<br />
Note: The given effect is also bypassed when you<br />
turn MOD FX, DELAY or REVERB to the far left<br />
position.<br />
TYPE: This knob also performs three functions.<br />
W Twist the knob to select individual effects from<br />
the MOD FX, DELAY and REVERB subsections.<br />
r Tap it to select the PRE signal routing option<br />
(this is akin to plugging a stomp box into the<br />
front panel input). A bar lights up below DELAY,<br />
MOD FX or REVERB in the display to<br />
indicate that this option has been<br />
selected. Tap it again to <strong>sw</strong>itch the<br />
effect to POST, in other words, in front of the<br />
power amp. The bar disappears from the<br />
display. The two options have distinctive sonic<br />
characteristics. A pre effect runs through all<br />
amp sectors while a post effect is inserted very<br />
near the end of the signal chain. Here too you<br />
should experiment to find out which signal<br />
routing configuration works best for which<br />
situation.<br />
s Double-click TYPE to activate the WAH WAH<br />
(see section 7.1). Then twist the TYPE knob to<br />
select FAT WAH or CRY WAH (late ‘60s Vox wah).<br />
Use the PARA 1 or PARA 2 knob to activate<br />
(ON; a bar appears in the display under INS-FX)<br />
or deactivate the WAH WAH (OFF; see section<br />
7.1 WAH WAH).<br />
Note: The TYPE knob responds only if an effect<br />
subsection has been activated.<br />
PARA 1 und PARA 2: Alongside other discrete<br />
functions, these two knobs perform the following<br />
functions jointly:<br />
W Turn the knobs to edit the parameters of the<br />
selected effect (see the table at the end of this<br />
chapter showing MOD FX, DELAY and REVERB<br />
effects.<br />
r Tap them to load the current value of the<br />
parameter into the display without changing it.<br />
s PARA 1 performs yet another function: You can<br />
connect a standard sustain pedal to the<br />
zenTera ® for the purpose of <strong>sw</strong>itching presets<br />
(see the section 7.5 FOOTSWITCH). To <strong>sw</strong>itch<br />
back and forth between two presets, one must<br />
be "marked". This is done by double-clicking<br />
PARA 1. For more on this, see section 7.5 FOOT-<br />
SWITCH.<br />
s Double-click PARA 2 to activate RECORDING<br />
OUT. Now you can twist PARA 1 to control the<br />
active preset’s presence and PARA 2 to control<br />
its volume.<br />
MASTER:<br />
W It controls the level of the power amp. This knob<br />
is global, meaning that it affects all presets. Its<br />
setting cannot be stored.<br />
9<br />
ENGLISH
10<br />
zenTera - MANUAL<br />
TUNER: This knob performs three functions:<br />
r Tap it to activate the built-in tuning device.<br />
You’ll find a detailed description of this function<br />
in section 7.3 TUNER.<br />
t Press and hold it to access the System menu<br />
(see section 8.0).<br />
r You can tap TUNER once or twice to quit all<br />
functions and menus and return to standard<br />
operating mode.<br />
STORE: This knob saves preset settings (see section<br />
7.4 STORE).<br />
TAP: This button lets you manually sync the delay<br />
effect up to the tempo of a song. Simply tap in<br />
the desired speed. The zenTera ® gauges the time<br />
between taps and synchronizes the delay<br />
accordingly. Of course TAP only works when a<br />
delay effect is active. (To learn how to activate an<br />
effect, see the section MOD FX, DELAY, REVERB<br />
above.) When HOLD DELAY is active, the TAP<br />
function lets you record loops. More on this<br />
looping option in section 7.6 TAP.<br />
4.2 EFFECTS<br />
The zenTera ® offers a wide selection of the most<br />
frequently used effects. Next to standard reverb,<br />
delay and modulation effects, the amp’s effects<br />
arsenal also offers emulations of classic stomp<br />
boxes such as the Tube Screamer, wah-wah, fuzz<br />
and vintage effect devices (e.g. tape echo<br />
devices, spring reverb).<br />
4.3 PRE EFFECT MODE<br />
The table below lists the effects available to you in<br />
this mode (INS-FX table).<br />
4.4 TABLE OF INS FX EXAMPLES<br />
TYPE PARA 1 PARA 2<br />
Fix Wah Frequency 0.23 - 1.55 - -<br />
Fix Wah 2 Frequency 0.50 - 2.20 - -<br />
Mod Wah Rate 0.0 - 10.0 Intensity 0 - 100<br />
Mod Wah 2 Rate 0.0 - 10.0 Intensity 0 - 100<br />
Comp Short Make Up Gain 0.0 - 15.0 Intensity 0 - 100<br />
Comp Medium Make Up Gain 0.0 - 15.0 Intensity 0 - 100<br />
Comp Long Make Up Gain 0.0 - 15.0 Intensity 0 - 100<br />
Tube Scream Gain 0.0 - 10.0 Level 0.0 - 10.0<br />
Fuzz Gain 0.0 - 10.0 Level 0.0 - 10.0<br />
Mid Boost Frequency 0.3 - 1.1 Boost 0.0 - 12.0<br />
Tap AMP TYPE to activate this effect subsection.<br />
Twist TYPE to select individual effects and set<br />
effect parameters by twisting PARA 1 and PARA 2.<br />
Press and hold AMP TYPE to set PRE EFFECT MODE<br />
to BYPASS (see also section AMP TYPE). This lets you<br />
A/B the sound<br />
with and without<br />
effect. If you<br />
want to use an<br />
expression<br />
pedal (see the section FOOTPEDAL) to create<br />
wah-wah effects, you must assign FAT WAH or CRY<br />
WAH to the given presets using the TYPE knob.<br />
• FIX WAH employs a standard tunable wah-wah<br />
filter. Use PARA 1 to set its filter frequencies.<br />
• MOD WAH is an automatic version of a wahwah.<br />
Use PARA 1 to set its modulation rate.<br />
• COMP SHORT/MEDIUM and LONG are three<br />
compressors with different attack times - short,<br />
medium and long.<br />
TUBE SCREAM is a model of the legendary Ibanez ®<br />
Tube Screamer TS 808.<br />
FUZZ is a model of a popular vintage distortion<br />
box.<br />
zenTera - MANUAL<br />
Note: Unlike the other effects found in the effect<br />
section, these effects cannot be routed POST preamp.<br />
The only signal routing option is PRE, in other<br />
words, into the front end as in the standard analog<br />
setup.<br />
4.5 MOD FX, DELAY AND REVERB<br />
EFFECTS EXAMPLE TABLES<br />
MOD FX.<br />
TYPE PARA 1 PARA 2<br />
Chorus M(ono) Rate 0.1 - 10.0 Depth 0 - 100<br />
Chorus S(tereo) Rate 0.1 - 10.0 Depth 0 - 100<br />
Flanger 1 M(ono) Rate 0.1 - 10.0 Intensity 0 - 100<br />
Flanger 1 S(tereo)Rate 0.1 - 10.0 Intensity 0 - 100<br />
Flanger 2 M(ono) Rate 0.0 - 10.0 Intensity 0 - 100<br />
Flanger 2 S(tereo)Rate 0.0 - 10.0 Intensity 0 - 100<br />
Phaser Rate 0.1 - 10.0 Colour 0 - 100<br />
Phaser XL Rate 0.1 - 10.0 Colour 0 - 100<br />
DELAY<br />
TYPE PARA 1 PARA 2<br />
Echo Time 10 ms - 2 s Feedback 0 - 100<br />
Ping Pong Time 10 ms - 2 s Feedback 0 - 100<br />
Tape Echo Time 10 ms - 2 s Feedback 0 - 100<br />
Tape Hallo Time 10 ms - 2 s Feedback 0 - 100<br />
Tape Multi Time 10 ms - 2 s Feedback 0 - 100<br />
Hold Echo >>PLEASE USE TAP BUTTON>PLEASE USE TAP BUTTON>PLEASE USE TAP BUTTON
12<br />
zenTera - MANUAL<br />
5. AMP MODELS<br />
You can select from among 17 different models of<br />
amps - herein called amp types - by rotating the<br />
zenTera ® ’s AMP TYPE knob. Every amp type has a<br />
distinctive sonic personality that is best suited for<br />
very specific styles of music. Next to vintage milestones<br />
that literally made amp history, the zenTera ®<br />
offers emulations of some contemporary amps. In<br />
the following, we’ll take a closer look at each<br />
amp type:<br />
BLACKFACE<br />
This American beauty is the definitive amp for<br />
classic clean tone. Although you'd be hardpressed<br />
to drive it into the distortion zone, its big<br />
sound and enormous punch left an indelible mark<br />
on several styles of music - it even helped shape<br />
certain playing techniques. This piece of gear has<br />
won friends and influenced people far and wide,<br />
from funk rhythm kings to jazz masters, from blues<br />
howlers to country pickers. Note that the BRIGHT<br />
function found on the original is integrated into<br />
the zenTera ® it’s all there for the taking. Particularly for Les Paul<br />
devotees with a penchant for blues and bluesbased<br />
rock, sonic heaven is just a touch of a<br />
button away.<br />
TWEED 4x10 N(ormal Channel)<br />
Though the Bassman was initially designed for bass<br />
guitars, blues and rockabilly players adopted it<br />
and turned it into a guitar amp tour de force.<br />
Ranking among the most versatile amps ever, its<br />
unrivalled qualities in conjuring clean and<br />
raunchier sounds à la Brian Setzer or Eric Clapton<br />
are legendary.<br />
's GAIN knob. GAIN settings of up to<br />
5.0 (12 o'clock position) elicit that characteristic<br />
treble boost of the original's BRIGHT <strong>sw</strong>itch. At<br />
higher settings – like on the original – the top end<br />
boost progressively lessens.<br />
BRIT CLASS A<br />
The amp for classic guitar-driven pop and rock.<br />
Judging by the many stellar songwriters who<br />
appear on its reference list, this amp would<br />
undoubtedly be the hands-down winner in a poll<br />
of songsmiths. Unarguably, its EL84-loaded, Class A<br />
power amp delivers the <strong>sw</strong>eetest harmonic<br />
distortion of all tube amps. And its flexible tone<br />
controls with the legendary Cut and Top Boost<br />
circuits elicit chiming, sparkling sounds as well as<br />
fat lead tone. Cranked wide open, it also delivers<br />
gritty, roots rock-approved goods. Note that the<br />
zenTera<br />
TWEED DELUXE<br />
The kid brother of the big tweed amp, connoisseurs<br />
of vintage grit hold its raw, throaty textures in<br />
high esteem. A purist's dream come true, its simple<br />
yet brilliant circuitry delivers earthy, fat tweed tone<br />
unrivalled by any other amp. On the downside,<br />
the original was equipped with just one tone<br />
knob, so we elected to assign a sound-shaping<br />
functionality to the 3-band EQ and the PRESENCE<br />
knob for this emulation. This gives you a lot more<br />
musically meaningful tweaking options without<br />
sacrificing its characteristic tone.<br />
® 's PRESENCE knob takes over the CUT<br />
function. The Top Boost circuit is integrated into<br />
the MID knob, which is handy because this lets<br />
you dial smoothly rather than <strong>sw</strong>itch hard from<br />
Normal to Top Boost mode.<br />
HOT CLASS A<br />
This model delivers the lead tone of the early<br />
masters Ritchie Blackmore, Rory Gallagher, Brian<br />
May, et al. A ‘60s-era Range Master Treble Booster<br />
plugged into the front end of this amp was the<br />
secret ingredient in these world class guitarists’<br />
recipes for jaw-dropping rock tone.<br />
PLEXI 50<br />
TWEED 4x10 B(right Channel)<br />
This British EL34-powered classic made music<br />
We were so enamored of our original Bassman’s<br />
history. Many a genre-defining steel-string slinger<br />
tone that we decided to dedicate a model to its<br />
wielded its considerable sonic clout to leave an<br />
Bright channel. You can coax <strong>sw</strong>eet, sparkling<br />
indelible mark on the face of modern music. With<br />
clean tone as well as dirtier tones from this baby.<br />
its hair-trigger response, the PLEXI does exactly<br />
From stinging to creamy and all points in between,<br />
what the position of your guitar's volume knob tells<br />
zenTera - MANUAL<br />
it to. Turn the volume down low, and you get fat,<br />
clean tone with shimmering top end. As you crank<br />
the knob, you can hear that vintage rock roar<br />
unfold.<br />
sustain and musical feedback made famous by<br />
perennial wailers Gary Moore and Carlos Santana.<br />
Still got the blues, indeed!<br />
PLEXI 100<br />
The PLEXI on steroids, this 100-watt sensation<br />
literally rocked the late '60s and continued to<br />
dominate the heavy rock scene throughout the<br />
'70s and well into the '80s. A staple of innumerable<br />
rock productions, this amp's dynamic response<br />
made it the tool of choice for many an audio<br />
alchemist. Indeed, it can be said with some<br />
authority that this beast's big, cutting sound<br />
defined what great rock tone is all about. It will<br />
also make you the object of fear and loathing in<br />
your neighborhood, because you won't feel the<br />
full fury of its sonic assault until you crank it to<br />
the hilt.<br />
HOT PLEXI<br />
Back in the taste-challenged ‘80s, the Plexi 100’s<br />
already considerably oomph was beefed up with<br />
an added gain stage. Alongside more gain, this<br />
hot-rodder’s trick lent the amp the kind of ”brown”<br />
sound heard on early Van Halen records.<br />
BRIT HIGH GAIN<br />
A logical outgrowth of the razor-edged sound of<br />
British steel, this amp delivers gear-grinding overdrive<br />
and meltdown lead sounds with truckloads<br />
of sustain and in-your-face punch. The tone<br />
controls are tweaked to deliver the response of a<br />
modern-day boutique amp, adding many shades<br />
and hues to your sonic palette. Less subtly, its<br />
scooped mids elicit a merciless metal edge, while<br />
its over-the-top high end has been rumored to<br />
peal paint at a hundred paces.<br />
BRIT ULTRA<br />
A zenTera ® RECTIFIED<br />
This amp's peerless tone is the product of three<br />
rectifier tubes. A real firecracker, it throws red-hot<br />
sparks of distortion for a fresh, dynamic tone. With<br />
its fat, bad and downright angry overdrive, this<br />
amp can take on many guises. Playing a key role<br />
in the rise of grunge in the '90s, it has since<br />
become the tool of choice for New Metal<br />
merchants. And with good reason, for few other<br />
amps can match its intensity and depth of musical<br />
expression, particularly for soloing.<br />
WARP<br />
(Hughes & Kettner Warp 7, 2001)<br />
Our take on the ‘90s-era Nu Metal sound, this<br />
model is even more evil-sounding then<br />
comparable amps. In fact, it offers more of<br />
everything. This one’s a sustain monster.<br />
ACOUSTIC<br />
(Hughes & Kettner Montana 1998)<br />
The Montana model was developed specifically<br />
for piezo-equipped acoustic guitar. It softens the<br />
piezo’s harsh – some might say ugly - edge and<br />
adds silky highs, plenty of body and lots of warmth<br />
to the tonal spectrum. Rarely have electric players<br />
felt so good and so at home on stage with an<br />
acoustic.<br />
ATS CLEAN<br />
(Hughes & Kettner ATS 100, 1988)<br />
Our first dual channel guitar combo, the ATS is<br />
now considered the classic clean machine<br />
among solid-state amps. Cherished by jazz<br />
guitarists for its tonal balance and warmth, it also<br />
delivers top-drawer, effects-laden pop sounds in<br />
special, this is what you get when you<br />
the vein of The Police’s axe man Andy Summers.<br />
hop up a British 100-watt amp until it is hot enough<br />
to roast weenies. And, frankly, the result is awe-<br />
JC CLEAN<br />
inspiring - the fattest and most creamy lead sound An ‘80s classic, this one delivers fresh, crisp and<br />
imaginable.<br />
transparent clean sound with presence galore as<br />
showcased in Prince’s Hendrix homage<br />
SOLO 100<br />
The cream king among lead amps, this amp<br />
abounds with the kind of singing tone, infinite<br />
Purple Rain.<br />
13<br />
ENGLISH
14<br />
zenTera - MANUAL<br />
6. REAR PANEL<br />
MAINS IN + VOLTAGE SELECTOR:<br />
REPLACE FUSES ONLY WITH SAME TYPE + RATING<br />
230 V~ = T <strong>2.5</strong> A<br />
SPEAKERS LEFT<br />
100 V~ = T 6.3 A<br />
MADE IN ST. WENDEL/GERMANY<br />
117 V~ = SB 5 A<br />
100 WATTS<br />
50 - 60 HZ<br />
EXTERN. INTERN.<br />
MAX. POWER CONSUMPTION 720 VA<br />
CAUTION!<br />
TO PREVENT THE RISK OF FIRE AND SHOCK<br />
HAZARD DON´T EXPOSETHIS APPLIANCE TO<br />
MOISTURE OR RAIN. DO NOT OPEN CASE;<br />
NO USER SERVICEABLE PARTS INSIDE.<br />
REFER SERVICING TO QUALIFIED SERVICE<br />
PERSONNEL.<br />
REAR PANEL AND VENTILATION OPENINGS<br />
MAY BECOME TOO HOT TO TOUCH!<br />
Ser. No.<br />
EXTERNAL SPEAKER MIN. 8 Ω<br />
INTERNAL SPEAKER MIN. 16 Ω<br />
MAINS IN: Connect the factory-included mains<br />
cord to this socket. Ensure the amp's voltage<br />
rating matches your local AC voltage rating<br />
before plugging in. The mains fuse bracket is<br />
located next to this the socket. When replacing<br />
blown fuses, make sure you use specified replacement<br />
fuses only (see section 16 TECHNICAL DATA).<br />
SPEAKERS LEFT/RIGHT: The zenTera ® is equipped<br />
with stereo outputs for the internal loudspeakers<br />
(combo) as well as for connecting extension<br />
cabinets (combo and head). When you opt to<br />
connect external cabinets, make absolutely sure<br />
that the overall impedance does not fall below<br />
the minimum permissible impedance of 6 ohms<br />
(combo) and 4 ohms (head) per channel. This<br />
means that you could - alongside the internal<br />
loudspeaker - connect a cabinet with at least<br />
8 ohms to the combo and two cabinets with at<br />
least 8 ohms each to the head.<br />
EFFECTS LOOP: Serial stereo/mono insert for<br />
connecting external effect devices. In the signal<br />
chain, the EFFECTS LOOP is located after the D/A<br />
converter and in front of the MASTER knob.<br />
Note: Bear in mind that when you use a serial<br />
FX loop, the entire signal is routed through it. This<br />
means that sound quality ultimately hinges on the<br />
quality of the external effect device.<br />
SEND: Connect these outputs to the input of your<br />
effect device. They route signals out without<br />
speaker simulation, so the SEND jacks may also be<br />
used as a line out for connecting external power<br />
amps.<br />
SPEAKERS RIGHT SERIAL EFFECTS LOOP<br />
100 WATTS<br />
RETURN<br />
SEND<br />
EXTERN. INTERN.<br />
LEFT RIGHT LEFT RIGHT<br />
EXTERNAL SPEAKER MIN. 8 Ω<br />
INTERNAL SPEAKER MIN. 16 Ω<br />
HEAD<br />
PHONES<br />
RECORDING OUT STAGE<br />
FOOT FOOT<br />
ANALOG DIGITAL<br />
BOARD<br />
SWITCH PEDAL<br />
LEFT RIGHT S/PDIF<br />
IN OUT THRU<br />
MIDI + STAGEBOARD PHANTOM POWER FUSE<br />
T 500 mA / SB 500 mA<br />
T : UP / TOGGLE<br />
R : DOWN<br />
T : + 5 V / R : CV<br />
S: GROUND<br />
RETURN: Connect your effects device’s outputs to<br />
these inputs jack. You can also use the RETURN<br />
jacks to connect an external signal source such as<br />
an audio playback device. However, keep in<br />
mind that in this interrupts the zenTera ® preamp’s<br />
signal path. In other words, the zenTera ® is unable<br />
to output both the external signal and its internal<br />
signal.<br />
Here’s how to get around that problem: If you<br />
want to practice to a backing track, connect<br />
your CD player to just one side of the effects<br />
return and adjust the playback track’s volume on<br />
the CD player. If you use presets with stereo<br />
effects, you must set the zenTera ® to mono in the<br />
System menu.<br />
HEADPHONES: Connect headphones to this jack.<br />
You can control the volume of the headphones<br />
output independently of the MASTER knob setting.<br />
Like the RECORDING OUT, this circuit features<br />
speaker simulation that replicates the sound of the<br />
original amp.<br />
Note that the internal loudspeakers are not muted<br />
automatically when you plug in headphones. If<br />
you want to mute the zenTera ® 's speakers, turn the<br />
MASTER volume knob all the way down.<br />
RECORDING OUT: Analog and digital stereo output<br />
for connecting the zenTera ® to a mixing console or<br />
a PC. Software Version 2.3 features an enhanced<br />
RECORDING OUT enabling volume and presence<br />
settings to be programmed and stored with each<br />
preset.<br />
Note: In some gigging scenarios, it can be<br />
beneficial to send a separate signal to the PA via<br />
RECORDING OUT.<br />
zenTera - MANUAL<br />
• The EFFECTS LOOP is not routed to the<br />
RECORDING OUT. This means you can do things<br />
like add further effects to your sound to suit your<br />
taste, while the F(ront)O(f)H(ouse) sound tech is<br />
free to blend the guitar signal into the overall mix<br />
using his own effects.<br />
ANALOG LEFT/RIGHT: Patches the RECORDING<br />
OUT signal out at line level while simulating the<br />
original amps' speakers.<br />
DIGITAL S/PDIF: The digital version of the<br />
RECORDING OUT (24 bits; 44.1 kHz sampling rate).<br />
STAGEBOARD: Port designed to take the optional<br />
Hughes & Kettner ® Z-Board.<br />
Note: This is not an interface for connecting a PC.<br />
MIDI IN/OUT/THRU: Standard MIDI trio. Connect a<br />
standard MIDI board here. It also serves as the<br />
interface for loading software updates and<br />
communicating with the factory-included zenTera ®<br />
SoundDiver. The MIDI IN port features a discrete<br />
fuse-equipped phantom power circuit by which<br />
the zenTera ® powers external MIDI pedals.<br />
4<br />
1<br />
6<br />
2<br />
5<br />
3<br />
7<br />
Sub-D connector’s pin out<br />
1. MIDI Out + (current source)<br />
2. n.c.<br />
3. MIDI Out – (current sink)<br />
4. MIDI In + (current source)<br />
5. MIDI In – (current sink)<br />
6. Phantom Power (not stabilized, +11V<br />
DC/ max. 600mA)<br />
7. Phantom Power – negative ( 0V )<br />
FOOTSWITCH: Stereo jack for connecting a 1-way<br />
or 2-way <strong>sw</strong>itch/pedal. It lets you <strong>sw</strong>itch to the<br />
next higher preset number (UP), next lower preset<br />
(DOWN), or back and forth between two presets<br />
(TOGGLE). For the latter alternative, you must<br />
assign a marker to one of the two presets (see<br />
section 7.5 FOOTSWITCH). The zenTera ® detects the<br />
polarity (1-way or 2-way) of the connected<br />
<strong>sw</strong>itch/pedal when it is <strong>sw</strong>itched on.<br />
FOOT PEDAL: Stereo jack designed to take an<br />
expression pedal for controlling VOLUME or WAH<br />
WAH. The volume function is the default setting<br />
and remains of until you assign a wah-wah effect<br />
for the given preset in WAH WAH MODE (see<br />
section 7.1).<br />
15<br />
ENGLISH
16<br />
zenTera - MANUAL<br />
7. SPECIAL FUNCTIONS<br />
7.1 WAH WAH<br />
The zenTera ® offers two different wah-wahs:<br />
FAT WAH: contemporary wah-wah with more<br />
bottom end<br />
CRY WAH: original ’60s-era Vox ® wah-wah (Cry<br />
Baby)<br />
Activate WAH WAH by double-clicking TYPE. Twist<br />
the TYPE knob to select the desired wah-wah<br />
model. Press the PARA 1 knob to access WAH WAH<br />
settings.<br />
<strong>Manual</strong> / Preset Mode<br />
The zenTera ® offers you a choice of two WAH WAH<br />
operating modes:<br />
• <strong>Manual</strong> Mode: When this mode is activated, the<br />
wah-wah remains on when you <strong>sw</strong>itch presets.<br />
(This is how a wah-wah would behave in a<br />
classic analog set-up).<br />
• Preset Mode: The wah-wah activates or<br />
deactivates automatically when you <strong>sw</strong>itch<br />
presets. In Preset mode, you can set the PARA 1<br />
knob to determine the wah-wah's status when<br />
the preset is activated (ON/OFF).<br />
Note: Don’t forget to store your setting.<br />
7.2 GLOBAL EQ<br />
If you use your zenTera ® in different venues, you<br />
may occasionally find it necessary to adjust its<br />
settings to suit the acoustics of the given room, for<br />
example, to cut back the bass frequencies for<br />
smaller clubs' stages. The GLOBAL EQ lets you do<br />
this quickly without having to adjust the settings of<br />
all presets.<br />
To activate the GLOBAL EQ, press and hold the<br />
PRESET knob. EQUALIZER ON or OFF appears in the<br />
display. If OFF appears, press and hold PRESET<br />
once more. The EQ activates and the BASS, MID,<br />
TREBLE and PRESENCE knobs are enabled for<br />
adjusting the GLOBAL EQ. BASS adjusts the bottom<br />
end, MID the low mids, TREBLE the upper mids,<br />
and PRESENCE the top end frequencies. You can<br />
<strong>sw</strong>itch the EQ (Preset) on and off to hear how the<br />
modifications affect the sound. Once you are<br />
satisfied, leave the EQ on and exit the menu by<br />
briefly tapping TUNER.<br />
Note: If the GLOBAL EQ was on when you <strong>sw</strong>itched<br />
the amp off, the amp indicates this when you<br />
<strong>sw</strong>itch it on again. GLOBAL EQ flashes in the<br />
display for about eight seconds. The idea here is<br />
of course to remind you that the EQ is still<br />
enabled.<br />
7.3 TUNER<br />
Activate the built-in tuning device by tapping<br />
TUNER. The term TUNER appears in the first line of<br />
the display. A large “+” appears when the string’s<br />
pitch is sharp (too high), a “-“ when the pitch is<br />
flat (too low), and “OK” when the string is tuned to<br />
pitch. You can also see this indicated in the tuning<br />
meter – a chain of lights at the bottom of the<br />
display. Various values can appear in the second<br />
line. Let’s take a closer look at these:<br />
1) The selected center frequency of the reference<br />
note A is indicated at the beginning of the line.<br />
You can calibrate it within a range of 435 to 445<br />
hertz using PARA 1.<br />
zenTera - MANUAL<br />
2) You can opt to mute the zenTera ® while you are<br />
tuning. Use PARA 2 to preset the amp’s level for<br />
the duration of the tuning procedure:<br />
M = muted, 1, 2, 3 = three different levels. The<br />
given setting appears in the display following<br />
the center frequency.<br />
3) The pitch of the most recently plucked string is<br />
indicated at the end of the second display line.<br />
7.4 STORE<br />
Press STORE to save preset settings. The indicator in<br />
the display flashes. Then select the desired<br />
memory slot for the preset using the PRESET knob.<br />
To name the preset, use PARA 1 to move the<br />
cursor and select the desired letters, numbers or<br />
symbols from the available font. If you tap PARA 2<br />
once you have made your selection, the cursor<br />
automatically jumps to the next position, sparing<br />
you the necessity of having to navigate with<br />
PARA 1. The preset is stored by pressing STORE<br />
repeatedly. You can cancel or quit the storage<br />
process at any time by pressing TUNER or TAP.<br />
NOTE:<br />
• Only the PRESET and PARA 1 and 2 knobs are<br />
enabled during the storage process. All other<br />
knobs are disabled.<br />
• If you want to edit and store presets you must<br />
deactivate MEMORY PROTECTION in the System<br />
menu (see section 8.1 below).<br />
7.5 FOOTSWITCH<br />
You can connect a standard 1-way or 2-way<br />
<strong>sw</strong>itch/pedal to the zenTera ® and use it to <strong>sw</strong>itch<br />
to the next higher preset number (UP), next lower<br />
preset (DOWN), or back and forth between two<br />
presets (TOGGLE). Go to the System menu to<br />
assign the desired UP/DOWN/TOGGLE function<br />
(see section 10). Turn TYPE until FOOTSWITCH<br />
ASSIGN appears in the display. Use PARA 1 or<br />
PARA 2 to select UP, DWN or TGL. The zenTera ®<br />
detects the type of connected <strong>sw</strong>itch.<br />
• With a 1-way pedal, you can only <strong>sw</strong>itch presets<br />
in ascending order – upwards, that is.<br />
• A 2-way pedal lets you <strong>sw</strong>itch upwards with one<br />
<strong>sw</strong>itch and downwards with the other.<br />
• To <strong>sw</strong>itch back and forth between two presets<br />
with a 1-way or 2-way <strong>sw</strong>itch/pedal, you must<br />
select the appropriate setting in the System<br />
menu and assign a marker to one of the two<br />
presets. To do this, select the desired preset and<br />
double-click PARA 2. This sets the marker. Select<br />
the second preset. You can then <strong>sw</strong>itch back<br />
and forth via sustain pedal between this most<br />
recently selected preset and the preset that you<br />
assigned the marker to. This is a convenient<br />
option whenever two sounds suffice or you<br />
forgot to bring your Z-Board.<br />
7.6 TAP<br />
In addition to letting you sync up delay to the<br />
tempo of a song manually, the TAP button gives<br />
you another option: you can use it to create short<br />
samples of guitar patterns or riffs (up to 25<br />
seconds). The zenTera ® plays these samples back<br />
in repeating loops so that you can play a melody<br />
or another riff over them. The optionally available<br />
Z-Board is far better suited for this purpose than<br />
the TAP button on the amp, because you have to<br />
press and hold the latter while you're recording<br />
samples.<br />
17<br />
ENGLISH
18<br />
zenTera - MANUAL<br />
Using the Z-Board frees both hands, which tends to<br />
make playing somewhat easier for most of us. To<br />
sample a riff, proceed as follows:<br />
• Tap the DELAY knob. This activates DELAY mode.<br />
• Then select one of the "HOLD" delay effects by<br />
turning the TYPE knob (see DELAY table below).<br />
If you want your sample to repeat at an unvarying<br />
volume level, set FEEDBACK to 100 using PARA 2.<br />
At values lower than 100, the volume of the<br />
sample decreases with each repetition. Press and<br />
hold the TAP button while you record your sample.<br />
When you release the button, the zenTera ®<br />
generates a loop and plays it back repeatedly.<br />
DELAY table<br />
TYPE PARA 1 PARA 2<br />
Hold Echo >>PLEASE USE TAP BUTTON>PLEASE USE TAP BUTTON>PLEASE USE TAP BUTTON
20<br />
zenTera - MANUAL<br />
9. MIDI<br />
Note: MIDI is another submenu of the SYSTEM<br />
MENU.<br />
The zenTera ® ’s presets can be <strong>sw</strong>itched via MIDI<br />
program change commands. To do this, you must<br />
define the MIDI base channel by which the<br />
zenTera ® communicates with the connected MIDI<br />
pedal. Wah-wah and volume can be also<br />
controlled via MIDI. To this end, the MIDI Controller<br />
must send control change CC 007 for volume and<br />
CC 004 for wah wah. CC 011 controls via MIDI a<br />
parameter assigned using PEDAL ASSIGN. Because<br />
every parameter can be assigned to PEDAL<br />
ASSIGN, it is possible to control any one parameter<br />
of every preset via MIDI (with the exception of<br />
delay times, because this would generate<br />
artifacts). In addition, the Z-Board - like a MIDI<br />
board - can send MIDI messages in continuous<br />
control data format. This lets you do things like<br />
control external MIDI devices.<br />
9.1 MIDI SETUP BASE CHANNEL<br />
Here you can define the MIDI base channel by<br />
which the zenTera ® communicates. Turn TYPE until<br />
MIDI SETUP BASE CHANNEL appears in the display.<br />
Use PARA 1 or PARA 2 to set the desired channel<br />
(1-16).<br />
9.2 MIDI PROGCHG<br />
This submenu determines if and how the zenTera ®<br />
sends MIDI program change messages (these are<br />
commands that change presets remotely via<br />
MIDI) and how it responds when it receives these<br />
messages. Turn TYPE until MIDI PROGCHG appears<br />
in the display. Using PARA 1 or PARA 2, select the<br />
desired mode from among the following options:<br />
• PROGCHG OFF: The zenTera ® does not send MIDI<br />
program changes, nor does it respond to incoming<br />
messages. In other words, an external effect<br />
device cannot be addressed via MIDI, and you<br />
cannot use a MIDI <strong>sw</strong>itcher to change the<br />
zenTera ® ’s presets.<br />
• PROGCHG ONLY: This is the default in Software<br />
Version 2.3. The zenTera ® sends and processes MIDI<br />
program changes. Note that messages are sent<br />
without bank select commands because these<br />
are irrelevant in Version 2.3.<br />
• PROGCHG CC00 and CC32: MIDI program<br />
changes are sent with bank select commands.<br />
This option will become necessary if and when a<br />
future software upgrade endows the zenTera ® with<br />
over 128 memory slots.<br />
CNTCTRL OFF<br />
Data is neither sent nor received.<br />
CNTCTRL RECV<br />
Only data received via MIDI is processed.<br />
CNTCTRL SEND<br />
Z-Board triggers CC 004/007/011 at the MIDI OUT.<br />
CNTCTRL BOTH<br />
Combination send / receive.<br />
9.3 MIDI SETUP DEVICE ID<br />
You may at some point elect to daisy-chain<br />
several zenTera ® ‘s – that is, connect them in a MIDI<br />
network - and want or need to address these<br />
individually via MIDI SysEx commands. The MIDI<br />
device ID rather than the MIDI base channel is<br />
used for this purpose. To this end, turn TYPE until<br />
MIDI SETUP DEVICE ID appears in the menu and<br />
choose a device ID between 1 and 127 (standard<br />
value = 1) using PARA 1 or PARA 2.<br />
zenTera - MANUAL<br />
9.4 MIDI SYSEX SEND<br />
This menu lets you determine if the zenTera ®<br />
responds to MIDI requests by sending SysEx data<br />
(for example, presets and system settings). Turn<br />
TYPE until MIDI SYSEX SEND appears in the display.<br />
Then enter YES or NO via the PARA 1 or PARA 2<br />
knobs.<br />
9.5 MIDI SYSEX RECEIVE<br />
This is where you determine if the zenTera ®<br />
processes incoming SysEx data. Turn TYPE until MIDI<br />
SYSEX RECEIVE appears in the display. Then enter<br />
YES or NO via the PARA 1 or PARA 2 knobs.<br />
9.6 MIDI DUMP<br />
This menu lets you create backups of your settings<br />
on an external storage medium such as your PC.<br />
This comes in handy if you play in several bands:<br />
You can download the presets that you need for<br />
each band from your archive whenever you need<br />
them. Beyond that, you can <strong>sw</strong>ap presets with<br />
other zenTera ® users via MIDI DUMP. And this of<br />
course affords you data protection in the unlikely<br />
event that your zenTera ® has to go in for repairs<br />
and you want to use a backup amp. Connect<br />
your zenTera ® 's MIDI OUT port with the MIDI IN port<br />
of your PC, MIDI File Player or another zenTera ® .<br />
Turn TYPE until MIDI DUMP appears in the display.<br />
Use PARA 1 or PARA 2 to select the MIDI data that<br />
you want the zenTera ® to send. For the record,<br />
ACTIVE PRESET sends the currently active preset;<br />
ALL PRESET sends all presets. SYSTEM CONFIG sends<br />
10. FOOTSWITCH ASSIGN<br />
Note: FOOTSWITCH ASSIGN is another submenu of<br />
the SYSTEM MENU.<br />
Using a standard 1-way or 2-way sustain pedal,<br />
you can <strong>sw</strong>itch presets upwards (UP), downwards<br />
(DOWN), or back and forth between two presets<br />
(TOGGLE).<br />
the System menu’s settings, MIDI MAP sends data<br />
contained in the MIDI MAPPING, and ALL sends all<br />
stored data. Send data by tapping PARA 1 or<br />
PARA 2. SYSEX SEND must be set to YES to ensure<br />
data is transmitted properly. If your zenTera is<br />
receiving data from another zenTera ® , a PC or<br />
similar device, MIDI SYSEX RECEIVE must also be<br />
set to YES. You can of course also request the<br />
zenTera ® ’s settings via MIDI (REQUEST).<br />
9.7 MIDI IMPORT<br />
All 100 presets of a zenTera ® with an OS older than<br />
Version 2.3 can be converted into 2.3 format via<br />
the MIDI IMPORT function. For this purpose, first set<br />
the receiving zenTera ® to MIDI IMPORT. Then<br />
initiate an ALL PRESET DUMP from the sending<br />
zenTera ® by tapping PARA 1.<br />
9.8 MIDI MAPPING<br />
If you elect to use a MIDI foot controller or the<br />
Z-Board, use this menu to determine which of the<br />
zenTera ® 's presets are <strong>sw</strong>itched via program<br />
change messages sent from the foot controller.<br />
This is a particularly handy option when you want<br />
to simultaneously <strong>sw</strong>itch an external signal<br />
processor's effect programs via MIDI. Turn TYPE<br />
until MIDI MAPPING appears in the display. Tap<br />
PARA 1 or PARA 2 to <strong>sw</strong>itch the function ON or<br />
OFF. Turn PARA 1 to dial in one of the program<br />
numbers of your MIDI foot controller. Turn PARA 2<br />
to assign one of the zenTera ® 's 128 presets to this<br />
memory slot.<br />
This menu lets you select the desired<br />
UP/DOWN/TGL function. Turn TYPE until FOOT-<br />
SWITCH ASSIGN appears in the display. Select UP,<br />
DWN or TGL using PARA 1 or PARA 2.<br />
21<br />
ENGLISH
22<br />
zenTera - MANUAL<br />
11. VOLUME PEDAL<br />
Note: VOLUME PEDAL is another submenu of the<br />
SYSTEM MENU.<br />
This menu lets you determine at which point in the<br />
signal chain a connected volume pedal or the<br />
volume pedal of the optionally available Z-Board<br />
regulates the amp’s level. Turn TYPE until VOLUME<br />
PEDAL appears in the display. Using PARA 1 or<br />
PARA 2, select the desired mode from among the<br />
following options:<br />
• AMP VOLUME: The pedal accesses the amp<br />
section’s Volume knob, meaning that it adjusts<br />
the volume level pre effect section. When you<br />
change a preset, the volume value<br />
programmed in the preset is activated. This<br />
value remains enabled and the level the same<br />
until you manipulate the pedal.<br />
• GLOBAL: The pedal accesses the amp’s MASTER<br />
knob to control overall output level. When you<br />
change a preset, the level is determined by the<br />
pedal’s current value.<br />
• GLOBAL PRE FX: Like GLOBAL, it works as a<br />
master knob, only that is located pre effect<br />
section.<br />
11.1 VOLUME PEDAL RANGE<br />
MINIMUM / MAXIMUM<br />
If you opt to plug an expression pedal into the<br />
jack on the rear panel of the zenTera ® , you can<br />
define the desired volume control range for the<br />
pedal in these submenus. The same holds true for<br />
the volume pedal on the optionally available<br />
Z-Board. Turn TYPE until the menu appears in the<br />
display. Select values between 0.0 and 9.9 using<br />
the PARA 1 or PARA 2 knobs.<br />
11.2 CV PED TYPE<br />
This menu lets you select a linear or a logarithmic<br />
action for your foot pedal's control range<br />
• linear = uniformly increasing volume<br />
• logarithmic = the volume curve initially rises<br />
steeply, then more gradually<br />
Turn TYPE until CV PED TYPE appears in the display.<br />
Select LINEAR TYPE or LOG TYPE using PARA 1 or<br />
PARA 2.<br />
11.3 CV PED CALIB MIN/MAX<br />
You can calibrate a connected expression pedal<br />
here. Turn TYPE until CV PED CALIB SET TO MIN<br />
appears in the display. Set your foot pedal so that<br />
it rests at its lowest position (MIN, with the heel all<br />
the way back and the toe pointing up) and<br />
confirm by tapping PARA 1 or PARA 2. The display<br />
automatically pages to the next menu, CV PED<br />
CALIB SET TO MAX. Floor the pedal so that it rests<br />
at its maximum position and tap PARA 1 again.<br />
Your pedal is now calibrated and ready to “rock”.<br />
11.4 Z-BOARD BANK CHANGE<br />
This menu lets you determine how the zenTera ®<br />
responds to bank change commands sent from<br />
the Z-Board. It can either access a preset of the<br />
next bank directly, meaning that the preset is<br />
activated immediately along with the bank<br />
change. Note that in this case the Z-Board<br />
<strong>sw</strong>itches in increments of five. For example, say<br />
you are using preset 23: A bank change<br />
command would automatically activate preset<br />
28. If you do not want presets to be <strong>sw</strong>itched in<br />
this manner, you can opt to change banks only.<br />
In this case, the next bank is always called up<br />
without accessing a preset directly. You then have<br />
to activate one of this bank's presets separately<br />
by stepping on the appropriate <strong>sw</strong>itch on the<br />
Z-Board. Turn TYPE until the menu appears in the<br />
display. Use PARA 1 to select DIR for the former,<br />
BNK for the latter option.<br />
Note: For an in-depth explanation of the workings<br />
of the Z-Board, please consult the Z-Board owner's<br />
manual.<br />
zenTera - MANUAL<br />
11.5 Z-BOARDCALIB<br />
As described above, you can also calibrate the<br />
pedals on the optional Z-Board. Proceed as<br />
follows: Turn TYPE until the Z-BOARDCALIB SET WAH<br />
MIN menu appears in the display. Set the wahwah<br />
pedal of the Z-Board so that it rests at its minimum<br />
position (with the heel all the way back and<br />
the toe pointing up) and confirm by tapping<br />
PARA 1 or PARA 2. The display automatically<br />
pages to the next menu, SET WAH MAX. Floor the<br />
pedal so that it rests at its maximum position and<br />
12. SOFTWARE VERSION<br />
Note: SOFTWARE VERSION is another submenu of<br />
the SYSTEM MENU.<br />
This menu tells you which software versions the<br />
13. MY zenTera ®<br />
Note: MY zenTera ® is another submenu of the<br />
SYSTEM MENU.<br />
Starting with Version 2.3, every zenTera ® ships with<br />
a unique identification number (you’ll find it in the<br />
14. MAINTENANCE AND SERVICE<br />
The zenTera ® does not require service of any type.<br />
There are however a few basic rules that – if you<br />
follow them - are sure to extend the service life of<br />
your amp enormously:<br />
• Make sure all peripheral devices, cords and<br />
cables are in a state of good repair! Defective<br />
speaker cables are the most common cause of<br />
power amp failure. Poor-quality cables cause<br />
hum and undesirable noise.<br />
• Ensure plenty of air can circulate around your<br />
amp's ventilation ducts at all times.<br />
• Definitely avoid exposure to mechanical shocks<br />
and extreme heat, dust and particularly<br />
moisture.<br />
tap PARA 1 again. The display automatically<br />
pages to the next menu, SET VOLUME MIN,<br />
which lets you calibrate the volume pedal. The<br />
procedure is the same as for calibrating the wahwah<br />
pedal. Set the volume pedal so that it rests at<br />
its minimum position and confirm by tapping<br />
PARA 1 or PARA 2. The display automatically<br />
pages to the next menu, SET VOLUME MAX. Floor<br />
the pedal so that it rests at its maximum position<br />
and tap PARA 1 again.<br />
individual modules of your zenTera ® are running.<br />
Turn TYPE until the menu appears in the display.<br />
Call up the versions using PARA 1 or PARA 2.<br />
System menu under VERSION CONTROL). You may<br />
be required to provide this ID when requesting<br />
future updates.<br />
• Be picky about the kind of peripheral devices<br />
you connect to your amp and always check out<br />
their specs before you plug them in. Never<br />
connect speaker cabinets with an ohm rating<br />
lower than the zenTera ® is designed to handle.<br />
Under no circumstances should you connect<br />
devices with high output signal levels (e.g.<br />
power amps) to your amp's input.<br />
• Be sure the AC power source delivers the current<br />
that your amp is designed to handle before you<br />
plug it in. When in doubt about the local rating,<br />
ask the venue's sound technician or a stagehand.<br />
• Refrain from DIY repairs! Have an experienced<br />
technician replace internal fuses.<br />
23<br />
ENGLISH
24<br />
zenTera - MANUAL<br />
15. TROUBLESHOOTING<br />
F1) The zenTera ® won't power up when you<br />
<strong>sw</strong>itch it on:<br />
• It's not getting AC power. Check the mains<br />
cable to see if it is connected properly!<br />
• The mains fuse is defective. Replace the fuse<br />
with another identical fuse. If this fuse also blows,<br />
be sure to talk to your local Hughes & Kettner ®<br />
dealer.<br />
F2) The zenTera ® is cabled up and connected<br />
properly, but no sound is audible.<br />
• One or more of the volume knobs or the master<br />
knob is/are turned all the way down. Dial in<br />
higher settings.<br />
• The internal speakers are not connected. Plug<br />
them in.<br />
• The zenTera ® is in TUNER mode, which means<br />
that it is muted. Quit TUNER mode by tapping<br />
the TUNER button.<br />
• A shorted external speaker cable caused one of<br />
the internal fuses to blow. Have a qualified<br />
technician change the fuse (ensure the<br />
replacement fuse bears the proper rating).<br />
• The volume pedal of the connected Z-Board is<br />
set to the minimum position. Floor the pedal.<br />
F3) The zenTera ® will not respond to the<br />
Z-Board or foot<strong>sw</strong>itch.<br />
• The connector of the Z-Board or foot<strong>sw</strong>itch is not<br />
plugged in correctly or at all. Plug it into the<br />
zenTera ® , ensuring that it is seated firmly.<br />
F4) The sound is totally distorted when you<br />
activate a connected effects device.<br />
• The input of the effect device is being overdriven.<br />
If it is equipped with a level meter or<br />
other level indicator, check the signal level and<br />
back off the signal processor's input sensitivity<br />
(via a knob labeled "Input" or "Gain").<br />
F5) The signal level drops considerably when<br />
you connect an external effects device.<br />
• The effect device’s output level is too low. Turn<br />
up the level on the signal processor.<br />
F6) A connected MIDI controller is not<br />
getting operating voltage via the<br />
phantom power feed of the MIDI IN port:<br />
• The phantom power fuse tripped. Replace the<br />
blown fuse making sure that the replacement<br />
has the same specs as the original fuse.<br />
F7) System Initialize:<br />
• You can perform a factory reset on the zenTera ®<br />
by pressing and holding PRESET and STORE while<br />
powering up. SYSTEM INIT appears in the display<br />
for about eight seconds. Following successful<br />
initialization, the zenTera ® has the following<br />
status: The System menu is reset to the factory<br />
setting.<br />
Note: The head is reset to 4x 12" if it was set to<br />
another configuration. P 1 – P 28 are copied to<br />
1 – 28. 29 - 100 remain unchanged.<br />
Caution: All your user presets and system settings<br />
are deleted or reset to the original values. Then<br />
you can upload your archived sounds to the<br />
zenTera ® using the SoundDiver software.<br />
zenTera - MANUAL<br />
16. TECHNICAL DATA<br />
PREAMP SECTION<br />
INPUT -10 dBV / 1 M ohms<br />
FX RETURN L/R 0 dBV / 10 K ohms<br />
FX SEND L/R 0 dBV / 220 ohms<br />
RECORDING OUT L/R 0 dBV / 220 ohms<br />
Headphones out: 500 mW an 4 - 600 ohms<br />
POWER AMP SECTION (Combo)<br />
Output power: 2x 100 watts into 6 ohms<br />
2x 60 watts into 16 ohms<br />
Frequency response: 20 Hz - 20 KHz<br />
Speaker outs:<br />
Minimum impedance per channel:<br />
6 ohms (1 x 16 ohms + 1 x 8 ohms)<br />
Speaker: Celestion Vintage 30,<br />
16 ohms<br />
POWER AMP SECTION (Head)<br />
Output power: 2x 100 watts into 4 ohms<br />
2x 60 watts into 16 ohms<br />
Frequency response: 20 Hz - 20 KHz<br />
Speaker outs:<br />
Minimum impedance per channel:<br />
4 ohms (2 x 8 ohms)<br />
General<br />
Mains voltage:<br />
230 V~ (European version)<br />
117 V~ (North American version)<br />
100 V~ (Japanese version)<br />
Max. power consump.: 708 VA<br />
Mains fuse:<br />
T <strong>2.5</strong> A (230 V model)<br />
T 5 A (117 V model)<br />
T 6.3 A (100 V model)<br />
External fuses:<br />
T 500 mA MIDI Phantom<br />
Internal fuses:<br />
2 x T 5 A (power amp)<br />
1 x T <strong>2.5</strong> A (DSP)<br />
2 x T 500 mA (analog section)<br />
Dimensions W x H x D:<br />
750 x 585 x 300 mm (Combo)<br />
740 x 300 x 250 mm (Head)<br />
Weight:<br />
30 kg (Combo)<br />
19 kg (Head)<br />
25<br />
ENGLISH
26<br />
zenTera - MANUAL<br />
17. AC POWER<br />
NOTE: Before plugging into the wall socket, make<br />
certain the amp is set to the proper voltage for<br />
your locale. You can read the amp's voltage<br />
setting in the Voltage Selector window found on<br />
the back of the unit. Also check the fuse<br />
specifications printed above the amp's power<br />
cord socket, and ensure that the fuses you are<br />
using have the correct value for your local<br />
current.<br />
MAINS IN / VOLTAGE SELECTOR<br />
zenTera ® can operate at AC currents of 230 volts,<br />
117 volts or 100 volts. Use the VOLTAGE SELECTOR<br />
to adjust the voltage accordingly (see Diagram 1):<br />
• Press the fuse's safety latch (1) towards the<br />
window (3) with a small screwdriver and remove<br />
it with the two fuses.<br />
• Pull the cartridge (4) out of its socket.<br />
• Rotate the cartridge (4) and plug it back into<br />
the socket so the desired voltage is legible.<br />
• Replace the previously mounted fuses (5). Make<br />
certain the values of your fuses are identical to<br />
those required for your local voltage. The values<br />
are specified above the amp's power cord<br />
socket.<br />
• Reinsert the fuse cartridge (2) with the new fuses<br />
(5).<br />
• Before you plug into the wall socket, check<br />
again to ensure the correct voltage rating is<br />
legible in the VOLTAGE SELECTOR window (3).<br />
18. MIDI IMPLEMENTATION CHART see page 51<br />
zenTera - MANUAL<br />
1. VORWORT . . . . . . . . . . . . . . . . . . . . . . . . . . . . . . . . . . . . . . . . . . . . . . . . . . . . . . . . . . . . . .28<br />
2. VOR DER INBETRIEBNAHME . . . . . . . . . . . . . . . . . . . . . . . . . . . . . . . . . . . . . . . . . . . . . . . . .29<br />
3. EIN ÜBERBLICK . . . . . . . . . . . . . . . . . . . . . . . . . . . . . . . . . . . . . . . . . . . . . . . . . . . . . . . . . . .29<br />
4. FRONTSEITE . . . . . . . . . . . . . . . . . . . . . . . . . . . . . . . . . . . . . . . . . . . . . . . . . . . . . . . . . . . . .30<br />
4.1 REGLER-FUNKTIONEN . . . . . . . . . . . . . . . . . . . . . . . . . . . . . . . . . . . . . . . . . . . . . . . . . . . . . .31<br />
4.2 EFFEKTE . . . . . . . . . . . . . . . . . . . . . . . . . . . . . . . . . . . . . . . . . . . . . . . . . . . . . . . . . . . . . . . . .34<br />
4.3 PRE EFFEKT MODE . . . . . . . . . . . . . . . . . . . . . . . . . . . . . . . . . . . . . . . . . . . . . . . . . . . . . . . . .34<br />
4.4 BEISPIEL-TABELLE ZU DEN INS FX . . . . . . . . . . . . . . . . . . . . . . . . . . . . . . . . . . . . . . . . . . . . . .34<br />
4.5 BEISPIEL-TABELLE ZU DEN EFFEKTEN MOD-FX, DELAY UND REVERB . . . . . . . . . . . . . . . . . . .35<br />
5. AMP-MODELLE . . . . . . . . . . . . . . . . . . . . . . . . . . . . . . . . . . . . . . . . . . . . . . . . . . . . . . . . . .36<br />
6. RÜCKSEITE . . . . . . . . . . . . . . . . . . . . . . . . . . . . . . . . . . . . . . . . . . . . . . . . . . . . . . . . . . . . . .38<br />
7. BESONDERE FUNKTIONEN . . . . . . . . . . . . . . . . . . . . . . . . . . . . . . . . . . . . . . . . . . . . . . . . . .40<br />
7.1 WAH WAH . . . . . . . . . . . . . . . . . . . . . . . . . . . . . . . . . . . . . . . . . . . . . . . . . . . . . . . . . . . . . . .40<br />
7.2 GLOBAL EQ . . . . . . . . . . . . . . . . . . . . . . . . . . . . . . . . . . . . . . . . . . . . . . . . . . . . . . . . . . . . .40<br />
7.3 TUNER . . . . . . . . . . . . . . . . . . . . . . . . . . . . . . . . . . . . . . . . . . . . . . . . . . . . . . . . . . . . . . . . . .40<br />
7.4 STORE . . . . . . . . . . . . . . . . . . . . . . . . . . . . . . . . . . . . . . . . . . . . . . . . . . . . . . . . . . . . . . . . . .41<br />
7.5 FOOTSWITCH . . . . . . . . . . . . . . . . . . . . . . . . . . . . . . . . . . . . . . . . . . . . . . . . . . . . . . . . . . . .41<br />
7.6 TAP . . . . . . . . . . . . . . . . . . . . . . . . . . . . . . . . . . . . . . . . . . . . . . . . . . . . . . . . . . . . . . . . . . . .41<br />
7.7 PEDAL ASSIGN . . . . . . . . . . . . . . . . . . . . . . . . . . . . . . . . . . . . . . . . . . . . . . . . . . . . . . . . . . .42<br />
8. DAS SYSTEM-MENÜ . . . . . . . . . . . . . . . . . . . . . . . . . . . . . . . . . . . . . . . . . . . . . . . . . . . . . . .42<br />
8.1 MEMORY PROTECTION . . . . . . . . . . . . . . . . . . . . . . . . . . . . . . . . . . . . . . . . . . . . . . . . . . . .42<br />
8.2 MODE . . . . . . . . . . . . . . . . . . . . . . . . . . . . . . . . . . . . . . . . . . . . . . . . . . . . . . . . . . . . . . . . . .43<br />
8.3 WAKE UP . . . . . . . . . . . . . . . . . . . . . . . . . . . . . . . . . . . . . . . . . . . . . . . . . . . . . . . . . . . . . . . .43<br />
8.4 READ VALUES . . . . . . . . . . . . . . . . . . . . . . . . . . . . . . . . . . . . . . . . . . . . . . . . . . . . . . . . . . . .43<br />
9. MIDI . . . . . . . . . . . . . . . . . . . . . . . . . . . . . . . . . . . . . . . . . . . . . . . . . . . . . . . . . . . . . . . . . . .44<br />
9.1 MIDI SETUP BASE CHANNEL . . . . . . . . . . . . . . . . . . . . . . . . . . . . . . . . . . . . . . . . . . . . . . . . .44<br />
9.2 MIDI PROGCHG . . . . . . . . . . . . . . . . . . . . . . . . . . . . . . . . . . . . . . . . . . . . . . . . . . . . . . . . . .44<br />
9.3 MIDI SETUP DEVICE ID . . . . . . . . . . . . . . . . . . . . . . . . . . . . . . . . . . . . . . . . . . . . . . . . . . . . .44<br />
9.4 MIDI SYSEX SEND . . . . . . . . . . . . . . . . . . . . . . . . . . . . . . . . . . . . . . . . . . . . . . . . . . . . . . . . .44<br />
9.5 MIDI SYSEX RECEIVE . . . . . . . . . . . . . . . . . . . . . . . . . . . . . . . . . . . . . . . . . . . . . . . . . . . . . . .45<br />
9.6 MIDI DUMP . . . . . . . . . . . . . . . . . . . . . . . . . . . . . . . . . . . . . . . . . . . . . . . . . . . . . . . . . . . . . .45<br />
9.7 MIDI IMPORT . . . . . . . . . . . . . . . . . . . . . . . . . . . . . . . . . . . . . . . . . . . . . . . . . . . . . . . . . . . . .45<br />
9.8 MIDI MAPPING . . . . . . . . . . . . . . . . . . . . . . . . . . . . . . . . . . . . . . . . . . . . . . . . . . . . . . . . . . .45<br />
10. FOOTSWITCH ASSIGN . . . . . . . . . . . . . . . . . . . . . . . . . . . . . . . . . . . . . . . . . . . . . . . . . . . . .45<br />
11. VOLUME PEDAL . . . . . . . . . . . . . . . . . . . . . . . . . . . . . . . . . . . . . . . . . . . . . . . . . . . . . . . . . .46<br />
11.1 VOLUME PEDAL RANGE MINIMUM / MAXIMUM . . . . . . . . . . . . . . . . . . . . . . . . . . . . . . . . .46<br />
11.2 CV PED TYPE . . . . . . . . . . . . . . . . . . . . . . . . . . . . . . . . . . . . . . . . . . . . . . . . . . . . . . . . . . . . .46<br />
11.3 CV PED CALIB MIN/MAX . . . . . . . . . . . . . . . . . . . . . . . . . . . . . . . . . . . . . . . . . . . . . . . . . . .46<br />
11.4 Z-BOARD BANK CHANGE . . . . . . . . . . . . . . . . . . . . . . . . . . . . . . . . . . . . . . . . . . . . . . . . . .46<br />
11.5 Z-BOARDCALIB . . . . . . . . . . . . . . . . . . . . . . . . . . . . . . . . . . . . . . . . . . . . . . . . . . . . . . . . . . .46<br />
12. SOFTWARE-VERSION . . . . . . . . . . . . . . . . . . . . . . . . . . . . . . . . . . . . . . . . . . . . . . . . . . . . . .47<br />
13. MY zenTera ® . . . . . . . . . . . . . . . . . . . . . . . . . . . . . . . . . . . . . . . . . . . . . . . . . . . . . . . . . . . .47<br />
14. WARTUNG UND SERVICE . . . . . . . . . . . . . . . . . . . . . . . . . . . . . . . . . . . . . . . . . . . . . . . . . . .47<br />
15. MÖGLICHE FEHLERQUELLEN/TROUBLESHOOTING . . . . . . . . . . . . . . . . . . . . . . . . . . . . . . . .48<br />
16. TECHNISCHE DATEN . . . . . . . . . . . . . . . . . . . . . . . . . . . . . . . . . . . . . . . . . . . . . . . . . . . . . . .49<br />
17. NETZANSCHLUSS . . . . . . . . . . . . . . . . . . . . . . . . . . . . . . . . . . . . . . . . . . . . . . . . . . . . . . . . .50<br />
18. MIDI IMPLEMENTATION CHART . . . . . . . . . . . . . . . . . . . . . . . . . . . . . . . . . . . . . . . . . . . . . .52<br />
27<br />
DEUTSCH
28<br />
zenTera - MANUAL<br />
1. VORWORT<br />
Herzlichen Glückwunsch und vielen Dank! Wir<br />
freuen uns, dass Sie sich für den zenTera ®<br />
entschieden haben!<br />
Der zenTera ® vereint die meistgespielten Verstärker<br />
und Effekte der Gitarrenamp-Geschichte in einem<br />
einfach zu bedienenden Gerät - sowohl Combo<br />
als auch Head – in authentischer Klangqualität.<br />
Die Basis für die neuen Möglichkeiten des zenTera ®<br />
bildet die Dynamic Sector Modeling ® DSM Technologie.<br />
Hierbei werden einzelne Baugruppen<br />
(Sektoren) der Original-Amps sowie die dynamischen<br />
Interaktionen dieser Sektoren analysiert und<br />
modelliert. Es ist die musikalische Qualität der einzelnen<br />
Baugruppen und ihr dynamisches<br />
Zusammenwirken, welches das Wesen des echten<br />
Tons ausmacht. Mit dem zenTera ® wird so jeder<br />
einzelne Amp in seiner ganzen Dynamik, seinem<br />
ureigenen Charakter und all seinen spezifischen<br />
Regelmöglichkeiten reproduzierbar. Eine weitere<br />
Innovation des zenTera ® ist der speziell für die<br />
Verarbeitung von Gitarrensignalen optimierte 24-<br />
Bit A/D-Wandler in der Eingangsstufe. Mit ihm ist es<br />
dem zenTera ® möglich, Impulse bis zu 116 dB zu<br />
verarbeiten. Als erster Digitalamp überhaupt kann<br />
der zenTera ® den gesamten Dynamikumfang der<br />
Gitarre so verarbeiten, wie man es sonst nur von<br />
Röhrenamps her kennt. Damit nicht genug: Im<br />
"Herzen" des zenTera ® verrichten gleich zwei 32 Bit<br />
Floating Point DSPs der neuesten Generation ihren<br />
Dienst. Ihre Rechenpower ist Garant für die optimale<br />
Umsetzung der DSM Technology in klangliche<br />
Spitzenleistungen. Außerdem sorgen sie dafür,<br />
dass der zenTera ® Signale ohne spürbare Latenzzeiten<br />
verarbeitet. Unter dem Strich heißt das:<br />
Dynamik und authentisches Spielgefühl pur!<br />
Insgesamt 17 verschiedene Amp-Modelle stehen<br />
zur Verfügung. Je nach ausgewähltem Amp Type<br />
reagieren die Regler wie die des Vorbildes.<br />
Dadurch läßt sich jeder Sound schnell und intuitiv<br />
einstellen, so wie man es von einem analogen<br />
Amp her kennt. Daneben bietet der zenTera ® eine<br />
große Fülle an Effekten in Studioqualität sowie<br />
Emulationen historischer Bodeneffekte und einen<br />
originalgetreuen Spring Reverb. Wie die Verstärker-<br />
Parameter sind auch die Effekte intuitiv, ohne<br />
nervendes Menü-Stepping justierbar. Sämtliche<br />
Einstellungen können als Presets in 128 Speicherplätzen<br />
(100 User Presets + 28 Werksounds)<br />
abgelegt und am Verstärker per Fußboard oder<br />
MIDI-Controller abgerufen werden. Somit genügt<br />
der zenTera ® auch den höchsten Ansprüchen an<br />
simple und anwenderfreundliche Bedienung. Für<br />
die nötige Durchsetzungskraft ist der zenTera ® mit<br />
einer 2 x 100 Watt Stereo-Endstufe ausgestattet.<br />
So kann er bei jeder Bühnenlautstärke mithalten<br />
und setzt sich auch unter Extrembelastungen kraftvoll<br />
durch. Ein analoger und digitaler Recording-<br />
Ausgang, ein eingebauter Tuner, eine Tap-Funktion<br />
zum Synchronisieren der Delay-Zeit, ein serieller<br />
FX Loop, ein regelbarer Kopfhörerausgang und<br />
viele weitere Features komplettieren die äußerst<br />
umfangreiche Ausstattung. Als optimale Lösung<br />
zur Schaltung aller wichtigen Funktionen wurde<br />
eigens das Z-Board als Remote Control für die<br />
Hughes & Kettner ® DSM Serie entwickelt. Mit<br />
dem zenTera ® haben Sie ein Stück Zukunft erworben.<br />
Über seine MIDI-Schnittstelle können Sie<br />
jederzeit Software-Upgrades aufspielen und mit<br />
anderen zenTera ® -Besitzern Sounds und<br />
Systemeinstellungen austauschen.<br />
Wir wünschen Ihnen viel Spaß am "Tone"<br />
mit Ihrem zenTera ® !<br />
ERLÄUTERUNG DER SYMBOLE<br />
W Regler drehen<br />
r Regler oder Button antippen (Klick)<br />
s Regler oder Button doppelt antippen (Doppelklick)<br />
t Regler oder Button länger gedrückt halten<br />
(Klicken und kurz halten)<br />
zenTera - MANUAL<br />
2. VOR DER INBETRIEBNAHME<br />
• Vergewissern Sie sich vor dem Anschluss des<br />
zenTera ® , dass der an der Netzbuchse angegebene<br />
Spannung<strong>sw</strong>ert mit der vorhandenen<br />
Netzspannung übereinstimmt.<br />
• Stellen Sie eine ausreichende Luftzufuhr durch<br />
die Kühlschlitze des Gerätes sicher.<br />
• Achten Sie auf einen festen Stellplatz, der<br />
mechanische und thermische Fremdeinwirkungen,<br />
welche die Betriebssicherheit des<br />
Gerätes oder die Sicherheit von Personen<br />
beeinträchtigen könnten, ausschließt.<br />
3. EIN ÜBERBLICK<br />
Die Bedienfront des zenTera ® ist im Wesentlichen in<br />
zwei Bereiche gegliedert:<br />
• Amp-Sektion<br />
• Effekt-Sektion<br />
Die Amp-Sektion ist so aufgebaut, wie man es von<br />
einem analogen Amp her kennt: Die Regler GAIN,<br />
BASS, MID, TREBLE, PRESENCE und VOLUME haben<br />
einen Links- und Rechtsanschlag. Es lassen sich<br />
Werte von 0 bis 10 einstellen. Lediglich der AMP<br />
TYPE-Regler ist ein Endlos-Poti. In Abhängigkeit<br />
vom ausgewählten Amp-Modell reagieren die<br />
Regler der Amp-Sektion wie die des Originals.<br />
Somit unterscheidet sich der zenTera ® in der<br />
Bedienung nicht von seinen analogen Vorbildern.<br />
Für Schäden am Gerät, die durch unsachgemäßen<br />
Betrieb entstehen, wird seitens des<br />
Herstellers keine Haftung übernommen.<br />
Achtung! Beachten Sie bitte, dass der zenTera ®<br />
nicht über längere Dauer extremer Kälte ausgesetzt<br />
werden sollte. In diesem Fall könnte sich die<br />
interne Batterie, bedingt durch die niedrige Temperatur,<br />
entladen. Diese sorgt für die Aufrechterhaltung<br />
des Systems im abgeschalteten Zustand<br />
und wird durch den Spielbetrieb konstant aufgeladen.<br />
TUNER STORE<br />
INPUT GAIN AMP TYPE BASS MID TREBLE PRESENCE VOLUME PRESET MOD FX DELAY REVERB TYPE PARA 1 PARA 2 MASTER<br />
POWER<br />
Amp-Sektion Effekt-Sektion<br />
In einigen Fällen geht er sogar über deren Regelmöglichkeiten<br />
hinaus, was musikalisch durchaus<br />
sinnvoll sein kann. In der Effekt-Sektion steht eine<br />
Fülle von Delay- Modulations- und Hall-Effekten zur<br />
Verfügung. Ihre Einstellung ist ohne aufwendiges<br />
Editieren möglich. Durch Antippen von MOD FX,<br />
DELAY und REVERB wird der jeweilige Effektblock<br />
aktiviert. Durch Drehen des TYPE-Reglers werden<br />
die verschieden Effekt-Typen aufgerufen und mit<br />
PARA 1 und PARA 2 die Effekt-Parameter eingestellt.<br />
Sämtliche Effekte können PRE (also wie ein<br />
Bodeneffekt vor dem INPUT) oder POST (also vor<br />
die Endstufe und damit stereo) geschaltet werden.<br />
Durch Antippen des TYPE-Reglers wird der<br />
jeweilige Effekt-Typ „PRE“ oder „POST“ geschaltet.<br />
DEUTSCH<br />
29
30<br />
zenTera - MANUAL<br />
4. FRONTSEITE<br />
Einschalten<br />
Mit dem POWER-Schalter auf der rechten Seite<br />
wird der zenTera ® aktiviert. Der Verstärker meldet<br />
sich im Auslieferungszustand mit dem Preset 1<br />
„LUKE DELSOLO HOT PLEXI“ und die LED über dem<br />
TAP-Taster blinkt.<br />
Das zenTera ® -Display<br />
Das Display des zenTera ® reagiert automatisch auf<br />
jeden Bedienschritt und jeden Menüwechsel, d.h.<br />
es zeigt immer den Parameter an, den Sie gerade<br />
regeln und springt in die nächste Anzeige, sobald<br />
Sie einen anderen Regler betätigen oder das<br />
Menü wechseln. Der Wert in der zweiten Zeile des<br />
Displays (kleinere Zahlen) zeigt immer den abgespeicherten<br />
Wert des Presets an. Die großen<br />
Zahlen (rechts) zeigen den aktuellen Wert an.<br />
Ausnahme: Die Regelung der Gesamtlautstärke<br />
(MASTER-Regler ganz rechts) ist unabhängig von<br />
allen übrigen Einstellungen und wird nicht im<br />
Display angezeigt.<br />
Im Grundzustand zeigt Ihnen das Display des<br />
zenTera ® den Namen des Presets, dessen<br />
Speicherplatz, den Namen der Amp-Simulation<br />
sowie evtl. aktivierte Effekt-Blöcke an. Folgende<br />
Zeichnung veranschaulicht beispielhaft die entsprechende<br />
Anzeige. Große Ziffernanzeige:<br />
Nummer des aktuellen Presets (User-Presets 1 - 100,<br />
Factory-Presets P1 - P28)<br />
Textzeile oben: Name des Presets<br />
Textzeile unten: Ausgewählter AMP TYPE<br />
• PRESET: Leuchtet im Grundzustand. Werden<br />
Veränderungen an den Einstellungen des Presets<br />
vorgenommen, leuchtet der Balken unter PRESET.<br />
Durch Doppel-Klick auf PRESET lässt sich das abgespeicherte<br />
Preset mit dem veränderten Preset vergleichen.<br />
• INS-FX: Leuchtet, falls einer der PRE-Effekte im<br />
Preset aktiviert ist. Wird ein Wah Wah-Effekt<br />
benutzt, leuchtet der Balken unter INS-FX auf,<br />
sobald das Wah Wah über das entsprechende<br />
Pedal zugeschaltet wird. (siehe dazu 7.1 WAH<br />
WAH)<br />
• DELAY: Leuchtet, falls einer der Delay-Effekte im<br />
Preset aktiviert ist. Wird der Effekt PRE geschaltet,<br />
leuchtet unter DELAY ein Balken.<br />
• MOD FX: Leuchtet, falls einer der Modulations-<br />
Effekte im Preset aktiviert ist. Wird der Effekt PRE<br />
geschaltet, leuchtet der Balken unter MOD FX.<br />
• REVERB: Leuchtet, falls einer der Hall-Effekte im<br />
Preset aktiviert ist. Wird der Effekt PRE geschaltet,<br />
leuchtet der Balken unter REVERB.<br />
Wird nun z.B. der Parameter BASS des aktiven<br />
Presets verändert (W), erscheint in der unteren<br />
Textzeile BASS sowie der abgespeicherte Wert. Die<br />
große Ziffernanzeige rechts zeigt den aktuellen<br />
Wert an. Der Balken unter PRESET leuchtet auf.<br />
Hinweis: Um das abgespeicherte PRESET mit der<br />
aktuellen Einstellung zu vergleichen, geben Sie<br />
einen Doppelklick auf sPreset. Der Balken unter<br />
PRESET erlischt und das zuletzt gespeicherte Preset<br />
wird aufgerufen. Ein erneuter Doppelklick schaltet<br />
wieder zurück auf die von Ihnen zuvor vorgenommenen<br />
Einstellungen (der Balken unter PRESET<br />
leuchtet wieder auf).<br />
zenTera - MANUAL<br />
INPUT GAIN AMP TYPE BASS MID TREBLE PRESENCE VOLUME PRESET MOD FX DELAY REVERB TYPE PARA 1 PARA 2 MASTER<br />
POWER<br />
4.1 REGLER-FUNKTIONEN<br />
INPUT:<br />
Eingangsbuchse zum Anschluss der E-Gitarre oder<br />
Akustikgitarre mit Tonabnehmer (akzeptiert alle<br />
Eingangspegel). Zur Anpassung der Eingangsempfindlichkeit<br />
steht die Funktion INPUT SENSITIVITY<br />
zur Verfügung. Bei vielen Amps gibt es Eingänge<br />
mit hoher und niedriger Eingangsempfindlichkeit.<br />
Beim zenTera ® ist dies in einer analogen Stufe vor<br />
dem Eingang<strong>sw</strong>andler umschaltbar.<br />
Durch Doppelklickens von AMP TYPE können Sie<br />
entweder HI oder (nochmaliges Doppelklicken)<br />
LOW als Eingangsempfindlichkeit einstellen. Beide<br />
Varianten haben ihren ganz eigenen Charakter.<br />
Durch etwas Probieren werden Sie schnell herausfinden,<br />
für welche Sounds Sie welche Alternative<br />
bevorzugen. Bei Tonabnehmern mit hohem<br />
Output ist LOW oft zu favorisieren.<br />
GAIN:<br />
Übernimmt in Abhängigkeit vom ausgewählten<br />
Amp Type unterschiedliche Funktionen: Einige<br />
Original-Modelle (BLACK FACE, TWEED DELUXE…)<br />
haben keinen Master-Volume. Bei diesen ersetzt<br />
GAIN den Volume-Regler. Bei Modellen, die<br />
sowohl über Gain als auch Master verfügen,<br />
entspricht sowohl GAIN als auch MASTER den<br />
jeweiligen Funktionen des Originals.<br />
TUNER STORE<br />
AMP TYPE:<br />
Dieser Regler übernimmt vier Funktionen:<br />
s Durch Doppelklicken die Au<strong>sw</strong>ahl der<br />
Eingangsempfindlichkeit.<br />
W Durch Drehen wählen Sie zwischen den Amp-<br />
Types aus (siehe 5. AMP-MODELLE).<br />
r Durch Antippen gelangen Sie in den PRE<br />
EFFECT MODE (siehe unter 4.3 PRE EFFECT<br />
MODE)<br />
t Durch Gedrückthalten schalten Sie die Pre-<br />
Effekte auf BYPASS PREEFFECT.<br />
BASS, MID, TREBLE, PRESENCE:<br />
Diese Regler arbeiten in Abhängigkeit vom ausgewählten<br />
Amp-Type, exakt wie die Regler des<br />
Originals. Da einige Originale nicht über einen<br />
Presence Regler oder einen 3-Band EQ verfügen,<br />
bietet der zenTera ® in diesen Fällen Spezialbelegungen<br />
der Potis, so daß alle Regelmöglichkeiten<br />
des Originals gegeben sind (nähere<br />
Erläuterungen hierzu unter 5. AMP-MODELLE).<br />
VOLUME:<br />
Regelt die Lautstärke des Presets. Im Gegensatz<br />
zum MASTER-Regler ist dieser Wert abspeicherbar.<br />
Somit können alle Presets in der Lautstärke<br />
abgeglichen werden.<br />
31<br />
DEUTSCH
32<br />
zenTera - MANUAL<br />
PRESET:<br />
W Durch Drehen wählen Sie unter den 128 möglichen<br />
Presets aus. Diese werden beim<br />
Anwählen sofort aktiv und müssen nicht gesondert<br />
bestätigt werden. Die Speicherplätze 1 bis<br />
100 sind für die User-Presets vorgesehen und<br />
können sowohl verändert als auch abgespeichert<br />
werden. Werden Veränderungen an den<br />
Einstellungen des Presets vorgenommen,<br />
erscheint ein Balken unter PRESET. Bei den<br />
Speicherplätzen 101 bis 128 (Display-Anzeige P1<br />
bis P28) handelt es sich um kopierbare, indes<br />
nicht um überschreibbare Factory-Presets.<br />
s Durch Doppelklick auf PRESET aktivieren Sie die<br />
COMPARE-Funktion. So können Sie ein abgespeichertes<br />
Preset mit der aktuellen Einstellung<br />
vergleichen. Ein erneuter Doppelklick bringt Sie<br />
wieder zurück. Durch längeres Drücken haben<br />
Sie die Möglichkeit, den GLOBAL EQ ein- oder<br />
auszuschalten: ON/OFF (nähere Erläuterungen<br />
zum GLOBAL EQ finden Sie unter Punkt 7.2).<br />
MOD FX: Dieser Regler hat drei Funktionen.<br />
r Durch Antippen aktivieren Sie den Effekt-Block<br />
(der somit ebenfalls aktivierte Effekt ist im<br />
Auslieferungszustand POST geschaltet, näheres<br />
unter Punkt 3.) ohne Beeinflussung des<br />
Effektpegels.<br />
W Durch Drehen aktivieren Sie den Effekt-Block<br />
UND regeln den Pegel des zugemischten<br />
Effektes, genau so wie mit einem Mix-Regler<br />
eines parallelen Effektweges.<br />
t Durch längeres Drücken schalten Sie den Effekt<br />
auf BYPASS MODULATION. Somit haben Sie die<br />
Möglichkeit, den Sound mit und ohne Effekt zu<br />
vergleichen. Ein nochmaliges Antippen schaltet<br />
den Effekt wieder hinzu.<br />
Tabelle der Modulationseffekte MOD FX:<br />
• CHORUS M(ono)<br />
• CHORUS ST(ereo)<br />
• FLANGER 1 M(ono)<br />
• FLANGER 1 ST(ereo)<br />
• FLANGER 2 M(ono)<br />
• FLANGER 2 ST(ereo)<br />
• PHASER<br />
• PHASER XL<br />
Die Au<strong>sw</strong>ahl der einzelnen Effekte wird mit TYPE<br />
getroffen (siehe TYPE).<br />
DELAY: Dieser Regler hat ebenfalls drei Funktionen.<br />
r Durch Antippen aktivieren Sie den Effekt-Block<br />
(der somit ebenfalls aktivierte Effekt ist im<br />
Auslieferungszustand POST geschaltet, näheres<br />
unter Punkt 3.) ohne Beeinflussung des<br />
Effektpegels.<br />
W Durch Drehen aktivieren Sie den Effekt-Block<br />
UND regeln den Pegel des zugemischten<br />
Effektes, genau so wie mit einem Mix-Regler<br />
eines parallelen Effektweges.<br />
t Durch längeres Drücken schalten Sie den Effekt<br />
auf BYPASS DELAY. Somit haben Sie die<br />
Möglichkeit, den Sound mit und ohne Effekt zu<br />
vergleichen. Ein nochmaliges Antippen schaltet<br />
den Effekt wieder hinzu.<br />
Tabelle der DELAY-Effekte:<br />
• ECHO<br />
• PINGPONG<br />
• TAPE ECHO<br />
• TAPE HALLO<br />
• TAPE MULTI<br />
• HOLD ECHO<br />
• HOLDPINGPONG<br />
• HOLD TAPE<br />
Die Au<strong>sw</strong>ahl der einzelnen Effekte wird mit TYPE<br />
getroffen (siehe TYPE).<br />
REVERB: Auch dieser Regler übt drei Funktionen<br />
aus.<br />
r Durch Antippen aktivieren Sie den Effekt-Block<br />
(der somit ebenfalls aktivierte Effekt ist im<br />
Auslieferungszustand POST geschaltet, näheres<br />
unter Punkt 3.) ohne Beeinflussung des<br />
Effektpegels.<br />
zenTera - MANUAL<br />
W Durch Drehen aktivieren Sie den Effekt-Block<br />
UND regeln den Pegel des zugemischten<br />
Effektes, genau so wie mit einem Mix-Regler<br />
eines parallelen Effektweges.<br />
t Durch längeres Drücken schalten Sie den Effekt<br />
auf BYPASS REVERB. Somit haben Sie die<br />
Möglichkeit, den Sound mit und ohne Effekt zu<br />
vergleichen. Ein nochmaliges Antippen schaltet<br />
den Effekt wieder hinzu.<br />
Tabelle der REVERB-Effekte:<br />
• HALL REV<br />
• SPRING REV<br />
• GARAGE REV<br />
• STAGE REV<br />
• SMALL REV<br />
• BRIGHT REV<br />
• NORMAL REV<br />
• WARM REV<br />
Die Au<strong>sw</strong>ahl der einzelnen Effekte wird mit TYPE<br />
getroffen (siehe TYPE).<br />
Hinweis: Die einzelnen Effekte werden auch dann<br />
auf BYPASS gesetzt, wenn Sie die Regler MOD FX,<br />
DELAY bzw. REVERB auf Linksanschlag drehen.<br />
TYPE: Auch dieser Regler deckt drei Funktionen ab.<br />
W Durch Drehen des Reglers wählen Sie die einzelnen<br />
Effekte der Effekt-Blöcke MOD FX, DELAY<br />
und REVERB an.<br />
r Durch Antippen schalten Sie den Effekt PRE<br />
(wie einen Bodeneffekt vor den Eingang). Im<br />
Display wird dies dadurch angezeigt, dass unter<br />
DELAY, MOD FX bzw. REVERB ein Balken aufleuchtet.<br />
Nochmaliges Antippen schaltet den<br />
Effekt POST, also vor die Endstufe.<br />
Im Display wird der Balken wieder<br />
ausgeblendet. Beide Varianten<br />
haben ihren ganz eigenen Klangcharakter. So<br />
durchläuft z.B. ein Pre-Effekt sämtliche Amp-<br />
Sektoren, während ein Post-Effekt erst kurz vor<br />
dem Ende der Signalkette zugemischt wird.<br />
Auch hier sollten Sie also über Probieren herausfinden,<br />
in welchen Fällen Sie die eine oder<br />
andere Alternative bevorzugen.<br />
s Mit Doppelklick auf TYPE aktivieren Sie den Wah<br />
Wah (siehe Punkt 7.1). Wenn Sie danach den<br />
TYPE-Regler drehen, können Sie zwischen FAT<br />
WAH und CRY WAH (End 60er Vox Wah) au<strong>sw</strong>ählen.<br />
Mit PARA 1 oder PARA 2 können Sie<br />
beide Wah Wah aktivieren - ON (ein Balken<br />
unter INS-FX erscheint im Display) oder deaktivieren<br />
- OFF. (siehe Punkt 7.1 - Abspeichern des<br />
Wah Wah beim Presetwechsel)<br />
Hinweis: Der TYPE-Regler reagiert nur dann, wenn<br />
zuvor ein Effekt-Block aktiviert wurde.<br />
PARA 1 und PARA 2: Beide Regler üben, neben<br />
anderen Funktionen Folgende gemeinsam aus:<br />
W Durch Drehen regeln Sie die Parameter (siehe<br />
Beispiel-Tabelle im Anschluss dieses Kapitels zu<br />
den Effekten MOD FX, DELAY und REVERB) der<br />
von Ihnen ausgewählten Effekte.<br />
r Durch Antippen schalten Sie den aktuellen<br />
Wert des Parameters ins Display, ohne ihn<br />
dabei zu verändern.<br />
s PARA 1 hat noch eine weitere Funktion: An den<br />
zenTera ® kann ein handelsübliches Sustain-<br />
Pedal zum Schalten der Presets angeschlossen<br />
werden (vgl. Anschlüsse auf der Rückseite<br />
FOOTSWITCH). Um zwischen zwei Presets hin<br />
und her zu schalten, muss eins der beiden<br />
Presets „markiert“ werden. Dies geschieht<br />
durch Doppelklicken von PARA 1. Lesen Sie<br />
hierzu bitte unter 7.5 FOOTSWITCH.<br />
s Ein Doppelklick auf PARA 2 aktiviert den<br />
Recording Out. Jetzt kann durch Drehen von<br />
PARA 1 die PRESENCE und mit PARA 2 die<br />
Lautstärke für das aktive Preset eingestellt<br />
werden.<br />
33<br />
DEUTSCH
34<br />
zenTera - MANUAL<br />
MASTER:<br />
W Regelt die Endstufenlautstärke. Dieser Regler<br />
wirkt sich generell auf alle Presets aus und ist<br />
nicht abspeicherbar.<br />
TUNER: Belegt drei Funktionen:<br />
r Durch Antippen aktivieren Sie das eingebaute<br />
Stimmgerät. Eine umfangreiche Beschreibung<br />
dieser Funktion finden Sie unter 7.3 TUNER.<br />
t Durch längeres Drücken gelangen Sie ins<br />
System-Menü (siehe unter 8.0).<br />
r Durch 1x bzw. 2x Antippen von TUNER können<br />
Sie jederzeit aus allen Funktionen und Menüs in<br />
den Grundzustand zurückkehren.<br />
STORE: Dient zum Abspeichern von Preset-<br />
Einstellungen (siehe unter 7.4 STORE).<br />
TAP: Taster zum manuellen Synchronisieren des<br />
Delay-Effektes mit dem Metrum eines Titels. Tippen<br />
Sie mit TAP das gewünschte Tempo ein. Der<br />
zenTera ® misst die Zeit zwischen den Eingaben und<br />
synchronisiert das Delay. TAP funktioniert selbstverständlich<br />
nur dann, wenn ein Delay-Effekt aktiv ist<br />
(zur Aktivierung siehe oben unter MOD FX, DELAY,<br />
REVERB.). Wenn ein Hold Delay aktiviert ist, dient<br />
die TAP-Funktion zur Aufnahme von Loops. Mehr zu<br />
dieser Loop-Funktion finden Sie unter 7.6 TAP.<br />
4.2 EFFEKTE<br />
Der zenTera ® bietet Ihnen eine breite Au<strong>sw</strong>ahl der<br />
am meisten benutzten Gitarreneffekte. Neben<br />
den gängigen Hall-, Delay- und Modulations-<br />
Effekten beinhaltet das Effekte-Archiv auch<br />
Emulationen klassischer "Bodentreter" wie z.B. Tube<br />
Screamer, Wah Wah, Fuzz und Vintage Effektgeräte<br />
(z.B. Bandechos, Federhall).<br />
4.3 PRE EFFECT MODE<br />
In diesem Mode stehen Ihnen die Effekte zur<br />
Verfügung, die in der nachfolgend aufgeführten<br />
Tabelle aufgelistet sind (Tabelle INS-FX ).<br />
4.4 BEISPIEL-TABELLE ZU DEN<br />
INS FX<br />
TYPE PARA 1 PARA 2<br />
Fix Wah Frequency 0.23 - 1.55 - -<br />
Fix Wah 2 Frequency 0.50 - 2.20 - -<br />
Mod Wah Rate 0.0 - 10.0 Intensity 0 - 100<br />
Mod Wah 2 Rate 0.0 - 10.0 Intensity 0 - 100<br />
Comp Short Make Up Gain 0.0 - 15.0 Intensity 0 - 100<br />
Comp Medium Make Up Gain 0.0 - 15.0 Intensity 0 - 100<br />
Comp Long Make Up Gain 0.0 - 15.0 Intensity 0 - 100<br />
Tube Scream Gain 0.0 - 10.0 Level 0.0 - 10.0<br />
Fuzz Gain 0.0 - 10.0 Level 0.0 - 10.0<br />
Mid Boost Frequency 0.3 - 1.1 Boost 0.0 - 12.0<br />
Durch Antippen von AMP TYPE aktivieren Sie diesen<br />
Effekt-Block. Eine Au<strong>sw</strong>ahl der einzelnen<br />
Effekte geschieht durch Drehen von TYPE, wobei<br />
die Effekt-Parameter wiederum mit PARA 1 und<br />
PARA 2 eingestellt<br />
werden.<br />
Durch längeres<br />
Drücken von<br />
AMP TYPE schalten Sie den PRE EFFECT MODE auf<br />
BYPASS (siehe auch AMP TYPE). So können Sie den<br />
Sound mit und ohne Effekt vergleichen. Möchten<br />
Sie ein Expression-Pedal (siehe unter FOOT PEDAL)<br />
für Wah Wah-Effekte benutzen, so müssen Sie für<br />
die entsprechenden Presets mit TYPE entweder FAT<br />
WAH oder CRY WAH au<strong>sw</strong>ählen.<br />
• FIX WAH verwendet den normalen durchstimmbaren<br />
Filter eines Wah Wah. Über PARA 1<br />
lassen sich dessen Filter-Frequenzen bestimmen.<br />
• MOD WAH ist eine automatische Variante eines<br />
Wah Wah. Mit PARA 1 lässt sich die<br />
Modulationsgeschwindigkeit einstellen.<br />
• COMP SHORT/MEDIUM und LONG: drei<br />
Kompressoren mit verschiedenen Attack-Zeiten,<br />
eben Short, Medium, und Long<br />
zenTera - MANUAL<br />
TUBE SCREAM Ist ein Modell des legendären<br />
Ibanez ® Tube Screamer TS 808<br />
FUZZ: Modell eines beliebten Vintage Verzerrers.<br />
Hinweis: Im Gegensatz zu den übrigen Effekten<br />
der Effekt-Sektion können diese nicht POST<br />
geschaltet werden. Sie sind ausschließlich als PRE-<br />
Effekt geschaltet, d.h. vor dem INPUT, wie es in<br />
einem analogen Setup üblich ist.<br />
4.5 BEISPIEL-TABELLEN ZU DEN<br />
EFFEKTEN MOD FX, DELAY<br />
UND REVERB<br />
MOD FX<br />
TYPE PARA 1 PARA 2<br />
Chorus M(ono) Rate 0.1 - 10.0 Depth 0 - 100<br />
Chorus S(tereo) Rate 0.1 - 10.0 Depth 0 - 100<br />
Flanger 1 M(ono) Rate 0.1 - 10.0 Intensity 0 - 100<br />
Flanger 1 S(tereo)Rate 0.1 - 10.0 Intensity 0 - 100<br />
Flanger 2 M(ono) Rate 0.0 - 10.0 Intensity 0 - 100<br />
Flanger 2 S(tereo)Rate 0.0 - 10.0 Intensity 0 - 100<br />
Phaser Rate 0.1 - 10.0 Colour 0 - 100<br />
Phaser XL Rate 0.1 - 10.0 Colour 0 - 100<br />
DELAY<br />
TYPE PARA 1 PARA 2<br />
Echo Time 10 ms - 2 s Feedback 0 - 100<br />
Ping Pong Time 10 ms - 2 s Feedback 0 - 100<br />
Tape Echo Time 10 ms - 2 s Feedback 0 - 100<br />
Tape Hallo Time 10 ms - 2 s Feedback 0 - 100<br />
Tape Multi Time 10 ms - 2 s Feedback 0 - 100<br />
Hold Echo >>PLEASE USE TAP BUTTON>PLEASE USE TAP BUTTON>PLEASE USE TAP BUTTON
36<br />
zenTera - MANUAL<br />
5. AMP-MODELLE<br />
Beim zenTera ® können Sie durch Drehen des AMP<br />
TYPE-Reglers zwischen 17 verschiedenen Amp-<br />
Modellen au<strong>sw</strong>ählen (im Folgenden Amp-Types<br />
genannt). Jeder einzelne Amp-Type besitzt einen<br />
unverwechselbaren Charakter und deckt daher<br />
ganz bestimmte Musikstilrichtungen ab. Neben<br />
den begehrtesten Meilensteinen der Amp-<br />
Geschichte stecken im zenTera ® auch einige<br />
moderne Vertreter. Nachfolgend werden die<br />
einzelnen Amp-Types näher erläutert:<br />
BLACKFACE<br />
Der amerikanische Clean-Amp-Klassiker schlechthin.<br />
Diesen Amp kann man praktisch kaum zum<br />
Zerren bringen. Sein großer Sound und sein enormer<br />
Druck haben einige Stilrichtungen und<br />
Spielweisen entscheidend geprägt. Von Funky<br />
Rhythm über Jazz bis hin zum Blues und auch unter<br />
den Country Pickern hat er viele Liebhaber gefunden.<br />
Beachten Sie bitte, dass beim zenTera ® die<br />
BRIGHT-Funktion des Originals im GAIN-Regler integriert<br />
ist. So enthält der Sound bei GAIN-Settings<br />
bis 5.0 (12 Uhr Stellung) die BRIGHT-Charakteristik,<br />
bei Einstellungen darüber wird diese Funktion, wie<br />
beim Original, kontinuierlich ausgeblendet.<br />
TWEED DELUXE<br />
Der "kleine" Tweed Amp. Sein rauhbeinig schmutziger<br />
Charakter wird von echten Kennern<br />
geschätzt. Die puristisch simple Schaltung liefert<br />
erdige und fette Tweed Sounds, die ihresgleichen<br />
suchen. Das Original verfügt über nur einen<br />
Klangregler. Beim zenTera ® wurde seine Wirkung<strong>sw</strong>eise<br />
auf den 3-Band-EQ und den PRESENCE-<br />
Regler verteilt. Dadurch ergeben sich mehr (und<br />
musikalisch durchaus sinnvolle) Regelmöglichkeiten,<br />
ohne dass dabei die Grundcharakteristik<br />
verloren geht.<br />
TWEED 4x10 B(right Channel)<br />
Wir waren von dem Soundcharakter unseres<br />
original Bassman so begeistert, dass wir uns ein<br />
eigenes Modell für den Bright-Kanal gegönnt<br />
haben. Spritzig frische und perlige Cleansounds<br />
sind ebenso wie bissige, aber dennoch cremige<br />
Distortionsounds seine absolute Stärke. Besonders<br />
für Paula-Spieler der Blues- und Bluesrock-Fraktion.<br />
TWEED 4x10 N(ormal Channel)<br />
Der Bassman (ursprünglich als Bass Amp gebaut)<br />
wurde durch Blues- und Rockabilly-Gitarristen zu<br />
einer der Amp-Legenden schlechthin. Er ist einer<br />
der vielseitigsten Amps überhaupt, mit unerreichten<br />
Qualitäten für cleane und angezerrte Sounds<br />
à la Brian Setzer oder Eric Clapton.<br />
BRIT CLASS A<br />
Der klassische "Guitar-Pop" und Rock Amp. Man<br />
könnte auch sagen: der Songwriter-Amp. Viele<br />
berühmte Namen stehen hier auf der User-Liste.<br />
Seine Class-A-Endstufe mit EL84-Bestückung<br />
erzeugt die harmonischsten Verzerrungen aller<br />
Röhrenamps. Die flexible Klangregelung mit dem<br />
sog. CUT und „Top Boost“ lässt transparente seidige<br />
Klänge ebenso zu wie fette Leadsounds. Voll<br />
aufgedreht liefert er auch den Bluesrockern den<br />
richtigen Ton. Beim zenTera ® übernimmt der<br />
PRESENCE-Regler die CUT-Funktion. Die „Top<br />
Boost“-Schaltung ist im Mittenregler integriert, mit<br />
dem man zwischen „Normal“ und „Top Boost“<br />
überblenden kann.<br />
HOT CLASS A<br />
Dieses Modell liefert den beliebten “Lead Tone”<br />
der frühen Meister wie Ritchie Blackmore, Rory<br />
Gallagher, Brain May und einigen mehr. Ein 60er-<br />
Jahre “Range Master Treble Booster” in<br />
Verbindung mit diesem Amp ist die “Geheimwaffe”<br />
und Grundlage des begehrten Sounds<br />
dieser Weltklasse-Gitarristen.<br />
PLEXI 50<br />
Dieser britische EL34-Klassiker hat Musikgeschichte<br />
geschrieben. Viele Gitarren-Heroes der Rockmusik<br />
haben seine Vorzüge genutzt und ihrer Musik<br />
einen unverwechselbaren Soundstempel aufge-<br />
zenTera - MANUAL<br />
drückt. Der PLEXI reagiert sehr nuanciert auf die<br />
Stellung des Volume-Poti der Gitarre. Bei abgedrehtem<br />
Volume klingt er fett clean mit silbrigen<br />
Höhen. Dreht man den Volume auf, kommt das<br />
Vintage Rock-Brett voll durch.<br />
PLEXI 100<br />
Die 100 Watt-Variante des PLEXI, die Ende der 60er<br />
Jahre Furore machte, deren brachialer Ton aber<br />
auch im Hardrock der 70er und frühen 80er Jahre<br />
dominierte. Unzählige Rockproduktionen sind mit<br />
diesem Amp eingespielt worden. Er reagiert sehr<br />
dynamisch und liefert die ultimativ großen und bissigen<br />
Sounds, die den Inbegriff des Rock darstellen.<br />
Gleichzeitig war und ist dieser Klassiker im<br />
Original der Alptraum der gesamten Nachbarschaft,<br />
denn er klingt erst dann richtig, wenn er<br />
voll aufgerissen wird.<br />
HOT PLEXI<br />
In den 80ern wurde der Plexi 100 oft mit einer<br />
zusätzlichen Gainstufe aufgerüstet. Dadurch<br />
bekommt der Amp mehr Biss und Gain, wie es z.B.<br />
auf frühen Van Halen Platten zu hören ist.<br />
BRIT HIGH GAIN<br />
Als Weiterentwicklung der britischen Rock-Tradition<br />
liefert dieser Amp stabile Overdrive Lead- und<br />
Brettsounds mit Sustain und viel Druck. Die modern<br />
abgestimmte Klangregelung lässt viele Klangcharakteristiken<br />
zu. So erhält man bei abgesenkten<br />
Mitten ein gnadenloses Metal-Brett und bei<br />
angehobenen Höhen extremen Biss.<br />
BRIT ULTRA<br />
Ein zenTera ® -Special. Ein britischer 100 Watt-Amp<br />
wurde heiß getunt. Das Ergebnis ist der fetteste<br />
Leadsound, den man sich vorstellen kann.<br />
SOLO 100<br />
Der cremigste aller Lead Amps, berühmt für seinen<br />
singenden Charakter mit endlosem Sustain und<br />
hervorragenden Feedbackeigenschaften. Still got<br />
the blues! Gary Moore, Carlos Santana.<br />
RECTIFIED<br />
Dieser Amp zieht seine ureigene Charakteristik aus<br />
drei Gleichrichter-Röhren. Seine sprühende und<br />
äußerst heiße Verzerrung verleiht dem Sound einen<br />
frischen, dynamischen Ton. Der fette und böse<br />
Overdrive dieses Amps kann sehr vielseitig eingesetzt<br />
werden. So hat er z.B. im Grunge der 90er<br />
eine tragende Rolle gespielt und sich im Nu Metal<br />
als Standardwerkzeug etabliert. Darüber hinaus<br />
eignet er sich hervorragend für ausdrucksstarkes<br />
Solo-Spiel.<br />
WARP (Hughes & Kettner Warp 7, 2001)<br />
Unsere Version des 90er Nu Metal Sounds, noch<br />
“böser” und mit noch “mehr” von “allem”. Wie<br />
der “Brit Ultra Gain” geht dieser Sound extrem<br />
“gut von der Hand” und trägt den Gitarristen.<br />
ACOUSTIC (Hughes & Kettner Montana 1998)<br />
Das Montana-Modell ist speziell für Akustik-Gitarren<br />
mit Piezo-Tonabnehmern entwickelt. Dieses Modell<br />
nimmt dem Piezoklang die extreme Härte und<br />
bringt neben seidigen Höhen mehr Body und jede<br />
Menge Wärme in das Soundspektrum. Etwas Hall,<br />
und selten hat man sich mit einer Akustik-Gitarre<br />
auf der Bühne so wohl gefühlt.<br />
ATS CLEAN (Hughes & Kettner ATS 100, 1988)<br />
Unser erster 2-kanaliger Gitarrencombo wurde<br />
einer der Klassiker unter den cleanen Transistoramp<br />
Sounds. Geliebt von Jazz-Gitarristen für seine<br />
Ausgewogenheit und Wärme. Mit diesem Amp<br />
lassen sich auch hervorragend Pop-Gitarrensounds,<br />
angereichert mit Effekten, realisieren, so<br />
wie z.B bei Andy Summers (The Police).<br />
JC CLEAN (Roland ® Jazz Chorus)<br />
Der Klassiker aus den 80ern! Frisch, spritzig und<br />
transparent für präsente Clean Sounds. “Purple<br />
Rain” von Prince ist hier ein gutes Beispiel.<br />
37<br />
DEUTSCH
38<br />
zenTera - MANUAL<br />
6. RÜCKSEITE<br />
MAINS IN + VOLTAGE SELECTOR:<br />
REPLACE FUSES ONLY WITH SAME TYPE + RATING<br />
230 V~ = T <strong>2.5</strong> A<br />
SPEAKERS LEFT<br />
100 V~ = T 6.3 A<br />
MADE IN ST. WENDEL/GERMANY<br />
117 V~ = SB 5 A<br />
100 WATTS<br />
50 - 60 HZ<br />
EXTERN. INTERN.<br />
MAX. POWER CONSUMPTION 720 VA<br />
CAUTION!<br />
TO PREVENT THE RISK OF FIRE AND SHOCK<br />
HAZARD DON´T EXPOSETHIS APPLIANCE TO<br />
MOISTURE OR RAIN. DO NOT OPEN CASE;<br />
NO USER SERVICEABLE PARTS INSIDE.<br />
REFER SERVICING TO QUALIFIED SERVICE<br />
PERSONNEL.<br />
REAR PANEL AND VENTILATION OPENINGS<br />
MAY BECOME TOO HOT TO TOUCH!<br />
Ser. No.<br />
EXTERNAL SPEAKER MIN. 8 Ω<br />
INTERNAL SPEAKER MIN. 16 Ω<br />
MAINS IN: Netzbuchse für das mitgelieferte<br />
Netzkabel. Stellen Sie vor der Inbetriebnahme<br />
sicher, dass die vorhandene Netzspannung mit der<br />
auf dem Gerät angegebenen übereinstimmt. Bei<br />
der Netzbuchse befindet sich die Schublade mit<br />
den Netzsicherungen. Halten Sie beim Austausch<br />
defekter Sicherungen unbedingt den korrekten<br />
Wert ein (siehe 16. Technische Daten).<br />
SPEAKERS LEFT/RIGHT: Der zenTera ® verfügt über<br />
Stereo-Ausgänge für die internen Lautsprecher<br />
(Combo) sowie für den Anschluss von Zusatzboxen<br />
(Combo und Head). Beim Anschluss von Zusatzboxen<br />
ist darauf zu achten, dass die minimal zulässige<br />
Gesamtimpedanz von 6 Ohm (Combo)<br />
und 4 Ohm (Head) pro Kanal nicht unterschritten<br />
werden darf. D.h. Sie können beispiel<strong>sw</strong>eise zusätzlich<br />
zum internen Lautsprecher des Combo eine<br />
Box mit mindestens 8 Ohm anschließen. Entsprechend<br />
können Sie beim Head zwei 8 Ohm-<br />
Boxen betreiben.<br />
EFFECTS LOOP: Serieller Stereo/Stereo-Einschleifweg<br />
für den Anschluss externer Effektgeräte. Der<br />
EFFECTS LOOP liegt im Signalweg nach dem D/A-<br />
Wandler und vor dem MASTER.<br />
Hinweis: Die gesamte Klangqualität hängt von der<br />
Qualität des verwendeten Effektgerätes ab, da<br />
das Signal dieses seriell durchläuft.<br />
SEND: Verbinden Sie diese Buchsen mit dem<br />
Eingang Ihres Effektgerätes. Die SEND-Buchsen<br />
eignen sich auch als Line Out, z.B. für den<br />
Anschluss externer Endstufen, da das Signal hier<br />
ohne die Speaker-Simulation des RECORDING OUT<br />
ausgeführt wird.<br />
SPEAKERS RIGHT SERIAL EFFECTS LOOP<br />
100 WATTS<br />
RETURN<br />
SEND<br />
EXTERN. INTERN.<br />
LEFT RIGHT LEFT RIGHT<br />
EXTERNAL SPEAKER MIN. 8 Ω<br />
INTERNAL SPEAKER MIN. 16 Ω<br />
HEAD<br />
PHONES<br />
RECORDING OUT STAGE<br />
FOOT FOOT<br />
ANALOG DIGITAL<br />
BOARD<br />
SWITCH PEDAL<br />
LEFT RIGHT S/PDIF<br />
IN OUT THRU<br />
MIDI + STAGEBOARD PHANTOM POWER FUSE<br />
T 500 mA / SB 500 mA<br />
RETURN: Verbinden Sie den Ausgang Ihres Effektgerätes<br />
mit diesen Buchsen. An die RETURN-<br />
Buchsen können Sie auch externe Signalquellen<br />
anschließen. Beachten Sie jedoch, dass dabei der<br />
Signalweg der zenTera ® -Vorstufe unterbrochen<br />
wird. Eine gleichzeitige Wiedergabe der externen<br />
Signalquelle und des zenTera ® ist daher auf beiden<br />
Kanälen nicht möglich.<br />
Ein kleiner Trick: Falls Sie zu einem Backing Track<br />
üben möchten, verbinden Sie den CD-Player nur<br />
mit einer Seite des Effekt Return und regeln Sie die<br />
Playbacklautstärke am CD-Player. Falls Sie Presets<br />
mit Stereo-Effekten verwenden, müssen Sie den<br />
zenTera ® im System-Menü auf Mono stellen.<br />
HEADPHONES: Buchse zum Anschluss eines Kopfhörers.<br />
Die Lautstärke des Kopfhörerausgangs ist<br />
getrennt vom MASTER regelbar. Das Signal wird<br />
hier wie beim RECORDING OUT mit der Speaker-<br />
Simulation der Originalamps bearbeitet.<br />
Beachten Sie bitte, dass die internen Lautsprecher<br />
bei der Verwendung eines Kopfhörers nicht stumm<br />
geschaltet werden. Soll der zenTera ® beim Einsatz<br />
eines Kopfhörers nicht zu hören sein, müssen Sie<br />
den MASTER-Regler ganz abdrehen.<br />
RECORDING OUT: Analoger und digitaler Stereo-<br />
Ausgang für den Anschluss des zenTera ® an ein<br />
Mischpult oder einen PC. In der Sofware 2.3 wurde<br />
der RECORDING OUT erweitert. Es besteht nun die<br />
Möglichkeit, für jedes Preset die individuelle<br />
Lautstärke und PRESENCE zu programmieren und<br />
abzuspeichern.<br />
Hinweis: Beim Live-Einsatz kann es durchaus<br />
sinnvoll sein, über den RECORDING OUT ein<br />
separates Signal zur PA zu senden.<br />
T : UP / TOGGLE<br />
R : DOWN<br />
T : + 5 V / R : CV<br />
S: GROUND<br />
zenTera - MANUAL<br />
• Der EFFECTS LOOP liegt nicht auf dem<br />
RECORDING OUT. Somit kann der Gitarrist seinem<br />
Sound z.B. weitere Effekte hinzufügen. Damit bleibt<br />
es dem F(ront)O(f)H(ouse)-Mischer freigestellt, das<br />
Gitarrensignal mit eigenen Effekten in den<br />
Gesamtsound einzufügen.<br />
ANALOG LEFT/RIGHT: Sendet das RECORDING<br />
OUT-Signal mit Line Pegel und integrierter Speaker-<br />
Simulation der Originalamps.<br />
DIGITAL S/PDIF: Die digitale Variante des<br />
RECORDING OUT (24 Bit; 44,1 kHz Samplingrate).<br />
STAGEBOARD: Buchse zum Anschluss des<br />
optionalen Hughes & Kettner ® Z-Boards.<br />
Hinweis: Dies ist keine Schnittstelle für den<br />
Anschluss eines PC.<br />
MIDI IN/OUT/THRU: Standard MIDI Trio. Anschluss für<br />
ein Standard MIDI-Board und Schnittstelle für das<br />
Überspielen von Software-Updates bzw. für die<br />
Kommunikation mit dem im Lieferumfang enthaltenen<br />
zenTera ® SoundDiver. Die MIDI IN-Buchse<br />
ist mit einer separat abgesicherten Phantomspeisung<br />
ausgestattet, mit der externe MIDI-<br />
Pedale vom zenTera ® mit der nötigen<br />
Versorgungsspannung versorgt werden können.<br />
4<br />
1<br />
6<br />
2<br />
5<br />
3<br />
7<br />
Pin Out des Sub-D Steckverbinders<br />
1. MIDI Out + (current source)<br />
2. n.c.<br />
3. MIDI Out – (current sink)<br />
4. MIDI In + (current source)<br />
5. MIDI In – (current sink)<br />
6. Phantom Power (nicht stabilisiert,<br />
+11V DC/ max. 600mA)<br />
7. Phantom Power – negativ ( 0V )<br />
FOOTSWITCH: Stereo-Buchse zum Anschluss eines<br />
1-fach oder 2-fach Fußschalters. Mit diesem können<br />
Sie die Presets aufwärts (UP) oder abwärts<br />
(DOWN) schalten, oder auch zwischen zwei<br />
Presets hin und her schalten (TOGGLE). Für letztere<br />
Alternative muss einem der beiden Presets ein<br />
Merker zugewiesen werden (siehe unter 7.5<br />
FOOTSWITCH). Der zenTera ® erkennt beim<br />
Einschalten die Polarität (1-fach oder 2-fach) des<br />
angeschlossenen Fußschalters.<br />
FOOT PEDAL: Stereo-Buchse zum Anschluss eines<br />
Expression-Pedals für VOLUME oder WAH WAH. Als<br />
Standard ist grundsätzlich Volume definiert, es sei<br />
denn, Sie haben für das entsprechende Preset im<br />
WAH WAH MODE einen Wah Wah-Effekt eingestellt<br />
(siehe unter 7.1).<br />
39<br />
DEUTSCH
40<br />
zenTera - MANUAL<br />
7. BESONDERE FUNKTIONEN<br />
7.1 WAH WAH<br />
Dem zenTera ® -User stehen zwei verschiedene<br />
Wah-Wah-Typen zur Verfügung:<br />
• FAT WAH: Modernes Wah-Wah mit mehr<br />
Bassanteilen<br />
• CRY WAH: Original 60er Jahre Vox ® Wah-Wah<br />
(Cry Baby)<br />
Das Wah Wah aktivieren Sie mit einem Doppelklick<br />
auf TYPE. Wählen Sie durch Drehen des TYPE-<br />
Reglers eines der Wah-Wah-Typen aus. Durch<br />
Drücken des PARA 1-Reglers gelangen Sie zu den<br />
Wah-Wah-Einstellungen.<br />
<strong>Manual</strong> / Preset Mode<br />
Sie können beim zenTera ® zwischen zwei verschieden<br />
Wah-Wah-„Arbeit<strong>sw</strong>eisen“ wählen:<br />
• <strong>Manual</strong> Mode: Bei aktiviertem Wah Wah bleibt<br />
das Wah-Wah beim Presetwechsel an (So wie<br />
sich ein Wah-Wah in einem klassischen, analogen<br />
Setup verhalten würde).<br />
• Preset Mode: Hierbei wird beim Presetwechsel<br />
das Wah-Wah automatisch ein- oder ausgeschaltet.<br />
Im Preset Mode kann durch Einstellen<br />
mit dem Regler PARA 1 der Zustand des Wah<br />
Wah beim Abrufen des Presets bestimmt werden<br />
(ON/OFF).<br />
Hinweis: Abspeichern nicht vergessen.<br />
7.2 GLOBAL EQ<br />
Falls Sie Ihren zenTera ® an wechselnden Orten im<br />
Einsatz haben, kann es hin und wieder notwendig<br />
sein, ihn an die jeweilige räumliche Situation anzupassen<br />
(Beispiel: Absenken der Bässe auf kleineren<br />
Club-Bühnen). Mit dem GLOBAL EQ können Sie<br />
diese Anpassung gezielt vornehmen, ohne die<br />
Einstellungen sämtlicher Presets ändern zu müssen.<br />
Zur Aktivierung des GLOBAL EQ halten Sie den<br />
PRESET-Regler länger gedrückt. Im Display<br />
erscheint die Anzeige GLOBAL EQ ON bzw. OFF.<br />
Falls OFF angezeigt wird, PRESET nochmals länger<br />
drücken. Der EQ ist nun aktiviert und die Regler<br />
BASS, MID, TREBLE und PRESENCE bedienen nun<br />
den Global EQ. Mit BASS werden die Bässe, mit<br />
MID die unteren Mitten, mit TREBLE obere Mitten<br />
und mit PRESENCE die Höhen geregelt. Durch<br />
ON/OFF-Schalten des GLOBAL EQ (Preset) können<br />
Sie überprüfen, wie sich die Veränderungen auf<br />
das Soundverhalten au<strong>sw</strong>irken. Wenn Sie mit der<br />
Abstimmung zufrieden sind, belassen Sie den GLO-<br />
BAL EQ in der ON-Einstellung und verlassen das<br />
Menü durch kurzes Antippen von TUNER.<br />
Hinweis: Falls der GLOBAL EQ vor dem Ausschalten<br />
noch ON geschaltet ist, wird Ihnen dieser Zustand<br />
beim nächsten Einschalten angezeigt. Im Display<br />
blinkt dann ca. 8 Sekunden lang die Anzeige<br />
GLOBAL EQ auf. Damit werden Sie daran erinnert,<br />
daß der GLOBAL EQ noch aktiv ist.<br />
7.3 TUNER<br />
Durch Antippen von TUNER aktivieren Sie das integrierte<br />
Stimmgerät. Im Display erscheint in der<br />
ersten Zeile TUNER. Die große Ziffer zeigt Ihnen<br />
beim Stimmvorgang an, ob die Saite zu hoch (+),<br />
zu tief (-) oder genau richtig gestimmt ist (OK). Dies<br />
können Sie im übrigen auch an der Lichtlaufleiste<br />
unten im Display erkennen. In der zweiten Zeile<br />
werden Ihnen verschiedene Werte angezeigt, die<br />
hier näher erläutert werden sollen:<br />
1) Am Anfang der Zeile steht die gewählte<br />
Centerfrequenz des Stimmtons A. Diese können<br />
Sie mit PARA 1 von 435 Hz bis 445 Hz kalibrieren.<br />
zenTera - MANUAL<br />
2) Sie können au<strong>sw</strong>ählen, ob der zenTera ® beim<br />
Stimmen stumm geschaltet werden soll. Mit<br />
PARA 2 können Sie die Lautstärke während des<br />
Stimmvorgangs voreinstellen: M = muted, 1, 2 ,3<br />
= kennzeichnen drei verschiedene Lautstärkeabstufungen.<br />
Die entsprechende Einstellung<br />
wird Ihnen im Display hinter der Centerfrequenz<br />
angezeigt.<br />
3) Am Ende der zweiten Display-Zeile wird Ihnen<br />
die Tonhöhe der gerade angeschlagenen Saite<br />
angezeigt.<br />
7.4 STORE<br />
Zum Abspeichern von Preset-Einstellungen tippen<br />
Sie STORE an. Die Anzeige im Display blinkt.<br />
Wählen Sie jetzt mit dem PRESET-Regler den<br />
Speicherplatz für das Preset aus. Um dem Preset<br />
einen Namen zu geben, bewegen Sie mit PARA 1<br />
den Cursor und wählen mit PARA 2 die gewünschten<br />
Buchstaben, Zahlen oder Zeichen aus dem<br />
Zeichensatz aus. Wenn Sie PARA 2 nach der<br />
Au<strong>sw</strong>ahl antippen, springt der Cursor automatisch<br />
an die nächste Stelle. Dadurch können Sie sich<br />
das Navigieren mit PARA 1 ersparen. Durch<br />
nochmaliges Antippen von STORE wird das Preset<br />
gespeichert. Sie können den Speichervorgang<br />
jederzeit abbrechen, indem Sie TUNER oder TAP<br />
antippen.<br />
HINWEIS:<br />
• Während des Speichervorgangs reagieren nur<br />
PRESET und die Regler PARA 1 und PARA 2. Alle<br />
anderen Regler sind deaktiviert.<br />
• STORE funktioniert nur, wenn im System-Menü<br />
„MEMORY PROTECTION“ auf OFF geschaltet ist<br />
(siehe Punkt 8.1).<br />
7.5 FOOTSWITCH<br />
Sie können jedes handelsübliche 1- oder 2-fach<br />
Fußschalter/Pedal an den zenTera ® anschließen.<br />
Mit diesem können Sie die Presets aufwärts (UP)<br />
oder abwärts (DOWN) schalten oder auch zwischen<br />
zwei Presets hin und her schalten (TOGGLE).<br />
Die entsprechende Voreinstellung UP/DOWN/<br />
TOGGLE nehmen Sie im System-Menü vor (siehe<br />
unter Punkt 10.). Drehen Sie TYPE, bis im Display<br />
FOOTSWITCH ASSIGN erscheint. Mit dem PARA 1<br />
oder PARA 2 Regler wählen Sie nun UP, DWN oder<br />
TGL aus. Der zenTera ® erkennt, welche Art von<br />
Schalter angeschlossen wurde.<br />
• Mit einem 1-fach Pedal können Sie die Presets<br />
lediglich aufwärts schalten.<br />
• Bei einem 2-fach Pedal schalten Sie mit einem<br />
Schalter aufwärts, mit dem anderen abwärts.<br />
• Um mit einem 1-fach oder 2-fach Pedal<br />
zwischen zwei Presets hin und her zu schalten,<br />
muss neben der Einstellung im System-Menü<br />
einem der beiden Presets ein Merker zugewiesen<br />
werden. Wählen Sie hierzu ein Preset aus und<br />
doppelklicken Sie auf PARA 1. Damit haben Sie<br />
den Merker gesetzt. Wählen Sie jetzt das zweite<br />
Preset an. Nun können Sie zwischen dem zuletzt<br />
gewählten Preset und dem mit dem Merker<br />
versehenen Preset hin und her schalten. Dies ist<br />
immer dann eine sinnvolle Option, wenn Sie nur<br />
zwei Sounds brauchen oder Ihr Z-Board mal<br />
vergessen haben.<br />
7.6 TAP<br />
Neben der Möglichkeit, die Delay-Zeit mit dem<br />
Metrum eines Stückes manuell zu synchronisieren,<br />
bietet Ihnen die TAP-Taste die Option, ein kurzes<br />
Sample selbstgespielter Gitarren-Patterns (bis zu 25<br />
Sec.) zu erstellen. Der zenTera ® gibt dieses Sample<br />
dann in sich wiederholenden Schleifen wieder, so<br />
dass Sie darüber eine Melodie oder ein anderes<br />
Riff spielen können. Grundsätzlich ist für diese<br />
Funktion der TAP Button am optional erhältlichen<br />
Z-Board besser geeignet als die TAP-Taste am Amp<br />
selbst, da die Taste während der Aufnahme des<br />
Samples gedrückt gehalten werden muss.<br />
41<br />
DEUTSCH
42<br />
zenTera - MANUAL<br />
Bei Verwendung des Z-Board hat man dann natürlich<br />
beide Hände zum Spielen frei. Zur Erstellung<br />
eines Samples gehen Sie wie folgt vor:<br />
• Tippen Sie den DELAY-Regler an. Sie befinden<br />
sich jetzt im Delay-Modus.<br />
• Wählen Sie dann durch Drehen des TYPE-Reglers<br />
einen der mit "HOLD" gekennzeichneten Delay-<br />
Effekte aus (vgl. Delay-Tabelle).<br />
Falls Ihr Sample die Wiederholungen in gleichbleibender<br />
Lautstärke durchlaufen soll, stellen Sie<br />
mit PARA 2 das Feedback auf 100 ein. Bei allen<br />
darunter liegenden Werten wird das Sample mit<br />
jeder Wiederholung leiser. Halten Sie jetzt TAP<br />
gedrückt, während Sie Ihr Sample einspielen. Beim<br />
Loslassen erstellt der zenTera ® einen Loop, der wiederholt<br />
abgespielt wird.<br />
DELAY-Tabelle<br />
TYPE PARA 1 PARA 2<br />
Hold Echo >>PLEASE USE TAP BUTTON>PLEASE USE TAP BUTTON>PLEASE USE TAP BUTTON
44<br />
zenTera - MANUAL<br />
9. MIDI<br />
Hinweis: MIDI ist ein Untermenü vom System-Menü.<br />
Die Presets des zenTera ® lassen sich über MIDI<br />
Program-Change-Befehle umschalten. Hierzu muss<br />
der Basiskanal des zenTera ® mit dem des angeschlossenen<br />
MIDI-Pedals übereinstimmen. Wah<br />
Wah und Volume können auch über MIDI<br />
gesteuert werden. Hierzu müssen von einem MIDI-<br />
Controller Control-Change-Daten CC 007 für<br />
Volume und CC 004 für Wah Wah gesendet werden.<br />
Der über PEDAL ASSIGN zugewiesene<br />
Parameter lässt sich ebenfalls mit CC 011 über<br />
MIDI steuern. Da sich jeder Parameter auf PEDAL<br />
ASSIGN zuweisen lässt, ist es möglich, pro Preset<br />
einen beliebigen Parameter über MIDI zu steuern<br />
(ausgenommen die Delay Times, da es hier zu<br />
Sound-Artefakten kommen würde). Außerdem<br />
können vom Z-Board MIDI-Nachrichten wie mit<br />
einem MIDI-Board als Continuous-Control-Daten<br />
gesendet werden. Damit lassen sich z.B externe<br />
MIDI-Geräte steuern.<br />
9.1 MIDI SETUP BASE CHANNEL<br />
Hier können Sie den MIDI-Basiskanal einstellen, auf<br />
dem mit dem zenTera ® kommuniziert werden kann.<br />
Drehen Sie TYPE, bis im Display MIDI SETUP BASE<br />
CHANNEL erscheint. Mit dem PARA 1 oder PARA 2<br />
Regler stellen Sie nun wahlweise den Kanal (1-16)<br />
ein.<br />
9.2 MIDI PROGCHG<br />
Dieses Untermenü beeinflusst das Verhalten des<br />
zenTera ® , ob und wie MIDI Program Change-<br />
Befehle (Presetwechsel) gesendet bzw. wie<br />
empfangene verarbeitet werden. Drehen Sie TYPE,<br />
bis MIDI PROGCHG im Display erscheint. Wählen<br />
Sie jetzt mit PARA 1 oder PARA 2 unter folgenden<br />
Optionen aus:<br />
• PROGCHG OFF: Es werden keine MIDI Program<br />
Changes gesendet, noch werden empfangene<br />
vom zenTera ® verarbeitet. Beispiel: Ein externes<br />
Effektgerät kann dann nicht via MIDI angesteuert<br />
werden. Über einen MIDI Switcher können<br />
keine Presets am zenTera ® geschaltet werden.<br />
• PROGCHG ONLY: Diese Option ist unter Software<br />
2.3 voreingestellt. MIDI Program Changes werden<br />
gesendet und empfangene werden verarbeitet.<br />
Die Sendung der Befehle erfolgt ohne<br />
„Bank Select“ Befehle, die bei der Version 2.3<br />
auch irrelevant sind.<br />
• PROGCHG CC00 und CC32: MIDI Program<br />
Changes werden mit „Bank Select“-Befehlen<br />
gesendet. Diese Option wird gebraucht, wenn<br />
der zenTera ® über ein zukünftiges Software<br />
Upgrade einmal mehr als 128 Speicherplätze<br />
bekommen soll.<br />
CNTCTRL OFF<br />
Daten werden weder gesendet noch empfangen.<br />
CNTCTRL RECV<br />
Nur per MIDI empfangene Daten werden verarbeitet.<br />
CNTCTRL SEND<br />
Z-Board löst CC 004/007/011 am MIDI OUT aus.<br />
CNTCTRL BOTH<br />
Kombination aus Send und Receive.<br />
9.3 MIDI SETUP DEVICE ID<br />
Falls Sie mehrere zenTera ® in einer MIDI-Kette<br />
anschließen und diese gezielt via MIDI SysEx<br />
ansprechen möchten oder müssen, wird hierzu<br />
nicht der MIDI Base Channel, sondern die MIDI<br />
Device ID verwendet. Dreehen Sie TYPE, bis MIDI<br />
SETUP DEVICE ID im Display steht und wählen Sie<br />
mit PARA 1 oder PARA 2 eine Device ID zwischen 1<br />
und 127 an (Standardwert = 1).<br />
9.4 MIDI SYSEX SEND<br />
In diesem Menü können Sie einstellen, ob der<br />
zenTera ® auf MIDI Requests mit der Sendung von<br />
SysEx-Daten (z.B. Presets, Systemeinstellungen)<br />
reagieren soll. Drehen Sie TYPE, bis im Display MIDI<br />
zenTera - MANUAL<br />
SYSEX SEND erscheint. Mit dem PARA 1 oder<br />
PARA 2-Regler stellen Sie nun YES oder NO ein.<br />
9.5 MIDI SYSEX RECEIVE<br />
Hier können Sie einstellen, ob der zenTera ®<br />
empfangene SysEx-Daten verarbeiten soll. Drehen<br />
Sie TYPE, bis im Display MIDI SYSEX RECEIVE<br />
erscheint. Mit dem PARA 1 oder PARA 2-Regler<br />
stellen Sie nun YES oder NO ein.<br />
9.6 MIDI DUMP<br />
Dieses Menü ermöglicht es Ihnen, Daten-Backups<br />
Ihrer Einstellungen auf einem externen Speichermedium<br />
wie z.B. Ihrem PC zu erstellen. Falls Sie<br />
beispiel<strong>sw</strong>eise in mehreren Bands spielen, hat dies<br />
den Vorteil, daß Sie die Datensätze je nach Bedarf<br />
aus Ihrem Archiv herunterladen können. Weiterhin<br />
können Sie über MIDI DUMP Presets mit anderen<br />
zenTera ® -Usern tauschen. Darüber hinaus haben<br />
Sie natürlich Datensicherheit für den Fall, dass Ihr<br />
zenTera ® einmal zur Reparatur muss und Sie ein<br />
Ersatzgerät benutzen möchten. Verbinden Sie die<br />
MIDI OUT-Buchse Ihres zenTera ® mit der MIDI IN-<br />
Buchse Ihres PC, MIDI File Player oder mit einem<br />
anderen zenTera ® . Drehen Sie TYPE, bis MIDI DUMP<br />
im Display erscheint. Wählen Sie mit PARA 1 oder<br />
PARA 2 aus, welche MIDI-Daten der zenTera ® senden<br />
soll. ACTIVE PRESET sendet das gerade aktive<br />
Preset, ALL PRESETS sendet alle Presets. Mit SYSTEM<br />
CONFIG senden Sie die Einstellungen des System-<br />
Menüs, mit MIDI MAP die Daten des Menüs MIDI<br />
MAPPING, und mit ALL senden Sie alle gespeicherten<br />
Daten. Durch Antippen von PARA 1 oder<br />
10. FOOTSWITCH ASSIGN<br />
Hinweis: FOOTSWITCH ASSIGN ist ein Untermenü<br />
vom System-Menü.<br />
Mit einem handelsüblichen 1-fach oder 2-fach<br />
Sustain-Pedal können Sie die Presets aufwärts (UP)<br />
oder abwärts (DOWN) schalten oder auch zwischen<br />
zwei Presets hin und her schalten (TOGGLE).<br />
PARA 2 werden die Daten abgeschickt. Zur korrekten<br />
Datenübertragung muss MIDI SYSEX SEND auf<br />
YES stehen. Bei Empfang aus einem anderen<br />
zenTera ® , PC o. ä. muss MIDI SYSEX RECEIVE ebenfalls<br />
auf YES stehen. Natürlich können die<br />
Einstellungen des zenTera ® auch per MIDI angefordert<br />
werden (REQUEST).<br />
9.7 MIDI IMPORT<br />
Alle 100 Presets von einem zenTera ® mit einer OS<br />
vor Version 2.3 können mit der MIDI IMPORT-<br />
Funktion in das 2.3-Format konvertiert werden.<br />
Dazu stellt man den empfangenden zenTera ® auf<br />
MIDI IMPORT. Nun kann auf dem sendenden<br />
zenTera ® ein manueller ALL PRESET DUMP durch<br />
Antippen von PARA 1 ausgelöst werden.<br />
9.8 MIDI MAPPING<br />
Falls Sie ein MIDI-Fußboard oder das Z-Board verwenden,<br />
können Sie in diesem Menü festlegen,<br />
welche Presets des zenTera ® durch einen Program<br />
Change-Befehl vom Fußboard geschaltet werden<br />
sollen. Dies macht vor allem dann Sinn, wenn Sie<br />
gleichzeitig Effektprogramme eines externen<br />
Effektgerätes per MIDI schalten wollen. Drehen Sie<br />
TYPE, bis MIDI MAPPING im Display steht. Durch<br />
Antippen von PARA 1 oder PARA 2 schalten Sie die<br />
Funktion ON oder OFF. Durch Drehen von PARA 1<br />
wählen Sie nun eine der Programm-Nummern<br />
Ihres MIDI-Fußboards an. Durch Drehen von<br />
PARA 2 ordnen Sie diesem Speicherplatz eines der<br />
128 Presets des zenTera ® zu.<br />
Die entsprechende Voreinstellung<br />
UP/DOWN/TGL/TAP nehmen Sie in diesem Menü<br />
vor. Drehen Sie TYPE, bis FOOTSWITCH ASSIGN im<br />
Display erscheint. Mit dem PARA 1 oder PARA 2-<br />
Regler wählen Sie nun UP, DWN oder TGL aus.<br />
45<br />
DEUTSCH
46<br />
zenTera - MANUAL<br />
11. VOLUME-PEDAL<br />
Hinweis: VOLUME PEDAL ist ein Untermenü vom<br />
System-Menü.<br />
In diesem Menü können Sie einstellen, an welcher<br />
Stelle im Signalweg ein angeschlossenes Volume<br />
Pedal bzw. das Volume-Pedal des optional erhältlichen<br />
Z-Boards zugreifen soll. Drehen Sie TYPE, bis<br />
VOLUME PEDAL im Display erscheint. Wählen Sie<br />
jetzt mit PARA 1 oder PARA 2 unter folgenden<br />
Optionen aus:<br />
• AMP VOLUME: Greift auf den Volume Regler der<br />
Amp-Sektion zu und regelt somit die Lautstärke<br />
vor der Effekt-Sektion. Bei einem Presetwechsel<br />
wird zuerst der im Preset programmierte Wert<br />
von Volume aktiviert. Eine Veränderung der<br />
Lautstärke erfolgt erst bei Betätigung des Pedals.<br />
• GLOBAL: Greift auf den Master-Regler zu und<br />
regelt somit die Gesamtlautstärke am Ausgang.<br />
Der „Pedalwert“ wird bei einem Presetwechsel<br />
direkt übernommen.<br />
• GLOBAL PRE FX: Arbeitet wie GLOBAL als Master-<br />
Regler, jedoch vor der Effekt-Sektion.<br />
11.1 VOLUME PEDAL RANGE<br />
MINIMUM / MAXIMUM<br />
Falls Sie ein Expression-Pedal an der rückseitigen<br />
Anschlussbuchse des zenTera ® angeschlossen<br />
haben, können Sie in diesen Untermenüs den<br />
gewünschten Arbeitsbereich für die Volume-<br />
Funktion des Pedals definieren. Gleiches gilt natürlich<br />
für das Volume-Pedal am optional erhältlichen<br />
Z-Board. Drehen Sie TYPE, bis das Menü im Display<br />
erscheint. Mit dem PARA 1 oder PARA 2-Regler<br />
wählen Sie nun Werte zwischen 0,0 und 9,9 aus.<br />
11.2 CV PED TYPE<br />
In diesem Menü können Sie einstellen, ob die<br />
Regelstrecke Ihres Fußpedals einen linearen oder<br />
logarithmischen Verlauf nehmen soll.<br />
• Linear = gleichmäßig ansteigende Lautstärke.<br />
• Logarithmisch = zunächst steil ansteigende,<br />
dann flacher werdende Lautstärkekurve.<br />
Drehen Sie TYPE, bis im Display CV PED TYPE<br />
erscheint. Mit PARA 1 oder PARA 2 wählen Sie nun<br />
LINEAR TYPE oder LOG TYPE aus.<br />
11.3 CV PED CALIB MIN/MAX<br />
Hier können Sie ein angeschlossenes Expression-<br />
Pedal kalibrieren. Drehen Sie TYPE, bis CV PED<br />
CALIB SET TO MIN im Display erscheint. Bewegen<br />
Sie jetzt Ihr Fußpedal zur minimalen Endposition<br />
(MIN) und bestätigen Sie durch Antippen von<br />
PARA 1 oder PARA 2. Das Menü springt jetzt automatisch<br />
auf CV PED CALIB SET TO MAX. Bewegen<br />
Sie Ihr Fußpedal auf die maximale Endposition des<br />
Regelweges und tippen Sie erneut auf PARA 1. Ihr<br />
Pedal ist nun kalibriert und einsatzbereit.<br />
11.4 Z-BOARD BANK CHANGE<br />
Hier definieren Sie, wie der zenTera ® auf Bank<br />
Change-Befehle vom Z-Board reagieren soll. Er<br />
kann einerseits direkt auf ein Preset der nächsten<br />
Bank zugreifen, d.h. dieses wäre mit dem Wechsel<br />
sofort aktiviert. Beachten Sie, dass das Z-Board<br />
dabei in 5er-Schritten weiterschaltet. Wenn Sie<br />
also z.B. gerade im Preset 23 sind, wird mit dem<br />
Bank Change automatisch Preset 28 aktiv. Falls<br />
diese Schaltung<strong>sw</strong>eise nicht gewünscht wird, ist<br />
andererseits auch ein reiner Bank-Change möglich.<br />
Dabei wird zunächst nur die nächste Bank<br />
angesteuert, ohne dass ein direkter Zugriff auf ein<br />
Preset erfolgt. Sie müssen ein Preset aus dieser<br />
Bank mit dem entsprechenden Schalter am Z-<br />
Board dann gesondert au<strong>sw</strong>ählen. Drehen Sie<br />
TYPE, bis das Menü im Display erscheint. Mit PARA<br />
1 können Sie jetzt DIR für die erste oder BNK für<br />
letztere Variante au<strong>sw</strong>ählen.<br />
Hinweis: Nähere Erläuterungen zur Funktion<strong>sw</strong>eise<br />
des Z-Boards entnehmen Sie bitte der Z-Board-<br />
Bedienungsanleitung.<br />
11.5 Z-BOARDCALIB<br />
Wie bereits oben beschrieben, können auch die<br />
Pedale am optionalen Z-Board kalibiriert werden.<br />
Gehen Sie dabei wie folgt vor: Drehen Sie TYPE, bis<br />
zenTera - MANUAL<br />
das Menü Z-BOARDCALIB SET WAH MIN im Display<br />
erscheint. Bewegen Sie jetzt das Wah-Wah-Pedal<br />
des Z-Boards zur minimalen Endposition und<br />
bestätigen Sie durch Antippen von PARA 1 oder<br />
PARA 2. Das Menü springt jetzt automatisch auf<br />
SET WAH MAX. Bewegen Sie Ihr Fußpedal auf die<br />
maximale Endposition des Regelweges und tippen<br />
Sie erneut auf PARA 1. Das Menü springt nun zur<br />
Kalibrierung des Volume-Pedals wiederum weiter<br />
auf SET VOLUME MIN. Das Kalibrier-Verfahren ist<br />
12. SOFTWARE-VERSION<br />
Hinweis: SOFTWARE-VERSION ist ein Untermenü<br />
vom System-Menü.<br />
Dieses Menü zeigt Ihnen die Software-Versionen<br />
der Einzelmodule Ihres zenTera ® . Drehen Sie TYPE,<br />
bis das Menü im Display erscheint.<br />
13. MY zenTera ®<br />
Hinweis: MY zerTera ® ist ein Untermenü vom<br />
System-Menü.<br />
Ab Version 2.3 verfügt jeder zenTera ® über eine<br />
eigene Identifikationsnummer (im System-Menü<br />
14. WARTUNG UND SERVICE<br />
Der zenTera ® ist wartungsfrei. Dennoch gibt es<br />
einige Grundregeln, deren Einhaltung die<br />
Lebensdauer Ihres Amps enorm verlängern:<br />
• Sorgen Sie immer für eine technisch einwandfreie<br />
Geräteperipherie! Defekte Boxenkabel (mit<br />
Kurzschluss/Wackelkontakt) sind mit Abstand die<br />
häufigste Ursache für Endstufenausfälle. Schlecht<br />
geschirmte Kabel führen immer wieder zu<br />
Brummproblemen.<br />
• Sorgen Sie stets für freie Luftzirkulation durch die<br />
Lüftungsschlitze Ihres Amps.<br />
• Vermeiden Sie in jedem Fall starke mechanische<br />
Erschütterungen, extreme Hitze, Eindringen von<br />
Staub und insbesondere Nässe.<br />
• Beachten Sie peinlich genau die Spezifikationen<br />
hier das gleiche wie beim Wah-Wah-Pedal:<br />
Bewegen Sie das Volume-Pedal zur minimalen<br />
Endposition und bestätigen Sie durch Antippen<br />
von PARA 1 oder PARA 2. Das Menü springt jetzt<br />
automatisch weiter auf SET VOLUME MAX.<br />
Bewegen Sie Ihr Pedal auf die maximale<br />
Endposition des Regelweges und tippen Sie erneut<br />
auf PARA 1.<br />
Mit PARA 1 oder PARA 2 können Sie jetzt die<br />
Versionen abrufen.<br />
unter VERSION CONTROL). Diese müssen Sie ggf.<br />
für zukünftige Updates angeben.<br />
von Zusatzgeräten. Verwenden Sie niemals<br />
Lautsprecherboxen mit zu kleiner Impedanz<br />
(Ohmzahl). Schließen Sie nie Ausgänge mit zu<br />
großem Pegel (z.B. Endstufen) an Ihren Amp an.<br />
• Prüfen Sie vor Anschluss des Gerätes immer die<br />
vorhandene Netzspannung. Kontaktieren Sie im<br />
Zweifelsfall den Bühnentechniker, Hausmeister,<br />
Servicetechniker.<br />
• Versuchen Sie keine "do it yourself" Reparaturen!<br />
Der Tausch interner Sicherungen darf nur von<br />
einem erfahrenen Techniker vorgenommen<br />
werden.<br />
47<br />
DEUTSCH
48<br />
zenTera - MANUAL<br />
15. MÖGLICHE FEHLERQUELLEN/TROUBLESHOOTING<br />
F1) Der zenTera ® lässt sich nicht einschalten:<br />
• Es liegt keine Netzspannung an. Überprüfen Sie<br />
den korrekten Anschluss des Netzkabels!<br />
• Die Netzsicherung ist defekt. Bitte ersetzen Sie<br />
die Netzsicherung durch eine neue Sicherung<br />
mit demselben Wert. Wenden Sie sich bei einem<br />
erneuten Defekt an Ihren Hughes & Kettner ®<br />
Fachhändler.<br />
F2) Der zenTera ® ist korrekt verkabelt, aber es<br />
ist nichts zu hören:<br />
• Einer oder mehrere der Volume- bzw. Master-<br />
Regler sind abgedreht. Drehen Sie den/die<br />
Regler auf.<br />
• Die internen Lautsprecher sind nicht eingesteckt.<br />
Stellen Sie die entsprechende Verbindung her.<br />
• Der zenTera ® befindet sich im TUNER-Modus und<br />
ist dabei stumm geschaltet. Verlassen Sie den<br />
TUNER-Modus durch Antippen des TUNER<br />
Buttons.<br />
• Durch einen Kurzschluss in einem externen<br />
Lautsprecherkabel hat eine der internen<br />
Sicherungen angesprochen. Lassen Sie durch<br />
einen Servicetechniker die Sicherung wechseln<br />
(korrekten Wert beachten!).<br />
• Das Volume-Pedal des angeschlossenen<br />
Z-Boards befindet sich in der Minimum-Position.<br />
Treten Sie das Pedal durch.<br />
F3) Der zenTera ® lässt sich nicht über das<br />
Stageboard/den Fußschalter steuern:<br />
• Der Stecker des Stageboards/Fußschalters ist<br />
nicht oder nicht richtig eingesteckt. Überprüfen<br />
Sie die Kontakte.<br />
F4) Beim Anschluss eines externen Effektgerätes<br />
ist das Signal völlig verzerrt:<br />
• Der Eingang des Effektgerätes wird übersteuert.<br />
Beachten Sie ggf. die Aussteuerungsanzeige des<br />
Effektgerätes und regeln Sie die Eingangsempfindlichkeit<br />
("Input" oder "Gain") am<br />
Effektgerät zurück.<br />
F5) Beim Anschluss eines externen Effektgerätes<br />
wird das Signal deutlich leiser:<br />
• Das Effektgerät ist an seinem Ausgang falsch<br />
ausgepegelt. Regeln Sie den "Output" am<br />
Effektgerät hoch.<br />
F6) Ein angeschlossener MIDI Controller<br />
erhält über die Phantomspeisung der<br />
MIDI IN-Buchse keine Betriebsspannung:<br />
• Die Sicherung der Phantomspeisung hat angesprochen.<br />
Wechseln Sie die Sicherung aus (bitte<br />
korrekten Wert beachten!).<br />
F7) System Initialise:<br />
• Sie können beim zenTera ein „Factory Reset“<br />
durchführen, indem Sie PRESET und STORE beim<br />
Einschalten gedrückt halten. Auf dem Display<br />
erscheint für etwa 8 Sekunden „SYSTEM INIT“,<br />
und nach erfolgreicher Initialisierung befindet<br />
sich der zenTera ® in folgendem Zustand: Das<br />
System-Menü wird auf die Werkseinstellung<br />
zurückgesetzt.<br />
Achtung: Head gegebenenfalls wieder auf 4x 12“<br />
schalten. P 1 – P 28 werden nach 1 – 28 kopiert. 29<br />
– 100 bleiben unverändert.<br />
Hinweis: Alle von Ihnen erstellten Presets und<br />
Systemeinstellungen werden dabei gelöscht bzw.<br />
in den Urzustand zurückgesetzt. Danach können<br />
Sie mit der SoundDiver Software die von Ihnen<br />
gespeicherten Sounds wieder auf Ihren zenTera ®<br />
aufspielen.<br />
zenTera - MANUAL<br />
16. TECHNISCHE DATEN<br />
VORSTUFEN-SEKTION<br />
INPUT: -10 dBV / 1 M Ohm<br />
FX RETURN L/R: 0 dBV / 10 K Ohm<br />
FX SEND L/R: 0 dBV / 220 Ohm<br />
RECORDING OUT L/R: 0 dBV / 220 Ohm<br />
Kopfhörerausgang: 500 mW an 4 - 600 Ohm<br />
ENDSTUFEN-SEKTION (Combo)<br />
Ausgangsleistung: 2 x 100 Watt an 6 Ohm<br />
2 x 60 Watt an 16 Ohm<br />
Frequenzgang: 20 Hz - 20 KHz<br />
Lautsprecherausgänge:<br />
Mindest-Impedanz pro Kanal 6 Ohm<br />
(1 x 16 Ohm + 1 x 8 Ohm)<br />
Lautsprecher: Celestion Vintage 30,<br />
16 Ohm<br />
ENDSTUFEN-SEKTION (Head)<br />
Ausgangsleistung: 2 x 100 Watt an 4 Ohm<br />
2 x 60 Watt an 16 Ohm<br />
Frequenzgang 20 Hz - 20 KHz<br />
Lautsprecherausgänge:<br />
Mindest-Impedanz pro Kanal 4 Ohm (2 x 8 Ohm)<br />
ALLGEMEINES<br />
Netzspannung:<br />
230 V~ (europäisches Modell)<br />
117 V~ (nordamerikanisches Modell)<br />
100 V~ (japanisches Modell)<br />
Max. Leistungsaufnahme: 708 VA<br />
Netzsicherung:<br />
T 2,5 A (230 V Modell)<br />
T 5 A (117 V Modell)<br />
T 6,3 A (100 V Modell)<br />
Externe Sicherungen:<br />
T 500 mA MIDI Phantom<br />
Interne Sicherungen:<br />
2 x T 5 A (Endstufe)<br />
1 x T 2,5 A (DSP)<br />
2 x T 500 mA (Analog-Sektion)<br />
Maße B x H x T:<br />
750 x 585 x 300 mm (Combo)<br />
740 x 300 x 250 mm (Head)<br />
Gewicht:<br />
30 Kg (Combo)<br />
19 Kg (Head)<br />
49<br />
DEUTSCH
50<br />
zenTera - MANUAL<br />
17. NETZANSCHLUSS<br />
HINWEIS: Stellen Sie bitte vor dem Anschluss des<br />
zenTera ® sicher, daß die vorhandene Netzspannung<br />
mit dem im Sichtfenster des VOLTAGE<br />
SELECTORS angegebenen Spannung<strong>sw</strong>ert übereinstimmt.<br />
Überprüfen Sie auch die Sicherung<strong>sw</strong>erte<br />
entsprechend dem Aufdruck nahe der<br />
Anschlussbuchse.<br />
MAINS IN / VOLTAGE SELECTOR<br />
Der zenTera ® kann an den Netzspannungen 230 V,<br />
117 V und 100 V betrieben werden. Die<br />
Anpassung erfolgt mittels des in die Netzbuchse<br />
integrierten VOLTAGE SELECTORS. Dazu wird wie<br />
folgt vorgegangen (siehe Abb.1):<br />
• Mittels eines kleinen Schraubenziehers die Sperre<br />
(1) des Sicherungshalters in Richtung Sichtfenster<br />
(3) drücken und diesen zusammen mit den<br />
beiden Sicherungen herausziehen.<br />
• Den Steckeinsatz (4) herausziehen.<br />
• Der Steckeinsatz (4) wird so gedreht und wieder<br />
eingesteckt, dass der Aufdruck der gewünschten<br />
Netzspannung nach außen zeigt.<br />
• Die vorher montierten Sicherungen (5) werden<br />
ersetzt. Verwenden Sie nur den nahe der<br />
Anschlussbuchse aufgedruckten Sicherung<strong>sw</strong>ert,<br />
der für die neue Netzspannung vorgesehen ist!<br />
• Den Sicherungshalter (2) zusammen mit den<br />
neuen Sicherungen (5) einsetzen.<br />
• Vor dem Netzanschluss nochmals prüfen, ob der<br />
richtige Spannung<strong>sw</strong>ert im Sichtfenster (3) des<br />
VOLTAGE SELECTORS erkennbar ist.<br />
zenTera - MANUAL<br />
18. MIDI IMPLEMENTATION CHART<br />
MIDI Implementation Chart v. 2.0 (page 1 of 3)<br />
Manufacturer: Hughes & Kettner Model: Zentera Version: 2.01 Date: 05.12.00/AP<br />
Transmitted Recognized Remarks<br />
1. Basic Information<br />
MIDI channels 1-16 1-16<br />
Note Numbers - -<br />
Program Change Yes 1) Bank Select Response? (Yes / No)<br />
If yes, list banks utilized in remarks column<br />
Yes 1)<br />
Adjustable via System Menu<br />
Modes supported: Mode 1:Omni-On, Poly (Yes/No)<br />
Mode 2:Omni-On, Mono (Yes/No)<br />
Mode 3:Omni-Off, Poly (Yes/No)<br />
Mode 4:Omni-Off, Mono (Yes/No)<br />
Multi Mode (Yes/No)<br />
Mode 3 / 4: Omni Off<br />
Note-On Velocity (Yes/No) No No<br />
Note-Off Velocity (Yes/No) No No<br />
Channel Aftertouch (Yes/No) No No<br />
Poly (Key) Aftertouch (Yes/No) No No<br />
Pitch Bend (Yes/No) No No<br />
Active Sensing (Yes / No) No No<br />
System Reset (Yes / No) No No<br />
Tune Request (Yes / No) No No<br />
System Exclusive: Sample Dump Standard (Yes/No)<br />
Device Inquiry (Yes/No)<br />
File Dump (Yes/No)<br />
MIDI Tuning (Yes/No)<br />
Master Volume (Yes/No)<br />
Notation Information (Yes/No)<br />
Turn GM1 System On (Yes/No)<br />
Turn GM2 System On (Yes/No)<br />
Turn GM System On (Yes/No)<br />
Other (note in Remarks column)<br />
No<br />
No<br />
No<br />
No<br />
No<br />
No<br />
No<br />
No<br />
No<br />
Yes<br />
No<br />
No<br />
No<br />
No<br />
No<br />
No<br />
No<br />
No<br />
No<br />
Yes<br />
NRPNs (Yes/No) No No<br />
RPN 00 (Pitch Bend Sensitivity) (Yes / No)<br />
RPN 01 (Channel Fine Tune) (Yes/No)<br />
RPN 02 (Channel Coarse Tune) (Yes/No)<br />
RPN 03 (Tuning Program Select (Yes/No)<br />
RPN 04 (Tuning Bank Select) (Yes/No)<br />
RPN 05 (Modulation Depth Range) (Yes/No)<br />
No<br />
No<br />
No<br />
No<br />
No<br />
No<br />
No<br />
No<br />
No<br />
No<br />
No<br />
No<br />
2. MIDI Timing and Synchronisation<br />
MIDI Clock (Yes/No) No No<br />
Song Position Pointer (Yes/No) No No<br />
Song Select (Yes/No) No No<br />
Start (Yes/No)<br />
Continue (Yes/No)<br />
Stop (Yes/No)<br />
No<br />
No<br />
No<br />
No<br />
No<br />
No<br />
MIDI Time Code (Yes/No) No No<br />
MIDI Machine Control (Yes/No) No No<br />
MIDI Show Control (Level/No)<br />
3. Extensions Compatibility<br />
No No<br />
General MIDI compatible? (Level(s)/No)<br />
Is GM default power-up mode? (Level/No)<br />
No<br />
DLS compatible (Level(s)/No)<br />
Import DLS Files? (Type(s)/No)<br />
Export DLS Files? (Type(s)/No)<br />
No<br />
Import Standard MIDI Files (Type(s)/No)<br />
Export Standard MIDI Files (Type(s)/No)<br />
NOTES<br />
No<br />
Data Dumps for<br />
User Preset Data,<br />
Global Data,<br />
Firmware Update<br />
MIDI Program Change Map<br />
Factory Preset Data<br />
51<br />
MIDI IMPLEMENTATION CHART
52<br />
zenTera - MANUAL<br />
MIDI Implementation Chart v. 2.0 (page 2 of 3)<br />
Manufacturer: Hughes & Kettner Model: Zentera Version: 2.01 Date: 05.12.00/AP<br />
Controller # Function Transmitted (Y/N) Recognized (Y/N) Remarks<br />
0 Bank Select (MSB) Yes Yes<br />
1 Modulation Wheel (MSB) No No<br />
2 Breath Controller (MSB) No No<br />
3<br />
4 Foot Controller (MSB) No No<br />
5 Portamento Time (MSB) No No<br />
6 Data Entry (MSB) No No<br />
7 Channel Volume (MSB) No No<br />
8 Balance (MSB) No No<br />
9<br />
10 Pan (MSB) No No<br />
11 Expression (MSB) No No<br />
12 Effect Control 1 (MSB) No No<br />
13 Effect Control 2 (MSB) No No<br />
14<br />
15<br />
16 General Purpose Controller 1 (MSB) No No<br />
17 General Purpose Controller 2 (MSB) No No<br />
18 General Purpose Controller 3 (MSB) No No<br />
19 General Purpose Controller 4 (MSB) No No<br />
20<br />
21<br />
22<br />
23<br />
24<br />
25<br />
26<br />
27<br />
28<br />
29<br />
30<br />
31<br />
32 Bank Select (LSB) Yes Yes<br />
33 Modulation Wheel (LSB) No No<br />
34 Breath Controller (LSB) No No<br />
35<br />
36 Foot Controller (LSB) No No<br />
37 Portamento Time (LSB) No No<br />
38 Data Entry (LSB) No No<br />
39 Channel Volume (LSB) No No<br />
40 Balance (LSB) No No<br />
41<br />
42 Pan (LSB) No No<br />
43 Expression (LSB) No No<br />
44 Effect Control 1 (LSB) No No<br />
45 Effect Control 2 (LSB) No No<br />
46<br />
47<br />
48 General Purpose Controller 1 (LSB) No No<br />
49 General Purpose Controller 2 (LSB) No No<br />
50 General Purpose Controller 3 (LSB) No No<br />
51 General Purpose Controller 4 (LSB) No No<br />
52<br />
53<br />
54<br />
55<br />
56<br />
57<br />
58<br />
59<br />
60<br />
61<br />
62<br />
63<br />
zenTera - MANUAL<br />
MIDI Implementation Chart v. 2.0 (page 3 of 3)<br />
Manufacturer: Hughes & Kettner Model: Zentera Version: 2.01 Date: 05.12.00/AP<br />
Controller # Function Transmitted (Y/N) Recognized<br />
(Y/N)<br />
Remarks<br />
64 Sustain Pedal No No<br />
65 Portamento On/Off No No<br />
66 Sostenuto No No<br />
67 Soft Pedal No No<br />
68 Legato Foot<strong>sw</strong>itch No No<br />
69 Hold 2 No No<br />
70 Sound Controller 1 Sound Variation No No<br />
71 Sound Controller 2 Timbre No No<br />
72 Sound Controller 3 Release Time No No<br />
73 Sound Controller 4 Attack Time No No<br />
74 Sound Controller 5 Brightness No No<br />
75 Sound Controller 6 Decay Time No No<br />
76 Sound Controller 7 Vibrato Rate No No<br />
77 Sound Controller 8 Vibrato Depth No No<br />
78 Sound Controller 9 Vibrato Delay No No<br />
79 Sound Controller 10 No No<br />
80 General Purpose Controller 5 No No<br />
81 General Purpose Controller 6 No No<br />
82 General Purpose Controller 7) No No<br />
83 General Purpose Controller 8 No No<br />
84<br />
85<br />
86<br />
87<br />
88<br />
89<br />
90<br />
Portamento Control No No<br />
91 Effects 1 Depth Reverb Send Level No No<br />
92 Effects 2 Depth No No<br />
93 Effects 3 Depth Chorus Send Level No No<br />
94 Effects 4 Depth No No<br />
95 Effects 5 Depth No No<br />
96 Data Increment No No<br />
97 Data Decrement No No<br />
98 Non-Registered Parameter N. (LSB) No No<br />
99 Non-Registered Parameter N. (MSB) No No<br />
100 Registered Parameter Number (LSB) No No<br />
101<br />
102<br />
103<br />
104<br />
105<br />
106<br />
107<br />
108<br />
109<br />
110<br />
111<br />
112<br />
113<br />
114<br />
115<br />
116<br />
117<br />
118<br />
119<br />
Registered Parameter Number (MSB) No No<br />
Channel Mode Messages<br />
120 All Sound Off No No<br />
121 Reset All Controllers No No<br />
122 Local Control On/Off No No<br />
123 All Notes Off No No<br />
124 Omni Mode Off No No<br />
125 Omni Mode On No No<br />
126 Poly Mode Off No No<br />
127 Poly Mode On No No<br />
MIDI IMPLEMENTATION CHART<br />
53
54<br />
zenTera - MANUAL<br />
zenTera - MANUAL<br />
55<br />
OPERATING MATRIX
zenTera - MANUAL<br />
56<br />
This is to certify that<br />
HUGHES & KETTNER zenTera<br />
complies with the provisions of the Directive of the<br />
Council of the European Communities on the<br />
approximation of the laws of the Member States relating<br />
to electromagnetic compatibility (EMC Directive<br />
89/336/EEC) and the low voltage Directive (73/23/EEC).<br />
This declaration of conformity of the European<br />
Communities is the result of an examination carried out<br />
by the Quality Assurance Department of STAMER GmbH<br />
in accordance with European Standards EN 50081-1,<br />
EN 50082-1and EN 60065 for low voltage, as laid down in<br />
Article 10 of the EMC Directive.<br />
Stamer Musikanlagen GmbH*<br />
Magdeburger Str. 8<br />
66606 St.Wendel<br />
* Stamer Musikanlagen manufactures exclusively<br />
for Hughes & Kettner<br />
Lothar Stamer Dipl.Ing.<br />
Managing Director<br />
St.Wendel, 07/20/2002<br />
Für das folgend bezeichnete Erzeugnis<br />
HUGHES & KETTNER zenTera<br />
wird hiermit bestätigt, dass es den wesentlichen Schutzanforderungen<br />
entspricht, die in der Richtlinie des Rates<br />
zur Angleichung der Rechtsvorschriften der Mitgliedsstaaten<br />
über die elektromagnetische Verträglichkeit<br />
(89/336/EWG) und der Niederspannungsrichtlinie<br />
(73/23/EWG) festgelegt sind. Diese Erklärung gilt für<br />
alle Exemplare, und bestätigt die Ergebnisse der<br />
Messungen, die durch die Qualitätssicherung der<br />
Fa. Stamer Musikanlagen GmbH durchgeführt wurden.<br />
Zur Beurteilung des Erzeugnisses hinsichtlich elektromagnetischer<br />
Verträglichkeit wurden folgende Normen<br />
herangezogen: EN 50081-1 • EN 50082-1. Zur Beurteilung<br />
der Einhaltung der Niederspannungsrichtlinie<br />
wurde folgende Norm herangezogen: EN 60065<br />
Diese Erklärung wird verantwortlich für den Hersteller<br />
abgegeben durch<br />
Stamer Musikanlagen GmbH*<br />
Magdeburger Str. 8<br />
66606 St.Wendel<br />
Lothar Stamer Dipl.Ing.<br />
Geschäftsführer<br />
St.Wendel, den 20.07.2002<br />
* Stamer Musikanlagen stellt exklusiv für Hughes & Kettner her<br />
IMPORTANT SAFETY INSTRUCTIONS<br />
BEFORE CONNECTING, READ INSTRUCTIONS<br />
• Read all of these instructions!<br />
• Save these instructions for later use!<br />
• Follow all warnings and instructions marked on the product!<br />
• Do not use this product near water, i.e. bathtub, sink, <strong>sw</strong>imming pool, wet basement,<br />
etc.<br />
• Do not place this product on an unstable cart, stand or table. The product may fall,<br />
causing serious damage to the product or to persons!<br />
• Slots and openings in the cabinet and the back or bottom are provided for ventilation;<br />
to ensure reliable operation of the product and to protect it from overheating,<br />
these openings must not be blocked or covered. This product should not be placed<br />
in a built-in installation unless proper ventilation is provided.<br />
• This product should not be placed near a source of heat such as a stove, radiator, or<br />
another heat producing amplifier.<br />
• Use only the supplied power supply or power cord. If you are not sure of the type of<br />
power available, consult your dealer or local power company.<br />
• Do not allow anything to rest on the power cord. Do not locate this product where<br />
persons will walk on the cord.<br />
• Never break off the ground pin on the power supply cord.<br />
• Power supply cords should always be handled carefully. Periodically check cords for<br />
cuts or sign of stress, especially at the plug and the point where the cord exits the<br />
unit.<br />
• The power supply cord should be unplugged when the unit is to be unused for long<br />
periods of time.<br />
• If this product is to be mounted in an equipment rack, rear support should be<br />
provided.<br />
• This product should be used only with a cart or stand that is recommended by<br />
Hughes & Kettner.<br />
• Never push objects of any kind into this product through cabinet slots as they may<br />
touch dangerous voltage points or short out parts that could result in risk of fire or<br />
electric shock. Never spill liquid of any kind on the product.<br />
• Do not attempt to service this product yourself, as opening or removing covers may<br />
expose you to dangerous voltage points or other risks. Refer all servicing to qualified<br />
service personnel.<br />
• Unplug this product from the wall outlet and refer servicing to qualified service<br />
personnel under the following conditions:<br />
• When the power cord or plug is damaged or frayed.<br />
• If liquid has been spilled into the product.<br />
• If the product has been exposed to rain or water.<br />
• If the product does not operate normally when the operating instructions are<br />
followed.<br />
• If the product has been dropped or the cabinet has been damaged.<br />
• If the product exhibits a distinct change in performance, indicating a need of<br />
service!<br />
• Adjust only these controls that are covered by the operating instructions since<br />
improper adjustment of other controls may result in damage and will often require<br />
extensive work by a qualified technician to restore the product to normal operation.<br />
• Exposure to extremely high noise levels may cause a permanent hearing loss.<br />
• Individuals vary considerably in susceptibility to noise induced hearing loss, but<br />
nearly everyone will lose some hearing if exposed to sufficiently intense noise for a<br />
sufficient time. The U.S. Government´s Occupational Safety and Health Administration<br />
(OSHA) has specified the following permissible noise level exposures:<br />
Duration Per Day In Hours Sound LeveldBA, Slow Response<br />
8 90<br />
6 92<br />
4 95<br />
3 97<br />
2 100<br />
11 /2<br />
102<br />
1 105<br />
1<br />
/2 110<br />
1<br />
/4 or less 115<br />
• According to OSHA, any exposure in excess of the above permissible limits could<br />
result in some hearing loss.<br />
• Ear plug protectors in the ear canals or over the ears must be worn when operating<br />
this amplification system in order to prevent a permanent hearing loss if exposure is<br />
in excess of the limits as set forth above. To ensure against potentially dangerous<br />
exposure to high sound pressure levels, it is recommended that all persons exposed<br />
to equipment capable of producing high sound pressure levels such as this amplification<br />
system be protected by hearing protectors while this unit is in operation.<br />
• Fuses: For continued protection against risk of fire, replace fuses only with the same<br />
type and ratings.<br />
TO PREVENT THE RISK OF FIRE AND SHOCK HAZARD, DO NOT EXPOSE THIS APPLIANCE TO<br />
MOISTURE OR RAIN. DO NOT OPEN CASE; NO USER SERVICE-ABLE PARTS INSIDE.<br />
REFER SERVICING TO QUALIFIED SERVICE PERSONNEL.<br />
WICHTIGE SICHERHEITSHINWEISE!<br />
BITTE VOR GEBRAUCH LESEN UND FüR SPÄTEREN GEBRAUCH<br />
AUFBEWAHREN!<br />
• Das Gerät wurde von Hughes & Kettner gemäss IEC 60065 gebaut und hat das Werk in<br />
sicherheitstechnisch einwandfreiem Zustand verlassen. Um diesen Zustand zu erhalten<br />
und einen gefahrlosen Betrieb sicherzustellen, muss der Anwender die Hinweise und die<br />
Warnvermerke beachten, die in der Bedienungsanleitung enthalten sind. Das Gerät entspricht<br />
der Schutzklasse I (schutzgeerdet).<br />
• DIE SICHERHEIT, ZUVERLÄSSIGKEIT UND LEISTUNG DES GERÄTES WIRD VON HUGHES &<br />
KETTNER NUR DANN GEWÄHRLEISTET, WENN:<br />
• Montage, Erweiterung, Neueinstellung, Änderungen oder Reparaturen von Hughes &<br />
Kettner oder von dazu ermächtigten Personen ausgeführt werden.<br />
• die elektrische Installation des betreffenden Raumes den Anforderungen von IEC (ANSI)-<br />
Festlegungen entspricht.<br />
• das Gerät in Übereinstimmung mit der Gebrauchsanweisung verwendet wird.<br />
WARNUNG:<br />
• Wenn Abdeckungen geöffnet oder Gehäuseteile entfernt werden, ausser wenn dies von<br />
Hand möglich ist, können Teile freigelegt werden, die Spannung führen.<br />
• Wenn ein Öffnen des Gerätes erforderlich ist, muss das Gerät von allen Spannungsquellen<br />
getrennt sein. Berücksichtigen Sie dies vor dem Abgleich, vor einer Wartung, vor<br />
einer Instandsetzung und vor einem Austausch von Teilen.<br />
• Ein Abgleich, eine Wartung oder eine Reparatur am geöffneten Gerät unter Spannung<br />
darf nur durch eine vom Hersteller autorisierte Fachkraft (nach VBG 4) geschehen, die<br />
mit den verbundenen Gefahren vertraut ist.<br />
• Lautsprecher-Ausgänge, die mit dem IEC 417/5036-Zeichen (Abb.1, s.unten) versehen<br />
sind können berührungsgefährliche Spannungen führen. Deshalb vor dem Einschalten<br />
des Gerätes Verbindung nur mit dem vom Hersteller empfohlenen Anschlusskabel zum<br />
Lautsprecher herstellen.<br />
• Alle Stecker an Verbindungskabeln müssen mit dem Gehäuse verschraubt oder verriegelt<br />
sein, sofern möglich.<br />
• Es dürfen nur Sicherungen vom angegebenen Typ und der angegebenen<br />
Nennstromstärke als Ersatz verwendet werden.<br />
• Eine Verwendung von geflickten Sicherungen oder Kurzschliessen des Halters ist unzulässig.<br />
• Niemals die Schutzleiterverbindung unterbrechen.<br />
• Oberflächen, die mit dem „HOT“-Zeichen (Abb.2, s.unten) versehen sind, Rückwände<br />
oder Abdeckungen mit Kühlschlitzen, Kühlkörper und deren Abdeckungen, sowie Röhren<br />
und deren Abdeckungen können im Betrieb erhöhte Temperaturen annehmen und sollten<br />
deshalb nicht berührt werden.<br />
• Hohe Lautstärkepegel können dauernde Gehörschäden verursachen. Vermeiden Sie<br />
deshalb die direkte Nähe von Lautsprechern, die mit hohen Pegeln betrieben werden.<br />
Verwenden Sie einen Gehörschutz bei dauernder Einwirkung hoher Pegel.<br />
NETZANSCHLUSS:<br />
• Das Gerät ist für Dauerbetrieb ausgelegt.<br />
• Die eingestellte Betriebsspannung muss mit der örtlichen Netzspannung übereinstimmen.<br />
• Achtung: Der Netzschalter des Gerätes muss in 0 - Position stehen, wenn das Netzkabel<br />
angeschlossen wird.<br />
• Der Anschluss an das Stromnetz erfolgt mit dem mitgelieferten Netzteil oder Netzkabel.<br />
• Netzteil: Eine beschädigte Anschlussleitung kann nicht ersetzt werden. Das Netzteil darf<br />
nicht mehr betrieben werden.<br />
• Vermeiden Sie einen Anschluss an das Stromnetz in Verteilerdosen zusammen mit vielen<br />
anderen Stromverbrauchern.<br />
• Die Steckdose für die Stromversorgung muss nahe am Gerät angebracht und leicht<br />
zugänglich sein.<br />
AUFSTELLUNGSORT:<br />
• Das Gerät sollte nur auf einer sauberen, waagerechten Arbeitsfläche stehen.<br />
• Das Gerät darf während des Betriebs keinen Erschütterungen ausgesetzt sein.<br />
• Feuchtigkeit und Staub sind nach Möglichkeit fernzuhalten.<br />
• Das Gerät darf nicht in der Nähe von Wasser, Badewanne, Waschbecken, Küchenspüle,<br />
Nassraum, Swimmingpool oder feuchten Räumen betrieben werden. Keine mit Flüssigkeit<br />
gefüllten Gegenstände -Vase, Gläser, Flaschen etc. auf das Gerät stellen.<br />
• Sorgen Sie für ausreichende Belüftung der Geräte.<br />
• Eventuelle Ventilationsöffnungen dürfen niemals blockiert oder abgedeckt werden. Das<br />
Gerät muss mindestens 20 cm von Wänden entfernt aufgestellt werden. Das Gerät darf<br />
nur dann in ein Rack eingebaut werden, wenn für ausreichende Ventilation gesorgt ist<br />
und die Einbauanweisungen des Herstellers eingehalten werden.<br />
• Vermeiden Sie direkte Sonneneinstrahlung sowie die unmittelbare Nähe von Heizkörpern<br />
und Heizstrahlern oder ähnlicher Geräte.<br />
• Wenn das Gerät plötzlich von einem kalten an einen warmen Ort gebracht wird, kann sich<br />
im Geräteinnern Kondensfeuchtigkeit bilden. Dies ist insbesondere bei Röhrengeräten zu<br />
beachten. Vor dem Einschalten solange warten bis das Gerät Raumtemperatur angenommen<br />
hat.<br />
• Zubehör: Das Gerät nicht auf einen instabilen Wagen, Ständer, Dreifuß, Untersatz oder<br />
Tisch stellen. Wenn das Gerät herunterfällt, kann es Personenschäden verursachen und<br />
selbst beschädigt werden. Verwenden Sie das Gerät nur mit einem vom Hersteller empfohlenen<br />
oder zusammen mit dem Gerät verkauften Wagen, Rack, Ständer, Dreifuß oder<br />
Untersatz. Bei der Aufstellung des Gerätes müssen die Anweisungen des Herstellers<br />
befolgt und muss das vom Hersteller empfohlene Aufstellzubehör verwendet werden.<br />
Eine Kombination aus Gerät und Gestell muss vorsichtigt bewegt werden. Plötzliches<br />
Anhalten, übermässige Kraftanwendung und ungleichmässige Böden können das<br />
Umkippen der Kombination aus Gerät und Gestell bewirken.<br />
• Zusatzvorrichtungen: Verwenden Sie niemals Zusatzvorrichtungen, die nicht vom Hersteller<br />
empfohlen wurden, weil dadurch Unfälle verursacht werden können<br />
• Zum Schutz des Gerätes bei Gewitter oder wenn es längere Zeit nicht beaufsichtigt oder<br />
benutzt wird, sollte der Netzstecker gezogen werden. Dies verhindert Schäden am Gerät<br />
aufgrund von Blitzschlag und Spannungsstössen im Wechselstromnetz.<br />
Abb.1 Abb.2
IMPORTANT ADVICE ON SAFETY!<br />
PLEASE READ BEFORE USE AND KEEP FOR LATER USE!<br />
• The unit has been built by Hughes & Kettner in accordance with IEC 60065 and left<br />
the factory in safe working order. To maintain this condition and ensure non-risk<br />
operation, the user must follow the advice and warning comments found in the<br />
operating instructions. The unit conforms to Protection Class 1 (protectively earthed).<br />
• HUGHES & KETTNER ONLY GUARANTEE THE SAFETY, RELIABILITY AND EFFICIENCY OF THE<br />
UNIT IF:<br />
• Assembly, extension, re-adjustment, modifications or repairs are carried out by<br />
Hughes & Kettner or by persons authorized to do so.<br />
• The electrical installation of the relevant area complies with the requirements of IEC<br />
(ANSI) specifications.<br />
•The unit is used in accordance with the operating instructions.<br />
• The unit is regularly checked and tested for electrical safety by a competent<br />
technician.<br />
WARNING:<br />
• If covers are opened or sections of casing are removed, except where this can be<br />
done manually, live parts can become exposed.<br />
• If it is necessary to open the unit this must be isolated from all power sources. Please<br />
take this into account before carrying out adjustments, maintenance, repairs and<br />
before replacing parts.<br />
• Adjustment, maintenance and repairs carried out when the unit has been opened<br />
and is still live may only be performed by specialist personnel who are authorized by<br />
the manufacturer (in accordance with VBG 4) and who are aware of the associated<br />
hazards.<br />
• Loudspeaker outputs which have the IEC 417/5036 symbol (Diagram 1, below) can<br />
carry voltages which are hazardous if they are made contact with. Before the unit is<br />
<strong>sw</strong>itched on, the loudspeaker should therefore only be connected using the lead<br />
recommended by the manufacturer.<br />
• Where possible, all plugs on connection cables must be screwed or locked onto the<br />
casing.<br />
• Replace fuses using only those of the specified type and current rating.<br />
• It is not permitted to use repaired fuses or to short-circuit the fuse holder.<br />
• Never interrupt the protective conductor connection.<br />
• Surfaces which are equipped with the „HOT“ mark (Diagram 2, below), rear panels or<br />
covers with cooling slits, cooling bodies and their covers, as well as tubes and their<br />
covers are purposely designed to dissipate high temperatures and should therefore<br />
not be touched.<br />
• High loudspeaker levels can cause permanent hearing damage. You should therefore<br />
avoid the direct vicinity of loudspeakers operating at high levels. Wear hearing<br />
protection if continuously exposed to high levels.<br />
MAINS CONNECTION:<br />
• The unit is designed for continuous operation.<br />
• The set operating voltage must match the local mains supply voltage.<br />
• Caution: The unit mains <strong>sw</strong>itch must be in position ‘0’ before the mains cable is<br />
connected.<br />
• The unit is connected to the mains via the supplied power unit or power cable.<br />
• Power unit: Never use a damaged connection lead. Any damage must be rectified<br />
by a competent technician.<br />
• Avoid connection to the mains supply in distributor boxes together with several other<br />
power consumers.<br />
• The plug socket for the power supply must be positioned near the unit and must be<br />
easily accessible.<br />
PLACE OF INSTALLATION:<br />
• The unit should stand only on a clean, horizontal working surface.<br />
• The unit must not be exposed to vibrations during operation.<br />
• Keep away from moisture and dust where possible.<br />
• Do not place the unit near water, baths, wash basins, kitchen sinks, wet areas,<br />
<strong>sw</strong>imming pools or damp rooms. Do not place objects containing liquid on the unit -<br />
vases, glasses, bottles etc.<br />
• Ensure that the unit is well ventilated.<br />
• Any ventilation openings must never be blocked or covered. The unit must be<br />
positioned at least 20 cm away from walls. The unit may only be fitted in a rack if<br />
adequate ventilation is ensured and if the manufacturer’s installation instructions are<br />
followed.<br />
• Keep away from direct sunlight and the immediate vicinity of heating elements and<br />
radiant heaters or similar devices.<br />
• If the unit is suddenly moved from a cold to a warm location, condensation can form<br />
inside it. This must be taken into account particularly in the case of tube units. Before<br />
<strong>sw</strong>itching on, wait until the unit has reached room temperature.<br />
• Accessories: Do not place the unit on an unsteady trolley, stand, tripod, base or table.<br />
If the unit falls down, it can cause personal injury and itself become damaged. Use<br />
the unit only with the trolley, rack stand, tripod or base recommended by the<br />
manufacturer or purchased together with the unit. When setting the unit up, all the<br />
manufacturer’s instructions must be followed and the setup accessories recommended<br />
by the manufacturer must be used. Any combination of unit and stand must be<br />
moved carefully. A sudden stop, excessive use of force and uneven floors can cause<br />
the combination of unit and stand to tip over.<br />
• Additional equipment: Never use additional equipment which has not been<br />
recommended by the manufacturer as this can cause accidents.<br />
• To protect the unit during bad weather or when left unattended for prolonged<br />
periods, the mains plug should be disconnected. This prevents the unit being<br />
damaged by lightning and power surges in the AC mains supply.<br />
Diagram 1 Diagram 2<br />
CONSEILS DE SECURITE IMPORTANTS!<br />
PRIERE DE LIRE AVANT L’EMPLOI ET A CONSERVER POUR UTILISATION ULTERIEURE!<br />
•L’appareil a été conçu par Hughes & Kettner selon la norme IEC 60065 et a<br />
quitté l’entreprise dans un état irréprochable. Afin de conserver cet état et<br />
d’assurer un fonctionnement sans danger de l’appareil nous conseillons à l’utilisateur<br />
la lecture des indications de sécurité contenues dans le mode d’emploi.<br />
L’appareil est conforme à la classification I (mise à terre de protection).<br />
• SURETE, FIABILITE ET EFFICACITE DE L’APPAREIL NE SONT GARANTIS PAR<br />
HUGHES & KETTNER QUE SI:<br />
•Montage, extension, nouveau réglage, modification ou réparation sont<br />
effectués par Hughes & Kettner ou par toute personne autorisée par<br />
Hughes & Kettner.<br />
• L’installation électrique de la pièce concernée correspond aux normes IEC<br />
(ANSI).<br />
•L’utilisation de l’appareil suit le mode d’emploi.<br />
AVERTISSEMENT:<br />
•A moins que cela ne soit manuellement possible, tout enlèvement ou ouverture<br />
du boîtier peut entrainer la mise au jour de pieces sous tension.<br />
• Si l’ouverture de l’appareil est nécessaire, celui-ci doit être coupé de chaque<br />
source de courant. Ceci est à prendre en considération avant tout ajustement,<br />
entretien, réparation ou changement de pieces.<br />
•Ajustement, entretien ou réparation sur l’appareil ouvert et sous tension ne<br />
peuvent être éffectués que par un spécialiste autorisé par le fabricant (selon<br />
VBG4). Le spécialiste étant conscient des dangers liés à ce genre de<br />
réparation.<br />
• Les sorties de baffles qui portent le signe IEC 417/5036 (fig. 1, voir en bas)<br />
peuvent être sous tension dangereuse. Avant de brancher l’appareil utiliser<br />
uniquement le câble de raccordement conseillé par le fabricant pour<br />
raccorder les baffles.<br />
•Toutes les prises des câbles de raccordement doivent être, si possible, vissées<br />
ou verrouillées sur le boîtier.<br />
•Utilisez subsidiairement uniquement des fusibles de type et de puissance de<br />
courant nominale donnés.<br />
• L’utilisation de fusibles rafistolés ou court-circuites est inadmissible.<br />
• Ne jamais interrompre la connexion du circuit protecteur.<br />
• Il est conseillé de ne pas toucher aux surfaces pourvues du signe „HOT“ (fig. 2,<br />
voir en bas), aux parois arrières ou caches munis de fentes d’aération,<br />
éléments d’aération et leurs caches ansi qu’aux tubes et leurs caches. Ces<br />
éléments pouvant atteindre des températures élévées pendant l’utilisation de<br />
l’appareil.<br />
• Les Niveaux de puissance élévés peuvent entrainer des lésions auditives<br />
durables. Evitez donc la proximité de haut-parleurs utilisés à haute puissance.<br />
Lors de haute puissance continue utilisez une protection auditive.<br />
BRANCHEMENT SUR LE SECTEUR:<br />
•L’appareil est conçu pour une utilisation continue.<br />
• La tension de fonctionnement doit concorder avec la tension secteur locale.<br />
•Attention: L’interrupteur de secteur de l’appareil doit être sur la position „0“,<br />
lorsque le câble de réseau est raccordé.<br />
• Le raccordement au réseau éléctrique s’effectue avec l’adaptateur ou le<br />
cordon d´alimentation livré avec l’appareil.<br />
• Adaptateur: Un câble de raccordement abimé ne peut être remplacé.<br />
L’adaptateur est inutilisable.<br />
• Evitez un raccordement au réseau par des boîtes de distribution surchargées.<br />
• La prise de courant doit être placée à proximité de l’appareil et facile à<br />
atteindre.<br />
LIEU D’INSTALLATION:<br />
•L’appareil doit être placé sur une surface de travail propre et horizontale.<br />
•L’appareil en marche ne doit en aucun cas subir des vibrations.<br />
• Evitez dans la mesure du possible poussière et humidité.<br />
•L’appareil ne doit pas être placé à proximité d’eau, de baignoire, lavabo,<br />
évier, pièce d’eau, piscine ou dans une pièce humide. Ne placez aucun vase,<br />
verre, bouteille ou tout objet rempli de liquide sur l’appareil.<br />
•L’appareil doit être suffisamment aéré.<br />
• Ne jamais recouvrir les ouvertures d’aération. L’appareil doit être placé à 20<br />
cm du mur au minimum. L’appareil peut être monté dans un Rack si une<br />
ventilation suffisante est possible et si les conseils de montage du fabricant<br />
sont suivis.<br />
• Evitez les rayons de soleil et la proximité de radiateurs, chauffages etc.<br />
• Une condensation d’eau peut se former dans l’appareil si celui-ci est transporté<br />
brusquement d’un endroit froid à un endroit chaud. Ceci est particulièrement<br />
important pour des appareils à tubes. Avant de brancher l’appareil attendre<br />
qu’il ait la température ambiante.<br />
• Accessoires: L’appareil ne doit être placé sur un chariot, support, trépied, bâti<br />
ou table instable. Une chute de l’appareil peut entrainer aussi bien des<br />
dommages corporels que techniques. Utilisez l’appareil uniquement avec un<br />
chariot, Rack, support, trépied ou bâti conseillé par le fabricant ou vendu en<br />
combinaison avec l’appareil. Les indications du fabricant pour l’installation de<br />
l’appareil sont à suivre, et les accessoires d’installation conseillés par le<br />
fabricant sont à utiliser. Un ensemble support et appareil doit être déplacé<br />
avec précaution. Des mouvements brusques et des revêtements de sol<br />
irreguliers peuvent entrainer la chute de l´ensemble.<br />
• Equipements supplémentaires: Ne jamais utiliser un équipement supplémentaire<br />
n’ayant pas été conseillé par le fabricant, ceci pouvant entrainer des<br />
accidents.<br />
•Afin de protéger l’appareil pendant un orage ou s’il ne doit pas être utilisé<br />
pendant un certain temps, il est conseillé d’enlever la prise au secteur. Ceci<br />
évite des dommages dûs à la foudre ou à des coups de tension dans le réseau<br />
à courant alternatif.<br />
Fig. 1 Fig. 2<br />
IMPORTANTI AVVERTIMENTI DI SICUREZZA!<br />
Leggere attentamente prima dell’uso e conservare per<br />
un utilizzo successivo:<br />
• L’apparecchio è stato costruito dalla Hughes & Kettner secondo la normativa europea<br />
IEC 60065 ed ha lasciato il nostro stabilimento in stato ineccepibile. Per garantire<br />
il mantenimento di tale stato e un utilizzo assolutamente privo di rischi l’utente è<br />
tenuto ad osservare le indicazioni e gli avvertimenti di sicurezza contenuti nelle<br />
istruzioni per l’uso. L’apparecchio rispecchia il livello di sicurezza I (collegato a terra).<br />
• Sicurezza, affidabilità e prestazioni dell’apparecchio vengono garantiti dalla Hughes<br />
& Kettner solo ed esclusivamente se:<br />
• Montaggio, ampliamento, rimessa a punto, modifiche e riparazioni vengono<br />
eseguite dalla Hughes & Kettner stessa o da personale da essa autorizzato.<br />
• Gli impianti elettrici nei locali prescelti per l’uso dell’apparecchio rispondono alle<br />
normative stabilite dall’ANSI.<br />
• L’apparecchio viene utilizzato come indicato nel libretto delle istruzioni per l’uso.<br />
Avvertimenti:<br />
• In caso di apertura di parti di rivestimento o rimozione di parti dell’involucro, a meno<br />
che non si tratti di pezzi rimovibili semplicemente a mano, possono venire alla luce<br />
parti dell’apparecchio conduttrici di tensione.<br />
• Se l’apertura dell’apparecchio dovesse risultare necessaria è indispensabile<br />
staccare precedentemente quest’ultimo da tutte le fonti di tensione. Rispettare tale<br />
misura di prevenzione anche prima di un allineamento, di operazioni di manutenzione,<br />
della messa in esercizio o della sostituzione di componenti all’interno<br />
dell’apparecchio.<br />
• Allineamento, operazioni di manutenzione o eventuali riparazioni dell’apparecchio<br />
in presenza di tensione vanno eseguite esclusivamente da personale specializzato<br />
ed autorizzato, in grado di eseguire tali operazioni evitandone i rischi connessi.<br />
• Le uscite degli altoparlanti contrassegnate dai caratteri IEC 417/5036 (vedi illustrazione<br />
1 a fondo pag.) possono essere conduttrici di tensione pericolosa con cui<br />
evitare il contatto. Per questo motivo, prima di accendere l’apparecchio, collegare<br />
quest’ultimo agli altoparlanti servendosi esclusivamente del cavetto<br />
d’allacciamento indicato dal produttore.<br />
• Tutte le spine e i cavi di collegamento devono essere avvitati o fissati all’involucro<br />
dell’apparecchio per quanto possibile.<br />
• Tutti i fusibili di sicurezza vanno sostituiti esclusivamente con fusibili del tipo prescritto<br />
e valore della corrente nominale indicato.<br />
• L’utilizzo di fusibili di sicurezza non integri e la messa in corto circuito del sostegno di<br />
metallo sono proibite.<br />
• Non interrompere mai il collegamento con il circuito di protezione.<br />
• Superfici contrassegnate dalla parola „HOT“ (vedi illustrazione 2 a fondo pag.), cosi<br />
come griglie di aerazione, dispositivi di raffreddamento e i loro rivestimenti di<br />
protezione, oppure valvole e i relativi rivestimenti protettivi possono surriscaldarsi<br />
notevolmente durante l’uso e per questo motivo non vanno toccate.<br />
• L’ascolto di suoni ad alto volume può provocare danni permanenti all’udito. Evitate<br />
perciò la diretta vicinanza con altoparlanti ad alta emissione di suono e utilizzate<br />
cuffie protettive in caso ciò non sia possibile.<br />
Alimentazione:<br />
• L’apparecchio è concepito per il funzionamento continuo.<br />
• La tensione di esercizio deve corrispondere alla tensione di rete a cui ci si allaccia.<br />
• Attenzione: l’interruttore di alimentazione dell’apparecchio deve essere in posizione<br />
0 quando viene allacciato il cavetto d’alimentazione.<br />
• L’allacciamento alla rete elettrica avviene tramite alimentatore o cavetto<br />
d’alimentazione consegnato insieme all’apparecchio.<br />
• Alimentatore: un cavo di connessione danneggiato non può essere sostituito.<br />
L’alimentatore non può più essere utilizzato.<br />
• Evitate un allacciamento alla rete di corrente utilizzando cassette di distribuzione<br />
sovraccariche.<br />
• La spina di corrente deve essere situata nelle vicinanze dell’apparecchio e<br />
facilmente raggiungibile in qualsiasi momento.<br />
Locali di collocamento:<br />
• Opportuno collocare l’apparecchio su una superficie pulita e orizzontale.<br />
• Non sottoporre l’apparecchio in funzione a scosse e vibrazioni.<br />
• Proteggere l’apparecchio per quanto possibile da umidità e polvere.<br />
• Non collocare l’apparecchio vicino ad acqua, vasche da bagno, lavandini, lavelli<br />
da cucina, locali umidi o piscine. Non appoggiare recipienti contenenti liquidi - vasi,<br />
bicchieri, bottiglie, ecc. - sull’apparecchio.<br />
• Provvedere ad una buone aerazione dell’apparecchio.<br />
• Eventuali aperture previste per la ventilazione dell’apparecchio non vanno ne<br />
bloccate, ne mai coperte. L’apparecchio va collocato ad almeno 20 cm di<br />
distanza dalle pareti circostanti e può essere inserito tra altre componenti di un<br />
impianto solo in caso di sufficiente ventilazione e qualora le direttive di montaggio<br />
del produttore vengano rispettate.<br />
• Evitare di esporre l’apparecchio ai raggi del sole e di collocarlo direttamente nelle<br />
vicinanze di fonti di calore come caloriferi, stufette, ecc.<br />
• Se l’apparecchio viene trasportato rapidamente da un locale freddo ad uno<br />
riscaldato può succedere che al suo interno si crei della condensa. Ciò va tenuto in<br />
considerazione soprattutto in caso di apparecchi a valvole. Attendere che<br />
l’apparecchio abbia assunto la temperatura ambiente prima di accenderlo.<br />
• Accessori: non collocare l’apparecchio su carrelli, supporti, treppiedi, superfici o<br />
tavoli instabili. Se l’apparecchio dovesse cadere a terra potrebbe causare danni a<br />
terzi o danneggiarsi irreparabilmente. Utilizzate per il collocamento dell’apparecchio<br />
supporti, treppiedi e superfici che siano consigliate dal produttore o direttamente<br />
comprese nell’offerta di vendita. Per il collocamento dell’apparecchio attenetevi<br />
strettamente alle istruzioni del produttore, utilizzando esclusivamente accessori da<br />
esso consigliati. L’apparecchio in combinazione ad un supporto va spostato con<br />
molta attenzione. Movimenti bruschi o il collocamento su pavimenti non piani<br />
possono provocare la caduta dell’apparecchio e del suo supporto.<br />
• Accessori supplementari: non utilizzate mai accessori supplementari che non siano<br />
consigliati dal produttore, potendo essere ciò causa di incidenti.<br />
• Per proteggere l’apparecchio in caso di temporali o nel caso questo non venisse<br />
utilizzato per diverso tempo si consiglia di staccarne la spina di corrente. In questo<br />
modo si evitano danni all’apparecchio dovuti a colpi di fulmine o ad improvvisi<br />
aumenti di tensione nel circuito di corrente alternata.<br />
Illustrazione 1 Illustrazione 2<br />
¡INDICACIONES DE SEGURIDAD IMPORTANTES!<br />
¡LÉANSE ANTES DE UTILIZAR EL APARATO Y GUARDENSE<br />
PARA SU USO POSTERIOR!<br />
• El aparato ha sido producido por Hughes & Kettner según el IEC 60065 y salió de la<br />
fábrica en un estado técnicamente perfecto. Para conservar este estado y asegurar<br />
un funcionamiento sin peligros el usuario debe tener en cuenta las indicaciones y<br />
advertencias contenidas en las instrucciones de manejo. El aparato corresponde a la<br />
clase de protección l (toma de tierra protegida).<br />
• LA SEGURIDAD, LA FIABILIDAD Y EL RENDIMIENTO DEL APARATO SOLO ESTAN<br />
GARANTIZADOS POR HUGHES & KETTNER CUANDO:<br />
• el montaje, la ampliación, el reajuste, los cambios o las reparaciones se realicen por<br />
Hughes & Kettner o por personas autorizadas para ello;<br />
• la instalación eléctrica del recinto en cuestión corresponda a los requisitos de la<br />
determinación del IEC (ANSI);<br />
• el aparato se use de acuerdo con las indicaciones de uso.<br />
ADVERTENCIA:<br />
• Si se destapan protecciones o se retiran piezas de la carcasa, exceptuando si se<br />
puede hacer manualmente, se pueden dejar piezas al descubierto que sean<br />
conductoras de tensión.<br />
• Si es necesario abrir el aparato, éste tiene que estar aislado de todas las fuentes de<br />
alimentación. Esto se debe tener en cuenta antes del ajuste, de un entretenimiento,<br />
de una reparación y de una sustitución de las piezas.<br />
• Un ajuste, un entretenimiento o una reparación en el aparato abierto y bajo tensión<br />
sólo puede ser llevado a cabo por un especialista autorizado por el productor (según<br />
VBG 4) que conozca a fondo los peligros que ello conlleva.<br />
• Las salidas de altavoces que estén provistas de la característica IEC 417/5036 (figura<br />
1, véase abajo) pueden conducir tensiones peligrosas al contacto. Por ello es<br />
indispensable que antes de poner en marcha el aparato; la conexión se haya<br />
realizado únicamente con el cable de empalmes recomendado por el productor.<br />
• Las clavijas de contacto al final de los cables conectores tienen que estar<br />
atornilladas o enclavadas a la carcasa, en tanto que sea posible.<br />
• Los fusibles de repuesto que se utilicen sólo pueden ser del tipo indicado y tener la<br />
intensidad nominal indicada.<br />
• El uso de fusibles reparados o la puesta en cortocircuito del soporte es inadmisible.<br />
• El empalme del conductor de protección no se puede interrumpir en ningún caso.<br />
• Las superficies provistas de la característica "HOT" (figura 2, véase abajo), los<br />
paneles de fondo trasero o las protecciones con ranuras de ventilación, los cuerpos<br />
de ventilación y sus protecciones, así como las válvulas electrónicas y sus<br />
protecciones pueden alcanzar temperaturas muy altas durante el funcionamiento y<br />
por ello no se deberían tocar.<br />
• Niveles elevados de la intensidad de sonido pueden causar continuos daños<br />
auditivos; por ello debe evitar acercarse demasiado a altavoces que funcionen a<br />
altos niveles. En tales casos utilice protecciones auditivas.<br />
ACOMETIDA A LA RED:<br />
• El aparato está proyectado para un funcionamiento continuo.<br />
• La tensión de funcionamiento ajustada tiene que coincidir con la tensión de la red<br />
del lugar.<br />
• Advertencia: el interruptor de la red del aparato tiene que estar en la posición 0<br />
cuando se conecte el cable de red.<br />
• La conexión a la red eléctrica se efectuará con la fuente de alimentación o con el<br />
cable de red que se entreguen con el aparato.<br />
• Fuente de alimentación: una linea de conexión dañada no se puede sustituir. La<br />
fuente de alimentación no puede volver a ponerse en funcionamiento.<br />
• Evite una conexión de la red eléctrica a distribuidores con muchas tomas de<br />
corriente.<br />
• El enchufe para el suministro de corriente tiene que estar cerca del aparato y ser de<br />
fácil acceso.<br />
SITUACION:<br />
• El aparato debería estar situado en una superficie limpia y totalmente horizontal.<br />
• El aparato no puede estar expuesto a ningún tipo de sacudidas durante su<br />
funcionamiento.<br />
• Se deben evitar la humedad y el polvo.<br />
• El aparato no puede ponerse en funcionamiento cerca del agua, la bañera, el<br />
lavamanos, la pila de la cocina, un recinto con tuberías de agua, la piscina o en<br />
habitaciones húmedas. Tampoco se pueden poner objetos llenos de líquido - jarrones,<br />
vasos, botellas, etc. - encima de él.<br />
• Procure que el aparato tenga suficiente ventilación.<br />
• Las aberturas de ventilación existentes no se deben bloquear ni tapar nunca. El<br />
aparato debe estar situado como mínimo a 20 cm de la pared. El aparato sólo se<br />
puede montar en un rack, si se ha procurado la suficiente ventilación y se han<br />
cumplido las indicaciones de montaje del productor.<br />
• Evite los rayos del sol directos así como la proximidad a radiadores, electroradiadores<br />
o aparatos similares.<br />
• Si el aparato pasa repentinamente de un lugar frío a otro caliente, se puede<br />
condensar humedad en su interior. Esto se debe tener en cuenta sobretodo en los<br />
aparatos con válvulas electrónicas. Antes de poner en marcha el aparato se debe<br />
esperar hasta que éste haya adquirido la temperatura ambiental.<br />
• Accesorios: el aparato no se puede colocar encima de carros, estantes, trípodes,<br />
soportes o mesas inestables. Si el aparato se cae puede causar daños personales y se<br />
puede estropear. Coloque el aparato sólo en un carro, rack, estante, trípode o<br />
soporte recomendado por el productor o que se le haya vendido junto con el aparato.<br />
En la instalación se deben seguir las indicaciones del productor así como utilizar los<br />
accesorios recomendados por el mismo para colocarlo encima. El conjunto del<br />
aparato con el pedestal se debe mover con mucho cuidado. Un paro brusco, la<br />
aplicación de una fuerza desmesurada o un suelo irregular puede ocasionar la caida<br />
de todo el conjunto.<br />
• Piezas adicionales: no utilice nunca piezas adicionales que no estén recomendadas<br />
por el productor, ya que se podrían provocar accidentes.<br />
• Para protejer el aparato de una tormenta o si no se supervisa ni utiliza durante algún<br />
tiempo, se debería desconectar la clavija de la red. Así se evitan daños en el aparato<br />
a causa de un rayo y golpes de tensión en la red de corriente alterna.<br />
Figura 1 Figura 2
MS D-0725 10/02<br />
AUSTRALIA<br />
CMI, Brooklyn, Vic 3025<br />
AUSTRIA<br />
EXACT Vertriebs-GmbH, 8020 Graz<br />
BENELUX<br />
WILS MUZIEKIMPORT, 4706 NJ Roosendaal<br />
BOSNIA and HERZEGOVINA<br />
Allied Music Exports GmbH, Munich/Germany<br />
CANADA<br />
EFKAY MUSIC, Lachine, Quebec H8T 2P1<br />
CROATIA<br />
Allied Music Exports GmbH, Munich/Germany<br />
CZECH REPUBLIC<br />
MUSICDATA, 59401 Velké<br />
DENMARK<br />
REHOLM MUSIK EN-GROS, 7000 Fredericia<br />
ESTONIA<br />
STANFORD TRADING, Tallinn<br />
FINLAND<br />
F-MUSIIKKI INC., 00100 Helsinki<br />
FRANCE<br />
CAMAC S.A., 44470 Thouaré<br />
GERMANY<br />
‘MUSIC & SALES’ GmbH, 66606 St. Wendel<br />
HUNGARY<br />
LAHA K.F.T., 9400 Sopron<br />
INDONESIA<br />
WIJAYA MUSIC, Jakarta 10710<br />
ITALY<br />
SISME SPA, 60028 Osimo Scalo<br />
JAPAN<br />
Y&P Corp., Yachiyo Chiba 2760034<br />
LETTLAND<br />
MUSIC SERVICE Ltd., Riga<br />
MACEDONIA<br />
Allied Music Exports GmbH, Munich/Germany<br />
MALAYSIA<br />
GUITAR COLLECTION, 60 000 Kuala Lumpur<br />
NEW ZEALAND<br />
MUSIC WORKS, Onehunga, Aukland<br />
NORWAY<br />
BELCO A/S, 3921 Porsgrunn<br />
POLAND<br />
AMTEC, 51-663 Wroclaw<br />
PORTUGAL<br />
ALRICA, 1100 Lisboa<br />
RUSSIA<br />
Bayland Music House, 119146 Moscow<br />
SLOVAK REPUBLIC<br />
GB Music spol. s.r.o., 8111 06 Bratislava<br />
SOUTH KOREA<br />
Firtra Trading Co., Ltd., Seoul<br />
SPAIN<br />
ADAGIO, 08110 Montcada I Reixach<br />
SWEDEN<br />
ILT AB, 84100 Ånge<br />
SWITZERLAND<br />
SDS Music Factory AG, 8048 Zürich<br />
TAIWAN<br />
OMEGA MUSIC, Taichung<br />
TURKEY<br />
Lay Lay Lom A.S., Istanbul<br />
UNITED KINGDOM & EIRE<br />
SENNHEISER, Highwycombe, Bucks HP12 3SL<br />
USA<br />
HUGHES & KETTNER Inc., Mt Prospect, IL 60056<br />
YUGOSLAVIA<br />
Allied Music Exports GmbH, Munich/Germany<br />
WORLDWIDE<br />
HUGHES & KETTNER • Postfach 1509 • 66595 St. Wendel • TEL. 0 68 51 - 90 50 • FAX 0 68 51 - 905 103<br />
INTERNATIONAL INQUIRIES: FAX +49 - 68 51 - 905 200 • E-Mail: h+k-intl@musicandsales.com<br />
www.hughes-and-kettner.com<br />
® 2002 by Music & Sales GmbH<br />
Printed in Germany, October 2002