EN Vehiclehub Pro VPA-B222R - Alpine
EN Vehiclehub Pro VPA-B222R - Alpine
EN Vehiclehub Pro VPA-B222R - Alpine

You also want an ePaper? Increase the reach of your titles
YUMPU automatically turns print PDFs into web optimized ePapers that Google loves.
FOR CAR USE ONLY/NUR FÜR AUTOMOBIL GEBRAUCH/POUR APPLICATION AUTOMOBILE/PARA USO <strong>EN</strong><br />
AUTOMÓVILES/SOLO PER L’UTILIZZO IN AUTOMOBILE/<strong>EN</strong>DAST FÖR BILBRUK<br />
ALPINE ELECTRONICS MARKETING, INC.<br />
1-1-8 Nishi Gotanda,<br />
Shinagawa-ku,<br />
Tokyo 141-0031, Japan<br />
Phone 03-5496-8231<br />
ALPINE ELECTRONICS OF AMERICA, INC.<br />
19145 Gramercy Place, Torrance,<br />
California 90501, U.S.A.<br />
Phone 1-800-ALPINE-1 (1-800-257-4631)<br />
ALPINE ELECTRONICS OF CANADA, INC.<br />
777 Supertest Road, Toronto,<br />
Ontario M3J 2M9, Canada<br />
Phone 1-800-ALPINE-1 (1-800-257-4631)<br />
YAMAGATA Corporation<br />
2-6-34, Takashima, Nishi-ku,<br />
Yokohama, Kanagawa, Japan<br />
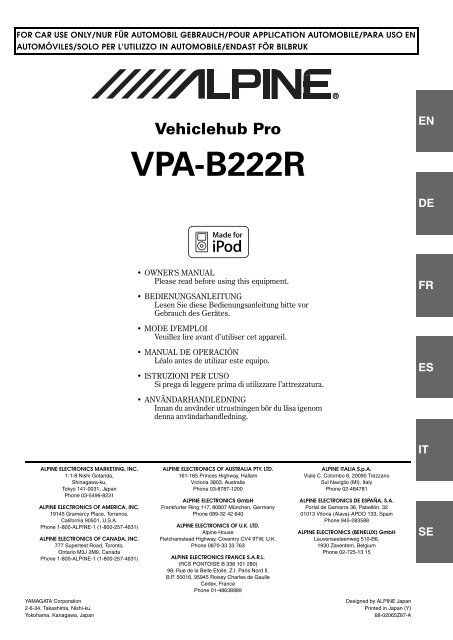
<strong>Vehiclehub</strong> <strong>Pro</strong><br />
<strong>VPA</strong>-<strong>B222R</strong><br />
• OWNER'S MANUAL<br />
Please read before using this equipment.<br />
• BEDI<strong>EN</strong>UNGSANLEITUNG<br />
Lesen Sie diese Bedienungsanleitung bitte vor<br />
Gebrauch des Gerätes.<br />
• MODE D'EMPLOI<br />
Veuillez lire avant d’utiliser cet appareil.<br />
• MANUAL DE OPERACIÓN<br />
Léalo antes de utilizar este equipo.<br />
• ISTRUZIONI PER L’USO<br />
Si prega di leggere prima di utilizzare l’attrezzatura.<br />
• ANVÄNDARHANDLEDNING<br />
Innan du använder utrustningen bör du läsa igenom<br />
denna användarhandledning.<br />
ALPINE ELECTRONICS OF AUSTRALIA PTY. LTD.<br />
161-165 Princes Highway, Hallam<br />
Victoria 3803, Australia<br />
Phone 03-8787-1200<br />
ALPINE ELECTRONICS GmbH<br />
Frankfurter Ring 117, 80807 München, Germany<br />
Phone 089-32 42 640<br />
ALPINE ELECTRONICS OF U.K. LTD.<br />
<strong>Alpine</strong> House<br />
Fletchamstead Highway, Coventry CV4 9TW, U.K.<br />
Phone 0870-33 33 763<br />
ALPINE ELECTRONICS FRANCE S.A.R.L.<br />
(RCS PONTOISE B 338 101 280)<br />
98, Rue de la Belle Etoile, Z.I. Paris Nord Il,<br />
B.P. 50016, 95945 Roissy Charles de Gaulle<br />
Cedex, France<br />
Phone 01-48638989<br />
R<br />
ALPINE ITALIA S.p.A.<br />
Viale C. Colombo 8, 20090 Trezzano<br />
Sul Naviglio (MI), Italy<br />
Phone 02-484781<br />
ALPINE ELECTRONICS DE ESPAÑA, S.A.<br />
Portal de Gamarra 36, Pabellón, 32<br />
01013 Vitoria (Alava)-APDO 133, Spain<br />
Phone 945-283588<br />
ALPINE ELECTRONICS (B<strong>EN</strong>ELUX) GmbH<br />
Leuvensesteenweg 510-B6,<br />
1930 Zaventem, Belgium<br />
Phone 02-725-13 15<br />
Designed by ALPINE Japan<br />
Printed in Japan (Y)<br />
68-02065Z87-A<br />
<strong>EN</strong><br />
DE<br />
FR<br />
ES<br />
IT<br />
SE
Contents<br />
Operating Instructions<br />
WARNING<br />
WARNING ................................................. 4<br />
CAUTION .................................................. 4<br />
PRECAUTIONS ........................................ 5<br />
Getting Started<br />
Feature .............................................................. 6<br />
Accessory List .................................................. 6<br />
Initial System Start-Up ..................................... 6<br />
Turning Power On or Off ................................. 6<br />
Displaying the Unit Source on the<br />
Monitor ...................................................... 6<br />
Switching a Source ........................................... 6<br />
Adjusting the Volume ....................................... 7<br />
Lowering Volume Quickly ............................... 7<br />
Radio<br />
Listening to Radio ............................................ 7<br />
Manual Storing of Station Presets .................... 8<br />
Automatic Memory of Station Presets ............. 8<br />
Tuning to Preset Stations .................................. 8<br />
RDS Operation<br />
Turning AF (Alternative Frequencies)<br />
On or Off ....................................................... 9<br />
Receiving Traffic Information .......................... 9<br />
PTY (<strong>Pro</strong>gramme Type) Tuning ....................... 9<br />
<strong>Pro</strong>gramme Seek ............................................ 10<br />
Receiving Traffic Information While Playing CD<br />
or Radio ....................................................... 10<br />
Priority News .................................................. 10<br />
Displaying Radio Text .................................... 10<br />
Other Useful Features<br />
<strong>EN</strong>GLISH<br />
Adjusting the Audio ........................................11<br />
Adjusting the Balance ..................................11<br />
Adjusting the Fader .....................................11<br />
Setting the Treble Control ...........................11<br />
Setting the Bass Control ..............................11<br />
Adjusting the Subwoofer Level ...................12<br />
Turning Loudness ON or OFF .....................12<br />
Turning Defeat ON or OFF .........................12<br />
Adjusting Volume of GUIDE Voice ............12<br />
Rear Entertainment Function ..........................12<br />
Switching the function of the remote<br />
sensor .......................................................13<br />
Setup<br />
G<strong>EN</strong>ERAL Setup<br />
General Setup Operation .................................13<br />
Demonstration Function ..............................14<br />
Setting the Time Display .............................14<br />
Setting the Time ...........................................14<br />
Setting Daylight Saving Time .....................14<br />
Sound (Beep) Guide Function .....................14<br />
Turning the Commander Vibration<br />
ON or OFF ...............................................14<br />
Setting the Scroll .........................................14<br />
RDS Time Display .......................................15<br />
Adjusting Source Signal Levels ..................15<br />
PI SEEK Setting ..........................................15<br />
Receiving RDS Regional (Local)<br />
Stations .....................................................15<br />
Switching the Display Language of PTY<br />
(<strong>Pro</strong>gramme Type) ...................................15<br />
Switching to the Russian Font .....................15<br />
1-<strong>EN</strong>
SYSTEM Setup<br />
System Setup Operation ................................. 15<br />
Using the Speaker Input ................................. 16<br />
Setting the Speaker Input Mode .................. 16<br />
Displaying the Speaker Input<br />
Volume Level ........................................... 16<br />
Setting the Navigation/Speaker Input Voice<br />
Interruption .............................................. 17<br />
Adjusting the Speaker Input's Interruption<br />
Detection Level ........................................ 17<br />
Adjusting the Speaker Input Voice Interruption<br />
Level ........................................................ 17<br />
Setting the Interrupt Type of the Speaker Input<br />
Voice ........................................................ 17<br />
Setting the Channel of the Speaker Interruption<br />
Detection .................................................. 17<br />
Connecting the Navigation ............................. 18<br />
Setting the Navigation Mode ....................... 18<br />
Navigation Audio Interruption Volume<br />
Adjustment ............................................... 18<br />
Connecting an External Input Device<br />
(AUX) .......................................................... 18<br />
Setting the AUX Mode ................................ 18<br />
Naming External Devices ............................ 18<br />
Adjusting the External Input Audio<br />
Level ........................................................ 18<br />
Connecting the Rear Monitor ......................... 18<br />
Setting of the External Monitor Output ...... 18<br />
Setting the VISUALIZER Mode Display ... 18<br />
Connecting a Subwoofer ................................ 19<br />
Subwoofer On and Off ................................ 19<br />
Setting the Commander .................................. 19<br />
Setting the Colour of the Commander Button<br />
illumination .............................................. 19<br />
Turning the Commander Button illumination<br />
on and off ................................................. 19<br />
Adjusting the Brightness of the Commander<br />
Button illumination .................................. 19<br />
Setting the Others ........................................... 19<br />
Setting the External Device Interrupt<br />
Mode ........................................................ 19<br />
Adjusting the display position ..................... 19<br />
CD/MP3/WMA Operation (Optional)<br />
Playing CD/MP3/WMA ................................. 20<br />
Folder/File Search ........................................... 20<br />
M.I.X. (Random Play) .................................... 21<br />
Repeat Play ..................................................... 21<br />
2-<strong>EN</strong><br />
DVD/Video CD Operation (Optional)<br />
Playing DVD/Video CD ................................. 22<br />
To display the DVD mode screen ............... 22<br />
If a menu screen appears ............................. 22<br />
Playing Still Frames (Pausing) ....................... 22<br />
Finding the Beginnings of<br />
Chapters or Tracks ...................................... 23<br />
Fast-forwarding/Fast-reversing ...................... 23<br />
Displaying the Top Menu Screen<br />
(DVD only) ................................................. 23<br />
Changing Discs (only when DVD changer is<br />
connected) ................................................... 23<br />
Stopping Playback (PRE STOP) .................... 23<br />
Stopping Playback .......................................... 23<br />
Chapter/Track/Title Repeat Playback ............. 23<br />
Switching the Audio Tracks ........................... 24<br />
Switching the Subtitles (Subtitle Language)<br />
(DVD only) ................................................. 24<br />
Switching the Angle (DVD only) ................... 24<br />
Switching from the disc menu .................... 24<br />
iPod ® (Optional)<br />
Playback ......................................................... 25<br />
Searching for a desired Song .......................... 25<br />
Searching by Playlist .................................. 25<br />
Searching by artist name ............................. 26<br />
Searching by album name ........................... 26<br />
Random Play Shuffle (M.I.X.) .................... 27<br />
Repeat Play ..................................................... 27<br />
Navigation System (Optional)<br />
Displaying the Navigation Screen .................. 27<br />
Changing the Navigation operation mode ...... 27<br />
Map Screen Function ..................................... 28<br />
Displaying the Current Position .................. 28<br />
Scrolling the Map ........................................ 28<br />
Changing the Map Scale ............................. 28<br />
Menu Screen Function ................................... 28
TV Operation (Optional)<br />
Operating TV Unit ......................................... 28<br />
Automatic Memory of Channel Presets ......... 29<br />
Switching Audio ............................................. 29<br />
Digital TV Operation (Optional)<br />
Operating Digital TV Unit ............................. 29<br />
EPG Screen Operation ................................... 30<br />
Automatic Memory of Channel Presets ......... 30<br />
Displaying the Menu Screen .......................... 30<br />
Auxiliary Device (Optional)<br />
Operating Auxiliary Devices (Optional) ........ 30<br />
Factory System<br />
Operating Factory System<br />
(Speaker Input mode) .................................. 31<br />
External Audio <strong>Pro</strong>cessor (Optional)<br />
Adjustment <strong>Pro</strong>cedure for Dolby Surround ... 32<br />
Setting the Speakers ....................................... 32<br />
Set MX Mode of the External Audio<br />
<strong>Pro</strong>cessor ..................................................... 33<br />
X-OVER Adjustment ..................................... 33<br />
Performing Time Correction Manually<br />
(TCR) .......................................................... 34<br />
Phase Switching ............................................. 34<br />
Graphic Equalizer Adjustments ..................... 35<br />
Parametric Equalizer Adjustments ................. 35<br />
Setting Bass Sound Control ........................... 36<br />
Setting Bass Compressor ............................ 36<br />
Setting Bass Focus ...................................... 36<br />
Speaker Setup ................................................. 36<br />
Setting of Dolby Digital ................................. 37<br />
Adjusting the acoustic image ...................... 37<br />
Mixing bass sound to the rear channel ........ 37<br />
Achieving powerful high volume sound ..... 38<br />
Adjusting the speaker levels ....................... 38<br />
Adjusting the DVD Level ............................... 38<br />
Storing Settings in the Memory ..................... 38<br />
Calling up the Preset Memory ........................ 39<br />
Using the <strong>Pro</strong> Logic II Mode ......................... 39<br />
Linear PCM Setting ........................................ 39<br />
Soft button operation<br />
Basic operation ...............................................40<br />
Radio Operation ..............................................40<br />
RDS Operation ................................................41<br />
Setup Operation ..............................................41<br />
CD/MP3/WMA Operation ..............................42<br />
DVD/Video CD Operation ..............................43<br />
iPod ® Operation ..............................................44<br />
TV Operation ..................................................44<br />
Digital TV Operation ......................................45<br />
Information<br />
In Case of Difficulty .......................................46<br />
Specifications ..................................................47<br />
Installation and<br />
Connections<br />
Warning .................................................. 48<br />
Caution ................................................... 48<br />
Precautions ........................................... 48<br />
Installation ......................................................49<br />
Connections (<strong>VPA</strong>-<strong>B222R</strong> Wiring<br />
Diagram) ......................................................52<br />
System Example .............................................54<br />
3-<strong>EN</strong>
Operating Instructions<br />
WARNING<br />
INSTALL THE PRODUCT CORRECTLY SO THAT THE DRIVER<br />
CANNOT WATCH TV/VIDEO UNLESS THE VEHICLE IS<br />
STOPPED AND THE EMERG<strong>EN</strong>CY BRAKE IS APPLIED.<br />
It is dangerous for the driver to watch TV/Video while driving a<br />
vehicle. Installing this product incorrectly enables the driver to<br />
watch TV/Video while driving. This may cause a distraction,<br />
preventing the driver from looking ahead, thus causing an accident.<br />
The driver or other people could be severely injured.<br />
DO NOT WATCH VIDEO WHILE DRIVING.<br />
Watching the video may distract the driver from looking ahead of<br />
the vehicle and cause an accident.<br />
DO NOT OPERATE ANY FUNCTION THAT TAKES YOUR<br />
ATT<strong>EN</strong>TION AWAY FROM SAFELY DRIVING YOUR VEHICLE.<br />
Any function that requires your prolonged attention should only be<br />
performed after coming to a complete stop. Always stop the vehicle<br />
in a safe location before performing these functions. Failure to do<br />
so may result in an accident.<br />
KEEP THE VOLUME AT A LEVEL WHERE YOU CAN STILL<br />
HEAR OUTSIDE NOISE WHILE DRIVING.<br />
Failure to do so may result in an accident.<br />
MINIMIZE DISPLAY VIEWING WHILE DRIVING.<br />
Viewing the display may distract the driver from looking ahead of<br />
the vehicle and cause an accident.<br />
4-<strong>EN</strong><br />
WARNING<br />
This symbol means important instructions.<br />
Failure to heed them can result in serious injury<br />
or death.<br />
DO NOT DISASSEMBLE OR ALTER.<br />
Doing so may result in an accident, fire or electric shock.<br />
USE ONLY IN CARS WITH A 12 VOLT NEGATIVE GROUND.<br />
(Check with your dealer if you are not sure.) Failure to do so may<br />
result in fire, etc.<br />
KEEP SMALL OBJECTS SUCH AS BATTERIES OUT OF THE<br />
REACH OF CHILDR<strong>EN</strong>.<br />
Swallowing them may result in serious injury. If swallowed,<br />
consult a physician immediately.<br />
USE THE CORRECT AMPERE RATING WH<strong>EN</strong> REPLACING<br />
FUSES.<br />
Failure to do so may result in fire or electric shock.<br />
DO NOT BLOCK V<strong>EN</strong>TS OR RADIATOR PANELS.<br />
Doing so may cause heat to build up inside and may result in fire.<br />
USE THIS PRODUCT FOR MOBILE 12V APPLICATIONS.<br />
Use for other than its designed application may result in fire,<br />
electric shock or other injury.<br />
CAUTION<br />
This symbol means important instructions.<br />
Failure to heed them can result in injury or<br />
material property damage.<br />
HALT USE IMMEDIATELY IF A PROBLEM APPEARS.<br />
Failure to do so may cause personal injury or damage to the<br />
product. Return it to your authorized <strong>Alpine</strong> dealer or the nearest<br />
<strong>Alpine</strong> Service Centre for repairing.
PRECAUTIONS<br />
<strong>Pro</strong>duct Cleaning<br />
Use a soft dry cloth for periodic cleaning of the product. For more<br />
severe stains, please dampen the cloth with water only. Anything<br />
else has the chance of dissolving the paint or damaging the plastic.<br />
Temperature<br />
Be sure the temperature inside the vehicle is between +45 °C<br />
(+113 °F) and 0 °C (+32 °F) before turning your unit on.<br />
Moisture Condensation<br />
You may notice the disc playback sound wavering due to<br />
condensation. If this happens, remove the disc from the player and<br />
wait about an hour for the moisture to evaporate.<br />
Maintenance<br />
If you have problems, do not attempt to repair the unit yourself.<br />
Return it to your <strong>Alpine</strong> dealer or the nearest <strong>Alpine</strong> Service<br />
Station for servicing.<br />
Installation Location<br />
Make sure the <strong>VPA</strong>-<strong>B222R</strong> will not be installed in a location<br />
subjected to:<br />
Direct sun and heat<br />
High humidity and water<br />
Excessive dust<br />
Excessive vibrations<br />
<strong>Alpine</strong> products equipped with the Ai-NET bus, connected to the<br />
<strong>VPA</strong>-<strong>B222R</strong>, can be operated from the <strong>VPA</strong>-<strong>B222R</strong>. Depending on<br />
the products connected, the functions and displays will vary. For<br />
details, consult your <strong>Alpine</strong> dealer.<br />
Operation of some of the functions of this unit is very complex.<br />
Because of this, it was deemed necessary to place these functions<br />
into a special screen. This will restrict operation of these functions<br />
to times when the vehicle is parked. This ensures the focus of the<br />
driver’s attention will be on the road and not on the <strong>VPA</strong>-<strong>B222R</strong>.<br />
This has been done for the safety of the driver and passengers.<br />
Audio <strong>Pro</strong>cessor Adjustments cannot be made if the car is moving.<br />
The car must be parked and the parking brake must be engaged for<br />
the procedure described in the Owner’s Manual to be valid. The<br />
warning “CAN’T OPERATE WHILE DRIVING,” will be<br />
displayed if any attempts are made to perform these operations<br />
while driving.<br />
Apple, the Apple logo and iPod are trademarks of Apple<br />
Computer, Inc., registered in the U.S. and other countries.<br />
5-<strong>EN</strong>
Getting Started<br />
Operation is carried out by the commander. If an <strong>Alpine</strong> touch panel<br />
monitor is connected to this unit, the soft buttons appear in the display<br />
to enable touch operation.<br />
This manual explains operation using the commander. For details of the<br />
touch operation, refer to “Soft button operation” on page 40.<br />
The commander vibrates when an operation is performed. Refer to<br />
“Turning the Commander Vibration ON or OFF” (page 14).<br />
Feature<br />
If an <strong>Alpine</strong> Ai-NET compatible products (DVD player, DVD/CD<br />
changer, Adapter for iPod, etc.) is connected to the <strong>VPA</strong>-<strong>B222R</strong>, it can<br />
be controlled from the commander and displayed on the external<br />
monitor. If an optional <strong>Alpine</strong> Navigation System is connected to the<br />
<strong>VPA</strong>-<strong>B222R</strong>, the Navigation screen will be displayed on the external<br />
monitor, and its operation can be performed. For details on the function<br />
of connected devices, refer to the Owner’s Manual.<br />
Accessory List<br />
Main unit....................................................................................1<br />
Power cable...............................................................................1<br />
Parking brake sub-lead .............................................................1<br />
Factory System Cable...............................................................1<br />
ISO power cable........................................................................1<br />
Pinch connector ........................................................................6<br />
Bracket ......................................................................................2<br />
Tapping screw (M4 × 14)...........................................................4<br />
Pan screw (M4 × 8) ...................................................................4<br />
Velcro fastener ..........................................................................2<br />
RGB cable (3M) ........................................................................1<br />
RCA extension cable (6M) ........................................................1<br />
Antenna extension cable (5.5M)................................................1<br />
Commander ..............................................................................1<br />
Holder........................................................................................1<br />
Commander connection cable (5.5M) .......................................1<br />
Double-sided adhesive tape......................................................1<br />
Reinforcement screw.................................................................3<br />
Cable clamp ..............................................................................3<br />
6-<strong>EN</strong><br />
Flipper switch<br />
Joystick<br />
Initial System Start-Up<br />
Be sure to press the RESET button when using the unit for the first time,<br />
after installing the CD changer, after changing the car battery, etc.<br />
1 Turn off the unit power.<br />
2 Press RESET with a ball-point pen or similar<br />
pointed object.<br />
Turning Power On or Off<br />
Some of this unit’s functions cannot be performed while the vehicle is in<br />
motion. Be sure to stop your vehicle in a safe location and apply the<br />
parking brake, before attempting these operations.<br />
1 Press SOURCE/POWER to turn on the unit.<br />
The unit can be turned on by pressing any button.<br />
2 Press and hold SOURCE/POWER for at least 2<br />
seconds to turn off the unit.<br />
By selecting the image source on the unit, it can be displayed on a<br />
connected monitor. For operation, refer to the Owner’s Manual of the<br />
monitor.<br />
If an <strong>Alpine</strong> monitor is connected (RGB connection)<br />
1 Recall the navigation mode by selecting the image<br />
source on the monitor.<br />
The source of the unit is displayed.<br />
Switching a Source<br />
1 Press SOURCE/POWER.<br />
The source selection screen is displayed.<br />
Screen example<br />
RESET<br />
Displaying the Unit Source on the Monitor<br />
Displays source modes that can be selected<br />
(The kind of source modes that are displayed varies<br />
depending on connection and setting)<br />
2 Press the joystick up or down to select the desired<br />
source, then press / /<strong>EN</strong>TER.<br />
The selected main source screen is displayed.<br />
In the source selection screen mode, press TA/RTN/SETUP to return<br />
to the previous screen.
Adjusting the Volume<br />
Turn the flipper switch clockwise or counterclockwise<br />
to adjust the volume.<br />
Clockwise: Volume up<br />
Counterclockwise: Volume down<br />
Volume: 0 - 35<br />
Lowering Volume Quickly<br />
Activating this function will instantly lower the volume level.<br />
This operation can be performed from either a monitor compatible<br />
with touch panel or remote control (sold separately). For operation<br />
from a remote control (sold separately), refer to the owner's manual<br />
of the remote control.<br />
Touch [MUTE] on the main source screen to activate the<br />
MUTE mode.<br />
The audio level decreases.<br />
During mute, the volume level indicator will blink.<br />
Screen example<br />
MUTE<br />
Touching [MUTE] again brings the audio back to its previous<br />
level.<br />
Radio<br />
Band display<br />
Preset number display<br />
Frequency display<br />
Listening to Radio<br />
1 Press SOURCE/POWER.<br />
The source selection screen is displayed.<br />
2 Press the joystick up or down to select RADIO, then<br />
press / /<strong>EN</strong>TER.<br />
3 Press and hold for at least 2 seconds repeatedly<br />
until the desired radio band is displayed.<br />
FM-1 FM-2 FM-3 MW LW FM-1<br />
4 Press / /<strong>EN</strong>TER to select the tuning mode.<br />
DX SEEK SEEK (OFF) DX SEEK<br />
The initial mode is Distance mode.<br />
Joystick<br />
DX SEEK (Distance mode):<br />
Both strong and weak stations will be automatically tuned in<br />
(Automatic Seek Tuning).<br />
SEEK (Local mode):<br />
Only strong stations will be automatically tuned in (Automatic<br />
Seek Tuning).<br />
OFF (Manual mode):<br />
The frequency is manually tuned in steps (Manual tuning).<br />
5 Press or to tune in the desired station.<br />
Holding down or will change the frequency<br />
continuously.<br />
7-<strong>EN</strong>
Manual Storing of Station Presets<br />
1 Select the radio band and tune in a desired radio<br />
station you wish to store in the preset memory.<br />
2 Press and hold /M<strong>EN</strong>U/FUNC. for at least 2<br />
seconds.<br />
The FUNCTION screen is displayed.<br />
3 Press the joystick up or down to select PRESET<br />
MEMORY, then press the joystick right.<br />
4 Press the joystick up or down to select any one of<br />
the preset numbers PRESET1 through PRESET6,<br />
then press / /<strong>EN</strong>TER.<br />
The selected station is stored.<br />
The display shows the band, preset number and station<br />
frequency memorized.<br />
A total of 30 stations can be stored in the preset memory (6 stations<br />
for each band; FM-1, FM-2, FM-3, MW and LW).<br />
If you store a station in a preset memory which already has a station,<br />
the current station will be cleared and replaced with the new station.<br />
Automatic Memory of Station Presets<br />
1 Press and hold for at least 2 seconds repeatedly<br />
until the desired radio band is displayed.<br />
2 Press and hold / /<strong>EN</strong>TER for at least 2 seconds.<br />
The frequency on the display continues to change while the<br />
automatic memory is in progress. The tuner will<br />
automatically seek and store 6 strong stations in the<br />
selected band. They will be stored into PRESET1 to<br />
PRESET6 in order of signal strength.<br />
When the automatic memory has been completed, the tuner<br />
goes to the station stored in preset location No. 1.<br />
If no stations are stored, the tuner will return to the original station<br />
you were listening to before the auto memory procedure began.<br />
8-<strong>EN</strong><br />
Tuning to Preset Stations<br />
1 Press and hold for at least 2 seconds repeatedly<br />
until the desired band is displayed.<br />
Changing Stations by the Commander<br />
2 Press or to select a preset number (P01 to<br />
P06).<br />
The selected station is received.<br />
Recalling by the FUNCTION screen<br />
2 Press and hold /M<strong>EN</strong>U/FUNC. for at least 2<br />
seconds.<br />
The FUNCTION screen is displayed.<br />
3 Press the joystick up or down to select PRESET<br />
CALL, then press the joystick right.<br />
4 Press the joystick up or down to select any one of<br />
the preset numbers PRESET1 through PRESET6,<br />
then press / /<strong>EN</strong>TER.<br />
The preset station is received.<br />
The display shows the band, preset number and frequency<br />
of the station selected.
RDS Operation<br />
Joystick<br />
Turning AF (Alternative Frequencies) On<br />
or Off<br />
The RDS (Radio Data System) is a radio information system using the<br />
57 kHz subcarrier of regular FM broadcasting. The RDS allows you to<br />
receive a variety of information such as traffic information, station<br />
names, and to automatically re-tune to a stronger transmitter that is<br />
broadcasting the same programme.<br />
1 Press and hold TA/RTN/SETUP for at least 2<br />
seconds.<br />
The SETUP screen is displayed.<br />
2 Press the joystick up or down to select RDS, then<br />
press the joystick right.<br />
The display changes to the RDS setting screen.<br />
3 Press and hold /M<strong>EN</strong>U/FUNC. for at least 2<br />
seconds.<br />
The FUNCTION screen is displayed.<br />
4 Press the joystick up or down to select the AF<br />
(Alternative Frequency), then press / /<strong>EN</strong>TER.<br />
When the AF mode is selected, the unit automatically tunes to a<br />
strong signal station in the AF list.<br />
Select AF again, then press / /<strong>EN</strong>TER to select OFF mode<br />
when automatic re-tuning is not required.<br />
5 Press TA/RTN/SETUP to return to the previous<br />
screen.<br />
Tips<br />
When the unit receives the PTY31 (Emergency Broadcast) signal, the<br />
unit will show “ALARM” in the display<br />
The RDS digital data includes the following:<br />
PI <strong>Pro</strong>gramme Identification<br />
PS <strong>Pro</strong>gramme Service Name<br />
AF List of Alternative Frequencies<br />
TP Traffic <strong>Pro</strong>gramme<br />
TA Traffic Announcement<br />
PTY <strong>Pro</strong>gramme Type<br />
EON Enhanced Other Networks<br />
Refer to G<strong>EN</strong>ERAL Setup section (Pages 13-15) about “RDS Time<br />
Display”, “PI SEEK Setting”, “Receiving RDS Regional (Local)<br />
Stations” and “Switching the Display Language of PTY (<strong>Pro</strong>gramme<br />
Type)”.<br />
Receiving Traffic Information<br />
Press TA/RTN/SETUP to turn on the Traffic Information<br />
mode.<br />
When the traffic information station is tuned in, the TA indicator<br />
lights up.<br />
Traffic information is heard only when it is being broadcast. If<br />
traffic information is not being broadcast, the unit is set in the<br />
standby mode.<br />
When a traffic information broadcast begins, the unit<br />
automatically receives it and the display shows “T. INFO”.<br />
When the traffic information broadcast is over, the unit will<br />
automatically set in the standby mode.<br />
If the traffic information broadcast signal falls below a certain level,<br />
the unit remains in the receiving mode for 1 minute. If the signal<br />
remains below a certain level for over 70 seconds,<br />
“TA” blink light up in the display.<br />
If you do not want to listen to the traffic information being received,<br />
lightly press TA/RTN/SETUP to skip that traffic information<br />
message. The T. INFO mode will remain in the ON position to receive<br />
the next traffic information message.<br />
If the volume level is changed while receiving traffic information, the<br />
changed volume level will be memorized. When traffic information is<br />
received next time, the volume level will be automatically adjusted to<br />
the level memorized.<br />
PTY (<strong>Pro</strong>gramme Type) Tuning<br />
1 Press and hold TA/RTN/SETUP for at least 2<br />
seconds.<br />
The SETUP screen is displayed.<br />
2 Press the joystick up or down to select RDS, then<br />
press the joystick right.<br />
The display changes to the RDS setting screen.<br />
Changing PTY by the commander<br />
3 Press and hold or for at least 2 seconds.<br />
PTY is changed.<br />
Changing by the FUNCTION screen<br />
3 Press and hold /M<strong>EN</strong>U/FUNC. for at least 2<br />
seconds.<br />
The FUNCTION screen is displayed.<br />
4 Press the joystick up or down to select the PTY<br />
and press the joystick right.<br />
5 Press the joystick up or down to choose the<br />
desired programme type.<br />
6 Press / /<strong>EN</strong>TER after selecting the programme<br />
type to start searching for a station of the selected<br />
programme type.<br />
If no station is found, “NO PTY” will be displayed.<br />
9-<strong>EN</strong>
<strong>Pro</strong>gramme Seek<br />
A programme in the current PTY (<strong>Pro</strong>gramme Type) is sought.<br />
1 Press and hold TA/RTN/SETUP for at least 2<br />
seconds.<br />
The SETUP screen is displayed.<br />
2 Press the joystick up or down to select RDS, then<br />
press the joystick right.<br />
The display changes to the RDS setting screen.<br />
3 Press or to seek a programme.<br />
Receiving Traffic Information While<br />
Playing CD or Radio<br />
The example explained here is how to receive the traffic information<br />
broadcast during CD playback.<br />
1 In the CD mode, press TA/RTN/SETUP to turn on<br />
the Traffic information mode.<br />
The unit automatically starts to search for receivable traffic<br />
broadcasts.<br />
When the traffic information broadcast is searched out, the<br />
CD mode is switched to the Radio mode and the unit<br />
receives the traffic information broadcast.<br />
10-<strong>EN</strong><br />
When the traffic information broadcast starts, the unit<br />
automatically mutes the CD.<br />
When the traffic information broadcast finishes, the unit<br />
automatically returns to the original source you were<br />
playing before the traffic information broadcast began.<br />
The receiver is equipped with the EON (Enhanced Other Networks)<br />
function so if the station being received does not broadcast the traffic<br />
information, the receiver automatically tunes in the related station<br />
that broadcasts the traffic information.<br />
2 When the traffic information broadcast has finished,<br />
the unit returns to the CD mode.<br />
Priority News<br />
This function allows you to preset to give priority to the News<br />
programme. You will never miss the News programme as the unit<br />
automatically gives priority to the News programme whenever it begins<br />
broadcasting, and interrupts the programme you are currently listening.<br />
This feature is functional when your unit is set to a mode other than the<br />
LW and MW modes.<br />
1 Press and hold TA/RTN/SETUP for at least 2<br />
seconds.<br />
The SETUP screen is displayed.<br />
2 Press the joystick up or down to select RDS, then<br />
press the joystick right.<br />
The display changes to the RDS setting screen.<br />
3 Press and hold /M<strong>EN</strong>U/FUNC. for at least 2<br />
seconds.<br />
The FUNCTION screen is displayed.<br />
4 Press the joystick up or down to select the NEWS<br />
mode, then press / /<strong>EN</strong>TER.<br />
The “NEWS” indicator appears in the display.<br />
In the PRIORITY NEWS function, unlike in the TA function, the<br />
volume does not increase automatically.<br />
5 Press TA/RTN/SETUP to return to the previous<br />
screen.<br />
Displaying Radio Text<br />
Text messages from a radio station can be displayed.<br />
1 Press and hold /M<strong>EN</strong>U/FUNC. for at least 2<br />
seconds in the FM radio mode.<br />
The FUNCTION screen is displayed.<br />
2 Press the joystick up or down to select INFO., then<br />
press / /<strong>EN</strong>TER.<br />
The display shows “WAIT” for a few seconds.<br />
3 To deactivate the Radio Text mode, repeat step 1<br />
and 2.<br />
If there is no receivable text message or the unit cannot receive a text<br />
message properly, the display shows “NO TEXT”.
Other Useful<br />
Features<br />
Adjusting the Audio<br />
The following steps 1 to 5 are common operations of each audio<br />
adjustment. Refer to each section for details.<br />
1 Press and hold TA/RTN/SETUP for at least 2<br />
seconds.<br />
The SETUP screen is displayed.<br />
2 Press the joystick up or down to select AUDIO<br />
MODE, then press the joystick right.<br />
The AUDIO MODE screen is displayed.<br />
Display Example for AUDIO MODE Screen<br />
Joystick<br />
3 Press the joystick up or down to select the desired<br />
item.<br />
Setting items: BALANCE / FADER / TREBLE / BASS /<br />
SUBW LEVEL / LOUDNESS / DEFEAT /<br />
GUIDE MIX LV*<br />
* Setting can be made only when an external audio processor is<br />
connected.<br />
4 Press the joystick left or right to adjust and set the<br />
desired item.<br />
5 Press TA/RTN/SETUP to return to the previous<br />
screen. Press TA/RTN/SETUP repeatedly to return<br />
to the main source screen displayed before starting<br />
the setup operation.<br />
Adjusting the Balance<br />
Adjust the sound volume of the left and right speakers.<br />
Setting item: BALANCE<br />
Setting range: L15 to R15<br />
Adjusting the Fader<br />
Adjust the volume of the front and rear speakers.<br />
Setting item: FADER<br />
Setting range: F15 to R15<br />
Setting the Treble Control<br />
You can change the Treble Frequency emphasis to create your own tonal<br />
preference.<br />
1 Select TREBLE on the AUDIO MODE screen, then<br />
press the joystick right.<br />
2 Press the joystick up or down to select the desired<br />
item, then press the joystick left or right to adjust<br />
and set the desired item.<br />
Setting the treble level<br />
You can boost or cut treble frequencies.<br />
(The level of each audio source can be adjusted.)<br />
Setting item: LEVEL<br />
Setting level: -7 to +7<br />
Setting the treble centre frequency<br />
The displayed treble frequency is boosted.<br />
(Common to each audio source.)<br />
Setting item: FREQU<strong>EN</strong>CY<br />
Setting range: 7.5kHz 10kHz 12.5kHz 15kHz<br />
Adjustment cannot be performed when an external audio processor is<br />
connected and DEFEAT is set to ON.<br />
Setting the Bass Control<br />
You can change the Bass Frequency emphasis to create your own tonal<br />
preference.<br />
1 Select BASS on the AUDIO MODE screen, then<br />
press the joystick right.<br />
2 Press the joystick up or down to select the desired<br />
item, then press the joystick left or right to adjust<br />
and set the desired item.<br />
11-<strong>EN</strong>
Setting the bass level<br />
You can boost or cut bass frequencies.<br />
(The audio source level can be adjusted.)<br />
Setting item: LEVEL<br />
Setting level: -7 to +10<br />
Setting the slope<br />
Select the frequency you want to set within the available range.<br />
(Common to each audio source.)<br />
Setting item: SLOPE<br />
Setting range: 0.50 0.75 1.00 1.25<br />
Setting the bass centre frequency<br />
The displayed bass frequency is boosted.<br />
(Common to each audio source.)<br />
Setting item: FREQU<strong>EN</strong>CY<br />
Setting range: 60Hz 80Hz 100Hz 120Hz<br />
Adjustment cannot be performed when an external audio processor is<br />
connected and DEFEAT is set to ON.<br />
Adjusting the Subwoofer Level<br />
Adjust the subwoofer output.<br />
Setting item: SUBW LEVEL<br />
Setting range: 0 to 15<br />
The level adjustment becomes available when ON is set in<br />
“Subwoofer On and Off” (page 19).<br />
Turning Loudness ON or OFF<br />
Loudness introduces a special low- and high-frequency emphasis at low<br />
listening levels. This compensates for the ear's decreased sensitivity to<br />
bass and treble sound.<br />
Setting item: LOUDNESS<br />
Setting range: ON / OFF<br />
Adjustment cannot be performed when an external audio processor is<br />
connected and DEFEAT is set to ON.<br />
Turning Defeat ON or OFF<br />
By setting Defeat ON, previously adjusted settings of BASS and<br />
TREBLE will return to the factory defaults.<br />
Setting item: DEFEAT<br />
Setting range: ON / OFF<br />
Adjusting Volume of GUIDE Voice<br />
The volume level of the speaker input voice and the navigation interrupt<br />
voice output from the external audio processor is adjusted.<br />
Setting item: GUIDE MIX LV<br />
* Setting range: 0 to 15<br />
* Make sure to adjust this setting to 15. Otherwise operation may not<br />
be correctly performed.<br />
Adjust the speaker input voice interruption level in “Adjusting the<br />
Speaker Input Voice Interruption Level” (page 17)and “Navigation<br />
Audio Interruption Volume Adjustment” (page 18).<br />
12-<strong>EN</strong><br />
Rear Entertainment Function<br />
The rear entertainment function independently routes different sources<br />
to the front and the rear inside a car. For example, while listening to the<br />
radio or other audio source in the front, DVD can be enjoyed in the rear<br />
with the optional rear monitor and headphones.<br />
To connect the rear monitor, the optional expansion box VPE-S431 is<br />
required.<br />
1 Press and hold TA/RTN/SETUP for at least 2<br />
seconds.<br />
The SETUP screen is displayed.<br />
2 Press the joystick up or down to select REAR<br />
SELECT, then press the joystick right.<br />
The REAR SELECT screen is displayed.<br />
Display Example for REAR SELECT screen<br />
This function cannot be used when MONITOR-1 or 2 is set to<br />
OFF in SYSTEM SETUP.<br />
3 Press the joystick up or down to select the desired<br />
external monitor.<br />
REAR-1: A rear external monitor can be connected to AUX<br />
OUT 1 of the optional expansion box (VPE-S431).<br />
REAR-2: A rear external monitor can be connected to AUX<br />
OUT 2 of the optional expansion box (VPE-S431)<br />
4 Press the joystick left or right to set the desired<br />
video source (external input).<br />
5 Press TA/RTN/SETUP to return to the previous<br />
screen. Press TA/RTN/SETUP repeatedly to return<br />
to the main source screen displayed before starting<br />
the setup operation.<br />
To cancel the rear entertainment function, set to OFF.<br />
When the “Setting the AUX Mode” (page 18) is set to OFF, the<br />
auxiliary source is not displayed.<br />
VISUALIZER (VISUAL.) is not displayed when the setting of “Setting<br />
the VISUALIZER Mode Display” (page 18) is turned off.
Switching the function of the remote<br />
sensor<br />
For remote control operation, the remote sensor of the external device<br />
(monitor, etc.) can be switched, as you prefer.<br />
Switching the Remote Control Sensor<br />
1 In the SETUP screen mode, press the joystick up or<br />
down to select SYSTEM SETUP, then press the<br />
joystick right.<br />
The SYSTEM SETUP screen is displayed.<br />
2 Press the joystick up or down to select REMOTE<br />
SEL.<br />
3 Press the joystick left or right to select the monitor<br />
to be controlled by the remote control.<br />
FRONT: Remote control operation can be performed<br />
when the <strong>Alpine</strong> monitor is connected using an<br />
RGB cable, and also when a monitor (other<br />
than <strong>Alpine</strong>) connected to a remote control<br />
sensor unit (optional) is connected.<br />
REAR-1: The remote sensor of the external monitor<br />
connected to AUX OUT1 of the tuner box of this<br />
unit, or the optional expansion box (VPE-S431)<br />
is effective, and the remote control can operate<br />
only the source selected for the REAR SELECT<br />
screen.<br />
REAR-2: The remote sensor of the external monitor<br />
connected to AUX OUT2 of the optional<br />
expansion box (VPE-S431) is effective, and the<br />
remote control can operate only the source<br />
selected for the REAR SELECT screen.<br />
4 Press TA/RTN/SETUP to return to the previous<br />
screen. Press TA/RTN/SETUP repeatedly to return<br />
to the main source screen displayed before starting<br />
the setup operation.<br />
Select SETUP on the FUNCTION screen to recall the SETUP screen<br />
after pressing and holding /M<strong>EN</strong>U/FUNC. for at least 2 seconds.<br />
The sensor of the touch panel rear monitor has priority over the<br />
sensor of the remote control, if the rear monitor (connected to the<br />
<strong>Alpine</strong> touch panel rear monitor via the Monitor control lead) is<br />
touched, regardless of the remote control sensor switch setting. Note,<br />
however, that the sensor of the remote control that has been set takes<br />
priority if it has been 5 seconds since last touching the panel.<br />
Setup<br />
G<strong>EN</strong>ERAL Setup<br />
General Setup Operation<br />
Joystick<br />
The Parking Brake must be engaged to access the SETUP<br />
mode screen. Attempting to access this screen while driving<br />
will display the warning-CAN’T OPERATE WHILE DRIVING.<br />
The following steps 1 to 5 are common operations to each<br />
“Setting item” of G<strong>EN</strong>ERAL Setup. Refer to each section for<br />
details.<br />
1 Press and hold TA/RTN/SETUP for at least 2<br />
seconds.<br />
The SETUP screen is displayed.<br />
13-<strong>EN</strong>
2 Press the joystick up or down to select G<strong>EN</strong>ERAL<br />
SETUP, then press the joystick right.<br />
The G<strong>EN</strong>ERAL SETUP screen is displayed.<br />
Display Example for G<strong>EN</strong>ERAL SETUP Screen<br />
3 Press the joystick up or down to select the desired<br />
item.<br />
Setting items:<br />
DEMO / CLOCK TYPE / CLOCK ADJ / DAYLIGHT TIME / BEEP /<br />
REACTOR / SCROLL AUTO / RDS CLK DISP / FM LEVEL /<br />
PI SEEK / RDS REGIONAL / PTY LANGUAGE / LANGUAGE SEL<br />
4 Press the joystick left or right to adjust and set the<br />
desired item.<br />
5 Press TA/RTN/SETUP to return to the previous<br />
screen. Press TA/RTN/SETUP repeatedly to return<br />
to the main source screen displayed before starting<br />
the setup operation.<br />
Select SETUP on the FUNCTION screen to recall the SETUP screen<br />
after pressing and holding /M<strong>EN</strong>U/FUNC. for at least 2 seconds.<br />
Immediately after changing the settings of General Mode (While the<br />
system is writing data automatically) do not turn the ignition key<br />
(engine key) to OFF. Otherwise, the settings may not be changed.<br />
Demonstration Function<br />
This unit is equipped with a demonstration function capable of showing<br />
basic operations of respective sources on the monitor display.<br />
Setting item: DEMO<br />
Setting content: OFF / ON<br />
ON: Turns on the demonstration mode to show the basic<br />
operations.<br />
OFF: Turns off the demonstration mode.<br />
The demonstration operation is automatically repeated until the<br />
function is turned off.<br />
Setting the Time Display<br />
The time display type can be set.<br />
Setting item: CLOCK TYPE<br />
Setting content: OFF / 12H / 24H<br />
12H: Clock indication is displayed for 12 hours.<br />
24H: Clock indication is displayed for 24 hours.<br />
OFF: Clock indication is turned off.<br />
14-<strong>EN</strong><br />
Setting the Time<br />
Setting item: CLOCK ADJ<br />
Further setting items: HOUR / MINUTE<br />
Setting content: 1-12 (0-23)* / 0-59<br />
HOUR: Adjust the hour.<br />
MINUTE: Adjust the minute.<br />
* The setting content differs depending on the selection in "Setting the<br />
Time Display" (page 14).<br />
Pressing and holding the joystick left or right will change the setting<br />
item continuously.<br />
Setting Daylight Saving Time<br />
Setting item: DAYLIGHT TIME<br />
Setting content: OFF / ON<br />
ON: Place the Summer Time mode ON. The time advances by<br />
one hour.<br />
OFF: Return to the ordinary time.<br />
Sound (Beep) Guide Function<br />
Setting item: BEEP<br />
Setting content: OFF / ON<br />
ON: Activate the Sound Guide mode.<br />
OFF: Deactivate the Sound Guide mode. The sound guide<br />
beep will not be produced when a button on the<br />
commander is pressed.<br />
Turning the Commander Vibration ON or<br />
OFF<br />
You can turn the commander vibration ON or OFF during operation.<br />
Setting item: REACTOR<br />
Setting content: OFF / ON<br />
OFF: Turns off vibration during operation.<br />
ON: Turns on vibration during operation.<br />
Setting the Scroll<br />
Scroll display is available if CD text, folder name, file name or tag<br />
information is entered.<br />
Setting item: SCROLL AUTO<br />
Setting content: OFF / ON<br />
ON: Turns on the AUTO scroll mode. Scroll display is<br />
repeated as long as the mode is turned on.<br />
OFF: Turns off the AUTO scroll mode.<br />
Scroll display is done once as a track is changed.<br />
Scroll display of the song, artist and album name is enabled when<br />
iPod is connected.
RDS Time Display<br />
When ON is selected, the clock is adjusted automatically based on the<br />
time data sent from the RDS broadcast.<br />
Setting item: RDS CLK DISP<br />
Setting content: OFF / ON<br />
ON: Adjust the clock automatically based on the time data. In<br />
this case, the clock cannot be adjusted manually.<br />
To adjust it manually, select OFF.<br />
Adjusting Source Signal Levels<br />
If the difference in volume level between the CD and FM radio is too<br />
great, adjust the FM signal level as follows.<br />
Setting item: FM LEVEL<br />
Setting content: LOW / HIGH<br />
PI SEEK Setting<br />
Setting item: PI SEEK<br />
Setting content: OFF / AUTO<br />
Receiving RDS Regional (Local) Stations<br />
When ON is selected, the unit automatically keeps receiving the related<br />
local RDS station.<br />
Setting item: RDS REGIONAL<br />
Setting content: OFF / ON<br />
Switching the Display Language of PTY<br />
(<strong>Pro</strong>gramme Type)<br />
You can select one of the patterns of the display languages.<br />
Setting item: PTY LANGUAGE<br />
Setting content: GB / NL / F / D / I / E<br />
Switching to the Russian Font<br />
Two types of font can be selected.<br />
Setting item: LANGUAGE SEL<br />
Setting content: MODE1 / MODE2<br />
MODE1: Normal Font Display (ISO8859-1)<br />
MODE2: Russian Font Display (WINDOWS-1251)<br />
You cannot use this font for display in RDS, Tuner<br />
mode.<br />
SYSTEM Setup<br />
System Setup Operation<br />
The Parking Brake must be engaged to access the SETUP<br />
mode screen. Attempting to access this screen while driving<br />
will display the warning-CAN’T OPERATE WHILE DRIVING.<br />
The following steps 1 to 5 are common operations to each<br />
“Setting item” of SYSTEM Setup. Refer to each section for<br />
details.<br />
1 Press and hold TA/RTN/SETUP for at least 2<br />
seconds.<br />
The SETUP screen is displayed.<br />
2 Press the joystick up or down to select SYSTEM<br />
SETUP, then press the joystick right.<br />
The SYSTEM SETUP screen is displayed.<br />
SYSTEM SETUP Screen example<br />
15-<strong>EN</strong>
3 Press the joystick up or down to select the desired<br />
item.<br />
Setting items:<br />
IN-INT MUTE / NAV. / GUIDE MIX / NAV. MIX LV / FACT SYS SET<br />
/ FACT SYS LV / FACT SYS DET / FACT SYS MIX / F.SYS MIX TYP<br />
/ F.SYS INT CH. / REMOTE SEL.* 1 / AUX IN-1(2,3) / AUX IN-<br />
1(2,3) NAME / AUX IN-1(2,3) LEVEL / MONITOR-1 / MONITOR-2<br />
/ VISUALIZER / ILLUM COLOR / CMNDR LIGHT. / DIMMER /<br />
SCRE<strong>EN</strong> ADJ / SUBW* 2<br />
* 1 Refer to "Rear Entertainment Function" on page 12.<br />
* 2 When an external audio processor is connected, the SUBW item is<br />
not displayed.<br />
4 Press the joystick left or right to adjust and set the<br />
desired item.<br />
5 Press TA/RTN/SETUP to return to the previous<br />
screen. Press TA/RTN/SETUP repeatedly to return<br />
to the main source screen displayed before starting<br />
the setup operation.<br />
Select SETUP on the FUNCTION screen to recall the SETUP screen<br />
after pressing and holding /M<strong>EN</strong>U/FUNC. for at least 2 seconds.<br />
Immediately after changing the settings of System Mode (While the<br />
system is writing data automatically) do not turn the ignition key<br />
(engine key) to OFF. Otherwise, the settings may not be changed.<br />
Using the Speaker Input<br />
The unit can interrupt the system (navigation or telephone) of the car.<br />
The audio can also be played back on the unit if the car system of the<br />
audio (CD, etc.) is selected as the source.<br />
The unit makes the sound interruption according to the sound output<br />
level of the car system. If any of the following settings are not correctly<br />
made, sound may not interrupt, or loud sound may suddenly interrupt.<br />
16-<strong>EN</strong><br />
Setting the Speaker Input Mode<br />
The following explains how to install the system (navigation/telephone)<br />
in your car. While listening to the radio, you can have navigation voice<br />
guidance or a received telephone call interrupt automatically. You can<br />
also select the speaker input mode (FACTRY SYS) on the source<br />
selection screen.<br />
Setting items: FACT SYS SET<br />
Setting content: OFF / SOURCE / INT / BOTH<br />
SOURCE: The system (CD, etc.) of the car can be selected as a<br />
source.<br />
Navigation/telephone voice of the car is not<br />
interrupted.<br />
INT: Interrupts only the navigation/telephone voice of the<br />
car.<br />
BOTH: The system (CD, etc.) of the car can be selected as<br />
the source.<br />
Navigation/telephone voice of the car is interrupted.<br />
OFF: Operation and setting of the speaker input mode is<br />
not performed.<br />
If the car system (CD, etc.) is set to SOURCE and played back in a<br />
car with multi-channel speakers, sound such as treble, etc., may not<br />
be correctly output.<br />
Depending on the conditions of use, the INT or SOURCE setting is<br />
recommended.<br />
If INT is set, do not output CD audio from the car system.<br />
With BOTH set, if the source is set to other than FACTORY SYS, do<br />
not output CD audio, etc., from the car system.<br />
If OFF is to set, speaker input mode settings cannot be made.<br />
Displaying the Speaker Input Volume Level<br />
The volume level of the speaker input is displayed numerically.<br />
Adjustment can be made only on the system in your car (standard car<br />
audio, etc.), and cannot be made by this unit.<br />
Setting items: FACT SYS LV<br />
Setting content: 0 to 2 L / 3 to 15: OK / 16 to 18 H<br />
L: Volume level is LOW<br />
OK: Volume level is optimally adjusted<br />
H: Volume level is HIGH<br />
Adjust the volume for optimum level.<br />
Set the volume as loud as possible, but before the onset of distortion<br />
(The volume level should not exceed 15). Even if OK is displayed, if<br />
any distortion is apparent, decrease the car audio's volume.<br />
Turn off the car audio's TREBLE, BASS settings.<br />
The volume level cannot be displayed when OFF is set in "Setting the<br />
Speaker Input Mode" (page 16).
Setting the Navigation/Speaker Input Voice<br />
Interruption<br />
With an <strong>Alpine</strong> navigation system connected to the <strong>VPA</strong>-<strong>B222R</strong>, the<br />
voice guidance of the navigation system will be mixed with the radio<br />
play. Also, the setting of interruption of the speaker input voice can be<br />
adjusted.<br />
Setting item: GUIDE MIX<br />
Setting content: OFF / ON<br />
OFF: The navigation/speaker input interruption mode is turned<br />
off.<br />
ON: The navigation/speaker input interruption mode is on.<br />
Adjusting the Speaker Input's Interruption<br />
Detection Level<br />
You can set the level for voice interruption.<br />
Setting items: FACT SYS DET<br />
Setting level: 1 to 15<br />
When the setting level is low, the voice interrupts even if a low<br />
volume level is set on the system<br />
The setting can be made when INT or BOTH is set in "Setting the<br />
Speaker Input Mode" (page 16).<br />
Warning beeps such as for seat belts may also output from the<br />
speakers, depending to the car. Make sure that voice interruption<br />
sounds correctly in such a car.<br />
We recommend initially setting the level to 8. Set the voice<br />
interruption level to more than 8 if interruption is too frequent, or set<br />
it to less than 8 if interruption is not frequent enough.<br />
Adjusting the Speaker Input Voice<br />
Interruption Level<br />
The output level of the speaker input interruption can be adjusted.<br />
Setting items: FACT SYS MIX<br />
Setting level: 0 to 15<br />
The setting can be made when INT or BOTH is set in “Setting the<br />
Speaker Input Mode” (page 16).<br />
Begin this setting after setting GUIDE MIX to ON and GUIDE MIX<br />
LV to 15, when an external audio processor is connected. For details,<br />
refer to “Setting the Navigation/Speaker Input Voice Interruption”<br />
(page 17) and “Adjusting Volume of GUIDE Voice” (page 12).<br />
Setting the Interrupt Type of the Speaker<br />
Input Voice<br />
The following explanation is how to set the voice interrupt type of the<br />
speaker input. When the navigation voice guidance is made to interrupt,<br />
set to DEMAND, and the telephone voice is made to interrupt, set to<br />
MUTE, these are recommended.<br />
Setting items: F.SYS MIX TYP<br />
Setting content: FULL / DEMAND / MUTE<br />
FULL: Regardless of the speaker interruption detection<br />
level, voice interruption and source sound are both<br />
active. If voice interruption cannot be heard clearly,<br />
adjust the source volume accordingly on the<br />
commander.<br />
DEMAND: When speaker input interruption occurs, voice<br />
interruption may be too high or too low, adjust the<br />
source volume so voice interruption can be heard. If<br />
no speaker input interruption occurs for 5 seconds,<br />
source volume returns to the level you initially set.<br />
When speaker input interruption occurs again,<br />
source volume level automatically returns to the last<br />
one you set.<br />
MUTE: To avoid voice interruption not being heard clearly,<br />
this setting mutes the current source sound<br />
whenever speaker input interruption occurs. In this<br />
setting, even when voice interruption cannot be<br />
heard clearly, you can still set the volume by the<br />
commander. When speaker input interruption occurs,<br />
the commander buttons blink. Press SOURCE/<br />
POWER to cancel voice interruption.<br />
The setting can be made when INT or BOTH is set in "Setting the<br />
Speaker Input Mode" (page 16).<br />
Setting the Channel of the Speaker<br />
Interruption Detection<br />
The setting should be made according to the speaker output of the car<br />
system (navigation/telephone).<br />
Setting items: F.SYS INT CH.<br />
Setting content: L / R / BOTH<br />
L: Outputs from the left speaker of the car system.<br />
R: Outputs from the right speaker of the car system.<br />
BOTH: Outputs from both speakers of the car system.<br />
Usually set to BOTH.<br />
The setting can be made when INT or BOTH is set in "Setting the<br />
Speaker Input Mode" (page 16).<br />
The speaker input interrupt voice is output from the right and left<br />
front speaker regardless of this setting.<br />
17-<strong>EN</strong>
Connecting the Navigation<br />
If an <strong>Alpine</strong> navigation system is connected, make the necessary<br />
settings in “Setting the Navigation/Speaker Input Voice Interruption”<br />
(page 17). Also make the following settings.<br />
Setting the Navigation Mode<br />
When you connect optional navigation equipment, set to ON.<br />
Setting item: NAV.<br />
Setting contents: OFF / ON<br />
ON: Navigation source is displayed.<br />
OFF: Navigation source is not displayed. The settings related<br />
to the navigation cannot be changed from this unit.<br />
Navigation Audio Interruption Volume<br />
Adjustment<br />
With an <strong>Alpine</strong> navigation system connected to the <strong>VPA</strong>-<strong>B222R</strong>, the<br />
voice guidance of the navigation system will be mixed with the DVD or<br />
CD playback sound.<br />
You can adjust the volume level of the voice guidance.<br />
Setting item: NAV. MIX LV<br />
Setting contents: 0 to 15<br />
When NAV. is turned on, the setting can be made. Refer to "Setting<br />
the Navigation Mode" (page 18).<br />
Connecting an External Input Device<br />
(AUX)<br />
If an external input device is connected, make the following settings.<br />
Setting the AUX Mode<br />
Setting item: AUX IN-1, 2, 3<br />
Setting content: OFF / ON<br />
OFF: AUX source is not displayed.<br />
ON: AUX source is displayed.<br />
When OFF is selected, the settings related to AUX cannot be changed<br />
from this unit.<br />
AUX IN-3 is adjustable when the external expansion box (VPE-S431)<br />
is connected.<br />
OFF is not displayed when a DVD player or DVD changer is<br />
connected with the optional Ai-NET.<br />
When either a DVD player or DVD changer is connected to AUX IN<br />
1, DVD is displayed on the screen. When both of them are connected,<br />
DVD is displayed for AUX IN 1 and DVD CHANGER is displayed for<br />
AUX IN 2.<br />
Naming External Devices<br />
When more than one external device is connected, you can name each<br />
(up to 3) as you like.<br />
Setting items: NAME<br />
Setting contents: AUX / VCR / GAME-1,2 / TV / EXTDVD* / DVB-T<br />
The setting can be made when ON is set in "Setting the AUX Mode"<br />
(page 18).<br />
The selected source name is displayed instead of AUX source name.<br />
If selecting TV/EXT.DVD/DVB-T as the source, the screen will<br />
change to the function screen of that source.<br />
18-<strong>EN</strong><br />
Only when an <strong>Alpine</strong> TV tuner is connected, can you operate the<br />
displayed function guide from this unit.<br />
If an Ai-NET compatible DVD player/DVD changer is connected,<br />
names are automatically set, however, they cannot be changed.<br />
* “EXT.DVD” is displayed on the source selection screen when a DVD<br />
player is connected, and “DVD-1-3” is displayed on the source<br />
selection screen when the NAME setting is set to “EXTDVD” on<br />
more than one AUX (included when an external Ai-NET compatible<br />
DVD player is connected).<br />
Adjusting the External Input Audio Level<br />
Setting item: LEVEL<br />
Setting content: LOW / HIGH<br />
LOW: Decreases the external input audio level<br />
HIGH: Increases the external input audio level<br />
The adjustment is available when ON is set in "Setting the AUX<br />
Mode" (page 18).<br />
Connecting the Rear Monitor<br />
If the rear monitor is connected, make the following each setting<br />
Setting of the External Monitor Output<br />
Set it to ON when you use the rear entertainment function (page 12).<br />
Setting items: MONITOR-1, 2<br />
Setting contents: OFF / ON<br />
ON: By setting the connected external monitor to ON, the<br />
remote control will be usable.<br />
OFF: When either MONITOR-1 or 2 is set to OFF, only one<br />
monitor can be set by the rear entertainment function.<br />
When both MONITOR-1 and 2 are set to OFF, the rear<br />
entertainment function cannot be used.<br />
This setting can be made if optional expansion box VPE-S431 is<br />
connected.<br />
Setting the VISUALIZER Mode Display<br />
Note that this setting is enabled only when the optional expansion box<br />
(VPE-S431) is connected.<br />
Setting item: VISUALIZER<br />
Setting contents: MODE-1-MODE-6 / SCAN / OFF<br />
MODE-1 to<br />
MODE-6 / OFF: Recalls the maker’s setting mode on the<br />
expansion box (VPE-S431).<br />
SCAN: Displays the pattern of MODE-1 to MODE-6<br />
repeatedly.<br />
VISUALIZER can be displayed in a rear monitor when mode is set to<br />
other than OFF. Set the source of the rear monitor to VISUAL. to<br />
display VISUALIZER in the rear monitor. For the rear monitor's<br />
setting, refer to “Rear Entertainment Function” (page 12).
Connecting a Subwoofer<br />
When a subwoofer is connected, set to ON.<br />
Subwoofer On and Off<br />
Setting item: SUBW<br />
Setting contents: ON / OFF<br />
ON: Subwoofer output is on.<br />
OFF: Subwoofer output is off.<br />
When an external audio processor is connected, refer to “Setting the<br />
Speakers” (page 32) for setting.<br />
Setting the Commander<br />
The colour/brightness, etc., of buttons lighting on the commander<br />
supplied with the unit can be adjusted.<br />
Setting the Colour of the Commander<br />
Button illumination<br />
You can set the illumination colour of the commander buttons.<br />
Setting items: ILLUM COLOR<br />
Setting content: BLUE / RED<br />
BLUE: When a source other than navigation is activated,<br />
illumination is blue. When the navigation is activated,<br />
illumination is red.<br />
RED: When a source other than navigation is activated,<br />
illumination is red. When navigation is activated,<br />
illumination is blue.<br />
Turning the Commander Button<br />
illumination on and off<br />
You can select whether the commander button illumination remains lit<br />
or blinks when no operation is performed for 5 minutes.<br />
Setting items: CMNDR LIGHT.<br />
Setting content: ON / OFF<br />
ON: Commander button illumination blinks.<br />
OFF: Commander button illumination stays lit (does not blink).<br />
Adjusting the Brightness of the<br />
Commander Button illumination<br />
With AUTO set, when the headlights are turned on, the commander<br />
button illumination dims. During the night, if the commander button<br />
illumination is too bright, this setting is recommended.<br />
Setting items: DIMMER<br />
Setting content: OFF / ON / AUTO<br />
OFF: Brightness of the commander button illumination is<br />
maximum.<br />
ON: Brightness of the commander button illumination is<br />
decreased.<br />
AUTO: When the headlights are turned on, the commander<br />
button illumination dims.<br />
Setting the Others<br />
Setting the External Device Interrupt Mode<br />
If an <strong>Alpine</strong> Versatile Link Terminal (KCA-410C) is connected to the<br />
<strong>VPA</strong>-<strong>B222R</strong>, an Auxiliary Source will be allowed to interrupt the<br />
current audio source. For example, you can listen to a portable MP3<br />
player through your car audio system even with a CD changer<br />
connected and playing. The CD changer will automatically mute when<br />
switched to the AUX Input. For further details on how to use the <strong>Alpine</strong><br />
KCA-410C, see your authorized <strong>Alpine</strong> dealer.<br />
Setting item: IN-INT MUTE<br />
Setting content: OFF / ON<br />
OFF: Sound will be output in Interrupt mode.<br />
ON: Sound will not be output in Interrupt mode.<br />
The auxiliary device being connected must have an interrupt wire<br />
with a negative trigger for this function to operate automatically.<br />
Otherwise, a separate switch needs to be added to switch it manually.<br />
Adjusting the display position<br />
Depending on the connected monitor, the display may move out of<br />
position. During touch panel operation, if the position between the<br />
display on the LCD and the display of the touch panel does not match,<br />
adjust the display position.<br />
Setting items: SCRE<strong>EN</strong> ADJ<br />
Setting content:<br />
Adjustment if a monitor not compatible with touch panel<br />
operation is connected.<br />
The screen position within the display is adjustable. The position is<br />
controlled from the commander.<br />
1 In the SCRE<strong>EN</strong> ADJ mode, press the joystick right.<br />
The adjustment screen appears.<br />
2 Press the joystick up, down, left or right to adjust the<br />
display position.<br />
3 Press / /<strong>EN</strong>TER.<br />
The adjustment is complete, and the display returns to<br />
the main source screen.<br />
Adjustment if a touch panel compatible monitor is connected.<br />
The screen and soft button positions are adjustable within the<br />
display. The position is controlled from the soft buttons.<br />
1 Touch [ ] of SCRE<strong>EN</strong> ADJ.<br />
2 Touch [ ], [ ], [ ] or [ ] to adjust the display position,<br />
and touch [<strong>EN</strong>T].<br />
The TOUCH LOCATE screen is displayed.<br />
3 Touch the centre of the mark displayed in the lower left<br />
of the screen.<br />
The screen changes to the adjustment screen.<br />
4 Touch the centre of the mark displayed in the upper<br />
right of the screen, then touch [<strong>EN</strong>T].<br />
The adjustment is complete, and the display returns to<br />
the main source screen.<br />
19-<strong>EN</strong>
CD/MP3/WMA<br />
Operation<br />
(Optional)<br />
Display example for MP3/WMA main screen<br />
Disc number display<br />
Folder number display<br />
File number display<br />
Playing CD/MP3/WMA<br />
1 Press SOURCE/POWER.<br />
The source selection screen is displayed.<br />
2 Press the joystick up or down to select the CD/MP3/<br />
WMA mode (CD CHANGER, etc.), then press / /<br />
<strong>EN</strong>TER.<br />
3 Press and hold or for at least 2 seconds to<br />
select a disc (when a changer is connected).<br />
4 While playing back MP3/WMA. Press or to<br />
select the desired folder.<br />
5 Press or to select the desired track.<br />
Returning to the beginning of the current track:<br />
Press .<br />
Fast reverse:<br />
Press and hold .<br />
Advancing to the beginning of the next track:<br />
Press .<br />
Fast forward:<br />
Press and hold .<br />
20-<strong>EN</strong><br />
Joystick<br />
6 To pause playback, press / /<strong>EN</strong>TER.<br />
Pressing / /<strong>EN</strong>TER again will resume playback.<br />
CD playback information (track no., text etc.) will be displayed on<br />
the monitor during playback.<br />
MP3/WMA playback information (folder no., file no., tag<br />
information, etc.) will be displayed on the monitor during playback.<br />
"NO SUPPORT" is displayed when text information is not<br />
compatible with the <strong>VPA</strong>-<strong>B222R</strong>.<br />
The DVD changer (optional) is controllable as well as the CD<br />
changer.<br />
Multi-Changer Selection<br />
With the KCA-410C (Versatile Link Terminal), you can connect two<br />
changers.<br />
1 Press and hold<br />
seconds.<br />
/M<strong>EN</strong>U/FUNC. for at least 2<br />
2<br />
The FUNCTION screen is displayed.<br />
Press the joystick up or down to select CHG SEL.<br />
Then press / /<strong>EN</strong>TER to select the next changer<br />
(connected CD changers only).<br />
Folder/File Search<br />
You can display the names of folders/files and search for a folder/file to<br />
play.<br />
1 Press /M<strong>EN</strong>U/FUNC. during playback.<br />
The Folder Name list is displayed.<br />
2 Press the joystick up or down to select the desired<br />
folder.<br />
3 Press / /<strong>EN</strong>TER to play back the first file in the<br />
selected folder.<br />
To search for a file in the selected folder<br />
1 After selecting the folder in step 2, press the joystick right<br />
to change to the file search mode of the selected folder.<br />
If there is a file name list in the folder, is displayed.<br />
2 Press the joystick up or down to select a file, then press<br />
/ /<strong>EN</strong>TER.<br />
The selected file is played back.<br />
Pressing TA/RTN/SETUP will return to the previous screen.<br />
Folder/File Name search cannot be made during M.I.X. play.<br />
“ROOT” is displayed for the root folder which does not have folder<br />
name.
M.I.X. (Random Play)<br />
1 Press and hold /M<strong>EN</strong>U/FUNC. for at least 2<br />
seconds.<br />
The FUNCTION screen is displayed.<br />
2 Press the joystick up or down to select M.I.X..<br />
When M.I.X. is displayed (changer is connected)<br />
3 Press the joystick right.<br />
4 Press the joystick up or down to select the M.I.X.<br />
mode, then press / /<strong>EN</strong>TER.<br />
CD mode:<br />
M.I.X.: Track are played back in random sequence.<br />
M.I.X. ALL: The tracks on all the CDs in the current magazine<br />
will be included in the random playback sequence.<br />
OFF: M.I.X. mode off.<br />
* When a CD changer equipped with the All M.I.X. function is<br />
connected.<br />
MP3/WMA mode:<br />
M.I.X. FLD: Only files in a folder are played back in random<br />
sequence.<br />
M.I.X.: All files in a disc are played back in random<br />
sequence, and playback shifts to the next disc.<br />
OFF: M.I.X. mode off.<br />
When M.I.X. is displayed<br />
3 Press / /<strong>EN</strong>TER.<br />
M.I.X. mode is changed.<br />
CD mode:<br />
M.I.X. OFF M.I.X.<br />
MP3/WMA mode:<br />
M.I.X. FLD M.I.X. OFF M.I.X. FLD<br />
Repeat Play<br />
1 Press and hold /M<strong>EN</strong>U/FUNC. for at least 2<br />
seconds.<br />
The FUNCTION screen is displayed.<br />
2 Press the joystick up or down to select REPEAT.<br />
When REPEAT is displayed (changer is connected)<br />
3 Press the joystick right.<br />
4 Press the joystick up or down to select the REPEAT<br />
mode and press / /<strong>EN</strong>TER.<br />
CD mode:<br />
RPT: Only a track is repeatedly played back.<br />
RPT DISC: A disc is repeatedly played back.<br />
OFF: Repeat mode off.<br />
MP3/WMA mode:<br />
RPT: Only a file is repeatedly played back.<br />
RPT FLD: Only files in a folder are repeatedly played back.<br />
RPT DISC: A disc is repeatedly played back.<br />
OFF: Repeat mode off.<br />
When REPEAT is displayed<br />
3 Press / /<strong>EN</strong>TER.<br />
The repeat mode is changed.<br />
CD mode:<br />
RPT OFF RPT<br />
MP3/WMA mode:<br />
RPT RPT FLD OFF RPT<br />
21-<strong>EN</strong>
DVD/Video CD<br />
Operation<br />
(Optional)<br />
Display example for DVD main operation screen<br />
Playing DVD/Video CD<br />
Basic operations of an <strong>Alpine</strong> DVD player/Changer can be done from<br />
the unit's supplied commander. Refer to the Owner's Manual of the<br />
connected DVD player/Changer.<br />
When using an <strong>Alpine</strong> DVD Player/Changer, some of the commander<br />
functions may not be recognized. This varies from disc to disc. If the<br />
supplied <strong>VPA</strong>-<strong>B222R</strong> commander is not controlling a particular<br />
function of the DVD being played, please use the remote control that<br />
came with the DVD player.<br />
22-<strong>EN</strong><br />
Joystick<br />
WARNING<br />
It is dangerous for the driver to watch the DVD/TV/<br />
Video while driving the vehicle. The driver may be<br />
distracted from looking ahead and an accident could<br />
occur.<br />
Install the <strong>VPA</strong>-<strong>B222R</strong> correctly so that the driver<br />
cannot watch DVD/TV/Video unless the vehicle is<br />
stopped and the emergency brake is applied.<br />
If the <strong>VPA</strong>-<strong>B222R</strong> is not installed correctly, the driver<br />
will be able to watch the DVD/TV/Video while driving<br />
the vehicle and may be distracted from looking ahead<br />
and cause an accident. The driver or other people<br />
could be severely injured.<br />
To display the DVD mode screen<br />
If you try to activate the auxiliary device while driving, the display<br />
will show the warning-PICTURE OFF FOR YOUR SAFETY.<br />
Caution<br />
Not all functions will operate for every DVD. See the<br />
individual DVD’s instructions for details on the<br />
features supported.<br />
If you try to perform an invalid operation (based on<br />
the type of disc being played), the following mark is<br />
displayed on the monitor screen:<br />
1 Press SOURCE/POWER.<br />
The source selection screen is displayed.<br />
2 Press the joystick up or down to select the DVD<br />
mode (EXT.DVD, DVD CHANGER or etc.), then press<br />
/ /<strong>EN</strong>TER.<br />
Playback starts.<br />
If a menu screen appears<br />
On DVDs and Video CDs with playback control (PBC), menu screens<br />
may appear automatically. The DVD menu can be controlled by the<br />
commander supplied with the unit. If this happens, perform the<br />
operation described below to start playback.<br />
Press the joystick up, down, left or right to select an<br />
item, then press and hold / /<strong>EN</strong>TER for at least<br />
2 seconds.<br />
Press TA/RTN/SETUP to return to the previous screen.<br />
The video CD menu screen cannot be controlled from the commander<br />
supplied with the unit.<br />
Depending on the disc, the menu screen may be recalled from the<br />
FUNCTION screen. Select M<strong>EN</strong>U on the FUNCTION screen and<br />
press / /<strong>EN</strong>TER to recall the menu, after displaying the<br />
FUNCTION screen by pressing and holding /M<strong>EN</strong>U/FUNC. for<br />
at least 2 seconds.<br />
Playing Still Frames (Pausing)<br />
1 During playback, press / /<strong>EN</strong>TER.<br />
2 Press / /<strong>EN</strong>TER to resume playback.
Finding the Beginnings of Chapters or<br />
Tracks<br />
During playback, press or .<br />
The chapter/track switches each time the button is pressed, and<br />
playback of the selected chapter/track starts.<br />
: Press this to start playback from the beginning of the<br />
following chapter or track.<br />
: Press this to start playback from the beginning of the<br />
current chapter or track.<br />
Some DVDs do not have chapters.<br />
Supplementary explanation<br />
“Chapters” are divisions of movies or musical selections on<br />
DVDs.<br />
“Tracks” are divisions of movies or musical selections on<br />
video and music CDs.<br />
Fast-forwarding/Fast-reversing<br />
1 During playback, press and hold (fast-reverse)<br />
or (fast-forward).<br />
2 Release or to return to normal playback.<br />
Displaying the Top Menu Screen (DVD<br />
only)<br />
With a DVD having two or more titles, a top menu screen will appear.<br />
Press /M<strong>EN</strong>U/FUNC. on the DVD mode main screen.<br />
The menu screen appears.<br />
To perform necessary operations, see “If a menu screen appears” on<br />
page 22.<br />
Changing Discs (only when DVD changer<br />
is connected)<br />
Press and hold or for at least 2 seconds.<br />
The selected disc is played back.<br />
Select DISC SELECT on the FUNCTION screen and press<br />
/ /<strong>EN</strong>TER to change discs, after pressing and holding /<br />
M<strong>EN</strong>U/FUNC. for at least 2 seconds.<br />
Stopping Playback (PRE STOP)<br />
Select the PRE STOP during playback to stop playback. That position is<br />
stored in the memory.<br />
1 During playback, press and hold /M<strong>EN</strong>U/FUNC.<br />
for at least 2 seconds.<br />
The FUNCTION screen is displayed.<br />
2 Press the joystick up or down to select STOP/PRE<br />
STOP, then press / /<strong>EN</strong>TER.<br />
"PRE STOP" is displayed.<br />
3 During PRE STOP mode, press / /<strong>EN</strong>TER.<br />
Playback starts from the position at which it was stopped.<br />
For some discs, the position at which playback was stopped may not<br />
be accurate.<br />
When a DVD player/changer is connected with Ai-NET, STOP/PRE<br />
STOP is not displayed on the FUNCTION screen in the video CD<br />
mode.<br />
Stopping Playback<br />
1 During the PRE STOP mode, press and hold /<br />
M<strong>EN</strong>U/FUNC. for at least 2 seconds.<br />
The FUNCTION screen is displayed.<br />
2 Press the joystick up or down to select STOP/PRE<br />
STOP, then press / /<strong>EN</strong>TER.<br />
“STOP” is displayed, and playback stops.<br />
Playback starts from the beginning when / /<strong>EN</strong>TER is pressed<br />
while playback is stopped.<br />
When a DVD player/changer is connected with Ai-NET, STOP/PRE<br />
STOP is not displayed on the FUNCTION screen in the video CD<br />
mode.<br />
Chapter/Track/Title Repeat Playback<br />
Use this function to play the disc’s titles, chapters or tracks repeatedly.<br />
1 Press and hold /M<strong>EN</strong>U/FUNC. for at least 2<br />
seconds.<br />
The FUNCTION screen is displayed.<br />
2 Press the joystick up or down to select REPEAT,<br />
then press / /<strong>EN</strong>TER.<br />
The screen changes to the repeat mode in the following<br />
step.<br />
DVD<br />
The chapter is played repeatedly.<br />
The title is played repeatedly.<br />
The playback returns to normal mode.<br />
23-<strong>EN</strong>
Video CD<br />
Display may vary depending on the connected devices.<br />
The track/disc repeat modes cannot be used on video CDs with<br />
playback control (PBC). These modes can be carried out after<br />
turning PBC off.<br />
For some discs it is not possible to switch the repeat mode.<br />
The repeat mode may not be switched, depending on the connected<br />
product.<br />
Switching the Audio Tracks<br />
DVDs can have up to 8 different audio tracks. These alternate tracks can<br />
be switched during playback.<br />
1 Press and hold /M<strong>EN</strong>U/FUNC. for at least 2<br />
seconds.<br />
The FUNCTION screen is displayed.<br />
2 Press the joystick up or down to select AUDIO,<br />
then press / /<strong>EN</strong>TER.<br />
The sound switches between the alternate audio tracks<br />
recorded on the disc.<br />
The alternate track selected becomes the default setting every time<br />
the power is turned on or the disc is replaced. If the disc does not<br />
include that track, the disc’s default language is selected instead.<br />
Not all discs will allow changing the alternate audio tracks during<br />
playback. In these cases, select audio tracks from the DVDs menu.<br />
There may be a delay before the selected alternate track begins to<br />
play.<br />
Video CDs with multiplex audio<br />
1 Press and hold /M<strong>EN</strong>U/FUNC. for at least 2<br />
seconds.<br />
The FUNCTION screen is displayed.<br />
2 Press the joystick up or down to select AUDIO,<br />
then press / /<strong>EN</strong>TER.<br />
The left and right channels will be output as shown in the<br />
figure below.<br />
If a DVD player/DVD changer with Ai-NET is connected, AUDIO is<br />
not displayed on the video CD function screen.<br />
24-<strong>EN</strong><br />
The track is played repeatedly.<br />
The disc is played repeatedly.<br />
Playback does not repeat.<br />
<br />
AUDIO L/R AUDIO L/L AUDIO R/R AUDIO L/R<br />
Switching the Subtitles (Subtitle<br />
Language) (DVD only)<br />
With DVDs on which multiple subtitle languages are recorded, the<br />
subtitle language can be switched during playback; moreover, subtitles<br />
can be hidden.<br />
1 Press and hold /M<strong>EN</strong>U/FUNC. for at least 2<br />
seconds.<br />
The FUNCTION screen is displayed.<br />
2 Press the joystick up or down to select SUB<br />
TITLE, then press / /<strong>EN</strong>TER.<br />
The subtitle language stored in the disc is changed, then<br />
turns off.<br />
There may be a delay before the selected subtitle appears.<br />
Not all discs will allow changing the subtitles during playback. In<br />
these cases, select subtitles from the DVDs menu.<br />
The subtitle language selected becomes the default setting every time<br />
the power is turned on or the disc is replaced. If the disc does not<br />
include that language, the disc’s default language is selected instead.<br />
However, the subtitle language may differ depending on the disc.<br />
For some discs, the subtitles will be displayed even when this is set to<br />
off. However, the subtitle language may differ depending on the disc.<br />
Switching the Angle (DVD only)<br />
On DVDs in which scenes have been filmed from multiple angles, the<br />
angle can be switched during playback.<br />
1 Press and hold /M<strong>EN</strong>U/FUNC. for at least 2<br />
seconds.<br />
The FUNCTION screen is displayed.<br />
2 Press the joystick up or down to select ANGLE,<br />
then press / /<strong>EN</strong>TER.<br />
The angle switches between the angles recorded on the<br />
disc.<br />
Some time may be required for the angle to change.<br />
Depending on the disc, the angle may switch in one of two ways.<br />
- Seamless: The angle switches smoothly.<br />
- Non-seamless: When the angle is switched, a still picture is<br />
displayed first, after which the angle switches.<br />
Switching from the disc menu<br />
For some discs, the audio language, angle and subtitles can be switched<br />
from the disc menu.<br />
1 Press and hold /M<strong>EN</strong>U/FUNC. for at least 2<br />
seconds.<br />
The FUNCTION screen is displayed.<br />
2 Press the joystick up or down to select M<strong>EN</strong>U,<br />
then press / /<strong>EN</strong>TER.<br />
3 Select an item to confirm it.<br />
See “If a menu screen appears” on page 22.
iPod ® (Optional)<br />
An iPod ® can be controlled from the <strong>VPA</strong>-<strong>B222R</strong>, when<br />
connected to an optional <strong>Alpine</strong> Interface Adapter for iPod<br />
(KCA-420i). While connected to the <strong>VPA</strong>-<strong>B222R</strong>, operation from<br />
the iPod is no longer possible.<br />
For details, refer to the Owner’s Manual of the connected adapter<br />
(KCA-420i).<br />
For each function, refer to the iPod’s documentation.<br />
About iPod usable with this unit<br />
The unit can be used with third generation and above iPod,<br />
iPod photo, iPod minis or iPod nano. iPod Shuffle cannot be<br />
used, however.<br />
Touch wheel or scroll wheel type iPods without the dock<br />
connector cannot be connected to the unit.<br />
The unit can be used with the following iPod versions.<br />
Correct function of earlier versions cannot be guaranteed.<br />
Third generation iPod: Ver. 2.3<br />
Fourth generation iPod: Ver. 3.0.2<br />
iPod photo: Ver.1.1<br />
iPod mini: Ver. 1.3<br />
iPod nano: Ver.1.0<br />
The unit cannot be used with the software versions earlier<br />
than 2005-02-22. For details about “iPod Software Update”,<br />
refer to the iPod Instruction Manual.<br />
Playback<br />
Joystick<br />
1 Press SOURCE/POWER.<br />
The source selection screen is displayed.<br />
2 Press the joystick up or down to select iPod, then<br />
press / /<strong>EN</strong>TER.<br />
3 Press or to select the desired song.<br />
Return to the beginning of the current song:<br />
Press .<br />
Fast reverse:<br />
Press and hold .<br />
Advance to the beginning of the next song:<br />
Press .<br />
Fast forward:<br />
Press and hold .<br />
4 To pause playback, press / /<strong>EN</strong>TER. Pressing<br />
/ /<strong>EN</strong>TER again will resume playback.<br />
If a song is playing on the iPod when it is connected to the<br />
<strong>VPA</strong>-<strong>B222R</strong>, it will continue playing after the connection.<br />
If using the iPod with a changer, the Versatile Link Terminal (KCA-<br />
410C) must be used. In this case, select “CHG SEL” and press /<br />
/<strong>EN</strong>TER on the FUNCTION screen or press and hold for at<br />
least 2 seconds to select the changer mode applicable to the iPod.<br />
If the artist, album or song name, created in iTunes, has too many<br />
characters, songs may not be played back when connected to the<br />
adapter. Therefore, a maximum of 250 characters is recommended.<br />
The maximum number of characters for this unit is 64 (64 byte).<br />
Some characters may not be correctly displayed.<br />
“NO SUPPORT” is displayed when text information is not<br />
compatible with the <strong>VPA</strong>-<strong>B222R</strong>.<br />
Searching for a desired Song<br />
An iPod can contain hundreds to thousands of songs. By keeping these<br />
songs organized in smaller playlists, the <strong>VPA</strong>-<strong>B222R</strong> has the ability to<br />
ease song searches.<br />
The maximum number of playlists, artists or albums that can be<br />
searched is 511. The maximum number of searches for a song is 255.<br />
Searching by Playlist<br />
1 Press /M<strong>EN</strong>U/FUNC..<br />
The search mode is activated, and the search list screen<br />
appears.<br />
2 Press the joystick up or down to select PLAYLIST<br />
SEARCH, then press the joystick right.<br />
3 Press the joystick up or down to select the playlist.<br />
To play back the playlist directly<br />
1 Press / /<strong>EN</strong>TER.<br />
The selected playlist is played back repeatedly.<br />
To search for a song in the playlist<br />
1 Press the joystick right to change to the song search<br />
mode of the selected playlist.<br />
2 Press the joystick up or down to select a song, then press<br />
/ /<strong>EN</strong>TER.<br />
The selected song is played back.<br />
25-<strong>EN</strong>
Searching by artist name Searching by album name<br />
1 Press /M<strong>EN</strong>U/FUNC..<br />
The search mode is activated, and the search list screen<br />
appears.<br />
2 Press the joystick up or down to select ARTIST<br />
SEARCH, then press the joystick right.<br />
3 Press the joystick up or down to select the artist to<br />
be played back.<br />
To play back the artist directly<br />
1 Press / /<strong>EN</strong>TER.<br />
Songs by the selected artist are played back.<br />
Selecting ALL and pressing / /<strong>EN</strong>TER will return to the iPod<br />
mode screen.<br />
Selecting ALL and pressing the joystick right will change to the<br />
ALBUM search screen.<br />
To search for the album of an artist<br />
1 Press the joystick right to change to the album search<br />
mode of the selected artist.<br />
2* 1 Press the joystick up or down to select the album to be<br />
played back.<br />
3 Press / /<strong>EN</strong>TER to play back all songs of the<br />
selected album.<br />
Songs in the selected album are played back.<br />
Selecting ALL and pressing / /<strong>EN</strong>TER will play back the first<br />
song of the selected artist.<br />
Selecting ALL and pressing the joystick right will change to the<br />
SONG search screen of the selected artist<br />
To search for a song in the album of an artist<br />
1 After selecting the album in step 2* 1 , press the joystick<br />
right to change to the song search mode of the selected<br />
album.<br />
2 Press the joystick up or down to select a song, then press<br />
/ /<strong>EN</strong>TER.<br />
The selected song is played back.<br />
26-<strong>EN</strong><br />
1 Press /M<strong>EN</strong>U/FUNC..<br />
The search mode is activated, and the search list screen<br />
appears.<br />
2 Press the joystick up or down to select ALBUM<br />
SEARCH, then press the joystick right.<br />
3 Press the joystick up or down to select the album<br />
to be played back.<br />
To play back the album directly<br />
1 Press / /<strong>EN</strong>TER.<br />
Songs in the selected album are played back.<br />
Selecting ALL and pressing / /<strong>EN</strong>TER will return to the iPod<br />
mode screen.<br />
Selecting ALL and pressing the joystick right will change to the<br />
SONG search screen.<br />
To search for a song in an album<br />
1 Press the joystick right to change to the song search<br />
mode of the selected album.<br />
2 Press the joystick up or down to select a song, then press<br />
/ /<strong>EN</strong>TER.<br />
The selected song is played back.
Random Play Shuffle (M.I.X.)<br />
The Shuffle function of the iPod is displayed as M.I.X. on the<br />
<strong>VPA</strong>-<strong>B222R</strong>.<br />
1 Press and hold /M<strong>EN</strong>U/FUNC. for at least 2<br />
seconds.<br />
The FUNCTION screen is displayed.<br />
2 Press the joystick up or down to select M.I.X., then<br />
press the joystick right.<br />
3 Press the joystick up or down to select the M.I.X.<br />
mode, then press / /<strong>EN</strong>TER.<br />
M.I.X. ALBUM:<br />
Album shuffle playback plays back all songs in order, then randomly<br />
selects the next album. All songs of that album are played back in order,<br />
and so on. Any one album is played just once.<br />
M.I.X. SONGS:<br />
Song shuffle randomly plays back certain selected songs. Any one song<br />
plays back just once until all songs have been played back.<br />
OFF: M.I.X. mode off<br />
4 To cancel M.I.X. play, select OFF, and press / /<br />
<strong>EN</strong>TER.<br />
For details of the search mode, refer to "Searching for a desired<br />
Song" (page 25).<br />
If a song is selected in the album search mode before selecting<br />
Shuffle (M.I.X.), the songs will not play back randomly even when<br />
Shuffle album is selected.<br />
The M.I.X. mode is cancelled when iPod is removed or the ignition<br />
key is turned off.<br />
Repeat Play<br />
Only Repeat One is available for the iPod.<br />
Repeat One: A single song is repeatedly played back.<br />
1 Press and hold /M<strong>EN</strong>U/FUNC. for at least 2<br />
seconds.<br />
The FUNCTION screen is displayed.<br />
2 Press the joystick up or down to select REPEAT,<br />
then press the joystick right.<br />
3 Press the joystick up or down to select RPT, then<br />
press / /<strong>EN</strong>TER.<br />
The track is played back repeatedly.<br />
4 To cancel repeat play, select OFF in step 3, and<br />
press / /<strong>EN</strong>TER.<br />
During repeat playback, no other songs are selectable by pressing<br />
or .<br />
The repeat mode is cancelled when iPod is removed or the ignition<br />
key is turned off.<br />
Navigation System<br />
(Optional)<br />
Joystick<br />
Basic <strong>Alpine</strong> navigation control can be performed by the commander<br />
supplied with the unit. Refer to the Owner's Manual of the navigator.<br />
If a navigation system that is not controlled by the remote control, but<br />
touch-panel operation only is connected, operations cannot be<br />
performed by the commander.<br />
Displaying the Navigation Screen<br />
When an <strong>Alpine</strong> navigation system is connected, the navigation screen<br />
can easily be displayed.<br />
1 Press DISP..<br />
The Navigation screen is displayed.<br />
2 To cancel the screen, press DISP. again.<br />
Changing the Navigation operation mode<br />
When an <strong>Alpine</strong> navigation system is connected, the navigation screen<br />
can easily be displayed, and some operations can be performed.<br />
1 Press NAV./POS..<br />
The navigation screen is displayed, and the navigation<br />
mode becomes active.<br />
2 Press DISP. to cancel the operation mode, and<br />
return to the main source screen before the<br />
operation was performed.<br />
When DISP. is pressed and held for at least 2 seconds, the<br />
operation mode is cancelled, the navigation screen display<br />
remains, and the sound returns to the selected source<br />
before the operation was performed.<br />
If the navigation mode is selected on the source selection screen, the<br />
navigation mode is not cancelled even if DISP. is pressed.<br />
The colour of the commander buttons illumination changes in the<br />
navigation mode. Refer to "Setting the Colour of the Commander<br />
Button Illumination" (page 19).<br />
27-<strong>EN</strong>
Map Screen Function<br />
Displaying the Current Position<br />
1 Press NAV./POS. while displaying the map screen.<br />
The current position screen is displayed.<br />
Scrolling the Map<br />
1 Press the joystick.<br />
The map scrolls in the direction the joystick is pressed.<br />
Changing the Map Scale<br />
1 Press or .<br />
Each press of the button changes the map scale. Pressing<br />
and holding changes the scale continuously.<br />
Menu Screen Function<br />
1 Press /M<strong>EN</strong>U/FUNC. in the Navigation mode.<br />
The Navigation Menu screen is displayed.<br />
2 Press the joystick up, down, left or right to select<br />
the desired item.<br />
3 Press / /<strong>EN</strong>TER.<br />
Press TA/RTN/SETUP to return to the previous screen.<br />
28-<strong>EN</strong><br />
TV Operation<br />
(Optional)<br />
When connected to an <strong>Alpine</strong> TV unit (sold separately), you can use the<br />
commander supplied with the <strong>VPA</strong>-<strong>B222R</strong> to operate the TV. Set the<br />
AUX NAME to TV. Refer to "Naming External Devices" page 18.<br />
When the optional expansion box (VPE-S431) is connected, connect<br />
TV to AUX IN-2, 3.<br />
Be sure to connect this unit or VPE-S431 remote control output lead<br />
to the TV unit's remote control input lead.<br />
For details, refer to the owner's manual of the digital TV unit.<br />
Operating TV Unit<br />
Joystick<br />
WARNING<br />
It is dangerous for the driver to watch the TV while<br />
driving the vehicle. The driver may be distracted from<br />
looking ahead and an accident could occur.<br />
Install the <strong>VPA</strong>-<strong>B222R</strong> correctly so that the driver<br />
cannot watch TV unless the vehicle is stopped and<br />
the emergency brake is applied.<br />
If the <strong>VPA</strong>-<strong>B222R</strong> is not installed correctly, the driver<br />
will be able to watch the TV while driving the vehicle<br />
and may be distracted from looking ahead and cause<br />
an accident. The driver or other people could be<br />
severely injured.<br />
If you try to activate the TV unit while driving, the display will show<br />
the warning-PICTURE OFF FOR YOUR SAFETY.
1 Press SOURCE/POWER.<br />
The source selection screen is displayed.<br />
2 Press the joystick up or down to select TV, then<br />
press / /<strong>EN</strong>TER.<br />
3 Press and hold for at least 2 seconds to select<br />
BAND.<br />
4 Press / /<strong>EN</strong>TER to switch the tuning mode.<br />
Manual tune Auto seek tune<br />
5 Press or to seek for a channel downward<br />
or upward respectively.<br />
Automatic Memory of Channel Presets<br />
1 Press and hold / /<strong>EN</strong>TER for at least 2 seconds.<br />
The auto preset operation starts.<br />
After the completion, memorized channel number list<br />
displays and the first memorized station is automatically<br />
received.<br />
2 To receive a memorized station, press or .<br />
Switching Audio<br />
1 Press and hold /M<strong>EN</strong>U/FUNC. for at least 2<br />
seconds.<br />
The FUNCTION screen is displayed.<br />
2 Press the joystick up or down to select AUDIO,<br />
then press / /<strong>EN</strong>TER.<br />
The audio mode is changed.<br />
Digital TV Operation<br />
(Optional)<br />
When connected to an <strong>Alpine</strong> Digital TV unit (sold separately), you can<br />
use the commander supplied with the <strong>VPA</strong>-<strong>B222R</strong> to operate the Digital<br />
TV. Set the AUX NAME to DVB-T. Refer to "Naming External<br />
Devices" page 18.<br />
Be sure to connect this unit or VPE-S431 remote control output lead<br />
to the Digital TV unit's remote control input lead.<br />
For details, refer to the owner’s manual of the digital TV unit.<br />
Operating Digital TV Unit<br />
Joystick<br />
WARNING<br />
It is dangerous for the driver to watch the TV while<br />
driving the vehicle. The driver may be distracted from<br />
looking ahead and an accident could occur.<br />
Install the <strong>VPA</strong>-<strong>B222R</strong> correctly so that the driver<br />
cannot watch TV unless the vehicle is stopped and<br />
the emergency brake is applied.<br />
If the <strong>VPA</strong>-<strong>B222R</strong> is not installed correctly, the driver<br />
will be able to watch the TV while driving the vehicle<br />
and may be distracted from looking ahead and cause<br />
an accident. The driver or other people could be<br />
severely injured.<br />
If you try to activate the Digital TV unit while driving, the display<br />
will show the warning-PICTURE OFF FOR YOUR SAFETY.<br />
29-<strong>EN</strong>
1 Press SOURCE/POWER.<br />
The source selection screen is displayed.<br />
2 Press the joystick up or down to select DVB-T,<br />
then press / /<strong>EN</strong>TER.<br />
3 Press / /<strong>EN</strong>TER to switch the channel mode.<br />
Channel up/down Favorite Channel up/down<br />
4 Press or to seek for a channel downward<br />
or upward respectively.<br />
5 Press and hold for at least 2 seconds to switch a<br />
source of digital TV unit.<br />
EPG Screen Operation<br />
1 Press /M<strong>EN</strong>U/FUNC..<br />
The EPG screen is displayed.<br />
2 Press the joystick up or down to select the desired<br />
item for adjusting.<br />
3 Press the joystick left or right to adjust the selected<br />
item, then press and hold / /<strong>EN</strong>TER for at least 2<br />
seconds.<br />
Automatic Memory of Channel Presets<br />
1 Press and hold /M<strong>EN</strong>U/FUNC. for at least 2<br />
seconds.<br />
The FUNCTION screen is displayed.<br />
2 Press the joystick up or down to select A. MEMO,<br />
then press / /<strong>EN</strong>TER.<br />
The auto preset operation starts.<br />
Displaying the Menu Screen<br />
The menu screen for a digital TV unit is displayed.<br />
1 Press and hold /M<strong>EN</strong>U/FUNC. for at least 2<br />
seconds.<br />
The FUNCTION screen is displayed.<br />
2 Press the joystick up or down to select M<strong>EN</strong>U,<br />
then press and hold / /<strong>EN</strong>TER for at least 2<br />
seconds.<br />
30-<strong>EN</strong><br />
Auxiliary Device<br />
(Optional)<br />
Operating Auxiliary Devices (Optional)<br />
To operate devices connected to the AUX terminals of <strong>VPA</strong>-<strong>B222R</strong>,<br />
follow the procedure described below.<br />
WARNING<br />
It is dangerous for the driver to watch the TV/Video<br />
while driving the vehicle. The driver may be distracted<br />
from looking ahead and an accident could occur.<br />
Install the <strong>VPA</strong>-<strong>B222R</strong> correctly so that the driver<br />
cannot watch TV/Video unless the vehicle is stopped<br />
and the emergency brake is applied.<br />
If the <strong>VPA</strong>-<strong>B222R</strong> is not installed correctly, the driver<br />
will be able to watch the TV/Video while driving the<br />
vehicle and may be distracted from looking ahead and<br />
cause an accident. The driver or other people could<br />
be severely injured.<br />
If you try to activate an auxiliary device while driving, the display<br />
will show the warning-PICTURE OFF FOR YOUR SAFETY.<br />
1 Press SOURCE/POWER.<br />
The source selection screen is displayed.<br />
2 Press the joystick up or down to select the AUX<br />
mode, then press / /<strong>EN</strong>TER.<br />
The external input screen is displayed.<br />
AUX-1 to AUX are displayed if AUX IN set to ON in “Setting the<br />
AUX mode” (page 18), or the name which is given as the source<br />
name in “Naming External Devices” on page 18 is displayed.<br />
AUX-3 is displayed when the optional expansion box (VPE-S431) is<br />
connected.<br />
When the Versatile Link Terminal (KCA-410C) is connected, external<br />
input to KCA-410C is unavailable. However, when IN-INT MUTE is<br />
set to off, the sound of a device connected to the external input of<br />
KCA-410C can be interrupted. (See "Setting the External Device<br />
Interrupt Mode" page 19.)
Factory System External Audio<br />
Operating Factory System (Speaker<br />
Input mode)<br />
The car’s system (standard CD player, etc.) can be selected as a source.<br />
1 Press SOURCE/POWER.<br />
The source selection screen is displayed.<br />
2 Press the joystick up or down to select the<br />
FACTORY SYS mode, then press / /<strong>EN</strong>TER.<br />
The speaker input screen is displayed.<br />
FACTORY SYS mode is displayed when SOURCE or BOTH is set in<br />
"Setting the Speaker Input Mode" (page 16).<br />
Make each setting correctly in “Using the Speaker Input” (page 16)<br />
before use this function.<br />
<strong>Pro</strong>cessor<br />
(Optional)<br />
Joystick<br />
When an external audio processor is connected to this unit, you can<br />
operate it from this unit. Some audio processors may not be operated.<br />
Explanations below is the case when PXA-H700 or PXA-H701 is<br />
connected for example.<br />
Refer also to the operating instructions of the connected audio<br />
processor.<br />
The adjustments or settings performed on the connected audio<br />
processor cannot be operated properly from this unit.<br />
The setting "Setting the Speakers", "Setting Bass Sound Control",<br />
and "Graphic Equalizer Adjustments" are not available if the MRD-<br />
D550 is connected. Additionally, if the MRD-F350 is connected, the<br />
following setting "Setting the MX mode" is not available. Also, the<br />
setting content differs between the PXA-H700 and PXA-H701.<br />
31-<strong>EN</strong>
Adjustment <strong>Pro</strong>cedure for Dolby<br />
Surround<br />
Make the adjustments described below in order to reproduce Dolby<br />
Digital and DTS sound with greater accuracy.<br />
Adjustment procedure<br />
1<br />
2<br />
3<br />
4<br />
5<br />
6<br />
7<br />
In case of combining the Automatic adjustments, etc.<br />
We recommend to make the Automatic adjustments before the Dolby<br />
Surround adjustments.<br />
32-<strong>EN</strong><br />
Speaker Setup (page 36)<br />
(Turning the speakers to be used on and off and<br />
setting their response)<br />
Adjusting the speaker levels (page 38)<br />
(Adjusting the signal output level to the various<br />
speakers)<br />
Mixing bass sound to the rear channel<br />
(page 37)<br />
(Achieving smooth sound in the rear seat by mixing<br />
the front audio signals with the rear speaker signals)<br />
Adjusting the acoustic image (page 37)<br />
(Adjusting the acoustic image to achieve a sound as<br />
if the centre speaker were directly in front of the<br />
listener)<br />
Achieving powerful high volume sound<br />
(page 38)<br />
(Achieving energetic sound with even greater power,<br />
like the sound in a movie theater)<br />
Adjusting the DVD Level (page 38)<br />
(Adjust the volume (signal level) in the Dolby Digital,<br />
<strong>Pro</strong> Logic II, DTS and PCM modes)<br />
Storing Settings in the Memory (page 38)<br />
(Storing all the settings and adjustments made on the<br />
<strong>VPA</strong>-<strong>B222R</strong> (not only the above settings/adjustments)<br />
in the memory)<br />
Setting the Speakers<br />
1 Check that Defeat mode is off (page 12).<br />
2 Press and hold TA/RTN/SETUP for at least 2<br />
seconds.<br />
The SETUP screen is displayed.<br />
3 Press the joystick up or down to select AP SETUP,<br />
then press the joystick right.<br />
The AP SETUP screen is displayed.<br />
4 Press the joystick up or down to select SPEAKER<br />
SEL, then press the joystick right.<br />
5 Press the joystick left or right to set the connected<br />
speaker.<br />
FRONT1: OFF/FULL (Full Range)/TW (tweeter)<br />
FRONT2: OFF/ON<br />
REAR: OFF/ON<br />
C<strong>EN</strong>TER: OFF/ON<br />
SUBWOOFER: OFF/MONO/STEREO<br />
6 Repeat step 4 and 5 to set all other speakers.<br />
7 Press TA/RTN/SETUP to return to the previous<br />
screen.<br />
Set any unconnected speakers to OFF.<br />
Settings above can be carried out even when the speaker is set to<br />
OFF in “Speaker Setup” (page 36).<br />
To use the subwoofer in MONO with PXA-H700 or PXA-H701<br />
connected, connect the subwoofer to the subwoofer output terminal<br />
of PXA-H700 or PXA-H701.
Set MX Mode of the External Audio<br />
<strong>Pro</strong>cessor<br />
Before performing the operations below, set MX (Media Xpander)<br />
mode of the PXA-H700 to “AUTO” when the PXA-H700 is connected.<br />
1 Check that Defeat mode is off (page 12).<br />
2 Press and hold TA/RTN/SETUP for at least 2<br />
seconds.<br />
The SETUP screen is displayed.<br />
3 Press the joystick up or down to select AP SETUP,<br />
then press the joystick right.<br />
The AP SETUP screen is displayed.<br />
4 Press the joystick up or down to select MX, then<br />
press joystick left or right to select ON.<br />
5 Press the joystick up or down to select<br />
MX SETUP, then press the joystick right.<br />
6 Press the joystick up or down to select the media<br />
that is being played back. Then press the joystick<br />
left or right to set the desired MX mode.<br />
MX CD (OFF, CD 1 to 3)<br />
CD mode processes a large quantity of data. This data is used<br />
to reproduce the sound cleanly by making use of the data<br />
quantity.<br />
MX COMPM (OFF, CMPM 1 to 3)<br />
This corrects information that was omitted at the time of<br />
compression. This reproduces a well-balanced sound close to<br />
the original.<br />
MX FM (OFF, FM 1 to 3)<br />
The medium to high frequencies become more clear, and<br />
produces well balanced sound in all the bands.<br />
MX DVD (OFF, MOVIE 1 to 2)<br />
The dialog portion of the video is reproduced more clearly.<br />
(MUSIC)<br />
This disk contains a large quantity of data, such as a music clip.<br />
MX uses this data to reproduce the sound accurately.<br />
MX AUX 1 to 3 (OFF, CMPM, MOVIE, MUSIC)<br />
Choose the MX mode (CMPM, MUSIC, or MOVIE) that<br />
corresponds to the media connected.<br />
7 Press TA/RTN/SETUP to return to the previous<br />
screen.<br />
The contents of MX set here is reflected in PXA-H700 or PXA-H701.<br />
When OFF is selected, MX effect of each MX mode will be OFF.<br />
Each music source, such as radio, CD, and MP3 can have its own<br />
MX setting.<br />
MX mode does not function when MX is ON for MW, LW radio.<br />
MX COMPM is applied for MP3/WMA, MMD, iPod.<br />
MX mode can only be set for media currently playing back.<br />
AUX3 can be set only when the optional expansion box VPE-S431 is<br />
connected.<br />
X-OVER Adjustment<br />
1 Check that Defeat mode is off (page 12).<br />
2 Press and hold TA/RTN/SETUP for at least 2<br />
seconds.<br />
The SETUP screen is displayed.<br />
3 Press the joystick up or down to select AP SETUP,<br />
then press the joystick right.<br />
The AP SETUP screen is displayed.<br />
4 Press the joystick up or down to select<br />
X-OVER.<br />
5 Press the joystick left or right to select L/R or L+R.<br />
6 Press the joystick up or down to select X-OVER<br />
SETUP, then press the joystick right.<br />
7 Press the joystick up or down to select the desired<br />
speaker, then press the joystick right.<br />
8 Press the joystick up or down to select the desired<br />
item, then press the joystick left or right to adjust<br />
the crossover.<br />
FREQU<strong>EN</strong>CY: Adjust the H.P.F. or L.P.F. cutoff frequency.<br />
The adjustable bands differ according to the<br />
channel (speaker).<br />
LEVEL: Adjust the H.P.F. or L.P.F. level.<br />
Adjustable level: -13 to 0<br />
SLOPE: Adjust the H.P.F. or L.P.F. slope.<br />
Adjustable slope: OFF/-6/-12/-18/-24/-30<br />
To adjust other channels, repeat steps 7 and 8.<br />
9 Press TA/RTN/SETUP to return to the previous<br />
screen.<br />
When the speaker is set to the “OFF” mode, the X-OVER for that<br />
speaker cannot be set. Refer to “Setting the Speakers” (page 32).<br />
Check the playback frequencies of the connected speakers before<br />
adjusting.<br />
In order to protect the speakers, there is no OFF setting for the<br />
subwoofer low pass filter (the slope remains the same).<br />
The H.P.F. filter cannot be set to OFF (slope OFF) if TW (tweeter) is<br />
selected for FRONT1.<br />
33-<strong>EN</strong>
Performing Time Correction Manually<br />
(TCR)<br />
Because of the particular conditions inside the vehicle, there can be<br />
major differences in the distances between the various speakers and the<br />
listening position. It is possible to calculate the optimum correction<br />
values and eliminate the time error at the listening position yourself<br />
using this function.<br />
1 Check that Defeat mode is off (page 12).<br />
2 Sit in the listening position (the driver’s seat, for<br />
example) and measure the distance (in meters)<br />
between your head and the various speakers.<br />
3 Calculate the difference in distance between the<br />
farthest speaker and the other speakers.<br />
L = (distance of farthest speaker)<br />
– (distance of other speakers)<br />
4 Divide the distances calculated for the different<br />
speakers by the speed of sound (343 m/s<br />
temperature 20 °C).<br />
This value is the time correction value for the various<br />
speakers.<br />
Concrete examples<br />
Calculating the time correction value for the front left speaker on<br />
the diagram below.<br />
Conditions:<br />
Distance between farthest speaker and listening position:<br />
2.25 m (88-3/4")<br />
Distance between front left speaker and listening position:<br />
0.5 m (20")<br />
Calculation:<br />
L = 2.25 m (88-3/4") – 0.5 m (20")= 1.75 m (68-3/4")<br />
Compensation time = 1.75 ÷ 343 x 1000 = 5.1 (ms)<br />
In other words, setting the time correction value for the front left<br />
speaker to 5.1 (ms) sets a virtual distance matching the<br />
distance to the farthest speaker.<br />
0.5m<br />
34-<strong>EN</strong><br />
2.25m<br />
The sound is uneven because<br />
the distance between the<br />
listening position and the<br />
different speakers is different.<br />
The difference in the distance<br />
between the front left and rear<br />
right speakers is 1.75 meters<br />
(68-3/4").<br />
5.1ms<br />
Time correction eliminates<br />
the difference between the<br />
time required for the sound<br />
from the different speakers to<br />
reach the listening position.<br />
Setting the time correction of<br />
the front left speaker to 5.1<br />
ms makes it possible to<br />
coordinate the distance from<br />
the listening position to the<br />
speaker.<br />
5 Press and hold TA/RTN/SETUP for at least 2<br />
seconds.<br />
The SETUP screen is displayed.<br />
6 Press the joystick up or down to select AP SETUP,<br />
then press the joystick right.<br />
The AP SETUP screen is displayed.<br />
7 Press the joystick up or down to select TCR.<br />
8 Press the joystick left or right to select L/R or L+R.<br />
L/R: Different adjustment values can be set for the left and<br />
right channels.<br />
L+R: Sets the same adjustment values for the left and right<br />
channels.<br />
9 Press the joystick up or down to select<br />
TCR SETUP, then press the joystick right.<br />
10 Press the joystick up or down to select the desired<br />
speaker.<br />
11 Press the joystick left or right to adjust the<br />
calculated time correction value (0.00 to 20.00ms).<br />
(1step=0.05ms)<br />
Time correction value changes continuously by pressing<br />
and holding the joystick.<br />
12 Press TA/RTN/SETUP to return to the previous<br />
screen.<br />
When the speaker is set to the “OFF” mode, the TCR for that<br />
speaker cannot be set. Refer to “Setting the Speakers” (page 32).<br />
The adjustment value for FRONT2 (Speakers) which is adjusted in<br />
time correction, is also applied to the front speakers in “Setting Bass<br />
Focus” (page 36).<br />
The adjustment (AUTO TCR) cannot be automatically set on this<br />
unit.<br />
Phase Switching<br />
1 Check that Defeat mode is off (page 12).<br />
2 Press and hold TA/RTN/SETUP for at least 2<br />
seconds.<br />
The SETUP screen is displayed.<br />
3 Press the joystick up or down to select AP SETUP,<br />
then press the joystick right.<br />
The AP SETUP screen is displayed.<br />
4 Press the joystick up or down to select PHASE<br />
SETUP, then press the joystick right.<br />
5 Press the joystick up or down to select the desired<br />
speaker.<br />
6 Press the joystick left or right to switch the phase<br />
(0°or 180°).<br />
7 Press TA/RTN/SETUP to return to the previous<br />
screen.
Graphic Equalizer Adjustments<br />
The graphic equalizer allows you to modify the sound using 31 bands<br />
each for the front (left and right), rear (left and right) and centre<br />
speakers. An additional 10 bands are available for the subwoofer. This<br />
allows you to customize the sound to suit your taste.<br />
1 Check that the Defeat mode is off (page 12).<br />
2 Press and hold TA/RTN/SETUP for at least 2<br />
seconds.<br />
The SETUP screen is displayed.<br />
3 Press the joystick up or down to select AP SETUP,<br />
then press the joystick right.<br />
The AP SETUP screen is displayed.<br />
4 Press the joystick up or down to select G-EQ.<br />
5 Press the joystick left or right to select L/R or L+R.<br />
L/R: Different adjustment values can be set for the left and<br />
right channels.<br />
L+R: Sets the same adjustment values for the left and right<br />
channels.<br />
When parametric EQ is adjusted, this setting will be turned<br />
off.<br />
6 Press the joystick up or down to select G-EQ<br />
SETUP, then press the joystick right.<br />
7 Press the joystick up or down to select the desired<br />
channel, then press the joystick right.<br />
8 Press the joystick up or down to select the desired<br />
frequency.<br />
9 Press the joystick left or right to adjust the level of<br />
the desired frequency.<br />
Adjustable level: -9 to +9<br />
To adjust other frequencies, repeat steps 8 and 9.<br />
To adjust other channels, repeat steps 7 and 9.<br />
10 Press TA/RTN/SETUP to return to the previous<br />
screen.<br />
When the speaker is set to the “OFF” mode, the graphic equalizer<br />
for that speaker cannot be set. Refer to “Setting the Speakers”<br />
(page 32).<br />
Check the playable frequency ranges of the connected speakers<br />
before making the equalizer adjustments. If the speaker’s playable<br />
frequency range is 55 Hz to 30 kHz, for example, adjusting the 40 Hz<br />
or 20 Hz band has no effect. Additionally, you may overload and<br />
damage the speakers.<br />
When graphic EQ is adjusted, the adjustment for parametric EQ<br />
becomes ineffective.<br />
Parametric Equalizer Adjustments<br />
The frequency bands of the graphic equalizer are fixed. This makes it<br />
very difficult to correct for undesired peaks and dips at specific<br />
frequencies. The parametric equalizer’s centre frequency can be tuned<br />
to these specific frequencies. Then, the bandwidth (Q) and level are<br />
fine-tuned, independently, to make the necessary corrections. The<br />
parametric equalizer function is an advanced tool for serious<br />
audiophiles.<br />
1 Check that Defeat mode is off (page 12).<br />
2 Press and hold TA/RTN/SETUP for at least 2<br />
seconds.<br />
The SETUP screen is displayed.<br />
3 Press the joystick up or down to select AP SETUP,<br />
then press the joystick right.<br />
The AP SETUP screen is displayed.<br />
4 Press the joystick up or down to select P-EQ.<br />
5 Press the joystick left or right to select L/R or L+R.<br />
L/R: Different adjustment values can be set for the left and<br />
right channels.<br />
L+R: Sets the same adjustment values for the left and right<br />
channels.<br />
When graphic EQ is adjusted, this setting will be turned off.<br />
6 Press the joystick up or down to select P-EQ<br />
SETUP, then press the joystick right.<br />
7 Press the joystick up or down to select the desired<br />
channel, then press the joystick right.<br />
8 Press the joystick up or down to select the desired<br />
band, then press the joystick right.<br />
9 Press the joystick up or down to select the desired<br />
item, then press the joystick left or right to adjust<br />
the desired mode.<br />
To adjust other bands, repeat steps 8 and 9.<br />
To adjust other channels, repeat steps 7 and 9.<br />
FREQU<strong>EN</strong>CY: Selects the frequency.<br />
LEVEL: Adjusts the level.<br />
Adjustable level: -9 to +9<br />
Q: Adjust the bandwidth.<br />
Adjustable bandwidth: 0.5/1/2/3/4/5<br />
10 Press TA/RTN/SETUP to return to the previous<br />
screen.<br />
When the speaker is set to the “OFF” mode, the parametric<br />
equalizer for that speaker cannot be set. Refer to “Setting the<br />
Speakers” (page 32).<br />
It is not possible to adjust the frequencies of adjacent bands within 7<br />
steps.<br />
Check the playable frequency ranges of the connected speakers<br />
before making the equalizer adjustments. If the speaker’s playable<br />
frequency range is 55 Hz to 30 kHz, for example, adjusting the 40 Hz<br />
or 20 Hz band has no effect. Additionally, you may overload and<br />
damage the speakers.<br />
When the parametric EQ is adjusted, the adjustment for graphic EQ<br />
becomes ineffective.<br />
35-<strong>EN</strong>
Setting Bass Sound Control<br />
1 Check that Defeat mode is off (page 12).<br />
2 Press and hold TA/RTN/SETUP for at least 2<br />
seconds.<br />
The SETUP screen is displayed.<br />
3 Press the joystick up or down to select AP SETUP<br />
and press the joystick right.<br />
The AP SETUP screen is displayed.<br />
4 Press the joystick up or down to select B.SOUND<br />
CNTL, then press the joystick right.<br />
Setting Bass Compressor<br />
You can adjust the sound of low frequencies as desired.<br />
5 Press the joystick up or down to select BASS<br />
COMP.<br />
6 Press the joystick left or right to select the desired<br />
mode.<br />
Bass sound is emphasized more as the mode is<br />
sequentially switched as MODE1<br />
vivid low frequencies.<br />
2 3, offering you<br />
Select OFF when the setting is not necessary.<br />
Press TA/RTN/SETUP to return to the previous screen.<br />
Setting Bass Focus<br />
Using the previously specified delay number (time difference) allows<br />
you to set a time difference between the front-rear/left-right speakers.<br />
Namely, it enables a time correction based on your preference. With an<br />
initial delay of 0.05 ms for each of the 0 to 400 steps, audible time<br />
correction can be achieved.<br />
5 Press the joystick up or down to select the desired<br />
speaker.<br />
6 Press the joystick left or right to adjust the front,<br />
rear, left and right speakers.<br />
7 Repeat step 5 and 6 to set other speakers.<br />
Any setting in Bass Focus is applied in time correction, too.<br />
Press TA/RTN/SETUP to return to the previous screen.<br />
36-<strong>EN</strong><br />
Speaker Setup<br />
The PXA-H700 or PXA-H701 can be set according to the playable<br />
frequency range of your speakers.<br />
Check the playable frequency range of the speakers (not including the<br />
subwoofer) before performing this operation to verify whether the<br />
speakers can play low frequencies (of about 80 Hz or less).<br />
Avoid stopping, pausing, switching the disc, cueing, fast-forwarding<br />
or switching the audio channel of this unit while making this<br />
adjustment. The setting is cancelled if Decode mode is switched.<br />
1 Check that Defeat mode is off (page 12).<br />
2 Press and hold TA/RTN/SETUP for at least 2<br />
seconds.<br />
The SETUP screen is displayed.<br />
3 Press the joystick up or down to select AP SETUP,<br />
then press the joystick right.<br />
The AP SETUP screen is displayed.<br />
4 Press the joystick up or down to select SPEAKER<br />
SETUP, then press the joystick right.<br />
5 Press the joystick up or down to select the desired<br />
speaker.<br />
6 Press the joystick left or right to select the speaker<br />
characteristic.<br />
OFF* 1 : When no speaker is connected.<br />
SMALL: When a speaker that cannot play low frequencies<br />
(80 Hz or less) is connected.<br />
LARGE* 2 : When a speaker that can play low frequencies (80<br />
Hz or less) is connected.<br />
* 1 It is not possible to set the front speakers to “OFF”.<br />
* 2 If the front speakers are set to “SMALL”, the rear and<br />
centre speakers cannot be set to “LARGE”.
7 Repeat step 5 and 6 to set each speaker.<br />
If the centre speaker is turned “OFF,” the centre channel’s audio<br />
signals are added to the audio signals output from the front speakers.<br />
If you set the speaker response to “OFF,” also set the speaker setting<br />
to “OFF” (page 32).<br />
Perform the setup for all the speakers (“Front,” “Centre,” “Rear”<br />
and “Subwoofer”). Otherwise, the sound may not be balanced.<br />
When the centre speaker is set to “OFF”, the setting is ineffective<br />
even if centre is set with this function.<br />
Through changing the settings on each speaker, a change in the<br />
output of the other speakers may occur due to the setting<br />
requirements.<br />
When using PRO LOGIC II, if the rear speaker is set to “LARGE”,<br />
there will be no output from the subwoofer.<br />
Setting of Dolby Digital<br />
1 Check that Defeat mode is off (page 12).<br />
2 Press and hold TA/RTN/SETUP for at least 2<br />
seconds.<br />
The SETUP screen is displayed.<br />
3 Press the joystick up or down to select AP SETUP,<br />
then press the joystick right.<br />
The AP SETUP screen is displayed.<br />
4 Press the joystick up or down to select MULTI CH<br />
SET, then press the joystick right.<br />
The MULTI CH SET screen is displayed.<br />
5 Press the joystick up or down to select the desired<br />
item.<br />
Set the items below as you desire.<br />
Adjusting the acoustic image<br />
In most installations, the centre speaker must be placed directly between<br />
the front passenger and driver. Using this function, the centre channel<br />
information is distributed to the left and right speakers. This creates an<br />
acoustic image simulating a centre speaker directly in front of each<br />
listener. Adjusting the centre width in PL II MUSIC (see “Using the <strong>Pro</strong><br />
Logic II Mode,” page 39), makes this function ineffective.<br />
Avoid stopping, pausing, switching the disc, cueing, fast-forwarding<br />
or switching the audio channel of this unit while making this<br />
adjustment. The setting is cancelled if the Decode mode is switched.<br />
1 Press the joystick left or right to select ON of BI-<br />
PHANTOM.<br />
2 Press the joystick down to select BI-PHANTOM LV.<br />
3 Press the joystick left or right to adjust the level.<br />
The level can be adjusted within the range of -5 to +5. The<br />
higher the level, the more the position of the centre speaker is<br />
shifted to the sides.<br />
The BI-PHANTOM function is turned off when setting to<br />
OFF.<br />
This adjustment is effective when the setting of the centre speaker to<br />
SMALL or LARGE in the speaker setup settings.<br />
This adjustment is ineffective when the speaker is set to C<strong>EN</strong>TER<br />
OFF in “Setting the Speakers” (page 32).<br />
Mixing bass sound to the rear channel<br />
This function mixes the front channel audio signals to the audio signals<br />
output from the rear speakers, improving the sound in the vehicle’s rear<br />
seat.<br />
Avoid stopping, pausing, switching the disc, cueing, fast-forwarding<br />
or switching the audio channel of this unit while making this<br />
adjustment. The setting is cancelled if the Decode mode is switched.<br />
1 Press the joystick left or right to select ON of REAR MIX.<br />
2 Press the joystick down to select MIX LEVEL.<br />
3 Press the joystick left or right to adjust the level.<br />
The level can adjusted in five steps: -6, -3, 0, +3 and +6. The<br />
higher the level, the more bass is output from the rear speakers.<br />
(The effect differs depending on the software (DVD, etc.)).<br />
The REAR MIX function is turned off when set to OFF.<br />
This adjustment is ineffective when the rear speaker setup setting is<br />
set to “OFF”.<br />
For linear PCM signals, the voice is output from the rear speaker<br />
regardless of the REAR FILL and REAR MIX setting.<br />
37-<strong>EN</strong>
Achieving powerful high volume sound<br />
With Dolby Digital, the dynamic range is compressed so that powerful<br />
sound can be achieved at regular volume levels. This compression can<br />
be cancelled to achieve an energetic sound with even greater power, like<br />
the sound in a movie theater.<br />
This function works only in the Dolby Digital mode.<br />
Press the joystick left or right to select STD or MAX. of<br />
LIST<strong>EN</strong>ING.<br />
STD: For powerful sound at regular volume levels<br />
MAX.: For powerful sound at high volumes<br />
Keep the volume to a level at which sounds outside the vehicle can<br />
still be heard.<br />
Adjusting the speaker levels<br />
The test tones help to make the volume adjustments of the different<br />
speakers. When levels are equal, a strong sense of presence can be heard<br />
from the different speakers at the listening position.<br />
Avoid stopping, pausing, switching the disc, cueing, fast-forwarding<br />
or switching the audio channel of this unit while making this<br />
adjustment. The setting is cancelled if the decode mode is switched.<br />
1 Press the joystick left or right to select ON of OUTPUT.<br />
Test tone output is repeated for each of the different<br />
speaker channels. They will be repeated in the order<br />
shown below.<br />
If no operation is performed for 2 seconds, the channel<br />
switches to the next channel.<br />
2 Press the joystick down to select OUTPUT LEVEL.<br />
3 Press the joystick left or right to balance the output from<br />
all the speakers.<br />
If a speaker is set to off mode, that speaker’s level adjustment cannot<br />
be made. Refer to “Speaker Setup” (page 36).<br />
38-<strong>EN</strong><br />
Left Centre Right Right Surround<br />
Left surround Left<br />
The adjustment range for the different speakers is<br />
–10 dB - +10 dB.<br />
Adjust based on the front speakers.<br />
Adjusting the DVD Level<br />
The volume (signal level) for Dolby Digital, Dolby PL II, DTS and<br />
PCM modes can be set.<br />
Avoid stopping, pausing, switching the disc, cueing, fast-forwarding<br />
or switching the audio channel of this unit while making this<br />
adjustment. The setting is cancelled if the Decode mode is switched.<br />
1 Check that Defeat mode is off (page 12).<br />
2 Press and hold TA/RTN/SETUP for at least 2<br />
seconds.<br />
The SETUP screen is displayed.<br />
3 Press the joystick up or down to select AP SETUP,<br />
then press the joystick right.<br />
The AP SETUP screen is displayed.<br />
4 Press the joystick up or down to select DVD<br />
LEVEL, then press the joystick right.<br />
The DVD LEVEL screen is displayed.<br />
5 Press the joystick up or down to select the desired<br />
mode.<br />
6 Press the joystick left or right to adjust level.<br />
The level can be adjusted in the range of –5 to +5.<br />
7 Repeat step 5 and 6 to set each level.<br />
Storing Settings in the Memory<br />
Adjustment or setting contents can be stored.<br />
Contents that can be stored vary depends on the audio processor used.<br />
1 Check that Defeat mode is off (page 12).<br />
2 Press and hold TA/RTN/SETUP for at least 2<br />
seconds.<br />
The SETUP screen is displayed.<br />
3 Press the joystick up or down to select AP SETUP,<br />
then press the joystick right.<br />
The AP SETUP screen is displayed.<br />
4 Press the joystick up or down to select PRESET<br />
MEMORY, then press the joystick right.<br />
5 Press the joystick up or down to select any one of<br />
the preset numbers (1 through 6), then press / /<br />
<strong>EN</strong>TER.<br />
The setting contents are stored.<br />
The stored contents will not be deleted even when the battery power<br />
cord is detached.
Calling up the Preset Memory<br />
1 Check that Defeat mode is off (page 12).<br />
2 Press and hold TA/RTN/SETUP for at least 2<br />
seconds.<br />
The SETUP screen is displayed.<br />
3 Press the joystick up or down to select AP SETUP,<br />
then press the joystick right.<br />
The AP SETUP screen is displayed.<br />
4 Press the joystick up or down to select PRESET<br />
CALL, then press the joystick right.<br />
5 Press the joystick up or down to select any one of<br />
the preset numbers (1 through 6), then press / /<br />
<strong>EN</strong>TER.<br />
It takes a few moments to call up the preset memory.<br />
Using the <strong>Pro</strong> Logic II Mode<br />
<strong>Pro</strong> Logic processing can be conducted on the music signals recorded<br />
on two channels to achieve Dolby <strong>Pro</strong> Logic II surround sound. For<br />
two-channel Dolby Digital and DTS signals, there is also a “REAR<br />
FILL” function for outputting the signals of the front channel to the rear<br />
channel.<br />
1 Check that Defeat mode is off (page 12).<br />
2 Press and hold TA/RTN/SETUP for at least 2<br />
seconds.<br />
The SETUP screen is displayed.<br />
3 Press the joystick up or down to select AP SETUP,<br />
then press the joystick right.<br />
The AP SETUP screen is displayed.<br />
4 Press the joystick up or down to select D PLII/<br />
REAR, then press the joystick right.<br />
5 Press the joystick left or right to select the desired<br />
mode of D PLII/REAR.<br />
MOVIE: Suits the stereo TV shows and all programs encoded in<br />
Dolby Surround. It improves the sound field directivity to<br />
near that of discrete 5.1-channel sound.<br />
MUSIC: Can be used for all stereo music recordings, and<br />
provides a wide, deep sound field.<br />
R.FILL: Depending on the input signals, the sound may only be<br />
output from the front speakers. In this case, the “REAR<br />
FILL” function can be used to output signals from the<br />
rear speakers as well.<br />
OFF: Turns D PLII/REAR FILL function to OFF.<br />
If MUSIC is selected, the centre width can be adjusted with the<br />
following operations.<br />
This function offers the optimum vocal position by adjusting the<br />
centre channel position between the centre speaker and the L/R<br />
speaker (The adjustments established in “Adjusting the acoustic<br />
image” (page 37) are ineffective while this function is activated).<br />
1 Press the joystick down to select C<strong>EN</strong>TER WIDTH, then<br />
press the joystick left or right to select ON.<br />
2 Press the joystick left or right to adjust the level.<br />
The level can be adjusted between 0 to 7. When the level<br />
increases, the centre channel position moves from the<br />
centre speaker position to both sides.<br />
The centre width control is cancelled when set to OFF.<br />
This adjustment is effective when the setting of the centre speaker is<br />
SMALL or LARGE in the speaker setup settings.<br />
Avoid stopping, pausing, switching the disc, cueing, fast-forwarding<br />
or switching the audio channel of this unit while making this<br />
adjustment. The setting is canceled if the Decode mode is switched.<br />
This adjustment is ineffective when the speaker is set to C<strong>EN</strong>TER<br />
OFF in “Setting the Speakers” (page 32).<br />
This function only works with two-channel signals. This operation is<br />
ineffective when 5.1-channel DTS or Dolby Digital signals are input.<br />
If the setting of REAR FILL is made when REAR MIX is ON, sound is<br />
unchanged in the rear fill setting because REAR MIX is given priority<br />
during 2 channel decoder other than linear PCM.<br />
For linear PCM signals, the voice is output from the rear speaker<br />
regardless of the REAR FILL and REAR MIX setting.<br />
Pressing TA/RTN/SETUP will return to the previous screen.<br />
Linear PCM Setting<br />
The output when playing discs recorded in linear PCM can be set to 2 or<br />
3 channels.<br />
1 Check that Defeat mode is off (page 12).<br />
2 Press and hold TA/RTN/SETUP for at least 2<br />
seconds.<br />
The SETUP screen is displayed.<br />
3 Press the joystick up or down to select AP SETUP,<br />
then press the joystick right.<br />
The AP SETUP screen is displayed.<br />
4 Press the joystick up or down to select PCM<br />
MODE.<br />
5 Press the joystick left or right to select 2CH or<br />
3CH.<br />
2CH: 2ch output (L/R)<br />
3CH: 3ch output (L/R/C<strong>EN</strong>TER)<br />
This adjustment is ineffective when the speaker is set to C<strong>EN</strong>TER<br />
OFF in “Setting the Speakers” (page 32).<br />
39-<strong>EN</strong>
Soft button<br />
operation<br />
If an <strong>Alpine</strong> touch panel compatible monitor is connected to this unit,<br />
touch operation can be performed by directly touching the monitor.<br />
Refer to each section for details.<br />
Operation may differ depending on the connected device. Refer to<br />
owner’s manual of the connected device.<br />
Basic operation<br />
The following example for the radio screen and source selection screen<br />
explains for basic operation.<br />
<br />
Returns to the main source screen.<br />
/<br />
Scrolls the list.<br />
Selects the item.<br />
SOURCE (page 6)<br />
The source selection screen is displayed.<br />
NAV. (page 27)<br />
The Navigation screen is displayed.<br />
CONTROL<br />
Displays the function screen on the connected touch panel<br />
compatible with the monitor.<br />
VOL. / (page 7)<br />
Adjusts the volume.<br />
MUTE (page 7)<br />
Turns mute on and off.<br />
FUNC.<br />
Displays the FUNCTION screen of each source.<br />
40-<strong>EN</strong><br />
If there is a hierarchical list, is displayed, and touching<br />
will change to the list screen.<br />
RTN<br />
Returns to the previous screen.<br />
Radio Operation<br />
Display example for the radio main screen<br />
(page 7)<br />
Searches and receives a channel automatically (distance<br />
mode or local mode).<br />
(page 7)<br />
Changes down through channels one by one (manual<br />
mode).<br />
(page 9)<br />
PTY search (RDS operation).<br />
TUNE (page 7)<br />
Changes the tuning mode.<br />
DX SEEK ( , ) SEEK ( , )<br />
OFF ( , ) PTY SEEK ( , ) DX SEEK<br />
(page 7)<br />
Searches and receives a channel automatically (distance<br />
mode or local mode).<br />
(page 7)<br />
Changes down through channels one by one (manual<br />
mode).<br />
(page 9)<br />
PTY search (RDS operation).<br />
A.MEMO (page 8)<br />
Memorizes automatically.<br />
BAND (page 7)<br />
Changes the band.<br />
TA (page 9)<br />
Displayed when FM radio is received. Touch to change to<br />
the Traffic Information mode.
Display example for function screen<br />
(page 8)<br />
When you store/recall a preset number, the display changes<br />
to the preset number screen.<br />
(page 8)<br />
Enters the preset number.<br />
RDS Operation<br />
Display example for the RDS screen<br />
(pages 9, 10)<br />
Seeks a programme in current PTY (<strong>Pro</strong>gramme Type).<br />
Touching and holding will change PTY.<br />
(pages 9, 10)<br />
Seeks a programme in current PTY (<strong>Pro</strong>gramme Type).<br />
Touching and holding will change PTY.<br />
Display example for the RDS function screen.<br />
(PTY) (page 9)<br />
Displays the PTY selection screen. Touch to confirm the<br />
programme type in selection screen.<br />
(NEWS) (page 10)<br />
Changes the news mode.<br />
(AF) (page 9)<br />
Changes AF setting ON/OFF.<br />
Display example for the function screen<br />
(INFO) (page 10)<br />
Displays the radio text.<br />
Setup Operation<br />
“Adjusting the Audio" (page 11), “Rear Entertainment Function"<br />
(page 12) and “External Audio <strong>Pro</strong>cessor (Optional)” (page 31) are<br />
operated in the same way.<br />
Display example for the function screen<br />
(SETUP)<br />
Displays SETUP screen.<br />
Display example for setup screen<br />
If there is a hierarchical list, is displayed, and touching<br />
will change to the list screen.<br />
/<br />
Adjusts and sets by touching.<br />
41-<strong>EN</strong>
CD/MP3/WMA Operation<br />
Display example for MP3/WMA main screen<br />
(page 20)<br />
Finds the beginning of the current track. Touch and hold to<br />
play fast-reverse.<br />
/ (page 20)<br />
Pauses and plays back.<br />
(page 20)<br />
Finds the beginning of the next track. Touch and hold to<br />
play fast-forward.<br />
F. (page 20)<br />
Selects previous folder.<br />
F. (page 20)<br />
Selects next folder.<br />
(page 20)<br />
Enters folder/file search mode.<br />
“ F.”, “F. ” and “ ” are not displayed during CD playback.<br />
Display example for search screen<br />
(page 20)<br />
Enters the selected folder/file.<br />
(page 20)<br />
If there is a file in the folder, folders are displayed, and<br />
touching will change to the file list screen.<br />
42-<strong>EN</strong><br />
Display example for the function screen<br />
(REPEAT), (M.I.X.) (page 21)<br />
Each touch changes to repeat or M.I.X. mode.<br />
Display example for when connecting a CD changer<br />
(REPEAT) , (M.I.X.) (page 21)<br />
Changes to the selection screen of M.I.X. or repeat mode.<br />
Touch to confirm mode in the selection screen.<br />
(DISC SELECT) (page 20)<br />
Displays disc selection screen.<br />
Touch to confirm disc in the selection screen.<br />
(CHG SEL) (page 20)<br />
Displayed when two changers are connected.<br />
Touch to change the changer.
DVD/Video CD Operation<br />
The display item differs according to disc and connected device.<br />
Some soft buttons may not be operational.<br />
Display example for DVD main operation screen<br />
(page 23)<br />
Finds the beginning of track/chapter. Touching and holding<br />
plays fast- reverse.<br />
/ (page 22)<br />
Pauses and plays back.<br />
(page 23)<br />
Finds the beginning of a track/chapter. Touching and<br />
holding plays fast- forward.<br />
KEY (page 22)<br />
The DVD menu operation screen is displayed.<br />
TOP M<strong>EN</strong>U (page 23)<br />
The DVD top menu screen is displayed.<br />
Display example for DVD menu operation screen<br />
Moves an item displayed on the screen.<br />
<strong>EN</strong>T<br />
Enters the selected item.<br />
RTN<br />
Returns to the previous screen.<br />
CONTROL<br />
Displays the main operation screen.<br />
Display example for function screen<br />
(M<strong>EN</strong>U) (page 24)<br />
Displays menu screen.<br />
(AUDIO) (page 24)<br />
Changes audio language.<br />
(SUB TITLE) (page 24)<br />
Changes subtitle language.<br />
(ANGLE) (page 24)<br />
Changes angle.<br />
(STOP/PRE STOP) (page 23)<br />
Stops/pauses playback.<br />
(REPEAT) (pages 23, 24)<br />
Changes repeat mode.<br />
43-<strong>EN</strong>
iPod ® Operation<br />
Display example for iPod main screen<br />
(page 25)<br />
Finds the beginning of a song. Touching and holding will go<br />
fast-reverse.<br />
/ (page 25)<br />
Pauses and plays back.<br />
(page 25)<br />
Finds the beginning of a song. Touching and holding fastforwards<br />
a song.<br />
(page 25)<br />
The search mode screen is displayed.<br />
Display example for search screen<br />
(page 25)<br />
Enters the selected playlist/artist/album/song.<br />
(page 25)<br />
If there is a hierarchy in playlist/artist/album, lists are<br />
displayed, and the list screen will change by touching.<br />
Display example for function screen<br />
(REPEAT) , (M.I.X.) (page 27)<br />
Changes to the selection screen of M.I.X. or repeat mode.<br />
Touch to confirm mode in selection screen.<br />
44-<strong>EN</strong><br />
TV Operation<br />
Display example for TV main screen<br />
(page 29)<br />
Decreases channels one by one (Manual mode).<br />
(page 29)<br />
Searches and receives a channel automatically (Auto seek<br />
mode).<br />
P.SET (page 29)<br />
Decreases the preset numbers one by one.<br />
TUNE (page 29)<br />
Changes the tuning way (manual mode, auto seek mode<br />
and preset number).<br />
(page 29)<br />
Increases channels one by one.<br />
(page 29)<br />
Searches and receives a channel automatically (Auto seek<br />
mode).<br />
P.SET (page 29)<br />
Increases the preset numbers one by one.<br />
A.MEMO (page 29)<br />
Memorizes automatically.<br />
BAND (page 29)<br />
Changes the band.<br />
Display example for the function screen<br />
(AUDIO) (page 29)<br />
Changes audio.
Digital TV Operation<br />
Display example for Digital TV main screen<br />
CH (page 30)<br />
Decreases channels one by one. Touching and holding<br />
changes continuously.<br />
FAV (page 30)<br />
Decreases favorite channels.<br />
TUNE (page 30)<br />
Changes the tuning way (channel and favorite channel).<br />
CH (page 30)<br />
Increases channels one by one. Touching and holding<br />
changes continuously.<br />
FAV (page 30)<br />
Increases favorite channels.<br />
KEY (page 30)<br />
Displays soft button for EPG screen operation.<br />
BAND (page 30)<br />
Switches source of digital TV.<br />
EPG (page 30)<br />
Displays EPG screen.<br />
Display example for function screen<br />
M<strong>EN</strong>U (page 30)<br />
Displays the menu screen.<br />
A.MEMO (page 30)<br />
Memorizes automatically.<br />
Display example for EPG screen<br />
(page 30)<br />
Moves an item displayed on the screen.<br />
<strong>EN</strong>T (page 30)<br />
Enters the selected item.<br />
RTN<br />
Returns to the previous screen.<br />
CONTROL<br />
Displays the main operation screen.<br />
45-<strong>EN</strong>
Information<br />
In Case of Difficulty<br />
If you encounter a problem, please turn the power off, then on again.<br />
If the unit is still not functioning normally, please review the items<br />
in the following checklist. This guide will help you isolate the<br />
problem if the unit is at fault. Otherwise, make sure the rest of your<br />
system is properly connected, or then consult your authorized<br />
<strong>Alpine</strong> dealer.<br />
Basic<br />
No function or display.<br />
Vehicle’s ignition is off.<br />
- If connected according to the instructions, the unit will not<br />
operate with the vehicle’s ignition off.<br />
Improper power lead connections.<br />
- Check power lead connections.<br />
Blown fuse.<br />
- Check the fuse on the battery lead of the unit; replace with the<br />
proper value if necessary.<br />
Internal micro-computer malfunctioned due to interference<br />
noise, etc.<br />
- Press the RESET switch with a ballpoint pen or other pointed<br />
article.<br />
No sound or unnatural sound.<br />
Incorrect setting of volume/balance/fader controls.<br />
- Readjust the controls.<br />
Connections are not properly or securely made.<br />
- Check the connections and firmly connect.<br />
Screen not displayed.<br />
Connections to the DVD, CD player, navigation system are not<br />
securely made.<br />
- Check the connections and firmly connect.<br />
Navigation system inoperative.<br />
Connections to the navigation system are incorrect.<br />
- Check the connections with the navigation system and connect<br />
the cables correctly and firmly.<br />
The remote control is inoperative.<br />
The remote control sensor setting of “Rear Entertainment<br />
Function” is not set to this unit.<br />
- Set for this unit.<br />
Radio<br />
Unable to receive stations.<br />
No antenna, or open connection in the antenna cable.<br />
- Make sure the antenna is properly connected; replace the<br />
antenna or cable if necessary.<br />
46-<strong>EN</strong><br />
Unable to tune stations in the seek mode.<br />
You are in a weak signal area.<br />
- Make sure the tuner is in DX mode.<br />
If the area you are in is a primary signal area, the antenna may<br />
not be grounded and connected properly.<br />
- Check your antenna connections; make sure the antenna is<br />
properly grounded at its mounting location.<br />
The antenna may not be the proper length.<br />
- Make sure the antenna is fully extended; if broken, replace the<br />
antenna with a new one.<br />
Broadcast is noisy.<br />
The antenna is not the proper length.<br />
- Extend the antenna fully; replace it if it is broken.<br />
The antenna is poorly grounded.<br />
- Make sure the antenna is grounded properly at its mounting<br />
location.<br />
The station signal is weak and noisy.<br />
- If above solution does not work, tune in another station.<br />
Indication for CD changer<br />
<strong>Pro</strong>tective circuit is activated due to high temperature.<br />
- The indicator will disappear when the temperature returns to<br />
within operation range.<br />
Malfunction in the CD Changer.<br />
- Consult your <strong>Alpine</strong> dealer. Press the magazine eject button<br />
and pull out the magazine.<br />
Check the indication. Insert the magazine again.<br />
If the magazine cannot be pulled out, consult your <strong>Alpine</strong><br />
dealer.<br />
Magazine ejection not possible.<br />
- Press the magazine eject button. If the magazine does not eject,<br />
consult your <strong>Alpine</strong> dealer.<br />
A disc is left inside the CD Changer.<br />
- Press the Eject button to activate the eject function. When the<br />
CD Changer finishes the eject function, insert an empty CD<br />
magazine into the CD Changer to receive the disc left inside<br />
the CD Changer.<br />
No magazine is loaded into the CD Changer.<br />
- Insert a magazine.<br />
No indicated disc.<br />
- Choose another disc.
Indication for iPod Mode<br />
The iPod is not connected.<br />
- Make sure the iPod is correctly connected.<br />
Make sure the cable is not bent excessively.<br />
The iPod’s battery remains low.<br />
- Refer to the iPod’s documentation and charge the battery.<br />
There are no songs in the iPod.<br />
- Download songs to the iPod and connect to the <strong>VPA</strong>-<strong>B222R</strong>.<br />
Communication error<br />
- Turn the ignition key off, and then set to ACC or ON again.<br />
- Check the display by reconnecting between the iPod and the<br />
adapter, using the iPod cable.<br />
Caused by the iPod Software Version not being compatible with<br />
this unit.<br />
- Update the iPod Software Version to be compatible with this<br />
unit.<br />
Specifications<br />
FM TUNER SECTION<br />
Tuning Range 87.5 – 108.0 MHz<br />
Mono Usable Sensitivity 9.3 dBf (0.8 µV/75 ohms)<br />
50 dB Quieting Sensitivity 13.5 dBf (1.3 µV/75 ohms)<br />
Alternate Channel Selectivity 80 dB<br />
Signal-to-Noise Ratio 65 dB<br />
Stereo Separation 35 dB<br />
Capture Ratio 2.0 dB<br />
MW TUNER SECTION<br />
Tuning Range 531 – 1,602 kHz<br />
Sensitivity (IEC Standard) 25.1 µV/28 dB<br />
LW TUNER SECTION<br />
Tuning Range 153 – 281 kHz<br />
Sensitivity (IEC Standard) 31.6 µV/30 dB<br />
G<strong>EN</strong>ERAL<br />
Power Requirement 14.4 V DC<br />
(11–16 V allowable)<br />
Operating temperature +32 °F to +113 °F<br />
(0 °C to + 45 °C)<br />
Maximum Power Output 50 W × 4<br />
Output Voltage 2,000 mV/10k ohms<br />
Bass +20/–14 dB at 100 Hz<br />
Treble ±14 dB at 10 kHz<br />
Weight 1.2 kg<br />
(2 lbs. 10 oz)<br />
Audio output level<br />
Preout (Front, Rear): 2V/10k ohms (max.)<br />
Preout (Subwoofer): 2V/10k ohms (max.)<br />
Auxout: 1.2V/10k ohms<br />
Ai-NET: 850 mV<br />
CHASSIS SIZE<br />
Width 275 mm (10-13/16")<br />
Height 40 mm (1-9/16")<br />
Depth 170 mm (6-3/4")<br />
Commander<br />
Width 53 mm (2-1/16")<br />
Height 29 mm (1-1/8")<br />
Depth 87 mm (3-7/16")<br />
Weight 50 g (1.8 oz) (holder excluded)<br />
47-<strong>EN</strong>
Installation and Connections<br />
Before installing or connecting the unit, please read the<br />
following and pages 4 to 5 of this manual thoroughly for<br />
proper use.<br />
48-<strong>EN</strong><br />
Warning<br />
MAKE THE CORRECT CONNECTIONS<br />
Failure to make the proper connections may result in fire or product<br />
damage.<br />
USE ONLY IN CARS WITH A 12 VOLT NEGATIVE GROUND.<br />
(Check with your dealer if you are not sure.) Failure to do so may<br />
result in fire, etc.<br />
BEFORE WIRING, DISCONNECT THE CABLE FROM THE<br />
NEGATIVE BATTERY TERMINAL.<br />
Failure to do so may result in electric shock or injury due to<br />
electrical shorts.<br />
DO NOT ALLOW CABLES TO BECOME <strong>EN</strong>TANGLED IN<br />
SURROUNDING OBJECTS.<br />
Arrange wiring and cables in compliance with the manual to<br />
prevent obstructions when driving. Cables or wiring that obstruct or<br />
hang up on places such as the steering wheel, gear lever, brake<br />
pedals, etc. can be extremely hazardous.<br />
DO NOT SPLICE INTO ELECTRICAL CABLES.<br />
Never cut away cable insulation to supply power to other<br />
equipment. Doing so will exceed the current carrying capacity of<br />
the wire and result in fire or electric shock.<br />
DO NOT DAMAGE PIPE OR WIRING WH<strong>EN</strong> DRILLING<br />
HOLES.<br />
When drilling holes in the chassis for installation, take precautions<br />
so as not to contact, damage or obstruct pipes, fuel lines, tanks or<br />
electrical wiring. Failure to take such precautions may result in fire.<br />
DO NOT USE BOLTS OR NUTS IN THE BRAKE OR STEERING<br />
SYSTEMS TO MAKE GROUND CONNECTIONS.<br />
Bolts or nuts used for the brake or steering systems (or any other<br />
safety-related system), or tanks should NEVER be used for<br />
installations or ground connections. Using such parts could disable<br />
control of the vehicle and cause fire etc.<br />
KEEP SMALL OBJECTS SUCH AS BOLTS OR SCREWS OUT<br />
OF THE REACH OF CHILDR<strong>EN</strong>.<br />
Swallowing them may result in serious injury. If swallowed,<br />
consult a physician immediately.<br />
DO NOT INSTALL IN LOCATIONS WHICH MIGHT HINDER<br />
VEHICLE OPERATION, SUCH AS THE STEERING WHEEL OR<br />
GEARSHIFT.<br />
Doing so may obstruct forward vision or hamper movement etc.<br />
and results in serious accident.<br />
IMPORTANT<br />
Please record the serial number of your unit in the space provided<br />
below and keep it as a permanent record. The serial number plate is<br />
located on the bottom of the unit.<br />
Caution<br />
HAVE THE WIRING AND INSTALLATION DONE BY EXPERTS.<br />
The wiring and installation of this unit requires special technical<br />
skill and experience. To ensure safety, always contact the dealer<br />
where you purchased this product to have the work done.<br />
USE SPECIFIED ACCESSORY PARTS AND INSTALL THEM<br />
SECURELY.<br />
Be sure to use only the specified accessory parts. Use of other than<br />
designated parts may damage this unit internally or may not<br />
securely install the unit in place. This may cause parts to become<br />
loose resulting in hazards or product failure.<br />
ARRANGE THE WIRING SO IT IS NOT CRIMPED OR<br />
PINCHED BY A SHARP METAL EDGE.<br />
Route the cables and wiring away from moving parts (like the seat<br />
rails) or sharp or pointed edges. This will prevent crimping and<br />
damage to the wiring. If wiring passes through a hole in metal, use<br />
a rubber grommet to prevent the wires insulation from being cut by<br />
the metal edge of the hole.<br />
DO NOT INSTALL IN LOCATIONS WITH HIGH MOISTURE OR<br />
DUST.<br />
Avoid installing the unit in locations with high incidence of<br />
moisture or dust. Moisture or dust that penetrates into this unit may<br />
result in product failure.<br />
Precautions<br />
Be sure to disconnect the cable from the (–) battery post before<br />
installing your <strong>VPA</strong>-<strong>B222R</strong>. This will reduce any chance of<br />
damage to the unit in case of a short-circuit.<br />
Be sure to connect the colour coded leads according to the<br />
diagram. Incorrect connections may cause the unit to<br />
malfunction or damage to the vehicle’s electrical system.<br />
When making connections to the vehicle’s electrical system, be<br />
aware of the factory installed components (e.g. on-board<br />
computer). Do not tap into these leads to provide power for this<br />
unit. When connecting the <strong>VPA</strong>-<strong>B222R</strong> to the fuse box, make<br />
sure the fuse for the intended circuit of the <strong>VPA</strong>-<strong>B222R</strong> has the<br />
appropriate amperage. Failure to do so may result in damage to<br />
the unit and/or the vehicle. When in doubt, consult your <strong>Alpine</strong><br />
dealer.<br />
The <strong>VPA</strong>-<strong>B222R</strong> uses female RCA-type jacks for connection to<br />
other units (e.g. amplifier) having RCA connectors. You may<br />
need an adaptor to connect other units. If so, please contact your<br />
authorized <strong>Alpine</strong> dealer for assistance.<br />
Be sure to connect the speaker (–) leads to the speaker (–)<br />
terminal. Never connect left and right channel speaker cables to<br />
each other or to the vehicle body.<br />
SERIAL NUMBER:<br />
INSTALLATION DATE:<br />
INSTALLATION TECHNICIAN:<br />
PLACE OF PURCHASE:
Installation<br />
Installing the unit<br />
Caution<br />
Do not block the unit’s fan or heat sink, thus preventing air<br />
circulation. If blocked, heat will accumulate inside the unit and<br />
may cause a fire.<br />
Do not touch the heat sink as it becomes hot, and may result in<br />
injury.<br />
Air ventilation hole<br />
When mounting with Velcro fasteners<br />
When mounting the unit with the Velcro fasteners, be sure to choose a<br />
flat location.<br />
Do not hang the unit from the bottom of the dashboard or rear deck with<br />
the Velcro fasteners.<br />
1 Remove the <strong>Pro</strong>tective paper and attach two pieces<br />
of Velcro fastener to the bottom of the Tuner.<br />
<strong>Pro</strong>tective paper<br />
<br />
<strong>VPA</strong>-<strong>B222R</strong><br />
<strong>Pro</strong>tective paper<br />
Velcro Fasteners<br />
(Included)<br />
2 Check the position, and then fix the Tuner to the<br />
floor carpet.<br />
When mounting with Screws<br />
When mounting the tuner with the screws, be sure to choose a flat<br />
location.<br />
When making holes, be careful not to scratch any pipes or wires.<br />
1 Connect the bracket to both the flanks of the tuner<br />
with the supplied pan screws (M4 × 8).<br />
<strong>VPA</strong>-<strong>B222R</strong><br />
Pan screws (M4 × 8) (Included)<br />
2 Install the tuner on the floor with the supplied flangehead<br />
tapping screws (M4 × 14).<br />
Flange-head tapping screws<br />
(M4 × 14) (Included)<br />
Bracket (Included)<br />
<strong>VPA</strong>-<strong>B222R</strong><br />
49-<strong>EN</strong>
Mounting the Commander<br />
For safe use, make sure of the following:<br />
Location is stable and film.<br />
Driver's view or operations are not obstructed.<br />
Located where driving can easily be performed (centre console, etc.).<br />
During operation, ensure that your driving posture does not change,<br />
or that your attention is not taken away from safely driving your<br />
vehicle.<br />
1 Confirm where the holder is to be placed, and<br />
determine its direction.<br />
The angle of the commander can be adjusted according to<br />
the direction of the holder.<br />
Pattern 1<br />
Pattern 2<br />
2 Route the commander connection cable through the<br />
holder.<br />
Pattern 1<br />
Pattern 2<br />
50-<strong>EN</strong><br />
Route the cable through<br />
the hole in the side.<br />
Route the cable through the<br />
hole in the underside.<br />
3 Mount the Holder<br />
When the holder cannot be mounted securely with double-sided<br />
adhesive tape, mount it by using screws.<br />
<strong>Pro</strong>tective<br />
Paper<br />
Console box, etc.<br />
*Before attaching the tape, make sure the mounting location is free<br />
from dust or dirt.<br />
4 Connect the commander cable to the commander.<br />
5 Take up any slack by pulling the cable, while holding<br />
the holder.<br />
6 Set the commander on the holder.<br />
After aligning the 2 projections on the backside of the<br />
commander with the groove of the holder, then turn the<br />
commander clockwise until it clicks.<br />
When you remove the commander from the holder, turn the<br />
commander counterclockwise by pressing on the holder, then<br />
remove the commander.<br />
WARNING<br />
Reinforcement screws<br />
Commander<br />
Holder<br />
Double-sided<br />
adhesive<br />
tape*<br />
<strong>Pro</strong>jections<br />
DO NOT INSTALL THE COMMANDER NEAR THE<br />
PASS<strong>EN</strong>GER AIR BAG.<br />
If the unit is not installed correctly, the air bag may not function<br />
correctly, and if the air bag is triggered, parts may spring<br />
upwards and cause accident or injury.<br />
7 Fix the connection cable with the supplied cable<br />
clamp.
Parking Brake Lead Connection<br />
If necessary, use a pinch connector to connect the foot brake lead, parking brake lead, etc.<br />
1 2<br />
Connection Diagram of SPST Switch (Sold Separately)<br />
(If the ACC power supply is not available)<br />
<strong>VPA</strong>-<strong>B222R</strong><br />
Vehicle Cable<br />
Stopper<br />
Pinch Connector<br />
(Red)<br />
Monitor Cable<br />
(Yellow)<br />
IGNITION<br />
BATTERY<br />
SPST SW (Optional)<br />
If your vehicle has no ACC power supply, add an SPST (Single-Pole, Single-Throw) switch (sold separately) and fuse (sold separately).<br />
The diagram and the fuse amperage shown above are in the case when <strong>VPA</strong>-<strong>B222R</strong> is used individually.<br />
If the switched power (ignition) lead of the <strong>VPA</strong>-<strong>B222R</strong> is connected directly to the positive (+) post of the vehicle’s battery, the <strong>VPA</strong>-<strong>B222R</strong> draws<br />
some current (several hundred milliamperes) even when its switch is placed in the OFF position and the battery may be discharged.<br />
Speaker Input Lead Connection<br />
1 Cut the car audio's speaker leads. 2 Connect the leads together.<br />
Connect the supplied pinch connector.<br />
Pliers<br />
FUSE (5A)<br />
(Optional)<br />
FUSE (20A)<br />
(Optional)<br />
Battery<br />
To prevent external noise from entering the audio system.<br />
Locate the unit and route the leads at least 10 cm away from the car harness.<br />
Keep the battery power leads as far away from other leads as possible.<br />
Connect the ground lead securely to a bare metal spot (remove any paint, dirt or grease if necessary) of the car chassis.<br />
If you add an optional noise suppressor, connect it as far away from the unit as possible. Your <strong>Alpine</strong> dealer carries various<br />
noise suppressors, contact them for further information.<br />
Your <strong>Alpine</strong> dealer knows best about noise prevention measures so consult your dealer for further information.<br />
51-<strong>EN</strong>
Connections (<strong>VPA</strong>-<strong>B222R</strong> Wiring Diagram)<br />
Set the system switch to “NORM” when only a changer is connected (when the Ai-NET compatible equalizer is not used).<br />
52-<strong>EN</strong><br />
<strong>VPA</strong>-<strong>B222R</strong><br />
SPEAKER<br />
SPEAKER<br />
LEFT<br />
LEFT<br />
FRONT<br />
REAR<br />
(White) (White/ (Green/<br />
Black) Black)<br />
SPEAKER<br />
RIGHT<br />
REAR<br />
(Green) (Violet)<br />
SPEAKER INPUT (Grey)<br />
RIGHT<br />
FRONT<br />
LEFT<br />
FRONT<br />
REMOTE OUT (AUX1)<br />
REMOTE OUT (AUX2)<br />
ILLUMINATION<br />
(Orange)<br />
REMOTE<br />
TURN-ON<br />
(Blue/White)<br />
POWER ANT<br />
(Blue)<br />
AUDIO<br />
INTERRUPT IN<br />
(Pink/Black)<br />
PARKING<br />
BRAKE<br />
(Yellow/Blue)<br />
ACC<br />
(Yellow)<br />
(Black)<br />
(White/<br />
Red)<br />
(White/Brown)<br />
(White/Brown)<br />
GUIDE CONT<br />
(White/Green)<br />
ILLM<br />
(Blue)<br />
(Red) (Red)<br />
BATTERY<br />
GND<br />
(Violet/<br />
Black)<br />
SPEAKER<br />
RIGHT<br />
FRONT<br />
(Grey/<br />
Black)<br />
F-Lch R-Lch R-Rch F-Rch<br />
(Grey/<br />
Red)<br />
SPEAKER INPUT (White)<br />
(Orange)<br />
P.ANT<br />
ACC<br />
BATTERY<br />
(Yellow)<br />
(Grey)<br />
Antenna<br />
To speaker output lead of<br />
the vehicle<br />
To speaker output lead of<br />
the vehicle<br />
To speaker output lead of<br />
the vehicle<br />
To speaker output lead of<br />
the vehicle<br />
To remote input lead<br />
To remote input lead<br />
To guide control lead of the<br />
external audio processor<br />
To the instrument<br />
cluster illumination<br />
lead<br />
Note:<br />
Be sure to connect the leads<br />
correctly after identifying the<br />
ISO connector terminals for<br />
the Battery and lgnition<br />
(ACC).
ISO Antenna Plug<br />
ISO Antenna Converter Plug (sold separately)<br />
Antenna Extension Cable (Included)<br />
Right Front (+) Speaker Input Lead (Grey)<br />
Right Front (–) Speaker Input Lead (Grey/Red)<br />
Left Front (+) Speaker Input Lead (White)<br />
Left Front (–) Speaker Input Lead (White/Red)<br />
Remote Control Output Lead (White/Brown)<br />
Connect this lead to the remote control input lead. This lead<br />
outputs the controlling signals from the remote control.<br />
Remote Control Output Lead (White/Brown)<br />
Connect this lead to the remote control input lead. This lead<br />
outputs the controlling signals from the remote control.<br />
Guide Control Lead (White/Green)<br />
If an external audio processor is connected, connect this to<br />
the guide control lead.<br />
Illumination Lead (Orange)<br />
This lead may be connected to the vehicle's instrument<br />
cluster illumination lead. This will allow the backlighting of<br />
the commander to dim whenever the vehicle's lights are<br />
turned on.<br />
Power Supply Connector<br />
Steering Remote Control Interface Connector<br />
To steering remote control interface box.<br />
Remote Control Eye Jack<br />
Connect this to the remote control sensor unit.<br />
Factory System Input Terminal<br />
Navigation Input (RGB Input) Terminal<br />
Connect this to the RGB output terminal of the Navigation<br />
System.<br />
Display Output (RGB Output) Terminal<br />
Connect a 13P RGB terminal equipped monitor using the<br />
RGB cable supplied with the unit.<br />
Video Output Terminal<br />
Connect this to the external front monitor using the RCA<br />
extension cable supplied with the unit.<br />
Subwoofer output Terminal<br />
Connect the input lead of an amplifier for the subwoofer to<br />
this terminal.<br />
Rear output Terminal<br />
Use when connecting an amplifier or equalizer.<br />
Front output Terminal<br />
Use when connecting an amplifier or equalizer.<br />
Ai-NET Connector<br />
Connect this to the output or input connector of other<br />
product (CD changer, Equalizer, iPod adapter*, etc.)<br />
equipped with Ai-NET.<br />
* If you connect to iPod, you need the optional adapter (KCA-420i).<br />
For details on connection, refer to the Owner’s Manual of the KCA-<br />
420i.<br />
Guide Output Terminal<br />
If an external audio processor is connected, outputs the<br />
navigation interrupt voice signal that is input from the <strong>Alpine</strong><br />
navigation system, or the speaker input terminal.<br />
Commander Terminal<br />
AV Select Connector<br />
When this connector is connected to the optional expansion<br />
box (VPE-S431), connect this to the HEAD UNIT terminal of<br />
VPE-S431.<br />
AUX Input Terminals<br />
If these terminals are connected to the optional expansion<br />
box (VPE-S431), the AUX input terminals are not used on<br />
this unit. Connect AUX IN 1, 2 and 3, and the AUX OUT 1<br />
and 2 terminals of the expansion box (VPE-S431) to the<br />
external device(s).<br />
Antenna Receptacle<br />
ISO Connector (Included)<br />
Ground Lead (Black)<br />
Connect this lead to a good chassis ground on the vehicle.<br />
Make sure the connection is made to bare metal and is<br />
securely fastened using the sheet metal screw provided.<br />
Remote Turn-On Lead (Blue/White)<br />
Connect this lead to the remote turn-on lead of your<br />
amplifier or signal processor.<br />
To amplifier or equalizer<br />
Power Antenna Lead (Blue)<br />
Connect this lead to the +B terminal of your power antenna,<br />
if applicable.<br />
Audio Interrupt In Lead (Pink/Black)<br />
To vehicle phone<br />
Parking Brake Lead (Yellow/Blue)<br />
Connect this lead to the power supply side of the parking<br />
brake switch to transmit the parking brake status signals to<br />
the <strong>VPA</strong>-<strong>B222R</strong>.<br />
Connect this lead to the parking brake lead powered<br />
when parking brake is engaged.<br />
Switched Power Lead (Ignition) (Red)<br />
Connect this lead to an open terminal on the vehicle’s fuse<br />
box or another unused power source which provides (+)<br />
12V only when the ignition is turned on or in the accessory<br />
position.<br />
Battery Lead (Yellow)<br />
Connect this lead to the positive (+) post of the vehicle’s<br />
battery.<br />
Fuse Holder (10A)<br />
Right Front (+) Speaker Output Lead (Grey)<br />
Right Front (–) Speaker Output Lead (Grey/Black)<br />
Right Rear (–) Speaker Output Lead (Violet/Black)<br />
Right Rear (+) Speaker Output Lead (Violet)<br />
Left Rear (+) Speaker Output Lead (Green)<br />
Left Rear (–) Speaker Output Lead (Green/Black)<br />
Left Front (–) Speaker Output Lead (White/Black)<br />
Left Front (+) Speaker Output Lead (White)<br />
System Switch<br />
When connecting an equalizer or divider using Ai-NET<br />
feature, place this switch in the EQ/DIV position. When no<br />
device is connected, leave the switch in the NORM position.<br />
Be sure to turn the power off on the unit before changing the<br />
switch position.<br />
ALPINE/OTHER switching button<br />
Set to “ALPINE” for normal use.<br />
Set to “OTHER” when connecting optional display interface<br />
box.<br />
NTSC/PAL switching button<br />
Switch if necessary. Effective only when the ALPINE/OTHER<br />
switching button is set to OTHER.<br />
Commander (Included)<br />
53-<strong>EN</strong>
System Example<br />
Connect the ALPINE Monitor<br />
Display Output (RGB Output) Terminal<br />
Connect a 13P RGB terminal equipped monitor using the RGB cable supplied with the unit.<br />
RGB Cable (Included)<br />
Connect a Monitor of another manufacturer<br />
Remote control sensor is required.<br />
Video Output Terminal<br />
Connect this to the external front monitor using the RCA extension cable supplied with the unit.<br />
RCA Extension Cable (Included)<br />
54-<strong>EN</strong><br />
RCA Extension Cable (Included)<br />
RGB Cable<br />
(Included)<br />
RGB Input Terminal<br />
Video Input Terminal<br />
Monitor<br />
(Sold Separately)<br />
Monitor B. Box<br />
(Sold Separately)<br />
Monitor<br />
(Sold Separately)<br />
Monitor B. Box (Sold<br />
Separately)
Connect the Ai-NET compatible audio processor, Navigation system, DVD player and changer.<br />
NVE-N099P<br />
Navigation system<br />
(Sold Separately)<br />
<strong>VPA</strong>-<strong>B222R</strong><br />
(Yellow)<br />
Guide Control lead*<br />
(White/Green)<br />
* Guide Control lead is not connected when PXA-H700/PXA-H701 is connected.<br />
When the NVA-N751AS is connected for the Navigation System, use the RGB conversion cable KWE-503N (sold separately).<br />
RGB Cable (Included with NVE-N099P)<br />
Factory System Input Terminal<br />
Navigation Input (RGB Input) Terminal<br />
Connect this to the RGB output terminal of the Navigation<br />
System.<br />
System Switch<br />
When connecting an equalizer or divider using Ai-NET<br />
feature, place this switch in the EQ/DIV position. When no<br />
device is connected, leave the switch in the NORM position.<br />
Be sure to turn the power off on the unit before changing the<br />
switch position.<br />
Guide Control Lead (White/Green)<br />
Ai-NET Connector<br />
Connect this to the output or input connector of other<br />
products equipped with Ai-NET.<br />
Guide Output Terminal<br />
If an external audio processor is connected, outputs the<br />
navigation interrupt voice signal that is input from the <strong>Alpine</strong><br />
navigation system, or the speaker input terminal.<br />
Guide Control lead<br />
(White/Green)<br />
RCA extension<br />
cable<br />
Ai-NET cable<br />
Fiber optic cable<br />
(White/Brown) (White/Brown)<br />
DVD Video Player<br />
(Ai-NET)<br />
Ai-NET cable<br />
REMOTE OUT REMOTE IN<br />
(DVA-5210 etc.)<br />
(Sold Separately)<br />
Fiber digital<br />
Input terminal<br />
(for DVD<br />
Player)<br />
Audio <strong>Pro</strong>cessor (Ai-NET)<br />
(Fiber Digital compatible)<br />
(Sold Separately)<br />
Ai-NET<br />
cable<br />
CD Changer<br />
(Ai-NET)<br />
(Sold Separately)<br />
RCA Extension Cable (Sold Separately)<br />
Ai-NET Cable (Included with DVD video player)<br />
Ai-NET Cable (Included with Audio <strong>Pro</strong>cessor)<br />
Ai-NET Cable (Included with CD Changer)<br />
Remote Control Output Lead (White/Brown)<br />
Connect this lead to the remote control input lead. This lead<br />
outputs the controlling signals from the remote control.<br />
To Ai-NET Connector (Grey)<br />
To Ai-NET Connector (Black)<br />
Navigation Audio Input Jack (RCA Input)<br />
Fiber optic Cable (Sold Separately)<br />
AUX Video Input (AUX1) Terminal<br />
Connect the video output lead of a DVD video player or<br />
DVD changer to this terminal.<br />
RCA Extension Cable (Included with DVD video<br />
player)<br />
55-<strong>EN</strong>
When Connecting External Equipment<br />
56-<strong>EN</strong><br />
<strong>VPA</strong>-<strong>B222R</strong><br />
System Switch<br />
When connecting an equalizer or divider using Ai-NET<br />
feature, place this switch in the EQ/DIV position. When no<br />
device is connected, leave the switch in the NORM position.<br />
Be sure to turn the power off on the unit before changing the<br />
switch position.<br />
Factory System Input Terminal<br />
To Video Output terminal<br />
To Audio Output terminal<br />
(White/Brown) REMOTE OUT REMOTE IN (White/Brown)<br />
TV Tuner, VCR or DVD Player<br />
(DVE-5207) that is not<br />
compatible with Ai-NET (Sold<br />
Separately)<br />
AUX Video/Audio Input Terminal<br />
RCA Extension Cable (Sold separately)<br />
Remote Control Output Lead (White/Brown)<br />
Connect this lead to the remote control input lead. This lead<br />
outputs the controlling signals from the remote control.
Connect an expansion box (VPE-S431), DVD Player, DVD Changer or a Touch<br />
Panel-compatible Monitor.<br />
<strong>VPA</strong>-<strong>B222R</strong><br />
To Video Input<br />
Terminals<br />
To Audio Input<br />
Terminals<br />
To AUX Output<br />
Terminals<br />
System Switch<br />
When connecting an equalizer or divider using Ai-NET<br />
feature, place this switch in the EQ/DIV position. When no<br />
device is connected, leave the switch in the NORM position.<br />
Be sure to turn the power off on the unit before changing the<br />
switch position.<br />
To AV Selector Terminal<br />
AV Selector Cable (Included with VPE-S431)<br />
RCA Extension Cable (Sold separately)<br />
Monitor Control Lead (White/Pink)<br />
Connect this to the Monitor Control Lead of the touch panelcompatible<br />
rear monitor.<br />
EXPANSION BOX<br />
(VPE-S431)<br />
(Sold separately)<br />
M.CONT<br />
(White/Pink)<br />
REMOTE<br />
IN<br />
M.CONT (White/Brown)<br />
REMOTE OUT<br />
(White/Pink)<br />
(White/Brown)<br />
TOUCH PANEL COMPATIBLE<br />
REAR MONITOR<br />
(Sold separately)<br />
To AUX Input (AUX IN 1)<br />
Terminals<br />
DVD PLAYER<br />
(DVA-5210, etc.)<br />
(Sold separately)<br />
To AUX Input (AUX IN 2)<br />
Terminals<br />
DVD CHANGER<br />
(Sold separately)<br />
REMOTE OUT (AUX1)<br />
(White/Brown)<br />
(White/Brown)<br />
REMOTE OUT<br />
(AUX2)<br />
REMOTE IN (AUX1)<br />
(White/Brown)<br />
REMOTE IN (AUX2)<br />
(White/Brown)<br />
If the expansion box (VPE-S431) is connected to either a DVD video player or DVD changer, connect this to AUX IN 1. If this is<br />
connected to AUX IN 2, remote control operation will not be possible. If both are to be connected, connect the DVD video player to<br />
AUX IN 1, and the DVD changer to AUX IN 2.<br />
Remote Control Output Lead (White/Brown)<br />
Connect this lead to the remote control input lead. This lead<br />
outputs the controlling signals from the remote control.<br />
Ai-NET Cable (Included with DVD video player)<br />
Ai-NET Cable (Included with DVD changer)<br />
To Ai-NET Connector (Black)<br />
To Ai-NET Connector (Grey)<br />
57-<strong>EN</strong>
Connect the car system (standard audio system, etc.).<br />
58-<strong>EN</strong><br />
SPEAKER INPUT<br />
SPEAKER<br />
Power Supply Connector<br />
Factory System Input Terminal<br />
Left Front (+) Speaker Input Lead (White)<br />
Left Front (–) Speaker Input Lead (White/Red)<br />
Right Front (+) Speaker Input Lead (Grey)<br />
Right Front (–) Speaker Input Lead (Grey/Red)<br />
Right Front (+) Speaker Output Lead (Grey)<br />
Right Front (–) Speaker Output Lead (Grey/Black)<br />
LEFT FRONT<br />
RIGHT FRONT<br />
(White)<br />
(White/Red)<br />
(Grey)<br />
(Grey/Red)<br />
(Grey)<br />
(Grey/Black)<br />
(White)<br />
(White/Black)<br />
(Green)<br />
(Green/Black)<br />
(Violet)<br />
(Violet/Black)<br />
SPEAKER OUTPUT<br />
LEFT FRONT<br />
RIGHT FRONT<br />
Standard Car Audio<br />
System<br />
SPEAKER (RIGHT FRONT)<br />
SPEAKER (LEFT FRONT)<br />
SPEAKER (LEFT REAR)<br />
SPEAKER (RIGHT REAR)<br />
Left Front (+) Speaker Output Lead (White)<br />
Left Front (–) Speaker Output Lead (White/Black)<br />
Left Rear (+) Speaker Output Lead (Green)<br />
Left Rear (–) Speaker Output Lead (Green/Black)<br />
Right Rear (+) Speaker Output Lead (Violet)<br />
Right Rear (–) Speaker Output Lead (Violet/Black)<br />
Be sure to connect the speaker input to the front speaker output lead. The rear speaker output lead cannot be connected.<br />
Be sure to disconnect all the speaker output lead of the standard speaker and system.<br />
If a multi-channel speaker system is connected, connect the speaker input to the mid range speaker (front). If a tweeter or woofer is connected,<br />
sound will not output correctly.<br />
Set each item in“Using the Speaker Input” (page 16).<br />
Refer to "Speaker Input Lead Connection" (page 51).<br />
Failure to connect correctly may result in damage to your standard car audio system.
To customers/Hinweis an Kunden/A l’attention<br />
de l’utilisateur/Información para los clientes/<br />
Informazioni per i clienti/Till kunder<br />
Please note following additional information of the Owner’s Manual./Bitte beachten Sie folgende zusätzliche<br />
Informationen zur Bedienungsanleitung./ Veuillez noter les ajouts suivants au mode d’emploi./Tenga en<br />
cuenta la información adicional contenida en el Manual de operación./ Tenere presente le seguenti<br />
informazioni supplementari d’ istruzioni per l’uso./ Se följande tillägg till användarhandledning.<br />
English<br />
About connecting other products<br />
L Connect the Ai-NET compatible audio processor, Navigation system, DVD player and<br />
changer (page 55).<br />
• If PXA-H701/PXA-H700 and DVD player/changer are connected via fiber digital, interruption audio may not be output when a<br />
disc is changed, during pause, etc. In this case, connect an external speaker with built-in amplifier to the GUIDE OUT terminal to<br />
output interruption audio.<br />
The Owner's Manual has errors as shown here.<br />
<br />
• When the NVA-N751AS is connected for the Navigation System, use the RGB conversion cable KWE-503N (Sold separately).<br />
<br />
• When the NVE-N055PS is connected for the Navigation System, use the RGB conversion cable KCE-030N (Sold separately).<br />
L Connect the Digital theater amplifier, Navigation system, DVD changer and CD<br />
changer.<br />
RGB<br />
cable<br />
Factory<br />
System Input<br />
terminal<br />
(White/Brown)<br />
REMOTE OUT<br />
NVE-N099P<br />
(Yellow)<br />
(White/Brown)<br />
Navigation System<br />
(Sold Separately)<br />
<strong>VPA</strong>-<strong>B222R</strong><br />
REMOTE IN<br />
RCA Extension cable<br />
(Included with DVD changer)<br />
DVD Changer<br />
(Ai-NET) (DHA-S680P)<br />
(Sold Separately)<br />
1 Navigation Input (RGB Input) Terminal<br />
Connect this to the RGB output terminal of the<br />
Navigation System.<br />
2 System Switch<br />
When connecting an equalizer or divider using<br />
Ai-NET feature, place this switch in the EQ/DIV<br />
position.<br />
• Be sure to turn the power off on the unit before<br />
changing the switch position.<br />
3 Ai-NET Connector<br />
Connect this to the output or input connector of<br />
other products equipped with Ai-NET.<br />
To Ai-NET connector<br />
(Grey)<br />
External Speaker with<br />
built-in amplifier (Sold<br />
Separately)<br />
RCA Extension<br />
cable (Sold<br />
Separately)<br />
Ai-NET cable<br />
(Included with<br />
DVD changer)<br />
Fiber Digital<br />
Input terminal<br />
(for DVD Player)<br />
Ai-NET cable<br />
(Included with amplifier)<br />
To Ai-NET connector (Black)<br />
Digital Theater<br />
amplifier<br />
(MRA-D550)<br />
Ai-NET<br />
cable<br />
(Included<br />
with CD<br />
Changer)<br />
CD Changer (Ai-NET)<br />
(Sold Separately)<br />
• If a DVD player such as DVA-5210 or DVE-5207 is connected, a digital theater amplifier cannot be connected via fiber digital to<br />
the DVD player.<br />
4 Guide Output Terminal<br />
If an external audio processor is connected,<br />
outputs the navigation interrupt voice signal that is<br />
input from the <strong>Alpine</strong> navigation system, or the<br />
speaker input terminal.<br />
5 Remote Control Output Lead (White/<br />
Brown)<br />
Connect this lead to the remote control input lead.<br />
This lead outputs the controlling signals from the<br />
remote control.<br />
6 AUX Video Input (AUX1) Terminal<br />
Connect the video output lead of a DVD video<br />
player or DVD changer to this terminal.<br />
R<br />
Deutsch<br />
Anmerkungen zum Anschluss anderer <strong>Pro</strong>dukte<br />
L Anschluss eines Ai-NET-kompatiblen Klangprozessors, Navigationssystems, DVD-<br />
Players und -Wechslers (Seite 55).<br />
• Wenn der PXA-H701/PXA-H700 bzw. DVD-Player/Wechsler über ein optisches Digitalkabel angeschlossen ist, kann beim Wechseln der Disc,<br />
im Pausenzustand u. dgl. unter Umständen der Ton eines unterbrechenden Signals (Ansage) nicht ausgegeben werden. In diesem Fall schafft<br />
ein externer Aktivlautsprecher Abhilfe, der für die Wiedergabe unterbrechender Tonsignale an die GUIDE OUT-Buchse angeschlossen wird.<br />
Bitte beachten Sie folgende Korrekturen an der Bedienungsanleitung.<br />
<br />
• Wenn das NVA-N751AS als Navigationssystem angeschlossen wird, verwenden Sie das RGB-Konversionskabel KWE-503N (separat erhältlich).<br />
<br />
• Wenn das NVE-N055PS als Navigationssystem angeschlossen wird, verwenden Sie das RGB-Konversionskabel KCE-030N (separat erhältlich).<br />
L Anschluss eines Digital-Theater-Verstärkers, Navigationssystems, DVD-Players und<br />
CD-Wechslers.<br />
(Weiß/Braun)<br />
FERNBEDI<strong>EN</strong>UNGS-<br />
AUSGANG<br />
(Weiß/Braun)<br />
• Wenn ein DVD-Player wie der DVA-5210 oder DVE-5207 angeschlossen ist, kann ein Digital-Theater-Verstärker nicht über ein<br />
optisches Digitalkabel an den DVD-Player angeschlossen werden.<br />
1 Navigationseingang (RGB)<br />
Wird mit dem RGB-Ausgang am<br />
Navigationssystem verbunden.<br />
NVE-N099P<br />
(Gelb)<br />
DVD-Wechsler<br />
(Ai-NET) (DHA-S680P)<br />
(separat erhältlich)<br />
2 System-Schalter<br />
Wenn ein Equalizer oder eine Frequenzweiche mit<br />
Ai-NET-Funktion angeschlossen wird, stellen Sie<br />
diesen Schalter auf EQ/DIV.<br />
• Vor Ändern der Schalterstellung unbedingt das<br />
Gerät ausschalten!<br />
3 Ai-NET-Anschluss<br />
Wird mit dem Aus- bzw. Eingangsanschluss des<br />
anderen Ai-NET-Geräts verbunden.<br />
Français<br />
RGB-<br />
Kabel<br />
Factory-<br />
System-<br />
Eingang<br />
Navigationssystem<br />
(separat erhältlich)<br />
<strong>VPA</strong>-<strong>B222R</strong><br />
FERNBE-<br />
DI<strong>EN</strong>UNGS-<br />
EINGANG<br />
Cinch-Anschlusskabel<br />
(im Lieferumfang des DVD-Wechslers)<br />
An Ai-NET-Anschluss<br />
(Grau)<br />
Externer<br />
Aktivlautsprecher<br />
(separat erhältlich)<br />
Cinch-<br />
Anschlusskabel<br />
(separat<br />
erhältlich)<br />
Ai-NET-Kabel<br />
(im Lieferumfang<br />
des DVD-<br />
Wechslers)<br />
Optischer<br />
Digitaleingang<br />
(für DVD-<br />
Player)<br />
Ai-NET-Kabel<br />
(im Lieferumfang des Versärkers)<br />
An Ai-NET-Anschluss (Schwarz)<br />
À propos du raccordement d'autres appareils<br />
Digital-Theater-<br />
Verstärker<br />
(MRA-D550)<br />
Ai-NET-<br />
Kabel (im<br />
Lieferumfang<br />
des CD-<br />
Wechslers)<br />
CD-Wechsler (Ai-NET)<br />
(separat erhältlich)<br />
4 Führungs-Ausgang<br />
Wenn ein externer Klangprozessor angeschlossen<br />
wird, kann hier das vom Navigationssystem bzw.<br />
den Lautsprechereingang eingegebene<br />
Unterbrechungs-Sprachsignal abgegriffen werden.<br />
5 Fernbedienungs-Ausgangskabel (Weiß/Braun)<br />
Wird mit dem Fernbedienungs-Eingangskabel<br />
verbunden. Über dieses Kabel werden die<br />
Steuersignale der Fernbedienung ausgegeben.<br />
6 AUX-Videoeingang (AUX1)<br />
Hier wird das Video-Ausgangskabel eines DVD-<br />
Players oder DVD-Wechslers angeschlossen.<br />
L Raccordez le processeur audio compatible Ai-NET, le système de navigation, le<br />
lecteur DVD et le changeur DVD (page 55).<br />
• Si le PXA-H701/PXA-H700 et le lecteur ou le changeur DVD sont raccordés via la borne d’entrée en fibres numériques, il est possible<br />
que l’interruption audio ne soit pas reproduite lorsque vous changez de disque, lorsque vous passez en mode pause, etc. Dans ce cas,<br />
raccordez une enceinte externe munie d’un amplificateur intégré à la borne GUIDE OUT pour reproduire l’interruption audio.<br />
Le mode d'emploi contient les erreurs indiquées ici.<br />
<br />
• Si vous connectez le système de navigation NVA-N751AS, utilisez le câble de conversion RGB KWE-503N (vendu séparément).<br />
<br />
• Si vous connectez le système de navigation NVE-N055PS, utilisez le câble de conversion RGB KCE-030N (vendu séparément).<br />
L Raccordez l’amplificateur numérique de home cinéma, le système de navigation, le<br />
changeur DVD et le changeur CD.<br />
• Si un lecteur DVD, tel que le DVA-5210 ou le DVE-5207 est raccordé, un amplificateur numérique de home cinéma ne peut pas<br />
être raccordé via la borne en fibres numériques au lecteur DVD.<br />
1 Borne d’entrée du système de navigation<br />
(entrée RGB)<br />
Raccordez-la à la borne de sortie RGB du<br />
système de navigation.<br />
2 Sélecteur de système<br />
Quand vous raccordez un égaliseur ou un<br />
répartiteur équipé de la fonction Ai-NET, placez<br />
ce sélecteur sur la position EQ/DIV.<br />
• N’oubliez pas de mettre l’appareil hors tension<br />
avant de modifier la position du sélecteur.<br />
4 Borne de sortie du guide<br />
Si un processeur audio externe est raccordé, vous<br />
pouvez reproduire le signal vocal d’interruption de<br />
la navigation qui entre du système de navigation<br />
ou de la borne d’entrée des enceintes.<br />
5 Fil de sortie de la télécommande (blanc/brun)<br />
Raccordez-le au fil d’entrée de la télécommande.<br />
Ce fil produit les signaux de commande de la<br />
télécommande.<br />
6 Borne d'entrée vidéo AUX (AUX1)<br />
<strong>VPA</strong>-<strong>B222R</strong><br />
3 Connecteur Ai-NET<br />
Raccordez-le au connecteur d’entrée ou de sortie<br />
d’un autre appareil équipé de la fonction Ai-NET.<br />
Raccordez-lui le fil de sortie vidéo d'un lecteur<br />
DVD vidéo ou d'un changeur DVD.<br />
68-06194Z30-A (Y)<br />
Câble<br />
RGB<br />
Borne<br />
d’entrée du<br />
système<br />
usinier<br />
(Blanc/Brun)<br />
SORTIE<br />
TÉLÉCOMMANDE<br />
(Blanc/Brun)<br />
NVE-N099P<br />
(Jaune)<br />
<strong>EN</strong>TRÉE<br />
TÉLÉCOMMANDE<br />
Système de navigation<br />
(vendu séparément)<br />
<strong>VPA</strong>-<strong>B222R</strong><br />
Câble d'extension RCA<br />
(inclus avec le changeur DVD)<br />
Changeur DVD<br />
(Ai-NET) (DHA-S680P)<br />
(vendu séparément)<br />
Enceinte externe avec<br />
amplificateur intégré<br />
(vendu séparément)<br />
Câble<br />
d’extension<br />
RCA (vendu<br />
séparément)<br />
Câble Ai-NET<br />
(inclus avec<br />
le changeur<br />
DVD)<br />
Vers le connecteur Ai-NET<br />
(gris)<br />
Borne d’entrée<br />
en fibres<br />
numériques<br />
(pour lecteur<br />
DVD)<br />
Câble Ai-NET<br />
(inclus avec le amplificateur)<br />
Vers le connecteur Ai-NET (noir)<br />
Amplificateur<br />
numérique de home<br />
cinéma (MRA-D550)<br />
Câble Ai-NET<br />
(fourni avec<br />
le changeur<br />
CD)<br />
Changeur CD<br />
(Ai-NET)<br />
(vendu séparément)
To customers/Hinweis an Kunden/<br />
A l’attention de l’utilisateur/Información para<br />
los clientes/Informazioni per i clienti/Till kunder<br />
English<br />
L Add to “In Case of Difficulty” in the Owner’s Manual (page 46) the following settings and operations for FACTORY<br />
SYSTEM (Speaker Input).<br />
Speaker input sound is distorted.<br />
• The Factory system has already been adjusted.<br />
- If the following settings of the car's Factory System: BASS, TREBLE, LOUDNESS, etc., are performed while in speaker input<br />
mode, the Factory System sound is easily distorted. Therefore reset the above settings.<br />
• The volume is not appropriately adjusted.<br />
- Set the speaker input volume level (FACT SYS LV) to less than 15. Then, lower the car's Factory System volume, so that sound is<br />
not distorted. Refer to “Displaying the Speaker Input Volume Level” (page 16).<br />
Malfunction.<br />
• A malfunction occurs caused by speaker input cable noise.<br />
- Bundle and route the e and d speaker input cables. Routing the speaker input cables separately may cause noise.<br />
The volume of the car audio system is too high/low.<br />
• The volume is not appropriately adjusted.<br />
- Select FACTORY SYS on the source selection screen, and adjust the volume using the commander.<br />
Interruption does not function correctly.<br />
• The speaker input is not correctly set to detect the Factory System.<br />
- Make sure that the speaker cable of the car's Factory System properly connected. Confirm that the input is correctly selected<br />
according to the detection channel setting (F.SYS INT CH.). Refer to “Setting the Channel of the Speaker Interruption Detection”<br />
(page 17).<br />
• Interruption volume of the car's Factory System is too low.<br />
- 1) When an external audio processor is connected, set the GUIDE voice to 15. Refer to “Adjusting Volume of GUIDE Voice”<br />
(page 12).<br />
- 2) While the navigation voice guidance or the telephone audio of the car's Factory System is ON, set the speaker input volume level<br />
(FACT SYS LV). The sound should be clearly audible, but the level should not exceed 15. Adjust the volume of the car's Factory<br />
System if necessary. Refer to “Displaying the Speaker Input Volume Level” (page 16).<br />
If the speaker input volume level is lower than the detection level (FACT SYS DET), interruption will not occur. Refer to<br />
“Adjusting the Speaker Input’s Interruption Detection Level” (page 17).<br />
• Interruption occurs too frequently because the detection level is set too low.<br />
- Raise the interruption detection level (FACT SYS DET). Refer to “Adjusting the Speaker Input’s Interruption Detection Level”<br />
(page 17).<br />
• Interruption does not occur frequently enough if the detection level is set too high.<br />
-Lower the interruption detection level (FACT SYS DET). Refer to “Adjusting the Speaker Input’s Interruption Detection Level”<br />
(page 17).<br />
• The source is set to FACTORY SYS.<br />
- Change to another source. If the source is set to FACTORY SYS while listening to the Factory audio system, sound is output to all<br />
speakers without interrupting the front speaker for the navigation voice guidance or telephone voice.<br />
• Depending on the type of telephone ring tone, interruption may not be recognized.<br />
-Lower the interruption detection level (FACT SYS DET), or change the telephone ring tone. Refer to “Adjusting the Speaker Input’s<br />
Interruption Detection Level” (page 17).<br />
• Depending on the car, the telephone volume is automatically lowered. Therefore, interruption is not recognized.<br />
-Lower the interruption detection level (FACT SYS DET) based on the car's Factory System level. Refer to “Adjusting the Speaker<br />
Input’s Interruption Detection Level” (page 17).<br />
Interruption volume of the car navigation system is too high/low.<br />
• The volume is not appropriately adjusted.<br />
- Set the interruption volume (FACT SYS MIX) appropriately. Refer to “Adjusting the Speaker Input Voice Interruption Level”<br />
(page 17).<br />
R<br />
<strong>EN</strong>
The volume of the source is too high/low during the navigation interruption of the car system.<br />
• The volume is not appropriately adjusted.<br />
- During navigation voice interruption, adjust the volume of the current listening source using the commander. The next time the<br />
navigation voice interrupts, the volume will match the adjusted source.<br />
When the navigation voice of the car system interrupts, the volume of the source changes.<br />
• The volume of the source was adjusted during a navigation voice interruption.<br />
- During a navigation voice interruption, adjust the desired volume using the commander.<br />
If the volume of the source is adjusted during a navigation voice interruption, its volume is stored, and the volume of the source is<br />
adjusted at the next time navigation voice interruption.<br />
Navigation interruption of the car system is not cancelled.<br />
• Navigation voice is output.<br />
-Navigation interruption cannot be cancelled on the unit. 5 seconds after you have operated the navigation and finished the guidance,<br />
interruption is cancelled, and the volume of the source returns to its previously adjusted level.<br />
The volume of the telephone interruption of the car system is too high/low.<br />
• The volume is not appropriately adjusted.<br />
- During the telephone interruption, adjust the volume appropriately using the commander. At the next telephone interruption, the<br />
volume will be adjusted automatically to that level. (Concerning the volume display, though the volume of the source is displayed,<br />
the volume of the telephone interruption is not displayed.)<br />
Telephone interruption of the car system is not cancelled.<br />
• Telephone voice is output.<br />
- If the volume of the telephone is higher than the interruption detection level (FACT SYS DET), the telephone voice interrupts again<br />
even when interruption is cancelled. Press SOURCE/POWER after hanging up, and cancel the telephone interruption.<br />
Although the source screen is displayed, sound is not output.<br />
• The telephone is interrupting.<br />
- 1) Make sure that the commander blinks quickly, and hang up.<br />
- 2) Press SOURCE/POWER, and cancel the telephone interruption.<br />
Operation cannot be performed on the unit.<br />
• The telephone is interrupting.<br />
- When the speaker input mode (FACT SYS SET) is set to INT or BOTH, or the voice interruption type (F.SYS MIX TYP) is set to<br />
MUTE, the telephone will interrupt if the audio of the car system is turned on in a source other than FACTORY SYS.<br />
Press SOURCE/POWER after the audio of the car system is turned off, and cancel the telephone interruption. Refer to “Setting the<br />
Speaker Input Mode” (page 16) and “Setting the Interrupt Type of the Speaker Input Voice” (page 17).
Deutsch<br />
L Ergänzung zu „Im <strong>Pro</strong>blemfall“ in der Bedienungsanleitung (Seite 46): Einstellungen und Bedienung für<br />
FACTORY SYSTEM (Lautsprechereingang).<br />
Der Klang des Lautsprechers ist verzerrt.<br />
• Das Werksystem wurde bereits eingestellt.<br />
-Wenn die Werksystem-Einstellfunktionen BASS, TREBLE, LOUDNESS usw. im Lautsprechereingangsmodus geändert werden,<br />
verzerrt der Klang des Werksystems leicht. Setzen Sie die obigen Einstellungen daher wieder zurück.<br />
• Die Lautstärke ist nicht gut eingestellt.<br />
- Stellen Sie den Lautstärkepegel des Lautsprechereingangs (FACT SYS LV) auf einen kleineren Wert als 15 ein. Vermindern Sie<br />
danach die Werksystem-Lautstärke des Fahrzeugs, so dass der Klang nicht mehr verzerrt ist. Siehe „Anzeigen des<br />
Lautsprechereingangspegels“ (Seite 16).<br />
Störung.<br />
• Lautsprechereingangskabelrauschen kann eine Störung verursachen.<br />
-Verlegen Sie die Lautsprechereingangskabel e und d gebündelt. Ein separates Verlegen der Lautsprechereingangskabel kann<br />
Rauschen verursachen.<br />
Die Lautstärke der Autostereoanlage ist zu hoch/niedrig.<br />
• Die Lautstärke ist nicht gut eingestellt.<br />
-Wählen Sie FACTORY SYS auf der Quellenauswahlanzeige, und stellen Sie die Lautstärke mit dem Commander passend ein.<br />
Unterbrechung arbeitet nicht einwandfrei.<br />
• Der Lautsprechereingang wurde nicht richtig auf die Erkennung des Werksystems eingestellt.<br />
-Vergewissern Sie sich, dass das Lautsprecherkabel des Werksystems im Fahrzeug korrekt angeschlossen ist. Prüfen Sie, ob der zur<br />
Einstellung des Erkennungskanals (F.SYS INT CH.) passende Eingang gewählt wurde. Siehe „Einstellen des Kanals für das<br />
Sprachsignal-Unterbrechungssignal“ (Seite 17).<br />
• Die Unterbrechungslautstärke des Werksystems im Fahrzeug ist zu niedrig.<br />
- 1) Wenn ein externer Klangprozessor angeschlossen ist, stellen Sie das GUIDE-Sprachsigal auf 15 ein. Siehe „Einstellen der<br />
Lautstärke des GUIDE-Sprachsignals“ (Seite 12).<br />
- 2) Stellen Sie, während das Werksystem eine Navigationsansage oder Telefonsignal wiedergibt, den Lautstärkepegel des<br />
Lautsprechereingangs (FACT SYS LV) ein. Der Ton sollte gut vernehmbar sein, aber der Pegel darf 15 nicht überschreiten.<br />
Stellen Sie ggf. die Lautstärke des Fahrzeug-Werksystems ein. Siehe „Anzeigen des Lautsprechereingangspegels“ (Seite 16).<br />
Wenn der Lautstärkepegel des Lautsprechereingangs niedriger ist als der Erkennungspegel (FACT SYS DET), erfolgt keine<br />
Unterbrechung. Siehe „Einstellen des Unterbrechungspegels für das Sprachsignal am Lautsprechereingang“ (Seite 17).<br />
• Zu häufige Unterbrechung wegen eines zu niedrig eingestellten Erkennungspegels.<br />
- Stellen Sie für den Erkennungspegel (FACT SYS DET) einen höheren Wert ein. Siehe „Einstellen des Unterbrechungspegels für das<br />
Sprachsignal am Lautsprechereingang“ (Seite 17).<br />
• Unterbrechung erfolgt wegen eines zu hoch eingestellten Erkennungspegels nicht jedes Mal.<br />
- Stellen Sie für den Erkennungspegel (FACT SYS DET) einen niedrigeren Wert ein. Siehe „Einstellen des Unterbrechungspegels für<br />
das Sprachsignal am Lautsprechereingang“ (Seite 17).<br />
• Die Quelle ist auf FACTORY SYS eingestellt.<br />
-Wechseln Sie die Quelle. Wenn beim Hören über das Fahrzeug-Werksystem die Quelle auf FACTORY SYS eingestellt ist, wird der<br />
Ton über alle Lautsprecher wiedergegeben, ohne dass eine Unterbrechung der Frontlautsprecher-Tonwiedergabe durch Navigationsoder<br />
Telefon-Sprachsignale erfolgt.<br />
• Das Unterbrechungssignal wird wegen des Telefon-Klingeltons unter Umständen nicht erkannt.<br />
- Stellen Sie für den Erkennungspegel (FACT SYS DET) einen niedrigeren Wert ein, oder ändern Sie den Telefon-Klingelton. Siehe<br />
„Einstellen des Unterbrechungspegels für das Sprachsignal am Lautsprechereingang“ (Seite 17).<br />
• Bei gewissen Fahrzeugen wird die Telefonlautstärke automatisch gesenkt, in welchem Fall die Unterbrechung nicht erkannt wird.<br />
- Stellen Sie für den Erkennungspegel (FACT SYS DET) einen niedrigeren Wert ein, der zum Signalpegel des Fahrzeug-Werksystems<br />
passt. Siehe „Einstellen des Unterbrechungspegels für das Sprachsignal am Lautsprechereingang“ (Seite 17).<br />
Die Unterbrechungslautstärke des Fahrzeugnavigationssystems ist zu hoch/niedrig.<br />
• Die Lautstärke ist nicht gut eingestellt.<br />
- Stellen Sie die Unterbrechungslautstärke (FACT SYS MIX) passend ein. Siehe „Einstellen des Unterbrechungspegels für das<br />
Sprachsignal am Lautsprechereingang“ (Seite 17).<br />
DE
Die Lautstärke der Quelle ist bei Navigationsunterbrechung des Fahrzeugsystems zu hoch/niedrig.<br />
• Die Lautstärke ist nicht gut eingestellt.<br />
- Stellen Sie bei einer Unterbrechung durch das Navigationssystem die Lautstärke der gegenwärtig gehörten Quelle mit dem<br />
Commander ein. Bei der nächsten Unterbrechung durch die Sprachführung des Navigationssystems passt die Lautstärke dann zu der<br />
für die Quelle eingestellten.<br />
Bei Unterbrechung durch die Sprachführung des Navigationssystems ändert sich die Lautstärke der Quelle.<br />
• Die Lautstärke wurde während einer Navigationsansage an der Quelle geändert.<br />
- Stellen Sie bei einer Unterbrechung durch das Navigationssystem die Lautstärke mit dem Commander ein.<br />
Wenn die Lautstärke bei einer Unterbrechung durch die Sprachführung am Quellengerät eingestellt wird, bleibt die Einstellung<br />
gespeichert und wird bei der nächsten Unterbrechung wieder abgerufen.<br />
Navigationsunterbrechung des Fahrzeugsystems wird nicht aufgehoben.<br />
• Navigationsansage wird wiedergegeben.<br />
- Die Navigationsunterbrechung kann nicht am Gerät aufgehoben werden. Wenn die Ansage der Sprachführung nach einer Bedienung<br />
des Navigationssystems beendet ist, wird die Unterbrechung 5 Sekunden später aufgehoben, wonach die frühere Tonquelle wieder<br />
mit der eingestellten Lautstärke wiedergegeben wird.<br />
Die Lautstärke des Fahrzeugsystems ist bei Unterbrechung durch ein Telefongespräch zu hoch/niedrig.<br />
• Die Lautstärke ist nicht gut eingestellt.<br />
- Stellen Sie während einer Unterbrechung durch ein Telefongespräch die Lautstärke mit dem Commander passend ein. Bei der<br />
nächsten Unterbrechung durch ein Telefongespräch wird die Lautstärke automatisch auf diesen Pegel eingestellt. (Auf der<br />
Lautstärkeanzeige ist lediglich die Lautstärke der Quelle zu sehen, aber nicht die Lautstärke der Telefonunterbrechung.)<br />
Telefonunterbrechung des Fahrzeugsystems wird nicht aufgehoben.<br />
• Telefonsignal wird ausgegeben.<br />
- Wenn die Lautstärke des Telefons höher ist als der Erkennungspegel (FACT SYS DET), unterbricht das Telefonsignal nach Aufheben<br />
der Unterbrechung erneut. Drücken Sie nach dem Auflegen SOURCE/POWER, um die Telefonunterbrechung aufzuheben.<br />
Es wird kein Ton wiedergegeben, obwohl der Quellenbildschirm angezeigt wird.<br />
• Unterbrechung durch das Telefon.<br />
- 1) Prüfen Sie, ob der Commander schnell blinkt, und legen Sie auf.<br />
- 2) Drücken Sie SOURCE/POWER, um die Telefonunterbrechung aufzuheben.<br />
Gerät lässt sich nicht bedienen.<br />
• Unterbrechung durch das Telefon.<br />
-Wenn als Lautsprechereingangsmodus (FACT SYS SET) INT oder BOTH eingestellt oder die Sprachsignal-Unterbrechungsart<br />
(F.SYS MIX TYP) auf MUTE eingestellt ist, unterbricht das Telefon, wenn das Fahrzeugsystem bei einer anderen Quelle als<br />
FACTORY SYS eingeschaltet wird.<br />
Drücken Sie nach Ausschalten des Fahrzeugsystems SOURCE/POWER, um die Telefonunterbrechung aufzuheben. Siehe<br />
„Einstellen des Lautsprechereingangsmodus“ (Seite 16) und „Einstellen der Unterbrechungsart für Lautsprechereingang-<br />
Sprachsignale“ (Seite 17).
Français<br />
Deutsch<br />
L Ajouter à la section « En cas de problème » du Mode d’emploi (page 46) les réglages et opérations suivants pour<br />
FACTORY SYSTEM (entrée des enceintes).<br />
Le son d’entrée des enceintes est déformé.<br />
• Le système d’usine est déjà configuré.<br />
- Si vous spécifiez les réglages BASS, TREBLE, LOUDNESS, etc. du système d’usine du véhicule en mode d’entrée des enceintes, le<br />
son du système d’usine risque d’être déformé. Par conséquent, réinitialisez les réglages ci-dessus.<br />
• Le volume n’est pas correctement réglé.<br />
-Réglez le niveau de volume de l’entrée des enceintes (FACT SYS LV) sur une valeur inférieure à 15. Ensuite, réduisez le volume du<br />
système d’usine du véhicule afin que le son ne soit pas déformé. Consultez la section « Affichage du niveau sonore d’entrée des<br />
enceintes » (page 16).<br />
Dysfonctionnement.<br />
• Un dysfonctionnement peut se produire en raison de bruits au niveau des câbles d’entrée des enceintes.<br />
-Regroupez et acheminez les câbles d’entrée des enceintes e et d. Si vous acheminez les câbles d’entrée des enceintes séparément,<br />
vous risquez de provoquer du bruit.<br />
Le volume du système audio du véhicule est trop élevé/faible.<br />
• Le volume n’est pas correctement réglé.<br />
- Sélectionnez FACTORY SYS sur l’écran de sélection de la source, puis réglez le volume à l’aide de l’appareil de commande.<br />
L’interruption ne fonctionne pas correctement.<br />
• L’entrée des enceintes n’est pas correctement configurée pour détecter le système d’usine.<br />
-Vérifiez que le câble des enceintes du système d’usine du véhicule est correctement raccordé. Assurez-vous que l’entrée est<br />
correctement sélectionnée en fonction du réglage du canal de détection (F.SYS INT CH.). Consultez la section « Réglage du canal<br />
de la détection de l’interruption des enceintes » (page 17).<br />
• Le volume de l’interruption du système d’usine du véhicule est trop faible.<br />
-1)Si un processeur audio externe est raccordé, réglez le volume du guidage vocal sur 15. Consultez la section « Réglage du volume<br />
du guidage vocal » (page 12).<br />
-2)Lorsque le guidage vocal du système de navigation ou le son du téléphone du système d’usine du véhicule sont activés, réglez le<br />
niveau sonore de l’entrée des enceintes (FACT SYS LV). Le son doit être clairement audible, mais le niveau ne doit pas dépasser<br />
15. Le cas échéant, réglez le volume du système d’usine du véhicule. Consultez la section « Affichage du niveau sonore d’entrée<br />
des enceintes » (page 16).<br />
Si le niveau sonore de l’entrée des enceintes est inférieur au niveau de détection (FACT SYS DET), l’interruption n’a pas lieu.<br />
Consultez la section « Réglage du niveau de détection de l’interruption de l’entrée des enceintes » (page 17).<br />
• L’interruption se produit trop fréquemment, car le niveau de détection est trop faible.<br />
- Augmentez le niveau de détection de l’interruption (FACT SYS DET). Consultez la section « Réglage du niveau de détection de<br />
l’interruption de l’entrée des enceintes » (page 17).<br />
• L’interruption ne se produit pas assez souvent, car le niveau de détection est trop élevé.<br />
- Réduisez le niveau de détection de l’interruption (FACT SYS DET). Consultez la section « Réglage du niveau de détection de<br />
l’interruption de l’entrée des enceintes » (page 17).<br />
• La source est réglée sur FACTORY SYS.<br />
- Sélectionnez une autre source. Si la source est réglée sur FACTORY SYS lorsque vous écoutez le système audio d’usine, le son est<br />
reproduit par toutes les enceintes, sans interruption de l’enceinte avant pour le guidage vocal du système de navigation ou<br />
l’utilisation du téléphone.<br />
• Selon le type de sonnerie du téléphone, il se peut que l’interruption ne soit pas reconnue.<br />
- Réduisez le niveau de détection de l’interruption (FACT SYS DET) ou modifiez la sonnerie du téléphone. Consultez la section<br />
«Réglage du niveau de détection de l’interruption de l’entrée des enceintes » (page 17).<br />
• Selon le véhicule, le volume du téléphone est automatiquement réduit. Par conséquent, l’interruption n’est pas reconnue.<br />
- Réduisez le niveau de détection de l’interruption (FACT SYS DET) en fonction du niveau du système d’usine du véhicule.<br />
Consultez la section « Réglage du niveau de détection de l’interruption de l’entrée des enceintes » (page 17).<br />
Le volume de l’interruption du système de navigation du véhicule est trop élevé/faible.<br />
• Le volume n’est pas correctement réglé.<br />
-Réglez correctement le volume de l’interruption (FACT SYS MIX). Consultez la section « Réglage du niveau d’interruption de la<br />
voix d’entrée des enceintes » (page 17).<br />
FR
Le volume de la source est trop élevé/faible pendant l’interruption du système de navigation du véhicule.<br />
• Le volume n’est pas correctement réglé.<br />
- Pendant l’interruption du guidage vocal du système de navigation, réglez le volume de la source d’écoute actuelle à l’aide de<br />
l’appareil de commande. Lors de la prochaine interruption du guidage vocal du système de navigation, le volume s’ajuste à la source<br />
réglée.<br />
Lorsque le guidage vocal du système de navigation du véhicule s’interrompt, le volume de la source change.<br />
• Le volume de la source a été réglé pendant une interruption du guidage vocal du système de navigation.<br />
- Pendant une interruption du guidage vocal du système de navigation, réglez le volume au niveau souhaité à l’aide de l’appareil de<br />
commande.<br />
Si vous réglez le volume de la source pendant une interruption du guidage vocal du système de navigation, ce volume est enregistré<br />
et sera ajusté lors de sa prochaine interruption par la voix du système de navigation.<br />
L’interruption du système de navigation du véhicule n’est pas annulée.<br />
• Le guidage vocal du système de navigation est diffusé.<br />
- Il est impossible d’annuler l’interruption de la navigation sur l’appareil. 5 secondes après l’utilisation du système de navigation et la<br />
fin du guidage vocal, l’interruption est annulée et le volume de la source revient à son niveau réglé précédemment.<br />
Le volume de l’interruption du téléphone du système du véhicule est trop élevé/faible.<br />
• Le volume n’est pas correctement réglé.<br />
- Pendant une interruption par le téléphone, réglez correctement le volume à l’aide de l’appareil de commande. Lors de la prochaine<br />
interruption par le téléphone, le volume sera automatiquement réglé à ce niveau. (En ce qui concerne l’affichage du volume : le<br />
volume de la source est indiqué, et non le volume de l’interruption du téléphone.)<br />
L’interruption du téléphone du système du véhicule n’est pas annulée.<br />
• L’appel téléphonique est diffusé.<br />
- Si le volume du téléphone est supérieur au niveau de détection de l’interruption (FACT SYS DET), l’appel téléphonique s’interrompt<br />
à nouveau, même si l’interruption est annulée. Raccrochez, puis appuyez sur SOURCE/POWER et annulez l’interruption du<br />
téléphone.<br />
Même si l’écran de la source s’affiche, aucun son n’est reproduit.<br />
• Le téléphone interrompt l’écoute de la source.<br />
- 1)Vérifiez que l’appareil de commande clignote rapidement et raccrochez.<br />
- 2) Appuyez sur SOURCE/POWER et annulez l’interruption du téléphone.<br />
Cette opération ne peut pas être réalisée sur l’appareil.<br />
• Le téléphone interrompt l’écoute de la source.<br />
- Lorsque le mode d’entrée des enceintes (FACT SYS SET) est réglé sur INT ou BOTH, ou lorsque le type d’interruption vocale<br />
(F.SYS MIX TYP) est réglé sur MUTE, le téléphone interrompt le son du système du véhicule si celui-ci est activé dans une source<br />
autre que FACTORY SYS.<br />
Désactivez le son du système du véhicule, puis appuyez sur SOURCE/POWER et annulez l’interruption du téléphone. Consultez les<br />
sections « Réglage du mode d’entrée des enceintes » (page 16) et « Réglage du type d’interruption de la voix d’entrée des<br />
enceintes » (page 17).
Français Español<br />
L Incluya los ajustes y operaciones siguientes del SISTEMA DE FÁBRICA (Entrada de altavoces) en la sección “En<br />
caso de dificultad” del Manual de operación (página 46).<br />
El sonido de la entrada de los altavoces suena distorsionado.<br />
• El Sistema de fábrica ya se ha ajustado.<br />
- Si los siguientes ajustes de Sistema de fábrica: BASS, TREBLE, LOUDNESS, etc., se llevan a cabo en el modo de entrada de los<br />
altavoces, el sonido del Sistema de fábrica se distorsionará con facilidad. Por lo tanto, restablezca los ajustes mostrados arriba.<br />
• El volumen no se ajusta correctamente.<br />
- Ajuste el nivel de volumen de la entrada de los altavoces (FACT SYS LV) en un valor por debajo de 15. A continuación, reduzca el<br />
volumen del Sistema de fábrica del vehículo de modo que deje de sonar con distorsión. Consulte la sección “Visualización del nivel<br />
del volumen de entrada de los altavoces” (página 16).<br />
Mal funcionamiento.<br />
• Se produce un mal funcionamiento provocado por ruidos en el cable de entrada de los altavoces.<br />
- Agrupe y guíe los cables de entrada e y d de los altavoces. Al guiar los cables de entrada de los altavoces por separado pueden<br />
aparecer ruidos.<br />
El volumen del sistema de audio del vehículo está demasiado alto o bajo.<br />
• El volumen no se ajusta correctamente.<br />
- Seleccione FACTORY SYS en la pantalla de selección de la fuente y ajuste el volumen desde el panel de mandos.<br />
La interrupción no funciona correctamente.<br />
• La entrada de los altavoces no está ajustada correctamente para detectar el Sistema de fábrica.<br />
-Verifique que el cable de los altavoces del Sistema de fábrica del vehículo está correctamente conectado. Confirme que la entrada<br />
está correctamente seleccionada según los ajustes del canal de detección (F.SYS INT CH.). Consulte la sección “Configuración del<br />
canal de detección de interrupción de los altavoces” (página 17).<br />
• El volumen de interrupción del Sistema de fábrica del vehículo está demasiado bajo.<br />
- 1) Si se conecta un procesador de audio externo, ajuste la voz de la guía en el valor 15. Consulte la sección “Ajuste del volumen de<br />
la voz de la guía” (página 12).<br />
- 2) Con el control por voz de navegación o el audio del teléfono del Sistema de fábrica del vehículo activado, ajuste el nivel del<br />
volumen de entrada de los altavoces (FACT SYS LV). El sonido debería oírse perfectamente, pero el nivel del sonido no debe<br />
superar el valor 15. Ajuste el volumen del Sistema de fábrica del vehículo si es necesario. Consulte la sección “Visualización del<br />
nivel del volumen de entrada de los altavoces” (página 16).<br />
Si el nivel del volumen de la entrada de los altavoces está por debajo del nivel de detección (FACT SYS DET), no se producirá<br />
la interrupción. Consulte la sección “Configuración del nivel de detección de interrupción de entrada de los altavoces” (página<br />
17).<br />
• La interrupción se produce con demasiada frecuencia porque el nivel de detección está ajustado en un valor muy bajo.<br />
- Aumente el nivel de detección de interrupción (FACT SYS DET). Consulte la sección “Configuración del nivel de detección de<br />
interrupción de entrada de los altavoces” (página 17).<br />
• La interrupción no se produce con la frecuencia deseada si el nivel de detección está ajustado en un valor demasiado alto.<br />
- Reduzca el nivel de detección de interrupción (FACT SYS DET). Consulte la sección “Configuración del nivel de detección de<br />
interrupción de entrada de los altavoces” (página 17).<br />
• La fuente está ajustada en FACTORY SYS.<br />
- Cambie a otra fuente. Si la fuente se ajusta en FACTORY SYS mientras se escucha el sistema de audio de fábrica, el sonido se<br />
emitirá por todos los altavoces sin interrumpir el altavoz delantero para el control por voz de navegación ni para la voz del teléfono.<br />
• En función del tipo de tono de llamada del teléfono, es posible que no se reconozca la interrupción.<br />
- Reduzca el nivel de detección de interrupción (FACT SYS DET) o cambie el tono de llamada del teléfono. Consulte la sección<br />
“Configuración del nivel de detección de interrupción de entrada de los altavoces” (página 17).<br />
• En función del vehículo, el volumen del teléfono disminuye automáticamente. Por lo tanto, no se reconoce la interrupción.<br />
- Reduzca el nivel de detección de interrupción (FACT SYS DET) según el nivel del Sistema de fábrica del vehículo. Consulte la<br />
sección “Configuración del nivel de detección de interrupción de entrada de los altavoces” (página 17).<br />
El volumen de interrupción del sistema de navegación del vehículo está demasiado alto o bajo.<br />
• El volumen no se ajusta correctamente.<br />
- Ajuste el volumen de interrupción (FACT SYS MIX) correctamente. Consulte la sección “Configuración del nivel de interrupción de<br />
voz de entrada de los altavoces” (página 17).<br />
ES
El volumen de la fuente es demasiado alto o bajo durante la interrupción de navegación del sistema del vehículo.<br />
• El volumen no se ajusta correctamente.<br />
- Durante la interrupción de voz de navegación, ajuste el volumen de la fuente que escuche en ese momento con ayuda del panel de<br />
mandos. La próxima vez que se produzca una interrupción de voz de navegación, el volumen se ajustará a la fuente configurada.<br />
Cuando se interrumpa la voz de navegación del sistema del vehículo, el volumen de la fuente cambiará.<br />
• El volumen de la fuente se ajustó durante una interrupción de voz de navegación.<br />
- Durante una interrupción de voz de navegación, ajuste el volumen que desee con ayuda del panel de mandos.<br />
Si el volumen de la fuente se ajusta durante una interrupción de voz de navegación, se guardará el valor del volumen y se ajustará el<br />
volumen de la fuente en la próxima interrupción de voz de navegación.<br />
La interrupción de navegación del sistema del vehículo no se cancela.<br />
• Se escucha la voz de navegación.<br />
- No es posible cancelar la interrupción de navegación en la unidad. 5 segundos de haber utilizado la navegación y cerrado la guía, se<br />
cancela la interrupción y el volumen de la fuente vuelve al nivel ajustado anteriormente.<br />
El volumen de la interrupción del teléfono del sistema del vehículo está demasiado alto o bajo.<br />
• El volumen no se ajusta correctamente.<br />
- Durante la interrupción del teléfono, ajuste el volumen correctamente con ayuda del panel de mandos. Cuando se produzca la<br />
siguiente interrupción del teléfono, el volumen se ajustará automáticamente en dicho nivel. (En relación con la pantalla del volumen,<br />
aunque sí se muestra el volumen de la fuente, no ocurre lo mismo con el volumen de la interrupción del teléfono.)<br />
La interrupción del teléfono del sistema del vehículo no se cancela.<br />
• Se escucha la voz del teléfono.<br />
- Si el volumen del teléfono es más alto que el nivel de detección de interrupción (FACT SYS DET), la voz del teléfono se<br />
interrumpirá de nuevo aunque se cancele la interrupción. Pulse SOURCE/POWER después de colgar y cancele la interrupción del<br />
teléfono.<br />
Aunque aparece la pantalla de fuente, no se escucha sonido.<br />
• El teléfono está interrumpiendo.<br />
-1)Verifique que el panel de mandos parpadea con insistencia y cuelgue.<br />
-2)Pulse SOURCE/POWER y cancele la interrupción del teléfono.<br />
No se puede realizar la operación en la unidad.<br />
• El teléfono está interrumpiendo.<br />
- Si el modo de entrada de los altavoces (FACT SYS SET) está ajustado en INT o BOTH, o bien si el tipo de interrupción de voz<br />
(F.SYS MIX TYP) está ajustado en MUTE, el teléfono interrumpirá si el audio del sistema del vehículo se activa con una fuente que<br />
no sea FACTORY SYS.<br />
Pulse SOURCE/POWER tras desactivar el audio del sistema del vehículo y cancele la interrupción del teléfono. Consulte las<br />
secciones “Configuración del modo de entrada de los altavoces” (página 16) y “Configuración del tipo de interrupción de la voz de<br />
entrada de los altavoces” (página 17).
Italiano<br />
L Aggiungere a “In caso di difficoltà” nelle Istruzioni per l’uso (pagina 46) le seguenti impostazioni e operazioni<br />
per IMPIANTO DI FABBRICA (Ingresso altoparlanti)<br />
L’audio in ingresso negli altoparlanti è distorto.<br />
• L’impianto è già stato regolato in fabbrica.<br />
- Se le impostazioni BASS, TREBLE, LOUDNESS per l’impianto di fabbrica della vettura vengono utilizzate nella modalità di<br />
ingresso altoparlanti, l’audio dell’impianto di fabbrica potrebbe risultare distorto. Ripristinare le impostazioni indicate.<br />
• Il volume non è regolato correttamente.<br />
- Impostare il livello del volume di ingresso altoparlanti (FACT SYS LV) su un valore inferiore a 15. Ridurre quindi il volume del<br />
sistema di fabbrica della vettura in modo da evitare la distorsione del suono. Consultare “Visualizzazione del livello di volume<br />
dell’ingresso altoparlanti” (pagina 16).<br />
Malfunzionamenti.<br />
• Un disturbo nel cavo di ingresso altoparlanti potrebbe provocare un malfunzionamento.<br />
-Legare e far scorrere insieme i cavi di ingresso altoparlanti e e d. Se i cavi di ingresso altoparlanti vengono separati si potrebbero<br />
verificare dei disturbi.<br />
Il volume dell’impianto audio della vettura è troppo alto o troppo basso.<br />
• Il volume non è regolato correttamente.<br />
- Selezionare FACTORY SYS nella schermata di selezione della sorgente, quindi regolare il volume utilizzando la manopola di<br />
comando.<br />
La modalità interruzione non funziona correttamente.<br />
• L’ingresso altoparlanti non è impostato in modo corretto per il rilevamento dell’impianto di fabbrica.<br />
-Verificare che il cavo altoparlanti dell’impianto di fabbrica della vettura sia collegato correttamente. Verificare la corretta selezione<br />
dell’ingresso secondo l’impostazione del canale di rilevamento (F.SYS INT CH.). Consultare “Impostazione del canale di<br />
rilevamento dell’interruzione altoparlanti” (pagina 17).<br />
• Il volume di interruzione dell’impianto di fabbrica della vettura è troppo basso.<br />
- 1) Se è collegato un processore audio esterno, impostare la guida vocale su 15. Consultare “Regolazione del volume della voce<br />
GUIDE” (pagina 12).<br />
- 2) Se la guida vocale del sistema di navigazione o l’audio del telefono dell’impianto di fabbrica della vettura sono attivi, impostare<br />
il livello di volume dell’ingresso altoparlanti (FACT SYS LV). L’audio dovrebbe essere udibile in modo chiaro, ma il livello non<br />
deve superare 15. Regolare il volume dell’impianto di fabbrica della vettura, se necessario. Consultare “Visualizzazione del<br />
livello di volume dell’ingresso altoparlanti” (pagina 16).<br />
Se il livello di volume dell’ingresso altoparlanti è inferiore al livello di rilevamento (FACT SYS DET), l’interruzione non sarà<br />
effettuata. Consultare “Regolazione del livello di rilevamento interruzioni nell’ingresso altoparlanti” (pagina 17).<br />
• L’interruzione si verifica troppo spesso perché il livello di rilevamento è troppo basso.<br />
- Aumentare il livello di rilevamento interruzioni (FACT SYS DET). Consultare “Regolazione del livello di rilevamento interruzioni<br />
nell’ingresso altoparlanti” (pagina 17).<br />
• L’interruzione non si verifica con la frequenza dovuta se il livello di rilevamento è troppo basso.<br />
- Ridurre il livello di rilevamento interruzioni (FACT SYS DET). Consultare “Regolazione del livello di rilevamento interruzioni<br />
nell’ingresso altoparlanti” (pagina 17).<br />
• La sorgente è impostata su FACTORY SYS.<br />
-Passare a un’altra sorgente. Se la sorgente è impostata su FACTORY SYS durante l’ascolto dall’impianto audio di fabbrica, l’audio<br />
viene inviato su tutti gli altoparlanti senza interrompere l’altoparlante anteriore per la guida vocale del sistema di navigazione o le<br />
telefonate.<br />
• Secondo il tipo di suoneria del telefono, l’interruzione potrebbe non essere riconosciuta.<br />
- Ridurre il livello di rilevamento interruzioni (FACT SYS DET) o cambiare la suoneria del telefono. Consultare “Regolazione del<br />
livello di rilevamento interruzioni nell’ingresso altoparlanti” (pagina 17).<br />
• Secondo la vettura in uso, il volume del telefono viene abbassato automaticamente. In questo caso, l’interruzione non viene<br />
riconosciuta.<br />
- Ridurre il livello di rilevamento interruzioni (FACT SYS DET) in base al livello dell’impianto di fabbrica della vettura. Consultare<br />
“Regolazione del livello di rilevamento interruzioni nell’ingresso altoparlanti” (pagina 17).<br />
Il volume di interruzione del sistema di navigazione della vettura è troppo alto o troppo basso.<br />
• Il volume non è regolato correttamente.<br />
- Impostare adeguatamente il volume dell’interruzione (FACT SYS MIX). Consultare “Regolazione del livello di interruzione<br />
nell’ingresso altoparlanti” (pagina 17).<br />
IT
Il volume della sorgente è troppo alto o troppo basso durante l’interruzione per la navigazione dell’impianto della<br />
vettura.<br />
• Il volume non è regolato correttamente.<br />
- Durante l’interruzione della voce di navigazione, regolare il volume della sorgente d’ascolto corrente utilizzando la manopola di<br />
comando. Alla successiva interruzione da parte della voce di navigazione, il volume corrisponderà a quello della sorgente regolata.<br />
Durante un’interruzione della voce di navigazione dell’impianto dell’audio, il volume della sorgente cambia.<br />
• Il volume della sorgente è stato regolato durante un’interruzione della voce di navigazione.<br />
- Durante un’interruzione della voce di navigazione, regolare il volume desiderato utilizzando la manopola di comando.<br />
Se il volume della sorgente viene regolato durante un’interruzione della voce di navigazione, tale volume viene memorizzato e il<br />
volume della sorgente viene regolato alla successiva interruzione della voce di navigazione.<br />
L’interruzione della navigazione sull’impianto della vettura non viene annullata.<br />
• Viene emessa la voce di navigazione.<br />
-L’interruzione della navigazione non può essere annullata sull’unità. 5 secondi dopo l’uso della navigazione e la conclusione della<br />
guida vocale, l’interruzione viene annullata e il volume della sorgente ritorna al livello precedentemente regolato.<br />
Il volume di interruzione del telefono della vettura è troppo alto o troppo basso.<br />
• Il volume non è regolato correttamente.<br />
- Durante l’interruzione del telefono, regolare il volume in modo adeguato utilizzando la manopola di comando. Alla successiva<br />
interruzione del telefono, il volume verrà regolato automaticamente su tale livello (per quanto riguarda la visualizzazione del<br />
volume, viene visualizzato il volume della sorgente e non quello di interruzione del telefono).<br />
L’interruzione del telefono sull’impianto della vettura non viene annullata.<br />
• Viene emessa la voce del telefono.<br />
- Se il volume del telefono è superiore al livello di rilevamento interruzioni (FACT SYS DET), la voce del telefono interrompe la<br />
riproduzione anche se l’interruzione è stata annullata. Premere SOURCE/POWER dopo aver riagganciato e annullare l’interruzione<br />
del telefono.<br />
L’audio non viene emesso nonostante sia visualizzata la schermata della sorgente.<br />
• Il telefono interrompe la riproduzione.<br />
- 1) Verificare che la manopola di comando lampeggi rapidamente e riagganciare.<br />
-2)Premere SOURCE/POWER e annullare l’interruzione del telefono.<br />
Non è possibile eseguire operazioni sull’unità.<br />
• Il telefono interrompe la riproduzione.<br />
- Se la modalità di ingresso altoparlanti (FACT SYS SET) è impostata su INT o BOTH, o se il tipo di interruzione vocale (F.SYS MIX<br />
TYP) è impostato su MUTE, il telefono interrompe la riproduzione se l’audio dell’impianto della vettura è acceso su una sorgente<br />
diversa da FACTORY SYS.<br />
Premere SOURCE/POWER dopo aver disattivato l’audio dell’impianto della vettura e annullare l’interruzione del telefono.<br />
Consultare “Impostazione del modo di ingresso degli altoparlanti” (pagina 16) e “Impostazione del tipo di interruzione della voce di<br />
ingresso altoparlanti” (pagina 17).
Svenska<br />
L Lägg till följande inställningar och funktioner under ”Felsökning” i användarhandledning (sidan 46) för<br />
FABRIKSSYSTEM (högtalaringång).<br />
Högtalaringångens ljud är förvrängt.<br />
• Fabrikssystemet har redan justerats.<br />
- Om inställningar av bilens fabrikssystem, BASS, TREBLE, LOUDNESS etc., utförs i högtalaringångens läge, är det lätt att<br />
fabrikssystemets ljud förvrängs. Återställ därför ovan nämnda inställningar.<br />
• Volymen justeras inte korrekt.<br />
- Ställ in högtalaringångens volym (FACT SYS LV) på lägre än 15. Sänk därefter bilens fabrikssystems volym så att ljudet inte<br />
förvrängs. Se ”Visa högtalaringångens volymnivå” (sidan 16).<br />
Funktionsstörning.<br />
• En funktionsstörning orsakad av bruset i högtalaringångens kabel uppstår.<br />
- Linda upp och dra högtalaringångens e och d -kablar. Det kan orsaka brus om högtalaringångens kablar dras separat.<br />
Volymen i bilens ljudsystem är för hög/låg.<br />
• Volymen justeras inte korrekt.<br />
-Välj FACTORY SYS på skärmen för val av källa och justera volymen med hjälp av fjärrkontrollen.<br />
Avbrott fungerar inte som det ska.<br />
• Högtalaringången är inte korrekt inställd för att upptäcka fabrikssystemet.<br />
-Kontrollera att högtalarkabeln för bilens fabrikssystem är ordentligt ansluten. Bekräfta att ingången valts korrekt i enlighet med<br />
detekteringskanalens inställning (F.SYS INT CH.). Se “Ställ in kanal för högtalaravbrott” (sidan 17).<br />
• Avbrottsvolym för bilens fabrikssystem är för låg.<br />
-1)När en extern ljudprocessor är ansluten ska GUIDE-rösten ställas in på 15. Se “Justering av volym för GUIDE-röst” (sidan 12).<br />
-2)Ställ in högtalaringångens volym (FACT SYS LV) när navigationens röstvägledning eller telefonens ljud i bilens fabrikssystem är<br />
ON. Ljudet ska höras tydligt men nivån bör inte överstiga 15. Justera volymen för bilens fabrikssystem vid behov. Se ”Visa<br />
högtalaringångens volymnivå” (sidan 16).<br />
Om nivån på högtalaringångens volym är lägre än detekteringsnivån (FACT SYS DET) sker inget avbrott. Se ”Justering av<br />
högtalaringångens avbrottsnivå” (sidan 17).<br />
• Avbrott sker för ofta eftersom detekteringsnivån är för lågt inställd.<br />
- Höj detekteringsnivån för avbrott (FACT SYS DET). Se ”Justering av högtalaringångens avbrottsnivå” (sidan 17).<br />
• Avbrott sker inte ofta nog om detekteringsnivån är för högt inställd.<br />
- Sänk detekteringsnivån för avbrott (FACT SYS DET). Se ”Justering av högtalaringångens avbrottsnivå” (sidan 17).<br />
• Källan ställs in på FACTORY SYS.<br />
- Byt till annan källa. Om källan är inställd på FACTORY SYS medan man lyssnar på fabriksljudsystemet, matas ljudet ut till alla<br />
högtalarna utan att avbryta främre högtalaren för navigationens röstvägledning eller telefonröst.<br />
• Beroende på vilken typ av ringsignal telefonen har kan det hända att avbrottet inte godkänns.<br />
- Sänk detekteringsnivån för avbrott (FACT SYS DET) eller byt telefonens ringsignal. Se ”Justering av högtalaringångens<br />
avbrottsnivå” (sidan 17).<br />
• Telefonens volym sänks beroende på vilken typ av bil du har. Därför godkänns inte avbrottet.<br />
- Sänk detekteringsnivån för avbrott (FACT SYS DET) baserat på nivån för bilens fabrikssystem. Se ”Justering av högtalaringångens<br />
avbrottsnivå” (sidan 17).<br />
Avbrottsvolymen för bilens navigationssystem är för hög/låg.<br />
• Volymen är inte korrekt justerad.<br />
- Ställ in avbrottsvolymen (FACT SYS MIX) ungefärligt. Se ”Justering av högtalaringångens nivå för röstavbrott” (sidan 17).<br />
SE
Källans volym är för hög/låg under bilsystemets navigationsavbrott.<br />
• Volymen är inte korrekt justerad.<br />
-Vid avbrott av navigationsrösten justeras volymen för aktuell ljudkälla med hjälp av fjärrkontrollen. Nästa gång navigationsrösten<br />
avbryts motsvarar volymen den justerade källans.<br />
När bilsystemets navigationsröst avbryter ändras källans volym.<br />
• Källans volym justerades under navigationsröstens avbrott.<br />
-Vid ett avbrott av navigationsrösten justeras den önskade volymen med hjälp av fjärrkontrollen.<br />
Om källans volym justeras under ett avbrott av navigationsrösten lagras dess volym och källans volym justeras nästa gång<br />
navigationsrösten avbryts.<br />
Bilsystemets navigationsavbrott avbryts inte.<br />
• Navigationsrösten matas ut.<br />
-Navigationsavbrott kan inte avbrytas på enheten. Fem sekunder efter att du använt navigationen och avslutat vägledningen avslutas<br />
avbrottet och källans volym återgår till föregående nivå.<br />
Volymen för bilsystemets telefonavbrott är för hög/låg.<br />
• Volymen är inte korrekt justerad.<br />
- ustera volymen med fjärrkontrollen under telefonavbrottet. Vid nästa telefonavbrott kommer volymen automatiskt att justeras till den<br />
nivån (när det gäller visningen av volymen så visas inte telefonavbrottets volym, trots att källans volym visas).<br />
Bilsystemets telefonavbrott avbryts inte.<br />
• Telefonrösten matas ut.<br />
- Om telefonens volym är högre än avbrottets detekteringsnivå (FACT SYS DET), avbryter telefonrösten igen även då avbrottet<br />
avslutats. Tryck på SOURCE/POWER efter att du lagt på och avsluta telefonens avbrott.<br />
Även om skärmbilden för källan visas matas inget ljud ut.<br />
• Telefonen avbryter.<br />
-1) Se till att fjärrkontrollen blinkar snabbt och lägg på luren.<br />
-2) Tryck på SOURCE/POWER och avsluta telefonens avbrott.<br />
Funktionen kan inte utföras på enheten.<br />
• Telefonen avbryter.<br />
- När högtalaringångens läge (FACT SYS SET) är inställt på INT eller BOTH, eller om typen av röstavbrott (F.SYS MIX TYP) är<br />
inställd på MUTE, kommer telefonen att avbryta om bilsystemets ljud sätts på i en annan källa än FACTORY SYS.<br />
Tryck på SOURCE/POWER efter att bilsystemets ljud stängts av, och avsluta telefonens avbrott. Se “Inställning av högtalaringång”<br />
(sidan 16) och “Inställning av avbrottstyp för högtalarens inmatningsröst” (sidan 17).<br />
<strong>VPA</strong>-<strong>B222R</strong> 68-06194Z40-A (Y)
Español<br />
Acerca de la conexión de otros productos<br />
L Conectar el procesador de audio compatible Ai-NET, el sistema de navegación, el<br />
reproductor de DVD y el cambiador de discos (página 55).<br />
• Si el PXA-H701/PXA-H700 y el cambiador/reproductor de DVD están conectados mediante fibra digital, es posible que no se<br />
obtenga el audio de interrupción al cambiar un disco, durante la pausa, etc. En este caso, conecte un altavoz externo con<br />
amplificador incorporado en el terminal GUIDE OUT para obtener el audio de interrupción.<br />
El manual de operación contiene los errores mostrados aquí.<br />
<br />
• Cuando el NVA-N751AS esté conectado al sistema de navegación, utilice el cable de conversión KWE-503N (se vende por separado).<br />
<br />
• Cuando el NVE-N055PS esté conectado al sistema de navegación, utilice el cable de conversión RGB KCE-030N (se vende por separado).<br />
L Conectar el amplificador digital de home cinema, el sistema de navegación, el<br />
cambiador de DVD y el cambiador de CD.<br />
Italiano<br />
Cable<br />
RGB<br />
Terminal de<br />
entrada del<br />
sistema de<br />
fábrica<br />
(blanco/marrón)<br />
SALIDA<br />
REMOTA<br />
NVE-N099P<br />
Sistema de navegación<br />
(Se vende por separado)<br />
<strong>VPA</strong>-<strong>B222R</strong><br />
(amarillo)<br />
(blanco/marrón)<br />
<strong>EN</strong>TRADA<br />
REMOTA<br />
<strong>Pro</strong>longador eléctrico RCA<br />
(incluido con el cambiador de DVD)<br />
Cambiador de DVD<br />
(Ai-NET) (DHA-S680P)<br />
(Se vende por separado)<br />
• Si se conecta un reproductor de DVD como el DVA-5210 o el DVE-5207, no podrá conectar un amplificador digital de home<br />
cinema mediante fibra digital al reproductor de DVD.<br />
1 Terminal de entrada de navegación (entrada RGB)<br />
Conéctelo al terminal de salida RGB del sistema<br />
de navegación.<br />
2 Interruptor del sistema<br />
Si conecta un ecualizador o un separador<br />
utilizando un elemento Ai-NET, sitúe este<br />
interruptor en la posición EQ/DIV.<br />
• Asegúrese de desactivar la alimentación de la<br />
unidad antes de cambiar la posición del interruptor.<br />
3 Conector Ai-NET<br />
Conéctelo al conector de salida o entrada de otro<br />
producto equipado con Ai-NET.<br />
Collegamento di altri prodotti<br />
Al conector Ai-NET<br />
(gris)<br />
Altavoz externo con<br />
amplificador<br />
incorporado (Se<br />
vende por separado)<br />
<strong>Pro</strong>longador<br />
eléctrico RCA<br />
(Se vende por<br />
separado)<br />
Cable Ai-NET<br />
(incluido con el<br />
cambiador de DVD)<br />
Terminal de<br />
entrada de<br />
fibra digital<br />
(para el<br />
reproductor<br />
de DVD)<br />
Cable Ai-NET<br />
(incluido con el amplificador)<br />
Al conector Ai-NET (negro)<br />
Amplificador digital<br />
de home cinema<br />
(MRA-D550)<br />
Cable Ai-NET<br />
(Incluido con<br />
el cambiador<br />
de CD)<br />
Cambiador de CD<br />
(Ai-NET) (Se vende<br />
por separado)<br />
4 Terminal de salida de la guía<br />
Si hay un procesador de audio externo conectado,<br />
obtenga la señal de voz de interrupción de<br />
navegación que entra al sistema de navegación de<br />
<strong>Alpine</strong> o al terminal de entrada de los altavoces.<br />
5 Cable de salida del control remoto (blanco/marrón)<br />
Conecte este cable al cable de entrada del<br />
control remoto. Este cable permite la salida de<br />
señales de control del mando a distancia.<br />
6 Terminal de entrada de vídeo AUX (AUX1)<br />
Conecte el cable de salida de vídeo de un<br />
reproductor de vídeo DVD o un cambiador de<br />
DVD a este terminal.<br />
L Collegare il processore audio compatibile con Ai-NET, il sistema di navigazione, il<br />
lettore DVD e il caricatore (pagina 55).<br />
• Se il PXA-H701/PXA-H700 e il lettore/cambia DVD sono collegati mediante dispositivi digitali in fibra, il segnale acustico di<br />
interruzione non viene emesso quando si cambia un disco, durante la pausa, ecc. In tal caso, collegare un altoparlante esterno<br />
con amplificatore incorporato al terminale GUIDE OUT per l’emissione del segnale acustico di interruzione.<br />
Le istruzioni per l'uso contengono gli errori indicati di seguito.<br />
<br />
• Quando è collegata un’unità NVA-N751AS per il sistema di navigazione, utilizzare il cavo di conversione RGB KWE-503N (venduto separatamente).<br />
<br />
• Quando vi è un unità NVE-N055PS collegata per il sistema di navigazione, utilizzare il cavo KCE-030N di conversione RGB (venduto separatamente).<br />
L Collegare l'amplificatore Digital Theater, il sistema di navigazione, il cambia DVD e il<br />
cambia CD.<br />
Cavo<br />
RGB<br />
Terminale di<br />
ingresso<br />
sistema<br />
industriale<br />
(bianco/marrone)<br />
USCITA DEL<br />
TELECOMANDO<br />
NVE-N099P<br />
Sistema di navigazione<br />
(venduto separatamente)<br />
<strong>VPA</strong>-<strong>B222R</strong><br />
(giallo)<br />
(bianco/<br />
marrone)<br />
INGRESSO DEL<br />
TELECOMANDO<br />
<strong>Pro</strong>lunga RCA (inclusa<br />
con il caricatore DVD)<br />
Caricatore DVD<br />
(Ai-NET) (DHA-S680P)<br />
(venduto<br />
separatamente)<br />
• Se è collegato un lettore DVD come il DVA-5210 o il DVE-5207, non è possibile collegare un amplificatore Digital Theater al<br />
lettore DVD mediante dispositivi digitali in fibra.<br />
1 Terminale di ingresso navigazione<br />
(ingresso RGB)<br />
Collegare al terminale di uscita RGB del sistema<br />
di navigazione.<br />
2 Interruttore sistema<br />
Quando si collega un equalizzatore o un divisore<br />
usando la funzione Ai-NET, portare l’interruttore<br />
sulla posizione EQ/DIV.<br />
• Assicurarsi di spegnere l’unità prima di<br />
cambiare la posizione dell’interruttore.<br />
3 Connettore Ai-NET<br />
Collegarlo al connettore di uscita o ingresso di<br />
altri prodotti dotati di Ai-NET.<br />
AI connettore Ai-NET<br />
(grigio)<br />
Altoparlante esterno<br />
con amplificatore<br />
incorporato (venduto<br />
separatamente)<br />
<strong>Pro</strong>lunga RCA<br />
(venduta<br />
separatamente)<br />
Cavo Ai-NET<br />
(inclusa con<br />
il caricatore<br />
DVD)<br />
AI connettore Ai-NET (nero)<br />
Terminale di<br />
ingresso digitale<br />
in fibra (per il<br />
lettore DVD)<br />
Cavo Ai-NET<br />
(inclusa con amplificatore)<br />
Amplificatore Digital<br />
Theater (MRA-D550)<br />
Cavo Ai-NET<br />
(incluso con<br />
il caricatore<br />
CD)<br />
Caricatore CD<br />
(Ai-NET) (venduto<br />
separatamente)<br />
4 Terminale di uscita guida<br />
Se è collegato un processore audio esterno, emette<br />
il segnale vocale di interruzione della navigazione<br />
in ingresso dal sistema di navigazione <strong>Alpine</strong> o dal<br />
terminale di ingresso degli altoparlanti.<br />
5 Cavo di uscita del telecomando (bianco/marrone)<br />
Collegare questo cavo al cavo di ingresso del<br />
telecomando.<br />
Questo cavo emette i segnali di controllo dal<br />
telecomando.<br />
6 Terminale (AUX1) di ingresso video AUX<br />
Collegare a questo terminale il cavo di uscita<br />
video di un lettore o caricatore DVD.<br />
Svenska<br />
Om att ansluta andra produkter<br />
L Anslut den Ai-NET-kompatibla ljudprocessorn, navigationssystem, DVD-spelare<br />
och -växlare (sidan 55).<br />
• Om PXA-H701/PXA-H700 och DVD-spelare/-växlare är anslutna med digital fiberoptik, kan det hända att avbrottssignalen inte<br />
matas ut när en skiva byts, vid paus etc. I detta fall ska en extern högtalare med inbyggd förstärkare anslutas till GUIDE OUTkontakten<br />
för utmatning av avbrottssignalen.<br />
Tyvärr har det smugit in ett fel i användarhandledningen. Följande behöver rättas till.<br />
<br />
• Använd RGB-omvandlingskabel KWE-503N (säljs separat) när NVA-N751AS är ansluten som navigationssystem.<br />
<br />
• Använd en RGB-omvandlingskabel KCE-030N (säljs separat) när NVE-N055PS är ansluten som navigationssystem.<br />
L Anslut den digitala bioförstärkaren, navigationssystem, DVD-växlare och CD-växlare.<br />
RGB-kabel<br />
Fabrikssystemingång<br />
(Vit/Brun)<br />
FJÄRRSTYRN-<br />
INGSUTGÅNG<br />
(Vit/Brun)<br />
FJÄRRSTYRN-<br />
INGSINGÅNG<br />
NVE-N099P<br />
Navigationssystem<br />
(säljs separat)<br />
<strong>VPA</strong>-<strong>B222R</strong><br />
RCA-förlängningskabel<br />
(medföljer DVD-växlare)<br />
(Gul)<br />
DVD-växlare<br />
(Ai-NET) (DHA-S680P)<br />
(säljs separat)<br />
• Om en DVD-spelare som t ex DVA-5210 eller DVE-5207 är ansluten, kan inte en digital bioförstärkare anslutas till DVD-spelaren<br />
med digital fiberoptik.<br />
1 Kontakt för navigationsinmatning (RGBingång)<br />
Anslut denna till navigationssystemets RGButgång.<br />
2 Systemomkopplare<br />
Ställ denna omkopplare i läget EQ/DIV när en<br />
Ai-NET-kompatibel equalizer eller delningsfilter<br />
ska anslutas.<br />
• Glöm inte att du måste slå av strömmen till<br />
enheten innan du ändrar läget på omkopplaren.<br />
3 Ai-NET-kontakt<br />
Anslut denna koppling till motsvarande koppling<br />
på en annan produkt kompatibel med Ai-NET.<br />
Till Ai-NET-kontakt<br />
(Grå)<br />
Extern högtalare med<br />
inbyggd förstärkare<br />
(säljs separat)<br />
RCAförlängningskabel<br />
(säljs separat)<br />
Ai-NETi-kabel<br />
(medföljer<br />
DVD-växlare)<br />
Till Ai-NET-kontakt (Svart)<br />
Fiberoptisk<br />
digital ingång<br />
(för DVD<br />
-spelare)<br />
Ai-NETi-kabel<br />
(medföljer förstärkare)<br />
Digital<br />
bioförstärkare<br />
(MRA-D550)<br />
Ai-NET-kabel<br />
(medföljer<br />
CD-växlaren)<br />
CD-växlare<br />
(Ai-NET) (säljs separat)<br />
4 Guideutgång<br />
Om en extern ljudprocessor är ansluten ska<br />
navigatorns avbrottssignal som matas in från<br />
<strong>Alpine</strong>s navigationssystem eller högtalarens<br />
ingång matas ut.<br />
5 Kontrollkabel för bildskärm (Vit/Brun)<br />
Anslut denna ledning till ingångsledningen för<br />
fjärrstyrning.<br />
Genom den här kabeln sänds kontrollsignaler ut<br />
från fjärrkontrollen.<br />
6 AUX-videoingång (AUX1)<br />
Anslut videoutgångskabeln från en DVD-spelare<br />
eller DVD-växlare till den här anslutningen.
CHA-S634<br />
CD changer for <strong>VPA</strong>-<strong>B222R</strong>.<br />
CD-Wechsler für <strong>VPA</strong>-<strong>B222R</strong>.<br />
Changeur CD pour <strong>VPA</strong>-<strong>B222R</strong>.<br />
Cambiador de CD para <strong>VPA</strong>-<strong>B222R</strong>.<br />
Cambia CD per <strong>VPA</strong>-<strong>B222R</strong>.<br />
CD-växlare för <strong>VPA</strong>-<strong>B222R</strong>.<br />
CHA-1214<br />
CD changer for <strong>VPA</strong>-<strong>B222R</strong>.<br />
CD-Wechsler für <strong>VPA</strong>-<strong>B222R</strong>.<br />
Changeur CD pour <strong>VPA</strong>-<strong>B222R</strong>.<br />
Cambiador de CD para <strong>VPA</strong>-<strong>B222R</strong>.<br />
Cambia CD per <strong>VPA</strong>-<strong>B222R</strong>.<br />
CD-växlare för <strong>VPA</strong>-<strong>B222R</strong>.<br />
CHM-S630<br />
<strong>Alpine</strong> CD Changers Give You More!<br />
More musical selections, more versatility, more convenience.<br />
The CHA-S634 is a high-performance 6-disc changer with a new M DAC, CD-R/RW PLAY BACK, MP3 PLAY BACK and CD TEXT.<br />
The CHA-1214 Ai-NET model holds 12 discs, and the CHM-S630 M-Bus model is a super-compact 6-disc changer with a CD-R/RW<br />
PLAY BACK.<br />
Von <strong>Alpine</strong> CD-Wechslern haben Sie mehr!<br />
Mehr Musikauswahl, mehr Vielseitigkeit, mehr Komfort.<br />
Der CHA-S634 ist ein Hochleistungs-Wechsler für 6 CDs mit dem neuen M-DAC, mit CD-R/RW- und MP3-Wiedergabefunktion und mit<br />
CD-TEXT. Der CHA-1214 ist ein Ai-NET-Modell für 12 CDs. Der M-Bus-kompatible CHM-S630 ist ein superkompakter Wechsler für 6<br />
CDs mit CD-R/RW-Wiedergabefunktion.<br />
Changeurs de CD <strong>Alpine</strong> : vous avez le choix!<br />
Plus de sélections musicales, plus de souplesse, plus de confort.<br />
Le modèle CHA-S634 est un changeur 6 disques ultra performant équipé des nouvelles fonctions M DAC, CD-R/RW PLAY BACK, MP3<br />
PLAY BACK et CD TEXT. Le modèle CHA-1214 Ai-NET contient 12 disques. Le modèle CHM-S630 M-Bus est un changeur 6 disques<br />
super compact doté de la fonction CD-R/RW PLAY BACK.<br />
¡Los cambiadores <strong>Alpine</strong> de CD le ofrecen más!<br />
Más selecciones musicales, más versatilidad y más ventajas.<br />
CHA-S634 es un cambiador de seis discos de alto rendimiento con nuevo M DAC, CD-R/RW PLAY BACK, MP3 PLAY BACK y CD<br />
TEXT. El modelo CHA-1214 Ai-NET alberga 12 discos y el modelo CHM-S630 M-Bus es un cambiador de seis discos de tamaño<br />
reducido con un CD-R/RW PLAY BACK.<br />
I caricatori CD <strong>Alpine</strong> danno di più!<br />
Più scelta, più versatilità, più comodità.<br />
Il modello CHA-S634 è un caricatore a 6 dischi ad elevate prestazioni dotato di un nuovo M DAC, CD-R/RW PLAY BACK, MP3 PLAY<br />
BACK e CD TEXT. Il modello CHA-1214 Ai-NET è in grado di contenere 12 dischi, il modello CHM-S630 M-Bus è un caricatore a 6<br />
dischi ultra compatto dotato di un CD-R/RW PLAY BACK.<br />
<strong>Alpine</strong>s CD-växlare ger mer!<br />
Fler musikval, mer variation, större bekvämlighet.<br />
CHA-S634 är en växlare för 6 skivor med mycket höga prestanda och en ny M D/A-omvandlare samt uppspelning av CD-R/RW, MP3 och<br />
CD TEXT. CHA-1214 Ai-NET rymmer 12 skivor. CHM-S630 M-Bus är en mycket kompakt växlare med kapaciteten 6 skivor med<br />
uppspelning av CD-R/RW PLAY BACK.