8090115 Service manual ASKO TD60.C EN.indd
8090115 Service manual ASKO TD60.C EN.indd
8090115 Service manual ASKO TD60.C EN.indd

You also want an ePaper? Increase the reach of your titles
YUMPU automatically turns print PDFs into web optimized ePapers that Google loves.
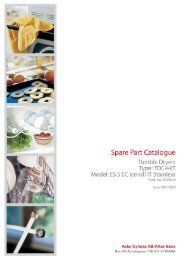
<strong>Service</strong> Manual Professional TD<br />
Type: <strong>TD60.C</strong>
<strong>Service</strong> Manual <strong>TD60.C</strong><br />
2
Contents<br />
Type: <strong>TD60.C</strong><br />
Updates ..................................................................................................................................................................................................................................................4<br />
Introduction .........................................................................................................................................................................................................................................5<br />
Product overview .............................................................................................................................................................................................................................6<br />
Knob and button descriptions ...................................................................................................................................................................................................6<br />
LCD description ..............................................................................................................................................................................................................................6<br />
Programme table ..............................................................................................................................................................................................................................7<br />
Programme descriptions ..............................................................................................................................................................................................................8<br />
Settings....................................................................................................................................................................................................................................................9<br />
<strong>Service</strong> menu ...................................................................................................................................................................................................................................10<br />
<strong>Service</strong> menu content .................................................................................................................................................................................................................11<br />
Fault indicators ................................................................................................................................................................................................................................13<br />
Components and measurement values ............................................................................................................................................................................14<br />
Technical data ...................................................................................................................................................................................................................................15<br />
Wiring diagram ...............................................................................................................................................................................................................................16
<strong>Service</strong> Manual <strong>TD60.C</strong><br />
4<br />
Updates<br />
Revision<br />
Date Description Initials<br />
01 2009-08-12 Conference version BPA<br />
02 2010-04-29 Supplemented with information MAS<br />
03 2010-07-19 Added information about automatic lint fi lter detection BPA
<strong>Service</strong> Manual <strong>TD60.C</strong><br />
5<br />
Introduction<br />
You are holding the service <strong>manual</strong> for TD60 tumble dryers.<br />
It should be easy to service a tumble dryer. It is important that you, as a service technician, are<br />
provided the necessary conditions to work in an effi cient and satisfactory manner. Our hope is<br />
that this service <strong>manual</strong> will prove a useful tool in your daily work.<br />
The type designation can be found on the machine plate located on the right-hand side of the<br />
front panel (concealed by the door).<br />
Type designation Product number<br />
<strong>TD60.C</strong><br />
Year Week<br />
Serial number
<strong>Service</strong> Manual <strong>TD60.C</strong><br />
6<br />
General product information<br />
Lint fi lter sensor<br />
A lint fi lter sensor was introduced in August 2010. If the lint fi lter is not fully seated or inserted<br />
incorrectly in the lint fi lter holder, the machine will not start. Moreover, an error message is displayed:<br />
“Insert fi lter”. The system comprises a sensor in the lint fi lter holder and a magnet in the<br />
lint fi lter. When the lint fi lter is correctly inserted, the magnet triggers the sensor, which closes the<br />
circuit in the machine.<br />
Fig.1 The sensor installed in the lint fi lter holder.<br />
Fig.2 Lint fi lter holder and lint fi lter as seen from the side. On the left, the sensor<br />
in the lint fi lter holder; on the right, the magnet in the lint fi lter.
<strong>Service</strong> Manual <strong>TD60.C</strong><br />
7<br />
Troubleshooting strategy<br />
At Asko, we believe in always remaining focused on the customer, and as an <strong>ASKO</strong> service technician,<br />
you are one of the most important ambassadors of our brand. As such, it is important that<br />
the customer fi nds the service callout a pleasant experience. Troubleshooting is an important part<br />
of the service callout, and as such we have drawn up a troubleshooting strategy that describes, in<br />
broad terms and step by step, what you need to do to fi nd and diagnose faults.<br />
• Ask the customer to describe the problem.<br />
• Check whether the customer’s description matches any service code.<br />
• Check that the machine is correctly installed:<br />
- Electrical connection - Drainage<br />
- Water connection - Machine correctly levelled<br />
Fault found?<br />
Incorrect installation or external factors that affect performance and functionality (for example,<br />
water pressure, electrical supply, drainage).<br />
The machine operates normally. No deviations can be found. The customer probably needs<br />
to be informed about proper use of the machine. If necessary, also inform the customer<br />
about guarantee conditions and charges and any charges due.<br />
Open the service menu:<br />
1. Check the settings<br />
2. Run a test cycle<br />
3. Note any fault codes<br />
If the above actions do not uncover the fault:<br />
• Conduct general troubleshooting. Use the documentation available at <strong>Service</strong>Saver (service<br />
<strong>manual</strong>s, service memos, wiring diagrams and other documents).<br />
Fault found?<br />
No<br />
Yes<br />
Yes<br />
Satisfi ed customer!<br />
Yes<br />
OK?<br />
No<br />
No<br />
No<br />
Fault diagnosed?<br />
Yes<br />
Repair and check function/<br />
safety.<br />
Contact technical support<br />
for assistance.<br />
Carry out the actions suggested<br />
by technical support.
<strong>Service</strong> Manual <strong>TD60.C</strong><br />
8<br />
Product overview<br />
<strong>TD60.C</strong><br />
S1<br />
Programmes: A total of 7 programmes.<br />
Settings: 4 settings (Language, Child-safe, Buzzer, Heater 2)<br />
Knob and button descriptions<br />
Start Stop<br />
Start Stop<br />
LCD description<br />
Auto normal dry<br />
J1<br />
LCD<br />
Programme selector (J1)<br />
Turn clockwise or anti-clockwise to cycle through<br />
the different programmes and options in the various<br />
menus.<br />
Start button (S2)<br />
• Start programme<br />
Stop button (S3)<br />
• Stop programme (press and hold for 3 seconds).<br />
S2 S3<br />
Programme name Low temperature Estimated remaining<br />
time
<strong>Service</strong> Manual <strong>TD60.C</strong><br />
9<br />
Programme table<br />
Programme Material Temperature<br />
Max.<br />
load<br />
(kg)<br />
Energy consumption<br />
(approx. kWh)<br />
800<br />
rpm<br />
1600<br />
rpm<br />
Programme time<br />
Auto extra dry Cotton, linen Auto normal<br />
dry<br />
6 4.5 3.5 2:25 1:55<br />
Auto dry Cotton, linen Auto normal<br />
dry<br />
6 4.3 3.2 2:15 1:45<br />
*Auto normal dry Cotton, linen Auto normal<br />
dry<br />
6 2.0 - 1:10 -<br />
Auto extra dry, low temperature<br />
Cotton, linen Low 6 3.9 2.8 2:00 1:30<br />
Auto dry, low temperature Permanent press,<br />
polyester/cotton<br />
Low 3 1.7 - 0:55 -<br />
Auto normal dry, low temperature<br />
Acrylic, rayon,<br />
acetate<br />
800<br />
rpm<br />
Low 3 2.0 - 1:15 -<br />
Auto iron dry Cotton, linen Low 6 3.0 2.2 1:35 1:10<br />
*Programme tested in accordance with <strong>EN</strong> 60456/A11/A12/.<br />
1600<br />
rpm<br />
Here we present a few examples of the energy and time consumption of a few different<br />
programme settings. Consumption can vary depending on room temperature, humidity,<br />
load, variations in the power supply and selected options.<br />
The following apply for the specifi ed consumption values:<br />
Temperature of intake air: 23°C<br />
Moisture content of intake air: 55%<br />
Drying temperature: Normal or low<br />
Heater output: 3000 W
<strong>Service</strong> Manual <strong>TD60.C</strong><br />
10<br />
Programme descriptions<br />
Programme designation Description<br />
Auto extra dry This programme is for items that are particularly diffi cult to dry, e.g. jeans with very thick seams.<br />
Auto dry These programmes shut off the heat once the load is dry but before it is “overly dry”. The Auto<br />
dry programme shuts off the heat slightly later than Auto normal dry. Use trial and error to fi nd<br />
out what works best. Use these programmes when you want items to be completely dry.<br />
Auto normal dry These programmes shut off the heat once the load is dry but before it is “overly dry”. The Auto<br />
dry programme shuts off the heat slightly later than Auto normal dry. Use trial and error to fi nd<br />
out what works best. Use these programmes when you want items to be completely dry.<br />
Auto extra dry, low temperature This programme is for items that are particularly diffi cult to dry, e.g. jeans with very thick seams.<br />
Auto dry, low temperature These programmes shut off the heat once the load is dry but before it is “overly dry”. The Auto<br />
dry programme shuts off the heat slightly later than Auto normal dry. Use trial and error to fi nd<br />
out what works best. Use these programmes when you want items to be completely dry.<br />
Auto normal dry, low temperature These programmes shut off the heat once the load is dry but before it is “overly dry”. The Auto<br />
dry programme shuts off the heat slightly later than Auto normal dry. Use trial and error to fi nd<br />
out what works best. Use these programmes when you want items to be completely dry.<br />
Auto iron dry This programme shuts off the heat once the load is just damp enough for ironing or pressing.
<strong>Service</strong> Manual <strong>TD60.C</strong><br />
11<br />
Settings<br />
Opening the settings menu<br />
Start Stop<br />
+<br />
Start Stop × 5<br />
Choosing a setting<br />
1<br />
2<br />
3<br />
4<br />
5<br />
Start Stop<br />
Start Stop<br />
Start Stop<br />
På/Av<br />
<strong>Service</strong> menu content Comments<br />
Is the machine on? First turn off the power at the main power<br />
switch (S1).<br />
Press the Stop button (S3) while simultaneously pressing the main<br />
power switch (S1).<br />
Press the Stop button 5 times within 10 seconds. The settings<br />
menu now opens.<br />
Turn the programme selector (J1) to cycle through the menu<br />
options.<br />
Press the Stop button (S3) to make a selection.<br />
Turn the programme selector (J1) to cycle through the different<br />
settings available for this selection.<br />
Press the Stop button (S3) to save the setting.<br />
Turn the programme selector (J1) to make further selections.<br />
Press the Start button (S2) to open the programme menu.<br />
Language US English<br />
English<br />
Svenska<br />
Dansk<br />
Norsk<br />
Suomi<br />
Français<br />
Deutsch<br />
Italiano<br />
Espanol<br />
Русский<br />
Nederlands<br />
Child-safe Child-safe Off You can temporarily disable Child-safe start by pressing<br />
Child-safe On<br />
“Start” and “Door opening” simultaneously.<br />
Buzzer Buzzer Off<br />
Buzzer On<br />
Heater 2 Heater 2 Off<br />
Heater 2 On
<strong>Service</strong> Manual <strong>TD60.C</strong><br />
12<br />
<strong>Service</strong> menu<br />
Opening the service menu<br />
Start Stop +<br />
På/Av If the machine is on: First turn off the power at the main power<br />
switch (S1).<br />
Press and hold the Start button (S2) while simultaneously pressing<br />
the main power switch (S1).<br />
Start Stop<br />
Press the Start button (S2) 5 times within 5 seconds. The service<br />
menu now opens (shown on LCD display).<br />
× 5<br />
Navigating the service menu<br />
1<br />
2<br />
3<br />
4<br />
or<br />
Start Stop<br />
Start Stop<br />
Start Stop<br />
Start Stop<br />
Press the Stop button (S3) to cycle through the service menu<br />
options.<br />
Turn the programme selector (J1) to cycle through the different<br />
settings available for a selection.<br />
Press the Stop button (S3) to select a setting.<br />
Press the Start button (S2) to save the setting and return to the<br />
programme menu.<br />
or<br />
Press the Stop button (S3) to save the setting and return to the<br />
service menu.
<strong>Service</strong> Manual <strong>TD60.C</strong><br />
13<br />
<strong>Service</strong> menu content<br />
SP SP: Date the software was programmed (Year_Week)<br />
CM: Date of manufacture of the control unit (Year_Week)<br />
SW: Software version<br />
NCP0: Total number of cycles run<br />
NCP1: Number of cycles for Programme 1<br />
NCP2 Number of cycles for Programme 2<br />
NCP3: Number of cycles for Programme 3<br />
NCP4: Number of cycles for Programme 4<br />
NCP5: Number of cycles for Programme 5<br />
NCP6: Number of cycles for Programme 6<br />
NCP7:<br />
Press the Stop button (S3) to continue.<br />
Number of cycles for Programme 7<br />
Fault Fault 1<br />
Fault 2<br />
Fault 3<br />
If the machine has a fault the type of fault is displayed.<br />
Test<br />
Motor<br />
Heater 1<br />
Heater 2<br />
Drain<br />
Buzzer<br />
Press the Stop button (S3) to continue.<br />
Dry level 0 Drying time not extended.<br />
+5 Drying time extended by 5 min.<br />
+10 Drying time extended by 10 min.<br />
+15 Drying time extended by 15 min.<br />
+20 Drying time extended by 20 min.<br />
Block Programs Auto extra dry Off Use the Stop button (S5) to toggle between On and<br />
Off.<br />
On<br />
Coin<br />
Auto dry Off<br />
On<br />
Auto normal dry Off<br />
On<br />
Auto extra dry, low temperature Off<br />
On<br />
Auto dry, low temperature Off<br />
On<br />
Auto normal dry, low temperature Off<br />
On<br />
Auto iron dry Off<br />
On<br />
Off<br />
Filter<br />
On<br />
Off<br />
On<br />
Detects whether the fi lter is blocked.
<strong>Service</strong> Manual <strong>TD60.C</strong><br />
14<br />
Filter interval 0 Sets the display interval for “Clean Lint Filter”.<br />
0 = no display, 1 = display every programme etc.<br />
1<br />
Condenser interval<br />
Total Reset<br />
2<br />
3<br />
4<br />
5<br />
6<br />
7<br />
8<br />
9<br />
10<br />
0 Sets the display interval for “Clean condenser”.<br />
0 = no display, 1 = display every 100 programmes etc.<br />
1<br />
2<br />
3<br />
4<br />
5<br />
6<br />
7<br />
8<br />
9<br />
10<br />
Resets all settings to factory defaults.
<strong>Service</strong> Manual <strong>TD60.C</strong><br />
15<br />
Fault indicators<br />
Error message<br />
Over Flow<br />
Cause Action<br />
Max program<br />
time<br />
Clean fi lter<br />
Clean condenser<br />
Thermistor fault<br />
Insert fi lter<br />
• A micro switch is opened when a full condensed<br />
water tank is detected. Detection begins 30<br />
seconds after the programme starts. If the micro<br />
switch<br />
is open >30 seconds the programme cycle is<br />
stopped.<br />
• The programme cycle time exceeds 200 minutes.<br />
The cycle is stopped and the programme is reset.<br />
• High ambient temperature combined with low<br />
heater output and low drying temperature causes<br />
condensation to form.<br />
• Poor condensing due to blocked external air.<br />
• Indicated when the air fl ow and temperature do<br />
not match.<br />
• Displayed automatically every 100 cycles.<br />
• Displayed if the machine has indicated “Clean<br />
fi lter” twice in a row.<br />
• Thermistor circuit open.<br />
• Thermistor malfunction.<br />
• The fi lter is not correctly inserted in the lint fi lter<br />
holder, which means the magnet in the lint fi lter<br />
cannot trigger the sensor in the lint fi lter holder.<br />
• Check that the customer has emptied the tank and<br />
restarted the machine.<br />
• Clean hoses and check voltage and resistance of<br />
drainage pump.<br />
• Check that the fl oat has not got “stuck” and check the<br />
function of the micro switch.<br />
• Tried spinning at a higher speed.<br />
• Had the machine switched off for 30 minutes before<br />
restarting.<br />
• Good ventilation in the room.<br />
• Ensure that the external air has free passage.<br />
• Clean the fi lter.<br />
• Clean condenser and fi lter.<br />
• Clean other air passages.<br />
• Check the thermistor.<br />
• Properly insert the lint fi lter in the lint fi lter holder.
<strong>Service</strong> Manual <strong>TD60.C</strong><br />
16<br />
Components and measurement values<br />
Item<br />
number<br />
80 618 24 Motor 50 Hz,<br />
220/240 V<br />
80 618 95 Motor 60 Hz,<br />
220/240 V<br />
73 829 92 Capacitor 6 µF<br />
80 546 40 Capacitor 4 µF<br />
Component Measurement value Comment<br />
88 011 94 Condensing water pump 25 W 111 �<br />
80 762 02<br />
80 844 11<br />
Primary winding: 23.8 �<br />
Auxiliary winding: 28.1 �<br />
Current: 1.1 A; 270 W; 2850<br />
rpm<br />
Winding resistance:<br />
cable colour grey-blue 25.5 �<br />
cable colour grey-red 16.0 �<br />
Current: 0.9 A; 200 W; 3300<br />
rpm<br />
The motor is a 2-pin motor and is directly connected<br />
to the fan for internal air and gearing for driving<br />
the cylinder. On condenser dryers, the motor also<br />
drives the fan for external air.<br />
The capacitor is mounted on the motor.<br />
EMC fi lter The fi lter eliminates interference to and from the<br />
machine.<br />
80 833 44 Thermistor 40–60 k� (at room temperature<br />
20–30°C)<br />
80 773 85<br />
80 796 00<br />
Thermostat/overheating cut-out<br />
(150°C automatic)<br />
Thermostat/overheating cut-out<br />
(135°C automatic)<br />
The thermistor controls temperature regulation. If<br />
the thermistor is short-circuited or detaches from<br />
the control unit, the programme is stopped.<br />
The thermostat/overheating cut-out stops the programme<br />
if the temperature becomes too high.<br />
80 738 36 Door switch The front door triggers a door switch, which stops<br />
the programme when the door is open. If the door<br />
has been opened and closed during the programme<br />
the machine must be restarted using the start/stop<br />
button.<br />
80 761 03 Overfl ow cut-out If both tanks are full the programme is stopped by a<br />
fl oat switch installed in the lower tank. Over fl ow is<br />
indicated on the display.<br />
8080604 Control unit<br />
Electrical connection The machine is delivered as single phase and can be<br />
switched between 1950 W, 10 A and 2500 W, 16 A.<br />
The buttons are used to switch between 1950 W /<br />
10 A and 2500 W / 16 A via the software.<br />
80 832 20 Heating element 2500 W Heater 1: 1950 W, 24.5 �<br />
Heater 2: 550 W, 91.4 �<br />
80 829 32 Heating Element 3000W Heater 1: 1950 W, 24.5 �<br />
Heater 2: 1050 W, 45.3 �
<strong>Service</strong> Manual <strong>TD60.C</strong><br />
17<br />
Technical data<br />
Height: 850 mm<br />
Width: 595 mm<br />
Depth: 585 mm<br />
Weight: 39 kg (vented)<br />
47 kg (condenser)<br />
Cylinder volume: 111 l<br />
Max. load capacity: EU 7.0 kg<br />
US/AU 6.0 kg<br />
Speed: 52 rpm<br />
Rated power: 1950 W = 10 A<br />
2500 W = 16 A<br />
3000 W = 16 A<br />
The buttons are used to switch between 10 A and 16 A via the software.<br />
Drum material: Stainless steel<br />
Outer panels: Powder-coated and hot-galvanised sheet steel or stainless steel<br />
Installation: Stacked or freestanding<br />
Protection class: IP X4
<strong>Service</strong> Manual <strong>TD60.C</strong><br />
18<br />
Wiring diagram<br />
RESISTANCES AT ROOM TEMPERATURE (CA. 20°C/68°F)<br />
VALUES WITH +/-10% ARE REGARDED AS NORMAL<br />
COMPON<strong>EN</strong>T<br />
WIRES IN ALL MACHINES<br />
INTERNAL CONNECTION<br />
F: RADIO INTERFER<strong>EN</strong>CE SUPPRESSION FILTER 680K Ohm<br />
NTC 1: THERMISTOR 1 4 - 6 K Ohm<br />
NTC 2: THERMISTOR 2: 4 - 6 K Ohm<br />
AP: DRAIN PUMP: 111 Ohm<br />
EL: HEATING ELEM<strong>EN</strong>T 550W 91.4 Ohm<br />
EL: HEATING ELEM<strong>EN</strong>T 1050W 45.3 Ohm<br />
EL: HEATING ELEM<strong>EN</strong>T 1950W 20.5 Ohm<br />
MO: MOTOR<br />
T1: THERMOSTAT, OVERHEATING (HEATER)<br />
T2: THERMOSTAT, OVERHEATING (HEATER)<br />
FB: FLOAT SWITCH<br />
DB: DOOR SWITCH<br />
R1: REED SWITCH<br />
CI: COMMUNICATIONS INTERFACE<br />
CABLE POSITIONS<br />
1: THERMISTOR<br />
2: REED SWITCH<br />
4: MOTOR, DRAIN PUMP, FLOAT SWITCH<br />
5: DOOR SWITCH<br />
6: COMMUNICATIONS INTERFACE<br />
7: COINMETER<br />
8: POWER<br />
9: HEATING ELEM<strong>EN</strong>T<br />
WIRES IN SOME MACHINES<br />
*A COND<strong>EN</strong>SE MACHINES<br />
R1<br />
NTC 2 *A<br />
NTC 1<br />
B4<br />
B1<br />
S1<br />
S2 S3<br />
SERVICE M<strong>EN</strong>U<br />
TURN OFF POWER (S1)<br />
WAIT FOR AT LEAST 5 SEC<br />
HOLD S2<br />
TURN ON POWER (S1)<br />
PRESS S2 5 TIMES TO <strong>EN</strong>TER SERVICE M<strong>EN</strong>U<br />
CI<br />
1 Phase<br />
3 Phase, 10 A<br />
PRESS STOP (S3) TO CHANGE M<strong>EN</strong>U STEP<br />
ROTATE DIAL TO CHANGE IN STEP<br />
PRESSING START (S2) STORES AND EXITS SERVICE M<strong>EN</strong>U<br />
INKB<br />
INKB<br />
BO *A<br />
AP *A<br />
B6<br />
B6<br />
USER SETTINGS M<strong>EN</strong>U<br />
TURN OFF POWER (S1)<br />
WAIT FOR AT LEAST 5 SEC<br />
HOLD S3<br />
TURN ON POWER (S1)<br />
PRESS S3 5 TIMES TO <strong>EN</strong>TER M<strong>EN</strong>U<br />
N<br />
N<br />
B3<br />
F1<br />
F2<br />
T1<br />
F<br />
L1<br />
B3<br />
F1<br />
R34<br />
R44/B2<br />
F2<br />
L2<br />
R44 R43<br />
EL 1950 W T2<br />
L3<br />
R33<br />
R34<br />
EL 1050/550 W<br />
L1<br />
B2<br />
R23<br />
B5<br />
R24<br />
DB<br />
2009-12-03<br />
RB RA<br />
WIRING WITHOUT<br />
COINMETER<br />
WIRING WITH<br />
COINMETER<br />
B1<br />
B2<br />
MO<br />
AP<br />
*A<br />
This document must not be copied without<br />
our written pemission, and the contents<br />
thereof must not be imparted to a third party<br />
nor be used for any unauthorized purpose.<br />
Contravention will be prosecuted.<br />
Asko Appliances AB<br />
CIRCUIT DIAGRAM <strong>TD60.C</strong><br />
80 807 14 - 01<br />
B3<br />
B4<br />
B5<br />
B6<br />
BLACK B1<br />
BROWN B2<br />
BLUE B3<br />
BLACK B4<br />
BLUE B5<br />
YELLOW- B6<br />
GRE<strong>EN</strong><br />
FB<br />
*A
<strong>Service</strong> Manual <strong>TD60.C</strong><br />
19<br />
XXXXXXX <strong>Service</strong> Manual WM60.C <strong>ASKO</strong> Rev. 03