

AVANTI SERIES - Hytorc Power Systems
AVANTI SERIES - Hytorc Power Systems
AVANTI SERIES - Hytorc Power Systems

You also want an ePaper? Increase the reach of your titles
YUMPU automatically turns print PDFs into web optimized ePapers that Google loves.
Since 1968<br />
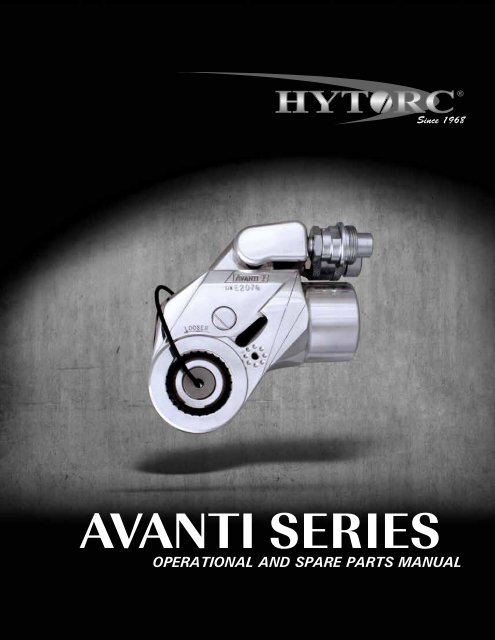
<strong>AVANTI</strong> <strong>SERIES</strong><br />
OPERATIONAL AND SPARE PARTS MANUAL
THANK YOU FOR PURCHASING THIS REVOLUTIONARY TORQUE/TENSION SYSTEM<br />
PLEASE CALL YOUR HYTORC REPRESENTATIVE TO SCHEDULE A FREE TRAINING THAT WILL<br />
HELP YOU GET THE MOST OUT OF THIS ADVANCED BOLTING SYSTEM.<br />
OPERATING CD: Please show the enclosed CD to your staff before each tool use to familiarize them<br />
with the tools.<br />
FREE SAFETY TRAINING: To ensure safe operation, please request the FREE Safety Training<br />
before use by calling your local HYTORC Representative 1-800-367-4986 or www.hytorc.com.<br />
We recommend safety training every 6 months. These trainings are free of charge. Just call us.<br />
PLEASE READ THE SAFETY INSTRUCTIONS HEREIN.<br />
SYSTEM INSPECTION: Before any use, please inspect the entire tool system, including hoses, gauge,<br />
sockets and backup wrenches. Do not use kinked hoses, oversized or heavily worn sockets, backup<br />
wrenches, damaged tools, pumps, connectors, or gauges. Connect system to operate from a safe<br />
distance. Ensure fasteners are in good shape. Check out tool functioning with drive or hex ratchet<br />
turning in one direction only and check out gauge from a safe distance that needle is on zero at<br />
no pressure and at 10,000 psi at high pressure. Keep high pressure on and check system visually<br />
for leaks. Please keep in mind that hydraulic tools are very strong and work at high pressure.<br />
HANDS-FREE BOLTING: The tool you have purchased permits hands-free operation from a safe<br />
distance in conjunction with a HYTORC Washer. We recommend the use of a HYTORC Washer<br />
to avoid finger-pinching, over-crowded sites and to ensure hands-free bolting at least on all vertical<br />
and inverted applications, while eliminating improvisation and the use of reaction members or<br />
backup wrenches. Otherwise, set up the tool in a way that it does not have to be held by hand.<br />
For more information, please contact us at 1-800-367-4986 or www.hytorc.com.<br />
HANDS-FREE WASHER APPLICATION: Make sure the drive and the tool are locked on securely.<br />
FREE ANNUAL TOOL INSPECTION: With the purchase of HYTORC, you have the right to a FREE<br />
annual tool inspection which includes free seals, springs, connectors, and free lubrication. In case of<br />
damaged or worn parts, the first inspection within 12 months of purchase is free of charge. Thereafter,<br />
you will be informed of any cost prior to replacement. Any part replaced and charged by us<br />
will be sent to you for your inspection upon request when P.O. is issued.<br />
STAY SAFE<br />
FREE LOANER TOOLS: In case of tool failure during the warranty or rental period, please contact<br />
your local HYTORC Agent for a free loaner tool - 24/7.<br />
HOSE REPLACEMENT: We recommend replacing hydraulic hoses and oil every (3) three months.<br />
PLEASE WEAR REQUIRED SAFETY ATTIRE and use common sense during operation.<br />
HELP: If you require any further assistance, please call your local HYTORC Representative or<br />
1-800-FOR-HYTORC (1-800-367-4986), on the web at www.hytorc.com - 24/7! It’s live!<br />
PLEASE REVIEW THESE SAFETY<br />
TIPS BEFORE EVERY TOOL USE<br />
No. Safety 1-2-1009
CONTENTS<br />
<strong>AVANTI</strong> <strong>SERIES</strong><br />
OPERATIONAL AND SPARE PARTS MANUAL<br />
The World’s Most Trusted Industrial Torque and Tension <strong>Systems</strong><br />
INTRODUCING HYTORC 4<br />
SECTION I<br />
IMPORTANT SAFETY INSTRUCTIONS 5<br />
SECTION II<br />
INSTRUCTIONS BEFORE USE 7<br />
2-1 Working Pressure<br />
2-2 Hydraulic Connections<br />
2-3 Electrical Connections<br />
2-4 Air Connections<br />
SECTION III<br />
OPERATION 9<br />
3-1 General<br />
3-2 Connecting the System<br />
3-3 Drive Direction Change<br />
3-4 Reaction Arm<br />
3-5 Setting Torque<br />
3-6 Setting Pressure<br />
3-7 Applying Torque<br />
3-8 Operating the Torque Machine<br />
3-9 Loosening Procedures<br />
SECTION IV<br />
HYTORC POWER PACKS 15<br />
4-1 General<br />
4-2 Remote Control<br />
4-3 Operation<br />
SECTION V<br />
PREVENTIVE MAINTENANCE 17<br />
5-1 Preventive Maintenance - Torque Machines<br />
5-2 Preventive Maintenance - Hydraulic <strong>Power</strong> Packs<br />
SECTION VI<br />
TROUBLESHOOTING<br />
SECTION VII<br />
18<br />
ASSEMBLY/DISASSEMBLY INSTRUCTIONS 23<br />
APPENDICES 24<br />
A <strong>AVANTI</strong> Parts Breakdown<br />
B <strong>AVANTI</strong> DUAL Parts Breakdown<br />
C <strong>AVANTI</strong> Dimensional Data<br />
D Square/Allen Drive Working Torque<br />
Leading Innovation in Torque and Tension Since 1968<br />
3
The World’s Most Trusted Industrial Torque and Tension <strong>Systems</strong><br />
INTRODUCING HYTORC<br />
THANK YOU FOR BUYING HYTORC!<br />
YOU ARE NOW HOLDING ONE OF THE WORLD'S LARGEST SELLING AND<br />
MOST ADVANCED HYDRAULIC TORQUE/TENSION TOOLS.<br />
HYTORC is used more often, by more industries on more applications than all others combined.<br />
If you maintain your new tool properly, it will last for years to come.<br />
This manual is designed to provide you with the basic knowledge required to operate and maintain your HYTORC<br />
tool. Please read this manual carefully and follow the instructions provided. If you have any questions regarding<br />
your HYTORC tool, please call us directly at 201-512-9500 or fax 201-512-0530.<br />
Finally, your purchase of this HYTORC tool entitles you to the following FREE services:<br />
• Free on-site training in the application and operation of your HYTORC equipment<br />
• Free semi-annual training<br />
• Free annual tool inspection<br />
• Free loaner tools in case of failure<br />
• Free engineering assistance by calling 1 800 FOR-HYTORC, or our continental office<br />
Your local HYTORC office was informed of the delivery of this equipment. Should you require immediate training,<br />
please feel free to call us directly to arrange an appointment with you at your convenience.<br />
An instructional CD is also available for basic training and occasional brush up on operating procedures.<br />
For additional information please visit our website at www.hytorc.com<br />
Again, thank you and welcome to HYTORC!<br />
Worldwide Warranty<br />
HYTORC equipment is engineered to the latest technological standards and is backed by our exclusive<br />
12-word, 12-month warranty.<br />
"YOU BREAK IT UNDER NORMAL USE, WE FIX IT FREE OF CHARGE!"<br />
If a HYTORC Tool cannot be repaired on-site, FREE loaner HYTORC equipment will be made available to you<br />
upon request.<br />
UNEX CORPORATION OR ITS DEALERS SHALL NOT BE LIABLE FOR LOSS OF PRODUCT OR OTHER INCIDENTAL OR CONSEQUENTIAL COSTS INCURRED BY THE BUYER OR THE USER.<br />
HYTORC Offices Worldwide<br />
Europe HYTORC Europe Tel. 33-1-4288-6745<br />
Japan HYTORC Japan Tel. 81-3-3314-3315<br />
Australia HYTORC Australia Tel. 61-8-8293-8411<br />
United Kingdom HYTORC UK Tel. 44-16-7036-3800<br />
Brazil HYTORC South America Tel. 55-21-2223-2944<br />
All Others HYTORC USA Tel. 201-512-9500 /800-FOR-HYTORC<br />
4 Leading Innovation in Torque and Tension Since 1968
SECTION I<br />
IMPORTANT<br />
SAFETY<br />
INSTRUCTIONS<br />
WARNING: Your HYTORC TORQUE/TENSION MACHINE is a power tool, and as with any<br />
power tool, certain safety precautions should be observed to avoid accidents or personal<br />
injury. The following tips will assist you.<br />
• READ ALL INSTRUCTIONS<br />
• KEEP WORK AREA CLEAN AND WELL LIT<br />
• CONSIDER WORK AREA ENVIRONMENT<br />
Electrical Pumps should never be used in any atmosphere which can be considered potentially volatile.<br />
If there is any doubt, use an air pump. Note: metal to metal contact can cause sparks, precautions<br />
should be taken.<br />
• AVOID PREMATURE TOOL STARTING<br />
The Pump Remote Control is for the TOOL OPERATOR only. Avoid separate pump and tool operator.<br />
• STAY CLEAR DURING OPERATION<br />
In most cases, the tool will allow “hands free” operation. If the tool must be held or steadied during<br />
operation, use alternative means of securing the tool to the application.<br />
• GUARD AGAINST ELECTRIC SHOCK<br />
Ensure the pump is properly grounded and the proper voltage is being used.<br />
• STORE IDLE TOOLS<br />
When not in use, tools and accessories should be properly stored to avoid deterioration.<br />
• USE THE RIGHT TOOL<br />
Don’t force small tools or attachments to do the job of a larger tool. Don’t use a tool for purposes not<br />
intended. HYTORC can develop custom accessories for your job to ensure safe and simple operation.<br />
Contact your local HYTORC representative for more information on our custom engineering abilities.<br />
• PROPER SAFETY ATTIRE<br />
When handling/operating hydraulic equipment, use work gloves, hard hats, safety shoes, hearing<br />
protection, and other applicable clothing.<br />
• USE SAFETY GLASSES<br />
The World’s Most Trusted Industrial Torque and Tension <strong>Systems</strong><br />
• MOVING EQUIPMENT<br />
Do not use hydraulic hoses, uniswivels, pump power or remote cords as means of moving the equipment.<br />
Leading Innovation in Torque and Tension Since 1968<br />
5
The World’s Most Trusted Industrial Torque and Tension <strong>Systems</strong><br />
• HOSES<br />
Do not kink hoses. Inspect and replace if damaged.<br />
• SHROUDS AND COVER PLATES<br />
All tools are equipped with shrouds and/or cover plates to cover up moving internal parts. If shrouds are<br />
missing or damaged, please contact your local HYTORC representative for repair. A free loaner tool will<br />
be made available to you during the time of repair.<br />
• MAINTAIN TOOLS WITH CARE<br />
For top performance, inspect tool powerpack, hoses, connectors, electric lines, and accessories for visual<br />
damage frequently. Always follow instructions for proper tool and pump maintenance. Refer to the<br />
Operations Maintenance Section for further clarification.<br />
• STAY ALERT<br />
Watch what you are doing. Use common sense. Do not use power equipment under the influence of any<br />
mood altering substances.<br />
• PRIOR TO OPERATION<br />
Ensure that all hydraulic connections are securely connected. Verify that the hydraulic hoses are not<br />
kinked. Ensure the square drive and its retainer are fully and securely engaged.<br />
• PRIOR TO USE<br />
Cycle tool to ensure proper function. Locate a solid, secure reaction point. Be sure the reaction arm retaining<br />
clamp is fully engaged. Be sure the hydraulic hoses are free and clear of the reaction point. Pressurize<br />
the system momentarily; if the tool tends to “ride up” or to “creep”, stop and re-adjust the reaction arm to a<br />
more solid and secure position.<br />
NOTE: For additional safety, a HYTORC Washer can be used in place of the reaction arm; call your<br />
HYTORC representative for more information.<br />
• ALWAYS USE QUALITY ACCESSORIES<br />
Always use top quality impact sockets in good condition which are the correct size and fully engage the<br />
nut. Hidden flaws, however, remain a possibility which could cause breakage, so stay clear of sockets<br />
during operation.<br />
• DO NOT USE FORCE<br />
Do not hammer on the socket or the tool to enhance performance. If the nut will not turn with the wrench<br />
you are using, use a larger size HYTORC tool.<br />
• REACTION ARM<br />
Proper reaction is required. Adjust reaction arm or plate accordingly. Avoid excessive play. In case of<br />
questions, consult with your local HYTORC office.<br />
6 Leading Innovation in Torque and Tension Since 1968
SECTION II<br />
INSTRUCTIONS<br />
BEFORE<br />
USE<br />
READ CAREFULLY: Most malfunctions in new equipment are the result of improper<br />
operation and/or set-up assembly.<br />
PREPARATION: Remove HYTORC Torque Machine from shipping container.<br />
INSPECTION: Visually inspect all components for shipping damage. If any damage is<br />
found, notify carrier immediately.<br />
2-1<br />
Working Pressure<br />
The tool’s maximum working pressure is 10,000 PSI (700kg/cm2).<br />
Make sure that all hydraulic equipment used with this tool is rated for 10,000 PSI Operating Pressure.<br />
2-2<br />
Hydraulic Connections<br />
The World’s Most Trusted Industrial Torque and Tension <strong>Systems</strong><br />
With older style pumps (SST-IO, SST-20), the retract side of the system may remain pressurized after the pump has<br />
been switched “off’. This trapped pressure makes it impossible to loosen the retract-side fittings by hand.<br />
To release the pressure, find the 5/16” manual override holes in the end ofthe black solenoids on the pump. With a<br />
welding rod, allen key or similar device, push in on the ends of both solenoids, each in turn, and the residual pres<br />
sure will be released. All fittings will then be hand tight again.<br />
Newer style pumps (HYTORC 115, HYTORC 230, HYTORC AIR) are equipped with an auto-pressure relief.<br />
Never disconnect or connect any hydraulic hoses or fittings without first unloading the wrench and the pump. If the<br />
system includes a gauge, double check the gauge to ensure pressure has been released.<br />
When making connections with quick disconnect couplings, make sure the couplings are fully engaged. Threaded<br />
connections such as fittings, gauges, etc., must be clean, securely tightened, and leak free.<br />
CAUTION: Loose or improper threaded fittings can be potentially dangerous if pressurized, yet severe over<br />
tightening can cause premature thread failure. Fittings need only to be securely tightened & leak free. Never<br />
grab, touch or in any way come in contact witb a hydraulic pressure leak. Escaping oil could penetrate the<br />
skin and cause injury.<br />
Leading Innovation in Torque and Tension Since 1968<br />
7
The World’s Most Trusted Industrial Torque and Tension <strong>Systems</strong><br />
2-3<br />
Electrical Connections<br />
Ensure proper power availability to prevent motor failure or dangerous electrical overloading. Compare the motor<br />
nameplate for required amperage.<br />
Do not use electric pump if the 3-prong electrical plug is not whole.<br />
Minimize the length of extension cords and be sure they are of adequate wire size, with ground connections.<br />
Extension cord should be #10 AWG gauge.<br />
WARNING: Electric motors may spark. Do not operate in an explosive atmosphere or in the<br />
presence of conductive liquids. Use an air motor pump Instead.<br />
2-4<br />
Air Connections<br />
Ensure that you have sufficient air flow (in cfm) to operate your pneumatic pump. If in doubt, compare the pump<br />
manufacturer’s recommended air flow rating prior to pressurizing pump. Improper air flow may damage the pump<br />
motor. For best results use airhoses larger than 3/4” I.D. diameter.<br />
Use of a filter regulator lubricator (FRL) is highly recommended. (Pictured below.)<br />
1. Adjust flow to one drop per 60 - 90 seconds<br />
2. Fill half way with grade 46 hydraulic oil supplied<br />
8 Leading Innovation in Torque and Tension Since 1968
SECTION III<br />
OPERATION<br />
3-1<br />
General<br />
All HYTORC Torque Machines are supplied completely assembled and ready for use. A HYTORC Hydraulic<br />
<strong>Power</strong> Pack (for use with your HYTORC machine) is recommended to provide the speed, pressure, and portability<br />
that makes your HYTORC System efficient and accurate.<br />
The System accuracy of your HYTORC tool is +/- 3%, based upon manufacturer’s specifications. This accuracy<br />
may be certified through calibration by HYTORC or any other qualified calibration facility whose program is trace<br />
able to the National Institute of Standards and Technology (N.I.S.T.).<br />
Using a calibrated gauge enhances the accuracy of your HYTORC System.<br />
3-2<br />
Connecting the System<br />
The wrench head and power pack are connected by a 10,000 PSI operating pressure (40,000 PSI burst) twinline<br />
hose assembly. Each end of the hose will have one male and one female connector to assure proper interconnection<br />
between pump and wrenchheads.<br />
IMPORTANT: To avoid tool malfunction. do not reverse connectors.<br />
Connect the twinline hose to the uniswivel as shown below:<br />
The World’s Most Trusted Industrial Torque and Tension <strong>Systems</strong><br />
Insure the connectors are fully engaged and screwed snugly and completely together.<br />
Leading Innovation in Torque and Tension Since 1968<br />
9
The World’s Most Trusted Industrial Torque and Tension <strong>Systems</strong><br />
3-3<br />
Drive Direction Change<br />
To remove the square drive, disengage the drive retainer assembly by depressing the round retaining button and<br />
gently pulling on the square end of the square drive. The square drive will slide out.<br />
Button<br />
Drive Retainer Square Drive<br />
To insert the drive in the tool, place the drive in the desired direction, engage drive and ratchet splines, then twist<br />
the reaction bushing until it engages the housing spline. Push drive through ratchet. Depress drive retainer button,<br />
engage retainer with drive, and release button to lock.<br />
Loosening Tightening<br />
The above diagram illustrates the direction the<br />
square drive should face for loosening and<br />
tightening of a standard right hand fastener.<br />
RIGHT IS TIGHT.<br />
LEFT IS LOOSE.<br />
3-4<br />
Reaction Arm<br />
All HYTORC Torque machines are equipped with a universal reaction arm. These reaction arms are employed<br />
to absorb and counteract forces created as the unit operates. The reaction arm should extend in the same<br />
direction of the square drive; however, slight adjustments may be made to suit your particular application.<br />
The <strong>AVANTI</strong> Reaction Arm is made of TITAL 399 and is 360 degree adjustable.<br />
NOTE: The standard <strong>AVANTI</strong> reaction arm cannot be welded on<br />
and should not be modified.<br />
Make sure the reaction arm spline is fully engaged on the square drive spline.<br />
Secure the position by tightening the set screw on the reaction arm. For additional<br />
safety and/or jobs without a convenient location for reaction arm placement, a<br />
HYTORC Washer can be used in place of the reaction arm; call your HYTORC<br />
representative for more information.<br />
10 Leading Innovation in Torque and Tension Since 1968
3-5<br />
Setting Torque<br />
Once the system is fully connected and the proper power supply available, it is time to adjust the pump pressure to<br />
the level needed on your job.<br />
When tightening, use the manufacturer’s specifications to determine the torque value which you will ultimately<br />
require.<br />
Torque sequences may vary from plant to plant and even within individual plants, depending on the gasket<br />
material, etc. Always abide by local procedures.<br />
The included torque chart is a guideline for comparison only and gives typical torque values specified for the most<br />
commonly encountered fasteners.<br />
Next, find the pressure-torque conversion table applicable to the tool which you intend to use.<br />
An example of finding the desired torque required is as follows:<br />
The World’s Most Trusted Industrial Torque and Tension <strong>Systems</strong><br />
Assume you are going to use a HYTORC <strong>AVANTI</strong> tool to torque a 1-1/4” bolt to 1,265 ft. lbs.<br />
Start by referring to the pressure-torque conversion table for the tool you are using and read left-to-right across the<br />
top line to the rightmost column.<br />
Read straight down to the number closest to 1,265 ft. lbs., which in this case is 1,280, about 1.5% over the targeted<br />
torque values.<br />
Now, using 1,280, read back to the left on that same line and read the pump pressure, under the PSI column,<br />
4,000 PSI.<br />
To be technically correct, you should diminish that 4,000 PSI by 1.5% (to 3940), but 1,280 is well within the<br />
tool’s +/- 3% accuracy range, so proceed to set 4,000 PSI on your pump’s regulator valve.<br />
Leading Innovation in Torque and Tension Since 1968<br />
11
The World’s Most Trusted Industrial Torque and Tension <strong>Systems</strong><br />
3-6<br />
Setting the Pressure on the Pump<br />
To set the pressure on the pump, follow this procedure:<br />
1. Loosen the knurled locking ring below the “T” handle on the pump’s external pressure regulator. Then turn the<br />
“T” handle (shown below) counterclockwise (CCW) until it turns freely and easily.<br />
2. Turn the pump “on”. Using the pump’s remote control pendant, push down the advance switch (or button<br />
on air pumps) and hold it.<br />
3. While holding the pump in the advance mode, slowly turn the “T” handle clockwise and observe the pump<br />
pressure gauge rise.<br />
T-Handle<br />
NOTE: Always adjust the regulator pressure up - never down.<br />
4. When your gauge reaches 4,000 PSI, stop turning the “T” handle and let<br />
the gauge settle out.<br />
5. If the pressure continues to rise (above 4,000), release the advance button<br />
and back off your pressure slighitly - by turning CCW on the “T” handle.<br />
Then re-depress the advance switch on your remote and slowly bring pressure<br />
up to 4,000 again.<br />
6. When the pressure is correct, turn the pump “off’ and tighten the knurled<br />
lock nut provided under the “T” handle. This sets pump pressure, which<br />
determines torque tool output.<br />
7. Once your target pressure is set and locked, cycle the pump once more to<br />
ensure that your pressure setting did not change as you turned down the<br />
knurled knob<br />
3-7<br />
Applying the Torque Machine - the Tightening Process<br />
1. Having set your target pressure, cycle the tool three or four times to full pressure before putting it on the<br />
application. Cycling the tool ensures that the system is operating properly and removes trapped air, if any.<br />
2. Place the proper size impact socket on the square drive and secure properly with a locking ring and pin.<br />
3. Place the tool and the socket on the nut, making sure that the socket has fully engaged the nut. Further ensure that<br />
the drive retainer is engaged.<br />
4. Make sure the reaction arm is firmly abutted against a stationary object (e.g. an adjacent nut, flange, equipment<br />
housing etc.)<br />
5. When positioning the wrench, make sure that the hose connections are well clear of any obstructions, and that all<br />
body parts are safely out of harm’s way.<br />
6. THEN, AND ONLY THEN, apply momentary pressure to the system to ensure proper tool placement. If it<br />
doesn’t look or act right, stop and re-adjust the reaction arm.<br />
12 Leading Innovation in Torque and Tension Since 1968<br />
Locking<br />
Ring
3-8<br />
Operating the Torque Machine<br />
1. By pushing down on the remote control button in the advance position, the rear of the tool will be pushed back<br />
until the reaction arm makes contact with its reaction point.<br />
2. Continue to hold down the button as the socket turns until you hear an audible “click” which will signify the<br />
hydraulic cylinder inside the tool is fully extended and will not turn the socket further.<br />
3. Continuing to hold down the remote control button will result in a rapid buildup of pressure to the point of where<br />
the gauge reads what was preset prior to applying the wrench.<br />
IMPORTANT: The reading of full preset pressure after the cylinder is extended DOES NOT<br />
INDICATE that this pressure (torque) is applied to the bolt. It only indicates that the cylinder<br />
is fully extended and cannot turn the socket further until the tool automatically resets itself.<br />
Releasing the remote control button will retract the cylinder. The tool will automatically reset itself and the operator<br />
will hear an audible “click” indicating he can again push the remote control button and the socket will turn. Each<br />
time the cylinder is extended and retracted, it is called a cycle. Successive cycles are made until the tool “stalls” at<br />
the pre-set Torque/PSI with an accuracy of ±3% and ±1%. Repeatability is +1 -1%.<br />
IMPORTANT:<br />
ALWAYS ATTEMPT ONE FINAL CYCLE TO ENSURE THE “STALL” POINT HAS BEEN REACHED.<br />
Releasing “LOCKED-ON” tools.<br />
<strong>AVANTI</strong> RELEASE PROCEDURE<br />
1. Push lever to position A<br />
2. Cycle tool in manual mode, release advance button<br />
3. Shut pump off<br />
4. Remove tool and reset lever to position B<br />
The World’s Most Trusted Industrial Torque and Tension <strong>Systems</strong><br />
A<br />
B<br />
Leading Innovation in Torque and Tension Since 1968<br />
13
The World’s Most Trusted Industrial Torque and Tension <strong>Systems</strong><br />
3-9<br />
Loosening Procedures<br />
First, set the pump to 10,000 PSI. Change the drive and the reaction arm to the loosening mode, assurring the<br />
reaction arm abuts squarely off a solid reaction point. Press and hold the remote control button down. Pressure will<br />
decrease as the socket begins to turn. As the cylinder extends fully, you will hear an audible “click”. Release the<br />
remote control button, and the cylinder automatically retracts, at which time you again hear the audible “click”.<br />
Repeat this process until the fastener can be removed by hand.<br />
NOTE: IF THE BOLT DOES NOT LOOSEN WITH THE ABOVE PROCEDURE, IT IS AN INDICATION<br />
THAT YOU REQUIRE THE NEXT LARGER SIZE TOOL TO LOOSEN THE BOLT.<br />
NEVER HOLD THE TOOL DURING OPERATION.<br />
Use the safety handle to set and remove tools. If you do<br />
not have the safety handle please contact HYTORC to<br />
get a replacement. This ensures that your hands are not<br />
in dangerous areas during placement and operation of<br />
the tool.<br />
14 Leading Innovation in Torque and Tension Since 1968
SECTION IV<br />
HYTORC<br />
POWER PACKS<br />
4-1<br />
General Information<br />
All HYTORC <strong>Power</strong> Packs operate in a pressure range from 500 to 10,000 PSI, and are fully adjustable. They have<br />
been engineered and designed for portability and high flow for increased speed. Before using your HYTORC power<br />
pack, check the following points:<br />
• Is the reservoir filled with oil?<br />
• Where is the closest electrical outlet at the job site?<br />
• Is there enough air pressure (100 PSI) and flow at the job site? (Air units only)<br />
• Is the gauge mounted and rated for 10,000 PSI?<br />
• Is the oil filler plug securely in place?<br />
4-2<br />
Working Pressure<br />
The Pump’s maximum working pressure is 10,000 PSI(700 kg/cm2). Make sure all hydraulic equipment and<br />
accessories are rated for 10,000 PSI operating pressure.<br />
4-3<br />
Hydraulic Connections<br />
The World’s Most Trusted Industrial Torque and Tension <strong>Systems</strong><br />
Never disconnect or connect hydraulic hoses or fittings without first unloading the wrench. Unplug the electrical<br />
cord of the pump, and open all hydraulic controls several times to ensure that the system has been depressurized. If<br />
the system includes a gauge, double check the gauge to ensure pressure has been released.<br />
When making a connection with quick disconnect couplings, make sure the couplings are fully engaged.<br />
Threaded connections such as fittings, gauges etc. must be clean, securely tightened, and leak free.<br />
CAUTION: Loose or improperly threaded couplers can be potentially dangerous if pressurized.<br />
However, severe over tightening can cause premature thread failure. Fittings need to be only<br />
tightened secure and leak free. Never grab, touch, or in any way come in contact with a hydraulic<br />
pressure leak. Escaping oil could penetrate the skin and cause injury.<br />
Do not subject the hose to potential hazards such as sharp surfaces, extreme heat or heavy<br />
objects. Do not allow the hose to kink and twist. Inspect the hose for wear before it is used.<br />
Leading Innovation in Torque and Tension Since 1968<br />
15
The World’s Most Trusted Industrial Torque and Tension <strong>Systems</strong><br />
4-4<br />
Electrical <strong>Power</strong><br />
1. CHECK FOR PROPER ELECTRICAL SUPPLY BEFORE CONNECTING.<br />
2. THIS MOTOR MAY SPARK. DO NOT OPERATE IN AN EXPLOSIVE ATMOSPHERE OR IN PRESENCE<br />
OF CONDUCTIVE LIQUIDS.<br />
a. Do not use a power or extension cord that is damaged or has exposed wiring.<br />
b. All single phase motors come equipped with a three prong grounding type plug to fit the proper grounded<br />
type electrical outlet. Do not use a two prong ungrounded extension cord as the pump’s motor must be<br />
grounded.<br />
3. COMPARE MOTOR NAMEPLATE AGAINST POWER AVAILABILITY TO PREVENT MOTOR BURN<br />
OUT OR DANGEROUS ELECTRICAL OVERLOADING.<br />
4-5<br />
Prior to Use<br />
Check the hydrauilc oil level to prevent possible pump burnout. Open the filler plug located on the reservoir plate.<br />
Look at oil fill level on the oil sight gauge. The oil level should be about 2” from the top of the reservoir plate with<br />
the motor off. Add HYTORC oil as necessary. Do not mix different grades of oil.<br />
Make sure all desired gauge, valve, hose, and quick coupler connections are tight and secure before operating.<br />
The use of a pressure gauge is required for normal pump operation. Mounted on the manifold, the gauge permits the<br />
operator to monitor the load on the wrench. 114% calibrated gauges are available for most applications.<br />
4-6<br />
Operation<br />
Before starting your Electric Pump (HYTORC 115/230), connect your hydraulic hoses to both the pump and<br />
torque wrench.<br />
Place the toggle switch in the ON position and the rocker switch on the hand control pendant in the OFF position.<br />
To start the pump, depress and release the yellow safety button.<br />
NOTE: The safety button is an added feature designed to prevent premature starting and should<br />
only be depressed by the tool operator.<br />
Push the rocker switch to advance and release. This will start your pump and place it in the retract position.<br />
NOTE: Read the section labeled HYTORC OPERATIONS and SETTING TORQUE prior to installing<br />
the torque wrench onto the application.<br />
Your HYTORC 115/230 hydraulic pump has been designed with an auto shut off system. The pump will shut off<br />
after about 30 seconds of non-cycling. This will prevent overheating and unnecessary wear which will prolong the<br />
life of your pump. To restart the pump, the yellow safety button must again be depressed before use.<br />
16 Leading Innovation in Torque and Tension Since 1968
SECTION VI<br />
PREVENTIVE<br />
MAINTENANCE<br />
5-1<br />
Preventive Maintenance - Torque Machines<br />
Tool failure, although rare, does occur. Such failure is most often in the hydraulic couplers or hoses. These items are<br />
repairable or replaceable immediately, since they are available universally. Failure of structural members of the tool<br />
are quite rare, but replacement parts are available from stock. All repairs to HYTORC tools may be made by<br />
reasonably experienced individuals according to these instructions.<br />
• Lubrication<br />
All moving parts should periodically be coated with a good quality NLGI #2 molybdenum disulfide grease. Under<br />
harsh environmental conditions, cleaning and lubricating should be performed more frequently.<br />
• Hydraulic Hoses<br />
Hoses should be checked for cracks and leaks before, and after each job. Hydraulic fittings can become plugged with<br />
dirt and should be flushed periodically.<br />
• Quick-Connects<br />
Fittings should be kept clean and not allowed to be dragged along the ground or floor, as even small particles of dirt<br />
can cause the internal valves to malfunction.<br />
• Springs<br />
Springs are used for the drive pawl assembly and for the accuracy assurance pawl. These springs can be replaced<br />
if necessary.<br />
• Cylinder Seals<br />
If the cylinder requires disassembly, it is recommended that the cylinder seals be replaced at the same time.<br />
Seal kits are readily available.<br />
• Structural Members<br />
The World’s Most Trusted Industrial Torque and Tension <strong>Systems</strong><br />
All structural parts on the tool should be inspected once a year to determine if there are any cracks, chips, or<br />
deformities. If so, immediate replacement is required.<br />
Leading Innovation in Torque and Tension Since 1968<br />
17
The World’s Most Trusted Industrial Torque and Tension <strong>Systems</strong><br />
5-2<br />
Preventive Maintenance -<br />
Hydraulic <strong>Power</strong> Packs<br />
HYTORC Hydraulic <strong>Power</strong> Packs are precision-built units and, as such, do require a certain amount of care and<br />
maintenance.<br />
• Hydraulic Oil<br />
Oil should be completely changed after every 40 hours of operation, or at least twice a year. Always make sure the<br />
reservoir is filled with fluid. If additional oil is required, use only high-grade hydraulic oil.<br />
• Quick-Disconnects<br />
Fittings should be checked periodically for leaks. Dirt or foreign materiais should be kept away from fittings.<br />
Clean before use.<br />
• Hydraulic Gauge<br />
Some gauges are liquid filled. Should this liquid level drop, it indicates external leakage, and replacement is<br />
necessary. Should the gauge fill with hydraulic oil, it indicates internal failure and it should be discarded.<br />
• Filter on Pump<br />
The filter should be replaced twice a year in normal use and more often if the pump is used daily or in a dirty, harsh<br />
environment.<br />
• Remote Control<br />
(Air Unit) The air line to the remote control unit should be checked for obstructions or kinks in the line periodically.<br />
If there is a bend or break in the line, it must be replaced. The spring-loaded buttons on the remote handle should be<br />
checked in the event of operating difficulties. (Electric Unit) The rocker switch should be checked periodically if<br />
any indication of problems exist.<br />
• Air Valve<br />
This valve should be checked twice a year.<br />
• Brushes and Brush Holders<br />
(Electric Unit) Check and replace, if worn.<br />
• Armature<br />
(Electric Unit) Check yearly.<br />
18 Leading Innovation in Torque and Tension Since 1968
SECTION VI<br />
TROUBLESHOOTING<br />
SYMPTOM PROBABLE CAUSE REQUIRED ACTION<br />
Gauge shows pressure build-up but the<br />
tool will not cycle<br />
1. Couplings loose or inoperative<br />
2. Solenoid inoperative<br />
Cylinder will not retract. 1. See above<br />
2. Voltage to electric pump is too low<br />
to line drop or inadequate amperage is<br />
available.<br />
3. Linkage between piston rod and drive<br />
arms are broken.<br />
Cylinder pressure will not build. 1. Oil blow by in tool (Piston seal leak,<br />
blown O-ring, cracked piston)<br />
2. Pump Problem<br />
The World’s Most Trusted Industrial Torque and Tension <strong>Systems</strong><br />
1. Tighten and/or replace couplings. Use Test #1<br />
listed below to isolate problem.<br />
2. Check using test #2 below. If solenoid is bad,<br />
replace.<br />
1. See Above<br />
2. Get shorter extension cord or upgrade to<br />
12AWG, 25 amp rating or better. If shop power is<br />
adequate, draw power from welding machine or cal<br />
rod transformer.<br />
3. Replace parts as necessary.<br />
1. Replace defective parts. SHOP JOB<br />
2. Check to see if sub-plate is worn by; a) Remove<br />
screws from pump motor to reservoir, slide Pump<br />
motor to the side, turn pump on and while holding<br />
down on the button, put your finger on the dump<br />
tube (round tube under the directional control<br />
valve) - if you feel pressure, then replace the subplate<br />
and shear seals.<br />
2A. Check to see if you have leaks from the<br />
external relief valve and the 2 oil line connections<br />
(bottom of relief valve and connection into pump<br />
body’s other end) of oil line. If leaking, retighten<br />
with 9/16” open end wrench. SHOP JOB<br />
2B. If pump sounds like a lot of pebbles in a tin<br />
can, the problem may be a worn motor coupling<br />
Remove motor from base plate - using a pair of<br />
needle nose pliers remove the motor coupling - if<br />
worn, replace. SHOP JOB<br />
2C. AIR PUMPS - Faulty Air Valve due to excessive<br />
moisture and/or dirt in air supply. Disassemble<br />
air valve and wipe any residue from air valve<br />
piston - spray brake cleaner into air valve body,<br />
dry thoroughly. Disassemble all small air lines and<br />
blow out with compressed air. Lubricate both air<br />
valve piston and body with hydraulic oil (sparingly)<br />
and reassemble. SHOP JOB<br />
2D. Air pumps - Faulty remote control valve<br />
cartridge. Replace.<br />
Leading Innovation in Torque and Tension Since 1968<br />
19
The World’s Most Trusted Industrial Torque and Tension <strong>Systems</strong><br />
SYMPTOM PROBABLE CAUSE REQUIRED ACTION<br />
Cylinder/Tool leaks 1. Safety relief valve on swivel has lifted.<br />
2. Blown O-ring in cylinder<br />
3. Defective gland seal.<br />
Tool operates backwards 1. Couplings reversed<br />
2. Multiple hoses in even numbers<br />
Ratchet returns with stroke 1. Broken or otherwise inoperable drive<br />
segment.<br />
Ratchet will not take successive strokes 1. Broken or otherwise inoperative drive<br />
segment I or spring<br />
2. Cylinder not retracting completely<br />
3. Linkage between piston rod and drive<br />
plates is broken<br />
Tool locks onto nut 1. Drive segment is loaded when the tool is<br />
max’d out in torque<br />
20 Leading Innovation in Torque and Tension Since 1968<br />
2. Tool is operating backwards<br />
3. Tool is wedged under a fixed object<br />
lA. Tighten all hose and couplers. If leak continues,<br />
adjust safety setting - Test #4<br />
1B. Check to see if the system is properly plumbed<br />
by running test #5 (high pressure on retract side<br />
will lift the safety relief valve)<br />
2. Replace O-Ring with proper high pressure O-<br />
Ring. SHOP JOB<br />
3. Replace gland seal. SHOP JOB<br />
1. Run test #5. Replumb system as necessary.<br />
2. As plumbed, HYTORC hoses may only be<br />
joined together in odd numbers ONLY. If it is<br />
necessary to use 2,4,6 hoses - make an adapter from<br />
spare high pressure couplings and nipples.<br />
1. Replace drive segment and/or spring. SHOP<br />
JOB.<br />
1. Replace drive segment and/or spring. SHOP JOB<br />
2. Remove tool from nut and cycle freely for several<br />
strokes. If problem persists, check pawls.<br />
2A. Operator not allowing adequate time for cylinder<br />
to retract fully.<br />
3. Replace parts as necessary - SHOP JOB.<br />
1. Press advance button on remote and build pressure<br />
- continue to press down on remote while<br />
pulling back on one of the accuracy assurance<br />
levers - release remote while continuing to hold<br />
back on levers<br />
2. Push advance button down - tool should immediately<br />
fall free- Run test #5<br />
3. Remove shroud from around ratchet. Using any<br />
tool available, pry the drive segment out of the<br />
ratchet and at the same time pull back on the<br />
accuracy assurance levers. Tool should swing free<br />
or burn away the socket or obstruction.
SYMPTOM PROBABLE CAUSE REQUIRED ACTION<br />
Gauge records no pressure 1. Gauge connection is loose<br />
2. Bad gauge<br />
3. Pump will not build pressure<br />
4. Tool seals are blown<br />
Pump will not build pressure 1. Air or electric supply is low<br />
2. Defective relief or regulator valve<br />
3. Low oil or clogged filter<br />
4. Internal leak in oil line from external<br />
relief valve to pump body.<br />
5. Worn sub-plate<br />
Motor sluggish and inefficient “sounds 1. Air or electric supply is low<br />
sick” slow to build pressure<br />
2. Clogged filter<br />
Pump heats up 1. Improper use<br />
2. Remote control is left in “on” position<br />
when pump is not actively in use.<br />
Hose or tool fitting is damaged or leaks 1. Broken or melted plastic outer covering<br />
2. Frayed Kevlar or steel strands<br />
3. Oil leaks through fibers<br />
4. Broken fittings<br />
Electric pump will not run 1. Loose electric connections in control<br />
box.<br />
2. Bad brushes<br />
3. Motor burned up<br />
The World’s Most Trusted Industrial Torque and Tension <strong>Systems</strong><br />
1. Tighten coupling.<br />
2. Replace gauge<br />
3. See cylinder pressure will not build pressureabove<br />
4. Replace defective seals. SHOP JOB<br />
1. Check air pressure or voltage.<br />
2. Replace valve. SHOP JOB<br />
3. Fill reservoir and clean filter.<br />
4. Open reservoir, inspect oil line while trying to<br />
build pressure - if leaking tighten fittings or replace.<br />
5. See cylinder pressure will not build pressureabove<br />
1. See #1 in preceding block<br />
2. Clean or replace filter<br />
1. Operator is continuing to hold down Pump heats<br />
up on the advance stroke after the cylinder has<br />
reached end of stroke - this causes a lot of oil to go<br />
through a very small hole in relief-valve - causing<br />
heat build-up. Have operator release advance stroke<br />
after accuracy assurance levers spring forward.<br />
2. Turn pump off whenever not actually being used.<br />
DO NOT leave pump running when tool is not in<br />
use.<br />
1. If underlying Kevlar or steel is still intact continue<br />
operation. Inspect frequently.<br />
2. Cut hose In half and discard. Replace Hose.<br />
3. Cut hose in half and discard. Replace<br />
hose.<br />
4. Remove old fitting and replace with<br />
STEEL high pressure fittings only.<br />
After changing fittings, always run test<br />
#5 to Ensure proper plumbing.<br />
1. Open control box and visually inspect for loose<br />
threaded or push-on connectors. Reconnect loose<br />
wires. If in doubt check wiring diagram. DANGER·<br />
BOX CONTAINS HIGH VOLTAGE· ALWAYS<br />
UNPLUG PRIOR TO TOUCHING ANYTHING<br />
IN CONTROL BOX.<br />
2. Change brushes. SHOP JOB<br />
3. Replace motor or components, whichever is<br />
necessary. SHOP JOB .<br />
Leading Innovation in Torque and Tension Since 1968<br />
21
The World’s Most Trusted Industrial Torque and Tension <strong>Systems</strong><br />
TEST #1<br />
Attach hoses to pump and tool in the normal manner. Press the advance button and hold it down. If the pump<br />
pressure builds and the hoses “flex” but the tool still refuses to cycle, the problem is most likely a loose or defective<br />
coupling connection. To find out where the bad coupling is, remove the tool from the hoses and marry the loose ends<br />
together and cycle the pump. If the gauge pressure reads no more than 500 PSI, then the bad fitting is on the tool. A<br />
significantly greater pressure indicates that the problem is in either the pump or a hose fitting.<br />
TEST #2<br />
Place a welding rod or thin screwdriver in the opening of either side of the solenoid. Press and then release the<br />
advance button. Repeat this process on the opposite side of the solenoid. You should feel the solenoids moving back<br />
and forth. If either side is “dead” the solenoid is bad and needs to be replaced. Note: if in an urgent situation, the tool<br />
may be cycled manually by pushing the solenoids back and forth through these access holes.<br />
TEST #3<br />
Remove tool from hoses. Cycle pump. If pump fails to build pressure, the problem is with the pump. If it does build<br />
pressure, the problem is with hydraulic blow-by in the tool.<br />
TEST #4<br />
Connect tool, pump, and hoses together normally and turn pump “on”. As oil leaks from the small port under the<br />
uniswivel, use a proper size Allen wrench and slowly tighten (clockwise) the set screw positioned between the<br />
couplings on the uni-swivel. Continue to tighten until the flow stops plus a quarter turn.<br />
TEST #5<br />
THIS TEST SHOULD BE RUN PRIOR TO EVERY USE OF A HYTORC TOOL<br />
Connect the tool, pump, and hoses together as normal. Cycle the pump several times. Cycle the system once more<br />
and observe the sequence of operation. As you depress the advance button, the tool drive should turn about. 24<br />
degrees and you should hear an audible “click”. On square drive tools, you will also notice that the accuracy<br />
assurance levers will move to the rear of the tool and spring forward. At this point, release the advance button. You<br />
should see no further movement and after a moment you will hear another audible “click”. This is how the tools are<br />
designed to operate. If you observe any other sequence of operation, the system is out of order and cannot deliver<br />
more than 10% of its designed capacity, Take immediate corrective action. For reference, tools and pumps are de<br />
signed from the factory plumbed as follows. This ensures that the tool, pump and ONE hose cannot possible be<br />
connected up incorrectly.<br />
Tool Advance Side - Male<br />
Retract Side - Female<br />
Hose Advance Side - Female to Female<br />
Retract Side - Male to Male<br />
Pump Advance Side - Male<br />
Retract Side - Female<br />
Note that connecting two (or any EVEN number) of hoses together creates “one” hose which is<br />
plumbed backwards! Male to Female and Female to Male. This will cause the system to operate<br />
backwards per Test #5 above. If your hose isn’t long enough, connect 3 hoses together, move your<br />
pump or call HYTORC for a longer hose assembly.<br />
22 Leading Innovation in Torque and Tension Since 1968
SECTION VII<br />
DISASSEMBLY<br />
1. Make sure the tool is fully retracted.<br />
2. Remove the reaction arm.<br />
3. Remove shroud (#11) by removing the two button head cap screws (#29) at the base of the housing. Unhook the<br />
Shroud Spring (#26).<br />
4. To remove the square drive, press center button of drive retainer (#14) while pulling square drive out of tool. If<br />
the retainer is a threaded type (size 20 and up), unscrew the retainer knob and pulling the square drive out.<br />
5. Remove the 2 Drive Plate Retaining Ring Backup Rings (#18).<br />
6. Remove the Access Plugs (#25). Line up the Rod Pin (#13) with the access hole of the housing and then punch<br />
the Rod Pin out.<br />
7. The whole drive assembly can be now removed completely from the housing (the 2 Drive Plate Retaining<br />
Rings, #19, may need to be pushed out from drive plates first)<br />
8. Remove the End Cap (#3) by using tool “End Cap Remover”<br />
9. Remove the Piston Rod Assembly (#2) from the cylinder by tapping with a soft punch or other proper gentle<br />
method.<br />
10. To change the seals, refer the diagram below.<br />
The World’s Most Trusted Industrial Torque and Tension <strong>Systems</strong><br />
Note: For assembly, follow the instructions in reverse. Be sure to properly lubricate all<br />
components prior to use.<br />
Leading Innovation in Torque and Tension Since 1968<br />
23
The World’s Most Trusted Industrial Torque and Tension <strong>Systems</strong><br />
APPENDIX A<br />
<strong>AVANTI</strong> TOOL SCHEMATIC<br />
ITEM QTY DESCRIPTION AV-.7 AV-1 AV-3 AV-5 AV-8 AV-10 AV-20 AV-35 AV-50 AV-80 AV-130<br />
1 1 Housing AV-.7-01 AV-01-01 AV-03-01 AV-05-01 AV-08-01 AV-10-01 AV-20-01 AV-35-01 AV-50-01 AV-80-01 AV-130-01<br />
2 1 Piston Assembly AV-.7-25 AV-01-25 AV-03-25 AV-05-25 AV-08-25 AV-10-25 AV-20-25 AV-35-25 AV-50-25 AV-80-25 AV-130-25<br />
3 1 End Cup MXT-.7-26 MXT-01-26 MXT-03-26 MXT-05-26 AV-08-34 AV-10-34 MXT-20-26 MXT-35-26 AV-50-34 AV-80-34 AV-130-34<br />
4 1<br />
4-A 1<br />
4-ASM 1<br />
4-B 1<br />
5 1<br />
Disengagement<br />
Lever (R/L)<br />
Disengagement<br />
Lever Pivot<br />
Shaft<br />
Disengagement<br />
Lever Assembly<br />
Reaction Pawl<br />
Push Pin Spring<br />
Reaction Pawl<br />
Assembly<br />
24 Leading Innovation in Torque and Tension Since 1968<br />
AV-.7-15A AV-01-15A AV-03-15A AV-05-15A AV-08-15A AV-10-15A AV-20-15A AV-35-15A AV-50-15A AV-80-15 AV-130-15A<br />
AV-.7-15B AV-01-15B AV-03-15B AV-05-15B AV-08-15B AV-10-15B AV-20-15B AV-35-15B AV-50-15B N/A AV-130-15B<br />
AV-.7-15 AV-01-15 AV-03-15 AV-05-15 AV-08-15 AV-10-15 AV-20-15 AV-35-15 AV-50-15 AV-80-15 AV-130-15<br />
AV-.7-18 AV-01-18 AV-03-18 AV-05-18 AV-08-18 AV-10-18 AV-20-18 AV-35-18 AV-50-18 AV-80-18 AV-130-18<br />
AV-.7-10 AV-01-10 AV-03-10 AV-05-10 AV-08-10 AV-10-10 AV-20-10 AV-35-10 AV-50-10 AV-80-10 AV-130-10<br />
Technical data and specifications are subject to change without notice.
APPENDIX A<br />
<strong>AVANTI</strong> TOOL PARTS LIST<br />
Technical data and specifications are subject to change without notice.<br />
The World’s Most Trusted Industrial Torque and Tension <strong>Systems</strong><br />
ITEM QTY DESCRIPTION AV-.7 AV-1 AV-3 AV-5 AV-8 AV-10 AV-20 AV-35 AV-50 AV-80 AV-130<br />
6 1<br />
7 1<br />
Reaction Pawl<br />
Push Pin<br />
Square Drive<br />
Assembly<br />
AV-.7-42 AV-01-42 AV-03-42 AV-05-42 AV-08-42 AV-10-42 AV-20-42 AV-35-42 AV-50-42 N/A AV-130-42<br />
AV-.7-05 AV-01-05 AV-03-05 AV-05-05 AV-08-05 AV-10-05 AV-20-05 AV-35-05 AV-50-05 AV-80-05 AV-130-05<br />
8 1 Ratchet AV-.7-06 AV-01-06 AV-03-06 AV-05-06 AV-08-06 AV-10-06 AV-20-06 AV-35-06 AV-50-06 AV-80-06 AV-130-06<br />
9 2<br />
Drive Plates<br />
(Left / Right)<br />
AV-.7-04L/R<br />
AV-01-<br />
04L/R<br />
AV-03-<br />
04L/R<br />
AV-05-<br />
04L/R<br />
AV-08-<br />
04L/R<br />
AV-10-04/R<br />
AV-20-<br />
04L/R<br />
AV-35-<br />
04L/R<br />
AV-50-04L/R AV-80-04 AV-130-04L/R<br />
10 1 Drive Pawl Assembly AV-.7-63 AV-01-63 AV-03-63 AV-05-63 AV-18-63 AV-10-63 AV-20-63 AV-35-63 AV-50-63 AV-80-63 AV-130-63<br />
11 1 Shroud AV-.7-31 AV-01-31 AV-03-31 AV-05-31 AV-08-31 AV-10-31 AV-20-31 AV-35-31 AV-50-31 AV-80-31 AV-130-31<br />
12 1 Uniswivel Assembly AV-001CL AV-001CL AV-003CL AV-003CL AV-003CL AV-010CL AV-010CL AV-010CL AV-010CL MXT-010A AV-130-001<br />
13 1 Rod Pin AV-.7-19 AV-01-19 AV-03-19 AV-05-19 AV-08-19 AV-10-19 AV-20-19 AV-35-19 AV-50-19 AV-80-19 AV-130-19<br />
14 1<br />
15 1<br />
Drive Retainer<br />
Assembly<br />
Drive Spline Sleeve<br />
Assembly<br />
AV-.7-11 AV-01-11 AV-03-11 AV-05-11 AV-08-11 AV-10-11 AV-20-11 AV-35-11 AV-50-11 AV-80-11 AV-130-11<br />
AV-.7-07 AV-01-07 AV-03-07 AV-05-07 AV-08-07 AV-10-07 AV-20-07 AV-35-07 AV-50-07 AV-80-07 AV-130-07<br />
16 1 Reaction Arm AV-.7-03 AV-01-03 AV-03-03 AV-05-03 AV-08-03 AV-10-03 AV-20-03 AV-35-03 AV-50-03 AV-80-03F AV-130-03<br />
17 1 Uniswivel Cap AV-01-001P AV-01-001P AV-03-001P AV-03-001P AV-03-001P AV-10-001P AV-10-001P AV-10-001P AV-10-001P N/A AV-10-001P<br />
18 1<br />
19 1<br />
Drive Plate Retaining<br />
Ring Backup Ring<br />
Drive Plate Retaining<br />
Ring<br />
AV-.7-20 AV-01-20 AV-03-20 AV-05-20 AV-08-20 AV-10-20 AV-20-20 AV-35-20 AV-50-20 AV-80-20 AV-130-20<br />
AV-.7-30 AV-01-30 AV-03-30 AV-05-30 AV-09-30 AV-10-30 AV-20-30 AV-35-30 AV-50-30 AV-80-30 AV-130-30<br />
20 1 Sq. Drive Set Screw AV-.7-5A AV-01-5A AV-03-5A AV-05-5A AV-09-5A AV-10-5A AV-20-5A AV-35-5A AV-50-5A AV-80-5A AV-130-5A<br />
21 1<br />
22 2<br />
Reaction Arm Set<br />
Screw<br />
Uniswivel Cover<br />
Screw<br />
AV-.7-22 AV-01-22 AV-03-22 AV-05-22 AV-08-22 AV-10-22 AV-20-22 AV-35-22 AV-50-22 AV-80-22 AV-130-22<br />
AV-01-13 AV-01-13 AV-03-13 AV-03-13 AV-03-13 AV-10-13 AV-10-13 AV-10-13 AV-10-13 N/A AV-10-13<br />
23 1 Drive Pawl Spring Pin AV-.7-40 AV-01-40 AV-03-40 AV-05-40 AV-08-40 AV-10-40 AV-20-40 AV-35-40 AV-50-40 AV-80-40 AV-130-40<br />
23A 1 Drive Plate Dowl Pin AV-.7-41 AV-01-41 AV-03-41 AV-05-41 AV-08-41 AV-10-41 AV-20-41 AV-35-41 AV-50-41 AV-80-41 AV-130-41<br />
24 2 Drive Pawl Spring AV-.7-27 AV-01-27 AV-03-27 AV-05-27 AV-08-27 AV-10-27 AV-20-27 AV-35-27 AV-50-27 AV-80-27 AV-130-27<br />
25 2<br />
Access Plug with<br />
O-Ring<br />
AV-.7-02 AV-01-02 AV-03-02 AV-05-02 AV-08-02 AV-10-02 AV-20-02 AV-35-02 AV-50-02 AV-80-02 AV-130-02<br />
26 1 Shroud Spring AV-.7-59 AV-01-59 AV-03-59 AV-05-59 AV-08-59 AV-10-59 AV-20-59 AV-35-59 AV-50-59 AV-80-59 AV-130-59<br />
27 1 Shroud Spring Screw AV-.7-58 AV-01-58 AV-03-58 AV-05-58 AV-08-58 AV-10-58 AV-20-58 AV-35-58 AV-50-58 AV-80-58 AV-130-58<br />
28 2<br />
Disengagement Lever<br />
Screw<br />
AV-.7-39 AV-01-39 AV-03-39 AV-05-39 AV-08-39 AV-10-39 AV-20-39 AV-35-39 AV-50-39 AV-80-39 AV-130-39<br />
29 2 Shroud Screw AV-.7-32 AV-01-32 AV-03-32 AV-05-32 AV-08-32 AV-10-32 AV-20-32 AV-35-32 AV-50-32 AV-80-32 AV-130-32<br />
30 2<br />
Reaction Pawl Pin Set<br />
Screw<br />
AV-.7-65 AV-01-65 AV-03-65 AV-05-65 AV-08-65 AV-10-65 AV-20-65 AV-35-65 AV-50-65 AV-80-65 AV-130-65<br />
31 1 Reaction Pawl Pin AV-.7-43 AV-01-43 AV-03-43 AV-05-43 AV-08-43 AV-10-43 AV-20-43 AV-35-43 AV-50-43 AV-80-43 AV-130-43<br />
32 1 Male Coupler 090155-1/8 090155-1/8 090155-1/4 090155-1/4 090155-1/4 090155-1/4 090155-1/4 090155-1/4 090155-1/4 090155-1/4 090155-1/4<br />
33 1 Female Coupler 090156-1 090156-1 90156 90156 90156 90156 90156 90156 90156 90156 90156<br />
34 1<br />
35 1<br />
36 1<br />
Housing Seal Kit<br />
(Not Shown)<br />
Uniswivel Seal Kit<br />
(Not Shown)<br />
MAINTENANCE KIT<br />
(Not Shown)<br />
AV-.7-62 AV-01-62 AV-03-62 AV-05-62 AV-08-62 AV-10-62 AV-20-62 AV-35-62 AV-50-62 AV-80-62 AV-130-62<br />
AV-01-00 AV-01-00 AV-03-00 AV-03-00 AV-03-00 AV-10-00 AV-10-00 AV-10-00 AV-10-00 MXT-010-00 AV-10-00<br />
MK-AV.7 MK-AV1 MK-AV3 MK -AV5 MK -AV8 MK -AV10 MK -AV20 MK -AV35 MK -AV50 MK -AV80 MK -AV130<br />
Leading Innovation in Torque and Tension Since 1968<br />
25
The World’s Most Trusted Industrial Torque and Tension <strong>Systems</strong><br />
APPENDIX B<br />
<strong>AVANTI</strong> DUAL SCHEMATIC<br />
26 Leading Innovation in Torque and Tension Since 1968<br />
Technical data and specifications are subject to change without notice.
APPENDIX B<br />
<strong>AVANTI</strong> DUAL PARTS LIST<br />
Technical data and specifications are subject to change without notice.<br />
The World’s Most Trusted Industrial Torque and Tension <strong>Systems</strong><br />
ITEM QTY DESCRIPTION AV-1D AV-3D AV-5D AV-10D<br />
1 1 Housing AV-01-01D AV-03-01D AV-05-01D AV-10-01D<br />
2 1 Piston Assembly AV-01-25 AV-03-25 AV-05-25 AV-10-25<br />
3 1 End Cup MXT-01-26 MXT-03-26 MXT-05-26 MXT-10-26<br />
4 1 Disengagement Lever (R/L) AV-01-15A AV-03-15A AV-05-15A AV-10-15A<br />
4-A 1 Disengagement Lever Pivot Shaft AV-01-15B AV-03-15B AV-05-15B AV-10-15B<br />
4-ASM 1 Disengagement Lever Assembly AV-01-15 AV-03-15 AV-05-15 AV-10-15<br />
4-B 1 Reaction Pawl Push Pin Spring AV-01-18 AV-03-18 AV-05-18 AV-10-18<br />
5 1 Reaction Pawl Assembly AV-01-10 AV-03-10 AV-05-10 AV-10-10<br />
6 1 Reaction Pawl Push Pin AV-01-42 AV-03-42 AV-05-42 AV-10-42<br />
7 1 Square Drive Assembly AV-01-05D AV-03-05D AV-05-05D AV-10-05D<br />
8 1 Ratchet AV-01-06 AV-03-06 AV-05-06 AV-10-06<br />
9 2 Drive Plates (Left / Right) AV-01-04L/R AV-03-04L/R AV-05-04L/R AV-10-04L/R<br />
10 1 Drive Pawl Assembly AV-01-63 AV-03-63 AV-05-63 AV-10-63<br />
11 1 Shroud AV-01-31 AV-03-31 AV-05-31 AV-10-31<br />
12 1 Uniswivel Assembly AV-001CL AV-003CL AV-003CL AV-010CL<br />
13 1 Rod Pin AV-01-19 AV-03-19 AV-05-19 AV-10-19<br />
14 1 Drive Retainer Assembly AV-01-11 AV-03-11 AV-05-11 AV-10-11<br />
15 1 Drive Spline Sleeve Assembly AV-01-07D AV-03-07D AV-05-07D AV-10-07D<br />
16 1 Uniswivel Cap AV-01-001P AV-03-001P AV-03-001P AV-10-001P<br />
17 1 Drive Plate Retaining Ring Backup Ring AV-01-20 AV-03-20 AV-05-20 AV-10-20<br />
18 1 Drive Plate Retaining Ring AV-01-30 AV-03-30 AV-05-30 AV-10-30<br />
19 2 Uniswivel Cover Screw AV-01-13 AV-03-13 AV-03-13 AV-10-13<br />
20 1 Drive Pawl Spring Pin AV-01-40 AV-03-40 AV-05-40 AV-10-40<br />
20A 1 Drive Plate Dowel Pin AV-01-41 AV-03-41 AV-05-41 AV-10-41<br />
21 2 Drive Pawl Spring AV-01-27 AV-03-27 AV-05-27 AV-10-27<br />
22 2 Access Plug with O-Ring AV-01-02 AV-03-02 AV-05-02 AV-10-02<br />
23 1 Shroud Spring AV-01-59 AV-03-59 AV-05-59 AV-10-59<br />
24 1 Shroud Spring Screw AV-01-58 AV-03-58 AV-05-58 AV-10-58<br />
25 2 Disengagement Lever Screw AV-01-39 AV-03-39 AV-05-39 AV-10-39<br />
26 2 Shroud Screw AV-01-32 AV-03-32 AV-05-32 AV-10-32<br />
27 2 Reaction Pawl Pin Set Screw AV-01-65 AV-03-65 AV-05-65 AV-10-65<br />
28 1 Reaction Pawl Pin AV-01-43 AV-03-43 AV-05-43 AV-10-43<br />
29 1 Male Coupler 090155-1/8 090155-1/4 090155-1/4 090155-1/4<br />
30 1 Female Coupler 090156-1 90156 90156 90156<br />
31 1 Rear Reaction Arm Assembly AV-01-03D AV-03-03D AV-05-03D AV-10-03D<br />
32 1 Housing Seal Kit (Not Shown) AV-01-62 AV-03-62 AV-05-62 AV-10-62<br />
33 1 Uniswivel Seal Kit (Not Shown) AV-01-00 AV-03-00 AV-03-00 AV-10-00<br />
34 1 MAINTENANCE KIT (Not Shown) MK-AV1 MK-AV3 MK-AV5 MK-AV10<br />
Leading Innovation in Torque and Tension Since 1968<br />
27
The World’s Most Trusted Industrial Torque and Tension <strong>Systems</strong><br />
APPENDIX C<br />
DIMENSIONAL DATA<br />
IMPERIAL<br />
Inches Lbs. Ft. Lbs.<br />
DRIVE R L H W Weigh Min Torque Max Torque Max Bolt Load<br />
<strong>AVANTI</strong>-.7 ¾" 0.99 4.14 4.21 1.79 3.1 115 767 61,000<br />
<strong>AVANTI</strong>-1 ¾" 1.13 5.04 4.92 2.18 4.5 193 1,284 90,000<br />
<strong>AVANTI</strong>-3 1" 1.50 6.53 6.31 2.9 9.45 445 2,969 177,000<br />
<strong>AVANTI</strong>-5 1 ½" 1.86 7.86 7.41 3.38 15.6 804 5,360 231,000<br />
<strong>AVANTI</strong>-8 1 ½" 2.07 8.83 8.38 3.86 20.75 1,164 7,760 326,000<br />
<strong>AVANTI</strong>-10 1 ½" 2.38 9.92 9.29 4.35 29.2 1,761 11,743 360,000<br />
<strong>AVANTI</strong>-20 2 ½" 2.60 11.64 10.26 5.07 47.7 2,760 17,890 565,000<br />
<strong>AVANTI</strong>-35 2 ½" 3.19 14.31 12.33 6.51 82.75 4,775 31,830 789,000<br />
<strong>AVANTI</strong>-50 2 ½" 3.95 16.3 14.03 7.04 125.7 7,202 46,126 980,000<br />
<strong>AVANTI</strong>-80 3 ½” 4.69 19.52 16.84 7.49 280.5 12,738 84,921 1,200,000<br />
<strong>AVANTI</strong>-130 3 ½" 5.31 22.73 20.14 8.5 585 19,395 138,510 1,500,000<br />
28 Leading Innovation in Torque and Tension Since 1968<br />
Technical data and specifications are subject to change without notice.
APPENDIX C<br />
DIMENSIONAL DATA<br />
METRIC<br />
mm Kg v Kn Nm<br />
DRIVE R L H W Weigh Min Torque Max Torque Max Bolt Load<br />
<strong>AVANTI</strong>-.7 ¾" 25.0 105.2 106.9 45.3 1.4 156 1040 271<br />
<strong>AVANTI</strong>-1 ¾" 28.6 127.9 124.9 55.2 2.0 261 1741 400<br />
<strong>AVANTI</strong>-3 1" 38.1 165.9 160.2 73.7 4.3 604 4025 787<br />
<strong>AVANTI</strong>-5 1 ½" 47.2 199.5 188.2 85.9 7.1 1090 7267 1027<br />
<strong>AVANTI</strong>-8 1 ½" 52.5 224.2 212.7 98.0 9.4 1578 10521 1450<br />
<strong>AVANTI</strong>-10 1 ½" 60.3 252.0 236.0 110.5 13.3 2388 15921 1601<br />
<strong>AVANTI</strong>-20 2 ½" 66.0 295.7 260.6 128.8 21.7 3742 24255 2513<br />
<strong>AVANTI</strong>-35 2 ½" 81.0 363.4 313.2 165.4 37.6 6473 43155 3509<br />
<strong>AVANTI</strong>-50 2 ½" 100.3 414.0 356.4 178.8 57.1 9764 62538 4359<br />
<strong>AVANTI</strong>-80 3 ½” 119.1 495.8 427.7 190.2 127.5 17270 115136 5338<br />
<strong>AVANTI</strong>-130 3 ½" 134.9 577.3 511.6 215.9 265.9 26296 187792 6672<br />
Technical data and specifications are subject to change without notice.<br />
The World’s Most Trusted Industrial Torque and Tension <strong>Systems</strong><br />
Leading Innovation in Torque and Tension Since 1968<br />
29
The World’s Most Trusted Industrial Torque and Tension <strong>Systems</strong><br />
APPENDIX D<br />
SQUARE/ALLEN DRIVE WORKING<br />
TORQUE<br />
DRIVE SIZE: The square or hex drive of each HYTORC is limited in its maximum output by its<br />
material and its engagement area. Since your HYTORC uses specially suited alloy steel for its<br />
drive members, the following maximum torque output can be achieved without drive failure,<br />
provided the reaction member abuts close to the same plane as the nut to be turned.<br />
DRIVE SIZE MAXIMUM WORKING TORQUE PROBABLE FAILURE<br />
1/2” Allen 350 ft./lbs. 380 ft./lbs.<br />
1/2” Square 385 ft./lbs. 425 ft./lbs.<br />
5/8” Allen 685 ft.ll bs. 750 ft./lbs.<br />
3/4” Allen 1,185 ft./lbs. 1,300 ft./lbs.<br />
3/4” Square 1,390 ft./lbs. 1,485 ft./lbs.<br />
7/8” Allen 1,880 ft./lbs. 2,065 ft./lbs.<br />
1” Allen 2,810 ft./lbs. 3,100 ft./lbs.<br />
1” Square 3,230 ft./lbs. 3,400 ft./lbs.<br />
1-1/8” Allen 4,000 ft./lbs. 4,400 ft./lbs.<br />
1-1/4” Allen 5,500 ft./lbs. 6,100 ft./lbs.<br />
1-3/8” Allen 7,300 ft./lbs. 8,000 ft./lbs.<br />
1-1/2” Allen 9,500 ft./lbs. 10,400 ft./lbs.<br />
1-1/2” Square 11,520 ft./lbs. 12,475 ft./lbs.<br />
1-5/8” Allen 12,000 ft.ll bs. 13,200 ft./lbs.<br />
1-3/4” Allen 15,000 ft./lbs. 16,500 ft./lbs.<br />
1-7/8” Allen 18,500 ft./lbs. 20,300 ft./lbs.<br />
2” Allen 22,500 ft.l\bs. 24,700 ft./lbs.<br />
2-1/4” Allen 32,000 ft.ll bs. 35,100 ft./lbs.<br />
2-1/2” Allen 44,000 ft./lbs. 48,200 ft./lbs.<br />
2-1/2” Square 52,500 ft./lbs. 63,625 ft./lbs.<br />
If the reaction arm cannot abut on the same plane as the nut to be turned. Less torque should be<br />
applied as the additional side load has to be taken Into consideration.<br />
When torque requirements are close or more than the values listed above, use HYTORC’s Socket<br />
Hex - Drive with replaceable Hex Insert Bits.<br />
30 Leading Innovation in Torque and Tension Since 1968<br />
Technical data and specifications are subject to change without notice.
Being #1 is no coincidence!<br />
Worldwide Warranty, Service & Expertise!<br />
Find your nearest HYTORC at<br />
www.hytorc.com/worldwide<br />
CALL: 1-800-FOR-<br />
We are always within 1 hour from you!<br />
Division UNEX Corporation<br />
333 State Route 17N, Mahwah, New Jersey 07430 U.S.A.<br />
800-FOR-HYTORC • Tel: 201-512-9500 • E-Mail: info@hytorc.com • Web: www.hytorc.com<br />
MAN-<strong>AVANTI</strong>-2012