You also want an ePaper? Increase the reach of your titles
YUMPU automatically turns print PDFs into web optimized ePapers that Google loves.
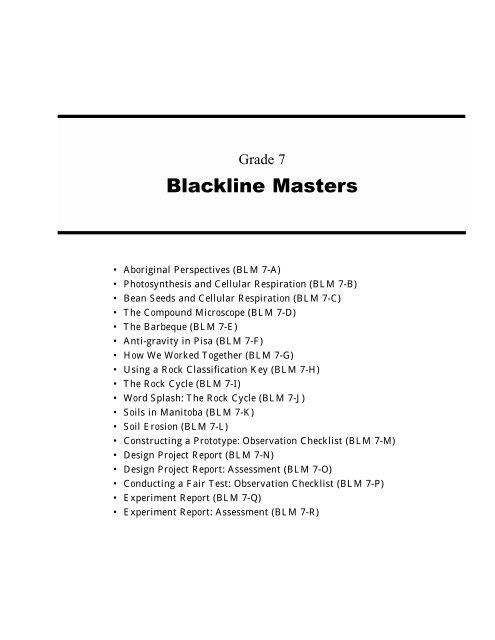
Grade 7<br />
<strong>Blackline</strong> <strong>Masters</strong><br />
• Aboriginal Perspectives (BLM 7-A)<br />
Photosynthesis and Cellular Respiration (BLM 7-B)<br />
Bean Seeds and Cellular Respiration (BLM 7-C)<br />
The Compound Microscope (BLM 7-D)<br />
The Barbeque (BLM 7-E)<br />
Anti-gravity in Pisa (BLM 7-F)<br />
How We Worked Together (BLM 7-G)<br />
Using a Rock Classification Key (BLM 7-H)<br />
The Rock Cycle (BLM 7-I)<br />
Word Splash: The Rock Cycle (BLM 7-J)<br />
Soils in Manitoba (BLM 7-K)<br />
Soil Erosion (BLM 7-L)<br />
Constructing a Prototype: Observation Checklist (BLM 7-M)<br />
Design Project Report (BLM 7-N)<br />
Design Project Report: Assessment (BLM 7-O)<br />
Conducting a Fair Test: Observation Checklist (BLM 7-P)<br />
Experiment Report (BLM 7-Q)<br />
Experiment Report: Assessment (BLM 7-R)
Aboriginal Perspectives on Sustainability<br />
Traditionally, Aboriginal people have exemplified the qualities of good stewardship in their<br />
interactions with the environment.<br />
Aboriginal environmental knowledge developed over centuries of observing and understanding<br />
seasonal changes—changes that were taken into consideration as a natural part of daily life and<br />
decision making.<br />
Decisions were made with regard for the environment, which ultimately met the needs of individuals,<br />
families, and communities.<br />
As food gatherers, Aboriginal people moved to areas where the land was bountiful. Each of the four<br />
seasons had a special time to hunt and trap animals for food and clothing, a time to catch fish, to<br />
harvest fruit and berries, and to pick roots and prepare medicines.<br />
In conducting these activities, Aboriginal people considered the growth, reproduction, and<br />
regeneration cycles of plants, animals, and birds. To interrupt these natural cycles and patterns was<br />
considered to be an act against the laws of nature. This knowledge and understanding of the natural<br />
environment reflected the importance of sustaining Mother Earth for seven generations to come.<br />
It is necessary for all peoples to embrace the concept of survival of the seventh generation, which is<br />
truly the heart of sustainability.<br />
We must make decisions that ensure an equitable quality of life for all for seven generations to<br />
come.<br />
Embedded within the Aboriginal world view is the concept of collective responsibility for tending the<br />
land and using only that which is needed for sustenance. Important, as well, is the interconnectedness<br />
and interdependence of all life forms—humankind, flora and fauna, and all that exists on the Earth.<br />
The concept of sustainability is not new to Aboriginal people; they are very aware of the growing<br />
need for all humans to show greater respect for the environment—respect for Mother Earth—if we are<br />
to continue to coexist in this world.<br />
Aboriginal people are rich in environmental knowledge and can provide important perspectives when<br />
considering the impact of economic decisions on the environment.<br />
Aboriginal people are also a source of sustainability strategies that can contribute to our collective<br />
well-being. Through ongoing communication and an understanding of traditional and environmental<br />
knowledge, education for a sustainable future can be achieved.<br />
Aboriginal Perspectives: Reproduced from Education for a Sustainable Future: A Resource for Curriculum Developers,<br />
Teachers, and Administrators. Winnipeg, MB: Manitoba Education and Training, 2000. pp. 49-50.<br />
BLM 7-A
Photosynthesis and Cellular Respiration<br />
Part A<br />
Complete the statements below, using terms from the Word Bank provided. Note: Terms can be used more<br />
than once.<br />
Word Bank<br />
water oxygen sugar<br />
photosynthesis carbon dioxide cellular respiration<br />
chlorophyll energy light energy<br />
1. a. ___________________ is the process that green plants use to produce their own food.<br />
b. Plants must contain ___________________ to carry out this process.<br />
c. _______________+______________+______________ ______________+______________<br />
d. The substance considered to be a by-product of this process is ___________________.<br />
2. a. _____________ is the process that plants and animals use to change food into useable energy.<br />
b. ______________+______________ ______________+______________+______________<br />
c. The substances considered to be by-products of this process are ___________________ and<br />
___________________.<br />
Part B<br />
Answer the following questions:<br />
3. What relationship do you see between the substances in the two word equations in 1.c. and 2.b.?<br />
4. Why are green plants important to animals?<br />
5. What do animals provide for plants?<br />
Look for:<br />
1. a. photosynthesis<br />
b. chlorophyll<br />
c. water, carbon dioxide, light energy, sugar, oxygen<br />
d. oxygen<br />
2. a. cellular respiration<br />
b. sugar, oxygen, water, carbon dioxide, energy<br />
c. water, carbon dioxide<br />
3. Products of one process are used in the other process.<br />
4. Green plants give off oxygen, which animals require to live.<br />
5. Animals give off carbon dioxide and water, which plants need to produce their own food.<br />
BLM 7-B
Bean Seeds and Cellular Respiration<br />
Proving That Germinating Bean Seeds Undergo Cellular Respiration<br />
A scientist conducted four experiments to prove that bean seeds, as living things, undergo cellular<br />
respiration. The scientist summarized the experiments into four statements: the question, the hypothesis,<br />
the test, and the result. These statements were captured in an electronic format but a computer glitch<br />
caused the hypothesis statements, the test statements, and the result statements to become mixed up.<br />
Using statements A to L from the Statement Bank below, fill in the blanks to match each of the following<br />
questions with its corresponding hypothesis statement, test statement, and result statement.<br />
1. What substance provides the sugar portion of the cellular respiration equation?<br />
Hypothesis: ______ Test: ______ Result: ______<br />
2. Is oxygen used in the germination of bean seeds?<br />
Hypothesis: ______ Test: ______ Result: ______<br />
3. Do germinating bean seeds give off carbon dioxide?<br />
Hypothesis: ______ Test: ______ Result: ______<br />
4. Are bean seeds able to transform stored chemical energy into usable energy?<br />
Hypothesis: ______ Test: ______ Result: ______<br />
The following information may help you with this task:<br />
In order for something to burn, oxygen must be present.<br />
Limewater is a chemical indicator that becomes cloudy in the presence of carbon dioxide.<br />
When heated, Benedict’s solution turns reddish-orange in the presence of sugar.<br />
Statement Bank<br />
A. Add water to bean seeds. Observe for several days.<br />
B. Test for the presence of oxygen before and after the germination of bean seeds by observing the<br />
effect of the air in a flask on a flame (burning wood splint test).<br />
C. Crush bean seeds. Add Benedict’s solution and heat. Observe.<br />
D. The bean itself provides the sugar.<br />
E. When heated, Benedict’s solution changed to reddish-orange.<br />
F. The limewater turned cloudy.<br />
G. Oxygen is used during the germination of bean seeds.<br />
H. Germinating seeds give off carbon dioxide.<br />
I. A burning wood splint flames longer in a flask of dry new beans than in a stoppered flask in<br />
which beans were allowed to germinate.<br />
J. Seeds were seen to grow, beginning stems and first leaves.<br />
K. Put germinating seeds in a covered container and have the air given off by the seeds come into<br />
contact with limewater.<br />
L. Bean seeds use some of the transformed chemical energy to carry out the life processes of growth.<br />
Look for:<br />
1. D, C, E<br />
2. G, B, I<br />
3. H, K, F<br />
4. L, A, J<br />
BLM 7-C
The Compound Microscope<br />
Purposes:<br />
Identify and describe the function of the parts of a compound microscope.<br />
Demonstrate proper care and use of the microscope (i.e., carrying the microscope, cleaning lenses,<br />
focusing carefully).<br />
Demonstrate the ability to prepare wet mounts, focus, calculate magnification, estimate specimen size,<br />
and sketch specimens as they appear under magnification using a compound microscope.<br />
Procedure:<br />
A. Handling the Microscope<br />
BLM 7-D<br />
1. Clean lenses as needed using lens paper only. Normal tissue is too coarse and may scratch lenses.<br />
2. Microscopes are fragile and must be handled with care. Carry the microscope with one hand under<br />
the base and one hand grasping the arm. Make sure the electrical cord is secured to prevent<br />
accidents.<br />
3. Put the lowest power objective lens in place and cover the microscope with the dust cover when<br />
finished.<br />
4. Never use direct sunlight as a light source.<br />
B. Adjusting Light<br />
The diaphragm regulates the amount of light passing through a specimen. Too much light results in<br />
flare, causing a lack of contrast or lost detail when viewing the specimen.<br />
C. Preparing a Wet Mount<br />
1. Place a drop of water on the slide.<br />
2. Place a very thinly sliced specimen in the water.<br />
3. Hold the cover slip against the water at a 45-degree angle, and then release. This will reduce the<br />
number of air bubbles, which may obscure portions of the specimen or the entire specimen. Gently<br />
pressing on the coverslip with a pencil eraser can eliminate some air bubbles.<br />
D. Focusing<br />
1. Always begin with the lowest power objective lens in position. This gives the largest field of<br />
vision and the greatest depth of field. It also reduces the chance of the lens striking the slide.<br />
2. To avoid breaking the slide during focusing, move the lowest power objective lens as close as<br />
possible to the slide while watching from the side of the microscope. Centre the specimen and<br />
focus by moving the objective lens away from the slide.<br />
3. Turn the adjustment dials to sharpen the image.<br />
4. Adjust the diaphragm for optimum contrast.<br />
5. When going from a lower power objective lens to a higher power objective lens:<br />
centre the specimen in the field of view<br />
change to the next power objective lens<br />
use the adjustment dials to sharpen the image and adjust the diaphragm for optimum contrast<br />
(continued)
(continued)<br />
E. Determining Total Magnification<br />
Total magnification = ocular lens power x objective lens power (e.g., 5X x4X = 20X)<br />
Note: the units are times (X).<br />
1. Determine the total magnification for each combination of ocular and objective lenses found on<br />
your microscope. Complete the table below:<br />
Low<br />
Power<br />
Medium<br />
Power<br />
High<br />
Power<br />
Ocular Lens Power (X) Objective Lens Power (X) Total Magnification (X)<br />
BLM 7-D<br />
2. Prepare a wet mount slide of the following letter: e (lower case). Use an “e” from a newspaper or<br />
magazine or draw your own.<br />
a. In the space below, draw the letter as it appears with the unaided eye on the stage of the<br />
microscope. To the right of this diagram, draw the letter as it appears in the field of view under<br />
low power.<br />
b. Compare the two drawings and describe what you see. (In your description, answer the<br />
following questions: What is the consistency of the ink or pencil lead? Describe the texture of<br />
the paper. Is the position or orientation of the letter in the two drawings the same or different?)<br />
c. Describe the movement of the specimen in the field of view when you move the slide to the<br />
left. Describe the movement of the specimen in the field of view when you move the slide<br />
away from you.<br />
(continued)
(continued)<br />
d. Make a general statement about the orientation and movement of objects viewed through a<br />
microscope.<br />
e. What would you say to help a friend who is having trouble locating a specimen in the field of<br />
view?<br />
f. The image below is drawn as viewed through the microscope. Draw what you would expect to<br />
see on the stage.<br />
3. Prepare a wet mount slide of two overlapping hairs or thin threads.<br />
a. Locate the hairs under low power. Is it possible to have both hairs in focus?<br />
b. Locate the hairs under medium power. Is it possible to have both hairs in focus? Draw what<br />
you see. Indicate the total magnification.<br />
c. Locate the hairs under high power. Is it possible to have both hairs in focus?<br />
BLM 7-D<br />
d. What happens to the depth of field (i.e., the ability to focus on more than one object when the<br />
objects are at different depths on the slide) as magnification increases?<br />
(continued)
(continued)<br />
The Microscope<br />
ocular lens (eye piece)<br />
medium power<br />
objective lens<br />
clips<br />
body tube<br />
high power<br />
objective lens<br />
stage<br />
mirror/light source<br />
coarse adjustment knob<br />
fine adjustment knob<br />
revolving nose piece<br />
low power objective lens<br />
arm<br />
diaphragm<br />
base<br />
BLM 7-D
The Barbeque<br />
BLM 7-E<br />
A group of six friends get together on a hot July day for a barbeque and a game of baseball. Each person<br />
brings a different menu item. Sally brings potato salad (which contains mayonnaise made from eggs), Fred<br />
brings thick burger patties made from raw hamburger meat, Mary brings a tossed green salad and a bottle<br />
of oil and vinegar salad dressing to add later, Sam brings potato chips and frozen hot dogs in a cooler,<br />
Harry brings pop to drink and hamburger and hot dog buns, and Alice brings ketchup, mustard, and<br />
freshly washed strawberries. As Fred places his dinner contribution into Sam’s cooler the group decides to<br />
play baseball.<br />
After a 45-minute game the group begins to prepare supper. Fred is in charge of the barbeque and ensures<br />
that the hamburgers and hot dogs are well cooked. When the juices from the hamburgers are clear he<br />
places the meat on a clean plate. The table is set and the group finally sits down to eat, one hour and thirty<br />
minutes after they initially arrived at the site. Everyone has at least one hamburger and one hot dog except<br />
Sally, who has one hot dog only. Sally, Sam, Alice, Fred, and Mary eat the green salad. Alice does not eat<br />
the potato salad due to an allergy but she shares the strawberries she brought with Harry. Harry likes the<br />
potato salad so much he decides to have a second helping. After the meal the group cleans up and heads<br />
home.<br />
The evening finds all the friends except Alice suffering from nausea and/or diarrhea. Sally also has a fever<br />
and Fred is suffering from stomach cramps. Harry is so ill he decides to go to the hospital.<br />
What’s the Cause?<br />
List all the food practices contained within the barbeque scenario and indicate whether they were safe.<br />
Use this information to identify and explain a possible cause for the illnesses, including an<br />
explanation of why Harry was extremely ill while Alice did not succumb to the illness her friends did.
Anti-gravity in Pisa<br />
Engineers have been tinkering with this lovable<br />
leaning bell tower for hundreds of years. Now it is so<br />
close to actually falling over that they had to try<br />
something radical.<br />
The control room of the Leaning Tower of Pisa<br />
is not very impressive, as control rooms<br />
go—just a handful of technicians and computers<br />
in a construction-site trailer. But if the tower<br />
ever decides to stop leaning and start falling,<br />
those technicians will be the first to know.<br />
Every five minutes the computers receive data<br />
from 120 sensors inside the tower that monitor<br />
its inclinations. The tower has its harmless<br />
daily moods. In the late morning it leans away<br />
from the sun, like some giant antimatter<br />
sunflower, tilting imperceptibly northwest as<br />
its southeastern side warms up and expands.<br />
At night the tower settles back to its current<br />
southward tilt of around 5.3 degrees.<br />
It is that persistent angle that is<br />
alarming. It is bigger than it sounds<br />
or than it looks on postcards. When<br />
you walk the streets of Pisa, and the<br />
tower pops into view for the first<br />
time, it is shocking—the visual<br />
equivalent of a prolonged screech of brakes. For a split<br />
second you wait for the crash. People have been<br />
waiting for centuries, of course, and so you might<br />
reassure yourself that the crash can’t really happen.<br />
After all, it is hard to imagine 177 feet and 32 million<br />
pounds of marble simply falling, in an instant, after<br />
800 years. But some people have no trouble imagining<br />
it. “It is pretty terrifying,” says John Burland, a<br />
specialist in soil mechanics at Imperial College in<br />
London. “The tower is literally on the point of falling<br />
over. It is very, very close.”<br />
Not quite as close as it was last year, though:<br />
Lately the tower has been moving ever so slightly in<br />
the right direction. From his London office Burland is<br />
supervising a delicate operation in which dirt is being<br />
extracted through thin drill pipes—the geotechnical<br />
equivalent of laboratory pipettes—from under the<br />
north, upstream side of the tower foundations, allowing<br />
it to settle toward the upright direction. The rate of soil<br />
extraction amounts to just a few dozen shovelfuls a<br />
day; anything faster might jolt the tower over the<br />
brink. Its condition is considered so precarious that it<br />
BLM 7-F<br />
By Robert Kunzig<br />
has been closed to visitors for a decade:<br />
The top leans a full 15 feet out of plumb.<br />
Burland and his colleagues on an expert<br />
committee appointed by the Italian<br />
government are hoping to bring it back<br />
20 inches by next summer.<br />
There are 13 members of the<br />
committee, but Burland, for this crucial<br />
operation, is the “responsible officer.”<br />
Every day he gets faxes from the control<br />
room in Pisa telling him how the tower<br />
is doing; every day he sends back<br />
instructions on where to remove dirt next.<br />
He takes care to sign his messages.<br />
“That’s absolutely essential,” he says.<br />
“Someone’s got to take responsibility.<br />
Unless you do that, you get another Black<br />
September.” Burland is referring to<br />
September 1995, when it seemed for a while<br />
as if the committee, which was charged<br />
with saving the tower, might manage to<br />
knock it down instead.<br />
In 1902 the campanile collapsed in St.<br />
Mark’s Square in Venice, and the<br />
Italian government appointed an expert<br />
committee, the third, to consider what to do about the<br />
Leaning Tower of Pisa. In 1989 another medieval bell<br />
tower collapsed in Pavia, south of Milan, killing four<br />
people, and the Italian government appointed its 16th<br />
(or 17th, depending on who’s counting) expert<br />
committee to consider what to do about the leaning<br />
bell tower of Pisa. Burland had never been to Pisa and<br />
little knew how his life was about to change when he<br />
took a phone call early in 1990 from his friend<br />
Michele Jamiolkowski, a geotechnical engineer at the<br />
Polytechnic in Turin. Burland remembers the<br />
conversation this way:<br />
Burland: Michele! How are you?<br />
Jamiolkowski: I was fine until this morning. Then I<br />
opened my newspaper and read that Prime Minister<br />
Andreotti has set up a commission to stabilize Pisa,<br />
and I’m chairman.<br />
Burland: Oh, Michele, I’m sorry. What a terrible<br />
job!<br />
Jamiolkowski: Keep your sympathy. Your name is<br />
there as well.<br />
(continued)<br />
Anti-Gravity in Pisa 1<br />
Anti-gravity in Pisa: Text reproduced, by permission, from Kunzig, Robert. “Anti-gravity in Pisa.” Discover 21.8 (August<br />
2000). Copyright © 2000 by Disney Publishing Worldwide. All rights reserved.
(continued)<br />
There followed a telex—it all seems so long ago,<br />
Burland says; he and Jamiolkowski both are grayhaired<br />
now—a summons to a meeting in Rome. Thus<br />
began a decade during which Burland devoted much of<br />
his energy to Pisa. He was known in his profession for<br />
another delicate excavation, in which he built a belowground<br />
parking garage alongside the Houses of<br />
Parliament without toppling Big Ben; he is still<br />
working for the London Underground on the extension<br />
of the Jubilee Line. But he has spent more time in<br />
recent years analyzing various models of the Italian<br />
tower. One morning last spring, in his office at<br />
Imperial, he demonstrated the simplest one. Taking a<br />
cardboard box from his bookshelf, he extracted some<br />
cylindrical plastic blocks and a two-inch-thick piece of<br />
foam rubber. “The problem of Pisa,” Burland said,<br />
laying the foam on his worktable and stacking the<br />
blocks on it, “is that it’s not built on rock. It’s built on<br />
soft clay.”<br />
Under the Tower of Pisa, under all of Pisa, 1,000<br />
feet of sediments cover the bedrock. The sediments<br />
come both from the Arno River, which flows through<br />
the town on its way to the Mediterranean, about six<br />
miles to the west, and from the sea itself, because as<br />
recently as the Roman period the area around Pisa was<br />
still a coastal lagoon. The tower sits on 30 feet of fairly<br />
dense river silts, below which lies a 100-foot-thick<br />
layer of marine clay. Called the Pancone Clay, it is<br />
made of flat, jumbled, loosely packed particles, and it<br />
is thus especially compressible. The tower, bearing<br />
down on a foundation just 65 feet wide and 10 feet<br />
deep, has compressed it.<br />
The first three stories—the tall ground story and the<br />
first two loggias, or open galleries—were built<br />
between 1173 and 1178. The next four loggias were<br />
added between 1272 and 1278; the belfry was finished<br />
in 1370. In other words, there were two construction<br />
delays of nearly a century—and that was lucky,<br />
because otherwise the clay would have failed right<br />
then under the growing load. “In both cases the masons<br />
stopped just in the nick of time,” says Burland.<br />
“Because they left it, the weight of the tower squeezed<br />
a lot of the water out of the clay, and the clay became<br />
stronger.”<br />
It’s possible they stopped because they were<br />
worried about the lean; it’s certain, anyway, that the<br />
tower was leaning, right from the beginning. When the<br />
new generations of masons resumed work, at the fourth<br />
story and then again at the belfry, they tried to correct<br />
the lean by building substantial northward kinks into<br />
the tower, thus giving it a banana shape. They were<br />
Anti-Gravity in Pisa 2<br />
BLM 7-F<br />
trying to curve the center line of the tower back over<br />
the center of the foundations, Burland thinks, just as a<br />
child would when faced with a leaning stack of blocks.<br />
Any child who has stacked blocks on a soft carpet<br />
knows, though, that sooner or later you add one block<br />
too many. At Pisa, the belfry was one block too many.<br />
The tower had already sunk 10 feet into the soil,<br />
according to Burland’s calculations, but the belfry<br />
caused it to sink another few inches, which quickly<br />
caused a big jump in its tilt, to about four degrees. The<br />
tower tilts south because one of the shallow silt layers<br />
happens to be more compressible on that side—it has<br />
some soft clay mixed into it. Today that shallow layer<br />
has become the seat of the tower’s problem, Burland<br />
believes. Analyzing data collected by previous<br />
committees, he has found that the tower as a whole,<br />
even as its tilt continued to increase, had stopped<br />
sinking in the 20th century, apparently because the<br />
Pancone Clay strengthened again. Instead, the tower is<br />
rotating: As the south side of the skimpy foundation<br />
digs deeper into that soft shallow layer, the north side<br />
is moving up toward the surface, ready to pop out like<br />
the roots of a storm-felled tree.<br />
Every little nudge moves the tower closer to that<br />
fate. According to Burland, ever since the addition of<br />
the belfry, it has been “metastable,” like a ball on a flat<br />
table. Give it a nudge and it does not come back, as it<br />
would if it were truly stable, like a ball at the bottom<br />
of a bowl. It just rolls along toward the edge of the<br />
table—toward what a geotechnical engineer calls<br />
“leaning instability.”<br />
In 1838 the tower received a big nudge: An<br />
architect named Gherardesca decided that people<br />
should be able to see the base of the tower—which had<br />
disappeared into the dirt—and so he excavated a<br />
walkway around it. The tower jumped half a degree<br />
south. In 1934 an engineer named Girometti decided to<br />
stabilize the foundations by drilling 361 holes into<br />
them and injecting 80 tons of grout; the tower jumped<br />
another 31 arc seconds. (There are 3,600 arc seconds<br />
in a degree.) More recently, the gradual increase in the<br />
tilt has been caused, Burland thinks, by groundwater<br />
rising up under the base of the tower during the annual<br />
rainy season. For some reason it pushes up on the<br />
north side of the tower more than on the south. “It<br />
starts in September, and it ends in February,” Burland<br />
says. “The tower ratchets in one direction, and it never<br />
comes back. It’s just moving inexorably toward falling<br />
over, and accelerating as it gets closer.”<br />
Burland and his colleagues have developed a<br />
computer model that reproduces the tower’s tilt history<br />
(continued)
(continued)<br />
from the 12th century on. The one thing it can’t quite<br />
reproduce is the tilt of 5.5 degrees, the angle it had<br />
reached before soil extraction. At any angle above<br />
5.44 degrees, the computer tower refuses to remain<br />
standing—which suggests how close to the edge the<br />
real one has been. On the worktable in his office,<br />
Burland slowly adds blocks to his plastic tower. It<br />
teeters as it presses into the foam foundation. At block<br />
number seven it topples.<br />
When Jamiolkowski’s committee convened for the<br />
first time in 1990, the tower was increasing its<br />
tilt by around six arc seconds a year. An equally<br />
pressing danger, though, was that its masonry wall<br />
would fail first, causing the tower to collapse on itself,<br />
as the Pavia tower had. The wall is not solid; it<br />
consists of external and internal facings of marble<br />
encasing an infill of rubble and lime mortar. The stress<br />
exerted by the weight of the building is concentrated in<br />
these foot-thick facings—and the tilt has concentrated<br />
it dangerously at one point in particular: on the south<br />
side, at the bottom of the first loggia. That also<br />
happens to be where the wall suddenly shrinks from<br />
13 feet to nine feet in thickness, and where it is<br />
hollowed by the internal stairway, which spirals around<br />
the tower inside the wall and arrives at the first loggia<br />
on the south side. In 1990 the external facing there was<br />
already badly cracked.<br />
The tower was threatened with a hernia—and the<br />
first solution, says Jamiolkowski, was “like a belt for<br />
your belly.” In 1992 the committee ordered the<br />
installation of 18 plastic-sheathed steel tendons around<br />
the first loggia and the ground story, pulled tight to<br />
hold it together. Early this year workers finally finished<br />
the rest of the committee’s wall-strengthening program,<br />
which included injecting grout into the wall to fill air<br />
pockets in the infill and inserting stainless steel bars<br />
between the inner and outer facings to tie them<br />
together.<br />
The committee also decided that they had to take<br />
some simple, temporary measures to stabilize the lean,<br />
to give themselves time to develop a long-range<br />
solution. If the north side of the foundation was rising,<br />
as Burland had found, there was an obvious option:<br />
Add a counterweight to stop it. In 1993, 600 tons of<br />
lead ingots were stacked on the north quarter of the<br />
tower, atop a concrete ring cast around the base. “For<br />
the first time in the history of the tower the tilt was<br />
stopped,” says site engineer Paolo Heiniger. By the<br />
summer of 1994 the tower had moved some 50 arc<br />
seconds north, around two thirds of an inch.<br />
The counterweight worked, but it was also very<br />
BLM 7-F<br />
ugly. Six years later the ground floor of the tower<br />
remains obscured on the north side by that 15-foot pile<br />
of lead and concrete. The committee, which includes<br />
art restoration experts alongside its engineers, started<br />
to worry about this ugliness soon after creating it. In an<br />
effort to remove the pile, they came close to bringing<br />
the tower down.<br />
By 1995 Burland had done much of the research to<br />
develop a permanent solution: soil extraction. It<br />
was not a new idea, having been suggested as early as<br />
1962 by an engineer named Fernando Terracina. At<br />
Imperial, Helen Edmunds, a student of Burland’s, had<br />
built a simple scale model of the tower on a bed of<br />
sand and sucked sand from under the model with a<br />
syringe. She found that, as long as she kept the point<br />
of the needle north of a certain line, there was no<br />
danger of the tower being inadvertently tipped into<br />
oblivion.<br />
But a large-scale field test still needed to be done,<br />
and then a test on the tower itself, and it was all taking<br />
a long time. The committee had endured funding<br />
troubles and ministerial turf squabbles and periodic<br />
lapses in its mandate; the Italian parliament had never<br />
gotten around to ratifying the decree that had created<br />
the committee in the first place. Some members began<br />
to fear that the committee would go out of business,<br />
with the lead blight still in place as their one legacy to<br />
Pisa.<br />
An idea for a new, temporary solution popped up:<br />
Why not replace the lead weights with 10 anchors<br />
buried 180 feet underground, in the firmer sand below<br />
the Pancone Clay? The anchors would hang from<br />
cables attached to yet another reinforced-concrete ring,<br />
this one hugging the foundations underneath<br />
Gherardesca’s sunken walkway. To install it would<br />
require digging under the walkway and under the<br />
shallow water table. The committee knew that digging<br />
the walkway had caused the tower to lurch back in<br />
1838, but they figured it would be safe to excavate<br />
their own trench in short sections. To avoid a<br />
groundwater escape that would flood the trench and<br />
possibly cause the tower to lurch again, they decided to<br />
freeze the ground first by injecting it with liquid<br />
nitrogen. The procedure worked on the north side of<br />
the tower. In September 1995, at the beginning of the<br />
rainy season, when the tower is at its most mobile,<br />
freezing started on the south side.<br />
“The operation,” says Heiniger, “had unexpected<br />
effects. The tower showed a tendency to move south, a<br />
tendency that developed quite suddenly.” South was<br />
the wrong direction for the tower to be going.<br />
(continued)<br />
Anti-Gravity in Pisa 3
(continued)<br />
“It was hair-raising, really,” says Burland, who<br />
rushed out of a conference in Paris to fly to Pisa. “As<br />
soon as they switched the freezing off, the tower began<br />
to move southwards at a rate of four to five arc<br />
seconds a day, which is the normal rate for a year. For<br />
three weeks we were watching the tower day and<br />
night.” Burland suspects that by freezing the<br />
groundwater under the walkway on the south side, he<br />
and his colleagues had compressed the soil<br />
underneath—water expands when it freezes—creating<br />
a gap for the tower to settle into once the freezing<br />
stopped. Ultimately, though, another 300 tons of<br />
hastily added lead halted the southward excursion, and<br />
the tower shifted only seven arc seconds.<br />
The committee now faced loud criticism. Piero<br />
Pierotti, an architectural historian at the University of<br />
Pisa, told The Guardian, a leading British newspaper,<br />
that Burland had done “incalculable damage” to the<br />
tower. “I just hope for the sake of the good people of<br />
Britain,” he added, “that he doesn’t do to your Big Ben<br />
what he has managed to do to the Leaning Tower.”<br />
James Beck, a professor of art history at Columbia<br />
University, compared the Pisa committee to the<br />
Keystone Kops—and also to Mussolini, for the<br />
committee’s supposedly authoritarian disregard of<br />
outside criticism.<br />
Meanwhile, Jamiolkowski was finding he had<br />
plenty of internal dissension to deal with. The<br />
government disbanded the committee for most of 1996,<br />
and when it was finally reconstituted with many new<br />
members, there was heated debate on how best to<br />
proceed. “To keep together a large group of university<br />
professors is quite a difficult task, especially when<br />
these university professors must make important<br />
decisions,” says Jamiolkowski. “I believe after this<br />
experience I will come to New York and open a<br />
psychoanalytic practice.”<br />
For the moment, the argument seems to be over;<br />
what the committee is doing now is working. In<br />
1998 they added one more ugly prophylactic to the<br />
tower, intended to catch it should anything go<br />
drastically wrong while soil is being extracted. Two<br />
steel cables looped round the second loggia were<br />
attached to giant anchors partially concealed behind a<br />
neighboring building. The final underexcavation<br />
program began in February. “There are no more<br />
polemics at the moment,” Pierotti says. “People have<br />
Anti-Gravity in Pisa 4<br />
BLM 7-F<br />
accepted this solution.”<br />
Forty-one drill pipes are now arrayed around the<br />
north quadrant of the tower. They enter the soil at<br />
different points along an arc about 40 feet from the<br />
tower and at an angle of 30 degrees; their tips lie about<br />
12 feet under the north edge of the foundation. Inside<br />
each eight-inch-diameter pipe is an augur, a<br />
corkscrewlike bit that traps soil between its blades and<br />
channels it to the surface. The tower then settles into<br />
the resulting yard-long cavities. Burland steers the<br />
tower, and tries to keep it on an even northward<br />
course, by deciding how much soil to remove through<br />
each pipe on any given day. As of late May, Heiniger’s<br />
crew had removed more than 10 tons of soil. The<br />
tower had rotated 513 arc seconds north, and the crew<br />
was one third of the way to its goal. There had been no<br />
ominous lurches.<br />
Every day now the workers wind the tower’s tilt<br />
clock back by months or even as much as a year. By<br />
next summer the committee hopes to restore the tower<br />
to five degrees, an angle it last saw early in the 19th<br />
century. That should buy the tower roughly two<br />
centuries of stability. Visitors are not likely to notice a<br />
half-degree decrease in tilt. The mayor of Pisa hopes to<br />
reopen the tower next year on June 17, the feast of San<br />
Ranieri, the city’s patron saint.<br />
But they are not there yet, the tower-savers.<br />
Jamiolkowski is looking forward to closing the work<br />
site, disbanding his fractious committee, enjoying<br />
life—but he balks superstitiously when you mention<br />
how well things seem to be going. Heiniger points out<br />
that the greatest threats to the tower have always come<br />
from people trying to give it a friendly nudge. “I hope<br />
it won’t happen this time,” he says. Burland, in the<br />
driver’s seat, has perhaps the most reason to carry a<br />
rabbit’s foot. Everywhere he goes these days the faxes<br />
from the control room follow him—two a day telling<br />
him how the tower has responded to the latest gentle<br />
suctioning underneath it. Every night Burland sends<br />
back the next day’s instructions, signed.<br />
“It’s kind of taxing,” he said recently, scanning the<br />
first fax of the day as he rode the elevator up to his<br />
office at Imperial. “It’s like trying to ride a bicycle by<br />
fax. It’s such a dangerous structure, and so many<br />
people have come unstuck on it. But yesterday was<br />
very good. We got the biggest north movement yet:<br />
four arc seconds in a single day.”
How We Worked Together<br />
Name: ____________________________________<br />
Date: _____________________________________<br />
Task: _____________________________________<br />
Everyone participated.<br />
We listened to each other.<br />
We encouraged each other.<br />
We took turns sharing ideas.<br />
The group stayed together.<br />
We accomplished our task.<br />
BLM 7-G<br />
Group Members:<br />
___________________________________<br />
___________________________________<br />
___________________________________<br />
Yes Sometimes No<br />
How We Worked Together: Reproduced from Grades 5 to 8 Mathematics: A Foundation for Implementation. Winnipeg, MB:<br />
Manitoba Education and Training, 1997. Appendix.
Using a Rock Classification Key<br />
To use the key, start with #1 and move through the key until you have identified the rock type: igneous,<br />
sedimentary, or metamorphic.<br />
1a. The rock is made up of distinguishable minerals. If so, go to 2a.<br />
1b. The rock is not made up of distinguishable minerals. Go to 5a.<br />
2a. The rock is made up of minerals that are interlocking. If so, go to 3a.<br />
2b. The rock is made up of minerals that are non-interlocking. Go to 6a.<br />
Grains<br />
Cement<br />
Grains<br />
Interlocking and non-interlocking minerals<br />
3a. The minerals in the sample are of the same kind. The rock is metamorphic.<br />
3b. The minerals in the sample are of two or more different types. Go to 4a.<br />
4a. The minerals in the sample are distributed in a random pattern. The rock is igneous.<br />
4b. The minerals in the sample are not distributed randomly but show a preferred arrangement, or<br />
banding. The rock is metamorphic.<br />
5a. The rock is either glassy or frothy (has small holes). The rock is igneous.<br />
5b. The rock is made up of strong, flat sheets that look as though they will split off into sheet-like pieces.<br />
The rock is metamorphic.<br />
6a. The rock is made of silt, sand, or pebbles cemented together. It may have fossils. The rock is<br />
sedimentary.<br />
6b. The rock is not made of silt, sand, or pebbles but contains a substance that fazes when dilute HCl<br />
(hydrochloric acid) is poured on it. The rock is sedimentary.<br />
BLM 7-H<br />
Using a Rock Classification Key: Reproduced from Adventures in Geology by Jack Hassard. Copyright © 1988 by Jack Hassard,<br />
Northington-Hearn Publishers; copyright © 1989 by the American Geological Institute. Reproduced by permission of the<br />
American Geological Institute.
The Rock Cycle<br />
Igneous Rock<br />
Rock begins as a molten mass of magma in the mantle of the Earth. Magma can ooze into already formed rock<br />
in the Earth’s crust and cool to create intrusive igneous rock. If there is enough pressure, or if there are cracks<br />
in the crust, the magma itself comes to the surface of the Earth. Now known as lava, it flows out of volcanoes<br />
both on land and under the sea, creating extrusive igneous rock as it cools and hardens.<br />
There are several things that could happen to igneous rock:<br />
It could be worn away in the process called weathering. Weathering breaks down the igneous rock, and<br />
sediment is created. This sediment may be transported elsewhere or it may collect layer upon layer<br />
(sedimentation). As the layers build up, their combined weight compresses the sediments, and sedimentary<br />
rock is formed. In many forms of sedimentary rock, layers may be seen, particles may be separated easily,<br />
or fossils (shells or bones of long-dead organisms) may be preserved.<br />
Besides being worn down and changed into sedimentary rock, igneous rock can be pushed lower and closer<br />
to the hotter mantle region of the Earth. Pressure and high heat can change igneous rock into metamorphic<br />
rock. Metamorphic rock can find its way back to the surface of the Earth by the movement of lower or<br />
neighbouring rock or by the weathering of the rock above. If igneous rock is pushed so low that it joins the<br />
hot mantle, it will become magma and eventually create new igneous rock.<br />
Sedimentary Rock<br />
Sedimentary rock can result from the wearing away of igneous rock. Sediment that forms sedimentary rock<br />
can also come from the breaking down of pre-existing sedimentary or metamorphic rock. Just as weathering<br />
can occur in igneous rock, so wind, water, ice, gravity, other rocks, and animals can break down sedimentary<br />
and metamorphic rock.<br />
Sedimentary rock, in turn, could become metamorphic rock if enough heat and pressure were applied to it. It<br />
could even find itself turning back into igneous rock if it were forced back toward the Earth’s mantle and<br />
allowed to melt. It may eventually return closer to the Earth’s crust and become igneous rock.<br />
Metamorphic Rock<br />
Metamorphic rock could weather and provide sediment to create sedimentary rock or, if enough force were<br />
applied, metamorphic rock could be transformed into magma in the Earth’s mantle.<br />
Summary<br />
All rock starts off as magma and hardens into igneous rock. Sedimentary rock is made as a result of the<br />
weathering of igneous and metamorphic rock. High heat and pressure applied to sedimentary or igneous rock<br />
can change them into metamorphic rock. These three types of rock continue to change from one form to<br />
another and back again. This process of change is called the rock cycle.<br />
Create and Label Diagrams<br />
Draw and label three diagrams to illustrate changes that can happen to igneous rock, sedimentary rock,<br />
and metamorphic rock.<br />
BLM 7-I
Word Splash: The Rock Cycle<br />
mantle<br />
process of change<br />
breaks down<br />
compresses<br />
hotter<br />
lava<br />
volcanoes<br />
pressure and<br />
heat<br />
metamorphic<br />
fossils<br />
layer upon layer<br />
sedimentary<br />
sedimentation<br />
weathering<br />
magma<br />
igneous<br />
extrusive<br />
BLM 7-J
Soils in Manitoba<br />
Like water, soil is a valuable resource for many forms of life. Green plants derive their energy from<br />
sunlight. Water, gases, and mineral nutrients are absorbed by plant organs and are incorporated into plant<br />
bodies. Plants that are consumed by animals or humans are eventually converted into animal tissue.<br />
Decomposition of plant and animal bodies and their waste products in soil allows matter to be used again<br />
and again by living organisms. In this way, soil serves as an important link between the living and nonliving<br />
worlds.<br />
Soils are made up of different compounds. Rocks are eroded by rain or wind and are broken down by<br />
physical or chemical processes to form tiny mineral particles. The sizes of the mineral particles are<br />
important in determining the characteristics and classifications of soils.<br />
BLM 7-K<br />
Clays have the finest particles, the largest total air space, and the ability to soak up and hold much<br />
water.<br />
Sands and gravels have the largest particles and large pores, but less total air space. They hold little<br />
water and allow water to pass through easily.<br />
Loams have particles of intermediate size and space. They have the ability to hold water more<br />
easily than sands and gravels.<br />
Irregular spaces between the mineral particles allow atmospheric gases, water, and water vapour to enter<br />
the soils. Atmospheric gases include oxygen, carbon dioxide, and nitrogen.<br />
The decaying organic matter within the soil is added over many thousands of years. This organic matter<br />
provides many nutrients for plants and is responsible for aerating and loosening soil and helping with<br />
water absorption.<br />
Also present in “dirt” are millions of living organisms. Bacteria, fungi, protozoans, and larger organisms<br />
are instrumental in determining the characteristics of soils.<br />
Soil Zones<br />
A soil zone is an area of relatively uniform soil colour and composition. In Manitoba, provincial soil maps<br />
generally identify from three to five soil zones. The soil zones shown on the Soil Zones of Manitoba map<br />
on the following page include<br />
bog and subarctic<br />
peat and podzolic<br />
lime-rich forest (grey)<br />
grey brown<br />
black soils<br />
Brown soil zones are found in warmer and drier regions that may experience drought. Lack of moisture is<br />
usually the main factor limiting crop production. This short grass prairie soil zone has less organic matter<br />
than black soils. It has lower than average provincial yields and a higher chance of crop failure.<br />
Black soil zones are much more favourable to good crop production. They are found in areas with slightly<br />
cooler temperatures and more effective moisture levels. This tall grass and parkland prairie soil zone has<br />
more organic matter than brown or grey soil zones.<br />
(continued)<br />
Soils in Manitoba: Reproduced from Senior 3 Agriculture: A Full Course for Distance Education Delivery, Field Validation<br />
Version. Winnipeg, MB: Manitoba Education and Training, 1999. pp. 17, 86-90.
(continued)<br />
Grey soil zones experience less decomposition of plant matter. This soil type is located farther north, where<br />
cooler temperatures result in increased soil moisture. These higher moisture levels leach minerals and<br />
nutrients out of the upper layers at a faster rate. As a result, the grey topsoils tend to be more shallow and less<br />
fertile than black or brown soils.<br />
Climate and vegetation play major roles in soil formation. The boundaries of the soil zones are similar to the<br />
boundaries for climatic and vegetation belts. All have significant effects on the farming operations of their<br />
areas. About 12 percent of Manitoba’s land area is considered to have soils suitable for agriculture. Compare<br />
the following three maps: Soil Zones of Manitoba, Climatic Regions in Manitoba, and Natural Vegetation in<br />
Manitoba. Notice the similarities.<br />
Soil Zones of Manitoba<br />
Legend<br />
1 Bog and subarctic<br />
2 Peat and podzolic<br />
3 Lime-rich forest (grey)<br />
4 Grey brown<br />
5 Black<br />
BLM 7-K<br />
(continued)
(continued)<br />
Climatic Regions in Manitoba<br />
Legend<br />
1 Arctic<br />
2 Sub-arctic<br />
3 Sub-humid<br />
4 Semi-arid<br />
BLM 7-K<br />
(continued)
(continued)<br />
Natural Vegetation in Manitoba<br />
Legend<br />
1 Tundra<br />
2 Taiga<br />
3 Mixed forests<br />
4 Aspen parkland<br />
5 Tall grass<br />
6 Mixed grass<br />
BLM 7-K
Soil Erosion<br />
Erosion is a naturally occurring process that can be either escalated or diminished by agricultural<br />
practices. With the disappearance of natural grass cover and the reduction of anchoring material in<br />
cultivated topsoil, erosion occurs. Drought conditions and an overextension or expansion of cultivation<br />
into regions of light soils resulted in tremendous losses of topsoil to winds in the 1930s.<br />
The loss of mineral particles and organic matter to wind erosion continues today. Dry, windy conditions<br />
are common to many areas at spring seeding time and clouds of dust can still be seen in certain areas.<br />
Treatments to replace topsoil include the use of fertilizer, manure, and irrigation. Some Alberta studies<br />
have shown improved yields through these practices. However, those yields were still not as good as<br />
those in test plots where natural topsoil remained.<br />
Water erosion occurs frequently. On sloping land, rill erosion of tiny channels that are several<br />
centimetres deep can eventually lead to gulley erosion characterized by deep-cut channels that can be<br />
measured in metres.<br />
On bottomlands, especially along rivers, sheet erosion can take place in times of high water. When<br />
water covers large areas of relatively flat land, it will dissolve matter from the upper soil layers and<br />
carry it away when the land finally drains.<br />
Solving Soil Problems<br />
Problems created by water erosion and wind erosion can be reduced by specific soil management<br />
techniques that are in keeping with the principles of sustainable development.<br />
Water erosion has been reduced by<br />
hillsides or slopes that are contour-cultivated or worked across the slope to create furrows, ridges,<br />
or plant strips that oppose the downward movement of water<br />
gullies or pathways for water movement that have been shaped and seeded to grasses or grasslegume<br />
mixtures<br />
areas of frequently submerged lowlands that have been grass-seeded to prevent sheet erosion<br />
crops (such as rye or winter wheat) seeded in the fall as crop cover to prevent spring water erosion<br />
Wind erosion has been reduced by<br />
shelter belts around farmyards, around fields, or along roadsides that reduce wind speed<br />
tillage and seeding equipment (cultivators) that leaves straw stubble upright to hold soil in place<br />
maintaining a trash cover on the soil surface to keep the soil moist for a longer period, reducing the<br />
amount of loose, dry soil available to the wind<br />
swathing so that alternate strips are at different heights<br />
planting fall cover crops (winter wheat or rye) in areas of light, sandy soil that are prone to wind<br />
erosion<br />
planting perennial grass or legumes (for animal forage or grazing lands)<br />
BLM 7-L<br />
(continued)<br />
Soil Erosion: Reproduced from Senior 3 Agriculture: A Full Course for Distance Education Delivery, Field Validation Version.<br />
Winnipeg, MB: Manitoba Education and Training, 1999. pp. 17, 60, 64, 65, 73.
(continued)<br />
Organic Matter: Did You Know?<br />
It is estimated that it has taken anywhere from 200 to 1 000 years for organic matter to form. This is<br />
why the loss of several centimetres of topsoil to wind or water erosion is considered serious.<br />
BLM 7-L<br />
Trends in Sustainable Agriculture<br />
Some soil management practices that have been in use for many years are still being used today. Others<br />
are being modified, and still others are being abandoned. Decisions to adapt to new methods are<br />
influenced by the following factors:<br />
costs of new method<br />
availability of specialized equipment<br />
time involved<br />
availability of information<br />
size of farming operation<br />
type of farming operation<br />
values and beliefs<br />
Conclusion<br />
Producing, purchasing, and eating foods are all actions that directly relate to agriculture and ultimately<br />
relate to soils. Therefore, either directly or indirectly, your actions have effects on soil management. In the<br />
past, not much attention was paid to the way soil was handled as a resource. Land deterioration often went<br />
unnoticed because the process was slow and fairly widespread. Problems that were recognized received<br />
minimal attention. Even though most management practices that led to soil degradation were directly<br />
carried out by agricultural producers, the responsibility for good soil conservation techniques lies with us<br />
all—from the home gardener to the crop producer. Sustainable agriculture is more frequently becoming<br />
standard practice, and is supported by increased research, knowledge, and public awareness.
Constructing a Prototype: Observation Checklist<br />
BLM 7-M<br />
Date: ________________________________ Problem/Challenge: _______________________________<br />
A group of students can be selected as a focus for observation on a given day, and/or one or more of the<br />
observational areas can be selected as a focus. The emphasis should be on gathering cumulative<br />
information over a period of time.<br />
1.<br />
2.<br />
3.<br />
4.<br />
5.<br />
6.<br />
7.<br />
8.<br />
9.<br />
10.<br />
11.<br />
12.<br />
13.<br />
14.<br />
15.<br />
16.<br />
Names<br />
Has Safe<br />
Work Habits<br />
(ensures<br />
personal safety<br />
and safety of<br />
others)<br />
Works with<br />
Group<br />
Members to<br />
Carry Out<br />
Plan<br />
Participates<br />
in Analysis<br />
and<br />
Modification<br />
of Prototype<br />
Shows<br />
Evidence of<br />
Perseverance<br />
and/or<br />
Confidence<br />
Comments<br />
(continued)
Constructing a Prototype: Observation Checklist (continued)<br />
17.<br />
18.<br />
19.<br />
20.<br />
21.<br />
22.<br />
23.<br />
24.<br />
25.<br />
26.<br />
27.<br />
28.<br />
29.<br />
30.<br />
31.<br />
32.<br />
33.<br />
Notes:<br />
Names<br />
Has Safe<br />
Work Habits<br />
(ensures<br />
personal safety<br />
and safety of<br />
others)<br />
Works with<br />
Group<br />
Members to<br />
Carry Out<br />
Plan<br />
Participates<br />
in Analysis<br />
and<br />
Modification<br />
of Prototype<br />
Shows<br />
Evidence of<br />
Perseverance<br />
and/or<br />
Confidence<br />
Comments<br />
BLM 7-M
Design Project Report<br />
BLM 7-N<br />
Name: ____________________________________ Date: ___________________________________<br />
Problem/Design Challenge:<br />
Criteria:<br />
Brainstorming (What are all the different ways . . .):<br />
Planning:<br />
Steps to Follow: Materials:<br />
Safety Considerations:<br />
(continued)
Design Project Report (continued)<br />
Testing:<br />
Criteria Test Used<br />
Test Results: Attach Data Summary<br />
Evaluating and Improving:<br />
Justification of changes to original design:<br />
Strengths and weaknesses of final design:<br />
Comment/Reflection (Next time . . . , A New Problem . . . .):<br />
BLM 7-N<br />
(continued)
Design Project Report (continued)<br />
Prototype Sketch 1 (Plan):<br />
Prototype Sketch 2 (Final):<br />
BLM 7-N
Design Project Report: Assessment<br />
BLM 7-O<br />
Prototype: ___________________________________ Date: ___________________________________<br />
Team Members: ________________________________________________________________________<br />
Criteria<br />
Identifying the Practical Problem and Criteria for Success<br />
the problem is clearly stated<br />
class and/or group criteria are identified<br />
criteria address all or some of the following: function,<br />
aesthetics, environmental considerations, cost, efficiency<br />
Planning<br />
all steps are included and clearly described in a logical<br />
sequence<br />
all required materials/tools are identified<br />
safety considerations are addressed<br />
a three-dimensional sketch of the prototype is included<br />
(Sketch 1)<br />
Testing the Prototype<br />
tests are described and align with criteria (e.g., each criterion<br />
has been tested)<br />
test results are presented in an appropriate format (data sheet<br />
is attached)<br />
Evaluating and Improving the Design<br />
a final sketch of the prototype is included (Sketch 2)<br />
changes to the original plan are justified<br />
strengths and weaknesses of the final prototype are presented<br />
suggestions for “next time” are included and/or “new<br />
problems” are identified<br />
Comments:<br />
Total Points<br />
Possible<br />
Points*<br />
Self-<br />
Assessment<br />
Teacher<br />
Assessment<br />
*Note: The teacher and/or the class assigns possible points to reflect the particular emphasis/es of the<br />
project.
Conducting a Fair Test: Observation Checklist<br />
BLM 7-P<br />
Date: ___________________________________ Experiment: _________________________________<br />
A group of students can be selected as a focus for observation on a given day, and/or one or more of the<br />
observational areas can be selected as a focus. The emphasis should be on gathering cumulative<br />
information over a period of time.<br />
1.<br />
2.<br />
3.<br />
4.<br />
5.<br />
6.<br />
7.<br />
8.<br />
9.<br />
10.<br />
11.<br />
12.<br />
13.<br />
14.<br />
15.<br />
16.<br />
Names<br />
Has Safe<br />
Work Habits<br />
(workspace,<br />
handling<br />
equipment,<br />
goggles,<br />
disposal)<br />
Ensures<br />
Accuracy/<br />
Reliability<br />
(e.g., repeats<br />
measurements/<br />
experiments)<br />
Works with<br />
Group<br />
Members to<br />
Carry Out<br />
Plan<br />
Shows<br />
Evidence of<br />
Perseverance<br />
and/or<br />
Confidence<br />
Comments<br />
(continued)
Conducting a Fair Test: Observation Checklist) (continued)<br />
17.<br />
18.<br />
19.<br />
20.<br />
21.<br />
22.<br />
23.<br />
24.<br />
25.<br />
26.<br />
27.<br />
28.<br />
29.<br />
30.<br />
31.<br />
32.<br />
33.<br />
Notes:<br />
Names<br />
Has Safe<br />
Work Habits<br />
(workspace,<br />
handling<br />
equipment,<br />
goggles,<br />
disposal)<br />
Ensures<br />
Accuracy/<br />
Reliability<br />
(e.g., repeats<br />
measurements/<br />
experiments)<br />
Works with<br />
Group<br />
Members to<br />
Carry Out<br />
Plan<br />
Shows<br />
Evidence of<br />
Perseverance<br />
and/or<br />
Confidence<br />
Comments<br />
BLM 7-P
Experiment Report<br />
BLM 7-Q<br />
Name: ____________________________________ Date: ___________________________________<br />
Experiment: ___________________________________________________________________________<br />
Testable Question:<br />
Independent Variable:<br />
Dependent Variable:<br />
Prediction/Hypothesis: (Identify a cause and effect relationship between independent and dependent<br />
variables.)<br />
Planning for a Fair Test<br />
Apparatus/Materials:<br />
Variables to Control:<br />
Method: (Include steps to follow, safety considerations, and plan for disposal of wastes.)<br />
(continued)
Experiment Report (continued)<br />
Observation: (Include data tables/charts on a separate sheet, if required.)<br />
Analysis of Data: (Identify patterns and discrepancies.)<br />
Note: Attach graph on a separate page, if required.<br />
BLM 7-Q<br />
(continued)
Experiment Report (continued)<br />
Strengths and Weaknesses of Approach/Potential Sources of Error:<br />
Conclusion: (Support or reject prediction/hypothesis; pose new question(s).)<br />
Applications/Implications: (Link to daily life or area of study.)<br />
BLM 7-Q
Experiment Report: Assessment<br />
BLM 7-R<br />
Experiment Title: _________________________________ Date ______________________________<br />
Team Members: ________________________________________________________________________<br />
Criteria<br />
Creating a Testable Question<br />
the question is testable and focused (includes a cause and<br />
effect relationship)<br />
Making a Prediction/Hypothesis<br />
independent and dependent variables are identified<br />
the prediction/hypothesis clearly identifies a cause and effect<br />
relationship between independent and dependent variables<br />
Planning for a Fair Test<br />
required apparatus/materials are identified<br />
major variables to be controlled are identified<br />
steps to be followed are included and clearly described<br />
safety considerations are addressed<br />
a plan for disposing of wastes is included<br />
Conducting a Fair Test/Making and Recording<br />
Observations<br />
evidence of repeated trials is provided<br />
detailed data are recorded, appropriate units are used<br />
data are recorded in a clear/well-structured/appropriate<br />
format<br />
Analyzing and Interpreting<br />
graphs are included (where appropriate)<br />
patterns/trends/discrepancies are identified<br />
strengths and weaknesses of approach and potential sources<br />
of error are identified<br />
changes to the original plan are identified and justified<br />
Drawing a Conclusion<br />
cause and effect relationship between dependent and<br />
independent variables are explained<br />
alternative explanations are identified<br />
prediction/hypothesis is supported or rejected<br />
Making Connections<br />
potential applications to or implications for daily life are<br />
identified and/or links to area of study are made<br />
Total Points<br />
Possible<br />
Points*<br />
Self-<br />
Assessment<br />
Teacher<br />
Assessment<br />
*Note: The teacher and/or the class assigns possible points to reflect the particular emphasis/es of the<br />
project.


