The Instructor - Chess Cafe
The Instructor - Chess Cafe
The Instructor - Chess Cafe

Create successful ePaper yourself
Turn your PDF publications into a flip-book with our unique Google optimized e-Paper software.
<strong>The</strong><br />
<strong>Instructor</strong><br />
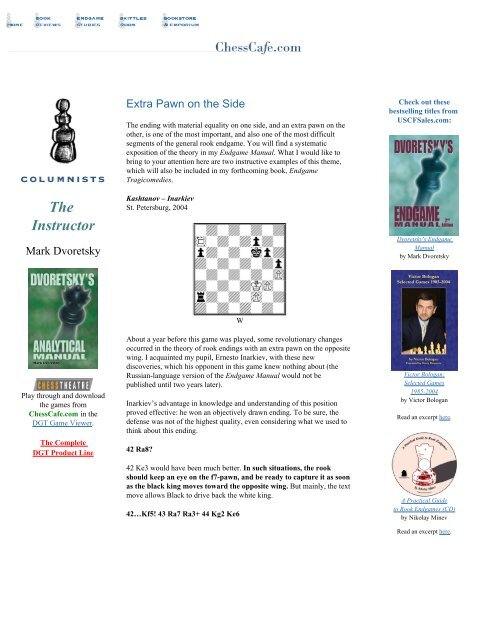
Mark Dvoretsky<br />
Play through and download<br />
the games from<br />
<strong>Chess</strong><strong>Cafe</strong>.com in the<br />
DGT Game Viewer.<br />
<strong>The</strong> Complete<br />
DGT Product Line<br />
Extra Pawn on the Side<br />
<strong>The</strong> ending with material equality on one side, and an extra pawn on the<br />
other, is one of the most important, and also one of the most difficult<br />
segments of the general rook endgame. You will find a systematic<br />
exposition of the theory in my Endgame Manual. What I would like to<br />
bring to your attention here are two instructive examples of this theme,<br />
which will also be included in my forthcoming book, Endgame<br />
Tragicomedies.<br />
Kashtanov – Inarkiev<br />
St. Petersburg, 2004<br />
W<br />
About a year before this game was played, some revolutionary changes<br />
occurred in the theory of rook endings with an extra pawn on the opposite<br />
wing. I acquainted my pupil, Ernesto Inarkiev, with these new<br />
discoveries, which his opponent in this game knew nothing about (the<br />
Russian-language version of the Endgame Manual would not be<br />
published until two years later).<br />
Inarkiev’s advantage in knowledge and understanding of this position<br />
proved effective: he won an objectively drawn ending. To be sure, the<br />
defense was not of the highest quality, even considering what we used to<br />
think about this ending.<br />
42 Ra8?<br />
42 Ke3 would have been much better. In such situations, the rook<br />
should keep an eye on the f7-pawn, and be ready to capture it as soon<br />
as the black king moves toward the opposite wing. But mainly, the text<br />
move allows Black to drive back the white king.<br />
42…Kf5! 43 Ra7 Ra3+ 44 Kg2 Ke6<br />
Check out these<br />
bestselling titles from<br />
USCFSales.com:<br />
Dvoretsky's Endgame<br />
Manual<br />
by Mark Dvoretsky<br />
Victor Bologan:<br />
Selected Games<br />
1985-2004<br />
by Victor Bologan<br />
Read an excerpt here.<br />
A Practical Guide<br />
to Rook Endgames (CD)<br />
by Nikolay Minev<br />
Read an excerpt here.
45 Ra8?<br />
W?<br />
White will eventually have to advance his kingside pawns, and every<br />
tempo could prove decisive. This is why it makes sense to start active<br />
operations there as soon as possible. <strong>The</strong> standard plan in such positions<br />
would be 45 f3!, followed by 46 g4.<br />
45…a5 46 Ra7!<br />
<strong>The</strong> obvious 46 Ra6+? Kd5 leads to a position from the game Akopian –<br />
Kir. Georgiev, Las Vegas Wch 1999, with colors reversed (Diagram 9-<br />
166 in the Endgame Manual). <strong>The</strong> complicated analysis given in the book<br />
shows that White’s counterplay comes too late, so his position is lost.<br />
46…a4 47 Ra5?<br />
How many times can White make the same double blunder? Again, he<br />
takes his rook off the seventh rank, and postpones his kingside<br />
counterplay. After 47 f3!, it appears that the position would still have<br />
been drawn.<br />
47…Ra2?!<br />
<strong>The</strong> advance of the black king, sacrificing the f7-pawn, is very<br />
dangerous for White, either with the rook on a3 and White’s king on<br />
g2 (as in the above-cited endgame Akopian – Georgiev), or with the<br />
rook on a2 and the pawn on a3. Ernesto decided to play the second of<br />
these lines. Objectively speaking, 47…Kd6! was stronger, and should<br />
have won.<br />
48 Kf3 a3<br />
49 Ra7?<br />
W?<br />
<strong>The</strong> concluding error, although a most excusable one. According to prior<br />
theory, the text move assures White an easy draw. Only recently was it<br />
discovered that White’s only chance to save himself is 49 g4!!. You may<br />
find out all the rest in the detailed analysis of the Kantorovich/Steckner<br />
position from my Endgame Manual (Diagram 9-144).<br />
49…Kd5! 50 Ke3
<strong>The</strong> main line is 50 Rxf7 Rc2 51 Ra7 a2 52 Kf4<br />
<strong>The</strong> Swiss player Johannes Steckner discovered that after 52…Kc5!!,<br />
Black wins by a single tempo. For example, 53 Kg5 Kb6! 54 Ra3 Rc5+<br />
55 Kxg6 Ra5 56 Rxa2 Rxa2 57 Kxh5 Kc6!-+.<br />
B?<br />
50…Kc4 51 Rxf7 Rc2 52 Rc7+ Kb3 53 Rb7+ Kc3 54 Ra7 a2 55 f3 Kb3<br />
56 Rb7+ Ka3 57 Ra7+ Kb2 58 Rb7+ Kc1 59 Ra7 Kb1 0-1<br />
Sometimes, the stronger side is able to place his rook on the same<br />
rank as his passed pawn, in order to defend both it and his pawns on<br />
the other wing. Such a setup is exceptionally dangerous for the<br />
defender, since the king is then free to jump over and support its<br />
passed pawn.<br />
Let’s examine an instructive endgame, badly played by Adrian<br />
Mikhalchishin, and poorly annotated by him in his book, Modern<br />
Endgame Practice. Some considerably deeper and more accurate notes<br />
were given by Boris Gelfand (first in Informant #80, and later in his book,<br />
My Most Memorable Games) – I shall rely on these.<br />
Gelfand – Mikhalchishin<br />
Istanbul Ol 2000<br />
B<br />
White’s rook cannot guarantee the protection of his kingside pawns, so<br />
one might suppose that the position is drawn. <strong>The</strong> guiding principle in<br />
defending such situations is generate counterplay on the kingside<br />
after White’s king has gone to the queenside. Well, such general advice<br />
is easily given. It is much harder to choose the only correct concrete way<br />
to do it. Let’s examine the different possibilities.<br />
A) 54…Kh7?! <strong>The</strong> passive defence I rejected – White will sacrifice the g4<br />
pawn to control the a-pawn with his king. It is too late for Black’s<br />
counterplay …g7-g6 (Mikhalchishin).<br />
This note makes no sense: he does not explain under exactly what<br />
circumstances White would be justified in sacrificing the g4-pawn for<br />
nothing (when in fact, it should not be given up at all). Since<br />
Mikhalchishin’s “analysis” stops here, while Gelfand did not examine<br />
moving his king to h7, I had to study it for myself. <strong>The</strong> results were pretty<br />
interesting.
55 Ke3? Rxg4 56 a6 (56 Kd3 Ra4 57 Kc3 g6 =) 56…Ra4 57 Rb6 Ra5 =,<br />
or 55 g5? hg 56 Rxg5 Kh6 57 Kc5 g6 are useless.<br />
It is more logical for White to play for zugzwang: 55 Rc5!. Now 55…g6<br />
leads to a position that we will examine later on (cf. 54…g6?!). Here we<br />
shall test a continuation of Black’s waiting tactics by 55…Kg8, and the<br />
move 55…g5.<br />
A1) 55…g5 56 Rc7+ Kg8 57 Ra7<br />
Black cannot just jog in place: White would continue 58 a6, and send his<br />
king after the a-pawn. 57…Rf4+ 58 Kg3 Re4 might look tempting, with<br />
the idea 59 a6? Re6! 60 Kf3 Kh8, when Black has a guaranteed draw,<br />
because his rook simultaneously locks White’s king up on the kingside,<br />
while tying White’s rook to the pawn’s defense. However, White has the<br />
winning 59 Ra6!, allowing the rook to get off the a-file and move the<br />
pawn up to a6. For example, 59…Kh7 60 Rb6 Ra4 61 a6 Kg7 62 Rb7+<br />
Kf6 63 Rh7 Ra3+ 64 Kf2 Ke5 65 Rxh6+-.<br />
B<br />
We must also check 57…Kf8 58 a6 Ke8 59 Ke3 (59 Ra8+ Kf7 60 Ke3<br />
Kg7 = would be premature – with his next move, Black intends to snap<br />
off the g4-pawn) 59…Kd8 60 Ra8+! Kc7 (60…Ke7 61 a7 Kf7 62 Rh8+-).<br />
W?<br />
After Black’s king moves to the queenside, White should plan on<br />
securing the g4-pawn with his king. 61 Kf3! wins; for example, 61…Rf4<br />
+ 62 Kg3 Rf6 63 a7 Kb7 64 Rg8 Kxa7 65 Rg6+-.<br />
An instructive draw occurs after the mistaken 61 Kd3? Rxg4 62 Rh8 Kb6<br />
63 Rxh6+ Ka7.
W<br />
After 64 Rg6 Rh4 65 h6 (65 Rxg5 Kxa6 =) 65…Ka8, the white king,<br />
permanently cut off on the fourth rank, cannot get close to its pawns; and<br />
without its help, they can never queen.<br />
But if White leaves the rook at h6, then a position of mutual zugzwang<br />
inevitably arises, with the rook on h4 and the king on g3, and White<br />
cannot obtain this position with Black to move. For example, 64 Ke3 Rh4<br />
65 Kf3 Rf4+ 66 Kg2 Rg4+! (but not 66…Rh4? 67 Kg3+- zugzwang) 67<br />
Kh3 Rf4 68 Kg3 Rh4 = zugzwang.<br />
A2) 55…Kg8<br />
W?<br />
Once again, the pawn sacrifice does not work: 56 Ke3? Rxg4 57 a6 Ra4<br />
58 Rc6 Kf7 59 Kd3 Ke7 60 Kc3 Kd7 61 Rg6 Kc8 62 Kb3 Ra5, and<br />
draws. <strong>The</strong>refore, White continues 56 Rc8+!.<br />
After 56…Kh7 57 Ra8, the attempt to attack the a-pawn from the flank by<br />
57…Rc4 58 a6 Rc6 (generally speaking, this is a typical method of<br />
defense against a rook pawn) fails to achieve its aim, in view of the rook’s<br />
inability to operate freely on the f-file (without the important square f5);<br />
and on the e-file, it is too close to the pawn.<br />
Here’s a sample variation: 59 Ke4 Rb6 60 Kd5 Rf6 61 Kc5 (threatening<br />
62 Kb5) 61…Re6 62 Kb5 Re5+ 63 Kc6 Re6+ 64 Kc7+-.<br />
W<br />
And if 56…Kf7, then 57 Ra8? Kf6 58 Ra6+ Kf7 = no longer works.<br />
White plays 57 Rc7+! Kf6 (57…Kg8 58 Ra7) 58 Rc6+ instead, with 59<br />
a6 to follow, reaching the same winning position as in the game. We shall<br />
analyze that later on.<br />
B) At first, Gelfand thought that Black could draw by playing 54…g6?!;<br />
but while preparing his book for publication, he found the winning<br />
method for White.
W?<br />
55 hg? Kg7 56 Kg3 Kxg6 57 Kh4 Ra1 58 Rb6+ Kg7 59 Ra6 Rh1+ 60<br />
Kg3 h5 = is not a problem.<br />
After 55 Ke3?! gh (but not 55…Rxg4? 56 Rb8+ Kg7 57 Rb7+ Kf6 58 Rb6<br />
+ Ke5 59 Rxg6+-) 56 gh Kf7 57 Kd3 Ke6 58 Kc3 (58 Rb6+ Kf5) 58…<br />
Kd6 59 Kb3 Ra1, the a-pawn is no longer a threat: White will have to<br />
trade it for the pawn at h6. <strong>The</strong> game might continue as follows: 60 Kb4<br />
(60 Rb6+ Kc5 61 Ra6 Kb5 62 Rxh6 Rxa5 63 Rh8 Kb6 64 h6 Kb7 65 Kc4<br />
Ra6 = changes nothing) 60…Rb1+ 61 Kc4 Rc1+ (but not 61…Ra1? 62<br />
Rb6+ Kc7 63 Kb5+-) 62 Kd4 Ra1 63 Rb6+ Kc7 64 Rxh6 Rxa5 65 Rh8<br />
Kb7 66 h6 Ra6 =.<br />
On the board, we have the so-called “Vancura Position,” which every<br />
chessplayer will find useful to include in his briefcase of endgame<br />
knowledge. <strong>The</strong> rook attacks the pawn from the side, keeping the<br />
opposing rook tied to the h-file, and checking the king away from the<br />
pawn when it goes to the kingside.<br />
55 Rb8+! Kg7 56 Rb7+ is considerably stronger. <strong>The</strong> king cannot move<br />
forward and remain cut off on the eighth rank. Let us examine 56…Kg8<br />
57 Ra7 gh 58 gh Kf8 59 a6 Ke8.<br />
W<br />
W?<br />
As in the similar situation from the 54…Kg8 variation (where the pawns<br />
at g4 and g5 were still on the board), the major subtlety of the position is<br />
that White must give check with the rook at a8 at exactly the right<br />
moment – not to early, nor too late.<br />
B1) <strong>The</strong> immediate 60 Ra8+? leads to a draw: 60…Kf7 61 Ke3 Kg7!<br />
(just not 61…Kf6? 62 Rg8!+-) 62 Kd3 Ra5 63 Kc4 Rxh5 64 Kb4 (64 Rc8
Ra5 65 Rc6 h5 66 Kb4 Ra1 67 Kb5 h4 =) 64…Rh1 65 Rc8 Ra1 66 Kb5<br />
66…Rb1+!<br />
B?<br />
A standard technique: to avoid interference, the king is checked into a less<br />
favorable position. 66…h5? loses to 67 Rc5! Kg6 68 Kb6.<br />
67 Kc6 Ra1 68 Kb7 Rb1+ 69 Ka8 Kg6 =<br />
B2) 60 Ke3 Kd8<br />
Waiting tactics do not make much sense here: 60…Kf8 61 Kd3 Ke8, and<br />
White does not play 62 Kc3 Kd8 63 Kb3 Ra1 64 Kc4 Kc8 65 Ra8+ Kc7<br />
66 a7 Kb7 =, but 62 Ra8+!. Wherever the king goes, White wins easily:<br />
62…Kf7 63 Kc3 Kg7 64 Kb3 Ra1 65 Kb4+-, or 62…Kd7 63 a7 Kc7 64<br />
Rh8 Rxa7 65 Rh7+ Kb6 66 Rxa7 Kxa7 67 Ke4+-.<br />
W?<br />
<strong>The</strong> rook check must be given now, since 61 Kd3? Kc8 62 Kc3 Ra5 leads<br />
only to a draw. As in the analogous situation from the 54…Kh7 variation,<br />
after the black king arrives on the queen’s wing, White changes his plan,<br />
and sends his own king after the pawns on the opposite side.<br />
61 Ra8+! Kc7 (61…Ke7 62 a7 Kf7 63 Rh8) 62 Kf3! Ra5 (62…Rh4 63<br />
Rh8 Kb6 64 Rxh6+; 62…Kb6 63 Rh8 Kxa6 64 Ra8+) 63 Kg4 Rg5+ 64<br />
Kh4 Ra5 65 a7 Kb7 66 Rh8 Ra4+ 67 Kg3 Kxa7 68 Rxh6 Ra5 (68…Kb7<br />
69 Rg6+-)<br />
W<br />
If the black rook were on c5, we would have the drawn Vancura position.<br />
We would inevitably arrive at the same situation, if the white king stood a
little farther away from the pawn. But here, it stands ready to support the<br />
pawn, and it cannot be driven away by checks, since the black king<br />
interferes with its own rook. Here’s a sample line: 69 Rh7+ Ka8 70 Kg4<br />
(70 h6?? Ra6! 71 Kg4 Rc6 =) 70…Ra4+ 71 Kg5 Ra5+ 72 Kg6 Ra6+ 73<br />
Kf7 Ra7+ 74 Kg8 Ra5 75 h6 Ra6 76 Rh8! Ra7 (White threatened 77 Kg7,<br />
discovered check) 77 Kf8+-, as 78 Rg8 is coming next.<br />
For a full picture, recall that at the very beginning of this variation, the<br />
black king could have immediately gone over to the queenside: 56…Kf8<br />
(instead of 56…Kg8) 57 Ra7 gh 58 gh Ke8 59 a6 Kd8. But this would<br />
have changed little: 60 Ra8+ Kc7 61 a7 (61 Kg3? would be a mistake:<br />
61…Ra5 62 a7 Kb7 63 Rh8 Kxa7 64 Rxh6 Rc5 – this is the Vancura<br />
position) 61…Kb7 62 Rh8 Kxa7 63 Rxh6<br />
B<br />
We already know what happens after 63…Ra5 64 Rh7+ and 65 Kg4. And<br />
63…Kb7 should be answered, not by 64 Rg6? Rh4 65 h6 Kc7 66 Kg3<br />
Rh1 =, nor by 64 Rh8? Rc4! =, intending 65…Rc5, but by 64 Rh7+! Kc6<br />
(64…Kb8 65 Kg3 Ra5 66 Kg4+-) 65 h6 Rh4 (Black can no longer attack<br />
the pawn from the side; and the rook behind the pawn is known to be lost<br />
for Black) 66 Rh8+-.<br />
C) Mikhalchishin rightly considers 54…g5! to be the correct move here.<br />
He examined the variation 55 Rb6 (55 Rb8+ Kf7 56 Ra8 Kf6 57 a6 Kg7<br />
=, or 56 Rb7+ Kf6 57 Rb6+ Ke5 58 a6 Ra3+ 59 Ke2 Kf4 60 Rxh6 Kxg4<br />
61 Kd2 Kh4 = Gelfand) 55…Rxa5 56 Rxh6 Kf7 57 Rd6.<br />
B<br />
It seemed to me that after a subsequent march of the king and the move<br />
Rd6-d5, the endgame could not be held, but I did not notice that Black<br />
keeps the rook on e5 and makes a draw – this also shows poor knowledge<br />
of a theoretical position (Mikhalchishin). Well, let’s just say that “poor<br />
knowledge of theoretical positions” does not mean much here, since the<br />
position is not a theoretical one. What we should be talking about here is<br />
a theoretical technique – cutting off the king. In fact, 57…Re5! gives<br />
Black an uncomplicated draw: 58 Rg6 Ke7 59 h6 Kf7 60 h7 (60 Rg7+<br />
Kf6) 60…Re8 61 Rxg5 Rh8 62 Rh5 Kg7 63 Kf4 Rf8+, and White cannot<br />
make progress.<br />
On the other hand, it is not clear how he was going to win after 57…Ke7<br />
58 Rd4 Kf6 (59 Ke4 is met by 59…Re5+), either.<br />
As you may see, the only correct path turned out not to be so complex,
after all. Now, the refutation of the alternative possibilities required a<br />
great deal of hard analysis – but that way, you do not have to do it during<br />
play!<br />
D) Black’s mistaken choice of 54…Kf7? in the actual game (which<br />
Mikhalchishin awarded a “!?”) would only have justified itself if White<br />
had played 55 g5? hg 56 Rxg5 Kf6 57 Rb5 g6! (or 57…g5! – as long as<br />
Black does not play 57…Ke6 58 Ke3 Kd6? 59 Kd3 Kc6 60 Rg5 and 61<br />
Rg6+, when White wins) 58 h6 (58 Rb6+ Kg5 =) 58…Rh4 59 a6 Rxh6<br />
60 Ra5 (60 a7 Rh3+) 60…Rh8 61 a7 Ra8 =.<br />
55 Rb7+! Kf6 (55…Kg8 56 Ra7 is no fun for Black either) 56 Rb6+ Ke5<br />
57 a6<br />
B<br />
This is the ideal layout of White’s forces that we spoke of when we<br />
introduced this example. <strong>The</strong> rook defends the passed pawn from the side,<br />
while simultaneously protecting, from g6, his own kingside. Such<br />
situations are won, as a rule: marching the king over to the passed pawn is<br />
decisive. And if Black’s king comes and stands in the way, then the<br />
king’s wing will be left undefended.<br />
57…Ra3+ 58 Ke2 Kd4 59 Rd6+ Ke4 60 Kd2 Ke5 61 Rg6 Ke5 62 Kc2<br />
On 62 Rxg7? Rxa6 63 Rg6, Mikhalchishin gives 63…Ra4 =, although of<br />
course 63…Rxg6 64 hg Ke6 = would do equally well.<br />
62…Kc4?<br />
B<br />
62…Ra4? 63 g5 hg 64 Rxg5+ Kc6 65 Rxg7 loses at once<br />
(Mikhalchishin), but the text move was no better. <strong>The</strong>re followed 63 Kb2<br />
Ra5 64 Rxg7 Rxa6 65 Rg6 Ra4 66 Rxh6 Kd5 67 Rg6 and Black<br />
resigned.<br />
He could have held out far longer after 62…Kc5!. <strong>The</strong> grandmaster<br />
believes Black could have saved the game. He gives the line 63 Rxg7<br />
Rxa6 64 Rg6 Rd6! 65 Kc3 (65 g5 Rd5! =) 65…Rd4! (all exclamation<br />
marks are Mikhalchishin’s).<br />
But, in fact, as the following analysis will make clear, the final position of<br />
his variation is lost. However, Black can in fact save himself by 64…Ra4!<br />
(instead of 64…Rd6?) 65 Kd3 Kd5 66 Ke3 Ke5 67 Kf3 Ra3+ (67…Rf4+
68 Kg3 Rf6 = is not bad, either) 68 Kg2 Kf4 =.<br />
And yet, as Gelfand demonstrated, 62…Kc5 would not have saved Black.<br />
Before capturing on g7, White would need to improve his king’s position,<br />
and take away the a4-square from Black’s rook. This can be done by 63<br />
Kb2! Ra4 64 Kb3 Ra1, and only now playing 65 Rxg7 Rxa6 66 Rg6 Rd6!<br />
(here indeed, Black has nothing better).<br />
W<br />
67 Kc3 (of course not 67 Rxd6? Kxd6 68 g5 Ke6 69 g6 Kf6 =) 67...Rd4!<br />
(67…Kd5 68 g5!+-) 68 g5! (Mikhalchishin only looks at 68 Rc6+? Kxc6<br />
69 Kxd4 Kd6 =) 68…Rd5 69 Ra6! Kb5 (69…Rxg5 70 Ra5+ Kd6 71 Rxg5<br />
+-) 70 Rxh6 Rxg5<br />
71 Kd4! (71 Rh8? Kc6 72 h6 Kb7! lets slip the win) 71…Ka5 72 Ke4!<br />
W?<br />
Getting the king closer to the pawn is important. <strong>The</strong> hasty 72 Rh8?<br />
would be a mistake: 72…Kb6 73 h6 Kb7 (threatening 74…Rg6, with the<br />
“Vancura Position”) 74 Rf8 Rh5 75 Rf6, and Black’s king gets back to<br />
the kingside in time: 75…Kc7 76 Ke4 (76 Ra6 Kb7!) 76…Kd7 77 Kf4<br />
Ke7 =.<br />
72…Rb5 73 Rh8! Rb4+ (73…Ka6 74 h6 Rb4+ 75 Kd5 Rb5+ 76 Kc4 Rh5<br />
77 Kd4+-) 74 Kd5 Rb5+ 75 Kc6 Rb6+ 76 Kc7+-.<br />
I will add one tiny note to Gelfand’s analysis: instead of 71…Ka5, let’s<br />
try 71…Rf5 72 Ke4 Rc5 73 Rh8 (otherwise, Black starts checking from<br />
the side) 73…Kb6 74 h6 Kb7.<br />
W?<br />
In order to prevent Vancura Position (with 75…Rc7), White wants to play
75 Rg8 (or 75 Rf8), but after 75…Rh5 76 Rg6? (76 Rh8!) 76…Kc7 77<br />
Kf4 Kd7 78 Kg4 Rh1, Black’s king gets back just in time to the kingside.<br />
<strong>The</strong> clever check 75 Rh7+! attains our goal. On 75…Kc6, White can<br />
reply either with 76 Kf4 (the rook cannot use the c6-square now), or with<br />
76 Ra7 Rh5 77 h7 Kd6 78 Ra6+! Ke7 79 Ra8!. And after 75…Kb6 76<br />
Rg7! Rh5 77 h7 Kc6 78 Kf4 Kd6 79 Kg4 Rh1 80 Kf5, White’s king will<br />
win the king race.<br />
[<strong>Chess</strong><strong>Cafe</strong> Home Page] [Book Review] [Columnists]<br />
[Endgame Study] [<strong>The</strong> Skittles Room] [Archives]<br />
[Links] [Online Bookstore] [About <strong>Chess</strong><strong>Cafe</strong>.com] [Contact Us]<br />
© 2008 Cyber<strong>Cafe</strong>s, LLC. All Rights Reserved.<br />
"<strong>Chess</strong><strong>Cafe</strong>.com®" is a registered trademark of Russell Enterprises, Inc.