

Metering For Correct Exposure - Lastolite School of Photography
Metering For Correct Exposure - Lastolite School of Photography
Metering For Correct Exposure - Lastolite School of Photography

Create successful ePaper yourself
Turn your PDF publications into a flip-book with our unique Google optimized e-Paper software.
Monthly Tips & Tutorials from <strong>Lastolite</strong><br />
Lesson One<br />
<strong>Metering</strong> <strong>For</strong> <strong>Correct</strong> <strong>Exposure</strong><br />
Getting exposure right in camera will maintain more detail in the image.<br />
A correct exposure is determined by a combination <strong>of</strong><br />
the amount <strong>of</strong> light reaching the cameras sensor<br />
through the lens (aperture) and the length <strong>of</strong> time the<br />
shutter (speed) is left open. This combination will also<br />
be effected by the sensitivity <strong>of</strong> the sensor to light,<br />
which we set via the ISO setting on camera.<br />
<strong>Metering</strong> can be difficult in a dramatic scene, especially when there is<br />
a domination <strong>of</strong> light or dark. Avoid auto metering modes to capture<br />
the detail you want to record, not what the camera averages.<br />
<strong>Correct</strong> <strong>Exposure</strong><br />
This will give detail in the highlights as well as in the<br />
shadow areas <strong>of</strong> an image with a subtle transition<br />
through the general tonal range in a scene. An image<br />
may contain brighter or darker areas in the<br />
photograph, however the main subject area will<br />
contain detail with little or no loss.<br />
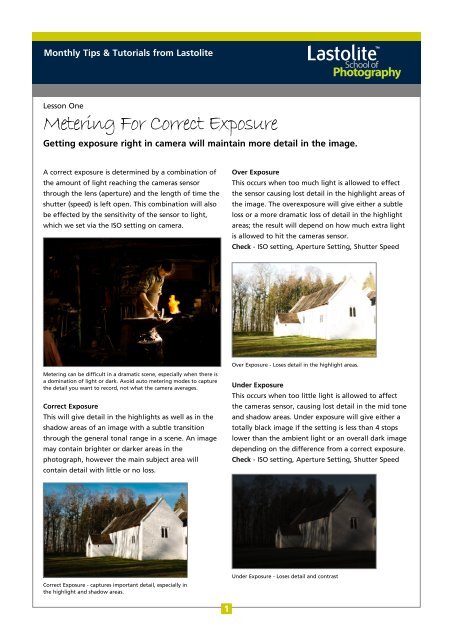
<strong>Correct</strong> <strong>Exposure</strong> - captures important detail, especially in<br />
the highlight and shadow areas.<br />
1<br />
Over <strong>Exposure</strong><br />
This occurs when too much light is allowed to effect<br />
the sensor causing lost detail in the highlight areas <strong>of</strong><br />
the image. The overexposure will give either a subtle<br />
loss or a more dramatic loss <strong>of</strong> detail in the highlight<br />
areas; the result will depend on how much extra light<br />
is allowed to hit the cameras sensor.<br />
Check - ISO setting, Aperture Setting, Shutter Speed<br />
Over <strong>Exposure</strong> - Loses detail in the highlight areas.<br />
Under <strong>Exposure</strong><br />
This occurs when too little light is allowed to affect<br />
the cameras sensor, causing lost detail in the mid tone<br />
and shadow areas. Under exposure will give either a<br />
totally black image if the setting is less than 4 stops<br />
lower than the ambient light or an overall dark image<br />
depending on the difference from a correct exposure.<br />
Check - ISO setting, Aperture Setting, Shutter Speed<br />
Under <strong>Exposure</strong> - Loses detail and contrast
Monthly Tips & Tutorials from <strong>Lastolite</strong><br />
Lesson One<br />
Key Points<br />
Light can be measured in 2 basic ways:<br />
Reflected the brightness <strong>of</strong> the light in<br />
the scene or bounced <strong>of</strong>f the<br />
subject.<br />
Incident the light falling on the subject<br />
or scene.<br />
A hand held meter makes exposure reading simple. Point the meter<br />
towards the ambient or flash light source.<br />
Incident <strong>Metering</strong><br />
This is the most accurate way to measure either the<br />
ambient light or flashlight on a subject when shooting<br />
weddings and portraiture as well as still life and<br />
product photography?<br />
This method is usually done with a light meter. A light<br />
meter is used to measure accurately the light falling on<br />
a subject, based on a calibrated sensor in the meter<br />
itself. It gives a reading based on a tone <strong>of</strong> grey, so no<br />
guess work is involved in choosing the right tone in an<br />
image to take a reflected reading <strong>of</strong>f.<br />
To use a hand held meter first set it to either ambient<br />
or flash mode, hold it by the subject and point it back<br />
toward the light source. This will now give you a<br />
correct exposure based on a combination <strong>of</strong> your<br />
chosen ISO, as well as the aperture F-Stop and the<br />
shutter speed setting.<br />
All text and photography ÇMark Cleghorn 2009. All rights reserved.<br />
2<br />
Even though a light meter is usually used to take an<br />
Incident light reading, they can also take a reflective<br />
reading when used in a different mode or with<br />
different accessories, even a spot meter reading.<br />
Reflective <strong>Metering</strong><br />
This is the most common metering as this uses the<br />
cameras built in sensor and is perfect for landscape<br />
photography when it is impossible to take an incident<br />
reading from the subject in the distance. Instead the<br />
reflective light is measured by accessing the light levels<br />
in the scene.<br />
In DSLR's the exposure is determined by the light<br />
hitting the sensor through the lens, hence the term<br />
'Through The Lens' metering (TTL)<br />
Accurate exposure can be difficult with landscape photogaphy.<br />
To take an accurate reflective meter reading takes a<br />
little more skill, as you have to be able to read the<br />
scene and decide which part <strong>of</strong> the image is going to<br />
give you the tone to record. As almost every image has<br />
highlights, mid tones and shadow areas the equation<br />
can be more confusing.<br />
Mark Cleghorn<br />
www.phototraining4u.com