CnMBook User Manual - KMS Components
CnMBook User Manual - KMS Components
CnMBook User Manual - KMS Components

Create successful ePaper yourself
Turn your PDF publications into a flip-book with our unique Google optimized e-Paper software.
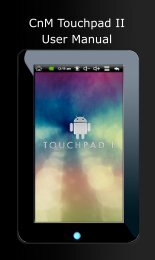
<strong>CnMBook</strong><br />
<strong>User</strong> <strong>Manual</strong><br />
www.cnmlifestyle.com
Contents<br />
1 Product Overview………………………………………………………………3<br />
2 System Overview………………………………………………………………4<br />
3 Hardware Overview……………………………………………………………4<br />
4 Quick Start………………………………………………………………………5<br />
1. Internet Access………………………………………………………6<br />
2. Email Box…………………………………………………………………10<br />
3. Instant Communication…………………………………………17<br />
4. Word Processor………………………………………………………21<br />
5. E-table………………………………………………………………………27<br />
6. E-Dictionary………………………………………………………………30<br />
7. PDF Viewer………………………………………………………………32<br />
8. E-book Reader…………………………………………………………33<br />
9. Xip Flash Player………………………………………………………36<br />
10. Video On-Line…………………………………………………………38<br />
11. Multimedia Player…………………………………………………40<br />
12. Image Browser………………………………………………………43<br />
13. Calculator………………………………………………………………45<br />
14. Using Paint Brush……………………………………………………46<br />
15. Calendar…………………………………………………………………48<br />
16. File Manager……………………………………………………………53<br />
17. Network Dial-up………………………………………………………56<br />
18. Software Manager……………………………………………………63<br />
19. System Settings………………………………………………………66<br />
GNU General Public License…………………………………………………71<br />
Warranty & Support…………………………………………………………………74<br />
2
1 Product Overview<br />
The <strong>CnMBook</strong> is designed for communication and digital multimedia entertainment by accessing the<br />
Internet through a broadband terminal which is affordable and has low power consumption. In addition to<br />
a variety of multimedia entertainment and high-speed broadband Internet access functions, the<br />
<strong>CnMBook</strong> can be used for other purposes, such as the e-book reader, picture browser, Flash player,<br />
instant communication, e-dictionary, MP3 player, game simulator and PDA. Also, it provides the user<br />
with personalised desktops and because of its secure Linux based Operating System It can be used<br />
without the threat of viruses and malware<br />
Main Features<br />
— 7” TFT-LCD True color display<br />
— Broadband Internet access<br />
— Highly secure virus and spyware free Linux OS<br />
— All kinds of application software packages<br />
Enriched experience<br />
— Internet surfing, information searching and news reading<br />
— Instant online communication with family, friends or classmates<br />
— Download and enjoy Music<br />
— Picture and image sharing<br />
Office assistant<br />
— Office software package<br />
— E-mail receiving and sending management<br />
— Daily work plan and management<br />
— PDF viewer<br />
— E-book reader<br />
3
2 System Overview<br />
The <strong>CnMBook</strong>, is highly portable & compact in its design, with good performance, adaptability and<br />
robustness. The <strong>CnMBook</strong>s optimised Linux based operation system ensures optimum performance<br />
with the minimum system resources.<br />
3 Hardware Overview<br />
◆ Processor: XBurst 400 MHz 32-bit CPU<br />
◆ Display: 7” 800 x 480 true-color LCD<br />
◆ RAM: 128M RAM<br />
◆ Storage: 2GB NAND Flash<br />
◆ USB port: 3 extensible USB ports<br />
◆ External storage: SD card slot<br />
◆ Input device: standard keyboard and touchpad<br />
◆ Network access: WiFi, 10/100MB Ethernet interface, ADSL, 3G (via supported USB modem)<br />
Appearance<br />
4
4 Quick Start<br />
1. Power on or power off the <strong>CnMBook</strong> through its I/O power button.<br />
2. Acquaint yourself with the desktop: The desktop is divided into 4 areas: the menu, application area,<br />
taskbar and the clock.<br />
3. Open an application:<br />
Move the cursor to the desired application icon, and click to open the related application.<br />
Notes:<br />
● To use the <strong>CnMBook</strong>s resources effectively, you can only open up to 3 applications at the same time.<br />
● To open a minimized application from the task bar, click the icon of that application.<br />
4. To move between different Program Groups on the desktop i.e. Internet and Work, click on the Menu<br />
Tabs at the top of the screen.<br />
5. Task manager: Click the task manager icon on the toolbar. On the displayed prompt box,<br />
select the application to be closed, and then click kill to stop this application. To go to this application,<br />
click Jump to. To exit the task manager, click Close.<br />
6. Power off: Click the power-off icon on the desktop. On the displayed prompt box, click OK to exit<br />
the system. To go back to the system, click Cancel.<br />
Power-off button Task manager<br />
5<br />
Menu<br />
Application area<br />
Clock
1. Internet Access<br />
Internet access is via a version of the Firefox web browser. This browser allows you to open multiple<br />
pages in the same window and does not limit the number of pages you can have open. This browser is<br />
designed to use only a relatively small amount of system resources to allow it to work as fast as possible.<br />
Its major functions include webpage browsing, webpage saving, viewing online video, and opening<br />
pictures or files.<br />
(1)To open the Web Browser, click the Web Browser icon on the desktop, as shown in Figure 1:<br />
Toolbar Menu Bar Address bar Minimize Close<br />
(2) Enter the web page address to be visited in<br />
Figure 1<br />
(the address bar)<br />
For example http://www.google.com. The homepage of Google is opened in the window, as shown.<br />
6
(3) You can open multiple web pages in the Web Browser, but only the currently browsed window is<br />
displayed. To create a window, select File→ New tab in the menu. To switch between different tab<br />
pages, click the related tab. The tab-browsing interface is shown in Figure 3:<br />
Figure 3<br />
To close the current tab page, select File→ Close tab in the menu.<br />
To close the Web Browser, select File→ Close window in the menu.<br />
(4) To save the favorite web page in the desired mode, select File→ Save page as in the menu, as<br />
shown in Figure 4. Enter the file name to be saved, select the saving directory, and click the<br />
button to save the file.<br />
Figure 4<br />
7
(5) To remove any personal or private information stored in the Web Browser, there is a function called<br />
Clear Private Data which is available on the Tools menu. Select Tools→ Clear Private Data in the<br />
menu, this will display the window shown in Figure 5. Check the boxes for the data to be cleared, and<br />
click the Clear Private Data Now button to clear the personal private information.<br />
Figure 5<br />
(6) The bookmark management function of Web Browser is the same as the My Favorites function of<br />
Internet Explorer. To open the bookmark manager, select Bookmarks→ Organize Bookmarks in<br />
the menu. With this function, you can a bookmark the current page or manage any existing<br />
bookmarks.<br />
(7) You can watch flash programs online by using the Web Browser. When you browse pages with flash<br />
programs on, they will be displayed (as long as the Flash movie is compatible). You can click to play<br />
the flash program, as shown in Figure 6:<br />
Figure 6<br />
8
(8) To obtain the help information for the Web Browser, select Help→ Help Contents in the menu, as<br />
shown in Figure 7.<br />
Figure 7<br />
For more information about Web Browsing, visit http://www.mozilla.com/en-US/.<br />
9
2. Email Box<br />
Email Box is a client email receiving and sending manager, which is as easy to use as Outlook.<br />
1) Click to the Email Box icon to open the application on the desktop, as shown in Figure 1:<br />
Figure 1<br />
This screen will be displayed the first time Email Box is run, click on to enter the Email<br />
Box as shown in Figure 2.<br />
Figure 2<br />
Click on this popup, to enter the Account Preferences where the settings for all email<br />
accounts are stored, as shown in Figure 3. Set your email account settings using information provided<br />
by your email service provider.<br />
10
Figure 3<br />
2) For example, set the account Djlhq@163.com to connect to a service provider called 163.com, as<br />
described below:<br />
① Fill in the following content on the Basic tab page of the Preferences, as shown in Figure 4.<br />
Name of this account: anywhere (you can fill your desired name)<br />
Full name: Djlhq<br />
Mail address: Djlhq@163.com (the email account address to be managed by using Email Box)<br />
Protocol: POP3 (the incoming mailbox to connect to is POP3 for this account with 163.com)<br />
Server for receiving: pop.163.com (the server address of the POP3 server used by 163.com)<br />
SMTP server (send): smtp:163.com (the server address of the smtp server used by 163.com)<br />
<strong>User</strong> ID: djlhq (the <strong>User</strong>name of the account with 163.com)<br />
Password: ****** (the Password of the account with 163.com)<br />
11
Figure 4<br />
② Fill in the following content on the Receive tab page of the Preferences, as shown in Figure 5.<br />
Check Filter messages on receiving (you can select this if needed).<br />
Default inbox: inbox (the default inbox; you can also select another one if required)<br />
Check ‘Get all’ checks for new messages on this account.<br />
Figure 5<br />
③ Fill in the following content on the Send tab page of the Preferences, as shown in Figure 6.<br />
Check SMTP Authentication (SMTP AUTH) (this option must be selected, because SMTP is used<br />
to send emails with this account).<br />
12
Authentication method: Automatic<br />
<strong>User</strong> ID: djlhq (the <strong>User</strong>name of the account with 163.com)<br />
Password: ****** (the Password of the account with 163.com)<br />
Figure 6<br />
④ Fill in the following content on the Compose tab page of the Preferences, as shown in Figure 7.<br />
Direct input: djlhq@163.com<br />
Fill in the relevant email addresses in Cc, Bcc and Reply-To as needed. In this example no email<br />
address is filled in.<br />
Figure 7<br />
⑤ Fill in the following content on the SSL tab page of the Preferences, as shown in Figure 8.<br />
Check don’t use SSL under POP3.<br />
Check don’t use SSL under SMTP.<br />
13
Figure 8<br />
⑥ Fill in the following content on the advanced tab page of the Preferences, as shown in Figure 9.<br />
Check Specify SMTP Port: 25 (SMTP port 25 is used for the 163.com email box. You can enter a<br />
different port number if your email server requires this).<br />
Check Specify POP: 110 (POP port 110 is used for the 126 email box. You can enter a different port<br />
number if your email server requires this).<br />
Check Put sent massage in, and then click to select the location for saving the sent email.<br />
The folder that sent email will be stored in is set here.<br />
Check Put draft massage in, and then click to select the location for saving the draft email.<br />
The folder that draft emails will be stored in is set here.<br />
Check Put queued massage in, and then click to select the location for saving the queued email.<br />
The folder that outgoing email will be stored in is set here.<br />
Check Put deleted massage in, and then click to select the location for saving the deleted email.<br />
The folder that deleted email will be stored in is set here.<br />
14
Figure 8<br />
All the relevant settings for the email box djlhq@163.com have now been set. Click<br />
3) The saved account information has now been setup and can be edited again at any time as shown in<br />
Figure 10.<br />
Figure 10<br />
The Edit accounts window displays any accounts which have been setup and allows them to be edited.<br />
You can click on this interface to add an account, click to edit an existing account,<br />
click to delete an existing account, click and to sort the existing accounts,<br />
and click use the selected account as the default account.<br />
(4) To enter the main interface of Email Box, click on the interface in Figure 10, this will bring<br />
you to the main email application screen shown in Figure 11.<br />
15
Figure 11<br />
To download new email for your account, just set, click or on the menu bar, this<br />
retrieves any messages from your email server as shown in Figure 12.<br />
Figure 12<br />
To cancel the ongoing operation of receiving email, click on the interface in Figure 12.<br />
Now, you have a general idea about how to use the Email Box client. Email Box is used in the same way<br />
as Outlook. If you are an Outlook user, you will become familiar with Email Box very quickly.<br />
For more information about Email Box (also known as Sylpheed), visit http://sylpheed.sraoss.jp/en/.<br />
16
3. Instant Communication<br />
Instant Messaging is an instant communication tool, which enables multiple persons to communicate<br />
with each other at the same time. It provides access to all the most commonly used Instant Messaging<br />
networks.<br />
1. Configuring AIM (AOL Instant Messenger) with Pidgin<br />
1) Click to icon named Xip Chatting to open Pidgin.<br />
a) Click Accounts →Add/Edit to display the window as shown in Figure 1.<br />
Figure 1<br />
b) Click the Add button on the interface in Figure 1, to display the Add Account window, as shown in<br />
Figure 2. Configure as follows:<br />
■ Protocol: AIM<br />
■ Screen name: Your AIM user name (excluding the symbol @ or network domain)<br />
■ Password: To increases the security, you are recommended to leave this field null. To log in<br />
automatically, enter your password.<br />
■ Local alias: Leave this field null.<br />
■ Remember password: To let Pidgin remember your password, check this box (after this option is<br />
selected, the system will not prompt you to enter the password<br />
when you log in to the system).<br />
17
C) Click Save to save the setting.<br />
Figure 2<br />
Congratulations! Now, you can connect to the AIM service using Pidgin.<br />
2. Configure Google Talk (XMPP) within Pidgin<br />
a) Open Pidgin.<br />
b) Click Accounts→ Add/Edit to display the window as shown in Figure 1.<br />
Figure 1<br />
1. Click the Add button on the interface in Figure 1, to display the Add Account window, as shown in<br />
Figure 2 and Figure 3. Configure as follows:<br />
18
■ Protocol: Google Talk<br />
■ Screen name: Your Google Talk username (excluding the symbol @ or network domain)<br />
■ Domain: gmail.com<br />
■ Resource: Gaim<br />
■ Password: To increase the security, you are recommended to leave this field null. To log in<br />
automatically, enter your password.<br />
■ Local alias: Leave this field null.<br />
■ Remember password: To let Gaim remember your password, check this box (after this option is<br />
selected, system will not prompt you to enter the password when you log in to the system).<br />
Figure 2<br />
1 Click the Advanced tag, and configure<br />
as follows on this tab:<br />
Connect port: 5222<br />
Connect server: talk.google.com<br />
Proxy Options: Use Global Proxy Settings<br />
19
2 Click Save to save the setting.<br />
Figure 3<br />
Congratulations! Now, you can connect to the Google Talk service using Pidgin.<br />
For more information on configuring your instant messaging service please check your service<br />
providers’ web site for configuration information. For more information about Pidgin visit<br />
http://www.pidgin.im/.<br />
20
4. Word Processor<br />
Xi p Word is a word processing package based on Open Office. It can work with almost all the most<br />
common<br />
types of documents which are available including Word documents (Word 97, 2000, XP, 2003).<br />
(1)<br />
Click the Xip Word icon on the desktop to open the Xip Word program. Select File→Open from the<br />
menu, and then select and open the desired file on the displayed interface, as shown in Figure 1.<br />
Menu Bar<br />
Number of<br />
pages<br />
Figure 1<br />
(2) Xip Word supports the following file formats:.doc,.abw,.awt,.dot,.rtf..txt,.zabw,.htm,.html and.xht. You<br />
can also save your file in these formats.<br />
(3) After entering the relevant content in the word area, you can select Edit→ Undo in the menu to<br />
cancel the operation you just performed, or select Edit→ Redo in the menu to redo the operation you<br />
just canceled. With Xip Word, you can select Cut, Copy and Paste to perform relevant operations. To<br />
search the relevant content, select Edit→ Find in the menu. To replace the found content, select<br />
Edit→ Replace in the menu.<br />
Toolbar<br />
21<br />
Minimize Close<br />
Status bar
(4) To set the required display<br />
mode for Xip Word and whether the toolbar and status bar should be<br />
displayed, select View in the menu. To enter the full screen display status, press F11 or select<br />
View→Full Screen in the menu. To zoom in or zoom out, select View→Zoom in the menu.<br />
(5) Make the edited file neater<br />
● to add a page header and a page footer to the file, select Insert→ Header (Footer) in the menu.<br />
● to add a background or a background to the file, select Format→ Page Background in the menu.<br />
● to ins ert a picture into the file to illustrate the file, select Insert → Picture in the menu.<br />
(6) Table usage<br />
in Xip Word<br />
● to insert a table or insert a row and a column in the original table, select Table→Insert in the menu.<br />
● to delete a table, a row, a column, select Table→Delete in the menu.<br />
● to select a table, a row, a column or a cell, select Table→Select in the menu.<br />
● to merge cells, select Table→Merge Cells in the menu.<br />
● to split cells, select Table→Split Cells in the menu.<br />
● to convert a table to a text file, select Table→Convert Table to Text in the menu.<br />
● to convert a text file to a table, select Table→Convert Text to Table in the menu.<br />
The<br />
following example details how to edit a file by using Xip Word:<br />
Step 1: Enter Xip Word, and select it. Click Format Align →Center in the menu. Now, the content<br />
will be displayed at the center of the row in the editing area, as shown in Figure 2.<br />
Figure2<br />
22<br />
→
Step 2: Press Enter, and select Format→ Align→ Left in the menu. The cursor will be displayed at the<br />
leftmost<br />
part of this row. Click Table→ Insert→ Table in the menu, to display the window as shown in<br />
Figure<br />
3.<br />
Step 3: Enter 5 in the Number of columns box and 2 in the Number of rows box, and<br />
then click the<br />
Insert button. You can see a table consisting of 2 rows and 5columns in the editing area,<br />
as shown in<br />
Figure<br />
4.<br />
Figure4<br />
Step<br />
4: Now you can enter content in the table. Select the table and right click. On the displayed shortcut<br />
menu, select Font. Here, you can set the font size, type, style<br />
and color (red in this example), as shown<br />
in Figure 5.<br />
Figure3<br />
23
Figure 5<br />
Step 5: After the table is prepared, click Insert →Text Box in the menu. The cursor changes to a cross<br />
shape. Drag the cursor downward by pressing the left key of the mouse to make a text box in the editing<br />
area,<br />
as shown in Figure 6.<br />
Figure 6<br />
Step<br />
6: You can enter the relevant content or insert a picture in the text area. To insert a picture, select<br />
Insert→ Picture in the menu, select a picture from the<br />
displayed window, and then click the Open<br />
button.<br />
The final result is shown in Figure 7.<br />
24
Figure7<br />
Step 7: To perfect the file, click Insert→ Header in the menu to insert a header. Enter the relevant<br />
content, and click in the blank area. You will see a header displayed at the upper right corner, as shown<br />
in Figure 8.<br />
Figure 8<br />
Welcome<br />
Step 8: A simple file is prepared, but it may look better if a background is also added. Xip Word also<br />
provides this function. Select Format→ Page<br />
Background→ Page Image in the menu, and select a<br />
picture<br />
to be inserted from the displayed window. The final result is shown in Figure 9.<br />
25
Figure 9<br />
Welcome<br />
Step<br />
9: Now, we have a nice looking document, but you must remember to save the file by selecting<br />
File→ Save in the menu.<br />
Do you want to share this file with others? That’s easy. The printing function provided by Xip Word can<br />
help<br />
you easily. Select File→ Print in the menu, and click the Print button in the displayed window to<br />
print the file. Please<br />
Note: Printer Drivers must be installed for this facility to work.<br />
Now,<br />
you have a general idea about how to use Xip Word, it is used in the same way as Microsoft Word.<br />
If you are a Microsoft Word user, you will become familiar with Xip Word very quickly. For more<br />
information<br />
about Xip Word, please visit http://www.abisource.com.<br />
26
5. E-table<br />
Xip<br />
Table is a Spreadsheet program, with the style and functions rather consistent with the current<br />
Microsoft<br />
Excel.<br />
(1)<br />
Click the Xip Table icon on the desktop to open Xip Table, as shown in Figure 1.<br />
Menu Bar Toolbar<br />
Minimize Close<br />
Figure 1<br />
(2)Xip Table provides you with table drawing and powerful data calculation functions,<br />
the following<br />
example<br />
describes how to draw a sales count table using Xip Table.<br />
Step 1: Confirm the area for drawing the table on the interface in Figure 1. Here, A1:E9 is selected.<br />
Step 2: Select the relevant cells and enter data, as shown in Figure 2.<br />
Figure 2<br />
27
Step 3: How to get the sums and averages using the functions provided by Xip Table.<br />
First select the target cell to store the calculation result, insert the function in the target cell, and then<br />
select the area for<br />
calculation, as shown in Figure 3 and Figure 4.<br />
=sum(B4:B6)<br />
=sum(B4:B6)<br />
Target cell<br />
=average(B4:B4)<br />
Calculation area<br />
Figure 3<br />
=average(B4:B4)<br />
Calculation area<br />
Figure 4<br />
Averaging formula<br />
Target cell<br />
Step<br />
4: You can show the sales information in a more visually appealing way by making a pie chart or a<br />
histogram<br />
based on the data in the sales table. Select Insert → Chart in the menu, select the chart type<br />
to be inserted in the displayed dialog box, and then the click<br />
as shown in Figure 5.<br />
28<br />
Summation<br />
formula
Figure 5<br />
Now<br />
a pie chart of the sale statistics table is shown.<br />
3) You can draw graphics through the buttons on the toolbar<br />
in the interface of Figure 1. To draw a<br />
rectangle<br />
in the worktable, click the rectangle button on the toolbar. The cursor changes to a cross<br />
sh ape. Drag the cursor by pressing the left mouse button in the worktable to select the area for drawing<br />
a rectangle, then release the mouse button. A rectangle has now been drawn.<br />
For more information about Xip Table, please vi sit http://www.gnome.org/projects/gnumeric/. 29
6. E-Dictionary<br />
E-Dictionary<br />
is configurable desktop dictionary software, it comes with English words by default, but<br />
other<br />
language dictionaries can be downloaded and installed within the software.<br />
Lots<br />
of functions are provided, including dictionary downloading, word searching, screen word capturing,<br />
wildcard<br />
query, and fuzzy query.<br />
1) Click the<br />
Dictionary icon on the desktop to open Dictionary, as shown in Figure 1.<br />
2) Enter the word to be searched in on the interface in<br />
Figure 1. The window will display the information of the searched word.<br />
3) To get the word that was previously searched, click on the toolbar on the interface in Figure 1.<br />
4) To get the previous word and the next word of the current word in the word in the left word list, click<br />
and respectively on the toolbar on the interface in Figure 1.<br />
5)To add a dictionary, click on the toolbar, select Manage Dict, and click on the<br />
displayed interface, as shown in Figure 2<br />
Figure 1<br />
When multiple dictionaries are added, the interface will display the information about the searched word<br />
in all the directories, You can select a proper dictionary as needed, Click on the interface<br />
in Figure 1 to display all the loaded dictionaries, and select the required dictionary.<br />
30<br />
Toolbar<br />
Minimize<br />
Close
Figure<br />
2<br />
6) Check on the main interface of Dictionary, to change it into . Dictionary will enter the<br />
screen word capturing status, and you can select a word by using the cursor in other windows.<br />
Double click or highlight a word. A floating window will pop up near the word, to display the meaning<br />
of the word.<br />
7) To query a word, you can enter the character string ” * ” and “?” as a wildcard for matching. Here, “ * ”<br />
indicates any multiple characters, and “?” indicates a character. Press Enter, to display the word that<br />
matches this rule in the left list box, This method can be used to query all the matched words. You<br />
can find the queried word in the left list box, as shown in Figure 3.<br />
Figure 3<br />
8) If you are uncertain about the exact spelling of a word, try the fuzzy query function of Dictionary, if the<br />
entered word is incorrect, Dictionary will provide the matching result of similar words in the list box.<br />
To display the meaning of the previous word or the next word in the meaning display list box, click<br />
or on the toolbar.<br />
31
7. PDF Viewer<br />
PDF<br />
Viewer is a PDF file viewer, which helps you to fast view the PDF file and can print and manage the<br />
viewed<br />
PDF file.<br />
1) To open the program, click the PDF Viewer icon on the desktop. Click File→ Open in the menu,<br />
select a file, and click the Open button. The displayed interface is shown in Figure 1.<br />
Figure 1<br />
2) To save a copy for the opened PDF file, select File →Save a copy in the menu.<br />
To open the Print manager, select File →Print, you can set the relevant option of the printer,<br />
and then<br />
click the Print button to complete printing.<br />
3) Setting your PDF Viewer interface<br />
To set if the toolbar, status bar and index are displayed on the current interface, select the View menu<br />
option. To zoom out the PDF file, select the Zoon option under the View menu option. To rotate the<br />
file to the right (left), click View→Rotate Right(Left) in the menu. To enter the full screen display<br />
status, press F11 or select View →Full Screen in the menu.<br />
4) Fast checking of a PDF file<br />
Menu Minimize Close<br />
To fast find the desired content, select Edit→Find in the menu, or select the Page option on the<br />
toolbar to rapidly go to the desired page.<br />
5) To obtain the help information of PDF viewer, select Help→About in the menu. Click the following<br />
//www.emma-soft.com/project/epdfview.<br />
Toolbar<br />
address in the displayed window to enter the PDF Viewer website for more help information: http:<br />
32
8. E- book Reader<br />
As an e-book reader, FB Reader can be used to read e-books in formats such as fb2, html, chm, rtf,<br />
plucker, zip, tar, gzip<br />
and bbzip2, its simplified interface provides powerful functions. After FB Reader is<br />
opened, the main interface will detail FB Reader.<br />
1) Click the<br />
FB Reader icon on the desktop to display the interface, as shown in Figure 1.<br />
Content<br />
display<br />
progress<br />
bar<br />
The<br />
interface in Figure 1 displays the information about FB Reader to enable the user to learn more<br />
about FB Reader. The interface displays the content display<br />
progress and the current system time.<br />
2) Click the<br />
shown in Figure 2. This interface is used to perform relevant settings for the file to be opened. You<br />
can select relevant options as needed.<br />
Figure 1<br />
33<br />
Minimize Close<br />
System<br />
time<br />
button on the interface in Figure 1. to display the option interface of FB Reader, as<br />
Figure 2
On the interface in Figure 2, you can set the font, Color, font size, margin, scrolling bar and other<br />
aspects<br />
of the opened e-book.<br />
3)Click the button on the interface in Figure 1. and select the e-book path and e-book to be read.<br />
Here, my document/ my file / FB reader / myman-5.0.3-alpha.chm<br />
is opened, as shown in Figure 3.<br />
Figure 3<br />
Click myman-5.0.3-alpha.chm on this interface, to display the Book Info interface, as shown in Figure 4.<br />
The Book Info interface introduces some related information of the e-book.<br />
Figure 4<br />
No<br />
settings are changed here, click the button on the interface in Figure 4. Now you can read the<br />
content<br />
of myman-5.0.3-alpha.chm, as shown if Figure 5.<br />
34
①Click the button to display the related information of<br />
the currently opened e-book.<br />
②Click<br />
the button to search the related information in the currently opened e-book.<br />
⑤Click<br />
the button to go back<br />
⑥Click the button<br />
to list the recently opened e—book list.<br />
⑦Click<br />
the button to list the tree structure of the book library.<br />
The<br />
usage of FB Reader is only briefly detailed here, Please take some time to grasp how to use it in<br />
practice.<br />
Figure 5<br />
③Click the button to the initial location of the opened e-book.<br />
④Click the button to go back<br />
35<br />
I page in total: the<br />
content of page 1 is<br />
being displayed<br />
Current system time
9. Xip Flash Player<br />
As<br />
a flash player, Sip Flash Player is used to play flash animation. The Xip Flash Player of the <strong>CnMBook</strong><br />
has<br />
three play modes: normal, low quality and half size.<br />
1) Click the Xip Flash Player icon on the desktop to open Xip Flash Player, as shown in Figure 1<br />
Menu Bar Minimize Close<br />
Figure 1<br />
2) Select File →Open in the menu on the interface in Figure 1. to display<br />
a dialog box. Select the flash<br />
file to be played, and then click the button in the dialog box to play the flash file, as<br />
shown in Figure 2.<br />
Figure 2<br />
36
3)To play the flash file in the low quality play mode, select Control →Low quality in the menu, as<br />
shown<br />
in Figure 3<br />
Figure 3<br />
4) To play the flash file in the half size play mode, select Control → Half size in the menu, as shown in<br />
Figure<br />
4<br />
Figure 4<br />
5) To stop playing the currently played flash file select File → Close in the menu.<br />
For<br />
more information about Xip Flash player, please visit http://www.xiptech.com.<br />
37
10. Video On-Line<br />
VideoOnLine is an easy-to-use and multi-functional online media player which allows you to fully enjoy<br />
what<br />
the Internet offers.<br />
1) Click the Video OnLine icon within Internet on the desktop, the graphical user interface for Video<br />
OnLine<br />
will appear, as shown in Figure 1.<br />
Figure 1<br />
2) www.youtube.com has been set as the default searching website for Video OnLine. There is a video<br />
list<br />
in the main window, which will be the most up to date videos available on YouTube. You can type in<br />
keywords to search in the text box in the top right hand corner then click the search button. All videos<br />
fulfilling<br />
the search keywords will be shown in the main window.<br />
3) To play a video which is shown in the main windows list, just double click it. After a short time loading,<br />
it will start playing.<br />
38
Figure 2<br />
You can bookmark your favorite movies by highlighting the movie in the list and then clicking the 'Add'<br />
button. This movie will now be listed in the 'Favorite' window in the bottom left hand corner of the screen.<br />
To play that favorite movie, click the 'Favorite' button and you will see the movie you have just added.<br />
39
11. Multimedia Player<br />
As a multimedia player, Media Player can be used to play files of mp3, avi, wma and other formats.<br />
1) Click the Media Player icon on the desktop to open the interface, as shown in Figure 1.<br />
Play<br />
Pause<br />
Return to<br />
previous file<br />
2) Simplified playing of multiple types of files<br />
In the past, each type of media file format requires an independent player, and you must download and<br />
configure these players. With Media Player, you need not bother about the configuration of different<br />
players. Media Player can support playing of MP3, WMA, WAV, WMV, asf, avi, mpg, mpge, mp2, mp4.<br />
mov and other video formats<br />
3) Easy customization to satisfy your personal taste<br />
When a movie is playing, you can suspend playing, adjust the volume, or go to your favorite part by<br />
dragging the progress bar, you can even enlarge the picture to the full screen<br />
4) High quality multimedia enjoyment<br />
Go to<br />
next file<br />
Figure 1<br />
Minimize<br />
Progress bar Mute<br />
Close<br />
Play list<br />
Open file<br />
Full screen<br />
display<br />
Media Player can provide the continuous playing even if files with multiple media types are played.<br />
40
The following example describes how to operate Media Player.<br />
Step<br />
1: Double click the Media Player icon on the desktop to open the interface as shown in Figure 1<br />
below.<br />
Step 2: Click the button for opening a file to display the file(s) to be viewed, as shown in Figure 2 below.<br />
Step<br />
3: Select a video file, and click the Add button to add the video file to the Selected Files box. If you<br />
can not find the desired file in the folder, click the Movie&Music files button and select All Files, as<br />
shown in Figure 3 below.<br />
41
Step 4: Click the Open button to return to the main interface of Media Player. Click the playing button to<br />
play the video file, as shown in Figure 4.<br />
Figure 4<br />
Step<br />
5: During the playing process, you can adjust the volume or click the play list button or press “L”<br />
key<br />
to display the play list. Select the video file to be played from the play list, as shown in Figure 5.<br />
Step<br />
6: You can click the play button again to suspend playing, or browse the movie or select the desired<br />
part<br />
by dragging the progress bar. Click the full screen display button to play the movie in the full screen.<br />
Step<br />
7: To exit the full screen display, F11 or ESC.<br />
Figure 5<br />
For<br />
more information about Media Player, please visit http://xinehq.de/index.php/features.<br />
42
12. Image Browser<br />
Image Gallery is an image-viewing tool that can be easily operated. It supports a large variety<br />
of image<br />
browsing<br />
functions, including thumbnail generating, zoom-in and zoom-out functions.<br />
1) Click the Image Gallery icon on the desktop to open image Gallery as shown in Figure 1:<br />
File list<br />
Picture list<br />
Toolbar<br />
Figure 1<br />
2) Open the folder where the images are located, and click to browse the images in this folder.<br />
To view the previous image of the currently opened image, click the icon on the<br />
toolbar.<br />
To v iew the next image of the currently opened image, click the icon on the toolbar.<br />
3) As needed, click the / / / icon on the toolbar to zoom in / out / adjusting the image size<br />
to the viewing area or set the image proportion to 1:1.<br />
4) Click the button on the toolbar, or right click and select Delete from the shortcut menu. ON the<br />
displayed dialog box, click the button to delete the file, or click the button<br />
to cancel the delete operation, as shown in Figure 2 below.<br />
43<br />
Minimize Close
5)To rename an image, click the button on the toolbar, or right click and select Rename from the<br />
shortcut menu. On the displayed dialog box enter the new file name, and click the<br />
button to confirm, or click the button to cancel the operation, as shown in Figure 3<br />
Figure 3<br />
6)To<br />
display the image in full screen, click the button on the toolbar, or right and select Full screen<br />
from the shortcut menu. To exit the full screen display, right click and select Exit Full Screen from the<br />
shortcut menu.<br />
7) Image Gallery supports image editing using other editors. Right click and select the related<br />
option<br />
from the shortcut menu. Open the image in the editing tool and edit it.<br />
8) To set the image as wallpaper, right click and select Set as Wallpaper from the shortcut menu.<br />
9) To play images in the slideshow mode, open an image using<br />
image Gallery, right click and select Start<br />
Slideshow from the shortcut menu.<br />
To pause the slideshow, right click and select Pause Slideshow from the shortc ut menu. To continue<br />
slideshow, select Continue Slideshow from the shortcut menu. To stop slideshow, select<br />
Stop Slideshow<br />
from the shortcut menu.<br />
For more information about Image Gallery, please visit http://ImageGallery.Sourceforge.net.<br />
44
13. Calculator<br />
You can use Calculator to perform all the standard operations that can be completed using a handheld<br />
calculator.<br />
Calculator can execute all the basic operations, such as addition, subtraction, multiplication<br />
ad division, as well as functions<br />
of the scientific calculator, like square.<br />
Click<br />
the Calculator icon on the desktop to open the interface, as shown in Figure 1.<br />
1) Executing a simple calculation<br />
Figure 1<br />
Click + for addition, -f or subtraction, * for multiplication and / for division<br />
·Key in the next number for calculation<br />
·Enter the other operators and numbers.<br />
·Click =.<br />
2) Using the numbers stored in the memory<br />
·To store the displayed data, click MS.<br />
·To recall the stored data, click MR<br />
· To add the displayed number to the existing number in the memory,click M+. To check a new number,<br />
click MR.<br />
Display box Menu<br />
·Key in the first number for calculation<br />
·<br />
3) Executing scientific calculation<br />
·Key in a number, and click the SQRT button to get the extraction of this number.<br />
For more information about Calculator, please visit http://galculator.sourceforge.net.<br />
45<br />
Minimize Close
14. Using Paint Brush<br />
Paint Brush is a drawing tool, which helps the user to create simple or elaborate images. These images<br />
can be black and white or colorful, and saved in the. JPG and. PNG forms. The image can be used as<br />
wallpaper or pasted to another file. The scanned photo can also be checked and edited using the<br />
relevant<br />
function.<br />
To open the program,<br />
click the Paint Brush icon on the desktop. Click the Load new image button on<br />
the toolbar, select a file and click Open, to display<br />
an interface, as shown in Figure1.<br />
Toolbar<br />
1) Creating an image<br />
·<br />
Figure1.<br />
Click the Paint Brush button on the toolbar. By default, you can draw a line by pressing the left key of<br />
the mouse and dragging the cursor.<br />
·Click the round black button in the toolbox.<br />
Click to draw a circle.<br />
·Click the square<br />
black button in the toolbox. Click to draw a square.<br />
·Round and square buttons with different sizes<br />
are available in the toolbox. Click them to draw the<br />
related circles and squares in various sizes.<br />
·Click the Paste Text button on the toolbar,<br />
and key in text in the image.<br />
2) Applying colors<br />
·Select colors from the toolbox to<br />
make your image more colorful.<br />
·Click the fog spot button in the toolbox, to get a spraying effect in the drawing.<br />
·<br />
Click the Flood Fill button on the toolbox to fill color in the selected area.<br />
·To customize your color, click the color button in the toolbar.<br />
46<br />
Minimize<br />
Close
3) Processing an image<br />
·<br />
To select a rectangle area, click Make Selection on the toolbar.<br />
·To specify the area to be displayed, click Pan Window on the toolbar.<br />
·To select the rectangle area to be copied or cut, click Make Selection on the toolbar. Drag the cursor<br />
by pressing the left<br />
key of the mouse to define the area to be copied or cut. Click the Paste button on<br />
the toolbar to paste the area.<br />
·To cancel / redo your operation, click the Undo / Redo button on the toolbar.<br />
For more information about Paint Brush, please visit http://mtpaint.sourceforge.net/rgbpaint.html.<br />
47
15. Calendar<br />
Calendar is a scheduling and management program. Its major functions<br />
include event management,<br />
event creating, event saving, event editing, event deleting, event moving and reminding.<br />
Calendar<br />
interface management: time scope setting (day, week, month or agenda) of calendar display.<br />
Content scopes setting (toolbar, calendar,<br />
calendar selector and agenda) of the interface display.<br />
1) Click the<br />
Calendar icon on the desktop to open Calendar, as shown in Figure1.<br />
Menu bar<br />
Toolbar<br />
Figure1<br />
2) Select File → New from the menu, to display the New event dialog box. Enter the events related<br />
items in the dialog box, and click the button to create a new event, as shown in Figure2.<br />
Figure2<br />
48<br />
Minimize Close
3) Right click the event, and select Save on the shortcut<br />
menu. In the displayed dialog box, enter the file name to be saved, select a saving directory, and click<br />
the button to save the file, as shown in Figure 3.<br />
Figure 3<br />
4)<br />
To edit the event, right click on , and select Edit from<br />
the shortcut menu.<br />
5)<br />
To delete an event, right click on ,and select Delete<br />
from the shortcut menu. In the displayed dialog box, click as shown in Figure 4.<br />
Figure 4<br />
6) Select Tools → Calendars form the menu, to display the window as shown as shown in Figure 5.<br />
Figure 5<br />
49
To create a new calendar category, click the button. On the displayed interface, enter the<br />
related<br />
content as prompted, and click the button to save the new calendar category, as<br />
shown<br />
in Figure 6.<br />
Figure 6<br />
7) To edit the calendar category (e.g., My Calendar); click the icon in on<br />
the interface in Figure 6. Perform the relevant modification in the displayed dialog box, and click the<br />
button to save the modification, as shown in Figure 7 below.<br />
8) To delete a calendar category category (e.g. My Calendar), click the icon in<br />
on the interface in Figure6, In the displayed dialog box, click the button to confirm, or<br />
click the button to cancel the operation, as shown in Figure 8.<br />
Figure 8<br />
50
9) To set the calendar display time scope, select the relevant items in the View menu, or click the ,<br />
, and buttons on the toolbar, or select the time to be displayed from the toolbar.<br />
1. To display the schedule<br />
of today, click as shown in Figure 9.<br />
Figure 9<br />
To display the schedule<br />
of a week, click , as shown in Figure 10.<br />
Figure 10<br />
1.<br />
To display the schedule of a month, click as shown in Figure11.<br />
51
Figure11<br />
2. To display all the schedules, click , as shown in Figure 12.<br />
Figure 12<br />
As described<br />
above, you can use Calendar to manager your complete schedule.<br />
52
16. File Manager<br />
File<br />
Manager is a fast and light file manager, which safely keeps files saved in the <strong>CnMBook</strong>. It provides<br />
a Tabbed Browsing feature, user-friendly interface, and both the icon checking and list check modes. It<br />
can<br />
also display the size of the current folder in list checking mode.<br />
The<br />
following gives you information on how to use File Manager:<br />
1) Click the File Manager icon on the desktop to open File Manager, as shown in Figure1.<br />
Figure1<br />
2) The left pane on the interface in Figures 1 lists the system folders, and the right pane displays the<br />
content in each folder after this folder is opened. Click<br />
in front of folder to automatically<br />
lists other folders contained in this folder, as shown in Figure 2.<br />
Figure 2<br />
53
On the interface in Figure 2, you can see the folder in the left pane contains one folder.<br />
3) In the left pane on the interface in Figure2, click in front of the folder. The<br />
interface automatically lists other folders contained in this folder, as shown in Figure 3.<br />
Figure 3<br />
On the interface in Figure 3, you can see the folder contains these folder:<br />
Download, My Favorites, My Files, My Games, My Media and My Photos. The right pane displays<br />
all the folders contained in .<br />
The above information deals with the file management structure of File Manager. The following part<br />
describes<br />
how to operate using File Manager:<br />
1) After you open a folder, you can right click in the right pane, to display an option list. Here, select<br />
Create New → Folder, as shown in Figure 5 below.<br />
54
Enter the name of the folder to be created to replace New Folder on the interface, such as anywhere,<br />
and then click OK. A new anywhere folder will be created in the currently opened Download folder, as<br />
shown in Figure 6.<br />
2) To minimize File Manager, click the button on the interface in Figure 1. To close File Manager,<br />
click<br />
the button.<br />
Use<br />
File Manager as described above.<br />
Figure 6<br />
For more information about PCman file manager, please visit http://pcmanfm.sourceforge.net.<br />
55
17. Network Dial-up<br />
1) ADSL dial-up setting<br />
Click the Network Dial-up icon on the desktop to open the dial-up setting interface,<br />
as shown in<br />
Figure1.<br />
Account name<br />
used for dialing<br />
Account password<br />
Figure1<br />
Click the button on the interface in Figure 1 to enter the advanced option setting<br />
interface, as shown in Figure 2.<br />
Figure 2<br />
Fill in the content on the interface in Figure2 according to the actual condition. After making sure all the<br />
settings are correct, click OK. Click the button in the interface in Figure1 to implement<br />
dial-up connection. During the connection, you can click the button to cancel the connection.<br />
56
2) Wireless network setting<br />
Click the wireless network application on the desktop to open the wireless network interface, as<br />
shown in Figure1.<br />
Figure 1<br />
It will check the wireless network device and search the wireless network<br />
automatically as show in<br />
Figure2.<br />
Figure 2<br />
57
It will list the relevant information currently searched, such as the wireless network name, as shown in<br />
Figure3.<br />
Figure 3<br />
Add or delete a network, and connect a network as follows:<br />
a). On the interface in Figure3, click WLAN Setting, as shown in Figure4.<br />
Figure 4<br />
On the interface in Figure4, select the IP addressing mode (static address or dynamic) and whether to<br />
automatically get DNS, and set the peer network host. Then, click the OK button to return to the<br />
interface shown in Figure3.<br />
58
). On the interface in Figure3, click the Preferred Network button, as shown in Figure5.<br />
Figure 5<br />
On<br />
the interface in Figure5, add or delete a network, and set the newly added network. For example,<br />
select the Add buttons. The relevant interfaces are shown in Figure 6.<br />
Figure 6<br />
You can see the Properties interface is used to reset the currently<br />
existing wireless network.<br />
c). After setting the preferred network, click the OK button on the interface shown in Figure 5, to return<br />
to the interface shown in Figure 3.<br />
59
d). Now, you can select a network to be connected from the interface shown in Figure 3. When the<br />
selected<br />
network is an encrypted network, the interface shown in Figure 7 will pop up to request you to<br />
enter<br />
the network key to connect to the network.<br />
connection starts. When the connection succeeds, the system prompts<br />
the networks is connected and<br />
the<br />
IP address is being obtained. When the IP address is obtained, the system prompts the network is<br />
connected<br />
and the IP address is , as shown in Figure 8.<br />
disconnect the current network connection.<br />
Figure 7<br />
e). On the interface shown in Figure7, enter the key and click OK to connect the network, then the<br />
* . * . * . * .<br />
Disconnect the currently connected network.<br />
Currently connected network<br />
and obtained IP address.<br />
Figure 8<br />
On the interface shown in Figure8, select the connected network, and then click Disconnect to rapidly<br />
60
3) Mobile dial-up setting<br />
4) CDMA dial-up Setting<br />
Click the Mobile Link icon on the desktop to open the wireless dial-up setting<br />
interface, as shown in<br />
Figure<br />
10.<br />
Click the button on the interface<br />
in Figure 9 to enter the advanced<br />
option setting interface,<br />
as shown in Figure 10.<br />
Figure 9<br />
Correctly fill in information in each item on the interface in Figure 9.<br />
Figure 10<br />
Device type<br />
Account name<br />
Account password<br />
Dial-in phone number<br />
Provided by the service<br />
provide<br />
Fill in the content on the interface in Figure 10 according<br />
to the actual condition. After making sure all the<br />
settings<br />
are correct, click OK. Click the button on the interface in Figure 9 to implement<br />
dial-up<br />
connection. During the connection, you can click the button to cancel the connection.<br />
61
5) GPRS 3G dial-up setting<br />
Double click the Mobile Link icon on the desktop to open the wireless dial-up setting interface, as<br />
shown in Figure 11.<br />
Figure 11<br />
Correctly fill in the information in each item on the interface<br />
in Figure 11.<br />
Device type<br />
Click the button on the interface in Figure 11 to enter<br />
the advanced option setting<br />
interface, as shown in Figure 12.<br />
Figure 12<br />
Account name<br />
Account password<br />
Dial-in phone number<br />
Provided by the service<br />
provide<br />
Fill in the content on the interface in Figure 12 according to the actual condition. After making sure all the<br />
settings are correct, click the button on the interface in Figure 9 to implement dial-up<br />
connection. During the connection, you can click the button to cancel the connection.<br />
62
18. Software Installer<br />
The software installer is<br />
used to add or delete applications. You can only click to install or uninstall a<br />
related<br />
application.<br />
1) Click the software manager application on the desktop, to display an i nterface, as shown in Figure 1.<br />
2) Use the software manager<br />
through a shortcut as follows:<br />
Step.1:<br />
Click or double click the software manager application on the desktop, to display an interface, as<br />
shown<br />
in Figure 1.<br />
Figure 1<br />
Step<br />
2: Click the Add button, to display an interface, as shown in Figure 2.<br />
Figure 2<br />
63
Step 3: Select a .info file (note: the .xap file and .info file must be in the same directory, otherwise the<br />
program<br />
will not find the installation file), and click the Open button, to display the dialog box that<br />
indicates the progress of the installation, as shown in Figure 3.<br />
Figure 3<br />
Step 4: The installation progress bar also ap pears. After the progress bar reaches 100%, click the<br />
complete<br />
button to complete the installation. If any error occurs during the installation, the program will<br />
give an error prompt when it starts next time, and you can<br />
complete installation as prompted. The<br />
interface after the installation is completed is shown in Figure 4.<br />
Figure 4<br />
64
Step 5: After you click the Finish button, the program is installed at your computer, and the software<br />
manager will display the application related information, as shown in Figure 5.<br />
Figure 5<br />
Step 6: If you want to delete the installed program, select it on the panel, and then click the Remove<br />
button at the right lower comer, to display a dialog box, as shown in Figure 6.<br />
Figure 6<br />
Step 7: Click the OK button to uninstall the program from<br />
the computer, or click the Cancel button to<br />
cancel<br />
the operation.<br />
65
19. System Settings<br />
System settings are used to set the system time, date, network, sound and other items. You can<br />
customize<br />
your <strong>CnMBook</strong><br />
The<br />
following part introduces how to set each item.<br />
(1)<br />
Time setting<br />
Click<br />
the Date/Time Setup icon to open the Time and Date Setup interface, as shown in Figure1.<br />
Set the items on the interface in Figure 1 according to the actual date and time. For example, it is<br />
14:46 on March 11 2008, and the time zone is Asia->Aden.<br />
(2) Network<br />
setting<br />
Click the Network Setup icon to open the Network Setup interface, as shown in Figure 2 (1) and<br />
Figure 2 (2).<br />
Figure 1<br />
Figure2(1)<br />
66
Figure2(2)<br />
If you set your network according to the above steps, you can normally connect the network by<br />
automatically<br />
obtaining the IP address or setting the static IP address.<br />
Here, you will find the DHCP Server option on the interface<br />
in Figure 2 (1) which wasn’t previously<br />
covered.<br />
Check the DHCP Server option, and click the button<br />
to perform the relevant setting, as<br />
shown in Figure 3 (1)<br />
and Figure 3 (2).<br />
Figure 3(1)<br />
67
Server has started, check if the DHCP Server option is selected. If it is selected, then the DHCP<br />
Server has started working, and you can allocate an IP address to the user on the same network.<br />
(3) Owner’ s profile<br />
Figure 3(2)<br />
After settings in Figure 3 (1) and Figure 3 (2), the DHCP Server can start. To make sure if the DHCP<br />
Click the Owner’s Profile icon to open the Owner Information setting interface, as shown in Figure 4.<br />
Figure 4<br />
68
You can set the relevant information according to your favorite and requirement. Here, the user<br />
anywhere<br />
is taken as an example to set the relevant information. The interface is shown in Figure 5.<br />
(4) Sound setting<br />
Figure 5<br />
Click the Sound Setup icon to open the Sound Setup interface, as shown in Figure 6.<br />
Figure 5<br />
69
(5) Desktop Template<br />
The Desktop Template enriches your desktop. With this program, you can set the desktop skin,<br />
system language, font<br />
and toolbar as desired.<br />
Click the Desktop Template icon on the desktop to open the subject palette.<br />
The main interface of the program consists of three tab pages: Theme, Language and System Style.<br />
They<br />
are used follows:<br />
On the Theme tab page (Figure 7), you can set different theme skins for the desktop, and add a group<br />
of icons to the background to personalize your desktop.<br />
Check:<br />
The left list displays the available subject skins that are installed in the current system. To learn<br />
about<br />
each theme skin, click the list thumbnail to get information from the big effect image on the right.<br />
Install:<br />
Select a subject skin thumbnail from the left list, and the click the Apply button. The system<br />
displays<br />
“the subject is being installed”. After it is installed, you can find the desktop (including the<br />
background and icon style) takes on an entirely new look.<br />
Customize the system language on the System Language tab page (Figure 8).<br />
The system provides two languages: English and Simplified<br />
Chinese. Select the desired language, and<br />
then<br />
click the Apply button.<br />
Figure 7<br />
70
Toolbar style: You can select the icon style on the toolbar,<br />
including the size and type (if a text<br />
description<br />
is added).<br />
Figure 8<br />
The System Style tab page (Figure 9) helps you to personalize the font and toolbar.<br />
Application<br />
font: You can select the favorite font and font size for you application menu.<br />
Figure 9<br />
After<br />
setting the desired style, click the Apply button to validate the setting in real time.<br />
71
GNU General Public License<br />
T he software included in this product contains copyrighted software that is licensed under the<br />
GPL. A<br />
copy of that lic ense is included below. You may obtain the complete Corresponding Source code from<br />
CnM<br />
Lifestyle for a period of three years after our last shipment of this product, which will be no earlier<br />
than 01/09/2011,<br />
by sending a cheque for £2.95 to:<br />
Source<br />
for <strong>CnMBook</strong> 7",<br />
CnM Lifestyle,<br />
<strong>KMS</strong><br />
House,<br />
Terra<br />
Nova Way,<br />
Cardiff,<br />
CF64<br />
1SA.<br />
You may<br />
also find a copy of the source available for download at http://www.cnmlifestyle.com.<br />
This<br />
offer is valid to anyone in receipt of this information.<br />
GNU GENERAL PUBLIC LICENSE<br />
Version 2, June 1991<br />
Copyright (C) 1989, 1991 Free Software Foundation, Inc.<br />
675<br />
Mass Ave, Cambridge, MA 02139, USA<br />
Everyone<br />
is permitted to copy and distribute verbatim copies of this license document, but changing it is not allowed.<br />
Preamble<br />
The licenses for most software<br />
are designed to take away your freedom to share and change it. By contrast, the GNU General Public<br />
License is intended to guarantee<br />
your freedom to share and change free software--to make sure the software is free for all its users.<br />
This General Public License applies to most of the Free Software Foundation's software and to any other program whose authors<br />
commit<br />
to using it. (Some other Free Software Foundation software is covered by the GNU Library General Public License instead.) You<br />
can apply it to your programs, too.<br />
When we speak of free software, we are referring to freedom, not price. Our General Public Licenses are designed to make sure that<br />
you have<br />
the freedom to distribute copies of free software (and charge for this service if you wish), that you receive source code or can<br />
get it if you want it, that you can change the software or use pieces of it in new free programs; and that you know you can do these<br />
things.<br />
To protect your rights, we need to make restrictions that forbid anyone to deny you these rights or to ask you to surrender<br />
the rights.<br />
These<br />
restrictions translate to certain responsibilities for you if you distribute copies of the software, or if you modify it.<br />
For<br />
example, if you distribute copies of such a program, whether gratis or for a fee, you must give the recipients all the rights that you<br />
have.<br />
You must make sure that they, too, receive or can get the source code. And you must show them these terms so they know their<br />
rights.<br />
We<br />
protect your rights with two steps: (1) copyright the software, and (2) offer you this license which gives you legal permission to copy,<br />
distribute and/or modify the software.<br />
Also,<br />
for each author's protection and ours, we want to make certain that everyone understands that there is no warranty for this free<br />
software.<br />
If the software is modified by someone else and passed on, we want its recipients to know that what they have is not the<br />
original,<br />
so that any problems introduced by others will not reflect on the original authors' reputations.<br />
Finally,<br />
any free program is threatened constantly by software patents. We wish to avoid the danger that redistributors of a free program<br />
will<br />
individually obtain patent licenses, in effect making the program proprietary. To prevent this, we have made it clear that any patent<br />
must<br />
be licensed for everyone's free use or not licensed at all.<br />
The precise<br />
terms and conditions for copying, distribution and modification follow.<br />
GNU GENERAL PUBLIC LICENSE TERMS AND CONDITIONS FOR COPYING,<br />
DISTRIBUTION AND MODIFICATION<br />
0. This License applies to any program or other work which contains a notice placed by the copyright holder saying it may be distributed<br />
under<br />
the terms of this General Public License. The "Program", below, refers to any such program or work, and a "work based on the<br />
Program" means either the Program or any derivative work under copyright law: that is to say, a work containing the Program or a<br />
portion of it, either verbatim or with modifications and/or translated into another language. (Hereinafter, translation is included without<br />
limitation in the term "modification".) Each licensee is addressed as "you".<br />
72
Activities other than copying, distribution and modification are not covered by this License; they are outside its scope. The act of running<br />
the Program is not restricted, and the output from the Program<br />
is covered only if its contents constitute a work based on the Program<br />
(independent of having been made by running the Program). Whether that is true depends on what the Program does.<br />
1. You may copy and distribute verbatim copies of the Program's source code as you receive it, in any medium, provided that you<br />
conspicuously and appropriately publish on each copy an appropriate copyright notice and disclaimer of warranty; keep intact all the<br />
notices that refer to this License and to the absence of any warranty; and give any other recipients of the Program a copy of this License<br />
along with the Program.<br />
You may charge a fee for the physical<br />
act of transferring a copy, and you may at your option offer warranty protection in exchange for a<br />
fee.<br />
2. You may modify your copy or copies of the Program or any portion of it, thus forming a work based on the Program, and copy and<br />
distribute such modifications<br />
or work under the terms of Section 1 above, provided that you also meet all of these conditions:<br />
a) You must cause<br />
the modified files to carry prominent notices stating that you changed the files and the date of any change.<br />
b) You must cause<br />
any work that you distribute or publish, that in whole or in part contains or is derived from the Program or any part<br />
thereof,<br />
to be licensed as a whole at no charge to all third parties under the terms of this License.<br />
c) If the modified program normally reads commands interactively when run, you must cause it, when started running for such<br />
interactive<br />
use in the most ordinary way, to print or display an announcement including an appropriate copyright notice and a notice that<br />
there is no warranty (or else, saying that you provide a warranty) and that users<br />
may redistribute the program under these conditions,<br />
and telling the user how to view a copy of this License. (Exception: if the Program<br />
itself is interactive but does not normally print such an<br />
announcement,<br />
your work based on the Program is not required to print an announcement.)<br />
These<br />
requirements apply to the modified work as a whole. If identifiable sections of that work are not derived from the Program, and<br />
can be reasonably considered independent<br />
and separate works in themselves, then this License, and its terms, do not apply to those<br />
sections when you distribute<br />
them as separate works. But when you distribute the same sections as part of a whole which is a work<br />
based on the Program, the distribution of the whole must be<br />
on the terms of this License, whose permissions for other licensees extend<br />
to the entire whole, and thus to each and every<br />
part regardless of who wrote it. Thus, it is not the intent of this section to claim rights or<br />
contest your rights to work written entirely by you; rather, the intent is to exercise the right to control the distribution of derivative<br />
or<br />
collective<br />
works based on the Program.<br />
In addition, mere aggregation of another work not based on the Program with the Program (or with a work based on the Program) on a<br />
volume of a storage or distribution medium does not bring the other work under the scope of this License.<br />
3. You may copy and distribute the Program (or a work based on it, under Section 2) in object code or executable form under the terms<br />
of Sections 1 and 2 above provided that<br />
you also do one of the following:<br />
a) Accompany it with the complete corresponding machine-readable source code, which must be distributed under the terms of<br />
Sections 1 and 2 above on a medium customarily used for software interchange; or,<br />
b) Accompany it with a written offer, valid for at least three years, to give any third party, for a charge no more than your cost of<br />
physically<br />
performing source distribution, a complete machine-readable copy of the corresponding source code, to be distributed under<br />
the terms<br />
of Sections 1 and 2 above on a medium customarily used for software interchange; or,<br />
c) Accompany it with the information you received as to the offer to distribute corresponding source code. (This alternative<br />
is allowed<br />
only for noncommercial distribution and only if you received the program in object code or executable form with such an offer, in accord<br />
with Subsection b above.)<br />
The source<br />
code for a work means the preferred form of the work for making modifications to it. For an executable work, complete<br />
source<br />
code means all the source code for all modules it contains, plus any associated interface definition files, plus the scripts used to<br />
control compilation and installation of the executable. However, as a special exception, the source code distributed need not include<br />
anything that is normally distributed (in either source or binary form) with the major components (compiler, kernel, and so on) of the<br />
operating<br />
system on which the executable runs, unless that component itself accompanies the executable.<br />
If distribution of executable or object code is made by offering access to copy from a designated place, then offering equivalent access<br />
to copy the source code from the same place counts as distribution of the source code, even though third<br />
parties are not compelled to<br />
copy the source along with the object code.<br />
4. You may not copy, modify, sublicense, or distribute the Program except as expressly provided under this License. Any attempt<br />
otherwise to copy, modify, sublicense or distribute the Program is void, and will automatically terminate your rights under this License.<br />
However,<br />
parties who have received copies, or rights, from you under this License will not have their licenses terminated so long as<br />
such parties remain in full compliance.<br />
5. You are not required to accept this License, since you have not signed it. However, nothing else grants you permission to<br />
modify or<br />
distribute the Program or its derivative works. These actions are prohibited by law if you do not accept this License. Therefore, by<br />
modifying or distributing the Program (or any work based on the Program), you indicate your acceptance of this License to do so, and all<br />
its terms and conditions for copying, distributing or modifying the Program or works based on it.<br />
6. Each time you redistribute the Program (or any work based on the Program),<br />
the recipient automatically receives a license from the<br />
original<br />
licensor to copy, distribute or modify the Program subject to these terms and conditions. You may not impose any further<br />
73
estrictions on the recipients' exercise of the rights granted herein. You are not responsible for enforcing compliance by third parties to<br />
this License.<br />
7. If, as a consequence of a court judgment or allegation of patent infringement or for any other reason (not limited to patent issues),<br />
conditions are imposed on you (whether by court order, agreement or otherwise) that contradict the conditions of this License, they do<br />
not excuse you from the conditions of this License. If you cannot distribute so as to satisfy simultaneously your obligations under this<br />
License and any other pertinent obligations, then as a consequence you may not distribute the Program at all. For example, if a patent<br />
license would not permit royalty-free<br />
redistribution of the Program by all those who receive copies directly or indirectly through you, then<br />
the only<br />
way you could satisfy both it and this License would be to refrain entirely from distribution of the Program.<br />
If any portion of this section is held invalid or unenforceable under any particular circumstance, the balance of the section is intended to<br />
apply<br />
and the section as a whole is intended to apply in other circumstances.<br />
It is not the purpose of this section to induce you to infringe any patents or other property right claims or to contest validity of any such<br />
claims;<br />
this section has the sole purpose of protecting the integrity of the free software distribution system, which is implemented by<br />
public license practices. Many people have made generous contributions to the wide range of software distributed through that system<br />
in reliance on consistent application of that system; it is up to the author/donor to decide if he or she is willing to distribute software<br />
through any other system and a licensee cannot impose that choice.<br />
This section is intended to make thoroughly clear what is believed to be a consequence of the rest of this License.<br />
8. If the distribution and/or use of the Program is restricted in certain countries either by patents or by copyrighted interfaces, the original<br />
copyright holder who places the Program under this License may add an explicit geographical<br />
distribution limitation excluding those<br />
countries,<br />
so that distribution is permitted only in or among countries not thus excluded. In such case, this License incorporates the<br />
limitation as if written in the body of this License.<br />
9. The Free Software Foundation may publish revised and/or new versions of the General Public License from time to time. Such new<br />
versions will be similar in spirit to the present version, but may differ in detail to address new problems or concerns.<br />
Each version is given a distinguishing version number. If the Program specifies a version number of this License which applies to it and<br />
"any later version", you have the option of following the terms and conditions either of that version or of any later version published by<br />
the Free<br />
Software Foundation. If the Program does not specify a version number of this License, you may choose any version ever<br />
published by the Free Software Foundation.<br />
10. If you<br />
wish to incorporate parts of the Program into other free programs whose distribution conditions are different, write to the<br />
author to ask for permission. For software which is copyrighted by the Free Software Foundation, write to the Free Software Foundation;<br />
we sometimes make exceptions for this. Our decision will be guided by the two goals of preserving the free status of all derivatives of<br />
our free software and of promoting the sharing and reuse of software generally.<br />
NO WARRANTY<br />
11. BECAUSE THE PROGRAM IS LICENSED FREE OF CHARGE, THERE IS NO WARRANTY FOR THE PROGRAM, TO THE<br />
EXTENT PERMITTED BY APPLICABLE LAW. EXCEPT WHEN OTHERWISE STATED IN WRITING THE COPYRIGHT HOLDERS<br />
AND/OR OTHER PARTIES PROVIDE THE PROGRAM "AS IS" WITHOUT WARRANTY OF ANY KIND, EITHER EXPRESSED OR<br />
IMPLIED,<br />
INCLUDING, BUT NOT LIMITED TO, THE IMPLIED WARRANTIES OF MERCHANTABILITY AND FITNESS FOR A<br />
PARTICULAR PURPOSE. THE ENTIRE RISK AS TO THE QUALITY AND PERFORMANCE OF THE PROGRAM IS WITH YOU.<br />
SHOULD THE PROGRAM PROVE DEFECTIVE, YOU ASSUME THE COST OF ALL NECESSARY SERVICING, REPAIR OR<br />
CORRECTION.<br />
12. IN NO EVENT UNLESS REQUIRED BY APPLICABLE LAW OR AGREED TO IN WRITING WILL ANY COPYRIGHT HOLDER, OR<br />
ANY OTHER PARTY WHO MAY MODIFY AND/OR REDISTRIBUTE THE PROGRAM AS PERMITTED ABOVE, BE LIABLE TO YOU<br />
FOR DAMAGES,<br />
INCLUDING ANY GENERAL, SPECIAL, INCIDENTAL OR CONSEQUENTIAL DAMAGES ARISING OUT OF THE<br />
USE OR INABILITY TO USE THE PROGRAM (INCLUDING BUT NOT LIMITED TO LOSS OF DATA OR DATA BEING RENDERED<br />
INACCURATE OR LOSSES SUSTAINED BY YOU OR THIRD PARTIES OR A FAILURE OF THE PROGRAM TO OPERATE WITH<br />
ANY OTHER PROGRAMS), EVEN IF SUCH HOLDER OR OTHER PARTY HAS BEEN ADVISED OF THE POSSIBILITY OF SUCH<br />
DAMAGES.<br />
74
Warranty Information<br />
This product is covered by a one year warranty, but this excludes the battery which is covered by a six<br />
month warranty.<br />
For all warranty issues please contact your place of purchase.<br />
Support<br />
For support on your <strong>CnMBook</strong> please visit www.cnmlifestyle.com to find out about frequently asked<br />
questions or to download patches and updates.<br />
Alternatively you can email support@cnmlifestyle.com<br />
with detailed information about the problem you are experiencing.<br />
We hope you<br />
enjoy using your <strong>CnMBook</strong><br />
All information is subject to change without notice.<br />
75