slip-free measurement of longitudinal and ... - Corrsys-Datron
slip-free measurement of longitudinal and ... - Corrsys-Datron
slip-free measurement of longitudinal and ... - Corrsys-Datron

Create successful ePaper yourself
Turn your PDF publications into a flip-book with our unique Google optimized e-Paper software.
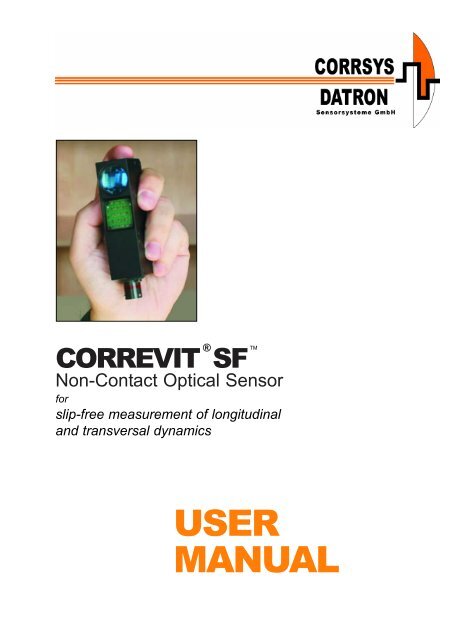
CORREVIT SF<br />
TM<br />
Non-Contact Optical Sensor<br />
for<br />
<strong>slip</strong>-<strong>free</strong> <strong>measurement</strong> <strong>of</strong> <strong>longitudinal</strong><br />
<strong>and</strong> transversal dynamics<br />
®<br />
USER<br />
MANUAL
User Manual CORREVIT ® SF Sensor<br />
Notes:<br />
© 2005 CORRSYS-DATRON Sensorsysteme GmbH, Wetzlar, Germany D049-50-01-03E 09/05 2
User Manual CORREVIT ® SF Sensor<br />
Table <strong>of</strong> Contents<br />
General Information . . . . . . . . . . . . . . . . . . . . . . . . . . . . . . . . . . . . . . . . . . . .4<br />
Safety Instructions . . . . . . . . . . . . . . . . . . . . . . . . . . . . . . . . . . . . . . . . . . . . .5<br />
1. Overview . . . . . . . . . . . . . . . . . . . . . . . . . . . . . . . . . . . . . . . . . . . . . . . . . .6<br />
2. Extent <strong>of</strong> Delivery . . . . . . . . . . . . . . . . . . . . . . . . . . . . . . . . . . . . . . . . . .8<br />
3. Technical Data . . . . . . . . . . . . . . . . . . . . . . . . . . . . . . . . . . . . . . . . . . . . .9<br />
3.1 Specifications . . . . . . . . . . . . . . . . . . . . . . . . . . . . . . . . . . . . . . . . . . . .9<br />
3.2 Pin Assignments . . . . . . . . . . . . . . . . . . . . . . . . . . . . . . . . . . . . . . . . .9<br />
3.2.1 PC (RS232) / CAN Outputs . . . . . . . . . . . . . . . . . . . . . . . . . . .9<br />
3.2.2 Power Connector Outputs . . . . . . . . . . . . . . . . . . . . . . . . . . . . .9<br />
3.3 Internal Signal Filtering . . . . . . . . . . . . . . . . . . . . . . . . . . . . . . . . . . . .10<br />
3.4 Typical Data Plots . . . . . . . . . . . . . . . . . . . . . . . . . . . . . . . . . . . . . . .10<br />
4. Set-up <strong>and</strong> Connection . . . . . . . . . . . . . . . . . . . . . . . . . . . . . . . . . . . .11<br />
4.1 Mounting Options . . . . . . . . . . . . . . . . . . . . . . . . . . . . . . . . . . . . . . . .11<br />
4.2 Sensor Mounting Jig . . . . . . . . . . . . . . . . . . . . . . . . . . . . . . . . . . . . . .11<br />
4.3 Mounting Instructions . . . . . . . . . . . . . . . . . . . . . . . . . . . . . . . . . . . . .12<br />
4.3.1 Mounting with Suction Holders . . . . . . . . . . . . . . . . . . . . . . . .12<br />
4.3.2 Mounting with Magnetic Plate Mounting Unit . . . . . . . . . . . . . .14<br />
4.3.3 Wheel Mount Set-Up . . . . . . . . . . . . . . . . . . . . . . . . . . . . . . .17<br />
4.4 Connecting the Sensor . . . . . . . . . . . . . . . . . . . . . . . . . . . . . . . . . . . .21<br />
5. Troubleshooting . . . . . . . . . . . . . . . . . . . . . . . . . . . . . . . . . . . . . . . . . . .23<br />
Appendix: Technical Drawings<br />
CORREVIT ® is a registered trademark <strong>of</strong> CORRSYS-DATRON Sensorsysteme GmbH, Wetzlar.<br />
CORRSYS-DATRON Sensorsysteme GmbH reserves the right to change specifications without prior notice.<br />
© 2005 CORRSYS-DATRON Sensorsysteme GmbH, Wetzlar, Germany D049-50-01-03E 09/05 3
User Manual CORREVIT ® SF Sensor<br />
General Information<br />
Legal Notice<br />
Information furnished is believed to be accurate <strong>and</strong> reliable. However, CORRSYS-DATRON assumes<br />
no responsibility for the consequences <strong>of</strong> use <strong>of</strong> such information nor for any infringement <strong>of</strong> patents<br />
or other rights <strong>of</strong> third parties which may result from its use. No license is granted by implication or<br />
otherwise under any patent or patent rights <strong>of</strong> CORRSYS-DATRON. Specifications mentioned in this<br />
publication are subject to change without notice <strong>and</strong> do not represent a commitment on the part <strong>of</strong><br />
CORRSYS-DATRON. This publication supersedes <strong>and</strong> replaces all information previously supplied.<br />
All br<strong>and</strong> names are trademarks <strong>of</strong> their respective holders.<br />
Copyright<br />
© Copyright 2005, CORRSYS-DATRON<br />
Revision<br />
D049-50-01-03D 09/05<br />
Contact<br />
International Headquarters:<br />
CORRSYS-DATRON Sensorsysteme GmbH<br />
Charlotte-Bamberg-Str. 12<br />
35523 Wetzlar / Germany<br />
Phone ++49 (6441) 9282-0<br />
Hotline ++49 (6441) 9282-82<br />
Fax ++49 (6441) 9282-17<br />
E-mail sales@corrsys-datron.com<br />
URL www.corrsys-datron.com<br />
North American Headquarters:<br />
CORRSYS-DATRON Sensorsystems, Inc.<br />
21654 Melrose Avenue, Building 16<br />
Southfield, MI 48075 / USA<br />
Phone ++1 (248) 204-0850<br />
Toll-<strong>free</strong>++1 (800) 832-0732<br />
Fax ++1 (248) 204-0864<br />
E-mail USA-sales@corrsys-datron.com<br />
URL www.corrsys-datron.com<br />
© 2005 CORRSYS-DATRON Sensorsysteme GmbH, Wetzlar, Germany D049-50-01-03E 09/05 4
User Manual CORREVIT ® SF Sensor<br />
Safety Instructions<br />
Please read carefully before operating the equipment.<br />
CORRSYS-DATRON is not responsible for damage that may occur when this system is used in<br />
any way other than that for which it is intended.<br />
To assure safe <strong>and</strong> proper operation, all supplied equipment, components <strong>and</strong>/or accessories must be<br />
carefully transported <strong>and</strong> stored, as well as pr<strong>of</strong>essionally installed <strong>and</strong> operated. Careful maintenance<br />
<strong>and</strong> usage in full accordance with operating instructions is imperative.<br />
CORRSYS-DATRON equipment should be installed <strong>and</strong> operated only by qualified persons who are<br />
familiar with devices <strong>of</strong> this type.<br />
Local regulations may not permit the operation <strong>of</strong> motor vehicles on public highways while the<br />
equipment is mounted on the exterior <strong>of</strong> the vehicle.<br />
• Use the equipment only for intended applications. Improper application is not advised.<br />
• Do not modify or change the equipment or its accessories in any way.<br />
• Improper use or mounting <strong>of</strong> the equipment may affect the safety <strong>of</strong> the vehicle <strong>and</strong>/or occupants.<br />
• The equipment must not be mounted <strong>and</strong>/or operated in any way that may compromise vehicle or<br />
<strong>and</strong>/or occupant safety.<br />
• Equipment must be mounted firmly <strong>and</strong> securely.<br />
• Use only original equipment, components <strong>and</strong>/or accessories included in the scope <strong>of</strong> delivery.<br />
• Do not mount equipment, components <strong>and</strong>/or accessories near heat sources (e.g. exhaust).<br />
• Do not use defective or damaged equipment, components <strong>and</strong>/or accessories.<br />
• Always note correct pin assignments <strong>and</strong> operating voltages when connecting equipment to<br />
power supplies, data acquisition/evaluation systems, <strong>and</strong>/or any other system or component.<br />
Equipment may be damaged if not properly connected <strong>and</strong>/or operated.<br />
• For additional information, please call the CORRSYS-DATRON Hotline: ++49 (6441) 9282-82<br />
or: hotline@corrsys-datron.com<br />
Danger<br />
Warning<br />
• Invisible Radiation from light emitting diodes!<br />
Do not observe with optical instruments!<br />
Laser class 1M in compliance with DIN EN 60825 - 1:2001<br />
• The sensor <strong>and</strong>/or sensor components may be damaged if power is applied for extended<br />
periods, especially in hot environmental conditions.<br />
• Disconnect power from the sensor if the vehicle is stationary for extended periods.<br />
© 2005 CORRSYS-DATRON Sensorsysteme GmbH, Wetzlar, Germany D049-50-01-03E 09/05 5
User Manual CORREVIT ® SF Sensor<br />
1. Overview<br />
CORREVIT ® SF<br />
Non-Contact Optical<br />
Sensor<br />
for<br />
<strong>slip</strong>-<strong>free</strong> <strong>measurement</strong> <strong>of</strong><br />
<strong>longitudinal</strong> <strong>and</strong> transversal<br />
dynamics<br />
Article no.:<br />
SF Sensor 13788<br />
The CORREVIT ® SF Sensor marks the next major step in an optimization process that<br />
has resulted in a significant miniaturization <strong>of</strong> the CORREVIT ® optical sensor. Even<br />
with this significant reduction in size <strong>and</strong> weight, functionality <strong>and</strong> <strong>measurement</strong><br />
accuracy remain comparable with existing CORREVIT ® S-Sensors. Miniaturization is<br />
made possible via the use <strong>of</strong> near-infrared light emitting diodes as illumination<br />
elements. With an appropriate heatsink, this new LED light source provides an<br />
operating life even longer than that <strong>of</strong> conventional halogen lamps.<br />
© 2005 CORRSYS-DATRON Sensorsysteme GmbH, Wetzlar, Germany D049-50-01-03E 09/05 6<br />
TM
User Manual CORREVIT ® SF Sensor<br />
Features<br />
• Smallest <strong>and</strong> lightest <strong>of</strong> the CORREVIT ® S Sensors *<br />
• Sensors weighs only 180 g<br />
• Developed for <strong>measurement</strong> <strong>of</strong> tire <strong>slip</strong> angle<br />
• Accurate at speeds up to 350 kph (optional 400 kph)<br />
• Minimum filter time 4 ms.<br />
• Speed linearity - desired distance < ± 0.5 %<br />
Distance linearity < ± 0.2 %<br />
• Easy operation<br />
• Mounting angle correction via s<strong>of</strong>tware<br />
• Direct connection to PC or other evaluation systems<br />
• Illumination by long-life, high-power infrared LEDs<br />
• Signal output via CAN bus<br />
• Negligible service <strong>and</strong> maintenance requirements as a result <strong>of</strong> durable technology<br />
• Tested <strong>and</strong> used under extreme environmental conditions<br />
Application<br />
The compact, lightweight CORRSYS-DATRON SF Sensor is designed for use in dynamic vehicle<br />
testing applications that require highly accurate <strong>measurement</strong> <strong>of</strong> the following variables:<br />
• Distance<br />
• Speed<br />
• Angle<br />
• Longitudinal speed<br />
• Transversal speed<br />
*As <strong>of</strong> 12/04<br />
© 2005 CORRSYS-DATRON Sensorsysteme GmbH, Wetzlar, Germany D049-50-01-03E 09/05 7
User Manual CORREVIT ® SF Sensor<br />
2. Extent <strong>of</strong> Delivery<br />
4.<br />
1.<br />
St<strong>and</strong>ard Extent <strong>of</strong> Delivery Art. No. 13788<br />
1. (1) SF Sensor (Art. No. 13837)<br />
2. (1) SF Electronics Box (Art. No. 13677)<br />
3. (1) Power Cable, 2m MIL Banana (Art. No. 13854)<br />
4. (1) Sensor to Electronics Box Cable, 2m (Art. No.13794)<br />
5. (1) CAN Output Cable, 2m (Art. No. 13683)<br />
6. (1) RS232 Output Cable, 2m (Art. No. 13682)<br />
7. (1) CeCalWin S<strong>of</strong>tware (not shown, Art. No. 11343)<br />
8. (1) Cooling element left + right (not shown, Art. No. 14044)<br />
9. (1) Transport Case (not shown, Art. No. 11228)<br />
10. (1) Inlet for transport case (not shown, Art. No. 11127)<br />
11 . (1) Inlet for transport case (not shown, Art. No. 11131)<br />
2.<br />
3.<br />
© 2005 CORRSYS-DATRON Sensorsysteme GmbH, Wetzlar, Germany D049-50-01-03E 09/05 8<br />
5.<br />
6.
User Manual CORREVIT ® SF Sensor<br />
3. Technical Data<br />
3.1 Specifications<br />
Performance Specifications<br />
Speed range: 0.5 ... 350 (optional 400 kph)<br />
Distance resolution 2.08 mm<br />
Uncertainty <strong>of</strong> <strong>measurement</strong>*: < ±0.2%<br />
Speed linearity - desired distance < ± 0.5 %<br />
Distance linearity < ± 0.2 %<br />
Working distance <strong>and</strong> range: 180 +/-50 mm<br />
CAN Bus: CAN V2.0B<br />
System Specifications<br />
Power supply: 12 V ... 14.5 V; 28 W (12 VDC)<br />
Temperature range: operation: -25 ... 50°C<br />
storage: -40 ... 85°C<br />
rel. humidity: 5 ... 80%, non condensing<br />
System Protection <strong>of</strong> the sensor: IP 67<br />
Illumination wavelength: 850 nm, laser class 1M<br />
Dimensions, sensor head (l x w x h): 100 x 28 x 40 mm (without plug)<br />
Weight, sensor head: 180 g<br />
Dimensions, electronics (L x H x B): 130 x 85 x 20 mm<br />
Weight, electronics: 300 g<br />
Shock: 50 g half-sine, 6 ms<br />
Vibration: 10 g, 10 ... 150 Hz<br />
Serial interface for connection to PC,<br />
automatic sensor identification, function control.<br />
3.2 Pin Assignments<br />
3.2.1 Pin Assignment: PC (RS 232) / CAN Output<br />
Cable: 5-pin MIL / 9-pin D-SUB<br />
RS232/CAN<br />
Pin 1: RXD<br />
Pin 2: TXD<br />
Pin 3: Digital GND<br />
Pin 4: CAN low<br />
Pin 5: CAN high<br />
3.2.2 Pin Assignment: Power Connector<br />
Cable: 5-pin, female<br />
MIL Connector<br />
Power Connector<br />
Pin 1 & 2: +12V Banana, red<br />
Pin 3: Shield<br />
Pin 4 & 5: Ground Banana, black<br />
INVISIBLE RADIATION FROM<br />
LIGHT EMITTING DIODES!<br />
DO NOT OBSERVE WITH<br />
OPTICAL INSTRUMENTS!<br />
LASER CLASS 1M<br />
IN COMPLIANCE WITH<br />
DIN EN 60825-1:2001<br />
© 2005 CORRSYS-DATRON Sensorsysteme GmbH, Wetzlar, Germany D049-50-01-03E 09/05 9
User Manual CORREVIT ® SF Sensor<br />
3.3 Internal Signal Filtering<br />
Signals may be smoothed using a moving average filter, which can be set to different time values.<br />
Note that signal detail <strong>and</strong> dynamics will decrease as the signal becomes increasingly smooth.<br />
Filter Values for Speed<br />
Filter Value delay time<br />
• 8 ms<br />
• 16 ms<br />
• 32 ms<br />
• 64 ms<br />
• 128 ms (default setting)<br />
• 256 ms<br />
• 512 ms<br />
increased signal detail <strong>and</strong> dynamics (as well as noise)<br />
minimum signal delay<br />
smoothest signal<br />
maximum signal delay<br />
Use CeCalWin S<strong>of</strong>tware to change filter settings.<br />
3.4 Typical Data Plots<br />
Brake Test<br />
Speed/Acceleration<br />
2 ms<br />
6 ms<br />
14 ms<br />
30 ms<br />
62 ms<br />
126 ms<br />
254 ms<br />
© 2005 CORRSYS-DATRON Sensorsysteme GmbH, Wetzlar, Germany D049-50-01-03E 09/05 10
User Manual CORREVIT ® SF Sensor<br />
4. Set-up <strong>and</strong> Connection<br />
4.1 Mounting Options<br />
180 mm<br />
i<br />
Longitudinal mounting only!<br />
180 mm<br />
180 mm<br />
Road Surface<br />
The mounting distance from the<br />
lower surface <strong>of</strong> the sensor body<br />
to the road surface must be<br />
180 ±50 mm.<br />
Note:<br />
In wet or snowy conditions, do not mount sensors directly behind the rear wheels.<br />
This will help to prevent <strong>measurement</strong> anomalies that can be caused by spray<br />
<strong>and</strong>/or blowing snow.<br />
4.2 Sensor Mounting Jig<br />
28<br />
40<br />
5<br />
31<br />
Objective<br />
Lens<br />
5<br />
→ 5<br />
59<br />
© 2005 CORRSYS-DATRON Sensorsysteme GmbH, Wetzlar, Germany D049-50-01-03E 09/05 11<br />
100<br />
Mounting holes<br />
18<br />
LED Illumination<br />
Sensor<br />
→ 15<br />
12<br />
MTT00-10-35-PN<br />
13 pin MIL connector
User Manual CORREVIT ® SF Sensor<br />
4.3 Mounting Instructions<br />
4.3.1 Suction Mounting Unit<br />
1. Pre-assemble the CORRSYS-DATRON Suction Mounting<br />
Unit (Art.No. 13990) as shown in Fig. 1.1.<br />
2. Position the Suction Mounting Unit parallel to the vehicle<br />
body (e.g. at the driver-side door), as shown in Fig. 2.1.<br />
To assure proper function <strong>of</strong> the suction holders, the<br />
mounting area must be <strong>free</strong> <strong>of</strong> grease, oil, dust <strong>and</strong> other<br />
contaminants. For this reason it its necessary to clean the<br />
painted surface in the mounting area before attaching the<br />
suction holders. Do not use cleaning products that leave<br />
residue <strong>of</strong> any kind on the surface.<br />
3. Adjust the Mounting Unit perpendicular to the ground:<br />
- Loosen the black levers at each suction holder so that<br />
the suction holder brackets slide <strong>free</strong>ly.<br />
- Position the Mounting Unit so that is perpendicular to<br />
the ground (vertical).<br />
- Re-tighten both levers.<br />
bracket<br />
black lever<br />
Fig. 3.1b<br />
Fig. 1.1<br />
Fig. 2.1<br />
Fig. 3.1a<br />
© 2005 CORRSYS-DATRON Sensorsysteme GmbH, Wetzlar, Germany D049-50-01-03E 09/05 12
User Manual CORREVIT ® SF Sensor<br />
4. When the Mounting Unit is correctly positioned, press the<br />
suction holders - one after the other - firmly against the<br />
vehicle body to flatten the rubber pads against the body<br />
surface. Then, fold the grey levers toward suction<br />
holders to produce a vacuum, which will secure the<br />
suction holders to the vehicle body.<br />
When producing the vacuum, you will feel a distinct<br />
resistance. If the suction created is not sufficient to<br />
secure the holder(s), check to be certain that the<br />
mounting surface is clean.<br />
Always inspect the Suction Mounting Unit before<br />
use. Special attention should be paid to the<br />
condition <strong>of</strong> the rubber suction pads, which must<br />
be absolutely intact. Replace damaged pads<br />
immediately.<br />
Use <strong>of</strong> a safety line is recommended.<br />
5. Measure the sensor mounting height to be sure that the<br />
sensor is within the specified vertical operating range <strong>of</strong><br />
180 +/-50 mm (see pages 9 <strong>and</strong> 11). This distance is<br />
measured from the bottom <strong>of</strong> the sensor body to the road<br />
or track surface. NOTE: The the bottom <strong>of</strong> the heat<br />
sink/sensor mounting plate will be flush with the bottom<br />
surface <strong>of</strong> the sensor, so the mounting height can be<br />
measured from the bottom surface <strong>of</strong> the heat sink/sensor<br />
mounting plate.<br />
If the sensor is not within the specified vertical operating<br />
range, loosen the black levers at each suction holder <strong>and</strong><br />
slide the the vertical mounting rod up or down, as<br />
required, then re-tighten both levers.<br />
If additional adjustment is required, fold the grey levers on<br />
the suction holders down to release suction, then remove<br />
the suction holders from the vehicle body by pulling the<br />
black tab on each holder. Reposition the Mounting Unit so<br />
that the mounting height is correct, then proceed with the<br />
mounting procedure described in Step 3 (page 12).<br />
6. Insert the included sensor mounting screws through the<br />
mounting holes in the sensor, then into the mounting holes<br />
in the heat sink/mounting plate <strong>and</strong> tighten the screws.<br />
Fig. 4.1<br />
Fig. 5.1<br />
Fig. 6.1<br />
© 2005 CORRSYS-DATRON Sensorsysteme GmbH, Wetzlar, Germany D049-50-01-03E 09/05 13
User Manual CORREVIT ® SF Sensor<br />
7. Connect the signal cable to the sensor.<br />
Fig. 7.1ba<br />
8. Route the signal cable trough the side window, into the<br />
interior <strong>of</strong> the vehicle <strong>and</strong> connect it to data acquisition,<br />
then secure the cable to the vertical mounting rod with<br />
with a cable tie.<br />
4.3.2 Magnetic Plate Mounting Unit<br />
1. Pre-assemble the CORRSYS-DATRON Magnetic Plate<br />
Mounting Unit (Art.No. 14091) as shown in Fig. 1.2.<br />
Fig. 7.1b<br />
Fig. 8.1<br />
Fig. 1.2<br />
© 2005 CORRSYS-DATRON Sensorsysteme GmbH, Wetzlar, Germany D049-50-01-03E 09/05 14
User Manual CORREVIT ® SF Sensor<br />
2. Position the Magnetic Mounting Unit parallel to the vehicle<br />
body (e.g. at the driver-side door), as shown in Fig. 2.2.<br />
The magnetic plates will automatically hold fast to the<br />
(metal) vehicle door/body panel.<br />
3. Adjust the Mounting Unit perpendicular to the ground:<br />
- Loosen the black levers at each magnetic holder so that<br />
the magnetic holder brackets slide <strong>free</strong>ly.<br />
- Position the Mounting Unit so that is perpendicular to<br />
the ground (vertical).<br />
- Re-tighten both levers.<br />
bracket<br />
black lever<br />
Abb. 3.2b<br />
Use <strong>of</strong> a safety line is recommended.<br />
4. Measure the sensor mounting height to be sure that the<br />
sensor is within the specified vertical operating range <strong>of</strong><br />
180 +/-50 mm (see pages 9 <strong>and</strong> 11). This distance is<br />
measured from the bottom <strong>of</strong> the sensor body to the road<br />
or track surface. NOTE: The the bottom <strong>of</strong> the heat<br />
sink/sensor mounting plate will be flush with the bottom<br />
surface <strong>of</strong> the sensor, so the mounting height can be<br />
measured from the bottom surface <strong>of</strong> the heat sink/sensor<br />
mounting plate.<br />
If the sensor is not within the specified vertical operating<br />
range, loosen the black levers at each magnetic holder<br />
<strong>and</strong> slide the the vertical mounting rod up or down, as<br />
required, then re-tighten both levers.<br />
If additional adjustment is required, release the magnetic<br />
plates by pulling them away from the vehicle with the black<br />
h<strong>and</strong>les. Reposition the Mounting Unit so that the<br />
mounting height is correct, then proceed with the<br />
mounting procedure described above.<br />
Fig. 2.2<br />
Fig. 3.2a<br />
Fig. 4.2<br />
© 2005 CORRSYS-DATRON Sensorsysteme GmbH, Wetzlar, Germany D049-50-01-03E 09/05<br />
15
User Manual CORREVIT ® SF Sensor<br />
6. Insert the included sensor mounting screws through the<br />
mounting holes in the sensor, then into the mounting holes<br />
in the heat sink/mounting plate <strong>and</strong> tighten the screws.<br />
7. Connect the signal cable to the sensor.<br />
Abb. 6.2a<br />
8. Route the signal cable trough the side window, into the<br />
interior <strong>of</strong> the vehicle <strong>and</strong> connect it to data acquisition,<br />
then secure the cable to the vertical mounting rod with<br />
with a cable tie.<br />
Abb. 5.2<br />
Abb. 6.2b<br />
Abb. 7.2<br />
© 2005 CORRSYS-DATRON Sensorsysteme GmbH, Wetzlar, Germany D049-50-01-03E 09/05 16
User Manual CORREVIT ® SF Sensor<br />
4.3.3 Wheel Mount<br />
The CORRSYS-DATRON Wheel Mount System for CORREVIT ® SF Sensors is designed to enable<br />
precision tire-<strong>slip</strong> <strong>measurement</strong>.<br />
The following mounting units are recommended.<br />
� Sensor Wheel Mounting Unit (Art. No. 14178) consisting <strong>of</strong>:<br />
(1) Torsion rod with protective boot<br />
(1) Suction holder<br />
(1) Torsion rod mounting clamp<br />
(1) Mounting disk with mounting hub<br />
(6) Centering stars (1 each for 3-, 4- <strong>and</strong> 5-lug hubs (Art. No 11295, 11293, 11294)<br />
� Mounting collets for various lug nut sizes:<br />
St<strong>and</strong>ard dimensions:<br />
17 mm, #10070<br />
19 mm, #10071<br />
21 mm, #10072<br />
further on request<br />
1. Remove hubcap or any covering over wheel nuts <strong>and</strong><br />
clean dirt/debris from wheel nuts.<br />
2. Place collets on wheel nuts.<br />
3. Position the mounting disc <strong>and</strong> attach it loosely to collets<br />
with mounting bolts <strong>and</strong> washers.<br />
NOTE: The mounting disc has 3 sets <strong>of</strong> slots for proper<br />
alignment with 3-, 4-, <strong>and</strong> 5-lug configurations. Each set <strong>of</strong><br />
slots is marked 3x, 4x or 5x, corresponding the number <strong>of</strong><br />
lugs.<br />
Fig. 1.3<br />
Fig. 2.3<br />
© 2005 CORRSYS-DATRON Sensorsysteme GmbH, Wetzlar, Germany D049-50-01-03E 09/05 17
User Manual CORREVIT ® SF Sensor<br />
4. Place the centering star tightly against the<br />
mounting disk <strong>and</strong> position the concave edges <strong>of</strong><br />
the centering star against the washers on the<br />
mounting bolts, as shown. Then, turn the<br />
centering star until it is tight against all <strong>of</strong> the<br />
washers to ensure that the mounting disk is<br />
properly centered on the wheel.<br />
5. Continue to hold the centering star tightly against the<br />
mounting washers <strong>and</strong> mounting disk, then tighten the<br />
mounting bolts in a cross pattern, using an allen wrench.<br />
6. Using an allen wrench, loosen the set-screw at the<br />
bottom <strong>of</strong> the torsion rod retainer clamp <strong>and</strong> place the<br />
retainer clamp onto the mounting hub.<br />
NOTE: The set screw should not be tightened until<br />
after the torsion rod is properly positioned, see Step 11.<br />
(page 19).<br />
torsion rod<br />
mounting hub<br />
retainer clamp set screw<br />
7. Slip the protective boots over the lower <strong>and</strong> upper<br />
sections <strong>of</strong> the torsion rod. Then, fit the upper section <strong>of</strong><br />
the torsion rod into the joiner at the top <strong>of</strong> the lower<br />
section <strong>of</strong> the torsion rod. Check the safety line to be<br />
sure it is secured to the torsion rod.<br />
A safety line should always<br />
be used to avoid damage or<br />
injury in the event that a<br />
suction holder separates<br />
from the vehicle body during<br />
the test drive.<br />
safety line<br />
protective boots<br />
Fig. 3.3<br />
Fig. 4.3<br />
Fig. 5.3<br />
Fig. 6.3<br />
© 2005 CORRSYS-DATRON Sensorsysteme GmbH, Wetzlar, Germany D049-50-01-03E 09/05 18
User Manual CORREVIT ® SF Sensor<br />
8. To assure proper function <strong>of</strong> the suction holders, the<br />
mounting area must be <strong>free</strong> <strong>of</strong> grease, oil, dust <strong>and</strong> other<br />
contaminants. For this reason it its necessary to clean the<br />
painted surface in the mounting area before attaching the<br />
suction holders. Do not use cleaning products that leave<br />
residue <strong>of</strong> any kind on the surface. Place the suction<br />
holders firmly against the vehicle fender <strong>and</strong> latch the<br />
suction holder lock h<strong>and</strong>les (latched position is<br />
approximately parallel to vehicle fender surface).<br />
When producing the vacuum, you will feel a<br />
distinct resistance<br />
9. Tighten the set screws that secure the upper <strong>and</strong> lower<br />
sections <strong>of</strong> the torsion rods together, using an allen<br />
wrench.<br />
10.If necessary, adjust the torsion rod so that is parallel to<br />
the vehicle, then tighten the nut that secures the<br />
suction holder mounting to the torsion rod.<br />
11.Tighten the retainer clamp set-screw with a allen<br />
wrench.<br />
Fig. 7.3<br />
Fig. 8.3<br />
Fig. 9.3<br />
Fig. 10.3<br />
© 2005 CORRSYS-DATRON Sensorsysteme GmbH, Wetzlar, Germany D049-50-01-03E 09/05 19
User Manual CORREVIT ® SF Sensor<br />
12.Secure the safety line at a suitable location on the vehicle.<br />
13.Loosen the sensor mounting retainer set screw with an<br />
allen wrench.<br />
Place the mounting plate onto the mounting hub <strong>and</strong><br />
re-tighten the set-screw.<br />
Insert the included sensor mounting screws through the<br />
mounting holes in the sensor, then into the mounting<br />
holes in the mounting plate <strong>and</strong> tighten the screws.<br />
14.Measure the sensor mounting height to be sure that the<br />
sensor is within the specified vertical operating range <strong>of</strong><br />
180 +/-50 mm (see pages 9 <strong>and</strong> 11). This distance is<br />
measured from the bottom <strong>of</strong> the sensor body to the road<br />
or track surface. If the sensor is not within the specified<br />
vertical operating range, first loosen the screws <strong>and</strong><br />
move the sensor up or down, as required, in the<br />
channels on the mounting plate <strong>and</strong> measure again.<br />
If this adjustment is insufficient, remove the mounting<br />
plate from the retainer clamp using an allen wrench.<br />
Move the plate up or down as required <strong>and</strong><br />
re-attach the plate to the mounting plate, then securely<br />
re-mount the sensor to the mounting plate.<br />
15.Connect the signal cable to the sensor, then wind the<br />
cable loosely around the torsion bar.<br />
Danger<br />
WARNING: Be sure to leave enough slack in the<br />
cable to allow for full-lock steering changes, but<br />
use caution to assure that the cable is not wound<br />
too loosely around the torsion bar. Under no<br />
circumstances should the cable be loose enough<br />
to touch the tire or to be pulled under the fender<br />
during testing. Either circumstance would<br />
inevitably result in damage to the equipment <strong>and</strong><br />
could also cause an accident.<br />
Finally, connect the cable to data acquisition.<br />
Fig. 11.3<br />
Fig. 12.3<br />
bottom <strong>of</strong><br />
sensor<br />
Fig. 13.3<br />
Fig. 14.3<br />
© 2005 CORRSYS-DATRON Sensorsysteme GmbH, Wetzlar, Germany D049-50-01-03E 09/05 20
User Manual CORREVIT ® SF Sensor<br />
16.If desired, mount the optional heat sink onto the sensor<br />
head using an allen wrench.<br />
4.4 Connecting the sensor<br />
Sensor Connections Sensor Electronic Connections<br />
to<br />
Electronics<br />
Box<br />
Power<br />
&<br />
St<strong>and</strong>still<br />
LEDs<br />
Fig. 15.3<br />
to<br />
Sensor<br />
PC Serial<br />
&<br />
CAN Interface<br />
to<br />
Power<br />
Supply<br />
Reverse Polarity Protection<br />
The electronic unit is equipped with reverse polarity protection. In the event that polarity is inverted,<br />
the unit will not be damaged but the power LED will illuminate red! Immediately disconnect power<br />
from the unit <strong>and</strong> correct the power supply connection.<br />
© 2005 CORRSYS-DATRON Sensorsysteme GmbH, Wetzlar, Germany D049-50-01-03E 09/05 21
User Manual CORREVIT ® SF Sensor<br />
To connect the sensor to a PC or laptop for set-up <strong>and</strong> calibration with<br />
CeCalWin S<strong>of</strong>tware:<br />
1. Connect the sensor signal output to the signal input on the electronics with the 5m Sensor to<br />
Electronics Box Cable (Art. No. 13796).<br />
2. Connect the electronic to a PC operating CeCalWin S<strong>of</strong>tware via the RS232 Output Cable, 2m<br />
(Art. No. 13682)<br />
3. Be sure that the individual switches on each power output circuit on the power distribution unit are<br />
in the "OFF" position.<br />
4. Connect the supply cable from the electronics to a CORRSYS-DATRON power distribution box.<br />
5. Start the vehicle engine <strong>and</strong> carefully connect the power distribution unit to the vehicle power supply.<br />
6. Switch the distribution box power circuit ON to send power to the sensor electronics box(es).<br />
7. The sensor is now ready for set-up <strong>and</strong> calibration with CeCalWin S<strong>of</strong>tware.<br />
See Using the CeCalWin S<strong>of</strong>tware Package for complete details.<br />
To connect the sensor to data acquisition:<br />
If the sensor is currently connected to PC for set-up/calibration:<br />
1. Disconnect the RS232 Output Cable (Art. No. 13682) from the PC/laptop.<br />
NOTE: It is not necessary to power down the sensor/electronic before disconnecting<br />
or connecting the signal cable.<br />
2. Connect the electronic to data acquisition:<br />
- for Serial connection, simply connect the RS232 Output Cable, 2m (Art. No. 13682) to the data<br />
acquisition system.<br />
or<br />
- for CAN connection, disconnect the RS232 Output Cable <strong>and</strong> connect the electronic to data<br />
acquisition via CAN Output Cable, 2m (Art. No. 13683).<br />
If the sensor is not already connected to PC for set-up/calibration:<br />
1. Connect the sensor signal output to the signal input on the electronic with the 5m Sensor to<br />
Electronics Box Cable (Art. No. 13796).<br />
2. Connect the electronic to data acquisition:<br />
- for CAN connection, use CAN Output Cable, 2m (Art. No. 13683)<br />
or<br />
- for Serial connection, use RS232 Output Cable, 2m (Art. No. 13682)<br />
3. Be sure that the individual switches on each power output circuit on the power distribution unit are<br />
in the "OFF" position.<br />
4. Connect the supply cable from the electronics to a CORRSYS-DATRON power distribution box.<br />
5. Start the vehicle engine <strong>and</strong> carefully connect the power distribution unit to the vehicle power supply.<br />
6. Switch the distribution box power circuit ON to send power to the sensor electronics box(es).<br />
© 2005 CORRSYS-DATRON Sensorsysteme GmbH, Wetzlar, Germany D049-50-01-03E 09/05 22
User Manual CORREVIT ® SF Sensor<br />
5. Troubleshooting<br />
When troubleshooting the CORREVIT ® SF Sensor,<br />
begin by checking the following:<br />
Cables <strong>and</strong> power supply<br />
• Check all connections to determine that each is complete <strong>and</strong> that the system is connected to<br />
a power supply that provides voltage output within the specified range.<br />
• Check to determine that the correct cables have been used for all connections.<br />
• The following problems can be caused by incorrect or incomplete cable connections <strong>and</strong>/or<br />
connection to incorrect power supply voltage:<br />
- Output signals are not available to data acquisition <strong>and</strong>/or connected PC.<br />
- A sensor will not go out <strong>of</strong> st<strong>and</strong>still mode with vehicle motion.<br />
Status LED’s on sensor electronic boxes<br />
• If all connections are correct <strong>and</strong> no faults are present, the "PWR" (power) LED on the sensor<br />
electronic will be illuminated orange. If the "PWR" LED is red, a fault is indicated. Additionally,<br />
the green "ST" (st<strong>and</strong>still) LED will be illuminated if all connections are correct <strong>and</strong> no faults<br />
are present.<br />
• If the "PWR" LED is red <strong>and</strong> the green "ST" LED is not illuminated, polarity has been reversed<br />
<strong>and</strong> must be corrected.<br />
• If the "PWR" LED is orange <strong>and</strong> the green "ST" LED is not illuminated, cables may have been<br />
connected incorrectly. Check <strong>and</strong> reconnect cables as necessary.<br />
Operating range<br />
If a sensor is mounted out <strong>of</strong> the recommended height range (st<strong>and</strong><strong>of</strong>f distance), it may not go out <strong>of</strong><br />
st<strong>and</strong>still mode with vehicle motion, <strong>and</strong> no <strong>measurement</strong> signals will be output. Check <strong>and</strong> correct<br />
mounting as necessary.<br />
Sensor lens<br />
The sensor lens (located on the underside <strong>of</strong> the sensor housing) may occasionally become dirty,<br />
preventing proper operation. Check <strong>and</strong> clean the sensor lens regularly.<br />
S<strong>of</strong>tware<br />
If one or more output signals appear to be incorrect, the sensor may have been set-up incorrectly via<br />
CeCalWin S<strong>of</strong>tware. Check all relevant settings in CeCalWin:<br />
- Check calibration factor<br />
Environmental conditions<br />
The sensor may occasionally interpret heavy spray from snow or water as part <strong>of</strong> the road or track<br />
surface, producing unexplained spikes in the output signals <strong>and</strong>/or other anomalous <strong>measurement</strong><br />
artifacts. Sensors should be mounted away from the heaviest spray areas, especially directly behind<br />
the rear wheels.<br />
EMC interference<br />
If the sensor starts to send output signals without vehicle motion, triggering may have been caused by<br />
excessive EMC interference from the test vehicle. To correct this condition, reset the sensor by<br />
disconnecting from power <strong>and</strong> then re-connecting, or by switching power <strong>of</strong>f <strong>and</strong> then back on at the<br />
power distribution box. If the condition persists, disconnect sensor from vehicle ground <strong>and</strong> isolate it at<br />
all mounting points.<br />
© 2005 CORRSYS-DATRON Sensorsysteme GmbH, Wetzlar, Germany D049-50-01-03E 09/05 23
User Manual CORREVIT ® SF Sensor<br />
If none <strong>of</strong> the above recommendations provides a solution, you may wish<br />
to contact CORRSYS-DATRON. Before doing so, please be ready to supply<br />
the following:<br />
• A .ccw file saved from CeCalWin s<strong>of</strong>tware to serve as an example <strong>of</strong> the problem or fault<br />
condition.<br />
• A list <strong>of</strong> all which outputs that appear to be problematic, i.e. analog, digital, CAN, RS-232.<br />
• The serial numbers <strong>of</strong> all relevant components.<br />
Troubleshooting CAN with the CORREVIT ® SF Sensor<br />
Problem: There are no messages on the CAN-bus<br />
Check to be sure that:<br />
• the electronic has power<br />
• data acquisition is connected to the SF sensor electronic<br />
• the correct send mode is selected (in CeCalWin S<strong>of</strong>tware settings)<br />
• the data acquisition system <strong>and</strong> all sensor electronics use the same settings<br />
for baud rate, CAN identifiers <strong>and</strong> identifier types (see CeCalWin S<strong>of</strong>tware settings)<br />
• if you use CANalyser or a data acquisition system with an acceptance filter, be<br />
sure the message from the sensor is not disabled<br />
Problem: Data received via the CAN bus appear to be incorrect<br />
Please be sure that:<br />
• the data acquisition system uses Intel data format for communication via CAN-bus<br />
• the data acquisition system <strong>and</strong> all sensor electronics use the same settings for the type <strong>of</strong><br />
measured value (signed or unsigned, number <strong>of</strong> bits)<br />
For more information about data types <strong>and</strong> how they apply to this sensor, see the separate CAN<br />
Protocol.<br />
CORRSYS-DATRON recommends that the .dbc file option be used to avoid problems with<br />
false data types or bit lengths. Sensor-specific .dbc files are available for download at<br />
www.corrsys-datron.com, or may also be obtained by contacting the CORRSYS-DATRON<br />
application department directly.<br />
© 2005 CORRSYS-DATRON Sensorsysteme GmbH, Wetzlar, Germany D049-50-01-03E 09/05 24
User Manual CORREVIT ® SF Sensor<br />
Appendix: Technical Drawing<br />
MTT00-10-35PN<br />
13-pin MIL plug<br />
mounting holes for M5<br />
objective<br />
LED illumination<br />
isometric<br />
aluminum housing<br />
SF Sensor Head<br />
<strong>measurement</strong> surface