COGO Manual - Colorado Department of Transportation
COGO Manual - Colorado Department of Transportation
COGO Manual - Colorado Department of Transportation

You also want an ePaper? Increase the reach of your titles
YUMPU automatically turns print PDFs into web optimized ePapers that Google loves.
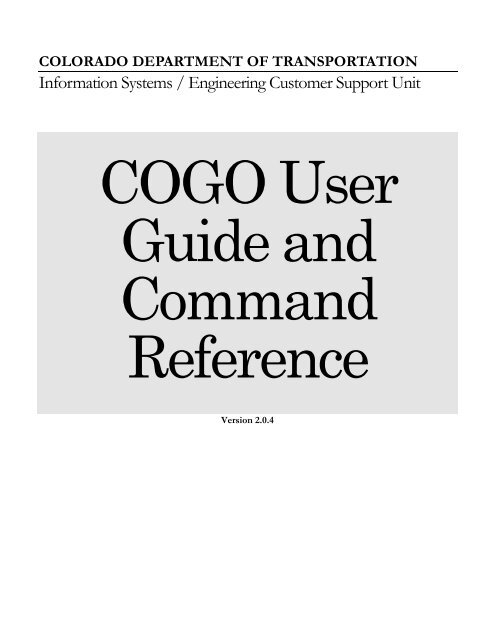
COLORADO DEPARTMENT OF TRANSPORTATION<br />
Information Systems / Engineering Customer Support Unit<br />
<strong>COGO</strong> User<br />
Guide and<br />
Command<br />
Reference<br />
Version 2.0.4
ENGINEERING CUSTOMER SUPPORT UNIT<br />
<strong>COGO</strong> User Guide and Command<br />
Reference<br />
© 2001 – 2002 <strong>Colorado</strong> <strong>Department</strong> <strong>of</strong> <strong>Transportation</strong><br />
4201 E. Arkansas<br />
Denver, <strong>Colorado</strong> 80222<br />
December 16, 2002<br />
<strong>COGO</strong> Version 2.0.4<br />
i
Table <strong>of</strong> Contents<br />
Table <strong>of</strong> Contents ......................................................................... ii<br />
Preface ......................................................................................... vi<br />
Intended Audience......................................................................................... vi<br />
Document Structure....................................................................................... vi<br />
<strong>Manual</strong> Conventions ...................................................................................... vi<br />
Introduction to <strong>COGO</strong>................................................................... 1<br />
What Is <strong>COGO</strong>?............................................................................................. 1<br />
<strong>COGO</strong> Item Definitions .................................................................................. 1<br />
Points .................................................................................................. 1<br />
Lines and Line Segments.................................................................... 2<br />
Curves ................................................................................................. 3<br />
Simple Curves....................................................................................................... 3<br />
Compound Curves ................................................................................................ 4<br />
Reversing Curves ................................................................................................. 4<br />
Transition Spirals .................................................................................................. 5<br />
Complex Curves ................................................................................................... 6<br />
Arcs ...................................................................................................................... 6<br />
Curve Points ......................................................................................................... 7<br />
Alignments........................................................................................... 7<br />
Traverses ............................................................................................ 8<br />
Parcels ................................................................................................ 9<br />
Installing <strong>COGO</strong>............................................................................................. 10<br />
Recommended Computer Configuration............................................. 10<br />
Installation Instructions........................................................................ 10<br />
Installing from the CDOT network ......................................................................... 10<br />
Installing <strong>COGO</strong> via the Internet............................................................................ 12<br />
Setting up <strong>COGO</strong> in AutoCAD............................................................................... 14<br />
Executing <strong>COGO</strong> in Micros<strong>of</strong>t Windows........................................................ 16<br />
Executing <strong>COGO</strong> Inside <strong>of</strong> AutoCAD ............................................................ 17<br />
Entering Data in <strong>COGO</strong>................................................................. 19<br />
Entering Numbers.......................................................................................... 19<br />
Entering Characters....................................................................................... 20<br />
Item Names ......................................................................................... 20<br />
File Names .......................................................................................... 20<br />
Dates ................................................................................................... 20<br />
Entering Distances......................................................................................... 21<br />
Entering Directions ........................................................................................ 21<br />
Azimuths.............................................................................................. 21<br />
Bearings .............................................................................................. 22<br />
Zenith Angles ...................................................................................... 23<br />
Entering Stations ........................................................................................... 24<br />
Creating Points............................................................................. 25<br />
The Point Menu ............................................................................................. 25<br />
Storing Points ................................................................................................ 26<br />
Copying Points............................................................................................... 26<br />
Locating Points Using Existing Information ................................................... 27<br />
Using a Distance and Direction to Locate a Point............................... 27<br />
Using a Direction from a Line Segment to Locate a Point .................. 27<br />
ii<br />
ii
Deflection Method ................................................................................................. 28<br />
Angle Method........................................................................................................ 28<br />
Using a Station to Locate a Point........................................................ 29<br />
Locating an Offset point ...................................................................... 30<br />
Offsetting Points from a Curve ............................................................ 30<br />
Projecting Points on a <strong>COGO</strong> Item ..................................................... 31<br />
Creating Points by Intersecting Two <strong>COGO</strong> Objects .......................... 33<br />
Creating Points by Turning Angles from the Ends <strong>of</strong> a Line Segment 34<br />
Locating a new point using two distances from two points ................. 34<br />
Locating a new point on a line, a distance from a point ...................... 35<br />
Locating a point <strong>of</strong> tangency to a curve, using a direction.................. 36<br />
Locating a Point <strong>of</strong> Tangency to a Curve, Using a Point Near the Curve 36<br />
Other Functions That Create Points .............................................................. 37<br />
Creating and Manipulating Lines ................................................. 38<br />
The Line Menu............................................................................................... 38<br />
Using Temporary Line Segments .................................................................. 39<br />
Storing Line Segments .................................................................................. 39<br />
Storing Lines or Rays .................................................................................... 39<br />
Dividing Lines to Create Points ..................................................................... 40<br />
Best Fit Line................................................................................................... 41<br />
Creating Curves............................................................................ 42<br />
The Curve Menu ............................................................................................ 42<br />
Creating a Curve............................................................................................ 43<br />
Dividing a Curve to Create New Points ......................................................... 45<br />
Creating and Adjusting Traverses ............................................... 46<br />
The Traverse menu ....................................................................................... 46<br />
Storing a Traverse ......................................................................................... 46<br />
Creating a Traverse Using Distance / Direction Pairs ................................... 47<br />
Creating a Traverse Using the Angle Right Survey....................................... 49<br />
Adjusting a Traverse...................................................................................... 50<br />
Creating Alignments..................................................................... 51<br />
The Alignment Menu...................................................................................... 51<br />
Storing an Alignment ..................................................................................... 51<br />
Creating an Alignment ................................................................................... 52<br />
Creating Curves as Part <strong>of</strong> an Alignment ...................................................... 54<br />
Creating Parcels........................................................................... 55<br />
The Parcel Menu ........................................................................................... 55<br />
Creating a Parcel ........................................................................................... 55<br />
Listing, Reporting, and Deleting Items ........................................ 59<br />
Listing Items in the Model.............................................................................. 59<br />
Item Reports .................................................................................................. 60<br />
Deleting Items................................................................................................ 61<br />
Other <strong>COGO</strong> Functions ................................................................. 62<br />
The Misc Menu .............................................................................................. 62<br />
Angle, Azimuth, Bearing, and Distance ......................................................... 62<br />
Executing <strong>COGO</strong> Commands ....................................................................... 63<br />
Deleting all <strong>COGO</strong> Items ............................................................................... 63<br />
Resetting the Total Area Register ................................................................. 64<br />
Setting the Working Units .............................................................................. 64<br />
Station Offset Function .................................................................................. 64<br />
Rotating and Translating <strong>COGO</strong> data in Windows and AutoCAD................. 65<br />
Transferring Information to Other Engineering Applications ...... 66<br />
AutoCAD........................................................................................................ 66<br />
iii<br />
iii
Layer Names in AutoCAD ................................................................... 67<br />
MX.................................................................................................................. 68<br />
SDR Data Collectors and PICS ..................................................................... 68<br />
RoadCalc Version 13..................................................................................... 70<br />
<strong>COGO</strong> Input, Output, Log, Saved Tables, and Archive Files........ 71<br />
<strong>COGO</strong> Input from a File................................................................................. 71<br />
The <strong>COGO</strong> Log File....................................................................................... 72<br />
<strong>COGO</strong> Output to a File .................................................................................. 73<br />
<strong>COGO</strong> Saved Tables..................................................................................... 73<br />
Archiving <strong>COGO</strong> Data for Future Use ........................................................... 74<br />
<strong>COGO</strong> in Windows Functions........................................................ 75<br />
The View Menu.............................................................................................. 75<br />
Zooming......................................................................................................... 76<br />
Panning.......................................................................................................... 76<br />
Refreshing the Display Area.......................................................................... 77<br />
Setting Item Colors ........................................................................................ 77<br />
<strong>COGO</strong> in AutoCAD Functions........................................................ 78<br />
Displaying <strong>COGO</strong> Data in AutoCAD.............................................................. 78<br />
Graphically Selecting <strong>COGO</strong> Points.............................................................. 79<br />
Graphically Moving <strong>COGO</strong> Points ................................................................. 80<br />
<strong>COGO</strong> Command Reference ......................................................... 81<br />
Adjust Traverse Command............................................................................ 81<br />
Alignment Command ..................................................................................... 82<br />
Angle Command ............................................................................................ 86<br />
Archive Command ......................................................................................... 86<br />
Area Command.............................................................................................. 87<br />
Azimuth Command ........................................................................................ 88<br />
Bearing Command......................................................................................... 88<br />
Deleting Points, Lines, Curves, Traverses, Alignments, Parcels and Text ... 89<br />
Deleting All Items in the <strong>COGO</strong> Model .......................................................... 89<br />
Distance Command ....................................................................................... 89<br />
Divide Line Command ................................................................................... 90<br />
Divide Line Segment Command.................................................................... 90<br />
Divide Curve Command................................................................................. 91<br />
Eject Command ............................................................................................. 91<br />
Finish Command............................................................................................ 91<br />
Layout Ties Command................................................................................... 92<br />
Layout Curve Command................................................................................ 93<br />
Layout Alignment Command ......................................................................... 93<br />
List Points, Lines, or Curves Command ........................................................ 94<br />
List Alignments, Traverses, Parcels, or Text Command ............................. 94<br />
List Alignment, Traverse, or Parcel Contents Command .............................. 94<br />
List All Items Command................................................................................. 95<br />
List Table Size Command.............................................................................. 95<br />
Locate Command Common Parameters and Options .................................. 95<br />
Locate a Point Given a Distance and Direction From Another Point ............ 98<br />
Locating a Point Given a Distance and Deflection from the End <strong>of</strong> a Line Segment 98<br />
Locating a Point Using a Distance and Angle from the Beginning <strong>of</strong> a Line Segment 99<br />
Locating a Point Using a Station on an Alignment ........................................ 100<br />
Locating a Point Which Is Offset from a <strong>COGO</strong> Item .................................... 101<br />
Locating Points Which Are Offset from a Curve............................................ 101<br />
Locating a Point by Projecting Another Point Onto a <strong>COGO</strong> Item ................ 102<br />
Locating the Intersection <strong>of</strong> Two <strong>COGO</strong> Items.............................................. 103<br />
Locating a Point Using Deflections From the Ends <strong>of</strong> a Line Segment......... 104<br />
iv<br />
iv
Locating a Point Using Two Distances from Two Different Points ................ 105<br />
Locating a Point Using a Distance from a Point and an Angle Turned from a Line Segment 106<br />
Locating a Point on a Curve Where the Tangent to the Curve Is a Specified Direction 107<br />
Locating a Point Where the Tangent to the Curve Passes Through Another Point 108<br />
Parcel Command ........................................................................................... 109<br />
Print Alignment Book Command ................................................................... 112<br />
Reporting the Geometry <strong>of</strong> Points, Lines, Curves, Alignments, Parcels, and Text 113<br />
Print All Command......................................................................................... 115<br />
Reset Area Command ................................................................................... 115<br />
Restation Alignment Command..................................................................... 115<br />
Restore Command......................................................................................... 116<br />
Rotate Translate Command........................................................................... 117<br />
Save Command ............................................................................................. 117<br />
Set No Redefine Command........................................................................... 118<br />
Set Date Command ....................................................................................... 118<br />
Set File Commands ....................................................................................... 119<br />
Set Log File Command.................................................................................. 119<br />
Set File Input.................................................................................................. 119<br />
Set File Input TTY Command ........................................................................ 120<br />
Set File Output Command ............................................................................. 120<br />
Set MOSS File Output Command (<strong>COGO</strong> to MX Interface) ......................... 121<br />
Set Roadcalc File Output Command (<strong>COGO</strong> to Roadcalc Interface) ........... 123<br />
Set SDR File Output Command (Leitz data collector interface).................... 124<br />
Set Three Dimensions Command ................................................................. 124<br />
Set Units Command....................................................................................... 125<br />
Station Alignment Command......................................................................... 125<br />
Station Offset Alignment Command .............................................................. 125<br />
Store Alignment Command ........................................................................... 126<br />
Store Curve Command.................................................................................. 127<br />
Store Line Command (direction form) ........................................................... 132<br />
Store Line Command (point to point form) .................................................... 132<br />
Store Point Command ................................................................................... 132<br />
Copy Point Command.................................................................................... 133<br />
Store Spiral Command .................................................................................. 133<br />
Store Text Command..................................................................................... 134<br />
Store Traverse Command ............................................................................. 135<br />
Traverse Command (distance/direction) ....................................................... 135<br />
Traverse Command (angle right)................................................................... 137<br />
An Example <strong>of</strong> a <strong>COGO</strong> Project .................................................... 140<br />
Appendix A – <strong>COGO</strong> command word abbreviations ..................... 153<br />
Appendix B - <strong>COGO</strong> Error Messages ............................................ 155<br />
Appendix C - <strong>COGO</strong> Command Quick Reference ......................... 158<br />
v
Preface<br />
This manual is a user guide and command reference for the <strong>Colorado</strong> <strong>Department</strong> <strong>of</strong> <strong>Transportation</strong><br />
<strong>COGO</strong> program.<br />
Intended Audience<br />
This manual is intended someone who is familiar with their discipline and has an understanding <strong>of</strong><br />
geometry.<br />
Document Structure<br />
The first part <strong>of</strong> this manual is a guide to understanding CDOT <strong>COGO</strong>. If you have never used <strong>COGO</strong><br />
before it is advisable to start with this section.<br />
The second part <strong>of</strong> this manual is devoted to the individual commands. The commands are in alphabetical<br />
order.<br />
The appendices contain command word abbreviations, a listing <strong>of</strong> the <strong>COGO</strong> error messages, and a<br />
<strong>COGO</strong> quick reference.<br />
<strong>Manual</strong> Conventions<br />
ICON KEY<br />
� <strong>COGO</strong> Command<br />
� Windows Information<br />
A AutoCAD Information<br />
! Important Note<br />
E<br />
ach chapter in this manual begins with an icon key. These icons point<br />
out <strong>COGO</strong> command information, Windows information or tips,<br />
AutoCAD information, and important notes.<br />
� Just as <strong>COGO</strong> has conventions for entering commands, this manual has conventions which indicate<br />
how to enter the command, the sequence <strong>of</strong> items in the command and what data is supplied by the user<br />
to complete the command. A <strong>COGO</strong> command is composed <strong>of</strong> three major elements<br />
vi<br />
vi
� Command words<br />
� User supplied data<br />
� Command parameters<br />
Command words may be required or optional. All command words appear in the manuals as upper case<br />
(capital) letters. Optional commands words are surrounded by square brackets ([ ]). Please note that the<br />
examples are the exception to this convention. Required command words cannot be omitted from the<br />
command. If the required command words are omitted <strong>COGO</strong> will not recognize the command and may<br />
execute a command which is similar in structure. This may cause unexpected results. Optional command<br />
words may be omitted from the command. Optional command words serve two purposes. Optional<br />
words reduce the amount <strong>of</strong> data input and allow the <strong>COGO</strong> user to customize the command to be<br />
executed. Omitting command words results in less input for the user but may decrease the legibility <strong>of</strong> the<br />
<strong>COGO</strong> input. If a question arises about whether or not an optional command word should be used, let<br />
the legibility issue decide it. Another way <strong>of</strong> reducing the input to <strong>COGO</strong> is to use command word<br />
abbreviations. Most command words may be abbreviated. The abbreviations are contained in the <strong>COGO</strong><br />
command reference in Appendix A. The following is an example <strong>of</strong> a command in the reference manual.<br />
STORE [POINT] p *id* [NORTH] n [EAST] e [STATION] s [ELEV] el<br />
The required command word is STORE. The optional command words are; POINT, NORTH, EAST,<br />
STATION, and ELEV. The user supplied data is; p, n, e, s, and el.<br />
Command parameters are parts <strong>of</strong> the command that are not required for proper execution <strong>of</strong> the<br />
command. All command parameters are surrounded by square brackets ([ ]). Some command words in<br />
the command parameters are optional and they too will be surrounded by square brackets.<br />
If a series <strong>of</strong> command words or phrases are surrounded by parenthesis ( ) and separated by slashes (/),<br />
one <strong>of</strong> the command words or phrases must be selected from the list for the command to execute<br />
properly.<br />
vii<br />
vii
Introduction to <strong>COGO</strong><br />
This chapter covers information about <strong>COGO</strong>, the basic items used in <strong>COGO</strong>, and<br />
how to install and execute <strong>COGO</strong>. This chapter is essential reading for the new<br />
<strong>COGO</strong> user.<br />
ICON KEY<br />
� <strong>COGO</strong> Command<br />
� Windows Information<br />
A AutoCAD Information<br />
! Important Note<br />
What Is <strong>COGO</strong>?<br />
T<br />
his chapter is divided into four sections: What is <strong>COGO</strong>; <strong>COGO</strong> item<br />
definitions; Installing <strong>COGO</strong>; and How to execute <strong>COGO</strong> in<br />
Windows and in AutoCAD.<br />
<strong>COGO</strong> (COordinate GeOmetry) is an engineering tool used to determine geometric relationships. There are a<br />
number <strong>of</strong> ways to create a geometric model. There is a command language that allows the user to define and<br />
solve geometric problems in engineering terms. There are Windows forms that you fill in to create the<br />
geometry. And you can execute <strong>COGO</strong> inside <strong>of</strong> AutoCAD using the Windows forms and native AutoCAD<br />
drafting tools to create, display, and manipulate the <strong>COGO</strong> model.<br />
The result is a model that describes the geometric relationships for a particular project. The information in the<br />
<strong>COGO</strong> model is used in many disciplines such as surveying, highway design, right <strong>of</strong> way, land acquisition,<br />
and construction.<br />
<strong>COGO</strong> Item Definitions<br />
The definitions in this section are used throughout this manual and in the <strong>COGO</strong> command reference.<br />
Points<br />
A point in <strong>COGO</strong> is a specific location and has the following properties.<br />
1<br />
Chapter<br />
1
� A northing (north or Y)<br />
� An easting (east or X)<br />
� An elevation (elev or Z)<br />
� A point number<br />
� An identification (PID), maximum <strong>of</strong> 20 characters<br />
The northing, easting, and elevation make up the coordinate part <strong>of</strong> the point. The point is referenced by<br />
the point number. The identification is used for comments about the point or identifies the special nature<br />
<strong>of</strong> the point. Points are stored in the <strong>COGO</strong> model.<br />
Another type <strong>of</strong> point is available it is the curve point. Please refer to the section on curves for further<br />
information.<br />
! You can influence the speed at which <strong>COGO</strong> executes by using smaller point numbers and by not<br />
leaving large gaps in the point numbers used. This is because <strong>COGO</strong> must have a way to determine when<br />
a point is defined or undefined. All undefined points must be cleared such that when point number 1000<br />
is the first point defined in the <strong>COGO</strong> execution, point numbers 1 to 999 must be cleared before point<br />
1000 can be created.<br />
Lines and Line Segments<br />
There are three types <strong>of</strong> lines in <strong>COGO</strong>, a line and a line segment. The method used to create the line<br />
determines the line type.<br />
A line in <strong>COGO</strong> is comprised <strong>of</strong> a starting point and a direction. The line starts at the point and continues<br />
in the direction infinitely. In mathematics this type <strong>of</strong> line is commonly called a ray. A line has the<br />
following properties.<br />
� Line number<br />
� Starting point<br />
� Direction<br />
A line segment is a line that starts at a point and ends at another point. A line segment is stored in the<br />
model. A line segment has the following properties.<br />
� Line number<br />
� Starting point<br />
� Ending Point<br />
2
A temporary line segment is a line that starts at a point and ends at another point. A temporary line<br />
segment is not stored in the model. The temporary line segment is only available during the function<br />
where it is created. A line segment has the following properties.<br />
� Starting point<br />
� Ending Point<br />
! You can influence the speed at which <strong>COGO</strong> executes by using smaller line numbers and by not<br />
leaving large gaps in the line numbers used. This is because <strong>COGO</strong> must have a way to determine when a<br />
line is defined or undefined. All undefined lines must be cleared such that when line number 100 is the<br />
first line defined in the <strong>COGO</strong> execution, line numbers 1 to 99 must be cleared before line 100 can be<br />
created.<br />
Curves<br />
<strong>COGO</strong> has many types <strong>of</strong> curves. All curves are stored in the <strong>COGO</strong> model independent <strong>of</strong> the type.<br />
The possible types <strong>of</strong> curves are:<br />
� Simple curves<br />
� Compound curves<br />
� Complex curves<br />
� Reversing curves<br />
� Transition spirals<br />
� Arcs (Parcels only)<br />
! You can influence the speed at which <strong>COGO</strong> executes by using smaller curve numbers and by not<br />
leaving large gaps in the curve numbers used. This is because <strong>COGO</strong> must have a way to determine when<br />
a curve is defined or undefined. All undefined curves must be cleared such that when curve number 500 is<br />
the first curve defined in the <strong>COGO</strong> execution, curve numbers 1 to 499 must be cleared before curve 500<br />
can be created.<br />
Simple Curves<br />
A simple curve is a circular arc in the horizontal plane that has a central angle <strong>of</strong> less than 180 degrees (PI<br />
radians). A simple curve starts at the PC (Point <strong>of</strong> Curvature), has a CC (Circle Center) and a PI (Point <strong>of</strong><br />
Intersection for the tangents to the curve), and ends at the PT (Point <strong>of</strong> Tangency, the ending point <strong>of</strong> the<br />
curve).<br />
3
Simple Curve<br />
Compound Curves<br />
A compound curve is a curve that consists <strong>of</strong> two or more simple curves with different radii, which curve<br />
in the same direction. Normally the adjacent simple curves will have a common point such as the PT <strong>of</strong><br />
one curve is the PC <strong>of</strong> the next. If a short tangent is between the simple curves, the compound curve is<br />
usually referred to as a broken back compound curve. Compound curves are used as a transition from<br />
large to small radius curves. Each simple curve in the compound curve is stored separately in the <strong>COGO</strong><br />
model.<br />
Compound Curve<br />
Reversing Curves<br />
Reversing curves are two simple curves which curve in opposite directions. The curves may have the same<br />
or different length radii and have a zero length tangent between them. The primary use for reversing<br />
curves are temporary detours and are usually used in pairs known as double reversing curves. The simple<br />
curves for the reversing curves are stored in the <strong>COGO</strong> model separately.<br />
4
Reversing Curve<br />
Transition Spirals<br />
A transition spiral is a curve that provides a gradual change in curvature from a straight line to a circular<br />
curve or a transition between two curves <strong>of</strong> different radii. As the length <strong>of</strong> the spiral increases the radius<br />
<strong>of</strong> the curve decreases. The spiral starts at the TS (Tangent to Spiral) or CS (Curve to Spiral) point and<br />
ends at the ST (Spiral to Tangent) or at the SC (Spiral to Curve) point. A spiral that is a transition from a<br />
tangent line to a curve is commonly called a spiral in, a spiral from a curve to a tangent line is commonly<br />
called a spiral out. A spiral can be stored in the <strong>COGO</strong> model by itself or as a part <strong>of</strong> a complex curve.<br />
Transition Spiral<br />
5
Complex Curves<br />
Complex Curves are curves with a simple curve and transition spiral(s). Complex curves fall into three<br />
categories; a spiral/curve, a curve/spiral, and a spiral/curve/spiral. Complex curves can be stored in the<br />
<strong>COGO</strong> model as a single curve or each part <strong>of</strong> the complex curve can be stored separately (not<br />
recommended).<br />
Complex Curve With Equal Length Spirals<br />
Arcs<br />
An arc is a part <strong>of</strong> a circle. Arcs are primarily used in the geometric description <strong>of</strong> a parcel <strong>of</strong> land. Arcs<br />
are not limited to 180 degrees or less because defining an arc is not dependent on tangent lines. Arcs may<br />
or may not be stored as a part <strong>of</strong> the <strong>COGO</strong> model depending on which <strong>COGO</strong> command is used.<br />
Please refer to the AREA command and the PARCEL command for more information on arcs.<br />
6<br />
An Arc in a Parcel
Curve Points<br />
All <strong>of</strong> the curves in <strong>COGO</strong> have associated points that may be referenced as independent points by some<br />
<strong>COGO</strong> commands. The rules for referencing curve points is that the reference to the curve point must<br />
start with the command word POINT followed by the curve point type and the curve number which the<br />
point belongs to. The type <strong>of</strong> curve dictates which points can be referenced. The following is a list <strong>of</strong> the<br />
curve points that may be referenced.<br />
PC - Point <strong>of</strong> curvature<br />
PI - Point <strong>of</strong> intersection for the curve tangents<br />
PT - Point <strong>of</strong> tangency<br />
TS - Tangent to spiral point<br />
SC - Spiral to curve point<br />
ST - Spiral to tangent point<br />
CS - Curve to spiral point<br />
CC - The center <strong>of</strong> the curve<br />
More information on curve points is available in the sections on specific curve types.<br />
Alignments<br />
An alignment is a collection <strong>of</strong> points, and curves. Alignments are typically used to geometrically describe<br />
the center line <strong>of</strong> a road. Alignments are stored in the <strong>COGO</strong> model. An alignment has the following<br />
properties.<br />
� A name<br />
� A starting point<br />
� An ending point<br />
� Automatic stationing<br />
7
Traverses<br />
� Curves (Optional)<br />
� Points (Optional)<br />
� Station equations (Optional)<br />
<strong>COGO</strong> Alignments<br />
A traverse is a collection <strong>of</strong> points. The points are linked by a distance and direction from the previous<br />
point in the traverse. The distance/direction from point to point is commonly called a course in the<br />
traverse. A traverse may be open (the starting point does not equal the end point), or closed (the starting<br />
point equals the end point). Traverses are stored in the <strong>COGO</strong> model. A traverse has the following<br />
properties.<br />
� A name<br />
� A starting point<br />
� An ending point<br />
� Points (Optional)<br />
8
Parcels<br />
Closed Traverse<br />
A parcel is a collection <strong>of</strong> points and arcs that geometrically describe a parcel <strong>of</strong> land. Parcels may be open<br />
(the starting point does not equal the end point) or closed (the starting point equals the end point). An<br />
open parcel is commonly called an access. The beginning <strong>of</strong> the parcel may be tied to other points in the<br />
<strong>COGO</strong> model. Parcels are stored in the <strong>COGO</strong> model. A parcel has the following properties.<br />
� A name<br />
� Tie points (optional)<br />
� A starting point<br />
� An ending point<br />
� Arcs (Optional)<br />
� An area to be added or subtracted from the Total Area Register (if the parcel is closed)<br />
9
Closed Parcel<br />
Installing <strong>COGO</strong><br />
Recommended Computer Configuration<br />
� Windows NT with service pack 5, or Windows 2000.<br />
� AutoCAD 2000 to 2002 (required for use in AutoCAD)<br />
� 64MB memory, minimum (128MB preferred for AutoCAD)<br />
� 20MB free disk space (maximum)<br />
Installation Instructions<br />
! If you have a previous version <strong>of</strong> <strong>COGO</strong> or Win<strong>COGO</strong> installed on your computer, remove it before<br />
proceeding with these installation instructions.<br />
� To remove an older version <strong>of</strong> <strong>COGO</strong>; click on the Start button, click on Settings, then Control Panel,<br />
then Add Remove Programs. Select <strong>COGO</strong> from the list and then click on the Remove button.<br />
<strong>COGO</strong> may be installed in one <strong>of</strong> two ways. The first is available only if your computer is part <strong>of</strong> the<br />
CDOT network. The second is available to anyone who can connect to the Internet.<br />
Installing from the CDOT network<br />
Installing <strong>COGO</strong> when your computer is connected to the CDOT Network is done via Start => Settings<br />
=> Control Panel => Add/Remove Programs. Click on the Add New Programs box on the left. Click<br />
on <strong>Colorado</strong> DOT <strong>COGO</strong>. The window should appear as follows.<br />
10 10<br />
10
Click on the “Add” button and the following window will appear.<br />
As installation progresses this windows will show the status <strong>of</strong> the install. Once the installation is<br />
complete the next window is displayed.<br />
Click on the “OK” button to finish the installation.<br />
11 11<br />
11
Installing <strong>COGO</strong> via the Internet<br />
<strong>COGO</strong> is available on the <strong>Colorado</strong> DOT web site at http://www.dot.state.co.us/. When this manual<br />
was published you select Planning/Construction, then Design and Construction Project Support, then<br />
Engineering Customer Support Unit (toward the bottom <strong>of</strong> the page), and then Download Area on the<br />
right. Click on CDOT <strong>COGO</strong>, then Download <strong>COGO</strong>. The following window will be displayed.<br />
Click on the “OK” button and indicate where you would like the <strong>COGO</strong> “.MSI” file to reside. Note:<br />
you want to keep this “.MSI” file since this allows <strong>COGO</strong> to be self-repairing. Once the download is<br />
complete the following window will appear.<br />
Click on the “Close” button.<br />
Execute the “.MSI” file by double clicking on it. The following window will be displayed.<br />
12 12<br />
12
After finishing installation preparations, the following window appears.<br />
Click on the “Next” button and the next installation window appears.<br />
13 13<br />
13
Fill in the information requested. The radio buttons asking how you want to install <strong>COGO</strong> appear in this<br />
window only if you are installing <strong>COGO</strong> with an Administrative account. If you do see this, click on the<br />
“Anyone” radio button and then click on the “Next” button. The following window will appear.<br />
Click on the “Next” button. When the installation is complete the following window appears.<br />
Click on the “Finish” button.<br />
Setting up <strong>COGO</strong> in AutoCAD<br />
In order to execute <strong>COGO</strong> in AutoCAD, one more step is needed. The <strong>COGO</strong> menus need to be<br />
loaded in AutoCAD. To do this, start AutoCAD and follow the instructions.<br />
14 14<br />
14
In AutoCAD, select “Run Script …” in the Tools menu.<br />
15
Select the script file “installcogo.scr” in the “C:\Program Files\AutoCAD 2002” folder and click on the<br />
Open button. Then close AutoCAD. This script will set up the <strong>COGO</strong> menus in AutoCAD 2002.<br />
Executing <strong>COGO</strong> in Micros<strong>of</strong>t Windows<br />
After <strong>COGO</strong> has been successfully installed, the folder C:\Program Files\CDOT<strong>COGO</strong> will contain the<br />
file CDOT<strong>COGO</strong>.exe. This is the executable file that is needed for executing <strong>COGO</strong> in Windows. If<br />
this file is missing the installation <strong>of</strong> <strong>COGO</strong> was not successful and <strong>COGO</strong> needs to be re-installed.<br />
<strong>COGO</strong> may be executed in Windows via the Start | Programs | <strong>COGO</strong> menu selection.<br />
The following figure is how <strong>COGO</strong> appears in windows.<br />
� It is recommended that the settings for <strong>COGO</strong> accuracy (Options | Accuracy) be set or checked<br />
when <strong>COGO</strong> is executed in Windows.<br />
16 16<br />
16
Executing <strong>COGO</strong> Inside <strong>of</strong> AutoCAD<br />
After successfully installing <strong>COGO</strong>, a <strong>COGO</strong> menu will appear in AutoCAD. Select the <strong>COGO</strong> menu.<br />
This is the <strong>COGO</strong> menu in AutoCAD. To Execute <strong>COGO</strong> in AutoCAD, click on the <strong>COGO</strong> menu<br />
item Load <strong>COGO</strong> in order to load the necessary macros for proper execution <strong>of</strong> <strong>COGO</strong>. AutoCAD<br />
may display a form that asks if you want to run macros, respond that you want to enable the running <strong>of</strong><br />
macros.<br />
17 17<br />
17
After loading the <strong>COGO</strong> macros all other menu selections are active and may be used. The Load <strong>COGO</strong><br />
must be done before <strong>COGO</strong> will execute properly in AutoCAD, and needs to be done only once per<br />
execution <strong>of</strong> AutoCAD.<br />
After the <strong>COGO</strong> functions <strong>of</strong> File | Open or File | Restore Tables, <strong>COGO</strong> asks if the data already exists<br />
in the AutoCAD drawing.<br />
If you answer Yes, none <strong>of</strong> the data just added to <strong>COGO</strong> will be added to the AutoCAD drawing. If you<br />
answer No, the data in <strong>COGO</strong> will be added to the AutoCAD drawing.<br />
� If you are short on disk space, or your disk is heavily fragmented, <strong>COGO</strong> may not execute well inside<br />
<strong>of</strong> AutoCAD.<br />
A <strong>COGO</strong> works in only one <strong>of</strong> the AutoCAD windows (drawings). Using more than one instance <strong>of</strong><br />
<strong>COGO</strong> in AutoCAD may have disastrous results. It is recommended that a number <strong>of</strong> settings in<br />
<strong>COGO</strong> and AutoCAD be checked or set before using <strong>COGO</strong> in AutoCAD. They are: the text size in<br />
<strong>COGO</strong>; the PDMODE and PDSIZE in AutoCAD; the Options | Accuracy settings for points and<br />
distances in <strong>COGO</strong>, and the object snap settings in AutoCAD.<br />
18 18<br />
18
Entering Data in <strong>COGO</strong><br />
This chapter covers the basic data types that you will use to create the geometry model, and the rules for<br />
entering the different data types. This chapter is essential reading.<br />
A<br />
s with all engineering applications, you need to supply data to <strong>COGO</strong> to create the model. This<br />
chapter covers the types <strong>of</strong> data you will enter, and the rules for entering the data. The basic<br />
types <strong>of</strong> data you will supply are numbers, characters, distances, directions, and alignment<br />
stations.<br />
Entering Numbers<br />
Numbers are used for point numbers, line numbers, curve numbers,<br />
coordinate data, distances, directions, stations, deflections, <strong>of</strong>fsets, and a<br />
variety <strong>of</strong> other geometric data. Numeric data may be entered in many<br />
forms. The number 1 for example may be entered in any <strong>of</strong> the<br />
following ways.<br />
1 +1 1. 1.0 01 01.0 etc.<br />
If the decimal is omitted it is assumed to be after the last digit in the<br />
number. If the number is negative, the minus must be immediately<br />
before the first digit <strong>of</strong> the number. The characters which are legal in a<br />
number are 0 through 9, . (period), +, and -. If any other characters are<br />
present <strong>COGO</strong> will issue an error.<br />
When the number <strong>of</strong> characters in the number exceeds the available<br />
space in the data entry area, as in the distance example (1401.6732), the<br />
� (left arrow) and � (right arrow) on the keyboard are used to move through the number.<br />
19 19<br />
19<br />
Chapter<br />
2
Entering Characters<br />
Character data is used in <strong>COGO</strong> for names, dates, file names, and<br />
comments. Character data may be composed <strong>of</strong> characters, characters and<br />
numbers, or numbers. Except for comments, all character data in <strong>COGO</strong><br />
commands is surrounded by asterisks (*). <strong>COGO</strong> uses whatever is<br />
between the asterisks as characters. The asterisks are not necessary for<br />
most Windows forms and in cases where an item name is needed and the<br />
item type is known, the names <strong>of</strong> the items <strong>of</strong> that type will be listed so<br />
that you can scroll through the list and select the item.<br />
Item names are limited to eight characters and may have blank spaces in<br />
them. Dates are entered in an eight-character format such as 11/26/01.<br />
File names are limited to eighty characters if entered in a command;<br />
otherwise the Windows rules apply for file names.<br />
When the number <strong>of</strong> characters exceeds the available space in the data entry area, as in the Point ID<br />
example (Parcel 14 Control), the � (left arrow) and � (right arrow) on the keyboard are used to move<br />
through the characters.<br />
Item Names<br />
(8 characters maximum)<br />
*PROJECT* *SURVEY* *TEST* *WB ML*<br />
File Names<br />
*C:\project 1\cogo\survey.cin*<br />
*D:\I70 and I25\<strong>COGO</strong>\I-70-WB*<br />
*89022_JUNK_TEST.COT*<br />
Dates<br />
(8 characters maximum)<br />
*01/12/25* (yy/mm/dd)<br />
*12/25/01* (mm/dd/yy)<br />
*25/02/01* (dd/mm/yy)<br />
20 20<br />
20
Entering Distances<br />
All distances in <strong>COGO</strong> are expressed in feet and decimal feet or meters. <strong>COGO</strong> does not accept input <strong>of</strong><br />
feet and inches. The rules for entering numbers apply to entering distances.<br />
Point-to-point distances need not be calculated. Instead, <strong>COGO</strong> can calculate the point-to-point distance<br />
needed. This is done by the command word USE. The form for the USE option is<br />
DISTANCE USE [POINT] n TO [POINT] m<br />
The above command option indicates to <strong>COGO</strong> that it should use the distance from point n to point m<br />
as the distance needed by the command <strong>COGO</strong> is executing.<br />
Entering Directions<br />
Directions may be expressed in azimuths, bearings, or zenith angles.<br />
Azimuths<br />
An azimuth is a horizontal measurement <strong>of</strong> angles between 0 and 360 degrees, north being 0 degrees and<br />
the azimuth increasing in a clockwise direction.<br />
Azimuth<br />
Azimuths may be expressed in terms <strong>of</strong> degrees and decimal degrees or as degrees minutes and seconds.<br />
If the minutes and seconds are zero they may be omitted. If the minutes are zero and the seconds are not,<br />
both must be entered. If the seconds are zero and the minutes are not, only the minutes need be entered.<br />
All <strong>of</strong> the following are valid azimuths.<br />
0 0 0 0 0 0.0<br />
10.5 10 30 10 30 0.0<br />
270 270 00 270 0 0.0<br />
21 21<br />
21
45.255555 45 15 2. 45 15 2.0<br />
As with distances, <strong>COGO</strong> provides a function by which a point-to-point azimuth can be used with any <strong>COGO</strong><br />
command or form without actually having to determine the azimuth between the points. This is done with the<br />
AZIMUTH USE option. The form for the AZIMUTH USE option is<br />
AZIMUTH USE [POINT] n TO [POINT] m<br />
This command option may be used in most areas that require a direction (azimuth or bearing).<br />
Bearings<br />
Bearings are horizontal measurements <strong>of</strong> angles based on quadrants. The four quadrants may be<br />
expressed in terms <strong>of</strong> the North East, North West, South West, and South East. Bearings are entered in<br />
terms <strong>of</strong> degrees minutes and seconds with the North or South in front <strong>of</strong> the bearing and the East or<br />
West after the bearing. The quadrants are indicated by the first letter in the word. For example, North is<br />
expressed as N.<br />
<strong>COGO</strong> will accept many forms <strong>of</strong> bearing input. The minimum requirements are that the North/South<br />
and East/West <strong>of</strong> the bearing and at least the degrees part <strong>of</strong> the bearing must be entered. If the minutes<br />
and seconds are zero they may be omitted. If the minutes are zero and the seconds are not, both must be<br />
entered. If the seconds are zero and the minutes are not, only the minutes need be entered. The proper<br />
form for a bearing may be expressed as<br />
N/S dd mm ss.ss E/W<br />
Bearing<br />
Where N/S indicates north or south, dd are the degrees, mm are the minutes, ss.ss are the seconds, and E /W<br />
indicates east or west. A space between the N/S and the degrees are not required, neither is a space required<br />
22 22<br />
22
etween the ss.ss and the E/W. Spaces are required between the degrees, minutes, and seconds. <strong>COGO</strong> will<br />
accept all <strong>of</strong> the following examples <strong>of</strong> the same bearings.<br />
N 00 E S15 02W<br />
N00 00 E S15 02 00 W<br />
N00 00 00.0E S 15 02 00.0 W<br />
As with distances, <strong>COGO</strong> provides a function by which a point to point bearing can be used with any <strong>COGO</strong><br />
command or form without actually having to determine the bearing between the points. This is done with the<br />
BEARING USE option. The form for the BEARING USE option is<br />
BEARING USE [POINT] n TO [POINT] m<br />
This command option may be used in most areas that require a direction (or bearing).<br />
Zenith Angles<br />
Zenith angles are vertical measurements <strong>of</strong> angles that range from 0° to 360°. 0 or 360 degrees being at<br />
the Zenith (straight up) and 90 or 270 degrees being the horizon.<br />
Zenith Angles<br />
Zenith angles may be expressed in terms <strong>of</strong> degrees and decimal degrees or as degrees minutes and<br />
seconds. If the minutes and seconds are zero they may be omitted. If the minutes are zero and the<br />
seconds are not, both must be entered. If the seconds are zero and the minutes are not, only the minutes<br />
need be entered. All <strong>of</strong> the following are valid zenith angles.<br />
0 0 0 0 0 0.0<br />
10.5 10 30 10 30 0.0<br />
270 270 00 270 0 0.0<br />
45.255555 45 15 2. 45 15 2.0<br />
At this time zenith angles are only used for an angle right traverses.<br />
23 23<br />
23
Entering Stations<br />
All stations in <strong>COGO</strong> are expressed in feet and decimal feet or in meters. <strong>COGO</strong> does not accept input<br />
<strong>of</strong> feet and inches. Stations are entered and represented in <strong>COGO</strong> as follows 1234+56.78 for feet, and<br />
123456.78 for metric. There is no limit to the number <strong>of</strong> decimals. Blank spaces cannot precede or follow<br />
the plus for the feet stations. The following are valid examples.<br />
Feet Metric<br />
10+46.893 1046.893<br />
1120+15.27 112015.27<br />
451+22.11 45122.11<br />
24 24<br />
24
Creating Points<br />
This chapter covers how to create points in <strong>COGO</strong>. The primary emphasis <strong>of</strong> this chapter is the use <strong>of</strong><br />
the Windows forms and includes the equivalent syntax for the <strong>COGO</strong> command (refer to the <strong>COGO</strong><br />
command reference for a complete description).<br />
ICON KEY<br />
� <strong>COGO</strong> Command<br />
� Windows Information<br />
A AutoCAD Information<br />
! Important Note<br />
The Point Menu<br />
T<br />
his chapter covers storing points, copying points, and creating points<br />
based on existing information.<br />
Points are the basic building block for all work done in <strong>COGO</strong>. In<br />
order to use <strong>COGO</strong> effectively, a good understanding <strong>of</strong> how to create points<br />
is necessary.<br />
25 25<br />
25<br />
Chapter<br />
3
The point menu in Windows has functions for creating new points by entering coordinates, copying a<br />
point, locating new points using existing items in the geometry model, displaying point reports, listing the<br />
point numbers in the model, deleting points, listing the next available unused point number, and if the<br />
points should be annotated with their point numbers.<br />
Storing Points<br />
The minimum information needed to store a point is the point number, northing and easting. Optional<br />
information for a point is the elevation, and point identifier (PID).<br />
and point ID.<br />
This is the Windows form for storing a new <strong>COGO</strong> point. The same<br />
form is used in Windows and in AutoCAD. In this example the point<br />
number is 1067, the northing is 4967.23914, the easting is 548923.786,<br />
the elevation is 0.0, and the point identifier (ID) is Monument 14.<br />
There are four buttons at the bottom <strong>of</strong> the form. The OK button saves<br />
the point and closes the form. The Cancel button closes the form<br />
without saving any information. The Apply button saves the point but<br />
leaves the form up so that you may store another point. The Screen Pick<br />
button is only active when executing <strong>COGO</strong> in AutoCAD. If you use<br />
the Screen Pick button in AutoCAD, the New Point form will be<br />
hidden, you will be prompted to select a point in AutoCAD, <strong>COGO</strong> will<br />
capture the coordinates <strong>of</strong> the point selected in AutoCAD, and then the<br />
form will be displayed so that you can enter the point number, elevation,<br />
� STORE [POINT] p [NORTH] n [EAST] e [ELEV el] [*id*]<br />
Copying Points<br />
You use the copy point form to copy the northing, easting,<br />
elevation, and point ID to another point. The required information<br />
is the existing point number and the point number to copy the<br />
information to. In this example, the coordinates for the PC <strong>of</strong><br />
curve 110 are copied to point 15. There are three buttons at the<br />
bottom <strong>of</strong> the form. The OK button saves the point and closes<br />
the form. The Cancel button closes the form without saving any<br />
information. The Apply button saves the point but leaves the form<br />
up so that you may copy another point.<br />
� STORE [POINT] p POINT k [*id*]<br />
26 26<br />
26
Locating Points Using Existing Information<br />
<strong>COGO</strong> has many commands that locate new points based on existing information. Based on the<br />
information available different commands are used to locate points. The following sections cover the<br />
commands that locate new points.<br />
Using a Distance and Direction to Locate a Point<br />
One <strong>of</strong> the most common ways to define a new point is to locate the new point based on a distance and<br />
direction from another point.<br />
Point 20 will be 237.25 feet<br />
from point 15 at a bearing <strong>of</strong><br />
N75 22 01E.<br />
The required information is the existing point number, the new point<br />
number, the distance and direction from the existing point. Optional<br />
information is the point ID and an <strong>of</strong>fset. There are three buttons at<br />
the bottom <strong>of</strong> the form. The OK button saves the point and closes the<br />
form. The Cancel button closes the form without saving any<br />
information. The Apply button saves the point but leaves the form up<br />
so that you may locate another point.<br />
� LOCATE [POINT] n [*id*] FROM [POINT] m distance direction [<strong>of</strong>fset]<br />
e.g. LOCATE pnt 20 FROM 15 DISTANCE 237.25 BEARING N75 22 01E<br />
Using a Direction from a Line Segment to Locate a Point<br />
Two commands in <strong>COGO</strong> will locate a new point based on a line segment and a direction. The first uses<br />
a deflection from the end <strong>of</strong> the line segment to locate a point. The second uses an angle from the<br />
beginning <strong>of</strong> the line segment to locate a new point.<br />
27 27<br />
27
Deflection Method<br />
The minimum data required for this command are two points that define a<br />
line segment, a distance, and a deflection angle from the direction <strong>of</strong> the line<br />
segment. The direction <strong>of</strong> the line segment is from the first point in the<br />
segment to the second. The deflection is applied at end point <strong>of</strong> the line<br />
segment. If the deflection is positive the new point will be on the right, a<br />
negative deflection results in the point being on the left. There are three<br />
buttons at the bottom <strong>of</strong> the form. The OK button saves the point and<br />
closes the form. The Cancel button closes the form without saving any<br />
information. The Apply button saves the point but leaves the form up so<br />
that you may locate another point.<br />
� LOCATE [POINT] n *id* FROM [POINT] m TO [POINT] p distance deflection<br />
[<strong>of</strong>fset]<br />
e.g. LOCATE 10 FROM pnt 20 TO 15 DIST 120.2 DEFL 20 15 01<br />
(This command will locate point 10 120.2 feet from point 15 at a deflection <strong>of</strong> 20 degrees 15 minutes and<br />
1 second to the right from the angle <strong>of</strong> the line segment from point 20 to 15.)<br />
Angle Method<br />
The minimum data required for this command are two points that define<br />
a line segment, a distance, and an angle from the direction <strong>of</strong> the line<br />
segment. The direction <strong>of</strong> the line segment is from the first point in the<br />
segment to the second. The angle is applied at the starting point <strong>of</strong> the line<br />
segment. If the angle is positive the new point will be on the right, a negative<br />
angle results in the point being on the left. There are three buttons at the<br />
bottom <strong>of</strong> the form. The OK button saves the point and closes the form.<br />
The Cancel button closes the form without saving any information. The<br />
Apply button saves the point but leaves the form up so that you may<br />
locate another point.<br />
28 28<br />
28
� LOCATE [POINT] n *id* FROM [POINT] m distance angle FROM [POINT] p<br />
[<strong>of</strong>fset]<br />
e.g. LOC 240 FROM pnt 42 1024.0 angle 43 15 00 FROM 721<br />
(This command will locate point 240 1024 feet from point 42 at an angle <strong>of</strong> 43 degrees 15 minutes from<br />
the direction <strong>of</strong> the line segment from point 42 to 721.)<br />
Using a Station to Locate a Point<br />
The minimum information needed is the new point number and a station<br />
on the alignment. There are three buttons at the bottom <strong>of</strong> the form.<br />
The OK button saves the point and closes the form. The Cancel button<br />
closes the form without saving any information. The Apply button saves<br />
the point but leaves the form up so that you may locate another point.<br />
� LOCATE [POINT] n *id* ON ALIGNMENT *name* [<strong>of</strong>fset] AT [STA] station [NEAR<br />
[POINT] p]<br />
e.g. LOC 4 *STA 144+50* ON ALI *PROJ* AT STA 144+50.0<br />
(Point 4 is created with coordinates corresponding to station 144+50.0 on alignment PROJ.)<br />
29 29<br />
29
Locating an Offset point<br />
This function is for finding a point <strong>of</strong>fset 90 degrees from an item. The<br />
minimum information necessary is a point on the item, the <strong>of</strong>fset distance<br />
from that point and the item. Items that this command will accept are line<br />
segments, curves, and alignments. There are three buttons at the bottom<br />
<strong>of</strong> the form. The OK button saves the point and closes the form. The<br />
Cancel button closes the form without saving any information. The<br />
Apply button saves the point but leaves the form up so that you may<br />
locate another point.<br />
� LOCATE [POINT] a *id* OFFSET distance FROM [POINT] p ON item [near]<br />
e.g. LOC pnt 100 OFFSET -10 FROM PNT PC 6 ON CURVE 6<br />
(Point 100 will be 10 feet to the left <strong>of</strong> the point <strong>of</strong> curvature (PC) on curve 6.)<br />
Offsetting Points from a Curve<br />
This function creates points <strong>of</strong>fset 90 degrees (normal) to the left and<br />
right from all curve points except the PI and CC. The minimum<br />
information required is a curve, the <strong>of</strong>fset distance to the right and left,<br />
and a group <strong>of</strong> consecutive point numbers that are used to store the<br />
new <strong>of</strong>fset points. The number <strong>of</strong> new points is dependent on the<br />
type <strong>of</strong> curve. A simple curve and stand alone spiral generates 4<br />
points, a complex curve generates 6 to 8 points depending on the<br />
number <strong>of</strong> spirals in the complex curve. This command uses the point<br />
identification to indicate which curve point the new point is <strong>of</strong>fset<br />
from and if it is to the left or right <strong>of</strong> the curve point. There are three<br />
buttons at the bottom <strong>of</strong> the form. The OK button saves the point<br />
and closes the form. The Cancel button closes the form without<br />
saving any information. The Apply button saves the point but leaves<br />
the form up so that you may locate another point.<br />
30 30<br />
30
� LOCATE [POINT] n TO m OFFSET (d / r RIGHT 1 LEFT / 1 LEFT r RIGHT) FROM<br />
CURVE c<br />
e.g. LOC POINTS 10 TO 13 OFFSET 100 FROM CURVE 114<br />
(Curve 114 is a simple curve so 4 new points (10, 11, 12, and 13) will be created. Points 10 and 11 are<br />
<strong>of</strong>fset 100' to the left and right <strong>of</strong> the PC and points 12 and 13 are <strong>of</strong>fset 100' to the left and right <strong>of</strong> the<br />
PT.)<br />
Projecting Points on a <strong>COGO</strong> Item<br />
This function projects a point onto a <strong>COGO</strong> object. This means that<br />
the line segment from the new point to the projected point will be<br />
perpendicular (normal) to the <strong>COGO</strong> object. The minimum<br />
information required is a point near a <strong>COGO</strong> object and the object.<br />
Some projections have more than one solution, others have no<br />
solution. A good example <strong>of</strong> a projection that has more than one<br />
solution is the projection <strong>of</strong> the center <strong>of</strong> a curve on to the curve, a<br />
situation that has infinite solutions. There are three buttons at the<br />
bottom <strong>of</strong> the form.<br />
The OK button saves<br />
the point and closes the<br />
form. The Cancel<br />
button closes the form<br />
without saving any<br />
information. The<br />
Apply button saves the<br />
point but leaves the<br />
form up so that you<br />
may locate another point. The diagram on the following page portrays possible and impossible<br />
projections.<br />
���� LOCATE [POINT] n *id* PROJECT [POINT] m ON item [<strong>of</strong>fset] [near]<br />
e.g. LOCATE 15 PROJECT PNT 101 ON ALI *PROJ*<br />
(Point 101 will be projected on to alignment PROJ, the resulting point stored in point 15)<br />
31 31<br />
31
32 32<br />
32
<strong>COGO</strong> has an option which specifies which projection point is desired. It is the NEAR POINT option.<br />
The command syntax for the near option is NEAR [point] n. The solution to the projection will<br />
include the point, the distance to the <strong>COGO</strong> object and the bearing <strong>of</strong> the line <strong>of</strong> projection. If the point<br />
is projected on an item that has stationing, the station will be reported.<br />
Creating Points by Intersecting Two <strong>COGO</strong> Objects<br />
This function intersects two <strong>COGO</strong> items. The <strong>COGO</strong> items which can<br />
be intersected are lines, line segments, curves, and alignments. The<br />
minimum information required is the two objects that intersect. Some<br />
intersections have more than one solution, others have no solution. A good<br />
example <strong>of</strong> an intersection which has more than one solution is the<br />
intersection <strong>of</strong> a line which passes through the beginning and end points <strong>of</strong><br />
a curve, a situation which has two solutions. <strong>COGO</strong> has a command<br />
option which allows the user to specify which intersection point is desired.<br />
It is the NEAR POINT option. The command syntax for the near option<br />
is NEAR [point] n. There are three buttons at the bottom <strong>of</strong> the form.<br />
The OK button saves the point and closes the form. The Cancel button<br />
closes the form without saving any information. The Apply button saves<br />
the point but leaves the form up so that you may locate another point.<br />
� LOCATE [POINT] n *id* INTERSECT item1 [<strong>of</strong>fset] WITH item2 [<strong>of</strong>fset] [near]<br />
e.g. LOCATE 24 INTERSECT ALI *WBML* WITH ALI *NBML*<br />
(The coordinates <strong>of</strong> the intersection <strong>of</strong> alignment WBML and NBML will be stored in point 24.)<br />
33 33<br />
33
Creating Points by Turning Angles from the Ends <strong>of</strong> a Line Segment<br />
This function uses a line segment and deflections turned from the end<br />
points <strong>of</strong> the line segment to locate a new point. There are three<br />
buttons at the bottom <strong>of</strong> the form. The OK button saves the point<br />
and closes the form. The Cancel<br />
button closes the form without<br />
saving any information. The Apply<br />
button saves the point but leaves the<br />
form up so that you may locate<br />
another point.<br />
� LOCATE [POINT] n [*id*] FORSECT [POINT] m (ANGLEl/BEARING1) AND [POINT] p<br />
(ANGLE2/BEARING2)<br />
e.g. LOCATE 20 FORSECT PNT 15 MINUS 45 0 0 AND PNT 17 45 0 0<br />
(The direction <strong>of</strong> the line segment from point 15 to point 17 is calculated, and then the deflections are<br />
applied to locate point 20.)<br />
Locating a new point using two distances from two points<br />
This function finds the point that is a distance from one point and another<br />
distance from another point. It is possible that there is more than one<br />
solution. If more than one solution is found, two options are provided to<br />
indicate which solution is desired. One <strong>of</strong> the options allows you to specify<br />
an approximate direction where the solution lies. The other option<br />
provides the ability to indicate a point that is near the solution. The<br />
required information is two points and distances from those points. There<br />
are three buttons at the bottom <strong>of</strong> the form. The OK button saves the<br />
point and closes the form. The Cancel button closes the form without<br />
saving any information. The Apply button saves the point but leaves the<br />
form up so that you may locate another point.<br />
34 34<br />
34
� LOCATE [POINT] n [*id*] TIE [POINT] m DISTANCE dl TIE [POINT] p DISTANCE<br />
d2 [(APPROX direction / near)]<br />
e.g. LOCATE PNT 701 TIE PNT 121 DIST 200.0 TIE PNT 122 DIST 1250.12<br />
(Point 701 is an intersection <strong>of</strong> the circle with the center at point 121 and a radius <strong>of</strong> 200', and the circle<br />
with the center at point 122 and a radius <strong>of</strong> 1250.12')<br />
Locating a new point on a line, a distance from a point<br />
This command finds a point on a line that is a specific distance from an<br />
existing point. The user can control which solution is selected by three<br />
command options. The options allow the user to specify the solution<br />
should be near a specified point or near the starting point <strong>of</strong> the line<br />
segment or the solution farthest away from the starting point <strong>of</strong> the line.<br />
The required information is a point and the distance from the point, the<br />
starting point <strong>of</strong> the line<br />
and the direction <strong>of</strong> the<br />
line. There are three<br />
buttons at the bottom<br />
<strong>of</strong> the form. The OK<br />
button saves the point<br />
and closes the form.<br />
The Cancel button<br />
closes the form without<br />
saving any information.<br />
The Apply button saves<br />
the point but leaves the<br />
form up so that you may locate another point.<br />
35 35<br />
35
� LOCATE (POINT) n *id* TIE [POINT] m distance TIE (POINT] p direction (NEAR<br />
FAR / NEAR [POINT] t)<br />
e.g. LOC 215 TIE 101 DIST 120.5 TIE 110 ANGLE 45 00 10<br />
(Point 215 is the intersection <strong>of</strong> the line that starts at point 110 with an azimuth <strong>of</strong> 45 degrees 00 minutes<br />
and 10 seconds, and the circle with the center at point 101 and a radius <strong>of</strong> 120.5)<br />
Locating a point <strong>of</strong> tangency to a curve, using a direction<br />
This function finds a point where a line <strong>of</strong> a specific direction is tangent to<br />
a curve. The minimum information is the direction <strong>of</strong> the line and a curve.<br />
Since curves are defined as a circular arc <strong>of</strong> less than 180 degrees there will<br />
be one solution, if there is a solution. There are three buttons at the<br />
bottom <strong>of</strong> the form. The OK button saves the point and closes the form.<br />
The Cancel button closes the form without saving any information. The<br />
Apply button saves the point but leaves the form up so that you may<br />
locate another point.<br />
� LOCATE [POINT] n [*id*] ON CURVE c TANGENT direction<br />
e.g. LOC PNT 890 ON CUR 110 TANGENT N 78 15 E<br />
(Point 890 will be located at the point where the tangent line to the curve has the direction N 78 15 E.)<br />
Locating a Point <strong>of</strong> Tangency to a Curve, Using a Point Near the Curve<br />
This function locates a point on a curve using a tangent that passes<br />
through another point. There may be two solutions to this problem.<br />
Specifying the desired solution is accomplished by indicating a point that is<br />
closer to the desired solution. There are three buttons at the bottom <strong>of</strong><br />
the form. The OK button saves the point and closes the form. The<br />
Cancel button closes the form without saving any information. The Apply<br />
button saves the point but leaves the form up so that you may locate<br />
another point.<br />
36 36<br />
36
� LOCATE [POINT] n [*id*] ON CURVE c TANGENT THRU [POINT] m [near]<br />
e.g. LOC 564 ON CUR 200 TANGENT THRU PNT 115<br />
(A line which passes through point 115 and is tangent to curve 200 is found, then the coordinates <strong>of</strong> the<br />
point at which that line is tangent are placed in point 564)<br />
Other Functions That Create Points<br />
In addition to the point functions, new points can be created by dividing lines, line segments, or curves<br />
into smaller parts, creating new points (see the section on Divide Lines and Divide Curve).<br />
Creating new points can also be done with the two traverse functions. The first traverse function uses<br />
distances and directions from a point to create a new point. The second traverse function creates new<br />
points using the angle right traverse survey method.<br />
37 37<br />
37
Creating and Manipulating Lines<br />
This chapter covers how to create and manipulate lines in <strong>COGO</strong>.<br />
ICON KEY<br />
� <strong>COGO</strong> Command<br />
� Windows Information<br />
A AutoCAD Information<br />
! Important Note<br />
The Line Menu<br />
T<br />
his chapter covers how to create the three different line types in<br />
<strong>COGO</strong>, divide lines to create points, and apply linear regression to a<br />
collection <strong>of</strong> points that represent a line. As mentioned in the first<br />
chapter there are three different line types, and the type is dependant<br />
on the way you create the line.<br />
The line menu in Windows has functions for creating new lines, dividing a line into parts to create new<br />
points, adjusting a line <strong>of</strong> points by linear regression, displaying line reports, listing the line numbers in the<br />
model, deleting lines, and listing the next available unused line number.<br />
38 38<br />
38<br />
Chapter<br />
4
Using Temporary Line Segments<br />
Storing Line Segments<br />
Storing Lines or Rays<br />
Temporary line segments exist only as long as the function is being performed.<br />
You may use the temporary line segment wherever you would use a line segment<br />
or line. For example, you can intersect two temporary line segments as in the<br />
form to the left. A soon as the calculations are completed and the point is stored,<br />
the temporary line segments are gone.<br />
In a <strong>COGO</strong> command the temporary line segment is created with the following<br />
syntax.<br />
� LINE SEG [POINT] n TO [POINT] m<br />
Line segments are stored in the geometry model and referred to via their<br />
line number. The required information to create a line segment is the line<br />
number, the beginning point, and the ending point. There are two<br />
buttons at the bottom <strong>of</strong> the form. The OK button saves the line<br />
segment and closes the form. The Cancel button closes the form without<br />
saving any information. In this example line 15 starts with point 8756,<br />
ends at point 873 and is a line segment.<br />
Lines are stored in the geometry model and referred to via their line number.<br />
The required information to create a line is the line number, the starting point<br />
and the direction <strong>of</strong> the line. There are two buttons at the bottom <strong>of</strong> the form.<br />
The OK button saves the line and closes the form. The Cancel button closes<br />
the form without saving any information. In this example line 2 starts at point<br />
769 and goes infinitely at a bearing <strong>of</strong> N 12 00 9.1 E.<br />
39 39<br />
39
Dividing Lines to Create Points<br />
The dividing <strong>of</strong> a line is done via the Divide Line function; the dividing <strong>of</strong> a line segment is done via the<br />
Divide Line Segment function.<br />
40 40<br />
40<br />
The required information for the Divide<br />
Line function is a line number, a length<br />
for the line (this may be different from<br />
the actual length <strong>of</strong> a line segment), and a<br />
list <strong>of</strong> points and distances. The line<br />
number, length, and information for the<br />
1 st new point is entered, then the Next<br />
Point button is clicked. Then the next<br />
point’s information is entered and the<br />
next point button is clicked, until the last<br />
point information is entered and the Last<br />
Point button is clicked.<br />
! After the first point is entered the line number and the line length cannot be changed.<br />
� DIVIDE LINE 1 length [POINT] pl [DISTANCE] dl [POINT] p2 [DISTANCE] d2<br />
etc.<br />
e.g. DIVIDE LINE 10 550.2 PNT 11 212.0 PNT 12 337.8<br />
(Line 10 is 550.2 feet long. Starting at the beginning point in line 10, the coordinates for point 11 will be<br />
212.0 feet in the direction <strong>of</strong> the line. Point 12's coordinates will be 337.8 feet from point 11 in the<br />
direction <strong>of</strong> line 10.)<br />
The required information for the Divide Line Segment function are<br />
two points which define the line segment, and a list <strong>of</strong> points. The line<br />
segment will be divided into equal length segments. The number <strong>of</strong><br />
segments is one more than the number <strong>of</strong> points in the list <strong>of</strong> points.<br />
There are three buttons at the bottom <strong>of</strong> the form. The OK button<br />
saves the points and closes the form. The Cancel button closes the<br />
form without saving any information. The Apply button saves the<br />
point but leaves the form up so that you may locate another point.<br />
� DIVIDE LINE SEGMENT [POINT] n TO [POINT] m list <strong>of</strong> points<br />
e.g. DIVIDE LINE SEGMENT 20 TO 33 10 TO 15<br />
(The line segment from point 20 to 33 is divided into 7 parts <strong>of</strong> equal length. The coordinates <strong>of</strong> the<br />
division are stored in points 10 to 15 (six points).)
Best Fit Line<br />
� This function has no equivalent <strong>COGO</strong> command.<br />
The Best Fit Line function uses linear regression to adjust a series <strong>of</strong><br />
points. The linear regression algorithm uses the northings to adjust<br />
the eastings. You enter the point numbers for the points to be<br />
adjusted as the Old Points, and <strong>COGO</strong> will adjust the points and<br />
store the results in the New Points that you specify. The Screen<br />
Pick button is only active in AutoCAD and allows you to pick<br />
points in AutoCAD rather than having to type in the point<br />
numbers. There are three buttons at the bottom <strong>of</strong> the form. The<br />
OK button saves the point and closes the form. The Cancel button<br />
closes the form without saving any information. The Apply button<br />
saves the adjusted points but leaves the form up so that you may<br />
adjust more points.<br />
41 41<br />
41
Creating Curves<br />
This chapter covers how to create and manipulate curves.<br />
ICON KEY<br />
� <strong>COGO</strong> Command<br />
� Windows Information<br />
A AutoCAD Information<br />
! Important Note<br />
The Curve Menu<br />
C<br />
urves may be created in a number <strong>of</strong> ways. Curves may be created<br />
separately or during the creation <strong>of</strong> an alignment. This section covers<br />
the methods <strong>of</strong> creating and using curves by themselves and not as<br />
part <strong>of</strong> an alignment. Please refer to the section on alignments for<br />
more information on creating and using curves within an alignment.<br />
The curve menu has functions for storing new curves, dividing a curve into parts to create new points,<br />
displaying curve reports, listing the curve numbers in the model, deleting curves, and listing the next<br />
available unused curve number.<br />
42 42<br />
42<br />
Chapter<br />
5
Creating a Curve<br />
43 43<br />
43<br />
The required information for<br />
creating a new curve is the curve<br />
number, information about the<br />
Point <strong>of</strong> Intersection (PI) for the<br />
curve, ahead information,<br />
circular information, and<br />
optional spiral information. You<br />
must first select the PI<br />
information you want to enter,<br />
then fill in the rest <strong>of</strong> the fields as<br />
necessary. Note that the PI<br />
selection controls which fields<br />
are displayed in the New Curve<br />
form. There are three buttons at<br />
the bottom <strong>of</strong> the form. The<br />
OK button creates the curve and<br />
closes the form. The Cancel<br />
button closes the form without<br />
saving any information. The<br />
Apply button creates the curve<br />
and leaves the New Curve form<br />
on the screen.<br />
In the above example, curve 10 is created using the Point Back, Back Azimuth, and Total Tangent Length<br />
for the PI information. The ahead item is the Ahead Azimuth <strong>of</strong> N52 31 39.504E, and the Circular Item<br />
is the 6 0 0 Degree <strong>of</strong> Curvature. Note that in the Ahead Item section the PA and PT are not available<br />
due to the selection <strong>of</strong> the PB, BA, TTL in the PI Information section. See the next section for further<br />
information.<br />
The following is a description <strong>of</strong> the fields in the New Curve form.<br />
PI Information<br />
BA Is the back azimuth or bearing<br />
PB Is the point on the back tangent. It may be a point number, curve point, or north east<br />
station.<br />
PI Is the point <strong>of</strong> intersection <strong>of</strong> the tangents. It may be the same form as the PB without<br />
STA.<br />
TS Is the tangent to spiral point. It may be the same form as the PB.
Ahead Item<br />
Circular Item<br />
[Spiral Item]<br />
PC Is the tangent to circular curve point (point <strong>of</strong> curvature). It may be the same form as the<br />
PB. Note The PC n form may only be used in conjunction with the ahead ref item PT n<br />
and the circular ref. item CC n.<br />
TTL Is the total tangent length, PB to PI.<br />
TL Is the tangent length, PB to TS/PC.<br />
PA Is the point on the ahead tangent. It may be the same form as the PB. This point may be<br />
on either side <strong>of</strong> the end <strong>of</strong> the curve. Note PA can only be used if a PI is given.<br />
AA Is the ahead azimuth or bearing.<br />
DEFL Is the total deflection at the PI. + indicates right, - indicates left.<br />
DELTA Is the circular curve delta. + indicates right, - indicates left.<br />
PT Is the point <strong>of</strong> tangency. Note: this option can only be used with a PC n and a CC n.<br />
RADIUS Is the radius <strong>of</strong> the curve.<br />
DEGREE Is the degree <strong>of</strong> curvature.<br />
LENGTH Is the length <strong>of</strong> the curve. (only if delta or deflection given, non spiraled)<br />
TANGENT Is the tangent length (TS/PC to PI or PI to ST/PC). This may only be used<br />
with a DELTA ahead ref. (only if delta or deflection given, non spiraled)<br />
CC AT n Is the circular curve center. It can be the same form as the PB. (only if nonspiraled)<br />
CC n Is the point where the curve center resides. Note This can only be used with the<br />
PC n and PT n.<br />
SLB Is the back spiral length.<br />
SLA Is the ahead spiral length.<br />
SL Is the spiral length for in and out spirals.<br />
44 44<br />
44
Dividing a Curve to Create New Points<br />
A curve may be divided into equal length segments with the Divide Curve function. The required<br />
information is a curve number and a list <strong>of</strong> points. The curve will be divided into equal length segments.<br />
The number <strong>of</strong> segments is one more than the number <strong>of</strong> points in the list <strong>of</strong> points. There are two<br />
buttons at the bottom <strong>of</strong> the form. The OK button saves the points<br />
and closes the form. The Cancel button closes the form without saving<br />
any information.<br />
� DIVIDE CURVE c list <strong>of</strong> points<br />
e.g. DIVIDE CURVE 114 710 711 712<br />
45 45<br />
45
Creating and Adjusting Traverses<br />
This chapter covers how to create traverses and how to adjust a traverse.<br />
ICON KEY<br />
� <strong>COGO</strong> Command<br />
� Windows Information<br />
A AutoCAD Information<br />
! Important Note<br />
The Traverse menu<br />
T<br />
his chapter covers the three methods <strong>of</strong> creating a traverse and the<br />
Adjust Traverse function. The three methods <strong>of</strong> creating a traverse<br />
are storing a traverse using existing points, creating a traverse using the<br />
distance / direction pairs to create the traverse and the points in the<br />
traverse, and the angle right survey method to create the traverse and the<br />
points in the traverse. Once the traverse is created it may be adjusted with the<br />
Adjust Traverse function.<br />
The Traverse menu can create a new traverse, process the information from an angle right traverse,<br />
generate a traverse report, list the traverses in the model, and delete traverses.<br />
Storing a Traverse<br />
� The Store Traverse function is only available in a <strong>COGO</strong> command.<br />
The Store Traverse command relates two or more existing points. The required information for this<br />
command is a traverse name, and the points that define the courses in the traverse. The points may be in<br />
the form <strong>of</strong> a list or block <strong>of</strong> points. The Store Traverse command does not accept curve points as input.<br />
46 46<br />
46<br />
Chapter<br />
6
� STORE TRAVERSE *name* (list <strong>of</strong> points/block <strong>of</strong> points)<br />
STORE TRAVERSE *CONTROL* 1001 1003 1005 1007 to 1009 1001<br />
(Traverse CONTROL is a closed traverse starting and ending at point 1001.)<br />
Creating a Traverse Using Distance / Direction Pairs<br />
The Traverse function in <strong>COGO</strong> defines the courses <strong>of</strong> a traverse with distance / direction pairs. The<br />
required information is the traverse name, and the distance / direction information for each course. One<br />
important option in the Traverse function is that the command word “Unknown” may be used for<br />
distance or direction information and <strong>COGO</strong> will calculate the missing information for you. Only two<br />
unknowns are allowed per traverse. The following is an example <strong>of</strong> the Traverse function.<br />
47 47<br />
47
In this case, the first course <strong>of</strong> the traverse is defined by the distance and direction between the points 1<br />
and 2; therefore the Distance Use and Bearing Use options define the 1 st course. The second course is<br />
433.21 feet at an azimuth <strong>of</strong> –48 28 57 from point 2. The third course is 951.38 feet at an azimuth <strong>of</strong> –87<br />
45 00 from point 3. The fourth course is 1737.03 feet at an azimuth <strong>of</strong> –129 07 50 from point 4. The last<br />
course’s distance and bearing are unknown and close the traverse at point 1. The following figure is the<br />
results.<br />
! Refer to the <strong>COGO</strong> Command Reference for all the options the Traverse function <strong>of</strong>fers.<br />
� TRAVERSE *name* [REDEFINE] [PRINT]<br />
BEGIN AT [POINT] n<br />
.<br />
.<br />
.<br />
[FROM [POINT] m] TO [POINT] p distance direction<br />
.<br />
.<br />
.<br />
END AT (POINT) k [PRINT]<br />
48 48<br />
48
Creating a Traverse Using the Angle Right Survey<br />
The Angle Right Survey function is used to create a traverse from field data that has been collected using<br />
the angle right survey technique. A number <strong>of</strong> shots are taken during the data collection, so there may be<br />
a lot <strong>of</strong> information to enter into this function. The data is then statistically meaned to increase the<br />
accuracy <strong>of</strong> the data. The following is an example <strong>of</strong> an angle right survey from the CDOT Survey<br />
manual, pages 3-05-11 and 3-05-12.<br />
In this case, the traverse begins at point 2. The back azimuth at point 2 is 00 00 04.0. The next point in<br />
the traverse is point three. The height <strong>of</strong> the instrument at point 2 is 4.58, and the height at point 3 is<br />
5.51. There are four back and forward distances. The forward distances also have zenith angles (85 0…)<br />
that are typed immediately following the distances (501.9…). Due to the limited size <strong>of</strong> the data entry<br />
fields, only the first 3 numbers <strong>of</strong> the zenith angle can be seen. When the complete number cannot be<br />
displayed in the field the � (left arrow) and � (right arrow) on the keyboard are used to move through<br />
the number. In the 4 th forward distance you can see the last part <strong>of</strong> the zenith angle. The turned angles<br />
from point 2 to point 3 are entered last.<br />
! Refer to the <strong>COGO</strong> Command Reference for all the options the Angle Right<br />
Traverse function <strong>of</strong>fers.<br />
� TRAVERSE *name* [REDEFINE] [PRINT]<br />
BEGIN WITH [POINT] b BA (azimuth/bearing/[PNT] a)<br />
.<br />
.<br />
49 49<br />
49
.<br />
AT [PNT] m [height] TO [PNT] n [height] [*PID*]<br />
BACK distances(s) [zenith(s)]<br />
FORWARD distance(s) [zenith(s)]<br />
Angle angle(s)<br />
.<br />
.<br />
.<br />
END<br />
Adjusting a Traverse<br />
Occasionally traverses need to be corrected due to errors that creep in. <strong>COGO</strong> provides the ADJUST<br />
TRAVERSE function for this purpose. The information required for this function is the traverse name,<br />
the type <strong>of</strong> adjustment method to be used, and whether or not the user wishes to reset the tolerance used<br />
in the adjustment. The adjustment function can adjust a traverse that has up to 100 legs. If the error is<br />
greater than 0.0001, <strong>COGO</strong> will adjust the traverse by either using Crandall’s Rule to adjust the distances,<br />
or the COMPASS method to adjust the latitude and departure. If you wish to force an adjustment no<br />
matter what the error is, set the tolerance to 0. Please refer to the <strong>COGO</strong> Command Reference for<br />
further information on the syntax <strong>of</strong> the Adjust Traverse command. The following is an example.<br />
In this example traverse MONARCH will be adjusted using<br />
Crandall’s Rule. The beginning point <strong>of</strong> the traverse will be adjusted<br />
to match point 234, and the adjustment will be forced since the<br />
tolerance is 0.0.<br />
50 50<br />
50
Creating Alignments<br />
This chapter covers storing, creating, and re-stationing alignments.<br />
ICON KEY<br />
� <strong>COGO</strong> Command<br />
� Windows Information<br />
A AutoCAD Information<br />
! Important Note<br />
T<br />
his chapter covers the Store Alignment, Alignment, and Restation<br />
Alignment functions.<br />
The Alignment Menu<br />
The alignment menu creates a new alignment, generates alignment reports, lists the alignments in the<br />
model, and deletes alignments.<br />
Storing an Alignment<br />
� The Store Alignment function is only available in a <strong>COGO</strong> command.<br />
The Store Alignment command creates an alignment using points and curves. The required information<br />
for this command is an alignment name, and the points and curves that define the alignment. The points<br />
and curves may be in the form <strong>of</strong> a list or block <strong>of</strong> points/curves. The stationing <strong>of</strong> the alignment starts<br />
at 0 and cannot be set in the Store Alignment command.<br />
51 51<br />
51<br />
Chapter<br />
7
� STORE ALIGNMENT *name* list<br />
STORE ALIGNMENT *CENTER* POINT 100 CURVE 10 CURVE 11 POINT 1001<br />
(Alignment Center starts with point 100, then has curve 10, curve 11, and ends at point 1001. The<br />
stationing starts at 0+00.0)<br />
Creating an Alignment<br />
The Alignment function defines the relationship between points, tangent lines, and curves. The resulting<br />
alignment is stationed and may have one equation per item in the alignment. The alignment function<br />
requires a name, beginning station, item type, and the item number. If the item type is a new curve, curve<br />
data is also required. If the item type is an equation, then station equation information is required. The<br />
item type determines what fields are active on the form. For example, the new curve data part <strong>of</strong> the<br />
form is active only when the item type is a new curve. The following is an example <strong>of</strong> a simple alignment.<br />
52 52<br />
52
In this example, the alignment starts with point 110, has a tangent line equation, goes to complex curve<br />
114 with an equation, then ends at point 116. The following figure is the results.<br />
53 53<br />
53
� ALIGNMENT *name* [ROUND TO (MIN/SEC)] [REDEFINE] [PRINT]<br />
BEGIN [AT] item 1 [STATION sta]<br />
.<br />
.<br />
.<br />
alignment item(s)<br />
.<br />
.<br />
.<br />
END AT item n [STATION sta] (PRINT)<br />
e.g. ALIGNMENT *Example* REDEFINE PRINT<br />
BEGIN AT 110 STA 0.0<br />
EQ 2+00 2+11<br />
CURVE 114 PI 114 RADIUS 3554.93 SL 250 EQ 19+42.3 19+41<br />
END AT 116<br />
Creating Curves as Part <strong>of</strong> an Alignment<br />
The easiest method to create curves is to create curves as part <strong>of</strong> an alignment because much <strong>of</strong> the<br />
information needed to create a curve is contained in the definition <strong>of</strong> the alignment. Instead <strong>of</strong> locating a<br />
back point on the tangent line or the PC/TS <strong>of</strong> the curve, this information is in the definition for the<br />
alignment.<br />
54 54<br />
54<br />
In this example, new curve 114 is created as part<br />
<strong>of</strong> the alignment Example. Instead <strong>of</strong> having to<br />
create the curve points or enter more detailed<br />
information about the curve, the only required<br />
information is the PI point, the radius, and the<br />
spiral lengths.
Creating Parcels<br />
This chapter covers creating parcels.<br />
ICON KEY<br />
� <strong>COGO</strong> Command<br />
� Windows Information<br />
A AutoCAD Information<br />
! Important Note<br />
The Parcel Menu<br />
T<br />
his chapter covers how to define parcels using the Parcel function.<br />
The main items in a parcel are courses and arcs. The parcel may be<br />
open or closed, and if the parcel is closed it has an area The Parcel<br />
function is used to describe a parcel or lot <strong>of</strong> land. Legal descriptions<br />
can be produced (see the chapter on Listing, Reporting, and Deleting Items).<br />
The parcel menu creates a new parcel, generates parcel reports, lists the parcels in the model, and deletes<br />
parcels.<br />
Creating a Parcel<br />
The Parcel function uses existing points to establish the relationships between the tie points leading to the<br />
parcel, the courses <strong>of</strong> the parcel, and the arcs that define a parcel <strong>of</strong> land. The parcel function requires a<br />
name, item type, and the item number. If the item type is an arc, arc data is also required. The item type<br />
determines what fields are active on the form. For example, the arc data part <strong>of</strong> the form is active only<br />
when the item type is an arc. The following is an example.<br />
55 55<br />
55<br />
Chapter<br />
8
56 56<br />
56
In this example, the parcel has tie that start with point 110 then goes to points 50, 51, and 52. The parcel<br />
begins at point 118 which is the start <strong>of</strong> an arc left with a radius <strong>of</strong> 953.0 and ends at point 116. From the<br />
end <strong>of</strong> the arc, the next course closes the parcel by ending at point 118.<br />
! If one course in a parcel intersects with another the calculated area will be incorrect.<br />
� PARCEL *name* [SUBTRACT] [(PRINT/LEGAL)] [REDEFINE]<br />
[TIE (POINT] m]<br />
.<br />
.<br />
.<br />
BEGIN AT [POINT] n<br />
.<br />
.<br />
.<br />
[POINT] q<br />
.<br />
.<br />
.<br />
ARC (LEFT/RIGHT) RADIUS r (PLUS/MINUS) CC [POINT] t<br />
.<br />
.<br />
.<br />
ARC [POINT] p (LEFT/RIGHT) (PLUS/MINUS)<br />
.<br />
57 57<br />
57
.<br />
.<br />
END AT [POINT] z<br />
e.g. PARCEL *Example* REDEFINE<br />
TIE POINT 110<br />
TIE POINT 50<br />
TIE POINT 51<br />
TIE POINT 52<br />
BEGIN AT POINT 118<br />
ARC left RADIUS 953 PLUS CC 54<br />
POINT 116<br />
END AT POINT 52<br />
58 58<br />
58
Listing, Reporting, and Deleting<br />
Items<br />
This chapter covers how to determine what items exist in the geometry model, how to obtain reports<br />
about the items in the model, and how to remove items from the model.<br />
ICON KEY<br />
� <strong>COGO</strong> Command<br />
� Windows Information<br />
A AutoCAD Information<br />
T<br />
his chapter covers lists <strong>of</strong> items in the model, reports on the geometry<br />
<strong>of</strong> those items, and how to remove specified items from the model.<br />
! Important Note<br />
The Point, Line, Curve, Alignment, Traverse, and Parcel menus all have<br />
selections for listing items in the model, generating reports about those items,<br />
and deleting items from the model. The following is the point menu.<br />
Listing Items in the Model<br />
There is no required information for listing the items in a <strong>COGO</strong> model. Once you have clicked on the<br />
List menu item for the type <strong>of</strong> item desired, the list is displayed. The following is an example <strong>of</strong> a point<br />
list.<br />
59 59<br />
59<br />
Chapter<br />
9
� LIST item(s)<br />
Item Reports<br />
The reports are a description <strong>of</strong> the geometry <strong>of</strong> the item. The type <strong>of</strong> report generated depends on the<br />
type <strong>of</strong> item. The report function also allows you to save the report to a file or print out the report. The<br />
following are examples <strong>of</strong> reports.<br />
In this example a report for points 1 to 120 was requested. The list<br />
<strong>of</strong> points may be individual point numbers or a range <strong>of</strong> points as in<br />
this example. Any undefined points in the range <strong>of</strong> points will not<br />
be reported.<br />
Two options are available. The monument report omits the “Pnt”<br />
in front <strong>of</strong> the point number, and formats the information<br />
differently for inclusion in monument listings. The print report<br />
option and the print button on the report will send the report to a<br />
specified printer.<br />
60 60<br />
60
� Print item(s)<br />
Deleting Items<br />
In this example, an alignment report is desired. All <strong>of</strong> the alignments<br />
in the model are listed in the select list. In this case there is only one<br />
alignment in the model – TEST.<br />
The option Print Report will send the report to a printer if Yes is<br />
selected. The print button on the report will print the report also.<br />
You remove items from the geometry model via the Delete menu entry. The item type determines what<br />
information is required to delete an item. In the case <strong>of</strong> points, lines, and curves the item number is<br />
required. In the case <strong>of</strong> alignments, parcels, and traverses the name <strong>of</strong> the item is selected from a list. The<br />
following are examples.<br />
� DELETE item(s)<br />
61 61<br />
61
Other <strong>COGO</strong> Functions<br />
This Chapter covers other important <strong>COGO</strong> functions.<br />
ICON KEY<br />
� <strong>COGO</strong> Command<br />
� Windows Information<br />
A AutoCAD Information<br />
! Important Note<br />
The Misc Menu<br />
T<br />
His chapter covers other functions in <strong>COGO</strong>.<br />
The Misc (miscellaneous) menu has a number <strong>of</strong> functions that report or modify the <strong>COGO</strong> items. The<br />
following is the Misc menu in Windows.<br />
! The Misc menu is different in Windows and AutoCAD.<br />
Angle, Azimuth, Bearing, and Distance<br />
The Angle, Azimuth, Bearing, and Distance functions report information about the distance(s) and<br />
direction(s) between points. The following is an example <strong>of</strong> a distance function.<br />
62 62<br />
62<br />
Chapter<br />
10
Executing <strong>COGO</strong> Commands<br />
In this case, the distance and direction from point 110 to points 50, 51, and 52<br />
will be reported. The To Points can be in the form <strong>of</strong> a single point number<br />
or a range <strong>of</strong> points.<br />
The Command function provides the ability to enter a <strong>COGO</strong> command. The <strong>COGO</strong> commands have<br />
more functionality than some <strong>of</strong> the Windows forms, so there may be instances where executing a<br />
<strong>COGO</strong> command is desirable.<br />
In this case, the Store Point command is used to store point 1001.<br />
Deleting all <strong>COGO</strong> Items<br />
! This function will delete all items in the <strong>COGO</strong> model.<br />
The Delete All <strong>COGO</strong> function removes all items. After execution <strong>of</strong> this function <strong>COGO</strong> will have no<br />
items in the geometry model. After clicking on the Misc | Delete All menu item, the following<br />
confirmation window appears.<br />
If you click the Yes button, all items in the geometry model will be deleted. Clicking on the No button<br />
will cancel the Delete All function.<br />
63 63<br />
63
Resetting the Total Area Register<br />
<strong>COGO</strong> has space set aside to keep track <strong>of</strong> areas called the Total Area Register. As Parcels are created<br />
their area is added to or subtracted from the Total Area Register. The Reset Area function sets the value<br />
<strong>of</strong> the Total Area Register.<br />
Setting the Working Units<br />
In this case, the Total Area Register will be set to 0.<br />
The Set Units function sets the working units to either feet or meters. The default units are set to feet. If<br />
you wish to work in feet you need not execute this function, but it is recommended.<br />
! This should be the first function executed in each <strong>COGO</strong> run. If this function is executed more than<br />
once per <strong>COGO</strong> run and the units are changed, the results are unpredictable.<br />
Station Offset Function<br />
The Station Offset Alignment function produces a coordinate report by projecting points from the base<br />
alignment onto the <strong>of</strong>fset alignment. The report produced also contains the distance and skew from one<br />
alignment to the other.<br />
64 64<br />
64
In this example, the base alignment is “STA EX” (shown in red) and the <strong>of</strong>fset alignment is “OFFSET”<br />
(shown in white). The report will use 100’ increments along alignment “STA EX” to produce the distance<br />
and skews from one alignment to the other.<br />
Rotating and Translating <strong>COGO</strong> data in Windows and<br />
AutoCAD<br />
65 65<br />
65<br />
This function rotates and, or translates individual<br />
<strong>COGO</strong> items. This function is available in<br />
Windows and AutoCAD. When this function is<br />
executed, the rotate / translate is documented in<br />
the <strong>COGO</strong> output (.COT) file.<br />
In this case, the specified items will be rotated<br />
about point 10 the angular difference between<br />
the line segment 22 to 23 and the line segment<br />
122 to 123 (clockwise 1 minute and 1.45<br />
seconds). If a translate point was provided, the<br />
items specified will also be translated from<br />
point 10 to the translate point.<br />
The rotation angle can be specified as an angle,<br />
or as the angular difference between two line<br />
segments.<br />
� The command for rotating / translating <strong>COGO</strong> items rotates/ translates the entire geometry model.
Transferring Information to Other<br />
Engineering Applications<br />
This Chapter covers the functions used to transfer information to other engineering applications and the<br />
SDR data collectors.<br />
ICON KEY<br />
� <strong>COGO</strong> Command<br />
� Windows Information<br />
A AutoCAD Information<br />
! Important Note<br />
AutoCAD<br />
C<br />
OGO can transfer information to MX (formerly MOSS), AutoCAD,<br />
SDR data collectors, PICS, and RoadCalc version 13. All <strong>of</strong> these<br />
functions are in the File menu, as shown below.<br />
The data transfer to AutoCAD can be done in two ways. The first is to use the File menu, AutoCAD<br />
selection to generate a DXF format file that can be read into AutoCAD. The second is to run <strong>COGO</strong> in<br />
AutoCAD 2000 and answer that the <strong>COGO</strong> information does not exist in AutoCAD. The following is<br />
an example if the DXF file transfer.<br />
66 66<br />
66<br />
Chapter<br />
11
Once you have specified the output file name, you then select what<br />
<strong>COGO</strong> items you want output to the DXF file, and whether you want<br />
brief layer names or long layer names, the text size <strong>of</strong> <strong>COGO</strong><br />
annotation in AutoCAD, and if 20m stationing ticks are desired if the<br />
model is metric.<br />
Layer Names in AutoCAD<br />
Three different layer names are possible in AutoCAD. There are two layer naming schemes in the DXF<br />
file transfer, and one layer name scheme if you are using <strong>COGO</strong> in AutoCAD. The schemes for layer<br />
naming are in the following table.<br />
DXF<br />
Brief<br />
DXF<br />
Long<br />
Run in<br />
AutoCAD<br />
Points Lines Curves Traverses Alignments Parcels<br />
CPnt Clin Ccur CTname &<br />
CTTXTname<br />
67 67<br />
67<br />
CAname &<br />
CATXTname<br />
Cnumber CLnumber CCnumber Same Same Same<br />
CPnt &<br />
CPntTXT<br />
CLine CCurve CTname &<br />
CTnameTXT<br />
CAname &<br />
CAnameTXT<br />
CPname &<br />
CPTXTname<br />
CPname &<br />
CPnameTXT
MX<br />
The transfer <strong>of</strong> alignments to MX is done via the MX Halign file. The Halign file is then imported into<br />
MX as a horizontal alignment string. Refer to the <strong>COGO</strong> command reference for more information on<br />
the MX Halign file format. The following is an example.<br />
In this example, the alignment TEST is selected for output to the file Example.C2M in standard (feet)<br />
units.<br />
SDR Data Collectors and PICS<br />
The SDR File Output function creates a coordinate file that can be downloaded to the Leitz SDR series 2,<br />
20, and 30 data collectors and can be transferred to PICS.<br />
68 68<br />
68<br />
In this case <strong>COGO</strong> creates the SDR33 format<br />
file Example.sdr with the data from alignment<br />
TEST starting at station 10+00 to station<br />
13+00 at 100’ intervals.<br />
The files created are fname.SDR and fname.COT. The SDR file contains the coordinates <strong>of</strong> the points<br />
along the specified alignment starting at the 'from' station (default = beginning station), ending at the 'to'
station (default = end station), at even intervals (default = 100').<br />
The coordinates <strong>of</strong> the curve points are automatically output to<br />
the SDR data collector file. The COT file is a report <strong>of</strong> the<br />
contents <strong>of</strong> the SDR file.<br />
� SET SDR FILE OUTPUT *fname* ALI *aname* [FROM stal] [TO sta2] [EVEN n]<br />
� SET SDR FILE OUTPUT *name* *code* list <strong>of</strong> points<br />
Entering only points, this example creates a SDR2 format file using<br />
the TMOSS point code <strong>of</strong> 1075. The list <strong>of</strong> points may be<br />
individual points, or in the form <strong>of</strong> a range <strong>of</strong> points (e.g. PNT 1<br />
TO 10 PNT 15 PNT 20). The recommended TMOSS codes are<br />
1086 and 1075 for the control points, and 1080 for property<br />
control points.<br />
69 69<br />
69
RoadCalc Version 13<br />
The Output to RoadCalc function creates the subproject files in Roadcalc 13’s internal format for<br />
alignments. It converts alignments from <strong>COGO</strong> internal format to Roadcalc internal format. All files<br />
necessary to transfer the survey or design alignment data to the Roadcalc SUBPROJECT nnn are created<br />
in the current directory. These files MUST reside in the directory specified for the RoadCalc subproject.<br />
The files created for the design alignment are named RCDAGnnn.DAT, RCDAGnnn.TCD, and if the<br />
alignment has station equations RCDEQnan.DAT.<br />
� ROADCALC FILE OUTPUT SUBPROJECT nnn ALIGNMENT *name* [DESIGN]<br />
[(METRIC/FEET)]<br />
! <strong>COGO</strong> can create curves with overlaps. Roadcalc cannot handle curve overlaps. All curve overlaps in<br />
<strong>COGO</strong> must be resolved before transferring alignments to Roadcalc.<br />
70 70<br />
70
<strong>COGO</strong> Input, Output, Log, Saved<br />
Tables, and Archive Files<br />
This chapter covers the <strong>COGO</strong> functions that use or create files. This chapter is essential reading.<br />
ICON KEY<br />
� <strong>COGO</strong> Command<br />
� Windows Information<br />
A AutoCAD Information<br />
! Important Note<br />
<strong>COGO</strong> Input from a File<br />
T<br />
his chapter covers the functions that input <strong>COGO</strong> commands, output<br />
<strong>COGO</strong> reports, logs functions executed during a <strong>COGO</strong> run, and<br />
archive the <strong>COGO</strong> model for future use.<br />
The primary method <strong>of</strong> creating a geometry model is the <strong>COGO</strong> input file (.CIN). The .CIN file is a<br />
collection <strong>of</strong> <strong>COGO</strong> commands that create the geometry model. The <strong>COGO</strong> commands may be<br />
entered into a .CIN file using a text editor such as PFE32 (Programmer’s File Editor, 32 bit), then you can<br />
instruct <strong>COGO</strong> to read from that file. The functions that redirect input are the File | Input or the Set File<br />
Input command. <strong>COGO</strong> expects the file extension to be .CIN. The file name must conform to the file<br />
naming conventions for the operating system. In the Set File Input command, the file name is a string <strong>of</strong><br />
characters and therefore must be surrounded by asterisks. The following are examples.<br />
71 71<br />
71<br />
Chapter<br />
12
� SET FILE INPUT *147REST*<br />
(Instructs <strong>COGO</strong> to read input from file 147REST.CIN in the current directory.)<br />
The <strong>COGO</strong> Log File<br />
The <strong>COGO</strong> log file records all functions that you executed during a <strong>COGO</strong> run. <strong>COGO</strong> does this by<br />
recording most <strong>of</strong> the functions as <strong>COGO</strong> commands. The functions that are not recorded as commands<br />
are those functions that exist only in Windows or those that only exist in AutoCAD. The log file can be<br />
used in a number <strong>of</strong> ways. It can be used as a disaster recovery technique, or can be used to capture<br />
commands that may be used later as an input file. The log file may be edited and, if desired, added to<br />
existing input files.<br />
72 72<br />
72
<strong>COGO</strong> Output to a File<br />
<strong>COGO</strong> automatically creates an output file named <strong>COGO</strong>.COT for each run. This file is over-written<br />
each time <strong>COGO</strong> is run. You may want to re-direct the <strong>COGO</strong> output to a file <strong>of</strong> your choosing. The<br />
Set File Output command is provided for this purpose. The Set File Output command redirects the<br />
output <strong>of</strong> the <strong>COGO</strong>.COT file to a file you specify. The file name must conform to the file naming<br />
conventions for the operating system. The file name is a string <strong>of</strong> characters and therefore must be<br />
surrounded by asterisks in the Set File Output command. The file name extension will be .COT. If<br />
desired, a "page break" can be introduced into the output file with the Eject command. The result <strong>of</strong> the<br />
Eject command is that the information following the Eject command will start on a new page. The<br />
following are examples.<br />
SET FILE OUTPUT *89042A1*<br />
(Redirects the <strong>COGO</strong>.LOG output to file 89042A1.COT in the default folder.)<br />
SET FILE OUTPUT *C:\JUNK1*<br />
(Redirects the output to file C:\JUNK1.COT.)<br />
<strong>COGO</strong> Saved Tables<br />
Saved Tables are files that contain the geometry model. The primary uses for saved tables are for saving<br />
the model for future use as either a recovery tool, or when a model becomes so large that re-running an<br />
input file is time consuming. The saved tables have file extensions <strong>of</strong> .PNT, .LIN, .CUR, .ALI, and .ATR.<br />
The two <strong>COGO</strong> functions that handle the saved tables are the Save and Restore functions in the File<br />
menu. The following are examples.<br />
73 73<br />
73
In the above examples, the geometry model is saved under the file name JUNK. The result is five files<br />
whose file names are JUNK (JUNK.PNT, JUNK.LIN, JUNK.CUR, JUNK.ALI, and JUNK.ATR). The<br />
model is Restored by specifying the JUNK.PNT as the file to restore. <strong>COGO</strong> then strips <strong>of</strong>f the<br />
extension <strong>of</strong> the file and uses the file name to Restore all five files.<br />
Archiving <strong>COGO</strong> Data for Future Use<br />
The <strong>COGO</strong> ARCHIVE function gives the user the capability <strong>of</strong> creating a high accuracy input file which<br />
can be used years later to recreate the model for a particular project. The required information is an<br />
identification line that must immediately follow the command. The resulting file, named<br />
ARCHIVE.COT, has the <strong>COGO</strong> Store commands necessary to recreate the model. The northings,<br />
eastings, and distances in the archive file are accurate to 6 decimal places. The following is an example.<br />
ARCHIVE<br />
I-70, I-25 interchange.<br />
(The file ARCHIVE.COT will be created with store commands that will recreate the <strong>COGO</strong> model. The<br />
identification line "I-70, I-25 interchange." will appear at the top <strong>of</strong> the file as a <strong>COGO</strong> comment line.)<br />
! It is advisable to rename the ARCHIVE.COT file before executing the Archive function again.<br />
74 74<br />
74
<strong>COGO</strong> in Windows Functions<br />
This chapter covers the <strong>COGO</strong> functions that exist only in Windows.<br />
ICON KEY<br />
� <strong>COGO</strong> Command<br />
� Windows Information<br />
A AutoCAD Information<br />
! Important Note<br />
The View Menu<br />
C<br />
OGO has some functions that exist only in Windows. This chapter<br />
covers those functions.<br />
Most <strong>of</strong> the functions that exist only in Windows are graphical functions such as<br />
zooming and panning and are in the View menu.<br />
The View menu contains the functions that manipulate the display area in Windows.<br />
75<br />
75<br />
Chapter<br />
13
Zooming<br />
There are four different zoom functions in the View menu. You can zoom in, zoom out, zoom to the<br />
extents <strong>of</strong> the <strong>COGO</strong> model, and return to the previous zoom. The only one <strong>of</strong> these that requires further<br />
input is the Zoom In function. To zoom in, click on the Zoom In menu entry, then click and drag from one<br />
corner <strong>of</strong> the zoom area to the other.<br />
Panning<br />
Panning allows you to re-center the display area. To pan, click on the Pan menu entry then click on the part<br />
<strong>of</strong> the drawing you want to move and drag the cursor to the area you want to move to.<br />
76<br />
76
Refreshing the Display Area<br />
Sometimes you need to redisplay or refresh the <strong>COGO</strong> display due to clutter or changes in the display. The<br />
Refresh function in the View menu re-generates the <strong>COGO</strong> display.<br />
Setting Item Colors<br />
The Set Color function changes the color <strong>of</strong> <strong>COGO</strong> items in Windows. The Set Color function is in the<br />
View menu.<br />
Once the color <strong>of</strong> an item is changed, the color is active until the next Refresh <strong>of</strong> the graphic display in<br />
Windows. This function is a two-step process. You indicate which items you want to change the color <strong>of</strong>,<br />
and then indicate what color is to be used.<br />
77<br />
77<br />
In this case points 110 to 124,<br />
curve 118, and parcel TE4 have<br />
been selected for the color<br />
change. After the OK button is<br />
clicked, the Color form is<br />
displayed. In this case, red is<br />
the chosen color. After the OK<br />
button is clicked, the display<br />
refreshes and the color <strong>of</strong> the<br />
items selected will be red.
<strong>COGO</strong> in AutoCAD Functions<br />
This chapter covers the <strong>COGO</strong> functions that exist only in AutoCAD.<br />
ICON KEY<br />
� <strong>COGO</strong> Command<br />
� Windows Information<br />
A AutoCAD Information<br />
! Important Note<br />
C<br />
OGO has a number <strong>of</strong> functions that exist only in AutoCAD, such as<br />
selecting points from the graphic display area in AutoCAD. This<br />
chapter covers those functions.<br />
Displaying <strong>COGO</strong> Data in AutoCAD<br />
Reading in a <strong>COGO</strong> input file while executing <strong>COGO</strong> in AutoCAD causes <strong>COGO</strong> to create AutoCAD<br />
objects for all <strong>of</strong> the items on the geometry model. After that, only new geometry items are added to the<br />
AutoCAD drawing as you create new items in <strong>COGO</strong>. Since this may result in duplicate AutoCAD objects,<br />
<strong>COGO</strong> prompts you to determine if the <strong>COGO</strong> items already exist in AutoCAD when you read in a<br />
<strong>COGO</strong> input file. If you already have this <strong>COGO</strong> information in AutoCAD you should respond that the<br />
data does exist in AutoCAD.<br />
It is your responsibility to properly maintain the <strong>COGO</strong> items in AutoCAD. Some tools are provided by<br />
<strong>COGO</strong> to assist you in maintaining <strong>COGO</strong> data in AutoCAD. See the section on graphically moving points<br />
for more information.<br />
78<br />
78<br />
Chapter<br />
14
Graphically Selecting <strong>COGO</strong> Points<br />
A number <strong>of</strong> the Windows forms have a “Screen Pick” button. This button is only active while <strong>COGO</strong> is<br />
executing in AutoCAD. The purpose <strong>of</strong> this button is to allow you to get information from the AutoCAD<br />
drawing for use in <strong>COGO</strong>. An example is the New Point form. If you choose to use the Screen Pick<br />
button, the coordinates for the point you pick in AutoCAD are captured and the Northing and Easting fields<br />
will be filled in for you. The following is an example.<br />
All you need to do now is to fill in the Point Number, and optionally, the<br />
elevation and point ID, then click on the OK or Apply button.<br />
In other cases, the Screen Pick button captures the <strong>COGO</strong> point number rather than coordinate<br />
information. The following is an example.<br />
In this case, the Screen Pick button for the item number was clicked. The<br />
New Parcel form was minimized, the user selected <strong>COGO</strong> point 50 in<br />
AutoCAD, and the point number was automatically entered in the Number<br />
field.<br />
79<br />
79
Graphically Moving <strong>COGO</strong> Points<br />
When <strong>COGO</strong> is loaded in AutoCAD and you choose to move a <strong>COGO</strong> point in the drawing, <strong>COGO</strong><br />
detects that you are moving a <strong>COGO</strong> point and, if you choose to, will update the geometry for that point to<br />
reflect the changes you made in the drawing. The following is an example.<br />
In this case point 50 was moved in AutoCAD. <strong>COGO</strong> detected this<br />
change and asked if the point should be moved. If Yes is selected, the<br />
coordinates in the geometry model will be updated. If No is selected, the<br />
point will be moved back to its original location in AutoCAD. In this way,<br />
the data in the geometry model and the drawing match.<br />
If only the text for point 50 was moved in AutoCAD, a warning message is displayed as follows.<br />
80<br />
80
<strong>COGO</strong> Command Reference<br />
This chapter covers all the <strong>COGO</strong> commands in detail.<br />
ICON KEY<br />
� <strong>COGO</strong> Command<br />
� Windows Information<br />
A AutoCAD Information<br />
! Important Note<br />
Adjust Traverse Command<br />
C<br />
OGO commands are used to build input files and archive files. Use this<br />
chapter as a reference to aid in understanding <strong>COGO</strong> commands and<br />
their syntax.<br />
The commands are arranged in alphabetical order.<br />
<strong>COGO</strong> depends on surveying for some information. During the survey process it is possible that slight<br />
errors can creep in. Therefore, <strong>COGO</strong> contains the ability to adjust traverses to correct these errors. The<br />
ADJUST Command provides this capability. The command has two forms. Basically one handles closed<br />
traverses and one handles open traverses.<br />
�ADJUST TRAVERSE *name* [TO [POINT] n] (LS/COMPASS) [PRINT] [TOL t]<br />
This command will compute and report the error <strong>of</strong> closure, and the difference between the northings and<br />
eastings <strong>of</strong> the start and end points for a stored traverse. If the error is greater than 0.0001, <strong>COGO</strong> will<br />
ADJUST the TRAVERSE by either using the Crandall Rule (LS) to adjust the distances, or the COMPASS<br />
method to adjust the latitude and departure. If used, the end point <strong>of</strong> the traverse is adjusted TO match<br />
POINT N. The PRINT option will report the results <strong>of</strong> the adjustment. The preset tolerance for<br />
adjustment is 1 foot to 10000. Ordinarily if the error is smaller than this, the traverse will not be adjusted.<br />
The TOL t option resets the adjustment tolerance. A tolerance <strong>of</strong> 0.0 will force the traverse to be adjusted.<br />
! The traverse may not have more than 99 courses to be adjusted. The command assumes that the last point differs from<br />
81<br />
81<br />
Chapter<br />
15
the first point by the error. After the adjustment the last point and the first point will have the same coordinates. The LS<br />
adjustment adjusts the distances and not angles.<br />
Example:<br />
ADJUST TRAV *16* LS PRINT<br />
DISTANCE/BEARING ERROR IS 242.156/S32.25. 44.4 E (-204.394, 129.857) 1 FT. IN 21.958 FT.<br />
TRAVERSE 16 ADJUSTED<br />
TRAVERSE 16<br />
PNT 1 716134.744 2126198.996<br />
86.644 S 0. 19. 32.0 E<br />
PNT 50 716048.101 2126199.488<br />
64.701 N 88. 20. 21.0 E<br />
PNT 51 716049.976 2126264.163<br />
237.742 N 88. 20. 21.0 E<br />
PNT 52 716056.867 2126501.804<br />
92.592 S 55. 54. 51.0 E<br />
PNT 53 716020.561 2126586.981<br />
149.270 S 55. 8. 32.0 E<br />
PNT 54 715935.247 2126709.469<br />
193.874 S 69. 42. 43.0 E<br />
PNT 55 715868.023 2126891.315<br />
282.147 S 84. 33. 48.0 E<br />
END TRAVERSE 16<br />
Alignment Command<br />
An alignment is made up <strong>of</strong> points, curves, and station equations. The ALIGNMENT command computes<br />
and stores the alignment and the items that makes up the alignment. The alignment is stationed and<br />
equations can be specified.<br />
The alignment command is a multiple line command with the alignment name, the beginning <strong>of</strong> the<br />
alignment, each item in the alignment and the end <strong>of</strong> the alignment. Please note that blank lines between the<br />
begin and end statements will generate an error.<br />
�ALIGNMENT *name* [ROUND TO (MIN/SEC)] [REDEFINE] [PRINT]<br />
BEGIN [AT] item 1 [STATION sta]<br />
.<br />
.<br />
.<br />
alignment item(s)<br />
.<br />
.<br />
.<br />
END AT item n [STATION sta] (PRINT)<br />
82<br />
82
The ALIGNMENT referred to by *NAME* (8 characters maximum), BEGINs at ITEM 1 with<br />
STATION sta followed by a list <strong>of</strong> ITEMS and ENDs AT ITEM n. If desired, you may force the<br />
ROUNDing <strong>of</strong> bearings TO the nearest MINute or SECond. This will cause points and PI's to be shifted<br />
slightly as necessary. The REDEFINE option instructs <strong>COGO</strong> to delete any alignment with the same name<br />
before creating the new alignment. The PRINT option will print the geometry <strong>of</strong> the alignment. The<br />
ALIGNMENT command accepts points, curves, and equations as items. The following are the accepted<br />
forms for specifying points, curves, and equations as part <strong>of</strong> the alignment.<br />
POINTS - A point may be defined in the following ways.<br />
[POINT] m [EQUATION aa.aa]<br />
Where: M is the number <strong>of</strong> a previously defined point. aa.aa is the ahead station for the point.<br />
[POINT] m NORTH n EAST *id* [EQUATION aa.aa]<br />
See the STORE POINT command for definitions.<br />
CURVES - A curve may be added to the alignment in the following ways.<br />
CURVE c [HOLD]<br />
Where: C is the number <strong>of</strong> a previously defined curve.<br />
HOLD prevents <strong>COGO</strong> from rounding the bearings <strong>of</strong> the elements <strong>of</strong> the curve. If the rounding<br />
option is specified, HOLD must be used.<br />
CURVE c, pi reference item, circular item, [spiral item], [Equation],<br />
[HOLD]<br />
Where: C is the curve number used for storing the curve.<br />
PI REFERENCE ITEM (select one)<br />
PI n EQ s.s [HOLD]<br />
Where: N is a previously defined point.<br />
S.S is a station equation.<br />
HOLD prevents rounding adjustments.<br />
PI PNT as c [EQ s.s] [HOLD]<br />
Where: PNT AA C is a curve point (TS/PC, SC, CS, ST/PT, CC) for curve C. e.g., PI PNT<br />
PC 3.<br />
S.S. is a station equation.<br />
HOLD prevents rounding adjustments.<br />
83<br />
83
PI NORTH n EAST e EO s.sl [HOLD]<br />
Where: N and E are the coordinates <strong>of</strong> the PI.<br />
S.S is a station equation.<br />
HOLD prevents rounding adjustments.<br />
CIRCULAR ITEM (select one)<br />
RADIUS r<br />
Where: R is the radius <strong>of</strong> the curve.<br />
DEGREE ddd mm ss.ss<br />
Where: DDD MM SS.SS is the degree <strong>of</strong> curvature.<br />
DELTA d<br />
Where: D is the circular curve delta. Can only be used if the curve is non-spiraled.<br />
LENGTH 1<br />
Where: L is the length <strong>of</strong> the curve. Can be used in association with DELTA or delta will be computed from<br />
next PI or POT.<br />
TANGENT t<br />
Where: T is the length <strong>of</strong> the tangent from TS/PC to PI or PI to ST/PT. This element can be used in<br />
association with DELTA or delta will be computed from next PI or POT.<br />
CC [AT] n<br />
Where: N is the point number for the center <strong>of</strong> the curve. This point may be in the form <strong>of</strong> a point number<br />
<strong>of</strong> a defined point or previously defined curve point or north and east coordinates.<br />
[SPIRAL ITEMS] (optional, select one or two <strong>of</strong> the following)<br />
SLB dist [HOLD]<br />
Where: DIST is the length <strong>of</strong> the back spiral.<br />
See above for explanation <strong>of</strong> HOLD.<br />
SLA dist [HOLD]<br />
Where: DIST is the length <strong>of</strong> the ahead spiral.<br />
See above for explanation <strong>of</strong> HOLD.<br />
SL dist [HOLD]<br />
Where: DIST is the spiral length <strong>of</strong> the back and ahead spiral.<br />
See above for explanation <strong>of</strong> HOLD.<br />
SAB ddd mm ss.ss [HOLD]<br />
Where: DDD MM SS.SS is the back spiral angle.<br />
See above for explanation <strong>of</strong> HOLD.<br />
84<br />
84
AA ddd mm ss.ss [HOLD]<br />
Where: DDD MM SS.SS is the ahead spiral angle.<br />
See above for explanation <strong>of</strong> HOLD.<br />
SA ddd mm ss.ss [HOLD]<br />
Where: DDD MM SS.SS is the spiral angle for both back and ahead spirals.<br />
See above for explanation <strong>of</strong> HOLD.<br />
[EQUATION] (optional)<br />
EQ bb.bb aa.aa<br />
Where: bb.bb is the back station on the curve or a curve point. Valid<br />
curve points are PC, TS, CS,SC, ST, PT.<br />
aa.aa is the ahead station<br />
EQUATION – An equation on a tangent line<br />
EQ bb.bb aa.aa<br />
Where: bb.bb is the back station<br />
aa.aa is the ahead station.<br />
! The station specified for the first item in the BEG AT line <strong>of</strong> the alignment command determines the stationing for the<br />
alignment. If the station is not provided in the BEG AT line, <strong>COGO</strong> will use 0+00 as the beginning station for the alignment.<br />
Examples:<br />
ALI *LEFT CL* REDEFINE PRINT<br />
BEGIN AT 10 STA 470+00<br />
CURVE 30 PI 30 DEG 5 SLA 350 EQ 485+12.51 487+10.00<br />
CURVE 70 PI 70 RADIUS 2083.64 SLB 250 SLA 300<br />
CURVE 100 PI 100 DEG I RADIUS 5730.00<br />
CURVE 140 PI 140 SL 300 RADIUS 1146.00<br />
CURVE 180 PI 180 RADIUS 1230.00 SLB 300<br />
EQ 1127+22.72 1127+14.00<br />
CURVE 210 PI 210 SL 300 RADIUS 1146.00<br />
CURVE 240 PI 240 RADIUS 5814.00<br />
CURVE 270 PI 270 RADIUS 1637.14 SL 200<br />
CURVE 300 PI 300 RADIUS 5814.00<br />
CURVE 330 PI 330 RADIUS 2949.00 SL 150<br />
PNT 340<br />
CURVE 360 PI 360 RADIUS 1432.50 SL 250 EQ PT 1562+92.2<br />
CURVE 390 PI 390 RADIUS 11544.00<br />
85<br />
85
CURVE 420 PI 420 RADIUS 5814.00<br />
CURVE 450 PI 450 SL 250 RADIUS 1432.5<br />
CURVE 480 PI 480 SL 300 RADIUS 1146.00<br />
END AT PNT 500<br />
ALIGNMENT *DETOUR*<br />
BEGIN AT 110 STA 311+15.99<br />
CURVE 114 PI 114 RADIUS 954.930<br />
CURVE 116 PI 116 RADIUS 954.930<br />
CURVE 118 PI 118 RADIUS 954.930<br />
CURVE 120 PI 120 RADIUS 954.930<br />
END AT 124<br />
ALIGNMENT *TEST* REDEFINE<br />
BEGIN AT 110 STA 0.0<br />
EQ 2+00 2+11<br />
CURVE 114 PI 114 RADIUS 954.930 EQ 4+10 4+11<br />
CURVE 116 PI 116 RADIUS 954.930 EQ 7+15 7+10<br />
CURVE 118 PI 118 RADIUS 954.930 EQ 10+50.0 0+00<br />
CURVE 120 PI 120 RADIUS 954.930 EQ PT 7+00.<br />
EQ 7+30.00 7+31.00<br />
END AT 124<br />
Angle Command<br />
This command calculates the angle formed by three points.<br />
ANGLE ([PLUS]/MINUS) AT [POINT] n FROM [POINT] m TO [POINT] p<br />
This command determines the angle formed by three points. It calculates the angle FROM POINT M<br />
through the vertex AT POINT N, TO POINT P. <strong>COGO</strong> computes the angle in a clockwise direction<br />
(PLUS), unless MINUS is specified.<br />
Examples:<br />
ANGLE MINUS AT 10 FROM 3 TO 4<br />
ANGLE AT 21 FROM 10 TO 15<br />
Archive Command<br />
The Archive Command creates an archive file. This file is an input file in the form <strong>of</strong> <strong>COGO</strong> store<br />
commands. This file is used for archiving a <strong>COGO</strong> model and transferring data from one computer to<br />
another. This command may also be used to convert a <strong>COGO</strong> model from feet to metric or visa versa.<br />
86<br />
86
ARCHIVE TABLES [(METRIC/FEET)]<br />
identification line<br />
The Archive Command is a two-line command that generates a file <strong>of</strong> <strong>COGO</strong> commands (ASCII file called<br />
ARCHIVE.COT) that will recreate the <strong>COGO</strong> model using STORE commands. The tables are unchanged<br />
by the command. The METRIC/FEET option allows for conversion from one unit <strong>of</strong> measurement to<br />
another. The 'identification line' must be on a separate line and immediately follow the ARCHIVE<br />
command. This identification line will be the first line <strong>of</strong> the file in the form <strong>of</strong> a comment.<br />
Example:<br />
ARCHIVE TABLES<br />
Identification Line<br />
Area Command<br />
The area command calculates the area <strong>of</strong> a boundary defined by lines and arcs.<br />
[SUBTRACT] AREA item list [PRINT]<br />
The area command calculates an area. It SUBTRACTs from or adds to (default) the total area register the<br />
AREA bounded by an ITEM LIST <strong>of</strong> lines and curves. If the PRINT option is used, the points and the<br />
distance/angle from point to point will be reported along with the area. A maximum <strong>of</strong> 350 line/curve<br />
segments may be used to define the boundary. The first point in the list must be the last point in the list.<br />
The line segments are defined in <strong>COGO</strong> as [point] n [point] m. There are two ways to define a circular<br />
segment. The first is the point arc point syntax:<br />
[POINT] a ARC [POINT] m (PLUS/MINUS) [POINT] p<br />
In this syntax the ARC goes from POINT n to POINT p with the center at POINT m. The PLUS or<br />
MINUS indicate whether the resulting area is to be added or subtracted from the parcel area.<br />
The second is the point arc radius syntax:<br />
[POINT] n ARC (LEFT/RIGHT) RADIUS r (PLUS/MINUS) [POINT] p<br />
In this syntax the ARC goes from POINT n to POINT p with the direction <strong>of</strong> curvature indicated by<br />
LEFT or RIGHT and RADIUS r. The PLUS or MINUS indicate whether the resulting area is to be<br />
added or subtracted from the parcel area.<br />
! The calculated area is inaccurate if any side <strong>of</strong> the parcel should cross another side. If the Area command<br />
must be continued on more than one line, you should be careful dividing the description <strong>of</strong> the circular<br />
segment. The division <strong>of</strong> the input can occur only before the word ARC or after the word PLUS or<br />
87<br />
87
MINUS.<br />
Example:<br />
AREA 670 671 ARC RIGHT RADIUS 4358.0 MINUS 672 673 674 + 675 ARC LEFT<br />
RADIUS 4558.0 PLUS 676 677 670 PRINT<br />
Azimuth Command<br />
The Azimuth Command calculates the azimuth and distance between two points, or between a point and a<br />
group <strong>of</strong> points.<br />
AZIMUTH ([POINT] n [POINT] m / [POINT] n [POINT] m TO [POINT] p)<br />
This command calculates the AZIMUTH and distance between points. The first type <strong>of</strong> azimuth command<br />
calculates the distance and azimuth between two points (POINT n and POINT m). The second type<br />
calculates the distance and azimuth between a point (POINT n) and a range <strong>of</strong> points (POINT m TO<br />
POINT p). Any undefined points in the range are ignored.<br />
Examples:<br />
AZIMUTH 15 PNT 100 TO 120<br />
AZIMUTH 41 52<br />
Bearing Command<br />
The Bearing Command calculates the bearing and distance between two points, or between a point and a<br />
group <strong>of</strong> points.<br />
BEARING [POINT] n [POINT] m / [POINT] n [POINT] m TO [POINT]<br />
This command calculates the BEARING and distance between points. The first type <strong>of</strong> bearing command<br />
calculates the distance and bearing between two points (POINT n and POINT m). The second type<br />
calculates the distance and bearing between a point (POINT n) and a range <strong>of</strong> points (POINT m TO<br />
POINT p). Any undefined points in the range are ignored.<br />
Examples:<br />
BEARING 1 3<br />
BEARING 15 30 TO 40<br />
88<br />
88
Deleting Points, Lines, Curves, Traverses, Alignments, Parcels<br />
and Text<br />
This command is the primary command for deleting all <strong>COGO</strong> item types from the <strong>COGO</strong> model.<br />
DELETE ([POINT]/LINE/CURVE/TRAVERSE/ALIGNMENT/PARCEL/TEXT) (list/ALL)<br />
This command DELETEs the specified item(s) from the <strong>COGO</strong> model.<br />
! POINTS is the only optional word when a list <strong>of</strong> numbers is used.<br />
Examples:<br />
DELETE POINT 1 TO 3<br />
DELETE 1 5 1034<br />
DELETE CURVE 10<br />
DELETE ALI *Gl3GDET*<br />
Deleting All Items in the <strong>COGO</strong> Model<br />
The Delete All command deletes all the items in the <strong>COGO</strong> model.<br />
DELETE ALL<br />
This command clears all data from the <strong>COGO</strong> model.<br />
Example:<br />
DELETE ALL<br />
Distance Command<br />
The Distance Command calculates the distance and bearing between two points or a point and a range <strong>of</strong><br />
points.<br />
DISTANCE ([POINT] n [POINT] m / [POINT] n [POINT] a TO [POINT] p)<br />
This command calculates the distance and bearing between points. The first type <strong>of</strong> distance command<br />
calculates the distance and bearing between two points (POINT n and POINT m). The second type<br />
89<br />
89
calculates the distance and bearing between a point (POINT n) and a range <strong>of</strong> points (POINT m TO<br />
POINT p). Any undefined points in the range are ignored.<br />
Examples:<br />
DISTANCE PNT 10 PNT 20<br />
DISTANCE PNT 3 5 TO 15<br />
Divide Line Command<br />
The Divide Line command creates new points by dividing a line into specified lengths.<br />
DIVIDE LINE 1 length [POINT] pl [DISTANCE] dl [POINT] p2 [DISTANCE] d2 etc.<br />
This command creates new points by dividing up a line. It creates point (s) (P1 to Pn) in the point table by<br />
dividing line L <strong>of</strong> length LENGTH into the segments specified by the point/distance pairs. Up, to 18<br />
point/distance pairs may be specified. The division <strong>of</strong> the line begins at the starting point for the line. The<br />
distance is calculated from the previous point specified, i.e., p2 will be d2' from p1 along line 1.<br />
! It may be useful to execute the NO REDEFINE command before executing this command.<br />
Example:<br />
DIVIDE LINE 10 1000 PNT 11 135.1 PNT 12 200 PNT 13 551.3<br />
Divide Line Segment Command<br />
The Divide Line Segment command creates new points by dividing a line segment into equal length parts.<br />
DIVIDE LINE SEGMENT [POINT] n TO [POINT] m list <strong>of</strong> points<br />
This command creates new points (LIST OF POINTS) in the point table by dividing the specified line<br />
segment (POINT n TO POINT m) into X + 1 equal segments, where X is the number <strong>of</strong> points in the list.<br />
The LIST OF POINTS may be individual points; [point] P1 [point] P2 [point] P3.... or a range <strong>of</strong> points -<br />
[point] P1 TO [point] Pn.<br />
! <strong>COGO</strong> locates POINT P1 from POINT N and then each point will be located from the previous point<br />
in the list. It may be useful to execute the NO REDEFINE command before executing this command.<br />
90<br />
90
Example:<br />
DIVIDE LINE SEG PNT 10 TO PNT 20 PNT 30 TO 40<br />
Divide Curve Command<br />
The Divide Curve command creates new points by dividing a curve into equal length arcs.<br />
DIVIDE CURVE c list <strong>of</strong> points<br />
This command creates new points in the point table by dividing the CURVE C (TS/PC to ST/PT) into X +<br />
1 equal segments where X is the number <strong>of</strong> points in the list. The curve may be simple or complex. The<br />
LIST OF POINTS may be individual points; [point] P1 [point] P2 [point] P3.... or a block <strong>of</strong> points - [point]<br />
P1 TO [point] Pn.<br />
! It may be useful to execute the NO REDEFINE command before executing this command.<br />
Examples:<br />
DIVIDE CURVE 5 PNT 6 PNT 7 PNT 8 PNT 9 PNT 10<br />
DIVIDE CURVE 10 PNT 20 TO PNT 31<br />
Eject Command<br />
The Eject command causes <strong>COGO</strong> to issue a form feed and print a new heading.<br />
EJECT<br />
This command creates a form feed and a page heading in the output.<br />
Example:<br />
EJECT<br />
Finish Command<br />
The Finish command terminates the current execution <strong>of</strong> <strong>COGO</strong>. This is an obsolete command.<br />
91<br />
91
FINISH<br />
This command terminates <strong>COGO</strong>.<br />
Example:<br />
FINI<br />
Layout Ties Command<br />
The Layout Ties command calculates the distance and bearing from a point to the pertinent points on a<br />
particular <strong>COGO</strong> item.<br />
LAYOUT TIES [point] n TO item<br />
This command lays out <strong>COGO</strong> items for staking. It calculates the distance and bearings from POINT N to<br />
the specified ITEM. The TO item may be one <strong>of</strong> the following.<br />
POINTS - points are referenced in the following ways<br />
List <strong>of</strong> points<br />
Where: The list is comprised <strong>of</strong> point numbers separated by blank spaces or commas.<br />
POINT m TO POINT p<br />
Where: M is the starting point number for the range <strong>of</strong> points and P is the last point number in<br />
the range. All undefined points in the range are ignored.<br />
CURVES - curves may be referenced in the following ways<br />
CURVE c<br />
Where: C is the curve number <strong>of</strong> a previously defined curve. <strong>COGO</strong> reports the distance and bearing from<br />
point n to the TS/PC, SC, PI, CS and ST/PT <strong>of</strong> curve C.<br />
TRAVERSES - traverses may be referenced in the following ways<br />
TRAVERSE *name*<br />
Where: Traverse NAME is a previously defined traverse. <strong>COGO</strong> reports the distances and<br />
bearings from point n to the points <strong>of</strong> the traverse.<br />
ALIGNMENTS - alignments may be referenced in the following ways<br />
ALIGNMENT *name*<br />
Where: Alignment NAME is a previously defined alignment. <strong>COGO</strong> reports the distances and<br />
92<br />
92
Examples:<br />
bearings from 'point n' to each point <strong>of</strong> the alignment and the curve points <strong>of</strong> each curve on the<br />
alignment.<br />
LAYOUT TIES PNT 100 TO ALIGNMENT *SURV*<br />
LAYOUT TIES POINT 10 TO POINT 100 TO 120<br />
Layout Curve Command<br />
The Layout Curve command is used for staking out curves. The distance and bearing from a point to the<br />
pertinent curve points is calculated and reported.<br />
LAYOUT CURVE c [TRANSIT AT [POINT] m] [SIGHT on [POINT] p] [EVEN n]<br />
This command allows you to layout a curve for staking. It calculates the deflection that will be turned from a<br />
SIGHT line (transit point to back sight point), the distance from the TRANSIT POINT M and bearing <strong>of</strong><br />
the line defined by the transit point and the staking points for CURVE C. The staking points will be at each<br />
curve point (TS/PC, SC, PI, CS, ST/PT) and a point at each station increment specified by EVEN N. If<br />
even n is not specified the increment is assumed to be 100'.<br />
Example:<br />
LAYOUT CURVE 121 TRANSIT AT PNT 110 SIGHT ON 11 EVEN 150<br />
Layout Alignment Command<br />
The Layout Alignment command computes deflections, bearings and distances along an alignment.<br />
LAYOUT ALIGNMENT *name* [EVEN n]<br />
This command allows you to layout an alignment for staking. It calculates the deflection turned from the<br />
sight line (TS/PC to PI), the distance from the transit point (TS/PC) and the bearing <strong>of</strong> the line defined by<br />
the TS/PC and the staking point for every curve defined in ALIGNMENT *NAME*.<br />
The option EVEN N is the increment along the curves you wish to stake. If you do not use this option,<br />
<strong>COGO</strong> assumes even 100.<br />
Example:<br />
LAYOUT ALIGNMENT *PROJ* EVEN 50<br />
93<br />
93
List Points, Lines, or Curves Command<br />
This list command reports the defined points or lines or curve contained in the <strong>COGO</strong> model.<br />
LIST (POINT/LINE/CURVE)<br />
This command lists defined points, lines or curves. It lists by number all defined items <strong>of</strong> the specified type<br />
in the <strong>COGO</strong> tables. The list(s) will be in increasing numerical order.<br />
Example:<br />
LIST POINTS<br />
List Alignments, Traverses, Parcels, or Text Command<br />
This list command reports the defined alignments, traverses, parcels or text contained in the <strong>COGO</strong> model.<br />
LIST (ALIGNMENT/TRAVERSE/PARCEL/TEXT)<br />
This command lists the names <strong>of</strong> defined alignments, traverses, parcels and text. It lists all items <strong>of</strong> the specified type defined in the<br />
<strong>COGO</strong> tables, by name.<br />
Example:<br />
LIST ALIGNMENT<br />
List Alignment, Traverse, or Parcel Contents Command<br />
This list command list the items that make up the specified alignment, traverse or parcel contained in the<br />
<strong>COGO</strong> model.<br />
LIST (ALIGNMENT/TRAVERSE/PARCEL) *name*<br />
This command lists the items in the alignment, traverse, or parcel. It lists the items (points, curves, etc.) by<br />
name and number, which make up the specific traverse, alignment, or parcel.<br />
Example:<br />
LIST ALIGNMENT *SURVEY*<br />
94<br />
94
List All Items Command<br />
This command lists all the defined items in the <strong>COGO</strong> model. The report produced is the equivalent <strong>of</strong><br />
executing all <strong>of</strong> the other list commands combined.<br />
LIST ALL<br />
This command lists all the defined items in the <strong>COGO</strong> model. It lists all defined items in the <strong>COGO</strong> model<br />
by name and number.<br />
Example:<br />
LIST ALL<br />
List Table Size Command<br />
The List Table Size command is used to determine how many <strong>of</strong> the available slots for items have been used<br />
in the <strong>COGO</strong> model. This command is obsolete.<br />
LIST TABLE SIZE<br />
This command reports the number <strong>of</strong> defined items in the <strong>COGO</strong> model. It reports the number <strong>of</strong> defined<br />
points, lines, etc., as well as the maximum number permitted.<br />
Example:<br />
LIST TABLE SIZE<br />
Locate Command Common Parameters and Options<br />
The Locate Commands calculate and store new points based on previously defined points, lines, curves,<br />
traverses and alignments.<br />
Most <strong>of</strong> the locate commands have parameters in common, and in some cases the parameters have multiple<br />
syntax. The following is a list <strong>of</strong> those parameters and their possible forms.<br />
Locate Commands Common Parameters and Options<br />
Parameter Name/ Description<br />
Form(s)<br />
ANGLE -<br />
95<br />
95
ANGLE +a The angle to be turned from the line defined by 'point m and point p'. If the<br />
angle is positive, it will be measured in a clockwise direction. If the angle is<br />
negative, it will be measured in a counter-clockwise direction.<br />
ANGLE USE ([PLUS]/MINUS) AT [POINT] v FROM [POINT] s TO [POINT] t<br />
This option gives the ability to define an angle using 3 points with 'point v' being the<br />
vertex <strong>of</strong> the angle. The word POINT is not optional for curve points.<br />
DEFLECTION –<br />
DEFLECTION +d<br />
DIRECTION –<br />
The deflection to be turned from the line established by 'point m and point p'. The<br />
angle will be to the right if the deflection is positive and to the left if the deflection is<br />
negative.<br />
AZIMUTH ddd mm ss.ss<br />
The azimuth in degrees minutes and seconds. The word AZIMUTH is optional.<br />
AZIMUTH USE [POINT] p TO [POINT] r<br />
This option may be used instead <strong>of</strong> supplying an exact bearing. <strong>COGO</strong><br />
calculates the azimuth <strong>of</strong> the line between the two points given. The word<br />
POINT is not optional for curve points.<br />
AZIMUTH USE LINE k [REVERSED]<br />
This option may be used instead <strong>of</strong> supplying an exact azimuth. <strong>COGO</strong> uses the<br />
azimuth <strong>of</strong> 'line k'. If specified the word REVERSED, <strong>COGO</strong> will reverse the<br />
direction.<br />
[BEARING] (n/s) dd mm ss.ss (e/w)<br />
A bearing in the form: [BEARING] (N/S) dd mm ss.ss (E/W)<br />
BEARING USE [POINT] p TO [POINT] r<br />
This option may be used instead <strong>of</strong> supplying an exact bearing. <strong>COGO</strong> calculates<br />
the bearing <strong>of</strong> the line between the two points given. The word POINT is not<br />
optional for curve points.<br />
BEARING USE LINE k [REVERSED]<br />
96<br />
96
DISTANCE -<br />
[DISTANCE] d<br />
This option may be used instead <strong>of</strong> supplying an exact bearing. <strong>COGO</strong> uses the<br />
bearing <strong>of</strong> 'line k'. If specified the word REVERSED, <strong>COGO</strong> will reverse the<br />
direction.<br />
The distance the new point will be located from the defined point.<br />
DISTANCE USE [POINT] p TO [POINT] r<br />
This option may be used instead <strong>of</strong> supplying an exact measurement. <strong>COGO</strong> will<br />
calculate the distance between the two points specified. The word POINT is not<br />
optional for curve points.<br />
NEAR -<br />
NEAR [POINT] t<br />
ITEM –<br />
ITEM<br />
OFFSET –<br />
OFFSET +d<br />
Ordinarily, the first solution found is returned. However, if this option is used, the<br />
whole item will be searched to find up to 7 solutions. Then the point closest to<br />
point t will be returned.<br />
An item can be a line segment, line, curve, alignment, or traverse. The proper<br />
command syntax for each type <strong>of</strong> item is listed below.<br />
LINE SEGMENT [POINT] pl TO [POINT] p2<br />
LINE 1<br />
CURVE c<br />
TRAVERSE *name*<br />
ALIGNMENT *name*<br />
The <strong>of</strong>fset distance normal (90 degrees) to the line. The distance is always positive<br />
to the right and negative to the left. It is measured in the direction <strong>of</strong> the line<br />
created by the two points.<br />
OFFSET USE ([PLUS]/MINUS) [POINT] p TO [POINT] r<br />
97<br />
97
<strong>COGO</strong> calculates the distance between the two points specified. It will then use<br />
this distance as the <strong>of</strong>fset distance. The word POINT is not optional for each point<br />
that is a curve point. The plus or minus indicate whether the distance used will be<br />
positive or negative.<br />
Locate a Point Given a Distance and Direction From Another<br />
Point<br />
This locate command uses a distance and direction (bearing or azimuth) from a point to locate a new point.<br />
LOCATE [POINT] n [*id*] FROM [POINT] m distance direction [<strong>of</strong>fset]<br />
This command locates a new point given a distance and direction from a point. It calculates and stores<br />
POINT N at the specified DISTANCE and DIRECTION FROM POINT M. If desired, the resulting<br />
point may be <strong>of</strong>fset by means <strong>of</strong> the OFFSET option. Also, if desired, the new point may have an<br />
identification *ID* <strong>of</strong> up to twenty characters. See the section on common parameters for locate commands<br />
for a description <strong>of</strong> DISTANCE, DIRECTION, and OFFSET.<br />
Examples:<br />
LOCATE 1600 FROM 1101 DISTANCE 527.32 BEARING N88 32 12E<br />
LOCATE 1601 FROM 1101 DIST 527.32 BEAR N88 32 12E OFFSET 100<br />
Locating a Point Given a Distance and Deflection from the End<br />
<strong>of</strong> a Line Segment<br />
This Locate command uses a deflection from the end <strong>of</strong> a line segment to locate a new point.<br />
LOCATE [POINT] n *id* FROM [POINT] m TO [POINT] p distance deflection [<strong>of</strong>fset]<br />
98<br />
98
This command locates a point given a deflection from the end <strong>of</strong> a line segment. It locates POINT n using<br />
the line formed FROM POINT m TO POINT p as the line to turn the DEFLECTION from. The<br />
DISTANCE and optional OFFSET are applied along the line <strong>of</strong> deflection which starts at POINT P. Please<br />
refer to the section on common parameters for the locate commands for a description <strong>of</strong> the DISTANCE,<br />
DEFLECTION, and OFFSET parameters.<br />
Examples:<br />
LOCATE 3 FROM I TO 2 70.7106782 DEFL 90<br />
LOCATE 2439 FROM 2413 TO 2416 387.5 DEFL 15 0 0 OFFSET 12.0<br />
Locating a Point Using a Distance and Angle from the<br />
Beginning <strong>of</strong> a Line Segment<br />
This Locate command uses an angle turned from the beginning <strong>of</strong> a line segment to locate a new<br />
point.<br />
LOCATE [POINT] n *id* FROM [POINT] m distance angle FROM [POINT] p [<strong>of</strong>fset]<br />
This command locates a point given an angle turned from the start <strong>of</strong> a line segment. It locates POINT n<br />
using the line segment formed FROM POINT m to POINT p as the line to turn the ANGLE from. The<br />
DISTANCE and optional OFFSET are applied along the line segment <strong>of</strong> deflection which starts at POINT<br />
M. Please refer to the section on common parameters for the locate commands for a description <strong>of</strong> the<br />
DISTANCE, ANGLE and OFFSET parameters.<br />
! The degrees, minutes and seconds for the angle must be included.<br />
Examples:<br />
LOCATE 3 FROM I 100 90 FROM 2<br />
99<br />
99
LOCATE 1909 FROM 1427 627.45 ANGLE 51 01 30 FROM 609 OFFSET -140.0<br />
Locating a Point Using a Station on an Alignment<br />
This Locate command uses a station value to locate a point on an alignment.<br />
LOCATE [POINT] n *id* ON ALIGNMENT *name* [<strong>of</strong>fset] AT [STA] station [NEAR<br />
[POINT] p]<br />
This command locates a point on an alignment at a specific station. It locates POINT n on the<br />
ALIGNMENT *name* AT the specified STATION. The point may be OFFSET from the alignment.<br />
Please refer to the section on common parameters for the locate commands for a description <strong>of</strong> the<br />
OFFSET parameter.<br />
Example:<br />
LOCATE 3 ON ALIGN *PROJ* AT STA 00+70.71<br />
100<br />
100
Locating a Point Which Is Offset from a <strong>COGO</strong> Item<br />
This Locate command uses an <strong>of</strong>fset distance from a specified <strong>COGO</strong> item to locate a new point.<br />
LOCATE [POINT] a *id* OFFSET distance FROM [POINT] p ON item [near]<br />
This command locates a point given an <strong>of</strong>fset distance from an item. It locates POINT n OFFSET a<br />
DISTANCE FROM POINT p on the ITEM. Please refer to the section on common parameters for the<br />
locate commands for a description <strong>of</strong> the DISTANCE and NEAR parameters.<br />
Example:<br />
LOCATE POINT 10 OFFSET -12 FROM POINT CS 6 ON CURVE 6<br />
Locating Points Which Are Offset from a Curve<br />
This command locates points that are <strong>of</strong>fset to the left and right <strong>of</strong> curve points. The number <strong>of</strong> points<br />
produced is dependent on the type <strong>of</strong> curve.<br />
LOCATE [POINT] n TO m OFFSET (d / r RIGHT 1 LEFT / 1 LEFT r RIGHT) FROM<br />
CURVE c<br />
This command locates points <strong>of</strong>fset from a curve at the curve points. It locates POINT n TO POINT m<br />
OFFSET FROM the TS/PC, SC, CS, ST/PT <strong>of</strong> a CURVE c. The points are <strong>of</strong>fset from curve c equidistant<br />
(d), or at specific distance r to the RIGHT, and l to the LEFT. The block <strong>of</strong> points must be the required<br />
number, namely 4, 6, or 8 depending whether there are 0, 1, or 2 spirals. The points are located in the<br />
direction <strong>of</strong> the curve starting with the point to the right <strong>of</strong> the first curve point (PC/TS), then to the left <strong>of</strong><br />
101<br />
101
the beginning curve point, then to the right <strong>of</strong> the next curve point, then to the left <strong>of</strong> the next curve point,<br />
etc.<br />
! The OFFSET USE option may be used with this command.<br />
Examples:<br />
LOCATE POINT 10 TO 13 OFFSET 100 FROM CURVE 114<br />
PNT 10 49487.951 48124.220 PC +<br />
PNT 11 49681.541 48073.992 PC -<br />
PNT 12 49671.829 48501.080 PT +<br />
PNT 13 49830.558 48379.404 PT -<br />
LOCATE 101 TO 108 OFFSET 85 LEFT 110 RIGHT FROM CURVE 2<br />
Locating a Point by Projecting Another Point Onto a <strong>COGO</strong> Item<br />
This Locate command projects a point onto a <strong>COGO</strong> item.<br />
LOCATE [POINT] n *id* PROJECT [POINT] m ON item [<strong>of</strong>fset] [near]<br />
This command locates a point by projecting a point onto an item. It locates POINT n on the specified<br />
ITEM as a geometric projection <strong>of</strong> POINT m. This projection is perpendicular (normal) to the item.<br />
<strong>COGO</strong> reports the north and east coordinates, and the station <strong>of</strong> the new point. It also reports the distance<br />
and the bearing <strong>of</strong> the line <strong>of</strong> projection. Please refer to the section on common parameters for the locate<br />
commands for a description <strong>of</strong> the OFFSET and NEAR parameters.<br />
102<br />
102
Examples:<br />
LOCATE 3 PROJECT POINT 4 ON ALIGN *TEST2*<br />
LOCATE 1671 PROJECT 427 ON ALIGNMENT *BASE-EX*<br />
Locating the Intersection <strong>of</strong> Two <strong>COGO</strong> Items<br />
This Locate command intersects two <strong>COGO</strong> items.<br />
LOCATE [POINT] n *id* INTERSECT item1 [<strong>of</strong>fset] WITH item2 [<strong>of</strong>fset] [near]<br />
This command locates the intersection <strong>of</strong> two items. It locates POINT n as the intersection <strong>of</strong> ITEM1 and<br />
ITEM2. Please see the section on common parameters for the locate commands for a description <strong>of</strong> the<br />
ITEM, OFFSET and NEAR POINT parameters. 3D intersections are available for intersecting lines (see<br />
the SET 3D command).<br />
103<br />
103
Examples:<br />
locate 14 intersect CURVE 6 with ali *test b*<br />
locate 15 intersect ali *ramp b* with ali *test b*<br />
LOCATE 191 INTERSECT LINE 71 WITH CURVE 61 OFFSET -25<br />
Locating a Point Using Deflections From the Ends <strong>of</strong> a Line<br />
Segment<br />
This Locate command turns deflections from the ends <strong>of</strong> a line segment and calculates where the deflections<br />
intersect.<br />
LOCATE [POINT] n [*id*] FORSECT [POINT] m (ANGLEl/BEARING1) AND [POINT] p<br />
(ANGLE2/BEARING2)<br />
This command locates a point when angles are turned from the ends <strong>of</strong> a line segment. It locates POINT n<br />
by intersecting ANGLEl/BEARING1 and ANGLE2/BEARING2 which are turned from the line segment<br />
104<br />
104
formed by POINT m and POINT p. Anglel/Bearing1 will be turned from the line segment at point m,<br />
Angle2/Bearing2 will be turned from point p. The first angle/bearing determines on which side <strong>of</strong> the line<br />
segment the calculated point will reside. Please refer to the section on common parameters for the locate<br />
commands for a description <strong>of</strong> ANGLES and BEARINGS.<br />
Examples:<br />
LOCATE 3 FORSECT I MINUS 45 00 00 AND 2 45 00 00<br />
LOCATE 77 FORSECT POINT 25 ANGLE MINUS 36 30 0 AND 76 ANGLE 27 16 30<br />
Locating a Point Using Two Distances from Two Different<br />
Points<br />
This Locate command uses a distance from the first point and a distance from the second point to locate a<br />
new point.<br />
LOCATE [POINT] n [*id*] TIE [POINT] m DISTANCE dl TIE [POINT] p DISTANCE d2<br />
[(APPROX direction / near)]<br />
This command locates a point given distances from two points. It locates POINT n at the intersection <strong>of</strong><br />
the two circles defined by the circle centers (POINT m, POINT p) and the radii (DISTANCE dl,<br />
DISTANCE d2). If the APPROX parameter is not used, the point chosen <strong>of</strong> the two possible solutions will<br />
be the one with the smaller azimuth for line segment formed by point m to point n. If the APPROX option<br />
is specified, the solution chosen will be the one such that the line segment point m to point n has an azimuth<br />
105<br />
105
closer to the given direction. Please refer to the section on common parameters for the locate commands<br />
for a description <strong>of</strong> DISTANCE, DIRECTION, and NEAR.<br />
Examples:<br />
LOCATE 21 TIE PNT 15 753.12 TIE PNT 17 123.47<br />
LOCATE 4 TIE 1 50 TIE 2 50 NEAR 3<br />
LOCATE 78 TIE 74 DIST 400 TIE 76 DIST 500 APPROX N45W<br />
Locating a Point Using a Distance from a Point and an Angle<br />
Turned from a Line Segment<br />
This Locate command uses a distance from a defined point and an angle turned from the starting point <strong>of</strong> a<br />
line segment to create a new point.<br />
LOCATE (POINT) n *id* TIE [POINT] m distance TIE (POINT] p direction (NEAR<br />
FAR / NEAR [POINT] t)<br />
This command locates POINT n at the intersection <strong>of</strong> the circle with center POINT m, radius DISTANCE,<br />
and the line formed by POINT p and DIRECTION. The NEAR, FAR and options indicate that the<br />
106<br />
106
solution NEARest to or FARthest from point p is the result. Please refer to the section on common<br />
parameters for the locate commands for a description <strong>of</strong> DISTANCE, DIRECTION, and NEAR.<br />
! The word 'ANGLE', 'BEARING', or 'AZIMUTH' must be used for the direction.<br />
Examples:<br />
LOCATE 3 TIE PNT 1 50 TIE 2 ANGLE 15 00 00 FAR<br />
LOCATE 810 TIE PNT 801 DIST 401.91 TIE 808 ANGLE 29 42 55 FAR<br />
Locating a Point on a Curve Where the Tangent to the Curve Is<br />
a Specified Direction<br />
This command locates the point where a line <strong>of</strong> specific direction is tangent to a curve.<br />
LOCATE [POINT] n [*id*] ON CURVE c TANGENT direction<br />
107<br />
107
This command locates the point <strong>of</strong> tangency to a curve given a direction. It locates POINT n ON CURVE<br />
c at the TANGENT with the specified DIRECTION. Please refer to the section on common parameters<br />
for the locate commands for a description <strong>of</strong> DIRECTION.<br />
Examples:<br />
LOCATE PNT 5 ON CURVE 1 TANGENT N90 00 00E<br />
LOCATE 194 ON CURVE 7 TANGENT BEARING N41 15W<br />
Locating a Point Where the Tangent to the Curve Passes<br />
Through Another Point<br />
This Locate command calculates the point <strong>of</strong> tangency on a curve from a point near the curve.<br />
108<br />
108
LOCATE [POINT] n [*id*] ON CURVE c TANGENT THRU [POINT] m [near]<br />
This command locates POINT n ON CURVE c at the TANGENT that passes THRU POINT m,<br />
optionally selecting the solution which is NEAR a specified point. Please refer to the section on common<br />
parameters for the locate commands for a description <strong>of</strong> NEAR.<br />
Example:<br />
Parcel Command<br />
LOCATE PNT 6 ON CURVE 1 TANGENT THRU PNT 4<br />
The parcel command stores information about a parcel in the alignment table. The information stored<br />
includes tie points, parcel points, arcs in the parcel, the parcel name, and the area if the parcel is closed. The<br />
parcel command will accept open and closed parcels.<br />
10 109 10
PARCEL *name* [SUBTRACT] [(PRINT/LEGAL)] [REDEFINE]<br />
[TIE (POINT] m]<br />
.<br />
.<br />
.<br />
BEGIN AT [POINT] n<br />
.<br />
.<br />
.<br />
[POINT] q<br />
.<br />
.<br />
.<br />
ARC (LEFT/RIGHT) RADIUS r (PLUS/MINUS) CC [POINT] t<br />
.<br />
.<br />
.<br />
ARC [POINT] p (LEFT/RIGHT) (PLUS/MINUS)<br />
.<br />
.<br />
.<br />
END AT [POINT] z<br />
The PARCEL named *NAME* is stored in the alignment table. If specified, the area <strong>of</strong> the parcel is<br />
SUBTRACTed from the total area register. Two parcel reports are available, either a working report<br />
(PRINT) or a LEGAL description. The working report <strong>of</strong> the parcel is output if the PRINT command<br />
word is used on the parcel command line. The legal description is obtained by using the word LEGAL.<br />
These report options are also available in the print command. The legal description will be output to a file.<br />
The file name will start with the parcel's name, and the extension will be ". COT", e. g., TE150A.COT. If<br />
necessary TIE POINTs may be included in the parcel description before the BEGIN POINT which starts<br />
the parcel. For closed parcels the begin point MUST be the same point number as the end point. If the<br />
begin point doesn't match the end point, the parcel is considered to be an open parcel (access). Each course<br />
in the parcel consists <strong>of</strong> a pair <strong>of</strong> points or an arc. The courses start at the point defined in the begin and<br />
stop at the point in the end. Course 1 is between the first and second points in the parcel definition, course 2<br />
is between points 2 and 3, etc.<br />
Defining Arcs in Parcels<br />
There are two ways to define an arc. The first is the point-arc center-point, the second is the point-radiusdirection-point.<br />
Point-Arc center-Point<br />
[POINT] n<br />
ARC [POINT] m (LEFT/RIGHT) (PLUS/MINUS)<br />
[POINT] p<br />
110<br />
110
In this syntax the ARC goes from POINT n to POINT p with the center at POINT m with the direction <strong>of</strong><br />
curvature indicated by LEFT or RIGHT. The PLUS or MINUS indicate whether the resulting area is to be<br />
added or subtracted from the parcel area.<br />
Point-Radius-Direction-Point<br />
[POINT] n<br />
ARC (LEFT/RIGHT) RADIUS r (PLUS/MINUS) CC POINT c<br />
[POINT] p<br />
In this syntax the ARC having RADIUS r goes from POINT n to POINT p with the direction <strong>of</strong> curvature<br />
indicated by LEFT or RIGHT. The PLUS or MINUS indicate whether the resulting area is to be added or<br />
subtracted from the parcel area. <strong>COGO</strong> will calculate the center (CC) point <strong>of</strong> the arc and store it in<br />
POINT c.<br />
! The calculated area is inaccurate if any side <strong>of</strong> the parcel crosses another side.<br />
Example:<br />
PARCEL *TE150A* LEGAL<br />
TIE PNT 650<br />
TIE PNT 660<br />
TIE PNT 665<br />
BEGIN AT PNT 670<br />
PNT 671<br />
ARC RIGHT RADIUS 4358.0 MINUS CC PNT 700 PNT 672<br />
PNT 673<br />
ARC PNT 674 RIGHT PLUS<br />
PNT 675<br />
END AT POINT 670<br />
Parcel TE150A<br />
Beginning at the ; Thence N. 39° 48' 06" E., a distance <strong>of</strong> 7811.75<br />
feet; Thence N. 63° 27' 08” E., a distance <strong>of</strong> 4470.79 feet; Thence N. 21°<br />
42' 17" E., a distance <strong>of</strong> 919.50 feet to the TRUE POINT OF BEGINNING;<br />
1. Thence N. 0° 03' 55" E., a distance <strong>of</strong> 52.67 feet;<br />
2. Thence along the arc <strong>of</strong> a curve to the right having a<br />
radius <strong>of</strong> 4358.00 feet, a distance <strong>of</strong> 1052.69 feet (the chord <strong>of</strong> said arc<br />
bears N. 52° 33' 06” W., a distance <strong>of</strong> 1050.13 feet);<br />
3. Thence S. 54° 35' 38” W., a distance <strong>of</strong> 287.76 feet;<br />
4. Thence S. 35° 24' 22” E., a distance <strong>of</strong> 200.00 feet;<br />
111<br />
111
5. Thence N. 54° 35' 38” E., a distance <strong>of</strong> 123.74 feet;<br />
6. Thence along the arc <strong>of</strong> a curve to the left having a radius <strong>of</strong><br />
4558.00 feet, a distance <strong>of</strong> 794.42 feet (the chord <strong>of</strong> said arc bears S.<br />
52° 44' 01” E., a distance <strong>of</strong> 793.41 feet);<br />
7. Thence S. 0° 03' 52” W., a distance <strong>of</strong> 10.69 feet;<br />
8. Thence N. 75° 14' 36" E., a distance <strong>of</strong> 227.55 feet, more or less,<br />
to the TRUE POINT OF BEGINNING.<br />
The above described contains 5.342 acres/232703 square feet, more or<br />
less.<br />
Print Alignment Book Command<br />
Once the final alignment has been settled on, it must be staked in the field. <strong>COGO</strong> can create horizontal<br />
alignment books for staking alignments in the field.<br />
PRINT ALIGNMENT BOOK [FOR] ALIGNMENT *name* [EVEN n] [SPIRAL TENTH POINTS]<br />
[CURVE c EVEN a]<br />
IDENTIFICATION LINE<br />
This command creates an ALIGNMENT BOOK file for ALIGNMENT *NAME*. The file name is<br />
name_BOOK.COT, where name is the alignment name. It reports points as 'POTS" and reports complete<br />
curve information. The EVEN N option changes the increment used to generate coordinates. If the<br />
increment is not specified the default is 100'. The SPIRAL TENTH POINTS option generates 10th points<br />
for spirals. The CURVE C EVEN M option specifies that for curve n the distance used for calculating<br />
coordinates should be changed to the distance m.<br />
This command is a two-line command. The first line is the actual command that reports on the alignment at<br />
the increment requested. The second line is a 48 character line <strong>of</strong> identification that will be present at the top<br />
<strong>of</strong> each page <strong>of</strong> the horizontal alignment book.<br />
! <strong>COGO</strong> will only allow an alignment to have a maximum <strong>of</strong> 15 curves for the horizontal alignment book.<br />
Example:<br />
PRINT ALIGNMENT BOOK ALIGNMENT *WB ML* EVEN 50 SPIRAL TENTH POINT +<br />
CURVE 31 EVEN 10<br />
Identification Line <strong>of</strong> 48 characters or less<br />
112<br />
112
Reporting the Geometry <strong>of</strong> Points, Lines, Curves, Alignments,<br />
Parcels, and Text<br />
The Print commands report the geometry <strong>of</strong> <strong>COGO</strong> items in the <strong>COGO</strong> model.<br />
PRINT ([POINT]/LINE/CURVE/TRAVERSE/ALIGNMENT/PARCEL/TEXT) (list/ALL)<br />
This command is used for reports <strong>of</strong> an item's geometry. It reports the information stored in the <strong>COGO</strong><br />
model for the specified item(s). The ALL option may be used with every item type. If the item type is<br />
points, lines, or curves and the ALL option is not used, a list <strong>of</strong> number(s) is required. If the item type is<br />
traverses, alignments, parcels or text and the ALL option is not used, a list <strong>of</strong> name(s) is required. If the<br />
PRINT PARCEL *name* is selected, there is another option available which is the option <strong>of</strong> printing a legal<br />
description <strong>of</strong> the parcel. The following is an example <strong>of</strong> this. PRINT PARCEL *102* LEGAL<br />
Examples:<br />
PRINT POINT 1<br />
PNT 1 10151.107 9762.349<br />
PRINT CURVE 6<br />
CURVE 6 Type: Spiral-Circle-Spiral Right<br />
Spiral In Data<br />
Length 125.000' SA 3 38 45.0<br />
LT 83.351' ST 41.683'<br />
Circular Curve Data<br />
Degree 5 50 .0 Deflection 151 15 52.7 Delta 143 58 22.7<br />
Radius 982.213' Length 2468.108' Es 2978.704'<br />
Spiral Out Data<br />
Length 125.000' SA 3 38 45.0<br />
LT 83.351' ST 41.683'<br />
Tangent Back Data (PC/TS to PI)<br />
S 10 18 23.4 E Length 3899.526'<br />
Tangent Ahead Data (PI to PT/ST)<br />
N 39 2 30.7 W Length 3899.526'<br />
TS 1 413408.491 633952.365 0+00.00'<br />
SC 1 413285.083 633972.112 1+25.00'<br />
PI 1 409571.885 634650.044 38+99.53'<br />
CC 1 413171.157 632996.529<br />
CS 1 412505.215 632274.543 25+93.11'<br />
ST 1 412600.592 632193.780 27+18.11'<br />
PRINT ALI *TEST*<br />
Alignment TEST<br />
Pnt 110 49524. N 47867. E 0. El 0+00.000'<br />
***** Station Equation. 2+00.00 back = 2+11.00 ahead.<br />
433.65042829901' N 75° 27' 17.559" E<br />
113<br />
113
Curve 114 Type: Circular Curve Left<br />
Circular Curve Data<br />
Degree 6 0 0.000 Deflection 22 55 38.055 Delta 22 55 38.055<br />
Radius 954.930' Length 382.120'<br />
Tangent Back Data<br />
N 75° 27' 17.559" E 193.651332836867'<br />
Tangent Ahead Data<br />
N 52° 31' 39.504" E 193.651332836872'<br />
PC 49585. 48099. 2+50.999'<br />
PI 49633. 48287. 4+44.650'<br />
***** Station equation. 4+10.00 back = 4+11.00 ahead.<br />
CC 50509. 47859.<br />
PT 49751. 48440. 6+34.120'<br />
387.303' N 52° 31' 39.504" E<br />
Curve 116 Type: Circular Curve Right<br />
Circular Curve Data<br />
Degree 6 0 0.000 Deflection 22 55 38.156 Delta 22 55 38.156<br />
Radius 954.930' Length 382.121'<br />
Tangent Back Data<br />
N 52° 31' 39.504" E 193.651'<br />
Tangent Ahead Data<br />
N 75° 27' 17.660" E 193.651'<br />
PC 49751. 48440. 6+34.120'<br />
PI 49869. 48594. 8+27.772'<br />
***** Station equation. 7+15.00 back = 7+10.00 ahead.<br />
CC 48993. 49021.<br />
PT 49918. 48781. 10+11.241'<br />
387.302' N 75° 27' 17.660" E<br />
*****Warning: Overlap between curve and curve.<br />
Curve 118 Type: Circular Curve Right<br />
Circular Curve Data<br />
Degree 6 0 0.000 Deflection 22 55 38.574 Delta 22 55 38.574<br />
Radius 954.930' Length 382.123'<br />
Tangent Back Data<br />
N 75° 27' 17.660" E 193.652'<br />
Tangent Ahead Data<br />
S 81° 37' 3.766" E 193.652'<br />
PC 49918. 48781. 10+11.243'<br />
PI 49966. 48969. 12+04.895'<br />
***** Station equation. 10+50.00 back = 0+00.00 ahead.<br />
CC 48993. 49021.<br />
PT 49938. 49160. 3+43.366'<br />
387.303' S 81° 37' 3.766" E<br />
*****Warning: Overlap between curve and curve.<br />
Curve 120 Type: Circular Curve Left<br />
Circular Curve Data<br />
Degree 6 0 0.000 Deflection 22 55 38.675 Delta 22 55 38.675<br />
Radius 954.930' Length 382.123'<br />
Tangent Back Data<br />
S 81° 37' 3.766" E 193.652'<br />
Tangent Ahead Data<br />
N 75° 27' 17.559" E 193.652'<br />
114<br />
114
PC 49938. 49160. 3+43.368'<br />
PI 49910. 49352. 5+37.021'<br />
***** Station equation. 7+25.49 back = 7+00.00 ahead.<br />
CC 50883. 49300.<br />
PT 49958. 49539. 7+00.000'<br />
433.65042829901' N 75° 27' 17.559" E<br />
***** Station Equation. 7+30.00 back = 7+31.00 ahead.<br />
Pnt 124 50019. N 49772. E 0. El 9+40.998'<br />
Print All Command<br />
This Print command reports the geometry for all <strong>of</strong> the items in the <strong>COGO</strong> model.<br />
PRINT ALL<br />
This command outputs complete information on all points, lines, curves, traverses, alignments and text<br />
stored in the <strong>COGO</strong> tables.<br />
Example:<br />
PRINT ALL<br />
Reset Area Command<br />
The Reset Area command sets the total area register to a specific value.<br />
RESET AREA [value]<br />
This command RESETs this total AREA register to VALUE. If value is omitted, it is assumed to be zero.<br />
Example:<br />
RESET AREA 102.1<br />
Restation Alignment Command<br />
The Restation Alignment command is used to assign new station values to an alignment. This command<br />
can also introduce station equation while assigning new station values to the alignment.<br />
RESTATION ALIGNMENT *name* [BEGIN AT STATION s.s] [equation list] [PRINT]<br />
115<br />
115
This command restations an Alignment. It RESTATIONS ALIGNMENT *name*. If specified, the<br />
stationing will BEGIN AT STATION s.s. If equations are needed they may be reintroduced by means <strong>of</strong><br />
the LIST. A report <strong>of</strong> the restationed alignment is obtained by the PRINT option. Each equation in the<br />
equation list is entered in the following form.<br />
EQ bb+bb.bb aa+aa.aa<br />
Example:<br />
RESTATION ALIGNMENT *PROJ* BEGIN AT 14+57.23 EQ 18+92.4 18+20.01<br />
Restore Command<br />
The Restore command retrieves a <strong>COGO</strong> model which was saved to disk with the SAVE<br />
command.<br />
RESTORE [TABLES] (*name*/LOCAL)<br />
This command RESTOREs saved <strong>COGO</strong> TABLES. The files restored are name.PNT, name.LIN,<br />
name.CUR, and name.ALI.<br />
! Care must be taken when <strong>COGO</strong> models are saved and restored in the same run.<br />
Examples:<br />
RESTORE *12345Cl*<br />
RESTORE LOCAL<br />
RESTORE TABLES *name1*<br />
SAVE TABLES *name2* no redefine<br />
Identification line<br />
In the above example, you restore a table and save a table in the same run, thus file 'name2' will<br />
replace file 'namel', if name1 and name2 are the same file name. <strong>COGO</strong> will in effect purge 'name1'.<br />
However, if the NO REDEFINE option is used, file 'name1' will be left alone and file 'name2' will<br />
be saved. Only file 'name2' will have the new design information.<br />
116<br />
116
Rotate Translate Command<br />
The Rotate Translate command rotates and/or translates all items in the <strong>COGO</strong> model. The model can be<br />
rotated about a specified point, translated by a distance and direction (indicated by two points), or may be<br />
rotated and translated at the same time.<br />
ROTATE TABLES [BY ddd mm ss.ss] [TRANSLATE TO POINT m] ORIGIN AT [POINT] n<br />
This command ROTATEs all items in the <strong>COGO</strong> TABLES BY the angle specified with DD MM SEC<br />
about the ORIGIN AT POINT n, and if specified TRANSLATE the ORIGIN AT POINT n TO POINT<br />
m. If the BY DD MM SS.SS option is omitted the tables will not be rotated. If the TRANSLATE option is<br />
omitted, the tables will not be translated. One or both <strong>of</strong> the options MUST be used or an error will be<br />
issued. The ORIGIN AT POINT n is not optional. The angle may be positive (clockwise) or negative<br />
(counterclockwise). If the angle is negative the negative sign must be in front <strong>of</strong> the first non zero value in<br />
the angle. Point m and point n must be previously defined points in the <strong>COGO</strong> tables.<br />
Examples:<br />
ROTATE TABLES BY 45 00 00 TRANSLATE TO POINT 20 ORIGIN AT PNT 10<br />
ROTATE TABLES BY 45 TRANSLATE TO POINT 20 ORIGIN AT PNT 10<br />
ROTATE TABLES BY 00 -45 00 ORIGIN AT PNT 100<br />
ROTATE TABLES TRANSLATE TO PNT 101 ORIGIN AT POINT I<br />
Save Command<br />
This command saves the <strong>COGO</strong> model in a compact form as a group <strong>of</strong> saved tables. The RESTORE<br />
command retrieves the saved tables.<br />
SAVE [TABLES] (*name*/LOCAL)<br />
identification line<br />
This two-line command SAVES the <strong>COGO</strong> tables as files on disk. The names <strong>of</strong> the saved tables are<br />
name.PNT, name.LIN, name.CUR, name.ALI. If the 'local file' is used instead <strong>of</strong> the file name, <strong>COGO</strong> will<br />
name the saved tables LOCAL.PNT, LOCAL.LIN, LOCAL.CUR and LOCAL.ALI. The<br />
IDENTIFICATION LINE is used for identification <strong>of</strong> the saved tables. Please note that there can be no<br />
blank lines between the SAVE command line and the identification line.<br />
Examples:<br />
117<br />
117
SAVE *89042C I* NO REDEFINE<br />
This is an identification line<br />
SAVE *12345C2* REDEFINE<br />
Identification line...<br />
SAVE *90134*<br />
I-36 and I-25 junk<br />
Set No Redefine Command<br />
The SET NO REDEFINE command, when set to 'on' is designed to issue a warning when existing data in<br />
the <strong>COGO</strong> model is changed.<br />
SET NO REDEFINE (ON/OFF)<br />
The purpose <strong>of</strong> this command is to protect existing data. If the NO REDEFINE switch is SET ‘ON’ any<br />
attempt to redefine the values <strong>of</strong> a stored point will result in a warning. This switch may be used to protect<br />
against reusing a point number accidentally.<br />
! If a point number is used more than once, the last coordinates used or calculated will be the coordinates<br />
stored in the <strong>COGO</strong> tables. This will occur if the point has been defined by storing it, or using it in a curve<br />
or in an alignment. It is wise for you to set the no redefine switch ‘on’ to warn about point redefinition.<br />
Default Setting: SET NO REDEFINE OFF<br />
Example:<br />
SET NO REDEFINE ON<br />
Set Date Command<br />
The Set Date command sets the date which <strong>COGO</strong> uses for the current run. This command can be used to<br />
change the format <strong>of</strong> the date.<br />
SET DATE *date*<br />
This command sets the date <strong>COGO</strong> uses on reports to a desired date or format for the date. The date can<br />
be any I to 10 characters <strong>of</strong> text (letters/numbers) that will replace the date in subsequent headings. The<br />
date must be surrounded by asterisks.<br />
118<br />
118
Default Setting: yy/mm/dd<br />
Where: yy = year, mm = month, dd = day<br />
Example:<br />
SET DATE *01/12/25*<br />
Set File Commands<br />
<strong>COGO</strong> is designed to use input files and output files. The SET FILE commands allow the <strong>COGO</strong> user to<br />
control the input and output via files, and provides interfaces to other engineering applications and devices.<br />
Set Log File Command<br />
The Set Log File command creates a log file <strong>of</strong> all commands that are entered interactively.<br />
SET LOG FILE (ON/OFF)<br />
This command logs interactive input to <strong>COGO</strong>. The command logs all input commands in the file<br />
"<strong>COGO</strong>.LOG" so the log file may be used as an input file for recovering lost work.<br />
Default Setting: SET LOG FILE OFF<br />
Example:<br />
SET LOG FILE ON<br />
Set File Input<br />
The Set File Input command redirects input to <strong>COGO</strong> from the keyboard to an input file.<br />
[SET FILE] INPUT *name*<br />
This command redirects input to <strong>COGO</strong> from the keyboard to an input file. The file extension must be<br />
'.CIN', i.e., if the file name is 88047CG then the full file name would be 88047CG.CIN.<br />
Example:<br />
119<br />
119
SET FILE INPUT *88037CG*<br />
Set File Input TTY Command<br />
This Set File Input TTY command redirects input from a file to the keyboard.<br />
[SET FILE] INPUT *TTY*<br />
This command is a special case <strong>of</strong> the SET FILE INPUT command. It informs <strong>COGO</strong> that the input<br />
should be read from the keyboard (*TTY*). If you do not want to display the commands input, the TTY<br />
option should be used.<br />
! This command is generally used when you are done using an input file and wish to enter more commands<br />
from the keyboard.<br />
Example:<br />
SET FILE INPUT *TTY*<br />
Set File Output Command<br />
The Set File Output command redirects the <strong>COGO</strong> output from the screen to a file.<br />
[SET FILE] OUTPUT *name* [(METRIC/FEET)]<br />
This command allows you to redirect <strong>COGO</strong> output. The command redirects <strong>COGO</strong> output from the<br />
<strong>COGO</strong>.COT file to the file *NAME*. The file name (excluding extension) may be up to 36 characters in<br />
length (dependent on the type <strong>of</strong> computer). The file extension will be '.COT', i.e., if the file name is<br />
88047CG then the full file name will be 88047CG.COT. The METRIC/FEET option will convert from<br />
feet to meters or meters to feet depending on the current units. Note that if the units are feet and feet<br />
output is specified, no conversion occurs (the same is true for metric/metric).<br />
Examples:<br />
SET FILE OUTPUT *88014RAMP*<br />
SET FILE OUTPUT *86999*<br />
120<br />
120
Set MOSS File Output Command (<strong>COGO</strong> to MX Interface)<br />
The SET MOSS FILE OUTPUT command is the interface between <strong>COGO</strong> and MX (formerly MOSS).<br />
The result <strong>of</strong> this command is a MX HALGN input file.<br />
SET MOSS FILE OUTPUT *name* [(METRIC/FEET)] ( ALL /<br />
ALIGNMENT<br />
list <strong>of</strong> alignments<br />
END /<br />
TRAVERSE<br />
list <strong>of</strong> traverses<br />
END )<br />
This command transfers geometry data to MX (formerly MOSS). The command converts alignments or<br />
traverses from <strong>COGO</strong> format to MX HALGN format and creates a file that can be input into MX.<br />
Conversion from feet to metric or metric to feet is done via the METRIC/FEET option. The command<br />
will read the <strong>COGO</strong> alignments/traverses and create a MX HALGN alignment composed <strong>of</strong> 'fixed" straight<br />
and 'fixed' curve elements, and provides two methods for transferring alignments/traverses to MOSS. The<br />
first will transfer all <strong>of</strong> the alignments/traverses in the <strong>COGO</strong> table to MX HALGN format (ALL). The<br />
second transfers a list <strong>of</strong> alignments/traverses. The list begins with the command word ALIGNMENT or<br />
TRAVERSE that immediately follows the file name. Each alignment/ traverse name in the list is then<br />
entered on a separate line and followed by the command word END.<br />
! If the MOSS HALGN file specified already exists, the new alignment/traverse data will be added to the<br />
end <strong>of</strong> the existing file.<br />
Due to the differences in <strong>COGO</strong> and MOSS it is possible to construct alignments in <strong>COGO</strong> that do not<br />
translate correctly to MOSS. It is your responsibility to be aware <strong>of</strong> possible conflicts between the two<br />
systems.<br />
This command creates a file that is composed <strong>of</strong> five MOSS record types. The first record contains the<br />
MOSS command HALGN. The second record, minor option 300, defines the alignment control options.<br />
Minor options 301 and 305 and are used to define elements <strong>of</strong> the alignment. Minor option 999 terminates<br />
the alignment definition.<br />
MOSS Record Definition:<br />
HALGN - This is the first record in the file design the MOSS major option. You must supply an<br />
appropriate MOSS model name.<br />
Minor Option 300 - This is the initial MOSS HALGN data record. The values assigned to the fields in this<br />
record are extracted from the <strong>COGO</strong> alignment or default values are used.<br />
121<br />
121
Field Description<br />
Descriptor<br />
LB The 4-character MOSS string beginning with the characters 'MC'. MOSS requires that the first two<br />
characters <strong>of</strong> an alignment be 'MC', the remaining three characters that will compose the string label will be<br />
the first 2 characters <strong>of</strong> <strong>COGO</strong> alignment name.<br />
SC The starting station <strong>of</strong> the alignment. The default value will be the beginning station <strong>of</strong> the<br />
alignment.<br />
CF The station <strong>of</strong> the first point <strong>of</strong> the first element <strong>of</strong> the alignment. 'Me default value will be the first<br />
station <strong>of</strong> the alignment.<br />
CE Station interval <strong>of</strong> the alignment. The default value is 100 feet.<br />
IM Defines the units to imperial.<br />
Minor option 301 - This option contains the element data used to define the 'fixed' straight and curve<br />
elements <strong>of</strong> the MOSS alignment.<br />
Field Description<br />
Descriptor<br />
X1 The east coordinate <strong>of</strong> the first point <strong>of</strong> the element being defined.<br />
Y1 The north coordinate <strong>of</strong> the first point <strong>of</strong> the element being defined.<br />
X2 The east coordinate <strong>of</strong> the second point <strong>of</strong> the element being defined.<br />
Y2 The north coordinate <strong>of</strong> the second point <strong>of</strong> the element being defined.<br />
Minor option 305 - This is a continuation record. This record is used to define the circular curve radius and<br />
the spiral transitions if applicable.<br />
Field Description<br />
Descriptor<br />
RA The circular curve radius.<br />
LI The length <strong>of</strong> the spiral transition into the circular curve.<br />
TI The length <strong>of</strong> the spiral transition out <strong>of</strong> the circular curve.<br />
Minor Option 999 - This is the termination record indicating the end <strong>of</strong> the data for the major option.<br />
Examples:<br />
122<br />
122
(Input)<br />
SET MOSS FILE OUTPUT *MOSS-FILE.INP* ALL<br />
SET MOSS FILE OUTPUT *MOSS-FILE.INP* ALIGNMENT<br />
WBL<br />
CLM<br />
END<br />
(Output)<br />
HALGN<br />
300,LB=MCLM,CF=1155629.57,SC=1155629.57,CE= 100,IM<br />
301,1,SX,X1=1539721.585000,Y1= 653507.444000,X2=1539721.616308,Y2=653507.441879<br />
301,2,LX,X1=1539921.368427,Y1 = 653498.284248,X2=1540824.590341,Y2=653791.407792<br />
305,RA=1527.887454,L1=200.000000,T1=200.000000<br />
301,3,SX,X1=1540980.898211,Y1=653916.117941,X2=1541035.598000,Y2=653961.748000<br />
999<br />
Set Roadcalc File Output Command (<strong>COGO</strong> to Roadcalc<br />
Interface)<br />
The Set Roadcalc File Output command creates the subproject files in Roadcalc 13's internal format for<br />
alignments. This command transfers survey and design alignments.<br />
SET ROADCALC FILE OUTPUT SUBPROJECT nnn ALIGNMENT *name* [DESIGN]<br />
[(METRIC/FEET)]<br />
This command transfers Alignments to Roadcalc. It converts alignments from <strong>COGO</strong> internal format to<br />
Roadcalc 13’s internal format. All files necessary to transfer the survey or design alignment data to the<br />
Roadcalc SUBPROJECT nnn are created in the current directory. These files MUST reside in the directory<br />
specified for the subproject. The DESIGN option specifies that the design alignment files are desired rather<br />
than the survey alignment files, which is the default. A minimum <strong>of</strong> two files are created, a maximum <strong>of</strong><br />
four may be created. The files created for the survey alignment are named RCSAGnnn.DAT,<br />
RCSAGnnn.TCD, and if the alignment has station equations, RCSEQnnn.DAT, and RCDEQnnn.DAT.<br />
The files created for the design alignment are named RCDAGnnn.DAT, RCDAGnnn.TCD, and if the<br />
alignment has station equations RCDEQnan.DAT.<br />
! <strong>COGO</strong> can create curves with overlaps. Roadcalc cannot handle curve overlaps. All curve overlaps in<br />
<strong>COGO</strong> must be resolved before transferring alignments to Roadcalc.<br />
Examples:<br />
SET ROADCALC FILE OUTPUT SUBPROJECT 003 ALIGNMENT *SURV*<br />
SET ROAD FILE OUTPUT SUE 010 ALI *ML WB* DESIGN<br />
123<br />
123
Set SDR File Output Command (Leitz data collector interface)<br />
The Set SDR File Output Command creates a coordinate file that can be downloaded to the Leitz SDR<br />
series 2, 20, and 30 data collectors and can be transferred to PICS. There are two styles <strong>of</strong> the command to<br />
meet these purposes.<br />
SET SDR FILE OUTPUT *fname* ALI *aname* [FROM stal] [TO sta2] [EVEN n]<br />
This command creates an SDR data collector file. It creates a file that may be uploaded to a Lietz SDR series<br />
data collector. The files created are fname.SDR and fname.COT. The SDR file contains the coordinates <strong>of</strong><br />
the points along the specified alignment (*aname*) starting at the 'from' station (default = beginning station),<br />
ending at the 'to' station (default = end station), at even intervals (default = 100'). The coordinates <strong>of</strong> the<br />
curve points are automatically output to the SDR data collector file. The COT file is a report <strong>of</strong> the contents<br />
<strong>of</strong> the SDR file.<br />
Examples:<br />
SET SDR FILE OUTPUT *SURV* ALI *SURV* EVEN 25.0<br />
SET SDR FILE OUTPUT *PROJ* ALI *PROJ* FROM 13+00 TO 14+00 EVEN 50<br />
SET SDR FILE OUTPUT *name* *code* list <strong>of</strong> points<br />
This SDR command style creates an SDR file with all <strong>of</strong> the points in the LIST OF POINTS using the<br />
CODE as the TMOSS code in the SDR file. The list <strong>of</strong> points may be individual points, or in the form <strong>of</strong> a<br />
range <strong>of</strong> points (e.g. PNT 1 TO 20 PNT 15 PNT 20). The recommended TMOSS codes are 1086 and 1075<br />
for the control points, and 1080 for property control points.<br />
Example:<br />
SET SDR FILE OUTPUT *SDRfile* *1086* 105 to 111 50 54 79<br />
Set Three Dimensions Command<br />
This command primarily controls how the <strong>COGO</strong> LOCATE commands work. The default is twodimensional<br />
point locations. If the three dimension switch is set, the locate commands are threedimensional.<br />
At this time, the only command this affects is the LOCATE INTERSECT command for a 3d<br />
line/line intersect.<br />
124<br />
124
SET 3D (ON/OFF)<br />
Examples:<br />
Set 3D Off<br />
Set 3D On<br />
Set Units Command<br />
The Set Units Command is used to set the units used in the <strong>COGO</strong> geometry model. This must<br />
be the first command in an input file, or the first operation in <strong>COGO</strong>. If this command is used at any<br />
other time, the results are unpredictable. The default units are set to feet.<br />
SET UNITS (FEET/METRIC)<br />
Examples:<br />
SET UNITS METRIC<br />
SET UNITS FEET<br />
Station Alignment Command<br />
The Station Alignment command produces a report <strong>of</strong> coordinates for an alignment at specific stations or at<br />
intervals on the alignment.<br />
STATION ALIGNMENT *name* [EVEN d] [FROM sta1] [TO sta2]<br />
This command calculates alignment coordinates at regular intervals along an alignment. It calculates the<br />
north and east coordinates for each STATION on ALIGNMENT *name* requested. Coordinates will be<br />
generated for every EVEN increment <strong>of</strong> distance D on the alignment. If the EVEN option is not used, the<br />
default interval is 100 feet/meters depending on the units in use. If coordinates for only a part <strong>of</strong> the<br />
alignment are needed, the stations may start FROM STATION m and go TO STATION p.<br />
Example:<br />
STATION ALIGNMENT *PROJ* EVEN 50 FROM STA 10+18.23 TO STA 16+20<br />
Station Offset Alignment Command<br />
125<br />
125
The Station Offset Alignment command produces coordinates on an <strong>of</strong>fset alignment by projecting points<br />
in the base alignment onto the <strong>of</strong>fset alignment. The report produced also contains the distance from one<br />
alignment to the other and the skew.<br />
STATION OFFSET ALIGNMENT *namel* [OFFSET d] [STORE FROM m] FROM ALIGNMENT<br />
*name2* [STORE FROM p] [EVEN n] [FROM STATION s] [TO STATION t]<br />
This command calculates OFFSET ALIGNMENT coordinates, based on intervals along alignment name2.<br />
It uses the specified stations on ALIGNMENT name2 (the base alignment) and projects a point on<br />
ALIGNMENT namel (the <strong>of</strong>fset alignment) at EVEN n intervals. If the points are to be stored in the point<br />
table the STORE FROM option should be used. The STORE FROM m will store the points for the <strong>of</strong>fset<br />
alignment (namel), and the STORE FROM p will store the points for the base alignment (name2).<br />
Coordinates will be generated for every EVEN increment <strong>of</strong> distance N on the alignment. If coordinates for<br />
only a part <strong>of</strong> the alignment are needed, the stations may start FROM STATION s and go TO STATION t.<br />
Examples:<br />
STATION OFFSET ALI *ML WB* FROM ALI *ML EB* EVEN 100<br />
STATION OFFSET ALI *PROJ I * FROM ALI *PROJ2* EVEN 50 FROM STA 144+10 +<br />
TO STA 150+00<br />
Store Alignment Command<br />
The Store Alignment command creates an alignment in the <strong>COGO</strong> model.<br />
STORE ALIGNMENT *name* list<br />
This command defines and STORES ALIGNMENT *NAME* using a LIST <strong>of</strong> previously defined points<br />
and curves. The alignment name may be up to eight characters in length.<br />
The list may be one or a combination <strong>of</strong> the following forms.<br />
Point numbers<br />
The point numbers <strong>of</strong> points previously defined. These points cannot be curve points. The word POINT is<br />
optional when listing the points.<br />
Block <strong>of</strong> points<br />
Point numbers designated by using the form 'n to m'.<br />
Curve number<br />
The curve or spiral number <strong>of</strong> previously defined curve or spiral. The word CURVE must be used in this<br />
option i.e., CURVE 6.<br />
126<br />
126
Block <strong>of</strong> curves<br />
Curve or spiral numbers designated by using the form 'n to m'. The word CURVES must be used in this<br />
option. i.e., CURVES 6 TO 8.<br />
! The store alignment command does not accept curve points as input.<br />
Examples:<br />
STORE ALIGNMENT *SH40SUR* 1 CURVE 2 CURVE 3 4<br />
STORE ALI *PROJ* 10 TO 15 CURVE 3 20<br />
Store Curve Command<br />
The Store Curve command creates a curve in the <strong>COGO</strong> model.<br />
STORE CURVE c, pi reference, ahead reference, circular item, [spiral item]<br />
This command calculates and stores/redefines a curve. All <strong>of</strong> the elements <strong>of</strong> this command are order<br />
independent. There must be a PI reference, an ahead reference, a circular item, and optionally a spiral item.<br />
If you input more information than necessary <strong>COGO</strong> may ignore the extra information.<br />
PI REFERENCE (select one <strong>of</strong> the following)<br />
PB n PI m<br />
PB n BA dir TTL dist<br />
PB n BA dir TL dist<br />
TS n BA dir<br />
PC n BA dir<br />
TS n PI m<br />
PC n PI m<br />
PC n<br />
Where:<br />
BA Is the back azimuth or bearing<br />
127<br />
127
PB Is the point on the back tangent. It may be a point number, curve point, or north<br />
east station.<br />
PI Is the point <strong>of</strong> intersection <strong>of</strong> the tangents. It may be the same form as the PB<br />
without STA.<br />
TS Is the tangent to spiral point. It may be the same form as the PB.<br />
PC Is the tangent to circular curve point (point <strong>of</strong> curvature). It may be the same form<br />
as the PB. Note The PC n form may only be used in conjunction with the ahead ref item<br />
PT n and the circular ref. item CC n.<br />
TTL Is the total tangent length, PB to PI.<br />
TL Is the tangent length, PB to TS/PC.<br />
! The PI station takes precedence over the PC station.<br />
AHEAD REFERENCE (select one <strong>of</strong> the following)<br />
PA n<br />
AA dir<br />
DEFL +angle<br />
DELTA +angle<br />
PT n<br />
Where:<br />
PA Is the point on the ahead tangent. It may be the same form as the PB. This point<br />
may be on either side <strong>of</strong> the end <strong>of</strong> the curve. Note PA can only be used if a PI is given.<br />
AA Is the ahead azimuth or bearing.<br />
DEFL Is the total deflection at the PI. + indicates right, - indicates left.<br />
DELTA Is the circular curve delta. + indicates right, - indicates left.<br />
PT Is the point <strong>of</strong> tangency. Note This option can only be used with a PC n and a CC<br />
n.<br />
128<br />
128
CIRCULAR ITEM (select one <strong>of</strong> the following)<br />
RADIUS r<br />
DEGREE deg min sec<br />
LENGTH d<br />
TANGENT d<br />
CC AT n<br />
CC n<br />
Where:<br />
[SPIRAL ITEM]<br />
SLB dist<br />
SLA dist<br />
SL dist<br />
SAB angle<br />
RADIUS Is the radius <strong>of</strong> the curve.<br />
DEGREE Is the degree <strong>of</strong> curvature.<br />
LENGTH Is the length <strong>of</strong> the curve. (only if delta or deflection given, non spiraled)<br />
TANGENT Is the tangent length (TS/PC to PI or PI to ST/PC). This may only be used<br />
with a DELTA ahead ref. (only if delta or deflection given, non<br />
spiraled)<br />
CC AT n Is the circular curve center. It can be the same form as the PB. (only if nonspiraled)<br />
CC n Is the point where the curve center resides. Note This can only be used with<br />
the PC n and PT n.<br />
129<br />
129
Examples:<br />
SAA angle<br />
SA angle<br />
Where:<br />
SLB Is the back spiral length.<br />
SLA Is the ahead spiral length.<br />
SL Is the spiral length for in and out spirals.<br />
SAB Is the back spiral angle.<br />
SAA Is the ahead spiral angle.<br />
SA Is the spiral angle for both in and out spirals.<br />
Please refer to next page for diagrams.<br />
STORE CURVE I PC POINT PT 2 PI 1 PA 3 RADIUS 1015.5 SLB 250 SLA 300<br />
STO CURVE 4 PC 1162 PT 1165 CC 1166 SL 200.0<br />
STO CUR 5 PC 1163 PT 1164 CC 1167<br />
STO CUR 10 PC 706 BA N82 15 01.3E DELTA 23 0 0 RADIUS 1254.32<br />
STO CURVE 15 PB 14 PI 4131.8 5528.65 CC AT 1721.3 2474.4 DELTA 20 0 0<br />
130<br />
130
131<br />
131
Store Line Command (direction form)<br />
The Store Line command creates a line in the <strong>COGO</strong> model.<br />
STORE LINE n THRU (POINT) p direction [ZENITH zz zz zz.zz]<br />
This command stores a line. It creates/redefines a line n using POINT p, a DIRECTION<br />
(bearing/azimuth), and an optional ZENITH zz zz zz.zz.<br />
! Bearings are entered (n/s) deg min sec (e/w). If min/sec or sec are zero, they may be omitted. No<br />
blanks are required after the (n/s) or before (e/w).<br />
Azimuths are entered 'deg min sec'. If min/sec or sec are zero, they may be omitted. An azimuth may be<br />
made negative by preceding the first non-zero value with a minus sign<br />
Spaces are required between the degrees minutes and seconds in the bearings and azimuths.<br />
Examples:<br />
STORE LINE 10 THRU 10 N 45 00 OOE<br />
STORE LINE 10 THRU 10 N 45 E<br />
STORE LINE 12 THRU PNT SC 5 N 47 12 E<br />
STORE LINE 20 THRU 25 BEARING USE POINT 35 TO 70<br />
Store Line Command (point to point form)<br />
This Store Line command creates a line segment in the <strong>COGO</strong> model.<br />
STORE LINE n THRU [POINT] TO [POINT] k<br />
This form <strong>of</strong> the STORE LINE command stores a line segment starting at POINT p ending at POINT k.<br />
Example:<br />
STORE LINE 1 1 THRU 15 TO 20<br />
Store Point Command<br />
The Store Point Command creates points in the <strong>COGO</strong> model.<br />
132<br />
132
STORE [POINT] p [NORTH] n [EAST] el [ELEV el] [*id*]<br />
This command creates/redefines POINT p having northing NORTH n, easting EAST e, ELEVation el,<br />
and point *ID* in the point table. Any item omitted is undefined for POINT P. If you want to be informed<br />
<strong>of</strong> any changes in the point table the SET NO REDEFINE command may be used. The point id may be<br />
up to 20 characters long.<br />
! If the optional words are not used, <strong>COGO</strong> assumes the order <strong>of</strong> the input to be NORTH, EAST,<br />
STATION, ELEVATION, POINT ID. If the identifiers are used, they are order independent. Once an<br />
item is omitted, the succeeding identifiers must be used.<br />
Examples:<br />
STORE PNT 10 56039.661 196794.108<br />
STORE 20 N 55796.605 E 197236.294 ELEV 5282.519<br />
STORE 10 10000 10000<br />
Copy Point Command<br />
The Copy Point command copies information from one point and stores it in another.<br />
STORE [POINT] p POINT k [*id*]<br />
This command copies a point. It copies a previously stored point or stored curve point. All information<br />
from the old point (point k) will be duplicated in the new point (point p). However, you can give the new<br />
point a different id by using the appropriate option.<br />
Examples:<br />
STORE 10 PNT 20 STA 132+00.0<br />
STORE 20 point cc 88<br />
Store Spiral Command<br />
The Store Spiral Command stores a stand alone spiral in the <strong>COGO</strong> model.<br />
STORE SPIRAL n back reference item, pi reference item, ahead reference item,<br />
spiral reference item, degree <strong>of</strong> simple curve back, degree <strong>of</strong> simple curve<br />
ahead<br />
This command stores/redefines a stand alone spiral. All items must be specified, and are order independent.<br />
133<br />
133
Back reference item<br />
PB n - where n is a point on the back tangent.<br />
BA direction - where direction is the azimuth or bearing <strong>of</strong> the back tangent.<br />
PI reference item<br />
PI n - where n is the PI <strong>of</strong> the spiral.<br />
Ahead reference item<br />
PA n - where n is a point on the ahead tangent.<br />
Spiral reference item<br />
SL distance - where distance is the length <strong>of</strong> the spiral.<br />
DELTA d - where d is the total spiral angle.<br />
Deg <strong>of</strong> simple curve back<br />
SDCB d - where d is the degree <strong>of</strong> curvature <strong>of</strong> the preceding simple curve.<br />
Deg <strong>of</strong> simple curve ahead<br />
SDCA d - where d is the degree <strong>of</strong> curvature <strong>of</strong> the simple curve ahead.<br />
! If the simple curve ahead or back is a tangent enter zero as the degree <strong>of</strong> curve.<br />
Examples:<br />
store spiral I pb I pi 2 sl 180 pa 3 sdcb 0 0 0 sdca 2 45 0<br />
store spiral 2 ba azimuth use 4 to 5 pi 5 sl 400 pa 6 sdcb 0 0 0 sdca 10<br />
0 0<br />
Store Text Command<br />
The Store Text command stores comments in the <strong>COGO</strong> model, and if the text name is the same as an<br />
alignment or traverse associates it with the alignment or traverse.<br />
STORE TEXT *name*<br />
lines <strong>of</strong> text<br />
END TEXT<br />
134<br />
134
This command is a multiple line command which stores textual information referencing it by *name*. Since<br />
this is a multiple line command, the continuation character is not required to continue input. The lines <strong>of</strong><br />
text may consist <strong>of</strong> up to 25 lines <strong>of</strong> 80-column text. The text input starts after the command STORE<br />
TEXT *name* and ends at the line before the END TEXT command. The text name may be up to eight<br />
characters in length.<br />
! If the text name is the same as an alignment/traverse, the text is automatically associated with the<br />
alignment/traverse <strong>of</strong> the same name.<br />
Example:<br />
STORE TEXT *TEXTI*<br />
LINE 1<br />
LINE 2<br />
LINE 3<br />
LINE 4 ABCDEFGHUKL<br />
END TEXT<br />
Store Traverse Command<br />
The Store Traverse command creates a traverse in the <strong>COGO</strong> model.<br />
STORE TRAVERSE *name* (list <strong>of</strong> points/block <strong>of</strong> points)<br />
This command stores the TRAVERSE *NAME* using points that have been previously defined. A LIST<br />
OF POINTS consists <strong>of</strong> a series <strong>of</strong> point numbers separated by blanks or commas. A BLOCK OF<br />
POINTS is defined as [POINT] n TO [POINT] m. The traverse name may be up to eight characters in<br />
length.<br />
! The store traverse command will not accept curve points as input.<br />
Examples:<br />
STORE TRAVERSE *TRAVER 1 * 1 2 3 4<br />
STORE TRAVERSE *TRAV2* 1 TO 4<br />
Traverse Command (distance/direction)<br />
The Traverse command computes and stores the coordinates <strong>of</strong> a traverse based on distance/direction pairs<br />
or angle right traverse survey data. A traverse is a sequence <strong>of</strong> points. Traverses may be open (the first point<br />
is not equal to last point) or closed (the first point is equal to last point).<br />
135<br />
135
TRAVERSE *name* [REDEFINE] [PRINT]<br />
BEGIN AT [POINT] n<br />
.<br />
.<br />
.<br />
[FROM [POINT] m] TO [POINT] p distance direction<br />
.<br />
.<br />
.<br />
END AT (POINT) k [PRINT]<br />
Depending on the type <strong>of</strong> the TRAVERSE command, it will create a traverse from distances and bearings,<br />
or from an angle right traverse. The TRAVERSE Command is a multiple line command consisting <strong>of</strong> a<br />
Traverse NAME, which BEGINs AT POINT n, a definition <strong>of</strong> a line for each course and an ENDs at<br />
POINT k. This command will compute and store a traverse and its points. This command creates open or<br />
closed traverses and will solve for up to 2 unknown distances or bearings. The REDEFINE option instructs<br />
COG0 to delete the traverse *name* before it is created. If desired the results <strong>of</strong> the computations may be<br />
output via the PRINT option.<br />
Each course in the traverse is defined as a line segment which starts at the end <strong>of</strong> the previous course and<br />
ends at the TO point. The command line which defines the course may include the FROM point, and<br />
requires the TO point and the distance and direction. The DISTANCE and DIRECTION may be one <strong>of</strong><br />
the following forms.<br />
Distance<br />
[DISTANCE] d.d<br />
Where: D. D is the distance from one point to the other point <strong>of</strong> a course <strong>of</strong> the traverse.<br />
[DISTANCE] (UNKNOWN/U) [APPROX d.d]<br />
This option informs <strong>COGO</strong> to calculate the distance from the starting point <strong>of</strong> the course to the<br />
ending point <strong>of</strong> the course based on the definitions <strong>of</strong> other courses. The APPROXIMATE option<br />
<strong>of</strong> this phrase informs <strong>COGO</strong> <strong>of</strong> the approximate length <strong>of</strong> the course.<br />
Direction<br />
AZIMUTH ddd mm ss.ss<br />
Where: DDD MM SS.SS are the degrees minutes and seconds <strong>of</strong> the azimuth.<br />
[BEARING] (N/S) dd mmm ss.ss (E/W)<br />
Where: DD MM SS.SS are the degrees minutes and seconds <strong>of</strong> the bearing.<br />
[DEFLECTION] ddd mmm ss.ss<br />
Where: DDD MM SS.SS are the degrees minutes and seconds <strong>of</strong> the deflection.<br />
(UNKNOWN/U) APPROX dir<br />
136<br />
136
Where : This option informs <strong>COGO</strong> that you wish <strong>COGO</strong> to calculate the direction <strong>of</strong> the course.<br />
The 'approximate' option <strong>of</strong> this phrase allows you to inform <strong>COGO</strong> <strong>of</strong> the approximate direction<br />
<strong>of</strong> the course. The direction is specified using the AZIMUTH, BEARING or DEFLECTION.<br />
! A direction angle without an identifier is assumed to be a deflection. A deflection may not occur on a<br />
course immediately following a course with an unknown direction.<br />
In some cases <strong>of</strong> two unknowns in a traverse, there are two possible pairs <strong>of</strong> solutions. The APPROX<br />
option allows you to choose the solution; however, this option should be used on only one <strong>of</strong> the two<br />
unknowns. It should be noted that this option may not allow <strong>COGO</strong> to choose the desired solution when<br />
the approximate direction and one <strong>of</strong> the solutions are on either side <strong>of</strong> the north axis.<br />
<strong>COGO</strong> calculates the solution <strong>of</strong> one unknown in the traverse using two equations with one unknown. If<br />
the solutions differ by more than 1/2 %, a warning is printed. This indicates that the distance bearing<br />
descriptions are not consistent.<br />
Examples:<br />
TRAVERSE *EXAMPLEI* PRINT<br />
BEGIN AT I 0 0<br />
FROM 1 TO 2 5280 N 90 W<br />
FROM 2 TO 3 440 -90 0 0<br />
FROM 3 TO 4 100 -15 0 0<br />
END AT 4<br />
TRAV *EXAMPLE2* REDEFINE<br />
BEGIN AT 101<br />
TO 102 418.5 N33 40 30E<br />
TO 103 508.8 12 30 0<br />
TO 104 UNKNOWN -14 0 0<br />
TO 105 600.1 UNKNOWN APPROX -5 30 0<br />
END AT 105 PRINT<br />
SOLUTIONS OF UNKNOWNS<br />
COURSE 3 2093.398<br />
(ALT) 3291.098<br />
COURSE 4 N 28 28 33.8 E<br />
(ALT) S 35 52 26.2 W<br />
CLOSURE<br />
DISTANCE 4203.522 S 32 56 48.2 W<br />
Traverse Command (angle right)<br />
137<br />
137
This type <strong>of</strong> the Traverse command computes and stores the coordinates <strong>of</strong> angle right traverse survey data.<br />
A traverse is a sequence <strong>of</strong> points. Traverses may be open (the first point is not equal to last point) or closed<br />
(the first point is equal to last point).<br />
TRAVERSE *name* [REDEFINE] [PRINT]<br />
BEGIN WITH [POINT] b BA (azimuth/bearing/[PNT] a)<br />
.<br />
.<br />
.<br />
AT [PNT] m [height] TO [PNT] n [height] [*PID*]<br />
BACK distances(s) [zenith(s)]<br />
FORWARD distance(s) [zenith(s)]<br />
Angle angle(s)<br />
.<br />
.<br />
.<br />
END<br />
The traverse NAME can be REDEFINED and PRINTED, and can be OUTPUT to CMM file<br />
NAME.LSA. The traverse begins with known POINT B which is at a back AZIMUTH (BA) or<br />
BEARING from a known station. The format for the direction is<br />
azimuth<br />
-or-<br />
BEAR bearing<br />
If desired, POINT A may be given instead <strong>of</strong> the azimuth or bearing and <strong>COGO</strong> will use the azimuth from<br />
POINT B to POINT A for the direction value.<br />
The legs <strong>of</strong> the traverse are defined with the instrument AT POINT M at HEIGHT, and the angle(s) turned<br />
clockwise from the azimuth <strong>of</strong> the previous leg to POINT N with the target at HEIGHT. If elevation<br />
calculations are to be performed, POINT M must have an elevation. The back distance(s) are required and<br />
entered one per line in the form<br />
BACK distance [zenith]<br />
The back distances will be meaned with the mean <strong>of</strong> the previous leg's forward distances. The forward<br />
distance(s) are required and entered one per line in the form<br />
FORWARD distance [zenith]<br />
If the zenith is not entered for the distances it is assumed to be 90 degrees (horizontal). The angles may be<br />
the raw data or the mean angles calculated from the raw data. The angles are entered one per line in the<br />
form<br />
ANGLE angle<br />
138<br />
138
The distance(s), angle(s), and (optionally) zenith(s) are used to calculate the coordinates <strong>of</strong> point N. In<br />
addition, a PID (point ID), and ATTRibutes may be entered for POINT N. If the PID for POINT N is<br />
present the first 16 characters <strong>of</strong> the PID will be used as the station name for CMM, otherwise the point<br />
number for POINT N will be used as the station name.<br />
The traverse ends with the command word END.<br />
! The accuracy <strong>of</strong> the weighted least squares adjustment will be based on the number <strong>of</strong> angle/distance<br />
values entered for each leg in the traverse. The fewer the number <strong>of</strong> values entered, the less accurate the<br />
results.<br />
Example:<br />
The following is an example (from the 1992 edition <strong>of</strong> the Survey<br />
<strong>Manual</strong> pages 3-05-11 AND 3-05-12. Note: The initial back azimuth<br />
and distance are fictional).<br />
TRAVERSE *RIGHT* REDEFINE PRINT OUTPUT *CMM*<br />
BEGIN WITH 2 BA 00 00 04.0<br />
AT PNT 2 4.58 TO PNT 3 5.51 *Type 2 monument*<br />
BACK 823.101<br />
BACK 823.110<br />
BACK 823.108<br />
BACK 823.109<br />
FORWARD 501.913 85 07 34<br />
FORWARD 501.911 85 07 36<br />
FORWARD 501.910 85 07 34<br />
FORWARD 501.906 85 07 27<br />
ANGLE 43 49 57<br />
ANGLE 43 49 56<br />
ANGLE 43 49 58<br />
ANGLE 43 49 56<br />
ANGLE 43 49 55<br />
ANGLE 43 49 56<br />
ANGLE 43 49 57<br />
ANGLE 43 49 55<br />
END AT PNT 3<br />
139<br />
139
An Example <strong>of</strong> a <strong>COGO</strong> Project<br />
This is a simple project with some points, curves, a traverse, an alignment, and a parcel. This is fictitious<br />
project.<br />
Here’s the information for the project.<br />
A detour has to be quickly designed and implemented due to a bridge closure. The project manager has<br />
established where he wants the detour to start, some rough alignment information, and that a temporary<br />
easement is necessary near the center <strong>of</strong> the alignment.<br />
Alignment Information:<br />
Starting Point: 49524.472 N 47866.799 E<br />
PI for 1 st curve 433.65’ at N 75° 27’ 17.559” E from starting point<br />
PI for 2 nd curve 387.303’ at N 52° 31’ 39.504” E from 1 st PI<br />
PI for 3 rd curve 387.303 at N 75° 27’ 17.660” E from 2 nd PI<br />
PI for 4 th curve 387.303’ at S 81° 37’ 3.766” E<br />
Ending point: 433.65’ at N 75° 27’ 17.559” E<br />
All curves should have a degree <strong>of</strong> curvature <strong>of</strong> 6°<br />
Temporary Easement Information:<br />
Half-way through the detour a small parcel is needed for a temporary easement. The starting point<br />
for the project is the 1 st tie point to the easement. The next tie point is 559.0169944’ at N 45 E, then<br />
259.5085 at N 30 E, then 375.0’ at N 90 E. The parcel starts at the PI <strong>of</strong> the 3 rd curve, follows the<br />
centerline <strong>of</strong>fset 10’ to the left <strong>of</strong> the centerline to the PI for the 2 nd curve, and ends at the PI <strong>of</strong> the<br />
3 rd curve.<br />
140<br />
140<br />
Chapter<br />
16
Starting the Project<br />
Creating the PIs for the Alignment<br />
The first item needs to be the start <strong>of</strong> the alignment. The Store Point<br />
function is used to create the point.<br />
In this case there are two ways to create the PIs for the alignment. The first is to use the Locate Distance<br />
Direction function and the second is to use the Traverse function. Let’s do the traverse.<br />
141<br />
141
All the PIs are created, so here’s the alignment.<br />
142<br />
142
Now for the Parcel<br />
Use the Traverse function to establish the tie points for the parcel.<br />
143<br />
143
With the tie points created, on to the parcel.<br />
144<br />
144
145<br />
145
This is the result.<br />
146<br />
146
Now that the geometry model is built, what do you do next? The best thing to do is make sure you have<br />
saved all your work in the form <strong>of</strong> an input file. The input file can be adjusted as necessary to finish the<br />
project, and re-run as many times as necessary. Can you imagine having to fill out the forms again every time<br />
a change comes through? To save all <strong>of</strong> this work in the form <strong>of</strong> an input file, you need to find the file<br />
<strong>COGO</strong>.LOG. Typically, this will reside in the C:\Program Files\CDOT<strong>COGO</strong> folder. This file contains<br />
all the functions you performed in the form <strong>of</strong> <strong>COGO</strong> commands, even all the mistakes. Copy this file to<br />
your work folder and rename it to a .CIN file. You now have your input file for later use. Here’s the<br />
<strong>COGO</strong>.LOG for this sample project (comments are added for clarity) and the <strong>COGO</strong>.COT (output file).<br />
<strong>COGO</strong>.LOG<br />
* Sample project for the <strong>COGO</strong> manual<br />
* Store the starting point for the project<br />
STORE POINT 110 49524.472 47866.799<br />
* Create the PIs for the detour alignment<br />
Trav *Center* redefine print<br />
beg at 110<br />
to 114 433.65 N75 27 17.559E<br />
to 116 387.303 N52 31 39.504E<br />
to 118 387.303 N75 27 17.66E<br />
to 120 387.303 S81 37 3.766E<br />
to 124 433.65 N75 27 17.559E<br />
end at 124<br />
* Create the detour alignment<br />
ALIGNMENT *Detour* REDEFINE PRINT<br />
BEGIN AT 110 STA 0.0<br />
CURVE 114 PI 114 DEGREE 6 0 0.0<br />
CURVE 116 PI 116 DEGREE 6 0 0.0<br />
CURVE 118 PI 118 DEGREE 6 0 0.0<br />
CURVE 120 PI 120 DEGREE 6 0 0.0<br />
END AT 124<br />
* Create the ties for the temporary easement<br />
TRAVERSE *TE4 Ties* REDEFINE<br />
BEGIN AT POINT 110<br />
TO 50 559.0169944 N45E<br />
TO 51 259.5085 N30E<br />
TO 52 375 N90E<br />
END AT 52<br />
* Create the temporary easement<br />
PARCEL *TE4* REDEFINE<br />
TIE POINT 110<br />
TIE POINT 50<br />
TIE POINT 51<br />
TIE POINT 52<br />
147<br />
147
BEGIN AT POINT 118<br />
ARC left RADIUS 964.93 PLUS CC 54<br />
POINT 116<br />
END AT POINT 118<br />
<strong>COGO</strong>.COT<br />
* Sample project for the <strong>COGO</strong> manual<br />
* Store the starting point for the project<br />
STORE POINT 110 49524.472 47866.799<br />
* Create the PIs for the detour alignment<br />
Trav *Center* redefine print<br />
beg at 110<br />
to 114 433.65 N75 27 17.559E<br />
to 116 387.303 N52 31 39.504E<br />
to 118 387.303 N75 27 17.66E<br />
to 120 387.303 S81 37 3.766E<br />
to 124 433.65 N75 27 17.559E<br />
end at 124<br />
Closure<br />
Distance 1968.015 S 75 27 17.7 W<br />
TRAVERSE CENTER<br />
PNT 110 49524.472 N 47866.799 E<br />
433.650' N 75 27 17.6 E<br />
PNT 114 49633.380 N 48286.551 E<br />
387.303' N 52 31 39.5 E<br />
PNT 116 49869.007 N 48593.932 E<br />
387.303' N 75 27 17.7 E<br />
PNT 118 49966.275 N 48968.822 E<br />
387.303' S 81 37 3.8 E<br />
PNT 120 49909.815 N 49351.988 E<br />
433.650' N 75 27 17.6 E<br />
PNT 124 50018.723 N 49771.740 E<br />
END TRAVERSE CENTER<br />
148<br />
148
* Create the detour alignment<br />
ALIGNMENT *Detour* REDEFINE PRINT<br />
BEGIN AT 110 STA 0.0<br />
CURVE 114 PI 114 DEGREE 6 0 0.0<br />
CURVE 116 PI 116 DEGREE 6 0 0.0<br />
CURVE 118 PI 118 DEGREE 6 0 0.0<br />
CURVE 120 PI 120 DEGREE 6 0 0.0<br />
END AT 124<br />
Stationing summary for alignment DETOUR<br />
0 equations<br />
ALIGNMENT DETOUR<br />
PNT 110 49524.472 N 47866.799 E 0+00.00'<br />
433.650' N 75 27 17.6 E<br />
CURVE 114 Type: Circular Curve Left<br />
Circular Curve Data<br />
Degree 6 0 0.0 Deflection 22 55 38.1 Delta 22 55 38.1<br />
Radius 954.930' Length 382.121'<br />
Tangent Back Data (PC/TS to PI)<br />
N 75 27 17.6 E Length 193.651'<br />
Tangent Ahead Data (PI to PT/ST)<br />
N 52 31 39.5 E Length 193.651'<br />
PC 114 49584.746 N 48099.106 E 2+40.00'<br />
PI 114 49633.380 N 48286.551 E 4+33.65'<br />
CC 114 50509.070 N 47859.283 E<br />
PT 114 49751.193 N 48440.241 E 6+22.12'<br />
387.303' N 52 31 39.5 E<br />
CURVE 116 Type: Circular Curve Right<br />
Circular Curve Data<br />
Degree 6 0 0.0 Deflection 22 55 38.2 Delta 22 55 38.2<br />
Radius 954.930' Length 382.121'<br />
Tangent Back Data (PC/TS to PI)<br />
N 52 31 39.5 E Length 193.652'<br />
Tangent Ahead Data (PI to PT/ST)<br />
N 75 27 17.7 E Length 193.652'<br />
PC 116 49751.193 N 48440.241 E 6+22.12'<br />
PI 116 49869.007 N 48593.932 E 8+15.77'<br />
CC 116 48993.316 N 49021.200 E<br />
PT 116 49917.641 N 48781.377 E 10+04.24'<br />
387.303' N 75 27 17.7 E<br />
***** Warning: Overlap between curve and curve.<br />
CURVE 118 Type: Circular Curve Right<br />
149<br />
149
Circular Curve Data<br />
Degree 6 0 0.0 Deflection 22 55 38.6 Delta 22 55 38.6<br />
Radius 954.930' Length 382.123'<br />
Tangent Back Data (PC/TS to PI)<br />
N 75 27 17.7 E Length 193.653'<br />
Tangent Ahead Data (PI to PT/ST)<br />
S 81 37 3.8 E Length 193.653'<br />
PC 118 49917.641 N 48781.376 E 10+04.24'<br />
PI 118 49966.275 N 48968.822 E 11+97.89'<br />
CC 118 48993.316 N 49021.199 E<br />
PT 118 49938.045 N 49160.406 E 13+86.36'<br />
387.303' S 81 37 3.8 E<br />
***** Warning: Overlap between curve and curve.<br />
CURVE 120 Type: Circular Curve Left<br />
Circular Curve Data<br />
Degree 6 0 0.0 Deflection 22 55 38.7 Delta 22 55 38.7<br />
Radius 954.930' Length 382.123'<br />
Tangent Back Data (PC/TS to PI)<br />
S 81 37 3.8 E Length 193.653'<br />
Tangent Ahead Data (PI to PT/ST)<br />
N 75 27 17.6 E Length 193.653'<br />
PC 120 49938.045 N 49160.404 E 13+86.37'<br />
PI 120 49909.815 N 49351.988 E 15+80.02'<br />
CC 120 50882.774 N 49299.611 E<br />
PT 120 49958.449 N 49539.434 E 17+68.49'<br />
433.650' N 75 27 17.6 E<br />
PNT 124 50018.723 N 49771.740 E 20+08.49'<br />
END ALIGNMENT DETOUR<br />
TRAVERSE *TE4 Ties* REDEFINE PRINT<br />
BEGIN AT POINT 110<br />
TO 50 559.0169944 N45E<br />
TO 51 259.5085 N30E<br />
TO 52 375 N90E<br />
END AT 52<br />
Closure<br />
Distance 1092.933 S 55 26 15.1 W<br />
TRAVERSE TE4 TIES<br />
PNT 110 49524.472 N 47866.799 E<br />
559.017' N 45 0 0.0 E<br />
150<br />
150
PNT 50 49919.757 N 48262.084 E<br />
259.509' N 30 0 0.0 E<br />
PNT 51 50144.498 N 48391.838 E<br />
375.000' N 90 0 0.0 E<br />
PNT 52 50144.498 N 48766.838 E<br />
END TRAVERSE TE4 TIES<br />
PARCEL *TE4* REDEFINE PRINT<br />
TIE POINT 110<br />
TIE POINT 50<br />
TIE POINT 51<br />
TIE POINT 52<br />
BEGIN AT POINT 118<br />
ARC left RADIUS 964.93 PLUS CC 54<br />
POINT 116<br />
END AT POINT 118<br />
-------------------<br />
| PARCEL: TE4 |<br />
-------------------<br />
Begins at point 110 49524.472 N 47866.799 E<br />
Thence N. 45^ 00' 00" E., a distance <strong>of</strong> 170.389 meters (559.02<br />
To tie point 50 49919.757 N 48262.084 E<br />
Thence N. 30^ 00' 00" E., a distance <strong>of</strong> 79.098 meters (259.51 feet);<br />
To tie point 51 50144.498 N 48391.838 E<br />
Thence N. 90^ 00' 00" E., a distance <strong>of</strong> 114.300 meters (375.00<br />
To tie point 52 50144.498 N 48766.838 E<br />
Thence S. 48^ 34' 34" E., a distance <strong>of</strong> 82.105 meters (269.37 feet);<br />
To point 118 49966.275 N 48968.822 E<br />
1. Thence along the arc <strong>of</strong> a curve to the left having a radius <strong>of</strong><br />
294.111 meters (964.93 feet), a distance <strong>of</strong> 118.857 meters<br />
(389.95 feet), (the chord <strong>of</strong> said arc bears S. 75^ 27' 18" W.,<br />
a distance <strong>of</strong> 118.050 meters (387.30 feet) );<br />
The area <strong>of</strong> the arc being 5079 SQFT, ( 0.117 Acres)<br />
Has been Added to the total area.<br />
151<br />
151
To point 116 49869.007 N 48593.932 E<br />
2. Thence N. 75^ 27' 18" E., a distance <strong>of</strong> 118.050 meters (387.30 feet), more<br />
or less, to the TRUE POINT OF BEGINNING.<br />
To point 118 49966.275 N 48968.822 E<br />
The above described parcel contains 0.047 hectares/471.9<br />
square meters (0.117 acres/5079 square feet), more or less.<br />
Total area 471.89 SQM ( 0.04719 Hectares)<br />
5079.33 SQF ( 0.12 Acres)<br />
----------------------<br />
| END PARCEL TE4 |<br />
----------------------<br />
152<br />
152
Appendix A – <strong>COGO</strong> command<br />
word abbreviations<br />
Command Abbreviation(s)<br />
ALDJUST ADJ<br />
ALIGNMENT ALI, ALIGN<br />
ANGLE ANG<br />
ANNOTATE ANNO<br />
APPROXIMATE APPROX<br />
ATTRIBUTE ATTR<br />
AZIMUTH AZI<br />
BEARING BEA,BEAR<br />
BEGIN BEG<br />
BOUNDARY BOU<br />
CURVE CUR<br />
COMPASS COMP<br />
DEFLECTION DEFL<br />
DEGREE DEG<br />
DELETE DEL<br />
DESIGN DES<br />
DISTANCE DIS<br />
DIVIDE DIV<br />
EAST E<br />
ELEVATION ELEV<br />
EQUATION EQ<br />
FINISH FIN<br />
INTERSECT INTER<br />
LAYOUT LAY<br />
LENGTH LENG<br />
LINE LIN<br />
LOCATE LOC<br />
MESSAGE MESS<br />
MINUTE MIN<br />
NORTH N<br />
NUMBER NUM<br />
ORIGIN ORI<br />
PARCEL PAR<br />
153<br />
153
POINT PNT<br />
PROJECT PROJ<br />
REDEFINE REDEF<br />
RESTATION RESTA<br />
REVERSED REV<br />
ROADCALC ROAD<br />
ROTATE ROT<br />
SCALE SCA<br />
SECOND SEC<br />
SEGMENT SEG<br />
SOUTH S<br />
STATION STA<br />
STORE STO<br />
SUBPROJECT SUB<br />
SUBTRACT SUB<br />
TABLES TABL<br />
TANGENT TANG<br />
TEMPLATE TEMP<br />
TERRAIN TERR<br />
TOLERANCE TOL<br />
TRAVERSE TRAV<br />
UNKNOWN U,UNKN<br />
WEST W<br />
154<br />
154
Appendix B - <strong>COGO</strong> Error Messages<br />
ERROR NO. DESCRIPTION OF THE ERROR<br />
101 W POINT UNDEFINED<br />
102 LINE UNDEFINED<br />
103 W LINE BEING REDEFINED<br />
104 W CURVE BEING REDEFINED<br />
105 CURVE UNDEFINED<br />
106 W <strong>COGO</strong> OBJECT UNDEFINED OR OF WRONG TYPE<br />
107 <strong>COGO</strong> OBJECT ALREADY DEFINED<br />
108 W ALIGNITRAV/TEXT UNDEFINED<br />
109 INPUT CHARACTER STRING BEGINS WITH ILLEGAL SYMBOL<br />
110 INPUT NAME NOT DELIMITED CORRECTLY<br />
111 INPUT NAME LONGER THAN 8 CHARACTERS<br />
112 INPUT WORD UNKNOWN (PERHAPS MISSPELLED)<br />
113 INPUT NUMBER ERROR<br />
114 IMPROPER CONTINUATION OF INPUT<br />
115 POINT NUMBER MISSING<br />
116 NO DEFINITIONS ON STORE POINT<br />
117 POINT BEING REDEFINED<br />
118 FIRST WORD OF COMMAND NOT LEGITIMATE<br />
119 SET METRIC INCORRECT<br />
120 COMMAND SYNTAX ERROR<br />
121 POINT NUMBER OUT OF RANGE<br />
122 MORE THAN 500 ALIGNMENTS<br />
124 N/S DELIMITER NOT CORRECT<br />
125 NO DEGREE IN ATTEMPTED BEARING SPECIFICATION<br />
126 E/W DELIMITER NOT CORRECT<br />
127 LINE NUMBER MISSING OR OUT OF RANGE<br />
131 CURVE NUMBER MISSING<br />
132 UNRECOGNIZABLE CURVE DATA ITEM<br />
134 CURVE BACK REFERENCE ITEM NOT CORRECT<br />
135 CURVE AHEAD REFERENCE ITEM NOT CORRECT<br />
136 CURVE CIRCULAR REFERENCE ITEM NOT CORRECT<br />
137 CURVE SPIRAL ITEM NOT CORRECT<br />
138 UNDEFINED POINT IN CURVE REFERENCE ITEM<br />
139 CIRCULAR ITEM INCORRECT OR SPIRALS TOO LONG FOR DEFL<br />
140 AHEAD DATA ITEM INCORRECT OR INCOMPLETE<br />
142 PI UNDEFINED OR INSUFFICIENTLY DEFINED<br />
143 CURVE NUMBER OUT OF RANGE<br />
146 POINT NUMBER MISSING OR USE OF TO INCORRECT<br />
147 NAME MISSING OR NOT CORRECT<br />
149 CURVE POINTS NOT TS,SC,P1,CC,CS,ST,PC,PT<br />
150 NO TS/ST ON NON-SPIRALED CURVES<br />
151 NO PC/PT ON SPIRALED CURVES<br />
155 IMPROPER USE OF TO IN ALIGNMENT LIST<br />
155<br />
155
156 ALIGNMENTS NESTED MORE THAN 7 DEEP<br />
157 MORE THAN 40 INPUT ITEMS ON CONTINUATION LINE<br />
160 NO BEGIN<br />
161 UNIDENTIFIABLE ITEM - PROBABLY MISSING END<br />
162 POINT DATA NOT CORRECT<br />
163 EQUATION NOT CORRECT<br />
167 MORE THAN 25 LINES OF TEXT - PERHAPS MISSING END<br />
168 TEXT FILE BAD ON RETRIEVAL<br />
178 ZERO LENGTH CURVE SPECIFICATION NOT CORRECT<br />
180 ITEM IN DELETE LIST NOT CORRECT<br />
183 MISSING POINT NUMBER OR DATA ON BEGIN OR END<br />
184 POINTS OUT OF SEQUENCE IN TRAVERSE<br />
186 COURSES WRONG - PROBABLY MISSING END<br />
187 DEFLECTION GIVEN AFTER UNKNOWN<br />
189 MORE THAN TWO UNKNOWNS<br />
190 DISTANCE NOT CORRECT<br />
192 AZ/BEARING/DEFLECTION NOT CORRECT<br />
193 TRAVERSE DATA BAD ON RETRIEVAL<br />
194 BEGIN OR END POINT UNDEFINED WITH UNKNOWNS<br />
196 UNDEFINED POINT IS DISTANCE OR BEARING<br />
201 DISTANCE MISSING OR INCORRECTLY GIVEN<br />
202 OFFSET MISSING OR INCORRECTLY GIVEN<br />
203 ANGLE MISSING OR INCORRECTLY GIVEN<br />
204 NO SOLUTION TO ARC/ARC TIE<br />
205 NO SOLUTION TO ARC/LINE TIE<br />
206 APPROXIMATE ANGLE DOES NOT INDICATE SOLUTION<br />
207 APPROXIMATION INCORRECTLY GIVEN<br />
208 NEAR POINT GIVEN INCORRECTLY<br />
209 NAME OR NUMBER MISSING OR INCORRECTLY GIVEN<br />
210 FROM POINT NOT ON LINE<br />
211 DISTANCE FROM POINT GOES OFF CURVE<br />
212 FROM POINT NOT ON TRAVERSE<br />
213 FROM POINT NOT ON ALIGNMENT<br />
215 NO TANGENT SOLUTION<br />
216 POINT TO PROJECT MISSING OR INCORRECTLY GIVEN<br />
218 NO PROJECTION<br />
219 FIRST OR LAST ITEM AN ARC<br />
222 POINT DISTANCE PAIR INCORRECT<br />
225 POINT IN USE OPTION INCORRECTLY GIVEN<br />
226 LINE SEGMENT NOT CORRECT<br />
228 NO INTERSECTION IN OFFSETS - BAD DATA<br />
233 NO SOLUTION<br />
234 W MORE THAN 7 SOLUTIONS; FIRST 7 KEPT<br />
236 CC DOES NOT PROJECT<br />
238 FILE NAME BAD<br />
239 FILE ACTION NOT CORRECT<br />
240 ERROR IN LIST<br />
241 BAD CURVE POINT<br />
242 MISSING POINT BETWEEN ARCS<br />
243 W UNEQUAL RADII<br />
244 END NOT BEGINNING POINT<br />
245 W TOO MANY SOLUTIONS FROM ITERATION<br />
246 LINE NUMBER NOT FOUND IN INPUT FILE<br />
249 BAD STATION VALUE<br />
156<br />
156
250 BAD ALIGNMENT<br />
252 INCORRECT BLOCK OF POINTS SPECIFIED<br />
253 CC POINT BAD<br />
254 STATION NOT FOUND<br />
258 STATION COMMAND STORE OPTION ERROR<br />
261 LAYOUT POINT ERROR<br />
266 UNABLE TO OPEN SAVED TABLE<br />
269 IS NOT GREATER/EQUAL TO M<br />
273 TOO MANY EQUATIONS, LIMIT = 10<br />
274 EQ ITEM NOT ON ALIGNMENT<br />
275 SPIRAL LENGTH IGNORED - NOT CONSISTENT<br />
276 TOO MANY COURSES IN TRAVERSE TO BE ADJUSTED<br />
277 KEYWORD FOR USE MISSING<br />
280 EVEN SPECIFICATION BAD<br />
300 END OF FILE ENCOUNTERED ON READ<br />
302 TEMP. FILE ERROR<br />
304 DIAMETER LESS THAN CHORD LENGTH<br />
305 TOO MANY ITEMS IN DISPLAY LIST<br />
157<br />
157
Appendix C - <strong>COGO</strong> Command<br />
Quick Reference<br />
Command Description<br />
[Examples]<br />
ADJUST Adjusts a traverse.<br />
[ADJUST TRAV *PROJ* COMPASS PRINT TOL 0.0]<br />
ALIGNMENT Creates a <strong>COGO</strong> alignment.<br />
[ALI *PROJ* REDEFINE PRINT<br />
BEG AT PNT 110<br />
PNT 115<br />
EQ 21+05.53 21+08.52<br />
CUR 3 EQ PT 23+83.22<br />
END AT PNT 120]<br />
ANGLE Calculates the angle between 3 points.<br />
[ANGLE MINUS AT 20 FROM 101 TO 107]<br />
AREA Computes the area <strong>of</strong> a closed figure.<br />
[AREA 100 102 ARC 103 PLUS 109 ARC LEFT RADIUS 1908 PLUS 117]<br />
ARCHIVE Archives the <strong>COGO</strong> model as an input file.<br />
[ARCHIVE TABLE]<br />
AZIMUTH Calculates the azimuth and distance between points.<br />
[AZIMUTH PNT I PNT 2]<br />
BEARING Calculates the bearing and distance between points.<br />
[BEARING PNT 15 PNT 20]<br />
DELETE Removes a <strong>COGO</strong> item from the <strong>COGO</strong> model.<br />
[DELETE PNT 1 TO 20]<br />
DISTANCE Calculates the distance and bearing between points. [DIST 410 420]<br />
158<br />
158
DIVIDE Divides a line, line segment or curve into smaller segments.<br />
[DIVIDE LINE 20 100 PNT 2 120.3 PNT 3 245.73 PNT 4 100.2]<br />
[DIVIDE LIN SEG PNT 25 TO PNT 30 PNT 26 PNT 27 PNT 28]<br />
[DIVIDE CUR 3 PNT 100 PNT 101 PNT 102]<br />
EJECT Causes the printer to form feed and prints a heading.<br />
[EJECT]<br />
FINISH Terminates a <strong>COGO</strong> run normally.<br />
[FINI]<br />
LAYOUT Produces a staking layout <strong>of</strong> a <strong>COGO</strong> item.<br />
[LAYOUT TIES PNT 101 TO ALI -PROJ*]<br />
[LAYOUT CUR 5 TRANSIT AT POINT 101 EVEN 25.01 [LAYOUT ALI *SURV* EVEN 25]<br />
LIST Lists <strong>COGO</strong> items<br />
[LIST PNT ALL]<br />
[LIST ALL]<br />
[LIST ALI *PROJ*]<br />
LOCATE Calculates the coordinates <strong>of</strong> a point based on given information.<br />
GIVEN: A distance and direction from a point<br />
[LOCATE PNT 10 FROM PNT 20 1842.67 N15E]<br />
GIVEN: A distance and deflection from the end <strong>of</strong> a line segment.<br />
[LOCATE 15 FROM 32 TO 33 512.36 DEFL 15 32 10.4]<br />
GIVEN: A distance and angle from the beginning <strong>of</strong> a line segment.<br />
[LOCATE 22 FROM 20 378.24 187 02 13.3 FROM 21]<br />
GIVEN: A station on an alignment.<br />
[LOCATE PNT 201 ON ALI *RAMPE* AT STA 144+15.2]<br />
GIVEN: An <strong>of</strong>fset distance from a point on a <strong>COGO</strong> item.<br />
[LOCATE PNT 32 OFFSET FROM PNT 101 ON ALI *PROJ*]<br />
GIVEN: A curve and <strong>of</strong>fsets to the left and right <strong>of</strong> the curve.<br />
[LOCATE PNT 10 TO 13 OFFSET 30 LEFT 32 RIGHT FROM CURVE 102]<br />
GIVEN: A point and a <strong>COGO</strong> item that the point is projected onto.<br />
[LOCATE PNT 35 PROJECT PNT 101 ON ALI *MAINWB*]<br />
GIVEN: Two <strong>COGO</strong> items that intersect.<br />
[LOCATE PNT 82 INTERSECT LIN SEG 3 TO 4 WITH ALI *SURV*]<br />
159<br />
159
GIVEN: Two points and deflections from the line formed by the two points.<br />
[LOCATE PNT 65 FORSECT PNT 82 ANGLE MINUS 34 20 01.2 AND PNT 201 ANGLE 22 00 01.3]<br />
GIVEN: Two distances from different points.<br />
[LOCATE PNT 101 TIE 10 DIST 741.0 TIE 11 DIST 241.3 APPROX N30W]<br />
GIVEN: A distance from one point, a second point and an angle turned from the line between the first and<br />
second point.<br />
[LOCATE 901 TIE PNT I DIST 456.2 TIE PNT 2 ANGLE 30 00 01.01<br />
GIVEN: A direction and a curve. (Locates the point where a line <strong>of</strong> direction is tangent to the curve.)<br />
[LOCATE PNT 18 ON CUR 15 TANGENT BEAR N33 49 01.4W]<br />
GIVEN: A point near a curve and the curve. (Locates the point where a line from the point to the curve is<br />
tangent.)<br />
[LOCATE PNT 24 ON CUR 120 TANGENT THRU PNT 871<br />
PARCEL Creates a <strong>COGO</strong> parcel.<br />
[PARCEL *TE10OA- SUBACCOUNT 09000 PRINT TIE POINT 10<br />
BEGIN AT 101<br />
ARC RIGHT RADIUS 824.5 CC 102<br />
PNT 103<br />
ARC 100 LEFT PLUS<br />
PNT 104<br />
END AT 105]<br />
RESET AREA Sets the <strong>COGO</strong> area register to a value<br />
[RESET AREA 0.0]<br />
RESTATION Restations a <strong>COGO</strong> alignment.<br />
[RESTATION ALI *PROJ* BEG AT STA 100+00.0 PNT 20 EQ 132+10.4]<br />
RESTORE Restores a saved <strong>COGO</strong> model.<br />
[RESTORE TABLE *87042Cl*]<br />
ROTATE Rotates the <strong>COGO</strong> model about a point.<br />
[ROTATE TABLES BY 00 05 15.2 ORIGIN AT 1 10]<br />
SAVE Saves a <strong>COGO</strong> model.<br />
[SAVE TABLE *87042Cl*]<br />
SET Sets input/output files, date, log file, MOSS output, Roadcalc output, SDR data collector output<br />
and protection.<br />
[SET FILE INPUT *<strong>COGO</strong>IN*]<br />
[SET FILE OUTPUT *<strong>COGO</strong>OUT*]<br />
[SET DATE *91/02/26*]<br />
[SET LOG FILE ON]<br />
160<br />
160
[SET MOSS FILE OUTPUT ALI PROI END]<br />
[SET ROADCALC FILE OUTPUT SUB 010 ALI *WB ML*]<br />
[SET SDR FILE OUTPUT *SDRFILE* ALI *SURV*]<br />
[SET NO REDEFINE]<br />
STORE Stores a <strong>COGO</strong> item in the <strong>COGO</strong> model.<br />
[STORE PNT I 10000 10000 114+01.0 5280.1 *Control point*]<br />
[STORE LIN 3 THRU PNT 15 N71 57 82.3E]<br />
[STORE CUR 5 PC 51 PT 53 CC 52]<br />
[STORE SPIRAL 2 PB 10 PI 11 SL 190.0 PA 14 SDCB 0 0 0 SDCA 2 45 0.01<br />
[STORE ALI *PROJ* 101 102 CUR 15 103 CUR 17 110]<br />
[STORE TRAV *SURV* 100 101 102 103 104 105]<br />
[STORE TEXT *PROJ*<br />
LINE 1<br />
LINE 2<br />
LINE 3<br />
END TEXT]<br />
STATION Calculate the coordinates on or <strong>of</strong>fset from an alignment.<br />
[STATION ALI *PROJ* EVEN 25.01<br />
[STATION OFFSET ALI *RAMPA* FROM *CENTER* EVEN 25.01<br />
TRANSLATE Translates all coordinates in the <strong>COGO</strong> model by an indicated distance and direction. [ROTATE TABLES<br />
TRANSLATE TO PNT 10 ORIGIN AT 11<br />
TRAVERSE Creates a <strong>COGO</strong> traverse item.<br />
TRAVERSE *SURVI* REDEFINE PRINT<br />
BEGIN AT 101<br />
TO 102 490.12 N15 83 10.2E<br />
TO 103 1024.71 22 18 9.2<br />
TO 105 912.01 UNKNOWN APPROX 15 20 8<br />
END AT 101]<br />
161<br />
161
Index<br />
Alignment<br />
command, 82<br />
creating, 52<br />
defined, 7<br />
equation, 52, 83, 85<br />
layout command, 93<br />
<strong>of</strong>fset, 64<br />
station, 52<br />
storing, 51<br />
Angle<br />
command, 86<br />
Archive, 74, 86<br />
AutoCAD, 66, 67, 81<br />
DXF, 66<br />
functions, 78<br />
layer names, 67<br />
macros, 17<br />
Screen Pick, 79<br />
Azimuth<br />
command, 88<br />
definition, 21<br />
use, 22<br />
Bearing<br />
command, 88<br />
definition, 22<br />
use, 23<br />
<strong>Colorado</strong> DOT web site, 12<br />
Curve<br />
broken back, compound, 4<br />
complex, 6<br />
162<br />
162<br />
compound, 4<br />
creating in an alignment, 54<br />
divide command, 91<br />
dividing, 45<br />
layout command, 93<br />
menu, 42<br />
reversing, 4<br />
simple, 3<br />
storing, 43<br />
Curve point, 7, 30, 84<br />
Distance<br />
command, 89<br />
use, 21<br />
Eject<br />
command, 91<br />
Entering<br />
characters, 20<br />
directions, 21<br />
distances, 21<br />
numbers, 19<br />
stations, 24<br />
Equation, 83, 85, 116<br />
Executing <strong>COGO</strong><br />
in AutoCAD, 17<br />
in Windows, 16<br />
File<br />
archive, 74<br />
input, 71<br />
log, 72<br />
output, 73<br />
Saved Tables, 73
Installation Instructions, 10<br />
Line<br />
best fit, 41<br />
definition, 2<br />
divide, 37<br />
divide command, 90<br />
dividing, 40<br />
menu, 38<br />
segment, 2, 39<br />
definition, 2<br />
temporary, 3<br />
temporary, 39<br />
storing, 39<br />
Misc<br />
menu, 62<br />
MX, 66<br />
Halign, 68<br />
Parcel<br />
command, 109<br />
creating, 55<br />
defined, 9<br />
menu, 55<br />
PICS, 66<br />
Point<br />
copying, 26<br />
definition, 2<br />
deleting, 61<br />
listing, 59<br />
locate<br />
2 distances/2 points, 34<br />
angles from a line segment, 34<br />
at tangent to curve, 36<br />
curve tangency from a point, 36<br />
distance from point/point on a line, 35<br />
distance/direction, 27<br />
intersection, 33<br />
163<br />
163<br />
Line segment/direction, 27<br />
<strong>of</strong>fset, 30<br />
<strong>of</strong>fset from curve, 30<br />
projecting, 31<br />
station, 29<br />
report, 60<br />
storing, 26<br />
Point <strong>of</strong> Tangency, 3, 36<br />
Radians, 3<br />
Ray, 2<br />
RoadCalc, 66, 70, 123<br />
Rotate/translate, 65<br />
SDR, 68<br />
Set<br />
color, 77<br />
date, 118<br />
units, 64<br />
Total Area Register, 64<br />
Transit, 93<br />
Transition spiral, 5, 6<br />
Traverse<br />
adjusting, 50<br />
angle right, 49<br />
defined, 8<br />
distance/direction pairs, 47<br />
Least squares adjustment, 50, 81<br />
menu, 46<br />
store, 46<br />
Zenith angle<br />
definition, 23