
Create successful ePaper yourself
Turn your PDF publications into a flip-book with our unique Google optimized e-Paper software.
Thank you, and congratulations on your choice of the <strong>Roland</strong> D2 Groovebox.<br />
Before using this unit, carefully read the sections entitled: “USING THE UNIT SAFELY” (pp.<br />
2–3) and “IMPORTANT NOTES” (p. 4). These sections provide important information<br />
concerning the proper operation of the unit. Additionally, in order to feel assured that you have<br />
gained a good grasp of every feature provided by your new unit, Owner’s manual should be read<br />
in its entirety. The manual should be saved and kept on hand as a convenient reference.<br />
2<br />
Owner’s <strong>Manual</strong><br />
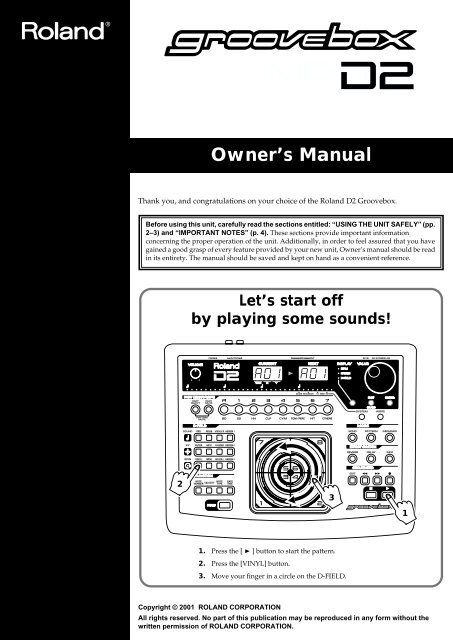
Let’s start off<br />
by playing some sounds!<br />
1. Press the [ ] button to start the pattern.<br />
2. Press the [VINYL] button.<br />
3. Move your finger in a circle on the D-FIELD.<br />
Copyright © 2001 ROLAND CORPORATION<br />
All rights reserved. No part of this publication may be reproduced in any form without the<br />
written permission of ROLAND CORPORATION.<br />
3<br />
1
USING THE UNIT SAFELY<br />
001<br />
• Before using this unit, make sure to read the<br />
instructions below, and the Owner’s <strong>Manual</strong>.<br />
..........................................................................................................<br />
002c<br />
• Do not open (or modify in any way) the unit or its<br />
AC adaptor.<br />
..........................................................................................................<br />
003<br />
• Do not attempt to repair the unit, or replace parts<br />
within it (except when this manual provides<br />
specific instructions directing you to do so). Refer<br />
all servicing to your retailer, the nearest <strong>Roland</strong><br />
Service Center, or an authorized <strong>Roland</strong><br />
distributor, as listed on the "Information" page.<br />
..........................................................................................................<br />
004<br />
• Never use or store the unit in places that are:<br />
• Subject to temperature extremes (e.g., direct<br />
sunlight in an enclosed vehicle, near a heating<br />
duct, on top of heat-generating equipment); or<br />
are<br />
• Damp (e.g., baths, washrooms, on wet floors);<br />
or are<br />
• Humid; or are<br />
• Exposed to rain; or are<br />
• Dusty; or are<br />
• Subject to high levels of vibration.<br />
..........................................................................................................<br />
2<br />
For the U.K.<br />
IMPORTANT: THE WIRES IN THIS MAINS LEAD ARE COLOURED IN ACCORDANCE WITH THE FOLLOWING CODE.<br />
BLUE:<br />
BROWN:<br />
NEUTRAL<br />
LIVE<br />
As the colours of the wires in the mains lead of this apparatus may not correspond with the coloured markings identifying<br />
the terminals in your plug, proceed as follows:<br />
The wire which is coloured BLUE must be connected to the terminal which is marked with the letter N or coloured BLACK.<br />
The wire which is coloured BROWN must be connected to the terminal which is marked with the letter L or coloured RED.<br />
Under no circumstances must either of the above wires be connected to the earth terminal of a three pin plug.<br />
Used for instructions intended to alert<br />
the user to the risk of death or severe<br />
injury should the unit be used<br />
improperly.<br />
Used for instructions intended to alert<br />
the user to the risk of injury or material<br />
damage should the unit be used<br />
improperly.<br />
* Material damage refers to damage or<br />
other adverse effects caused with<br />
respect to the home and all its<br />
furnishings, as well to domestic<br />
animals or pets.<br />
The symbol alerts the user to important instructions<br />
or warnings.The specific meaning of the symbol is<br />
determined by the design contained within the<br />
triangle. In the case of the symbol at left, it is used for<br />
general cautions, warnings, or alerts to danger.<br />
The symbol alerts the user to items that must never<br />
be carried out (are forbidden). The specific thing that<br />
must not be done is indicated by the design contained<br />
within the circle. In the case of the symbol at left, it<br />
means that the unit must never be disassembled.<br />
The ● symbol alerts the user to things that must be<br />
carried out. The specific thing that must be done is<br />
indicated by the design contained within the circle. In<br />
the case of the symbol at left, it means that the powercord<br />
plug must be unplugged from the outlet.<br />
007<br />
• Make sure you always have the unit placed so it is<br />
level and sure to remain stable. Never place it on<br />
stands that could wobble, or on inclined surfaces.<br />
..........................................................................................................<br />
008c<br />
• Be sure to use only the AC adaptor supplied with<br />
the unit. Also, make sure the line voltage at the<br />
installation matches the input voltage specified on<br />
the AC adaptor’s body. Other AC adaptors may<br />
use a different polarity, or be designed for a<br />
different voltage, so their use could result in<br />
damage, malfunction, or electric shock.<br />
..........................................................................................................<br />
009<br />
• Do not excessively twist or bend the power cord,<br />
nor place heavy objects on it. Doing so can<br />
damage the cord, producing severed elements and<br />
short circuits. Damaged cords are fire and shock<br />
hazards!<br />
..........................................................................................................<br />
010<br />
• This unit, either alone or in combination with an<br />
amplifier and headphones or speakers, may be<br />
capable of producing sound levels that could<br />
cause permanent hearing loss. Do not operate for<br />
a long period of time at a high volume level, or at<br />
a level that is uncomfortable. If you experience<br />
any hearing loss or ringing in the ears, you should<br />
immediately stop using the unit, and consult an<br />
audiologist.<br />
..........................................................................................................
011<br />
• Do not allow any objects (e.g., flammable material,<br />
coins, pins); or liquids of any kind (water, soft<br />
drinks, etc.) to penetrate the unit.<br />
..........................................................................................................<br />
012b<br />
• Immediately turn the power off, remove the AC<br />
adaptor from the outlet, and request servicing by<br />
your retailer, the nearest <strong>Roland</strong> Service Center, or<br />
an authorized <strong>Roland</strong> distributor, as listed on the<br />
"Information" page when:<br />
• The AC adaptor, the power-supply cord, or the<br />
plug has been damaged; or<br />
• Objects have fallen into, or liquid has been<br />
spilled onto the unit; or<br />
• The unit has been exposed to rain (or otherwise<br />
has become wet); or<br />
• The unit does not appear to operate normally or<br />
exhibits a marked change in performance.<br />
..........................................................................................................<br />
013<br />
• In households with small children, an adult<br />
should provide supervision until the child is<br />
capable of following all the rules essential for the<br />
safe operation of the unit.<br />
..........................................................................................................<br />
014<br />
• Protect the unit from strong impact.<br />
(Do not drop it!)<br />
..........................................................................................................<br />
015<br />
• Do not force the unit’s power-supply cord to share<br />
an outlet with an unreasonable number of other<br />
devices. Be especially careful when using<br />
extension cords—the total power used by all<br />
devices you have connected to the extension<br />
cord’s outlet must never exceed the power rating<br />
(watts/amperes) for the extension cord. Excessive<br />
loads can cause the insulation on the cord to heat<br />
up and eventually melt through.<br />
..........................................................................................................<br />
016<br />
• Before using the unit in a foreign country, consult<br />
with your retailer, the nearest <strong>Roland</strong> Service<br />
Center, or an authorized <strong>Roland</strong> distributor, as<br />
listed on the "Information" page.<br />
..........................................................................................................<br />
101b<br />
• The unit and the AC adaptor should be located so<br />
their location or position does not interfere with<br />
their proper ventilation.<br />
..........................................................................................................<br />
102d<br />
• Always grasp only the plug or the body of the AC<br />
adaptor when plugging into, or unplugging from,<br />
an outlet or this unit.<br />
..........................................................................................................<br />
103b<br />
• Whenever the unit is to remain unused for an<br />
extended period of time, disconnect the AC<br />
adaptor.<br />
..........................................................................................................<br />
104<br />
• Try to prevent cords and cables from becoming<br />
entangled. Also, all cords and cables should be<br />
placed so they are out of the reach of children.<br />
..........................................................................................................<br />
106<br />
• Never climb on top of, nor place heavy objects on<br />
the unit.<br />
..........................................................................................................<br />
107d<br />
• Never handle the AC adaptor body, or its plugs,<br />
with wet hands when plugging into, or<br />
unplugging from, an outlet or this unit.<br />
..........................................................................................................<br />
108b<br />
• Before moving the unit, disconnect the AC<br />
adaptor and all cords coming from external<br />
devices.<br />
..........................................................................................................<br />
109b<br />
• Before cleaning the unit, turn off the power and<br />
unplug the AC adaptor from the outlet (p. 11).<br />
..........................................................................................................<br />
110b<br />
• Whenever you suspect the possibility of lightning<br />
in your area, disconnect the AC adaptor from the<br />
outlet.<br />
..........................................................................................................<br />
3
4<br />
IMPORTANT NOTES<br />
291a<br />
In addition to the items listed under “USING THE UNIT SAFELY” on pages 2 and 3, please read and observe the following:<br />
Power Supply<br />
301<br />
• Do not use this unit on the same power circuit with any<br />
device that will generate line noise (such as an electric<br />
motor or variable lighting system).<br />
302<br />
• The AC adaptor will begin to generate heat after long<br />
hours of consecutive use. This is normal, and is not a<br />
cause for concern.<br />
307<br />
• Before connecting this unit to other devices, turn off the<br />
power to all units. This will help prevent malfunctions<br />
and/or damage to speakers or other devices.<br />
Placement<br />
352<br />
• This device may interfere with radio and television<br />
reception. Do not use this device in the vicinity of such<br />
receivers.<br />
354a<br />
• Do not expose the unit to direct sunlight, place it near<br />
devices that radiate heat, leave it inside an enclosed<br />
vehicle, or otherwise subject it to temperature extremes.<br />
Excessive heat can deform or discolor the unit.<br />
355<br />
• To avoid possible breakdown, do not use the unit in a wet<br />
area, such as an area exposed to rain or other moisture.<br />
Maintenance<br />
401a<br />
• For everyday cleaning wipe the unit with a soft, dry cloth<br />
or one that has been slightly dampened with water. To<br />
remove stubborn dirt, use a cloth impregnated with a<br />
mild, non-abrasive detergent. Afterwards, be sure to wipe<br />
the unit thoroughly with a soft, dry cloth.<br />
402<br />
• Never use benzine, thinners, alcohol or solvents of any<br />
kind, to avoid the possibility of discoloration and/or<br />
deformation.<br />
Additional Precautions<br />
551<br />
• Please be aware that the contents of memory can be<br />
irretrievably lost as a result of a malfunction, or the<br />
improper operation of the unit. To protect yourself against<br />
the risk of loosing important data, we recommend that<br />
you periodically save a backup copy of important data<br />
you have stored in the unit’s memory in another MIDI<br />
device (e.g., a sequencer).<br />
552<br />
• Unfortunately, it may be impossible to restore the contents<br />
of data that was stored in another MIDI device (e.g., a<br />
sequencer) once it has been lost. <strong>Roland</strong> Corporation<br />
assumes no liability concerning such loss of data.<br />
553<br />
• Use a reasonable amount of care when using the unit’s<br />
buttons, sliders, or other controls; and when using its jacks<br />
and connectors. Rough handling can lead to malfunctions.<br />
554<br />
• Never strike or apply strong pressure to the display.<br />
556<br />
• When connecting / disconnecting all cables, grasp the<br />
connector itself—never pull on the cable. This way you<br />
will avoid causing shorts, or damage to the cable’s<br />
internal elements.<br />
558a<br />
• To avoid disturbing your neighbors, try to keep the unit’s<br />
volume at reasonable levels. You may prefer to use<br />
headphones, so you do not need to be concerned about<br />
those around you (especially when it is late at night).<br />
559a<br />
• When you need to transport the unit, package it in the box<br />
(including padding) that it came in, if possible. Otherwise,<br />
you will need to use equivalent packaging materials.
Contents<br />
IMPORTANT NOTES ...............................................................................4<br />
Features of the D2...................................................................................8<br />
How to read this manual ........................................................................9<br />
Conventions in this manual........................................................................................................... 9<br />
Panel Descriptions/ Making Connections ..........................................10<br />
Top panel ................................................................................................................................................... 10<br />
Rear panel.................................................................................................................................................. 11<br />
Turning On/Off the Power..................................................................................................................... 11<br />
Chapter 1. An Overview of the D2 .......................................................12<br />
How the D2 is structured ........................................................................................................................ 12<br />
The sequencer section................................................................................................................... 12<br />
The sound generator section ....................................................................................................... 12<br />
About the D-FIELD....................................................................................................................... 12<br />
How characters and numerals are displayed.......................................................................................13<br />
Changing a value in large steps ............................................................................................................. 13<br />
Saving your settings................................................................................................................................. 13<br />
Restoring the factory settings (Factory Reset)...................................................................................... 14<br />
Chapter 2. Playing Patterns .................................................................15<br />
Basics of playing a pattern ...................................................................................................................... 15<br />
Indication of the pattern number................................................................................................15<br />
Selecting a pattern......................................................................................................................... 15<br />
Playing Back Patterns ................................................................................................................... 15<br />
Changing the BPM (tempo)......................................................................................................... 16<br />
Muting a part or rhythm tone ..................................................................................................... 16<br />
Selecting a sound (Patch/Rhythm set).................................................................................................. 18<br />
Saving a patch ........................................................................................................................................... 18<br />
Modifying the settings of each part (Part Edit).................................................................................... 19<br />
Saving a pattern ........................................................................................................................................ 20<br />
Chapter 3. About the D-FIELD .............................................................21<br />
What is the D-FIELD? .............................................................................................................................. 21<br />
Basic use of the D-FIELD......................................................................................................................... 22<br />
Selecting a function....................................................................................................................... 22<br />
Memorizing the location from which you released your finger (Hold) ............................... 22<br />
Setting the volume of SOUND mode......................................................................................... 22<br />
Changing the D-FIELD settings .................................................................................................. 22<br />
SOUND mode .......................................................................................................................................... 23<br />
Playing back a phrase (RPS: Realtime Phrase Sequence)........................................................ 23<br />
Improvising along with a chord progression (ADLIB) ........................................................... 24<br />
Applying special turntable-type effects (VINYL-FX: Vinyl Effects)...................................... 25<br />
Applying various muting effects (ASSIGN 1: MUTE-FX: Mute Effects) .............................. 25<br />
Playing arpeggios (ASSIGN 1: ARPEGGIATOR 1).................................................................. 26<br />
Playing arpeggios (ASSIGN 1: ARPEGGIATOR 2).................................................................. 27<br />
Table of STYLE/MOTIF/BEAT PATTERN ........................................................................................ 29<br />
Recalling a pattern (ASSIGN 1: PATTERN CALL).................................................................. 30<br />
Auditioning the sound of a patch (ASSIGN 1: PATCH PREVIEW)...................................... 31<br />
Playing a monophonic synth sound (ASSIGN 1: SOLO SYNTH) ......................................... 31<br />
Playing rhythm instruments / scales (ASSIGN 1: KEYBOARD PAD) ................................. 32<br />
XY mode .................................................................................................................................................... 33<br />
Changing the brightness of the sound/Adding character to the sound (FILTER) ............. 33<br />
Applying special effects to the sound (MFX)............................................................................ 33<br />
Changing the volume of the parts (X-FADER)......................................................................... 34<br />
5
6<br />
Contents<br />
Making the sound change over time (ASSIGN 2: ENVELOPE)............................................. 34<br />
Applying cyclic change to the sound (ASSIGN 2: LFO).......................................................... 36<br />
Changing the pitch or vibrato depth (ASSIGN 2: BENDER).................................................. 36<br />
Changing the rhythmic feel of a pattern (ASSIGN 2: QUANTIZE) ...................................... 37<br />
Changing the reverb depth (ASSIGN 2: REVERB)................................................................... 39<br />
Changing the delay depth (ASSIGN 2: DELAY) ...................................................................... 39<br />
Controlling an external MIDI device (ASSIGN 2: EXT CTRL: External Control) ............... 39<br />
SPIN mode ................................................................................................................................................ 40<br />
Changing the sound as on a turntable (VINYL)....................................................................... 40<br />
Changing the tempo (BPM)......................................................................................................... 40<br />
Sounding a snare roll (SD ROLL) ............................................................................................... 41<br />
Changing the number of notes that are sounded (ASSIGN 3: STEP MUTE)....................... 41<br />
Changing the stereo location of the sound (ASSIGN 3: PAN) ............................................... 41<br />
Chapter 4. Applying Effects to the Sound (Effects)...........................42<br />
Reverb ........................................................................................................................................................ 42<br />
Turning reverb on/off.................................................................................................................. 42<br />
Making detailed settings.............................................................................................................. 42<br />
Delay (Add echoes to the sound)........................................................................................................... 43<br />
Turning delay on/off.................................................................................................................... 43<br />
Making detailed settings.............................................................................................................. 43<br />
Multi-Effects (MFX).................................................................................................................................. 44<br />
Turning the multi-effects on/off................................................................................................. 44<br />
Making detailed settings.............................................................................................................. 44<br />
Chapter 5. Replacing phrases to create a different pattern (MEGAMIX)...58<br />
Replacing phrases..................................................................................................................................... 58<br />
Using D-FIELD for MEGAMIX................................................................................................... 58<br />
Saving the pattern you rearranged ........................................................................................................ 59<br />
Chapter 6. Creating an Original Pattern..............................................60<br />
Creating a pattern..................................................................................................................................... 60<br />
Recording as you perform (Realtime Recording)..................................................................... 60<br />
Inputting notes one by one (Step Recording) ........................................................................... 62<br />
Editing a pattern (Pattern Edit) .............................................................................................................. 65<br />
Basic procedure for pattern editing............................................................................................ 65<br />
Copying a pattern (Pattern Copy) .............................................................................................. 66<br />
Erasing unwanted data (Erase) ...................................................................................................67<br />
Deleting unwanted measures (Delete Measure) ...................................................................... 67<br />
Inserting blank measures (Insert Measure)............................................................................... 67<br />
Shifting the pitch (Transpose) ..................................................................................................... 67<br />
Changing the strength of the notes (Change Velocity)............................................................ 68<br />
Changing the note length (Change Gate Time) ........................................................................ 68<br />
Make fine adjustments in timing (Shift Clock) ......................................................................... 68<br />
Thinning out unnecessary data (Data Thin) ............................................................................. 68<br />
Creating a quantized pattern (Edit Quantize) .......................................................................... 68<br />
Saving a pattern............................................................................................................................. 68<br />
Chapter 7. Playing and Creating Songs..............................................69<br />
Playing a song ........................................................................................................................................... 69<br />
Creating a song (Song Recording) ......................................................................................................... 70<br />
Deleting an unwanted step (Step Delete) .................................................................................. 70<br />
Inserting a step (Step Insert)........................................................................................................ 71<br />
Editing a song (Song Edit)....................................................................................................................... 71<br />
Erasing a song (Song Clear)......................................................................................................... 71<br />
Copying a song (Song Copy)....................................................................................................... 72<br />
Saving a song ................................................................................................................................. 72
Contents<br />
Chapter 8. System Settings and MIDI Applications...........................73<br />
Making system settings (System)........................................................................................................... 73<br />
Sound generator settings ............................................................................................................. 73<br />
Sequencer settings......................................................................................................................... 74<br />
MIDI transmission settings.......................................................................................................... 76<br />
Table of Transmitted Data ........................................................................................................... 76<br />
MIDI reception settings................................................................................................................ 77<br />
Advanced Operation Using MIDI.......................................................................................................... 78<br />
About MIDI.................................................................................................................................... 78<br />
Using the D2 together with an external MIDI device.............................................................. 79<br />
Synchronization with an External MIDI Device....................................................................... 80<br />
Saving data on an external sequencer (Bulk Dump)................................................................ 81<br />
Troubleshooting....................................................................................82<br />
Error Message List................................................................................83<br />
Preset Patch List...................................................................................84<br />
Preset Rhythm Set List.........................................................................86<br />
Preset Pattern List ................................................................................92<br />
RPS Pattern List....................................................................................94<br />
RPS Set List...........................................................................................95<br />
Profiles of Pattern Composers ............................................................96<br />
Waveform List .......................................................................................97<br />
MIDI Implementation.............................................................................98<br />
Specifications......................................................................................110<br />
Index.....................................................................................................111<br />
7
8<br />
Features of the D2<br />
D-FIELD controller for total freedom of expression<br />
The newly developed “D-FIELD controller” is located in the center of the panel. Its three modes (SOUND/XY/SPIN) allow<br />
you to control phrases and sounds in a completely uninhibited way, simply by touching the controller, scratching it from top<br />
to bottom or side to side, or spinning it like a turntable, thus giving rise to performance possibilities that were unavailable<br />
until now.<br />
High-performance sound-synthesis engine<br />
For sound generation, the D2 features a high-performance synthesizer module equivalent to the one that’s in the MC-505. A<br />
rich assortment of parameters, including precision filters and ADSR-type envelopes, can be controlled by the D-FIELD<br />
controller to create new sounds. The D2 can also be used as an eight-part multitimbral sound module.<br />
The latest patterns and sounds put you at the forefront of most any scene<br />
The built-in 157 preset patterns and the 232 patterns for use with RPS (original patterns and single-track data extracted from<br />
the preset patterns) cover styles including techno, house, and hip-hop, and are ready for immediate use. The D2 is all you<br />
need to take care of most styles. In addition, 600 sounds and 30 rhythm sets indispensable for dance music have been<br />
carefully selected from classic instruments such as the TB-303, TR-808/909, JUNO, and JUPITER, letting you use the sounds<br />
that match your music scene. Original sounds and patterns that you yourself create can also be saved in internal memory and<br />
recalled at any time.<br />
MEGAMIX function lets you create original patterns in remix fashion<br />
The D2 comes equipped with a newly enhanced version of the MEGAMIX function, which was so popular on the MC-505.<br />
You can create original patterns by recalling and mixing phrases from different parts, such as drums and bass. Using the D-<br />
FIELD controller or the VALUE dial, patterns can be created quickly and easily.<br />
New type of step recording<br />
The D2 features a new feel in step recording. Use the 32 indicators on the panel to specify the input point, and use the REC<br />
FUNCTION section and the D-FIELD controller to instantly edit that point. It’s easier than ever before to create original<br />
patterns from scratch. In addition, D-FIELD recording allows operations of the D-FIELD controller to be recorded exactly as<br />
performed, and you can also perform realtime recording using an external keyboard or other MIDI source.
How to read this manual<br />
The D2 manual is structured as follows.<br />
Chapter 1. An Overview of the D2<br />
This chapter explains how the D2 sound generator and sequencer are organized, and explains the basic operation. By reading<br />
this chapter, you can gain an overall understanding of the D2.<br />
Chapter 2. Playing Patterns<br />
This chapter explains the most basic operations used with the D2: how to play patterns, adjust the tempo, and mute sounds.<br />
Be sure to read this chapter.<br />
Chapter 3. Using the D-FIELD Controller<br />
This chapter explains how to use the D-FIELD controller. Be sure to read this chapter.<br />
Chapter 4. Applying Effects to the Sound (Effects)<br />
This chapter explains the various effect types and how to use them. Read this chapter when you wish to use the arpeggiator.<br />
Chapter 5. Replacing Phrases to Create a New Pattern (MEGAMIX)<br />
This chapter explains how to use MEGAMIX to replace phrases within a pattern. Read this chapter when you wish to use<br />
MEGAMIX to create patterns.<br />
Chapter 6. Creating an Original Pattern<br />
This chapter explains how to use the RPS functions and how to assign your own phrases. Read this chapter when you wish to<br />
use the RPS function.<br />
Chapter 7. Playing and Creating Songs<br />
This chapter explains how to play, record, and edit songs. Be sure to read this chapter when you wish to use songs.<br />
Chapter 8. System Settings and MIDI Applications<br />
This chapter explains settings that affect the entire D2, such as tuning and synchronization, and how to use the D2 together<br />
with external MIDI devices. Read this chapter as necessary.<br />
Appendices<br />
Consult this chapter when the D2 does not function as you expect, or if an error message is displayed. This chapter also<br />
contains information such as parameter lists and the MIDI implementation.<br />
Conventions in this manual<br />
In this manual, text or symbols enclosed in square brackets [ ] indicate buttons or dials on the panel.<br />
(Example) [EDIT]: Edit button<br />
9<br />
Chapter 1<br />
Chapter 2<br />
Chapter 3<br />
Chapter 4<br />
Chapter 5<br />
Chapter 6<br />
Chapter 7<br />
Chapter 8<br />
Appendices
10<br />
Panel Descriptions/ Making Connections<br />
Top panel<br />
5<br />
6<br />
1. VOLUME knob<br />
This knob adjusts the volume of the entire D2.<br />
1 2 3 4<br />
2. Beat scan indicators<br />
These indicators show the playback/recording location<br />
within the measure of the pattern or song.<br />
3. DISPLAY button<br />
This switches the display. Each time you press the<br />
button, the display will alternate between BPM, patch<br />
number, information regarding the D-FIELD, and the<br />
original screen (such as the pattern number display).<br />
4. VALUE dial, ENTER/EXIT button<br />
These are used to switch patterns or songs (p. 15, p. 69),<br />
or to modify settings.<br />
5. Part buttons<br />
These are used to select whether each part will be heard<br />
(p. 16), or to select the part whose settings you wish to<br />
edit (p. 19).<br />
6. REC FUNCTION buttons<br />
When recording a pattern, these buttons are used to<br />
make settings for the notes being input (p. 63).<br />
7<br />
8<br />
9<br />
10<br />
11<br />
12<br />
7. D-FIELD<br />
You can produce a variety of effects by touching this<br />
area with your finger (p. 21).<br />
8. WRITE button<br />
Use this to save settings you have modified.<br />
9. SYSTEM button<br />
Use this when you wish to modify settings that affect the<br />
entire D2 (p. 73).<br />
10. Mode buttons<br />
These buttons switch between Pattern mode (p. 15), Song<br />
mode (p. 69), and MEGAMIX mode (p. 58).<br />
11. Effect switches<br />
These are on/off switches for Reverb (p. 42), Delay (p.<br />
43), and Multi-effect (p. 44).<br />
12. Sequencer section<br />
These buttons are used to play back or record a pattern<br />
or song (p. 15, p. 69).
Rear panel<br />
Panel Descriptions/ Making Connections<br />
* To prevent malfunction and/or damage to speakers or other devices, always turn down the volume, and turn off the power on all devices<br />
before making any connections.<br />
1. POWER switch<br />
This turns the power on/off.<br />
2. AC adaptor jack<br />
Connect the supplied AC adaptor to this jack.<br />
* To prevent the inadvertent disruption of power to your unit<br />
(should the plug be pulled out accidentally), and to avoid<br />
applying undue stress to the AC adaptor jack, anchor the<br />
power cord using the cord hook, as shown in the illustration.<br />
3. MIDI connectors (IN, OUT)<br />
These connectors are used when you want to use the D2<br />
to play external sound generating devices, or use an<br />
external sequencer to play the D2’s sound generator; or<br />
Turning On/Off the Power<br />
* Once the connections have been completed, turn on power to<br />
your various devices in the order specified. By turning on<br />
devices in the wrong order, you risk causing malfunction and/<br />
or damage to speakers and other devices.<br />
1. Make sure that all volume controls on the D2 and<br />
connected devices are set to “0.”<br />
2. Turn on the D2’s [POWER] switch.<br />
3. Turn on the device connected to the OUTPUT Jacks.<br />
4. Adjust the volume levels for the devices.<br />
1 2 3 4 5 6<br />
AC Adaptor<br />
Cord hook<br />
To Mixer, Amplifier<br />
when you want to save or load D2 settings.<br />
* For details concerning MIDI devices, refer to Chapter 8.<br />
System Settings and MIDI Applications (p. 73).<br />
4. OUTPUT jacks (L, R)<br />
Connect these jacks to your mixer or amp.<br />
5. Headphone jack<br />
This jack accepts connection of a set of stereo<br />
headphones. Sound will still be output from the<br />
OUTPUT jacks even while headphones are connected.<br />
6. Security Slot ( )<br />
http://www.kensington.com/<br />
* This unit is equipped with a protection circuit. A brief interval<br />
(a few seconds) after power up is required before the unit will<br />
operate normally.<br />
Turning off the power<br />
Stereo Headphones<br />
Before switching off the power, lower the volume on each of<br />
the devices in your system and then TURN OFF the devices<br />
in the reverse order to which they were switched on.<br />
11
12<br />
Chapter 1. An Overview of the D2<br />
How the D2 is structured<br />
This section explains the main sections of the D2: the<br />
sequencer section, sound generator section, and the D-<br />
FIELD.<br />
SEQUENCER<br />
Recording<br />
Play<br />
D-FIELD Controller<br />
The sequencer section<br />
A sequencer is a device that records musical performance<br />
data, and can play back the performance data that was<br />
recorded.<br />
Recording/playing a performance<br />
The D2 comes with 157 previously prepared patterns<br />
(preset patterns). These preset patterns can be played<br />
back easily.<br />
You can also create your own original patterns, either by<br />
modifying preset patterns or by creating a pattern from<br />
scratch.<br />
Simultaneous playback of multiple parts<br />
The D2 is able to play multiple sounds (patches)<br />
simultaneously. For example, with the following part<br />
configuration, you can simultaneously play drums, bass,<br />
piano and guitar; and the resulting performance will<br />
sound like a band.<br />
Editing performance data<br />
SOUND<br />
GENERATOR<br />
Performance<br />
Part R Rhythm (Drum) Set<br />
Part 1 Guitar<br />
Part 2 Bass<br />
Part 3 Piano<br />
Unlike a cassette tape or MD, a sequencer records a<br />
performance as musical data (not as sound). It’s easy to<br />
edit the performance data to create your own original<br />
patterns.<br />
The sound generator section<br />
The sound generator is what actually produces the sound.<br />
The sounds are generated in accord with information<br />
arriving from the D2’s D-FIELD and sequencer. Performance<br />
data from an external MIDI device can also play the sound<br />
generator.<br />
The sound generator of the D2 is able to produce up to 64<br />
notes simultaneously, more than enough for playing<br />
multiple parts at once.<br />
Patches<br />
A patch is analogous to a particular instrument, such as<br />
a piano or guitar. The D2 contains 600 preset patches,<br />
and you can enjoy virtually any type of sound simply by<br />
selecting one of these patches.<br />
Rhythm Sets<br />
A rhythm set has a different instrument assigned to each<br />
note. It is not possible to play scales using any one<br />
instrument. 30 different preset rhythm sets are provided.<br />
(Example)<br />
Parts<br />
A part is analogous to an individual musician in a band<br />
or orchestra. There are eight parts, [R], [1]... [7], allowing<br />
you to use seven patches and one rhythm set to play a<br />
total of up to eight performances simultaneously.<br />
Effects<br />
KICK<br />
SNARE<br />
The D2 provides three effect processors that can be used<br />
to apply various tonal effects to a patch or rhythm set:<br />
Reverb (reverberation), Delay (echo-like effects), and<br />
Multi-effects (choose from 25 effects such as equalizer or<br />
compressor). All three effect processors can be used<br />
simultaneously.<br />
About the D-FIELD<br />
HI-HAT CRASH<br />
TOM<br />
The D-FIELD is a controller on the panel of the D2. By<br />
operating the D-FIELD in real time, you can modify the<br />
performance, or the way in which the sounds are heard. This<br />
can also be used when playing RPS or the arpeggiator (pp.<br />
21–41).
How characters and<br />
numerals are displayed<br />
The display of the D2 indicates characters and numbers as<br />
follows.<br />
Capital<br />
letters<br />
Small<br />
letters<br />
Capital<br />
letters<br />
Small<br />
letters<br />
A<br />
B C D E F G H I J K L M N<br />
O P Q R S T U V W X Y Z<br />
1 2 3 4 5 6 7 8 9 0<br />
Changing a value in large steps<br />
If you hold down [DISPLAY] and turn [VALUE], the value<br />
will change in large steps.<br />
If you do this when selecting a patch (p. 18), the first patch of<br />
the category (type of sound) will be selected.<br />
Hold down Turn<br />
When selecting a pattern (p. 15) or patch (p. 18), you can hold<br />
down [EXIT] and turn [VALUE] to switch banks.<br />
Hold down Turn<br />
Chapter 1. An Overview of the D2<br />
Saving your settings<br />
After you modify settings or record a performance, you must<br />
perform the Save procedure if you wish to keep the results. If<br />
you turn off the power without doing this, your settings or<br />
the recorded contents will be lost.<br />
For details on saving, refer to the following pages.<br />
• Patch ➔ Saving a patch (p. 18)<br />
• Pattern ➔ Saving a pattern (p. 20)<br />
• Song ➔ Saving a song (p. 72)<br />
• Arpeggio style ➔ Step 4 of “Making detailed settings“ in<br />
Playing arpeggios (ASSIGN 1: ARPEGGIATOR 1) (p.<br />
26)<br />
It will take several seconds for the data to be saved. Do not<br />
turn off the power until the Save operation has been<br />
completed. Doing so may cause malfunctions.<br />
Since the following settings are saved<br />
automatically when they are modified, you do<br />
not need to perform the Save operation.<br />
• RPS set ➔ Assigning phrases to the D-FIELD (p. 23)<br />
• Pattern set ➔ Assigning patterns to the D-FIELD (p.<br />
30)<br />
• MEGAMIX set ➔ Registering the parts for use with<br />
MEGAMIX (MEGAMIX Set) (p. 30)<br />
It will take several seconds for the data to be saved. Do not<br />
turn off the power until the Save operation has been<br />
completed. Doing so may cause malfunctions.<br />
13<br />
Chapter 1
Chapter 1. An Overview of the D2<br />
Restoring the factory settings<br />
(Factory Reset)<br />
The settings of the D2 can be restored to their factory-set<br />
condition.<br />
Approximately 2 minutes are required for the Factory<br />
Reset operation.<br />
Never turn off the power while the display indicates<br />
“Factry.” Doing so can destroy the contents of memory.<br />
When you execute the Factory Reset operation, the<br />
internal memory data will be lost. If you have any data<br />
in the D2’s internal memory that you don’t want to lose,<br />
you must first use the Bulk Dump (p. 81) operation to<br />
save the data on an external MIDI sequencer or similar<br />
device before you perform the reset.<br />
1. Hold down [WRITE] and press [SYSTEM].<br />
“Factry” will blink in the display.<br />
2. Press [ENTER].<br />
The display will ask “SurE” (are you sure you want to<br />
proceed with the reset?).<br />
3. Press [ENTER].<br />
The display will indicate “Factry,” and the Factory Reset<br />
operation will be executed.<br />
* If you decide not to execute the operation, press [EXIT].<br />
Once the Factory Reset is complete, the D2 will be in the<br />
same state as it is normally after being powered-up.<br />
14
Chapter 2. Playing Patterns<br />
Basics of playing a pattern<br />
A pattern consists of 1 to 32 measures of play that include<br />
patches and rhythm sets of up to 8 parts.<br />
The D2 is a sequencer that plays back patterns and adds<br />
changes to the playback method. This type of sequencer is<br />
referred to as a pattern sequencer.<br />
The D2 is provided with 157 preset patterns. In addition to<br />
these, an area for up to 100 user-created patterns is also<br />
available.<br />
In order to play patterns, press [PATTERN] to<br />
put the D2 in Pattern mode.<br />
Indication of the pattern number<br />
fig.<br />
The CURRENT display (left) shows the bank and number of<br />
the pattern that’s currently playing (the current pattern).<br />
The NEXT display (right) shows the bank and number of the<br />
pattern that will be played next (the next pattern).<br />
Selecting a pattern<br />
Turn [VALUE] to select a pattern, while a<br />
pattern stops.<br />
• By holding down [DISPLAY] and turning [VALUE] you<br />
can change the pattern number in steps of ten.<br />
• By holding down [EXIT] and turning [VALUE] you can<br />
switch banks.<br />
–<br />
A01–A100 Preset Pattern (Bank A)<br />
–<br />
B01–B100 Preset Pattern (Bank B)<br />
–<br />
C01–C100 Preset Pattern (Bank C)<br />
–<br />
D01–D89 Preset Pattern (Bank D)<br />
–<br />
U01–U100 User Pattern<br />
* Preset patterns B58–D89 are patterns for use with RPS (p.<br />
23).<br />
Playing Back Patterns<br />
Use the following buttons to play back.<br />
Return to the<br />
previous measure.<br />
Advance to the<br />
next measure.<br />
Stop the sequencer.<br />
Play back.<br />
* [ ], [ ] buttons can also be used while playback is in<br />
progress.<br />
If you select the D-FIELD function “VINYL” (p. 40), it will<br />
not be possible to use [ ] and [ ].<br />
Playing back patterns in succession<br />
Selecting the next pattern while a pattern is being played<br />
back, the new pattern is played back when playback of the<br />
current one is completed.<br />
This technique is used to keep playing back patterns in<br />
sequence. The BPM (tempo) of the performance is<br />
determined by the tempo of the first Pattern that is played<br />
back.<br />
1. While a pattern is playing back, turn [VALUE] to<br />
select the next pattern.<br />
The NEXT display will begin flashing.<br />
Use in recording.<br />
2. Press [ENTER] to confirm your selection.<br />
The NEXT readout will change from flashing to steady.<br />
When the current pattern finishes playing, the selected<br />
pattern will begin playing.<br />
* Immediately before the pattern finishes playing, the<br />
CURRENT readout will begin flashing. During this time,<br />
preparations are being made for moving to the next pattern, so<br />
it is not possible to change the pattern.<br />
15<br />
Chapter 2
Chapter 2. Playing Patterns<br />
Playing Back at the Tempo Set for the<br />
Pattern<br />
In order to play back patterns at the BPM (standard tempo)<br />
set up for the respective patterns, select a pattern while no<br />
pattern is being played back, then start playback.This secures<br />
playback at the optimal BPM for the pattern.<br />
Changing the BPM (tempo)<br />
The BPM can be set to any value from 20.0 up to 240.0.<br />
For some preset patterns, raising the BPM excessively can<br />
cause the playback to lag.<br />
Using the VALUE dial to change the<br />
BPM<br />
Playback can be set to take place at any desired BPM value.<br />
This is convenient when you want to carry out playback at a<br />
known BPM.<br />
1. Press [DISPLAY] enough times to get the BPM<br />
indicator to light.<br />
2. Turn [VALUE] to change the BPM.<br />
• By holding down [DISPLAY] and turning [VALUE] you<br />
can change the BPM in steps of one.<br />
3. After you have finished making the setting, press<br />
[EXIT] to return to the previous display.<br />
Using the D-FIELD to change the BPM<br />
You can use the D-FIELD to set the BPM. This method lets<br />
you set the BPM using your own sense of rhythm, even if<br />
you do not know the numerical value (p. 40).<br />
16<br />
Muting a part or rhythm tone<br />
The part button indicators show the mute status of each<br />
part (rhythm instrument) as follows:<br />
• Lit: The part will play.<br />
• Blinking: The part is muted.<br />
• Dark: No performance has been recorded for the<br />
part.<br />
(This will light when data is recorded for the part.)<br />
Muting an individual part<br />
Parts R and 1–7 can be muted (silenced) individually.<br />
1. Press [PART MUTE].<br />
[PART MUTE] will light, and part buttons [R] and [1]–[7]<br />
will function as Part Mute buttons.<br />
2. Press the [R] or [1]–[7] button for the part that you<br />
wish to mute, making the indicator blink.<br />
The sound of that part will be muted.<br />
3. To cancel muting, once again press the button of the<br />
muted part, making it light.<br />
* In the preset patterns, part 1 does not contain performance<br />
data. This allows you to conveniently use D-FIELD (p. 24) to<br />
perform along with the pattern.<br />
* Since the RPS preset patterns are for use with RPS, they<br />
contain performance data only for part 1 (or part R).<br />
* You can change the mute status of each part and save the<br />
pattern as a user pattern (p. 20).
Muting individual rhythm sounds<br />
The instruments used within part R can be muted (silenced)<br />
individually. A certain category of instrument, such as bass<br />
drum (BD) or snare drum (SD) can be muted as a group.<br />
1. Simultaneously press [PART SELECT] and [PART<br />
MUTE].<br />
[PART SELECT] and [PART MUTE] will light, and part<br />
buttons [R] and [1]–[7] will function as Rhythm Tone<br />
Mute buttons ([BD]–[OTHERS]).<br />
2. Press the [BD]–[OTHERS] button for the part that you<br />
wish to mute, making the indicator blink.<br />
The corresponding rhythm instrument will be muted.<br />
3. To cancel muting, once again press the button of the<br />
muted part, making it light.<br />
Association of rhythm groups and buttons for muting<br />
them<br />
• BD: Bass Drum<br />
• SD: Snare Drum<br />
• HH: Hi-Hat<br />
• CLP: Hand Claps<br />
• CYM: Cymbal<br />
• TOM/PERC: TomTom/Percussion<br />
• HIT: hit such as a one-shot SFX sound.<br />
• OTHERS: Other instruments<br />
* If you would like to know which instrument is muted by<br />
muting a particular rhythm group?<br />
➔ Preset Rhythm Set List (p. 86)<br />
* Using the part muting function to mute Part R mute all<br />
rhythm tones regardless of the settings for respective rhythm<br />
tones.<br />
Chapter 2. Playing Patterns<br />
Applying the mute status to the next<br />
pattern as well (Mute Remain)<br />
This operation is used to maintain the muting mode for<br />
playing back the next part. It is useful, for example, to play<br />
back the next pattern with the rhythm track muted by<br />
maintaining the current setting.<br />
1. Hold down [PART MUTE] and press [HOLD].<br />
[PART MUTE] will begin flashing.<br />
* If you once again hold down [PART MUTE] and press<br />
[HOLD], this function will be cancelled.<br />
2. Turn [VALUE] to select the next pattern.<br />
After a time, the newly selected pattern will begin<br />
playing, using the current Part Mute settings.<br />
* Mute Remain will be cancelled automatically.<br />
Using D-FIELD to mute<br />
By using D-FIELD you can perform the following mute<br />
operations (p. 25).<br />
• Mute all parts at once<br />
• Put only one specific part in playback mode<br />
• Reverse the status of muted parts versus playing parts<br />
• Fade in/out only a specific part<br />
• Fade in/out all parts<br />
• Put only the bass drum and bass in playback mode<br />
17<br />
Chapter 2
Chapter 2. Playing Patterns<br />
Selecting a sound<br />
(Patch/Rhythm set)<br />
The D2’s Patterns are composed of up to eight Parts, and<br />
different Patches (Part1 - 7: Patches, Part R = Rhythm set) can<br />
be selected for each Part. To change tones, first select the<br />
desired Part.<br />
First, specify the part for which you will select a patch.<br />
1. Press [PART SELECT].<br />
The part button of the currently selected part (the<br />
current part) will light.<br />
2. Press the part button ([R] or [1]–[7]) of the part<br />
whose patch you wish to change.<br />
The part of the button you pressed will become the<br />
current part, and that part button will light.<br />
Select a patch.<br />
3. Press [DISPLAY] enough times to get the PATCH<br />
indicator to light.<br />
4. Turn [VALUE] to select the desired patch.<br />
• By holding down [DISPLAY] and turning [VALUE] you<br />
can change the patch (or rhythm set) in units of ten.<br />
• By holding down [EXIT] and turning [VALUE] you can<br />
switch banks.<br />
5. After you have finished making the setting, press<br />
[EXIT] to return to the previous display.<br />
Part R<br />
R-A 01–26<br />
–<br />
Preset Rhythm Set (Bank A)<br />
R-B 01–04 Preset Rhythm Set (Bank B)<br />
R-U 01–20 User Rhythm Set<br />
Part 1–7<br />
P-A 001–128<br />
–<br />
Preset Patch (Bank A)<br />
P-B 001–128 Preset Patch (Bank B)<br />
P-C 001–128 Preset Patch (Bank C)<br />
P-D 001–128 Preset Patch (Bank D)<br />
P-E 001–088 Preset Patch (Bank E)<br />
P-U 001–256 User Patch<br />
18<br />
Saving a patch<br />
Here’s how the sound you modified by using D-FIELD filter<br />
(p. 33), envelope (p. 34), and LFO (p. 36) operations can be<br />
saved as a patch.<br />
1. Press [DISPLAY] to access the patch select screen.<br />
2. Modify the sound parameters.<br />
3. Press [WRITE].<br />
A screen will appear in which you can specify the save<br />
destination patch.<br />
4. Turn [VALUE] to select the save destination patch.<br />
The settings will be saved in the patch you select here.<br />
The previously-saved patch will be erased, so be careful<br />
when making this selection.<br />
5. Press [ENTER].<br />
The display will ask “SurE” (are you sure you want to<br />
save?).<br />
6. If you wish to save, press [ENTER].<br />
* If you decide not to save, press [EXIT].<br />
If you select another patch or turn off the power without<br />
saving the patch you edited, your edits will be lost.
Modifying the settings of each part (Part Edit)<br />
You can modify the settings of each part to change the way in which the pattern is sounded.<br />
First specify the part whose settings you wish to modify.<br />
1. Press [PART SELECT].<br />
The part button of the currently selected part (the current part) will light.<br />
2. Press the part button ([R] or [1]–[7]) of the part whose settings you wish to modify.<br />
The part whose button you pressed will become the current part, and the part button will light.<br />
Modify the settings.<br />
3. Hold down [PART SELECT] and press [EDIT].<br />
4. Press [ENTER] to select a parameter.<br />
The parameter will change each time you press [ENTER].<br />
LEVEL ➔ PAN ➔ KEY SHIFT ➔ REVERB ➔ DELAY ➔ MFX SW ➔ SEQ OUT ➔ LEVEL ➔ …<br />
5. Turn [VALUE] to modify the setting.<br />
6. When you are finished, press [EXIT].<br />
Indication Parameter Explanation Value<br />
LEVEL<br />
(Part Level)<br />
Set the volume of the part. 0 – 127<br />
PAN<br />
(Part Pan)<br />
KEY SHIFT<br />
(Part Key Shift)<br />
REVERB<br />
(Part Reverb Level)<br />
DELAY<br />
(Part Delay Level)<br />
MFX SW<br />
(Part MFX switch)<br />
SEQ OUT<br />
(Sequencer Output Assign)<br />
Set the left/right position of the<br />
part.<br />
Chapter 2. Playing Patterns<br />
L64 – 0 – R63<br />
Set the transposition of the part. -48 – 0 – 48<br />
Set the amount of reverb for the<br />
part.<br />
Set the amount of delay for the<br />
part.<br />
Determines whether the multi-effect<br />
will be used for the part.<br />
* You can also set this using the<br />
D-FIELD function button<br />
[MFX] and the part button [R]<br />
or [1]–[7] (p. 33).<br />
Specify the output destination<br />
from the sequencer to the sound<br />
source.<br />
0 – 127<br />
0 – 127<br />
OFF, ON, RHY<br />
* RHY can be set only for the rhythm part. If<br />
you specify RHY, the multi-effect will be<br />
applied according to the settings of each tone<br />
in the rhythm set. If you select ON for the<br />
rhythm part, the multi-effect will apply to all<br />
tones.<br />
INT: Output to the internal sound generator.<br />
EXT: Output to the MIDI OUT connector.<br />
BOTH: Output to both of the above simultaneously.<br />
19<br />
Chapter 2
Chapter 2. Playing Patterns<br />
Saving a pattern<br />
When you have made the settings for setup parameter, save<br />
the pattern as a user pattern.<br />
If you edit another pattern, switch to Song mode, or turn off<br />
the power without saving the pattern you recorded or edited,<br />
your edits will be lost.<br />
* For a pattern to be saved, pattern playback must be stopped.<br />
1. Press [PATTERN] to enter Pattern mode.<br />
2. Press [WRITE].<br />
A screen will appear, allowing you to specify the savedestination<br />
pattern.<br />
3. Turn [VALUE] to select the save-destination pattern.<br />
The data will be saved to the pattern you select here.<br />
Make your selection carefully, since the pattern that was<br />
previously saved in this location will be erased.<br />
4. Press [ENTER].<br />
The display will ask “SurE” (are you sure you want to<br />
proceed with the save?).<br />
5. To save the pattern, press [ENTER].<br />
* To cancel without saving, press [EXIT].<br />
20<br />
Setup Parameters<br />
On the D2, the following parameters are saved for each<br />
pattern. These parameters are collectively referred to as<br />
the “Setup parameters.”<br />
- Standard Tempo (p. 16)<br />
- Patch/Rhythm Set * (p. 18)<br />
- Part LEVEL * (p. 19)<br />
- Part PAN * (p. 19)<br />
- Part KEY SHIFT* (p. 19)<br />
- Part REVERB LEVEL * (p. 19)<br />
- Part DELAY LEVEL * (p. 19)<br />
- Part MFX SWITCH * (p. 19)<br />
- SEQ OUT * (p. 19)<br />
- REVERB settings (p. 42)<br />
- DELAY settings (p. 43)<br />
- MFX settings (p. 44)<br />
- Part Mute status * (p. 16)<br />
- Rhythm Mute status (p. 17)<br />
The “*” indicates parameters that are set independently<br />
for each part.
Chapter 3. About the D-FIELD<br />
What is the D-FIELD?<br />
The D-FIELD is a controller that lets you produce various effects by touching the surface of the controller with your finger. The<br />
effect can be controlled by the location of your touch, or by how you move your finger.<br />
Broadly speaking, there are three ways to use the D-FIELD.<br />
SOUND mode<br />
By pressing on the eight areas of the D-FIELD, or by rubbing the surface of the D-FIELD up/down/left/right, you can play back<br />
phrases or play sounds.<br />
fig.3-01<br />
•RPS (Realtime Phrase Sequence)<br />
Play phrases by pressing on the eight areas of the D-FIELD.<br />
•ADLIB (Ad-lib)<br />
Play solos or arpeggios.<br />
•VINYL-FX (Vinyl effects)<br />
Produce effects, such as backspin, which are perfect for DJ work.<br />
•ASSIGN 1<br />
Control muting and play arpeggios.<br />
XY mode<br />
By rubbing the surface of the D-FIELD up/down/left/right, you can control two parameters simultaneously to modify the sound.<br />
fig.3-02<br />
•FILTER<br />
Simultaneously control the cutoff frequency and resonance to modify the sound.<br />
•MFX (Multi-effects)<br />
Control the effect parameters to modify the sound.<br />
•X-FADER (Crossfader)<br />
Crossfade between two desired parts of the pattern.<br />
•ASSIGN 2<br />
Control the pitch, timbre, or volume of the sound, or the rhythmic feel of the pattern.<br />
SPIN mode<br />
By moving your finger in a circle over the surface of the D-FIELD you can control how the pattern sounds in a manner similar to<br />
when manually spinning a turntable.<br />
fig.3-03<br />
•VINYL<br />
Just as on a turntable, you can make the pattern play forward, backward, or stop.<br />
•BPM<br />
Control the BPM (tempo).<br />
•SD ROLL (Snare drum roll)<br />
Control the speed of the snare roll.<br />
•ASSIGN 3<br />
You can control things such as Step Mute and Pan (stereo location).<br />
• When touching the D-FIELD, you must use only one finger and touch only one location. If you touch two or more locations, the controller<br />
will determine that you touched a point between those locations.<br />
• If you press too hard on the edge of the D-FIELD, the location of your finger may not be recognized properly.<br />
• Do not poke the surface of the D-FIELD with a sharp object. Doing so will cause malfunctions.<br />
21<br />
Chapter 3
Chapter 3. About the D-FIELD<br />
Basic use of the D-FIELD<br />
Selecting a function<br />
1. Of the D-FIELD function buttons [RPS]–[ASSIGN 3],<br />
press the button for the desired function to make its<br />
indicator light.<br />
The function of the illuminated button will be selected.<br />
2. For [ASSIGN 1–3], hold down the button and turn<br />
[VALUE] to select the desired function.<br />
Functions that can be selected for [ASSIGN 1]<br />
22<br />
Mute effect<br />
Arpeggiator 1<br />
Arpeggiator 2<br />
Pattern Call<br />
Patch Preview<br />
Solo Synth<br />
Keyboard Pad<br />
Functions that can be selected for [ASSIGN 2]<br />
Envelope<br />
LFO<br />
Bender<br />
Quantize<br />
Reverb<br />
Delay<br />
External Control<br />
Functions that can be selected for [ASSIGN 3]<br />
Step Mute<br />
Pan<br />
* For details on each function, refer to pp. 25–41.<br />
Memorizing the location from which<br />
you released your finger (Hold)<br />
If you press [HOLD] to make it light, you can take your<br />
finger off of the D-FIELD and the effect will continue as if<br />
you were still pressing at that location.<br />
If you press [HOLD] once again to make it go dark, the effect<br />
will change as though you had taken your finger off of the D-<br />
FIELD.<br />
This is convenient when you want to use RPS to keep a<br />
phrase sounding, or when you want to sustain a sound that<br />
is being modified by filter or MFX.<br />
There are some functions for which Hold cannot be used. If<br />
such a function is selected, pressing [HOLD] will not make it<br />
light.<br />
When used in conjunction with RPS, there are some cases in<br />
which [HOLD] will blink. For details refer to “Holding RPS”<br />
(p. 23).<br />
Setting the volume of SOUND<br />
mode<br />
1. Hold down the REC FUNCTION button [VELOCITY]<br />
and turn [VALUE].<br />
You can use [ADLIB] and [ASSIGN 1(AP1, AP2, PRV,<br />
PAD)] to specify the velocity of the sound that will be<br />
played.<br />
Values: 1–127<br />
Changing the D-FIELD settings<br />
1. Press and hold the D-FIELD function button [RPS]–<br />
[ASSIGN 3] whose settings you wish to change.<br />
The parameter will be displayed.<br />
2. Turn [VALUE] to modify the setting.<br />
* For [ASSIGN 1–3], this will be the selection of function.<br />
* The VINYL-FX setting is fixed, and turning [VALUE] will<br />
not change it.<br />
For [ADLIB], [ASSIGN 1(AP2, PCL, SYN)], [MFX], [X-<br />
FADER], and [ASSIGN 2 (other than BND)], you can<br />
further perform the following operations.<br />
1. Continue holding the D-FIELD function button.<br />
2. Press [ENTER] to select a parameter.<br />
3. Turn [VALUE] to modify the setting.<br />
For details on each setting, refer to the explanations on the<br />
subsequent pages.
SOUND mode<br />
Playing back a phrase<br />
(RPS: Realtime Phrase Sequence)<br />
Phrases assigned to each of the eight areas of the D-FIELD<br />
will continue playing as long as you continue pressing that<br />
area.<br />
The phrases assigned to each of the eight areas of the D-<br />
FIELD are collectively managed as an “RPS set.” You are free<br />
to re-assign the contents of an RPS set, and internal memory<br />
can accommodate 30 different sets. You can also switch RPS<br />
sets while a pattern is playing.<br />
Display Explanation Setting<br />
TYPE Select an RPS set. 1–30<br />
➔ Changing the D-FIELD settings (p. 22)<br />
Holding RPS<br />
You can hold the RPS so that the phrase continues playing<br />
even when you take your finger off of the D-FIELD.<br />
• Holding all phrases<br />
1. Press [HOLD] to make it light.<br />
2. Press the D-FIELD to play a phrase.<br />
When you once again press the same area of the D-<br />
FIELD, that phrase will stop.<br />
• Specifying whether each phrase will be held or not<br />
1. While pressing [HOLD], press the D-FIELD to play a<br />
phrase.<br />
[HOLD] will blink, and that phrase will continue playing<br />
until the same area of the D-FIELD is pressed once again.<br />
2. The phrases being held will continue playing until<br />
you hold down [HOLD] and press the D-FIELD as you<br />
did in step 1.<br />
The phrases will be heard together.<br />
3. A phrase that you do not want to hold can be played<br />
by pressing only the D-FIELD.<br />
When you release your finger, that phrase will stop<br />
playing.<br />
* As an alternative to holding down [HOLD] and pressing the<br />
D-FIELD in steps 1 and 2, you can obtain the same result by<br />
holding down the D-FIELD to play the phrase and pressing<br />
[HOLD].<br />
By pressing [HOLD] to make it go dark, you can stop all<br />
phrases.<br />
Chapter 3. About the D-FIELD<br />
Assigning phrases to the D-FIELD<br />
You may find it convenient to assign your favorite or<br />
frequently used phrases as one RPS set.<br />
1. Select the pattern that contains the phrase you want<br />
to assign.<br />
2. Press [PART MUTE], and use the mute buttons to<br />
mute all but the part that you wish to assign to RPS.<br />
3. Hold down [RPS] and turn [VALUE] to select the RPS<br />
set to which you will assign the phrase.<br />
4. While holding down [RPS], press the D-FIELD area<br />
number to which you will assign the pattern.<br />
<br />
* It is not possible for multi-part phrases to be assigned to each<br />
of the eight D-FIELD areas. You must mute all parts other<br />
than the part that contains the phrase you wish to assign. If<br />
you attempt to assign a phrase in which two or more parts are<br />
un-muted, the display will indicate “noASGn”.<br />
* If you have assigned a phrase from a user pattern to RPS, and<br />
modify the performance data of the pattern that contains that<br />
phrase after it has been assigned, be aware that the phrase<br />
played by RPS will be affected by these modifications. For<br />
example if you delete the performance data of a pattern that<br />
contains an assigned phrase, no sound will be heard when you<br />
use RPS to play that phrase.<br />
* If you assign a phrase from a part that uses MFX, the MFX<br />
settings during RPS playback will be determined by the MFX<br />
settings of the currently selected pattern. This means that the<br />
RPS playback may sound different than the original phrase.<br />
* If you assign a phrase from the rhythm part, the rhythm mute<br />
settings will be ignored during RPS playback.<br />
* Each phrase will be played back by a dedicated RPS part 1–8<br />
that corresponds to the eight areas of the D-FIELD. However,<br />
phrases that were assigned from the rhythm part will be played<br />
back by the rhythm part of the currently selected pattern. This<br />
means that in some cases, the phrase may be sounded by a<br />
different rhythm set than that of the assignment source. If a<br />
different rhythm set is selected when you switch patterns, the<br />
rhythm set played by RPS will also change.<br />
23<br />
Chapter 3
Chapter 3. About the D-FIELD<br />
Improvising along with a chord progression (ADLIB)<br />
After pressing one of the areas in the lower half of the D-FIELD, move your finger in the left/right direction to play an ad-lib<br />
performance. While sound is being produced, you can move your finger upward to apply modulation.<br />
fig.Adlib<br />
fig.Scale<br />
Making detailed settings<br />
24<br />
Modulation<br />
Pitch<br />
➔ Changing the D-FIELD settings (p. 22)<br />
1. Hold down [ADLIB] and press [EDIT].<br />
2. Press [ENTER] to select the desired parameter.<br />
3. Turn [VALUE] to modify the value.<br />
Display Explanation Setting<br />
TYPE Select how the sound will be<br />
played.<br />
X Specify the scale. Scale 1–Scale 9<br />
Y Raise or lower the pitch in<br />
octave units.<br />
MAN (MANUAL):<br />
Notes of any pitch and duration are<br />
available for play at will.<br />
ARP (ARPEGGIO):<br />
Play automatic arpeggios.<br />
Display Parameter Explanation Setting<br />
TYPE Select how the sound will be played. MAN (MANUAL):<br />
Notes of any pitch and duration<br />
are available for play at will.<br />
ARP (ARPEGGIO):<br />
Play automatic arpeggios.<br />
-3–3<br />
STYLE Select how the sound will be played when TYPE is “AR-<br />
PEGGIO.”<br />
MOTIF Specify the order in which the component notes of the<br />
chord will sound.<br />
BEAT PATTERN Specify the pattern of accent locations and note lengths.<br />
SHUFFLE RATE You can vary the timing of the backbeats to create shuffle<br />
rhythms. With a setting of 50%, the notes will be spaced<br />
equally. As this value is increased, the notes will be played<br />
with a more “dotted” feel.<br />
50–90(%)<br />
* When the Beat Pattern setting is 1/4, no “shuffle” feel<br />
will be applied even if you increase the Shuffle Rate.<br />
ACCENT RATE You can add expression to the arpeggio by varying the<br />
strength and note length of the accented notes. Increasing<br />
this value will produce a greater sense of groove.<br />
0–100<br />
OCTAVE RANGE Specify the pitch range of the arpeggio in octave units.<br />
Lowering this value below 0 will cause the arpeggio to be<br />
played in a pitch range below the chord you specified.<br />
-3–3<br />
ROOT Specify the root note of the chord. C–B<br />
SCALE Specify the scale. Scale 1–Scale 9<br />
OCTAVE SHIFT Raise or lower the pitch that is sounded, in units of an octave.<br />
Refer to “Arpeggio settings” (p.<br />
28).<br />
* Arpeggio settings are common<br />
to Adlib and Arpeggiator 1 and<br />
2.<br />
-3–3
Chapter 3. About the D-FIELD<br />
Applying special turntable-type effects (VINYL-FX: Vinyl Effects)<br />
You can apply various special effects by pressing each of the eight areas of the D-FIELD.<br />
fig.Pad<br />
Applying various muting effects (ASSIGN 1: MUTE-FX: Mute Effects)<br />
fig.MUT—<br />
You can perform various muting operations by pressing each of the eight areas of the D-FIELD.<br />
fig.Pad<br />
* The fade-in/out of D-FIELD area numbers 5–7 will continue even after you take your finger away, and the volume(s) will not return to the<br />
original setting(s).<br />
Making detailed settings<br />
No. Function Explanation<br />
1 POWER OFF The tempo will slow down and the pitch will fall, just as when a turntable is<br />
powered-off during playback. Finally the playback will stop. If you wish to<br />
play back once again, after the playback has stopped completely, press [ ].<br />
2 REVERSE The sounds of the rhythm part will be played backward.<br />
3 PITCH DOWN The pitch of all parts will become lower.<br />
4 PITCH UP The pitch of all parts will become higher.<br />
5 BPM HALF The BPM will be halved (minimum 20).<br />
6 BPM DOUBLE The BPM will be doubled (maximum 240).<br />
7 RETURN TO TOP Play back from the beginning of the pattern.<br />
8 BACK SPIN The sound will be as when a turntable is spun backward.<br />
No. Function Explanation<br />
1 DEFAULT Return to the mute status that is registered in the pattern.<br />
2 ALL MUTE ON All parts will be muted.<br />
3 SOLO All parts other than the current part will be muted.<br />
4 REVERSE The current mute settings will be inverted.<br />
5 FADE OUT The volume of the current part will gradually decrease.<br />
6 FADE IN The volume of the current part will gradually increase.<br />
7 ALL CROSSFADE The current mute settings will gradually be inverted.<br />
8 KICK & BASS Sounds other than the BD (bass drum) of the rhythm group and<br />
Part 2 (bass) will be muted.<br />
1. Hold down [ASSIGN 1] and press [EDIT].<br />
2. Turn [VALUE] to modify the setting.<br />
Display Parameter Explanation Setting<br />
FADE TIME Specify the time over which the volume will<br />
be changed by D-FIELD effects No.5–7.<br />
1.0–10.0 (sec.)<br />
25<br />
Chapter 3
Chapter 3. About the D-FIELD<br />
Playing arpeggios (ASSIGN 1: ARPEGGIATOR 1)<br />
fig.AP1—<br />
You can specify ahead of time how the arpeggio will be sounded; then change the root note by varying the left/right location at<br />
which you press the D-FIELD, and change the chord by moving up/down.<br />
Display Explanation Setting<br />
TYPE none none none<br />
X none Root note Root note (fixed)<br />
Y none Chord Chord (fixed)<br />
Making detailed settings<br />
1. Hold down [ASSIGN 1] and press [EDIT].<br />
2. Press [ENTER] to select the desired parameter.<br />
3. Turn [VALUE] to modify the setting.<br />
Display Parameter Explanation Setting<br />
STYLE Select how the sound will be played. Refer to “Arpeggio settings”<br />
(p. 28).<br />
26<br />
When you have created an arpeggio that you like, save it as a user<br />
style.<br />
4. Press [WRITE].<br />
A screen will appear in which you can specify the save destination<br />
for the arpeggio style.<br />
5. Turn [VALUE] to select the save destination arpeggio style.<br />
6. Press [ENTER].<br />
The display will ask “SurE” (are you sure you want to save?).<br />
7. If you wish to save, press [ENTER].<br />
* If you decide not to save, press [EXIT].<br />
MOTIF Specify the order in which the component notes of the chord<br />
will sound.<br />
BEAT PATTERN Specify the pattern of accent locations and note lengths.<br />
SHUFFLE RATE You can vary the timing of the backbeats to create shuffle<br />
rhythms. With a setting of 50%, the notes will be spaced<br />
equally. As this value is increased, the notes will be played<br />
with a more “dotted” feel.<br />
* When the Beat Pattern setting is 1/4, no “shuffle” feel will<br />
be applied even if you increase the Shuffle Rate.<br />
ACCENT RATE You can add expression to the arpeggio by varying the<br />
strength and note length of the accented notes. Increasing<br />
this value will produce a greater sense of groove.<br />
OCTAVE RANGE Specify the pitch range of the arpeggio in octave units. Lowering<br />
this value below 0 will cause the arpeggio to be played<br />
in a pitch range below the chord you specified.<br />
OCTAVE SHIFT Raise or lower the pitch that is sounded, in units of an octave.<br />
* Arpeggio settings are<br />
common to Adlib and<br />
Arpeggiator 1 and 2.<br />
50–90(%)<br />
0–100<br />
-3–3<br />
-3–3<br />
If you switch to another style without saving the<br />
edited arpeggio settings in a user style, your<br />
settings will be lost.
Playing arpeggios (ASSIGN 1: ARPEGGIATOR 2)<br />
fig.AP2—<br />
Chapter 3. About the D-FIELD<br />
Arpeggios can be played using the root note and chord that you specify ahead of time. By varying the location at which you press<br />
the D-FIELD, you can change how the arpeggio is sounded.<br />
Display Explanation Setting<br />
TYPE none none none<br />
X Select the part that will be af- OFF, STYLE, MOTIF, BEAT PATTERN, SHUFFLE RATE, ACfected<br />
when you move your CENT RATE, and OCTAVE RANGE<br />
finger in the left/right direction.<br />
* It is not possible to select the same parameter for X, Y.<br />
Y Select the part that will be affected<br />
when you move your<br />
finger in the up/down direction.<br />
➔ Changing the D-FIELD settings (p. 22)<br />
Making detailed settings<br />
1. Hold down [ASSIGN 1] and press [EDIT].<br />
2. Press [ENTER] to select the desired parameter.<br />
3. Turn [VALUE] to modify the setting.<br />
Display Parameter Explanation Setting<br />
STYLE Select how the sound will be played. Refer to “Arpeggio settings”<br />
(p. 28).<br />
MOTIF Specify the order in which the component notes of the chord<br />
will sound.<br />
BEAT PATTERN Specify the pattern of accent locations and note lengths.<br />
SHUFFLE RATE You can vary the timing of the backbeats to create shuffle<br />
rhythms. With a setting of 50%, the notes will be spaced<br />
equally. As this value is increased, the notes will be played<br />
with a more “dotted” feel.<br />
50–90(%)<br />
* When the Beat Pattern setting is 1/4, no “shuffle” feel will<br />
be applied even if you increase the Shuffle Rate.<br />
ACCENT RATE You can add expression to the arpeggio by varying the<br />
strength and note length of the accented notes. Increasing<br />
this value will produce a greater sense of groove.<br />
0–100<br />
OCTAVE RANGE Specify the pitch range of the arpeggio in octave units. Lowering<br />
this value below 0 will cause the arpeggio to be played<br />
in a pitch range below the chord you specified.<br />
-3–3<br />
ROOT Specify the root note of the chord. C–B<br />
When you have created an arpeggio that you like, save it as a user style.<br />
When you have created an arpeggio that you like, save it as a user style.<br />
➔ Refer to steps 4 and following of “Making detailed settings” on the preceding page.<br />
* Arpeggio settings are<br />
common to Adlib and<br />
Arpeggiator 1 and 2.<br />
CHORD Select the type of chord. Major, minor, 7th, m7, M7,<br />
mM7, 6th, m7-5, dim, sus4,<br />
7sus4, aug<br />
OCTAVE SHIFT Raise or lower the pitch that is sounded, in units of an octave.<br />
-3–3<br />
27<br />
Chapter 3
Chapter 3. About the D-FIELD<br />
Arpeggio settings<br />
Arpeggio Styles<br />
When you wish to make arpeggiator settings, you will first select an Arpeggio Style. When you select a style, optimal values will<br />
be set for the four parameters “Motif,” “Beat Pattern,” “Shuffle Rate,” and “Accent Rate.” You can adjust parameters such as<br />
Accent Rage and Octave Range to modify the pattern to your taste.<br />
STYLE Explanation<br />
1/4 The rhythm will be divided in quarter notes.<br />
1/6 The rhythm will be divided in quarter note triplets.<br />
1/8 The rhythm will be divided in eighth notes.<br />
1/12 The rhythm will be divided in eighth note triplets.<br />
1/16 The rhythm will be divided in 16th notes.<br />
1/32 The rhythm will be divided in 32nd notes.<br />
PORTAMENTO A, B A style using the portamento effect.<br />
GLISSANDO A glissando style.<br />
SEQUENCE A–D Styles for sequenced patterns.<br />
ECHO An echo-like style.<br />
BASS 1–4 Styles appropriate for bass playing.<br />
RHYTHM GUITAR 1–5 Guitar strumming styles.<br />
3 FINGER Three-finger guitar style.<br />
STRUMMING GUITAR A style simulating a guitar chord strummed upward (downward).<br />
PIANO BACKING, CLAVI CHORD Styles for keyboard instrument backing.<br />
WALTZ, SWING WALTZ Styles in triple meter.<br />
REGGAE A reggae-type style.<br />
PERCUSSION A style suitable for percussive instrument sounds.<br />
HARP The playing style of a harp.<br />
SHAMISEN The playing style of a Shamisen.<br />
BOUND BALL A style suggestive of a bouncing ball.<br />
RANDOM A style in which the notes sound in random order.<br />
BOSSA NOVA Bossa nova guitar strumming style. Can also be used for Samba by making the BPM faster.<br />
SALSA Typical salsa style.<br />
MAMBO Typical mambo style.<br />
LATIN PERCUSSION A rhythm style with Latin percussion instruments such as Claves, Cowbell, Clap, Bongo, Conga, Agogo etc.<br />
SAMBA Typical samba style. Use for rhythm patterns or bass lines.<br />
TANGO Typical tango rhythm style.<br />
HOUSE A style for house piano backing.<br />
LIMITLESS The settings of all parameters can be freely combined without restriction.<br />
USER STYLE 1–10 Arpeggio settings can be modified and saved in one of these user styles.<br />
MOTIF<br />
Specifies the order in which the notes of the chord will be sounded.<br />
* The values which can be set will depend on the currently selected arpeggio style. For details on the possible values for each style, refer to<br />
“Table of STYLE/MOTIF/BEAT PATTERN” on next page.<br />
MOTIF Description<br />
SINGLE UP Notes will be sounded individually, beginning from low to high.<br />
SINGLE DOWN Notes will be sounded individually, beginning from high to low.<br />
SINGLE UP&DW Notes will be sounded individually, from low to high, and then back down from high to low.<br />
SINGLE RANDOM Notes will be sounded individually, in random order.<br />
DUAL UP Notes will be sounded two at a time, beginning from low to high.<br />
DUAL DOWN Notes will be sounded two at a time, beginning from high to low.<br />
DUAL UP&DW Notes will be sounded two at a time, from low to high, and then back down from high to low.<br />
DUAL RANDOM Notes will be sounded two at a time, in random order.<br />
TRIPLE UP Notes will sound three at a time, from low to high.<br />
TRIPLE DOWN Notes will sound three at a time, from high to low.<br />
TRIPLE UP&DOWN Notes will sound three at a time, from low to high and then back down from high to low.<br />
TRIPLE RANDOM Notes will sound three at a time, in random order.<br />
NOTE ORDER Notes you press will be sounded in the order in which you pressed them. By pressing the notes in the appropriate order<br />
you can produce melody lines. Up to 32 notes will be remembered.<br />
* This is valid only when playing arpeggios from an external MIDI device.<br />
GLISSANDO Each chromatic step between the highest and lowest notes will sound in succession, repeating upward and downward.<br />
Press only the lowest and the highest notes.<br />
CHORD All notes will sound simultaneously.<br />
BASS+CHORD 1–5 The lowest of the notes you play will sound, and the remaining notes will sound as a chord.<br />
BASS+UP 1–8 The lowest of the notes you play will sound, and the remaining notes will be arpeggiated.<br />
BASS+RND 1–3 The lowest of the notes you play will sound, and the remaining notes will sound in random order.<br />
TOP+UP 1–6 The highest of the notes you play will sound, and the remaining notes will be arpeggiated.<br />
BASS+UP+TOP The highest and the lowest of the notes you play will sound, and the remaining notes will be arpeggiated.<br />
28
Beat pattern<br />
Chapter 3. About the D-FIELD<br />
It will affect the accent location and note length, causing the beat (rhythm) to change.<br />
* The values which can be set will depend on the currently selected arpeggio style. For details on the possible values for each style, refer to<br />
“Table of STYLE/MOTIF/BEAT PATTERN” on this page.<br />
Types of Beat pattern<br />
1/4, 1/6, 1/8, 1/12, 1/16 1-3, 1/32 1-3, PORTA-A 1-11, PORTA-B 1-15, SEQ-A 1-7, SEQ-B 1-5, SEQ-C 1–2, SEQ-D 1-8, ECHO 1-3,<br />
MUTE 1-16, STRUM 1-8, REGGAE 1–2, REF 1–2, PERC 1-4, WALKBS, HARP, BOUND, RANDOM, BOSSA NOVA, SALSA 1-4,<br />
MAMBO 1-2, CLAVE, REV CLA, GUILO, AGOGO, SAMBA, TANGO 1-4, HOUSE 1–2<br />
Table of STYLE/MOTIF/BEAT PATTERN<br />
Style Motif Beat Pattern<br />
1/4 all 1/4<br />
1/6 all 1/6<br />
1/8 all 1/8<br />
1/12 all 1/12<br />
1/16 all 1/16 1 - 3<br />
1/32 SINGLE UP, SINGLE DOWN, SINGLE UP&DOWN,SINGLE RANDOM, DUAL UP,<br />
DUAL DOWN, DUAL UP&DOWN, DUAL RANDOM, NOTE ORDER, GLISSAN-<br />
DO, BASS+UP 1 - 8, BASS+RND 1 - 3, TOP+UP 1 - 6<br />
1/32 1 - 3<br />
PORTAMENTO A all PORTA 1 - 11<br />
PORTAMENTO B all PORTA 12 - 26<br />
GLISSANDO GLISSANDO 1/16 1 - 3, 1/32 1 - 3<br />
SEQUENCE A all SEQ-A 1 - 7<br />
SEQUENCE B all SEQ-B 1 - 5<br />
SEQUENCE C SINGLE UP, SINGLE DOWN, SINGLE UP&DOWN,SINGLE RANDOM, DUAL UP,<br />
DUAL DOWN, DUAL UP&DOWN, DUAL RANDOM, NOTE ORDER, GLISSAN-<br />
DO, BASS+UP 1 - 8, BASS+RND 1 - 3, TOP+UP 1 - 6<br />
SEQ-C 1 - 2<br />
SEQUENCE D all SEQ-D 1 - 8<br />
ECHO SINGLE UP, SINGLE DOWN, SINGLE UP&DOWN, SINGLE RANDOM, DUAL UP,<br />
DUAL DOWN, DUAL UP&DOWN, DUAL RANDOM, NOTE ORDER<br />
SEQ-D 1 - 8<br />
BASS 1 BASS+UP 2 SEQ-A 1, SEQ-C 1<br />
BASS 2 BASS+UP 5, TOP+UP 5 MUTE 02, 03<br />
BASS 3 BASS+UP 5, TOP+UP 5 MUTE 02, 03<br />
BASS 4 SINGLE UP, SINGLE DOWN, SINGLE UP&DOWN, SINGLE RANDOM, NOTE OR-<br />
DER, GLISSANDO<br />
WALKBS<br />
RHYTHM GTR 1 SINGLE UP, SINGLE DOWN, SINGLE UP&DOWN, SINGLE RANDOM, DUAL UP,<br />
DUAL DOWN, DUAL UP&DOWN, DUAL RANDOM, NOTE ORDER, BASS+UP 1 -<br />
8, BASS+RND 1 - 3, TOP+UP 1 - 6<br />
MUTE 01, 04<br />
RHYTHM GTR 2 CHORD MUTE 07, 13, 14<br />
RHYTHM GTR 3 CHORD MUTE 08, 12, 15<br />
RHYTHM GTR 4 CHORD MUTE 09, 10, 11, 16<br />
RHYTHM GTR 5 SINGLE UP, SINGLE DOWN STRUM 1 - 6<br />
3 FINGER BASS+UP+TOP SEQ-A 7<br />
STRUMMING GTR SINGLE UP, SINGLE DOWN STRUM 7, 8<br />
PIANO BACKING CHORD MUTE 12, REF 2<br />
CLAVI CHORD BASS+CHORD 4, BASS+CHORD 5 MUTE 05, 06<br />
WALTZ BASS+CHORD 2, BASS+UP 2, BASS+RND 2, TOP+UP 2 1/6, 1/12<br />
SWING WALTZ BASS+CHORD 2, BASS+UP 2, BASS+RND 2, TOP+UP 2 1/16 1 - 3<br />
REGGAE CHORD, BASS+CHORD 1 REGGAE1 - 2<br />
PERCUSSION SINGLE UP, SINGLE DOWN, SINGLE UP&DOWN, SINGLE RANDOM, DUAL UP,<br />
DUAL DOWN, DUAL UP&DOWN, DUAL RANDOM, NOTE ORDER, BASS+UP 1 -<br />
8, BASS+RND 1 - 3, TOP+UP 1 - 6<br />
PERC1 - 4<br />
HARP SINGLE UP, SINGLE DOWN, SINGLE UP&DOWN, GLISSANDO HARP<br />
SHAMISEN TOP+UP 4 - 6 SEQ-A 2<br />
BOUND BALL SINGLE UP, SINGLE DOWN, SINGLE UP&DOWN, SINGLE RANDOM, DUAL UP,<br />
DUAL DOWN, DUAL UP&DOWN, DUAL RANDOM, NOTE ORDER, GLISSANDO<br />
BOUND<br />
RANDOM SINGLE RANDOM, DUAL RANDOM, BASS+RND 1 - 3 1/4,1/6,1/8,1/12,1/16 1-3,<br />
1/32 1-3, RANDOM<br />
BOSSA NOVA all BOSSA NOVA<br />
SALSA all SALSA 1 - 4<br />
MAMBO all MAMBO 1 - 2<br />
LATIN PERCUS- SINGLE UP, SINGLE DOWN, SINGLE UP&DOWN, SINGLE RANDOM, DUAL UP, CLAVE, REV CLA, GUIRO,<br />
SION<br />
DUAL DOWN, DUAL UP&DOWN, DUAL RANDOM, NOTE ORDER, GLISSANDO AGOGO<br />
SAMBA all SAMBA<br />
TANGO all TANGO 1 - 4<br />
HOUSE all HOUSE 1 - 2<br />
LIMITLESS all all<br />
29<br />
Chapter 3
Chapter 3. About the D-FIELD<br />
Recalling a pattern (ASSIGN 1: PATTERN CALL)<br />
fig.PCL—<br />
The eight areas of the D-FIELD can be used as buttons that select patterns. You can prepare the desired patterns ahead of time,<br />
and then use this method to switch patterns quickly.<br />
The patterns assigned to the eight areas of the D-FIELD are collectively managed as a “pattern set.” You are free to re-assign the<br />
contents of a pattern set, and internal memory can accommodate 20 different sets. You can also switch pattern sets while a pattern<br />
is playing.<br />
When you perform Pattern Call in MEGAMIX mode, the parts registered in the MEGAMIX set will be selected.<br />
Display Explanation Setting<br />
TYPE Select a pattern set. 1–20<br />
30<br />
➔ Changing the D-FIELD settings (p. 22)<br />
Assigning patterns to the D-FIELD<br />
You may find it convenient to assign your favorite or frequently used patterns as one pattern set.<br />
1. Set [ASSIGN 1] TYPE to “PCL.”<br />
2. Select the pattern that you wish to assign.<br />
3. While holding down [ASSIGN 1], turn [VALUE] to select the pattern set to which you will assign the phrase.<br />
4. Hold down [ASSIGN 1], and press the D-FIELD area to which you will assign the pattern.<br />
This specifies the correspondence of the D-FIELD and the part.<br />
Registering the parts for use with MEGAMIX (MEGAMIX Set)<br />
It is convenient to register the parts you wish to use for MEGAMIX (p. 58) as a single MEGAMIX Set. You can store twenty<br />
MEGAMIX Sets separately from the conventional pattern sets.<br />
1. Select the pattern that contains the part you wish to assign.<br />
2. Press [MEGAMIX] to enter MEGAMIX mode.<br />
3. Press [PART MUTE], and use the mute buttons to mute all parts except for the one that you wish to register.<br />
4. As the [ASSIGN 1] TYPE, select "PCL."<br />
5. Hold down [ASSIGN 1] and press [ENTER] to access the MEGAMIX set select screen, and while continuing to hold<br />
down [ASSIGN 1], turn [VALUE] to select the MEGAMIX Set in which you wish to register the part.<br />
6. Hold down [ASSIGN 1], and press the D-FIELD to which you wish to assign the part.<br />
This specifies the correspondence of the D-FIELD and the part.<br />
* It is not possible to register multiple parts to each of the eight D-FIELD areas. You must mute all parts other than the part being<br />
registered. If you perform the registration operation with more than one part unmuted, the display will indicate “noASGn.”
Chapter 3. About the D-FIELD<br />
Auditioning the sound of a patch (ASSIGN 1: PATCH PREVIEW)<br />
fig.PRV—<br />
You can press each of the eight D-FIELD areas to hear the sound of each part. Pressing D-FIELD 8 will sound the rhythm part.<br />
* The note number (pitch) that is played can be modified by holding down REC FUNCTION (p. 63) [NOTE NUMBER], and turning<br />
[VALUE].<br />
You can check the currently sounding part and note number by pressing [DISPLAY] to set it to “D-FIELD.”<br />
Playing a monophonic synth sound (ASSIGN 1: SOLO SYNTH)<br />
fig.SYN—<br />
The sound will play when you press the D-FIELD. Left/right movement will change the pitch, and up/down movement will<br />
change the volume.<br />
Display Explanation Setting<br />
TYPE Select the solo synth sound. 1–14<br />
X none Pitch Pitch (fixed)<br />
Y none Level Level (fixed)<br />
➔ Changing the D-FIELD settings (p. 22)<br />
Making detailed settings<br />
1. Hold down [ASSIGN 1] and press [EDIT].<br />
2. Press [ENTER] to select the desired parameter.<br />
3. Turn [VALUE] to change the setting.<br />
Display Parameter Explanation Setting<br />
SOUND Select the solo synth sound. 1–14<br />
OCTAVE RANGE Adjust the pitch range in octave units. -4–4<br />
REVERB SEND LEVEL Adjust the reverb depth. 0–127<br />
DELAY SEND LEVEL Adjust the delay depth. 0–127<br />
* The solo synth sounds are the sounds of the following patches.<br />
No. Patch No. Patch No. Patch<br />
1 P-E001: SOLO Saw 11 P-A030: Square Lead1 21 P-B005: Saw Stack 1<br />
2 P-E003: Fright Saw 12 P-A040: PortaSynLead 22 P-B006: Saw Stack 2<br />
3 P-E006: SOLO PWM 13 P-A042: Beep Mod 23 P-B012: Good Bean<br />
4 P-E007: SOLO Square 14 P-A045: JU2 SubOsc 1 24 P-B014: Mega 5th<br />
5 P-E008: Square Lead4 15 P-A054: Sine Tone 25 P-B025: Sweep Pad 2<br />
6 P-E012: SOLO Choir 16 P-A057: Big Up Massv 26 P-B045: Atmosphere 2<br />
7 P-E013: SOLO Sin 17 P-A064: Dark SawLead 27 P-B094: Cal + After<br />
8 P-E015: Sweep Beep 18 P-A068: Voc Saw 28 P-C005: P5 Noise<br />
9 P-E037: Saw Stack 3 19 P-A112: NU-NRG Bass 29 P-C050: Pop Organ<br />
10 P-E063: Powerful Org 20 P-B001: Strong Brass 30 P-C098: Hush Brass<br />
31<br />
Chapter 3
Chapter 3. About the D-FIELD<br />
Playing rhythm instruments / scales (ASSIGN 1: KEYBOARD PAD)<br />
fig.PAD—<br />
By pressing the eight areas of the D-FIELD you can play any eight notes of the current part.<br />
In the case of part R alone, you can specify different note numbers than the other parts. This allows you to assign various<br />
instruments of the rhythm set for part R, and assign a scale for the other parts.<br />
Specifying the notes (note numbers) that will sound<br />
1. Press [PART SELECT] and select the part.<br />
2. Hold down [ASSIGN 1] and press [EDIT].<br />
3. Press the D-FIELD to select the D-FIELD area to which you wish to assign a note number.<br />
Example displays<br />
Part R, D-FIELD No.1, Note number 36<br />
32<br />
Part 1–7, D-FIELD No.5, Note G4<br />
4. Turn [VALUE] to specify the note.<br />
* For the note numbers that can be assigned to the D-FIELD for part R, refer to “Preset Rhythm Set List” (p. 86).<br />
5. When you are finished, press [EXIT].
XY mode<br />
Chapter 3. About the D-FIELD<br />
Changing the brightness of the sound/Adding character to the sound (FILTER)<br />
You can vary the brightness of the current part by the location of your touch. Left/right movement will vary the cutoff<br />
frequency. Upward movement will apply more emphasis to the region surrounding the cutoff frequency (resonance),<br />
producing a distinctive tone.<br />
Display Explanation Setting<br />
TYPE Select the type of filter.<br />
* At the factory<br />
settings, the filter<br />
will be as specified<br />
by the patch<br />
selected for the<br />
current part of the<br />
current pattern.<br />
* For some waveforms, you may hear no sound at all if you move your finger far<br />
toward the right.<br />
X none Cutoff Frequency<br />
PKG (Peaking Filter):<br />
Moving your finger toward the right will increasingly emphasize the high frequency<br />
range. Moving your finger toward the left will increasingly emphasize<br />
the lower frequency range.<br />
Cutoff Frequency (fixed)<br />
Y none Resonance Resonance (fixed)<br />
➔ Changing the D-FIELD settings (p. 22)<br />
Applying special effects to the sound (MFX)<br />
You can simultaneously control any two desired parameters of a multi-effects (p. 44).<br />
* There will be no effect if [MFX] is dark. Press [MFX] to make it light.<br />
Display Explanation Setting<br />
TYPE Select the multi-effects type. Refer to “Available Settings” (p. 44).<br />
X Select the parameter that will be affected<br />
when you move your finger to left or<br />
right.<br />
Y Select the parameter that will be affected<br />
when you move your finger upward or<br />
downward.<br />
➔ Changing the D-FIELD settings (p. 22)<br />
While setting X or Y, you can hold down the D-FIELD function button [MFX] and press one of the part buttons to turn the Part<br />
MFX Switch (p. 19) on/off. The part button will light to indicate parts for which the multi-effects is on.<br />
Making detailed settings<br />
1. Hold down the D-FIELD function button [MFX], and press [EDIT].<br />
2. Press [ENTER] to select the desired parameter.<br />
OFF:<br />
The filter will not be applied.<br />
LPF (Low Pass Filter):<br />
Moving your finger toward the right will cause the sound to become increasingly<br />
closer to the original waveform, and be brighter. Moving your finger toward<br />
the left will increasingly cut the higher frequencies, making the sound darker.<br />
* For some waveforms, you may hear no sound at all if you move your finger far<br />
toward the left.<br />
BPF (Band Pass Filter):<br />
Moving your finger toward the right will increasingly cause only the high frequency<br />
range to be heard. Moving your finger toward the left will increasingly<br />
cause only the low frequencies to be heard.<br />
HPF (High Pass Filter):<br />
Moving your finger toward the right will increasingly cut the lower frequencies,<br />
sharpening the sound. Moving your finger toward the left will cause the sound<br />
to become increasingly closer to the original waveform.<br />
Refer to the explanation for each effect (pp. 45–57).<br />
* When you change the type, the parameter whose value is<br />
followed by an “X” or “Y” will be selected automatically (X =<br />
left/right, Y = up/down).<br />
* It is not possible to select the same parameter for both X and Y.<br />
3. Turn [VALUE] to change the setting.<br />
For details on the parameters and their settings, refer to the explanation for each effect (pp. 45–57).<br />
33<br />
Chapter 3
Chapter 3. About the D-FIELD<br />
Changing the volume of the parts (X-FADER)<br />
The volume or pan of two parts can be controlled simultaneously.<br />
Display Explanation Setting<br />
TYPE Specify whether you will control volume or pan. LEV (LEVEL), PAN<br />
X Select the part that will be affected when you move your<br />
finger to left or right.<br />
Y Select the part that will be affected when you move your<br />
finger upward or downward.<br />
34<br />
➔ Changing the D-FIELD settings (p. 22)<br />
As an alternate way to select the part that will be controlled, you can hold down [X-FADER] and press a part button while making<br />
X or Y settings. (At this time, the selected part button will blink.)<br />
When TYPE is “LEVEL,” it is not possible for the volume to become louder than the volume setting of the pattern.<br />
Making the sound change over time (ASSIGN 2: ENVELOPE)<br />
fig.ENV—<br />
You can control the time-variant change in pitch, tone, and volume of the current part.<br />
➔ Changing the D-FIELD settings (p. 22)<br />
P-r, P-1–P-7<br />
* It is not possible to select<br />
the same part for both X<br />
and Y.<br />
Display Explanation Setting<br />
TYPE none none none<br />
X Select the parameter that will be OFF,<br />
affected when you move your PITCH DEPTH, PITCH ATTACK TIME, PITCH DECAY TIME,<br />
finger to left or right.<br />
PITCH SUSTAIN LEVEL, PITCH RELEASE TIME, FILTER DEPTH,<br />
Y Select the parameter that will be FILTER ATTACK TIME, FILTER DECAY TIME,<br />
affected when you move your FILTER SUSTAIN LEVEL, FILTER RELEASE TIME,<br />
finger upward or downward. AMP ATTACK TIME, AMP DECAY TIME, AMP SUSTAIN LEVEL,<br />
AMP RELEASE TIME<br />
* It is not possible to select the same parameter for both X and Y.<br />
About the envelope<br />
These parameters specify how the pitch, filter, or amp will change over time. As shown in<br />
the diagram below, this allows you to specify how change will occur from the beginning to<br />
the end of the sound.<br />
fig.Envelope<br />
Pitch<br />
Filter (Cutoff Frequency)<br />
Level<br />
+ Attack Decay Release<br />
0<br />
Sustain<br />
Note On Note Off<br />
Time
Making detailed settings<br />
1. Hold down [ASSIGN 2] and press [EDIT].<br />
2. Press [ENTER] to select the desired parameter.<br />
3. Turn [VALUE] to change the setting.<br />
Chapter 3. About the D-FIELD<br />
Display<br />
PITCH ENVELOPE<br />
Parameter Explanation Setting<br />
DEPTH Adjust the range of pitch change. Negative (-) settings will invert<br />
the shape of the envelope, causing the pitch to change in the opposite<br />
direction.<br />
-12–12<br />
ATTACK TIME Refer to “About the envelope” on previous page. 0–127<br />
FILTER ENVELOPE<br />
AMP ENVELOPE<br />
DECAY TIME 0–127<br />
SUSTAIN LEVEL -63–63<br />
RELEASE TIME 0–127<br />
DEPTH Adjust the range of tonal change. Negative (-) settings will invert<br />
the shape of the envelope, causing the tone to change in the opposite<br />
direction.<br />
-63–63<br />
ATTACK TIME Refer to “About the envelope” on previous page. 0–127<br />
DECAY TIME 0–127<br />
SUSTAIN LEVEL 0–127<br />
RELEASE TIME 0–127<br />
ATTACK TIME Refer to “About the envelope” on previous page. 0–127<br />
DECAY TIME 0–127<br />
SUSTAIN LEVEL 0–127<br />
RELEASE TIME 0–127<br />
35<br />
Chapter 3
Chapter 3. About the D-FIELD<br />
Applying cyclic change to the sound (ASSIGN 2: LFO)<br />
fig.LFO—<br />
The LFO (Low Frequency Oscillator) applies cyclic change to the sound. By cyclically changing the pitch, cutoff frequency, or<br />
volume, you can create effects such as vibrato, wah, tremolo, or auto-pan.<br />
* There will be no effect for part R.<br />
Display Explanation Setting<br />
TYPE Select the LFO waveform. TRI, SIN, SAW, SQR, TRP, S-H, RND, CHS<br />
X Select the parameter that will be affected when<br />
you move your finger to left or right.<br />
Y Select the parameter that will be affected when<br />
you move your finger upward or downward.<br />
➔ Changing the D-FIELD settings (p. 22)<br />
LFO waveforms<br />
fig.LFOWave<br />
Making detailed settings<br />
1. Hold down [ASSIGN 2] and press [EDIT].<br />
2. Press [ENTER] to select the desired parameter.<br />
3. Turn [VALUE] to change the setting.<br />
Changing the pitch or vibrato depth (ASSIGN 2: BENDER)<br />
fig.BND—<br />
Pressing the right half of the D-FIELD will raise the pitch of the current part, and pressing the left half will lower the pitch.<br />
Pressing the upper half or lower half will apply vibrato. *This has no effect on part R.<br />
* There will be no effect for part R.<br />
36<br />
OFF, PITCH, FILTER, AMP, PAN, RATE<br />
* It is not possible to select the same parameter for<br />
both X and Y.<br />
TRI SIN SAW SQR TRP S-H RND CHS<br />
Display Parameter Explanation Setting<br />
LFO Select the LFO waveform. TRI, SIN, SAW, SQR, TRP,<br />
S-H, RND, CHS<br />
PITCH DEPTH The pitch will be cyclically modulated to produce a vibrato effect.<br />
Positive (+) and negative (-) settings will produce inverse waveforms.<br />
-63–63<br />
FILTER DEPTH The cutoff frequency will be cyclically modulated to produce a<br />
wah effect. Positive (+) and negative (-) settings will produce inverse<br />
waveforms.<br />
-63–63<br />
AMP DEPTH The volume will be cyclically modulated to produce a tremolo effect.<br />
Positive (+) and negative (-) settings will produce inverse<br />
waveforms.<br />
-63–63<br />
PAN DEPTH The pan (stereo position) will be cyclically modulated to produce<br />
an auto-pan effect. Positive (+) and negative (-) settings will produce<br />
inverse waveforms.<br />
-63–63<br />
RATE Specify the speed of modulation. 0–127<br />
Display Explanation Setting<br />
TYPE none none none<br />
X none Pitch Pitch (fixed)<br />
Y none Vibrato Vibrato (fixed)
Chapter 3. About the D-FIELD<br />
Changing the rhythmic feel of a pattern (ASSIGN 2: QUANTIZE)<br />
fig.QTE—<br />
You can change the rhythm feel of the performance data of a pattern. By modifying the timing and velocity (volume) of the notes<br />
in the pattern, you can produce a rhythm feel that is different than that of the original pattern.<br />
fig.Quantize<br />
You can modify the note timing by the location at which you press the D-FIELD.<br />
When TYPE is set to “GROOVE,” you can also modify the velocity by pressing a higher or lower location.<br />
Display Explanation Setting<br />
TYPE Select the type of quantization. OFF, GRID, SHUFFLE, GROOVE<br />
X none Timing Timing (fixed)<br />
Y none Velocity (Only when the type is set to “GROOVE.”) Velocity (fixed)<br />
➔ Changing the D-FIELD settings (p. 22)<br />
Making detailed settings<br />
1. Hold down [ASSIGN 2] and press [EDIT].<br />
2. Press [ENTER] to select the desired parameter.<br />
3. Turn [VALUE] to change the setting.<br />
Display Parameter Explanation Setting<br />
When TYPE is “GRID”<br />
TYPE Select the type of quantization. OFF:<br />
Quantize will not be applied.<br />
GRID:<br />
The note timing of the pattern will be corrected toward<br />
the note value specified by the template setting.<br />
SHUFFLE:<br />
The timing of the backbeats of the pattern will be<br />
adjusted to create a “bouncy” feel as in shuffle or<br />
swing.<br />
GROOVE:<br />
The note timing and velocity of the pattern will be<br />
adjusted toward the values specified by the template,<br />
producing a variety of different grooves.<br />
TEMPLATE Specify the note value to which the timing<br />
will be aligned.<br />
32, 16T, 16, 8T, 8, 4T, 4<br />
TIMING Specify the strength of the correction. Higher<br />
settings will cause the timing to be corrected<br />
more precisely (tightly).<br />
When TYPE is “SHUFFLE”<br />
TEMPLATE Specify the note value to which the timing<br />
will be aligned.<br />
TIMING Adjust the amount of swing. With a setting of<br />
“50,” there will be no sense of swing at all.<br />
Normally, a setting in the range of 60–66 will<br />
produce a pleasant shuffle rhythm.<br />
When TYPE is “GROOVE”<br />
TEMPLATE Select the template. *The templates are for a<br />
4/4 time signature. The desired result will not<br />
be obtained for other time signatures.<br />
TIMING Specify the strength of the timing correction.<br />
Higher settings will cause the timing to be adjusted<br />
closer to the timing of the template.<br />
VELOCITY Specify the strength of the velocity correction.<br />
Higher settings will cause the velocity to be<br />
adjusted closer to the velocity of the template.<br />
0–100<br />
16, 8<br />
0–100<br />
1–71<br />
* Refer to “List of GROOVE templates” on next<br />
page.<br />
0–100<br />
0–100<br />
37<br />
Chapter 3
Chapter 3. About the D-FIELD<br />
Quantization will correct only note messages; other messages<br />
are not corrected. This means that if messages that modify<br />
the sound in real time (such as pitch bend) have been<br />
recorded in the pattern, some Quantize settings may cause<br />
the timing of these messages to become incorrect, so that they<br />
are no longer played correctly. It is best to use Quantize on<br />
patterns that do not contain messages that produce realtime<br />
change.<br />
List of GROOVE templates<br />
16 Beat Dance type<br />
01: DANCE-NM-L.AC exact/low dynamics<br />
02: DANCE-NM-H.AC exact/high dynamics<br />
03: DANCE-NM-L.SW exact/light swing<br />
04: DANCE-NM-H.SW exact/strong swing<br />
05: DANCE-HV-L.AC dragging/low dynamics<br />
06: DANCE-HV-H.AC dragging/high dynamics<br />
07: DANCE-HV-L.SW dragging/light swing<br />
08: DANCE-HV-H.SW dragging/strong swing<br />
09: DANCE-PS-L.AC rushing/low dynamics<br />
10: DANCE-PS-H.AC rushing/high dynamics<br />
11: DANCE-PS-L.SW rushing/light swing<br />
12: DANCE-PS-H.SW rushing/strong swing<br />
16 Beat Fusion type<br />
13: FUSON-NM-L.AC exact/low dynamics<br />
14: FUSON-NM-H.AC exact/high dynamics<br />
15: FUSON-NM-L.SW exact/light swing<br />
16: FUSON-NM-H.SW exact/strong swing<br />
17: FUSON-HV-L.AC dragging/low dynamics<br />
18: FUSON-HV-H.AC dragging/high dynamics<br />
19: FUSON-HV-L.SW dragging/light swing<br />
20: FUSON-HV-H.SW dragging/strong swing<br />
21: FUSON-PS-L.AC rushing/low dynamics<br />
22: FUSON-PS-H.AC rushing/high dynamics<br />
23: FUSON-PS-L.SW rushing/light swing<br />
24: FUSON-PS-H.SW rushing/strong swing<br />
16 Beat Reggae type<br />
25: REGGE-NM-L.AC exact/low dynamics<br />
26: REGGE-NM-H.AC exact/high dynamics<br />
27: REGGE-NM-L.SW exact/light swing<br />
28: REGGE-NM-H.SW exact/strong swing<br />
29: REGGE-HV-L.AC dragging/low dynamics<br />
30: REGGE-HV-H.AC dragging/high dynamics<br />
31: REGGE-HV-L.SW dragging/light swing<br />
32: REGGE-HV-H.SW dragging/strong swing<br />
33: REGGE-PS-L.AC rushing/low dynamics<br />
38<br />
34: REGGE-PS-H.AC rushing/high dynamics<br />
35: REGGE-PS-L.SW rushing/light swing<br />
36: REGGE-PS-H.SW rushing/strong swing<br />
8 Beat Pops type<br />
37: POPS-NM-L.AC exact/low dynamics<br />
38: POPS-NM-H.AC exact/high dynamics<br />
39: POPS-NM-L.SW exact/light swing<br />
40: POPS-NM-H.SW exact/strong swing<br />
41: POPS-HV-L.AC dragging/low dynamics<br />
42: POPS-HV-H.AC dragging/high dynamics<br />
43: POPS-HV-L.SW dragging/light swing<br />
44: POPS-HV-H.SW dragging/strong swing<br />
45: POPS-PS-L.AC rushing/low dynamics<br />
46: POPS-PS-H.AC rushing/high dynamics<br />
47: POPS-PS-L.SW rushing/light swing<br />
48: POPS-PS-H.SW rushing/strong swing<br />
8 Beat Rhumba type<br />
49: RHUMB-NM-L.AC exact/low dynamics<br />
50: RHUMB-NM-H.AC exact/high dynamics<br />
51: RHUMB-NM-L.SW exact/light swing<br />
52: RHUMB-NM-H.SW exact/strong swing<br />
53: RHUMB-HV-L.AC dragging/low dynamics<br />
54: RHUMB-HV-H.AC dragging/high dynamics<br />
55: RHUMB-HV-L.SW dragging/light swing<br />
56: RHUMB-HV-H.SW dragging/strong swing<br />
57: RHUMB-PS-L.AC rushing/low dynamics<br />
58: RHUMB-PS-H.AC rushing/high dynamics<br />
59: RHUMB-PS-L.SW rushing/light swing<br />
60: RHUMB-PS-H.SW rushing/strong swing<br />
Others<br />
61: SAMBA 1 samba (pandero)<br />
62: SAMBA 2 samba (surdo and timba)<br />
63: AXE 1 axe (caixa)<br />
64: AXE 2 axe (surdo)<br />
65: SALSA 1 salsa (cascara)<br />
66: SALSA 2 salsa (conga)<br />
67: TRIPLETS triplets<br />
68: QUITUPLETS quintuplets<br />
69: SEXTUPLETS sextuplets<br />
70: 7 AGAINST 2 seven notes played over two beats<br />
71: LAGGING TRI lagging triplets
Changing the reverb depth (ASSIGN 2: REVERB)<br />
fig.REV—<br />
* There will be no effect if [REVERB] is dark. Press [REVERB] to make it lit.<br />
➔ Changing the D-FIELD settings (p. 22)<br />
Making detailed settings<br />
1. Hold down the D-FIELD function button [ASSIGN 2] and press [EDIT].<br />
2. Press [ENTER] to select the desired parameter.<br />
3. Turn [VALUE] to change the setting.<br />
For details on the parameters and settings, refer to the explanation of reverb (p. 42).<br />
Changing the delay depth (ASSIGN 2: DELAY)<br />
fig.DLY—<br />
* There will be no effect if [DELAY] is dark. Press [DELAY] to make it lit.<br />
Display Explanation Setting<br />
TYPE Select the type of delay. SHORT, LONG<br />
➔ Changing the D-FIELD settings (p. 22)<br />
Making detailed settings<br />
1. Hold down the D-FIELD function button [ASSIGN 2] and press [EDIT].<br />
2. Press [ENTER] to select the desired parameter.<br />
3. Turn [VALUE] to change the setting.<br />
For details on the parameters and settings, refer to the explanation of delay (p. 43).<br />
Chapter 3. About the D-FIELD<br />
Display Explanation Setting<br />
TYPE Select the type of reverb. ROOM1, ROOM2, STAGE1, STAGE2, HALL1, HALL2<br />
X Select the parameter that will be affected<br />
when you move your finger to left or right.<br />
Y Select the parameter that will be affected<br />
when you move your finger upward or<br />
downward.<br />
X Select the parameter that will be affected<br />
when you move your finger to left or right.<br />
Y Select the parameter that will be affected<br />
when you move your finger upward or<br />
downward.<br />
Controlling an external MIDI device (ASSIGN 2: EXT CTRL: External Control)<br />
fig.EXT—<br />
You can transmit control change messages to an external MIDI device.<br />
Display Explanation Setting<br />
TYPE Select the MIDI channel on which the messages will be<br />
transmitted.<br />
CH1–CH16<br />
X Select the control change number that will be transmitted<br />
when you move your finger to left or right.<br />
Y Select the control change number that will be transmitted<br />
when you move your finger upward or downward.<br />
➔ Changing the D-FIELD settings (p. 22)<br />
Refer to the explanation of reverb (p. 42).<br />
* When you change the type, the parameter whose setting is<br />
followed by an “X” or “Y” will be selected automatically (X<br />
= left/right, Y = up/down).<br />
* It is not possible to select the same parameter for both X and<br />
Y.<br />
Refer to the explanation of delay (p. 43).<br />
* When you change the type, the parameter whose setting is<br />
followed by an “X” or “Y” will be selected automatically (X<br />
= left/right, Y = up/down).<br />
* It is not possible to select the same parameter for both X and<br />
Y.<br />
1–5, 7–31, 64–95<br />
* It is not possible to select the same control<br />
change number for both X and Y.<br />
39<br />
Chapter 3
Chapter 3. About the D-FIELD<br />
SPIN mode<br />
You can produce a variety of effects by moving your finger in a circle on the D-FIELD.<br />
Changing the sound as on a turntable (VINYL)<br />
In the same way as by spinning a turntable manually, you can change the tempo or pitch, play a pattern backward, or produce<br />
scratch effects. You can also vary the volume by the size of the circle in which you move your finger.<br />
Display Explanation Setting<br />
Select the effect. TTE (TURNTABLE EMULATION), MAN (MANUAL):<br />
The tempo and pitch will be affected by the speed at which you move your finger in a circle,<br />
and the volume will be affected by the size of the circle.<br />
SR1 (SCRATCH 1), SR2 (SCRATCH 2):<br />
A scratch sound will be produced according to the way in which you move your finger.<br />
Circling broadly with a counterclockwise motion will produce a backspin sound.<br />
“SCRATCH 2” will produce the scratch sound while continuing to play the pattern.<br />
40<br />
➔ Changing the D-FIELD settings (p. 22)<br />
* While “TURNTABLE EMULATION” simulates the operation of a turntable, “MANUAL” selects the portion of the pattern that will be<br />
played according to the location at which you press the D-FIELD. The two effects are similar, but have a slightly different character.<br />
* You can specify independently whether tempo, pitch, and volume will change.<br />
➔ “D-FIELD BPM SW/D-FIELD PITCH SW/D-FIELD LEVEL SW“ (p. 75).<br />
• If you select the D-FIELD function “VINYL,” [ ] and [ ] cannot be used.<br />
• When you are playing back patterns consecutively (p. 15) and you select the next pattern and press [ENTER], the “VINYL” effect cannot<br />
be obtained until the pattern changes.<br />
Changing the tempo (BPM)<br />
The tempo (BPM) can be changed by the speed at which you rotate your finger or the timing at which you strike the D-FIELD.<br />
Display Explanation Setting<br />
Select how the BPM<br />
will be determined.<br />
➔ Changing the D-FIELD settings (p. 22)<br />
BPM:<br />
Clockwise rotation speeds up the tempo, while rotating counterclockwise will slow it<br />
down. When you remove your finger, the tempo will return to the original setting.<br />
TAP:<br />
You can specify the tempo by striking the D-FIELD three times.
Sounding a snare roll (SD ROLL)<br />
Chapter 3. About the D-FIELD<br />
You can sound a snare drum roll. The speed at which you rotate your finger will affect the speed of the roll. You can also change<br />
the volume by varying the size of the circle in which you move your finger.<br />
Display Explanation Setting<br />
➔ Changing the D-FIELD settings (p. 22)<br />
* You can change the sound that is used to play the roll. ➔ SD ROLL NOTE NUMBER (snare roll note number) (p. 73)<br />
* The volume change can be turned on/off. ➔ D-FIELD LEVEL SW (p. 75)<br />
Changing the number of notes that are sounded<br />
(ASSIGN 3: STEP MUTE)<br />
fig.SMT—<br />
Counterclockwise rotation produces a gradual decrease in the number of notes being sounded. By switching to clockwise<br />
rotation, you can gradually increase the number of notes that are sounded.<br />
Changing the stereo location of the sound (ASSIGN 3: PAN)<br />
fig.PAN—<br />
Select how the<br />
speed of the roll<br />
will change.<br />
You can change the pan and volume of the current part.<br />
Low-range parts such as kick and bass will tend to remain to the end.<br />
Display Explanation Setting<br />
TYPE none none none<br />
X none Pan Pan (fixed)<br />
Y none Level Level (fixed)<br />
AUT (AUTO):<br />
The speed of the roll will change in stages, according to the tempo of the song.<br />
Speed of finger rotation:<br />
STOPPED: 8th notes, SLOW SPEED: 16th notes, HIGH SPEED: 32nd notes<br />
MAN (MANUAL):<br />
The speed of the roll will change according to the speed at which you rotate your finger,<br />
regardless of the tempo of the song.<br />
41<br />
Chapter 3
42<br />
Chapter 4. Applying Effects to the Sound (Effects)<br />
Reverb<br />
Reverb is an effect which adds reverberation and ambiance to the sound, creating an impression of spatial depth. It simulates the<br />
sound of music played in a concert hall. This section describes the settings for using the reverb function.<br />
Turning reverb on/off<br />
Reverb is turned on by pressing [REVERB] and confirming that its indicator has lighted. To turn it off, press the button again,<br />
extinguishing the indicator.<br />
* This lets you turn the effect on/off for all parts regardless of other settings.<br />
Adjusting the reverb depth for individual parts<br />
Refer to the explanation of “Part Reverb Level” in “Modifying the settings of each part” (p. 19).<br />
Making detailed settings<br />
1. Hold down [REVERB] and press [EDIT].<br />
* If the D-FIELD function ASSIGN 2 is set to “REVERB,” you can also access the setting screen by holding down the D-FIELD function<br />
button [ASSIGN 2] and pressing [EDIT].<br />
2. Press [ENTER] to select a parameter.<br />
3. Turn [VALUE] to modify the setting.<br />
4.<br />
.<br />
When you are finished, press [EXIT]<br />
Screen Parameter Explanation Value<br />
TYPE Selecting the type. ROOM1 (reverb with short decay and high density),<br />
ROOM2 (reverb with short decay and low density),<br />
STAGE1 (reverb with much lingering reverberation),<br />
STAGE2 (reverb with strong early reflections),<br />
HALL1 (clear-sounding reverb),<br />
HALL2 (rich-sounding reverb)<br />
TIME Adjusting the length of reverberation.<br />
You can adjust the<br />
time over which the reverberation<br />
will continue.<br />
0–127 X<br />
HF DAMP Specifies the frequency at 200 (Hz)–8.00 (kHz), BYPASS<br />
which the high frequency por- * If this “BYPASS” is selected, the high frequency<br />
tions of the reverberation will<br />
be cut. Lowering this setting<br />
will cause more of the upper<br />
frequency content to be cut,<br />
making the reverberation more<br />
muted.<br />
range will not be cut.<br />
REVERB LEVEL You can adjust the overall volume<br />
of reverb for the eight<br />
parts (rhythm part and parts 1–<br />
7).<br />
0–127 Y<br />
MFX TO REV LEVEL Specifies the volume of the re- 0–127<br />
verb that will be applied to the * This setting does not have any effect on a part with<br />
Multi-effects sound.<br />
Applies reverb equally to each<br />
of the parts with Multi-effects<br />
set at ON regardless of the Part<br />
Reverb Level for each part.<br />
the MFX switch turned off (p. 19).<br />
* Parameters with an “X” or “Y” following the value will be selected when using D-FIELD to control the reverb (p. 39). “X” can be controlled by moving<br />
your finger to left and right, and “Y” by moving your finger up and down.
Delay (Add echoes to the sound)<br />
Chapter 4. Applying Effects to the Sound (Effects)<br />
Delay is an effect which adds echoes to the sound. It is effective when applied to solo phrases or to densely rhythmic phrases.<br />
Described here is how to set the Delay effect.<br />
Turning delay on/off<br />
Delay is turned on by pressing [DELAY] and confirming that its indicator has lighted. To turn it off, press the button again,<br />
extinguishing the indicator.<br />
* This lets you turn the effect on/off for all parts regardless of other settings.<br />
Adjusting the delay volume for individual parts<br />
Refer to the explanation of “Part Delay Level” in “Modifying the settings of each part” (p. 19).<br />
Making detailed settings<br />
1. Hold down [DELAY] and press [EDIT].<br />
* If the D-FIELD function ASSIGN 2 is set to “DELAY,” you can also access the setting screen by holding down the D-FIELD function<br />
button [ASSIGN 2] and pressing [EDIT].<br />
2. Press [ENTER] to select a parameter.<br />
3. Turn [VALUE] to modify the setting.<br />
4. When you are finished, press [EXIT].<br />
Screen Parameter Explanation Value<br />
TYPE Selecting the type. SHORT, LONG<br />
TIME Adjusts the time from the original sound until<br />
when the delayed sound is heard (the interval between<br />
repeats).<br />
* On the D-2, it is not possible to set a delay time<br />
longer than 1 second. When the delay time is<br />
synchronized to the BPM, selecting a note value<br />
which would make the delay time exceed 1second<br />
will cause the delay time to be halved, and the<br />
delay sound will be heard at 1/2 the specified<br />
interval. In addition, even if 1/2 the length would<br />
exceed 1 second, the delay time will be shortened<br />
to 1/4 the length.<br />
FEEDBACK Sets the amount of delayed sound to be repeated, as<br />
a proportion of the original sound.<br />
HF DAMP Specifies the frequency at which the high frequency<br />
portions of the reverberation will be cut. Lowering<br />
this setting will cause more of the upper frequency<br />
content to be cut, making the reverberation more<br />
muted in tone.If this “BYPASS” is selected, the high<br />
frequency range will not be cut.<br />
OUTPUT Allows you to select a destination for the sound after<br />
reverb has been applied.Selecting LINE outputs<br />
the sound to the OUTPUT jacks on the rear panel;<br />
selecting REV outputs it to Reverb; or selecting<br />
LINE + REV outputs the sound to both the OUT-<br />
PUT jacks and Reverb.<br />
DELAY OUTPUT<br />
LEVEL<br />
This adjusts the volume of the delay sound for all<br />
eight parts (the rhythm part and parts 1-7).<br />
MFX TO DLY LEVEL Applies the Delay equally to each of the parts with<br />
Multi-effects set at ON regardless of the Part Delay<br />
Level for each part.<br />
When “TYPE” is SHORT: 0.1-275 (ms)<br />
When “TYPE” is LONG: 200 (ms)-1 (s), notes<br />
(*1)<br />
0–98 (%) Y<br />
200 (Hz)–8.00 (kHz), BYPASS<br />
LINE, REV, LINE+REV<br />
* 1: 16 (16th note), 8T (8th note triplets), 16. (dotted 16th note), 8 (8th note), 4T (quarter note triplets), 8. (dotted 8th note), 4 (quarter note), 2T (half note<br />
triplets), 4. (dotted quarter note), 2 (half note)<br />
* Parameters with an “X” or “Y” following the value will be selected when using D-FIELD to control the delay (p. 39). “X” can be controlled by moving<br />
your finger to left and right, and “Y” by moving your finger up and down.<br />
0–127<br />
0–127<br />
* This setting does not have any effect on a part<br />
with the MFX switch turned off (p. 19).<br />
X<br />
43<br />
Chapter 4
Chapter 4. Applying Effects to the Sound (Effects)<br />
Multi-Effects (MFX)<br />
Multi-effects provides 25 different Effect Types, each of<br />
which let you apply a different effect. Described here is how<br />
to enter the MFX-related settings.<br />
Turning the multi-effects on/off<br />
The multi-effects is turned on by pressing [MFX] and getting<br />
the indicator to light. To turn it off, press the button again,<br />
extinguishing the indicator.<br />
* This lets you turn the effect on/off for all parts, regardless of<br />
other settings.<br />
Applying the multi-effects to individual<br />
parts<br />
Refer to the explanation of “Part MFX Switch” in “Modifying<br />
the settings of each part” (p. 19).<br />
Using the part buttons to turn the<br />
multi-effects on/off<br />
You can also turn the multi-effects on/off for an individual<br />
part by holding down the D-FIELD function button [MFX]<br />
and pressing the corresponding part button.<br />
The multi-effects is on for parts whose part button is lit while<br />
you are pressing the D-FIELD function button [MFX].<br />
* This method cannot be used to set the MFX switch of the<br />
rhythm part to “RHY.” The setting can be changed from<br />
“RHY” to “OFF,” but will always change from “OFF” to<br />
“ON.”<br />
Making detailed settings<br />
1. Hold down [MFX] and press [EDIT].<br />
* You can also access the setting screen by holding down the D-<br />
FIELD function button [MFX] and pressing [EDIT].<br />
2. Turn [VALUE] to select the desired type of multieffects.<br />
3. Press [ENTER] to select the parameter.<br />
4. Turn [VALUE] to modify the setting.<br />
5. When you are finished, press [EXIT].<br />
44<br />
Available Settings<br />
No MFX TYPE Description<br />
1 4BAND EQ modify the tone<br />
2 SPECTRUM add character to the sound<br />
3 ENHANCER add sparkle to the sound<br />
4 OVERDRIVE distort the sound mildly<br />
5 DISTORTION distort the sound severely<br />
6 Lo-Fi simulate a “low-fidelity” sound<br />
7 NOISE add various types of noise<br />
8 RADIO TUNING simulate a radio being tuned<br />
9 PHONOGRAPH simulate an old record<br />
10 COMPRESSOR make the volume level more consistent<br />
11 LIMITER smooth out irregularities in volume<br />
12 SLICER apply successive cuts to the sound<br />
13 TREMOLO cyclic changes in volume<br />
14 PHASER modulate the sound<br />
15 CHORUS add spaciousness and depthto the<br />
sound<br />
16 SPACE-D add transparent depth<br />
17 TETRA CHORUS layer chorus sounds to add spaciousness<br />
18 FLANGER add metallic resonance to the sound<br />
19 STEP FLANGER add metallic resonance to the sound<br />
while changing the pitch in steps<br />
20 SHORT DELAY add echoes to the sound<br />
21 AUTO PAN automatically move the stereo location<br />
22 FB PITCH<br />
SHIFTER<br />
skew the pitch<br />
23 REVERB add reverberation<br />
24 GATE REVERB sharply cut the reverberation<br />
25 ISOLATOR Cuts off a specific range<br />
* For details on the settings for each effect, refer to the<br />
explanations on the next and following pages.
Chapter 4. Applying Effects to the Sound (Effects)<br />
* Parameters with an “X” or “Y” following the value will be selected when using D-FIELD to control the multi-effects (p. 33). “X” can be<br />
controlled by moving your finger to left and right, and “Y” by moving your finger up and down.<br />
1. 4 Band EQ (Modify the tone)<br />
fig.MFXEQ<br />
This is a 4 band (high, midrange x 2, low) stereo equalizer.<br />
Screen Parameter Explanation Value<br />
LOW FREQ<br />
(LOW Frequency)<br />
Determines the frequency of the low range. 200, 400 (Hz)<br />
2. Spectrum (Add Character to the Sound)<br />
fig.MFXSPE<br />
LOW GAIN Adjusts the volume of the low frequency range. -15–15<br />
HIGH FREQ<br />
(HIGH Frequency)<br />
Determines the frequency of the high range. 4.00, 8.00 (kHz)<br />
HIGH GAIN Adjusts the volume of the high frequency range. -15–15<br />
PEAK1 FREQ<br />
(Peaking 1 Frequency)<br />
PEAK1 Q<br />
(Peaking 1Q)<br />
PEAK1 GAIN<br />
(Peaking 1 GAIN)<br />
PEAK2 FREQ<br />
(Peaking 2 Frequency)<br />
PEAK2 Q<br />
(Peaking 2Q)<br />
PEAK2 GAIN<br />
(Peaking 2 GAIN)<br />
Determines the frequency of midrange 1. 200 (Hz)–8.00 (kHz)<br />
Specifies the width of the frequency range affected by<br />
midrange 1. As this setting is increased, the affected area will<br />
become narrower.<br />
0.5–8.0<br />
Adjusts the volume of midrange 1. -15–15 X<br />
Determines the frequency of midrange 2. 200 (Hz)–8.00 (kHz)<br />
Specifies the width of the frequency range affected by<br />
midrange 2. As this setting is increased, the affected area will<br />
become narrower.<br />
0.5–8.0<br />
Adjusts the volume of midrange 2. -15–15 Y<br />
OUTPUT LEVEL Adjusts the output level from the 4 band EQ. 0–127<br />
This is a type of filter, which modifies the tonal character by boosting or cutting specific frequencies. It is similar to an equalizer,<br />
but when you wish to add character to the sound, the Spectrum effect will produce a more distinctive result.<br />
Screen Parameter Explanation Value<br />
LOW-HIGH GAIN Specifies the volume change at 500 Hz and 8.00 kHz. -15–15 X<br />
MIDDLE GAIN Specifies the volume change at 1.25 kHz. -15–15 Y<br />
BAND WIDTH Specifies the width of the bands in which the volume will be adjusted.<br />
OUTPUT PAN Specifies the panning of the sound that is output from the Spectrum<br />
effect.<br />
1–5<br />
L64–R63<br />
OUTPUT LEVEL Specifies the volume that is output from the Spectrum effect. 0–127<br />
45<br />
Chapter 4
Chapter 4. Applying Effects to the Sound (Effects)<br />
3. Enhancer (Add Sparkle to the Sound)<br />
fig.MFXENH<br />
By controlling the overtones of the high frequency range, this effect adds sparkle to the sound, giving it more definition.<br />
Use this effect when you want to make a specific sound stand out from the rest of the ensemble, or to give it greater definition.<br />
Screen Parameter Explanation Value<br />
SENS<br />
(Sensitivity)<br />
Adjusts the depth of the enhancer effect. 0–127<br />
4. Overdrive (Distort the Sound Mildly)<br />
fig.MFXodr<br />
This simulates the soft distortion that occurs when you raise the gain of a vacuum tube amp. The effect also contains an amp<br />
simulator, and produces the natural distortion that is created by sounds played through a guitar amp. It is suitable for use with<br />
guitar and synth-bass sounds.<br />
46<br />
MIX<br />
(Mix Level)<br />
Determines the proportion at which the overtones generated by<br />
the enhancer will be mixed with the original sound.<br />
0–127 Y<br />
LOW GAIN Adjusts the volume of the low frequency range. -15–15 X<br />
HIGH GAIN Adjusts the volume of the high frequency range. -15–15<br />
OUTPUT LEVEL Specifies the volume of the output from the Enhancer effect. 0–127<br />
Screen Parameter Explanation Value<br />
INPUT LEVEL Adjusts the level of the input signal. 0–127<br />
DRIVE Adjusts the depth of distortion. This will also affect<br />
the volume.<br />
0–127 Y<br />
AMP TYPE Selection for the type of guitar amp. SMALL (small amp),<br />
BUILTIN (built-in type amp),<br />
2STACK (large double amp stack),<br />
3STACK (large triple amp stack)<br />
OUTPUT PAN Specifies the stereo location of the sound that is<br />
output from the Overdrive effect.<br />
L64–R63 X<br />
OUTPUT LEVEL Specifies the output volume from the Overdrive<br />
effect.<br />
0–127
5. Distortion (Distort the Sound Severely)<br />
fig.MFXDST<br />
Chapter 4. Applying Effects to the Sound (Effects)<br />
This effect produces a more severe distortion than the Overdrive effect. It also contains an amp simulator, and produces the<br />
natural sound of a guitar amp.<br />
Screen Parameter Explanation Value<br />
INPUT LEVEL Adjusts the level of the input signal. 0–127<br />
6. Lo-Fi (Simulate a “Lo-Fidelity” Sound)<br />
fig.MFXNSE<br />
DRIVE Adjusts the depth of distortion. This will also affect<br />
the volume.<br />
0–127 Y<br />
AMP TYPE Determines the type of guitar amp. SMALL (small amp),<br />
BUILTIN (built-in type amp),<br />
2STACK (large double amp stack),<br />
3STACK (large triple amp stack)<br />
OUTPUT PAN Specifies the stereo location of the sound that is<br />
output from the Distortion effect.<br />
L64–R63 X<br />
OUTPUT LEVEL Specifies the output volume from the Distortion<br />
effect.<br />
This effect intentionally degrades the audio quality to simulate a Lo-Fi sound. It is particularly effective on drums.<br />
Screen Parameter Explanation Value<br />
BIT DOWN This setting lowers the audio quality. The audio quality will<br />
worsen as this setting is increased.<br />
0–7 X<br />
0–127<br />
SAMPLE RATE DOWN This coarsens the output signal. The sound will become<br />
coarser as this setting is lowered.<br />
32, 16, 8, 4 Y<br />
POST GAIN Adjusts the output signal. 0, +6, +12, +18<br />
LOW GAIN Adjusts the boost or cut applied to the low frequency range. -15–15<br />
HIGH GAIN Adjusts the boost or cut applied to the high frequency range. -15–15<br />
OUTPUT Specifies how the sound will be output. With a setting of<br />
“MONO,” the output sound will be monaural.<br />
OUTPUT LEVEL Specifies the output volume from the Lo-Fi effect. 0–127<br />
MONO, STEREO<br />
47<br />
Chapter 4
Chapter 4. Applying Effects to the Sound (Effects)<br />
7. Noise Generator (Add Various Types of Noise)<br />
fig.MFXNSE<br />
In addition to a Lo-Fi effect, this effect also generates various types of noise such as hum, pink noise, and disk noise.<br />
Screen Parameter Explanation Value<br />
NOISE TYPE Determines the type of noise(s) that will be generated. 1–18<br />
For each setting, the type(s) of noise marked by “ ” will be generated.<br />
8. Radio Tuning (Simulate a Radio Being Tuned)<br />
fig.MFXRTN<br />
This effect simulates the sound of a radio being tuned.<br />
48<br />
NOISE LEVEL Specifies the volume of the noise. 0–127 Y<br />
NOISE FILTER Adjusts the tone of the noise. If you do not wish to filter the<br />
noise, select “BYPASS.”<br />
LO-FI LEVEL Increasing this setting will make the original sound rougher. 0–127<br />
OUTPUT PAN Specifies the stereo location of the sound output from the Noise<br />
Generator.<br />
200 (Hz)–8.00 (kHz),<br />
BYPASS<br />
L64–R63<br />
OUTPUT LEVEL Specifies the output volume of the Noise Generator effect. 0–127<br />
NOISE TYPE 1 2 3 4 5 6 7 8 9 10 11 12 13 14 15 16 17 18<br />
Hum noise (50Hz)<br />
Hum noise (60Hz)<br />
Pink noise<br />
Disc noise (45 RPM)<br />
Disc noise (33 RPM)<br />
Disc noise generated at random<br />
Screen Parameter Explanation Value<br />
RADIO DETUNE Specifies the frequency being tuned. 0–127 X<br />
NOISE LEVEL Specifies the volume of the tuning noise. 0–127 Y<br />
LOW GAIN Adjusts the boost or cut of the low frequency range. -15–15<br />
HIGH GAIN Adjusts the boost or cut of the high frequency range. -15–15<br />
OUTPUT Specifies how the sound will be output. With a setting of “MONO,”<br />
the output sound will be monaural.<br />
OUTPUT LEVEL Specifies the output volume of the Radio Tuning effect. 0–127<br />
MONO, STEREO<br />
X
9. Phonograph (Simulates an Old Record)<br />
Chapter 4. Applying Effects to the Sound (Effects)<br />
This effect mutes the tone and adds disc noise to simulate the sound of music played on an old record player.<br />
Screen Parameter Explanation Value<br />
DISC TYPE Determines the type of disc noise. LP (33 RPM record),<br />
EP (45 RPM record),<br />
SP (78 RPM record)<br />
DISC NOISE LEVEL Specifies the volume of the disc noise. 0–127 Y<br />
DEPTH Adjusts the tone. As this value is increased, the high range and<br />
low range will be cut, and the mid range will be emphasized.<br />
OUTPUT PAN Specifies the stereo location of the output from the Phonograph<br />
effect.<br />
10. Compressor (Make the Volume Level More Consistent)<br />
This effect suppresses loud volume levels and boosts soft volume levels, making the volume more consistent.<br />
11. Limiter (Smooth Out Irregularities in Volume)<br />
This effect compresses the sound when it exceeds a specified volume level, thus preventing distortion.<br />
0–20 X<br />
L64–R63<br />
OUTPUT LEVEL Specifies the output volume from the Phonograph effect. 0–127<br />
Screen Parameter Explanation Value<br />
ATTACK Specifies the duration of the attack when sound is input. 0–127 X<br />
SUSTAIN Specifies the time over which low-level sounds will be<br />
boosted to reach the specified volume.<br />
POST GAIN Adjusts the output signal. 0, +6, +12, +18<br />
LOW GAIN Adjusts the boost or cut of the low frequency range. -15–15<br />
HIGH GAIN Adjusts the boost or cut of the high frequency range. -15–15<br />
OUTPUT LEVEL Specifies the output volume from the Compressor effect. 0–127<br />
0–127 Y<br />
Screen Parameter Explanation Value<br />
THRESHOLD<br />
(Threshold Level)<br />
Specifies the volume level at which compression will begin. 0–127 Y<br />
RATIO<br />
(Compression Ratio)<br />
Specifies the ratio of compression. 1.5:1, 2:1, 4:1, 100:1 X<br />
RELEASE Specifies the time from when the volume drops below the<br />
Threshold Level until compression is no longer applied.<br />
0–127<br />
POST GAIN Adjusts the output signal. 0, +6, +12, +18<br />
OUTPUT PAN Specifies the stereo location of the output from the Limiter<br />
effect.<br />
L64–R63<br />
OUTPUT LEVEL Specifies the output volume of the Limiter effect. 0–127<br />
49<br />
Chapter 4
Chapter 4. Applying Effects to the Sound (Effects)<br />
12. Slicer (Apply Successive Cuts to the Sound)<br />
fig.MFXSLI<br />
By applying successive cuts to the sound, this effect turns a conventional sound into a sound that appears to be played as a<br />
backing phrase. This is especially effective when applied to sustain-type sounds.<br />
Screen Parameter Explanation Value<br />
TIMING PATTERN Select a pattern to specify the timing at which the sound will be<br />
cut.<br />
34 types X<br />
13. Tremolo (Cyclic Changes in Volume)<br />
fig.MFXTRM<br />
This effect cyclically modulates the volume to create tremolo.<br />
* 1: 16 (16th note), 8T (8th note triplets), 16. (dotted 16th note), 8 (8th note), 4T (quarter note triplets), 8. (dotted 8th note), 4 (quarter note), 2T (half note<br />
triplets), 4. (dotted quarter note), 2 (half note), 1T (whole note triplets), 2. (dotted half note), 1 (whole note)<br />
* 2: 2M (2 measures), 3M (3 measures), 4M (4 measures), 8M (8 measures), 16M (16 measures)<br />
50<br />
ACCENT PATTERN Specifies the location of the accents. 16 types<br />
ACCENT LEVEL Adjusts the volume of the accents. As this setting is increased,<br />
the accent will be more pronounced.<br />
ATTACK Adjusts the attack speed of the sound. As this setting is increased,<br />
the attack will become faster.<br />
OUTPUT LEVEL Adjusts the output volume from the Slicer effect. 0–127<br />
RATE Determines the note value unit which will be cut. 4, 2, 1<br />
Screen Parameter Explanation Value<br />
LFO TYPE Determines the waveform that will be used to modulate the<br />
sound.<br />
0–127 Y<br />
1–10<br />
TRI, TRP, SIN,<br />
SAW1, SAW2, SQR<br />
DEPTH Specifies the depth of modulation. 0–127 Y<br />
LOW GAIN Adjusts the boost or cut of the low frequency range. -15–15<br />
RATE Specifies the frequency of modulation. If a note value or measure<br />
is selected as the value of this parameter, the Rate will synchronize<br />
with the BPM of the pattern at intervals of the specified note value<br />
or measure.<br />
HIGH GAIN Adjusts the boost or cut of the high frequency range. -15–15<br />
OUTPUT LEVEL Specifies the output volume of the Tremolo effect. 0–127<br />
0.1–10.0 (Hz), notes<br />
(*1), measures (*2)<br />
X
14. Phaser (Modulate the Sound)<br />
Chapter 4. Applying Effects to the Sound (Effects)<br />
By adding a phase-shifted sound to the original sound, this effect modulates the sound to add depth and a sense of rotation.<br />
Screen Parameter Explanation Value<br />
MANUAL Specifies the center frequency at which the sound will be modulated. 100 (Hz)–8.00 (kHz)<br />
DEPTH Specifies the depth of modulation. 0–127 Y<br />
RESONANCE This setting emphasizes the frequency range in the vicinity of the center<br />
frequency.<br />
RATE Specifies the frequency of modulation. If a note value or measure is<br />
selected as the value of this parameter, the Rate will synchronize with<br />
the BPM of the pattern at intervals of the specified note value or measure.<br />
MIX<br />
(Mix Level)<br />
Adjusts the proportion of the original sound that will be combined<br />
with the phase-shifted sound.<br />
* 1: 16 (16th note), 8T (8th note triplets), 16. (dotted 16th note), 8 (8th note), 4T (quarter note triplets), 8. (dotted 8th note), 4 (quarter note), 2T (half note<br />
triplets), 4. (dotted quarter note), 2 (half note), 1T (whole note triplets), 2. (dotted half note), 1 (whole note)<br />
* 2: 2M (2 measures), 3M (3 measures), 4M (4 measures), 8M (8 measures), 16M (16 measures)<br />
15. Chorus (Add Spaciousness and Depth to the Sound)<br />
This effect creates an impression of multiple sound sources in unison (Chorus effect), giving spaciousness and depth to the sound.<br />
* 1: 16 (16th note), 8T (8th note triplets), 16. (dotted 16th note), 8 (8th note), 4T (quarter note triplets), 8. (dotted 8th note), 4 (quarter note), 2T (half note<br />
triplets), 4. (dotted quarter note), 2 (half note), 1T (whole note triplets), 2. (dotted half note), 1 (whole note)<br />
* 2: 2M (2 measures), 3M (3 measures), 4M (4 measures), 8M (8 measures), 16M (16 measures)<br />
0–127<br />
0.1–10.0 (Hz), notes<br />
(*1), measures (*2)<br />
0–127<br />
OUTPUT PAN Specifies the stereo location of the output from the Phaser effect. L64–R63<br />
OUTPUT LEVEL Specifies the output volume of the Phaser effect. 0–127<br />
Screen Parameter Explanation Value<br />
PRE DELAY<br />
Specifies the time from the original sound until 0.0–100<br />
(Pre Delay Time) when the chorus sound is heard.<br />
DEPTH Specifies the depth of modulation. 0–127 Y<br />
PHASE Adjusts the spaciousness of the sound.As this<br />
setting is increased, the sound will spread more<br />
toward left and right.<br />
RATE Specifies the rate of modulation. If a note value<br />
or measure is selected as the value of this parameter,<br />
the Rate will synchronize with the BPM of<br />
the pattern at intervals of the specified note value<br />
or measure.<br />
FILTER TYPE Determines the type of filter that will be applied<br />
to the chorus sound.<br />
CUTOFF<br />
(Cutoff Frequency)<br />
BALANCE<br />
(Effect Balance)<br />
0–180<br />
0.1–10.0 (Hz), notes (*1), measures<br />
(*2)<br />
OFF (a filter will not be used),<br />
LPF (the frequency range above the<br />
cutoff frequency will be cut),<br />
HPF (the frequency range below the<br />
cutoff frequency will be cut)<br />
Specifies the cutoff frequency of the filter. 200 (Hz)–8.00 (kHz)<br />
Adjusts the volume balance between the original<br />
sound and the chorus sound.With a setting<br />
of “0,” no chorus sound will be output.<br />
OUTPUT LEVEL Specifies the output volume from the stereo chorus.<br />
0–100 (%)<br />
0–127<br />
X<br />
X<br />
51<br />
Chapter 4
Chapter 4. Applying Effects to the Sound (Effects)<br />
16. Space-D (Add Transparent Depth)<br />
This is a type of chorus, but unlike a conventional chorus, it does not create a sense of modulation.<br />
Screen Parameter Explanation Value<br />
PRE DELAY Specifies the time from the original sound until the chorus sound is 0.0–100<br />
(Pre Delay Time) heard.<br />
* 1: 16 (16th note), 8T (8th note triplets), 16. (dotted 16th note), 8 (8th note), 4T (quarter note triplets), 8. (dotted 8th note), 4 (quarter note), 2T (half note<br />
triplets), 4. (dotted quarter note), 2 (half note), 1T (whole note triplets), 2. (dotted half note), 1 (whole note)<br />
* 2: 2M (2 measures), 3M (3 measures), 4M (4 measures), 8M (8 measures), 16M (16 measures)<br />
17. Tetra Chorus (Layer Chorus Sounds to Add Spaciousness)<br />
This effect layers four chorus sounds to produce even more depth and spaciousness than a conventional chorus.<br />
* 1: 16 (16th note), 8T (8th note triplets), 16. (dotted 16th note), 8 (8th note), 4T (quarter note triplets), 8. (dotted 8th note), 4 (quarter note), 2T (half note<br />
triplets), 4. (dotted quarter note), 2 (half note), 1T (whole note triplets), 2. (dotted half note), 1 (whole note)<br />
* 2: 2M (2 measures), 3M (3 measures), 4M (4 measures), 8M (8 measures), 16M (16 measures)<br />
52<br />
DEPTH Specifies the depth of modulation. 0–127 Y<br />
PHASE Adjusts the spread of the sound.As this value is increased, the<br />
sound will have a broader left/right spread.<br />
RATE Specifies the rate of modulation. If a note value or measure is selected<br />
as the value of this parameter, the Rate will synchronize with the<br />
BPM of the pattern at intervals of the specified note value or measure.<br />
0–180<br />
LOW GAIN Adjusts the boost or cut of the low frequency range. -15–15<br />
HIGH GAIN Adjusts the boost or cut of the high frequency range. -15–15<br />
BALANCE<br />
(Effect Balance)<br />
Adjusts the volume balance between the original sound and the<br />
chorus sound.With a setting of “0,” no chorus sound will be output.<br />
0.1–10.0 (Hz), notes<br />
(*1), measures (*2)<br />
0–100 (%)<br />
OUTPUT LEVEL Specifies the output volume from the Space-D effect. 0–127<br />
Screen Parameter Explanation Value<br />
PRE DELAY<br />
Specifies the time from the original sound until when the 0.0–100<br />
(Pre Delay Time) chorus sound is heard.<br />
DEPTH Specifies the depth of modulation. 0–127<br />
PRE DELAY DEVI<br />
(Pre Delay Deviation)<br />
Adjusts the difference in pre delay between each of the chorus<br />
sounds.<br />
RATE Specifies the rate of modulation. If a note value or measure<br />
is selected as the value of this parameter, the Rate will synchronize<br />
with the BPM of the pattern at intervals of the specified<br />
note value or measure.<br />
DEPTH DEVI<br />
(Depth Deviation)<br />
Adjusts the difference in modulation depth between each of<br />
the chorus sounds.<br />
PAN DEVI Adjusts the pan difference between each chorus sound.As<br />
this value is increased, the sound will have a greater left/<br />
right spread.<br />
BALANCE<br />
(Effect Balance)<br />
Specifies the volume balance between the original sound<br />
and the chorus sound.With a setting of “0,” no chorus sound<br />
will be output.<br />
0–20<br />
0.1–10.0 (Hz), notes (*1),<br />
measures (*2)<br />
-20–20<br />
X<br />
X<br />
0–20 Y<br />
0–100 (%)<br />
OUTPUT LEVEL Specifies the output volume from the Tetra Chorus effect. 0–127
18. Flanger (Add Metallic Resonance to the Sound)<br />
fig.MFXFLN<br />
Chapter 4. Applying Effects to the Sound (Effects)<br />
This creates a sharp and mechanical sound. It can add a metallic resonance to the sound, or produce an effect that sounds like an<br />
jet airplane taking off and landing.<br />
Screen Parameter Explanation Value<br />
PRE DELAY<br />
Specifies the time from the original sound 0.0–100<br />
(Pre Delay Time) until the flanger sound is heard.<br />
DEPTH Specifies the depth of modulation. 0–127<br />
FEEDBACK<br />
(Feedback Level)<br />
Specifies the proportion of the flanger<br />
sound that is fed back into the input.<br />
RATE Specifies the rate of modulation. If a note<br />
value or measure is selected as the value<br />
of this parameter, the Rate will synchronize<br />
with the BPM of the pattern at intervals<br />
of the specified note value or<br />
measure.<br />
PHASE Adjusts the width of the sound. As this<br />
setting is increased, the left/right spread<br />
of the sound will increase.<br />
FILTER TYPE Determines the type of filter that will be<br />
applied to the flanger sound.<br />
CUTOFF<br />
(Cutoff Frequency)<br />
BALANCE<br />
(Effect Balance)<br />
0–98 (%) Y<br />
0.1–10.0 (Hz), notes (*1), measures (*2) X<br />
* 1: 16 (16th note), 8T (8th note triplets), 16. (dotted 16th note), 8 (8th note), 4T (quarter note triplets), 8. (dotted 8th note), 4 (quarter note), 2T (half note<br />
triplets), 4. (dotted quarter note), 2 (half note), 1T (whole note triplets), 2. (dotted half note), 1 (whole note)<br />
* 2: 2M (2 measures), 3M (3 measures), 4M (4 measures), 8M (8 measures), 16M (16 measures)<br />
0–180<br />
Specifies the cutoff frequency of the filter. 200 (Hz)–8.00 (kHz)<br />
Adjusts the volume balance between the<br />
original sound and the flanger<br />
sound.With a setting of “0,” no flanger<br />
sound will be output.<br />
OUTPUT LEVEL Specifies the output volume from the stereo<br />
flanger.<br />
OFF (a filter will not be used),<br />
LPF (the frequency range above the cutoff<br />
frequency will be cut),<br />
HPF (the frequency range below the cutoff<br />
frequency will be cut)<br />
0–100 (%)<br />
0–127<br />
53<br />
Chapter 4
Chapter 4. Applying Effects to the Sound (Effects)<br />
19. Step Flanger (Add Metallic Resonance to the Sound While Changing the Pitch in Steps)<br />
This is a flanger that changes the pitch of the sound in steps. The frequency of pitch change can also be synchronized to the BPM.<br />
Screen Parameter Explanation Value<br />
PRE DELAY Specifies the time from the original sound until the flanger sound is 0.0–100<br />
(Pre Delay Time) heard.<br />
* 1: 16 (16th note), 8T (8th note triplets), 16. (dotted 16th note), 8 (8th note), 4T (quarter note triplets), 8. (dotted 8th note), 4 (quarter note), 2T (half note<br />
triplets), 4. (dotted quarter note), 2 (half note), 1T (whole note triplets), 2. (dotted half note), 1 (whole note)<br />
* 2: 2M (2 measures), 3M (3 measures), 4M (4 measures), 8M (8 measures), 16M (16 measures)<br />
* 3: 16 (16th note), 8T (8th note triplets), 16. (dotted 16th note), 8 (8th note), 4T (quarter note triplets), 8. (dotted 8th note), 4 (quarter note), 2T (half note<br />
triplets), 4. (dotted quarter note), 2 (half note)<br />
20. Short Delay (Add Echoes to the Sound)<br />
54<br />
DEPTH Specifies the depth of modulation. 0–127<br />
FEEDBACK<br />
(Feedback Level)<br />
Specifies the proportion of the flanger sound that is fed back into the<br />
input.<br />
RATE Specifies the frequency of modulation.If a note value or measure is<br />
selected as the value of this parameter, the Rate will synchronize<br />
with the BPM of the pattern at intervals of the specified note value<br />
or measure.<br />
PHASE Adjusts the spread of the sound.As this value is increased, the left/<br />
right spread of the sound will increase.<br />
BALANCE<br />
(Effect Balance)<br />
Adjusts the volume balance between the original sound and the<br />
flanger sound.With a setting of “0,” no flanger sound will be output.<br />
0–98 (%) X<br />
0.1–10.0 (Hz),<br />
notes (*1),<br />
measures (*2)<br />
0–180<br />
0–100 (%)<br />
OUTPUT LEVEL Specifies the output volume of the Step Flanger effect. 0–127<br />
STEP RATE Specifies the rate at which the pitch will change.If a note value is selected<br />
as the value of this parameter, the Step Rate will synchronize<br />
with the BPM of the pattern at intervals of the specified note value.<br />
0.05–10.0 (Hz),<br />
notes (*3)<br />
This is a short delay which allows you to set the left and right delay times independently. You can also move the panning of the<br />
delay sound in synchronization with the BPM.<br />
Screen Parameter Explanation Value<br />
TIME L<br />
Specifies the time from the original sound until the left delay 0.1–190 Y<br />
(Left Delay Time) sound is heard.<br />
TIME R<br />
(Right Delay Time)<br />
Specifies the time from the original sound until the right delay<br />
sound is heard.<br />
Y<br />
0.1–190 X<br />
HF DAMP Determines the frequency at which the high frequency portions of 200 (Hz)–8.00 (kHz),<br />
the delay sound will be cut. As this parameter is set to a lower frequency,<br />
more of the high range will be cut, making the delay<br />
sound more muted in tone. If you do not wish to cut the high frequency<br />
range, select “BYPASS.”<br />
BYPASS<br />
FEEDBACK<br />
(Feedback Level)<br />
Adjusts the number of delay repeats. 0–98 (%)<br />
LOW GAIN Adjusts the boost or cut of the low frequency range. -15–15<br />
HIGH GAIN Adjusts the boost or cut of the high frequency range. -15–15<br />
BALANCE<br />
(Effect Balance)<br />
Adjusts the volume balance between the original sound and the<br />
delay sound. With a setting of “0,” no delay sound will be output.<br />
AUTO PAN This setting causes the panning of the delay sound to move in synchronization<br />
with the BPM.<br />
0–100 (%)<br />
0.1–10.0 (Hz), notes<br />
(*1), measures (*2)
Chapter 4. Applying Effects to the Sound (Effects)<br />
Screen Parameter Explanation Value<br />
OUTPUT LEVEL Specifies the output volume from the Short Delay effect. 0–127<br />
* 1: 16 (16th note), 8T (8th note triplets), 16. (dotted 16th note), 8 (8th note), 4T (quarter note triplets), 8. (dotted 8th note), 4 (quarter note), 2T (half note<br />
triplets), 4. (dotted quarter note), 2 (half note), 1T (whole note triplets), 2. (dotted half note), 1 (whole note)<br />
* 2: 2M (2 measures), 3M (3 measures), 4M (4 measures), 8M (8 measures), 16M (16 measures)<br />
21. Auto PAN (Automatically Move the Stereo Location)<br />
fig.MFXAPN<br />
This effect automatically moves the stereo location of the sound. You can cause the sound to be panned left and right in time with<br />
low notes such as a Bass Drum, or in synchronization with the BPM of the pattern.<br />
Screen Parameter Explanation Value<br />
LFO TYPE Determines the waveform that will be used<br />
to pan the sound to left and right.<br />
TRI, TRP, SIN, SAW1, SAW2, SQR<br />
BASS SENS Make this setting when you wish to shift the<br />
panning at the timing of the bass notes.<br />
OFF (the panning will change at the speed<br />
specified by Rate),<br />
MODE1 (the Rate value will increase at<br />
the timing of the bass notes),<br />
MODE2 (the panning will change at the<br />
timing of the bass notes)<br />
DEPTH Specifies the depth of panning. 0–127 Y<br />
RATE Specifies the rate at which the pan will be<br />
moved.If a note value or measure is selected<br />
as the value of this parameter, the Rate will<br />
synchronize with the tempo of the pattern at<br />
intervals of the specified note value or measure.<br />
* When the Bass Sensitivity parameter is set<br />
to “MODE2,” the Rate setting will be<br />
ignored.<br />
LOW GAIN Adjusts the boost or cut of the low frequency<br />
range.<br />
HIGH GAIN Adjusts the boost or cut of the high frequency<br />
range.<br />
OUTPUT LEVEL Specifies the output volume of the AUTO<br />
PAN effect.<br />
0.1–10.0 (Hz), notes (*1), measures (*2) X<br />
* 1: 16 (16th note), 8T (8th note triplets), 16. (dotted 16th note), 8 (8th note), 4T (quarter note triplets), 8. (dotted 8th note), 4 (quarter note), 2T (half note<br />
triplets), 4. (dotted quarter note), 2 (half note), 1T (whole note triplets), 2. (dotted half note), 1 (whole note)<br />
* 2: 2M (2 measures), 3M (3 measures), 4M (4 measures), 8M (8 measures), 16M (16 measures)<br />
-15–15<br />
-15–15<br />
0–127<br />
55<br />
Chapter 4
Chapter 4. Applying Effects to the Sound (Effects)<br />
22. Feedback Pitch Shifter (Skew the Pitch)<br />
fig.MFXFPS<br />
This effect shifts the pitch of the original sound and layers it with the original sound. It can be used to play unison lines at an<br />
interval of an octave or fifth, or to layer a slightly pitch-shifted with the original sound to create a chorus effect.<br />
Screen Parameter Explanation Value<br />
COARSE<br />
Specifies the amount of pitch shift relative to the original sound, in -24–12 X<br />
(Coarse Pitch) semitone steps.<br />
23. Reverb (Add Reverberation)<br />
fig.MFXREV<br />
This effect adds reverberation and ambiance to the sound, creating spatial depth.<br />
56<br />
FINE<br />
(Fine Pitch)<br />
Adjusts the amount of pitch shift in 2-cent steps. -100–100<br />
OUTPUT PAN Determines the stereo location of the pitch-shifted sound. L64–R63<br />
PRE DELAY<br />
(Pre Delay Time)<br />
MODE<br />
(Pitch Shifter Mode)<br />
FEEDBACK<br />
(Feedback Level)<br />
Specifies the time from the original sound until the pitch-shifted<br />
sound is heard.<br />
Specifies how the pitch will be shifted.As this setting is increased,<br />
the response will be slower, but the sound will be more stable.<br />
Specifies the proportion of the pitch-shifted sound that will be fed<br />
back into the input.<br />
0.0–100<br />
1–5<br />
0–98 (%)<br />
LOW GAIN Adjusts the boost or cut of the low frequency range. -15–15<br />
HIGH GAIN Adjusts the boost or cut of the high frequency range. -15–15<br />
BALANCE<br />
(Effect Balance)<br />
Specifies the volume balance between the original sound and the<br />
pitch-shifted sound. When the setting is “0,” the pitch-shifted<br />
sound will not be output.<br />
OUTPUT LEVEL Specifies the output volume of the Feedback Pitch Shifter effect. 0–127<br />
Screen Parameter Explanation Value<br />
TYPE<br />
(Reverb Type)<br />
TIME<br />
(Reverb Time)<br />
You can select one of the following<br />
six basic types of reverb.<br />
Specifies the duration of the reverberation.<br />
HF DAMP Determines the frequency at<br />
which the high frequency portions<br />
of the reverberation will be<br />
cut. As this parameter is set to a<br />
lower frequency, more of the high<br />
range will be cut, making the delay<br />
sound more muted in tone. If<br />
this “BYPASS” is selected, the<br />
high frequency range will not be<br />
cut.<br />
0–100 (%) Y<br />
ROOM1 (reverb with short decay and high density),<br />
ROOM2 (reverb with short decay and low density),<br />
STAGE1 (reverb with much subsequent reverberation),<br />
STAGE2 (reverb with strong early reflections),<br />
HALL1 (clear-sounding reverb),<br />
HALL2 (rich-sounding reverb)<br />
0–127 X<br />
200 (Hz)–8.00 (kHz), BYPASS
24. Gate Reverb (Sharply Cut the Reverberation)<br />
fig.MFXGTR<br />
Chapter 4. Applying Effects to the Sound (Effects)<br />
Screen Parameter Explanation Value<br />
0–100 (%) Y<br />
This is a type of reverb, in which the reverberation is cut off before the natural completion of its decay.<br />
25. Isolator (Cuts Off a Specific Range)<br />
fig.MFXISO<br />
BALANCE<br />
(Effect Balance)<br />
Specifies the volume balance between<br />
the original sound and the<br />
reverberation.With a setting of<br />
“0,” no reverb sound will be output.<br />
OUTPUT LEVEL Specifies the output volume from<br />
the reverb effect.<br />
An equalizer which cuts the volume greatly, allowing you to add a special effect to the sound by cutting the volume in varying<br />
ranges. The Isolator parameters are, in general, effective when applied to the following musical instruments.<br />
• LOW: Bass drums and basses<br />
• MID: Vocals and the like<br />
• HIGH: High-pitched musical instruments such as cymbals<br />
0–127<br />
Screen Parameter Explanation Value<br />
TYPE<br />
(Gate Reverb Type)<br />
TIME<br />
(Gate Reverb Time)<br />
BALANCE<br />
(Effect Balance)<br />
Select one of the following<br />
four basic types of gated reverb.<br />
Specifies the time from when<br />
the reverberation begins until<br />
it ends.<br />
Specifies the volume balance<br />
between the original sound<br />
and the reverberation. With<br />
a setting of “0,” no reverb<br />
sound will be output.<br />
OUTPUT LEVEL Specifies the output volume<br />
of the Gate Reverb effect.<br />
NORMAL (normal gated reverb),<br />
REVERSE (reverse-playback reverb),<br />
SWEEP1 (the reverberation will sweep from right to left.),<br />
SWEEP2 (the reverberation will sweep from left to right)<br />
5–330 X<br />
0–100 (%) Y<br />
Screen Parameter Explanation Value<br />
LOW GAIN Specifies the amount of low-frequency range to be cut. 0–127 X<br />
0–127<br />
MID GAIN Specifies the amount of mid-range to be cut. 0–127<br />
HIGH GAIN Specifies the amount of high-frequency range to be cut. 0–127 Y<br />
PAN Specifies the stereo position of the sound output from the Isolator.<br />
L64–R63<br />
LEVEL Determines the loudness output from the Isolator. 0–127<br />
57<br />
Chapter 4
58<br />
Chapter 5. Replacing phrases to create a<br />
different pattern (MEGAMIX)<br />
MEGAMIX is a function which lets you play back a pattern<br />
while you exchange the musical data of one part with the<br />
data from a different pattern. You can combine phrases for<br />
each instrument to create a completely different pattern, just<br />
as if you were creating a remix.<br />
fig.AAA<br />
PATTERN A21<br />
MEGAMIX<br />
* This diagram is intended to explain the concept of<br />
MEGAMIX. It does not imply that phrases of actual patterns<br />
are as shown in the diagram.<br />
Replacing phrases<br />
* MEGAMIX can be used both when a pattern is playing or<br />
stopped.<br />
1. Press [PATTERN] to select Pattern mode.<br />
2. Use [VALUE] to select a pattern.<br />
3. Press [MEGAMIX] to select MEGAMIX mode.<br />
4. Press [PART SELECT].<br />
The part button of the currently selected part (current<br />
part) will light.<br />
5. Press the part button ([R] or [1]–[7]) of the part that<br />
you wish to replace, making it the current part.<br />
6. Turn [VALUE] to select the pattern containing the<br />
performance data that you wish to use.<br />
7. Press a part button [R] or [1]–[7] to select the part<br />
containing the performance data.<br />
The part button of the current part will change from<br />
blinking to lit, and the part button of the selected part<br />
will blink.<br />
* If you select the same part as the current part, the part button<br />
of the current part will blink.<br />
8. Press [ENTER].<br />
* To cancel, press [ENTER].<br />
C16<br />
B14<br />
A21<br />
A21<br />
A25<br />
A21<br />
A22<br />
A15<br />
The part button of the current part will remain lit, and<br />
the part button of the selected part will go dark.<br />
* If you selected the same part as the current part in step 7, the<br />
part button of the current part will change from blinking to lit.<br />
The performance data of the selected part will be placed in<br />
the current part, and the performance will change when the<br />
currently-sounding pattern makes a complete cycle.<br />
It is not possible to perform MEGAMIX between part R and<br />
parts 1–7.<br />
* Even after you exit MEGAMIX mode, the state you<br />
created using MEGAMIX will be maintained until you<br />
select a different pattern. [MEGAMIX] will blink during<br />
this time.<br />
* It is not possible to record a pattern in the state you<br />
created using MEGAMIX. If you wish to record, you<br />
must first save the pattern (see next page).<br />
* The time signature and number of measures of the pattern<br />
that is played by MEGAMIX will depend on the time<br />
signature and number of measures of the Rhythm part.<br />
Also, the mute status of each part will be maintained<br />
during MEGAMIX.<br />
* If you switch to a part that contains no performance data,<br />
that part will not play anything. In each of the preset<br />
patterns, part 1 contains no performance data (regardless<br />
of the pattern you select). For other parts as well, please be<br />
aware that the part you select may not necessarily contain<br />
performance data.<br />
Using D-FIELD for MEGAMIX<br />
If D-FIELD function ASSIGN 1 is set to “PCL (Pattern Call),”<br />
entering MEGAMIX mode will let you use the eight areas of<br />
the D-FIELD to access the performance data assigned to each<br />
part.<br />
For details refer to p. 30.
Chapter 5. Replacing phrases to create a different pattern (MEGAMIX)<br />
Saving the pattern you<br />
rearranged<br />
When you have used MEGAMIX to create a pattern that you<br />
like, you can save it as a User Pattern. The saved pattern can<br />
be recalled during normal pattern playback, just as any other<br />
pattern.<br />
If you edit another pattern, switch to Song mode, or turn off<br />
the power without saving the pattern you recorded or edited,<br />
your edits will be lost.<br />
* You must stop pattern playback before saving the pattern.<br />
1. Use MEGAMIX to create a pattern.<br />
2. Press [ ] to stop pattern playback.<br />
3. Press [WRITE].<br />
A screen will appear in which you can specify the savedestination<br />
pattern.<br />
4. Turn [VALUE] to specify the save-destination<br />
pattern.<br />
The data will be saved in the pattern you specify here. Be<br />
careful not to specify the wrong pattern, since the<br />
pattern that was previously saved in this location will be<br />
erased.<br />
5. Press [ENTER].<br />
The display will ask “SurE” (are you sure you want to<br />
proceed with the save?).<br />
6. To save the data, press [ENTER].<br />
* To cancel without saving, press [EXIT].<br />
After the data has been saved, the save-destination<br />
pattern number will be displayed.<br />
Tips when using MEGAMIX to create a<br />
pattern<br />
If the patterns that you combine using MEGAMIX have<br />
different time signatures or a different number of<br />
measures, their playback may not be connected<br />
appropriately. When using MEGAMIX to combine<br />
patterns, it is best to combine patterns of the same<br />
number of measures and time signature.<br />
When you use MEGAMIX to replace phrases within a<br />
pattern, the volume balance of the parts may change<br />
significantly, depending on the phrase that you replaced.<br />
In such cases, you should re-adjust the Part Level (p. 19)<br />
before you save the pattern.<br />
Most of the preset patterns have the following part<br />
structure.<br />
Part R Drums<br />
Part 1 For D-FIELD performance (contains no<br />
performance data)<br />
Part 2 Bass<br />
Parts 3–7 Chords, lead, other<br />
Keeping the above structure in mind, you can replace<br />
part 2 when you wish to replace the bass, replace part R<br />
when you wish to replace the drums, and so on.<br />
If you follow the above guidelines when creating user<br />
patterns as sell, it sill be easier to use your patterns with<br />
MEGAMIX.<br />
It is not possible to perform MEGAMIX between part R<br />
and parts 1–7.<br />
59<br />
Chapter 5
60<br />
Chapter 6. Creating an Original Pattern<br />
Creating a pattern<br />
Two methods of creating an original pattern are available: realtime recording (a method similar to recording on a tape recorder<br />
or MD recorder), and step recording (a method by which simple button operations are used to record the pattern).<br />
* If you edit another pattern, switch to Song mode, or turn off the power without saving the pattern you recorded or edited, your edits will<br />
be lost. ➔ “Saving a pattern” (p. 20)<br />
Recording as you perform (Realtime Recording)<br />
Here’s how you can record your performance on the D2’s D-<br />
FIELD controller or an external MIDI keyboard.<br />
1. Press [PATTERN] to enter Pattern mode.<br />
2. Turn [VALUE] to select the number of the pattern that<br />
you wish to create, and press [ENTER].<br />
3. Press [PART SELECT].<br />
4. Press a part button [R] or [1]–[7] so that the part you<br />
wish to record is the current part.<br />
The part being recorded can also be switched during<br />
recording.<br />
5. Select a patch.<br />
➔ Selecting a sound (Patch/Rhythm set) (p. 18)<br />
6. Press [ ].<br />
[ ] will light, and the D2 will be in REC STANDBY<br />
mode.<br />
7. Make settings for the pattern.<br />
Press [ENTER] to select a parameter, and turn [VALUE]<br />
to set its value. Refer to “List of pattern settings.”<br />
8. Press [ ] to begin realtime recording.<br />
Your performance, including operations on the D-FIELD<br />
will be recorded.<br />
9. To stop recording, press [ ].<br />
List of pattern settings (common to both Realtime Recording and Step Recording)<br />
Display Parameter Explanation Setting<br />
LENGTH Specify the length (number of measures) of the pattern. 1–32<br />
COUNT IN Specify the number of measures in the count that will occur<br />
before recording. If this is “OFF,” no count will occur.<br />
If this is “NTE,” recording will start when you first<br />
operate the D-FIELD. (*1)<br />
LOOP REST If this is ON, there will be a one-measure rest (blank) before<br />
playback resumes from the beginning of the pattern.<br />
This is convenient when you wish to prevent the end of<br />
the last measure of the phrase from being recorded onto<br />
the beginning of the first measure. (*1)<br />
METRONOME Specify whether the metronome will sound.<br />
If you want the metronome to sound during step recording,<br />
set this to “ALL.”<br />
INPUT QUANTIZE<br />
TEMPLATE<br />
INPUT QUANTIZE<br />
TIMING<br />
This adjusts the recorded result so it is aligned with the<br />
template’s timing. Specify the shortest note value that<br />
you will be performing. (*1)<br />
Specify the degree of input quantization. Higher settings<br />
of this parameter will cause the timing to be corrected<br />
more precisely. (*1)<br />
OFF, 1, 2, NTE (WAIT NOTE)<br />
OFF, ON<br />
OFF: The metronome will not<br />
sound.<br />
ALL: The metronome will sound<br />
all the time, regardless of the<br />
mode of operation.<br />
REC (REALTIME REC ONLY):<br />
The metronome will sound only<br />
during realtime recording.<br />
PLY (PLAY&REC): The metronome<br />
will sound during playback<br />
and during realtime recording.<br />
OFF, notes (*2)<br />
* 1 This parameter is valid only for realtime recording.<br />
* 2 32 (32th note), 16T (16th note triplets), 16 (16th note), 8T (8th note triplets), 8 (8th note), 4T (quarter note triplets), 4 (quarter note)<br />
0–100
The display during realtime recording<br />
The CURRENT display will indicate the measure and beat<br />
being recorded. The NEXT display will indicate the number<br />
of measures in the entire pattern.<br />
(Example) Measure 3, beat 2, pattern length is 8 measures<br />
The current recording location (grid line) within the measure<br />
is also shown by the beat scan indicators.<br />
D-FIELD functions that can be recorded in real<br />
time<br />
Functions that can record sound<br />
• [ADLIB]<br />
• [ASSIGN 1 (AP1, AP2, PRV, PAD)]<br />
• [SD ROLL]<br />
Functions that can record effects<br />
• [FILTER]<br />
• [MFX]<br />
• [X-FADER]<br />
• [ASSIGN 2 (all except for QTE and EXT)]<br />
• [ASSIGN 3 (PAN)]<br />
Practice performing in recording mode<br />
(Rehearsal)<br />
You can temporarily suspend recording without actually<br />
stopping realtime recording. This allows you to alternate<br />
between practicing and recording without having to actually<br />
start and stop recording.<br />
1. During realtime recording, press [ ].<br />
[ ] will blink, and you will be in rehearsal mode. In this<br />
state, your performance will not be recorded.<br />
2. When you are finished practicing, press [<br />
again.<br />
] once<br />
[ ] will light, and you will return to normal realtime<br />
recording mode.<br />
Chapter 6. Creating an Original Pattern<br />
Erasing unwanted data while<br />
recording (Realtime Erase)<br />
Instances of a particular kind of data that occur within data<br />
you are playing back can be erased from the current part.<br />
Simply press the relevant button (see below) while holding<br />
down [EXIT (ERASE)].<br />
Instances of the specified form of data that occur at the<br />
moments when you have the buttons pressed will be erased.<br />
[EXIT]+[ ] All performance data will be<br />
erased.<br />
[EXIT]+[EDIT] Erase all control data etc.<br />
[EXIT]+[NOTE NUMBER] Notes of the selected note number<br />
will be erased.<br />
[EXIT]+[VELOCITY] All notes will be erased.<br />
[EXIT]+external keyboard Notes between the lowest and<br />
highest notes you pressed on<br />
the keyboard will be erased.<br />
If you wish to connect an external keyboard and record, turn<br />
Auto Channel (p. 77) to “ON.”<br />
Part editing while you record in real<br />
time<br />
If you perform part edit (p. 19) operations during realtime<br />
recording, your editing operations will also be recorded.<br />
By using this feature, you can reproduce changes in level and<br />
pan during pattern playback.<br />
61<br />
Chapter 6
Chapter 6. Creating an Original Pattern<br />
Inputting notes one by one<br />
(Step Recording)<br />
1. Press [PATTERN] to enter Pattern mode.<br />
2. Turn [VALUE] to select the number of the pattern that<br />
you wish to create, and press [ENTER].<br />
3. Press [PART SELECT].<br />
4. Press a part button [R] or [1]–[7] to make the current<br />
part the part that you wish to record.<br />
The part to be recorded can also be switched while<br />
recording.<br />
5. Press [ ].<br />
[ ] will light, and the D2 will be in REC STANDBY<br />
mode.<br />
6. Make pattern settings.<br />
Press [ENTER] to select the desired parameter, and turn<br />
[VALUE] to change its setting. Refer to the “List of<br />
pattern settings” (p. 60).<br />
7. Press [ ] to begin step recording.<br />
62<br />
Input notes. Refer to “Inputting notes.”<br />
8. To stop recording, press [ ].<br />
If you wish to connect an external keyboard and record, turn<br />
Auto Channel (p. 77) to “ON.”<br />
The display during step recording<br />
The CURRENT display will indicate the measure and beat<br />
being recorded. The NEXT display will indicate the note<br />
number (pitch), velocity (strength), and duration (length) of<br />
the note (event) at the note input location (grid line).<br />
(Example) Measure 2 beat 3, note pitch C4<br />
* If the location of the event is between that grid line and the<br />
next, a dot will be displayed after the beat.<br />
* If the grid line has no event, the NEXT display will indicate<br />
“—”.<br />
When you press and hold [HOLD], the CURRENT display<br />
will indicate the location (tick) in 1/96th of a beat.<br />
(Example) 7th tick of beat 3, note pitch E5<br />
The grid line is also indicated by the beat scan indicator that<br />
is blinking.<br />
fig.BeatScan.j<br />
Blink<br />
How the note length is displayed<br />
For notes that have already been input, both [NOTE TYPE]<br />
and [GATE TIME] will indicate the length (duration) of the<br />
sound.<br />
The first digit of the NEXT display indicates the number of<br />
beats, and the second and third digits indicate the number of<br />
ticks that the sound will continue.<br />
(Example) The first beat of the first measure is two beats and<br />
35 ticks long<br />
If the duration is longer than 9 beats and 95 ticks, the<br />
CURRENT display will also be used to indicate the duration.<br />
(Example) 13 beats and 58 ticks<br />
Only notes specified by the REC FUNCTION [NOTE<br />
NUMBER] will be displayed.
Inputting notes<br />
Changing the location at which to input notes<br />
Turn [VALUE] to move to the next (previous) grid line.<br />
Hold down [HOLD] and turn [VALUE] to move in steps of a<br />
tick.<br />
When you reach the end of the measure, you will move to the<br />
next (previous) measure.<br />
Specifying the note to input<br />
Hold down a REC FUNCTION button [NOTE NUMBER]–<br />
[GATE TIME], and turn [VALUE], or move your finger<br />
horizontally on the D-FIELD to set the pitch/strength/length<br />
of the note that will be newly input.<br />
Operation Function Setting<br />
[NOTE NUM- Specify the pitch of C–(C-1)–G9<br />
BER]+[VALUE] the note.<br />
[VELOCI-<br />
Specify the strength 1–127<br />
TY]+[VALUE] (velocity) of the note.<br />
[NOTE<br />
Specify the time value 32, 16T, 16, 8T, 8,<br />
TYPE]+[VALUE] of the note.<br />
4T, 4, 2, 1<br />
[GATE<br />
Specify the length 5–200 (%)<br />
TIME]+[VALUE] (gate time) that the<br />
note will be held.<br />
* 1: 32 (32nd note), 16T (16th note triplets), 16 (16th note), 8T<br />
(8th note triplets), 8 (8th note), 4T (quarter note triplets), 4<br />
(quarter note), 2 (half note), 1 (whole note)<br />
Note settings for the D-FIELD<br />
Specify the note number, velocity, and gate time by moving<br />
your finger to left and right on the D-FIELD.<br />
The type of note can be specified by pressing the eight areas<br />
of the D-FIELD.<br />
Inputting/erasing notes<br />
No. Notes<br />
1 32 (32nd note)<br />
2 16T (16th note triplets)<br />
3 16 (16th note)<br />
4 8T (8th note triplets)<br />
5 8 (8th note)<br />
6 4T (quarter note triplets)<br />
7 4 (quarter note)<br />
8 2 (half note)<br />
When you press [ENTER], the note you specified using the<br />
REC FUNCTION buttons will be input at the current tick.<br />
If you press [EXIT (ERASE)], the note at the current tick will<br />
be erased.<br />
* Only notes specified by the REC FUNCTION [NOTE<br />
NUMBER] will be displayed.<br />
Chapter 6. Creating an Original Pattern<br />
Using the D-FIELD to enter notes<br />
During step recording, you can press the eight areas of the D-<br />
FIELD to record efficiently.<br />
fig.Pad<br />
No. Function Explanation<br />
1 REST Input a rest at the current tick and<br />
advance to the next tick.<br />
2 ENTER Input a note at the current tick and<br />
advance to the next tick.<br />
3 ERASE Erase the note at the current tick.<br />
4 TIE Extend the length of the most-recently<br />
input note by the amount of the<br />
current REC FUNCTION setting.<br />
5 PREV NOTE Move to the note of the same note<br />
number located immediately before<br />
the current tick.<br />
6 NEXT NOTE More to the note of the same note<br />
number located immediately after<br />
the current tick.<br />
7 SEARCH BWD Move to the note located immediately<br />
before the current tick, regardless<br />
of the note number.<br />
8 SEARCH FWD Move to the note located immediately<br />
after the current tick, regardless of<br />
the note number.<br />
Part editing while carrying out step<br />
recording<br />
If you perform part edit operations during step recording,<br />
the part settings will be modified, but the edit operations will<br />
not be recorded.<br />
63<br />
Chapter 6
Chapter 6. Creating an Original Pattern<br />
Modifying a note that you input<br />
(Note Edit)<br />
You can modify the pitch, strength, and length of an alreadyentered<br />
note.<br />
1. During step recording, turn [VALUE] or use the D-<br />
FIELD to move to the location of the note that you<br />
wish to edit (p. 63).<br />
2. Hold down one of the REC FUNCTION buttons [NOTE<br />
NUMBER]–[GATE TIME], and press [EDIT].<br />
The REC FUNCTION button that you pressed will blink,<br />
and you will be in Note Edit mode.<br />
3. Turn [VALUE] to modify the value.<br />
4. By pressing another REC FUNCTION button other<br />
than the one that is currently blinking, you can<br />
modify its parameter.<br />
5. Repeat steps 3 and 4 to edit the note.<br />
6. When you are finished with note editing, press<br />
[ENTER] or [EDIT].<br />
The REC FUNCTION button will change from blinking<br />
to lit.<br />
By using REC FUNCTION [NOTE NUMBER] to switch<br />
pitches, you can independently edit each note of a chord.<br />
For notes that are between two grid lines, the beat scan<br />
indicator of the preceding grid line will light (or blink), but if<br />
you press [EDIT] on that grid line, the display will indicate<br />
“noEdit.” In this case, use the D-FIELD 5–8 functions (p. 63)<br />
to select the note.<br />
64<br />
Adjusting the location of a previously<br />
input note<br />
You can move the location of a previously input note (Move<br />
Note), or copy it to a different location (Copy Note).<br />
1. During step recording, turn [VALUE] or use the D-<br />
FIELD to move to the location of the note that you<br />
wish to move (copy).<br />
2. Press [EDIT].<br />
3. Turn [VALUE] to select whether the note will be<br />
moved or copied.<br />
Move the note.<br />
Copy the note.<br />
4. Press [ENTER].<br />
The grid-setting screen will appear.<br />
(Example) 86th tick of beat 2, 1st measure<br />
5. Turn [VALUE] to specify the location that you wish to<br />
move (copy).<br />
By holding down [DISPLAY] and turning [VALUE], you<br />
can specify the location in grid units.<br />
By holding down [EXIT] and turning [VALUE] you can<br />
specify this in beat units.<br />
6. When you have specified the location, press<br />
[ENTER].<br />
The display will ask “SurE” (are you sure you want to<br />
move or copy?).<br />
7. To execute the move (copy) operation, press<br />
[ENTER].<br />
* If you press [EXIT] during steps 3–7, you will return to the<br />
previous screen.<br />
For notes that are between two grid lines, the beat scan<br />
indicator of the proceeding grid line will light (or blink), but<br />
if you press [EDIT] on that grid line, the display will indicate<br />
“noEdit.” In this case, use the D-FIELD 5–8 functions (p. 63)<br />
to select the note.
Editing a pattern<br />
(Pattern Edit)<br />
The process of editing the performance data of a pattern in<br />
measure units is called Pattern Editing. By editing the<br />
performance data in a pattern, or by combining various<br />
patterns, you can create a completely new pattern.<br />
* In order to perform pattern editing, you must stop the pattern.<br />
The pattern data that you create by editing will be lost if you<br />
simply turn off the power. If you wish to keep the pattern<br />
that you create, you must perform the Pattern Write<br />
operation.<br />
–> “Saving a pattern” (p. 20)<br />
Pattern Initialize<br />
This operation initialized a user pattern to a state of<br />
containing no musical data.<br />
1. Turn [VALUE] to select a pattern that you wish to<br />
initialize.<br />
2. Hold down [EXIT] and press [PATTERN].<br />
The display will ask “SurE” (are you sure you want to<br />
initialize?)<br />
3. To execute, press [ENTER].<br />
* To cancel without executing, press [EXIT].<br />
Chapter 6. Creating an Original Pattern<br />
Basic procedure for pattern<br />
editing<br />
1. Press [PATTERN] to enter Pattern mode.<br />
2. Turn [VALUE] to select the pattern that you wish to<br />
edit.<br />
3. Press [EDIT].<br />
4. Turn [VALUE] to select the desired editing function.<br />
5. Use [ENTER] and [EXIT] to select the desired<br />
parameter.<br />
Press [ENTER] to advance to the next parameter, or<br />
press [EXIT] to go back.<br />
6. Turn [VALUE] to specify the desired value.<br />
7. Repeat steps 5–6 to continue editing.<br />
8. When you are finished setting the last parameter, the<br />
display will ask “SurE” (are you sure you want to<br />
proceed?).<br />
9. To execute, press [ENTER].<br />
* To stop editing, press [ ].<br />
65<br />
Chapter 6
Chapter 6. Creating an Original Pattern<br />
Copying a pattern (Pattern Copy)<br />
fig.PTNCPY<br />
This operation copies a pattern to a different pattern.<br />
Display Parameter Explanation Setting<br />
SOURCE Select the data that you wish to copy.<br />
ALL: all performance data,<br />
* Press the part button [R] or [1]–[7] of the part whose data PHRASE: only note data,<br />
you wish to erase, getting its indicator to light.<br />
SETUP: only setup parameters<br />
(p. 20)<br />
TOP/END Specify the range of measures that will be copied. The CUR-<br />
RENT display will indicate the first measure to be copied,<br />
and the NEXT display will indicate the last measure to be<br />
copied.<br />
001–END<br />
* This will not be displayed if Source is “SETUP.”<br />
DESTINATION Specify the copy-destination pattern. A01–U00<br />
* The copy destination part can be specified only if the copy source part is a single part. If the copy source consists of two or more parts, each<br />
will be copied to the same part.<br />
* If you are copying the data of a part to another part within the same pattern, you can select only one part at a time.<br />
It is not possible to copy between part R and parts 1–7.<br />
66<br />
MEASURE Specify the number of the measure in the copy-destination<br />
pattern to which the data will be copied.<br />
001–END<br />
TIMES Specify the number of times that the data will be copied. 1–32 (maximum)<br />
MODE Specify whether the data at the copy destination will be replaced<br />
by the copy-source data, or will be mixed with the<br />
copy-source data.<br />
REPLACE, MIX
Erasing unwanted data (Erase)<br />
fig.PTNERS<br />
This operation erases part (or all) of the data in a pattern.<br />
Display Explanation Setting<br />
Press the part button [R] or [1]–[7] of the part whose data you<br />
wish to erase, getting its indicator to light.<br />
Deleting unwanted measures<br />
(Delete Measure)<br />
fig.PTNDEL<br />
This operation deletes unwanted measures from a pattern,<br />
bringing the previous and subsequent measures together. If<br />
the pattern contains data following the deleted range, the<br />
performance data for that part will become shorter by the<br />
number of measures that were deleted. If you specified that<br />
the deletion be performed on all parts, this operation will<br />
shorten the pattern itself.<br />
fig.7-01<br />
Specify the range of measures<br />
that will be erased.<br />
The CURRENT display indicates<br />
the first measure,<br />
and the NEXT display indicates<br />
the last measure.<br />
1 2 3 4 5 6<br />
1 2 3 4 5<br />
001–<br />
END<br />
Display Explanation Setting<br />
Specify the range of measures<br />
that will be deleted.<br />
The CURRENT display indicates<br />
the first measure,<br />
and the NEXT display indicates<br />
the last measure.<br />
001–<br />
END<br />
Press the part button [R] or [1]–[7] of the part whose measure<br />
you wish to delete, getting its indicator to light.<br />
Chapter 6. Creating an Original Pattern<br />
Inserting blank measures<br />
(Insert Measure)<br />
fig.PTNINS<br />
This operation inserts blank measures between the specified<br />
measure of the pattern and the next measure. If you want to<br />
add a performance in the middle of a pattern, you can use<br />
this operation to insert one or more blank measures, and then<br />
record the additional performance. The time signature of the<br />
inserted measure(s) will be the same as the time signature<br />
that precedes the inserted location.<br />
fig.7-02<br />
1 2<br />
Display Explanation Setting<br />
Press the part button [R] or [1]–[7] of the part you wish to<br />
insert measure, getting its indicator to light.<br />
Shifting the pitch (Transpose)<br />
fig.PTNTPS<br />
3 4 5<br />
1 2 23 4 5 6<br />
CURRENT display:<br />
Specify the measure at<br />
which the blank measure(s)<br />
will be inserted.<br />
* For the example shown<br />
above, select step 2.<br />
NEXT display:<br />
Specify the number of<br />
measures that will be inserted.<br />
* It is not possible to<br />
specify a number that<br />
would cause the pattern<br />
to be longer than 32<br />
measures after<br />
insertion.<br />
001–<br />
END<br />
1–32<br />
This operation shifts the note numbers (pitch) of a part in the<br />
pattern. You can transpose in a +/-2 octave range.<br />
Display Explanation Setting<br />
Specify the amount of<br />
transposition. Each increase<br />
(decrease) of 1 will<br />
raise (lower) the pitch by a<br />
semitone.<br />
-24–0–24<br />
Press the part button [R] or [1]–[7] of the part that you wish<br />
to transpose, getting its indicator to light.<br />
67<br />
Chapter 6
Chapter 6. Creating an Original Pattern<br />
Changing the strength of the<br />
notes (Change Velocity)<br />
fig.PTNCVL<br />
This operation changes the velocity (strength) of the notes<br />
recorded in the pattern. Higher settings will cause the notes<br />
to be played more strongly. Use this when you want to make<br />
the notes stronger or weaker.<br />
Display Explanation Setting<br />
Specify the amount of the<br />
change in velocity.<br />
-99–0–99<br />
Press the part button [R] or [1]–[7] of the part whose velocity<br />
you wish to change, getting its indicator to light.<br />
* If this operation would result in a velocity greater than 127 (or<br />
less than 1), that velocity will be converted to 127 (or 1).<br />
Changing the note length<br />
(Change Gate Time)<br />
fig.CGT<br />
This operation changes the gate time (duration that the note<br />
is held) of the notes recorded in the pattern. Use this when<br />
you want to make the entire performance more staccato or<br />
tenuto.<br />
Display Explanation Setting<br />
Specify the amount of<br />
change in gate time.<br />
-99–0–99<br />
Press the part button [R] or [1]–[7] of the part whose gate<br />
time you wish to change, getting its indicator to light.<br />
Make fine adjustments in timing<br />
(Shift Clock)<br />
fig.PTNSCK<br />
Using this operation, the timing of the performance data<br />
recorded in the pattern can be shifted forward or backward<br />
in units of one clock (1/96th of a beat). Use this when you<br />
wish to move the entire performance slightly forward or<br />
backward.<br />
Display Explanation Setting<br />
Specify the shift<br />
clock amount.<br />
-99–0–99<br />
Press the part button [R] or [1]–[7] of the part whose timing<br />
you wish to change, getting its indicator to light.<br />
68<br />
Thinning out unnecessary data<br />
(Data Thin)<br />
fig.PTNDTH<br />
Since data such as Pitch Bend and Control Change typically<br />
has a continuously changing value, it can occupy an<br />
unexpectedly large amount of memory. The Data Thin<br />
operation thins out such data to reduce the amount of the<br />
data without affecting the audible result. This lets you make<br />
more efficient use of internal memory.<br />
Display Explanation Setting<br />
Specify the amount by<br />
which the data will be<br />
thinned.<br />
0–99<br />
Press the part button [R] or [1]–[7] of the part whose data you<br />
wish to thin, getting its indicator to light.<br />
Creating a quantized pattern<br />
(Edit Quantize)<br />
fig.PTNQTE<br />
This operation modifies the actual performance data of the<br />
pattern so it is aligned with the timing produced by the<br />
Quantize operation (p. 37).<br />
The normal Quantize operation does not modify the contents<br />
of the performance data; it merely adjusts the timing at<br />
which the pattern data is played back. Through the use of<br />
Edit Quantize, you can create data that incorporates the<br />
result of quantization.<br />
Display Explanation<br />
Apply the quantization settings.<br />
* You must first set Quantize (p. 37) to<br />
either GRID, SHUFFLE, or<br />
GROOVE. (If one of these are not<br />
selected, the data will not be modified.)<br />
Edit Quantize will be performed with<br />
this setting.<br />
Press the part button [R] or [1]–[7] of the part that you wish<br />
to quantize, getting its indicator to light.<br />
Saving a pattern<br />
When you have created a pattern that you like, you should<br />
save that pattern as a user pattern.<br />
For details on saving, refer to p. 20.<br />
If you edit another pattern, switch to Song mode, or turn off<br />
the power without saving the pattern you recorded or edited,<br />
your edits will be lost.
Chapter 7. Playing and Creating Songs<br />
Playing a song<br />
A song consists of two or more patterns connected in the<br />
desired order of playback.<br />
When you play back a song, the patterns will be selected<br />
automatically in the specified order, so you do not need to<br />
select them yourself. For each song, you can register up to 50<br />
patterns in the desired order of playback.<br />
1. Press [SONG] to enter Song mode.<br />
The number of the currently selected song will appear in<br />
the NEXT display.<br />
2. Turn [VALUE] to select the song that you wish to<br />
play.<br />
3. When you press [ ], the song will begin playing.<br />
When the song begins playing, the displays will indicate<br />
the current pattern and next pattern in the same way as<br />
when patterns are played back. The BPM can also be<br />
adjusted in the same way as when playing patterns.<br />
–> Changing the BPM (tempo) (p. 16)<br />
4. Press [ ] to stop song playback.<br />
<br />
Songs do not actually contain the musical data of the<br />
patterns; they contain only the order in which the patterns<br />
are to be played back. This means that if you modify a<br />
pattern that has been registered in a song, the playback of the<br />
song will also be affected. If you delete all of the musical data<br />
of the pattern, playback will stop at the moment that pattern<br />
is selected.<br />
<br />
Each time you press the [ ] button, the cursor moves to<br />
the beginning of the next pattern.<br />
Each time you press the [ ] button, the cursor moves to<br />
the beginning of the previous pattern.<br />
Press [ ] button while the song is stopped to return to the<br />
beginning.<br />
<br />
1. Press [ENTER] during song playback.<br />
The CURRENT display will indicate the currently<br />
playing step, and the NEXT display will show its pattern<br />
number.<br />
2. Press either [ENTER] or [EXIT].<br />
You are returned to the previous screen.<br />
* This screen will also appear when you use [<br />
move between steps.<br />
][ ] to<br />
<br />
1. Press [ ] during song playback.<br />
The CURRENT display will show the currently-playing<br />
pattern number, and the NEXT display will show the<br />
measure and beat.<br />
2. Release your finger from [ ].<br />
You are returned to the previous screen.<br />
69<br />
Chapter 7
Chapter 7. Playing and Creating Songs<br />
Creating a song<br />
(Song Recording)<br />
You can input patterns one by one to specify the order in<br />
which the patterns will be played back. The playback order<br />
of the patterns is indicated by a number called the step.<br />
1. Press [SONG] to enter Song mode.<br />
2. Turn [VALUE] to select the song number that you<br />
wish to create.<br />
3. Press [ ].<br />
[ ] will light, and the D2 will be in SONG REC mode.<br />
4. Turn [VALUE] to select the pattern that will play back<br />
for this step.<br />
5. As necessary, edit the setup parameters (p. 20) such<br />
as the mute and patch setting of each part.<br />
6. Press [ENTER] to proceed to the next step.<br />
7. Repeat steps 4–6 to input the pattern for the second<br />
and subsequent steps.<br />
8. After you have input the last step, press [<br />
the procedure.<br />
] to end<br />
<br />
During recording, you can select a pattern and press [ ] to<br />
audition that pattern.<br />
<br />
If you have modified setup parameters (p. 20) such as part<br />
mute and effect settings during song recording, you can<br />
press [ENTER] to register the modified state of these settings.<br />
This merely registers the pattern setup parameters as song<br />
data, and does not affect the original patterns.<br />
You can use this function to change the mute settings or MFX<br />
type of a pattern, or to make a song in which a pattern<br />
develops gradually.<br />
<br />
After recording several steps, you can use [<br />
SONG REC mode to move between steps.<br />
][ ] in<br />
70<br />
Deleting an unwanted step<br />
(Step Delete)<br />
You can delete an unwanted step from a song, joining the<br />
prior and subsequent portions of the song.<br />
fig.7-01<br />
• Tempo (BPM) can be input/edited only for the first<br />
step.<br />
• Tempo cannot be changed during the song.<br />
1 2 3 4 5 6<br />
1 2 3 4 5<br />
1. Press [SONG] to select Song mode.<br />
2. Turn [VALUE] to select the song from which you<br />
wish to delete a step.<br />
3. Press [ ].<br />
[ ] will light, and the D2 will enter SONG REC mode.<br />
4. Press [<br />
delete.<br />
][ ] to display the step that you wish to<br />
5. Press [EDIT] to make the following display appear.<br />
6. Press [ENTER].<br />
The display will ask “SurE” (are you sure you want to<br />
proceed with the deletion?).<br />
7. To delete the step, press [ENTER].<br />
* To cancel the operation, press [EXIT].<br />
8. Press [ ] to return to the normal song mode.
Inserting a step (Step Insert)<br />
You can insert a step into the middle of a song, causing<br />
subsequent steps to be moved back by one step.<br />
fig.7-02<br />
1 2<br />
1. Press [SONG] to enter Song mode.<br />
2. Turn [VALUE] to select the song into which you wish<br />
to insert a step.<br />
3. Press [ ].<br />
[ ] will light, and the D2 will enter SONG REC mode.<br />
4. Use [ ][ ] to display the step at which you<br />
wish to insert a pattern.<br />
For the example shown above, select step 2.<br />
5. Press [EDIT].<br />
3 4 5<br />
1 2 23 4 5 6<br />
6. Turn [VALUE] to make the following display appear.<br />
7. Press [ENTER].<br />
The display will ask “SurE” (are you sure you want to<br />
proceed with the insertion?).<br />
8. To insert the step, [ENTER].<br />
* To cancel the operation, press [EXIT].<br />
9. Turn [VALUE] to select patterns, or edit setup<br />
parameters (p. 20).<br />
10. Press [ ] to return to the normal song mode.<br />
Chapter 7. Playing and Creating Songs<br />
Editing a song (Song Edit)<br />
* You must stop song playback before editing a song.<br />
Erasing a song (Song Clear)<br />
When this operation is executed, all the steps you input will<br />
be set to an empty state. This is convenient when you wish to<br />
create a song from scratch.<br />
1. Press [SONG] to enter Song mode.<br />
2. Turn [VALUE] to select the song whose steps you<br />
wish to clear.<br />
3. Press [EDIT].<br />
The display will indicate “SnG CLr.”<br />
4. Press [ENTER].<br />
The display will ask “SurE” (are you sure you want to<br />
proceed with the clear?).<br />
5. To clear the steps, press [ENTER].<br />
* To cancel the operation, press [EXIT].<br />
71<br />
Chapter 7
Chapter 7. Playing and Creating Songs<br />
Copying a song (Song Copy)<br />
This operation copies the song data to a different song.<br />
1. Press [SONG] to enter Song mode.<br />
2. Turn [VALUE] to select the copy-source song.<br />
3. Press [EDIT].<br />
4. Turn [VALUE] to make the display read “SnG CPy.”<br />
5. Press [ENTER].<br />
A screen will appear in which you can specify the copydestination<br />
song.<br />
6. Turn [VALUE] to select the copy-destination song.<br />
The song will be copied to the number you select here.<br />
Be aware that the song that was previously saved at this<br />
number will be erased.<br />
7. Press [ENTER].<br />
The display will ask “SurE” (are you sure you want to<br />
proceed with the copy?).<br />
8. To execute the copy operation, press [ENTER].<br />
* To cancel the operation, press [EXIT].<br />
72<br />
Saving a song<br />
When you have created a song that you like, you should save<br />
that song as a user song.<br />
If you wish to save the song with the changes you made, use<br />
the following procedure to save it.<br />
1. Press [SONG] to enter Song mode.<br />
2. Press [WRITE].<br />
A screen will appear in which you can specify the savedestination<br />
song.<br />
3. Turn [VALUE] to select the save-destination song.<br />
The song will be saved into the number you select here.<br />
Be aware that the song that was previously saved at this<br />
number will be erased.<br />
4. Press [ENTER].<br />
The display will ask “SurE” (are you sure you want to<br />
carry out the save?).<br />
5. To save the song, press [ENTER].<br />
* To cancel the operation, press [EXIT].<br />
The edited song will be remembered until you turn the<br />
power off.
Chapter 8. System Settings and MIDI Applications<br />
Making system settings (System)<br />
Here you can make settings that affect the operation of the entire D2, such as tuning and the synchronization method.<br />
* It is not possible to enter these set-up screens while a pattern or song is being played back.<br />
System setting parameters are saved to internal memory when you move to another screen by pressing [EXIT] (or in some other<br />
way). These settings will still be in effect the next time the power of the D2 is turned on.<br />
1. Press [SYSTEM] to enter System Edit mode.<br />
Each time you press [SYSTEM], you will cycle through “Sound generator settings” ➔ “Sequencer settings” ➔ “MIDI<br />
transmission settings” ➔ “MIDI reception settings.”<br />
➔ ➔ ➔ ➔ ➔ ...<br />
* The beat scan display indicators below the NEXT display will blink to indicate the settings that you are making.<br />
fig.8-1<br />
2. Press [ENTER] to select the parameter that you wish to set.<br />
3. Turn [VALUE] to modify the setting.<br />
4. When you are finished, press [EXIT].<br />
Sound generator settings<br />
Indication Parameter Explanation Values<br />
MASTER TUNE For tuning the sound generator. The displayed value is<br />
the frequency of the A4 note.<br />
SD ROLL NOTE<br />
NUMBER<br />
RESONANCE LIMIT-<br />
ER RHYTHM<br />
RESONANCE LIMIT-<br />
ER NORMAL<br />
Select the instrument that will be rolled by SD ROLL in<br />
D-FIELD. Within the rhythm set that is selected for<br />
part R of the current pattern, the instrument having the<br />
note number you specify here will be sounded. –> Preset<br />
Rhythm Set List (p. 86)<br />
Determines the maximum resonance value for the<br />
rhythm part. Higher settings of this value will increase<br />
the range of change.<br />
Determines the maximum resonance value for parts 1–<br />
7. Higher settings of this value will increase the range<br />
of change.<br />
27.4 (427.4)–40.0 (440.0)–52.6<br />
(452.6) (Hz)<br />
35–98<br />
50–127<br />
50–127<br />
73<br />
Chapter 8
Chapter 8. System Settings and MIDI Applications<br />
Sequencer settings<br />
Indication Parameter Explanation Values<br />
74<br />
SYNC MODE Specifies how the internal sequencer will operate<br />
and how MIDI Clock messages will be<br />
transmitted and received.<br />
SYNC OUT Determines whether synchronization-related<br />
MIDI messages will be transmitted. When<br />
this is on, the following messages will be<br />
transmitted from the MIDI OUT connector.<br />
* If the SYNC MODE is set to “SLAVE,” it<br />
will not be possible to set SYNC OUT to<br />
“ON.”<br />
* If “VINYL” is selected as the D-FIELD<br />
function, Timing Clock (F8) and Song<br />
Position Pointer (F2) will not be output<br />
even if you set SYNC OUT to “ON.”<br />
SONG LOOP<br />
MODE<br />
SONG PLAY<br />
MODE<br />
Specifies how songs will be played back. You<br />
can cause the same song to be played back repeatedly,<br />
or all songs to be played back in sequence.<br />
Specifies whether or not the pattern setup parameters<br />
will be loaded when you move to<br />
the next step of the song.<br />
INT:<br />
The internal sequencer will synchronize<br />
to the internal tempo clock.<br />
Any MIDI Clock messages received<br />
from an external device will be ignored.<br />
REMOTE:<br />
Operation will be essentially the<br />
same as “INT.” However, Start/<br />
Stop messages from the external<br />
MIDI device will control playback/<br />
stop for the internal sequencer.<br />
SLAVE:<br />
The internal sequencer will synchronize<br />
to MIDI Clock messages<br />
received from an external device. If<br />
no MIDI Clock messages are being<br />
received, pattern/song playback<br />
will not occur even if you press the<br />
[ ] button.<br />
OFF:<br />
Messages will not be transmitted.<br />
ON:<br />
The following messages will be<br />
transmitted from the MIDI OUT<br />
connector.<br />
•Timing clock: F8<br />
•Start: FA<br />
•Continue: FB<br />
•Stop: FC<br />
•Song Position Pointer: F2<br />
OFF:<br />
This is the normal condition. The<br />
currently selected song will be<br />
played back only once.<br />
LOOP1:<br />
The currently selected song will be<br />
played back repeatedly.<br />
ALL:<br />
All songs will be played back repeatedly<br />
in sequence.<br />
* When using “ALL” to playback a<br />
song, we recommend that a pattern<br />
which mutes all parts (i.e., a silent<br />
pattern) be inserted at the end of the<br />
song, so that songs are joined<br />
smoothly.<br />
MODE1:<br />
The setup parameters, mute, and realtime<br />
modify settings will be loaded<br />
each time you move to the next<br />
step.<br />
MODE2:<br />
Setup parameters, mute, and realtime<br />
modify will be maintained<br />
during playback only if the next<br />
step plays a pattern that is the same<br />
as the currently playing pattern.
RPS TRIGGER<br />
QUANTIZE<br />
Chapter 8. System Settings and MIDI Applications<br />
Indication Parameter Explanation Values<br />
When using RPS during pattern playback,<br />
patterns and phrases may not play back in<br />
precise alignment, depending on the timing<br />
at which you press the D-FIELD. On the D2<br />
you can specify the playback timing of the<br />
phrase, so it will play back in precise synchronization<br />
with the pattern.<br />
* Except when this parameter is set to<br />
“OFF,” pressing on the D-FIELD slightly<br />
before the actual desired timing will help<br />
you synchronize the phrase to the pattern.<br />
TURNTABLE TOP When the D-FIELD function is VINYL (TTE<br />
or SR1), this setting specifies whether the pattern<br />
will return to the beginning when you<br />
release your finger.<br />
D-FIELD BPM SW When the D-FIELD function is VINYL (TTE),<br />
this setting specifies whether the BPM will<br />
change according to the speed at which you<br />
move your finger in a circle.<br />
D-FIELD PITCH<br />
SW<br />
D-FIELD LEVEL<br />
SW<br />
When the D-FIELD function is VINYL (TTE<br />
or MAN), this setting specifies whether the<br />
pitch will change according to the speed at<br />
which you move your finger in a circle.<br />
When the D-FIELD function is VINYL (TTE<br />
or MAN) or SD ROLL, this setting specifies<br />
whether the volume will change according to<br />
the size of the circle in which you move your<br />
finger.<br />
OFF:<br />
The phrase will play back immediately,<br />
at the timing at which you<br />
pressed D-FIELD.<br />
16, 8, 4:<br />
The pattern will be divided into selected<br />
note units, and when you<br />
press the D-FIELD, the phrase will<br />
begin playing at the beginning of<br />
the next note unit.<br />
MES:<br />
The pattern will be divided into<br />
one-measure units, and when you<br />
press the D-FIELD, the phrase will<br />
begin playing at the beginning of<br />
the next measure.<br />
* If the pattern is stopped, the phrase<br />
will play back immediately,<br />
regardless of the setting that is<br />
selected in the above procedure.<br />
OFF, ON<br />
OFF, ON<br />
OFF, ON<br />
OFF, ON<br />
75<br />
Chapter 8
Chapter 8. System Settings and MIDI Applications<br />
MIDI transmission settings<br />
Indication Parameter Explanation Values<br />
Table of Transmitted Data<br />
* If this parameter is changed while a pattern is playing, the data recorded in the sequencer will stop being transmitted to the sound<br />
generator. (This is because panel operations take priority for producing sounds.) This state will continue until a different pattern is<br />
recalled.<br />
76<br />
TX MODE<br />
(transmit<br />
mode)<br />
TX BULK<br />
(bulk transmit)<br />
Specifies the types of MIDI message that will be transmitted. At the factory settings,<br />
this is set to “MODE1.” When using a MIDI connection to a D2, MC-307,<br />
MC-505, or JX-305, setting this to MODE2 will reduce the amount of data transmitted<br />
and received, in comparison to MODE1.<br />
* For the controller numbers that are switched by MODE1 and MODE2, refer to<br />
“Table of transmitted data” on this page.<br />
Internal settings and the data of the current pattern can be transmitted as a group<br />
for storage on an external device.<br />
For details refer to p. 81.<br />
Parameter EDIT TX/RX Value<br />
MODE1 (Default) MODE2<br />
PITCH COARSE TUNE EXCLUSIVE CC#21 16 - 112 Center=64)<br />
FINE TUNE CC#77 CC#77 14 - 114 (Center=64)<br />
FILTER FILTER TYPE EXCLUSIVE CC#34 0 - 4<br />
CUTOFF CC#74 CC#74 0 - 127<br />
RESONANCE CC#71 CC#71 0 - 127<br />
AMPLIFIER TONE LEVEL EXCLUSIVE CC#36 0 - 127<br />
TONE PAN EXCLUSIVE CC#35 0 - 127 (Center=64)<br />
RND PAN EXCLUSIVE CC#37 0 (OFF), 63 (ON)<br />
P-ENVELOPE DEPTH EXCLUSIVE CC#25 52 - 76 (Center=64)<br />
A EXCLUSIVE CC#26 0 - 127<br />
D EXCLUSIVE CC#27 0 - 127<br />
S EXCLUSIVE CC#39 1 - 127 (Center=64)<br />
R EXCLUSIVE CC#40 0 - 127<br />
F-ENVELOPE DEPTH CC#81 CC#81 1 - 127 (Center=64)<br />
A CC#82 CC#82 0 - 127<br />
D CC#83 CC#83 0 - 127<br />
S EXCLUSIVE CC#28 0 - 127<br />
R EXCLUSIVE CC#29 0 - 127<br />
A-ENVELOPE A CC#73 CC#73 0 - 127<br />
D CC#75 CC#75 0 - 127<br />
S EXCLUSIVE CC#31 0 - 127<br />
R CC#72 CC#72 0 - 127<br />
LFO1 WAVEFORM EXCLUSIVE CC#15 0 - 7<br />
RATE CC#16 CC#16 0 - 127<br />
P-DEPTH CC#18 CC#18 1 - 127 (Center=64)<br />
F-DEPTH CC#19 CC#19 1 - 127 (Center=64)<br />
A-DEPTH CC#80 CC#80 1 - 127 (Center=64)<br />
PORTAMENTO SW CC#65 CC#65 0 - 63 (OFF), 64 - 127 (ON)<br />
TIME CC#5 CC#5 0 - 127<br />
SOLO CC#126/127 CC#126/127 126=1 (ON), 127=0 (OFF)<br />
PART MIXER LEVEL CC#7 CC#7 0 - 127<br />
PAN CC#10 CC#10 0 - 127 (Center=64)<br />
KEY SHIFT EXCLUSIVE CC#85 16 - 112 (Center=64)<br />
REVERB CC#91 CC#91 0 - 127<br />
DELAY CC#94 CC#94 0 - 127<br />
MFX SW EXCLUSIVE CC#86 0 (OFF), 1 (ON), 4 (RHY)<br />
MODE1,<br />
MODE2<br />
OFF:<br />
Data will not<br />
be transmitted.<br />
PTN:<br />
Data of the<br />
current pattern<br />
will be<br />
transmitted.<br />
ALL:<br />
All data will<br />
be transmitted.
MIDI reception settings<br />
Chapter 8. System Settings and MIDI Applications<br />
Indication Parameter Explanation Values<br />
AUTO<br />
CHANNEL<br />
ARPEGGIO<br />
CTRL CH<br />
(arpeggio<br />
control channel)<br />
RPS CTRL<br />
CH<br />
(RPS control<br />
channel)<br />
RX SYSEX<br />
(receive systemexclusive)<br />
Determines how MIDI messages will be received from external<br />
MIDI devices.<br />
* At the factory settings this is set to “OFF.”<br />
* Set this “OFF” if you want note messages of the channel<br />
specified as the Arpeggio Control Channel or RPS Control<br />
Channel to control arpeggios or RPS from an external<br />
device.<br />
Specifies the channel on which note messages from an external<br />
MIDI device will control arpeggios when Auto Channel<br />
is “OFF.” When note messages of the specified channel are<br />
received from an external MIDI device, an arpeggio can be<br />
generated according to that note data, and will sound the<br />
current part. At the factory settings this is set to “16.”<br />
* This setting is ignored if Auto Channel is “ON.”<br />
Specifies the channel on which note messages from an external<br />
MIDI device will control RPS when Auto CHANNEL is<br />
“OFF.” RPS can be played by receiving note messages on the<br />
specified channel. At the factory settings this is set to “15.”<br />
* This setting is ignored if Auto Channel is “ON.”<br />
Determines whether the D2 will receive system exclusive<br />
messages. When this setting is “OFF,” system exclusive<br />
messages will not be received.<br />
SOFT THRU If this is “ON,” MIDI messages received at the MIDI IN connector<br />
will be re-transmitted without change from the MIDI<br />
OUT connector.<br />
DEVICE ID<br />
(device ID<br />
number)<br />
RX BULK<br />
(bulk receive)<br />
This setting is necessary only if data is being transmitted<br />
separately to two or more D2 units. Otherwise, you should<br />
not change this setting. At the factory settings, the device ID<br />
number is set to “17.”<br />
* If you forget the device ID that was used when bulk data<br />
was saved on an external device, it will no longer be possible<br />
to receive the saved bulk data.<br />
Data that was saved on an external device can be sent back<br />
to the D2.<br />
For details refer to p. 81.<br />
OFF:<br />
The patches of each part can be<br />
played independently according<br />
to the channel of the MIDI data<br />
transmitted from an external<br />
MIDI device.<br />
ON:<br />
The patch of the part selected on<br />
the D2 can be played, regardless<br />
of the transmit channel of the external<br />
MIDI device.<br />
OFF, 1–16<br />
OFF, 1–16<br />
OFF, ON<br />
OFF, ON<br />
17–32<br />
OFF:<br />
Data will not be received.<br />
PTN:<br />
Data of the current pattern will<br />
be received.<br />
ALL:<br />
All data will be received.<br />
77<br />
Chapter 8
Chapter 8. System Settings and MIDI Applications<br />
Advanced Operation Using<br />
MIDI<br />
About MIDI<br />
The D2 records and plays back MIDI musical data, and when<br />
MIDI musical data is received its sound generator will<br />
produce sound.<br />
MIDI (Musical Instrument Digital Interface) is a standard<br />
specification that allows musical data to be exchanged<br />
between electronic musical instruments and computers.<br />
Devices that have a MIDI connector can be connected using a<br />
MIDI cable, allowing them to transmit and receive data.<br />
Today, MIDI is found on virtually all electronic musical<br />
instruments. Without MIDI, it would not be possible to use<br />
an external keyboard to play the D2, or to use the D2 to<br />
record and play back a performance played on an external<br />
keyboard. Although you can use the D2 without knowing<br />
much at all about MIDI, you might also want to take full<br />
advantage of the possibilities offered by electronic musical<br />
instruments. This chapter will provide a simple explanation<br />
of the D2’s MIDI-related functionality.<br />
About MIDI connectors<br />
The D2 has two kinds of MIDI connectors.<br />
• MIDI OUT Connectors<br />
These connectors transmit MIDI messages to external<br />
MIDI devices. These can also be used as connectors from<br />
which data received from the MIDI IN connector are<br />
directly transmitted. (Refer to SOFT THRU (p. 77).)<br />
• MIDI IN Connectors<br />
Performance messages from an external MIDI device are<br />
received here. The D2 can receive these messages to play<br />
notes or select sounds, etc.<br />
78<br />
MIDI Channels<br />
MIDI is able to transmit 16 parts of independent musical data<br />
over a single MIDI cable. This is made possible by the<br />
concept of “MIDI channels.” MIDI channels allow messages<br />
intended for a given instrument to be distinguished from<br />
messages intended for another instrument. There are sixteen<br />
MIDI channels (1–16), and normally the transmitting device<br />
must be set to the same MIDI channel as the receiving device<br />
in order for messages to be received.<br />
With the factory settings, the D2’s AUTO CHANNEL setting<br />
is ON. (p. 77) In this condition, an external MIDI keyboard<br />
will be able to play the patch of the current part, regardless of<br />
its transmit channel setting.<br />
* The transmit/receive channel settings of each part are as<br />
follows. It is not possible to change the channel settings of each<br />
part.<br />
Rhythm part Ch. 10<br />
Part 1 Ch. 1<br />
Part 2 Ch. 2<br />
Part 3 Ch. 3<br />
Part 4 Ch. 4<br />
Part 5 Ch. 5<br />
Part 6 Ch. 6<br />
Part 7 Ch. 7<br />
RPS (factory setting) Ch. 15<br />
Arpeggiator (factory setting) Ch. 16
Using the D2 together with an<br />
external MIDI device<br />
Using an external MIDI keyboard to<br />
record on the D2<br />
Use these settings when you wish to perform on an external<br />
MIDI keyboard and record on the D2.<br />
Set the Auto Channel to “ON” (p. 77).<br />
fig.8-3<br />
MIDI Ch = 1–16<br />
MIDI OUT<br />
MIDI IN<br />
AUTO CHANNEL = ON<br />
With this setting, the part selected on the D2 will be the<br />
recording part (regardless of which channel is used for<br />
transmission by the external MIDI keyboard).<br />
Using the D2 as a sound module for<br />
an external MIDI sequencer<br />
Set the Auto Channel to “OFF” (p. 77). (At the factory<br />
settings, this is “OFF.”)<br />
With this setting, the D2 can receive multiple channels of<br />
MIDI data and sound them simultaneously.<br />
Set the transmit channel of the external MIDI sequencer to<br />
match the receive channel of the D2 part that you wish to<br />
play. For example if you wish to play part 2, set the transmit<br />
channel of the external MIDI sequencer to “2,” since the<br />
receive channel of part 2 is “2.”<br />
Chapter 8. System Settings and MIDI Applications<br />
Playing an external MIDI device using<br />
the D2<br />
The D2 can transmit D-FIELD operations from its MIDI OUT<br />
connector. Recordings in the respective parts of the D2 can<br />
also be transmitted to an external device. In such<br />
transmission, MIDI channels 10 and 1 to 7 are assigned to<br />
data in parts R and 1 to 7, in this order.<br />
Setting the external MIDI sound module channel, the<br />
receiving channel, to one of channels 10 and 1 to 7 enables<br />
playback on the external MIDI device.<br />
MIDI IN MIDI OUT<br />
MIDI Sound Module<br />
D2<br />
1. Set the MIDI channel of the external sound module to<br />
one of channels 10 and 1 to 7.<br />
2. Play back the data on the D2 by pressing [<br />
using the D-FIELD.<br />
] or<br />
79<br />
Chapter 8
Chapter 8. System Settings and MIDI Applications<br />
Synchronization with an External<br />
MIDI Device<br />
Timing of the D2’s sequencer can be synchronized with that<br />
of another sequencer for playback. This feature enables largescale<br />
performance playing back a number of parts at the<br />
same time.<br />
Making an external MIDI sequencer<br />
synchronized with playback on the D2<br />
Now, let’s make D2’s patterns synchronized with an external<br />
MIDI sequencer. (In this example, the external MIDI sound<br />
generator is played back using the MIDI data from the<br />
external MIDI sequencer.)<br />
Set up the D2<br />
1. Set SYNC OUT to “ON” (p. 74).<br />
This setting enables synchronizing signals to be<br />
transmitted from the D2’s MIDI OUT.<br />
2. Set the sequence output assignment for all parts of<br />
the pattern to be used to “INT” (p. 19).<br />
This setting enables the D2 to output only MIDI clocks<br />
and start/stop information from the MIDI OUT<br />
connector.<br />
Set up the external sequencer<br />
3. Set the external MIDI sequencer so it will<br />
synchronize to the MIDI Clock messages that it<br />
receives.<br />
For details on the setting, refer to the owner’s manual for<br />
your MIDI sequencer.<br />
Start synchronized playback.<br />
4. Press the [ ] button of the D2, and synchronized<br />
playback will begin.<br />
5. To stop synchronized playback, press [<br />
on the D2.<br />
The external MIDI sequencer will also stop.<br />
] button<br />
80<br />
MIDI IN MIDI OUT<br />
Sequencer<br />
D2<br />
Making the D2 synchronized with<br />
performance on an external<br />
sequencer.<br />
The playback of the D2’s sequencer can be synchronized to<br />
the MIDI Clock messages transmitted from an external MIDI<br />
sequencer or from a hard disk recorder (optional). In the<br />
following example, we will synchronize the D2 pattern<br />
playback to an external source of timing.<br />
MIDI OUT<br />
Set up the D2.<br />
MIDI IN<br />
Sequencer D2<br />
1. Set SYNC MODE to “SLAVE” (p. 74).<br />
2. Press the [ ] button on the D2.<br />
Returns to the beginning of pattern.<br />
Set up the external sequencer.<br />
3. Set up so that MIDI clocks are transmitted from the<br />
external MIDI sequencer.<br />
For details on the setting, refer to the owner’s manual for<br />
your external MIDI sequencer.<br />
Start synchronized playback.<br />
4. Press the [PLAY] button of the external MIDI<br />
sequencer, and synchronized playback will begin.<br />
5. To stop synchronized playback, press [STOP] button<br />
on the external sequencer.<br />
* As required, set up to block transmission of playback<br />
information from the external device to the D2. (Or, set MIDI<br />
channels 1 to 7 and 10, corresponding to those used on the D2,<br />
not to be used for data transmission.) Otherwise, the D2<br />
performs playback with playback information from the external<br />
device. For details, see the operation manual of the external<br />
MIDI device.<br />
* It is also possible to control playback/stop operations only<br />
without synchronization with MIDI clocks transmitted from<br />
the external MIDI sequencer. In this case, set Sync mode of the<br />
D2 to “REMOTE.”
Saving data on an external<br />
sequencer (Bulk Dump)<br />
Data for the currently selected pattern or for all data in<br />
memory can be transmitted from the D2 to another D2, or to<br />
an external MIDI sequencer (such as the <strong>Roland</strong> MC-80) for<br />
saving. Transmitting this data is called bulk dump, and<br />
receiving this data is called bulk load.<br />
Transmission (bulk dump) procedure<br />
Here’s how data stored in the D2 can be transmitted to a<br />
sequencer or other external MIDI device for saving.<br />
fig.8-7.j<br />
MIDI IN MIDI OUT<br />
Sequencer<br />
1. Press [SYSTEM] several times to access the MIDI<br />
transmission setting display.<br />
2. Press [ENTER] to access the Bulk Dump setting<br />
display.<br />
3. Turn [VALUE] to select either “Ptn” (transmit the<br />
data of the current pattern) or “ALL” (transmit all<br />
data).<br />
4. Press [ENTER].<br />
The display will ask “SurE” (are you sure you want to<br />
proceed with the transmission?)<br />
* To cancel the operation, press [EXIT].<br />
5. Set your connected MIDI device so it is ready to<br />
receive data.<br />
6. Press [ENTER] to begin the transmission.<br />
Once the data transmission has been completed, the<br />
previous display will reappear.<br />
Chapter 8. System Settings and MIDI Applications<br />
D2<br />
Reception (bulk load) procedure<br />
Here’s how to receive data that was stored on an external<br />
MIDI device.<br />
fig.8-8.j<br />
MIDI OUT<br />
1. Press [SYSTEM] several times to access the MIDI<br />
reception setting display.<br />
2. Press [ENTER] several times to access the Bulk Load<br />
setting display.<br />
3. Turn [VALUE] to select either “Ptn” (receive the data<br />
of the current pattern) or “ALL” (receive all data).<br />
4. Press [ENTER].<br />
The display will ask “SurE” (are you sure you want to<br />
proceed with the reception?).<br />
* To cancel the operation, press [EXIT].<br />
MIDI IN<br />
Sequencer D2<br />
5. Press [ENTER] and reception will begin.<br />
6. Transmit data from the connected MIDI device.<br />
Once the data reception has been completed, the<br />
previous display will reappear.<br />
When you enter Bulk Load, the contents of the pattern being<br />
editing will be changed. If you selected “ALL” in step 3, all of<br />
the data will be changed.<br />
Never turn off the power while bulk load is in progress.<br />
Doing so may destroy the contents of memory.<br />
81<br />
Chapter 8
82<br />
Troubleshooting<br />
If the D2 stops producing sound, or if it does not function the way you expect, please check the following points first.<br />
If checking these points does not resolve the problem, please contact your dealer or a nearby <strong>Roland</strong> service center.<br />
* <strong>Roland</strong> can take no responsibility for the recovery of any lost data, or for any damages incurred as a result of such loss.<br />
Problem Cause Action<br />
No sound The D2 and/or connected equipment is not Turn on the power.<br />
powered-on.<br />
Make sure that the AC adaptor is connected correctly.<br />
The volume of the D2 and/or connected<br />
equipment has been lowered.<br />
Raise the volume.<br />
MIDI cable(s) and/or audio cables are not<br />
connected correctly.<br />
Make the correct connections (p. 11).<br />
The part level of the corresponding part is<br />
lowered.<br />
Raise the part level (p. 19).<br />
Part R does not sound All rhythm tones are muted. Defeat muting of the rhythm tones (p. 17).<br />
Sound is interrupted You are attempting to sound too many notes Reduce the number of notes that are played simultaneously.<br />
at once (the maximum polyphony is 64<br />
notes).<br />
Reduce the number of notes in the pattern that is playing back.<br />
Some notes continue sound- The delay time, feedback, or amp envelope Lower these values (p. 43, p. 35).<br />
ing unnaturally.<br />
release time settings are too high.<br />
Touching the D-FIELD does A function that does not produce sound has Select a function that produce sound (such as RPS or ADLIB)<br />
not produce sound<br />
been assigned as the D-FIELD function. (pp. 23–32).<br />
D-FIELD effect does not oc- You didn’t press the D-FIELD strongly Press the D-FIELD with an appropriate amount of force.<br />
cur<br />
enough.<br />
The D2 is in SYSTEM/EDIT/WRITE modes. Press [EXIT] several times to exit these states.<br />
The Sync Mode is set to “SLAVE.” Change the Sync Mode setting to “INT” (p. 74).<br />
The sound continues even<br />
after you remove your hand<br />
from the D-FIELD.<br />
[HOLD] is lit. Press [HOLD] to make it go dark.<br />
Reverb/Delay/MFX is not Reverb/Delay/MFX is turned “OFF.” Turn the desired effect “ON” (p. 42, p. 43, p. 44).<br />
applied.<br />
The Reverb Level or the Part Reverb Level<br />
setting of each part is set to “0.”<br />
Raise the value (p. 42, p. 19).<br />
The Delay Level or the Part Delay Level setting<br />
of each part is set to “0.”<br />
Raise the value (p. 43, p. 19).<br />
The MFX Output Level is set to “0.” The Part Raise the MFX Output Level. Turn the Part MFX SW “ON” (pp.<br />
MFX SW value of each part is set to “OFF.” 45–57, p. 19).<br />
Pitch is incorrect. The tuning of the D2 or the external MIDI<br />
sound source is incorrect.<br />
Check the tuning setting (p. 73).<br />
Patterns or songs will not The D2 is in SYSTEM/EDIT/WRITE modes. Press [EXIT] several times to exit these states.<br />
play back.<br />
The Sync Mode setting is set to “SLAVE.” Chang the Sync Mode setting to “INT” (p. 74).<br />
Pattern playback is not “on The pattern contains too much data. Remove unwanted data. Use the Data Thin function to thin out<br />
the beat,” or lags.<br />
the data (p. 68).<br />
Using the Move Note function, move note data that was input<br />
as a chord (i.e., note data that is located at the same position)<br />
backward in time (p. 64).<br />
Use the Shift Clock function to move data of parts other than<br />
the rhythm part backward in time (p. 68).<br />
Tempo is too fast. Slow down the tempo (p. 16).<br />
Can’t change patterns The CURRENT display is blinking when you Select a pattern when the CURRENT display is not blinking (p.<br />
select a pattern.<br />
15).<br />
The D2 is in Song mode or MEGAMIX mode. Press [PATTERN] to enter Pattern mode.<br />
[ENTER] was not pressed. Press [ENTER] to finalize your selection.<br />
The D2 does not operate correctly.<br />
A panel button is being held down. Release the button.
Error Message List<br />
If the D2 is operated incorrectly or if an operation could not be executed correctly, an error message will be displayed.<br />
Take the appropriate action for the error message that is displayed.<br />
Display Meaning Action<br />
There is a problem with the internal<br />
system.<br />
Please contact your dealer or a nearby <strong>Roland</strong> service center.<br />
It is possible that the contents of user<br />
memory have been lost.<br />
That operation cannot be performed<br />
because the D2 is now playing back.<br />
That operation cannot be performed<br />
because the pattern has been megamixed.<br />
The data cannot be registered in a RPS<br />
set (or MEGAMIX set) because there<br />
are multiple un-muted parts.<br />
Please perform the Factory Reset operation (p. 14). If this does not resolve<br />
the problem, contact your dealer or a nearby <strong>Roland</strong> service<br />
center.<br />
Press [ ] to stop playback before performing the operation.<br />
Save the pattern, or re-select the pattern.<br />
Decide on one part of the phrase that you wish to register, and mute<br />
all of the remaining parts (p. 23, p. 30).<br />
There is no item to edit. (This will be displayed if there is no editable parameter when you<br />
press [EDIT].)<br />
Playback is not possible because no<br />
performance data has been recorded<br />
in the pattern.<br />
No further pattern recording is possible<br />
because the maximum number of<br />
notes recordable in one pattern has<br />
been exceeded.<br />
No further song recording is possible<br />
because the maximum number of patterns<br />
recordable in one song has been<br />
exceeded.<br />
The pattern cannot be saved because<br />
of insufficient user memory.<br />
Since a large amount of MIDI messages<br />
was received in a short time (or because<br />
there was too much pattern<br />
data), the D2 was not able to process<br />
the MIDI messages.<br />
There is a problem with the MIDI cable<br />
connection.<br />
Select a pattern that contains data.<br />
Delete unwanted data from the pattern being recorded (p. 67).<br />
Up to 50 patterns can be recorded in one song. No more patterns than<br />
this can be recorded.<br />
Either initialize unwanted patterns (p. 65), or save the data on an external<br />
sequencer (p. 81).<br />
Reduce the amount of MIDI messages transmitted to the D2.<br />
Make sure that the MIDI cable has not been disconnected or broken.<br />
83<br />
Appendices
84<br />
Preset Patch List<br />
Preset A<br />
(CC#0 = 81, CC#32 = 0)<br />
No. Name<br />
001 Lead TB 1<br />
002 Dist TB 1<br />
003 Dist Sqr TB<br />
004 Dist TB 2<br />
005 Dist TB 3<br />
006 TB + Voco<br />
007 Dist TB 4<br />
008 Lead TB 2<br />
009 Devil TB<br />
010 Dual TB<br />
011 HiLo303ModSw<br />
012 Arpness TB<br />
013 Acid Line<br />
014 Dist TB 5<br />
015 Lead TB 3<br />
016 Lead TB 4<br />
017 TB Tra Bass<br />
018 Acid TB<br />
019 Psyche-TB<br />
020 TB + Sine<br />
021 Hi-Pass TB<br />
022 Moog Saw<br />
023 OB Saw<br />
024 MG Lead<br />
025 Poly Key<br />
026 Synth Pulse<br />
027 Dual Profs<br />
028 Axe of 80<br />
029 MG Square<br />
030 Square Lead1<br />
031 Square Lead2<br />
032 Square Lead3<br />
033 Lucky<br />
034 Synth Lead 1<br />
035 Moon Lead<br />
036 Rezo SynLead<br />
037 Wspy Synth<br />
038 Enorjizor<br />
039 JP8 Sprang<br />
040 PortaSynLead<br />
041 Wah Lead<br />
042 Beep Mod<br />
043 Dist Lead 1<br />
044 Freaky Fry<br />
045 JU2 SubOsc 1<br />
046 JU2 SubOsc 2<br />
047 Froggy<br />
048 Synth Lead 2<br />
049 Singin’ MINI<br />
050 Plastic Tone<br />
051 SinusoidRave<br />
052 Sine Me Up<br />
053 Spooky Sine<br />
054 Sine Tone<br />
055 D50 Saw Lead<br />
056 Dst Syn Lead<br />
057 Big Up Massv<br />
058 Warm SawLead<br />
059 Hartnoll Era<br />
060 Skegness 97<br />
061 Simply June<br />
062 The Brothers<br />
063 Dist Lead 2<br />
064 Dark SawLead<br />
No. Name<br />
065 Dist Lead 3<br />
066 Mosquito<br />
067 Phazyn Vox<br />
068 Voc Saw<br />
069 VT Vox<br />
070 Pure Voice<br />
071 Robo Vox<br />
072 Hallucinate<br />
073 Seq.Synth<br />
074 Analog Seq<br />
075 Ana Punch<br />
076 Atom Brain<br />
077 Fooled MC<br />
078 101 Bass 1<br />
079 House Bass<br />
080 101 Bass 2<br />
081 202 Bass<br />
082 Psycho Funk<br />
083 Talking Line<br />
084 Inside Bass<br />
085 Bubble Bass<br />
086 Bass Bleep<br />
087 Wiggle Bass<br />
088 Twist Bass<br />
089 Octa Bass<br />
090 BT’s Sticky<br />
091 MG Bass<br />
092 FM Super Bs<br />
093 Solid Bass<br />
094 T Nite Bass<br />
095 Front 505<br />
096 Def Bass 1<br />
097 Def Bass 2<br />
098 Sine Bass 1<br />
099 Sine Bass 2<br />
100 RollModRezBs<br />
101 Gate Me Buzz<br />
102 System Bass<br />
103 Spike Bass<br />
104 Solid Goa<br />
105 Rezo Bass<br />
106 Blip Bass<br />
107 Pizz Bass<br />
108 Voco Bass<br />
109 VoCoRoBo<br />
110 Dust Bass<br />
111 ArtCore Bass<br />
112 NU-NRG Bass<br />
113 TalkBox Bass<br />
114 Incontinence<br />
115 Bari Voice<br />
116 Ac.Bass<br />
117 E.Ac.Bass<br />
118 Acid Jazz Bs<br />
119 Soup’s Bass<br />
120 Fingered Bs<br />
121 FingBsVeloSw<br />
122 PickedBass 1<br />
123 PickedBass 2<br />
124 Fretless Bs<br />
125 Phot Bass<br />
126 Slap Bass<br />
127 R&B B-Slides<br />
128 Syn Stack 1<br />
Preset B<br />
(CC#0 = 81, CC#32 = 1)<br />
No. Name<br />
001 Strong Brass<br />
002 You Can Fly<br />
003 Syn stack 2<br />
004 Dawn Of Man<br />
005 Saw Stack 1<br />
006 Saw Stack 2<br />
007 DLM Stack<br />
008 DOC Stack<br />
009 LN2 Stack<br />
010 Bend Stack<br />
011 Freedom<br />
012 Good Bean<br />
013 JP8000 5th<br />
014 Mega 5th<br />
015 5th Saw<br />
016 4th Saw<br />
017 Soundtrack<br />
018 Rise Pad<br />
019 Warm Pad<br />
020 JP + OB Pad<br />
021 Planet<br />
022 Additive<br />
023 Noise Pad<br />
024 Sweep Pad 1<br />
025 Sweep Pad 2<br />
026 Alles Padde<br />
027 Sky Light<br />
028 Stargate MC<br />
029 Middle Grow<br />
030 AiRye Bread-<br />
031 NU-NRG Org<br />
032 Halo Pad<br />
033 Str/Brs Pad<br />
034 Syn Brs Pad<br />
035 Simple Pad<br />
036 OB Rezo Pad<br />
037 Sweet Vocode<br />
038 Thin Pad<br />
039 Attack Pad<br />
040 Metal Pad<br />
041 Atmosphere<br />
042 Fantasia<br />
043 Feedbackwave<br />
044 Pacifica<br />
045 Atmosphere 2<br />
046 Sub Atmosphe<br />
047 Machine Pad<br />
048 Detuned Pad<br />
049 Scoop Pad<br />
050 Psycho Trevo<br />
051 Floating Pad<br />
052 Fancy Pad<br />
053 Strings 1<br />
054 Strings 2<br />
055 Old StringSW<br />
056 Swim Strings<br />
057 Eclip-Str<br />
058 Slow Strings<br />
059 OB Slow Str<br />
060 Syn.Strings1<br />
061 Syn.Strings2<br />
062 OB Strings<br />
063 Rhap Strings<br />
064 Banded Jupe<br />
No. Name<br />
065 NU-NRG Str<br />
066 Violin<br />
067 Contrabass<br />
068 Tremolo Str<br />
069 Pizzicato 1<br />
070 Pizzicato 2<br />
071 Pizz It<br />
072 Guardians<br />
073 Gat Passion<br />
074 Syn Harp<br />
075 Voice Oohs<br />
076 Solo Vox<br />
077 Syn Vox<br />
078 Choir Aahs<br />
079 Space Voice<br />
080 Star Voice<br />
081 Brightness<br />
082 Vox Lead<br />
083 Auhbient<br />
084 Auh Luv Rave<br />
085 PCM Life<br />
086 Noisevox<br />
087 Trance Voice<br />
088 Effect Acer<br />
089 Alternative<br />
090 Hard Pure<br />
091 Metal EF<br />
092 Dly Tone<br />
093 Osci Frog<br />
094 Cal + After<br />
095 8b Pad<br />
096 SpaceHighway<br />
097 Trek Storm<br />
098 Abduction<br />
099 1st Contact<br />
100 Ice Cave<br />
101 Rev Cord<br />
102 Blue Random<br />
103 Sync Tone<br />
104 Seq Up<br />
105 SawLFOSaw<br />
106 Calculating<br />
107 Touch EF<br />
108 Welding<br />
109 Press Machin<br />
110 EF Tribe<br />
111 Scratch Alt<br />
112 Analog FX<br />
113 Non TB<br />
114 Nasty Filt<br />
115 Psy-Ence<br />
116 Music Hi<br />
117 Uber Zone<br />
118 Down Gown<br />
119 For Giving<br />
120 Sound Alarm<br />
121 Acid Drone<br />
122 X-Mod<br />
123 X-FM/Org<br />
124 X-FM Bass<br />
125 Hard BD?<br />
126 S&H Voc<br />
127 X-TlkBxBass<br />
128 X-Kick/TB<br />
Preset C<br />
(CC#0 = 81, CC#32 = 2)<br />
No. Name<br />
001 X-Org/Nz<br />
002 X-Pizz/Rng<br />
003 White Noise<br />
004 Pink Noise<br />
005 P5 Noise<br />
006 Toy Noise<br />
007 Rezo Noise<br />
008 Vinyl Noise<br />
009 Tornado Jet<br />
010 Smooth Jet<br />
011 Sweep Noise<br />
012 ModWhtSweep<br />
013 Perk Breath<br />
014 Pink Bomb<br />
015 64voicePiano<br />
016 Ac.Piano 1<br />
017 Ac.Piano 2<br />
018 Epic House<br />
019 Hush Piano<br />
020 Happy Piano<br />
021 BPF Piano<br />
022 Honky-tonk<br />
023 NY Piano+Str<br />
024 Voice Piano<br />
025 Old E.Piano<br />
026 E.Piano 1<br />
027 E.Piano 2<br />
028 Cool Rhodes<br />
029 Psycho EP<br />
030 Trip E.Piano<br />
031 Rotary Rhode<br />
032 EP-Organ<br />
033 Harpsichord<br />
034 Clavi<br />
035 Digi Clavi<br />
036 FM Clavi<br />
037 AnalogClavi1<br />
038 AnalogClavi2<br />
039 Funky Clavi<br />
040 RotaryOrg Sl<br />
041 RotaryOrg Fs<br />
042 Gospel Spin<br />
043 L Org F<br />
044 Organ 1<br />
045 Lp-Hp Organ<br />
046 Organ 2<br />
047 Percsv Organ<br />
048 Ballad B<br />
049 FM Club Org<br />
050 Pop Organ<br />
051 Cheese Organ<br />
052 Reed Organ<br />
053 Telstar<br />
054 Church Org<br />
055 Organ Bass<br />
056 Strict Organ<br />
057 SmkyChrd Org<br />
058 Sweep Organ<br />
059 Accordion<br />
060 Vibraphone<br />
061 FM Marimba<br />
062 Marimba<br />
063 Xylophone<br />
064 Balaphone
No. Name<br />
065 Timpani<br />
066 Steel Drum<br />
067 Digi Bell<br />
068 Acid Perc<br />
069 MetaL-SD<br />
070 Classy Pulse<br />
071 Glockenspiel<br />
072 Fanta Bell<br />
073 Crystal<br />
074 Tubular-Bell<br />
075 Shank Bells<br />
076 MKS-30 Melts<br />
077 Trip Lead<br />
078 Steel-Str.Gt<br />
079 Clean Gtr<br />
080 Jazz Gtr 1<br />
081 Jazz Gtr 2<br />
082 Muted Gtr<br />
083 Lo-Fi Gtr<br />
084 Terror Dome<br />
085 Psycho-G<br />
086 Dist Gtr Chd<br />
087 Going Bald<br />
088 Gt.Harmonic1<br />
089 Gt.Harmonic2<br />
090 Shafted Gtr<br />
091 WahGT 2 Menu<br />
092 Gtr Up<br />
093 Gtr Down<br />
094 Gtr Sweep<br />
095 Orch Gtr<br />
096 Brass<br />
097 Bright Brass<br />
098 Hush Brass<br />
099 Synth Brass1<br />
100 Synth Brass2<br />
101 Synth Brass3<br />
102 Syn Brs Lead<br />
103 Obilator<br />
104 OpenUp Brass<br />
105 Brass Fall<br />
106 Trumpet<br />
107 MutedTrumpet<br />
108 Soprano Sax<br />
109 Alto Sax<br />
110 Baritone Sax<br />
111 SlideBiteSax<br />
112 Sax & Tp<br />
113 Tuba<br />
114 Syn F.Horn<br />
115 Oboe<br />
116 Whistle<br />
117 Ocarina<br />
118 Recorder<br />
119 Jazz SynLead<br />
120 Solo Flute<br />
121 Pan Flute<br />
122 Bottle Blow<br />
123 Funky Pipe<br />
124 Breath Noise<br />
125 Shakuhachi<br />
126 Sitar 1<br />
127 Sitar 2<br />
128 Santur<br />
Preset D<br />
(CC#0 = 81, CC#32 = 3)<br />
No. Name<br />
001 Kalimba<br />
002 Bagpipes<br />
003 PnoBendM7-m7<br />
004 Org Chd m7<br />
005 BalapChd 9th<br />
006 Wah Gtr Hit<br />
007 Orch Hit 1<br />
008 Orch Hit 2<br />
009 Rave-X-Tasy<br />
010 Philly Hit 1<br />
011 Philly Hit 2<br />
012 Attack Hit<br />
013 Funky Hit<br />
014 Tekno ChdHit<br />
015 Dist Hit<br />
016 Glasgow Hit<br />
017 Happy Hit<br />
018 Scene Hit 1<br />
019 Scene Hit 2<br />
020 Drill Hit<br />
021 Gaia Message<br />
022 Rezo Perc<br />
023 Syn Perc<br />
024 MG Blip<br />
025 Rev Blip<br />
026 Air Blip<br />
027 Radical Perc<br />
028 Machine<br />
029 Metal Hit<br />
030 Tanz Devil<br />
031 Headz Direkt<br />
032 ShoppingCart<br />
033 Noisy Drill<br />
034 Thump Bounce<br />
035 Tape Rewind<br />
036 Stop<br />
037 Ao!<br />
038 Ha!<br />
039 Seashore<br />
040 Bird<br />
041 Telephone<br />
042 Helicopter<br />
043 Applause<br />
044 Gun Shot<br />
045 Machine Gun<br />
046 Laser Gun<br />
047 Sci-Fi Laser<br />
048 Breath<br />
049 Rain<br />
050 Siren<br />
051 TR909 Tom<br />
052 TR808 Tom<br />
053 Syn Tom 1<br />
054 Syn Tom 2<br />
055 Old Syn Tom<br />
056 Taiko<br />
057 Slow Down<br />
058 Boom Drop<br />
059 B-Tom-D<br />
060 Mr.Bong Bass<br />
061 Friends of 0<br />
062 Latin Perc<br />
063 Bongo Fury<br />
064 High Timbale<br />
No. Name<br />
065 MutePandeiro<br />
066 Open Surdo<br />
067 Brazil Perc<br />
068 Tablabaya<br />
069 Mute Cuica<br />
070 Long Whistle<br />
071 Agogo<br />
072 Short Tamb<br />
073 808 Cowbell<br />
074 CR78 Cowbell<br />
075 CR78 Beat<br />
076 Wind-Chime<br />
077 Rim Shot<br />
078 TR909 Rim<br />
079 Hyoshigi<br />
080 TR626 Shaker<br />
081 727 Quijada<br />
082 Real CH<br />
083 TR909 OH<br />
084 Syn OH<br />
085 TR909 Crash<br />
086 Reverse Cym.<br />
087 Asian Gong<br />
088 TR808 Clap<br />
089 Down Clap<br />
090 Clap Tail<br />
091 Rap&Real Clp<br />
092 Maddening<br />
093 TR909 Snare<br />
094 TR808 Snare<br />
095 House Snare<br />
096 Jungle Snr 1<br />
097 Jungle Snr 2<br />
098 TR808 Kick<br />
099 Plastic BD<br />
0100 Gate Kick<br />
0101 Jungle Kick<br />
0102 Scrtch/Vo Mn<br />
0103 Flexi Vox Mn<br />
0104 Hit Menu<br />
0105 Indust Menu<br />
0106 Tom Menu<br />
0107 Percus1 Menu<br />
0108 Percus2 Menu<br />
0109 Cowbell Menu<br />
0110 Shaker+ Menu<br />
0111 Rim Menu<br />
0112 Cymbal Menu<br />
0113 CHH 1 Menu<br />
0114 CHH 2 Menu<br />
0115 PHH Menu<br />
0116 OHH 1 Menu<br />
0117 OHH 2 Menu<br />
0118 Clap 1 Menu<br />
0119 Clap 2 Menu<br />
0120 Snare 1 Menu<br />
0121 Snare 2 Menu<br />
0122 Snare 3 Menu<br />
0123 Snare 4 Menu<br />
0124 Snare 5 Menu<br />
0125 Snare 6 Menu<br />
0126 Kick 1 Menu<br />
0127 Kick 2 Menu<br />
0128 Kick 3 Menu<br />
Preset E<br />
(CC#0 = 84, CC#32 = 0)<br />
No. Name<br />
001 SOLO Saw<br />
002 Stereo Saw<br />
003 Fright Saw<br />
004 Seq Strings<br />
005 Delay Seq<br />
006 SOLO PWM<br />
007 SOLO Square<br />
008 Square Lead4<br />
009 Fbk 8000<br />
010 Juno Lead<br />
011 Dark Lead<br />
012 SOLO Choir<br />
013 SOLO Sin<br />
014 PortaDetLead<br />
015 Sweep Beep<br />
016 Pow Lead<br />
017 NonReality<br />
018 HardTranceLd<br />
019 Dist Reso TB<br />
020 Dark TB<br />
021 SpaceKhoomij<br />
022 80s Bass<br />
023 Mini Bass<br />
024 Percus Bass<br />
025 Filter Chop<br />
026 Hard Bass<br />
027 Solid Reso<br />
028 Electro Bass<br />
029 Master Bass<br />
030 FX Bass<br />
031 Sine Bass 3<br />
032 Def Bass 3<br />
033 DnB Dist Bs<br />
034 PickedBass 3<br />
035 Heavy PBass<br />
036 Euro Stab<br />
037 Saw Stack 3<br />
038 Trance Riff<br />
039 Galactic Stb<br />
040 Devil Stab<br />
041 Sweep Pad<br />
042 Detroit Pad<br />
043 Church Pad<br />
044 Eternal Pad<br />
045 Strong Orch<br />
046 Mellow Str<br />
047 Strings 3<br />
048 Big Choir<br />
049 Drop FX<br />
050 Old Space<br />
051 LaughMachine<br />
052 Hicuts<br />
053 Spaceship<br />
054 FXM Blip<br />
055 Wierd Mod<br />
056 4Dimensions<br />
057 LowdownBass<br />
058 Radio Sweep<br />
059 SF Noise<br />
060 Clear Piano<br />
061 Space Piano<br />
062 Trip E.P 2<br />
063 Powerful Org<br />
064 E.Org Sweep<br />
Preset Patch List<br />
No. Name<br />
065 Digi Steel<br />
066 OctoLimba<br />
067 Alto Sax 2<br />
068 Synth Brass4<br />
069 DiscoAction<br />
070 Dooomed Hit<br />
071 Hard Rave<br />
072 Analog Hash<br />
073 PR riff<br />
074 HardRock Hit<br />
075 Retro SE 1<br />
076 Retro SE 2<br />
077 Reso Blip<br />
078 Dark Rim<br />
079 R&B Rim<br />
080 Tabla Seq<br />
081 Afro Attack<br />
082 Cyber Cymbal<br />
083 D&B Ride<br />
084 Real Snap<br />
085 TR909 Snare2<br />
086 HipHop Snare<br />
087 Nrg BD<br />
088 Beats Kick<br />
User: 001–128<br />
(CC#0 = 85, CC#32 = 0)<br />
User: 129–256<br />
(CC#0 = 85, CC#32 = 1)<br />
85<br />
Appendices
Note No.<br />
35<br />
C2 36<br />
38<br />
40<br />
41<br />
43<br />
45<br />
47<br />
C3 48<br />
50<br />
52<br />
53<br />
55<br />
57<br />
59<br />
C4 60<br />
62<br />
64<br />
65<br />
67<br />
69<br />
71<br />
C5 72<br />
74<br />
76<br />
77<br />
79<br />
81<br />
83<br />
C6 84<br />
86<br />
88<br />
89<br />
91<br />
93<br />
95<br />
37<br />
39<br />
42<br />
44<br />
46<br />
49<br />
51<br />
54<br />
56<br />
58<br />
61<br />
63<br />
66<br />
68<br />
70<br />
73<br />
75<br />
78<br />
80<br />
82<br />
85<br />
87<br />
90<br />
92<br />
94<br />
96<br />
98 97<br />
C7<br />
86<br />
Preset Rhythm Set List<br />
* The Rhythm Group column shows the button that can be pressed to mute that rhythm tone.<br />
P: A 01–26 (CC#0 = 81, CC#32 = 0), P: B 01–04 (CC#0 = 84, CC#32 = 0), User: 01–20 (CC#0 = 85, CC#32 = 0)<br />
Rhythm Group<br />
BD<br />
BD<br />
TOM/PERC<br />
SD<br />
CLP<br />
SD<br />
TOM/PERC<br />
HH<br />
TOM/PERC<br />
HH<br />
TOM/PERC<br />
HH<br />
BD<br />
BD<br />
TOM/PERC<br />
SD<br />
CLP<br />
SD<br />
TOM/PERC<br />
HH<br />
TOM/PERC<br />
HH<br />
TOM/PERC<br />
HH<br />
TOM/PERC<br />
TOM/PERC<br />
CYM<br />
TOM/PERC<br />
CYM<br />
CYM<br />
CYM<br />
TOM/PERC<br />
CYM<br />
TOM/PERC<br />
CYM<br />
TOM/PERC<br />
CYM<br />
TOM/PERC<br />
TOM/PERC<br />
TOM/PERC<br />
TOM/PERC<br />
TOM/PERC<br />
TOM/PERC<br />
TOM/PERC<br />
TOM/PERC<br />
TOM/PERC<br />
TOM/PERC<br />
TOM/PERC<br />
HIT<br />
HIT<br />
HIT<br />
HIT<br />
HIT<br />
HIT<br />
OTHERS<br />
OTHERS<br />
OTHERS<br />
OTHERS<br />
OTHERS<br />
CLP<br />
BD<br />
BD<br />
SD<br />
SD<br />
P: A01 TR-909<br />
Plastic BD 4<br />
Plastic BD 3<br />
TR808 Rim<br />
TR909 Snr 1<br />
TR909 Clap 2<br />
TR909 Snr 3<br />
TR707 Tom<br />
TR909 CHH 2<br />
TR707 Tom<br />
TR909 PHH 2<br />
TR707 Tom<br />
TR909 OHH 1<br />
TR909 Kick 4<br />
TR909 Kick 2<br />
TR909 Rim<br />
TR909 Snr 2<br />
TR909 Clap 1<br />
TR909 Snr 3<br />
TR909 Tom<br />
TR909 CHH 1<br />
TR909 Tom<br />
TR909 OHH 2<br />
TR909 Tom<br />
TR909 OHH 2<br />
TR909 Tom<br />
TR909 Tom<br />
TR909 Crash<br />
TR909 Tom<br />
TR909 Ride<br />
TR909 Crash<br />
TR909 Ride<br />
Tambourine 2<br />
NaturalCrash<br />
TR808Cowbell<br />
TR606 Cym 1<br />
PC-2 Machine<br />
Natural Ride<br />
HiBongo Open<br />
LoBongo Open<br />
HiConga Mute<br />
HiConga Open<br />
LoConga Open<br />
Hi Timbale<br />
Lo Timbale<br />
TR727 Agogo<br />
TR727 Agogo<br />
Cabasa Up<br />
808 Maracas<br />
Beam HiQ<br />
Air Blip<br />
MG Blip<br />
Techno Scene<br />
Air Gun<br />
Tekno Hit<br />
Come on!<br />
Wao!<br />
Ooh! 1<br />
Canvas<br />
JP8000 FBK<br />
Funky Clap<br />
TR808 Kick 1<br />
Gabba Kick<br />
Synth Snare<br />
TR808 Snr 2<br />
P: A02 TR-808<br />
TR808 Kick 5<br />
TR808 Kick 3<br />
TR808 RimLng<br />
TR808 Snr 8<br />
TR909 Clap 1<br />
TR808 Snr 9<br />
TR606 Tom<br />
TR808 CHH 2<br />
TR606 Tom<br />
TR808 PHH 2<br />
TR606 Tom<br />
TR808 OHH 2<br />
TR808 Kick 1<br />
TR808 Kick 4<br />
TR808 Rim<br />
TR808 Snr 6<br />
TR808 Clap<br />
TR808 Snr 2<br />
TR808 Tom<br />
TR808 CHH 1<br />
TR808 Tom<br />
TR808 CHH 2<br />
TR808 Tom<br />
TR808 OHH 1<br />
TR808 Tom<br />
TR808 Tom<br />
TR606 Cym 1<br />
TR808 Tom<br />
TR606 Cym 1<br />
TR909 Crash<br />
TR909 Ride<br />
CR78 Tamb<br />
TR909 Crash<br />
TR808Cowbell<br />
TR909 Crash<br />
CR78 Guiro<br />
Natural Ride<br />
TR808 Conga<br />
TR808 Conga<br />
TR808 Conga<br />
TR808 Conga<br />
TR808 Conga<br />
Hi Timbale<br />
Lo Timbale<br />
TR727 Agogo<br />
TR808 Claves<br />
Cabasa Up<br />
808 Maracas<br />
Beam HiQ<br />
Air Blip<br />
Syn Hit<br />
Techno Scene<br />
Beam HiQ<br />
PC-2 Machine<br />
P5 Noise<br />
Toy Gun 1<br />
Syn Tom<br />
Cup Cym<br />
TR808 OHH 1<br />
Hip Clap<br />
TR808 Kick 2<br />
TR909 Kick 4<br />
CR78 Snare<br />
TR808 Snr 3<br />
P: A03 TR-606<br />
TR808 Kick 3<br />
Analog Kick<br />
TR808 Rim<br />
TR606 Snr 3<br />
Cheap Clap<br />
TR808 Snr 5<br />
TR606 CmpTom<br />
TR606 CHH 2<br />
TR606 CmpTom<br />
Hip PHH<br />
TR606 CmpTom<br />
TR606 DstOHH<br />
TR606 Dst BD<br />
TR606 Kick<br />
Analog Rim<br />
TR606 Snr 2<br />
TR808 Clap<br />
TR606 Snr 1<br />
TR606 Tom<br />
TR606 CHH 1<br />
TR606 Tom<br />
TR606 PHH 1<br />
TR606 Tom<br />
TR606 OHH<br />
TR606 Tom<br />
TR606 Tom<br />
TR606 Cym 2<br />
TR606 Tom<br />
TR909 Ride<br />
TR606 Cym 1<br />
TR707 Ride<br />
CR78 Tamb<br />
TR909 Crash<br />
TR808Cowbell<br />
TR909 Crash<br />
CR78 Guiro<br />
Natural Ride<br />
TR808 Conga<br />
TR808 Conga<br />
TR808 Conga<br />
TR808 Conga<br />
TR808 Conga<br />
Hi Timbale<br />
Lo Timbale<br />
CR78 Beat<br />
CR78 Beat<br />
Cabasa Up<br />
808 Maracas<br />
Beam HiQ<br />
Buzzer<br />
Air Blip<br />
Rezo Noise<br />
Hyoshigi<br />
Analog Bird<br />
Retro UFO<br />
PC-2 Machine<br />
Syn Hit<br />
Retro UFO<br />
Thrill<br />
Comp Clap<br />
TR808 Kick 1<br />
Plastic BD 4<br />
TR909 Snr 3<br />
CR78 Snare<br />
P: A04 CR78&Cheaps<br />
Toy Kick<br />
Plastic BD 4<br />
TR808 Rim<br />
TR808 Snr 5<br />
TR909 Clap 1<br />
Deep Snare<br />
MG Blip<br />
TR808 CHH 1<br />
MG Blip<br />
TR606 PHH 2<br />
MG Blip<br />
TR606 OHH<br />
TR606 Kick<br />
Analog Kick<br />
Analog Rim<br />
TR808 Snr 1<br />
TR808 Clap<br />
CR78 Snare<br />
TR606 Tom<br />
DR55 CHH 1<br />
TR606 Tom<br />
CR78 CHH<br />
TR606 Tom<br />
CR78 OHH<br />
TR606 Tom<br />
TR606 Tom<br />
TR606 Cym 1<br />
TR606 Tom<br />
TR606 Cym 1<br />
Cup Cym<br />
TR909 Ride<br />
CR78 Tamb<br />
TR909 Crash<br />
CR78 Cowbell<br />
TR909 Ride<br />
TR808Cowbell<br />
TR707 Ride<br />
TR808 Conga<br />
TR808 Conga<br />
TR808 Conga<br />
TR808 Conga<br />
TR808 Conga<br />
CR78 Beat<br />
CR78 Beat<br />
TR727 Agogo<br />
TR727 Agogo<br />
CR78 Guiro<br />
808 Maracas<br />
Syn Hit<br />
Beam HiQ<br />
Analog Bird<br />
MG Attack<br />
Tape Rewind<br />
Air Blip<br />
Reso FX<br />
Ring Osc<br />
MG Blip<br />
MG White Nz<br />
Rezo Noise<br />
Cheap Clap<br />
TR808 Kick 1<br />
TR909 Kick 1<br />
TR909 Snr 1<br />
Sim Snare<br />
P: A05 Techno 1<br />
Plastic BD 3<br />
Plastic BD 2<br />
TR707 Rim<br />
TR909 Snr 6<br />
TR909 Clap 1<br />
TR909 Snr 7<br />
TR909 DstTom<br />
TR909 CHH 2<br />
TR909 DstTom<br />
TR909 PHH 1<br />
TR909 DstTom<br />
TR909 OHH 2<br />
TR909 Kick 5<br />
TR909 Kick 4<br />
TR909 Rim<br />
TR909 Snr 4<br />
Group Clap<br />
TR909 Snr 5<br />
TR909 Tom<br />
TR909 CHH 1<br />
TR909 Tom<br />
TR909 PHH 2<br />
TR909 Tom<br />
TR909 OHH 3<br />
TR909 Tom<br />
TR909 Tom<br />
TR909 Crash<br />
TR909 Tom<br />
TR707 Ride<br />
TR909 Crash<br />
Asian Gong<br />
Tambourine 3<br />
TR909 Crash<br />
Cowbell<br />
TR606 Cym 1<br />
TR808Cowbell<br />
Natural Ride<br />
HiBongo LoFi<br />
LoBongo LoFi<br />
HiCnga Mt LF<br />
HiCnga Op LF<br />
LoConga LoFi<br />
HiTimbale LF<br />
LoTimbale LF<br />
CR78 Beat<br />
CR78 Beat<br />
TechnoShaker<br />
TR626 Shaker<br />
Wao!<br />
Come on!<br />
Ooh! 1<br />
MG White Nz<br />
Bomb Noise<br />
Wah Gtr 2b<br />
Toy Gun 3<br />
Toy Gun 3<br />
Buzzer<br />
Bomb Noise<br />
Sea<br />
Flange Snr<br />
TR909 Dst BD<br />
Plastic BD 4<br />
Break Snare2<br />
Ragga Rim 2
Note No.<br />
35<br />
C2 36<br />
38<br />
40<br />
41<br />
43<br />
45<br />
47<br />
C3 48<br />
50<br />
52<br />
53<br />
55<br />
57<br />
59<br />
C4 60<br />
62<br />
64<br />
65<br />
67<br />
69<br />
71<br />
C5 72<br />
74<br />
76<br />
77<br />
79<br />
81<br />
83<br />
C6 84<br />
86<br />
88<br />
89<br />
91<br />
93<br />
95<br />
37<br />
39<br />
42<br />
44<br />
46<br />
49<br />
51<br />
54<br />
56<br />
58<br />
61<br />
63<br />
66<br />
68<br />
70<br />
73<br />
75<br />
78<br />
80<br />
82<br />
85<br />
87<br />
90<br />
92<br />
94<br />
96<br />
98 97<br />
C7<br />
Rhythm Group<br />
BD<br />
BD<br />
TOM/PERC<br />
SD<br />
CLP<br />
SD<br />
TOM/PERC<br />
HH<br />
TOM/PERC<br />
HH<br />
TOM/PERC<br />
HH<br />
BD<br />
BD<br />
TOM/PERC<br />
SD<br />
CLP<br />
SD<br />
TOM/PERC<br />
HH<br />
TOM/PERC<br />
HH<br />
TOM/PERC<br />
HH<br />
TOM/PERC<br />
TOM/PERC<br />
CYM<br />
TOM/PERC<br />
CYM<br />
CYM<br />
CYM<br />
TOM/PERC<br />
CYM<br />
TOM/PERC<br />
CYM<br />
TOM/PERC<br />
CYM<br />
TOM/PERC<br />
TOM/PERC<br />
TOM/PERC<br />
TOM/PERC<br />
TOM/PERC<br />
TOM/PERC<br />
TOM/PERC<br />
TOM/PERC<br />
TOM/PERC<br />
TOM/PERC<br />
TOM/PERC<br />
HIT<br />
HIT<br />
HIT<br />
HIT<br />
HIT<br />
HIT<br />
OTHERS<br />
OTHERS<br />
OTHERS<br />
OTHERS<br />
OTHERS<br />
CLP<br />
BD<br />
BD<br />
SD<br />
SD<br />
P: A06 Techno 2<br />
TR808 Kick 5<br />
TR707 Kick 1<br />
TR909 Rim<br />
Real Snare<br />
Down Clap<br />
Rap Snare<br />
TR808 Tom<br />
TR808 CHH 2<br />
TR808 Tom<br />
TR808 PHH 1<br />
TR808 Tom<br />
TR808 OHH 1<br />
TR909 Kick 2<br />
Plastic BD 4<br />
TR808 RimLng<br />
TR909 Snr 4<br />
Claptail<br />
Funky Clap<br />
TR707 Tom<br />
Closed Hat<br />
TR707 Tom<br />
TR909 OHH 2<br />
TR707 Tom<br />
TR909 OHH 2<br />
TR707 Tom<br />
TR707 Tom<br />
TR909 Crash<br />
TR707 Tom<br />
TR707 Ride<br />
TR909 Crash<br />
Asian Gong<br />
Tambourine 2<br />
TR909 Crash<br />
TR808Cowbell<br />
TR606 Cym 2<br />
CR78 Tamb<br />
Cup Cym<br />
HiBongo Open<br />
LoBongo Open<br />
HiConga Mute<br />
HiConga Open<br />
LoConga Open<br />
Hi Timbale<br />
Lo Timbale<br />
TR727 Agogo<br />
TR727 Agogo<br />
TechnoShaker<br />
Maracas<br />
Beam HiQ<br />
Techno Scene<br />
Thin Beef<br />
Come on!<br />
Ooh! 1<br />
Wao!<br />
Analog Bird<br />
Retro UFO<br />
Metal Sweep<br />
Emergency<br />
Tonality<br />
TR909 Clap 1<br />
Wet Kick<br />
Hip Kick<br />
TR909 Snr 5<br />
Clap Snare 2<br />
P: A07 Techno 3<br />
Plastic BD 3<br />
Plastic BD 4<br />
Jungle Snr 2<br />
TR808 Snr 7<br />
Comp Clap<br />
Indus Snare<br />
Air Blip<br />
CHH MENU 2<br />
MG Blip<br />
Jungle Rim 2<br />
HIT MENU<br />
TR909 OHH 2<br />
KICK MENU 2<br />
West Kick<br />
Natural Rim<br />
TR808 Snr 8<br />
Comp Clap<br />
MC Snare<br />
Uuh Formant<br />
TR606 PHH 2<br />
Ooh Formant<br />
CR78 CHH<br />
Iih Formant<br />
TR606 OHH<br />
Can Tom<br />
ElectricDunk<br />
TR606 Cym 2<br />
HiBongo LoFi<br />
CYMBAL MENU<br />
Cup Cym<br />
TR909 Ride<br />
Tambourine 4<br />
CYMBAL MENU<br />
CR78 Beat<br />
Natural Ride<br />
CR78 Beat<br />
Cup Cym<br />
HiBongo LoFi<br />
HiBongo LoFi<br />
HiBongo LoFi<br />
HiCnga Mt LF<br />
HiConga Mute<br />
Triangle 2<br />
ElectricDunk<br />
Air Blip<br />
MG Attack<br />
TechnoShaker<br />
808 Maracas<br />
Reso FX<br />
Beam HiQ<br />
Toy Gun 3<br />
MG Blip<br />
Toy Gun 3<br />
Air Blip<br />
Reso FX<br />
Emergency<br />
MG Blip<br />
MG Pink Nz<br />
Jet Plane<br />
Roll Snare<br />
TR808 Kick 1<br />
TR909 Kick 1<br />
TR909 Snr 1<br />
Urban RollSD<br />
P: A08 Hardcore<br />
TR909 Kick 5<br />
Gabba Kick<br />
SideStiker<br />
Jungle Snr 1<br />
Fuzzy Clap<br />
TR909 Snr 4<br />
TR606 CmpTom<br />
TR909 CHH 2<br />
TR606 CmpTom<br />
TR909 PHH 1<br />
TR606 CmpTom<br />
TR909 OHH 1<br />
Amsterdam BD<br />
TR909 Dst BD<br />
Lo-Fi Rim<br />
TR909 DstSnr<br />
Funk Clap 2<br />
TR909 DstSnr<br />
TR909 DstTom<br />
TR909 PHH 1<br />
TR909 DstTom<br />
TR909 PHH 2<br />
TR909 DstTom<br />
TR909 DstOHH<br />
TR909 DstTom<br />
TR909 DstTom<br />
TR909 Crash<br />
TR909 DstTom<br />
TR707 Ride<br />
TR909 Crash<br />
Asian Gong<br />
CR78 Tamb<br />
NaturalCrash<br />
TR808Cowbell<br />
Jungle Crash<br />
TR727Quijada<br />
Natural Ride<br />
HiBongo LoFi<br />
LoBongo LoFi<br />
HiCnga Mt LF<br />
HiCnga Op LF<br />
LoConga LoFi<br />
HiTimbale LF<br />
LoTimbale LF<br />
TR727 Agogo<br />
TR727 Agogo<br />
TechnoShaker<br />
Dance Shaker<br />
Beam HiQ<br />
Air Gun<br />
ElectricDunk<br />
Thin Beef<br />
Drill Hit<br />
TAO Hit<br />
Rezo Noise<br />
Toy Gun 1<br />
Toy Gun 3<br />
Gtr FX<br />
Dist Synth<br />
Funk Clap<br />
TR909 Kick 2<br />
Turbo Kick<br />
Rage Snare<br />
Big Trash SD<br />
Preset Rhythm Set List<br />
P: A09 Ambient<br />
TR909 Kick 5<br />
Wet Kick<br />
Ragga Rim 1<br />
DJ Snare<br />
Comp Clap<br />
SideStiker<br />
TR707 Tom<br />
Closed Hat<br />
TR707 Tom<br />
Pedal Hat 1<br />
TR707 Tom<br />
Real OHH<br />
Wet Kick<br />
TR808 Kick 3<br />
TR808 RimLng<br />
CR78 Snare<br />
TR909 Clap 1<br />
Beam HiQ<br />
TR808 Tom<br />
DR55 CHH 1<br />
TR808 Tom<br />
TR606 PHH 2<br />
TR808 Tom<br />
CR78 OHH<br />
TR808 Tom<br />
TR808 Tom<br />
TR606 Cym 1<br />
TR808 Tom<br />
TR909 Ride<br />
TR606 Cym 1<br />
Asian Gong<br />
Tambourine 3<br />
TR606 Cym 2<br />
CR78 Cowbell<br />
NaturalCrash<br />
TR808Cowbell<br />
Natural Ride<br />
HiBongo Open<br />
LoBongo Open<br />
HiConga Mute<br />
HiConga Open<br />
LoConga Open<br />
Hi Timbale<br />
Lo Timbale<br />
TR727 Agogo<br />
TR727 Agogo<br />
TechnoShaker<br />
808 Maracas<br />
Air Blip<br />
Wind Chime<br />
Thrill<br />
CR78 Beat<br />
Retro UFO<br />
Hyoshigi<br />
Pizzy Techno<br />
Org Chord<br />
Feedbackwave<br />
Stream<br />
Bird<br />
Claptail<br />
TR808 Kick 1<br />
JungleKick 2<br />
TR808 Snr 2<br />
Jungle Snr 1<br />
P: A10 House 1<br />
TR808 Kick 5<br />
TR909 Kick 2<br />
TR808 Rim<br />
SNR MENU 1<br />
CLAP MENU 1<br />
TR909 Snr 6<br />
TOM MENU<br />
TR707 OHH<br />
TR909 Tom<br />
TR707 OHH<br />
TR909 Tom<br />
TR707 OHH<br />
TR808 Kick 1<br />
TR909 Kick 3<br />
TR808 RimLng<br />
Break Snare2<br />
Claptail<br />
TR909 Snr 4<br />
TR808 Tom<br />
TR909 CHH 1<br />
TR808 Tom<br />
OHH MENU 1<br />
TR808 Tom<br />
OHH MENU 1<br />
TR707 Tom<br />
TR707 Tom<br />
TR909 Crash<br />
TR707 Tom<br />
TR909 Ride<br />
NaturalCrash<br />
Tambourine 2<br />
Tambourine 1<br />
TR909 Crash<br />
TR707Cowbell<br />
Cup Cym<br />
TR808Cowbell<br />
Natural Ride<br />
HiBongo LoFi<br />
LoBongo LoFi<br />
HiConga Mute<br />
HiConga Open<br />
LoConga Open<br />
HiTimbale LF<br />
LoTimbale LF<br />
TR727 Agogo<br />
TR727 Agogo<br />
808 Maracas<br />
TR626 Shaker<br />
TR606 CHH 1<br />
TR727Quijada<br />
Short Guiro<br />
Long Guiro<br />
TR808 Claves<br />
Hyoshigi<br />
Bomb Noise<br />
Come on!<br />
Triangle 1<br />
Cup Cym<br />
TR808 OHH 1<br />
Hip Clap<br />
TR808 Kick 2<br />
TR909 Kick 4<br />
CR78 Snare<br />
TR808 Snr 3<br />
87<br />
Appendices
Preset Rhythm Set List<br />
Note No.<br />
35<br />
C2 36<br />
38<br />
40<br />
41<br />
43<br />
45<br />
47<br />
C3 48<br />
50<br />
52<br />
53<br />
55<br />
57<br />
59<br />
C4 60<br />
62<br />
64<br />
65<br />
67<br />
69<br />
71<br />
C5 72<br />
74<br />
76<br />
77<br />
79<br />
81<br />
83<br />
C6 84<br />
86<br />
88<br />
89<br />
91<br />
93<br />
95<br />
37<br />
39<br />
42<br />
44<br />
46<br />
49<br />
51<br />
54<br />
56<br />
58<br />
61<br />
63<br />
66<br />
68<br />
70<br />
73<br />
75<br />
78<br />
80<br />
82<br />
85<br />
87<br />
90<br />
92<br />
94<br />
96<br />
98 97<br />
C7<br />
88<br />
Rhythm Group<br />
BD<br />
BD<br />
TOM/PERC<br />
SD<br />
CLP<br />
SD<br />
TOM/PERC<br />
HH<br />
TOM/PERC<br />
HH<br />
TOM/PERC<br />
HH<br />
BD<br />
BD<br />
TOM/PERC<br />
SD<br />
CLP<br />
SD<br />
TOM/PERC<br />
HH<br />
TOM/PERC<br />
HH<br />
TOM/PERC<br />
HH<br />
TOM/PERC<br />
TOM/PERC<br />
CYM<br />
TOM/PERC<br />
CYM<br />
CYM<br />
CYM<br />
TOM/PERC<br />
CYM<br />
TOM/PERC<br />
CYM<br />
TOM/PERC<br />
CYM<br />
TOM/PERC<br />
TOM/PERC<br />
TOM/PERC<br />
TOM/PERC<br />
TOM/PERC<br />
TOM/PERC<br />
TOM/PERC<br />
TOM/PERC<br />
TOM/PERC<br />
TOM/PERC<br />
TOM/PERC<br />
HIT<br />
HIT<br />
HIT<br />
HIT<br />
HIT<br />
HIT<br />
OTHERS<br />
OTHERS<br />
OTHERS<br />
OTHERS<br />
OTHERS<br />
CLP<br />
BD<br />
BD<br />
SD<br />
SD<br />
P: A11 House 2<br />
Wet Kick<br />
Plastic BD 2<br />
TR808 Rim<br />
Clap Snare 2<br />
Group Clap<br />
TR808 Snr 7<br />
TR808 Tom<br />
TR707 CHH<br />
TR808 Tom<br />
TR707 PHH<br />
TR808 Tom<br />
TR707 OHH<br />
TR909 Kick 2<br />
TR909 Kick 5<br />
TR909 Rim<br />
Break Snare2<br />
TR909 Clap 1<br />
TR909 Snr 4<br />
TR707 Tom<br />
TR909 CHH 1<br />
TR707 Tom<br />
TR909 PHH 1<br />
TR707 Tom<br />
TR909 OHH 3<br />
TR707 Tom<br />
TR707 Tom<br />
TR909 Crash<br />
TR707 Tom<br />
TR909 Ride<br />
NaturalCrash<br />
Tambourine 3<br />
Tambourine 4<br />
TR909 Crash<br />
TR707Cowbell<br />
Cup Cym<br />
TR808Cowbell<br />
Natural Ride<br />
HiBongo LoFi<br />
LoBongo LoFi<br />
HiCnga Mt LF<br />
HiCnga Op LF<br />
LoConga LoFi<br />
HiTimbale LF<br />
LoTimbale LF<br />
TR727 Agogo<br />
TR727 Agogo<br />
Cabasa Up<br />
TR626 Shaker<br />
Belltree<br />
TR727Quijada<br />
Short Guiro<br />
Long Guiro<br />
TR808 Claves<br />
Hyoshigi<br />
Bomb Noise<br />
Come on!<br />
Ooh! 1<br />
Wao!<br />
Laugh<br />
Claptail<br />
TR808 Kick 1<br />
Plastic BD 3<br />
TR808 Snr 6<br />
TR909 Snr 7<br />
P: A12 Jungle<br />
TR909 Kick 3<br />
Lo-Fi Kick 2<br />
SideStiker<br />
Urban RollSD<br />
Down Clap<br />
Jungle Rim 1<br />
Jungle Snr 2<br />
Tight CHH<br />
Jungle Snr 2<br />
Tambourine 1<br />
Jungle Snr 2<br />
Cym OHH<br />
TR909 Kick 5<br />
JungleKick 2<br />
Jungle Rim 2<br />
Urban Snare<br />
Jungle Rim 3<br />
Jungle Snr 1<br />
TR606 CmpTom<br />
Real CHH<br />
TR606 CmpTom<br />
Jungle Hat<br />
TR606 CmpTom<br />
Hip OHH<br />
TR606 CmpTom<br />
TR606 CmpTom<br />
Jungle Crash<br />
TR606 CmpTom<br />
Natural Ride<br />
NaturalCrash<br />
Asian Gong<br />
Tambourine 3<br />
TR606 Cym 1<br />
Cowbell<br />
TR909 Crash<br />
CR78 Tamb<br />
TR707 Ride<br />
HiBongo LoFi<br />
LoBongo LoFi<br />
HiCnga Mt LF<br />
HiCnga Op LF<br />
LoConga LoFi<br />
HiTimbale LF<br />
LoTimbale LF<br />
Open Surdo<br />
Mute Surdo<br />
TechnoShaker<br />
TR626 Shaker<br />
Beam HiQ<br />
Air Blip<br />
Thin Beef<br />
Analog Bird<br />
Tape Rewind<br />
Wao!<br />
Emergency<br />
Toy Gun 3<br />
Reso FX<br />
Toy Gun 2<br />
Toy Gun 1<br />
Big Clap<br />
TR808 Kick 2<br />
Roll Kick<br />
Roll Snare<br />
Break Snare2<br />
P: A13 Drum’n’Bass1<br />
Roll Kick<br />
Analog Kick<br />
RaggaTightSD<br />
Cross Snare<br />
Roll Snare<br />
Headz Snare<br />
TR606 Tom<br />
Pop CHH<br />
TR606 Tom<br />
Tambourine 3<br />
TR606 Tom<br />
Pop Hat Open<br />
Plastic BD 1<br />
Hip Kick<br />
Scratch SD r<br />
Break Snare2<br />
Funky Clap<br />
Ragga Snr 2<br />
Kick Tom<br />
Real CHH<br />
Kick Tom<br />
TR808 PHH 1<br />
Kick Tom<br />
TR606 OHH<br />
Kick Tom<br />
Kick Tom<br />
TR909 Crash<br />
Kick Tom<br />
TR909 Ride<br />
TR909 Crash<br />
Asian Gong<br />
Tambourine 2<br />
TR909 Crash<br />
CR78 Cowbell<br />
TR606 Cym 2<br />
TR808Cowbell<br />
Natural Ride<br />
HiBongo Open<br />
LoBongo Open<br />
HiConga Mute<br />
HiConga Open<br />
LoConga Open<br />
Hi Timbale<br />
Lo Timbale<br />
TR727 Agogo<br />
TR727 Agogo<br />
Cabasa Up<br />
Maracas<br />
MG Blip<br />
Air Blip<br />
Hyoshigi<br />
CR78 Guiro<br />
Mt Pandeiro<br />
Chenchen<br />
Thrill<br />
Retro UFO<br />
Rezo Noise<br />
Feedbackwave<br />
Space Noise<br />
Little Clap<br />
TR808 Kick 2<br />
TR909 Kick 1<br />
Solid Snare<br />
Flange Snr<br />
P: A14 Drum’n’Bass2<br />
TR909 Kick 3<br />
Lo-Fi Kick 2<br />
SideStiker<br />
Urban RollSD<br />
Down Clap<br />
Jungle Snr 1<br />
Jungle Snr 2<br />
Tight CHH<br />
Jungle Snr 2<br />
Tambourine 1<br />
Jungle Snr 2<br />
Cym OHH<br />
TR909 Kick 5<br />
JungleKick 2<br />
Jungle Rim 2<br />
Urban Snare<br />
Jungle Rim 3<br />
Jungle Snr 1<br />
TR909 DstTom<br />
Real CHH<br />
TR909 DstTom<br />
Jungle Hat<br />
TR909 DstTom<br />
Hip OHH<br />
TR909 DstTom<br />
TR909 DstTom<br />
Jungle Crash<br />
TR606 CmpTom<br />
Natural Ride<br />
NaturalCrash<br />
Asian Gong<br />
Tambourine 3<br />
TR606 Cym 1<br />
Cowbell<br />
TR909 Crash<br />
CR78 Tamb<br />
TR707 Ride<br />
HiBongo LoFi<br />
LoBongo LoFi<br />
HiCnga Mt LF<br />
HiCnga Op LF<br />
LoConga LoFi<br />
HiTimbale LF<br />
LoTimbale LF<br />
Open Surdo<br />
Mute Surdo<br />
Cabasa Up<br />
Maracas<br />
Beam HiQ<br />
ElectricDunk<br />
Bomb<br />
Analog Bird<br />
Tape Rewind<br />
Wao!<br />
Emergency<br />
Toy Gun 3<br />
Reso FX<br />
Toy Gun 2<br />
Toy Gun 1<br />
Big Clap<br />
TR808 Kick 2<br />
Roll Kick<br />
Roll Snare<br />
Break Snare2<br />
P: A15 Hip-Hop 1<br />
Lo-Fi Kick 1<br />
TR808 Kick 3<br />
Solid Snare<br />
HipJazz Snr<br />
Funk Clap 2<br />
R&B Snare<br />
TR808 Tom<br />
Pop CHH<br />
TR808 Tom<br />
Pedal Hat 1<br />
TR808 Tom<br />
Pop Hat Open<br />
Break Kick<br />
Hip Kick<br />
Lo-Fi Rim<br />
Jazz Snare<br />
Funky Clap<br />
East Snare<br />
Natural Tom<br />
Tight CHH<br />
Natural Tom<br />
Pedal Hat 2<br />
Natural Tom<br />
Hip OHH<br />
Natural Tom<br />
Natural Tom<br />
TR909 Crash<br />
Natural Tom<br />
TR707 Ride<br />
TR909 Crash<br />
Cup Cym<br />
Tambourine 3<br />
Tambourine 4<br />
TR808Cowbell<br />
TR606 Cym 1<br />
CR78 Cowbell<br />
Natural Ride<br />
HiBongo LoFi<br />
LoBongo LoFi<br />
HiCnga Mt LF<br />
HiCnga Op LF<br />
LoConga LoFi<br />
HiTimbale LF<br />
LoTimbale LF<br />
TR727 Agogo<br />
TR727 Agogo<br />
Dance Shaker<br />
808 Maracas<br />
Scratch BD f<br />
Scratch BD r<br />
Scratch SD f<br />
Scratch SD r<br />
Scratch ALT<br />
Vinyl Stop<br />
Vinyl Noise<br />
Kick it!<br />
Ooh! 2<br />
Ooh! 1<br />
Laugh<br />
Funk Clap<br />
TR808 Kick 1<br />
Dance Kick 1<br />
Break Snare2<br />
HH Soul Snr
Note No.<br />
35<br />
C2 36<br />
38<br />
40<br />
41<br />
43<br />
45<br />
47<br />
C3 48<br />
50<br />
52<br />
53<br />
55<br />
57<br />
59<br />
C4 60<br />
62<br />
64<br />
65<br />
67<br />
69<br />
71<br />
C5 72<br />
74<br />
76<br />
77<br />
79<br />
81<br />
83<br />
C6 84<br />
86<br />
88<br />
89<br />
91<br />
93<br />
95<br />
37<br />
39<br />
42<br />
44<br />
46<br />
49<br />
51<br />
54<br />
56<br />
58<br />
61<br />
63<br />
66<br />
68<br />
70<br />
73<br />
75<br />
78<br />
80<br />
82<br />
85<br />
87<br />
90<br />
92<br />
94<br />
96<br />
98 97<br />
C7<br />
Rhythm Group<br />
BD<br />
BD<br />
TOM/PERC<br />
SD<br />
CLP<br />
SD<br />
TOM/PERC<br />
HH<br />
TOM/PERC<br />
HH<br />
TOM/PERC<br />
HH<br />
BD<br />
BD<br />
TOM/PERC<br />
SD<br />
CLP<br />
SD<br />
TOM/PERC<br />
HH<br />
TOM/PERC<br />
HH<br />
TOM/PERC<br />
HH<br />
TOM/PERC<br />
TOM/PERC<br />
CYM<br />
TOM/PERC<br />
CYM<br />
CYM<br />
CYM<br />
TOM/PERC<br />
CYM<br />
TOM/PERC<br />
CYM<br />
TOM/PERC<br />
CYM<br />
TOM/PERC<br />
TOM/PERC<br />
TOM/PERC<br />
TOM/PERC<br />
TOM/PERC<br />
TOM/PERC<br />
TOM/PERC<br />
TOM/PERC<br />
TOM/PERC<br />
TOM/PERC<br />
TOM/PERC<br />
HIT<br />
HIT<br />
HIT<br />
HIT<br />
HIT<br />
HIT<br />
OTHERS<br />
OTHERS<br />
OTHERS<br />
OTHERS<br />
OTHERS<br />
CLP<br />
BD<br />
BD<br />
SD<br />
SD<br />
P: A16 Hip-Hop 2<br />
TR707 Kick 1<br />
Optic Kick<br />
TR808 RimLng<br />
Headz Snare<br />
Claptail<br />
TR808 Snr 7<br />
TR808 Tom<br />
TR808 CHH 1<br />
TR808 Tom<br />
TR808 PHH 1<br />
TR808 Tom<br />
TR808 OHH 2<br />
TR909 Kick 3<br />
TR808 Kick 3<br />
Gate Rim<br />
Tiny Snare 2<br />
Little Clap<br />
R&B Snare<br />
Natural Tom<br />
Pop CHH<br />
Natural Tom<br />
Pedal Hat 1<br />
Natural Tom<br />
Pop Hat Open<br />
Natural Tom<br />
Natural Tom<br />
NaturalCrash<br />
Natural Tom<br />
TR909 Ride<br />
TR909 Crash<br />
Cup Cym<br />
Tambourine 4<br />
TR909 Crash<br />
Cowbell<br />
TR606 Cym 1<br />
TR808Cowbell<br />
Natural Ride<br />
HiBongo Open<br />
LoBongo Open<br />
HiConga Mute<br />
HiConga Open<br />
LoConga Open<br />
Hi Timbale<br />
Lo Timbale<br />
TR727 Agogo<br />
TR727 Agogo<br />
TechnoShaker<br />
808 Maracas<br />
Scratch BD f<br />
Scratch BD r<br />
Scratch SD f<br />
Scratch SD r<br />
Scratch ALT<br />
Funky Bass<br />
Vinyl Noise<br />
Philly Hit<br />
Brass Fall<br />
Ooh! 1<br />
Ooh! 2<br />
Finger Snap<br />
TR808 Kick 1<br />
Hazy Kick<br />
TR606 Snr 2<br />
Machine Snr<br />
P: A17 Funk<br />
TR707 Kick 2<br />
West Kick<br />
Lo-Fi Rim<br />
Deep Snare<br />
Funky Clap<br />
Disco Snare<br />
TR707 Tom<br />
Tight CHH<br />
TR707 Tom<br />
Hip PHH<br />
TR707 Tom<br />
Funk OHH<br />
Hazy Kick<br />
Turbo Kick<br />
SideStiker<br />
Whack Snare<br />
Funk Clap 2<br />
Macho Snare<br />
TR909 Tom<br />
Real CHH<br />
TR909 Tom<br />
Pedal Hat 1<br />
TR909 Tom<br />
Cym OHH<br />
TR909 Tom<br />
TR909 Tom<br />
NaturalCrash<br />
TR909 Tom<br />
TR909 Ride<br />
TR909 Crash<br />
Cup Cym<br />
CR78 Tamb<br />
TR909 Crash<br />
TR707Cowbell<br />
TR606 Cym 1<br />
TR808Cowbell<br />
Natural Ride<br />
HiBongo Open<br />
LoBongo Open<br />
HiConga Mute<br />
HiConga Open<br />
LoConga Open<br />
Hi Timbale<br />
Lo Timbale<br />
TR727 Agogo<br />
TR727 Agogo<br />
TechnoShaker<br />
808 Maracas<br />
Scratch BD f<br />
Scratch BD r<br />
Scratch SD f<br />
Scratch SD r<br />
Scratch ALT<br />
Vinyl Stop<br />
Vinyl Noise<br />
Philly Hit<br />
Brass Fall<br />
Kick it!<br />
Harmo Gtr<br />
Big Clap<br />
Plastic BD 2<br />
TR909 Kick 5<br />
DanceHall SD<br />
Machine Snr<br />
P: A18 Electro<br />
TR808 Kick 1<br />
TR808 Kick 5<br />
TR808 RimLng<br />
TR808 Snr 8<br />
Down Clap<br />
TR808 Snr 5<br />
TR808 Tom<br />
TR808 CHH 1<br />
TR808 Tom<br />
TR808 PHH 1<br />
TR808 Tom<br />
TR808 OHH 1<br />
Ele Kick<br />
TR707 Kick 2<br />
TR707 Rim<br />
ElectroSnr 2<br />
TR707 Clap<br />
Sim Snare<br />
Deep Tom<br />
Closed Hat<br />
Deep Tom<br />
Pedal Hat 1<br />
Deep Tom<br />
Open Hat<br />
Deep Tom<br />
Deep Tom<br />
TR909 Crash<br />
Deep Tom<br />
TR707 Ride<br />
NaturalCrash<br />
Asian Gong<br />
Tambourine 2<br />
TR909 Crash<br />
TR808Cowbell<br />
TR606 Cym 1<br />
TR727Quijada<br />
Natural Ride<br />
HiBongo Open<br />
LoBongo Open<br />
HiConga Mute<br />
HiConga Open<br />
LoConga Open<br />
Hi Timbale<br />
Lo Timbale<br />
TR727 Agogo<br />
TR727 Agogo<br />
Cabasa Up<br />
808 Maracas<br />
Air Blip<br />
Thin Beef<br />
Back Hit<br />
Analog Bird<br />
Hoo<br />
Metal Sweep<br />
Emergency<br />
Buzzer<br />
Tonality<br />
Ring Osc<br />
Toy Gun 3<br />
Hip Clap<br />
Plastic BD 1<br />
Lo-Fi Kick 1<br />
Synth Snare<br />
TR808 Snr 6<br />
Preset Rhythm Set List<br />
P: A19 Jazz<br />
Lo-Fi Kick 1<br />
Hip Kick<br />
SideStiker<br />
Deep Snare<br />
Real Clap 1<br />
HH Soul Snr<br />
Natural Tom<br />
Real CHH<br />
Natural Tom<br />
Pedal Hat 1<br />
Natural Tom<br />
Real OHH<br />
Optic Kick<br />
Video Kick<br />
Gate Rim<br />
Headz Snare<br />
Big Clap<br />
Cross Snare<br />
TR707 Tom<br />
Closed Hat<br />
TR707 Tom<br />
Bristol CHH<br />
TR707 Tom<br />
Cym OHH<br />
TR707 Tom<br />
TR707 Tom<br />
NaturalCrash<br />
TR707 Tom<br />
TR909 Ride<br />
NaturalCrash<br />
Cup Cym<br />
Tambourine 2<br />
TR909 Crash<br />
Cowbell<br />
TR606 Cym 1<br />
TR808Cowbell<br />
Natural Ride<br />
HiBongo Open<br />
LoBongo Open<br />
HiConga Mute<br />
HiConga Open<br />
LoConga Open<br />
Hi Timbale<br />
Lo Timbale<br />
TR727 Agogo<br />
TR727 Agogo<br />
Cabasa Up<br />
Maracas<br />
TR727Quijada<br />
Jingle Bell<br />
Short Guiro<br />
Long Guiro<br />
TR808 Claves<br />
Hyoshigi<br />
Hyoshigi<br />
Mute Cuica<br />
Open Cuica<br />
Triangle 1<br />
Triangle 1<br />
Finger Snap<br />
TR808 Kick 1<br />
TR909 Kick 1<br />
R8 BrshSwill<br />
R8 Brush Tap<br />
P: A20 Brush<br />
Video Kick<br />
West Kick<br />
Natural Rim<br />
R&B Snare<br />
Brush Slap 1<br />
MC Snare<br />
TR707 Tom<br />
Pop CHH<br />
TR707 Tom<br />
Room CHH<br />
TR707 Tom<br />
Pop Hat Open<br />
Hip Kick<br />
Optic Kick<br />
R8 BrshSwill<br />
R8 Brush Tap<br />
Brush Slap 2<br />
R8 BrushRoll<br />
Natural Tom<br />
R8 Brush CHH<br />
Natural Tom<br />
Pedal Hat 1<br />
Natural Tom<br />
R8 OHH<br />
Natural Tom<br />
Natural Tom<br />
NaturalCrash<br />
Natural Tom<br />
TR909 Ride<br />
NaturalCrash<br />
Cup Cym<br />
Tambourine 2<br />
TR606 Cym 1<br />
Cowbell<br />
TR909 Crash<br />
TR808Cowbell<br />
Natural Ride<br />
HiBongo Open<br />
LoBongo Open<br />
HiConga Mute<br />
HiConga Open<br />
LoConga Open<br />
Hi Timbale<br />
Lo Timbale<br />
TR727 Agogo<br />
TR727 Agogo<br />
Cabasa Up<br />
Maracas<br />
Whistle<br />
Whistle<br />
Short Guiro<br />
Long Guiro<br />
TR808 Claves<br />
Hyoshigi<br />
Hyoshigi<br />
Mute Cuica<br />
Open Cuica<br />
Triangle 1<br />
Triangle 1<br />
Real Clap 1<br />
TR909 Kick 2<br />
TR707 Kick 1<br />
Real Snare<br />
Deep Snare<br />
89<br />
Appendices
Preset Rhythm Set List<br />
Note No.<br />
35<br />
C2 36<br />
38<br />
40<br />
41<br />
43<br />
45<br />
47<br />
C3 48<br />
50<br />
52<br />
53<br />
55<br />
57<br />
59<br />
C4 60<br />
62<br />
64<br />
65<br />
67<br />
69<br />
71<br />
C5 72<br />
74<br />
76<br />
77<br />
79<br />
81<br />
83<br />
C6 84<br />
86<br />
88<br />
89<br />
91<br />
93<br />
95<br />
37<br />
39<br />
42<br />
44<br />
46<br />
49<br />
51<br />
54<br />
56<br />
58<br />
61<br />
63<br />
66<br />
68<br />
70<br />
73<br />
75<br />
78<br />
80<br />
82<br />
85<br />
87<br />
90<br />
92<br />
94<br />
96<br />
98 97<br />
C7<br />
90<br />
Rhythm Group<br />
BD<br />
BD<br />
TOM/PERC<br />
SD<br />
CLP<br />
SD<br />
TOM/PERC<br />
HH<br />
TOM/PERC<br />
HH<br />
TOM/PERC<br />
HH<br />
BD<br />
BD<br />
TOM/PERC<br />
SD<br />
CLP<br />
SD<br />
TOM/PERC<br />
HH<br />
TOM/PERC<br />
HH<br />
TOM/PERC<br />
HH<br />
TOM/PERC<br />
TOM/PERC<br />
CYM<br />
TOM/PERC<br />
CYM<br />
CYM<br />
CYM<br />
TOM/PERC<br />
CYM<br />
TOM/PERC<br />
CYM<br />
TOM/PERC<br />
CYM<br />
TOM/PERC<br />
TOM/PERC<br />
TOM/PERC<br />
TOM/PERC<br />
TOM/PERC<br />
TOM/PERC<br />
TOM/PERC<br />
TOM/PERC<br />
TOM/PERC<br />
TOM/PERC<br />
TOM/PERC<br />
HIT<br />
HIT<br />
HIT<br />
HIT<br />
HIT<br />
HIT<br />
OTHERS<br />
OTHERS<br />
OTHERS<br />
OTHERS<br />
OTHERS<br />
CLP<br />
BD<br />
BD<br />
SD<br />
SD<br />
P: A21 Disco<br />
TR707 Kick 2<br />
TR808 Kick 3<br />
TR707 Rim<br />
Real Snare<br />
Real Clap 1<br />
Fat Snare<br />
TR707 Tom<br />
Real CHH<br />
TR707 Tom<br />
Pedal Hat 1<br />
TR707 Tom<br />
Real OHH<br />
Turbo Kick<br />
TR707 Kick 1<br />
TR808 RimLng<br />
Deep Snare<br />
Big Clap<br />
TR707 Snare<br />
Deep Tom<br />
TR808 CHH 1<br />
Kick Tom<br />
Pop CHH<br />
Deep Tom<br />
TR707 OHH<br />
Kick Tom<br />
Deep Tom<br />
NaturalCrash<br />
Kick Tom<br />
TR909 Ride<br />
NaturalCrash<br />
Cup Cym<br />
Tambourine 2<br />
TR909 Crash<br />
Cowbell<br />
TR606 Cym 1<br />
TR808Cowbell<br />
Natural Ride<br />
HiBongo Open<br />
LoBongo Open<br />
HiConga Mute<br />
HiConga Open<br />
LoConga Open<br />
Hi Timbale<br />
Lo Timbale<br />
TR727 Agogo<br />
TR727 Agogo<br />
Cabasa Up<br />
Maracas<br />
Triangle 1<br />
Triangle 1<br />
Beam HiQ<br />
Back Hit<br />
Back Hit<br />
Philly Hit<br />
Brass Fall<br />
Rezo Noise<br />
Iih Formant<br />
Analog Bird<br />
Emergency<br />
Down Clap<br />
TR808 Kick 1<br />
TR909 Kick 1<br />
TR909 Snr 3<br />
TR808 Snr 5<br />
P: A22 Ragga<br />
Analog Kick<br />
TR707 Kick 2<br />
Gate Rim<br />
Jungle Rim 1<br />
Hip Clap<br />
Ragga Snr 2<br />
TR808 Tom<br />
Bristol CHH<br />
TR808 Tom<br />
Pedal Hat 1<br />
TR808 Tom<br />
Cym OHH<br />
Plastic BD 4<br />
Video Kick<br />
Beam HiQ<br />
DanceHall SD<br />
Little Clap<br />
Ragga Rim 2<br />
Deep Tom<br />
TR707 CHH<br />
Deep Tom<br />
Pop CHH<br />
Deep Tom<br />
TR707 OHH<br />
Deep Tom<br />
Deep Tom<br />
NaturalCrash<br />
Deep Tom<br />
TR909 Ride<br />
NaturalCrash<br />
Asian Gong<br />
Tambourine 3<br />
TR909 Crash<br />
Cowbell<br />
TR606 Cym 1<br />
TR808Cowbell<br />
TR707 Ride<br />
HiBongo Open<br />
LoBongo Open<br />
HiConga Mute<br />
HiConga Open<br />
LoConga Open<br />
Hi Timbale<br />
Lo Timbale<br />
TR727 Agogo<br />
TR727 Agogo<br />
TechnoShaker<br />
808 Maracas<br />
MG Attack<br />
Air Blip<br />
Syn Hit<br />
TAO Hit<br />
Chiki!<br />
Hey!<br />
Toy Gun 1<br />
Toy Gun 2<br />
Toy Gun 3<br />
Reso FX<br />
Emergency<br />
Big Clap<br />
TR808 Kick 1<br />
TR909 Kick 1<br />
HH Soul Snr<br />
TR909 Snr 4<br />
P: A23 Rock<br />
Optic Kick<br />
TR909 Kick 4<br />
TR808 RimLng<br />
Hash Snare<br />
Funk Clap 2<br />
DJ Snare<br />
Kick Tom<br />
TR909 CHH 2<br />
Kick Tom<br />
TR909 PHH 1<br />
Kick Tom<br />
TR909 OHH 1<br />
TR909 Kick 5<br />
Turbo Kick<br />
SideStiker<br />
Lo-Fi Snare<br />
Claptail<br />
Macho Snare<br />
TR707 Tom<br />
TR909 PHH 1<br />
TR707 Tom<br />
TR909 OHH 3<br />
TR707 Tom<br />
Cym OHH<br />
TR707 Tom<br />
TR707 Tom<br />
TR909 Crash<br />
TR707 Tom<br />
TR909 Ride<br />
TR909 Crash<br />
Asian Gong<br />
Tambourine 3<br />
TR909 Crash<br />
Cowbell<br />
TR606 Cym 2<br />
TR808Cowbell<br />
Natural Ride<br />
HiBongo LoFi<br />
LoBongo LoFi<br />
HiCnga Mt LF<br />
HiCnga Op LF<br />
LoConga LoFi<br />
HiTimbale LF<br />
LoTimbale LF<br />
TR727 Agogo<br />
TR727 Agogo<br />
TR727Quijada<br />
TR626 Shaker<br />
Bounce<br />
ElectricDunk<br />
Iron Door<br />
Drill Hit<br />
Thrill<br />
PCM Press<br />
Dist TekGtr<br />
Dist TekGtr<br />
Dist TekGtr<br />
Dist TekGtr<br />
Gtr FX<br />
Air Gun<br />
TR909 Kick 2<br />
Gabba Kick<br />
ElectroSnr 2<br />
Big Trash SD<br />
P: A24 Industrial<br />
TR909 Dst BD<br />
Lo-Fi Kick 2<br />
Drill Hit<br />
Big Trash SD<br />
Dist Swish<br />
Rage Snare<br />
Can Tom<br />
Air Blip<br />
Can Tom<br />
Beam HiQ<br />
Can Tom<br />
TR909 DstOHH<br />
Bomb<br />
Iron Door<br />
Thrill<br />
PCM Press<br />
Air Gun<br />
PCM Press<br />
TekRok Snare<br />
Real PHH<br />
TekRok Snare<br />
TR909 PHH 1<br />
TekRok Snare<br />
TR909 DstOHH<br />
TekRok Snare<br />
TekRok Snare<br />
Bomb Noise<br />
TekRok Snare<br />
TR909 Ride<br />
Drill Hit<br />
ElectricDunk<br />
Mt Pandeiro<br />
TR606 Cym 1<br />
PC-2 Machine<br />
TR909 Crash<br />
Crash<br />
Natural Ride<br />
HiBongo LoFi<br />
LoBongo LoFi<br />
HiCnga Mt LF<br />
HiCnga Op LF<br />
LoConga LoFi<br />
HiTimbale LF<br />
LoTimbale LF<br />
Analog Bird<br />
Analog Bird<br />
TechnoShaker<br />
TR626 Shaker<br />
One!<br />
Two!<br />
Three!<br />
Kick it!<br />
Wao!<br />
Come on!<br />
Fuzzy Clap<br />
Roll Kick<br />
Bomb<br />
LoTimbale LF<br />
TR909 DstOHH<br />
Fuzzy Clap<br />
TR909 Kick 2<br />
Roll Kick<br />
TR909 DstSnr<br />
Flange Snr<br />
P: A25 Ethnic<br />
Open Surdo<br />
Mute Surdo<br />
Jungle Snap<br />
Natural Rim<br />
Big Clap<br />
Jungle Snr 1<br />
Jungle Snr 2<br />
Mt Pandeiro<br />
Jungle Snr 2<br />
R8 Brush CHH<br />
Jungle Snr 2<br />
Metal Sweep<br />
Afro Feet<br />
Mute Surdo<br />
Jungle Snap<br />
Op Pandeiro<br />
Real Clap 2<br />
Hi Timbale<br />
TablaBaya<br />
Chenchen<br />
TablaBaya<br />
Tambourine 1<br />
TablaBaya<br />
Tambourine 4<br />
TablaBaya<br />
Udo<br />
Asian Gong<br />
Udo<br />
Cup Cym<br />
NaturalCrash<br />
Cup Cym<br />
Tambourine 2<br />
TR606 Cym 1<br />
Cowbell<br />
NaturalCrash<br />
CR78 Beat<br />
Natural Ride<br />
HiBongo LoFi<br />
LoBongo LoFi<br />
HiCnga Mt LF<br />
HiCnga Op LF<br />
LoConga LoFi<br />
HiTimbale LF<br />
LoTimbale LF<br />
TR727 Agogo<br />
TR727 Agogo<br />
Cabasa Up<br />
TR626 Shaker<br />
Whistle<br />
Whistle<br />
Short Guiro<br />
Long Guiro<br />
TR808 Claves<br />
Hyoshigi<br />
AfroDrum Rat<br />
Mute Cuica<br />
Open Cuica<br />
Triangle 2<br />
Triangle 1<br />
Real Clap 1<br />
Boost Kick<br />
Kick Ghost<br />
Voice loop<br />
Chiki!
Note No.<br />
35<br />
C2 36<br />
38<br />
40<br />
41<br />
43<br />
45<br />
47<br />
C3 48<br />
50<br />
52<br />
53<br />
55<br />
57<br />
59<br />
C4 60<br />
62<br />
64<br />
65<br />
67<br />
69<br />
71<br />
C5 72<br />
74<br />
76<br />
77<br />
79<br />
81<br />
83<br />
C6 84<br />
86<br />
88<br />
89<br />
91<br />
93<br />
95<br />
37<br />
39<br />
42<br />
44<br />
46<br />
49<br />
51<br />
54<br />
56<br />
58<br />
61<br />
63<br />
66<br />
68<br />
70<br />
73<br />
75<br />
78<br />
80<br />
82<br />
85<br />
87<br />
90<br />
92<br />
94<br />
96<br />
98 97<br />
C7<br />
Rhythm Group<br />
BD<br />
BD<br />
TOM/PERC<br />
SD<br />
CLP<br />
SD<br />
TOM/PERC<br />
HH<br />
TOM/PERC<br />
HH<br />
TOM/PERC<br />
HH<br />
BD<br />
BD<br />
TOM/PERC<br />
SD<br />
CLP<br />
SD<br />
TOM/PERC<br />
HH<br />
TOM/PERC<br />
HH<br />
TOM/PERC<br />
HH<br />
TOM/PERC<br />
TOM/PERC<br />
CYM<br />
TOM/PERC<br />
CYM<br />
CYM<br />
CYM<br />
TOM/PERC<br />
CYM<br />
TOM/PERC<br />
CYM<br />
TOM/PERC<br />
CYM<br />
TOM/PERC<br />
TOM/PERC<br />
TOM/PERC<br />
TOM/PERC<br />
TOM/PERC<br />
TOM/PERC<br />
TOM/PERC<br />
TOM/PERC<br />
TOM/PERC<br />
TOM/PERC<br />
TOM/PERC<br />
HIT<br />
HIT<br />
HIT<br />
HIT<br />
HIT<br />
HIT<br />
OTHERS<br />
OTHERS<br />
OTHERS<br />
OTHERS<br />
OTHERS<br />
CLP<br />
BD<br />
BD<br />
SD<br />
SD<br />
P: A26 Reverse<br />
Ele Kick<br />
Turbo Kick<br />
TR909 Rim<br />
TR606 Snr 2<br />
Comp Clap<br />
Real Snare<br />
Can Tom<br />
TR808 CHH 2<br />
Can Tom<br />
TR808 PHH 1<br />
Can Tom<br />
TR808 OHH 1<br />
TR707 Kick 1<br />
Plastic BD 3<br />
TR707 Rim<br />
TR909 Snr 4<br />
TR707 Clap<br />
Comp Clap<br />
TR707 Tom<br />
TR909 CHH 1<br />
TR707 Tom<br />
TR909 PHH 1<br />
TR707 Tom<br />
TR909 DstOHH<br />
TR707 Tom<br />
TR707 Tom<br />
TR909 Crash<br />
TR707 Tom<br />
TR707 Ride<br />
TR909 Crash<br />
Asian Gong<br />
Tambourine 2<br />
TR909 Crash<br />
TR808Cowbell<br />
TR606 Cym 2<br />
CR78 Tamb<br />
Cup Cym<br />
HiBongo Open<br />
LoBongo Open<br />
HiConga Mute<br />
HiConga Open<br />
LoConga Open<br />
Hi Timbale<br />
Lo Timbale<br />
TR727 Agogo<br />
TR727 Agogo<br />
TechnoShaker<br />
Maracas<br />
Beam HiQ<br />
Tape Rewind<br />
Vinyl Stop<br />
Come on!<br />
One!<br />
Pa!<br />
Analog Bird<br />
Retro UFO<br />
Metal Sweep<br />
Dst Solo Gtr<br />
Emergency<br />
Down Clap<br />
Wet Kick<br />
Hip Kick<br />
TR909 Snr 5<br />
Jazz Snare<br />
P: B01 Trance<br />
Plastic BD 4<br />
Gabba Kick<br />
Jungle Rim 3<br />
Headz Snare<br />
Fuzzy Clap<br />
TekRok Snare<br />
Deep Tom<br />
TR909 CHH 2<br />
Deep Tom<br />
TR909 PHH 2<br />
Deep Tom<br />
TR909 DstOHH<br />
Amsterdam BD<br />
Hip Kick<br />
Jungle Rim 1<br />
TR606 Snr 1<br />
Clap Snare 1<br />
Indus Snare<br />
TR606 Tom<br />
TR909 PHH 1<br />
TR606 Tom<br />
TR909 PHH 2<br />
TR606 Tom<br />
TR909 DstOHH<br />
TR606 CmpTom<br />
TR606 CmpTom<br />
TR909 Crash<br />
HiTimbale LF<br />
TR707 Ride<br />
TR909 Crash<br />
Natural Ride<br />
TR707 Ride<br />
NaturalCrash<br />
Cup Cym<br />
TR909 Ride<br />
Triangle 1<br />
Triangle 1<br />
HiBongo LoFi<br />
LoBongo LoFi<br />
HiCnga Mt LF<br />
HiCnga Op LF<br />
LoConga LoFi<br />
HiTimbale LF<br />
LoTimbale LF<br />
TR727 Agogo<br />
TR727 Agogo<br />
TechnoShaker<br />
Dance Shaker<br />
Beam HiQ<br />
Dist Swish<br />
PCM Press<br />
Iron Door<br />
MG Attack<br />
Air Blip<br />
Rezo Noise<br />
Toy Gun 2<br />
Buzzer<br />
P5 Noise<br />
Rezo Noise<br />
SNR MENU 6<br />
TR808 Kick 2<br />
Turbo Kick<br />
ElectroSnr 2<br />
Synth Snare<br />
P: B02 House 3<br />
TR909 Kick 3<br />
Plastic BD 2<br />
TR808 RimLng<br />
TR808 Snr 7<br />
Real Clap 1<br />
TR909 Snr 5<br />
TR909 Tom<br />
TR707 CHH<br />
TR909 Tom<br />
TR707 PHH<br />
TR909 Tom<br />
TR707 OHH<br />
TR707 Kick 2<br />
TR909 Kick 5<br />
Lo-Fi Rim<br />
Tiny Snare 2<br />
TR909 Clap 1<br />
TR909 Snr 4<br />
TR707 Tom<br />
TR909 CHH 1<br />
TR707 Tom<br />
TR909 PHH 1<br />
TR707 Tom<br />
TR909 OHH 3<br />
TR707 Tom<br />
TR707 Tom<br />
NaturalCrash<br />
TR707 Tom<br />
TR909 Ride<br />
NaturalCrash<br />
Tambourine 3<br />
Tambourine 1<br />
TR909 Ride<br />
CR78 Cowbell<br />
Cup Cym<br />
CR78 Beat<br />
Natural Ride<br />
HiBongo Open<br />
LoBongo Open<br />
HiConga Mute<br />
HiConga Open<br />
LoConga Open<br />
Hi Timbale<br />
Lo Timbale<br />
TR727 Agogo<br />
TR727 Agogo<br />
Cabasa Up<br />
TR626 Shaker<br />
Wind Chime<br />
TR727Quijada<br />
Short Guiro<br />
Long Guiro<br />
Wood Block<br />
Whistle<br />
Beam HiQ<br />
Drill Hit<br />
Thin Beef<br />
Dist Swish<br />
Analog Bird<br />
Big Clap<br />
TR808 Kick 1<br />
TR606 Dst BD<br />
TR606 Snr 1<br />
Whack Snare<br />
Preset Rhythm Set List<br />
P: B03 2step<br />
TR909 Dst BD<br />
Break Kick<br />
Natural Rim<br />
Cross Snare<br />
Big Clap<br />
Antigua Snr<br />
TR909 Tom<br />
Real CHH<br />
TR909 Tom<br />
Pedal Hat 1<br />
TR909 Tom<br />
Open Hat<br />
Hip Kick<br />
Hazy Kick<br />
Scratch SD f<br />
Hash Snare<br />
Real Clap 1<br />
Cross Snare<br />
TR707 Tom<br />
Real CHH<br />
TR707 Tom<br />
TR808 PHH 1<br />
TR707 Tom<br />
TR606 OHH<br />
TR707 Tom<br />
TR707 Tom<br />
NaturalCrash<br />
TR707 Tom<br />
Natural Ride<br />
NaturalCrash<br />
TR909 Crash<br />
Tambourine 3<br />
TR707 Ride<br />
TR808Cowbell<br />
TR606 Cym 1<br />
CR78 Beat<br />
Cup Cym<br />
HiBongo Open<br />
LoBongo Open<br />
HiConga Mute<br />
HiConga Open<br />
LoConga Open<br />
Hi Timbale<br />
Lo Timbale<br />
TR727 Agogo<br />
TR727 Agogo<br />
Cabasa Up<br />
TR626 Shaker<br />
Beam HiQ<br />
Philly Hit<br />
ElectricDunk<br />
TablaBaya<br />
Tabla<br />
Chenchen<br />
Metal Sweep<br />
Analog Bird<br />
Wao!<br />
Mute Cuica<br />
Toy Gun 3<br />
Big Clap<br />
TR909 Kick 3<br />
TR909 Kick 5<br />
Jungle Rim 2<br />
RaggaTightSD<br />
P: B04 R&B<br />
TR606 Dst BD<br />
Dance Kick 1<br />
Gate Rim<br />
HH Soul Snr<br />
Finger Snap<br />
DJ Snare<br />
TR606 Tom<br />
Pop CHH<br />
TR606 Tom<br />
Pedal Hat 1<br />
TR606 Tom<br />
Pop Hat Open<br />
Hip Kick<br />
Wet Kick<br />
Natural Rim<br />
Whack Snare<br />
Real Clap 2<br />
Lo-Hard Snr<br />
Natural Tom<br />
Tight CHH<br />
Natural Tom<br />
Pedal Hat 2<br />
Natural Tom<br />
Open Hat<br />
Natural Tom<br />
Natural Tom<br />
NaturalCrash<br />
Natural Tom<br />
Natural Ride<br />
NaturalCrash<br />
Cup Cym<br />
Tambourine 3<br />
Tambourine 4<br />
TR707Cowbell<br />
TR606 Cym 2<br />
CR78 Cowbell<br />
TR707 Ride<br />
HiBongo LoFi<br />
LoBongo LoFi<br />
HiCnga Mt LF<br />
HiCnga Op LF<br />
LoConga LoFi<br />
HiTimbale LF<br />
LoTimbale LF<br />
TR727 Agogo<br />
TR727 Agogo<br />
TR626 Shaker<br />
Maracas<br />
Scratch BD f<br />
Scratch BD r<br />
Scratch SD f<br />
Scratch SD r<br />
Scratch ALT<br />
MG Blip<br />
Philly Hit<br />
Metal Sweep<br />
Chiki!<br />
Chenchen<br />
Canvas<br />
Cheap Clap<br />
TR808 Kick 1<br />
Turbo Kick<br />
Real Snare<br />
HipJazz Snr<br />
91<br />
Appendices
92<br />
Preset Pattern List<br />
No. Pattern Name BPM Mes. Programmer<br />
A01 EuroTrance 1 140 8 <strong>Roland</strong> Corporation<br />
A02 EuroTrance 2 140 8 <strong>Roland</strong> Corporation<br />
A03 EuroTrance 3 140 8 Hans-Joerg Scheffler<br />
A04 EuroTrance 4 140 4 B.U.S<br />
A05 EuroTrance 5 138 4 B.U.S<br />
A06 EuroTrance 6 135 8 <strong>Roland</strong> Corporation<br />
A07 EuroTrance 7 138 8 Hans-Joerg Scheffler<br />
A08 EuroTrance 8 150 8 Hans-Joerg Scheffler<br />
A09 EuroTrance 9 144 8 <strong>Roland</strong> Europe S.p.A.<br />
A10 EuroTrance 10 138 4 B.U.S<br />
A11 Progressive 1 140 4 B.U.S<br />
A12 Progressive 2 138 8 B.U.S<br />
A13 Progressive 3 138 4 B.U.S<br />
A14 Progressive 4 140 4 B.U.S<br />
A15 Progressive 5 138 8 B.U.S<br />
A16 Progressive 6 130 8 Hans-Joerg Scheffler<br />
A17 Psy Trance 1 145 4 MASA<br />
A18 Psy Trance 2 140 4 MASA<br />
A19 Psy Trance 3 136 4 MASA<br />
A20 Psy Trance 4 143 4 <strong>Roland</strong> Corporation U.S.<br />
A21 Psy Trance 5 145 4 MASA<br />
A22 HardTrance 1 145 4 MASA<br />
A23 HardTrance 2 140 4 MASA<br />
A24 HardTrance 3 139 4 MASA<br />
A25 HardTrance 4 138 8 MASA<br />
A26 HardTrance 5 141 4 B.U.S<br />
A27 Trance 1 140 4 MASA<br />
A28 Trance 2 138 4 MASA<br />
A29 Trance 3 136 4 MASA<br />
A30 Trance 4 137 4 MASA<br />
A31 Trance 5 136 4 MASA<br />
A32 Trance 6 140 8 <strong>Roland</strong> Corporation U.S.<br />
A33 Trance 7 130 4 Hans-Joerg Scheffler<br />
A34 DetroitTechno 1 132 4 HEIGO TANI<br />
A35 DetroitTechno 2 134 4 Cappadocia Productions<br />
A36 DetroitTechno 3 135 8 Cappadocia Productions<br />
A37 DetroitTechno 4 130 4 HEIGO TANI<br />
A38 DetroitTechno 5 132 4 HEIGO TANI<br />
A39 DetroitTechno 6 140 4 <strong>Roland</strong> Corporation<br />
A40 Minimal 1 140 4 HEIGO TANI<br />
A41 Minimal 2 140 4 HEIGO TANI<br />
A42 Minimal 3 140 4 HEIGO TANI<br />
A43 Minimal 4 140 4 HEIGO TANI<br />
A44 Minimal 5 130 4 <strong>Roland</strong> Corporation<br />
A45 Minimal 6 141 4 Cappadocia Productions<br />
A46 Minimal 7 141 4 Cappadocia Productions<br />
A47 New Electro 1 128 4 Cappadocia Productions<br />
A48 New Electro 2 128 4 Bjoern Bojahr<br />
A49 New Electro 3 130 4 <strong>Roland</strong> Corporation<br />
A50 New Electro 4 155 4 Cappadocia Productions<br />
No. Pattern Name BPM Mes. Programmer<br />
A51 Ambient 1 100 4 Cappadocia Productions<br />
A52 Ambient 2 80 4 Cappadocia Productions<br />
A53 Ambient 3 98 4 HEIGO TANI<br />
A54 Ambient 4 93 8 Cappadocia Productions<br />
A55 NU-NRG 1 145 8 <strong>Roland</strong> Corporation<br />
A56 NU-NRG 2 155 8 <strong>Roland</strong> Corporation<br />
A57 NU-NRG 3 150 8 <strong>Roland</strong> Corporation<br />
A58 NU-NRG 4 145 8 <strong>Roland</strong> Corporation<br />
A59 NU-NRG 5 150 4 Hans-Joerg Scheffler<br />
A60 EuroBeat 1 159 4 <strong>Roland</strong> Europe S.p.A.<br />
A61 EuroBeat 2 159 8 <strong>Roland</strong> Europe S.p.A.<br />
A62 EuroBeat 3 159 8 <strong>Roland</strong> Europe S.p.A.<br />
A63 HappyHardcore 1 175 8 <strong>Roland</strong> Corporation<br />
A64 HappyHardcore 2 175 8 <strong>Roland</strong> Europe S.p.A.<br />
A65 HappyHardcore 3 175 4 HEIGO TANI<br />
A66 Gabba 1 190 8 <strong>Roland</strong> Corporation<br />
A67 Gabba 2 180 4 <strong>Roland</strong> Corporation<br />
A68 Gabba 3 170 4 HEIGO TANI<br />
A69 UK HardHouse 1 140 8 <strong>Roland</strong> Corporation<br />
A70 UK HardHouse 2 135 8 <strong>Roland</strong> Corporation<br />
A71 UK HardHouse 3 138 4 B.U.S<br />
A72 UK HardHouse 4 138 8 B.U.S<br />
A73 UK HardHouse 5 138 4 B.U.S<br />
A74 UK HardHouse 6 138 4 B.U.S<br />
A75 UK HardHouse 7 138 4 B.U.S<br />
A76 UK HardHouse 8 128 4 Bjoern Bojahr<br />
A77 US HardHouse 1 120 8 <strong>Roland</strong> Corporation<br />
A78 US HardHouse 2 125 8 <strong>Roland</strong> Corporation<br />
A79 US HardHouse 3 127 4 <strong>Roland</strong> Corporation U.S.<br />
A80 US HardHouse 4 128 4 Bjoern Bojahr<br />
A81 US HardHouse 5 128 4 <strong>Roland</strong> Corporation U.S.<br />
A82 US HardHouse 6 136 4 <strong>Roland</strong> Corporation U.S.<br />
A83 US HardHouse 7 136 4 <strong>Roland</strong> Corporation U.S.<br />
A84 US HardHouse 8 130 4 Hans-Joerg Scheffler<br />
A85 Chicago House 1 130 4 HEIGO TANI<br />
A86 Chicago House 2 130 4 HEIGO TANI<br />
A87 Filter Disco 1 132 8 HEIGO TANI<br />
A88 Filter Disco 2 132 4 HEIGO TANI<br />
A89 House 1 132 4 Hans-Joerg Scheffler<br />
A90 House 2 130 4 Hans-Joerg Scheffler<br />
A91 House 3 125 8 Hans-Joerg Scheffler<br />
A92 House 4 130 4 <strong>Roland</strong> Corporation U.S.<br />
A93 House 5 133 8 <strong>Roland</strong> Corporation U.S.<br />
A94 House 6 130 4 Hans-Joerg Scheffler<br />
A95 House 7 128 4 Bjoern Bojahr<br />
A96 House 8 134 8 Hans-Joerg Scheffler<br />
A97 House 9 125 4 <strong>Roland</strong> Corporation U.S.<br />
A98 House 10 127 8 <strong>Roland</strong> Corporation U.S.<br />
A99 House 11 128 4 Bjoern Bojahr<br />
A00 House 12 128 4 Bjoern Bojahr
No. Pattern Name BPM Mes. Programmer<br />
B01 House 13 128 4 Bjoern Bojahr<br />
B02 Garage House 1 130 4 <strong>Roland</strong> Corporation<br />
B03 Garage House 2 125 8 Hans-Joerg Scheffler<br />
B04 Garage House 3 120 4 Hans-Joerg Scheffler<br />
B05 Garage House 4 125 8 Hans-Joerg Scheffler<br />
B06 Garage House 5 135 4 B.U.S<br />
B07 Garage House 6 133 8 <strong>Roland</strong> Corporation U.S.<br />
B08 2step 1 130 8 presto<br />
B09 2step 2 132 8 presto<br />
B10 2step 3 136 8 presto<br />
B11 2step 4 136 8 presto<br />
B12 2step 5 126 8 presto<br />
B13 2step 6 130 4 <strong>Roland</strong> Corporation<br />
B14 R&B 1 100 8 presto<br />
B15 R&B 2 100 8 presto<br />
B16 R&B 3 111 4 <strong>Roland</strong> Corporation U.S.<br />
B17 R&B 4 103 4 <strong>Roland</strong> Corporation U.S.<br />
B18 R&B 5 102 4 <strong>Roland</strong> Corporation U.S.<br />
B19 R&B 6 135 8 <strong>Roland</strong> Corporation U.S.<br />
B20 R&B 7 104 4 <strong>Roland</strong> Corporation U.S.<br />
B21 R&B 8 100 4 <strong>Roland</strong> Corporation<br />
B22 R&B 9 82 4 presto<br />
B23 R&B 10 80 8 presto<br />
B24 R&B 11 93 4 <strong>Roland</strong> Corporation<br />
B25 R&B 12 110 8 presto<br />
B26 R&B 13 78 8 <strong>Roland</strong> Corporation U.S.<br />
B27 R&B 14 78 4 <strong>Roland</strong> Corporation U.S.<br />
B28 HipHopEast 1 88 4 <strong>Roland</strong> Corporation U.S.<br />
B29 HipHopEast 2 91 4 <strong>Roland</strong> Corporation U.S.<br />
B30 HipHopEast 3 90 4 Cappadocia Productions<br />
B31 HipHopEast 4 94 4 <strong>Roland</strong> Corporation U.S.<br />
B32 HipHopEast 5 89 4 Cappadocia Productions<br />
B33 HipHopEast 6 100 4 <strong>Roland</strong> Corporation U.S.<br />
B34 HipHopEast 7 93 4 <strong>Roland</strong> Corporation<br />
B35 HipHopEast 8 90 4 <strong>Roland</strong> Corporation<br />
B36 HipHopEast 9 90 4 <strong>Roland</strong> Corporation<br />
B37 HipHopEast 10 90 4 <strong>Roland</strong> Corporation<br />
B38 G-Funk 1 91 4 <strong>Roland</strong> Corporation U.S.<br />
B39 G-Funk 2 92 4 <strong>Roland</strong> Corporation U.S.<br />
B40 G-Funk 3 98 4 Cappadocia Productions<br />
B41 G-Funk 4 92 4 <strong>Roland</strong> Corporation U.S.<br />
B42 Abstruct 1 96 4 <strong>Roland</strong> Corporation U.S.<br />
B43 Abstruct 2 90 4 <strong>Roland</strong> Corporation<br />
B44 Abstruct 3 85 4 <strong>Roland</strong> Corporation<br />
B45 Abstruct 4 93 4 <strong>Roland</strong> Corporation<br />
B46 Abstruct 5 78 4 <strong>Roland</strong> Corporation<br />
B47 Abstruct 6 97 4 <strong>Roland</strong> Corporation<br />
B48 Drum'n'Bass 1 156 16 presto<br />
B49 Drum'n'Bass 2 165 8 presto<br />
B50 Drum'n'Bass 3 180 8 <strong>Roland</strong> Corporation<br />
Preset Pattern List<br />
No. Pattern Name BPM Mes. Programmer<br />
B51 Drum'n'Bass 4 160 4 HEIGO TANI<br />
B52 Drum'n'Bass 5 180 8 presto<br />
B53 Drum'n'Bass 6 170 8 <strong>Roland</strong> Corporation<br />
B54 Drum'n'Bass 7 160 8 presto<br />
B55 Drum'n'Bass 8 173 8 presto<br />
B56 Drum'n'Bass 9 170 4 HEIGO TANI<br />
B57 Drum'n'Bass 10 165 8 HEIGO TANI<br />
No.: Pattern Number<br />
Mes.: Measure Length<br />
The sounds, phrases and patterns contained in this<br />
product are sound recordings protected by copyright.<br />
<strong>Roland</strong> hereby grants to purchasers of this product the<br />
permission to utilize the sound recordings contained in<br />
this product for the creation and recording of original<br />
musical works; provided however, the sound recordings<br />
contained in this product may not be sampled,<br />
downloaded or otherwise re-recorded, in whole or in<br />
part, for any other purpose, including but not limited to<br />
the transmission of all or any part of the sound<br />
recordings via the internet or other digital or analog<br />
means of transmission, and/or the manufacture, for sale<br />
or otherwise, of any collection of sampled sounds,<br />
phrases or patterns, on CD-ROM or equivalent means.<br />
The sound recordings contained in this product are the<br />
original works of <strong>Roland</strong> Corporation. <strong>Roland</strong> is not<br />
responsible for the use of the sound recordings<br />
contained in this product, and assumes no liability for<br />
any infringement of any copyright of any third party<br />
arising out of use of the sounds, phrases and patterns in<br />
this product.<br />
93<br />
Appendices
94<br />
RPS Pattern List<br />
No. Pattern Name<br />
B58 Trance Drums 1<br />
B59 Trance Drums 2<br />
B60 Trance Drums 3<br />
B61 Trance Drums 4<br />
B62 Trance Drums 5<br />
B63 Trance Drums 6<br />
B64 Techno Drums 1<br />
B65 Techno Drums 2<br />
B66 Techno Drums 3<br />
B67 Techno Drums 4<br />
B68 Techno Drums 5<br />
B69 Techno Drums 6<br />
B70 Techno Drums 7<br />
B71 Techno Drums 8<br />
B72 Techno Drums 9<br />
B73 House Drums 1<br />
B74 House Drums 2<br />
B75 House Drums 3<br />
B76 House Drums 4<br />
B77 House Drums 5<br />
B78 House Drums 6<br />
B79 House Drums 7<br />
B80 2step Drums 1<br />
B81 2step Drums 2<br />
B82 R&B Drums 1<br />
B83 R&B Drums 2<br />
B84 R&B Drums 3<br />
B85 R&B Drums 4<br />
B86 HipHop Drums 1<br />
B87 HipHop Drums 2<br />
B88 HipHop Drums 3<br />
B89 HipHop Drums 4<br />
B90 DnB Drums<br />
B91 Drums Fill 1<br />
B92 Drums Fill 2<br />
B93 Drums Fill 3<br />
B94 Drums Fill 4<br />
B95 Drums Fill 5<br />
B96 Drums Fill 6<br />
B97 Drums Fill 7<br />
B98 Drums Fill 8<br />
B99 Drums Fill 9<br />
B00 Drums Fill 10<br />
C01 Drums Fill 11<br />
C02 Drums Fill 12<br />
C03 Drums Fill 13<br />
C04 Drums Fill 14<br />
C05 Drums Fill 15<br />
C06 Drums Fill 16<br />
C07 Drums Fill 17<br />
C08 Drums Fill 18<br />
C09 Drums Fill 19<br />
C10 Drums Fill 20<br />
C11 Drums Fill 21<br />
C12 Drums Fill 22<br />
C13 Drums Fill 23<br />
C14 Drums Fill 24<br />
C15 Drums Fill 25<br />
No. Pattern Name<br />
C16 Drums Fill 26<br />
C17 Drums Fill 27<br />
C18 Drums Fill 28<br />
C19 Perc Fill 1<br />
C20 Perc Fill 2<br />
C21 Perc Fill 3<br />
C22 Noise Fill 1<br />
C23 Noise Fill 2<br />
C24 Trance Bass 1<br />
C25 Trance Bass 2<br />
C26 Trance Bass 3<br />
C27 Trance Bass 4<br />
C28 Trance Bass 5<br />
C29 Techno Bass 1<br />
C30 Techno Bass 2<br />
C31 Techno Bass 3<br />
C32 Techno Bass 4<br />
C33 Techno Bass 5<br />
C34 Techno Bass 6<br />
C35 Techno Bass 7<br />
C36 Techno Bass 8<br />
C37 House Bass 1<br />
C38 House Bass 2<br />
C39 House Bass 3<br />
C40 House Bass 4<br />
C41 House Bass 5<br />
C42 House Bass 6<br />
C43 2step Bass<br />
C44 R&B Bass<br />
C45 HipHop Bass 1<br />
C46 HipHop Bass 2<br />
C47 HipHop Bass 3<br />
C48 DnB Bass<br />
C49 Synth Seq 1<br />
C50 Synth Seq 2<br />
C51 Synth Seq 3<br />
C52 Synth Seq 4<br />
C53 Synth Seq 5<br />
C54 Synth Seq 6<br />
C55 Synth Seq 7<br />
C56 Synth Seq 8<br />
C57 Synth Seq 9<br />
C58 Synth Seq 10<br />
C59 Synth Seq 11<br />
C60 Synth Seq 12<br />
C61 Synth Seq 13<br />
C62 Kalimba Seq<br />
C63 Synth Riff 1<br />
C64 Synth Riff 2<br />
C65 Synth Riff 3<br />
C66 Synth Riff 4<br />
C67 Synth Riff 5<br />
C68 Synth Riff 6<br />
C69 Synth Riff 7<br />
C70 Synth Riff 8<br />
C71 Synth Riff 9<br />
C72 Synth Riff 10<br />
C73 Synth Riff 11<br />
No. Pattern Name<br />
C74 Synth Riff 12<br />
C75 Synth Riff 13<br />
C76 Synth Riff 14<br />
C77 Synth Riff 15<br />
C78 Synth Riff 16<br />
C79 Synth Riff 17<br />
C80 Synth Riff 18<br />
C81 Synth Riff 19<br />
C82 Synth Riff 20<br />
C83 Synth Riff 21<br />
C84 Synth Riff 22<br />
C85 Synth Riff 23<br />
C86 Synth Riff 24<br />
C87 Synth Riff 25<br />
C88 Synth Riff 26<br />
C89 Synth Riff 27<br />
C90 Synth Riff 28<br />
C91 Synth Riff 29<br />
C92 Synth Riff 30<br />
C93 Synth Riff 31<br />
C94 Synth Riff 32<br />
C95 Synth Riff 33<br />
C96 Synth Riff 34<br />
C97 Guitar Riff 1<br />
C98 Guitar Riff 2<br />
C99 Guitar Riff 3<br />
C00 Organ Riff<br />
D01 Hit Riff 1<br />
D02 Hit Riff 2<br />
D03 Hit Riff 3<br />
D04 Hit Riff 4<br />
D05 Hit Riff 5<br />
D06 Hit Riff 6<br />
D07 Perc Riff<br />
D08 Synth Pad 1<br />
D09 Synth Pad 2<br />
D10 Synth Pad 3<br />
D11 Synth Pad 4<br />
D12 Synth Pad 5<br />
D13 Synth Pad 6<br />
D14 Synth Pad 7<br />
D15 Synth Pad 8<br />
D16 Synth Pad 9<br />
D17 Synth Pad 10<br />
D18 Synth Pad 11<br />
D19 Synth Pad 12<br />
D20 Synth Lead 1<br />
D21 Synth Lead 2<br />
D22 Synth Lead 3<br />
D23 Synth Lead 4<br />
D24 Synth Lead 5<br />
D25 Synth Lead 6<br />
D26 Synth Lead 7<br />
D27 Synth Lead 8<br />
D28 Synth Lead 9<br />
D29 Synth Lead 10<br />
D30 Synth Lead 11<br />
D31 Synth Lead 12<br />
No. Pattern Name<br />
D32 Synth Lead 13<br />
D33 Piano 1<br />
D34 Piano 2<br />
D35 Piano 3<br />
D36 E.Piano 1<br />
D37 E.Piano 2<br />
D38 E.Piano 3<br />
D39 E.Piano 4<br />
D40 E.Piano 5<br />
D41 E.Piano 6<br />
D42 Organ<br />
D43 Guitar 1<br />
D44 Guitar 2<br />
D45 Brass 1<br />
D46 Brass 2<br />
D47 Brass 3<br />
D48 Voice 1<br />
D49 Voice 2<br />
D50 Voice 3<br />
D51 Voice 4<br />
D52 Scratch 1<br />
D53 Scratch 2<br />
D54 SFX 1<br />
D55 SFX 2<br />
D56 SFX 3<br />
D57 SFX 4<br />
D58 SFX 5<br />
D59 SFX 6<br />
D60 SFX 7<br />
D61 SFX 8<br />
D62 SFX 9<br />
D63 SFX 10<br />
D64 SFX 11<br />
D65 SFX 12<br />
D66 SFX 13<br />
D67 SFX 14<br />
D68 SFX 15<br />
D69 SFX 16<br />
D70 SFX 17<br />
D71 SFX 18<br />
D72 SFX 19<br />
D73 SFX 20<br />
D74 SFX 21<br />
D75 SFX 22<br />
D76 SFX 23<br />
D77 SFX 24<br />
D78 SFX 25<br />
D79 SFX 26<br />
D80 SFX 27<br />
D81 SFX 28<br />
D82 SFX 29<br />
D83 SFX 30<br />
D84 SFX 31<br />
D85 SFX 32<br />
D86 SFX 33<br />
D87 SFX 34<br />
D88 SFX 35<br />
D89 SFX 36
RPS Set List<br />
D-FIELD No. Pattern Name<br />
1. Euro Trance<br />
1 B58 Trance Drums 1<br />
2 C24 Trance Bass 1<br />
3 B91 Drums Fill 1<br />
4 C63 Synth Riff 1<br />
5 C70 Synth Riff 8<br />
6 D20 Synth Lead 1<br />
7 C60 Synth Seq 12<br />
8 D54 SFX 1<br />
2. Progressive<br />
1 B59 Trance Drums 2<br />
2 C25 Trance Bass 2<br />
3 B92 Drums Fill 2<br />
4 D08 Synth Pad 1<br />
5 C71 Synth Riff 9<br />
6 D21 Synth Lead 2<br />
7 D34 Piano 2<br />
8 D55 SFX 2<br />
3. Psy Trance<br />
1 B60 Trance Drums 3<br />
2 C26 Trance Bass 3<br />
3 B93 Drums Fill 3<br />
4 D09 Synth Pad 2<br />
5 C54 Synth Seq 6<br />
6 D22 Synth Lead 3<br />
7 C85 Synth Riff 23<br />
8 D05 Hit Riff 5<br />
4. Hard Trance<br />
1 B61 Trance Drums 4<br />
2 C27 Trance Bass 4<br />
3 B94 Drums Fill 4<br />
4 D10 Synth Pad 3<br />
5 C72 Synth Riff 10<br />
6 C80 Synth Riff 18<br />
7 C61 Synth Seq 13<br />
8 D56 SFX 3<br />
5. Trance<br />
1 B62 Trance Drums 5<br />
2 C28 Trance Bass 5<br />
3 B95 Drums Fill 5<br />
4 C64 Synth Riff 2<br />
5 D13 Synth Pad 6<br />
6 C81 Synth Riff 19<br />
7 C86 Synth Riff 24<br />
8 D06 Hit Riff 6<br />
6. Detroit Techno<br />
1 B64 Techno Drums 1<br />
2 C29 Techno Bass 1<br />
3 B96 Drums Fill 6<br />
4 D11 Synth Pad 4<br />
5 C73 Synth Riff 11<br />
6 D23 Synth Lead 4<br />
7 D30 Synth Lead 11<br />
8 D57 SFX 4<br />
7. Minimal<br />
1 B65 Techno Drums 2<br />
2 C30 Techno Bass 2<br />
3 B97 Drums Fill 7<br />
4 C49 Synth Seq 1<br />
5 C74 Synth Riff 12<br />
6 C58 Synth Seq 10<br />
7 C87 Synth Riff 25<br />
8 D50 Voice 3<br />
8. New Electro<br />
1 B66 Techno Drums 3<br />
2 C31 Techno Bass 3<br />
3 C22 Noise Fill 1<br />
4 C65 Synth Riff 3<br />
5 D14 Synth Pad 7<br />
6 C59 Synth Seq 11<br />
7 C88 Synth Riff 26<br />
8 D58 SFX 5<br />
D-FIELD No. Pattern Name<br />
9. Ambient<br />
1 B67 Techno Drums 4<br />
2 C32 Techno Bass 4<br />
3 B98 Drums Fill 8<br />
4 C50 Synth Seq 2<br />
5 D15 Synth Pad 8<br />
6 C82 Synth Riff 20<br />
7 D45 Brass 1<br />
8 D59 SFX 6<br />
10. NU-NRG<br />
1 B68 Techno Drums 5<br />
2 C33 Techno Bass 5<br />
3 B99 Drums Fill 9<br />
4 C66 Synth Riff 4<br />
5 C75 Synth Riff 13<br />
6 D24 Synth Lead 5<br />
7 C89 Synth Riff 27<br />
8 D60 SFX 7<br />
11. Euro Beat<br />
1 B69 Techno Drums 6<br />
2 C34 Techno Bass 6<br />
3 B00 Drums Fill 10<br />
4 C51 Synth Seq 3<br />
5 C55 Synth Seq 7<br />
6 C83 Synth Riff 21<br />
7 D35 Piano 3<br />
8 D61 SFX 8<br />
12. HappyHardcore<br />
1 B70 Techno Drums 7<br />
2 C35 Techno Bass 7<br />
3 C01 Drums Fill 11<br />
4 C52 Synth Seq 4<br />
5 C76 Synth Riff 14<br />
6 D25 Synth Lead 6<br />
7 C90 Synth Riff 28<br />
8 D62 SFX 9<br />
13. Gabba<br />
1 B71 Techno Drums 8<br />
2 C36 Techno Bass 8<br />
3 C02 Drums Fill 12<br />
4 C97 Guitar Riff 1<br />
5 C56 Synth Seq 8<br />
6 D26 Synth Lead 7<br />
7 D49 Voice 2<br />
8 D63 SFX 10<br />
14. UK HardHouse<br />
1 B73 House Drums 1<br />
2 C37 House Bass 1<br />
3 C03 Drums Fill 13<br />
4 C67 Synth Riff 5<br />
5 C57 Synth Seq 9<br />
6 D02 Hit Riff 2<br />
7 D31 Synth Lead 12<br />
8 D64 SFX 11<br />
15. US HardHouse<br />
1 B74 House Drums 2<br />
2 C38 House Bass 2<br />
3 C19 Perc Fill 1<br />
4 C68 Synth Riff 6<br />
5 C00 Organ Riff<br />
6 D27 Synth Lead 8<br />
7 C91 Synth Riff 29<br />
8 D65 SFX 12<br />
16. Chicago House<br />
1 B75 House Drums 3<br />
2 C39 House Bass 3<br />
3 C04 Drums Fill 14<br />
4 D48 Voice 1<br />
5 C77 Synth Riff 15<br />
6 D03 Hit Riff 3<br />
7 D07 Perc Riff<br />
8 D66 SFX 13<br />
D-FIELD No. Pattern Name<br />
17. Filter Disco<br />
1 B76 House Drums 4<br />
2 C40 House Bass 4<br />
3 C05 Drums Fill 15<br />
4 C98 Guitar Riff 2<br />
5 C78 Synth Riff 16<br />
6 D04 Hit Riff 4<br />
7 C92 Synth Riff 30<br />
8 D67 SFX 14<br />
18. House<br />
1 B77 House Drums 5<br />
2 C41 House Bass 5<br />
3 C20 Perc Fill 2<br />
4 D33 Piano 1<br />
5 C79 Synth Riff 17<br />
6 D18 Synth Pad 11<br />
7 C93 Synth Riff 31<br />
8 D51 Voice 4<br />
19. Garage House<br />
1 B78 House Drums 6<br />
2 C42 House Bass 6<br />
3 C06 Drums Fill 16<br />
4 C53 Synth Seq 5<br />
5 D40 E.Piano 5<br />
6 D43 Guitar 1<br />
7 D46 Brass 2<br />
8 D68 SFX 15<br />
20. 2step<br />
1 B80 2step Drums 1<br />
2 C43 2step Bass<br />
3 C07 Drums Fill 17<br />
4 D36 E.Piano 1<br />
5 C62 Kalimba Seq<br />
6 D44 Guitar 2<br />
7 D47 Brass 3<br />
8 D69 SFX 16<br />
21. R&B<br />
1 B82 R&B Drums 1<br />
2 C44 R&B Bass<br />
3 C23 Noise Fill 2<br />
4 D37 E.Piano 2<br />
5 C99 Guitar Riff 3<br />
6 D42 Organ<br />
7 C94 Synth Riff 32<br />
8 D70 SFX 17<br />
22. HipHop East<br />
1 B86 HipHop Drums 1<br />
2 C45 HipHop Bass 1<br />
3 C08 Drums Fill 18<br />
4 D38 E.Piano 3<br />
5 D01 Hit Riff 1<br />
6 D28 Synth Lead 9<br />
7 D52 Scratch 1<br />
8 D71 SFX 18<br />
23. G-Funk<br />
1 B87 HipHop Drums 2<br />
2 C46 HipHop Bass 2<br />
3 C09 Drums Fill 19<br />
4 D39 E.Piano 4<br />
5 D16 Synth Pad 9<br />
6 D29 Synth Lead 10<br />
7 C95 Synth Riff 33<br />
8 D72 SFX 19<br />
24. Abstruct<br />
1 B88 HipHop Drums 3<br />
2 C47 HipHop Bass 3<br />
3 C10 Drums Fill 20<br />
4 C69 Synth Riff 7<br />
5 D17 Synth Pad 10<br />
6 D19 Synth Pad 12<br />
7 C96 Synth Riff 34<br />
8 D53 Scratch 2<br />
D-FIELD No. Pattern Name<br />
25. Drum'n'Bass<br />
1 B90 DnB Drums<br />
2 C48 DnB Bass<br />
3 C11 Drums Fill 21<br />
4 D12 Synth Pad 5<br />
5 D41 E.Piano 6<br />
6 C84 Synth Riff 22<br />
7 D32 Synth Lead 13<br />
8 D73 SFX 20<br />
26. BreakBeats Collection<br />
1 B83 R&B Drums 2<br />
2 B72 Techno Drums 9<br />
3 B89 HipHop Drums 4<br />
4 B84 R&B Drums 3<br />
5 B63 Trance Drums 6<br />
6 B85 R&B Drums 4<br />
7 B79 House Drums 7<br />
8 B81 2step Drums 2<br />
27. BreakBeats Collection2<br />
1 B58 Trance Drums 1<br />
2 B68 Techno Drums 5<br />
3 B65 Techno Drums 2<br />
4 B76 House Drums 4<br />
5 B90 DnB Drums<br />
6 B86 HipHop Drums 1<br />
7 B82 R&B Drums 1<br />
8 B67 Techno Drums 4<br />
28. Fill Collection<br />
1 C12 Drums Fill 22<br />
2 C13 Drums Fill 23<br />
3 C14 Drums Fill 24<br />
4 C21 Perc Fill 3<br />
5 C15 Drums Fill 25<br />
6 C16 Drums Fill 26<br />
7 C17 Drums Fill 27<br />
8 C18 Drums Fill 28<br />
29. FX Collection<br />
1 D74 SFX 21<br />
2 D75 SFX 22<br />
3 D76 SFX 23<br />
4 D77 SFX 24<br />
5 D78 SFX 25<br />
6 D79 SFX 26<br />
7 D80 SFX 27<br />
8 D81 SFX 28<br />
30. FX Collection 2<br />
1 D82 SFX 29<br />
2 D83 SFX 30<br />
3 D84 SFX 31<br />
4 D85 SFX 32<br />
5 D86 SFX 33<br />
6 D87 SFX 34<br />
7 D88 SFX 35<br />
8 D89 SFX 36<br />
No.: RPS Pattern Number<br />
95<br />
Appendices
96<br />
Profiles of Pattern Composers<br />
B.U.S [Build Up Swing]<br />
Okada Hideki, born in 1966, debuted in 1995 with a<br />
Japanese house garage unit named Swell Emotion<br />
[DOHB disk/Epic], and is a highly acclaimed creative<br />
talent of house music.<br />
He has signed a contract with the Paratone label, and<br />
released an album as the solo project “B.U.S.” His work<br />
has appeared in the radio and TV charts, and has been<br />
praised by DJ TOMO, YO-C, DJ Shinkawa and others.<br />
He is also active as a producer for the YO-C solo album.<br />
He is one of the most talked-about house creators in<br />
Japan today, partially due to his highly successful<br />
remixes in 1998 of Debra Morgan, and the group “Every<br />
Little Thing.”<br />
Bjoern Bojahr<br />
Bjoern Bojahr is a germany based young sound designer<br />
and music producer.<br />
He is also getting a reputation as one of the main<br />
reviewers of the german KEYBOARDS magazine. He has<br />
been into synthesizers for years and does lots of<br />
multimedia-projects in his studio. He can be reached at<br />
mail@bjoernbojahr.de<br />
Hans-Joerg Scheffler<br />
Born and raised in the Ruhrvalley, one of the largest<br />
industrial areas of europe, Hans interest in noise and<br />
rhythm came quite naturally.<br />
Today he runs his own company Digital Audio Design<br />
and creates patches and patterns for <strong>Roland</strong> Synthesizers<br />
and Grooveboxes.<br />
Visit him online at www.DigitalAudioDesign.de<br />
HEIGO TANI<br />
Active in the techno unit “Co-Fusion,” a collaboration<br />
with Japan’s well-known techno DJ “DJ WADA,” and<br />
has also released an album from Sublime Records.<br />
MASA<br />
Psychedelic Trance DJ / Artist<br />
Active since the beginning of the 90’s in live and DJ<br />
performance at parties both in and outside of Japan.<br />
Masa has also released numerous works as a creator, and<br />
collaborates frequently with artists around the world. He<br />
has also been responsible for music production and<br />
effects for commercials, events, and videos. In addition,<br />
he created internal patterns and preset sounds for the<br />
<strong>Roland</strong> MC-505 and 307. Listeners are captivated by his<br />
four-dimensional sound unbound by stereotypical ideas.<br />
Naoki “GigBag” Matsuura<br />
Naoki began musical activity in 1983 during his<br />
university days. As a bassist, he participated in<br />
numerous live and studio sessions. Subsequently, he<br />
took a break from his performance activities and began<br />
creating MIDI data and working as a producer. At<br />
present, he is the chairman and producer of Prest Ltd.,<br />
which produces desktop music and other digital content.<br />
Cappadocia Productions<br />
Electronic sound tinkerers based in Japan.<br />
Also active as an art performance unit named<br />
GIGAHERTZ.<br />
Also involved in the development of products such as<br />
the <strong>Roland</strong> MC series.<br />
E-mail:RXN00541@nifty.ne.jp
Waveform List<br />
Group A<br />
No Name No Name No Name No Name No Name No Name<br />
001 TB Dst Saw<br />
002 TB Dst Sqr 1<br />
003 TB Dst Sqr 2<br />
004 TB Reso Sqr1<br />
005 TB Reso Sqr2<br />
006 TB Saw<br />
007 TB SolidSaw1<br />
008 TB SolidSaw2<br />
009 TB Square 1<br />
010 TB Square 2<br />
011 TB Sqr Decay<br />
012 TB Natural<br />
013 JP8000 Saw 1<br />
014 JP8000 Saw 2<br />
015 MG Saw<br />
016 Synth Saw 1<br />
017 JP-8 Saw<br />
018 P5 Saw<br />
019 Synth Saw 2<br />
020 OB Saw<br />
021 D-50 Saw<br />
022 JP-6 Square<br />
023 MG Square<br />
024 P5 Square<br />
025 JP-8 Pulse<br />
026 JP-6 Pulse<br />
027 MG Pulse<br />
028 260 Pulse<br />
029 JU-2 Sub OSC<br />
030 Frog wave<br />
031 Digiwave<br />
032 FM Pulse<br />
033 JP8000 PWM<br />
034 JP8000 FBK<br />
035 260 Sub OSC<br />
036 Dist Synth<br />
037 Dist Square<br />
038 MG Triangle<br />
039 Jungle Bass<br />
040 260 Sine Bs<br />
041 MC-202 Bass<br />
042 SH-101 Bass<br />
043 Octa Bass<br />
Group B<br />
044 Funky Bass<br />
045 Poly Bass<br />
046 MG Bass<br />
047 FM Super Bs<br />
048 Solid Bass<br />
049 Organ Bass<br />
050 Dirty Bass<br />
051 Upright Bs<br />
052 Ac Bass<br />
053 Voco Bass<br />
054 Fingered Bs<br />
055 Pick Bass<br />
056 Fretless Bs<br />
057 Slap Bass<br />
058 Juno Rave<br />
059 Blaster<br />
060 Fat JP-6<br />
061 OB Strings<br />
062 Orch Strings<br />
063 Pizzy Techno<br />
064 Choir<br />
065 Syn Vox 1<br />
066 Syn Vox 2<br />
067 Syn Vox 3<br />
068 Ac Piano<br />
069 D-50 EP<br />
070 E.Piano<br />
071 Clavi<br />
072 Full Stop<br />
073 FM Club Org<br />
074 E.Organ 1<br />
075 E.Organ 2<br />
076 Church Org<br />
077 Power B fst<br />
078 Power B slw<br />
079 Org Chord<br />
080 Tubular<br />
081 Glockenspiel<br />
082 Vibraphone<br />
083 FantabellSub<br />
084 DIGI Bell<br />
085 Steel Drum<br />
086 Marimba<br />
087 Balaphone<br />
088 Kalimba<br />
089 Steel Gtr<br />
090 Clean TC<br />
091 Dst Solo Gtr<br />
092 Dist TekGtr<br />
093 Gtr FX<br />
094 Harmo Gtr<br />
095 Wah Gtr 1<br />
096 Wah Gtr 2<br />
097 Wah Gtr 2a<br />
098 Wah Gtr 2b<br />
099 Wah Gtr 2c<br />
100 Wah Gtr 2d<br />
101 Sitar<br />
102 Brass<br />
103 Trumpet<br />
104 Mute Trumpet<br />
105 Soprano Sax<br />
106 Solo Sax<br />
107 Baritone Sax<br />
108 Brass Fall<br />
109 Flute<br />
110 Pan Flute<br />
111 Shakuhachi<br />
112 Bagpipe<br />
113 Breath<br />
114 Feedbackwave<br />
115 Atmosphere<br />
116 Rezo Noise<br />
117 MG White Nz<br />
118 P5 Noise<br />
119 MG Pink Nz<br />
120 Bomb Noise<br />
121 Sea<br />
122 Brush Noise<br />
123 Space Noise<br />
124 Scream<br />
125 Jet Plane<br />
126 Toy Gun 1<br />
127 Crash<br />
128 Toy Gun 2<br />
129 Toy Gun 3<br />
130 Emergency<br />
131 Buzzer<br />
132 Insect<br />
133 Tonality<br />
134 Ring Osc<br />
135 Reso FX<br />
136 SCRATCH MENU<br />
137 Vinyl Noise<br />
138 Scratch BD f<br />
139 Scratch BD r<br />
140 Scratch SD f<br />
141 Scratch SD r<br />
142 Scratch ALT<br />
143 Tape Rewind<br />
144 Vinyl Stop<br />
145 HIT MENU<br />
146 MG Blip<br />
147 Beam HiQ<br />
148 MG Attack<br />
149 Air Blip<br />
150 Org Click<br />
151 Syn Hit<br />
152 Techno Scene<br />
153 Techno Chord<br />
154 Dist Hit<br />
155 Thin Beef<br />
156 Tekno Hit<br />
157 Back Hit<br />
158 TAO Hit<br />
159 Philly Hit<br />
160 INDUST. MENU<br />
161 Analog Bird<br />
162 Retro UFO<br />
163 PC-2 Machine<br />
164 Hoo<br />
165 Metal Sweep<br />
166 Afro Feet<br />
167 Bomb<br />
168 Bounce<br />
169 ElectricDunk<br />
170 Iron Door<br />
171 Dist Swish<br />
172 Drill Hit<br />
173 Thrill<br />
174 PCM Press<br />
175 Air Gun<br />
176 VOICE MENU<br />
177 One!<br />
178 Two!<br />
179 Three!<br />
180 Kick it!<br />
181 Come on!<br />
182 Wao!<br />
183 Shout<br />
184 Ooh! 1<br />
185 Ooh! 2<br />
186 Voice loop<br />
187 Pa!<br />
188 Canvas<br />
189 Punch<br />
190 Chiki!<br />
191 Hey!<br />
192 Laugh<br />
193 Aah Formant<br />
194 Eeh Formant<br />
195 Iih Formant<br />
196 Ooh Formant<br />
197 Uuh Formant<br />
198 Dist Ooh Vox<br />
199 Auh Voice<br />
200 Stream<br />
201 Bird<br />
202 TOM MENU<br />
203 TR909 Tom<br />
204 TR909 DstTom<br />
205 TR808 Tom<br />
206 TR606 Tom<br />
207 TR606 CmpTom<br />
208 TR707 Tom<br />
209 Syn Tom<br />
210 Deep Tom<br />
211 Can Tom<br />
212 Kick Tom<br />
213 Natural Tom<br />
214 PERCUS MENU1<br />
215 PERCUS MENU2<br />
216 TR808 Conga<br />
217 HiBongo Open<br />
218 LoBongo Open<br />
219 HiConga Mute<br />
220 HiConga Open<br />
221 LoConga Open<br />
222 HiBongo LoFi<br />
223 LoBongo LoFi<br />
224 HiCnga Mt LF<br />
225 HiCnga Op LF<br />
226 LoConga LoFi<br />
227 Timpani<br />
228 Mute Surdo<br />
229 Open Surdo<br />
230 Hi Timbale<br />
231 Lo Timbale<br />
232 HiTimbale LF<br />
233 LoTimbale LF<br />
234 Tabla<br />
235 TablaBaya<br />
236 Udo<br />
237 AfroDrum Rat<br />
238 Chenchen<br />
239 Op Pandeiro<br />
240 Mt Pandeiro<br />
241 Tambourine 1<br />
242 Tambourine 2<br />
243 Tambourine 3<br />
244 Tambourine 4<br />
245 CR78 Tamb<br />
246 COWBELL MENU<br />
247 TR808Cowbell<br />
248 TR707Cowbell<br />
249 CR78 Cowbell<br />
250 Cowbell<br />
251 TR727 Agogo<br />
252 CR78 Beat<br />
253 Triangle 1<br />
254 Triangle 2<br />
No Name No Name No Name No Name No Name No Name<br />
001 SHKR+ MENU<br />
002 808 Maracas<br />
003 Maracas<br />
004 Cabasa Up<br />
005 TechnoShaker<br />
006 TR626 Shaker<br />
007 Dance Shaker<br />
008 CR78 Guiro<br />
009 Long Guiro<br />
010 Short Guiro<br />
011 Mute Cuica<br />
012 Open Cuica<br />
013 Whistle<br />
014 TR727Quijada<br />
015 Jingle Bell<br />
016 Belltree<br />
017 Wind Chime<br />
018 RIM MENU<br />
019 TR909 Rim<br />
020 TR808 Rim<br />
021 TR808 RimLng<br />
022 TR707 Rim<br />
023 Analog Rim<br />
024 Natural Rim<br />
025 Ragga Rim 1<br />
026 Lo-Fi Rim<br />
027 Wood Block<br />
028 Jungle Snap<br />
029 TR808 Claves<br />
030 Hyoshigi<br />
031 CHH MENU 1<br />
032 CHH MENU 2<br />
033 TR909 CHH 1<br />
034 TR909 CHH 2<br />
035 TR808 CHH 1<br />
036 TR808 CHH 2<br />
037 TR808 CHH 3<br />
038 TR606 CHH 1<br />
039 TR606 CHH 2<br />
040 TR606 DstCHH<br />
041 TR707 CHH<br />
042 CR78 CHH<br />
043 DR55 CHH 1<br />
044 Closed Hat<br />
045 Pop CHH<br />
046 Real CHH<br />
047 Bristol CHH<br />
048 DR550 CHH 2<br />
049 Tight CHH<br />
050 Hip CHH<br />
051 Room CHH<br />
052 R8 Brush CHH<br />
053 Jungle Hat<br />
054 PHH MENU<br />
055 TR909 PHH 1<br />
056 TR909 PHH 2<br />
057 TR808 PHH 1<br />
058 TR808 PHH 2<br />
059 TR606 PHH 1<br />
060 TR606 PHH 2<br />
061 TR707 PHH<br />
062 Hip PHH<br />
063 Tight PHH<br />
064 Pedal Hat 1<br />
065 Real PHH<br />
066 Pedal Hat 2<br />
067 OHH MENU 1<br />
068 OHH MENU 2<br />
069 TR909 OHH 1<br />
070 TR909 OHH 2<br />
071 TR909 OHH 3<br />
072 TR909 DstOHH<br />
073 TR808 OHH 1<br />
074 TR808 OHH 2<br />
075 TR606 OHH<br />
076 TR606 DstOHH<br />
077 TR707 OHH<br />
078 CR78 OHH<br />
079 Hip OHH<br />
080 Pop Hat Open<br />
081 Open Hat<br />
082 Cym OHH<br />
083 DR550 OHH<br />
084 Funk OHH<br />
085 Real OHH<br />
086 R8 OHH<br />
087 CYMBAL MENU<br />
088 TR606 Cym 1<br />
089 TR606 Cym 2<br />
090 TR909 Ride<br />
091 TR707 Ride<br />
092 Natural Ride<br />
093 Cup Cym<br />
094 TR909 Crash<br />
095 NaturalCrash<br />
096 Jungle Crash<br />
097 Asian Gong<br />
098 CLAP MENU 1<br />
099 CLAP MENU 2<br />
100 TR909 Clap 1<br />
101 TR909 Clap 2<br />
102 TR808 Clap<br />
103 TR707 Clap<br />
104 Cheap Clap<br />
105 Funk Clap<br />
106 Little Clap<br />
107 Real Clap 1<br />
108 Real Clap 2<br />
109 Funky Clap<br />
110 Comp Clap<br />
111 Hip Clap<br />
112 Down Clap<br />
113 Group Clap<br />
114 Big Clap<br />
115 Claptail<br />
116 Clap Snare 1<br />
117 Fuzzy Clap<br />
118 Snap<br />
119 Finger Snap<br />
120 SNR MENU 1<br />
121 SNR MENU 2<br />
122 SNR MENU 3<br />
123 SNR MENU 4<br />
124 SNR MENU 5<br />
125 SNR MENU 6<br />
126 TR909 Snr 1<br />
127 TR909 Snr 2<br />
128 TR909 Snr 3<br />
129 TR909 Snr 4<br />
130 TR909 Snr 5<br />
131 TR909 Snr 6<br />
132 TR909 Snr 7<br />
133 TR909 DstSnr<br />
134 TR808 Snr 1<br />
135 TR808 Snr 2<br />
136 TR808 Snr 3<br />
137 TR808 Snr 4<br />
138 TR808 Snr 5<br />
139 TR808 Snr 6<br />
140 TR808 Snr 7<br />
141 TR808 Snr 8<br />
142 TR808 Snr 9<br />
143 TR606 Snr 1<br />
144 TR606 Snr 2<br />
145 TR606 Snr 3<br />
146 DanceHall SD<br />
147 TR707 Snare<br />
148 CR78 Snare<br />
149 Clap Snare 2<br />
150 Jngl Tiny SD<br />
151 Jazz Snare<br />
152 Headz Snare<br />
153 Whack Snare<br />
154 Rap Snare<br />
155 Jungle Snr 1<br />
156 Antigua Snr<br />
157 Real Snare<br />
158 Tiny Snare 1<br />
159 Tiny Snare 2<br />
160 Break Snare1<br />
161 Break Snare2<br />
162 MC Snare<br />
163 East Snare<br />
164 Phat Snare<br />
165 Brush Slap 1<br />
166 Brush Slap 2<br />
167 Deep Snare<br />
168 Fat Snare<br />
169 Disco Snare<br />
170 DJ Snare<br />
171 Macho Snare<br />
172 Hash Snare<br />
173 Lo-Hard Snr<br />
174 Indus Snare<br />
175 Rage Snare<br />
176 TekRok Snare<br />
177 Big Trash SD<br />
178 Ragga Rim 2<br />
179 Gate Rim<br />
180 SideStiker<br />
181 HipJazz Snr<br />
182 HH Soul Snr<br />
183 Cross Snare<br />
184 Jungle Rim 1<br />
185 Ragga Snr 2<br />
186 Upper Snare<br />
187 Lo-Fi Snare<br />
188 RaggaTightSD<br />
189 Flange Snr<br />
190 Machine Snr<br />
191 Clap Snare 3<br />
192 Solid Snare<br />
193 Funk Clap 2<br />
194 Jungle Rim 2<br />
195 Jungle Rim 3<br />
196 Jungle Snr 2<br />
197 Urban Snare<br />
198 Urban RollSD<br />
199 R&B Snare<br />
200 R8 Brush Tap<br />
201 R8 BrshSwill<br />
202 R8 BrushRoll<br />
203 Sim Snare<br />
204 ElectroSnr 1<br />
205 ElectroSnr 2<br />
206 Synth Snare<br />
207 Roll Snare<br />
208 KICK MENU 1<br />
209 KICK MENU 2<br />
210 KICK MENU 3<br />
211 TR909 Kick 1<br />
212 TR909 Kick 2<br />
213 TR909 Kick 3<br />
214 TR909 Kick 4<br />
215 Plastic BD 1<br />
216 Plastic BD 2<br />
217 Plastic BD 3<br />
218 Plastic BD 4<br />
219 TR909 Kick 5<br />
220 TR808 Kick 1<br />
221 TR808 Kick 2<br />
222 TR808 Kick 3<br />
223 TR808 Kick 4<br />
224 TR808 Kick 5<br />
225 TR606 Kick<br />
226 TR606 Dst BD<br />
227 TR707 Kick 1<br />
228 TR707 Kick 2<br />
229 Toy Kick<br />
230 Analog Kick<br />
231 Boost Kick<br />
232 West Kick<br />
233 JungleKick 1<br />
234 Optic Kick<br />
235 Wet Kick<br />
236 Lo-Fi Kick 1<br />
237 Hazy Kick<br />
238 Hip Kick<br />
239 Video Kick<br />
240 Tight Kick<br />
241 Break Kick<br />
242 Turbo Kick<br />
243 Ele Kick<br />
244 Dance Kick 1<br />
245 Kick Ghost<br />
246 Lo-Fi Kick 2<br />
247 JungleKick 2<br />
248 TR909 Dst BD<br />
249 Amsterdam BD<br />
250 Gabba Kick<br />
251 Roll Kick<br />
97<br />
Appendices
98<br />
MIDI Implementation<br />
Model: D2 (groovebox)<br />
Date: Mar. 12, 2001<br />
Version: 1.00<br />
Symbol Description Range<br />
n MIDI Channel 0H–6H,9H (ch.1–ch.7,ch.10)<br />
vv Control value 00H–7FH (0–127)<br />
kk Note Number 00H–7FH (0–127)<br />
xx ON/OFF 00H–3FH (0–63:OFF), 40H–7FH (64–127:ON)<br />
1. Data reception (sound source section)<br />
■Channel voice messages<br />
●Note Off<br />
status 2nd byte 3rd byte<br />
8nH kkH vvH<br />
9nH kkH 00H<br />
vv=Note Off velocity: 00H - 7FH (0 - 127)<br />
●Note On<br />
status 2nd byte 3rd byte<br />
9nH kkH vvH<br />
vv=Note On velocity: 01H - 7FH (1 - 127)<br />
●Polyphonic Aftertouch<br />
status 2nd byte 3rd byte<br />
AnH kkH vvH<br />
vv=Polyphonic Aftertouch: 00 00H - 7FH (0 - 127)<br />
●Control Change<br />
* Not received when the Rx Switch parameter is OFF.<br />
❍Bank Select (Controller number 0,32)<br />
status 2nd byte 3rd byte<br />
BnH 00H mmH<br />
BnH 20H llH<br />
mm,ll=Bank number: 00 00H–7F 7FH (bank.1–bank.16384)<br />
* Not received when the Rx Program Change Switch or Rx Bank Select Switch parameter<br />
is OFF.<br />
* The Patches corresponding to each Bank Select are as follows.<br />
Bank Select | Program No | Group Patch No.<br />
MSB | LSB | |<br />
——————+—————+————————————+————————————————————————————————————————<br />
81 | 0 | 001 - 128 | Preset A 001 - 128<br />
81 | 1 | 001 - 128 | Preset B 001 - 128<br />
81 | 2 | 001 - 128 | Preset C 001 - 128<br />
81 | 3 | 001 - 128 | Preset D 001 - 128<br />
84 | 0 | 001 - 088 | Preset E 001 - 088<br />
85 | 0 | 001 - 128 | User 001 - 128<br />
85 | 1 | 001 - 128 | User 129 - 256<br />
* The Rhythm set corresponding to each Bank Select are as follows.<br />
Bank Select | Program No | Group Patch No.<br />
MSB | LSB | |<br />
——————+—————+————————————+————————————————————————————————————————<br />
81 | 0 | 1 - 26 | Preset A 01 - 26<br />
84 | 0 | 1 - 4 | Preset B 01 - 04<br />
85 | 0 | 1 - 20 | User 01 - 20<br />
❍Modulation (Controller number 1)<br />
status 2nd byte 3rd byte<br />
BnH 01H vvH<br />
* The effect will apply according to the Modulation Control setting.<br />
❍Data Entry (Controller number 6,38)<br />
status 2nd byte 3rd byte<br />
BnH 06H mmH<br />
BnH 26H llH<br />
mm,ll= the value of the parameter specified by RPNmm=MSB, ll=LSB<br />
❍Expression (Controller number 11)<br />
status 2nd byte 3rd byte<br />
BnH 0BH vvH<br />
* Expression messages are used to adjust the volume of each part.<br />
❍Hold 1 (Controller number 64)<br />
status 2nd byte 3rd byte<br />
BnH 40H xxH<br />
❍Sostenuto (Controller number 66)<br />
status 2nd byte 3rd byte<br />
BnH 42H xxH<br />
❍Soft (Controller number 67)<br />
status 2nd byte 3rd byte<br />
BnH 43H xxH<br />
❍Hold 2 (Controller number 69)<br />
status 2nd byte 3rd byte<br />
BnH 45H xxH<br />
❍Portamento Control (Controller number 84)<br />
status 2nd byte 3rd byte<br />
BnH 54H kkH<br />
* A Note On message received immediately after a Portamento control will be sounded<br />
with the pitch changing smoothly from the source note number. If a voice is already<br />
sounding at the same note number as the source note number, that voice will change<br />
pitch to the pitch of the newly received Note On, and continue sounding (i.e., will be<br />
played legato).<br />
* The speed of the pitch change caused by Portamento is determined by the Portamento<br />
Time parameter.<br />
❍RPN MSB/LSB (Controller number 100,101)<br />
status 2nd byte 3rd byte<br />
BnH 65H mmH<br />
BnH 64H llH<br />
mm=MSB of the parameter number specified by RPN<br />
ll=LSB of the parameter number specified by RPN<br />
><br />
Control Changes include RPN (Registered Parameter Numbers), which are extended<br />
parameters whose function is defined in the MIDI specification.<br />
When using RPNs, first the RPN (Controller numbers 100 and 101; they can be sent in any<br />
order) is transmitted to specify the parameter you wish to control. Then, Data Entry<br />
messages (Controller numbers 6 and 38) are used to set the value of the specified parameter.<br />
Once a RPN parameter has been specified, all further Data Entry messages on that channel<br />
are considered to apply to that specified parameter. In order to prevent accidents, when the<br />
desired setting has been made for the parameter, it is recommended that RPN be set to Null.<br />
This device receives the following RPNs.<br />
RPN Data entry<br />
MSB LSB MSB LSB Notes<br />
00H 00H mmH — Pitch Bend Sensitivity<br />
mm : 00H–0CH (0–12 semitones)<br />
ll : ignored (processed as 00H)<br />
Up to 1 octave can be specified in semitone steps.<br />
*The Bend Range up parameter, Bend Range Down parameter will<br />
also be changed.<br />
*Not received by the Part R.<br />
00H 01H mmH llH Master Fine Tuning<br />
mm, ll: 20 00H–40 00H–60 00H ( -4096 x 100 / 8192–0–+4096 x 100 /<br />
8192 cent )<br />
*The Fine Tune parameter of each Part will change.<br />
00H 02H mmH — Master Coarse Tuning<br />
mm : 10H–40H–70H (-48–0–+48 semitones)<br />
ll : ignored (processed as 00H)<br />
*The Key Shift parameter of each Part will change.<br />
7FH 7FH — — RPN null<br />
*<br />
RPN will be set as “unspecified”. Once this setting has been made,<br />
subsequent Data Entry messages will be ignored. (It is not necessary to<br />
transmit Data Entry for RPN Null settings.) Parameter values that<br />
were previously set will not change.<br />
mm, ll: ignored<br />
For the functions of other controller numbers, refer to “Table of Transmitted Data” (p. 76).
● Program Change<br />
status 2nd byte<br />
CnH ppH<br />
pp=Program number: 00H–7FH (prog.1–prog.128)<br />
●Channel Aftertouch<br />
status 2nd byte<br />
DnH vvH<br />
* The effect will apply according to the Aftertouch Control setting.<br />
●Pitch Bend Change<br />
status 2nd byte 3rd byte<br />
EnH llH mmH<br />
mm,ll=Pitch Bend value:00 00H–40 00H–7F 7FH (-8192–0–+8191)<br />
* The effect will apply according to the Pitch Bend Control setting.<br />
■Channel Mode messages<br />
●All Sound Off (Controller number 120)<br />
status 2nd byte 3rd byte<br />
BnH 78H 00H<br />
* When this message is received, all notes currently sounding on the corresponding<br />
channel will be turned off.<br />
●Reset All Controllers (Controller number 121)<br />
status 2nd byte 3rd byte<br />
BnH 79H 00H<br />
* When this message is received, the following controllers will be set to their reset values.<br />
Controller Reset value<br />
Pitch Bend Change ±0 (center)<br />
Polyphonic Key Pressure 0 (off)<br />
Channel Pressure 0 (off)<br />
Modulation 0 (off)<br />
Expression 127 (maximum)<br />
Hold 1 0 (off)<br />
Sostenuto 0 (off)<br />
Soft 0 (off)<br />
Hold 2 0 (off)<br />
RPN Unset. Previously set data will not change.<br />
●All Note Off (Controller number 123)<br />
status 2nd byte 3rd byte<br />
BnH 7BH 00H<br />
* When All Note Off is received, all currently sounding notes of the corresponding<br />
channel will be turned off. However if Hold 1 or Sostenuto are on, the sound will be held<br />
until these are turned off.<br />
●Omni Off (Controller number 124)<br />
status 2nd byte 3rd byte<br />
BnH 7CH 00H<br />
* The same processing as when All Note Off is received will be done.<br />
●Omni On (Controller number 125)<br />
status 2nd byte 3rd byte<br />
BnH 7DH 00H<br />
* The same processing as when All Note Off is received will be done. The instrument will<br />
not be set to OMNI ON.<br />
●Mono (Controller number 126)<br />
status 2nd byte 3rd byte<br />
BnH 7EH mmH<br />
mm=Mono number: 00H–10H (0–16)<br />
* The same processing as when All Note Off is received will be done, and the Solo Switch<br />
parameter will be set to ON.<br />
●Poly (Controller number 127)<br />
status 2nd byte 3rd byte<br />
BnH 7FH 00H<br />
MIDI Implementation<br />
* The same processing as when All Note Off is received will be done, and the Solo Switch<br />
parameter will be set to OFF.<br />
■System Realtime messages<br />
●Timing Clock<br />
status<br />
F8H<br />
* Settings can be made to synchronize or the LFO rate or the effect rate.<br />
●Active Sensing<br />
status<br />
FEH<br />
* When an Active Sensing message is received, the unit will begin monitoring the interval<br />
at which MIDI messages are received. During monitoring, if more than 420 ms passes<br />
without a message being received, the same processing will be done as when All Sound<br />
Off, All Note Off, and Reset All Controllers messages are received. Then monitoring will<br />
be halted.<br />
■ System Exclusive messages<br />
status data byte status<br />
F0H iiH, ddH, ......, eeH F7H<br />
F0H: System Exclusive message status<br />
ii = ID number: This is the ID number (manufacturer ID) that specifies the<br />
manufacturer whose exclusive message this is. <strong>Roland</strong>’s manufacturer<br />
ID is 41H.ID numbers 7EH and 7FH are defined in an expansion of the<br />
MIDI standard as Universal Non-realtime messages (7EH) and<br />
Universal Realtime Messages (7FH).<br />
dd,..., ee = data: 00H–7FH (0–127)<br />
F7H: EOX (End Of Exclusive) This is the last status of system exclusive<br />
message.<br />
●Universal Non-realtime System Exclusive Messages<br />
IdentityIdentity Request Message<br />
Status Data byte Status<br />
F0H 7EH, dev, 06H, 01H F7H<br />
Byte Explanation<br />
F0H Exclusive status<br />
7EH ID number (universal non-realtime message)<br />
dev Device ID (dev:10H(17)-1FH(32))<br />
06H Sub ID#1 (General Information)<br />
01H Sub ID#2 (Identity Request)<br />
F7H EOX (End Of Exclusive)<br />
* The “dev” is own device number or 7FH (Broadcast)<br />
* When Identity Request is received, Identity Reply message will be transmitted.<br />
●Data Request 1 RQ1<br />
This message requests the other device to transmit data. The address and size indicate the<br />
type and amount of data that is requested.<br />
When a Data Request message is received, if the device is in a state in which it is able to<br />
transmit data, and if the address and size are appropriate, the requested data is transmitted<br />
as a Data Set 1 (DT1) message. If the conditions are not met, nothing is transmitted.<br />
The model ID of the exclusive messages used by this instrument is 00 0BH.<br />
status data byte status<br />
F0H 41H, dev, 00H, 0BH, 11H, aaH, bbH,<br />
ccH, ddH, ssH, ttH, uuH, vvH, sum<br />
F7H<br />
Byte Remarks<br />
F0H Exclusive status<br />
41H ID number (<strong>Roland</strong>)<br />
dev device ID (dev: 10H–1FH)<br />
00H model ID (D2)<br />
0BH model ID (D2)<br />
99<br />
Appendices
MIDI Implementation<br />
11H command ID (RQ1)<br />
aaH address MSB<br />
bbH address<br />
ccH address<br />
ddH address LSB<br />
ssH size MSB<br />
ttH size<br />
uuH size<br />
vvH size LSB<br />
sum checksum<br />
F7H EOX (End Of Exclusive)<br />
* For the address, size, and checksum, refer to “Examples of system exclusive messages<br />
and calculating the checksum” (p. 107).<br />
* This message is not received if the Rx.System Exclusive Switch Switch parameter is OFF.<br />
●Data Set 1 DT1<br />
This message transmits the actual data, and is used when you wish to set the data of the<br />
receiving device.<br />
status data byte status<br />
F0H 41H, dev, 00H, 0BH, 12H, aaH, bbH,<br />
ccH, ddH, eeH, ... ffH, sum<br />
F7H<br />
Byte Remarks<br />
F0H Exclusive status<br />
41H ID number (<strong>Roland</strong>)<br />
dev device ID (dev: 10H–1FH)<br />
00H model ID (D2)<br />
0BH model ID (D2)<br />
12H command ID (DT1)<br />
aaH address MSB<br />
bbH address<br />
ccH address<br />
ddH address LSB<br />
eeH data: The actual data to be transmitted. Multi-byte data is transmitted<br />
in the order of the address.<br />
: :<br />
ffH data<br />
sum checksum<br />
F7H EOX (End Of Exclusive)<br />
* For the address, size, and checksum, refer to “Examples of system exclusive messages<br />
and calculating the checksum” (p. 107).<br />
* Data whose size is greater than 128 bytes should be divided into packets of 128 bytes or<br />
less and transmitted. Successive “Data Set 1” messages should have at least 20 ms of<br />
time interval between them.<br />
* This message is not received if the Rx.System Exclusive Switch parameter is OFF.<br />
The only GS exclusive messages received by the D2 are Scale Tune settings.<br />
●Data Set 1 DT1<br />
status data byte status<br />
F0H 41H, dev, 42, 12H, aaH, bbH,<br />
ccH, ddH, ... eeH, sum<br />
F7H<br />
Byte Remarks<br />
F0H Exclusive status<br />
41H ID number (<strong>Roland</strong>)<br />
dev device ID (dev: 10H–1FH)<br />
42H model ID (GS)<br />
12H command ID (DT1)<br />
aaH address MSB<br />
bbH address<br />
ccH address LSB<br />
ddH data: The actual data to be transmitted. Multi-byte data is transmitted<br />
in the order of the address.<br />
: :<br />
eeH data<br />
sum checksum<br />
F7H EOX (End Of Exclusive)<br />
* This message is not received if the Rx.System Exclusive Switch parameter is OFF.<br />
In addition to conventional system exclusive messages, the D2 also uses special system<br />
exclusive messages for operations which require realtime handling.<br />
100<br />
●Data Set 1 DT1<br />
status data byte status<br />
F0H 41H, dev, 3AH, 12H, aaH,<br />
bbH, ccH, ddH, sum<br />
F7H<br />
Byte Remarks<br />
F0H Exclusive status<br />
41H ID number (<strong>Roland</strong>)<br />
dev device ID (dev: 10H–1FH)<br />
3AH model ID (D2 Quick)<br />
12H command ID (DT1)<br />
aaH address (Status/Channel)<br />
bbH address/Data H<br />
ccH Data L<br />
ddH Data E<br />
sum checksum<br />
F7H EOX (End Of Exclusive)<br />
* For the address, size, and checksum, refer to “Examples of system exclusive messages<br />
and calculating the checksum” (p. 107).<br />
* Transmission of consecutive addresses is not possible.<br />
* This message is not received if the Rx.System Exclusive Switch parameter is OFF.<br />
2. Data transmission<br />
(sound source section)<br />
■Channel Voice messages<br />
●Note Off<br />
status 2nd byte 3rd byte<br />
8nH kkH vvH<br />
●Note On<br />
status 2nd byte 3rd byte<br />
9nH kkH vvH<br />
vv=Note On velocity: 01H - 7FH (1 - 127)<br />
●Control Change<br />
* By selecting a controller number that corresponds to the setting of the Control Pedal<br />
Assign parameter, you can transmit any desired control change.<br />
❍Bank Select (Controller number 0,32)<br />
status 2nd byte 3rd byte<br />
BnH 00H mmH<br />
BnH 20H llH<br />
mm,ll=Bank number: 00 00H - 7F 7FH (bank.1 - bank.16384)<br />
* This message is not transmitted if Tx Program Change Switch parameter or Tx Bank<br />
Select Switch parameter is OFF.<br />
* For the Bank Select that corresponds to each Patch, refer to section 1.<br />
❍Modulation (Controller number 1)<br />
status 2nd byte 3rd byte<br />
BnH 01H vvH<br />
❍Expression (Controller number 11)<br />
status 2nd byte 3rd byte<br />
BnH 0BH vvH<br />
❍Hold 1 (Controller number 64)<br />
status 2nd byte 3rd byte<br />
BnH 40H xxH<br />
❍Sostenuto (Controller number 66)<br />
status 2nd byte 3rd byte<br />
BnH 42H xxH<br />
❍Soft (Controller number 67)<br />
status 2nd byte 3rd byte<br />
BnH 43H xxH
❍Hold 2 (Controller number 69)<br />
status 2nd byte 3rd byte<br />
BnH 45H xxH<br />
❍Portamento control (Controller number 84)<br />
status 2nd byte 3rd byte<br />
BnH 54H kkH<br />
* For the functions of other controller numbers, refer to “Table of Transmitted Data” (p. 76).<br />
●Program Change<br />
status 2nd byte<br />
CnH ppH<br />
pp=Program number: 00H - 7FH (prog.1 - prog.128)<br />
* This message is not transmitted when the Tx Program Change Switch parameter is OFF.<br />
■System Realtime messages<br />
●Active Sensing<br />
status<br />
FEH<br />
* Transmitted at intervals of approximately 250ms.<br />
■System Exclusive messages<br />
●Universal Non-realtime System Exclusive Messages<br />
Identity Reply<br />
Status Data byte Status<br />
F0H 7EH, dev, 06H, 02H, 41H, 0BH, 01H,<br />
03H, 00H, 00H, 03H, 00H, 00H<br />
F7H<br />
Byte Explanation<br />
F0H Exclusive status<br />
7EH ID number (universal non-realtime message)<br />
dev Device ID (dev:10H(17)-1FH(32))<br />
06H Sub ID#1 (General Information)<br />
02H Sub ID#2 (Identity Reply)<br />
41H ID number (<strong>Roland</strong>)<br />
0BH 01H Device family code<br />
03H 00H Device family number code<br />
00H 03H 00H 00H Software revision level<br />
F7H EOX (End of Exclusive)<br />
* When Identity Request is received, Identity Reply message will be transmitted.<br />
●Data Set 1 DT1<br />
status data byte status<br />
F0H 41H, dev, 00H, 0BH, 12H, aaH, bbH,<br />
ccH, ddH, eeH, ... ffH, sum<br />
F7H<br />
Byte Remarks<br />
F0H Exclusive status<br />
41H ID number (<strong>Roland</strong>)<br />
dev device ID (dev: 10H–1FH)<br />
00H model ID (D2)<br />
0BH model ID (D2)<br />
12H command ID (DT1)<br />
aaH address MSB<br />
bbH address<br />
ccH address<br />
ddH address LSB<br />
eeH data: The actual data to be transmitted. Multi-byte data is transmitted<br />
in the order of the address.<br />
: :<br />
ffH data<br />
sum checksum<br />
F7H EOX (End Of Exclusive)<br />
* For the address, size, and checksum, refer to “Examples of system exclusive messages<br />
and calculating the checksum” (p. 107).<br />
* Data whose size is greater than 128 bytes should be divided into packets of 128 bytes or<br />
less and transmitted. Successive “Data Set 1” messages should have at least 20 ms of<br />
time interval between them.<br />
●Data Set 1 DT1<br />
MIDI Implementation<br />
status data byte status<br />
F0H 41H, dev, 3AH, 12H, aaH,<br />
bbH, ccH, ddH, sum<br />
F7H<br />
Byte Remarks<br />
F0H Exclusive status<br />
41H ID number (<strong>Roland</strong>)<br />
dev device ID (dev: 10H–1FH)<br />
3AH model ID (D2 Quick)<br />
12H command ID (DT1)<br />
aaH address (Status/Channel)<br />
bbH address/Data H<br />
ccH Data L<br />
ddH Data E<br />
sum checksum<br />
F7H EOX (End Of Exclusive)<br />
* For the address, size, and checksum, refer to “Examples of system exclusive messages<br />
and calculating the checksum” (p. 107).<br />
* Transmission of consecutive addresses is not possible.<br />
3. Data reception (Sequencer section)<br />
3.1 Messages recorded during recording<br />
■Channel voice messages<br />
●Note Off<br />
status 2nd byte 3rd byte<br />
8nH kkH vvH<br />
9nH kkH 00H<br />
●Note On<br />
status 2nd byte 3rd byte<br />
9nH kkH vvH<br />
vv=Note On velocity: 01H - 7FH (1 - 127)<br />
●Polyphonic Aftertouch<br />
status 2nd byte 3rd byte<br />
AnH kkH vvH<br />
●Control Change<br />
status 2nd byte 3rd byte<br />
BnH kkH vvH<br />
kk=control number: 00H–78H (0–120)<br />
●Program Change<br />
status 2nd byte<br />
CnH ppH<br />
pp=Program number: 00H–7FH (prog.1–prog.128)<br />
●Channel Aftertouch<br />
status 2nd byte<br />
DnH vvH<br />
●Pitch Bend Change<br />
status 2nd byte 3rd byte<br />
EnH llH mmH<br />
mm,ll=Pitch Bend value: 00 00H–40 00H–7F 7FH (-8192–0–+8191)<br />
■Channel Mode messages<br />
●All Sound Off (Controller number 120)<br />
status 2nd byte 3rd byte<br />
BnH 78H 00H<br />
●Reset All Controllers (Controller number 121)<br />
status 2nd byte 3rd byte<br />
BnH 79H 00H<br />
101<br />
Appendices
MIDI Implementation<br />
●Omni Off (Controller number 124)<br />
status 2nd byte 3rd byte<br />
BnH 7CH 00H<br />
* The same processing will be done as when an All Note Off message is received.<br />
●Omni On (Controller number 125)<br />
status 2nd byte 3rd byte<br />
BnH 7DH 00H<br />
* The same processing will be done as when an All Note Off message is received.<br />
●Mono (Controller number 126)<br />
status 2nd byte 3rd byte<br />
BnH 7EH mmH<br />
mm=mono number: 00H–10H (0–16)<br />
* The same processing will be done as when an All Note Off message is received.<br />
●Poly (Controller number 127)<br />
status 2nd byte 3rd byte<br />
BnH 7FH 00H<br />
* The same processing will be done as when an All Note Off message is received.<br />
■System Exclusive messages<br />
status data byte status<br />
F0H iiH, ddH, ......, eeH F7H<br />
F0H: System Exclusive message status<br />
ii = ID number: This is the ID number (manufacturer ID) that specifies the<br />
manufacturer whose exclusive message this is. <strong>Roland</strong>’s manufacturer<br />
ID is 41H.ID numbers 7EH and 7FH are defined in an expansion of the<br />
MIDI standard as Universal Non-realtime messages (7EH) and<br />
Universal Realtime Messages (7FH).<br />
dd,..., ee = data: 00H–7FH (0–127)<br />
F7H: EOX (End Of Exclusive)<br />
3.2 Messages not recorded during recording<br />
■Channel Mode messages<br />
●Local On/Off (Controller number 122)<br />
status 2nd byte 3rd byte<br />
BnH 7AH 00H<br />
vv=value: 00H,7FH (Local off, Local on)<br />
●All Note Off (Controller number 123)<br />
status 2nd byte 3rd byte<br />
BnH 7BH 00H<br />
* When an All Note Off message is received, all notes of the corresponding channel that<br />
are on will be sent Note Off’s, and the resulting Note Off messages will be recorded.<br />
3.3 Messages acknowledged for synchronization<br />
■System Common messages<br />
●Song Position Pointer<br />
status 2nd byte 3rd byte<br />
F2H mmH llH<br />
mm,ll=value: 00 00H–7F 7FH (0–16383)<br />
■System Realtime messages<br />
●Timing Clock<br />
status<br />
F8H<br />
* This message will be received if the Sync Mode parameter is SLAVE.<br />
102<br />
●Start<br />
status<br />
FAH<br />
* This message will be received if the Sync Mode parameter is SLAVE or REMOTE.<br />
●Continue<br />
status<br />
FBH<br />
* This message will be received if the Sync Mode parameter is SLAVE or REMOTE.<br />
●Stop<br />
status<br />
FCH<br />
* This message will be received if the Sync Mode parameter is SLAVE or REMOTE.<br />
4. Data transmission (Sequencer section)<br />
4.1 Recorded messages are transmitted during<br />
playback.<br />
4.2 If the Through parameter is ON, messages<br />
received (except for System Common messages<br />
and System Realtime messages) will be<br />
transmitted.<br />
4.3 Messages that are generated and transmitted<br />
4.3.1 Messages automatically generated by the system<br />
■Channel Mode messages<br />
●Omni Off (Controller number 124)<br />
status 2nd byte 3rd byte<br />
BnH 7CH 00H<br />
* At start-up, this message is transmitted to all channels.<br />
●Poly (Controller number 127)<br />
status 2nd byte 3rd byte<br />
BnH 7FH 00H<br />
* At start-up, this message is transmitted to all channels.<br />
4.3.2 Messages generated and transmitted when the<br />
Sync Out is ON<br />
■System Common messages<br />
●Song Position Pointer<br />
status 2nd byte 3rd byte<br />
F2H mmH llH<br />
mm,ll=value: 00 00H–7F 7FH (0–16383)<br />
* This message is transmitted if the Sync out is ON. It is not transmitted when the D-<br />
FIELD is set to VINYL.<br />
■System Realtime messages<br />
●Timing Clock<br />
status<br />
F8H<br />
* This message is transmitted if the Sync out is ON. It is not transmitted when the D-<br />
FIELD is set to VINYL.
●Start<br />
status<br />
FAH<br />
* This message is transmitted if the Sync out is ON.<br />
●Continue<br />
status<br />
FBH<br />
* This message is transmitted if the Sync out is ON.<br />
●Stop<br />
status<br />
FCH<br />
* This message is transmitted if the Sync out is ON.<br />
5. Parameter address map<br />
* For addresses marked by #, the data is transmitted in two parts. For example, the<br />
hexadecimal data ABH would be divided into 0AH and 0BH, and transmitted in this<br />
order.<br />
* Addresses for which the Description field is listed as “Reserved” have no meaning for<br />
the D2. They will be ignored.<br />
■1. D2 (Model ID=00H 0BH)<br />
■ Outline<br />
The following is an outline of the address manp for Exclusive messages.<br />
Start<br />
Address(H) Block Sub Block Reference<br />
=========== ==================== =========================== =========<br />
00 00 00 00 +------------------+......................................+-------+<br />
| System common | | 1-1-1 |<br />
+------------------+......................................+-------+<br />
+------------------+.....+----------+.....................+-------+<br />
| Scale tune | | Part 1 | | 1-1-2 |<br />
+------------------+. +----------+.....................+-------+<br />
: : . | : |<br />
: : . +----------+<br />
: : . | Part 7 |<br />
: : .+----------+<br />
01 00 00 00 +------------------+.....+----------+.....................+-------+<br />
| Part Info | | Common | | 1-2-1 |<br />
| | +----------+.....................+-------+<br />
+------------------+. +----------+.....................+-------+<br />
: : . | Part 1 | | 1-2-2 |<br />
: : . +----------+.....................+-------+<br />
: : . | : |<br />
: : . +----------+<br />
: : . | Part 7 |<br />
: : . +----------+<br />
: : . +----------+<br />
: : . | Part R |<br />
: : .+----------+<br />
02 00 00 00 +------------------+.....+----------+.....+----------+....+-------+<br />
| Patch | | Part 1 | | Common | | 1-3-1 |<br />
| | +----------+. +----------+....+-------+<br />
+------------------+.. | : | . +----------+....+-------+<br />
: : . +----------+ . | Tone 1 | | 1-3-2 |<br />
: : . | Part 7 | . +----------+....+-------+<br />
: : .+----------+ . | : |<br />
: : . +----------+<br />
: : . | Tone 4 |<br />
: : .+----------+<br />
02 09 00 00 +------------------+.....+----------+.....................+-------+<br />
| | | Common | | 1-4-1 |<br />
| Rhythm Set | +----------+.....................+-------+<br />
+------------------+. +----------+.....................+-------+<br />
. | Note# 35 | | 1-4-2 |<br />
. +----------+.....................+-------+<br />
. | : |<br />
. +----------+<br />
. | Note# 98 |<br />
.+----------+<br />
■1-1.System<br />
+——————————————————————————————————————————————————————————————————————————————+<br />
| Offset | |<br />
| Address | Description |<br />
|—————————————+————————————————————————————————————————————————————————————————|<br />
| 00 00 | System Common 1—1—1 |<br />
| 10 00 | Part 1 Scale Tune 1—1—2 |<br />
| 11 00 | Part 2 Scale Tune |<br />
| : | |<br />
| 16 00 | Part 7 Scale Tune |<br />
+——————————————————————————————————————————————————————————————————————————————+<br />
■1-1-1.System Common<br />
+——————————————————————————————————————————————————————————————————————————————+<br />
| Offset | | |<br />
| Address | Size | Description Data (Value) |<br />
|—————————————+————————————————————————————————————————————————————————————————|<br />
| 00 00—00 05 | 0aaa aaaa | Reserved —— |<br />
|—————————————+———————————+————————————————————————————————————————————————————|<br />
| 00 06 | 0aaa aaaa | Master Tune 0 — 126 *1 |<br />
| 00 07 | 0000 000a | Scale Tune Switch 0 — 1 (OFF,ON) |<br />
| 00 08 | 0000 000a | MFX Switch 0 — 1 (OFF,ON) |<br />
| 00 09 | 0000 000a | Delay Switch 0 — 1 (OFF,ON) |<br />
| 00 0A | 0000 000a | Reverb Switch 0 — 1 (OFF,ON) |<br />
| 00 0B | 0000 000a | Patch Remain 0 — 1 (OFF,ON) |<br />
|—————————————+———————————+————————————————————————————————————————————————————|<br />
| 00 0C—00 13 | 0aaa aaaa | Reserved —— |<br />
|—————————————+———————————+————————————————————————————————————————————————————|<br />
| 00 14 | 0000 000a | Receive Program Change Switch 0 — 1 (OFF,ON) |<br />
| 00 15 | 0000 000a | Receive Bank Select Switch 0 — 1 (OFF,ON) |<br />
|—————————————+———————————+————————————————————————————————————————————————————|<br />
| 00 16—00 27 | 0aaa aaaa | Reserved —— |<br />
|—————————————+———————————+————————————————————————————————————————————————————|<br />
| 00 28 | 0000 000a | Transmit Program Change Switch 0 — 1 (OFF,ON) |<br />
| 00 29 | 0000 000a | Transmit Bank Select Switch 0 — 1 (OFF,ON) |<br />
|—————————————+———————————+————————————————————————————————————————————————————|<br />
| 00 2A—00 61 | 0aaa aaaa | Reserved —— |<br />
|—————————————+————————————————————————————————————————————————————————————————|<br />
| Total size | 00 00 00 62 |<br />
+——————————————————————————————————————————————————————————————————————————————+<br />
* 1: 427.4 - 452.6<br />
■1-1-2.Scale Tune<br />
MIDI Implementation<br />
+——————————————————————————————————————————————————————————————————————————————+<br />
| Offset | | |<br />
| Address | Size | Description Data (Value) |<br />
|—————————————+————————————————————————————————————————————————————————————————|<br />
| 00 00 | 0aaa aaaa | Scale Tune for C 0 — 127 (—64 — +63)|<br />
| 00 01 | 0aaa aaaa | Scale Tune for C# 0 — 127 (—64 — +63)|<br />
| 00 02 | 0aaa aaaa | Scale Tune for D 0 — 127 (—64 — +63)|<br />
| 00 03 | 0aaa aaaa | Scale Tune for D# 0 — 127 (—64 — +63)|<br />
| 00 04 | 0aaa aaaa | Scale Tune for E 0 — 127 (—64 — +63)|<br />
| 00 05 | 0aaa aaaa | Scale Tune for F 0 — 127 (—64 — +63)|<br />
| 00 06 | 0aaa aaaa | Scale Tune for F# 0 — 127 (—64 — +63)|<br />
| 00 07 | 0aaa aaaa | Scale Tune for G 0 — 127 (—64 — +63)|<br />
| 00 08 | 0aaa aaaa | Scale Tune for G# 0 — 127 (—64 — +63)|<br />
| 00 09 | 0aaa aaaa | Scale Tune for A 0 — 127 (—64 — +63)|<br />
| 00 0A | 0aaa aaaa | Scale Tune for A# 0 — 127 (—64 — +63)|<br />
| 00 0B | 0aaa aaaa | Scale Tune for B 0 — 127 (—64 — +63)|<br />
|—————————————+————————————————————————————————————————————————————————————————|<br />
| Total size | 00 00 00 0C |<br />
+——————————————————————————————————————————————————————————————————————————————+<br />
■1-2.Part Info<br />
+——————————————————————————————————————————————————————————————————————————————+<br />
| Offset | |<br />
| Address | Description |<br />
|—————————————+————————————————————————————————————————————————————————————————|<br />
| 00 00 | Part Info Common 1—2—1 |<br />
| 10 00 | Part Info Part 1 1—2—2 |<br />
| 11 00 | Part Info Part 2 |<br />
| : | |<br />
| 16 00 | Part Info Part 7 |<br />
| 19 00 | Part Info Part R |<br />
+——————————————————————————————————————————————————————————————————————————————+<br />
■1-2-1.Part Info Common<br />
+——————————————————————————————————————————————————————————————————————————————+<br />
| Offset | | |<br />
| Address | Size | Description Data (Value) |<br />
|—————————————+———————————+————————————————————————————————————————————————————|<br />
| 00 00—00 0C | 0aaa aaaa | Reserved —— |<br />
|—————————————+———————————+————————————————————————————————————————————————————|<br />
| 00 0D | 00aa aaaa | MFX Type 0 — 24 (1 — 25) |<br />
| 00 0E | 0aaa aaaa | MFX CTRL 1 0 — 127 |<br />
| 00 0F | 0aaa aaaa | MFX CTRL 2 0 — 127 |<br />
| 00 10 | 0aaa aaaa | MFX CTRL 3 0 — 127 |<br />
| 00 11 | 0aaa aaaa | MFX CTRL 4 0 — 127 |<br />
| 00 12 | 0aaa aaaa | MFX CTRL 5 0 — 127 |<br />
| 00 13 | 0aaa aaaa | MFX CTRL 6 0 — 127 |<br />
| 00 14 | 0aaa aaaa | MFX CTRL 7 0 — 127 |<br />
| 00 15 | 0aaa aaaa | MFX CTRL 8 0 — 127 |<br />
| 00 16 | 0aaa aaaa | MFX CTRL 9 0 — 127 |<br />
| 00 17 | 0aaa aaaa | MFX CTRL 10 0 — 127 |<br />
| 00 18 | 0aaa aaaa | MFX CTRL 11 0 — 127 |<br />
|—————————————+———————————+————————————————————————————————————————————————————|<br />
| 00 1A—00 1B | 0aaa aaaa | Reserved —— |<br />
|—————————————+———————————+————————————————————————————————————————————————————|<br />
| 00 1C | 0aaa aaaa | MFX Delay Send Level 0 — 127 |<br />
| 00 1D | 0aaa aaaa | MFX Reverb Send Level 0 — 127 |<br />
|—————————————+———————————+————————————————————————————————————————————————————|<br />
| 00 1E—00 21 | 0aaa aaaa | Reserved —— |<br />
|—————————————+———————————+————————————————————————————————————————————————————|<br />
| 00 22 | 0aaa aaaa | Delay Level 0 — 127 |<br />
| 00 23 | 0000 000a | Delay Type 0 — 1 *1 |<br />
| 00 24 | 0aaa aaaa | Delay HF Damp 0 — 17 *4 |<br />
| 00 25 | 0aaa aaaa | Delay Time 0 — 120 |<br />
| 00 26 | 0aaa aaaa | Delay Feedback Level 0 — 98 |<br />
| 00 27 | 0000 00aa | Delay Output Assign 0 — 2 *2 |<br />
| 00 28 | 0000 0aaa | Reverb Type 0 — 5 *3 |<br />
| 00 29 | 0aaa aaaa | Reverb Level 0 — 127 |<br />
| 00 2A | 0aaa aaaa | Reverb Time 0 — 127 |<br />
| 00 2B | 000a aaaa | Reverb HF Damp 0 — 17 *4 |<br />
|—————————————+———————————+————————————————————————————————————————————————————|<br />
| 00 0C—00 2F | 0aaa aaaa | Reserved —— |<br />
|—————————————+———————————+————————————————————————————————————————————————————|<br />
| 00 30 | 0aaa aaaa | Voice Reserve 1 0 — 64 |<br />
| 00 31 | 0aaa aaaa | Voice Reserve 2 0 — 64 |<br />
| 00 32 | 0aaa aaaa | Voice Reserve 3 0 — 64 |<br />
| 00 33 | 0aaa aaaa | Voice Reserve 4 0 — 64 |<br />
| 00 34 | 0aaa aaaa | Voice Reserve 5 0 — 64 |<br />
| 00 35 | 0aaa aaaa | Voice Reserve 6 0 — 64 |<br />
| 00 36 | 0aaa aaaa | Voice Reserve 7 0 — 64 |<br />
|—————————————+———————————+————————————————————————————————————————————————————|<br />
| 00 37—00 38 | 0aaa aaaa | Reserved —— |<br />
|—————————————+———————————+————————————————————————————————————————————————————|<br />
| 00 39 | 0aaa aaaa | Voice Reserve R 0 — 64 |<br />
|—————————————+———————————+————————————————————————————————————————————————————|<br />
| 00 3A—00 43 | 0aaa aaaa | Reserved —— |<br />
|—————————————+————————————————————————————————————————————————————————————————|<br />
| Total size | 00 00 00 44 |<br />
+——————————————————————————————————————————————————————————————————————————————+<br />
* 1: SHORT, LONG<br />
* 2: LINE, REV, LINE+REV<br />
* 3: ROOM1, ROOM2, STAGE1, STAGE2, HALL1, HALL2<br />
* 4: 200, 250, 315, 400, 500, 630, 800, 1000, 1250, 1600, 2000,<br />
* 2500, 3150, 4000, 5000, 6300, 8000, BYPASS<br />
================================================================================<br />
MFX CTRL Value Display<br />
--------------------------------------------------------------------------------<br />
Type 0: 4 BAND EQ<br />
CTRL1 Low Freq 0 - 1 200,400<br />
CTRL2 Low Gain 0 - 30 -15 - +15<br />
CTRL3 High Freq 0 - 1 4000,8000<br />
CTRL4 High Gain 0 - 30 -15 - +15<br />
CTRL5 Peak1 Freq 0 - 16 *1<br />
CTRL6 Peak1 Q 0 - 4 0.5,1.0,2.0,4.0,8.0<br />
CTRL7 Peak1 Gain 0 - 30 -15 - +15<br />
CTRL8 Peak2 Freq 0 - 16 *1<br />
CTRL9 Peak2 Q 0 - 4 0.5,1.0,2.0,4.0,8.0<br />
CTRL10 Peak2 Gain 0 - 30 -15 - +15<br />
CTRL11 Output Level 0 - 127<br />
--------------------------------------------------------------------------------<br />
Type 1: SPECTRUM<br />
CTRL1 Low-High 0 - 30 -15 - +15<br />
CTRL2 Middle Gain 0 - 30 -15 - +15<br />
CTRL3 Width 0 - 4 1 - 5<br />
CTRL4 Output Pan 0 - 127 L64 - 63R<br />
CTRL5 Output Level 0 - 127<br />
--------------------------------------------------------------------------------<br />
Type 2: ENHANCER<br />
CTRL1 Sens 0 - 127<br />
CTRL2 Mix 0 - 127<br />
CTRL3 Low Gain 0 - 30 -15 - +15<br />
CTRL4 High Gain 0 - 30 -15 - +15<br />
CTRL5 Output Level 0 - 127<br />
--------------------------------------------------------------------------------<br />
Type 3: OVERDRIVE<br />
CTRL1 Input Level 0 - 127<br />
103<br />
Appendices
MIDI Implementation<br />
CTRL2 Drive 0 - 127<br />
CTRL3 AMP Type 0 - 3 SMALL,BUILTIN,2STACK,3STACK<br />
CTRL4 Output Pan 0 - 127 L64 - 63R<br />
CTRL5 Output Level 0 - 127<br />
--------------------------------------------------------------------------------<br />
Type 4: DISTORTION<br />
CTRL1 Input Level 0 - 127<br />
CTRL2 Drive 0 - 127<br />
CTRL3 AMP Type 0 - 3 SMALL,BUILTIN,2STACK,3STACK<br />
CTRL4 Output Pan 0 - 127 L64 - 63R<br />
CTRL5 Output Level 0 - 127<br />
--------------------------------------------------------------------------------<br />
Type 5: Lo-Fi<br />
CTRL1 BitDown 0 - 7<br />
CTRL2 S-Rate Down 0 - 3 32,16,8,4<br />
CTRL3 Post Gain 0 - 3 0,+6,+12,+18<br />
CTRL4 Low Gain 0 - 30 -15 - +15<br />
CTRL5 High Gain 0 - 30 -15 - +15<br />
CTRL6 Output 0 - 1 MONO,STEREO<br />
CTRL7 Output Level 0 - 127<br />
--------------------------------------------------------------------------------<br />
Type 6: NOISE<br />
CTRL1 Noise Type 0 - 17 1 - 18<br />
CTRL2 Noise Level 0 - 127<br />
CTRL3 N Filter 0 - 17 *1,BYPASS<br />
CTRL4 Lo-Fi Level 0 - 127<br />
CTRL5 Output Pan 0 - 127 L64 - 63R<br />
CTRL6 Output Level 0 - 127<br />
--------------------------------------------------------------------------------<br />
Type 7: RADIO TUNG<br />
CTRL1 Radio Detune 0 - 127<br />
CTRL2 Noise Level 0 - 127<br />
CTRL3 Low Gain 0 - 30 -15 - +15<br />
CTRL4 High Gain 0 - 30 -15 - +15<br />
CTRL5 Output 0 - 1 MONO,STEREO<br />
CTRL6 Output Level 0 - 127<br />
--------------------------------------------------------------------------------<br />
Type 8: PHONOGRAPH<br />
CTRL1 Disc Type 0 - 2 LP,EP,SP<br />
CTRL2 D Noise Level 0 - 127<br />
CTRL3 Depth 0 - 20 0 - +20<br />
CTRL4 Output Pan 0 - 127 L64 - 63R<br />
CTRL5 Output Level 0 - 127<br />
--------------------------------------------------------------------------------<br />
Type 9: COMPRESSOR<br />
CTRL1 Attack 0 - 127<br />
CTRL2 Sustain 0 - 127<br />
CTRL3 Post Gain 0 - 3 0,+6,+12,+18<br />
CTRL4 Low Gain 0 - 30 -15 - +15<br />
CTRL5 High Gain 0 - 30 -15 - +15<br />
CTRL6 Output Level 0 - 127<br />
--------------------------------------------------------------------------------<br />
Type 10: LIMITER<br />
CTRL1 Threshold 0 - 127<br />
CTRL2 Ratio 0 - 3 1.5:1,2.0:1,4.0:1,100:1<br />
CTRL3 Release 0 - 127<br />
CTRL4 Post Gain 0 - 3 0,+6,+12,+18<br />
CTRL5 Output Pan 0 - 127 L64 - 63R<br />
CTRL6 Output Level 0 - 127<br />
--------------------------------------------------------------------------------<br />
Type 11: SLICER<br />
CTRL1 Timing Pattern 0 - 33<br />
CTRL2 Rate 0 - 2 1/4,1/2,1/1<br />
CTRL3 Accent Pattern 0 - 15<br />
CTRL4 Accent Level 0 - 127<br />
CTRL5 Attack 0 - 9 1 - 10<br />
CTRL6 Output Level 0 - 127<br />
--------------------------------------------------------------------------------<br />
Type 12: TREMOLO<br />
CTRL1 LFO Type 0 - 5 TRI,TRP,SIN,SAW1,SAW2,SQR<br />
CTRL2 Rate 0 - 117 0.1 - 10.00,*2<br />
CTRL3 Depth 0 - 127<br />
CTRL4 Low Gain 0 - 30 -15 - +15<br />
CTRL5 High Gain 0 - 30 -15 - +15<br />
CTRL6 Output Level 0 - 127<br />
--------------------------------------------------------------------------------<br />
Type 13: PHASER<br />
CTRL1 <strong>Manual</strong> 0 - 125 100 - 8000<br />
CTRL2 Rate 0 - 117 0.1 - 10.00,*2<br />
CTRL3 Depth 0 - 127<br />
CTRL4 Resonance 0 - 127<br />
CTRL5 Mix 0 - 127<br />
CTRL6 Output Pan 0 - 127 L64 - 63R<br />
CTRL7 Output Level 0 - 127<br />
--------------------------------------------------------------------------------<br />
Type 14: CHORUS<br />
CTRL1 Pre Delay 0 - 125 0.0 - 100<br />
CTRL2 Rate 0 - 117 0.1 - 10.00,*2<br />
CTRL3 Depth 0 - 127<br />
CTRL4 Phase 0 - 90 0 - 180<br />
CTRL5 Filter Type 0 - 2 OFF,LPF,HPF<br />
CTRL6 Cutoff 0 - 16 *1<br />
CTRL7 Balance 0 - 100 D100:0W - D0:100W<br />
CTRL8 Output Level 0 - 127<br />
--------------------------------------------------------------------------------<br />
Type 15: SPACE-D<br />
CTRL1 Pre Delay 0 - 125 0.0 - 100<br />
CTRL2 Rate 0 - 117 0.1 - 10.00,*2<br />
CTRL3 Depth 0 - 127<br />
CTRL4 Phase 0 - 90 0 - 180<br />
CTRL5 Low Gain 0 - 30 -15 - +15<br />
CTRL6 High Gain 0 - 30 -15 - +15<br />
CTRL7 Balance 0 - 100 D100:0W - D0:100W<br />
CTRL8 Output Level 0 - 127<br />
--------------------------------------------------------------------------------<br />
Type 16: TETRA CHORUS<br />
CTRL1 Pre Delay 0 - 125 0.0 - 100<br />
CTRL2 Rate 0 - 117 0.1 - 10.00,*2<br />
CTRL3 Depth 0 - 127<br />
CTRL4 Pre Dly Devi 0 - 20<br />
CTRL5 Depth Devi 0 - 40 -20 - +20<br />
CTRL6 Pan Devi 0 - 20<br />
CTRL7 Balance 0 - 100 D100:0W - D0:100W<br />
CTRL8 Output Level 0 - 127<br />
--------------------------------------------------------------------------------<br />
Type 17: FLANGER<br />
CTRL1 Pre Delay 0 - 125 0.0 - 100<br />
CTRL2 Rate 0 - 117 0.1 - 10.00,*2<br />
CTRL3 Depth 0 - 127<br />
CTRL4 Feedback 0 - 98 0 - +98<br />
CTRL5 Phase 0 - 90 0 - 180<br />
CTRL6 Filter Type 0 - 2 OFF,LPF,HPF<br />
CTRL7 Cutoff 0 - 16 *1<br />
CTRL8 Balance 0 - 100 D100:0W - D0:100W<br />
CTRL9 Output Level 0 - 127<br />
--------------------------------------------------------------------------------<br />
Type 18: ST FLANGER<br />
CTRL1 Pre Delay 0 - 125 0.0 - 100<br />
CTRL2 Rate 0 - 117 0.1 - 10.00,*2<br />
CTRL3 Depth 0 - 127<br />
CTRL4 Feedback 0 - 98 0 - +98<br />
CTRL5 Phase 0 - 90 0 - 180<br />
CTRL6 Step Rate 0 - 125 0.05 - 10.00,*3<br />
CTRL7 Balance 0 - 100 D100:0W - D0:100W<br />
CTRL8 Output Level 0 - 127<br />
--------------------------------------------------------------------------------<br />
Type 19: SHORT DELAY<br />
CTRL1 Time L 0 - 103 0.1 - 190<br />
104<br />
CTRL2 Time R 0 - 103 0.1 - 190<br />
CTRL3 HF Damp 0 - 17 *1,BYPASS<br />
CTRL4 Feedback 0 - 98 0 - +98<br />
CTRL5 Auto Pan 0 - 18 OFF,*2<br />
CTRL6 Low Gain 0 - 30 -15 - +15<br />
CTRL7 High Gain 0 - 30 -15 - +15<br />
CTRL8 Balance 0 - 100 D100:0W - D0:100W<br />
CTRL9 Output Level 0 - 127<br />
--------------------------------------------------------------------------------<br />
Type 20: AUTO PAN<br />
CTRL1 LFO type 0 - 5 TRI,TRP,SIN,SAW1,SAW2,SQR<br />
CTRL2 Rate 0 - 117 0.1 - 10.00,*2<br />
CTRL3 Bass Sense 0 - 2 OFF,MODE1,MODE2<br />
CTRL4 Depth 0 - 127<br />
CTRL5 Low Gain 0 - 30 -15 - +15<br />
CTRL6 High Gain 0 - 30 -15 - +15<br />
CTRL7 Output Level 0 - 127<br />
--------------------------------------------------------------------------------<br />
Type 21: FB PITCH SHIFTER<br />
CTRL1 Coarse 0 - 36 -24 - +12<br />
CTRL2 Fine 0 - 100 -100 - +100<br />
CTRL3 Output Pan 0 - 127<br />
CTRL4 Pre Delay 0 - 125 0.0 - 100<br />
CTRL5 Mode 0 - 4 1 - 5<br />
CTRL6 Feedback 0 - 98 0 - +98<br />
CTRL7 Low Gain 0 - 30 -15 - +15<br />
CTRL8 High Gain 0 - 30 -15 - +15<br />
CTRL9 Balance 0 - 100 D100:0W - D0:100W<br />
CTRL10 Output Level 0 - 127<br />
--------------------------------------------------------------------------------<br />
Type 22: REVERB<br />
CTRL1 Rev Type 0 - 5 ROOM1,ROOM2,STAGE1,STAGE2,<br />
HALL1,HALL2<br />
CTRL2 Time 0 - 127<br />
CTRL3 HF Damp 0 - 17 *1,BYPASS<br />
CTRL4 Balance 0 - 100 D100:0W - D0:100W<br />
CTRL5 Output Level 0 - 127<br />
--------------------------------------------------------------------------------<br />
Type 23: GATE REVERB<br />
CTRL1 Gate Type 0 - 3 NORMAL,REVERSE,SWEEP1,SWEEP2<br />
CTRL2 Gate Time 0 - 65 5 - 330<br />
CTRL3 Balance 0 - 100 D100:0W - D0:100W<br />
CTRL4 Output Level 0 - 127<br />
--------------------------------------------------------------------------------<br />
Type 24: ISOLATOR<br />
CTRL1 Low gain 0 - 127<br />
CTRL2 Mid gain 0 - 127<br />
CTRL3 High gain 0 - 127<br />
CTRL4 Output Pan 0 - 127 L64 - 63R<br />
CTRL5 Output Level 0 - 127<br />
================================================================================<br />
* 1: 200, 250, 315, 400, 500, 630, 800, 1000, 1250,<br />
* 1600, 2000, 2500, 3150, 4000, 5000, 6300, 8000<br />
* 2: 1/16, 1/12, 3/32, 1/8, 1/6, 3/16, 1/4, 1/3, 3/8,<br />
* 1/2, 2/3, 3/4, 1/1, 2MES, 3MES, 4MES, 8MES, 16MES<br />
* 3: 1/16, 1/12, 3/32, 1/8, 1/6, 3/16, 1/4, 1/3, 3/8, 1/2<br />
■1-2-2.Part Info Part<br />
+——————————————————————————————————————————————————————————————————————————————+<br />
| Offset | | |<br />
| Address | Size | Description Data (Value) |<br />
|—————————————+————————————————————————————————————————————————————————————————|<br />
| 00 00 | 0000 000a | Receive Switch 0 — 1 (OFF,ON) |<br />
|—————————————+———————————+————————————————————————————————————————————————————|<br />
| 00 01 | 0aaa aaaa | Reserved —— |<br />
|—————————————+———————————+————————————————————————————————————————————————————|<br />
| 00 02 | 0000 00aa | Patch Group Type 0 — 3 *2 |<br />
| 00 03 | 0aaa aaaa | Patch Group ID 1 — 9 *2 |<br />
|# 00 04 | 0000 aaaa | Patch Number 0 — 127 *2 |<br />
| | 0000 bbbb | (001 — 128)|<br />
| 00 06 | 0aaa aaaa | Part Level 0 — 127 |<br />
| 00 07 | 0aaa aaaa | Part Pan 0 — 127 (L64 — 63R)|<br />
| 00 08 | 0aaa aaaa | Part Key Shift 0 — 96 (—48 — +48)|<br />
| 00 09 | 0aaa aaaa | Part Fine Tune 0 — 100 (—50 — +50)|<br />
| 00 0A | 0000 0aaa | MFX Switch 0 — 4 *1 |<br />
|—————————————+———————————+————————————————————————————————————————————————————|<br />
| 00 0B | 0aaa aaaa | Reserved —— |<br />
|—————————————+———————————+————————————————————————————————————————————————————|<br />
| 00 0C | 0aaa aaaa | Delay Send Level 0 — 127 |<br />
| 00 0D | 0aaa aaaa | Reverb Send Level 0 — 127 |<br />
|—————————————+———————————+————————————————————————————————————————————————————|<br />
| 00 0E—00 19 | 0aaa aaaa | Reserved —— |<br />
|—————————————+————————————————————————————————————————————————————————————————|<br />
| Total size | 00 00 00 1A |<br />
+——————————————————————————————————————————————————————————————————————————————+<br />
* 1: OFF, ON, Reserved, Reserved, RHY<br />
* 2: Refer to the chart below<br />
[Patch]<br />
+---------------++----------------+--------------+------------++-----------+-----------+<br />
| || | | ||Bank Select| |<br />
|Patch ||Patch Group Type|Patch Group ID|Patch Number|| MSB | LSB |Program No.|<br />
|---------------++----------------+--------------+------------++-----+-----+-----------+<br />
|P-A001 - P-A128|| 0| 3| 0 - 127|| 81| 0| 1 - 128|<br />
|P-B001 - P-B128|| 0| 4| 0 - 127|| 81| 1| 1 - 128|<br />
|P-C001 - P-C128|| 0| 5| 0 - 127|| 81| 2| 1 - 128|<br />
|P-D001 - P-D128|| 0| 6| 0 - 127|| 81| 3| 1 - 128|<br />
|P-E001 - P-E088|| 0| 7| 0 - 87|| 84| 0| 1 - 88|<br />
|P-U001 - P-U128|| 3| 1| 0 - 127|| 85| 0| 1 - 128|<br />
|P-U129 - P-U256|| 3| 2| 0 - 127|| 85| 1| 1 - 128|<br />
+---------------++----------------+--------------+------------++-----+-----+-----------+<br />
[Rhythm set]<br />
+-------------++----------------+--------------+------------++-----------+-----------+<br />
| || | | ||Bank Select| |<br />
|Rhythm set ||Patch Group Type|Patch Group ID|Patch Number|| MSB | LSB |Program No.|<br />
|-------------++----------------+--------------+------------++-----+-----+-----------+<br />
|R-A01 - R-A26|| 0| 3| 0 - 25|| 81| 0| 1 - 26|<br />
|R-B01 - R-B04|| 0| 4| 0 - 3|| 84| 0| 1 - 4|<br />
|R-U01 - R-U20|| 3| 1| 0 - 19|| 85| 0| 1 - 20|<br />
+-------------++----------------+--------------+------------++-----+-----+-----------+
■1-3.Patch<br />
+——————————————————————————————————————————————————————————————————————————————+<br />
| Offset | |<br />
| Address | Description |<br />
|—————————————+————————————————————————————————————————————————————————————————|<br />
| 00 00 | Patch Common 1—3—1 |<br />
| 10 00 | Patch Tone 1 1—3—2 |<br />
| 12 00 | Patch Tone 2 |<br />
| 14 00 | Patch Tone 3 |<br />
| 16 00 | Patch Tone 4 |<br />
+——————————————————————————————————————————————————————————————————————————————+<br />
■1-3-1.Patch Common<br />
+——————————————————————————————————————————————————————————————————————————————+<br />
| Offset | | |<br />
| Address | Size | Description Data (Value) |<br />
|—————————————+————————————————————————————————————————————————————————————————|<br />
| 00 00 | 0aaa aaaa | Patch Name 1 32 — 125 |<br />
| 00 01 | 0aaa aaaa | Patch Name 2 32 — 125 |<br />
| 00 02 | 0aaa aaaa | Patch Name 3 32 — 125 |<br />
| 00 03 | 0aaa aaaa | Patch Name 4 32 — 125 |<br />
| 00 04 | 0aaa aaaa | Patch Name 5 32 — 125 |<br />
| 00 05 | 0aaa aaaa | Patch Name 6 32 — 125 |<br />
| 00 06 | 0aaa aaaa | Patch Name 7 32 — 125 |<br />
| 00 07 | 0aaa aaaa | Patch Name 8 32 — 125 |<br />
| 00 08 | 0aaa aaaa | Patch Name 9 32 — 125 |<br />
| 00 09 | 0aaa aaaa | Patch Name 10 32 — 125 |<br />
| 00 0A | 0aaa aaaa | Patch Name 11 32 — 125 |<br />
| 00 0B | 0aaa aaaa | Patch Name 12 32 — 125 |<br />
|—————————————+———————————+————————————————————————————————————————————————————|<br />
| 00 0C—00 30 | 0aaa aaaa | Reserved —— |<br />
|—————————————+———————————+————————————————————————————————————————————————————|<br />
| 00 31 | 0000 aaaa | Bend Range Up 0 — 12 |<br />
| 00 32 | 00aa aaaa | Bend Range Down 0 — 48 (0 — —48) |<br />
| 00 33 | 0000 000a | Solo Switch 0 — 1 (OFF,ON) |<br />
| 00 34 | 0000 000a | Solo Legato Switch 0 — 1 (OFF,ON) |<br />
| 00 35 | 0000 000a | Portamento Switch 0 — 1 (OFF,ON) |<br />
| 00 36 | 0000 000a | Portamento Mode 0 — 1 *1 |<br />
| 00 37 | 0000 000a | Portamento Type 0 — 1 (RATE,TIME)|<br />
| 00 38 | 0000 000a | Portamento Start 0 — 1 (PITCH,NOTE)|<br />
| 00 39 | 0aaa aaaa | Portamento Time 0 — 127 |<br />
|—————————————+———————————+————————————————————————————————————————————————————|<br />
| 00 3A—00 3F | 0aaa aaaa | Reserved —— |<br />
|—————————————+———————————+————————————————————————————————————————————————————|<br />
| 00 40 | 0000 000a | Velocity Range Switch 0 — 1 (OFF,ON) |<br />
|—————————————+———————————+————————————————————————————————————————————————————|<br />
| 00 41 | 0aaa aaaa | Reserved —— |<br />
|—————————————+———————————+————————————————————————————————————————————————————|<br />
| 00 42 | 0000 00aa | Stretch Tune Depth 0 — 3 (OFF,1 — 3)|<br />
| 00 43 | 0000 000a | Voice Priority 0 — 1 *2 |<br />
| 00 44 | 0000 aaaa | Structure Type 1/2 0 — 9 (1 — 10) |<br />
| 00 45 | 0000 00aa | Booster 1/2 0 — 3 *3 |<br />
| 00 46 | 0000 aaaa | Structure Type 3/4 0 — 9 (1 — 10) |<br />
| 00 47 | 0000 00aa | Booster 3/4 0 — 3 *3 |<br />
|—————————————+———————————+————————————————————————————————————————————————————|<br />
| 00 48—00 49 | 0aaa aaaa | Reserved —— |<br />
|—————————————+————————————————————————————————————————————————————————————————|<br />
| Total size | 00 00 00 4A |<br />
+——————————————————————————————————————————————————————————————————————————————+<br />
* 1: NORMAL, LEGATO<br />
* 2: LAST, LOUDEST<br />
* 3: 0, +6, +12, +18<br />
■1-3-2.Patch Tone<br />
+——————————————————————————————————————————————————————————————————————————————+<br />
| Offset | | |<br />
| Address | Size | Description Data (Value) |<br />
|—————————————+————————————————————————————————————————————————————————————————|<br />
| 00 00 | 0000 000a | Tone Switch 0 — 1 (OFF,ON) |<br />
| 00 01 | 0000 0000 | Wave Group Type 0 *1 |<br />
| 00 02 | 0000 00aa | Wave Group ID 1 — 3 *1 |<br />
|# 00 03 | 0000 aaaa | Wave Number 0 — 253 *1 |<br />
| | 0000 bbbb | |<br />
| 00 05 | 0000 00aa | Wave Gain 0 — 3 *2 |<br />
| 00 06 | 0000 000a | FXM Switch 0 — 1 (OFF,ON) |<br />
| 00 07 | 0000 00aa | FXM Color 0 — 3 (1 — 4) |<br />
| 00 08 | 0000 aaaa | FXM Depth 0 — 15 (1 — 16) |<br />
|—————————————+———————————+————————————————————————————————————————————————————|<br />
| 00 09—00 0A | 0aaa aaaa | Reserved —— |<br />
|—————————————+———————————+————————————————————————————————————————————————————|<br />
| 00 0B | 0aaa aaaa | Velocity Cross Fade 0 — 127 |<br />
| 00 0C | 0aaa aaaa | Velocity Range Lower 1 — 127 *3 |<br />
| 00 0D | 0aaa aaaa | Velocity Range Upper 1 — 127 *4 |<br />
| 00 0E | 0aaa aaaa | Keyboard Range Lower 0 — 127 *5 |<br />
| 00 0F | 0aaa aaaa | Keyboard Range Upper 0 — 127 *6 |<br />
|—————————————+———————————+————————————————————————————————————————————————————|<br />
| 00 10—00 14 | 0aaa aaaa | Reserved —— |<br />
|—————————————+———————————+————————————————————————————————————————————————————|<br />
| 00 15 | 000a aaaa | Modulation 1 Destination 0 — 15 *7 |<br />
| 00 16 | 0aaa aaaa | Modulation 1 Depth 0 — 126 (—63 — +63)|<br />
| 00 17 | 000a aaaa | Modulation 2 Destination 0 — 15 *7 |<br />
| 00 18 | 0aaa aaaa | Modulation 2 Depth 0 — 126 (—63 — +63)|<br />
| 00 19 | 000a aaaa | Modulation 3 Destination 0 — 15 *7 |<br />
| 00 1A | 0aaa aaaa | Modulation 3 Depth 0 — 126 (—63 — +63)|<br />
| 00 1B | 000a aaaa | Modulation 4 Destination 0 — 15 *7 |<br />
| 00 1C | 0aaa aaaa | Modulation 4 Depth 0 — 126 (—63 — +63)|<br />
| 00 1D | 000a aaaa | Pitch Bend 1 Destination 0 — 15 *7 |<br />
| 00 1E | 0aaa aaaa | Pitch Bend 1 Depth 0 — 126 (—63 — +63)|<br />
| 00 1F | 000a aaaa | Pitch Bend 2 Destination 0 — 15 *7 |<br />
| 00 20 | 0aaa aaaa | Pitch Bend 2 Depth 0 — 126 (—63 — +63)|<br />
| 00 21 | 000a aaaa | Pitch Bend 3 Destination 0 — 15 *7 |<br />
| 00 22 | 0aaa aaaa | Pitch Bend 3 Depth 0 — 126 (—63 — +63)|<br />
| 00 23 | 000a aaaa | Pitch Bend 4 Destination 0 — 15 *7 |<br />
| 00 24 | 0aaa aaaa | Pitch Bend 4 Depth 0 — 126 (—63 — +63)|<br />
| 00 25 | 000a aaaa | Aftertouch 1 Destination 0 — 15 *7 |<br />
| 00 26 | 0aaa aaaa | Aftertouch 1 Depth 0 — 126 (—63 — +63)|<br />
| 00 27 | 000a aaaa | Aftertouch 2 Destination 0 — 15 *7 |<br />
| 00 28 | 0aaa aaaa | Aftertouch 2 Depth 0 — 126 (—63 — +63)|<br />
| 00 29 | 000a aaaa | Aftertouch 3 Destination 0 — 15 *7 |<br />
| 00 2A | 0aaa aaaa | Aftertouch 3 Depth 0 — 126 (—63 — +63)|<br />
| 00 2B | 000a aaaa | Aftertouch 4 Destination 0 — 15 *7 |<br />
| 00 2C | 0aaa aaaa | Aftertouch 4 Depth 0 — 126 (—63 — +63)|<br />
|—————————————+———————————+————————————————————————————————————————————————————|<br />
| 00 2D | 0000 0aaa | LFO1 Waveform 0 — 7 *8 |<br />
| 00 2E | 0000 000a | LFO1 Key Sync 0 — 1 (OFF,ON) |<br />
| 00 2F | 0aaa aaaa | LFO1 Rate 0 — 127 |<br />
| 00 30 | 0000 0aaa | LFO1 Offset 0 — 4 *9 |<br />
| 00 31 | 0aaa aaaa | LFO1 Delay Time 0 — 127 |<br />
| 00 32 | 0000 00aa | LFO1 Fade Mode 0 — 3 *10 |<br />
| 00 33 | 0aaa aaaa | LFO1 Fade Time 0 — 127 |<br />
| 00 34 | 0000 000a | LFO1 Tempo Sync 0 — 1 (OFF,ON) |<br />
| 00 35 | 0000 0aaa | LFO2 Waveform 0 — 7 *8 |<br />
| 00 36 | 0000 000a | LFO2 Key Sync 0 — 1 (OFF,ON) |<br />
| 00 37 | 0aaa aaaa | LFO2 Rate 0 — 127 |<br />
| 00 38 | 0000 0aaa | LFO2 Offset 0 — 4 *9 |<br />
| 00 39 | 0aaa aaaa | LFO2 Delay Time 0 — 127 |<br />
| 00 3A | 0000 00aa | LFO2 Fade Mode 0 — 3 *10 |<br />
| 00 3B | 0aaa aaaa | LFO2 Fade Time 0 — 127 |<br />
| 00 3C | 0000 000a | LFO2 Tempo Sync 0 — 1 (OFF,ON) |<br />
|—————————————+———————————+————————————————————————————————————————————————————|<br />
| 00 3D | 0aaa aaaa | Coarse Tune 0 — 96 (—48 — +48)|<br />
| 00 3E | 0aaa aaaa | Fine Tune 0 — 100 (—50 — +50)|<br />
MIDI Implementation<br />
| 00 3F | 000a aaaa | Random Pitch Depth 0 — 30 *11 |<br />
| 00 40 | 0000 aaaa | Pitch Key Follow 0 — 15 *12 |<br />
| 00 41 | 000a aaaa | Pitch Envelope Depth 0 — 24 (—12 — +12)|<br />
| 00 42 | 0aaa aaaa | Pitch Envelope Velocity Sens 0 — 125 *13 |<br />
| 00 43 | 0000 aaaa | Pitch Envelope Velocity Time1 0 — 14 *14 |<br />
| 00 44 | 0000 aaaa | Pitch Envelope Velocity Time4 0 — 14 *14 |<br />
| 00 45 | 0000 aaaa | Pitch Envelope Time Key Follow 0 — 14 *14 |<br />
| 00 46 | 0aaa aaaa | Pitch Envelope Time 1 0 — 127 |<br />
| 00 47 | 0aaa aaaa | Pitch Envelope Time 2 0 — 127 |<br />
| 00 48 | 0aaa aaaa | Pitch Envelope Time 3 0 — 127 |<br />
| 00 49 | 0aaa aaaa | Pitch Envelope Time 4 0 — 127 |<br />
| 00 4A | 0aaa aaaa | Pitch Envelope Level 1 0 — 126 (—63 — +63)|<br />
| 00 4B | 0aaa aaaa | Pitch Envelope Level 2 0 — 126 (—63 — +63)|<br />
| 00 4C | 0aaa aaaa | Pitch Envelope Level 3 0 — 126 (—63 — +63)|<br />
| 00 4D | 0aaa aaaa | Pitch Envelope Level 4 0 — 126 (—63 — +63)|<br />
| 00 4E | 0aaa aaaa | Pitch LFO1 Depth 0 — 126 (—63 — +63)|<br />
| 00 4F | 0aaa aaaa | Pitch LFO2 Depth 0 — 126 (—63 — +63)|<br />
|—————————————+———————————+————————————————————————————————————————————————————|<br />
| 00 50 | 0000 0aaa | Filter Type 0 — 4 *15 |<br />
| 00 51 | 0aaa aaaa | Cutoff Frequency 0 — 127 |<br />
| 00 52 | 0000 aaaa | Cutoff Key Follow 0 — 15 *12 |<br />
| 00 53 | 0aaa aaaa | Resonance 0 — 127 |<br />
| 00 54 | 0aaa aaaa | Resonance Velocity Sens 0 — 125 *13 |<br />
| 00 55 | 0aaa aaaa | Filter Envelope Depth 0 — 126 (—63 — +63)|<br />
| 00 56 | 0000 0aaa | Filter Envelope Velocity Curve 0 — 6 (1 — 7) |<br />
| 00 57 | 0aaa aaaa | Filter Envelope Velocity Sens 0 — 125 *13 |<br />
| 00 58 | 0000 aaaa | Filter Envelope Velocity Time1 0 — 14 *14 |<br />
| 00 59 | 0000 aaaa | Filter Envelope Velocity Time4 0 — 14 *14 |<br />
| 00 5A | 0000 aaaa | Filter Envelope Time Keyfollow 0 — 14 *14 |<br />
| 00 5B | 0aaa aaaa | Filter Envelope Time 1 0 — 127 |<br />
| 00 5C | 0aaa aaaa | Filter Envelope Time 2 0 — 127 |<br />
| 00 5D | 0aaa aaaa | Filter Envelope Time 3 0 — 127 |<br />
| 00 5E | 0aaa aaaa | Filter Envelope Time 4 0 — 127 |<br />
| 00 5F | 0aaa aaaa | Filter Envelope Level 1 0 — 127 |<br />
| 00 60 | 0aaa aaaa | Filter Envelope Level 2 0 — 127 |<br />
| 00 61 | 0aaa aaaa | Filter Envelope Level 3 0 — 127 |<br />
| 00 62 | 0aaa aaaa | Filter Envelope Level 4 0 — 127 |<br />
| 00 63 | 0aaa aaaa | Filter LFO1 Depth 0 — 126 (—63 — +63)|<br />
| 00 64 | 0aaa aaaa | Filter LFO2 Depth 0 — 126 (—63 — +63)|<br />
|—————————————+———————————+————————————————————————————————————————————————————|<br />
| 00 65 | 0aaa aaaa | Tone Level 0 — 127 |<br />
| 00 66 | 0000 00aa | Bias Direction 0 — 3 *16 |<br />
| 00 67 | 0aaa aaaa | Bias Point 0 — 127 (C—1 — G9) |<br />
| 00 68 | 0000 aaaa | Bias Level 0 — 14 *14 |<br />
| 00 69 | 0000 0aaa | Amp Envelope Velocity Curve 0 — 6 (1 — 7) |<br />
| 00 6A | 0aaa aaaa | Amp Envelope Velocity Sens 0 — 125 *13 |<br />
| 00 6B | 0000 aaaa | Amp Envelope Velocity Time1 0 — 14 *14 |<br />
| 00 6C | 0000 aaaa | Amp Envelope Velocity Time4 0 — 14 *14 |<br />
| 00 6D | 0000 aaaa | Amp Envelope Time Keyfollow 0 — 14 *14 |<br />
| 00 6E | 0aaa aaaa | Amp Envelope Time 1 0 — 127 |<br />
| 00 6F | 0aaa aaaa | Amp Envelope Time 2 0 — 127 |<br />
| 00 70 | 0aaa aaaa | Amp Envelope Time 3 0 — 127 |<br />
| 00 71 | 0aaa aaaa | Amp Envelope Time 4 0 — 127 |<br />
| 00 72 | 0aaa aaaa | Amp Envelope Level 1 0 — 127 |<br />
| 00 73 | 0aaa aaaa | Amp Envelope Level 2 0 — 127 |<br />
| 00 74 | 0aaa aaaa | Amp Envelope Level 3 0 — 127 |<br />
| 00 75 | 0aaa aaaa | Amp LFO1 Depth 0 — 126 (—63 — +63)|<br />
| 00 76 | 0aaa aaaa | Amp LFO2 Depth 0 — 126 (—63 — +63)|<br />
| 00 77 | 0aaa aaaa | Tone Pan 0 — 127 (L64 — 63R)|<br />
| 00 78 | 0000 aaaa | Pan Key follow 0 — 14 *14 |<br />
| 00 79 | 00aa aaaa | Random Pan Switch 0,63 (OFF,ON) |<br />
| 00 7A | 0aaa aaaa | Alternate Pan Depth 1 — 127 (L63 — 63R)|<br />
| 00 7B | 0aaa aaaa | Pan LFO1 Depth 0 — 126 (—63 — +63)|<br />
| 00 7C | 0aaa aaaa | Pan LFO2 Depth 0 — 126 (—63 — +63)|<br />
|—————————————+———————————+————————————————————————————————————————————————————|<br />
| 00 7D—01 00 | 0aaa aaaa | Reserved —— |<br />
|—————————————+————————————————————————————————————————————————————————————————|<br />
| Total size | 00 00 01 01 |<br />
+——————————————————————————————————————————————————————————————————————————————+<br />
* 1: Correspondence between the "Waveform List" and "Wave Group Type, Wave Group ID, Wave Number"<br />
Wave Wave Group Type Wave Group ID Wave Number<br />
A001-254 0 1 0 - 253<br />
B001-251 0 2 0 - 250<br />
* 2: -6, 0, +6, +12<br />
* 3: 1 - Upper<br />
* 4: Lower - 127<br />
* 5: C-1 - Upper<br />
* 6: Lower - G9<br />
* 7: OFF, PCH, CUT, RES, LEV, PAN, L1P, L2P, L1F, L2F, L1A, L2A, PL1, PL2, L1R, L2R<br />
* 8: TRI, SIN, SAW, SQR, TRP, S&H, RND, CHS<br />
* 9: -100, -50, 0, +50, +100<br />
* 10: ON-IN, ON-OUT, OFF-IN, OFF-OUT<br />
* 11: 0, 1, 2, 3, 4, 5, 6, 7, 8, 9, 10, 20, 30, 40, 50, 60, 70, 80, 90, 100, 200, 300, 400, 500, 600, 700, 800, 900,<br />
1000, 1100, 1200<br />
* 12: -100, -70, -50, -30, -10, 0, +10, +20, +30, +40, +50, +70, +100, +120, +150, +200<br />
* 13: -100 - +150<br />
* 14: -100, -70, -50, -40, -30, -20, -10, 0, +10, +20, +30, +40, +50, +70, +100<br />
* 15: OFF, LPF, BPF, HPF, PKG<br />
* 16: LOWER, UPPER, LOW&UP, ALL<br />
■1-4.Rhythm Set<br />
+——————————————————————————————————————————————————————————————————————————————+<br />
| Offset | |<br />
| Address | Description |<br />
|—————————————+————————————————————————————————————————————————————————————————|<br />
| 00 00 | Rhythm Common 1—4—1 |<br />
| 23 00 | Rhythm Note for Key# 35 1—4—2 |<br />
| 24 00 | Rhythm Note for Key# 36 |<br />
| : | |<br />
| 62 00 | Rhythm Note for Key# 98 |<br />
+——————————————————————————————————————————————————————————————————————————————+<br />
■1-4-1.Rhythm Common<br />
+——————————————————————————————————————————————————————————————————————————————+<br />
| Offset | | |<br />
| Address | Size | Description Data (Value) |<br />
|—————————————+————————————————————————————————————————————————————————————————|<br />
| 00 00 | 0aaa aaaa | Rhythm Name 1 32 — 125 |<br />
| 00 01 | 0aaa aaaa | Rhythm Name 2 32 — 125 |<br />
| 00 02 | 0aaa aaaa | Rhythm Name 3 32 — 125 |<br />
| 00 03 | 0aaa aaaa | Rhythm Name 4 32 — 125 |<br />
| 00 04 | 0aaa aaaa | Rhythm Name 5 32 — 125 |<br />
| 00 05 | 0aaa aaaa | Rhythm Name 6 32 — 125 |<br />
| 00 06 | 0aaa aaaa | Rhythm Name 7 32 — 125 |<br />
| 00 07 | 0aaa aaaa | Rhythm Name 8 32 — 125 |<br />
| 00 08 | 0aaa aaaa | Rhythm Name 9 32 — 125 |<br />
| 00 09 | 0aaa aaaa | Rhythm Name 10 32 — 125 |<br />
| 00 0A | 0aaa aaaa | Rhythm Name 11 32 — 125 |<br />
| 00 0B | 0aaa aaaa | Rhythm Name 12 32 — 125 |<br />
|—————————————+————————————————————————————————————————————————————————————————|<br />
| Total size | 00 00 00 0C |<br />
+——————————————————————————————————————————————————————————————————————————————+<br />
105<br />
Appendices
MIDI Implementation<br />
■1-4-2.Rhythm Note<br />
+——————————————————————————————————————————————————————————————————————————————+<br />
| Offset | | |<br />
| Address | Size | Description Data (Value) |<br />
|—————————————+————————————————————————————————————————————————————————————————|<br />
| 00 00 | 0000 000a | Tone Switch 0 — 1 (OFF,ON) |<br />
| 00 01 | 0000 0000 | Wave Group Type 0 *1 |<br />
| 00 02 | 0000 00aa | Wave Group ID 1 — 3 *1 |<br />
|# 00 03 | 0000 aaaa | Wave Number 0 — 253 *1 |<br />
| | 0000 bbbb | |<br />
| 00 05 | 0000 00aa | Wave Gain 0 — 3 *2 |<br />
| 00 06 | 0000 aaaa | Bend Range 0 — 12 |<br />
| 00 07 | 000a aaaa | Mute Group 0 — 31 (OFF,1 — 31)|<br />
| 00 08 | 0000 000a | Envelope Mode 0 — 1 *3 |<br />
|—————————————+———————————+————————————————————————————————————————————————————|<br />
| 00 09—00 0B | 0aaa aaaa | Reserved —— |<br />
|—————————————+———————————+————————————————————————————————————————————————————|<br />
| 00 0C | 0aaa aaaa | Coarse Tune 0 — 120 (—60 — +60)|<br />
| 00 0D | 0aaa aaaa | Fine Tune 0 — 100 (—50 — +50)|<br />
| 00 0E | 000a aaaa | Random Pitch Depth 0 — 30 *4 |<br />
| 00 0F | 000a aaaa | Pitch Envelope Depth 0 — 24 (—12 — +12)|<br />
| 00 10 | 0aaa aaaa | Pitch Envelope Velocity Sens 0 — 125 *5 |<br />
| 00 11 | 0000 aaaa | Pitch Envelope Velocity Time 0 — 14 *6 |<br />
| 00 12 | 0aaa aaaa | Pitch Envelope Time 1 0 — 127 |<br />
| 00 13 | 0aaa aaaa | Pitch Envelope Time 2 0 — 127 |<br />
| 00 14 | 0aaa aaaa | Pitch Envelope Time 3 0 — 127 |<br />
| 00 15 | 0aaa aaaa | Pitch Envelope Time 4 0 — 127 |<br />
| 00 16 | 0aaa aaaa | Pitch Envelope Level 1 0 — 126 (—63 — +63)|<br />
| 00 17 | 0aaa aaaa | Pitch Envelope Level 2 0 — 126 (—63 — +63)|<br />
| 00 18 | 0aaa aaaa | Pitch Envelope Level 3 0 — 126 (—63 — +63)|<br />
| 00 19 | 0aaa aaaa | Pitch Envelope Level 4 0 — 126 (—63 — +63)|<br />
|—————————————+———————————+————————————————————————————————————————————————————|<br />
| 00 1A | 0000 0aaa | Filter Type 0 — 4 *7 |<br />
| 00 1B | 0aaa aaaa | Cutoff Frequency 0 — 127 |<br />
| 00 1C | 0aaa aaaa | Resonance 0 — 127 |<br />
| 00 1D | 0aaa aaaa | Resonance Velocity Sens 0 — 125 *5 |<br />
| 00 1E | 0aaa aaaa | Filter Envelope Depth 0 — 126 (—63 — +63)|<br />
| 00 1F | 0aaa aaaa | Filter Envelope Velocity Sens 0 — 125 *5 |<br />
| 00 20 | 0000 aaaa | Filter Envelope Velocity Time 0 — 14 *6 |<br />
| 00 21 | 0aaa aaaa | Filter Envelope Time 1 0 — 127 |<br />
| 00 22 | 0aaa aaaa | Filter Envelope Time 2 0 — 127 |<br />
| 00 23 | 0aaa aaaa | Filter Envelope Time 3 0 — 127 |<br />
| 00 24 | 0aaa aaaa | Filter Envelope Time 4 0 — 127 |<br />
| 00 25 | 0aaa aaaa | Filter Envelope Level 1 0 — 127 |<br />
| 00 26 | 0aaa aaaa | Filter Envelope Level 2 0 — 127 |<br />
| 00 27 | 0aaa aaaa | Filter Envelope Level 3 0 — 127 |<br />
| 00 28 | 0aaa aaaa | Filter Envelope Level 4 0 — 127 |<br />
|—————————————+———————————+————————————————————————————————————————————————————|<br />
| 00 29 | 0aaa aaaa | Tone Level 0 — 127 |<br />
| 00 2A | 0aaa aaaa | Amp Envelope Velocity Sens 0 — 125 *5 |<br />
| 00 2B | 0000 aaaa | Amp Envelope Velocity Time 0 — 14 *6 |<br />
| 00 2C | 0aaa aaaa | Amp Envelope Time 1 0 — 127 |<br />
| 00 2D | 0aaa aaaa | Amp Envelope Time 2 0 — 127 |<br />
| 00 2E | 0aaa aaaa | Amp Envelope Time 3 0 — 127 |<br />
| 00 2F | 0aaa aaaa | Amp Envelope Time 4 0 — 127 |<br />
| 00 30 | 0aaa aaaa | Amp Envelope Level 1 0 — 127 |<br />
| 00 31 | 0aaa aaaa | Amp Envelope Level 2 0 — 127 |<br />
| 00 32 | 0aaa aaaa | Amp Envelope Level 3 0 — 127 |<br />
| 00 33 | 0aaa aaaa | Tone Pan 0 — 127 (L64 — 63R)|<br />
| 00 34 | 00aa aaaa | Random Pan Switch 0,63 (OFF,ON) |<br />
| 00 35 | 0aaa aaaa | Alternate Pan Depth 1 — 127 (L63 — 63R)|<br />
|—————————————+———————————+————————————————————————————————————————————————————|<br />
| 00 36 | 0000 00aa | MFX Switch 2 — 3 *8 |<br />
|—————————————+———————————+————————————————————————————————————————————————————|<br />
| 00 37 | 0aaa aaaa | Reserved —— |<br />
|—————————————+———————————+————————————————————————————————————————————————————|<br />
| 00 38 | 0aaa aaaa | Delay Send Level 0 — 127 |<br />
| 00 39 | 0aaa aaaa | Reverb Send Level 0 — 127 |<br />
|—————————————+————————————————————————————————————————————————————————————————|<br />
| Total size | 00 00 00 3A |<br />
+——————————————————————————————————————————————————————————————————————————————+<br />
* 1: Correspondence between the "Waveform List" and "Wave Group Type, Wave Group ID, Wave Number"<br />
Wave Wave Group Type Wave Group ID Wave Number<br />
A001-254 0 1 0 - 253<br />
B001-251 0 2 0 - 250<br />
* 2: -6, 0, +6, +12<br />
* 3: NO-SUS, SUSTAIN<br />
* 4: 0, 1, 2, 3, 4, 5, 6, 7, 8, 9, 10, 20, 30, 40, 50, 60, 70, 80,<br />
* 90, 100, 200, 300, 400, 500, 600, 700, 800, 900, 1000, 1100, 1200<br />
* 5: -100 - +150<br />
* 6: -100, -70, -50, -40, -30, -20, -10, 0, +10, +20, +30, +40,<br />
* +50, +70, +100<br />
* 7: OFF, LPF, BPF, HPF, PKG<br />
* 8: OFF, ON<br />
■2. GS (Model ID=42H)<br />
+——————————————————————————————————————————————————————————————————————————————+<br />
| Start | |<br />
| address | Description |<br />
|—————————————+————————————————————————————————————————————————————————————————|<br />
| 40 11 00 | Scale Tune Part1 2—1 |<br />
| 40 12 00 | : Part2 |<br />
| 40 13 00 | : Part3 |<br />
| 40 14 00 | : Part4 |<br />
| 40 15 00 | : Part5 |<br />
| 40 16 00 | : Part6 |<br />
| 40 17 00 | : Part7 |<br />
+——————————————————————————————————————————————————————————————————————————————+<br />
■2-1. Scale Tune<br />
+——————————————————————————————————————————————————————————————————————————————+<br />
| Offset | | |<br />
| Address | Size | Description Data (Value) |<br />
|—————————————+————————————————————————————————————————————————————————————————|<br />
| 40 | 0aaa aaaa | Scale Tune for C 0 — 127 (—64 — +63)|<br />
| 41 | 0aaa aaaa | Scale Tune for C# 0 — 127 (—64 — +63)|<br />
| 42 | 0aaa aaaa | Scale Tune for D 0 — 127 (—64 — +63)|<br />
| 43 | 0aaa aaaa | Scale Tune for D# 0 — 127 (—64 — +63)|<br />
| 44 | 0aaa aaaa | Scale Tune for E 0 — 127 (—64 — +63)|<br />
| 45 | 0aaa aaaa | Scale Tune for F 0 — 127 (—64 — +63)|<br />
| 46 | 0aaa aaaa | Scale Tune for F# 0 — 127 (—64 — +63)|<br />
| 47 | 0aaa aaaa | Scale Tune for G 0 — 127 (—64 — +63)|<br />
| 48 | 0aaa aaaa | Scale Tune for G# 0 — 127 (—64 — +63)|<br />
| 49 | 0aaa aaaa | Scale Tune for A 0 — 127 (—64 — +63)|<br />
| 4A | 0aaa aaaa | Scale Tune for A# 0 — 127 (—64 — +63)|<br />
| 4B | 0aaa aaaa | Scale Tune for B 0 — 127 (—64 — +63)|<br />
|—————————————+————————————————————————————————————————————————————————————————|<br />
| Total size | 00 00 0C |<br />
+——————————————————————————————————————————————————————————————————————————————+<br />
106<br />
■3. Quick SysEx (Model ID=3AH)<br />
+——————————————————————————————————————————————————————————————————————————————+<br />
| Start | |<br />
| address | Description |<br />
|—————————————+————————————————————————————————————————————————————————————————|<br />
| 30 00 | Quick SysEx Part1 3—1 |<br />
| 31 00 | : Part2 |<br />
| : | : |<br />
| 36 00 | : Part7 |<br />
|—————————————+————————————————————————————————————————————————————————————————|<br />
| 39 00 | : PartR 3—2 |<br />
|—————————————+————————————————————————————————————————————————————————————————|<br />
| 70 00 | : Sequencer 3—3 |<br />
+——————————————————————————————————————————————————————————————————————————————+<br />
■3-1. Quick SysEx Part<br />
+——————————————————————————————————————————————————————————————————————————————+<br />
| Offset | Size | |<br />
| Address | DataL DataE | Description Data (Value L) |<br />
|—————————————+————————————————————————————————————————————————————————————————|<br />
| 0F | 0000 aaaa 0000 0000 | LFO1 Wave Form 0 — 7 *1 |<br />
| 14 | 0aaa aaaa 0000 0000 | LFO1 Fade Time 0 — 127 |<br />
| 15 | 0aaa aaaa 0000 0000 | Coarse Tune 16 — 112 (—48 — +48)|<br />
| 19 | 0aaa aaaa 0000 0000 | Pitch Env Depth 52 — 76 (—12 — +12)|<br />
| 1A | 0aaa aaaa 0000 0000 | Pitch Env Attack 0 — 127 |<br />
| 1B | 0aaa aaaa 0000 0000 | Pitch Env Decay 0 — 127 |<br />
| 1C | 0aaa aaaa 0000 0000 | Filter Env Sustain 1 — 127 (—63 — +63)|<br />
| 1D | 0aaa aaaa 0000 0000 | Filter Env Release 0 — 127 |<br />
| 1F | 0aaa aaaa 0000 0000 | Amp Env Sustain 0 — 127 |<br />
| 22 | 0000 0aaa 0000 0000 | Filter Type 0 — 4 *2 |<br />
| 23 | 0aaa aaaa 0000 0000 | Tone Pan 0 — 127 (L64 — 63R)|<br />
| 24 | 0aaa aaaa 0000 0000 | Tone Level 0 — 127 |<br />
| 25 | 00aa aaaa 0000 0000 | Random Pan Switch 0,63 (OFF,ON) |<br />
| 27 | 0aaa aaaa 0000 0000 | Pitch Env Sustain 1 — 127 (—63 — +63)|<br />
| 28 | 0aaa aaaa 0000 0000 | Pitch Env Release 0 — 127 |<br />
| 55 | 0aaa aaaa 0000 0000 | Part Key Shift 16 — 112 (—48 — +48)|<br />
| 56 | 0000 00aa 0000 0000 | Part MFX Switch 0 — 3 *3 |<br />
+——————————————————————————————————————————————————————————————————————————————+<br />
* 1: TRI, SIN, SAW, SQR, TRP, S&H, RND, CHS<br />
* 2: OFF, LPF, BPF, HPF, PKG<br />
* 3: OFF, ON, Reserved, Reserved<br />
■3-2. Quick SysEx Rhythm<br />
+——————————————————————————————————————————————————————————————————————————————+<br />
| Offset | Size | |<br />
| Address | DataL DataE *1 | Description Data (Value L) |<br />
|—————————————+————————————————————————————————————————————————————————————————|<br />
| 15 | 0aaa aaaa 0000 aaaa | Coarse Tune 0 — 120(—60 — +60) |<br />
| 19 | 0aaa aaaa 0000 aaaa | Pitch Env Depth 52 — 76 (—12 — +12) |<br />
| 1A | 0aaa aaaa 0000 aaaa | Pitch Env Attack 0 — 127 |<br />
| 1B | 0aaa aaaa 0000 aaaa | Pitch Env Decay 0 — 127 |<br />
| 1C | 0aaa aaaa 0000 aaaa | Filter Env Sustain 0 — 127 |<br />
| 1D | 0aaa aaaa 0000 aaaa | Filter Env Release 0 — 127 |<br />
| 1F | 0aaa aaaa 0000 aaaa | Amp Env Sustain 0 — 127 |<br />
| 22 | 0000 0aaa 0000 aaaa | Filter Type 0 — 4 *2 |<br />
| 23 | 0aaa aaaa 0000 aaaa | Tone Pan 0 — 127 (L64 — 63R)|<br />
| 24 | 0aaa aaaa 0000 aaaa | Tone Level 0 — 127 |<br />
| 25 | 00aa aaaa 0000 aaaa | Random Pan Switch 0,1 (OFF,ON) |<br />
| 27 | 0aaa aaaa 0000 aaaa | Pitch Env Sustain 0 — 127 |<br />
| 28 | 0aaa aaaa 0000 aaaa | Pitch Env Release 0 — 127 |<br />
| 47 | 0aaa aaaa 0000 aaaa | Resonance 0 — 127 |<br />
| 48 | 0aaa aaaa 0000 aaaa | Amp Env Release Time 0 — 127 |<br />
| 49 | 0aaa aaaa 0000 aaaa | Amp Env Attack Time 0 — 127 |<br />
| 4A | 0aaa aaaa 0000 aaaa | Cutoff Frequency 0 — 127 |<br />
| 4B | 0aaa aaaa 0000 aaaa | Amp Env Decay 0 — 127 |<br />
| 4D | 0aaa aaaa 0000 aaaa | Fine Tune 14 — 114 (—50 — +50)|<br />
| 51 | 0aaa aaaa 0000 aaaa | Filter Env Depth 1 — 127 (—63 — +63)|<br />
| 52 | 0aaa aaaa 0000 aaaa | Filter Env Attack 0 — 127 |<br />
| 53 | 0aaa aaaa 0000 aaaa | Filter Env Decay 0 — 127 |<br />
| 55 | 0aaa aaaa 0000 aaaa | Part Key Shift 16 — 112 (—48 — +48)|<br />
| 56 | 0000 00aa 0000 aaaa | Part MFX Switch 0 — 4 *3 |<br />
+——————————————————————————————————————————————————————————————————————————————+<br />
* 1:Use when transmitting to and from each Rhythm group in Part R.<br />
Rhythm group DataE Rhythm group DataE<br />
BD 0 CYM 4<br />
SD 1 TOM/PERC 5<br />
HH 2 HIT 6<br />
CLP 3 OTHERS 7<br />
CYM 4 ALL 9<br />
* 2: OFF, LPF, BPF, HPF, PKG<br />
* 3: OFF, ON, Reserved, Reserved ,RHY<br />
■3-3. Quick SysEx Sequencer<br />
+——————————————————————————————————————————————————————————————————————————————+<br />
| Offset | Size | |<br />
| Address | DataL DataE | Description Data(Value L/E) |<br />
|—————————————+————————————————————————————————————————————————————————————————|<br />
| 01 | 0000 aaaa 0000 000a | Part Mute 0—6,9 / 0,1 |<br />
| 02 | 0000 aaaa 0000 000a | Drum Mute 0—7*1 / 0,1 |<br />
+——————————————————————————————————————————————————————————————————————————————+<br />
* 1: BD,SD,HH,CLP,CYM,TOM/PEC,HIT,OTHERS
6. Supplementary material<br />
■Examples of MIDI messages<br />
92 3E 5F<br />
9n is the Note On status and ‘n’ is the MIDI channel number. Since 2H = 2, 3EH = 62, and<br />
5FH = 95, this is a Note On message of MIDI CH = 3, note number 62 (note name D4) and<br />
velocity 95.<br />
C9 49<br />
CnH is the Program Change status and ‘n’ is the MIDI channel number. Since 9H = 9, and<br />
49H = 73, this is a Program Change message of MIDI CH = 10, Program number 74.<br />
EA 00 28<br />
EnH is the Pitch Bend Change status and ‘n’ is the MIDI channel number. The 2nd byte<br />
(00H=0) is the LSB of the Pitch Bend value, and the 3rd byte (28H=40) is the MSB. However<br />
since the Pitch Bend is a signed number with 0 at 40 00H ( = 64 x 128 + 0 = 8192), the Pitch<br />
Bend value in this case is<br />
28 00H - 40 00H = 40 x 128 + 0 - (64 x 128 + 0) = 5120 - 8192 = -3072<br />
If we assume that the Pitch Bend Sensitivity is set to two semitones, the pitch will change<br />
only -200 cents for a Pitch Bend value of -8192 (00 00H). Thus, this message is specifying a<br />
Pitch Bend of -200 x (-3072) ÷ (-8192) = -75 cents on MIDI CH = 7.<br />
B3 64 00 65 00 06 0C 26 00 64 7F 65 7F<br />
BnH is the Control Change status, and ‘n’ is the MIDI channel number. In Control Change<br />
messages, the 2nd byte is the controller number, and the 3rd byte is the parameter value.<br />
MIDI allows what is known as “running status,” when if messages of the the same status<br />
follow each other, it is permitted to omit the second and following status bytes. In the<br />
message above, running status is being used, meaning that the message has the following<br />
content.<br />
B3 64 00 MIDI CH = 4, RPN parameter number LSB: 00H<br />
(B3) 65 00 MIDI CH = 4, RPN parameter number MSB: 00H<br />
(B3) 06 0C MIDI CH = 4, parameter value MSB: 0CH<br />
(B3) 26 00 MIDI CH = 4, parameter value LSB: 00H<br />
(B3) 64 7F MIDI CH = 4, RPN parameter number LSB: 7FH<br />
(B3) 65 7F MIDI CH = 4, RPN parameter number MSB: 7FH<br />
■Examples of system exclusive messages and<br />
calculating the checksum<br />
<strong>Roland</strong> exclusive messages (RQ1, DT1) are transmitted with a checksum at the end of the<br />
data (before F7) to check that the data was received correctly. The value of the checksum is<br />
determined by the address and data (or size) of the exclusive message.<br />
●How to calculate the checksum<br />
The checksum consists of a value whose lower 7 bits are 0 when the address, size and<br />
checksum itself are added.<br />
The following formula shows how to calculate the checksum when the exclusive message to<br />
be transmitted has an address of aa bb cc ddH, and data or size of ee ffH.<br />
aa + bb + cc + dd + ee + ff = total<br />
total ÷ 128 = quotient ... remainder<br />
128 - remainder = checksum<br />
Setting the REVERB TYPE to HALL2 (DT1)<br />
Referring to “3. Parameter address map,” the starting address for Part Information is 01 00<br />
00 00H, and offset address of Part Information Common is 00 00H, and the REVERB TYPE<br />
address is 00 28H. Therefore, the address will be<br />
01 00 00 00H<br />
00 00H<br />
+) 00 28H<br />
01 00 00 28H<br />
Since HALL2 is parameter value 05H,<br />
F0 41 10 00H 0BH 12 01 00 00 28 05 ?? F7<br />
(1) (2) (3) (4) (5) (6) address data checksum (7)<br />
(1) Exclusive status (2) ID number (<strong>Roland</strong>) (3) device ID (17)<br />
(4), (5) model ID (D2) (6)command ID (DT1) (7) EOX<br />
Next we calculate the checksum.<br />
01H + 00H + 00H + 28H + 05H = 1 + 0 + 0 + 40 + 5 = 46(sum)<br />
46 (total) ÷ 128 = 0 (quotient)...46 (remainder)<br />
checksum = 128 - 46 (quotient) = 82 = 52H<br />
MIDI Implementation<br />
This means that the message transmitted will be F0 41 10 00 0B 12 01 00 00 28 05 52 F7.<br />
Obtaining part information data (RQ1)<br />
Referring to “3. Parameter address map,” the starting addresses for Part Information are<br />
assigned as follows.<br />
01 00 00 00H Part Info Common<br />
01 00 10 00H Part Info Part 1<br />
01 00 11 00H Part Info Part 2<br />
01 00 16 00H Part Info Part 7<br />
01 00 19 00H Part Info Part R<br />
Since the size of Part Information Part is 00 00 00 1AH, this size is added to the starting<br />
address of Part Information Part R, to obtain<br />
01 00 19 00H<br />
+) 00 00 00 1AH<br />
01 00 19 1AH<br />
Therefore, the size of the data to be obtained is<br />
01 00 19 1AH<br />
-) 01 00 00 00H<br />
00 00 19 1AH<br />
F0 41 10 00 0B 11 01 00 00 00 00 00 19 1A ?? F7<br />
(1) (2) (3) (4) (5) (6) address data checksum (7)<br />
(1) Exclusive status (2) ID number (<strong>Roland</strong>) (3) Device ID (17)<br />
(4), (5) Model ID (D2D2) (6) Command ID (RQ1) (7) EOX<br />
When the checksum is calculated in the same way as in , we have the following<br />
message to be transmitted: F0 41 10 00 0B 11 01 00 00 00 00 00 19 1A 4C F7.<br />
●Scale Tune function (Model ID : 42H (GS), address: 40<br />
1x 40H)<br />
Scale Tune is a function that makes fine adjustments to the pitch of each note C-B. Settings<br />
are made for one octave, and applied to the notes of all octaves. By making Scale Tune<br />
settings you can use tunings and temperaments other than the standard Equal<br />
Temperament. Here we give three types of settings as examples.<br />
❍Equal temperament<br />
This temperament divides the octave into 12 equal steps, and is the temperament most<br />
frequently used today, especially in western music. Initially, the Scale Tune function of this<br />
instrument is set to Equal Temperament.<br />
❍Just intonation (tonic of C)<br />
The primary triads sound more beautiful in just intonation than in equal temperament.<br />
However, this applies only in one key, and chords will be discordant if you play in a<br />
different key. The settings here are for a tonic of C.<br />
❍Arabian-type scale<br />
The Scale Tune function allow you to use various tunings of ethnic music. Here is one of the<br />
Arabian scales.<br />
Setting examples<br />
Note Equal Temp. Just (in C) Arabian-type scale<br />
C 0 0 -6<br />
C# 0 -8 +45<br />
D 0 +4 -2<br />
Eb 0 +16 -12<br />
E 0 -14 -51<br />
F 0 -2 -8<br />
F# 0 -10 +43<br />
G 0 +2 -4<br />
G# 0 +14 +47<br />
A 0 -16 0<br />
Bb 0 +14 -10<br />
B 0 -12 -49<br />
The values in the above table are in units of 1 cent. Convert these values to hexadecimal,<br />
and transmit them as exclusive data. For example to set the Scale Tune of Part 1 to an<br />
Arabian-type scale, transmit the following data.<br />
F0 41 10 42 12 40 11 40 3A 6D 3E 34 0D 38 6B 3C 6F 40 36 0F 76 F7<br />
107<br />
Appendices
MIDI Implementation<br />
groovebox (Sound Generator Section)<br />
Model D2<br />
108<br />
Basic<br />
Channel<br />
Mode<br />
Note<br />
Number :<br />
Velocity<br />
After<br />
Touch<br />
Pitch Bend<br />
Control<br />
Change<br />
Function...<br />
Program<br />
Change : True Number<br />
System Exclusive<br />
System<br />
Common<br />
System<br />
Real Time<br />
Aux<br />
Messages<br />
Notes<br />
Default<br />
Changed<br />
Default<br />
Messages<br />
Altered<br />
True Voice<br />
Note On<br />
Note Off<br />
Key's<br />
Channel's<br />
0, 1<br />
2–4 567<br />
8, 9<br />
10, 11<br />
12–14<br />
15, 16<br />
17<br />
18, 19<br />
20<br />
21<br />
22–24<br />
25–29<br />
30<br />
31, 32, 34–37<br />
38<br />
39, 40, 64–67<br />
68<br />
69<br />
70<br />
71–75<br />
76<br />
77<br />
78, 79<br />
80–86<br />
87–90<br />
91<br />
92, 93<br />
94<br />
95<br />
100, 101<br />
: Song Position<br />
: Song Select<br />
: Tune Request<br />
: Clock<br />
: Commands<br />
: All Sound Off<br />
: Reset All Controllers<br />
: Local On/Off<br />
: All Notes Off<br />
: Active Sensing<br />
: System Reset<br />
Mode 1 : OMNI ON, POLY<br />
Mode 3 : OMNI OFF, POLY<br />
X<br />
X<br />
X<br />
X<br />
**************<br />
0–127<br />
**************<br />
O<br />
X<br />
X<br />
X<br />
O<br />
O<br />
O<br />
O<br />
X<br />
O<br />
O<br />
O<br />
O<br />
O<br />
O<br />
O<br />
O<br />
O<br />
O<br />
O<br />
O<br />
O<br />
X<br />
O<br />
O<br />
O<br />
O<br />
O<br />
O<br />
O<br />
O<br />
O<br />
O<br />
O<br />
O<br />
O<br />
O<br />
O<br />
MIDI Implementation Chart<br />
O<br />
**************<br />
O<br />
X<br />
X<br />
X<br />
X<br />
X<br />
X<br />
X<br />
X<br />
X<br />
O<br />
X<br />
Transmitted Recognized Remarks<br />
1–7, 10<br />
1–7, 10<br />
Mode 3<br />
Mode 3, 4 (M = 1)<br />
0–127<br />
0–127<br />
O<br />
O<br />
O<br />
O<br />
O<br />
O<br />
X<br />
O<br />
O<br />
O<br />
X<br />
O<br />
X<br />
O<br />
X<br />
O<br />
X<br />
O<br />
X<br />
O<br />
X<br />
O<br />
O<br />
O<br />
X<br />
O<br />
X<br />
O<br />
X<br />
O<br />
X<br />
O<br />
X<br />
O<br />
X<br />
O<br />
X<br />
O<br />
O<br />
0–127<br />
O<br />
X<br />
X<br />
X<br />
O<br />
X<br />
O (120, 126, 127)<br />
O<br />
X<br />
O (123–127)<br />
O<br />
X<br />
Date : Mar. 8, 2001<br />
Version : 1.00<br />
* 1 Recognized as M=1 even if M≠1.<br />
* 2 Refer to “Table of Transmitted Data” (p. 76) about function of each controller number.<br />
Mode 2 : OMNI ON, MONO<br />
Mode 4 : OMNI OFF, MONO<br />
* 1<br />
* 2<br />
Program No. 1–128<br />
O : Yes<br />
X : No
goovebox (Sequencer Section)<br />
Model D2<br />
Basic<br />
Channel<br />
Mode<br />
Note<br />
Number :<br />
Velocity<br />
After<br />
Touch<br />
Pitch Bend<br />
Control<br />
Change<br />
Program<br />
Change<br />
Function...<br />
System Exclusive<br />
System<br />
Common<br />
System<br />
Real Time<br />
Aux<br />
Messages<br />
Notes<br />
Default<br />
Changed<br />
Default<br />
Messages<br />
Altered<br />
True Voice<br />
Note On<br />
Note Off<br />
Key's<br />
Channel's<br />
0–119<br />
: True Number<br />
: Song Position<br />
: Song Select<br />
: Tune Request<br />
: Clock<br />
: Commands<br />
: All Sound Off<br />
: Reset All Controllers<br />
: Local On/Off<br />
: All Notes Off<br />
: Active Sensing<br />
: System Reset<br />
Mode 1 : OMNI ON, POLY<br />
Mode 3 : OMNI OFF, POLY<br />
MIDI Implementation Chart<br />
1–7, 10<br />
X<br />
MIDI Implementation<br />
Transmitted Recognized Remarks<br />
Mode 3<br />
OMINI OFF, POLY *1<br />
**************<br />
0–127<br />
**************<br />
O<br />
O<br />
O<br />
O<br />
O<br />
O O<br />
O<br />
**************<br />
O<br />
O *4<br />
X<br />
X<br />
O *4<br />
O *5<br />
O<br />
O<br />
X<br />
O *6<br />
X<br />
X<br />
1–7, 10<br />
X<br />
X<br />
X<br />
0–127<br />
0–127<br />
O<br />
O<br />
O<br />
O<br />
O<br />
O<br />
0–127<br />
O<br />
O *2<br />
X<br />
X<br />
O *3<br />
O *2<br />
O<br />
O<br />
X<br />
O (123–127) *6<br />
O<br />
X<br />
Date : Mar. 8, 2001<br />
Version : 1.00<br />
There is no basic<br />
channel.<br />
*1 Omni Off, Poly is transmitted to all channels at starting up.<br />
*2 Recognized only when Sync Mode is SLAVE or REMOTE.<br />
*3 Recognized only when Sync Mode is SLAVE.<br />
*4 Transmitted only when Sync Out is ON and D-FIELD mode is not VINYL.<br />
*5 Transmitted only when Sync Out is ON.<br />
*6 Mode messages (123–127) are stored/transmitted after All Note Off processing is performed.<br />
The All Note Off message itself is not stored/transmitted.<br />
Mode 2 : OMNI ON, MONO<br />
Mode 4 : OMNI OFF, MONO<br />
O : Yes<br />
X : No<br />
109<br />
Appendices
110<br />
Specifications<br />
D2 (GROOVEBOX)<br />
Sound generator:<br />
Maximum Polyphony 64 voices<br />
Parts 16 (Main: 8 + RPS: 8)<br />
Patches<br />
Preset 600<br />
User 256<br />
Rhythm set<br />
Preset 30<br />
User 20<br />
Effects<br />
Reverb 6<br />
Delay 2<br />
MFX 25<br />
Sequencer:<br />
Tracks 8<br />
Resolution 96 TPQN<br />
Tempo 20.0 – 240.0 (max.)<br />
Maximum Note Storage approx. 40,000 notes<br />
Patterns<br />
Preset 157<br />
RPS 232<br />
User 100<br />
Songs 25<br />
Recording Method New Step REC<br />
Arpeggiator<br />
Preset 43<br />
User 10<br />
D-Field REC<br />
Real-time Quantize GRID/SHUFFLE/<br />
GROOVE<br />
RPS Set 30<br />
Pattern Set 20<br />
MEGAMIX Set 20<br />
Controller<br />
D-FIELD Controller<br />
Connectors<br />
Headphones Jack (Stereo miniature phone type)<br />
Output Jacks (L, R) (RCA phono type)<br />
MIDI Connectors (IN/OUT)<br />
DC IN Jack<br />
Power Supply<br />
AC Adaptor (DC9V)<br />
Current Draw<br />
1000 mA<br />
Dimensions<br />
325 (W) x 256 (D) x 55 (H) mm<br />
12-13/16 (W) x 10-1/8 (D) x 2-3/16 (H) inches<br />
Weight<br />
1.4 kg / 3 lb 2 oz (excluding AC Adaptor)<br />
Accessories<br />
Owner’s <strong>Manual</strong><br />
AC Adaptor (ACI series or PSB-1U)<br />
* In the interest of product improvement, the specifications and/<br />
or appearance of this unit are subject to change without prior<br />
notice.
Index<br />
Numerics<br />
4 Band EQ ....................................................................... 45<br />
A<br />
AC adaptor jack ............................................................. 11<br />
ADLIB ................................................................. 21–22, 24<br />
Advanced Operation Using MIDI .............................. 78<br />
ARPEGGIATOR<br />
ARPEGGIATOR 1 ................................................... 26<br />
ARPEGGIATOR 2 ................................................... 27<br />
Arpeggio ................................................................... 26–28<br />
Beat pattern .............................................................. 29<br />
Motif .......................................................................... 28<br />
Style ........................................................................... 28<br />
ASSIGN 1 .......................................... 21–22, 25–27, 30–32<br />
ASSIGN 2 .......................................... 21–22, 34, 36–37, 39<br />
ASSIGN 3 ............................................................ 21–22, 41<br />
Auto PAN ....................................................................... 55<br />
B<br />
Beat scan indicator .................................................. 10, 62<br />
BENDER ......................................................................... 36<br />
BPM ............................................................... 15–16, 21, 40<br />
bulk dump ...................................................................... 81<br />
bulk load ......................................................................... 81<br />
C<br />
Changing a value in large steps .................................. 13<br />
characters and numerals .............................................. 13<br />
Chorus ....................................................................... 51–52<br />
Compressor .................................................................... 49<br />
CURRENT display ........................................................ 15<br />
current part .................................................................... 18<br />
current pattern ............................................................... 15<br />
cutoff frequency ............................................................. 33<br />
D<br />
DELAY ...................................................................... 39, 43<br />
Delay ......................................................................... 43, 54<br />
D-FIELD ........................................................ 10, 12, 21, 58<br />
D-FIELD function button ............................................. 22<br />
DISPLAY ...................................................... 10, 13, 15, 18<br />
Distortion ........................................................................ 47<br />
duration .......................................................................... 62<br />
E<br />
EDIT .............................................................. 19, 64–65, 71<br />
Effect switch ................................................................... 10<br />
Effects ........................................................................ 12, 42<br />
Enhancer ......................................................................... 46<br />
ENTER/EXIT ................................................................. 10<br />
ENVELOPE .................................................................... 34<br />
EXT CTRL (External Control) ...................................... 39<br />
F<br />
Factory Reset .................................................................. 14<br />
fast-forward .................................................................... 69<br />
Feedback Pitch Shifter .................................................. 56<br />
FILTER ...................................................................... 21, 33<br />
Flanger ...................................................................... 53–54<br />
G<br />
Gate Reverb .................................................................... 57<br />
GATE TIME .............................................................. 62–63<br />
grid line ........................................................................... 62<br />
H<br />
Headphone jack ............................................................. 11<br />
HOLD .................................................................. 17, 22–23<br />
I<br />
Isolator ............................................................................ 57<br />
K<br />
KEYBOARD PAD .......................................................... 32<br />
L<br />
LFO .................................................................................. 36<br />
Limiter ............................................................................. 49<br />
Lo-Fi ................................................................................ 47<br />
M<br />
MEGAMIX ................................................................ 30, 58<br />
MEGAMIX Set ............................................................... 30<br />
MFX ..................................................................... 21, 33, 44<br />
MIDI .............................................................. 11, 73, 76–78<br />
MIDI Channels ............................................................... 78<br />
MIDI connectors ............................................................ 78<br />
MIDI reception ............................................................... 77<br />
MIDI transmission ......................................................... 76<br />
Mode button ................................................................... 10<br />
multi-effects ........................................................ 21, 33, 44<br />
multitimbral sound module ........................................... 8<br />
mute ..................................................................... 16–17, 25<br />
Mute Remain .................................................................. 17<br />
MUTE-FX ........................................................................ 25<br />
N<br />
NEXT display ................................................................. 15<br />
next pattern .................................................................... 15<br />
Noise Generator ............................................................. 48<br />
NOTE NUMBER ...................................................... 62–63<br />
NOTE TYPE ............................................................. 62–63<br />
O<br />
OUTPUT jacks ............................................................... 11<br />
Overdrive ........................................................................ 46<br />
P<br />
PAN ................................................................................. 41<br />
Part ...................................................................... 12, 16, 19<br />
Part button .......................................................... 10, 16, 19<br />
Part Edit .......................................................................... 19<br />
PART MUTE ............................................................ 16–17<br />
PART SELECT ......................................................... 17–19<br />
Patch .................................................................... 12, 18, 84<br />
PATCH PREVIEW ........................................................ 31<br />
111
Index<br />
PATTERN ....................................................................... 15<br />
pattern ............................................................................. 60<br />
PATTERN CALL ........................................................... 30<br />
Pattern Edit .................................................................... 65<br />
Change Gate Time ................................................... 68<br />
Change Velocity ....................................................... 68<br />
Data Thin .................................................................. 68<br />
Delete Measure ........................................................ 67<br />
Edit Quantize ........................................................... 68<br />
Erase .......................................................................... 67<br />
Insert Measure ......................................................... 67<br />
Pattern Copy ............................................................ 66<br />
Shift Clock ................................................................. 68<br />
Transpose .................................................................. 67<br />
Pattern Initialize ............................................................ 65<br />
Pattern mode .................................................................. 15<br />
pattern number .............................................................. 15<br />
pattern sequencer .......................................................... 15<br />
pattern set ....................................................................... 30<br />
Phaser .............................................................................. 51<br />
Phonograph .................................................................... 49<br />
phrase .............................................................................. 58<br />
Playing Patterns ............................................................. 15<br />
POWER switch .............................................................. 11<br />
preset pattern ........................................................... 12, 15<br />
Q<br />
QUANTIZE .................................................................... 37<br />
R<br />
Radio Tuning ................................................................. 48<br />
Realtime Recording ....................................................... 60<br />
Part Edit .................................................................... 61<br />
Realtime Erase .......................................................... 61<br />
Rehearsal ................................................................... 61<br />
REC FUNCTION ............................................... 10, 22, 63<br />
recording .................................................................. 60, 62<br />
resonance ........................................................................ 33<br />
REVERB .................................................................... 39, 42<br />
Reverb ................................................................. 42, 56–57<br />
rewind ............................................................................. 69<br />
rhythm group ................................................................. 17<br />
RHYTHM MUTE ........................................................... 17<br />
Rhythm Set ......................................................... 12, 18, 86<br />
RPS ................................................................ 21, 23, 94–95<br />
RX (MIDI) ....................................................................... 77<br />
S<br />
Saving your settings ...................................................... 13<br />
SD ROLL ................................................................... 21, 41<br />
Security Slot ................................................................... 11<br />
SEQUENCER ................................................................. 74<br />
sequencer .................................................................. 12, 15<br />
Sequencer section .......................................................... 10<br />
Setup parameters ..................................................... 20, 70<br />
Short Delay ..................................................................... 54<br />
Slicer ................................................................................ 50<br />
SOLO SYNTH ................................................................ 31<br />
112<br />
SONG .............................................................................. 69<br />
Song Edit ......................................................................... 71<br />
Song Clear ................................................................. 71<br />
Song Copy ................................................................. 72<br />
Song mode ...................................................................... 69<br />
Song Recording .............................................................. 70<br />
SOUND ........................................................................... 73<br />
SOUND mode .......................................................... 21–23<br />
Space-D ........................................................................... 52<br />
Spectrum ......................................................................... 45<br />
SPIN mode ................................................................ 21, 40<br />
standard tempo .............................................................. 16<br />
step .................................................................................. 69<br />
Step Delete ...................................................................... 70<br />
Step Flanger .................................................................... 54<br />
Step Insert ....................................................................... 71<br />
STEP MUTE .................................................................... 41<br />
Step Recording ......................................................... 60, 62<br />
Copy Note ................................................................. 64<br />
Move Note ................................................................ 64<br />
Note Edit ................................................................... 64<br />
Part Edit .................................................................... 63<br />
Synchronization ............................................................. 80<br />
SYSTEM .................................................................... 10, 73<br />
System Settings .............................................................. 73<br />
RX (MIDI) .................................................................. 77<br />
SEQUENCER ............................................................ 74<br />
SOUND ..................................................................... 73<br />
TX (MIDI) .................................................................. 76<br />
T<br />
tempo .................................................................. 15–16, 40<br />
Tetra Chorus .................................................................. 52<br />
tick ................................................................................... 62<br />
Transmitted Data ........................................................... 76<br />
Tremolo ........................................................................... 50<br />
TX (MIDI) ....................................................................... 76<br />
U<br />
user pattern .................................................................... 15<br />
V<br />
VALUE dial .............................................................. 10, 13<br />
VELOCITY ...................................................................... 63<br />
vibrato ............................................................................. 36<br />
VINYL ....................................................................... 21, 40<br />
VINYL-FX ................................................................. 21, 25<br />
VOLUME knob .............................................................. 10<br />
W<br />
WRITE ..................................................... 10, 18, 20, 26, 72<br />
X<br />
X-FADER .................................................................. 21, 34<br />
XY mode ................................................................... 21, 33
MEMO
MEMO
This product complies with the requirements of European Directive 89/336/EEC.<br />
FEDERAL COMMUNICATIONS COMMISSION<br />
RADIO FREQUENCY INTERFERENCE STATEMENT<br />
NOTICE<br />
For EU Countries<br />
This Class B digital apparatus meets all requirements of the Canadian Interference-Causing Equipment Regulations.<br />
AVIS<br />
For the USA<br />
This equipment has been tested and found to comply with the limits for a Class B digital device, pursuant to Part 15 of the<br />
FCC Rules. These limits are designed to provide reasonable protection against harmful interference in a residential<br />
installation. This equipment generates, uses, and can radiate radio frequency energy and, if not installed and used in<br />
accordance with the instructions, may cause harmful interference to radio communications. However, there is no guarantee<br />
that interference will not occur in a particular installation. If this equipment does cause harmful interference to radio or<br />
television reception, which can be determined by turning the equipment off and on, the user is encouraged to try to correct the<br />
interference by one or more of the following measures:<br />
– Reorient or relocate the receiving antenna.<br />
– Increase the separation between the equipment and receiver.<br />
– Connect the equipment into an outlet on a circuit different from that to which the receiver is connected.<br />
– Consult the dealer or an experienced radio/TV technician for help.<br />
This device complies with Part 15 of the FCC Rules. Operation is subject to the following two conditions:<br />
(1) This device may not cause harmful interference, and<br />
(2) This device must accept any interference received, including interference that may cause undesired operation.<br />
Unauthorized changes or modification to this system can void the users authority to operate this equipment.<br />
This equipment requires shielded interface cables in order to meet FCC class B Limit.<br />
For Canada<br />
Cet appareil numérique de la classe B respecte toutes les exigences du Règlement sur le matériel brouilleur du Canada.
Information<br />
When you need repair service, call your nearest <strong>Roland</strong> Service Center or authorized <strong>Roland</strong> distributor in your country as<br />
shown below.<br />
AFRICA<br />
EGYPT<br />
Al Fanny Trading Office<br />
P.O. Box 2904,<br />
El Horrieh Heliopolos, Cairo,<br />
EGYPT<br />
TEL: (02) 4185531<br />
REUNION<br />
Maison FO - YAM Marcel<br />
25 Rue Jules Hermann,<br />
Chaudron - BP79 97 491<br />
Ste Clotilde Cedex,<br />
REUNION ISLAND<br />
TEL: 28 29 16<br />
SOUTH AFRICA<br />
That Other Music Shop<br />
(PTY) Ltd.<br />
11 Melle St., Braamfontein,<br />
Johannesbourg<br />
Republic of SOUTH AFRICA<br />
P.O.Box 32918, Braamfontein 2017<br />
Republic of SOUTH AFRICA<br />
TEL: (011) 403 4105<br />
Paul Bothner (PTY) Ltd.<br />
17 Werdmuller Centre Claremont<br />
7700<br />
Republic of SOUTH AFRICA<br />
P.O. Box 23032<br />
Claremont, Cape Town<br />
SOUTH AFRICA, 7735<br />
TEL: (021) 674 4030<br />
ASIA<br />
CHINA<br />
Beijing Xinghai Musical<br />
Instruments Co., Ltd.<br />
6 Huangmuchang Chao Yang<br />
District, Beijing, CHINA<br />
TEL: (010) 6774 7491<br />
HONG KONG<br />
Tom Lee Music Co., Ltd.<br />
Service Division<br />
22-32 Pun Shan Street, Tsuen<br />
Wan, New Territories,<br />
HONG KONG<br />
TEL: 2415 0911<br />
INDIA<br />
Rivera Digitec (India) Pvt. Ltd.<br />
409, Nirman Kendra Mahalaxmi<br />
Flats Compound Off. Dr. Edwin<br />
Moses Road, Mumbai-400011,<br />
INDIA<br />
TEL: (022) 498 3079<br />
INDONESIA<br />
PT Citra IntiRama<br />
J1. Cideng Timur No. 15J-150<br />
Jakarta Pusat<br />
INDONESIA<br />
TEL: (021) 6324170<br />
KOREA<br />
Cosmos Corporation<br />
1461-9, Seocho-Dong,<br />
Seocho Ku, Seoul, KOREA<br />
TEL: (02) 3486-8855<br />
MALAYSIA<br />
Bentley Music SDN BHD<br />
140 & 142, Jalan Bukit Bintang<br />
55100 Kuala Lumpur,MALAYSIA<br />
TEL: (03) 2443333<br />
PHILIPPINES<br />
G.A. Yupangco & Co. Inc.<br />
339 Gil J. Puyat Avenue<br />
Makati, Metro Manila 1200,<br />
PHILIPPINES<br />
TEL: (02) 899 9801<br />
SINGAPORE<br />
Swee Lee Company<br />
150 Sims Drive,<br />
SINGAPORE 387381<br />
TEL: 748-1669<br />
CRISTOFORI MUSIC PTE<br />
LTD<br />
Blk 3014, Bedok Industrial Park E,<br />
#02-2148, SINGAPORE 489980<br />
TEL: 243 9555<br />
TAIWAN<br />
ROLAND TAIWAN<br />
ENTERPRISE CO., LTD.<br />
Room 5, 9fl. No. 112 Chung Shan<br />
N.Road Sec.2, Taipei, TAIWAN,<br />
R.O.C.<br />
TEL: (02) 2561 3339<br />
THAILAND<br />
Theera Music Co. , Ltd.<br />
330 Verng NakornKasem, Soi 2,<br />
Bangkok 10100, THAILAND<br />
TEL: (02) 2248821<br />
VIETNAM<br />
Saigon Music<br />
138 Tran Quang Khai St.,<br />
District 1<br />
Ho Chi Minh City<br />
VIETNAM<br />
TEL: (08) 844-4068<br />
AUSTRALIA/<br />
NEW ZEALAND<br />
AUSTRALIA<br />
<strong>Roland</strong> Corporation<br />
Australia Pty., Ltd.<br />
38 Campbell Avenue<br />
Dee Why West. NSW 2099<br />
AUSTRALIA<br />
TEL: (02) 9982 8266<br />
NEW ZEALAND<br />
<strong>Roland</strong> Corporation (NZ) Ltd.<br />
97 Mt. Eden Road, Mt. Eden,<br />
Auckland 3, NEW ZEALAND<br />
TEL: (09) 3098 715<br />
CENTRAL/LATIN<br />
AMERICA<br />
ARGENTINA<br />
Instrumentos Musicales S.A.<br />
Florida 656 2nd Floor<br />
Office Number 206A<br />
Buenos Aires<br />
ARGENTINA, CP1005<br />
TEL: (54-11) 4- 393-6057<br />
BRAZIL<br />
<strong>Roland</strong> Brasil Ltda<br />
Rua San Jose, 780 Sala B<br />
Parque Industrial San Jose<br />
Cotia - Sao Paulo - SP, BRAZIL<br />
TEL: (011) 4615 5666<br />
COSTA RICA<br />
JUAN Bansbach<br />
Instrumentos Musicales<br />
Ave.1. Calle 11, Apartado 10237,<br />
San Jose, COSTA RICA<br />
TEL: (506)258-0211<br />
CHILE<br />
Comercial Fancy ΙΙ S.A.<br />
Avenida Rancagua #0330<br />
Providencia Santiago, CHILE<br />
TEL: 56-2-373-9100<br />
EL SALVADOR<br />
OMNI MUSIC<br />
75 Avenida Notre YY Alameda,<br />
Juan Pablo 2, No. 4010<br />
San Salvador, EL SALVADOR<br />
TEL: (503) 262-0788<br />
MEXICO<br />
Casa Veerkamp, s.a. de c.v.<br />
Av. Toluca No. 323, Col. Olivar<br />
de los Padres 01780 Mexico D.F.<br />
MEXICO<br />
TEL: (525) 668 04 80<br />
La Casa Wagner de<br />
Guadalajara s.a. de c.v.<br />
Av. Corona No. 202 S.J.<br />
Guadalajara, Jalisco Mexico<br />
C.P.44100 MEXICO<br />
TEL: (3) 613 1414<br />
PANAMA<br />
SUPRO MUNDIAL, S.A.<br />
Boulevard Andrews, Albrook,<br />
Panama City,<br />
REP. DE PANAMA<br />
TEL: (507) 315-0101<br />
PARAGUAY<br />
Distribuidora De<br />
Instrumentos Musicales<br />
J.E. Olear y ESQ. Manduvira<br />
Edeficio, El Dorado Planta Baja<br />
Asuncion PARAGUAY<br />
TEL: 595-21-492147<br />
PERU<br />
VIDEO Broadcast S.A.<br />
Portinari 199 (ESQ. HALS),<br />
San Borja, Lima 41,<br />
REP. OF PERU<br />
TEL: 51-14-758226<br />
URUGUAY<br />
Todo Musica S.A.<br />
Cuareim 1844, Montevideo,<br />
URUGUAY, CP11200<br />
TEL: 5982-924-2335<br />
VENEZUELA<br />
Musicland Digital C.A.<br />
Av. Francisco de Miranda,<br />
Centro Parque de Cristal, Nivel<br />
C2 Local 20 Caracas<br />
VENEZUELA<br />
TEL: (02) 285 9218<br />
EUROPE<br />
AUSTRIA<br />
<strong>Roland</strong> Austria GES.M.B.H.<br />
Siemensstrasse 4, P.O. Box 74,<br />
A-6063 RUM, AUSTRIA<br />
TEL: (0512) 26 44 260<br />
BELGIUM/HOLLAND/<br />
LUXEMBOURG<br />
<strong>Roland</strong> Benelux N. V.<br />
Houtstraat 3, B-2260, Oevel<br />
(Westerlo) BELGIUM<br />
TEL: (014) 575811<br />
DENMARK<br />
<strong>Roland</strong> Scandinavia A/S<br />
Nordhavnsvej 7, Postbox 880,<br />
DK-2100 Copenhagen<br />
DENMARK<br />
TEL: (039)16 6200<br />
FRANCE<br />
<strong>Roland</strong> France SA<br />
4, Rue Paul Henri SPAAK,<br />
Parc de l'Esplanade, F 77 462 St.<br />
Thibault, Lagny Cedex FRANCE<br />
TEL: 01 600 73 500<br />
FINLAND<br />
<strong>Roland</strong> Scandinavia As,<br />
Filial Finland<br />
Lauttasaarentie 54 B<br />
Fin-00201 Helsinki, FINLAND<br />
TEL: (9) 682 4020<br />
GERMANY<br />
<strong>Roland</strong> Elektronische<br />
Musikinstrumente HmbH.<br />
Oststrasse 96, 22844 Norderstedt,<br />
GERMANY<br />
TEL: (040) 52 60090<br />
GREECE<br />
STOLLAS S.A.<br />
Music Sound Light<br />
155, New National Road<br />
26422 Patras, GREECE<br />
TEL: 061-435400<br />
HUNGARY<br />
Intermusica Ltd.<br />
Warehouse Area ‘DEPO’ Pf.83<br />
H-2046 Torokbalint, HUNGARY<br />
TEL: (23) 511011<br />
IRELAND<br />
<strong>Roland</strong> Ireland<br />
Audio House, Belmont Court,<br />
Donnybrook, Dublin 4.<br />
Republic of IRELAND<br />
TEL: (01) 2603501<br />
ITALY<br />
<strong>Roland</strong> Italy S. p. A.<br />
Viale delle Industrie 8,<br />
20020 Arese, Milano, ITALY<br />
TEL: (02) 937-78300<br />
NORWAY<br />
<strong>Roland</strong> Scandinavia Avd.<br />
Kontor Norge<br />
Lilleakerveien 2 Postboks 95<br />
Lilleaker N-0216 Oslo<br />
NORWAY<br />
TEL: 273 0074<br />
POLAND<br />
P. P. H. Brzostowicz<br />
UL. Gibraltarska 4.<br />
PL-03664 Warszawa POLAND<br />
TEL: (022) 679 44 19<br />
PORTUGAL<br />
Tecnologias Musica e Audio,<br />
<strong>Roland</strong> Portugal, S.A.<br />
Cais Das Pedras, 8/9-1 Dto<br />
4050-465 PORTO<br />
PORTUGAL<br />
TEL: (022) 608 00 60<br />
ROMANIA<br />
FBS LINES<br />
Piata Libertatii 1,<br />
RO-4200 Gheorghehi<br />
TEL: (066) 164-609<br />
RUSSIA<br />
Slami Music Company<br />
Sadojava-Triumfalnaja st., 16<br />
103006 Moscow, RUSSIA<br />
TEL: 095 209 2193<br />
SPAIN<br />
<strong>Roland</strong> Electronics<br />
de España, S. A.<br />
Calle Bolivia 239, 08020<br />
Barcelona, SPAIN<br />
TEL: (93) 308 1000<br />
SWEDEN<br />
<strong>Roland</strong> Scandinavia A/S<br />
SWEDISH SALES OFFICE<br />
Danvik Center 28, 2 tr.<br />
S-131 30 Nacka SWEDEN<br />
TEL: (08) 702 0020<br />
SWITZERLAND<br />
<strong>Roland</strong> (Switzerland) AG<br />
Musitronic AG<br />
Gerberstrasse 5, Postfach,<br />
CH-4410 Liestal, SWITZERLAND<br />
TEL: (061) 921 1615<br />
UKRAINE<br />
TIC-TAC<br />
Mira Str. 19/108<br />
P.O. Box 180<br />
295400 Munkachevo, UKRAINE<br />
TEL: (03131) 414-40<br />
UNITED KINGDOM<br />
<strong>Roland</strong> (U.K.) Ltd.<br />
Atlantic Close, Swansea<br />
Enterprise Park, SWANSEA<br />
SA7 9FJ,<br />
UNITED KINGDOM<br />
TEL: (01792) 700139<br />
MIDDLE EAST<br />
BAHRAIN<br />
Moon Stores<br />
Bab Al Bahrain Road,<br />
P.O. Box 20077<br />
State of BAHRAIN<br />
TEL: 211 005<br />
CYPRUS<br />
Radex Sound Equipment Ltd.<br />
17 Diagorou St., P.O. Box 2046,<br />
Nicosia CYPRUS<br />
TEL: (02) 453 426<br />
ISRAEL<br />
Halilit P. Greenspoon &<br />
Sons Ltd.<br />
8 Retzif Ha'aliya Hashnya St.<br />
Tel-Aviv-Yafo ISRAEL<br />
TEL: (03) 6823666<br />
JORDAN<br />
AMMAN Trading Agency<br />
Prince Mohammed St. P.O. Box<br />
825 Amman 11118 JORDAN<br />
TEL: (06) 4641200<br />
KUWAIT<br />
Easa Husain Al-Yousifi<br />
Abdullah Salem Street,<br />
Safat KUWAIT<br />
TEL: 5719499<br />
LEBANON<br />
A. Chahine & Fils<br />
P.O. Box 16-5857 Gergi Zeidan St.<br />
Chahine Building, Achrafieh<br />
Beirut, LEBANON<br />
TEL: (01) 335799<br />
QATAR<br />
Al Emadi Co. (Badie Studio<br />
& Stores)<br />
P.O. Box 62,<br />
DOHA QATAR<br />
TEL: 4423-554<br />
SAUDI ARABIA<br />
aDawliah Universal<br />
Electronics APL<br />
Corniche Road, Aldossary Bldg.,<br />
1st Floor<br />
SAUDI ARABIA<br />
P.O.Box 2154, Alkhobar 31952<br />
SAUDI ARABIA<br />
TEL: (03) 898 2081<br />
SYRIA<br />
Technical Light & Sound<br />
Center<br />
Khaled Ibn Al Walid St.<br />
P.O. Box 13520<br />
Damascus - SYRIA<br />
TEL: (011) 2235 384<br />
TURKEY<br />
Barkat muzik aletleri ithalat<br />
ve ihracat Ltd Sti<br />
Siraselviler cad.Guney is hani 84-<br />
86/6, Taksim. Istanbul. TURKEY<br />
TEL: (0212) 2499324<br />
U.A.E.<br />
Zak Electronics & Musical<br />
Instruments Co. L.L.C.<br />
Zabeel Road, Al Sherooq Bldg.,<br />
No. 14, Grand Floor DUBAI<br />
U.A.E.<br />
TEL: (04) 3360715<br />
NORTH AMERICA<br />
CANADA<br />
<strong>Roland</strong> Canada Music Ltd.<br />
(Head Office)<br />
5480 Parkwood Way Richmond<br />
B. C., V6V 2M4 CANADA<br />
TEL: (0604) 270 6626<br />
<strong>Roland</strong> Canada Music Ltd.<br />
(Toronto Office)<br />
Unit 2, 109 Woodbine Downs<br />
Blvd, Etobicoke, ON<br />
M9W 6Y1 CANADA<br />
TEL: (0416) 213 9707<br />
U. S. A.<br />
<strong>Roland</strong> Corporation U.S.<br />
5100 S. Eastern Avenue<br />
Los Angeles, CA 90040-2938,<br />
U. S. A.<br />
TEL: (323) 890 3700<br />
IRAN<br />
MOCO, INC.<br />
No.41 Nike St.Dr.Shariyati Ave.<br />
Roberoye Cerahe Mirdamad<br />
Tehran, IRAN<br />
TEL: 285 4169<br />
As of February 5, 2001 (<strong>Roland</strong>)<br />
02670878 ’01-5-E3-11N