
You also want an ePaper? Increase the reach of your titles
YUMPU automatically turns print PDFs into web optimized ePapers that Google loves.
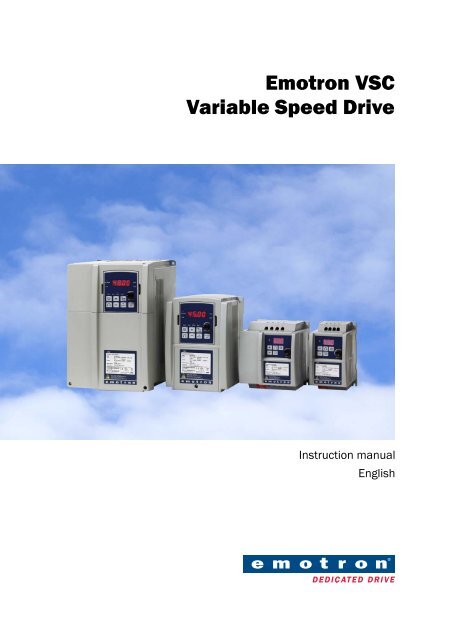
<strong>Emotron</strong> <strong>VSC</strong><br />
<strong>Variable</strong> <strong>Speed</strong> <strong>Drive</strong><br />
Instruction manual<br />
English
Quick Start Guide<br />
This guide is to assist in installing and running the variable<br />
speed drive, VSD, to verify that the drive and motor are<br />
working properly. Starting, stopping and speed control will<br />
be from the keypad. If your application requires external<br />
control or special system programming, consult the <strong>VSC</strong><br />
Instruction Manual supplied with your VSD.<br />
Step 1 Before Starting the VSD<br />
Please review Preface and Safety Precautions of the <strong>VSC</strong><br />
Instruction Manual. Verify drive was installed in accordance<br />
with the procedures as described in <strong>VSC</strong> Ambient Environment<br />
and Installation. If you feel this was abnormal, do not<br />
start the drive until qualified personnel have corrected the<br />
situation. (Failure to do so could result in serious injury.)<br />
• Check VSD and motor nameplates to determine that<br />
they have the same HP and voltage ratings. (Ensure that<br />
full load motor amps do not exceed that of the VSD.)<br />
• Remove the terminal cover to expose the motor and<br />
power terminals.<br />
a. Verify that AC power is wired to L1, L2, and L3<br />
(pages 3-12).<br />
b. Verify that motor leads are connected to T1, T2, and<br />
T3 (pages 3-12).<br />
(The two leads may need to be reversed if motor rotation<br />
is not correct.<br />
1. SEQ LED: 1_00=1, LED Lit.<br />
2. FRQ LED: 1_01=1/2/3/4, LED Lit.<br />
3. FWD LED: Forward Direction, LED action (Flashes if<br />
stopped, stays lit during operation).<br />
4. REV LED: Reverse Direction, LED action (Flashes if<br />
stopped, Stays lit during operation).<br />
<strong>Emotron</strong> AB 01-3992-01r3<br />
5. 4-action LED: FUN, Hz/RPM,VOLT and AMP and<br />
four 7-segment display, refer to operation instructions<br />
for the keypad.<br />
Step 2 Apply Power to the <strong>Drive</strong><br />
Apply AC power to the drive and observe operator. Four 7segment<br />
display should read power voltage for 3 to 5 seconds<br />
and then read frequency/speed, 05.00. Four 7-segment<br />
display and FWD LED should flash all the time.<br />
Step 3 Check Motor Rotation Without<br />
Load<br />
• Press the key (FWD LED should light up); four 7-<br />
•<br />
segment display should run from 00.00 to 05.00.<br />
Check motor rotation.<br />
If it is not correct:<br />
• Press the key. Disconnect AC power. Wait for LED<br />
•<br />
charge lamp to extinguish.<br />
Reverse motor leads T1 and T2. Restart the drive and<br />
check new rotation.<br />
• Press the key to stop the drive.<br />
Step 4 Check Full <strong>Speed</strong> at 50Hz/60Hz<br />
• Frequency/<strong>Speed</strong> can be changed by pressing the or<br />
keys. To move right or left for next digit, press the<br />
key. Press the key to set the speed.<br />
• Set frequency up to 50Hz/60Hz in accordance with the<br />
last rule.<br />
• Press the key. Check drive acceleration up to full<br />
speed.<br />
• Press the key to stop drive and check deceleration.<br />
Step 5 Other Operations<br />
For information, see <strong>VSC</strong> Instruction Manual.<br />
Please refer to the following pages:<br />
Set Accel..................................................................... .p. 32<br />
Set Decel .................................................................... p. 32<br />
Set Max <strong>Speed</strong> ............................................................ p. 32<br />
Set Min <strong>Speed</strong> ............................................................ p. 32<br />
Set Motor Rated Current............................................. p. 29<br />
Set Control Mode (Vector, V/F) .................................. p. 28
<strong>Emotron</strong> AB 01-3992-01r3
2 <strong>Emotron</strong> AB 01-3992-01r3
Preface<br />
To extend the performance of the product and ensure your<br />
safety, please read this manual thoroughly before using the<br />
VSD. Should there be any problem when using the product<br />
that cannot be solved with the information provided in the<br />
manual, contact your nearest <strong>Emotron</strong> distributor or sales<br />
representative who will be willing to help you.<br />
Precautions<br />
The VSD is an electronic product. For your safety, there are<br />
symbols such as “Danger” and “Caution” in this manual to<br />
remind you to pay attention to safety instructions on handling,<br />
installing, operating and checking the VSD. Be sure<br />
to follow the instructions for optimum safety.<br />
!<br />
WARNING: Indicates a potential hazard could<br />
cause death or serious personal injury if<br />
misused.<br />
CAUTION: Indicates that the VSD or the<br />
mechanical system might be damaged if<br />
misused.<br />
WARNING: Do not touch any circuit boards or<br />
components if the charging indicator is still<br />
lit after turned the power off.<br />
Do not wire when the VSD is electrified. Do not check<br />
parts and signals on circuit boards during the VSD<br />
operation.<br />
Do not disassemble the VSD or modify internal wires,<br />
circuits and parts.<br />
Earth the ground terminal of the VSD properly. As per<br />
400 V class, earth to 10 Ohm or below.<br />
!<br />
CAUTION: Do not perform a voltage test on<br />
parts inside the VSD. High voltage will easily<br />
destroy these semiconductor parts.<br />
Do not connect the VSD’s T1 (U), T2 (V) and T3 (W)<br />
terminals to an AC power supply.<br />
CMOS ICs on the VSD’s main board are susceptible to<br />
static electricity. Do not touch the main circuit board<br />
Products Inspection<br />
<strong>Emotron</strong>’s VSDs are all function tested before delivery.<br />
Please check the following when you receive and unpack the<br />
VSD:<br />
• The model and capacity of the VSD are the same as<br />
those specified in your purchase order.<br />
• That there is not any damage caused by transportation.<br />
Please do not switch on the power, and do contact <strong>Emotron</strong>’s<br />
sales representatives if you experience any problems.<br />
<strong>Emotron</strong> AB 01-3992-01r3 3
4 <strong>Emotron</strong> AB 01-3992-01r3
Safety Precautions<br />
Operation Precaution<br />
Before Power ON<br />
!<br />
!<br />
CAUTION: The line voltage applied must<br />
comply with the VSD’s specified input<br />
voltage.<br />
WARNING: Make sure the main circuit<br />
connections are correct. L1, L2 and L3 are<br />
power-input terminals and must not be<br />
mistaken for T1, T2 and T3. If they are, the<br />
VSD might get damaged.<br />
CAUTION: To avoid the front cover<br />
disengaging, do not pull the cover during<br />
handling or the heat sink may fall off. This<br />
will damage the VSD or cause a personal<br />
injury, which should be avoided.<br />
To avoid the risk of fire, do not install the VSD on a<br />
flammable object. Install it on a non-flammable object<br />
such as metal.<br />
If several VSDs are placed in the same control panel, add<br />
an extra heat sink to keep the temperature below 40°C<br />
to avoid overheating or fire.<br />
When removing or installing the operator, turn OFF the<br />
power first, and follow the instructions in the diagram to<br />
avoid operator error or no display due to bad contact.<br />
!<br />
WARNING: According to IEC 61800-3, this<br />
product belongs to the restricted sales<br />
distribution class. In a domestic environment<br />
this product may cause radio interference in<br />
which case the user may be required to take<br />
appropriate measures.<br />
CAUTION: To ensure the safety of peripheral<br />
devices, it is strongly recommended to install<br />
the right fuse in the mains input side. Check<br />
chapter 2.3.1. for specifications and<br />
information concerning fuse type.<br />
During Power ON<br />
WARNING: Do not plug or unplug the<br />
connectors on the VSD when electrified,<br />
otherwise the control panel may be damaged<br />
as a result of an erratic transition voltage<br />
surge from contact bounce.<br />
When momentary power loss is longer than 2 seconds<br />
(the greater the horsepower, the longer the time), the<br />
VSD does not have enough power stored to control the<br />
circuit. Therefore, when power is regenerated, the<br />
operation of the VSD is based on the setup for 1-00 / 2-<br />
05 and the condition of the external switch. This is the<br />
definition or restart in the following paragraphs.<br />
When the momentary power loss is short, the VSD still<br />
has enough power stored to control the circuit.<br />
Therefore, when power is regenerated, the VSD will<br />
automatically restart according on the setup of 2-00/2-<br />
01.<br />
When the VSD is restarted, the operation is based on the<br />
setup for 1-00 and 2-05 and the condition of the external<br />
switch ( key). Note: The start operation is irrelevant<br />
with 2-00/2-01/2-02/2-03.<br />
1. When 1-00=0000, the VSD will not automatically run<br />
after restart.<br />
2. When 1-00=0001 and the external switch ( key) is<br />
OFF, the VSD will not run after restart.<br />
3. When 1-00=0001, the external switch ( key) is<br />
ON, and 2-05=0000, the VSD will run automatically after<br />
restart. Note: For safety reasons, please turn off the<br />
external switch ( key) after power loss to body if the<br />
power resumes suddenly.<br />
To ensure personal and machinery safety, please refer to<br />
the description and suggestion in 2-05<br />
<strong>Emotron</strong> AB 01-3992-01r3 5
Before Operation<br />
!<br />
WARNING: Make sure the model and<br />
capacity are the same as those set with 15-<br />
0.<br />
CAUTION: The VSD will flash the power<br />
voltage set by 0-07 for 5 seconds when<br />
power is applied.<br />
During Operation<br />
WARNING: Do not engage or disengage the<br />
motor during operation. Otherwise, the overcurrent<br />
will cause the VSD to disconnect or<br />
the main circuit to burn.<br />
WARNING: To avoid electric shock, do not<br />
take the front cover off when the power is on.<br />
The motor will restart automatically after<br />
stop when the auto-restart function is enabled. In this<br />
case, do not get close to the machine.<br />
Note: The stop switch is not used in the same way as the<br />
emergency stop switch. It must first be set to be<br />
effective.<br />
!<br />
CAUTION: Do not touch heat-generating<br />
components such as the heat sink and<br />
braking resistor.<br />
The VSD can drive the motor from low speed to high<br />
speed. Verify the motor’s range of permitted capacities<br />
and the mechanism.<br />
Note the settings related to the braking reactor.<br />
Do not check signals on circuit boards while the VSD is<br />
running.<br />
!<br />
CAUTION: The components cannot be<br />
disassembled or checked until five minutes<br />
after the power supply has been turned OFF<br />
and the indicator is off.<br />
During Maintenance<br />
CAUTION: The VSD should be used in a noncondensed<br />
environment with temperature<br />
from –10 to +40°C and relative humidity of<br />
95%.<br />
CAUTION: When the VSD top cover has been<br />
removed, it can be used in a non-condensed<br />
environment with temperature from –10 to<br />
+50°C and relative humidity of 95%, but the<br />
environment should be free from water and<br />
metal dust.<br />
6 <strong>Emotron</strong> AB 01-3992-01r3<br />
!<br />
!
1. Model Definition<br />
VSD model<br />
Input voltage<br />
Output specifications<br />
<strong>VSC</strong> 48 001<br />
Series<br />
Supply voltage<br />
48: 380-480 VAC<br />
Power<br />
009:4 kW<br />
013:5.5 kW<br />
018:7.5 kW<br />
Model: <strong>VSC</strong>48-013<br />
I/P : AC 3 PH<br />
480V 50/60Hz<br />
013 : AC 3PH 0~480V<br />
5.5kW 13 A<br />
EMOTRON AB<br />
<strong>Emotron</strong> AB 01-3992-01r3 Model Definition 7
8 Model Definition <strong>Emotron</strong> AB 01-3992-01r3
2. Ambient Conditions and Installation<br />
2.1 Environment<br />
The environment will directly affect the proper operation<br />
and the life span of the inverter, so install the inverter in an<br />
environment complying with the following conditions:<br />
Ambient temperature: -10 o C - +40 o C; without cover: -10 o C - +50 o C<br />
Avoid exposure to rain or moisture. Avoid direct sunlight.<br />
Avoid oil mist and salinity. Avoid erosive liquid and gas.<br />
Avoid dust, bats, and small metal pieces. Keep away from radioactive and flammable materials.<br />
Avoid electromagnetic interference (soldering machine, power machine).<br />
Avoid vibration (punching machine). Add a vibration-proof pad if the situation cannot be avoided.<br />
If several inverters are placed in the same control panel, add extra heat sinks to keep the temperature below 40 o C.<br />
Inside the power<br />
distributor<br />
(Correct configuration)<br />
• Place the front side of the inverter onward and top<br />
upward to in favour of heat sink.<br />
• Install the inverter according to the following figures:<br />
(take the dust proof cover off in favour of heat sinking if<br />
it is installed in a box or the environment allows to do<br />
so).<br />
<strong>VSC</strong>48<br />
Installing<br />
direction<br />
5 cm 5 cm<br />
Air convection<br />
0°C - +40°C<br />
(a) Front view<br />
12 cm<br />
12 cm<br />
Inside<br />
the<br />
power<br />
distributor<br />
(Incorrect configuration)<br />
5 cm<br />
(b) Side view<br />
Air exchanging fan<br />
Inside<br />
the<br />
power<br />
distributor<br />
(Correct configuration)<br />
Air exchanging fan<br />
(Incorrect configuration)<br />
<strong>Emotron</strong> AB 01-3992-01r3 Ambient Conditions and Installation 9
2.2 Environmental precautions<br />
Do not use the inverter in an environment with the following<br />
conditions.<br />
Direct sunlight Corrosive gas and liquid Oil Mist<br />
Salt<br />
Salt Wind, rain, and water<br />
drops may get into<br />
Strong vibration Extreme low temperature<br />
Electromagnetic wave and<br />
ultra high wave<br />
(Near an electric welding machine)<br />
Radioactive materials<br />
10 Ambient Conditions and Installation <strong>Emotron</strong> AB 01-3992-01r3<br />
Oil<br />
Iron filings, dust<br />
Excessive high<br />
temperature<br />
Inflammable materials
2.3 Installation<br />
2.3.1 Wiring notes<br />
A. Fastening terminals:<br />
Connect wiring with a screwdriver or other tool and take the<br />
fastening torque listed below in account:<br />
Power<br />
Power<br />
source<br />
Fastening torque<br />
Nominal torque for TM1 terminal<br />
4/5.5/7.5 380-480V 1.5/0.21, (LBS-FT / KG-M)<br />
B. Power wires:<br />
Power wires are connected to L1, L2, L3, T1, T2, T3, P, BR<br />
and P1. Choose wires in accordance with the following criteria:<br />
1. Use copper wires only. Deciding diameters of wires<br />
should be based on rating working at 105 o C.<br />
2. For rating voltage of wires, the minimum voltage of<br />
460VAC type is 600V.<br />
3. For safety reason, the power wires should be fixed by<br />
type terminal.<br />
C. Control wires:<br />
Control wires are wires connected to TM2 control terminal.<br />
Choose the wire in accordance with the following criteria:<br />
1. Use copper wires only. Deciding diameters of wires<br />
should be based on rating working at 105oC. 2. For rating voltage of wires, the minimum voltage of<br />
460VAC type is 600V.<br />
3. To avoid noise interference, do not route the control<br />
wires in the same conduit with power wires and motor<br />
wires.<br />
D. Nominal electrical specifications of the<br />
terminals Block:<br />
The following list is nominal values of TM1:<br />
Power Power source Volts Amps<br />
4/5.5/7.5 380-480V 600 40A<br />
Note: Nominal values of input and output signals (TM2) –<br />
follow the specifications of class 2 wiring.<br />
E. Fuse types<br />
<strong>Drive</strong> input fuses are provided to disconnect the drive from<br />
power in the event that a component fails in the drive’s<br />
power circuitry. The drive’s electronic protection circuitry is<br />
designed to clear drive output short circuits and ground<br />
faults without blowing the drive input fuses. The table<br />
below shows the <strong>VSC</strong> input fuse ratings.<br />
To protect the inverter most effectively, use fuses with<br />
current-limiting function, non delay type, and also<br />
consider the applicable local regulations for short circuit<br />
and overload protection.<br />
For UL approval, select one of the following fuse type:<br />
RK5, CC or T.<br />
For non UL applications the fuse type gG or aR can be<br />
used.<br />
RK5, C/T TYPE FUSE FOR <strong>VSC</strong><br />
440V class (3ϕ)<br />
<strong>VSC</strong>48- HP KW KVA<br />
100%<br />
CONT<br />
Output<br />
AMPS<br />
(A)<br />
MaxRK5<br />
FUSE<br />
Rating<br />
(A)<br />
Max.CC<br />
or T<br />
FUSE<br />
Rating<br />
(A)<br />
009 5 4 6.7 8.8 20 30<br />
013 7.5 5.5 9.9 13 25 35<br />
018 10 7.5 13.3 17.5 30 50<br />
*Fuse ratings are based upon 600V fuses for 460V inverters<br />
Notice<br />
• To avoid shock hazards, do not touch any electrical component<br />
when the power is applied or until the power<br />
plug has been disconnected for five minutes. Other<br />
action should be performed after the charge indicator<br />
goes off.<br />
• Do not wire the inverter while it is still electrified. Disregarding<br />
this could cause serious injury or death.<br />
This product is designed for use in Pollution Degree 2 environments<br />
or equivalent.<br />
<strong>Emotron</strong> AB 01-3992-01r3 Ambient Conditions and Installation 11
2.3.2 Applicable specification of<br />
magnetic contactor and wires<br />
Moulded-case circuit breaker/magnetic contactor<br />
• <strong>Emotron</strong> bears no responsibility to service for failures<br />
caused by the following conditions:<br />
A moulded-case circuit breaker is not installed, or an<br />
improper or overrated breaker is used, between the<br />
power source and the inverter.<br />
A magnetic contactor, a phase capacitor, or a burst<br />
absorber is connected between the inverter and the<br />
motor.<br />
<strong>VSC</strong> model<br />
Moulded-case circuit<br />
breaker<br />
Magnetic contactor<br />
(MC)<br />
Main circuit terminals<br />
(TM1)<br />
Signal terminals<br />
(TM2)<br />
TO-50E<br />
15A<br />
<strong>VSC</strong>48-<br />
009 013 018<br />
TO-50E<br />
20A<br />
TO-50E<br />
30A<br />
CN-11 CN-16 CN-18<br />
Wire gauge<br />
2.0mm 2<br />
Wire gauge 3.5mm 2<br />
Wire gauge 0.75mm 2 (# 18 AWG),<br />
terminal screw M3<br />
Use three-phase cage induction motor with power suitable<br />
for the inverter.<br />
• One inverter is driving several motors, the total current<br />
of all motors running simultaneously must be less than<br />
the rated current of the inverter, and each motor has to<br />
be equipped with a proper thermal relay.<br />
• Do not add capacitive component, such as a phase<br />
capacitor, LC or RC, between the inverter and the<br />
motor.<br />
12 Ambient Conditions and Installation <strong>Emotron</strong> AB 01-3992-01r3
2.3.3 Precautions for peripheral<br />
applications:<br />
Power<br />
Moulded-case<br />
Circuit breaker<br />
Magnetic contactor<br />
AC reactor for<br />
power improvement<br />
<strong>VSC</strong>48<br />
<strong>Variable</strong> speed drive<br />
Motor<br />
Power supply:<br />
• Make sure the correct voltage is applied to avoid damaging<br />
the inverter.<br />
• A moulded-case circuit breaker must be installed<br />
between the AC source and the inverter.<br />
Moulded-case circuit breaker:<br />
• Use a moulded-case circuit breaker that conforms to the<br />
rated voltage and current of the inverter to control the<br />
power ON/OFF and protect the inverter.<br />
• Do not use the inverter as the switch for the run/stop<br />
switch.<br />
Leakage breaker:<br />
• Install a leakage breaker to prevent error operation<br />
caused by electric leakage and to protect operators.<br />
• Setting current should be 200 mA or above and the<br />
operating time at 0.1 second or longer to prevent malfunction.<br />
Magnetic contactor:<br />
• Normal operations do not need a magnetic contactor.<br />
But a contactor has to be installed on the primary side<br />
when performing functions such as external control and<br />
auto restart after power failure, or when using brake controller.<br />
• Do not use the magnetic contactor as the run/stop<br />
switch for the inverter.<br />
AC reactor for power improvement:<br />
• When inverters below 400V 15 kW are supplied with a<br />
high capacity (above 600 kVA) power source or an AC<br />
reactor can be connected to improve the power performance.<br />
Inverter:<br />
• Input power terminals L1, L2, and L3 can be used in any<br />
sequence regardless of phases.<br />
• Output terminals T1, T2, and T3 are connected to the<br />
motor's U, V, and W terminals. If the motor is reversed<br />
while the inverter is forward, just swap any two terminals<br />
of T1, T2, and T3.<br />
• To avoid damaging the inverter, do not connect the output<br />
terminals T1, T2, and T3 to AC power.<br />
• Connect the ground terminal properly. 400 V series:<br />
A: Main circuit’s wiring must be separated from other high<br />
voltage or high current power line to avoid noise interference.:<br />
A noise filter in the output of the main circuit can suppress<br />
conductive noise. To prevent radiative noise, the wires<br />
Power supply<br />
~<br />
• When the connection between the inverter and the<br />
motor is too long, consider the voltage drop of the circuit.<br />
Phase-to-phase voltage drop (V) =<br />
3×resistance of wire (/km)×length of line (m)×cur-<br />
The length (L) of the line between the<br />
inverter and the motor<br />
MCCB<br />
Metal box<br />
<strong>VSC</strong>48<br />
(B) The wiring of the control circuit must be separated and<br />
routed away from the main circuit control line or other high<br />
voltage or current power lines to avoid noise interference<br />
• To avoid error actions caused by noise interference,<br />
shield the control circuit wiring with a twisted wire, and<br />
connect the shielded wire to a ground terminal. Refer to<br />
the figure below.<br />
The wiring distance should not exceed 50 m.<br />
(C) Ground the ground terminal of the inverter properly.<br />
For 400V class ground 10Ω or less.<br />
• Ground wiring is based on the electrical equipment technical<br />
basis (AWG). The shorter, the better.<br />
• Do not share the ground of the inverter to other high<br />
current loads (welding machine, high power motor).<br />
Connect the terminals to ground respectively.<br />
should be put in a metal pipe and distance from signal lines<br />
of other control machines for more than 30 cm.<br />
Metal pipe<br />
Signal wire<br />
rent×10 -3 . The carrier frequency must be adjusted based<br />
on the length of the line.<br />
• Do not make a loop when several inverters share a common<br />
ground point.<br />
(a) Good (b) Good (c) Bad<br />
(D) To ensure maximum safety, use proper wire gauges<br />
(AWG) for the main power circuit and control circuit<br />
according to relative regulations.<br />
(E) After wiring, check that the wiring is correct, wires are<br />
intact, and terminal screws are secured.<br />
14 Ambient Conditions and Installation <strong>Emotron</strong> AB 01-3992-01r3<br />
M<br />
Controller<br />
above<br />
L < 25m 25m < L < 50m 50m < L < 100m L > 100m<br />
Number of carriers allowed Below 16KHz Below 12KHz Below 8KHz Below 5KHz<br />
Settings of 3-22parameter 16 12 8 5<br />
Shielded wire<br />
To ground terminal<br />
(refer to instructions<br />
of filter wiring)<br />
Protective<br />
Wrapped with insulating<br />
Do not connect this end
2.4 Specifications<br />
2.4.1 Products Individual<br />
Specifications<br />
Three phases, 380 – 480V model<br />
<strong>VSC</strong>48 009 013 018<br />
Horsepower (HP) 5 7.5 10<br />
Suitable Motor Capacity (KW) 3.7 5.5 7.5<br />
Rated Output Current (A) 8.8 13.0 17.5<br />
2.4.2 General Specifications<br />
Rated Capacity (KVA) 6.7 9.9 13.3<br />
Max. Input Voltage<br />
Three phase:380~480V<br />
+10% -15% 50/60Hz± 5%<br />
Max. Output Voltage Three phase: 380~480V<br />
Input Current (A) 11.6 17 23<br />
Net Weight (KG) 2.2 6.6 6.6<br />
Allowable momentary power<br />
loss time (second)<br />
Item <strong>VSC</strong> TYPE<br />
Control Mode V/F or Current Vector Control<br />
Frequency Control<br />
Range 0.1~650.0 Hz<br />
Start control torque 150%/1Hz (Current Vector)<br />
<strong>Speed</strong> control range 1:50 (Current Vector)<br />
<strong>Speed</strong> Control Precision ±0.5% (Current Vector)<br />
Setting resolution Digital0.01Hz (Note *1) Analogue: 0.06Hz/ 60Hz (10bits)<br />
Keypad setting Set directly with keys or the VR on the keypad<br />
Display Function<br />
External signal setting<br />
2.0 2.0 2.0<br />
Four digital LED (or 2×16 LCD) and status indicator; display frequency/ speed/ line speed/<br />
DC voltage/ Output voltage/ Current/ Rotation direction/ Inverter parameter/ Trouble Log/<br />
Program Version<br />
External variable resistor/ 0-10V/ 0-20mA/ 10-0V/ 20-0mA<br />
Performs up/down controls, speed control or automatic procedure control with multifunctional<br />
contacts on the terminal block (TM2)<br />
Frequency Limit Function Respectively setting upper/lower frequency limits and three-stage prohibited frequencies<br />
<strong>Emotron</strong> AB 01-3992-01r3 Ambient Conditions and Installation 15
Carrier frequency 2 ~ 16 kHz<br />
V/F pattern 18fixable patterns, 1programable curve<br />
Acc/Dec control<br />
Two-stage Acc/Dec time (0.1 – 3,600 seconds) and two-stage S curves (refer to descriptions<br />
on 3-05)<br />
Multifunctional analog output 6 functions (refer to description on 8-00/8-01)<br />
Multifunctional input 30 functions (refer to description on 5-00~5-06)<br />
Multifunctional output 16 functions (refer to description on 8-02~8-03)<br />
Digital Input Signal NPN (SINK) / PNP (SOURCE) toggle<br />
Other Function<br />
Communication Control<br />
Momentary Power Loss Restart, <strong>Speed</strong> Search, Overload Detection, 8 preset speeds (PLC<br />
use 16 preset speeds). Acc/Dec Switch (2 Stages), S Curves, 3-wire Control, PID control,<br />
torque boost, Slip Compensation, Frequency Upper/ Lower Limit, Auto energy saving, Modbus<br />
slave, Auto Restart.<br />
Item <strong>VSC</strong> TYPE<br />
Control by RS232 or RS485<br />
One to one or One to more (RS485 ONLY) control.<br />
BAUD RATE/STOP BIT/PARITY/bit can be set<br />
Braking Torque About 20%, the model built-in braking transistor and connected braking resistor is 100%<br />
Operation temperature -10 ~ 50°C (note 2)<br />
Storage temperature -20 ~ 60°C<br />
Humidity 0 – 95% Relative Humidity (Non-condense)<br />
Vibration Sustention 1G (9.8m/s 2 )<br />
EMC Comply with requirement EN 61800-3 (1st environment, restricted distribution).<br />
LVD Comply with requirement EN 50178<br />
Enclosure IP20 (NEMA 1 by external box attached)<br />
Safety Level UL 508C<br />
16 Ambient Conditions and Installation <strong>Emotron</strong> AB 01-3992-01r3
Protective Functions<br />
Overload protection The relays to protect the motor (the curve can be set) and the inverter (150% / 1min)<br />
FUSE protection The motor stops after FUSE melt<br />
Over Voltage 400V class DC Voltage 820V<br />
Under Voltage 400V class DC Voltage 380V<br />
Momentary Power Loss<br />
Restart<br />
Stop for more than 15ms-power-loss can be restarted with spin start after momentary<br />
power loss in Max 2 sec.15ms<br />
Stall Prevention Stall prevention for Acceleration/ Deceleration/ Operation.<br />
Short-circuit output terminal Electronic Circuit Protection<br />
Grounding Fault Electronic Circuit Protection<br />
Other Function<br />
NOTE 1: The setting resolution of above 100Hz is 0.1Hz<br />
when controlled with operation keypad, and 0.01 Hz<br />
when controlled using computer (PC) or programmable<br />
controller (PLC).<br />
NOTE 2: -10 ~ 50°C in distributor (without dust proof<br />
cover), -10 ~ 40°C outside distributor (with dustpans<br />
cover).<br />
Protection for overheating of heat sink, over torque detection, error contact control,<br />
reverse restriction, restrictions for direct start after power up and error recovery, parameter<br />
lock up.<br />
<strong>Emotron</strong> AB 01-3992-01r3 Ambient Conditions and Installation 17
2.5 Wiring diagram for <strong>VSC</strong> series inverter<br />
Multifunction input terminal<br />
Moulded-case circuit breaker<br />
MCCB<br />
AC<br />
Power<br />
source<br />
ON/OFF<br />
Forward/stop or run/stop<br />
Reverse/stop or reverse/forward<br />
<strong>Speed</strong> control<br />
Reset/Error recovery<br />
(Multifunction input terminal)<br />
Common point for PNP input<br />
Common point for NPN<br />
Multifunction input terminal<br />
Frequency setting device<br />
Frequency indicator<br />
0~10 VDC<br />
Magnetic<br />
contactor<br />
(MC)<br />
P<br />
P<br />
Install<br />
fast<br />
action<br />
Burst absorber<br />
NOTE 1: Please refer to description of main circuit<br />
terminals (P1,BR) and specification of braking resistor<br />
for value selection.<br />
NOTE 2: the diagram above refers to 440V: 4~7.5 kW<br />
only.<br />
+<br />
P<br />
Note 2<br />
P1<br />
Note 2<br />
BR<br />
Note 2<br />
L1<br />
T1 (U)<br />
L2Power<br />
L3<br />
input<br />
Power<br />
output<br />
T2 (V)<br />
T2 (W)<br />
TM2<br />
S1<br />
S2<br />
S3<br />
S4<br />
S5<br />
S6<br />
24V<br />
24G<br />
AI2<br />
10V<br />
AIN<br />
+<br />
AGND<br />
FM+<br />
V NPN<br />
FM SW2 SW3 SW1<br />
AGND<br />
PE<br />
PNP<br />
18 Ambient Conditions and Installation <strong>Emotron</strong> AB 01-3992-01r3<br />
PE<br />
DC<br />
reactor<br />
Braking<br />
Resistor<br />
(note1)<br />
Digital<br />
control<br />
panel<br />
CON1<br />
PE<br />
CON2<br />
TM2<br />
R1A<br />
R1B<br />
R1C<br />
R2A<br />
R2B<br />
Induction<br />
motor<br />
400V: Special ground<br />
RS485<br />
RS232 (Option card)<br />
Memory card<br />
Multifunctional output<br />
terminals<br />
250 VAC<br />
SW2: AIN 0~10V/0~20mA selective<br />
SW3: AI2 0~10V/0~20mA selective<br />
or 2~10V/4~20mA<br />
I position: 0~20mA signal<br />
V position: 0~10V signal<br />
SW1: NPN/PNP selective
2.6 Description of terminals of troubleshooting inverter<br />
Descriptions of main circuit terminals<br />
R / L1<br />
S / L2<br />
T / L3<br />
Symbol Description<br />
Main power input: Three-phase: L1/L2/L3<br />
P1 Braking resistor or connecting terminal: Used in cases where the inverter frequently<br />
disconnects due to large load inertia or short deceleration time (refer to specifications<br />
BR<br />
for braking resistor)<br />
U / T1<br />
V / T2<br />
W / T3<br />
Inverter outputs<br />
Descriptions of <strong>VSC</strong> control circuit terminals<br />
R2A<br />
R2B<br />
Symbol Description<br />
Multifunctional terminal – Normal open<br />
R1C Common contact<br />
R1B Normal closed contact<br />
R1A Normal open contact<br />
Multifunctional output terminals<br />
10V Frequency knob (VR) power source terminal (pin 3)<br />
AIN<br />
For 440V: 4~7.5 kW<br />
Contact rated capacity:<br />
(250VAC/1A or 30VDC/1A)<br />
Contact using description: (refer to 8-02,<br />
8-03)<br />
Analogue frequency signal input terminal or multifunction input terminals S7 (H level:>8V, L level:
S1<br />
S2<br />
S3<br />
S4<br />
S5<br />
S6<br />
Symbol Function Description<br />
Descriptions of SW function<br />
SW2/<br />
SW3<br />
Multifunction input terminals (refer to 5-00 ~ 5-05 description)<br />
(S5 = Encoder input terminal, the Encoder voltage range: 19.2V~24.7V)<br />
Type of external signal Remarks<br />
0~10VDC analogue signal<br />
0~20mA analogue signal<br />
External control<br />
is available as<br />
1-06=0002<br />
SW1 Type of external signal Remarks<br />
NPN (SINK) input<br />
PNP (SOURCE) input Factory default<br />
20 Ambient Conditions and Installation <strong>Emotron</strong> AB 01-3992-01r3
2.7 Outline dimensions<br />
Frame2: Three phase <strong>VSC</strong>48-009<br />
LENGTH<br />
MODEL<br />
A<br />
B<br />
E<br />
F<br />
A<br />
mm/inches<br />
G<br />
C<br />
D<br />
L1 L2 L3 T1 T2 T3<br />
PE P PE PE PE<br />
B<br />
mm/inches<br />
C<br />
mm/inches<br />
4x∅5.5<br />
D<br />
mm/inches<br />
E<br />
mm/inches<br />
F<br />
mm/inches<br />
G<br />
mm/inches<br />
Frame 2 187.1/7.36 170.5/6.71 114.6/4.51 128/5.04 148/5.83 142.1/5.59 7/0.28<br />
<strong>Emotron</strong> AB 01-3992-01r3 Ambient Conditions and Installation 21
Frame3: Three phase <strong>VSC</strong>48-013, <strong>VSC</strong>48-018<br />
LENGTH<br />
MODEL<br />
Open Chassis TypeIP00<br />
A<br />
B<br />
E<br />
F<br />
A<br />
mm/inches<br />
B<br />
mm/inches<br />
C D<br />
C<br />
mm/inches<br />
4x∅5.5<br />
D<br />
mm/inches<br />
E<br />
mm/inches<br />
F<br />
mm/inches<br />
Frame 3 260/10.24 244/9.61 173/6.81 186/7.32 195/7.68 188/7.4<br />
22 Ambient Conditions and Installation <strong>Emotron</strong> AB 01-3992-01r3
3. Software Index<br />
3.1 Keypad description<br />
3.1.1 Keypad display and operation<br />
instructions<br />
1. SEQ LED: 1_00=1/2/3, LED Lit.<br />
2. FRQ LED: 1_06=1/2/3/4, LED Lit.<br />
3. FWD LED: Forward Direction, LED action (flash if<br />
stopped, Stays lit during operation).<br />
4. REV LED: Reverse Direction, LED action (flash if<br />
stopped, Stays lit during operation)).<br />
5. 4-action LED: FUN, Hz/RPM, VOLT and AMP and<br />
four 7-segment display, refer to operating instructions<br />
for the keypad.<br />
CAUTION: To avoid damaging the keypad, do not operate<br />
it with a screwdriver or any other sharp and hard tool.<br />
*1: The VSD will flash the current setting of 0-07 (power<br />
supply voltage) after power up.<br />
Remote/Local Mode<br />
Local mode – Operation Command with the key on<br />
the keypad<br />
– Frequency Command with the key on the keypad<br />
Remote mode – Operating Command by 1-00<br />
– Frequency Command by 1-06<br />
To Change the Remote/Local mode, you must push<br />
and at the same time.<br />
The Remote /Local mode of change can used in mode,<br />
it cannot be used in Run mode.<br />
<strong>Emotron</strong> AB 01-3992-01r3 Software Index 23
3.1.2 Operating instructions for the keypad<br />
Hz/RPM<br />
Hz/RPM<br />
FUN<br />
FUN<br />
Power On<br />
Power voltage (*1)<br />
5 seconds later or Enter operation signal or press DSP to modify frequency<br />
Selecting the<br />
parameter group 0-00<br />
Selecting the<br />
parameter group 10-0<br />
Output Voltage<br />
Frequency/<strong>Speed</strong>/<br />
Line <strong>Speed</strong> (stop)<br />
Frequency/<strong>Speed</strong>/<br />
Line <strong>Speed</strong><br />
Built-in PLC Status<br />
END<br />
Hz/RPM<br />
FUN<br />
*2: 4-04, 4-05 determines the displaying of frequency, speed<br />
or line speed.<br />
*3: It is not necessary to press the ENTER key when<br />
stopped for modification. Refer to example 1 and 2.<br />
*4: Whether output current, output voltage, DC voltage,<br />
status of built-in PLC is displayed or not is determined by 4-<br />
00 to 4-03 respectively.<br />
LED Light lit<br />
LED Light flashing<br />
Frequency/<strong>Speed</strong>/<br />
Line <strong>Speed</strong> (In setting)<br />
Frequency/<strong>Speed</strong>/<br />
Line <strong>Speed</strong> (In setting)<br />
VOLT DC Voltage<br />
VOLT<br />
Output Current<br />
24 Software Index <strong>Emotron</strong> AB 01-3992-01r3<br />
AMP<br />
(*3)<br />
(*2)<br />
(*4)
3.1.3 Operating instructions for the<br />
LED keypad<br />
Power on<br />
HZ/RPM<br />
HZ/RPM<br />
FUN<br />
FUN<br />
VOLT<br />
HZ/RPM<br />
5 seconds later or Enter operation signal or press DSP to<br />
modify the display frequency.<br />
FUN<br />
FUN<br />
LED Light lit<br />
LED Light flashing<br />
VOLT<br />
AMP<br />
<strong>Emotron</strong> AB 01-3992-01r3 Software Index 25
3.1.4 Keypad operation<br />
Example 1. Modify frequency for stopping.<br />
Hz/RPM<br />
Hz/RPM<br />
Hz/RPM<br />
Hz/RPM<br />
Hz/RPM<br />
Hz/RPM<br />
Hz/RPM<br />
FWD<br />
6 0 0 0<br />
5 9 9 0<br />
x x x x<br />
FWD<br />
Example 2. Modify frequency for operating<br />
FWD<br />
6 0 0 0<br />
FWD<br />
5 9 9 0<br />
FWD<br />
6 0 0 0<br />
FWD<br />
x x x x<br />
FWD<br />
1 second later<br />
Release the<br />
key<br />
Hz/RPM<br />
Hz/RPM<br />
Hz/RPM<br />
Hz/RPM<br />
Hz/RPM<br />
Hz/RPM<br />
26 Software Index <strong>Emotron</strong> AB 01-3992-01r3<br />
FWD<br />
6 0 0 0<br />
FWD<br />
5 9 9 0<br />
5 9 9 0<br />
PWD<br />
FWD<br />
x x x x<br />
NOTE: XXXX shows the preset output frequency. The value ranges from 59.58 to 0 Hz, depending on the length of time<br />
the key is pressed<br />
Example 3. Modify frequency for running<br />
After 2<br />
seconds<br />
Keep<br />
pressing<br />
FWD<br />
6 0 0 0<br />
5 9 9 0<br />
FWD<br />
NOTE: XXXX shows the present output frequency
Example 4. Modify the parameter value<br />
Example 5 Operation control<br />
FWD LED<br />
REV LED<br />
Power on<br />
: LED lit, : LED flash, : LED goes out<br />
<strong>Emotron</strong> AB 01-3992-01r3 Software Index 27<br />
6-00<br />
6-00
3.2 Control mode selection<br />
The <strong>VSC</strong> series VSD has three control modes:<br />
1. General Vector Control Mode<br />
2. VT Vector Control Mode (especially for blower, pump).<br />
3. V/F Control Mode<br />
V/F Control<br />
Control mode selection 0-00=2<br />
Set the following parameter:<br />
V/F pattern 10-0<br />
Torque boost 10-1<br />
Motor no load current 10-2 (≤0-02)<br />
Motor rated slip 10-3<br />
Max output frequency 10-4<br />
Max output voltage 10-5<br />
Medium output frequency 10-6<br />
Medium output voltage 10-7<br />
Min output frequency 10-8<br />
Min output voltage 10-9<br />
Suitable motor power 0-02 (OL1 reference index)<br />
The user can choose these modes using the digital keypad<br />
according to the application characteristics. The factory setting<br />
is general vector control mode. Before operation, please<br />
set the control mode and the relative parameters of the<br />
motor in accordance with the following flow chart. (The<br />
Vector control mode is only suitable for an VSD with the<br />
same capacity as the motor, or a class larger or smaller)<br />
Setting procedure of<br />
control mode<br />
Control mode<br />
Control mode selection<br />
0-00=0<br />
0-00=1<br />
Set the following parameter:<br />
Motor rated voltage 0-01<br />
Motor rated current 0-02<br />
Motor power 0-03<br />
Motor rated <strong>Speed</strong> 0-04<br />
Motor rated frequency 0-05<br />
Power voltage 0-07<br />
Perform Autotuning (0-06=1)<br />
28 Software Index <strong>Emotron</strong> AB 01-3992-01r3<br />
End<br />
Vector control
. 3.3 <strong>VSC</strong> programmable<br />
functions list<br />
NOTE:<br />
1. Use V/F Control Mode if:<br />
(1) You want one VSD to drive several motors<br />
simultaneously.<br />
(2) The motor’s nameplate is unknown or the motor<br />
specifications are too specialised, this will cause an<br />
autotuning fault.<br />
(3) The specification of VSD and motor differ by more<br />
than 1 class.<br />
2. One VSD drives several motors (only V/F mode<br />
available), set the motor parameter to comply with the<br />
following rules:<br />
(1). As for the current, total up the rated current of all<br />
motors.<br />
(2). As for others, input correct VF pattern parameter<br />
(10-4 to 10-9).<br />
3. When the nameplate of the motor is unknown, the<br />
VSD will set the internal parameter as if for the standard<br />
<strong>Emotron</strong> motor.<br />
4. When parameter 0-00 is set to 2, the keypad will<br />
display ‘Err2’ when performing autotuning.<br />
5. When using Vector control, set to 0-01 to 0-05 for<br />
max. and min. values with a standard motor<br />
specification limit (one level less and one level more).<br />
When using V/F Control, no range to be set.<br />
0- <strong>Drive</strong> Operation Mode<br />
Function<br />
Code No.<br />
0-00 Control Mode<br />
Description Range/Code<br />
Parameter<br />
Group No.<br />
Description<br />
0- <strong>Drive</strong> Operation Mode<br />
1- Start/Stop and Frequency Control Modes<br />
2- Manual/Automatic Restart Modes<br />
3- Operating Parameters<br />
4- Digital Display Operation Mode<br />
5- Multifunction Input Terminals (MFIT)<br />
6- Jog, and Preset (MFIT) <strong>Speed</strong> Setting on Keypad<br />
7- Analogue Input Signal Operation<br />
8-<br />
Multifunction Output Relays and Output Signal<br />
Operation<br />
9- <strong>Drive</strong> and Load Protection Modes<br />
10- Volts/Hz Pattern Operation Mode<br />
11- PID Operation Mode<br />
12- PID "Limits" and "Out of Range" Mode<br />
13- Communication Mode<br />
14- Motor Autotuning Parameters<br />
15- <strong>Drive</strong> Status and Function Reset<br />
0000:Vector (General Purpose)<br />
0001:Vector (<strong>Variable</strong> Torque)<br />
0002:Volts/Hz (Refer to Parameter Group 10-<br />
Volts/Hz Mode)<br />
Factory<br />
Setting<br />
0000 *3<br />
0-01 Motor Rated Voltage (VAC) ----- *3*5<br />
0-02 Motor Rated Current (Amp) ----- *3*5<br />
0-03 Motor Rated Power (kW) ----- *3*5<br />
0-04 Motor Rated <strong>Speed</strong> (RPM) X100*7 ----- *3*5<br />
0-05 Motor Rated Frequency (Hz) ----- *3*5<br />
0-06 Motor Parameter Autotuning<br />
0000: Invalid<br />
0001: Valid<br />
0000<br />
0-07 AC Line Input Voltage (VAC) 440V SERIES:323.0 to 528.0 *3<br />
Remarks<br />
<strong>Emotron</strong> AB 01-3992-01r3 Software Index 29
1- Start/Stop and Frequency Control Modes<br />
Function<br />
Code No.<br />
1-00 Run Command Source Selection<br />
1-01<br />
Description Range/Code<br />
Run/Stop-Forward/Reverse Operation Mode<br />
with External Terminals<br />
1-02 Prohibition of Reverse operation<br />
1-03 Keypad Stop Button<br />
1-04 Starting Method Selection<br />
1-05 Stopping Method Selection<br />
1-06 Frequency Command Source Selection<br />
1-07<br />
Keypad Operation with Up/Down Keys in Run<br />
Mode<br />
0000: Keypad<br />
0001: External Run/Stop Control (See 1-01)<br />
0002: Communication<br />
0003: Built-In PLC<br />
0000: Forward/Stop-Reverse/Stop<br />
0001: Run/Stop-Forward/Reverse<br />
0002: 3-Wire Control Mode- Run/Stop<br />
0000: Enable Reverse Command<br />
0001: Disable Reverse Command<br />
0000: Stop Button Enabled<br />
0001: Stop Button Disabled<br />
0000: Normal Start<br />
0001: Enable <strong>Speed</strong> Search<br />
0000: Controlled Deceleration-to- Stop with<br />
DC Injection Braking (Rapid Stop)<br />
0001: Free run Stop<br />
0000: Keypad<br />
0001: Potentiometer on Keypad<br />
0002: External analogue signal Input or<br />
Remote Potentiometer<br />
0003: Up/Down Frequency Control using<br />
MFIT (S1 - S6)<br />
0004: Communication setting frequency<br />
0005: Impulse (S5) setting frequency (ver2.3)<br />
0000: “Enter” must be pressed after<br />
frequency change with the up/down keys on<br />
keypad.<br />
0001: Frequency will be changed directly<br />
when the up/down keys are pressed<br />
Factory<br />
Setting<br />
Remarks<br />
30 Software Index <strong>Emotron</strong> AB 01-3992-01r3<br />
0000<br />
0000<br />
0000<br />
0000<br />
0000<br />
0000<br />
0000
2- Manual/Automatic Restart Modes<br />
Function<br />
Code No.<br />
2-00 Momentary Power Loss and Restart<br />
Description Range/Code<br />
0000: Momentary power loss and restart disable<br />
0001: Momentary power loss and restart enable<br />
0002: Momentary power loss and restart enable<br />
while CPU is operating. (According to the capacity<br />
of DC power)<br />
2-01 Momentary Power Loss Ride-Thru Time (s) 0.0 to 2.0 0.5<br />
2-02 Auto Restart Delay Time (s) 0.0 to 800.0 0.0<br />
2-03 Number of Auto Restart Attempts 0 to 10 0<br />
2-04 Auto Restart Method<br />
0000: Enable <strong>Speed</strong> Search<br />
0001: Normal Start<br />
Factory<br />
Setting<br />
2-05 Direct Running After Power Up<br />
0000: Enable Direct running after power up<br />
0001: Disable Direct running after power up<br />
0001 *8<br />
2-06 Delay-ON Timer (s) 0.0 to 300.0 0.0<br />
2-07 Reset Mode Setting<br />
2-08 Kinetic Energy Back-up Deceleration Time<br />
0000: Enable Reset Only when Run Command is<br />
Off<br />
0001: Enable Reset when Run Command is On<br />
or Off<br />
0.0: Disable<br />
0.1 to 25.0: KEB Deceleration Time<br />
Remarks<br />
<strong>Emotron</strong> AB 01-3992-01r3 Software Index 31<br />
0000<br />
0000<br />
0000<br />
0.0
3- Operating Parameters<br />
Function<br />
Code No.<br />
Description Range/Code<br />
Factory<br />
Setting<br />
3-00 Frequency Upper Limit (Hz) 0.01 to 650.00<br />
50.00<br />
60.00<br />
*4<br />
3-01 Frequency Lower Limit (Hz) 0.00 to 650.00 0.00<br />
3-02 Acceleration Time #1 (s) 0.1 to 3600.0 10.0 *1<br />
3-03 Deceleration Time #1 (s) 0.1 to 3600.0 10.0 *1<br />
3-04 S-Curve Acc/Dec #1 (s) 0.0 to 4.0 0.2<br />
3-05 S-Curve Acc/Dec #2 (s) 0.0 to 4.0 0.2<br />
3-06 Acceleration Time #2 (MFIT) (s) 0.1 to 3600.0 10.0 *1<br />
3-07 Deceleration Time #2 (MFIT) (s) 0.1 to 3600.0 10.0 *1<br />
3-08 Jog Acceleration Time (MFIT) (s) 0.1 to 25.5 0.5 *1<br />
3-09 Jog Deceleration Time (MFIT) (s) 0.1 to 25.5 0.5 *1<br />
3-10 DC Injection Brake Start Frequency (Hz) 0.1 to 10.0 1.5<br />
3-11 DC Injection Brake Level (%) 0.0 to 20.0 5.0 *7<br />
3-12 DC Injection Brake Time (s) 0.0 to 25.5 0.5<br />
3-13 Skip Frequency #1 (Hz) 0.00 to 650.00 0.0 *1<br />
3-14 Skip Frequency #2 (Hz) 0.00 to 650.00 0.0 *1<br />
3-15 Skip Frequency #3 (Hz) 0.00 to 650.00 0.0 *1<br />
3-16 Skip Frequency Bandwidth (±Hz) 0.00 to 30.00 0.0 *1<br />
3-17 Parameter Lock<br />
3-18 Copy Unit<br />
3-19 Fan Control<br />
0000: Enable all Functions<br />
0001: 6-00 - 6-08 cannot be changed<br />
0002: All Functions Except 6-00 - 6-08 cannot be<br />
changed<br />
0003: Disable All Function<br />
0000: Disable<br />
0001: VSD to Copy Unit<br />
0002: Copy Unit to VSD<br />
0003: Verify<br />
0000: Auto (Depend on temp.)<br />
0001: Operate while in RUN mode<br />
0002: Always Run<br />
0003: Always Stop<br />
3-20 Energy Saving Mode * 1 0000: Disabled<br />
0001: Controlled by MFIT at Set Frequency<br />
0000 *6<br />
3-21 Energy Saving Gain (%)* 1 0 to 100 80 *6<br />
3-22 Carrier Frequency (kHz) 2 to 16 10<br />
3-23 Centre Frequency (CF) of Traverse Run (%) 5.00 to 100.00 20.00<br />
3-24 Amplitude (A) of Traverse Run (%) 0.1 to 20.0 10.0<br />
3-25 Drop (D) of Traverse Run (%) 0.0 to 50.0 0.0<br />
3-26 Acc Time (AT) of Traverse Run (s) 0.5 to 60.0 10.0<br />
3-27 Dec Time (DT) of Traverse Run (s) 0.5 to 60.0 10.0<br />
3-28 Rise (X) Deviated Traverse (%) 0.0 to 20.0 10.0<br />
3-29 Lower (Y) Deviated Traverse (%) 0.0 to 20.0 10.0<br />
3-30 Start Frequency (Hz) 0.00 to 10.0 0.0<br />
NOTE: 1. Energy Saving Mode is available only in Volts/<br />
Hz Mode (0-00=0002).<br />
Remarks<br />
32 Software Index <strong>Emotron</strong> AB 01-3992-01r3<br />
0000<br />
0000<br />
0000
4- Digital Display Operation Mode<br />
Function<br />
Code No.<br />
4-00 Motor Current Display Selection<br />
4-01 Motor Voltage Display Selection<br />
4-02 DC Bus Voltage Display Selection<br />
5- Multifunction Input Terminals (MFIT)<br />
Description Range/Code<br />
0000: Disable Motor Current Display<br />
0001: Enable Motor Current Display<br />
0000: Disable Motor Voltage Display<br />
0001: Enable Motor Voltage Display<br />
0000: Disable Bus Voltage Display<br />
0001: Enable Bus Voltage Display<br />
Factory<br />
Setting<br />
0000 *1<br />
0000 *1<br />
0000 *1<br />
4-03 PLC Status Display Selection<br />
0000: Disable PLC Status Display<br />
0001: Enable PLC Status Display<br />
0000 *1<br />
4-04 Custom Units (Line <strong>Speed</strong>) Value 0 to 9999 1800 *1<br />
4-05 Custom Units (Line <strong>Speed</strong>) Display Mode<br />
4-06 PID Feedback Display Selection<br />
Function<br />
Code No.<br />
0000: <strong>Drive</strong> Output Frequency is displayed<br />
0001: Line <strong>Speed</strong> is displayed in Integer (xxxx)<br />
0002: Line <strong>Speed</strong> is displayed with one decimal<br />
place (xxx.x)<br />
0003: Line <strong>Speed</strong> is displayed with two decimal<br />
places (xx.xx)<br />
0004: Line <strong>Speed</strong> is displayed with three decimal<br />
places (x.xxx)<br />
0000: Disable PID Feedback Display<br />
0001: Enable PID Feedback Display<br />
Description Range/Code<br />
5-00 Multifunction Input Term. S1<br />
0000: Forward/Stop Command * 1<br />
0001: Reverse/Stop Command * 2<br />
0002: Preset <strong>Speed</strong> #1 (6-02)<br />
0003: Preset <strong>Speed</strong> #2 (6-03)<br />
0004: Preset <strong>Speed</strong> #3 (6-05) * 3<br />
0000<br />
5-01 Multifunction Input Term. S2<br />
0005: Jog<br />
0006: Acc/Dec #2<br />
0007: Emergency Stop A Contact<br />
0001<br />
5-02 Multifunction Input Term. S3 0008: Base Block<br />
0009: <strong>Speed</strong> Search<br />
0010: Energy Saving<br />
0011: Control Signal Selection<br />
0002<br />
5-03 Multifunction Input Term. S4 0012: Communication Selection<br />
0013: Acc/Dec Disabled<br />
0014: Up Command<br />
0015: Down Command<br />
0003<br />
5-04 Multifunction Input Term. S5 0016: Master/Auxiliary <strong>Speed</strong><br />
0017: PID Function Disabled<br />
0018: Reset<br />
0019: Encoder input terminal (terminal S5)<br />
0004<br />
5-05 Multifunction Input Term. S6 0023: Analogue input (terminal AIN)<br />
0024: PLC Application<br />
0025: Traverse Run<br />
0026: Traverse Run upper deviation<br />
0018<br />
5-06 Multifunction Input Term. AIN 0027: Traverse Run lower deviation<br />
0028: Power Source Detect for KEB Function<br />
0029: Emergency Stop B Contact *7<br />
0023<br />
5-07<br />
Multifunction Input Term. S1 - S6 Signal<br />
Verification Scan Time (ms X 4)<br />
1 to 100 5<br />
0000 *1<br />
0000 *1<br />
Factory<br />
Setting<br />
Remarks<br />
Remarks<br />
<strong>Emotron</strong> AB 01-3992-01r3 Software Index 33
5-08 Stop Mode Using MFIT<br />
6- Jog, and Preset (MFIT) Frequency Setting on<br />
Keypad<br />
0000: When the MFITs are Programmed for Up/<br />
Down Frequency Control, the Set Frequency will<br />
remain when the <strong>Drive</strong> stops. And when the <strong>Drive</strong><br />
stops, Up/Down Function is disabled.<br />
0001: Up/Down is used. The preset frequency is<br />
reset to 0 Hz as the VSD stops.<br />
0002: When the MFITs are Programmed for Up/<br />
Down Frequency Control, the Set Frequency will<br />
remain when the <strong>Drive</strong> stops. And when the <strong>Drive</strong><br />
stops, Up/Down Function is enabled. *7<br />
5-09 Step of Up/Down Function (Hz) 0.00 to 5.00 0.00<br />
5-10 Encoder Impulse Ratio 0.001 to 9.999 1.000 *7<br />
5-11<br />
Select the source of auxiliary frequency<br />
command<br />
5-12 AI2 function selection<br />
NOTE:<br />
1. To switch to Run/Stop with Function 1-01=0001.<br />
2. To switch to Forward/Reverse with Function 1-<br />
01=0001.<br />
3. Preset <strong>Speed</strong> #3 is obtained by activating Terms. S3<br />
and S4 simultaneously.<br />
Function<br />
Code No.<br />
0=refer to 6-00<br />
1= VR on keypad<br />
2=AIN on control terminal TM2<br />
3=Up/Down on TM2<br />
4= reference via serial communication<br />
0020 PID feedback<br />
0021 Bias Signal 1 input<br />
0022 Bias Signal 2 input<br />
Description Range/Code<br />
Factory<br />
Setting<br />
34 Software Index <strong>Emotron</strong> AB 01-3992-01r3<br />
0000<br />
0 *7<br />
6-00 Keypad Frequency (Hz) 0.00 to 650.00 5.00 *1<br />
6-01 Jog Frequency (Hz) 0.00 to 650.00 2.00 *1<br />
6-02 Preset <strong>Speed</strong> #1 (Hz) 0.00 to 650.00 5.00 *1<br />
6-03 Preset <strong>Speed</strong> #2 (Hz) 0.00 to 650.00 10.00 *1<br />
6-04 Preset <strong>Speed</strong> #3 (Hz) 0.00 to 650.00 20.00 *1<br />
6-05 Preset <strong>Speed</strong> #4 (Hz) 0.00 to 650.00 30.00 *1<br />
6-06 Preset <strong>Speed</strong> #5 (Hz) 0.00 to 650.00 40.00 *1<br />
6-07 Preset <strong>Speed</strong> #6 (Hz) 0.00 to 650.00 50.00 *1<br />
6-08 Preset <strong>Speed</strong> #7 (Hz) 0.00 to 650.00 60.00 *1<br />
0020<br />
Remarks
7- Analogue Input Signal Operation<br />
Function<br />
Code No.<br />
Description Range/Code<br />
8- Multifunction Output Relays and Output Signal Operation<br />
Factory<br />
Setting<br />
7-00 AIN Gain (%) 0 to1000 100 *1 *10<br />
7-01 AIN Bias (%) 0 to 100 0 *1<br />
7-02 AIN Bias Selection<br />
7-03 AIN Slope<br />
0000: Positive<br />
0001: Negative<br />
0000: Positive<br />
0001: Negative<br />
0000 *1<br />
0000 *1<br />
7-04<br />
AIN Signal Verification Scan Time (AIN, AI2)<br />
(ms x 2)<br />
1 to 100 50<br />
7-05 AI2 Gain (%)(S6) 0 to 200 100 *1<br />
NOTE: Group 7 is available when 5-06=0023<br />
(AIN term.=Analogue input)<br />
Function<br />
Code No.<br />
8-00<br />
Description Range/Code<br />
Analogue Output Voltage Mode<br />
(0 - 10 VDC, Term. FM+)<br />
0000: Output Frequency<br />
0001: Frequency Setting<br />
0002: Output Voltage<br />
0003: DC Voltage<br />
0004: Output Current<br />
0005: PID Feedback *7<br />
Factory<br />
Setting<br />
0000 *1<br />
8-01 Analogue Output Gain (%) 0 - 200 100 *1<br />
8-02<br />
Output Relay R1 Operation Mode<br />
0000: Run<br />
0001: Frequency Reached (Frequency Command)<br />
(Set Frequency ± 8-05)<br />
0002: Set Frequency (8-04 ± 8-05)<br />
0003: Frequency Threshold Level (> 8-04) - Frequency<br />
Reached<br />
0004: Frequency Threshold Level (< 8-04) - Frequency<br />
Reached<br />
0005: Over torque Threshold Level<br />
0006: Fault<br />
0007: Auto Restart<br />
0008: Momentary AC Power Loss<br />
0009: Rapid Stop Mode<br />
0010: Coast-to-Stop Mode<br />
0006<br />
8-03 Output Relay R2 Operation Mode 0011: Motor Overload Protection<br />
0012: <strong>Drive</strong> Overload Protection<br />
0013: PID Feedback Signal Loss<br />
0014: PLC Operation<br />
0015: Power On *7<br />
0000<br />
8-04<br />
Frequency Reached (Hz)<br />
(Refer to 8-02: 0001)<br />
0.00 to 650.00 0.00 *1<br />
8-05 Frequency Reached Bandwidth (± Hz) 0.00 to 30.00 2.00 *1<br />
Remarks<br />
Remarks<br />
<strong>Emotron</strong> AB 01-3992-01r3 Software Index 35
9- <strong>Drive</strong> and Load Protection Modes<br />
Function<br />
Code No.<br />
9-00<br />
9-01<br />
9-02<br />
9-03<br />
Description Range/Code<br />
Trip Prevention Selection During<br />
Acceleration<br />
Trip Prevention Level During Acceleration<br />
(%)<br />
Trip Prevention Selection During<br />
Deceleration<br />
Trip Prevention Level During Deceleration<br />
(%)<br />
0000: Enable Trip Prevention During Acceleration<br />
0001: Disable Trip Prevention<br />
During Acceleration<br />
Factory<br />
Setting<br />
Remarks<br />
36 Software Index <strong>Emotron</strong> AB 01-3992-01r3<br />
0000<br />
50 to 300 200<br />
0000: Enable Trip Prevention During Deceleration<br />
0001: Disable Trip Prevention During Deceleration<br />
0000<br />
50 to 300 200<br />
9-04<br />
0000: Enable Trip Prevention in Run Mode<br />
Trip Prevention Selection in Run Mode<br />
0001: Disable Trip Prevention in Run Mode<br />
0000<br />
9-05 Trip Prevention Level In Run Mode (%) 50 to 300 200<br />
9-06<br />
9-07<br />
9-08<br />
Trip Prevention Deceleration Time<br />
Selection in Run Mode<br />
Deceleration Time In Trip Prevention<br />
Mode (s)<br />
Electronic Motor Overload Protection<br />
Operation Mode<br />
9-09 Motor Type Selection<br />
9-10<br />
9-11<br />
Motor Overload Protection Curve<br />
Selection<br />
Operation After Overload Protection is<br />
Activated<br />
9-12 Over torque Detection Selection<br />
9-13<br />
Operation After Over torque Detection<br />
is Activated<br />
0000: Trip Prevention Deceleration Time Set by 3-03<br />
0001: Trip Prevention Deceleration Time Set by 9-07<br />
0000<br />
0.1 to 3600.0 3.0<br />
0000: Enable Electronic Motor Overload Protection<br />
0001: Disable Electronic Motor Overload Protection<br />
0000: Electronic Motor Overload Protection Set for<br />
Non-VSD Duty Motor<br />
0001: Electronic Motor Overload Protection Set for<br />
VSD Duty Motor<br />
0000: Constant Torque (OL=103%) (150% for 1<br />
Minute)<br />
0001: <strong>Variable</strong> Torque (OL=113%) (123% for 1 Minute)<br />
0000: Coast-to-Stop After Overload Protection is Activated<br />
0001: <strong>Drive</strong> Will Not Trip when Overload Protection is<br />
Activated (OL1)<br />
0000: Disable Over torque Operation<br />
0001: Enable Over torque Operation Only if at Set Frequency<br />
0002: Enable Over torque Operation while the <strong>Drive</strong> is<br />
in Run Mode<br />
0000: <strong>Drive</strong> will Continue to Operate After Over torque<br />
is Activated<br />
0001: Coast-to-Stop After Over torque is Activated<br />
9-14 Over torque Threshold Level (%) 30 to 200 160<br />
9-15 Over torque Activation Delay Time (s) 0.0 to 25.0 0.1<br />
0000<br />
0000<br />
0000<br />
0000<br />
0000<br />
0000
10- Volts/Hz Operation Mode<br />
Function<br />
Code No.<br />
11- PID Operation Mode<br />
Description Range/Code<br />
Factory<br />
Setting<br />
10-0 Volts/Hz Patterns 0 to 18 0/9 *4*6<br />
10-1 Volts/Hz Curve Modification (Torque Boost) (%) 0 to 30.0 0.0 *1*6<br />
10-2 Motor No Load Current (Amps AC) ----- *5*6<br />
10-3 Motor Slip Compensation (%) 0.0 to 100.0 0.0 *1*6<br />
10-4 Maximum Frequency (Hz) 0.20 to 650.00 50.00/ 60.00 *4*6<br />
10-5 Maximum Frequency Voltage Ratio (%) 0.0 to 100.0 100.0 *6<br />
10-6 Mid Frequency (Hz) 0.10 to 650.00 25.00/ 30.00*7 *4*6<br />
10-7 Mid Frequency Voltage Ratio (%) 0.0 to 100.0 50.0 *6 *7<br />
10-8 Minimum Frequency (Hz) 0.10 to 650.00 0.50/ 0.60 *6<br />
10-9 Minimum Frequency Voltage Ratio (%) 0.0 to 100.0 1.0 *6 *7<br />
Function<br />
Code No.<br />
11-0 Mode Selection<br />
Description Range/Code<br />
0000: Disabled<br />
0001: Bias D Control<br />
0002: Feedback D Control<br />
0003: Bias D Reversed Characteristics Control<br />
0004: Feedback D Reversed Characteristics Control<br />
0005: Frequency Command + Bias D Control<br />
0006: Frequency Command + Feedback D Control<br />
0007: Frequency Command + Bias D Reversed Characteristics<br />
Control<br />
0008: Frequency Command + Feedback D Reversed<br />
Characteristics Control<br />
Factory<br />
Setting<br />
11-1 Feedback Gain (%) 0.00 to 10.00 1.00 *1<br />
11-2 Proportional Gain (%) 0.0 to 10.0 1.0 *1<br />
11-3 Integration Time (s) 0.0 to 100.0 10.0 *1<br />
11-4 Differentiation Time (s) 0.00 to 10.00 0.00 *1<br />
11-5 PID Offset<br />
0000: Positive<br />
0001: Negative<br />
0000 *1<br />
11-6 PID Offset Adjust (%) 0 to 109 0 *1<br />
11-7 Output Lag Filter Time (s) 0.0 to 2.5 0.0 *1<br />
Remarks<br />
Remarks<br />
<strong>Emotron</strong> AB 01-3992-01r3 Software Index 37<br />
0000
12- PID "Limits" and "Out of Range" Mode<br />
Function<br />
Code No.<br />
12-0 Feedback Loss Detection Mode<br />
13- Communication Mode<br />
Description Range/Code<br />
0000: Disabled<br />
0001: Enabled - <strong>Drive</strong> Continues to Operate After Feedback<br />
Loss<br />
0002: Enabled - <strong>Drive</strong> "STOPS" After Feedback Loss<br />
12-1 Feedback Loss Detection Level (%) 0 to 100 0<br />
Factory<br />
Setting Remarks<br />
12-2<br />
Feedback Loss Detection Delay<br />
Time (s)<br />
0.0 to 25.5 1.0<br />
12-3 Integration Limit Value (%) 0 to 109 100 *1<br />
12-4<br />
12-5<br />
Integration Value Resets to Zero<br />
when Feedback Signal Equals the<br />
Intended Value<br />
Allowable Integration Error Margin<br />
(Units)<br />
(1 Unit=1/8192)<br />
12-6 AIN or AI2 Source signal<br />
0000: Disabled<br />
0001: 1 Second<br />
0030: 30 Seconds<br />
0 to 100 0<br />
0000: AIN=0-10V or 0-20mA<br />
AI2=0-10V or 0-20mA<br />
0001: AIN=0-10V or 0-20mA<br />
AI2=2-10V or 4-20mA<br />
0002: AIN=2-10V or 4-20mA<br />
AI2=0-10V or 0-20mA<br />
0003: AIN=2-10V or 4-20mA<br />
AI2=2-10V or 4-20mA<br />
12-7 Sleep Function Operation Level 0.00 to 650.00 0.0<br />
12-8 Sleep Function Delay Time 0.0 to 25.5 0.0<br />
Function<br />
Code No.<br />
Description Range/Code<br />
38 Software Index <strong>Emotron</strong> AB 01-3992-01r3<br />
0000<br />
0000<br />
0000 *7<br />
Factory<br />
Setting<br />
13-0 Assigned Communication Station Number 1 to 254 1 *2*3<br />
13-1 Baud Rate Setting (bps)<br />
13-2 Stop Bit Selection<br />
13-3 Parity Selection<br />
13-4 Data Format Selection<br />
13-5<br />
Communication time-out operation selection<br />
0000: 4800<br />
0001: 9600<br />
0002: 19200<br />
0003: 38400<br />
0000: 1 Stop Bit<br />
0001: 2 Stop Bits<br />
0000: Without Parity<br />
0001: With Even Parity<br />
0002: With Odd Parity<br />
0000: 8-Bits Data<br />
0001: 7-Bits Data<br />
0000: Deceleration to stop<br />
According Deceleration time 1 (3-03)<br />
0001: Coast to stop<br />
0002: Deceleration to stop<br />
According Deceleration time 2 (3-07)<br />
0003: continue operation<br />
Remarks<br />
0003 *2*3<br />
0000 *2*3<br />
0000 *2*3<br />
0000 *2*3<br />
13-6 Communication time-out, detection time 00,0 to 25,5 sec 00,00 *11<br />
0000
14- Motor Autotune Parameters<br />
Function<br />
Code No.<br />
15- <strong>Drive</strong> Status and Function Reset<br />
Description Range/Code<br />
Factory<br />
Setting<br />
14-0 Stator Resistance (Ohms) ----- *3*5<br />
14-1 Rotor Resistance (Ohms) ----- *3*5<br />
14-2 Equivalent Inductance (mH) ----- *3*5<br />
14-3 Magnetizing Current (Amps AC) ----- *3*5<br />
14-4 Ferrite Loss Conductance (gm) ----- *3*5<br />
Function<br />
Code No.<br />
Description Range/Code<br />
Factory<br />
Setting<br />
15-0 <strong>Drive</strong> Horsepower Code (See page 53) *3<br />
15-1 Software Version ----- ----- *3<br />
15-2 Fault Jog (Last 3 Faults) (See page 53) ----- *3<br />
15-3 Accumulated Operation Time (Hours) 0 to 9999 ----- *3<br />
15-4<br />
Accumulated Operation Time<br />
(Hours X 10000)<br />
15-5 Accumulated Operation Time Mode<br />
15-6 Reset <strong>Drive</strong> to Factory Settings<br />
Remarks:<br />
*1 can be modified during operation.<br />
*2 cannot be modified during communication.<br />
*3 do not change while making factory setting.<br />
*4 as parameter related to factory setting.<br />
*5 the parameter will be changed by replacing model.<br />
*6 only available in V/F mode.<br />
*7 only for version 2.3 and above.<br />
*8 only for version 2.4 and above.<br />
*10 only for version 2,6 A and above.<br />
*11 only for version 2,9 and above.<br />
0 to 27 ----- *3<br />
0000: Time Under Power<br />
0001: Run Mode Time Only<br />
1110: Reset for 50 Hz Motor Operation<br />
1111: Reset for 60 Hz Motor Operation<br />
1112: Reset PLC Program<br />
0000 *3<br />
0000 *4<br />
Remarks<br />
Remarks<br />
<strong>Emotron</strong> AB 01-3992-01r3 Software Index 39
3.4 Parameter function<br />
description<br />
3.4.1 Parameter Group 0: <strong>Drive</strong><br />
Operation Mode<br />
0-00: Control Mode<br />
0000: Vector mode (General Mode)<br />
0001: Vector mode (VT Mode)<br />
0002: V/F mode<br />
Selects the most suitable vector control mode or V/F mode<br />
according to the load characteristics.<br />
1. Vector (general mode) is intended to control the general<br />
load or rapidly-changed torque load.<br />
2. Vector (VT mode) is suitable for Blower/ Pump and<br />
HVAC load. motor’s magnetic current will vary according<br />
to the torque, which will reduce the current to save<br />
energy.<br />
3. If V/F mode is selected, set parameter group10 to comply<br />
with the load features.<br />
0-01: Motor Rated Voltage (VAC)<br />
0-02: Motor Rated Current (A)<br />
0-03: Motor Rated Power (kW)<br />
0-04: Motor Rated <strong>Speed</strong> (RPM)<br />
0-05: Motor Rated Frequency (Hz)<br />
0-06: Motor Parameter Auto Tuning<br />
0000: Disabled 0001: Enabled<br />
It is necessary to enter nameplate and autotuning data as<br />
long as vector mode is selected to change the motor.<br />
Autotuning: firstly enter the data for 0-01to 0-05 according<br />
to the nameplate after power off, then set 0-06=0001and<br />
perform autotuning; The internal data detected will be automatically<br />
written to parameter group 14 when the display<br />
shows “End”.<br />
Example, if the motor rated speed is 1700 rpm, please set 0-<br />
04 to 17.0<br />
PRECAUTION: 1. The motor parameter autotuning covers<br />
stationary autotuning. During motor autotuning, the<br />
motor does not rotate, and the keypad display shows -AT-.<br />
2. During motor parameter autotuning, the input signal in<br />
the control circuit is invalid.<br />
3. Before motor parameter autotuning, please confirm the<br />
stop state of the motor.<br />
4. The motor parameter autotuning is only available for<br />
vector control mode (0-00=0000 or 0-00=0001).<br />
0-07 AC Line Input Voltage (Volts AC)<br />
220V series: 170.0 to 264.0<br />
440V series: 323.0 to 528.0<br />
To make sure of the voltage level of the VSD, enter the<br />
actual on-site voltage value.<br />
3.4.2 Parameter Group 1 - Start/<br />
Stop and Frequency Control<br />
Modes<br />
1-00: Run Command Source Selection<br />
0000: Keypad<br />
0001: External terminal control<br />
0002: Communication control<br />
0003: Built-in PLC<br />
1. 1-00=0000 the VSD is controlled by the keypad.<br />
2. 1-00=0001 the VSD is controlled by the external terminals,<br />
and the Emergency Stop key does work. (Refer to<br />
1-03 description).<br />
NOTE: 1-00=0001, please refer to parameter group 2-00,<br />
2-01, 2-02 and 2-03 for a detailed description of how to<br />
ensure personal and machine safety.<br />
3. 1-00=0002 the VSD is communication controlled.<br />
4. 1-00=0003 the VSD controlled by the built-in PLC, and<br />
1-06 preset value is invalid.<br />
1-01: Operation modes for external terminals<br />
0000: Forward/stop-reverse/stop<br />
0001: Run/stop-forward/reverse<br />
0002: 3-wire control mode -run/stop<br />
1. When operation command 1-00=0001 (external terminal),<br />
1-01 is valid.<br />
2. When operation command 1-00=0001 (external terminal<br />
control), the emergency stop button for is available.<br />
(Refer to 1-03 for detailed description).<br />
3. If both forward and reverse commands are ON this will<br />
be treated as STOP.<br />
1-01=0000, Control mode is as below:<br />
40 Software Index <strong>Emotron</strong> AB 01-3992-01r3
(1) Input signal is NPN (2) Input signal is PNP<br />
S1 (forward)<br />
S2 (reverse)<br />
COM (0V common)<br />
S1 (forward)<br />
S2 (reverse)<br />
24V (common)<br />
1-01=0001, Control mode is as below: (1) Input signal is NPN(2) Input signal is PNP<br />
S1 (run)<br />
S2 (forward/reverse)<br />
COM (0Vcommon)<br />
S1 (run)<br />
S2 (forward/reverse)<br />
24V (common)<br />
1-01=0002, Control mode is as below: (1) Input signal is NPN(2) Input signal is PNP<br />
S1 (run)<br />
S2 (stop)<br />
S3 (FWD/REV)<br />
COM (0Vcommon)<br />
NOTE: If 3-wire control mode is selected, the terminal S3<br />
is not controlled by 5-02.<br />
S1<br />
S2<br />
S3<br />
1-01=2<br />
3 wire<br />
1-01=0<br />
1-01=1<br />
NOTE: 1-02=0001, the reverse command is unavailable.<br />
1-02: Prohibition of Reverse Operation<br />
0000: Enable Reverse Command<br />
0001: Disable Reverse Command<br />
S1 (run)<br />
S2 (stop)<br />
S3 (FWD/REV)<br />
24V (common)<br />
1-02=0001, the reverse command is unavailable.<br />
1-03: Keypad Stop Button<br />
0000: Stop Button Enable<br />
0001: Stop Button Disable<br />
<strong>Emotron</strong> AB 01-3992-01r3 Software Index 41
1-03=0000, the STOP key is available for controlling the<br />
stopping of the VSD.<br />
NOTE: 1-03=0001 is valid only for 1-00=0001 and 0002,<br />
1-04: Starting Method Selection<br />
0000: Normal Start<br />
0001: Enable <strong>Speed</strong> Search<br />
1. 1-04=0000: When starting, the VSD accelerates from 0<br />
to target frequency in the set time.<br />
2. 1-04=0001: When starting, the VSD accelerates to target<br />
frequency from the detected motor speed.<br />
1-05: Stopping Method<br />
0000: Controlled Deceleration-to-Stop with DC Injection<br />
Braking (Rapid Stop)<br />
0001: Free run stop<br />
1. 1-05=0000: the VSD will decelerate to 0Hz in preset<br />
deceleration time after receiving the stop command.<br />
2. 1-05=0001: the VSD will stop output when it receives<br />
the stop command. The motor will use inertia to free<br />
run to stop.<br />
1-06: Frequency Command Source Selection<br />
0000: Set the frequency with the keypad<br />
0001: Potentiometer on the keypad<br />
0002: External Analogue Signal Input or Remote Potentiometer<br />
0003: Up/Down Frequency Control using MFIT (S1-S6)<br />
0004: Communication Setting Frequency<br />
0005: Impulse frequency (S5) setting frequency (ver 2.3)<br />
1. 1-06=0001, if one of the parameter in group 5-00 to<br />
5-06 is set to 16 and multifunction terminal is OFF, the<br />
frequency is set by the KNOB (VR for principal speed)<br />
on the keypad. While the multifunction is ON, the frequency<br />
is set by analogue signal (auxiliary speed) on terminal<br />
block (TM2).<br />
2. 1-06=0002, if one of the parameter in group 5-00 to<br />
5-06 is set to 16 and the multifunction terminal is OFF,<br />
the frequency is set by analogue signal (principal speed)<br />
on terminal block (TM2). While the multifunction is<br />
ON, the frequency is set by the KNOB (VR for auxiliary<br />
speed) on the keypad.<br />
3. Please refer to the description of parameter group 5-00<br />
to 5-06 (multifunction input terminals) for the function<br />
of the Up/Down terminal.<br />
4. The priority for reading frequency is PLC frequency<br />
control >traverse run >Jog> preset speed> on the keypad<br />
or Up/Down keys or communication control.<br />
5. Impulse frequency command input source should be set<br />
for S5 terminal and needs to coordinate with the 5-10<br />
frequency exchange times ratio. For example, the input<br />
value for S5 is 4 KHz, 5-10 is 1.500 times, and the output<br />
frequency is 4000/100*1.500=60.00 Hz. 5-04(S5)<br />
should be set to19.<br />
1-07: Keypad Operation using the up/down keys in Run<br />
Mode.<br />
0000: “Enter” must be pressed after frequency change with<br />
the up/down keys on the keypad.<br />
0001: Frequency will be changed directly when the up/<br />
down keys are pressed.<br />
42 Software Index <strong>Emotron</strong> AB 01-3992-01r3
3.4.3 Parameter Group 2 - Manual/<br />
Automatic Restart Modes<br />
2-00: Momentary Power Loss and Restart<br />
0000: Momentary Power Loss and Restart Disable<br />
0001: Momentary Power Loss and Restart Enable<br />
0002: Momentary Power Loss and Restart Enable while<br />
CPU is Operating.<br />
2-01: Momentary Power Loss Ride-Thru Time (sec): 0.0 -<br />
2.0 seconds.<br />
1. As starting the power supply for the other load results in<br />
the voltage going down to less than the under voltage<br />
level, the VSD will stop output at once. If the power<br />
supply recovers in the 2-01 preset time, it will start a<br />
speed search start tracing from the trip frequency, or the<br />
VSD will trip with “LV-C” displayed.<br />
2. The allowable power time loss varies from model to<br />
model. The range is from 1 to 2 seconds.<br />
3. 2-00=0000: if power is lost, the VSD will not start.<br />
4. 2-00=0001: if the loss time is less than the value of 2-01,<br />
the VSD will Spin Start in 0.5 seconds as the power supplied<br />
and restart times are infinite.<br />
5. 2-00=0002: if the power lost lasts for long time and is<br />
before the VSD loses the control power for the CPU, the<br />
VSD will restart according to the 1-00 and 2-04 settings<br />
and the status of the external switch when the power is<br />
turned back on.<br />
NOTE: 1-00=0001, 2-04=0000, 2-00=0001 or 0002<br />
after power loss for a long time, turn OFF the power and<br />
power switches to prevent personal injury and machine<br />
damage when the power is turned back on.<br />
2-02: Auto restart Delay Time: 0 to 800.0 seconds<br />
2-03: Number of Auto restart Attempts: 0 to 10 times<br />
1. 2-03=0: the VSD will not auto restart if it was tripped<br />
accidentally.<br />
2. 2-03>0, 2-02=0: the VSD will conduct SPEED<br />
SEARCH 0.5 seconds after it is accidentally tripped.<br />
The motor will use inertia to run to the frequency at the<br />
trip stop, then accelerate or decelerate time to target frequency<br />
according to its setting.<br />
3. 2-03>0, 2-02>0: the output will be stopped for a period<br />
which is determined by 2-02 after an accidental trip. A<br />
speed search is then performed to find the target frequency.<br />
4. As the VSD is set to braking deceleration or DC braking,<br />
it will not restart after accidental trip.<br />
2-04: Start Method:<br />
0000: Enable <strong>Speed</strong> Search<br />
0001: Normal Start<br />
1. 2-04=0000: the VSD will detect motor speed and accelerate<br />
the setting frequency via speed search enable.<br />
2. 2-04=0001: the VSD will accelerate the motor speed<br />
from stop (zero speed) to setting frequency.<br />
2-05: Direct running after power up:<br />
0000: Enable Direct Running After Power Up<br />
0001: Disable Direct Running After Power Up<br />
WARNING: 1.) 2-05=0000 and the VSD is set<br />
to external terminal controlled<br />
(1-00=0001). If the run switch is ON as power<br />
is supplied, the VSD will auto start. It is<br />
recommend that you turn off the power switch and run<br />
switch to avoid personal injury or machine damage<br />
when the power turned back on.<br />
2.) 2-05=0001 and the VSD is set to external terminal<br />
controlled (1-00=0001). If the run switch is ON as power<br />
is supplied, the VSD will not auto start and STP1 will<br />
flash. It is necessary to OFF the run switch and then ON<br />
again to start normally.<br />
2-06: Delay-ON Timer (seconds): 0 to 300.0 seconds<br />
When power is on and 2-05=0000, the VSD will perform<br />
auto restart within the setting delay time.<br />
2-07: Error reset mode setting<br />
0000: Enable Reset Only when Run Command is Off<br />
0001: Enable Reset when Run Command is On or Off<br />
2-07=0000 when the VSD detects the accidental trip, please<br />
turn off the Run switch to perform reset, or restarting does<br />
not work.<br />
2-08: Kinetic Energy Back-up Deceleration Time: 0.00 to<br />
25.00 seconds<br />
2-08=0 KEB function disable<br />
2-08≠0 KEB function enable<br />
<strong>Emotron</strong> AB 01-3992-01r3 Software Index 43
Example: 220 V system<br />
When 2-08≠0 and<br />
PN Voltage below 190 V<br />
KEB function work<br />
DC=190V<br />
NOTE: 1. For 2-08 Function.<br />
Power off Power on<br />
2. When the power is off CPU detect the DC Voltage.<br />
KEB function is enabled when DC Voltage lower than<br />
190V/220V system or 380V/440V system.<br />
3. When the KEB function is enabled, the VSD<br />
decelerates to zero using 2-08, and the VSD stops.<br />
4. If the power on signal enabled during the KEB<br />
function, the VSD accelerates to its original frequency.<br />
T0<br />
3.4.4 Parameter Group 3 -<br />
Operating Parameters<br />
3-00: Frequency Upper limit (Hz): 0.01 to 650.00<br />
3-01: Frequency Lower limit (Hz): 0.01 to 650.00<br />
When 3-01 > 0 Hz and frequency command<br />
Internal frequency<br />
(NOTE:)<br />
3-00 (upper frequency limit)<br />
3-01 (lower frequency limit)<br />
External power<br />
on signal when<br />
5-00‚-5-06=<br />
TM2<br />
S2 to S6<br />
PN DC voltage<br />
Frequency output<br />
NOTE: When 3-01=0 Hz and frequency command is 0 Hz,<br />
the VSD will stop at 0 speed.<br />
When 3-01 > 0 Hz and frequency command is 3-01, the<br />
VSD will output the 3-01 preset value.<br />
3-02: Acceleration Time #1 (s): 0.1 to 3600.0<br />
3-03: Deceleration Time #1 (s): 0.1 to 3600.0<br />
3-04: S Curve of First Acceleration Stage (s): 0.0 to 4.0<br />
3-05: S Curve of Second Acceleration Stage (s): 0.0 to 4.0<br />
3-06: Acceleration Time #2 (s): 0.1 to 3600.0<br />
3-07: Deceleration Time #2 (s): 0.1 to 3600.0<br />
3-08: Jog Acceleration Time (s): 0.1 to 25.5<br />
3-09: Jog Deceleration Time (s): 0.1 to 25.5<br />
1. Formula for calculating acceleration and deceleration<br />
time: The denominator is base on the rated frequency of<br />
motor.<br />
Acceleration time = 3-02 (or 3-06) x<br />
Deceleration time = 3-03 (or 3-07) x<br />
Preset frequency<br />
0-05<br />
Preset frequency<br />
0-05<br />
44 Software Index <strong>Emotron</strong> AB 01-3992-01r3
2. When 5-00 – 5-06 is set as 06 (the second acceleration<br />
and deceleration time), the first acceleration/ deceleration/<br />
S-curve or the second acceleration/ deceleration/ Scurve<br />
will be selected with off or on the external input<br />
terminal.<br />
3. When 5-00 – 5-06 is set to 05 (Jog), Jog run is controlled<br />
by external terminals. The acceleration and decelera-<br />
Function<br />
preset value<br />
5-00 to 5-05=06 Jog command<br />
5-00 to 5-06=04<br />
Toggle Acc/Dec time.<br />
5. When S-curve time (3-04/3-05) is set as 0, the S curve is<br />
useless. The line shows acceleration and deceleration.<br />
6. When S-curve time (3-04/3-05) is greater than 0, the<br />
acceleration and deceleration action is as per the following<br />
diagram.<br />
7. Regardless of the stall prevention period, actual acceleration<br />
and deceleration time = preset acceleration / deceleration<br />
time + S-curve time. For example: acceleration<br />
time = 3-03+3-04.<br />
8. During the acceleration and deceleration process, there<br />
may be residual error in acceleration and deceleration<br />
toggling. Please set the S-curve time as 0 (3-04/3-05) if<br />
you need to toggle acceleration and deceleration time<br />
during the acceleration/deceleration process.<br />
Output frequency<br />
tion action will be at Jog acceleration and deceleration<br />
time.<br />
4. When 5-00 – 5-06 is set as 05 (Jog) and 06 (acceleration<br />
and deceleration time toggle), change the acceleration<br />
and deceleration time with ON on the external terminals.<br />
Here is a list of setting:<br />
Acc/ Dec time 1 (3-02/3-03) Acc/ Dec time 2 (3-06/3-07) JOG Acc/Dec time (3-08/3-09)<br />
1-06 determines the output<br />
frequency<br />
3-10: DC Injection Brake Start Frequency (Hz): 0.1 to 10.0<br />
3-11: DC Injection Brake Level (%): 0.0 to 20.0<br />
3-12: DC Injection Brake Time (s): 0.0 to 25.5<br />
1-06 determines the output<br />
frequency<br />
Off Off On<br />
Off On Off<br />
S-Curve time<br />
Time<br />
Run at 6-01Jog frequency<br />
3-12 / 3-10 is the action time and start frequency of DC<br />
braking, as graph below:<br />
The upper setting of 3-11 will be corrected 20.0 after manual<br />
V2.3.<br />
3-13: Skip Frequency #1 (Hz): 0.00 to 650.00<br />
3-14: Skip Frequency #2 (Hz): 0.00 to 650.00<br />
3-15: Skip Frequency #3 (Hz): 0.00 to 650.00<br />
3-16: Skip Frequency Bandwidth (± Hz): 0.00 to 30.00<br />
Example: 3-13 is set to 10.0 Hz / 3-14 to 20.0 Hz / 3-15 to<br />
30.0 Hz / 3-16 as 2.0Hz<br />
<strong>Emotron</strong> AB 01-3992-01r3 Software Index 45<br />
10 Hz<br />
HZ<br />
3-10<br />
20 Hz<br />
30 Hz<br />
3-12<br />
±2 Hz=8-12 H<br />
±2 Hz=18-22 H<br />
±2 Hz=28-32 H<br />
3-16<br />
3-15<br />
3-14<br />
3-13<br />
t<br />
Skip<br />
frequency
3-17: Parameter lock function<br />
0000: Enable all Functions<br />
0001: 6-00 to 6-08 cannot be changed<br />
0002: All Functions Except 6-00 to 6-08 cannot be<br />
changed<br />
0003: Disable all Functions<br />
3-18: Copy Unit<br />
0000: Disable<br />
0001: VSD to Copy Unit<br />
0002: Copy Unit to VSD<br />
0003: Verify<br />
1. 3-18=0000: VSD can not copy parameter.<br />
2. 3-18=0001: Copy the VSD parameters to module.<br />
3. 3-18=0002: Copy the module parameters to VSD.<br />
4. 3-18=0003: Copy the parameters to VSD or module to<br />
mutually verify the parameters.<br />
NOTE: The copy function is available for the models with<br />
same capacity.<br />
3-19: Fan Running Control<br />
0000: Auto (Depend on temp.)<br />
0001: Operate while in RUN Mode<br />
0002: Always Run<br />
0003: Always Stop<br />
3-22<br />
Carrier<br />
Frequency<br />
3-22<br />
Carrier<br />
Frequency<br />
1. 3-19=0000: The fan runs as the VSD senses temperature<br />
rises. Extend the service period accordingly.<br />
2. 3-19=0001: The fan runs while the VSD is running.<br />
3. 3-19=0002: The fan runs continuously regardless of<br />
what the VSD is doing.<br />
4. 3-19=0003: The fan always stops regardless what the<br />
VSD is doing.<br />
3-20: Energy Saving Mode Operation<br />
0000: Disabled<br />
0001: Controlled by MFIT at Set Frequency<br />
3-21: Energy saving operation gain (%): 0-100<br />
1. While operation, FAN, PUMP or other heavy inert<br />
loads which need greater starting torque, do not need<br />
such high torque. As a result, use setting 3-20 to save<br />
energy by reducing the output voltage.<br />
2. 5-00 to 5-06 (Multifunction input terminal) set to 10 in<br />
order to save energy.<br />
3. 3-20=0001, if the multifunction terminal is set to 10<br />
(energy saving control terminal), the output voltage will<br />
gradually decline to “original voltage” x “3-21” preset<br />
value when the terminal’ is ON. The output voltage will<br />
rise to the original voltage when the terminal is OFF.<br />
NOTE:1.The declining and rising voltage speeds for<br />
energy saving are same as those for SPEED SEARCH.<br />
2. Energy saving mode is only available under V/F mode.<br />
(0-00=0002).<br />
3-22: Carrier Frequency (KHz): 2 to 16<br />
46 Software Index <strong>Emotron</strong> AB 01-3992-01r3<br />
3-22<br />
Carrier<br />
Frequency<br />
2 2KHz 6 6KHz 10 10KHz 14 14KHz<br />
3 3KHz 7 7KHz 11 11KHz 15 15KHz<br />
4 4KHz 8 8KHz 12 12KHz 16 16KHz<br />
5 5KHz 9 9KHz 13 13KHz<br />
NOTE: The external electronic components may<br />
experience interference or, more seriously, motor<br />
vibration if the high carrier frequency waveform is<br />
turned off, even though the VSD is very quiet during<br />
operation. As a result, it is necessary to regulate the<br />
carrier frequency.<br />
3-22<br />
Carrier<br />
Frequency<br />
3-23: Centre Frequency (CF) of Traverse Run (%): 2 to 16<br />
3-24: Amplitude (%) 0.1 to 20.0<br />
3-25: Amplitude Drop(%): 0.0 to 50.0<br />
3-26: Acceleration Time (s): 0.5 to 60.0<br />
3-27: Deceleration Time (s): 0.5 to 60.0<br />
3-28: Deviated traverse (X upper deviation) (%): 0.0 to 20.0<br />
3-29: Deviated traverse (Y lower deviation (%: 0.0 to 20.0)
Traverse Run (dedicated feature for textile machinery) is<br />
defined as adding a triangle wave to the basic operation frequency<br />
of VSD output frequency at the preset acceleration<br />
and deceleration time. The motion is as per the graph below:<br />
3-23: Traverse Run Centre frequency (%)<br />
3-24: Amplitude (%)<br />
3-25: Amplitude Drop (%)<br />
3-26: Acceleration Time (s)<br />
3-27: Deceleration Time (s)<br />
3-28: Deviated traverse (X upper deviation)<br />
3-29: Deviated traverse (Y lower deviation)<br />
1. The traverse run is available when the run command and<br />
the terminal (5-00 to 5-05=0025) for such operation<br />
both ON. When the VSD is operating, the traverse run<br />
F out<br />
3-23<br />
0<br />
Run ON<br />
5-00~5-06=25<br />
3-24<br />
3-02<br />
3-06<br />
F out<br />
3-23<br />
3-24<br />
3-25<br />
3-26 3-27<br />
2. During traverse run, the centre frequency could be controlled<br />
by the multifunction input terminals. However,<br />
the X upper deviation and Y lower D deviation cannot<br />
F out<br />
3-23<br />
0<br />
5-00 ~ 5-06 = 26<br />
OFF<br />
OFF<br />
5-00 ~ 5-06 = 27<br />
3. The stall prevention is idle during the acceleration and<br />
deceleration time of traverse run. But it is valid during<br />
first acceleration to centre frequency process when the<br />
traverse run function is OFF or the VSD is in deceleration<br />
time after the STOP command is received.<br />
0 Time<br />
3-24<br />
3-25<br />
3-28<br />
3-25<br />
3-26 3-27<br />
ON<br />
is ready when the VSD output frequency reaches centre<br />
frequency (3-23). During acceleration to centre frequency,<br />
the acceleration time is at the original preset<br />
value (3-02/3-06). When the traverse run is OFF or the<br />
VSD is OFF, the deceleration time is also at the original<br />
preset value (3-03/3-07). However, during traverse running,<br />
the VSD is at traverse run acceleration time (3-36)<br />
and deceleration time (3-27). The motion is as the following<br />
diagram:<br />
be entered at the same time. If they are entered at the<br />
same time, the VSD will maintain the original centre frequency.<br />
The motion is as per the graph below:<br />
4. The frequency range of the traverse run is restricted by<br />
the VSD’s upper and lower frequency limits, i.e. if the<br />
(centre frequency + amplitude) is greater than the upper<br />
limit, it will operate at the upper frequency limit. And if<br />
(centre frequency - amplitude) is less than the lower<br />
limit, vice versa.<br />
<strong>Emotron</strong> AB 01-3992-01r3 Software Index 47<br />
ON<br />
3-28<br />
3-29<br />
3-29<br />
3-03<br />
3-07<br />
Time<br />
Time
5. During traverse run, not all the preset values, such as<br />
centre frequency, amplitude, amplitude drop, acceleration<br />
time, deceleration time, traverse run upper deviation<br />
and lower deviation, can be modified. The modified<br />
acceleration and deceleration time is priority for the<br />
original one, but not traverse run acceleration and deceleration<br />
time. The motion is as per the graph below:<br />
6. The stall prevention protection is unavailable during<br />
traverse run acceleration and deceleration time. Therefor<br />
this must be taken into consideration when designing<br />
equipment so that the actual system capacity complies<br />
with the proper VSD capacity.<br />
7. Centre frequency = 3-23*max. frequency (3-00)<br />
Amplitude = 3-24*centre frequency Acceleration/Deceleration<br />
time = amplitude acceleration/deceleration time<br />
Amplitude Drop = 3-25*amplitude<br />
Deviated traverse (X upper deviation) = 3-28*traverse run<br />
centre.<br />
Deviated traverse (lower deviation) = 3-29* traverse run centre.<br />
If you want to change the max. frequency of 3-00, reset 3-23<br />
to 3-29 values where necessary.<br />
3-30: Start Frequency (Hz) INV Start Frequency<br />
The Inverter can start at 5Hz and still have an operational<br />
control range of 0.0 - 60Hz. To accomplish this (3-01 will<br />
need to be set to 0Hz and (3-30) to 5Hz.<br />
3.4.5 Parameter Group 4 - Digital<br />
Display Operation Mode<br />
4-00: Motor Current Display Selection:<br />
0000: Disable Motor Current Display<br />
0001: Enable Motor Current Display<br />
4-01: Motor Voltage Display Selection:<br />
0000: Disable Motor Voltage Display<br />
0001: Enable Motor Voltage Display<br />
4-02: DC Bus Voltage Display Selection:<br />
0000: Disable Bus Voltage Display<br />
0001: Enable Bus Voltage Display<br />
4-03: PLC Status Display Selection:<br />
0000: Disable PLC Status Display<br />
0001: Enable PLC Status Display<br />
This function is available for the LCD keypad, but not for<br />
the LED one.<br />
4-04: Custom Units (Line <strong>Speed</strong>) Value: 0-9999<br />
The max preset line value of 4-04 is equal to the rated frequency<br />
(0-05) of the motor. For instance, given line speed<br />
1800 is equal to display 900 when output is 30 Hz while the<br />
operation frequency is 60 Hz.<br />
4-05: Custom Units (Line <strong>Speed</strong>) Display Mode<br />
0000: <strong>Drive</strong> Output Frequency is Displayed<br />
0001: Line <strong>Speed</strong> is Displayed in Integers (xxxx)<br />
0002: Line <strong>Speed</strong> is Displayed to One Decimal Place<br />
(xxx.x)<br />
0003: Line <strong>Speed</strong> is Displayed to Two Decimal Places<br />
(xx.xx)<br />
0004: Line <strong>Speed</strong> is Displayed to Three Decimal Places<br />
(x.xxx)<br />
The preset frequency is displayed when the VSD stops while<br />
the operation line speed is displayed when the VSD is running.<br />
4-06: PID Feedback Display<br />
0000: Disable<br />
0001: Enable<br />
Keypad displays PID feedback value:<br />
Parameter 5-05=20 (That is, S6 is set as the PID feedback<br />
analogue terminal, refer to PID), 11-0=1 (PID is enabled),<br />
and 4-06=1 (Display S6 as PID analogue feedback value 0–<br />
100, the formula as follows:)<br />
If feedback signal is 0–10V, (12-6=0000), keypad display<br />
value = (S6/10V)*100.<br />
If feedback Signal is 4–20mA, (12-6=0001), keypad display<br />
value = (S6/20mA)*100.<br />
NOTE: Please press the Key to switch between the<br />
output frequency and PID feedback value.<br />
NOTE: The VSD displays XXXF as Running, while XXXr as<br />
Stop.<br />
48 Software Index <strong>Emotron</strong> AB 01-3992-01r3
3.4.6 Parameter Group 5 -<br />
Multifunction Input Terminals<br />
(MFIT)<br />
Multifunction input terminals (TM2 S1-S6/AIN)<br />
controlling:<br />
5-00 to 06<br />
000: Forward/Stop Command *1<br />
0001: Reverse/Stop Command * 2<br />
0002: Preset <strong>Speed</strong> # 1 (6-02)<br />
0003: Preset <strong>Speed</strong> # 2 (6-03)<br />
0004: Preset <strong>Speed</strong> # 3 (6-05) * 3<br />
0005: Jog<br />
0006: Acc/Dec time # 2<br />
0007: Emergency Stop Contact A<br />
0008: Base Block<br />
0009: <strong>Speed</strong> Search Stop<br />
0010: Energy Saving<br />
0011: Control Signal Selection<br />
0012: Communication Control Signal Selection<br />
0013: Acc/Dec Disabled<br />
0014: Up Command<br />
0015: Down Command<br />
0016: Principal/Auxiliary <strong>Speed</strong><br />
0017: PID Function Disabled<br />
0018: Reset<br />
0019: Encoder Input Terminal (Terminal S5)<br />
0020: PID Feedback Signal AI2 (only for terminal AI2)<br />
0021: AI2 Bias Signal 1 Input (only for terminal AI2)<br />
0022: AI2 Bias Signal 2 Input (only for terminal AI2)<br />
0023: Analogue Input Terminal AIN<br />
0024: PLC Application<br />
0025: Traverse Run<br />
0026: Traverse Run Upper Deviation<br />
0027: Traverse Run Lower Deviation<br />
0028: Power Source Detect for KEB Function<br />
0029: Emergency Stop Contact B<br />
Multifunction<br />
terminal 3<br />
Preset value=04<br />
Multifunction<br />
terminal 2<br />
Preset value=03<br />
4. 5-00 to 06=6 (toggle acceleration and deceleration time)<br />
On the external input terminal, to select the acceleration<br />
Multifunction terminal 1<br />
Preset value=02<br />
A. The terminals S1-AIN on terminal block (TM2) are multifunction<br />
input terminals. The above 30 functions can be<br />
set in these terminals.<br />
B. Function Description for 5-00 to 06:<br />
1. 5-00 to 06=0/1 (Forward/Reverse/Stop)<br />
When forward command is ON, the VSD runs and<br />
stops when it is OFF. The 5-00 factory setting is forward.<br />
When reverse command is ON, the VSD runs and<br />
stops when it is OFF. The 5-01factory setting is reverse.<br />
2. 5-00 to 06=2-4 (Preset speed 1 to 3)<br />
When the external multifunction input terminals are<br />
ON, the VSD operates for the preset time, and the duration<br />
is determined by the time the terminal is ON. The<br />
corresponding frequency parameter is illustrated below:<br />
3. 5-00 to 06=5 (Jog)<br />
To select Jog operation the external input terminals must<br />
be ON. The VSD operates for the Jog acceleration and<br />
deceleration time. The corresponding frequency parameter<br />
is illustrated below:<br />
The priority order of frequency: Jog <strong>Speed</strong>Preset <strong>Speed</strong>Keypad<br />
frequency or external frequency signal<br />
Jog Command<br />
terminal<br />
Preset value=05<br />
Output frequency<br />
preset value<br />
0 0 0 0 6-00<br />
X X X 1 6-01<br />
0 0 1 0 6-02<br />
0 1 0 0 6-03<br />
0 1 1 0 6-04<br />
1 0 0 0 6-05<br />
1 0 1 0 6-06<br />
1 1 0 0 6-07<br />
1 1 1 0 6-08<br />
1/ deceleration 1/ S-curve 1 or acceleration 2/ deceleration<br />
2/ S-curve 2.<br />
<strong>Emotron</strong> AB 01-3992-01r3 Software Index 49
5. 5-00 to 06=7 /29: External emergency stop contact A or<br />
B. The VSD will decelerate to stop and flash E.S when<br />
the emergency stop signal is received regardless of the 1-<br />
05 setting. After this signal is released, turn OFF the<br />
operation switch then turn it ON or press the Operation<br />
Key, the VSD will restart from the start frequency. If the<br />
emergency signal was released before the VSD came to<br />
complete stop, the VSD will still perform an emergency<br />
stop. The 8-02/03 determines the action of the error terminal.<br />
When 8-02/0=0 the error terminal does not act<br />
when the external emergency signal is received. When 8-<br />
02/03=9, the error terminal does act when an emergency<br />
signal is received.<br />
6. 5-00 to 06=8: Base Block<br />
The VSD stops output when it receives a STOP command,<br />
and the motor Free-Run stops.<br />
7. 5-00 to 06=9: <strong>Speed</strong> Search Stop<br />
When starting, the VSD detects the present speed of the<br />
motor first, then the VSD accelerates from the present<br />
speed to preset speed.<br />
8. 5-00 to 06=10: Energy-saving operation<br />
While in operation FAN, PUMP or other heavy inertia<br />
loads which need high start torque, do not need such<br />
high torque over full speed range. As a result, energy can<br />
be saved by reducing the output voltage. The output<br />
voltage gradually decreases when the multifunction ter-<br />
Operation signal<br />
Disable<br />
ACC/DEC<br />
Output<br />
Frequency<br />
12. 5-00 to 06=14,15: Up / Down Function (actual acc/dec<br />
time is based on the setting):<br />
(1) Please set 1-06=3 if you want to use the Up/Down<br />
function, and the other frequency signals are useless.<br />
(2) Set 5-08=0 and 5-09=0, the VSD accelerates to the<br />
preset value of 6-00 when the operation terminal is ON.<br />
It then maintains the known speed. As the VSD receives<br />
the Up/Down command, it will accelerate / decelerate<br />
until the command is released. The VSD runs at the<br />
known speed. The VSD will either ramp stop or Free-<br />
Run stop, this is determined by the 1-05 setting as long<br />
as the VSD receives the STOP command. The stopping<br />
frequency will be stored in 6-00. The Up/Down key is<br />
invalid when the VSD stops. You need to use the keypad<br />
to modify the preset parameter.<br />
(3) Set 5-08=1 and the VSD will operate from 0 Hz<br />
when the operation terminal is ON. The Up/Down<br />
minal is ON. It will gradually increase (to the original<br />
voltage) when the multifunction terminal is OFF.<br />
NOTE: The output voltage decrease and increase speed<br />
in energy saving operation is the same as the speed of<br />
SPEED SEARCH.<br />
9. 5-00 to 06=11: Control signal switch<br />
External switch terminal is OFF: 1-00/01 determines the<br />
operation signal and frequency signal.<br />
External switch terminal is ON: Keypad controls the<br />
operation signal and frequency signal but not controlled<br />
by 1-00/01.<br />
10. 5-00 to 06=12: The VSD switch controlling communication.<br />
External switch terminal is OFF: for communication,<br />
the master (PC or PLC) can control the VSD operation<br />
and frequency signal and allow the modification of<br />
parameters. The operation signals from the keypad and<br />
TM2 are idle. Furthermore, the keypad can only display<br />
the voltage, current and frequency; the parameters are<br />
readable but not writable, and Emergency Stop is valid.<br />
External switch terminal is ON: for communication, the<br />
VSD is controlled by the keypad regardless of the setting<br />
of 1-00/1-06 and master. In this situation, the master<br />
can still read and write the VSD parameters.<br />
NOTE: When the Operation switch is OFF, the<br />
disable command is activated<br />
action is as per the description above. The VSD will<br />
ramp stop or free-run stop, which is determined by the<br />
1-05 setting when it receives the Stop Command and go<br />
back to 0 Hz. The next operation will start at 0 Hz.<br />
(4) If the UP/Down signal cannot act simultaneously.<br />
(5) 5-09 0, the VSD will accelerate to the setting of 6-00<br />
and maintain this speed. When the Up/Down terminal<br />
is ON, the setting frequency is the present value of 6-<br />
00±5-09, and the VSD will accelerate/decelerate to frequency<br />
6-00. The upper frequency limit and lower frequency<br />
limit also restrict the operation. If the Up/ Down<br />
signal is maintained for 2 seconds, the VSD will begin to<br />
accelerate/decelerate. If 5-09=0, the operation is the<br />
same, until the Up/ Down signal stops. Please refer to<br />
the time diagram for 5-09.<br />
50 Software Index <strong>Emotron</strong> AB 01-3992-01r3
Operation<br />
UP<br />
DOWN<br />
Output<br />
Frequency<br />
6-00<br />
13. 5-00 to 06=16 Principal/Auxiliary speed toggle<br />
Multifunction terminal = OFF, the frequency is set by<br />
Master <strong>Speed</strong>, whereas, Multifunction terminal = ON,<br />
the frequency is set by Auxiliary <strong>Speed</strong>.<br />
Example. 1-06=0001, the master speed is the VR on the<br />
keypad and the auxiliary speed is the analogue signal on<br />
the TM2 terminal block.<br />
14. 5-00 to 06=17 (PID Function Disable)<br />
The PID Function Disable is ON. PID is not controlled<br />
by 11-0, while OFF, it is controlled by 11-0.<br />
15. 5-00 to 06=18 (Reset Command)<br />
The Reset command is the same as when the Reset Key<br />
on the panel is ON. The command is OFF, and the VSD<br />
does not respond. The factory setting of 5-05 is Reset<br />
command.<br />
16. 5-04=19 (Encoder Input terminal)<br />
The multifunction terminal S5 is set to 19, which means<br />
it is the input terminal for the PLC program Encoder.<br />
17. 5-05=20 (PID feedback input terminal)<br />
The multifunction terminal S6 = 20, which means the<br />
PID feedback input terminal and 0–10V (0–20 mA) or<br />
2–10V (4–20mA) is available by setting 11-0.<br />
18. 5-05=21 /22 (Bias signal 1/2 input)<br />
To regulate the Offset of the Keypad VR or AIN analogue<br />
input, only a signal of 0–10V (0– 20 mA) or 2–<br />
10V (4–20mA) is available.<br />
5-05=21 Function<br />
19. 5-06=23 (Analogue input AIN)<br />
The multifunction terminal AIN = 23. The action is<br />
provided for setting the frequency.<br />
20. 5-00–06=24 (PLC Application)<br />
The multifunction terminal S1-AIN = 24, which means<br />
the terminal is for PLC application. The terminal is provided<br />
for the PLC program input.<br />
21. 5-00–06=25 (Traverse Run); 5-00–06=26 (Upper Deviation<br />
Traverse); 5-00–06=27 (Lower deviation Traverse).<br />
Refer to 3-23–3-29 for a detailed motion description.<br />
22. 5-00–06=28 (Power Source Detect for KEB Function)<br />
Please refer to the description of 2-08.<br />
<strong>Emotron</strong> AB 01-3992-01r3 Software Index 51<br />
Hz<br />
Upper Frequency<br />
Limit 3-00<br />
Hz<br />
0 AIN+S6<br />
10<br />
5-05=22 Function The value is 0 when AIN+(S6-5V)
Digital/Analogue input signal scan times:<br />
5-07: Multifunction terminal S1-S6 and AIN signal confirm<br />
the scan times (ms X 4), 1 to 100 times<br />
1. TM2 terminal used for scanning. If the same signals are<br />
continuously entered for N times (i.e. scan times), the<br />
VSD will treated the signal as normal. If the scan times<br />
are less than N, the signal will be audible.<br />
2. Each scan period is 4ms.<br />
3. The user can specify the duration of the scan times interval<br />
according to the noise environment. If the noise is<br />
serious, increase the value of 5-07, but the response<br />
speed will be slowed down.<br />
NOTE: If the S6 and AIN are for a digital signal, the<br />
voltage level for a digital signal above 8 V is treated as<br />
ON, below 2 V is OFF.<br />
Stop Mode Using MFIT:<br />
5-08:<br />
0000: When Up/Down is used, the preset frequency is<br />
held when the VSD stops, and the Up/Down is idle.<br />
0001: When Up/Down is used, the preset frequency is<br />
reset to 0 Hz as the VSD stops.<br />
0002: When Up/Down is used, the preset frequency is<br />
held when the VSD stops, and the Up/Down is available.<br />
(1) Set 5-08=0, the VSD will accelerate to the speed of 6-00<br />
as it receives the Run command and run at that speed. The<br />
VSD begins to accelerate (decelerate) as the Up (Down) terminal<br />
is energised. The VSD will hold the speed as the Up/<br />
Down command is released. When the Run Signal releases,<br />
the VSD will ramp stop or stop output (determined by the<br />
1-05 setting). It will store the frequency when the operation<br />
signal disappears. Up/Down keys are idle when the VSD is<br />
at rest. The keypad allows you to modify the preset frequency<br />
(6-00). If 5-08=0002 the Up/Down is available<br />
when the VSD stops.<br />
(2) Set 5-08=1, when the Run terminal is energised, the<br />
VSD operates from 0 Hz, the Function of Up/Down is the<br />
same as in the description above. When the Run signal is<br />
released, the VSD will ramp stop or stop output (determined<br />
by 1-05). And the VSD goes back to 0 Hz. The following<br />
operation will always begin from 0 Hz.<br />
Step of Up/Down Function (Hz):<br />
5-09: Up/Down (Hz) 0.00 to 5.00<br />
There are two modes covered below:<br />
(1) 5-09=0.00, the function is disable. The operation is just<br />
like the original one. When the UP terminal is ON, the frequency<br />
increases, and when the Down terminal is ON, the<br />
frequency decreases. (Refer to the following graph).<br />
(2) 5-09=0.01 to 5.00, Up/ Down terminal ON, which is<br />
equivalent to increasing/decreasing the frequency of 5-09. If<br />
the held down for over 2 seconds, revive the original Up/<br />
Down mode (Please refer to the following diagram).<br />
Encoder Impulse Ratio:<br />
5-10 Impulse input frequency time ratio<br />
When frequency source 1-06 is set as 0005, the impulse signal<br />
frequency will be according to this parameter to decide<br />
the real internal frequency of the VSD.<br />
The internal calculation formula: Frequency = S5 (impulse<br />
frequency)*5-10 (times ratio)<br />
For example, when the S5 impulse is 1KZ1000, and 5-10 is<br />
set to 1.50 times, the VSD frequency command is 1000*1.5<br />
= 1500 = 15.00Hz. The frequency accuracy of S5 is by based<br />
on 100; i.e. 1K (1000) present 10.00 Hz.<br />
Reference Source 2:<br />
5-11 Auxiliary frequency source can be selected<br />
Example.<br />
If the frequency source command is set as impulse command,<br />
(1-06=5).<br />
If using master speed operation (5-00 to 5-06 set to 16 and<br />
the terminal is OFF), the frequency runs as impulse frequency.<br />
If using auxiliary speed operation (5-00 to 5-06 set to 16<br />
and the terminal is ON), the frequency should be decided<br />
by the 5-11 setting.<br />
52 Software Index <strong>Emotron</strong> AB 01-3992-01r3<br />
UP<br />
DOWN<br />
Output frequency<br />
ON<br />
OFF<br />
ON<br />
OFF<br />
ON<br />
OFF<br />
ON<br />
OFF<br />
Increase/decrease<br />
with ramp<br />
X-XX<br />
2 s<br />
Ramp<br />
X-XX
The action process is as follows:<br />
5-11=0, frequency refer to 6-00.<br />
5-11=1, frequency refer to the VR analogue signal on the<br />
keypad.<br />
5-11=2, frequency refer to the VR analogue signal on TM2.<br />
5-11= 3, frequency refer to the frequency value which is calculated<br />
by Up/Down on TM2.<br />
5-11= 4, frequency refer to the input communication frequency..<br />
AI2 Function:<br />
5-12 Analog Input<br />
5-12=0020 : PID Feedback Signal AI2 (terminal AI2)<br />
5-12=0021 : AI2 Bias Signal 1 Input (terminal AI2)<br />
5-12=0022 : AI2 Bias Signal 2 Input (terminal AI2)<br />
3.4.7 Parameter Group 6 - Jog and<br />
Preset (MFIT) <strong>Speed</strong> Setting<br />
on Keypad<br />
Jog and Preset (MFIT) <strong>Speed</strong> Setting on Keypad:<br />
6-00 to 08: Set Jog and preset speed with Keypad<br />
Multifunction<br />
terminal3<br />
Preset value=04<br />
Multifunction<br />
terminal 2<br />
Preset value=03<br />
Multifunction<br />
terminal 1<br />
Preset value=02<br />
A. 5-00 to 06=2-4 (preset speed 1 to 3)<br />
The external multifunction terminal = ON, the VSDVSD<br />
operates at preset speed. The operation time of the 8 stages<br />
is based on the ON time of the terminal. Please refer to the<br />
corresponding parameters list:<br />
B. 5-00 to 06=5 (Jog terminal)<br />
The external multifunction terminal = ON, the VSD operates<br />
in Jog acceleration time/ Jog decelerate time/ON.<br />
Function<br />
Code No.<br />
Description Range/Code<br />
6-00 Keypad Frequency (Hz) 0.00 to 650.00<br />
6-01 Jog Frequency (Hz) 0.00 to 650.00<br />
6-02 Preset <strong>Speed</strong> #1 (Hz) 0.00 to 650.00<br />
6-03 Preset <strong>Speed</strong> #2 (Hz) 0.00 to 650.00<br />
6-04 Preset <strong>Speed</strong> #3 (Hz) 0.00 to 650.00<br />
6-05 Preset <strong>Speed</strong> #4 (Hz) 0.00 to 650.00<br />
6-06 Preset <strong>Speed</strong> #5 (Hz) 0.00 to 650.00<br />
6-07 Preset <strong>Speed</strong> #6 (Hz) 0.00 to 650.00<br />
6-08 Preset <strong>Speed</strong> #7 (Hz) 0.00 to 650.00<br />
Priority in reading the frequency: Jog > Preset speed > Keypad<br />
frequency or external frequency signal.<br />
Jog Command terminal<br />
Preset value=05<br />
Output frequency<br />
preset value<br />
0 0 0 0 6-00<br />
X X X 1 6-01<br />
0 0 1 0 6-02<br />
0 1 0 0 6-03<br />
0 1 1 0 6-04<br />
1 0 0 0 6-05<br />
1 0 1 0 6-06<br />
1 1 0 0 6-07<br />
1 1 1 0 6-08<br />
<strong>Emotron</strong> AB 01-3992-01r3 Software Index 53
3.4.8 Parameter Group 7 - Analogue<br />
input signal operation mode<br />
Analogue Input Signal Operation Mode: (The function is<br />
valid when 1-06==0002)<br />
7-00: AIN Gain (%) 0 - 200<br />
7-01: AIN Bias (%) 0 - 100<br />
7-02: AIN Bias Selection:<br />
0000: positive<br />
0001: negative<br />
7-03: AIN Slope:<br />
0000: positive<br />
0001: negative<br />
7-04: AIN signal verification Scan Time (AIN, AI2) 1–100<br />
(× 4ms)<br />
7-05: AI2 Gain (%) (S6) 0 - 200<br />
1. 7-02=0: 0V (0mA) corresponding to lower frequency<br />
limit. 10V (20mA) corresponding to upper frequency<br />
limit.<br />
2. 7-02=1: 10V (20mA) corresponding to lower frequency<br />
limit 0V (0mA) corresponding to upper frequency limit.<br />
3. 12-6=0: 0–10V (0–20mA)<br />
F = I*(3-00)/20 I> = 0SW2 = or F=V*(3-00)/10<br />
V>=0SW2=V<br />
= 1: 2–10V (4–20mA)<br />
F=(I-4)*(3-00)/16 I>=4SW2=<br />
F=0 I=2SW2=V or<br />
F=0 V
4. The VSD reads the average value of A/D signals once per<br />
(7-04×4 ms). Users can determine scan intervals according<br />
to noise in the environment. Increase 7-04 in noisy<br />
environment, but the response time will increase accordingly.<br />
3.4.9 Parameter Group 8 -<br />
Multifunction output terminal<br />
and output signal operation<br />
mode<br />
Multifunction analogue output control:<br />
8-00: Analogue Output Voltage Mode:<br />
0000: Output frequency<br />
0001: Frequency Setting<br />
0002: Output voltage<br />
0003: DC Bus Voltage<br />
0004: Motor current<br />
0005: Feedback Signal of PID<br />
8-01: Analogue Output Gain=0 to 200%<br />
The multifunction analogue output terminal of the terminal<br />
block (TM2) is 0–10 VDC analogue output. The output<br />
type is determined by the setting 8-00. The function of 8-01<br />
is: when there is tolerance for the external voltage meter and<br />
peripheral equipment, please regulate 8-01.<br />
The feedback value of PID (i.e. the input voltage and current<br />
of AI2) outputs analogue value from the FM+ terminal.<br />
(Decides parameter 4-06). The value corresponds to the<br />
input signal 0–10V (0–20 mA) or 2–10V (4–20mA).<br />
Note: The max output voltage is 10V due to the circuit,<br />
even when the output voltage should be higher than<br />
10 V.<br />
8-00 Multifunction analog output control:<br />
8-00=0000<br />
1. When 0-00=0 or 1 (vector) FM+ 0~10V corresponds to<br />
0~ motor rated voltage (0-01)<br />
2. When 0-00=2 (V/F) FM+ 0~10V corresponds to 0~AC<br />
line input voltage (0-07) x Max output frequency voltage<br />
ratio % (10-5).<br />
200V class: FM+ 0~10V corresponds to 0~500Vdc<br />
400V class: FM+ 0~10V corresponds to 0~1000Vdc<br />
<strong>Emotron</strong> AB 01-3992-01r3 Software Index 55<br />
3-00<br />
Fmax<br />
F<br />
8-00=0001<br />
3-00<br />
Fmax<br />
F<br />
8-00=0002<br />
Vector: 0-01<br />
or<br />
V/F: 0-07 x 10-5<br />
8- 00 = 0003<br />
500 V<br />
or<br />
1000 V<br />
V<br />
V<br />
10V<br />
10V<br />
10 V<br />
V (FM+)<br />
V (FM+)<br />
10 V<br />
V (FM+)<br />
V (FM+)
8-00=0004<br />
Rated<br />
current<br />
Ex. The rated current of 201 is 4.5A, FM+ 0~10V corresponds<br />
to 0~4.5A<br />
8-02/03=01:<br />
The preset frequency is reached (±8-05)<br />
Operation signal (1-009)<br />
Setting frequency (1-06)<br />
INV output frequency<br />
Setting frequency (1-06)<br />
Relay output signal<br />
I<br />
10V<br />
V (FM+)<br />
8-02/3=02:<br />
Arbitrary frequency consistency F OUT =8-04 ± 8-05<br />
Operation signal (-00)<br />
Operation frequency reached arbitrary frequency (8-04+/8-05)<br />
Operation conditions:<br />
A. Input frequency-Frequency command (1-06)
8-02/3=03:<br />
Frequency detection F OUT > 8-04<br />
Operation signal (1-00)<br />
Arbitrary frequency (8-04)<br />
INV output frequency<br />
Arbitrary frequency (8-04)<br />
Relay output signal<br />
8-02/3=04:<br />
Frequency detection F OUT < 8-04<br />
Operation signal (1-00)<br />
Arbitrary frequency (8-04)<br />
INV output frequency<br />
Arbitrary frequency (8-04)<br />
Relay output signal<br />
8-02/3=05:<br />
Over torque detection<br />
Output current<br />
Over torque output<br />
8-02/3=05<br />
Over torque detecting level 9-14<br />
Multifunction output terminal (8-02 / 8-03)=3<br />
9-15<br />
Even without a Run signal or command,<br />
the relay is still activated<br />
<strong>Emotron</strong> AB 01-3992-01r3 Software Index 57
3.4.10 Parameter Group 9 – <strong>Drive</strong><br />
and Load Protection Modes<br />
9-00: Trip Prevention Selection During Acceleration:<br />
0000: Enable Trip Prevention During Acceleration<br />
0001: Disable Trip Prevention During Acceleration<br />
9-01: Trip Prevention Level During Acceleration: 50% to<br />
300%<br />
9-02: Trip Prevention Selection During Deceleration:<br />
0000: Enable Trip Prevention During Deceleration<br />
0001: Disable Trip Prevention During Deceleration<br />
9-03: Trip Prevention Level During Deceleration: 50% to<br />
300%<br />
9-04: Trip Prevention Selection in Run Mode:<br />
0000: Enable Trip Prevention in Run Mode<br />
0001: Disable Trip Prevention in Run Mode<br />
9-05: Trip Prevention Level in Run Mode: 50% to 300%<br />
9-06: Trip Prevention Deceleration Time Selection in Run<br />
Mode:<br />
0000: Trip Prevention Deceleration Time Set with 3-03<br />
0001: Trip Prevention Deceleration Time Set with 9-07<br />
9-07: Deceleration Time in Trip Prevention Mode (s): 0.1<br />
to 3600.0<br />
1. When accelerating, the VSD will delay the acceleration,<br />
if it is too short and this would result in over current, in<br />
order to prevent the VSD tripping.<br />
2. When decelerating, the VSD will delay the deceleration,<br />
if it is too short and this would result in an over voltage<br />
of DC BUS, to prevent the VSD tripping with ‘OV’ displayed.<br />
3. Some mechanical characteristics (such as pressure) or<br />
unusual breakdown (seizure due to insufficient lubrication,<br />
uneven operation, impurities in processed materials,<br />
etc.) will cause the VSD to trip, thus<br />
inconveniencing users. When the operating torque of<br />
the VSD exceeds the setting of 9-05, the VSD will lower<br />
the output frequency following the deceleration time set<br />
by 9-06, and return to the normal operation frequency<br />
after the torque stabilises.<br />
4. When the VSD needs to stop immediately and the braking<br />
resistor is connected, set 9-02 to 1 to obtain greater<br />
braking capacity.<br />
9-08: Electronic Motor Overload Protection Operation<br />
Mode:<br />
0000: Enable Electronic Motor Overload Protection<br />
0001: Disable Electronic Motor Overload Protection<br />
9-09: Motor Type Selection:<br />
0000: Electronic Motor Overload Protection Set for self<br />
ventilated Motor<br />
0001: Electronic Motor Overload Protection Set for forced<br />
ventilated Motor<br />
9-10: Motor Overload Protection Curve Selection:<br />
0000: Constant Torque (OL=103%) (150%,1 minute)<br />
0001: <strong>Variable</strong> Torque (OL=113%) (123%,1 minute)<br />
9-11: Operation After Overload Protection is Activated:<br />
0000: Coast-to-Stop After Overload Protection is Activated<br />
0001: <strong>Drive</strong> Will not Trip when Overload Protection is<br />
Activated (OL1)<br />
Description of the thermal relay function:<br />
1. 9-10=0000: protect the general mechanical load. If the<br />
load is less than 103% rated current, the motor continues<br />
to run. If the load is larger than 150% rated current,<br />
the motor will run for 1 minute. (Refer to following<br />
curve (1).<br />
= 0001: protects HVAC load (FAN, PUMP, etc.): If the<br />
load is less than 113% rated current, the motor continue<br />
to run. If the load is larger than 123% rated current, the<br />
motor will run for 1 minute.<br />
2. The heat sinking function will decline when the motor<br />
runs at low speed. So the thermal relay action level will<br />
decline at the same time. (Curve 1 will change to curve<br />
2).<br />
3. 9-09=0000: sets 0-05 as the rated frequency for the<br />
motor.<br />
9-11=0000: the VSD coast to stop as the thermal relay<br />
acts and flashes OL1. Press ‘reset’ or the external reset<br />
terminal to continue running<br />
= 0001: the VSD continues to run as the thermal relay<br />
acts and flashes OL1. Until the current declines to 103%<br />
or 113%(determined by 9-10), OL1 will disappear.<br />
58 Software Index <strong>Emotron</strong> AB 01-3992-01r3
Minute<br />
5.0<br />
Minute<br />
1.0<br />
1.0<br />
103 150<br />
Current<br />
percent<br />
113 123<br />
Electronic motor overload OL1 protection current and frequency<br />
Rated current<br />
percent<br />
103%<br />
63%<br />
30% 100%<br />
Rated<br />
frequency<br />
percent<br />
Non-VSD duty motor OL1 protection curve<br />
OL=103% Start, 150%/1 Min.<br />
Rated current<br />
percent<br />
103%<br />
30% 100%<br />
Rated<br />
frequency<br />
percent<br />
The over torque is defined as: the output torque is inside<br />
parameter 9-15, the voltage level (the VSD rated torque is<br />
100%) is over 9-14 parameter.<br />
9-13=0000: If there is over torque, the VSD can continue to<br />
run and flashes OL3 till the output torque is less than the 9-<br />
14 setting value.<br />
= 0001: If there is over torque, the VSD coasts to stop and<br />
flashes OL3. it is necessary to press ‘RESET’ or external terminal<br />
to continue to run.<br />
5.0<br />
Rated current<br />
percent<br />
113%<br />
Current<br />
percent<br />
63%<br />
0.13% 30% 100%<br />
Rated<br />
frequency<br />
percent<br />
Non-VSD duty motor OL1 protection curve<br />
OL=113% Start, 123%/1 Min<br />
Rated current<br />
percent<br />
113%<br />
30% 100%<br />
9-12: Over Torque Detection Selection:<br />
= 0000: Disable Over Torque Operation<br />
= 0001: Enable Over Torque Operation Only if at Set Frequency<br />
= 0002: Enable Over Torque Operation while the <strong>Drive</strong> is<br />
in Run Mode<br />
9-13: Operation After Over Torque Detection is Activated:<br />
= 0000: <strong>Drive</strong> will Continue to Operate After Over<br />
Torque is Activated<br />
= 0001: Coast-to-Stop After Over Torque is Activated<br />
9-14: Over Torque Threshold Level (%): 30-200%<br />
9-15: Over Torque Activation Delay Time (s): 0.0-25.0<br />
Rated<br />
frequency<br />
percent<br />
If parameter 8-02,03 (Multifunction output terminal) = 05,<br />
the output terminal is output over torque signal.<br />
NOTE: Over torque output signal will be output when the<br />
parameter 9-12=0001 or 0002 when the level and time<br />
are above the range.<br />
3.4.11 Parameter Group 10 – Volts /<br />
Hz Pattern Operation Mode<br />
V/F pattern Selection<br />
10-0: V/F pattern Selection = 0 to 18<br />
10-1: Torque boost gain (V/F pattern modulation)% = 0.0 to<br />
30.0%<br />
10-2: Motor no load current (Amps AC) -------------<br />
10-3: Motor rated slip compensation (%) = 0.0 to 100.0%<br />
10-4: Max output frequency (Hz) = 0.20 to 650.0 Hz<br />
10-5: Max output frequency voltage ratio (%) = 0.0 to 100.0%<br />
10-6: Medium frequency (Hz) = 0.10 to 650.0 Hz<br />
10-7: Medium output frequency voltage ratio (%) = 0.0 to<br />
100.0%<br />
10-8: Min output frequency (Hz) = 0.10 to 650.0 Hz<br />
10-9: Min output frequency voltage ratio (%) = 0.0 to 100.0%<br />
<strong>Emotron</strong> AB 01-3992-01r3 Software Index 59
1. 10-0=18, sets the V/F pattern freely complying with 10-<br />
4 to 10-9 (Refer to following diagram)<br />
10-5<br />
(Vmax)<br />
10-7<br />
(Vmid)<br />
10-9<br />
(Vmin)<br />
(V)<br />
10-8 10-6 10-4 650<br />
2. 10-0=0 to 17 V/F pattern (Refer to following list) C<br />
Hz<br />
Type Function 10-0 V/F pattern Type Function 10-0 V/F pattern<br />
50<br />
Hz<br />
General use<br />
High start torque<br />
Decreasing torque<br />
Constant torque<br />
0<br />
1<br />
3<br />
C<br />
0.1 2.5 50 650 Hz 60<br />
Hz<br />
12<br />
60 Software Index <strong>Emotron</strong> AB 01-3992-01r3<br />
General use<br />
2 B<br />
11<br />
4<br />
High start torque<br />
Decreasing torque<br />
5 C<br />
14<br />
0.1 25 50 650 Hz<br />
6<br />
V (%)<br />
100<br />
B<br />
C<br />
V (%)<br />
100<br />
V (%)<br />
100<br />
B<br />
V (%)<br />
100<br />
0.1 2.5 50 650 Hz<br />
Constant torque<br />
7<br />
B<br />
16<br />
8<br />
C<br />
17<br />
C<br />
0.1 5 50 650 Hz 0.1 6 60 650 Hz<br />
9<br />
10<br />
13<br />
15<br />
V (%)<br />
100<br />
B<br />
C<br />
V (%)<br />
100<br />
B<br />
C<br />
V (%)<br />
100<br />
B<br />
C<br />
V (%)<br />
100<br />
B<br />
0.1 3.0 60 650 Hz<br />
1 3.0 60 650 Hz<br />
0.1 30 60 650 Hz
10-0 B C<br />
0 / 9 50.0% 1.0%<br />
1 / 10 60.0% 1.0%<br />
2 / 11 65.0% 1.0%<br />
3 / 12 70.0% 1.0%<br />
4 / 13 40.0% 1.0%<br />
5 / 14 35.0% 1.0%<br />
6 / 15 45.0% 1.0%<br />
7 / 16 55.0% 1.0%<br />
8 / 17 65.0% 1.0%<br />
Slip frequency boost =<br />
Marked on the motor nameplate<br />
Output Current-(10-2)<br />
(0-02)-(10-2)<br />
x (10-3)<br />
3. The VSD will output the value in B, C and voltage (refer<br />
to 10-0) plus 10-1 V/F pattern setting. The start torque<br />
will also be raised.<br />
4. When the induction motor is running, there must be<br />
slip due to the load. Boost is necessary to improve the<br />
precision of the speed.<br />
<strong>Emotron</strong> AB 01-3992-01r3 Software Index 61<br />
10-1=<br />
Voltage<br />
100%<br />
B<br />
C<br />
1 2.5/3.0 50/60<br />
Note: 0-02 = motor rated current 10-2 =<br />
motor no load current<br />
10-3 rough value = (Motor synchronization speed– Rated speed) / Motor synchronization speed<br />
Motor synchronization speed (RPM) =<br />
120<br />
Motor Poles<br />
e.g.: 4-pole 60 Hz induction motor synchronization speed =<br />
Note: Motor with no load current (10-2) differs from the<br />
VSD capacities in 15-0 (refer to 0-02 note). It should be<br />
regulated according to the actual condition.<br />
× Motor rated frequency (50Hz or 60Hz)<br />
120<br />
4<br />
X 60 = 1800 RPM<br />
Hz
3.4.12 Parameter group 11 - PID<br />
operation mode<br />
11-0: PID Operation Selection<br />
0000: PID disable<br />
0001: PID enable (deviation is D-controlled)<br />
0002: PID feedback D-controlled<br />
0003: PID D reverse characteristic controlled<br />
0004: PID feedback D characteristic controlled<br />
0005: PID frequency command + D controlled<br />
0006: PID frequency command + feedback D controlled<br />
0007: PID frequency command + D reverse characteristic<br />
controlled.<br />
0008: PID frequency command + feedback D reverse characteristic<br />
controlled.<br />
11-0 =1, D is the deviation of (target value – detected value)<br />
in the unit time (11-4).<br />
=2, D is the deviation of the detected values in unit time<br />
(11-4).<br />
=3, D is the deviation of (target value – detected value) in<br />
the unit time (11-4). If the deviation is positive, the output<br />
frequency decreases, and vice versa.<br />
=4, D is the deviation of detected value in unit time (11-4).<br />
When the deviation is positive, the frequency decreases, and<br />
vice versa.<br />
=5, D is equal to the deviation of (target value – detected<br />
value) in unit time (11-4) + Frequency command.<br />
=6, D is equal to the deviation of detected values in unit<br />
time + Frequency command.<br />
=7, D is equal to the deviation of (target value – detected<br />
value) in unit time + Frequency command. If the deviation<br />
is positive, the output frequency decreases, and vice versa.<br />
=8, D is equal to the deviation of detected values in unit<br />
time + Frequency command. When the deviation is positive,<br />
the frequency decreases, and vice versa.<br />
11-1: Feedback Calibration Gain (%): 0.00 to 10.00<br />
11-1 is the calibration gain which can be used to increases<br />
the accuracy of the PID controller when low feedback signal<br />
are used. Deviation = Feedback signal × 11-1.<br />
Example: When PID Feedback signal is 30 and 11-1 setting<br />
is 2, the internal used feedback signal becomes 30*2=60<br />
11-2: Proportion Gain (%): 0.00 to 10.00<br />
11-2: Proportion gain for P control.<br />
11-3: Integrate Time (s): 0.0 to 100.0<br />
11-3: Integrate time for I control.<br />
11-4: Differential Time (s): 0.00 to 10.00<br />
11-4: Differential time for D control.<br />
11-5: PID Offset:<br />
0000: Positive Direction<br />
0001: Negative Direction<br />
11-6: PID Offset Adjust (%): -109% to +109% of rated<br />
motor speed<br />
11-5/11-6: PID output is compensated with the PID Offset<br />
according to setting of 11-6. This is done by adding: PID<br />
Offset Adjust (11-6) x motor rated speed to the actual speed.<br />
The sign of PID Offset Adjust is changed if Negative Direction<br />
(11-5=0001).<br />
Example: The PID control uses this PID Offset, 11-5 =<br />
0000, and the rated motor speed is 60Hz.<br />
The PID process value result is an output frequency of<br />
30Hz. With adjusting the PID Offset 11-6= 10%, the output<br />
frequency will become 30 Hz + (motor rated speed<br />
*10%) = 36Hz.<br />
11-7: Output Lag Filter Time (s): 0.0 to 2.5<br />
11-7: Updates time for output frequency; ; the output frequency<br />
will each time be updated to the actual PID output<br />
signal value when the set time in 11-7 is reached..<br />
NOTE: PID Function is available for controlling the<br />
output flow, external fan flow and temperature. The<br />
controlling flow is as follows:<br />
62 Software Index <strong>Emotron</strong> AB 01-3992-01r3
1-06<br />
Frequency command<br />
(PID command)<br />
5-05 (AS6)=20<br />
PID Feedback<br />
Signal<br />
12-6<br />
Feedback<br />
signal<br />
Gain<br />
11-1<br />
Feedback<br />
gain<br />
1. For performing PID control, set 5-05=20, AI2 (S6) on<br />
TM2 as PID feedback signal.<br />
2. The target value of above diagram is the 1-06 input frequency.<br />
3. There are two ways to see the PID feedback signal, one is<br />
using the keypad switch display (4-06 must be set as 1);<br />
the other is using analogue output FM+ (8-00 must be<br />
set as 5).<br />
3.4.13 Parameter Group 12 - PID<br />
"Limits" and "Out of Range"<br />
Mode<br />
12-0=0: Disable; 12-0=1: detection for running and display<br />
PDER12-0=2: detection for stopping and display PDER.<br />
+<br />
_<br />
D<br />
11-4<br />
D gain<br />
-1<br />
11-0=1,2,5,6<br />
Forward characteristic<br />
11-0=1,3,5,7<br />
Deviation D<br />
11-0=3,4,7,8<br />
Reverse<br />
characteristic<br />
11-0=2,4,6,8<br />
Feedback D<br />
12-0: Feedback Loss Detection Mode:<br />
0000: Disable<br />
0001: Enable – <strong>Drive</strong> Continues to Operate After Feedback<br />
Loss<br />
0002: Enable – <strong>Drive</strong> “STOPS” After Feedback Loss<br />
12-1: Feedback Loss Detection Mode (%): 0 to 100<br />
12-1 is the level for signal loss. Deviation = Command value<br />
– Feedback value. While the deviation is larger than the loss<br />
level, the feedback signal is lost.<br />
12-2: The action delay time if the feedback signal is lost.<br />
12-3: The Limiter prevents PID saturation and set the Icontrol<br />
limit as a percentage of the rated motor speed.<br />
12-4=0: When PID feedback value reaches the Frequency<br />
command value, the PID controller will keep active.<br />
12-4=1 to 30: When PID feedback value reaches the Frequency<br />
command value, and this will stay stable for the set<br />
time in 12-4, the PID output will become 0 and stops to<br />
control the output speed, until there is a deviation (target<br />
<strong>Emotron</strong> AB 01-3992-01r3 Software Index 63<br />
P<br />
11-2<br />
Proportion gain<br />
I I I<br />
limit reset<br />
11-3 12-3 12-4<br />
Integrator Integrator Integrator<br />
time limit reset to 0<br />
D<br />
11-4<br />
Differential<br />
time<br />
11-0=2,4,6,8<br />
Feedback D<br />
11-0=1,3,5,7<br />
Deviation D<br />
PID<br />
Limit<br />
PID limit<br />
Up=3-00<br />
Down=3-01<br />
11-0=5,6,7,8<br />
PID output=PID+frequency command<br />
+<br />
+<br />
Sleep<br />
Mode<br />
11-0=1,2,3,4<br />
PID output=PID<br />
+/-<br />
Offset<br />
11-5/11-6<br />
Deviation<br />
12-7/12-8<br />
Sleep mode<br />
11-7<br />
PID Delay<br />
+<br />
+<br />
PID output<br />
12-2: Feedback Loss Detection Delay Time (s): 0.0 to 25.5<br />
12-3: Integrate Limit Value (%): 0 to 109 of rated motor<br />
speed<br />
12-4: Integrator Reset to 0 when Feedback Signal Equals<br />
the Intended Value:<br />
0000: Disable<br />
0001: 1 second<br />
0030: 30 seconds
speed - feedback) which is above the set integration Error<br />
Margin in 12-5..<br />
12-5: Allowable Integration Error Margin (Unit Value) (1<br />
Unit = 1/8192): 0 to 100<br />
Note: when 12-4 = 0000, the setting of 12-5 has no<br />
effect.<br />
Internal run command<br />
External run command<br />
3-00<br />
12-7<br />
3-01<br />
12-8<br />
INV out frequency<br />
PID out frequency<br />
sleep level (set from 12-7, unit is Hz)<br />
12-5=0 to 100% unit value: will re-activate the PID control<br />
when the deviation is greater then the set unit value.<br />
12-6: AIN and AI2 Signal Type: 0-10V (0-20mA) or 2-<br />
10V (4-20mA)<br />
12-6:AIN and AI2 Signal Type:<br />
12-6=0: AIN=0-10V or 0-20mA, AI2=0-10V or 0-20mA<br />
(signal V or I is decided by SW2 & SW3)<br />
12-6=1: AIN=0-10V or 0-20mA, AI2=2-10V or 4-20mA<br />
(signal V or I is decided by SW2 & SW3)<br />
12-6=2: AIN=2-10V or 4-20mA, AI2=0-10V or 0-20mA<br />
(signal V or I is decided by SW2 & SW3)<br />
12-6=3: AIN=2-10V or 4-20mA, AI2=2-10V or 4-20mA<br />
(signal V or I is decided by SW2 & SW3).<br />
12-7, 12-8: PID Sleep Mode<br />
PID Sleep Mode:<br />
11-0=1 (PID Enable)<br />
5-05=20 (PID Feedback Enable)<br />
1-06 = PID setting frequency source (Target Value)<br />
12-7 Sets the frequency for sleep start, Unit: Hz<br />
12-8 Sets the Time for sleep delay, Unit: sec<br />
When PID output frequency is less than the frequency for<br />
sleep start and it reaches the time of sleep delay, the VSD<br />
will decelerate to 0 and enter PID sleep mode.<br />
When PID output frequency is larger than the frequency for<br />
sleep start the VSD will be woken and enter PID awake<br />
mode. The time diagram is as follows:<br />
12-7: Sleep level<br />
12-8: Sleep delay<br />
3-00: Upper limit<br />
3-01: Lower limit<br />
64 Software Index <strong>Emotron</strong> AB 01-3992-01r3
3.4.14 Parameter Group 13 -<br />
Communication mode<br />
13-0: Assigned Communication Station Number: 1 - 254<br />
13-0: Sets the communication station codes which are suitable<br />
for driving the situations of more than one VSD.<br />
13-1: Baud Rate setting (bps): 0000: 4800<br />
0001: 9600<br />
0002: 19200<br />
0003: 38400<br />
13-2: Stop Bit Selection:<br />
0000: 1 stop bit<br />
0001: 2 stop bit<br />
13-3: Parity Selection: 0000: no parity<br />
0001: even parity<br />
0002: odd parity<br />
13-4: Data Format Selection: 0000: 8 bit data<br />
0001: 7 bit data<br />
1. RS-485 Communication:<br />
(1)1 vs. 1 Control: controlling one VSD with a PC, PLC<br />
or controller. (Set 13-0=1 to 254)<br />
(2)1 vs. more Control: controlling more than one VSD<br />
with PC, PLC or controller. (The max. number of VSDs<br />
is 254. Set 13-0=1 to 254). When the VSD receives the<br />
communication station code = 0, the communication<br />
control is acceptable regardless of the set value for 13-0.<br />
2. RS-232 communication: (RS232 interface is required) 1<br />
vs. 1 control: controlling one VSD with a PC, PLC or<br />
controller. (Set 13-0=1 to 254).<br />
NOTE: a. The BAUD RATE (13-1) of the PC (or PLC or<br />
controller) and of the VSD should be set to the same<br />
level. Communication format (13-2/13-3/13-4) should<br />
be set to the same one.<br />
b. The VSD will confirm the parameter co-efficient when<br />
the PC modifies the parameter of the VSD.<br />
c. Please refer to the <strong>VSC</strong> Communication PROTOCOL.<br />
13-5/13-6: Communication time-out detection time /<br />
Communication time-out operation<br />
1. Time-out operation selection:<br />
000: Deceleration to stop (3-03: Deceleration time 1).<br />
001: Free run to stop.<br />
002: Deceleration to stop (3-07: Deceleration time 2).<br />
003: Continue operating.<br />
Default=000<br />
Reset method:<br />
a. Push the "Reset" button directly.<br />
b. Receive correct Modbus data from Master.<br />
After communication time-out, the motor decelerates to<br />
stop (13-5 = 000, 001, 002). And the motor does not run<br />
automatic after reset, the inverter must set the run command<br />
again to restart.<br />
*Cannot be modified during communication.<br />
*Detail list please see figure on next page.<br />
2. Time-out detection time: 00.0~25.5sec; setting 00.0 sec:<br />
disable time-out function.<br />
Default: 00.0sec<br />
Communication time-out detection enable or not is according<br />
to 13-6?not relationship with Run/Frequency command.<br />
*Cannot be modified during communication.<br />
<strong>Emotron</strong> AB 01-3992-01r3 Software Index 65
Master<br />
Slave<br />
(<strong>VSC</strong> response)<br />
RY Output<br />
Frequency Output<br />
Display<br />
Reset<br />
8-02= 0006<br />
8-03= 0006<br />
13-5 = 000, 002<br />
13-5 = 001<br />
13-5 = 003<br />
T1 T2<br />
T3 > 316<br />
T3<br />
000 → Dec from 3-03<br />
002 →Dec from 3-07<br />
001 →free run<br />
003--> keep on running<br />
according to set reference<br />
If 3- 03 < 3-07<br />
Master send data again to auto reset<br />
66 Software Index <strong>Emotron</strong> AB 01-3992-01r3<br />
000<br />
002<br />
“ COt”<br />
Display show “ COt ” always until reset
3.4.15 Parameter Group 14 -<br />
Autotuning<br />
14-0: Stator Resistance (Ohms) Gain<br />
14-1: Rotator Resistance (Ohms) Gain<br />
14-2: Equivalent Inductance (mH) Gain<br />
14-3: Magnetized Current (Amps AC) Gain<br />
14-4: Ferrite Loss Conduction (gm) Gain<br />
1. If 0-00=0 or 1 (vector mode) is selected, when power<br />
ON, set 0-06=1, the motor will run as the VSD performs<br />
autotuning. When the motor stops, it means that<br />
autotuning is finished. The VSD will write the internal<br />
parameter of the motor to 14-0 to 14-4, and auto reset<br />
the 0-06 back to 0.<br />
2. Autotuning must be carried out if the motor has been<br />
changed. If the internal parameters are known already,<br />
they can be entered to 14-0 to 14-4 directly.<br />
3. 0-06=1to perform autotuning. When finished, 0-06 is<br />
auto reset to 0, the Keypad displays END.<br />
4. The parameter group only affects the Vector mode.<br />
3.4.16 Parameter Group 15 -<br />
Operation Status and<br />
Function Reset<br />
15-0: <strong>Drive</strong> Horsepower Code<br />
15-0 VSD Model<br />
405<br />
009<br />
408 <strong>VSC</strong>48<br />
013<br />
410 018<br />
15-1: Software Version<br />
15-2: Fault JogLatest 3 times<br />
1. When the VSD doesn’t work normally, the previous fault<br />
log stored in 2.xxxx will be transferred to 3.xxxx and<br />
then the one in 1.xxxx to 2.xxxx. The present fault will<br />
be stored in the blank 1.xxxx. Thus the fault stored in<br />
3.xxxx is the earliest one of the three, while the one<br />
1.xxxx is the latest.<br />
2. Enter 15-2, the fault 1.xxxx will be displayed first, press<br />
. Now you can read 2.xxx3.xxx1.xxx, whereas with<br />
, the order is 3.xxx2.xxx1.xxx3.xxx.<br />
3. Enter 15-2, the three fault log will be cleared once the<br />
reset key is pressed. The log content will be changed to<br />
1.---2.---3.---.<br />
4. E.g. if the fault log content is ‘1.OCC’, which indicates<br />
the latest fault is OC-C, etc.<br />
15-3: Accumulated Operation Time 1 (hours): 0 – 9999<br />
15-4: Accumulated Operation Time 2 (hours X 10000): 0<br />
- 27<br />
15-5: Accumulated Operation Time Mode: 0000: Power<br />
on time<br />
0001: Operation time<br />
1. When the operation time goes up to 9999 this set operation<br />
duration 1. The next hour will be carried to operation<br />
duration 2. Meanwhile, the recorded value will be<br />
cleared to 0000, and the recorded value of operation<br />
duration 2 will be 01.<br />
2. Description of operation time selection:<br />
Preset<br />
value<br />
Description<br />
0 Power on, counts the accumulated time.<br />
If 15-6 is set to 1111, the parameter will be reset to factory<br />
setting. The max output voltage will comply with the voltage<br />
and frequency (0-01/0-05) on the nameplate of the<br />
motor. The output frequency is 60 Hz if the upper frequency<br />
limit is not set.<br />
<strong>Emotron</strong> AB 01-3992-01r3 Software Index 67<br />
1<br />
VSD operation, counts the accumulated operation<br />
time<br />
15-6: Reset the factory setting:<br />
1110: Reset the 50Hz factory setting<br />
1111: Reset the 60Hz factory setting<br />
1112: Reset PLC program<br />
NOTE: In V/F control mode, motor parameters (14-0 to<br />
14-4) will be modified when resetting factory setting.<br />
However, in vector control mode, motor parameters<br />
(14-0 to 14-4) will not be modified when resetting<br />
factory setting.
68 Software Index <strong>Emotron</strong> AB 01-3992-01r3
4. Troubleshooting and Maintenance<br />
4.1 Error display and remedying errors<br />
4.1.1 Errors which cannot be recovered manually<br />
Display Error Cause Remedy<br />
CPF<br />
EPR<br />
-CV-<br />
-LV-<br />
-OH-<br />
CTER<br />
Program problem External noise interference<br />
EEPROM problem Faulty EEPROM Replace EEPROM<br />
Voltage too high during<br />
stop<br />
Voltage too low during<br />
stop<br />
The VSD is overheated<br />
during stop<br />
Current Sensor detecting<br />
error<br />
Note @ the failure contact does not function.<br />
4.1.2 Errors which can be recovered manually and automatically<br />
Connect a parallel RC burst absorber<br />
across the magnetizing coil of the magnetic<br />
contactor that causes interference<br />
Detection circuit malfunction Send the VSDVSD back to be repaired<br />
1. Power voltage too low<br />
2. Restraining resistor or fuse burnt out.<br />
3. Detection circuit malfunctions<br />
1. Detection circuit malfunctions<br />
2. Ambient temperature too high or bad<br />
ventilation<br />
Current sensor error or circuit malfunction<br />
1. Check if the power voltage was correct<br />
or not<br />
2. Replace the restraining resistor or the<br />
fuse<br />
3. Send the VSD back to be repaired<br />
1. Send the VSD back to be repaired<br />
2. Improve ventilation conditions<br />
Send the VSD back to be repaired<br />
Display Error Cause Remedy<br />
OC-S<br />
OC-D<br />
OC-A<br />
Over-current at start<br />
Over-current at deceleration<br />
Over-current at acceleration<br />
The motor wind and enclosure short circuit<br />
The motor contacts and earth short circuit<br />
The IGBT module is damaged<br />
Inspect the motor<br />
Inspect the wire<br />
Replace the transistor module<br />
The preset deceleration time is too short Set a longer deceleration time<br />
1. Acceleration time too short<br />
2. The capacity of the<br />
motor higher than the capacity of the VSD<br />
3. Short circuit between the motor coil and<br />
the shell<br />
4. Short circuit between motor wiring and<br />
earth<br />
5. IGBT module is damaged<br />
1. Set a longer acceleration time<br />
2. Replace a VSD with the same capacity as<br />
that of the motor<br />
3. Check the motor<br />
4. Check the wiring<br />
5. Replace the IGBT module<br />
<strong>Emotron</strong> AB 01-3992-01r3 Troubleshooting and Maintenance 69
OC-C<br />
OV-C<br />
Err4<br />
OVSP<br />
Over-current at fixed<br />
speed<br />
Voltage too high during<br />
operation/deceleration<br />
1. Transient load change<br />
2. Transient power change<br />
1. Deceleration time setting too short or<br />
large load inertia<br />
2. Power voltage varies widely<br />
Illegal interrupt of CPU Outside noise interference<br />
Over speed during operation<br />
Motor load too great or VSD capacity too<br />
small<br />
Mother parameter error (vector mode)<br />
The gain is too great during vector mode<br />
operation<br />
The current detect circuit is faulty<br />
1. Increase the capacity of the VSD<br />
2. Rerun parameter autotuning (0-06=1)<br />
3. Reduce stator resistance (14-0) if the<br />
above remedies are helpless<br />
1. Set a longer deceleration time<br />
2. Add a brake resistor or brake module<br />
3. Add a reactor at the power input side<br />
4. Increase VSD capacity<br />
Send back to be repaired if it happens<br />
repeatedly<br />
1. Increase acceleration / deceleration time<br />
(3-02/3-03)<br />
2. Input correct motor Parameter<br />
3. Change stator Resistance gain and Rotator<br />
resistance gain (14-0/14-1). Recommended<br />
decrease 50~100, until 0<br />
4. Send back to <strong>Emotron</strong><br />
4.1.3 Errors which can be recovered manually but not automatically<br />
Display Error Cause Remedy<br />
OC<br />
OL1<br />
OL2<br />
OL3<br />
LV-C<br />
OH-C<br />
Over-current during stop<br />
Motor overload<br />
1. Detection circuit malfunction<br />
2. Bad connection for CT signal cable<br />
1. Heavy load<br />
2. Inappropriate settings of 0-02,<br />
9-08~11<br />
1. Check the noise between Power line and<br />
motor line<br />
2. Send the VSD back to be repaired<br />
1. Increase the motor capacity<br />
2. Set 0-02, 9-08~11 properly<br />
VSD overload Heavy load Increase the VSD capacity<br />
Over torque<br />
Voltage too low during<br />
operation<br />
Heatsink temperature<br />
too high during<br />
operation<br />
1. Heavy load<br />
2. Insufficient settings of 9-14, 9-15<br />
Power voltage too low<br />
2. Power voltage varies widely<br />
1. Heavy load<br />
2. Ambient temperature too<br />
high or bad ventilation<br />
1. Increase the VSD capacity<br />
2. Set 9-14, 9-15 properly<br />
Improve power quality or increase the value<br />
of 2-01<br />
Set a longer acceleration time<br />
Increase VSD capacitor<br />
Add a reactor at the power input side<br />
1. Check if there are any<br />
problems with the load<br />
2. Increase VSD capacity<br />
3. Improve ventilation<br />
conditions<br />
70 Troubleshooting and Maintenance <strong>Emotron</strong> AB 01-3992-01r3
4.1.4 Special conditions<br />
Display Error Description<br />
STP0<br />
STP1<br />
STP2<br />
E.S.<br />
b.b.<br />
ATER<br />
PDER<br />
Zero speed stop Happens when preset frequency
4.1.5 Operation errors<br />
Display Error Cause Remedy<br />
LOC<br />
Err1<br />
Err2<br />
Err5<br />
Err6<br />
Err7<br />
Err8<br />
EPr1<br />
EPr2<br />
Parameter and frequency<br />
reverse already<br />
locked<br />
Key<br />
operation error<br />
Parameter setting error<br />
Modification of parameter<br />
is not available in<br />
communication<br />
Communication failed<br />
Parameter conflict<br />
1. Attempt to modify frequency /parameter while<br />
3-17>0000<br />
2. Attempt to reverse while 1-02=0001<br />
1. Press or while 1-06>0 or running at preset<br />
speed.<br />
2. Attempt to modify the parameter cannot be modified<br />
during operation (refer to the parameter list).<br />
1. 3-01in the range of 3-13 ± 3-16 or 3-14 ± 3-16<br />
or 3-15 ± 3-16<br />
2. 3-003-01<br />
3.The setting error as per performing autotuning<br />
(e.g. 1-00 = 0, 1-06=0<br />
1. Issue a control command during communication<br />
disabled<br />
2. Modify the function 13-1~13-4 during communication<br />
1. Wiring error<br />
2. Communication parameter setting error<br />
3. Sum-check error<br />
4. Incorrect communication protocol<br />
Attempt to modify the function 15-0 or 15-7<br />
Voltage and current detection circuit is abnormal<br />
Factory setting error When PLC is running, perform factory setting<br />
Parameter setting error<br />
copy unit failed<br />
Parameter does not<br />
match<br />
1.Set 3-18=1.2 without connecting copy unit.<br />
2. Copy unit failed<br />
Copy the parameter to VSD to verify the parameter<br />
does not match.<br />
1. Set 3-17=0000<br />
2. Set 1-02=0000<br />
1. The or is available for modifying<br />
the parameter only when 1-06=0<br />
2. Modify the parameter during STOP<br />
1. Modify 3-13~3-15 or 3-16<br />
3-00>3-01<br />
2. Set 1-00=0, 1-06=0 during autotuning<br />
1. Issue enable command before communication<br />
2. Set the specific parameter of the<br />
function before communication<br />
1. Check hardware and wiring<br />
2. Check functions 13-1~13-4<br />
If Reset VSD is not available, please<br />
send the VSD back to be repaired<br />
Please perform factory setting before<br />
PLC stops.<br />
1. Modify 3-18<br />
2. Replace copy unit<br />
1. Rewrite again<br />
2. Replace copy unit<br />
72 Troubleshooting and Maintenance <strong>Emotron</strong> AB 01-3992-01r3
4.2 General troubleshooting<br />
Status Checking point Remedy<br />
Motor cannot<br />
run<br />
Motor runs<br />
inversely<br />
The motor<br />
speed cannot<br />
be regulated.<br />
Motor running<br />
speed<br />
too high or<br />
too low<br />
Motor speed<br />
varies unusually<br />
Is power applied to L1, L2, and L3 terminals (is the charging<br />
indicator lit)?<br />
Is the power applied?<br />
Turn the power OFF and then ON again.<br />
Make sure the power voltage is correct.<br />
Make sure screws are secured firmly.<br />
Is there voltage across the output terminals T1, T2, and T3? Turn the power OFF and then ON again.<br />
Is overload causing the motor to be blocked? Reduce the load to let the motor run.<br />
Are there any abnormalities in the VSD?<br />
Has a forward or reverse running command been issued?<br />
Has analogue frequency signal been entered?<br />
See error descriptions to check wiring and correct if<br />
necessary.<br />
Is analogue frequency input signal wiring correct?<br />
Is voltage of frequency input correct?<br />
Is operation mode setting correct? Carry out operations via the digital panel.<br />
Is wiring for output terminals T1, T2, and T3 correct?<br />
Wiring must match the motor’s U, V, and W terminals.<br />
Is wiring for forward and reverse signals correct? If necessary, check wiring is correct.<br />
Is wiring for analogue frequency inputs correct? If necessary, check wiring is correct.<br />
Is the operation mode correctly set? Check the operation mode of the operator.<br />
Is the load too heavy? Reduce the load.<br />
Are the motor specifications (poles, voltage…) correct? Confirm the motor’s specifications.<br />
Is the gear ratio correct? Confirm the gear ratio.<br />
Is the setting of the highest output frequency correct? Confirm the highest output frequency.<br />
Is the load too heavy? Reduce the load.<br />
Does the load vary largely?<br />
Is the input power lack of phase?<br />
Minimize the variation of the load.<br />
Increase capacities of the VSD and the motor.<br />
Add an AC reactor at the power input side if using single-phase<br />
power.<br />
Check wiring if using three-phase power.<br />
<strong>Emotron</strong> AB 01-3992-01r3 Troubleshooting and Maintenance 73
4.3 Quick troubleshooting of <strong>VSC</strong><br />
<strong>VSC</strong><br />
Is fault fully<br />
understood?<br />
YES<br />
Symptoms other than burn<br />
out, damage, or fuse melt-down<br />
in the VSD?<br />
YES<br />
Abnormal signal?<br />
Check according to displayed<br />
abnormal messages<br />
Any abnormal<br />
display?<br />
Visually check controller and<br />
driver boards<br />
Any abnormalities in<br />
appearances?<br />
Apply the power<br />
NO<br />
Are displays and<br />
indicators of the operating unit<br />
working normally?<br />
YES<br />
Any abnormal<br />
display?<br />
What’s t<br />
message?<br />
Check 3 abnormal values of 15-2<br />
with key<br />
* to next page<br />
NO<br />
NO<br />
YES �<br />
NO<br />
NO<br />
Any symptoms<br />
of burn out and<br />
damage?<br />
Is the main circuit<br />
DM intact?<br />
YES<br />
YES<br />
YES<br />
74 Troubleshooting and Maintenance <strong>Emotron</strong> AB 01-3992-01r3<br />
YES<br />
NO<br />
NO<br />
NO<br />
Check burnt and damaged parts<br />
Replace DM<br />
Is the fuse intact? Replace fuse<br />
Is the main circuit<br />
I.G.B.T intact?<br />
Replace the abnormal boards<br />
Is LED lit?<br />
YES<br />
Is the DC input voltage<br />
controlling the power<br />
correct?<br />
YES<br />
Is +5V control<br />
voltage correct?<br />
YES<br />
Replace control board and<br />
digital operating unit<br />
Is the error eliminated<br />
after replacing control<br />
board?<br />
YES<br />
NO<br />
NO<br />
NO<br />
Replace I.G.B.T<br />
Replace the burst absorber<br />
Check terminals and wiring<br />
Replace the driver board<br />
VSD fault<br />
Perform detailed check
* to previous page<br />
Check parameters of VSD<br />
Perform parameter initialization<br />
Specify operation control mode<br />
FWD or REV LED lit<br />
after flashing?<br />
Set up frequency command<br />
Is the frequency<br />
value displayed in operation<br />
unit<br />
Are there voltage<br />
outputs in output terminals<br />
U, V and W?<br />
YES<br />
YES<br />
YES<br />
Connect the motor to run<br />
Is there any abnormal<br />
display?<br />
NO<br />
Is output current of<br />
each phase even?<br />
YES<br />
The VSD is OK<br />
YES<br />
NO<br />
NO<br />
NO<br />
NO<br />
Replace the control board<br />
Replace the control board<br />
Replace the control board<br />
Is the control board<br />
working well after<br />
replacement?<br />
VSD fault<br />
Perform detailed check<br />
<strong>Emotron</strong> AB 01-3992-01r3 Troubleshooting and Maintenance 75<br />
YES<br />
NO
Troubleshooting for OC, OL error displays<br />
The VSD displays OC, OL errors<br />
Is the main circuit<br />
I.G.B.T working?<br />
YES<br />
Any abnormalities<br />
in appearances?<br />
Apply the power<br />
Any abnormal<br />
indications?<br />
Input operation command<br />
Has FWD LED remained<br />
lit after flashing?<br />
YES<br />
Input frequency command<br />
Is the output frequency<br />
of the operating unit<br />
displayed?<br />
YES<br />
YES<br />
NO<br />
YES<br />
NO<br />
YES<br />
Are there voltage<br />
outputs at U, V and W output<br />
terminals?<br />
Connect the motor to run<br />
Any abnormal<br />
values displayed?<br />
Is output<br />
current of each phase<br />
even?<br />
The VSD’s output is<br />
NO<br />
NO<br />
NO<br />
NO<br />
YES<br />
Replace control board<br />
Replace control board<br />
Replace control board<br />
Replace I.G.B.T<br />
Replace faulty circuit board<br />
Is the current<br />
detector OK?<br />
76 Troubleshooting and Maintenance <strong>Emotron</strong> AB 01-3992-01r3<br />
YES<br />
Replace control board<br />
NO<br />
Is the VSD<br />
working well after<br />
replacement?<br />
VSD fault<br />
Replace the current controller<br />
YES<br />
Perform detailed check<br />
NO
Troubleshooting for OV, LV error<br />
The VSD displays OV, LV<br />
Is the main circuit<br />
fuse intact?<br />
YES<br />
Any abnormalities<br />
in the appearances?<br />
NO<br />
Apply the power<br />
YES<br />
NO<br />
YES<br />
NO<br />
YES<br />
YES<br />
NO<br />
YES<br />
NO<br />
YES<br />
NO<br />
NO<br />
NO<br />
YES<br />
Replace the main circuit fuse<br />
Replace the faulty circuit board<br />
Any abnormal<br />
indications? Replace the control board<br />
Input operation command<br />
Has FWD LED remained<br />
lit after flashing?<br />
Input frequency commands<br />
Is the output frequency<br />
of the operating unit<br />
displayed?<br />
Are there voltage<br />
outputs at T1, T2, T3 output<br />
terminals?<br />
Connect the motor to run<br />
Any abnormal value?<br />
Is current of all<br />
phase even?<br />
The VSD’s output<br />
Replace the control board<br />
Replace the control board<br />
Replace the control board<br />
Is the VSD<br />
working well after<br />
replacement?<br />
<strong>Emotron</strong> AB 01-3992-01r3 Troubleshooting and Maintenance 77<br />
YES<br />
VSD fault<br />
Perform detailed check<br />
NO
The motor cannot run<br />
YES<br />
Is MCCB applied?<br />
NO<br />
NO<br />
Can MCCB be applied? Short circuit wiring<br />
Is voltage between<br />
power terminals correct?<br />
YES (within ±10% of the normal value<br />
NO<br />
Is LED 10 lit? <strong>VSC</strong> fault<br />
Is the operation<br />
switch in “RUN” posit<br />
YES<br />
Are there outputs<br />
NO<br />
between the motor’s U, V,<br />
terminals?<br />
<strong>VSC</strong> fault<br />
Are outputs between<br />
U, V, W even?<br />
ℜ• Moto<br />
ℜ• Motor fault<br />
ℜ• Bad wirin<br />
YES (voltage deviation between pairs are even if within ±3% of the normal<br />
value without the motor connected)<br />
78 Troubleshooting and Maintenance <strong>Emotron</strong> AB 01-3992-01r3<br />
NO<br />
NO<br />
NO<br />
ℜ• The power is abnorma<br />
ℜ• Bad wirin<br />
The operation switch is set to<br />
“RUN” posi<br />
<strong>VSC</strong> fault
The motor is overheated<br />
Motor runs unevenly<br />
Is load or current<br />
exceeding the specified<br />
value?<br />
NO<br />
Is it running at<br />
low speed for a long<br />
time?<br />
NO<br />
Is voltage<br />
between U-V, V-W, W-U<br />
correct?<br />
Is there any<br />
dirt preventing cooling<br />
the motor<br />
YES<br />
YES<br />
YES (within ±3% of the normal value<br />
NO<br />
Bad connection between<br />
<strong>VSC</strong> and the motor<br />
Does it happen<br />
when decelerating?<br />
NO<br />
Is output<br />
voltage between U-V, V-W,<br />
W-U balanced?<br />
Is the load floating?<br />
NO<br />
Vibration degree in<br />
transmission parts such<br />
as gears?<br />
small<br />
YES<br />
NO<br />
YES<br />
YES<br />
Is the acceleration<br />
time correct?<br />
YES (within ±3% of rated output voltage<br />
YES<br />
Reduce the load.<br />
Increase capacities of <strong>VSC</strong><br />
and the motor<br />
Select the motor again<br />
<strong>VSC</strong> faults<br />
Remove the dirt<br />
Correct the bad connection<br />
Increase the acc/dec time<br />
Reduce the load.<br />
Increase capacities of <strong>VSC</strong><br />
and the motor.<br />
<strong>VSC</strong> fault<br />
Reduce the load floating or add<br />
a flywheel.<br />
Input the mechanical system<br />
<strong>VSC</strong> fault<br />
<strong>Emotron</strong> AB 01-3992-01r3 Troubleshooting and Maintenance 79<br />
YES<br />
NO
4.4 Routine inspection and<br />
periodical inspection<br />
To ensure stable and safe operations, check and maintain the<br />
VSD regularly and periodically.<br />
Items Details<br />
Ambient conditions<br />
around<br />
the machine<br />
Installation and<br />
grounding of<br />
the VSD<br />
Input power<br />
voltage<br />
External terminals<br />
and internal<br />
mounting<br />
screws of the<br />
VSD<br />
Internal wiring<br />
of the VSD<br />
Heat sink<br />
Printed circuit<br />
board<br />
Cooling fan<br />
Power component<br />
Capacitor<br />
Confirm the temperature<br />
and humidity around the<br />
machine<br />
Are there inflammable<br />
piled up around?<br />
Any unusual vibration<br />
from the machine<br />
Is the grounding resistance<br />
correct?<br />
Is the voltage of the main<br />
circuit correct?<br />
Checking<br />
period<br />
Daily Annually<br />
Ο<br />
The table below lists the items to be checked to ensure stable<br />
and safe operations.<br />
Check these items 5 minutes after the “Charge” indicator<br />
goes out to prevent service personnel from being injured by<br />
residual electric power.<br />
Methods Criteria Remedies<br />
Measure with thermometer<br />
and hygrometer<br />
according to installation<br />
notices.<br />
Temperature:<br />
-10 to 40oC Humidity: Below 95%<br />
RH<br />
Ο Visual check No foreign matters<br />
Improve the circumstances<br />
Ο Visual, hearing No foreign matters Secure screws<br />
Ο<br />
Ο<br />
Are secure parts loose? Ο<br />
Is the terminal base damaged?<br />
Ο<br />
Obvious rust stains Ο<br />
Deformed or crooked Ο<br />
Any damage of the wrapping<br />
of the conducting<br />
wire<br />
Heap of dust or mingled<br />
trifles<br />
Heap of conductive metal<br />
or oil sludge<br />
Discoloured, overheated,<br />
or burned parts<br />
Unusual vibration and<br />
noise<br />
Heap of dust or mingled<br />
trifles<br />
Heap of dust or mingled<br />
trifles<br />
Check resistance<br />
between each terminals<br />
Any unusual odour or<br />
leakage<br />
Ο<br />
Measure the resistance<br />
with a multi-tester<br />
Measure the voltage<br />
with a multi-tester<br />
Visual check<br />
Check with a screwdriver<br />
200V series: below<br />
100<br />
400V series: below 10<br />
Voltage must conform<br />
to the specifications<br />
No abnormalities<br />
Visual check No abnormalities<br />
Ο Visual check No abnormalities<br />
Ο<br />
Ο<br />
Visual check No abnormalities<br />
Improve the<br />
grounding<br />
Improve input<br />
voltage<br />
Secure or send<br />
back for repair<br />
Replace or<br />
send back for<br />
repair<br />
Clean up<br />
heaped dust<br />
Clean up or<br />
replace the circuit<br />
board<br />
Ο Visual or hearing check<br />
Replace the<br />
cooling fan<br />
No abnormalities<br />
Ο Visual check Clean up<br />
Ο<br />
Any inflation or protrusion Ο<br />
Ο Visual check No abnormalities Clean up<br />
Ο<br />
Measure with a multitester<br />
No short circuit or broken<br />
circuit in threephase<br />
output<br />
Visual check No abnormalities<br />
Replace power<br />
component or<br />
VSD<br />
Replace capacitor<br />
or VSD<br />
80 Troubleshooting and Maintenance <strong>Emotron</strong> AB 01-3992-01r3
4.5 Maintenance and<br />
inspection<br />
The VSD does not require daily inspection and maintenance.<br />
To ensure long-term reliability, follow the instructions below<br />
when performing regular inspection. Turn the power off and<br />
wait for the charge indicator (LED101) to go out before<br />
inspection to avoid receiving an electric shock possibly<br />
caused by charges resides in high-capacity capacitors.<br />
(1) Clean up the accumulation of muck inside the VSD.<br />
(2) Check if there are any loose terminal screws and securing<br />
screws. Tighten all loose screws.<br />
Power source<br />
L1<br />
L2<br />
L3<br />
DC-500V high resistance meter<br />
VSD<br />
Ground terminal<br />
(3) Insulation tests<br />
(a) Disconnect all leads connecting T-VERTER to the external<br />
circuit when performing insulation tests against external<br />
circuit.<br />
(b) An internal insulation test should be only be performed<br />
against the main circuit of the T-VERTER body. Use a high<br />
resistance DC 500V meter with insulating resistance higher<br />
than 5M.<br />
Caution: Do not perform this test against the control<br />
circuit.<br />
<strong>Emotron</strong> AB 01-3992-01r3 Troubleshooting and Maintenance 81<br />
T1<br />
T2<br />
T3<br />
M
82 Troubleshooting and Maintenance <strong>Emotron</strong> AB 01-3992-01r3
5. Peripheral Components<br />
5.1 Reactor specification for<br />
input side<br />
<strong>VSC</strong>48-<br />
Model<br />
AC inductance on input side<br />
Current (A)<br />
009 10.0 2.2<br />
013 15.0 1.42<br />
018 20.0 1.06<br />
Inductance<br />
(mH)<br />
5.3 Braking unit and braking resistor<br />
<strong>VSC</strong> series braking current calculation<br />
VSD<br />
Model<br />
Braking Unit<br />
Model<br />
Number<br />
used<br />
Formula for braking resistor:<br />
W= (Vpnb * Vpnb) * ED% / R<br />
1. W: braking resistor consumption power<br />
2. Vpnb: braking voltage (440V=760VDC)<br />
3. ED%: braking effective period<br />
4. R: used braking resistor<br />
For detailed information, please contact your supplier.<br />
5.2 Reactor specification on<br />
DC side<br />
<strong>VSC</strong>48-<br />
<strong>Emotron</strong> AB 01-3992-01r3 Peripheral Components 83<br />
Model<br />
Braking Resistor<br />
per braking unit Suitable<br />
Braking<br />
Suitable resistor<br />
Motor Motor Specification<br />
Capacity Capacity<br />
(HP) (KW)<br />
Braking<br />
resistor<br />
ED(%)<br />
Type (W) (Ώ)<br />
DC inductance for input<br />
side<br />
Current (A)<br />
009 8.8 3.98<br />
013 13 2.69<br />
018 17.5 2.00<br />
Braking<br />
torque<br />
(%)<br />
Inductance<br />
(mH)<br />
Resistor<br />
dimension<br />
(L*W*H) mm<br />
<strong>VSC</strong>48-009 - - JNBR-400W150- 5 3.7 400 150 10 126 395*34*78<br />
<strong>VSC</strong>48-013 - - JNBR-600W130- 7.5 5.5 600 130 10 102 470*50*100<br />
<strong>VSC</strong>48-018 - - JNBR-800W100 10 7.5 800 100 10 99 535*50*110
5.4 EMC Filter<br />
The VSD adopts rapid switching components to improve<br />
the efficiency of the motor and to reduce the motor noise.<br />
Using the EMC filter allows the EMI (Electromagnetic<br />
Interference) and RFI (Radio Frequency interference) to be<br />
controlled within a certain range.<br />
Filter Selection<br />
VSD Model Rating (INPUT)<br />
5.5 Digital operator and<br />
extension cable<br />
A.Remote Keypad Cable Kit<br />
B. Content<br />
1. Inverter<br />
2. LED Keypad<br />
3. REMOTE Cable for Keypad<br />
C. Operation procedure:<br />
EMC Directive<br />
The VSD with built-in filter complies with the EMC Directive<br />
89/336/EEC, limiting the environmental EMI and RFI.<br />
Independent tests have demonstrated compliance to the following<br />
standards when the optional filters are used.<br />
EMI radio standard °BEMS immunity standard<br />
EN 61800-3 1996/A11: 2000: First Environment Restricted<br />
Distribution<br />
First Environment Restricted<br />
Distribution<br />
Filter Model<br />
First Environment<br />
Unrestricted Distribution<br />
<strong>VSC</strong>48 009 3 φ 323~528 V Built-in Contact supplier<br />
013 3 φ 323~528 V Built-in Contact supplier<br />
018 3 φ 323~528 V Built-in Contact supplier<br />
Inverter<br />
Model<br />
All models<br />
Extension Cable<br />
Kit<br />
<strong>VSC</strong> Remote<br />
Keypad cable<br />
Cable Length (Meter)<br />
2.0<br />
Warning: Turn OFF the power supply. The following<br />
procedures should be performed after there is no display<br />
on the keypad.<br />
1. Remove the keypad from the Inverter.<br />
2. Please refer to Diagram before mounting the keypad to<br />
your machine or Panel.<br />
3. Connect the inverter and the keypad with the remote<br />
cable in accordance with the above Diagram.<br />
Supply the power to operate ONLY after all elements are<br />
securely fixed.<br />
5.5.1 LED Keypad Mounting<br />
Dimensions Unit : mm<br />
84 Peripheral Components <strong>Emotron</strong> AB 01-3992-01r3
<strong>Emotron</strong> AB 01-3992-01r3 Peripheral Components 85
5.5.2 Keypad Installation Dimension<br />
Dimensions for mounting remote keypad direct to control<br />
panel<br />
5.6 Interface Card<br />
5.6.1 RS485 Interface Card<br />
TM2 terminal block<br />
RS485 option card<br />
RS485<br />
black wire<br />
red wire<br />
NOTE:<br />
1. Connect the black wire to the “com” terminal of TM2.<br />
2. Connect the red wire to the “24V” terminal of TM2.<br />
Dimensions for mounting keypad with additional mountingframe<br />
to control panel.<br />
86 Peripheral Components <strong>Emotron</strong> AB 01-3992-01r3
RS485 Wiring Diagram:<br />
RS485<br />
NOTE:<br />
(+)<br />
(-)<br />
Three-phase<br />
power supply<br />
(A)<br />
(B)<br />
RS485<br />
Red<br />
Black<br />
Please put on the VSD cover to avoid the Interface card<br />
being disturbed by outside static electricity.<br />
Please use isolated RS232/RS485 converter to link PC<br />
and interface card to avoid damaging equipment.<br />
T1<br />
T2<br />
T3<br />
Con2 (12P)<br />
24 V<br />
COM<br />
<strong>VSC</strong> series<br />
<strong>VSC</strong> series<br />
<strong>Emotron</strong> AB 01-3992-01r3 Peripheral Components 87<br />
T1<br />
T2<br />
T3<br />
M
5.6.2 RS232 Interface Card<br />
RS232 Wiring Diagram<br />
RS232<br />
1.8m<br />
Three-phase<br />
power supply<br />
RS232<br />
L1 T1<br />
L2 T2<br />
L3 T3<br />
<strong>VSC</strong> series<br />
Con2 (12P)<br />
88 Peripheral Components <strong>Emotron</strong> AB 01-3992-01r3<br />
M
5.6.3 Program Copy Unit<br />
Memory Pack Wiring Diagram<br />
Three-phase<br />
power supply<br />
Memory<br />
Pack<br />
L1<br />
L2<br />
L3<br />
<strong>Emotron</strong> AB 01-3992-01r3 Peripheral Components 89<br />
T1<br />
T2<br />
T3<br />
<strong>VSC</strong> series<br />
M
90 Peripheral Components <strong>Emotron</strong> AB 01-3992-01r3
Appendix 1:<br />
List of internal parameters for<br />
<strong>VSC</strong> motor<br />
Factory settings for the motor’s internal parameters.<br />
<strong>VSC</strong> 48-<br />
Parameter<br />
Model<br />
14-0<br />
(Stator<br />
Resistance)<br />
009 260 200<br />
013 240 160<br />
018 220 150<br />
NOTE: 1. The above parameters are idle in V/F Control<br />
Mode. These parameters can be enabled in vector<br />
control mode.<br />
2. The motor parameters (14-0~14-4) cannot be<br />
modified when factory settings are in vector mode. The<br />
internal parameters will be maintained after autotuning<br />
(refer to Autotuning and Description of motor’s internal<br />
parameters).<br />
3: The motor parameters (14-0~14-4) will be completely<br />
modified to factory settings in any operation mode.<br />
14-1<br />
(Rotor<br />
Resistance)<br />
14-2<br />
(Equivalent<br />
Inductance)<br />
14-3<br />
(Magnetization<br />
Current)<br />
800 7200 0<br />
14-4<br />
(Iron Loss<br />
Conductance)<br />
<strong>Emotron</strong> AB 01-3992-01r3 91
Appendix 2:<br />
<strong>VSC</strong> parameter setting list<br />
Customer VSD Model<br />
Using Site Contact Phone<br />
Address<br />
Parameter<br />
Code<br />
Setting Content Parameter<br />
Code<br />
Setting Content Parameter<br />
Code<br />
Setting Content Parameter<br />
Code<br />
0-00 3-16 6-05 10-8<br />
0-01 3-17 6-06 10-9<br />
0-02 3-18 6-07 11-0<br />
0-03 3-19 6-08 11-1<br />
0-04 3-20 7-00 11-2<br />
0-05 3-21 7-01 11-3<br />
0-06 3-22 7-02 11-4<br />
0-07 3-23 7-03 11-5<br />
0-08 3-24 7-04 11-6<br />
1-00 3-25 7-05 11-7<br />
1-01 3-26 8-00 12-0<br />
1-02 3-27 8-01 12-1<br />
1-03 3-28 8-02 12-2<br />
1-04 3-29 8-03 12-3<br />
1-05 3-30 8-04 12-4<br />
1-06 4-00 8-05 12-5<br />
1-07 4-01 9-00 12-6<br />
2-00 4-02 9-01 12-7<br />
2-01 4-03 9-02 12-8<br />
2-02 4-04 9-03 13-0<br />
2-03 4-05 9-04 13-1<br />
2-04 4-06 9-05 13-2<br />
2-05 5-00 9-06 13-3<br />
2-06 5-01 9-07 13-4<br />
3-00 5-02 9-08 13-5<br />
3-01 5-03 9-09 13-6<br />
3-02 5-04 9-10 14-0<br />
3-03 5-05 9-11 14-1<br />
3-04 5-06 9-12 14-2<br />
3-05 5-07 9-13 14-3<br />
Setting Content<br />
92 <strong>Emotron</strong> AB 01-3992-01r3
3-06 5-08 9-14 14-4<br />
3-07 5-09 9-15 15-0<br />
3-08 5-10 10-0 15-1<br />
3-09 5-11 10-1 15-2<br />
3-10 5-12 10-2 15-3<br />
3-11 6-00 10-3 15-4<br />
3-12 6-01 10-4 15-5<br />
3-13 6-02 10-5 15-6<br />
3-14 6-03 10-6<br />
3-15 6-04 10-7<br />
<strong>Emotron</strong> AB 01-3992-01r3 93
94 <strong>Emotron</strong> AB 01-3992-01r3
<strong>Emotron</strong> AB, Mörsaregatan 12, SE-250 24 Helsingborg, Sweden<br />
Tel: +46 42 16 99 00, Fax: +46 42 16 99 49<br />
E-mail: info@emotron.se<br />
Internet: www.emotron.com<br />
<strong>Emotron</strong> AB 01-3992-01r3 2009-07-15