Clear-Com RS-601 Manual
Clear-Com RS-601 Manual
Clear-Com RS-601 Manual

You also want an ePaper? Increase the reach of your titles
YUMPU automatically turns print PDFs into web optimized ePapers that Google loves.
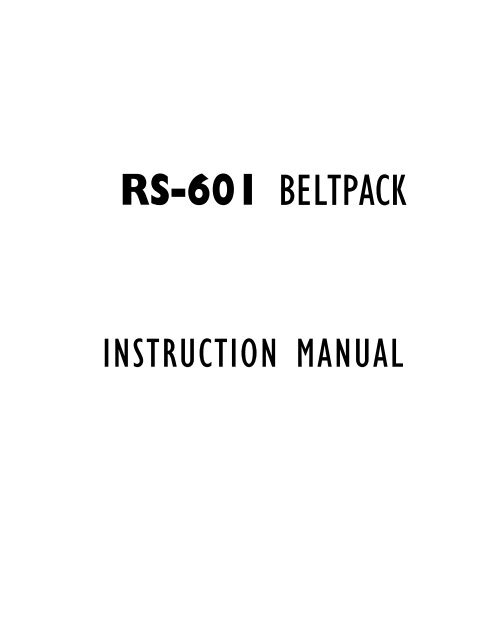
<strong>RS</strong>-<strong>601</strong> BELTPACK<br />
INSTRUCTION MANUAL
<strong>RS</strong>-<strong>601</strong> Instruction <strong>Manual</strong><br />
©2005 Vitec Group <strong>Com</strong>munications<br />
All Rights Reserved<br />
Part Number 810287, Rev. B<br />
Vitec Group <strong>Com</strong>municatons Inc.<br />
4065 Hollis Street<br />
Emeryville, CA 94608-3505<br />
U.S.A<br />
<strong>Clear</strong>-<strong>Com</strong> is a registered trademark of Vitec Group<br />
<strong>Com</strong>munications<br />
The <strong>Clear</strong>-<strong>Com</strong> Logo is a registered trademark of Vitec<br />
Group <strong>Com</strong>munications<br />
Windows is a registered trademarks of Microsoft Corp.
CONTENTS<br />
INTRODUCTION . . . . . . . . . . . . . . . . . . . . . . . . . . . .1<br />
QUICK START . . . . . . . . . . . . . . . . . . . . . . . . . . . . .3<br />
OPERATING YOUR BELTPACK . . . . . . . . . . . . . . . . . . . .5<br />
CONNECTING YOUR BELTPACK . . . . . . . . . . . . . . . . . . . 13<br />
CUSTOMIZING YOUR BELTPACK . . . . . . . . . . . . . . . . . . 19<br />
V-Pack Software . . . . . . . . . . . . . . . . . . . . . . . . . . . . . . . . . 19<br />
Onboard Programming . . . . . . . . . . . . . . . . . . . . . . . . . . . . 20<br />
Settings You Can Customize . . . . . . . . . . . . . . . . . . . . . . 21<br />
Mode Select. . . . . . . . . . . . . . . . . . . . . . . . . . . . . . . . . 22<br />
Latch Disable. . . . . . . . . . . . . . . . . . . . . . . . . . . . . . . . 23<br />
Talk Disable . . . . . . . . . . . . . . . . . . . . . . . . . . . . . . . . 24<br />
Call-on-Talk . . . . . . . . . . . . . . . . . . . . . . . . . . . . . . . . 25<br />
Electret Microphone . . . . . . . . . . . . . . . . . . . . . . . . . . 26<br />
Call Signal Tone (in Earphone) . . . . . . . . . . . . . . . . . . 27<br />
Electret Microphone Hi-Lo . . . . . . . . . . . . . . . . . . . . . 28<br />
Lockout . . . . . . . . . . . . . . . . . . . . . . . . . . . . . . . . . . . . 29<br />
Restoring the Factory Default Settings . . . . . . . . . . . . . . 30<br />
<strong>RS</strong>-<strong>601</strong> BELTPACK 1
SPECIFICATIONS . . . . . . . . . . . . . . . . . . . . . . . . . . . 31<br />
MAINTENANCE . . . . . . . . . . . . . . . . . . . . . . . . . . . 35<br />
WARRANTY . . . . . . . . . . . . . . . . . . . . . . . . . . . . . 39<br />
Technical Support . . . . . . . . . . . . . . . . . . . . . . . . . . . . . . . . 39<br />
Warranty Repairs . . . . . . . . . . . . . . . . . . . . . . . . . . . . . . . . . 40<br />
Non-Warranty Repairs . . . . . . . . . . . . . . . . . . . . . . . . . . . . 41<br />
2 <strong>RS</strong>-<strong>601</strong> BELTPACK
INTRODUCTION<br />
Thank you for choosing this product. <strong>Clear</strong>-<strong>Com</strong> designed the 600<br />
series of beltpacks to meet the needs of all beltpack users, from<br />
beginners to experienced professionals. For advanced users, the 600<br />
series provides the most advanced level of functioning available.<br />
<strong>RS</strong>-600 SERIES BELTPACKS<br />
All <strong>RS</strong>-600 series beltpacks offer the following features:<br />
• Rugged, compact design<br />
Full compatibility with all existing <strong>Clear</strong>-<strong>Com</strong> party-line systems<br />
Four setup configurations that you can activate directly from the<br />
beltpack<br />
Extra 2.5 mm cell-phone type headset jack<br />
Advanced setup options with V-Pack software<br />
<strong>RS</strong>-<strong>601</strong> BELTPACK<br />
The <strong>RS</strong>-<strong>601</strong> beltpack offers the following features:<br />
One intercom channel<br />
3-pin female and male XLR connectors for ease of setup<br />
4-pin male XLR to connect a headset<br />
<strong>RS</strong>-<strong>601</strong> BELTPACK 1
The <strong>RS</strong>-<strong>601</strong> offers all the performance and durability of <strong>Clear</strong>-<strong>Com</strong>’s<br />
world-standard beltpacks, plus TW compatibility. You can use the<br />
<strong>RS</strong>-<strong>601</strong> on a TW line (Audio on Channel B) without loading down<br />
Channel A.<br />
2 <strong>RS</strong>-<strong>601</strong> BELTPACK
QUICK START<br />
To start using your beltpack immediately:<br />
1. Connect the appropriate line cables (3-pin XLR) from an<br />
active intercom line to the beltpack.<br />
2. Turn down the beltpack’s incoming volume with the<br />
volume-control knob.<br />
3. Plug in a headset equipped with a dynamic microphone to<br />
the beltpack’s main headset jack.<br />
The headset jack is labeled on the back of the beltpack.<br />
4. To talk on the intercom line, press and hold the talk button.<br />
Speak into the microphone in your headset.<br />
Note: If you tap the talk button twice in quick succession,<br />
the talk button locks to the “on” setting (“latches”) for<br />
hands-free use. Press the talk button again to unlatch it.<br />
5. Adjust the sidetone and incoming volume levels as you and<br />
others on the intercom line speak at the anticipated levels for<br />
the application.<br />
6. To send a call signal, press the button labeled “call.”<br />
<strong>RS</strong>-<strong>601</strong> BELTPACK 3
4<br />
<strong>RS</strong>-<strong>601</strong> BELTPACK
OPERATING YOUR BELTPACK<br />
An <strong>RS</strong>-<strong>601</strong> beltpack works with all previous versions of <strong>Clear</strong>-<strong>Com</strong><br />
party-line stations and beltpacks. It is the first single-channel<br />
<strong>Clear</strong>-<strong>Com</strong> beltpack that is compatible with <strong>Clear</strong>-<strong>Com</strong> TW<br />
beltpacks.<br />
This means that you can wire several beltpacks together in a “daisychain”<br />
or “home-run” configuration on a TW line that includes<br />
<strong>RS</strong>-502/522 TW beltpacks as well as other <strong>RS</strong>-600 series TW<br />
beltpacks. While the audio on the <strong>RS</strong>-<strong>601</strong> will always be from pin 3 of<br />
the XLR connector (channel B), it will still pass the channel A audio<br />
through on Pin 2.<br />
The <strong>RS</strong>-<strong>601</strong> is not recommended for use with RTS-TW systems as<br />
the frequency response curves and audio levels are different.<br />
<strong>Clear</strong>-<strong>Com</strong>’s <strong>RS</strong>-603 series beltpacks are compatible with RTS-TW<br />
systems.<br />
R S - 6 0 1 B E L T P A C K<br />
5
CONTROLS AND ADJUSTMENTS<br />
1<br />
��������������<br />
�������������<br />
�����������������<br />
��������<br />
�<br />
�<br />
Figure 1: Control Panel of an <strong>RS</strong>-<strong>601</strong> Beltpack<br />
Talk Button<br />
�<br />
�<br />
�����<br />
�����<br />
� �<br />
��������������<br />
�������������<br />
��������������������������<br />
���������������������<br />
To talk on the intercom line, press and hold the beltpack’s talk button<br />
while speaking into the microphone in your headset. While you hold<br />
the button, your voice transmits to the intercom line. When you<br />
6 <strong>RS</strong>-<strong>601</strong> BELTPACK<br />
�<br />
�
elease the button, your voice no longer transmits to the intercom<br />
line.<br />
To “latch” the talk button “on” for hands-free use, quickly tap the<br />
button twice. To unlatch the talk button, press the button again.<br />
With the V-Pack programming software you can program the talk<br />
button to latch with a single or double tap, or not to latch at all. See<br />
“Customizing Your Beltpack” for more information.<br />
2 Talk Light<br />
The green talk light illuminates when you press or latch the talk<br />
button.<br />
Some onboard programming options can change the function of this<br />
light. For more information about onboard programming, refer to the<br />
chapter “Customizing Your Beltpack.”<br />
3<br />
Volume-Control Knob<br />
The volume-control knob adjusts incoming volume level (“listen<br />
level”).<br />
There is a limiter built into the beltpack circuitry to prevent incoming<br />
volume from exceeding a safe level. You can suspend this limit with<br />
the V-Pack software.<br />
R S - 6 0 1 B E L T P A C K<br />
7
4<br />
Call Button<br />
When you press the call button, a call signal is sent to all other<br />
stations on the intercom line.<br />
The call light glows red to indicate both outgoing and incoming call<br />
signals.<br />
5 Call Light<br />
The call light illuminates when the beltpack sends or receives a call<br />
signal.<br />
Some onboard and computer programming options can change the<br />
function of this light. See the chapter “Customizing Your Beltpack”<br />
for more information.<br />
6<br />
Setup Information Window<br />
When you press and hold the setup button for more than three<br />
seconds, the setup information window lights up and displays current<br />
beltpack programming information.<br />
If you do not select or program a feature within five seconds, setup is<br />
cancelled, and the setup information window dims to indicate that<br />
the setup mode is no longer available. This feature prevents changes if<br />
the setup button is pressed accidentally.<br />
For more information on programming features from your beltpack,<br />
see the chapter “Customizing Your Beltpack.”<br />
8 <strong>RS</strong>-<strong>601</strong> BELTPACK
7<br />
Power Status Light<br />
An illuminated power status light indicates that the beltpack is<br />
connected to a powered intercom line.<br />
Note: The light may illuminate even if the beltpack is receiving less<br />
than the minimum 12 VDC required for beltpack operation.<br />
8<br />
Setup Button<br />
R S - 6 0 1 B E L T P A C K<br />
Figure 2: Side Controls for <strong>RS</strong>-<strong>601</strong> Beltpack<br />
When you press and hold the blue setup button for approximately<br />
three seconds, the beltpack enters “setup mode” during which you can<br />
select certain operating features for the beltpack.<br />
�<br />
�<br />
�������������<br />
�������������������<br />
9
Once setup mode is active, if you do not select or program a feature<br />
within five seconds, the setup mode deactivates, and the beltpack goes<br />
back to its normal state.<br />
See the chapter “Customizing Your Beltpack” for information on<br />
programming your beltpack with this feature.<br />
9<br />
<strong>Com</strong>puter Connector<br />
You can program your beltpack from a computer using the V-Pack<br />
programming software. To use this software you must first physically<br />
connect the beltpack to a computer with <strong>Clear</strong>-<strong>Com</strong>’s VPC-1 cable or<br />
its equivalent.<br />
The VPC-1 cable has a tip-ring-sleeve 3.5 mm plug at one end for<br />
connecting to the beltpack, and a DB-9F plug at the other end for<br />
connecting to a computer’s serial port.<br />
To connect the VPC-1 cable from your beltpack to a computer:<br />
1. Plug the 3.5 mm plug at one end of the cable into the beltpack’s<br />
3.5 mm jack located just under the setup button.<br />
2. Plug the DB-9F plug on the other end of the cable into the<br />
DB-9M serial port socket on a computer.<br />
If your computer only has USB connectors, you must purchase a<br />
USB-to-serial adaptor.<br />
Contact your dealer or the <strong>Clear</strong>-<strong>Com</strong> factory for information about<br />
obtaining the beltpack programming kit, which contains the V-Pack<br />
software, VPC-1 cable, and V-Pack manual. You can also find a PDF<br />
of the V-Pack manual at www.clearcom.com.<br />
1 0 <strong>RS</strong>-<strong>601</strong> BELTPACK
R S - 6 0 1 B E L T P A C K<br />
PIN FUNCTION<br />
Tip SDO to computer<br />
Ring SDI from computer<br />
Sleeve <strong>Com</strong>mon<br />
Figure 3: Pinouts of <strong>RS</strong>-<strong>601</strong> <strong>Com</strong>puter Connector<br />
��<br />
���������<br />
����������������<br />
Figure 4: Back of <strong>RS</strong>-<strong>601</strong>Beltpack<br />
11
10<br />
Sidetone Adjustment<br />
To adjust the beltpack’s “sidetone,” or the level of one’s own voice in<br />
the headset, insert a small flat-headed screwdriver into the hole labeled<br />
“sidetone” on the back of the beltpack, as shown in Figure 3. Turn the<br />
screwdriver until you can no longer hear any sidetone in the headset.<br />
This is called the “null” setting.<br />
When you turn the screwdriver again, either clockwise or<br />
counterclockwise, the sidetone increases. Adjust the sidetone so that it<br />
is somewhere in the mid-range of possible settings, at a level that feels<br />
comfortable to you.<br />
The inability to null or set the sidetone level could indicate a problem<br />
with the overall intercom system, such as lack of terminations or<br />
multiple terminations. A malfunctioning headset could also be the<br />
cause.<br />
NOTE: Do not force the sidetone adjustment control past its stop<br />
points as this will damage it.<br />
1 2 <strong>RS</strong>-<strong>601</strong> BELTPACK
CONNECTING YOUR BELTPACK<br />
An <strong>RS</strong>-<strong>601</strong> beltpack works with all previous versions of <strong>Clear</strong>-<strong>Com</strong><br />
party-line stations and beltpacks. It is the first single-channel <strong>Clear</strong>-<br />
<strong>Com</strong> beltpack that is compatible with <strong>Clear</strong>-<strong>Com</strong> TW beltpacks.<br />
This means that you can wire several beltpacks together in a “daisychain”<br />
or “home-run” configuration on a TW line that includes <strong>RS</strong>-<br />
502/522 TW beltpacks as well as other <strong>RS</strong>-600 series TW beltpacks.<br />
While the audio on the <strong>RS</strong>-<strong>601</strong> will always be from pin 3 of the XLR<br />
connector (channel B), it will still pass the channel A audio through<br />
on Pin 2.<br />
R S - 6 0 1 B E L T P A C K<br />
�������������������������������������������<br />
���������������������������������������������<br />
����������������������������������������������<br />
������������������������������������������<br />
�<br />
�� �� ��<br />
Figure 1: Control Panel of an <strong>RS</strong>-<strong>601</strong> Beltpack<br />
��<br />
13
The <strong>RS</strong>-<strong>601</strong> is not recommended for use with RTS-TW systems as<br />
the frequency response curves and audio levels are different. <strong>Clear</strong>-<br />
<strong>Com</strong>’s <strong>RS</strong>-603 series beltpacks are compatible with RTS-TW systems.<br />
11 Intercom Connector<br />
The beltpack connects to a main station, power supply, or to other<br />
beltpacks through the connector labeled “intercom.” When you press<br />
the blue button next to this connector, the attached cable releases.<br />
12<br />
PIN FUNCTION<br />
1 Ground<br />
2 + 30 VDC<br />
3 Intercom<br />
Table 1: Pinouts for <strong>RS</strong>-<strong>601</strong> Intercom and Loop-Through Connectors<br />
Loop-Through Connector<br />
The “loop-through” socket can be used to connect the beltpack to<br />
another beltpack. It can also connect to an intercom station if<br />
necessary.<br />
Table 1 shows the pin assignments for this connector.<br />
1 4 <strong>RS</strong>-<strong>601</strong> BELTPACK
13<br />
Auxiliary (“AUX”) Headphone<br />
<strong>Clear</strong>-<strong>Com</strong> designed the auxiliary headset connector, labeled “AUX,”<br />
for use with the CC-25 Ultra-Light headset. The beltpack’s circuitry is<br />
designed to work with the CC-25 headset to produce excellent quality<br />
sound.<br />
While certain types of mobile-phone style headsets will fit the 2.5 mm<br />
AUX jack, using these headsets may degrade system performance. You<br />
can use such mobile-phone style headsets more reliably with<br />
listen-only applications.<br />
By default, the AUX connector provides bias voltage for electret<br />
microphones. With V-Pack, you can also program this connector for<br />
use with dynamic microphones.<br />
Note: Using multiple mobile-phone style headsets in a system could<br />
adversely affect nulling, crosstalk, and overall system performance.<br />
Table 2: Pinouts for <strong>RS</strong>-<strong>601</strong> Auxiliary Headset Connector<br />
R S - 6 0 1 B E L T P A C K<br />
PIN FUNCTION<br />
Tip Mic<br />
Ring Earphone<br />
Sleeve <strong>Com</strong>mon<br />
15
14<br />
Headset Connector<br />
You connect a headset to the beltpack at the 4-pin male XLR<br />
connector labeled “headset.” The headset connector is always active<br />
and has priority if a second headset is connected to the auxiliary<br />
(“AUX”) connector. Generally you should connect only one headset at<br />
a time to a beltpack.<br />
With the onboard programming options or with V-Pack, you can<br />
program the beltpack to provide power to an electret microphone.<br />
The microphone’s gain automatically adjusts to the electret<br />
microphone. See “Specifications” for impedance requirements.<br />
PIN FUNCTION<br />
1 Mic (Low)<br />
2 Mic (High)<br />
3 Headphone (Low)<br />
4 Headphone (High)<br />
Table 3: Pinouts for <strong>RS</strong>-<strong>601</strong> Headset Connector<br />
1 6 <strong>RS</strong>-<strong>601</strong> BELTPACK
CUSTOMIZING YOUR BELTPACK<br />
You can customize an <strong>RS</strong>-600 series beltpack for quick adaptation to<br />
the needs of any working environment. There are two methods for<br />
customizing your beltpack’s settings:<br />
Using a beltpack’s onboard controls<br />
Using the V-Pack programming software<br />
This manual briefly describes the V-Pack programming software, and<br />
then thoroughly describes the onboard controls. The V-Pack<br />
programming software has its own manual, which you can view and<br />
download at www.clearcom.com.<br />
Note: Refer to the printed guide on the back of the beltpack for quick<br />
instructions on setting up the beltpack with the onboard controls.<br />
V-PACK SOFTWARE<br />
The V-Pack programmming software gives you access to the full<br />
range of options for customizing your beltpack. For example, you can<br />
program a call signal to appear as a steady or flashing light, a bright or<br />
dim light, or a tone.<br />
A unique V-Pack feature is that you can create one custom setup and<br />
quickly transfer it to several beltpacks with the “beltpack cloning”<br />
feature. This feature is useful for programming many beltpacks with<br />
<strong>RS</strong>-<strong>601</strong> BELTPACK<br />
19
the same settings. And V-Pack includes many more features you can<br />
program for your beltpack.<br />
To operate the V-Pack software, you must first install it on a<br />
computer, then connect the VPC-1 cable to both a beltpack and to<br />
your computer.<br />
For more detailed instructions on using the software, see the V-Pack<br />
manual. You can access the manual from the <strong>Clear</strong>-<strong>Com</strong> Web site. A<br />
V-Pack installation kit, which includes a CD containing the V-Pack<br />
software, a cable to connect to a computer, and a printed V-Pack<br />
manual is available for purchase through your dealer or directly from<br />
<strong>Clear</strong>-<strong>Com</strong>.<br />
ONBOARD PROGRAMMING<br />
With onboard programming, you customize the operation of your<br />
beltpack using the controls on the beltpack itself.<br />
When you receive your beltpack, it already contains the default<br />
settings that will meet the needs of most users. You do not need to<br />
program the beltpack unless you want to.<br />
However, if you wish to change the settings to better meet your<br />
needs, you can do so with onboard programming. The beltpack<br />
remembers your new settings until you change them again.<br />
20 <strong>RS</strong>-<strong>601</strong> BELTPACK
SETTINGS YOU CAN CUSTOMIZE<br />
Table 1 shows the beltpack functions you can customize with<br />
onboard controls. Note than each function is assigned a number,<br />
which you will refer to for programming.<br />
FUNCTION # NAME STATUS<br />
Function 1 Mode Select 1,2,3,4<br />
Function 2 Latch disable on or off<br />
Function 3 Talk disable on or off<br />
Function 4 Call-on-talk on or off<br />
Function 5 Electret mic (headset) on or off<br />
Function 6 Call tone (in earphone) on or off<br />
Function 7 Electret Mic Hi-Lo hi or lo<br />
Function L Locks out onboard access on or off<br />
Table 1: Functions You Can Edit With Onboard Controls<br />
Before you program the beltpack with the onboard controls, the<br />
beltpack must be connected to an intercom line and receiving power,<br />
and must not be connected to a computer.<br />
<strong>RS</strong>-<strong>601</strong> BELTPACK<br />
21
Mode Select, Function 1<br />
A “mode” is one complete “package” of settings for a beltpack. Each<br />
beltpack’s memory holds four modes. You can easily select and<br />
activate any one of the four modes directly from the beltpack.<br />
When you receive your beltpack, each of the four modes is<br />
preprogrammed with the <strong>Clear</strong>-<strong>Com</strong> default settings. Each mode is<br />
similar to the others, with only minor variations.<br />
With onboard setup, you can select any one of the four modes and<br />
change specific settings to your requirements. Editing a mode’s<br />
settings automatically saves them in the beltpack’s nonvolatile<br />
memory.<br />
To select a mode:<br />
1. Press and hold the setup button until the setup information<br />
window displays a “P” and then release the button.<br />
2. Press and release the talk button. A winking number appears in the<br />
display. This is the currently selected mode.<br />
Note: A “winking” light flashes three times per second.<br />
3. To select a new mode, press the talk button to scroll through the<br />
four possible modes, 1 through 4.<br />
4. When the desired mode appears in the display, press the setup<br />
button to select the mode and to exit setup.<br />
The selected mode becomes the active mode for the beltpack. If you<br />
do not press a button within five seconds, the beltpack exits the setup<br />
program without making any changes.<br />
22 <strong>RS</strong>-<strong>601</strong> BELTPACK
Latch Disable, Function 2<br />
A beltpack’s talk button normally latches when you tap it twice. If<br />
you select to disable this function, the talk button does not latch.<br />
This setting is recommended if you use the call-on-talk feature, which<br />
causes the beltpack to send a call signal each time you press the talk<br />
button.<br />
To select “latch disable” for a channel:<br />
1. Press and hold the setup button until the setup information<br />
window displays a “P” and then release the button.<br />
2. Repeatedly press the call button until “2” appears in the display.<br />
3. Press the talk button to toggle “latch disable” either on or off.<br />
The beltpack’s talk light reveals whether “latch disable” is on or<br />
off. If the talk light is on, “latch disable” is on; if the talk light is<br />
off, “latch disable” is off.<br />
4. When you have made your selection, press the setup button to save<br />
it and to exit setup, or press the call button to select other<br />
functions to program.<br />
If you do not press a button within five seconds, the beltpack exits the<br />
setup program without making any changes.<br />
<strong>RS</strong>-<strong>601</strong> BELTPACK<br />
23
Talk Disable, Function 3<br />
This function turns the talk button on or off. When off, the talk<br />
button does not function.<br />
Turn the talk button off when you wish to operate the beltpack as a<br />
listen-only device.<br />
To select “talk disable” for a channel:<br />
1. Press and hold the setup button until the setup information<br />
window displays a “P” and then release the button.<br />
2. Repeatedly press the call button until “3” appears in the display.<br />
3. Press the talk button to toggle “talk disable” either on or off.<br />
The beltpack’s talk light reveals whether “talk disable” is on or off.<br />
If the talk light is on, “talk disable” is on; if the talk light is off, is<br />
off.<br />
4. When you have made your selection, press the setup button to save<br />
it and to exit setup, or press the call button to select other<br />
functions to program.<br />
If you do not press a button within five seconds, the beltpack exits the<br />
setup program without making any changes.<br />
24 <strong>RS</strong>-<strong>601</strong> BELTPACK
Call-on-Talk, Function 4<br />
This function causes a beltpack to send a call signal each time you<br />
press or latch the talk button. You can toggle this function on or off.<br />
When using “call-on-talk,” it is recommended that you set the talk<br />
button for non-latching operation. Call-on-talk is useful when<br />
operating call-signal based components such as the <strong>Clear</strong>-<strong>Com</strong><br />
TW-40 two-way radio interface and the <strong>Clear</strong>-<strong>Com</strong> KB-212 speaker<br />
station.<br />
To select “call-on-talk”:<br />
1. Press and hold the setup button until the setup information<br />
window displays a “P” and then release the button.<br />
2. Repeatedly press the call button until “4” appears in the display.<br />
3. Press the talk button to toggle “call-on-talk” either on or off.<br />
The beltpack’s talk light reveals whether “call-on-talk” is on or off.<br />
If the talk light is on, “call-on-talk” is on; if the talk light is off,<br />
“call-on-talk” is off.<br />
4. When you have made your selection, press the setup button to save<br />
it and to exit setup, or press the call button to select other<br />
functions to program.<br />
If you do not press a button within five seconds, the beltpack exits the<br />
setup program without making any changes.<br />
<strong>RS</strong>-<strong>601</strong> BELTPACK<br />
25
Electret Microphone, Function 5<br />
This function allows a beltpack to operate with an electretmicrophone<br />
equipped headset. It only affects a headset connected to<br />
the main headset jack. Turning this function off reverts the beltpack<br />
to dynamic microphone operation.<br />
To select “electret microphone” for a channel:<br />
1. Press and hold the setup button until the setup information<br />
window displays a “P” and then release the button.<br />
2. Repeatedly press the call button until “5” appears in the display.<br />
3. Press the talk button to toggle “electret microphone” to either on<br />
or off.<br />
If the talk light is on, the “electret microphone” option is on; if the<br />
talk light is off, the “electret microphone” option is off.<br />
4. When you have made your selection, press the setup button to save<br />
it and to exit setup, or press the call button to select other<br />
functions to program.<br />
If you do not press a button within five seconds, the beltpack exits the<br />
setup program without making any changes.<br />
26 <strong>RS</strong>-<strong>601</strong> BELTPACK
Call Signal Tone (in Earphone), Function 6<br />
When this function is on, the beltpack produces an audible call signal<br />
in the headset when a call signal is received.When this function is off,<br />
it does not.<br />
The audible call signal’s volume level is preset. (Volume may vary<br />
slightly, depending on headset.) This function is useful for unspoken<br />
cues when a visual call signal is not practical or effective.<br />
To select an “audible call signal”:<br />
1. Press and hold the setup button until the setup information<br />
window displays a “P” and then release the button.<br />
2. Repeatedly press the call button until “6” appears in the display.<br />
3. Press the talk button to toggle “audible call signal” to either on or<br />
off.<br />
The talk light reveals whether “audible call signal” is on or off. If<br />
the talk light is on, “audible call signal” is on; if the talk light is off,<br />
“audible call signal” is off.<br />
4. When you have made your selection, press the setup button to save<br />
it and to exit setup, or press the call button to select other<br />
functions to program.<br />
If you do not press a button within five seconds, the beltpack exits the<br />
setup program without making any changes.<br />
<strong>RS</strong>-<strong>601</strong> BELTPACK<br />
27
Electret Microphone, Hi-Lo, Function 7<br />
This function selects high or low gain for an electret microphone.<br />
The “on” setting selects high gain. The “off” setting selects low gain.<br />
Low gain is useful for high-noise environments.<br />
To select an high or low gain for an electret microphone:<br />
1. Press and hold the setup button until the setup information<br />
window displays a “P” and then release the button.<br />
2. Repeatedly press the call button until “7” appears in the display.<br />
3. Press the talk button to toggle to either “on” for high gain or “off”<br />
for low gain.<br />
The talk light reveals whether the function is “on” or “off.” If the<br />
talk light is on, the electret microphone is set to “high gain”; if the<br />
talk light is off, the electret microphone is set to “low gain.”<br />
4. When you have made your selection, press the setup button to save<br />
it and to exit setup, or press the call button to select other<br />
functions to program.<br />
If you do not press a button within five seconds, the beltpack exits the<br />
setup program without making any changes.<br />
28 <strong>RS</strong>-<strong>601</strong> BELTPACK
Lockout, Function L<br />
“Lockout” allows you to prevent all editing of beltpack functions with<br />
onboard controls.<br />
When you select “lockout,” you can access the on-off status of<br />
functions with the onboard controls, but you cannot edit them. You<br />
cannot access information about which mode is active.<br />
To regain access to editing, you can either restore the factory default<br />
settings from the beltpack itself, or use the V-Pack software to restore<br />
them.<br />
To select “lockout”:<br />
1. Press and hold the setup button until the setup information<br />
window displays a “P” and then release the button.<br />
2. Repeatedly press the call button until “L” appears in the display.<br />
3. Press the talk button to toggle “lockout” either on or off.<br />
The beltpack’s talk lights reveals whether “lockout” is on or off. If<br />
the talk light is on, “lockout” is on; if the talk lights is off,<br />
“lockout” is off.<br />
4. When you have made your selection, press the setup button to save<br />
it and to exit setup, or press the call button to select other<br />
functions to program.<br />
If you do not press a button within five seconds, the beltpack exits the<br />
setup program without making any changes.<br />
<strong>RS</strong>-<strong>601</strong> BELTPACK<br />
29
RESTORING THE FACTORY DEFAULT SETTINGS<br />
To restore the factory default settings for all four modes:<br />
1. Press and hold the setup button until the setup information<br />
window displays a “P” and then release the button.<br />
2. Press and hold the call button. The display changes from “1” to<br />
“2.”<br />
3. While still holding the call button down, press the setup button.<br />
The display momentarily shows an “F” to indicate that the<br />
beltpack is now programmed with the factory default settings.<br />
4. Release the setup button and the call button.<br />
The beltpack resumes operation with the factory default settings.<br />
30 <strong>RS</strong>-<strong>601</strong> BELTPACK
SPECIFICATIONS<br />
0 dBv is referenced to 0.775 V RMS<br />
General<br />
Amplifier Design: I.C. amplifiers, including solid-state digital<br />
switching and signaling circuits. Current-limited and shortcircuit<br />
protected.<br />
Signal to Noise: >75 dB<br />
Bridging Impedance: >15k<br />
Line Level: -14 dB, +5 dB max.<br />
Sidetone Adjust: >35 dB<br />
EMI and RFI rejection: >60 dB<br />
Microphone Pre-Amplifier<br />
Headset Mic Impedance: 200 ohms<br />
Gain, mic to line: 41 dB (dynamic)<br />
Limiter Range: 26 dB<br />
Frequency Response: 200 Hz – 12 kHz contoured for<br />
intelligibility<br />
<strong>RS</strong>-<strong>601</strong> BELTPACK 31
Headphone Amplifier<br />
Load Impedance: 50 - 2,000 ohms<br />
Output Level: +17 dBv before clipping<br />
Distortion:
Dimensions<br />
4.58"H x 3.73"W x 1.34"D (116 x 95 x 34 mm)<br />
Weight<br />
7.3 oz. (0.20 kg)<br />
Specifications subject to change.<br />
<strong>RS</strong>-<strong>601</strong> BELTPACK 33
34 <strong>RS</strong>-<strong>601</strong> BELTPACK
MAINTENANCE<br />
GENERAL USAGE NOTES<br />
Cabling choices can greatly impact the performance of an intercom<br />
system. Length, gauge, and shield quality, as well as routing, must all<br />
be considered. For two-pair cable, crosstalk performance is affected<br />
both by length and DC resistance of the shield (the lower the better).<br />
The quality of the headset cable can affect crosstalk, particularly in<br />
large systems.<br />
Note: For more information on installing a party-line system, see the<br />
Party-Line Installation <strong>Manual</strong>.<br />
The headphone amplifier accommodates impedances from 50 to<br />
2000 ohms. The mic preamplifier accommodates impedances from<br />
50 to 1000 ohms. The output level is more critical to optimal<br />
performance than the impedance. Higher impedances may require<br />
more mic gain, thereby raising the noise floor.<br />
MAINTENANCE<br />
BELTCLIP<br />
In some applications, you may want to wear the beltpack “upside<br />
down” or “sideways.”<br />
<strong>RS</strong>-<strong>601</strong> BELPACK<br />
35
To rotate the beltclip to a new position:<br />
1. Remove the setup help label and the two retaining screws.<br />
2. Rotate the beltclip 90 o or 180 o as desired.<br />
3. Replace the screws.<br />
The label on the beltclip is not reusable and must be replaced. You<br />
can order a replacement label from your distributor or from the<br />
factory.<br />
Use the same procedure for replacing a broken or damaged beltclip.<br />
CLEANING<br />
To clean the surface of your beltpack, use a damp cloth and mild soap.<br />
Remove all soap residue and excess moisture before returning to<br />
service.<br />
TROUBLESHOOTING<br />
36<br />
PROBLEM Low audio level.<br />
CAUSE Multiple terminations on the line. Excessive<br />
capacitance and/or resistance due to cable<br />
length and/or gauge.<br />
SOLUTION If connected to more than one main station<br />
or power supply, check that there is only<br />
one termination per channel.<br />
<strong>RS</strong>-<strong>601</strong> BELPACK
PROBLEM Call light stays on.<br />
CAUSE DC voltage present on audio line pin 3.<br />
SOLUTION Check cables for shorts and cross-wiring.<br />
Make sure there is a termination on the<br />
channel.<br />
PROBLEM Mic level too low or too high.<br />
CAUSE Mic distance from mouth too far or too<br />
close; mic gain set incorrectly; sidetone set<br />
incorrectly; no terminations or more than<br />
one termination.<br />
SOLUTION Reposition mic and/or change headset mic<br />
gain.<br />
PROBLEM Headset level too low or too high.<br />
CAUSE Unterminated channel; improper<br />
impedance; shorted line.<br />
SOLUTION Adjust sidetone and volume controls; check<br />
wiring; use compatible headset.<br />
<strong>RS</strong>-<strong>601</strong> BELPACK<br />
37
38<br />
PROBLEM Can’t change configuration on beltpack.<br />
CAUSE Disabled access to functions.<br />
SOLUTION Restore access by resetting to factory default<br />
settings or with V-Pack.<br />
<strong>RS</strong>-<strong>601</strong> BELPACK
WARRANTY<br />
Vitec Group <strong>Com</strong>munications (VGC) guarantees this product to be<br />
free of manufacturing defects in material and workmanship under<br />
normal use for a period of two years from the date of purchase.<br />
TECHNICAL SUPPORT<br />
To ensure complete and timely support to its customers, VGC<br />
maintains Technical Service Centers (TSC) staffed by qualified<br />
technical personnel. A Technical Service Center is staffed to respond<br />
to all technical inquiries and to troubleshoot technical problems<br />
regarding all products supplied by VGC. A TSC is fully available to<br />
VGC’s customers during the full course of their warranty period.<br />
Instructions for reaching our Technical Service Centers are given<br />
below.<br />
For technical support from Europe, the Middle East, and<br />
Africa<br />
Call: +49 40 66 88 40 40 Monday through Friday 09:00 – 17:00<br />
(GMT)<br />
+49 40 66 88 40 41 24hrs, any day (But you must have your PIN<br />
number ready.)<br />
<strong>RS</strong>-<strong>601</strong> BELTPACK 39
Web site: www.clearcom.com (Click the 24 X 7 User Support symbol<br />
on the Web site.)<br />
For technical support from the Americas and Asia<br />
Call: +1 510 496 6666 or 800 VITEC USA<br />
Web site: www.clearcom.com (Click the 24 X 7 User Support symbol<br />
on the Web site.)<br />
Email: support@clearcom.com<br />
FAX: +1 510 496 6610<br />
EXCEPTIONS<br />
This warranty does not include damage to a product resulting from<br />
cause other than part defect and malfunction. The VGC warranty<br />
does not cover any defect, malfunction, or failure caused beyond the<br />
control of VGC, including unreasonable or negligent operation,<br />
abuse, accident, failure to follow instructions in the manual, defective<br />
or improperly associated equipment, attempts at modification and<br />
repair not approved by VGC, and shipping damage. Products with<br />
their serial numbers removed or defaced are not covered by this<br />
warranty.<br />
WARRANTY REPAI<strong>RS</strong><br />
While VGC will ensure complete system integrity by providing<br />
whatever support is necessary to resolve any failure covered under the<br />
40 <strong>RS</strong>-<strong>601</strong> BELTPACK
terms of the warranty, the normal procedure will be to repair or<br />
replace any defective Line Replaceable Unit (LRU) that is returned to<br />
VGC during the warranty period.<br />
A Line Replaceable Unit (LRU) is defined as: an assembly that can be<br />
safely removed from the system and readily replaced by plugging in a<br />
new unit. In the case of ancillary items such as power supplies, the<br />
entire power supply would be returned. Whereas, in the case of circuit<br />
cards, control panels, etc., only these assemblies would be returned<br />
for repair. All equipment provided by VGC is covered under the<br />
warranty.<br />
This warranty does not include defects arising from installation<br />
(when not performed by VGC), lightning, power outages and<br />
fluctuations, air conditioning failure, improper integration with nonapproved<br />
components, defects or failures of customer furnished<br />
components resulting in damage to VGC provided product.<br />
NON-WARRANTY REPAI<strong>RS</strong><br />
Equipment that is not under warranty must be sent prepaid to VGC.<br />
If requested, an estimate of repair costs will be issued prior to service.<br />
Once repair is approved and completed, the equipment will be<br />
shipped freight collect from the TSC.<br />
<strong>RS</strong>-<strong>601</strong> BELTPACK 41
REPLACEMENT UNITS<br />
Should VGC determine, in its reasonable discretion, that any part of<br />
a product is defective due to faulty materials or workmanship, VGC<br />
shall at its expense, repair or replace such part and return the repaired/<br />
replacement part to the customer. The provisions of this warranty<br />
shall apply to the repaired/replacement part for the unexpired<br />
portion, if any, of the warranty period.<br />
EMERGENCY ON-SITE ASSISTANCE<br />
VGC can provide emergency on-site technical assistance in support of<br />
warranty activities. The level of support effort required will be<br />
decided on a case-by-case basis. VGC has the qualified technical staff<br />
to support any and all emergency site activities should they occur.<br />
LIABILITY<br />
The foregoing warranty is VGC’s sole and exclusive warranty. There<br />
are no other warranties (including without limitation warranties for<br />
consumables and other supplies), or guarantees, expressed or implied<br />
(including, without limitation, any warranties of merchantability or<br />
fitness for a particular purpose), of any nature whatsoever, whether<br />
arising in contract, tort, negligence of any degree, strict liability or<br />
otherwise, with respect to the products or any part thereof delivered<br />
hereunder and/or with respect to any non-conformance or defect in<br />
any such product and/or part thereof delivered hereunder and/or with<br />
42 <strong>RS</strong>-<strong>601</strong> BELTPACK
espect to any non-conformance or defect in any such product and/or<br />
part thereof delivered hereunder, or any other warranties or<br />
guarantees, including but not limited to any liability of VGC for any<br />
consequential and/or incidental damages and/or losses (including loss<br />
of use, revenue, and/or profits). In any event, the maximum extent of<br />
VGC’s liability to customer hereunder shall not under any<br />
circumstances exceed the cost of repairing or replacing any part(s)<br />
fount to be defective within the warranty period as aforesaid.<br />
RETURNING EQUIPMENT FOR REPAIR<br />
All equipment returned for repair must be accompanied by:<br />
Documentation stating the return address, telephone number, date<br />
of purchase, and a description of the problem.<br />
A repair reference number.<br />
To obtain a repair reference number, contact the appropriate<br />
Technical Service Center at the phone numbers or Web sites listed<br />
below. Our representatives will give you instructions and addresses for<br />
returning your equipment. By talking with our representatives, many<br />
problems can be resolved on the phone.<br />
For returns from Europe, the Middle East, and Africa<br />
Call: +49 40 66 88 40 40 Monday through Friday 09:00 – 17:00<br />
(GMT)<br />
+49 40 66 88 40 41 anytime, any day<br />
<strong>RS</strong>-<strong>601</strong> BELTPACK 43
(But you must have your PIN number ready)<br />
Web site: www.clearcom.com (Click the 24 X 7 User Support symbol<br />
on the Web site.)<br />
For returns from the Americas and Asia<br />
Call: +1 510 496 6666 or 800 VITEC USA<br />
Web site: www.clearcom.com (Click the 24 X 7 User Support symbol<br />
on the Web site.)<br />
Email: support@clearcom.com<br />
FAX: +1 510 496 6610<br />
44 <strong>RS</strong>-<strong>601</strong> BELTPACK