Autodesk® AliasStudio - formpig
Autodesk® AliasStudio - formpig
Autodesk® AliasStudio - formpig

Create successful ePaper yourself
Turn your PDF publications into a flip-book with our unique Google optimized e-Paper software.
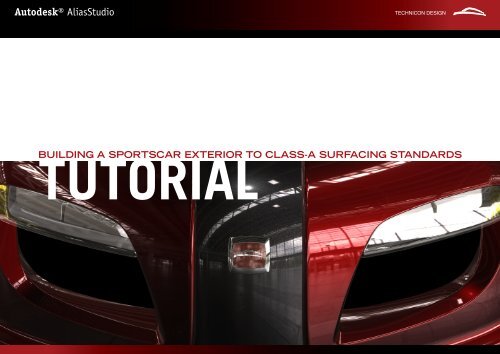
<strong>Autodesk®</strong> <strong>AliasStudio</strong> TECHNICON DESIGN<br />
BUILDING A SPORTSCAR EXTERIOR TO CLASS-A SURFACING STANDARDS<br />
TUTORIAL
<strong>Autodesk®</strong> <strong>AliasStudio</strong> TECHNICON DESIGN<br />
CONTENT<br />
ACKNOWLEDGEMENTS<br />
Our sincere thanks go to David Shall, Audrey Carstens, Uwe Rossbacher, Thomas<br />
Heermann, Alexander Fuchs, Thomas Sahlin, Dagmar Miller and all the other people<br />
who encouraged us and helped with this tutorial.<br />
Special thanks go to the French Technicon Design Team who did<br />
the inital design and modelling of the Aerospeed car used in this tutorial.<br />
Further thanks must go to the German Technicon Design Team<br />
for the final design and modelling of this car.<br />
Very special thanks go to the team of 16 Colours for the layout,<br />
graphic design and the programming of the PDF.<br />
Raphaël Sulpice, Nicolas Caquelin,<br />
Luc Bonnot, Guillaume Diet, Benjamin Moussa.<br />
Stev Sommer, Frederik Wallmander, Katharina Roos,<br />
Henrik Ihlefeld, Christoffer Brenander.<br />
Alex Ziegler, Tom Heinen, Victor Stelmasuk.<br />
WERNER STRATHAUS
<strong>Autodesk®</strong> <strong>AliasStudio</strong> TECHNICON DESIGN<br />
CONTENT<br />
PREFACE<br />
INTRODUCTION TO ‘CLASS A SURFACING’<br />
‘Class A surfacing’ is to produce mathematical surfaces to the most exacting standard.<br />
Once completed the ‘A Class surface’ is the final output of styling design. These surfaces<br />
are the ‘Master’ for making the tools that produces the product itself.<br />
‘Class A’ surfacing is one of the most complex and tedious 3D computer modeling tasks<br />
you can do.<br />
‘Class A’ surface development occurs in the final phase of a project, when constraints are<br />
much tighter to adhere to.<br />
Modeling under these conditions is very hard without adoption of certain ‘surface basics’<br />
rules.<br />
3D computer modeling is still based on the knowledge and skill set of the individual user.<br />
Therefore productivity and surface quality is user dependent.<br />
The surfacing task can begin from the scan of a physical model, as in this tutorial, but<br />
it can also start from 2D sketch or verbal input. In most cases it is the continuation of a<br />
concept 3D digital model.<br />
Most of the time you will also need to be aware of and include flanges, draft angles, tool<br />
split lines and other engineering constraints<br />
In the tutorial these are not included.<br />
To include them would put even more constraints on the modeling/surfacing itself.<br />
This tutorial demonstrates only one small part of ‘class A’ surfacing, but a very important<br />
element of creating good quality surfaces<br />
When you are starting a project or a part, always take some time to think how you will<br />
build this before you start.<br />
It is not a good idea to rush in the beginning of a project.<br />
To be successful and to achieve that right quality in the time given you need a ‘strategy’.<br />
Without this you can find yourself in a corner from which you can never escape a dead<br />
end.<br />
These points below are, in my opinion, the most important, basic rules to succeed.<br />
� It is very important to have a strategy on methodology,<br />
surface layout and surface construction.<br />
� Always try to build the surfaces to allow easy modification.<br />
� Keep the surfaces as simple as possible.<br />
� Always try to build to an intersection.<br />
By following these basic rules you have come a long way to succeeding in your modeling.<br />
Good luck.<br />
THOMAS SAHLIN<br />
Digital Design Manager<br />
GME Design
<strong>Autodesk®</strong> <strong>AliasStudio</strong> TECHNICON DESIGN<br />
CONTENT<br />
AIM OF THIS TUTORIAL<br />
This tutorial has been created due to an increased<br />
demand in the automotive industry in recent times<br />
for digital modelling work of very high quality. We are<br />
therefore trying to explain to the tutorial user what Class-A<br />
surfacing in the field of automotive modelling means and<br />
how the required high surface quality can be achieved<br />
with Autodesk Studio.<br />
This is done using teaching sessions to show the<br />
modelling of selected exterior parts based on scan data<br />
from a 1:4 clay model and further design changes.<br />
The tutorial covers a wide range of Class-A modelling<br />
aspects but is by no means comprehensive, because this<br />
is such a wide-ranging topic. However, we believe that<br />
this tutorial will provide its user with a good understanding<br />
of the Class-A surfacing theory and the basic knowledge<br />
of the strategies used to develop his Class-A surfacing<br />
skills further.<br />
The tutorial is aimed at Alias modellers with experience<br />
in the field of automotive design and a good general<br />
knowledge of the Autodesk AutoStudio modelling tools<br />
and their options.
<strong>Autodesk®</strong> <strong>AliasStudio</strong> BUILDING A SPORTS CAR TO CLASS-A SURFACING STANDARDS<br />
TECHNICON DESIGN<br />
Introduction<br />
Class-A surfacing in the automotive design process<br />
The philosophy of Class-A surfacing<br />
Numerical Class-A surfacing definition<br />
Nurbs and Bezier geometry<br />
Different types of body architecture<br />
Learning sessions:<br />
1 Starting point: input data<br />
1.1 Review the given information and adjust the display settings<br />
1.2 Diagnostic shader usage for scan data evaluation<br />
2 Technicon Design Construction Options for Class-A surfacing<br />
2.1 Recommended Class A construction settings<br />
2.2 Rebuild tolerance for scan data and its influence on<br />
Class A surfacing work<br />
3 Data screening<br />
3.1 Mesh Subset<br />
3.2 File organisation<br />
3.2.1 Layer organisation & usage<br />
3.2.2 Layer categories<br />
4 Surface hierarchy & patch layout<br />
4.1 Surface hierarchy<br />
4.1.1 Primary surfaces<br />
4.1.2 Secondary surfaces<br />
4.1.3 Tertiary surfaces<br />
4.1.4 Rank Four surfaces<br />
4.2 Surface patch layout<br />
5 Surface build-up principles<br />
5.1 Apex-less surfaces<br />
5.2 Axis symmetrical surfaces X = 0<br />
5.3 Start rebuilding the greenhouse<br />
5.4 Evaluating the rebuild tolerance<br />
5.4.1 Cross sections<br />
5.4.2 Deviation Map<br />
5.4.3 Cross Section Control<br />
5.4.4 Dynamic Sections Control<br />
5.5 Working with direct history<br />
5.5.1 Advanced options of Surface tools<br />
5.5.2 Surface Fillet tool usage for secondary surfaces<br />
5.5.3 Align tool usage for secondary surfaces<br />
5.5.4 Explicit Control functionality for surface square &<br />
surface rail tools to create secondary surfaces<br />
5.6 Fillets and Flanges<br />
5.6.1 Surface fillet tool for tertiary surfaces<br />
5.6.2 Draft/Flange functionality to build up rank four surfaces<br />
6 Pushing for G3 continuity conditions<br />
6.1 CV layout and manipulation<br />
6.1.1 Planarize Hull<br />
6.1.2 CV move functions<br />
6.1.3 Surface continuity check tool<br />
6.1.4 Proportional modification<br />
6.2 Evaluating surface continuity<br />
6.2.1 Evaluation Shader<br />
6.2.2 Cross Section Curvature Plot<br />
7 Complex workflow examples<br />
7.1 Rebuild the secondary bonnet surface<br />
7.2 Generate the rear fender sweep<br />
8 Data validation checks<br />
8.1 Check model tool<br />
8.2 Stitch check
<strong>Autodesk®</strong> <strong>AliasStudio</strong> INTRODUCTION<br />
TECHNICON DESIGN<br />
CONTENT<br />
CLASS-A SURFACING IN THE AUTOMOTIVE DESIGN PROCESS<br />
Any product development process of the automotive industry is divided into phases<br />
beginning with Global Marketing Research and ending with Start of Production (SOP).<br />
Amongst the OEM´s and suppliers the defined gates within their product development<br />
process can differ drastically. Some work with a lot of iterative gates others have just<br />
some important big gates to pass. In any case the surfacer‘s work is an iterative process,<br />
constantly increasing aesthetical expression, engineering & design content and the<br />
mathematical quality of all visually recognisable surfaces of the car.<br />
Conceptual work<br />
Technical feasebylity<br />
Product<br />
development Global marketing research<br />
process<br />
Class-A surfacing<br />
The workload for Class-A surfacing work is ramping up towards the end of the product<br />
development process. It is the amount of implemented feasibility information, styling details<br />
and steps within the Class-A surfacing process itself that differentiates Class-A surfacing<br />
work from conceptual surfacing much more than tolerance settings of the used software.<br />
For this reason and in order to continue the entire surfacing process with Alias Studio<br />
tools as one software system from Concept to Class-A, we nowadays see more and more<br />
the tendency to implement basic Class-A surfacing methodologies into the early concept<br />
modelling phase. Using principal Class-A modelling methods will also help you to generate<br />
quickly high quality concept data that are easy to change and can be used during the whole<br />
surfacing process.<br />
Concept/design ideation<br />
Design & engineering<br />
development<br />
time<br />
Technical feasibility<br />
Start of production<br />
workload
<strong>Autodesk®</strong> <strong>AliasStudio</strong> INTRODUCTION<br />
TECHNICON DESIGN<br />
CONTENT<br />
THE PHILOSOPHY OF CLASS-A SURFACING<br />
Class A Surfacing is the art of digital surface<br />
generation at the highest aesthetic level reflected<br />
by the minimum mathematical information needed.
<strong>Autodesk®</strong> <strong>AliasStudio</strong> INTRODUCTION<br />
TECHNICON DESIGN<br />
CONTENT<br />
NUMERICAL CLASS-A SURFACING<br />
DEFINITION:<br />
A definition of the numerical Class-A settings for<br />
your Alias work is usually defined by the custumer.<br />
This definition has to be reflected within your<br />
Construction Options in Alias.<br />
Basically, two sets of parameters define these settings:<br />
One is related to the surface quality definition as<br />
such,the other as a set of parameters related to the<br />
requirements of the client‘s major CAD system.<br />
Alias provides you with default Construction Presets<br />
of the most common engineering CAD systems.<br />
TIP:<br />
Check your client‘s requirements carefully. They may<br />
differ from the default engineering system settings<br />
used in the Construction Presets, even if the system is<br />
listed!
<strong>Autodesk®</strong> <strong>AliasStudio</strong> INTRODUCTION<br />
TECHNICON DESIGN<br />
CONTENT<br />
NURBS AND BEZIER<br />
GEOMETRY:<br />
Bezier and NURBS surfaces are closely related.<br />
Pierre Bézier developed the algorithm that mathematically<br />
describes a free form surface shape by the position<br />
of its anchor points.<br />
The NURBS algorithm is a further developed Bezier<br />
algorithm with the advantage or disadvantage to contain<br />
help geometry (spans) that enables the single surface<br />
to do more drastic changes in direction than a Bezier<br />
surface ever can.<br />
In other words it is possible to incorporate several<br />
Bezier surfaces in one single NURBS surface.<br />
It is most obvious that NURBS surfaces are much<br />
harder to control than Bezier surfaces. For<br />
this reason Class-A surfacing is so heavily depending<br />
on Bezier structure surfaces.<br />
NURBS<br />
Degree 1 1<br />
Spans 2 2<br />
Degree 2 2<br />
Spans 2 2<br />
Degree 2 2<br />
Spans 1 1<br />
Degree 2 2<br />
Spans 2 2<br />
Degree 3 3<br />
Spans 1 1<br />
Bezier Surfaces<br />
Degree 5 5<br />
Spans 1 1
<strong>Autodesk®</strong> <strong>AliasStudio</strong> INTRODUCTION<br />
TECHNICON DESIGN<br />
CONTENT<br />
DIFFERENT TYPES OF BODY<br />
ARCHITECTURE:<br />
Similar to a human body, the body architecture and<br />
aesthetic appearance of a car is not dependent on its size.<br />
Of course the differences between coupé, limousine,<br />
estate and convertible are defined by different body<br />
architectures. Thereby the biggest differences between<br />
these types of cars are due to the way the greenhouses<br />
are built, the amount of pillars that are holding up the roof<br />
and the number of doors a car has.<br />
In this respect, what is important for Class-A surface<br />
complexity?<br />
� Whether we have a sidewall that is basically built out of<br />
one big slap (e.g. Mercedes S-Class 1991) or if the<br />
sidewall is defined by a prominent shoulder (e.g. Volvo<br />
S60).<br />
� Whether the styling is emotional or rational. Emotional<br />
design usually increases surface complexity. The<br />
transitions of side wall into front, bonnet, A- and C-pillar<br />
and the back of the car are usually more curved and<br />
more complex than on cars with a rational design<br />
development (such as the Hummer for example ,even<br />
though a Hummer causes emotional outbreaks with<br />
some people).<br />
The Lotus Esprit might be an exception!<br />
� Most complex areas:<br />
A-pillar transition into bonnet and fender.<br />
C-pillar transition into sidewall and back-end<br />
Front facia and rear end.
<strong>Autodesk®</strong> <strong>AliasStudio</strong> CLASS-A SURFACING<br />
TECHNICON DESIGN<br />
CONTENT<br />
HELLO, MY NAME IS WERNER STRATHAUS<br />
I AM A DESIGN CONSULTANT IN THE<br />
TECHNICON DESIGN STUDIO<br />
IN RÜSSELSHEIM, GERMANY.<br />
Welcome to the interactive Class-A surfacing tutorial<br />
of Autodesk AutoStudio.<br />
This session is tailor-made for advanced Studio users<br />
aiming to achieve ultimate quality surface creation.<br />
Let me spend some time with you to go through the build<br />
up of a sports car exterior at Class-A surfacing standard<br />
using the Autodesk Studio tools.
<strong>Autodesk®</strong> <strong>AliasStudio</strong><br />
CONTENT<br />
1. Starting point: input data<br />
1.1 REVIEW THE GIVEN INFORMATION & ADJUST DISPLAY SETTINGS<br />
1.2 DIAGNOSTIC SHADER USAGE FOR SCAN DATA EVALUATION<br />
TECHNICON DESIGN
<strong>Autodesk®</strong> <strong>AliasStudio</strong> CLASS-A SURFACING SESSION 1<br />
TECHNICON DESIGN<br />
CONTENT<br />
1.1 REVIEW THE GIVEN INFORMATION<br />
AND ADJUST THE DISPLAY SETTINGS<br />
� In session 1 I will talk about the starting point<br />
„Input Data“ and how to review the given information.<br />
� We will learn how to adjust the Display Settings and how<br />
to use the Diagnostic Shader tools to be able to evaluate the<br />
quality and the general surface conditions of the scanned<br />
polygon data of a 1:4 size clay model blown up to a full<br />
scale size data set.<br />
STARTING POINT: INPUT DATA
<strong>Autodesk®</strong> <strong>AliasStudio</strong> CLASS-A SURFACING SESSION 1<br />
TECHNICON DESIGN<br />
CONTENT<br />
1.1 REVIEW THE GIVEN INFORMATION<br />
AND ADJUST THE DISPLAY SETTINGS<br />
Open the “Aerospeed” scan data and make sure to accept<br />
the Technicon Design Class-A construction options.<br />
Now the mesh of half of the car will be displayed in a very<br />
unreadable way.<br />
In order to achieve better readability of the shape of your<br />
object, go to the Control Panel and open the Display options<br />
and then the Transparency Box and change the Mesh<br />
Transparency Setting to 0.8 or adjust it using the slider until<br />
you get a nice and readable appearance of the half car.<br />
Complete the car using the Mirror Function and start<br />
building up your own individual Modelling-Shelf for<br />
the scan rebuild workflow!<br />
Open up the Mirror Function under Edit>Duplicate>Mirror,<br />
tap the XZ box and move<br />
the Duplicate Mirror Icon into the empty Shelf-Set.<br />
Save the Shelf-Set and rename it to „Scan Rebuild“.<br />
Click on the Mirror Icon and then the polygon mesh. The<br />
complete car appears!<br />
You have just displayed and adjusted the appearance<br />
of your scan data and have started to individualize your<br />
workflow to rebuild the scan data!<br />
STARTING POINT: INPUT DATA
<strong>Autodesk®</strong> <strong>AliasStudio</strong> CLASS-A SURFACING SESSION 1<br />
TECHNICON DESIGN<br />
CONTENT<br />
STARTING POINT: INPUT DATA
<strong>Autodesk®</strong> <strong>AliasStudio</strong> TECHNICON DESIGN<br />
CONTENT<br />
2. Technicon Design Construction Options<br />
for Class-A surfacing<br />
2.1 RECOMMENDED CLASS-A CONSTRUCTION SETTINGS<br />
2.2 REBUILD TOLERANCE FOR SCAN DATA AND ITS INFLUENCE ON CLASS A SURFACING WORK.
<strong>Autodesk®</strong> <strong>AliasStudio</strong> CLASS-A SURFACING SESSION 2<br />
TECHNICON DESIGN<br />
CONTENT<br />
2.1 RECOMMENDED CLASS-A<br />
CONSTRUCTION SETTINGS<br />
The recommended Technicon Design Class-A surfacing<br />
settings are a harmonization of different specifications from<br />
various international OEMs incorporating Technicon‘s long<br />
experience in the automotive design process.<br />
In any case you should follow the specifications given<br />
by your client or the settings of the system you have to<br />
hand the data over to. If there are no specifications the<br />
Technicon Design Class-A surfacing settings are a good<br />
recommendation.<br />
2.2 THE INFLUENCE OF THE REBUILD<br />
TOLERANCE ON CLASS-A SURFACING<br />
WORK<br />
The rebuild tolerance is the amount of deviation between<br />
the scan data and your new rebuilt surfaces. A maximum<br />
tolerance is usually given by your client.<br />
Class-A expectations such as perfect surface flow under G3<br />
conditions are often not achievable within the given rebuild<br />
deviation distance.<br />
A hand-made clay exterior can hardly incorporate the<br />
same amount of information (package info, hard points,<br />
engineering criteria, surface continuity, highlighting etc.)<br />
as we usually have to do in our CAD work (all at the same<br />
time).<br />
A good Alias Modeller communicates where and why he<br />
does not stick to the requested rebuild tolerance, thus<br />
assisting design and engineering.<br />
CONSTRUCTION OPTIONS
<strong>Autodesk®</strong> <strong>AliasStudio</strong> TECHNICON DESIGN<br />
CONTENT<br />
3. Data Screening<br />
3.1 MESH SUBSET<br />
3.2 FILE ORGANISATION<br />
3.2.1 LAYER ORGANISATION & USAGE<br />
3.2.2 LAYER CATEGORIES
<strong>Autodesk®</strong> <strong>AliasStudio</strong> CLASS-A SURFACING SESSION 3<br />
TECHNICON DESIGN<br />
CONTENT<br />
In session 3 we divide the scan data into pieces related to<br />
the body architecture of the car and start to organise the<br />
file in a proper and clear way.<br />
3.1 MESH SUBSET<br />
First go to the Mesh Tools of the Palette and drag the<br />
Mesh Subset (mmb pressed) Icon into your Shelf-Set.<br />
Switch to top view and use the Look At command to<br />
center the car on the screen.<br />
Delete the mirrored side of the mesh and zoom in the<br />
half windscreen as much as possible.<br />
Activate the Mesh Subset tool in your Shelf-Set, then<br />
activate the mesh with a click (lmb) and it appears pink!<br />
Then click (lmb) point by point around the area of the<br />
windscreen until the black line surrounds the area you<br />
want to separate.<br />
Click (lmb) the Select button in the Modeling Window<br />
(bottom right) and the selected area will appear blue.<br />
If you then click the Subset button the selected part of the<br />
mesh is separated from the rest.<br />
EXERCISE:<br />
Please separate front and rear wheels along the wheel<br />
arches!<br />
DATA SCREENING
<strong>Autodesk®</strong> <strong>AliasStudio</strong> CLASS-A SURFACING SESSION 3<br />
TECHNICON DESIGN<br />
CONTENT<br />
3.2 FILE ORGANISATION<br />
Proper file organisation is most important for a good<br />
structured workflow.<br />
Layer usage and clear naming is the key to information for<br />
yourself but also for others you might share your work with.<br />
Develop a sensible self-explanatory way of layer naming<br />
and separate between reference, work in progress and final<br />
data.<br />
Use the layer coloring to visualize the structure.<br />
3.2.1 LAYER ORGANISATION & USAGE<br />
So far we already have separated the mesh of our car into<br />
four parts. Front wheel, rear wheel, windscreen and body.<br />
It is time now to assign them to well named Layers.<br />
Create a New Layer and name it Mesh Complete.<br />
To this layer we will assign the complete original mesh.<br />
Therefore, open up the original file in a new stage again<br />
and then copy and paste the mesh back into the other<br />
stage to assign it to the layer „Mesh Complete“.<br />
Then go back to the Stage Editor and delete the latest stage.<br />
Now hide the layer by disabling the Layer Visible option.<br />
Name the next layer „Body Mesh“ and Assign the whole<br />
body of the car to it.<br />
Another layer will be named „Wheel Mesh“ to which we<br />
assign the two wheels and hide them.<br />
Layer 4 should be called Windscreen Mesh. Assign the<br />
windscreen to it and activate the Symmetry option.<br />
DATA SCREENING
<strong>Autodesk®</strong> <strong>AliasStudio</strong> CLASS-A SURFACING SESSION 3<br />
TECHNICON DESIGN<br />
CONTENT<br />
3.2.2 LAYER CATEGORIES<br />
The Layer Category Window provides a good functionality<br />
to sort and reduce the amount of layers displayed in the<br />
Layer Bar on top of the Modelling Window.<br />
Open the Editor Box of the Layer Categories.<br />
By default we have three layer categories as such.<br />
The Arrow/Square icon selects all layer of a category.<br />
The Eye icon displays or hides all layers of a category.<br />
Open up a new layer category by pressing (lmb) at Category<br />
on top of the icons in the Category Window and select New<br />
Category.<br />
Rename the new category into Mesh Layers. The white bar<br />
behind “Mesh Layers” indicates the active status of the<br />
category.<br />
Click the Select icon of the All Layers category and choose<br />
Add Layers.<br />
A 5 appears in the little right box of this category, it shows<br />
the number of Layers related to this category.<br />
TIP:<br />
Each layer can belong to several Categories. For example<br />
the layer “Windscreen Mesh” can belong to the categories<br />
“All Layers”, “Mesh Layers” and “Work in progress”.<br />
Use this functionality in a flexible manner as you need it.<br />
DATA SCREENING
<strong>Autodesk®</strong> <strong>AliasStudio</strong> TECHNICON DESIGN<br />
CONTENT<br />
4. Aerospeed architecture<br />
4.1 SURFACE HIERARCHY<br />
4.1.1 PRIMARY SURFACES<br />
4.1.2 SECONDARY SURFACES<br />
4.1.3 TERTIARY SURFACES<br />
4.1.4 RANK FOUR SURFACES<br />
4.2 SURFACE PATCH LAYOUT
<strong>Autodesk®</strong> <strong>AliasStudio</strong> CLASS-A SURFACING SESSION 4<br />
TECHNICON DESIGN<br />
CONTENT<br />
AEROSPEED CAR ARCHITECTURE & SURFACE HIERARCHY
<strong>Autodesk®</strong> <strong>AliasStudio</strong> CLASS-A SURFACING SESSION 4<br />
TECHNICON DESIGN<br />
CONTENT<br />
4.1 SURFACE HIERARCHY<br />
The organisation of surfaces and the layout of the patches<br />
is very much related to the architecture of the car. A clear<br />
hierarchy of the surfaces leads to a good patch layout.<br />
4.1.1 PRIMARY SURFACES<br />
Aerospeed‘s primary surfaces are the main slaps of the<br />
general exterior volume that share the same boundaries or<br />
intersect each other.<br />
4.1.2 SECONDARY SURFACES<br />
Fillets and floating surfaces between the big slaps that essentially<br />
define the car body become secondary surfaces.<br />
Ideally, the whole volume of the car can be represented by<br />
primary and secondary surfaces. Of course the main body<br />
parts (for example sidewall to roof) will then have sharpedged<br />
connections and no gaps.<br />
NOTICE:<br />
In order to achieve Class-A surface quality for primary<br />
and secondary surfaces, the surfaces must have G3<br />
Curvature conditions in relation to each other. No spans<br />
(Bezier structures) and no more than 7 degrees (8 CVs)<br />
in u and v direction!<br />
AEROSPEED CAR ARCHITECTURE & SURFACE HIERARCHY
<strong>Autodesk®</strong> <strong>AliasStudio</strong> CLASS-A SURFACING SESSION 4<br />
TECHNICON DESIGN<br />
CONTENT<br />
4.1.3 TERTIARY SURFACES<br />
Surfaces that smooth out the edges or intersections of<br />
the main body parts, such as sidewall and roof or wheel<br />
arch and bonnet, are defined as tertiary surfaces.<br />
4.1.4 RANK FOUR SURFACES<br />
These surfaces are typically interfacial surfaces between<br />
primary, secondary or tertiary surfaces and engineering<br />
driven surfaces such as drafts and flanges. Typical<br />
examples are fillets around the A-surface of bumper / hood<br />
/ doors and other body parts to their engineering flanges.<br />
NOTICE:<br />
Class-A surface quality for tertiary and rank four surfaces<br />
means that these surfaces must have a minimum of G2<br />
Curvature conditions (G3 is desirable) in relation to<br />
primary and secondary surfaces. Up to 7 spans (no spans<br />
desirable) and no more than 7 degrees (8 CVs) in u and v<br />
direction!<br />
A minimum of tangent continuity between rank four<br />
surfaces and engineering surfaces is required<br />
AEROSPEED CAR ARCHITECTURE & SURFACE HIERARCHY
<strong>Autodesk®</strong> <strong>AliasStudio</strong> CLASS-A SURFACING SESSION 4<br />
TECHNICON DESIGN<br />
CONTENT<br />
4.2 SURFACE PATCH LAYOUT<br />
As a general rule, create as few patches as possible but<br />
enough to reflect the required morphology of the object.<br />
Keep the structure of each patch simple (single span<br />
surfacing) to assure they are easy to control!<br />
Avoid multiple curvature directions (S-shape) in single<br />
patches.<br />
Adjoining patches should have a direction change or<br />
curvature acceleration in just one direction.<br />
Although we have hardly ever 90 degree surface corners,<br />
the footprint of each patch (untrimmed) should be almost<br />
rectangular or square.<br />
Avoid heavy rhomboidal footprints.<br />
AEROSPEED CAR ARCHITECTURE & SURFACE HIERARCHY
<strong>Autodesk®</strong> <strong>AliasStudio</strong> TECHNICON DESIGN<br />
CONTENT<br />
5. Surface build-up principles<br />
5.1 APEX-LESS SURFACES<br />
5.2 AXIS SYMMETRICAL SURFACES X = 0<br />
5.3 START REBUILDING THE GREENHOUSE<br />
5.4 EVALUATING THE REBUILD TOLERANCE<br />
5.4.1 CROSS SECTIONS<br />
5.4.2 DEVIATION MAP<br />
5.4.3 CROSS SECTION CONTROL<br />
5.4.4 DYNAMIC SECTIONS CONTROL<br />
5.5 WORKING WITH DIRECT HISTORY<br />
5.5.1 ADVANCED OPTIONS FOR SURFACE TOOLS<br />
5.5.2 SURFACE FILLET TOOL FOR SECONDARY SURFACE<br />
5.5.3 ALIGN TOOL USAGE FOR SECONDARY SURFACES<br />
5.5.4 EXPLICIT CONTROL FOR SURFACE TOOLS<br />
5.6 FILLETS AND FLANGES<br />
5.6.1 SURFACE FILLET TOOL FOR TERTIARY SURFACES<br />
5.6.2 DRAFT/FLANGE FUNCTION FOR RANK FOUR SURFACES
<strong>Autodesk®</strong> <strong>AliasStudio</strong> CLASS-A SURFACING SESSION 5<br />
TECHNICON DESIGN<br />
CONTENT<br />
5.1 APEX-LESS SURFACES<br />
Surfaces, which are built symmetrically over the X=0 axis of<br />
the car and which do not have an edge or hard peak in the<br />
middle, are apex-less surfaces. Windscreen, roof, and back<br />
window usually have no apex. Bonnet, front and rear end<br />
sometimes do.<br />
In principal these surfaces should be built as X axis<br />
symmetrical patches with symmetrical CV layout across X<br />
and the pivot at the Y=0 axis. Using this building method<br />
assures, that you never get tangent breaks or loose G3<br />
conditions for surfaces that are built across the middle of<br />
the car .<br />
Notice:<br />
Take care to move the CVs always in a symmetrical fashion<br />
across X=0, otherwise the surfaces will loose their internal<br />
symmetry!<br />
5.2 AXIS SYMMETRICAL (MIRRORED)<br />
SURFACES X = 0<br />
Almost all car exterior surfaces are symmetrical so we just<br />
build them once and copy them over to the other side<br />
(sidewalls, wheel arches, fenders, etc.). Mirrored surfaces<br />
have to have the same relation to their adjoining surfaces as<br />
the originals.<br />
SURFACE BUILD-UP PRINCIPLES
<strong>Autodesk®</strong> <strong>AliasStudio</strong> CLASS-A SURFACING SESSION 5<br />
TECHNICON DESIGN<br />
CONTENT<br />
5.3 START REBUILDING THE GREENHOUSE<br />
A car is basically divided into two zones: Beltline upper<br />
zone and beltline lower zone or “greenhouse” and “body”.<br />
The beltline upper part of the car is surrounded by the<br />
windows, therefore it is also called „greenhouse“.<br />
Add another layer and name it „wip“ for „work in progress“.<br />
Then give it a blue colour and activate it. Hide anything<br />
other than the windscreen mesh (using layer categories)<br />
and zoom in as much as possible into the top window.<br />
Drag Create Plane from your Surfaces tool bar into the<br />
Shelf-Set. Activate it and type „0“ into the Command bar,<br />
the plane will then be located on the X axis in your top<br />
window. Scale and move the plane until it is slightly bigger<br />
than the windscreen. Don’t move it in Y-direction otherwise<br />
it will loose its X-axis symmetry.<br />
Turn on the CVs and Hulls of the plane. Change the surface<br />
degree from 3/3 to 1/1, then switch to the right window and<br />
move the activated plane up in Z-direction right under the<br />
windscreen.<br />
Activate the CVs on one end of the plane and move them in<br />
Z- and X-direction to give the plane the same direction as<br />
the windscreen.<br />
SURFACE BUILD-UP PRINCIPLES
<strong>Autodesk®</strong> <strong>AliasStudio</strong> CLASS-A SURFACING SESSION 5<br />
TECHNICON DESIGN<br />
CONTENT<br />
5.4 EVALUATING THE REBUILD TOLERANCE<br />
The relationship of the given rebuild tolerance and the<br />
surfaces achievable under Class- A conditions is all too<br />
often problematic.<br />
The tighter the tolerance settings are, the better the<br />
surfaces of the scanned original model have to be, in order<br />
to build surfaces at Class-A quality.<br />
A common tolerance to rebuild a full scale size clay model<br />
of good quality is 0.25 mm.<br />
Looking at an entire exterior, I have never seen a<br />
hand-made clay model precise enough to do all digital<br />
surfaces within the expected rebuild tolerance achieving<br />
Class-A surfacing quality.<br />
The model we use in our exercise was originally a handmade<br />
quarter scale clay model.<br />
This means all inaccuracies have been multiplied by four<br />
when the model was enlarged. In this case I recommend<br />
a sensible rebuild tolerance for the primary surfaces of 1.0<br />
to 3.0 mm already anticipating that there may be areas,<br />
where we do not want stay within these tolerances in order<br />
to achieve superior Class-A surfacing quality.<br />
SURFACE BUILD-UP PRINCIPLES
<strong>Autodesk®</strong> <strong>AliasStudio</strong> CLASS-A SURFACING SESSION 5<br />
TECHNICON DESIGN<br />
CONTENT<br />
5.4.1 CROSS SECTIONS<br />
In Studio the Cross Section tool provides a simple and fast<br />
way to evaluate the rebuild distances between created<br />
and given data. It automatically creates additional layers<br />
for these sections in your layer bar. The X section layer<br />
is coloured in red, the Y section layer in blue and the Z<br />
section layer is coloured in green.<br />
Drag the Cross Section icon into your Shelf-Set and open<br />
it. Make sure you use the Section Type Axis Aligned and<br />
change the Step size for the sections of the windscreen to<br />
“X = 200”, “Y = 200” and “Z = 50”. Now activate the xsect<br />
tool and click at the windscreen mesh and the surface<br />
below , press Go and look at the sections of the surface and<br />
mesh. Also look at the layer bar.<br />
You have new „X,Y and Z section“ layers and a layer called<br />
other sections.<br />
Tip: The Cross Section tool cannot recognize whether<br />
sections of planar surfaces belong to the X,Y or Z layer so<br />
it automatically creates a layer called „other sections“ and<br />
adds the unrecognized sections in there.<br />
To overcome this problem: Over-crown in two directions<br />
the surface you want to cross-sect before using the Cross<br />
Section tool. Studio then recognizes the direction of the<br />
sections and sorts them into the correct layers.<br />
Please practice both variations and add the three new<br />
layers X,Y and Z to the „work in progress“ layer category!<br />
SURFACE BUILD-UP PRINCIPLES
<strong>Autodesk®</strong> <strong>AliasStudio</strong> CLASS-A SURFACING SESSION 5<br />
TECHNICON DESIGN<br />
CONTENT<br />
5.4.2 DEVIATION MAP<br />
Drag the Deviation Map icon into your Shelf-Set. Open it<br />
and set the Acceptable Distance to 1.0 mm. Give it a go to<br />
evaluate the rebuild distance of the windscreen as our first<br />
primary surface.<br />
In the Perspective Window display just the windscreen<br />
mesh and the surface underneath. Activate both surface<br />
and mesh and accept them. The green area of the surface<br />
tells us where we are within the rebuild tolerance of<br />
1.0 mm, the other colours indicate whether and by how<br />
much we are above or below the rebuild tolerance.<br />
Now go into the CV move option of the Modelling-Shelf and<br />
activate CV move/XYZ/HULL, lock X and Y and activate the<br />
two middle v direction Hulls. Move them in Z-direction and<br />
see the colour change in the deviation map.<br />
The Deviation Map tool provides very fast and convenient<br />
feedback of the deviation range between scanned and<br />
rebuilt surfaces. In my opinion it is a very good tool to<br />
analyze where we are with our model regarding the „RBT“<br />
and it is „spot on“.<br />
SURFACE BUILD-UP PRINCIPLES
<strong>Autodesk®</strong> <strong>AliasStudio</strong> CLASS-A SURFACING SESSION 5<br />
TECHNICON DESIGN<br />
CONTENT<br />
5.4.3 CROSS SECTION CONTROL<br />
While the Deviation Map just analyzes the distance between<br />
given and created data, the Cross Section Functionality<br />
tells you something about the quality and behaviour of your<br />
surfaces. Set the Curvature Scale to 10 and activate it.<br />
The waves of the green combs are a boosted view of the<br />
curvature condition of your surface at each section.<br />
NOTICE:<br />
Class-A quality surfaces do not have any kinks or heavy<br />
waves in their curvature combs.<br />
5.4.4 DYNAMIC SECTIONS CONTROL<br />
This tool generates sections similar to the Cross Section tool<br />
but highly flexible, the Dynamic Section tool allows you to<br />
cut and blend surfaces in any direction or position.<br />
It can also generate construction planes or transform the<br />
sections into section curve geometry.<br />
With the Visual Clip function of Dynamic Section Control<br />
we are able to move sections in real time through given<br />
and created surfaces (e.g. package information, meshes,<br />
surfacing data). At the same time it is also possible to hide<br />
one side or the other by using the Flip option of the<br />
Visual Clip function.<br />
SURFACE BUILD-UP PRINCIPLES
<strong>Autodesk®</strong> <strong>AliasStudio</strong> CLASS-A SURFACING SESSION 5<br />
TECHNICON DESIGN<br />
CONTENT<br />
SURFACE BUILD-UP PRINCIPLES
<strong>Autodesk®</strong> <strong>AliasStudio</strong> CLASS-A SURFACING SESSION 5<br />
TECHNICON DESIGN<br />
CONTENT<br />
5.5.1 ADVANCED OPTIONS OF SURFACE<br />
TOOLS<br />
Now it is time to build the first secondary surfaces exploring<br />
the advanced options of the Surface Tools. We build up the<br />
transition of windscreen and roof in three different ways.<br />
5.5.2 SURFACE FILLET TOOL USAGE FOR<br />
SECONDARY SURFACES<br />
Display the primary windscreen and roof surface and also<br />
the roof mesh. Open up the Advanced Surface Fillet option<br />
box and set the Construction Type to Chordal, the Section<br />
Type to Curvature and Span placement to Free. The Flow<br />
Control to Edge Align.<br />
Now we create a fillet between the two primary surfaces.<br />
Cut X sections through all displayed objects and increase<br />
the Chordal Distance until you get a fillet as close possible to<br />
the mesh. You might end up with a value around 600.<br />
You might have recognized, that with these options the<br />
Surface Fillet tool maintains the curvature condition of the<br />
fillet. Therefore, it automatically generates more spans the<br />
bigger the fillet becomes.<br />
To avoid this, tick the Explicit Control box. Then you loose<br />
the curvature condition in relation to the roof surface and<br />
even worse, we get a gap!<br />
Increase the U-Degree to 6 and we are back to curvature<br />
conditions without gap!<br />
This is the best result we can achieve with the Surface Fillet<br />
tool itself.<br />
Analyze the result with the Curvature plot and the<br />
Stripe shader. Ok it looks quite good.<br />
However, looking at the CV layout, the distribution of the<br />
CVs is not in accordance with Class-A surfacing standards.<br />
SURFACE BUILD-UP PRINCIPLES
<strong>Autodesk®</strong> <strong>AliasStudio</strong> CLASS-A SURFACING SESSION 5<br />
TECHNICON DESIGN<br />
CONTENT<br />
5.5.3 ALIGN TOOL USAGE FOR SECONDARY<br />
SURFACES<br />
Now that we know the size of the fillet, we know where<br />
the patches of windscreen and roof start to blend into<br />
the transitional surface. That’s the position where the<br />
final primary surfaces should end. Therefore, we use the<br />
Extend tool with the Merge box ticked to shrink back the<br />
windscreen and roof surfaces, so that the corners of these<br />
surfaces join up with the corners of the fillet. Then hide<br />
away the fillet surface and stretch a skin surface between<br />
windscreen and roof and change the weight of the skin<br />
surface from 5u 3v to 5u 5v.<br />
Open the Align tool and its Advanced options and set<br />
Continuity to Curvature and the Align Type to Colinear.<br />
Switch on all Control Options and align one side of the skin<br />
to the windscreen, the other to the roof surface.<br />
5.5.4 EXPLICIT CONTROL FUNCTIONALITY<br />
FOR SURFACE SQUARE AND SURFACE RAIL<br />
TOOLS TO CREATE SECONDARY SURFACES<br />
Another common way to create such surfaces is to<br />
stretch 5 degree curves between the big slaps. Give<br />
them curvature conditions to the side boundaries of the<br />
big slaps and generate a Square or a Birail surface with<br />
curvature conditions in relation to the big slaps with the<br />
ticked Explicit Control option on.<br />
Finally, analyze the result of the three different ways to<br />
build such surfaces and review the different conditions of<br />
the surfaces using the Stripe Shader and the Cross Section<br />
Control.<br />
SURFACE BUILD-UP PRINCIPLES
<strong>Autodesk®</strong> <strong>AliasStudio</strong> CLASS-A SURFACING SESSION 5<br />
TECHNICON DESIGN<br />
CONTENT<br />
SURFACE BUILD-UP PRINCIPLES
<strong>Autodesk®</strong> <strong>AliasStudio</strong> CLASS-A SURFACING SESSION 5<br />
TECHNICON DESIGN<br />
CONTENT<br />
5.6.2 DRAFT/FLANGE FUNCTIONALITY TO<br />
BUILD UP RANK FOUR SURFACES<br />
In the latter part of the Class-A process the fillets around<br />
body parts such as doors, bumpers, bonnet, tailgate, lamps<br />
and even wheel houses are usually built on the basis of<br />
flange surfaces you receive as engineering information<br />
from your studio engineers.<br />
Mostly these engineering surfaces are not built to Class-A<br />
surface quality standards and have to be rebuilt in a better<br />
quality to be able to do the neighbouring surfaces in the<br />
required quality.<br />
In our case we have to create such surfaces ourselves<br />
based on the information we get from our scan data.<br />
The door gaps of the sidewall are located between flanges<br />
built in Y-direction with small fillets to the sidewall. These<br />
fillets are rank four surfaces.<br />
In side view, rebuild the door gaps of the scan data as<br />
5 degree curves with curvature continuity to each other,<br />
offset the curves with a gap distance of 4 mm and project<br />
them onto the sidewall. Open up the Advanced Draft/Flange<br />
Surface Options, set Construction type to Draft/ Angle=0 /<br />
Surface Depth=20/ Pull Direction User defined / Presets =Y<br />
and give it a go. Then do the fillets as described in 5.6.1<br />
with the difference, that the connection to the flanges is<br />
acceptable with tangent continuity only.<br />
SURFACE BUILD-UP PRINCIPLES
<strong>Autodesk®</strong> <strong>AliasStudio</strong> TECHNICON DESIGN<br />
CONTENT<br />
6. Pushing for G3 continuity conditions<br />
6.1 CV LAYOUT AND MANIPULATION<br />
6.1.1 PLANARIZE HULL<br />
6.1.2 CV MOVE FUNCTIONS<br />
6.1.3 SURFACE CONTINUITY CHECK TOOL<br />
6.1.4 PROPORTIONAL MODIFICATION<br />
6.2 EVALUATING THE SURFACE CONTINUITY<br />
6.2.1 EVALUATION SHADER<br />
6.2.2 CROSS SECTION CURVATURE PLOT
<strong>Autodesk®</strong> <strong>AliasStudio</strong> CLASS-A SURFACING SESSION 6<br />
TECHNICON DESIGN<br />
CONTENT<br />
The CV positioning and layout is the key to G3 continuity.<br />
In general, we are aiming for a most simplistic and even<br />
CV layout within all surfaces of an object.<br />
6.1 CV LAYOUT AND MANIPULATION<br />
To explore the CV layout and the possibilities to<br />
manipulate the CVs more in depth, we first go back to the<br />
roof surfaces and push them from G2 to G3 maintaining<br />
a most even CV layout as described in Chapter 5.5. Then<br />
we move to the most difficult part of the car: the rear<br />
wheel arch.<br />
We learn how to use the Planarize Hull tool and the CV<br />
Move Functions together with the Surface Continuity<br />
Check tool, the Stripe Shader and the Cross Section tool<br />
at the same time to get the surfaces of these areas into<br />
the right conditions. The exact workflow is shown in<br />
Chapter 7.<br />
6.1.1 PLANARIZE HULL<br />
The Planarize Hull tool straightens CVs of the Hulls<br />
between the first and the last CV of each of Hull, so that<br />
the footprint of the patch is not affected but the internal<br />
condition of the patch is more even.<br />
PUSHING FOR G3 CONTINUITY CONDITIONS
<strong>Autodesk®</strong> <strong>AliasStudio</strong> CLASS-A SURFACING SESSION 6<br />
TECHNICON DESIGN<br />
CONTENT<br />
6.1.2 CV MOVE FUNCTIONS<br />
Here we have a very efficient and easy to use tool to<br />
manipulate CVs in a wide range of different ways. It is an<br />
almost self-explanatory tool.<br />
You can choose via the Mode options the direction in<br />
which the CVs are going to be moved and if you wish to<br />
move individual CVs or a complete u or v direction row of<br />
CVs as a Hull.<br />
There are just a few things to mention.<br />
I recommend to create a range of different Step sizes for<br />
each mode to be dragged into your Shelf-set. That way<br />
you have direct access to this tool for each work step,<br />
which will speed up your Class-A surfacing workflow.<br />
6.1.3 SURFACE CONTINUITY CHECK TOOL<br />
Same recommendations as for the CV move functions,<br />
drag it three times with different settings for direct access<br />
to G2, G1 and the positional check option into the Shelfset.<br />
6.1.4 PROPORTIONAL MODIFICATION<br />
Proportional modification enables us to move a selected<br />
range of CVs of one surface with a pre-selected<br />
dependency and in proportion to each other.<br />
The application of this tool was already demonstrated on<br />
a surface earlier in chapter 5.5 direct history – rebuilding<br />
fillets.<br />
PUSHING FOR G3 CONTINUITY CONDITIONS
<strong>Autodesk®</strong> <strong>AliasStudio</strong> CLASS-A SURFACING SESSION 6<br />
TECHNICON DESIGN<br />
CONTENT<br />
6.2 EVALUATING THE SURFACE<br />
CONTINUITY<br />
6.2.1 EVALUATION SHADER<br />
We assess the surface quality of our model by using<br />
various diagnostic shader methods.<br />
The most commonly used is the Stripe Shader. It<br />
simulates a tunnel of linear white light stripes which are<br />
reflected by the surfaces of our object.The orientation<br />
of the stripes can be changed from horizontal to vertical<br />
which may be necessary to review certain parts of the<br />
model.<br />
The Stripe Shader can also be set to an adjustable<br />
transparency. In transparent mode one can select and<br />
modify CVs or Hulls of surfaces while assessing their<br />
surface flow at the same time. With transparency it is also<br />
easy to compare final surfaces with the original surfaces<br />
that were rebuilt.<br />
As already mentioned, the final surfaces displayed in<br />
Stripe Shader mode should appear without any jags, dots<br />
or kinks.<br />
The Sky Shader projects an abstract horizon with diffused<br />
light direction onto the surfaces of the object. This allows<br />
a much better assessment of the overall shape of the<br />
object compared to the Stripe Shader.<br />
The Double Horizon Shader gives an extra dimension<br />
of evaluation potential of the surface flow because it<br />
combines the advantages of the Stripe Shader<br />
(having „one stripe“) with the overall shape assessment<br />
properties of the Sky Shader.<br />
PUSHING FOR G3 CONTINUITY CONDITIONS
<strong>Autodesk®</strong> <strong>AliasStudio</strong> CLASS-A SURFACING SESSION 6<br />
TECHNICON DESIGN<br />
CONTENT<br />
6.2.2 CROSS SECTION CURVATURE PLOT<br />
The Cross Section tool with the enabled option Curvature<br />
Scale is the most important tool to evaluate G3 continuity<br />
of surface transitions. All primary and secondary surfaces<br />
need to have G3 conditions for Class-A quality. Curvature<br />
combs should show a smooth transition of curvature<br />
accelaration between surfaces (see the example in<br />
chapter 5.5 Working with direct history-achieving G3<br />
continuity).<br />
PUSHING FOR G3 CONTINUITY CONDITIONS
<strong>Autodesk®</strong> <strong>AliasStudio</strong> TECHNICON DESIGN<br />
CONTENT<br />
7. Complex workflow examples<br />
7.1 REBUILD THE TRANSITIONAL BONNET SURFACE<br />
7.2 GENERATE THE REAR FENDER SWEEP
<strong>Autodesk®</strong> <strong>AliasStudio</strong> CLASS-A SURFACING SESSION 7<br />
TECHNICON DESIGN<br />
CONTENT<br />
COMPLEX WORKFLOW EXAMPLES
<strong>Autodesk®</strong> <strong>AliasStudio</strong> CLASS-A SURFACING SESSION 7<br />
TECHNICON DESIGN<br />
CONTENT<br />
COMPLEX WORKFLOW EXAMPLES
<strong>Autodesk®</strong> <strong>AliasStudio</strong> TECHNICON DESIGN<br />
CONTENT<br />
8. Data validation checks<br />
8.1 CHECK MODEL TOOL<br />
8.2 STITCH CHECK
<strong>Autodesk®</strong> <strong>AliasStudio</strong> CLASS-A SURFACING SESSION 8<br />
TECHNICON DESIGN<br />
CONTENT<br />
To ensure the delivery of a proper and clean data file to<br />
your client, it is absolutely essential to check the final<br />
data for errors and insufficiencies.<br />
8.1 CHECK MODEL TOOL<br />
The options on the left are not only good for Class-A<br />
surfaces, but also for a general data check of all other<br />
surfacing quality standards.<br />
The tick Normal Consistency check is necessary if your<br />
file is used for visualization purposes.<br />
Short Edges sometimes have to be checked by hand if<br />
parts of your model are very small.<br />
In general, all positional and continuity checks measure<br />
the objects to the construction tolerances used.<br />
8.2 STITCH CHECK<br />
For rapid prototyping parts a closed model has to be<br />
achieved.<br />
The Surface Stitch tool “sews together” and immediately<br />
highlights all gaps, unclosed regions and other problems<br />
of your completed model.<br />
In general, it is a good and quick tool to do a fast check<br />
of the entire model.<br />
DATA VALIDATION CHECKS
<strong>Autodesk®</strong> <strong>AliasStudio</strong> TECHNICON DESIGN<br />
CONTENT<br />
DISCLAIMER<br />
Author: Werner Strathaus/Technicon Design<br />
Design/Programming: Tom Heinen. www.16colours.com<br />
Alex Ziegler. www.alexziegler.de<br />
Victor Stelmasuk. www.victorstelmasuk.com<br />
Renderings: Werner Strathaus/Technicon Design<br />
Autodesk<br />
© 2008 Autodesk, Inc. All Rights Reserved. Except as otherwise permitted by Autodesk, Inc., this publication, or parts thereof, may not be reproduced in any form, by any method, for any purpose.<br />
Certain materials included in this publication are reprinted with the permission of the copyright holder.<br />
Trademarks<br />
The following are registered trademarks or trademarks of Autodesk, Inc., in the USA and other countries: 3DEC (design/logo), 3December, 3December.com, 3ds Max, ActiveShapes, Actrix, ADI, Alias, Alias (swirl design/logo),<br />
<strong>AliasStudio</strong>, Alias|Wavefront (design/logo), ATC, AUGI, AutoCAD, AutoCAD Learning Assis tance, AutoCAD LT, AutoCAD Simulator, AutoCAD SQL Extension, AutoCAD SQL Interface, Autodesk, Autodesk Envision, Autodesk Insight,<br />
Autodesk Intent, Autodesk Inventor, Autodesk Map, Autodesk MapGuide, Autodesk Streamline, AutoLISP, AutoSnap, AutoSketch, AutoTrack, Backdraft, Built with ObjectARX (logo), Burn, Buzzsaw, CAiCE, Can You Imagine, Character<br />
Studio, Cinestream, Civil 3D, Cleaner, Cleaner Central, ClearScale, Colour Warper, Combustion, Communication Specification, Construct ware, Content Explorer, Create>what’s>Next> (design/logo), Dancing Baby (image), DesignCenter,<br />
Design Doctor, Designer’s Toolkit, DesignKids, DesignProf, DesignServer, DesignStudio, Design|Studio (design/ logo), Design Your World, Design Your World (design/logo), DWF, DWG, DWG (logo), DWG TrueConvert, DWG TrueView,<br />
DXF, EditDV, Education by Design, Exposure, Extending the Design Team, FBX, Filmbox, FMDesktop, Freewheel, GDX Driver, Gmax, Heads-up Design, Heidi, HOOPS, HumanIK, i-drop, iMOUT, Incinerator, IntroDV, Inventor, Inventor<br />
LT, Kaydara, Kaydara (design/logo), LocationLogic, Lustre, Maya, Mechanical Desktop, MotionBuilder, Mudbox, NavisWorks, ObjectARX, ObjectDBX, Open Reality, Opticore, Opticore Opus, PolarSnap, PortfolioWall, Powered with<br />
Autodesk Technology, Productstream, ProjectPoint, ProMaterials, Reactor, RealDWG, Real-time Roto, Recognize, Render Queue, Reveal, Revit, Showcase, ShowMotion, SketchBook, SteeringWheels, StudioTools, Topobase, Toxik,<br />
ViewCube, Visual, Visual Bridge, Visual Construction, Visual Drainage, Visual Hydro, Visual Landscape, Visual Roads, Visual Survey, Visual Syllabus, Visual Toolbox, Visual Tugboat, Visual LISP, Voice Reality, Volo, Wiretap, and<br />
WiretapCentral<br />
The following are registered trademarks or trademarks of Autodesk Canada Co. in the USA and/or Canada and other countries: Backburner, Discreet, Fire, Flame, Flint, Frost, Inferno, Multi-Master Editing, River, Smoke, Sparks, Stone,<br />
and Wire<br />
All other brand names, product names or trademarks belong to their respective holders.<br />
THIS PUBLICATION AND THE INFORMATION CONTAINED HEREIN IS MADE AVAILABLE BY AUTODESK, INC. “AS IS.” AUTODESK, INC. DISCLAIMS ALL WARRANTIES, EITHER EXPRESS OR IMPLIED, INCLUDING BUT NOT LIMITED TO ANY IMPLIED<br />
WARRANTIES OF MERCHANTABILITY OR FITNESS FOR A PARTICULAR PURPOSE REGARDING THESE MATERIALS.<br />
Published by:<br />
Autodesk, Inc.<br />
111 Mclnnis Parkway<br />
San Rafael, CA 94903, USA