GTII SPORT TURBINE KIT INSTALLATION MANUAL
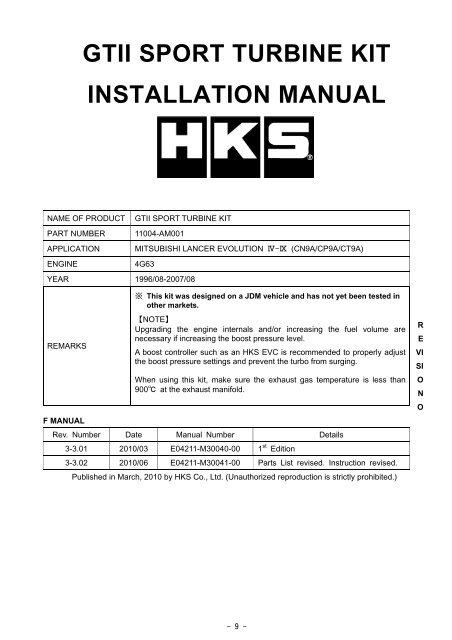
GTII SPORT TURBINE KIT INSTALLATION MANUAL
GTII SPORT TURBINE KIT INSTALLATION MANUAL
Create successful ePaper yourself
Turn your PDF publications into a flip-book with our unique Google optimized e-Paper software.
F <strong>MANUAL</strong><br />
<strong>GTII</strong> <strong>SPORT</strong> <strong>TURBINE</strong> <strong>KIT</strong><br />
<strong>INSTALLATION</strong> <strong>MANUAL</strong><br />
NAME OF PRODUCT <strong>GTII</strong> <strong>SPORT</strong> <strong>TURBINE</strong> <strong>KIT</strong><br />
PART NUMBER 11004-AM001<br />
APPLICATION MITSUBISHI LANCER EVOLUTION Ⅳ-Ⅸ (CN9A/CP9A/CT9A)<br />
ENGINE 4G63<br />
YEAR 1996/08-2007/08<br />
REMARKS<br />
※ This kit was designed on a JDM vehicle and has not yet been tested in<br />
other markets.<br />
【NOTE】<br />
Upgrading the engine internals and/or increasing the fuel volume are<br />
necessary<br />
if increasing the boost pressure level.<br />
A boost controller such as an HKS EVC is recommended to properly adjust<br />
the boost pressure settings and prevent the turbo from surging.<br />
When using this kit, make sure the exhaust gas temperature is less than<br />
900℃ at the exhaust manifold.<br />
Rev. Number Date Manual Number Details<br />
3-3.01 2010/03 E04211-M30040-00 1 st Edition<br />
3-3.02 2010/06 E04211-M30041-00 Parts List revised. Instruction revised.<br />
Published in March, 2010 by HKS Co., Ltd. (Unauthorized reproduction is strictly prohibited.)<br />
- 9 -<br />
R<br />
E<br />
VI<br />
SI<br />
O<br />
N<br />
O
INDEX<br />
NOTICE/ATTENTION ····················································································································1<br />
PARTS LIST ·····································································································································2<br />
1. REMOVAL OF FACTORY PARTS ·································································································3<br />
2. <strong>INSTALLATION</strong> OF TURBOCHRGER ASSEMBLY ·······································································4<br />
3. RE<strong>INSTALLATION</strong> OF FACTORY PARTS ····················································································6<br />
4. CONFIRAMTION AFTER <strong>INSTALLATION</strong>·····················································································7<br />
NOTICE<br />
This manual assumes that you have and know how to use the tools and equipment necessary to safely<br />
perform service operations on your vehicle. This manual assumes that you are familiar with typical<br />
automotive systems and basic service and repair procedures. Do not attempt to carry out the operations<br />
shown in this manual unless these assumptions are correct. Always have access to a factory repair manual.<br />
To avoid injury, follow the safety precautions contained in the factory repair manual.<br />
ATTENTION<br />
● This manual indicates items you need to pay attention to in order to install this product safely and lists<br />
precautions to avoid any possible damage and/or accidents.<br />
● This product is an automobile part. Do not use for any other purposes.<br />
● HKS will not be responsible for any damage caused by incorrect installation and/or use, or use after<br />
modification and/or dismantling of this product.<br />
● This product was designed based on installation onto a specific factory vehicle.<br />
● The specifications of this product are subject to change without notice.<br />
● The instructions are subject to change without notice. Make sure to refer to the most recent instructions.<br />
- 10 -
PARTS LIST<br />
NO. DESCRIPTIONS QT IMAGE REMARKS<br />
1 Turbocharger Assembly 1<br />
2 Air Outlet Pipe 1<br />
3 Turbocharger Water Return Pipe 1<br />
4 Turbocharger Water Feed Pipe 1<br />
5 Turbocharger Oil Feed Pipe 1<br />
6 Stud Bolt for Turbine Flange 2 Long<br />
7 Stud Bolt for Extension Flange 2 Short<br />
8 Turbine Flange Gasket 1<br />
9 Extension Flange Gasket 1<br />
10 Air Outlet Gasket 1<br />
11 Oil Return Gasket 2<br />
12 Oil Return Tube Gasket 2<br />
w/ Actuator<br />
Turbine Inlet Side<br />
Turbine Outlet Side<br />
13 Copper Washer 10mm 2 Oil Feed Tube (Engine side)<br />
14 Copper Washer 12mm 2<br />
15 Copper Washer 14mm 4<br />
16 Hose Fitting 4mm 1<br />
17 Installation Manual 1<br />
18 Instruction Manual 1<br />
- 11 -<br />
Oil Feed Tube (Turbo side)<br />
Water Banjo Fitting
1. REMOVAL OF FACTORY PARTS<br />
Use this instruction manual and the manufacturer’s service manual as a reference.<br />
(1) Disconnect the negative cable from the battery terminal<br />
(2) Remove the engine under cover.<br />
(3) Drain the coolant and remove the radiator.<br />
(4) Disconnect the air intake hose and air hose.<br />
(5) Remove the cross member bar.<br />
(6) Remove the front pipe.<br />
(7) Drain the engine oil.<br />
(8) Remove the factory parts referring to Diagram 1.<br />
59<br />
D-1<br />
CAUTION<br />
● Make sure the engine bay temperature has cooled down before installation.<br />
Failure to do so may lead to severe burns.<br />
Extension<br />
⑨<br />
⑫<br />
⑪<br />
⑧<br />
①<br />
②<br />
Oil Return Tube<br />
- 12 -<br />
⑭<br />
⑩<br />
⑮ ⑭<br />
⑫ ⑬<br />
③<br />
④<br />
⑤<br />
⑭ ⑮
2. <strong>INSTALLATION</strong> OF TURBOCHARGER ASSEMBLY<br />
(1) Install the provided 4 Stud Bolts to the Turbocharger Assembly as shown below. The shorter threaded<br />
portion must be installed to the turbocharger side. (D-2, D-3, D-4)<br />
⑥<br />
Long<br />
D-3<br />
- 13 -<br />
Short<br />
⑦<br />
D-4<br />
D-2<br />
Turbocharger
(2) Install the provided 4mm Hose Fitting to the Air Outlet Pipe as shown below. (D-5)<br />
③⑯<br />
(3) Clean the factory oil return tube with brake cleaner and blow air inside of the tube before reuse. Make<br />
sure there is no rust and/or debris left inside the tube.<br />
(4) Use an air gun to blow the Turbocharger Assembly’s compressor wheel, turbine wheel, compressor<br />
housing, turbine housing, and center housing to clean the assembly. Make sure there is no debris left<br />
on any of these parts.<br />
(5) Pour new engine oil to the Turbocharger Assembly through the oil feed tube. Rotate the wheel by finger<br />
to let the oil run through to the inside of the bearing for better lubrication at initial engine start-up.<br />
(6) Install the Turbocharger Assembly to the engine using the provided parts referring to D-1.<br />
●Replace the factory washers and gaskets with the provided washers and gaskets.<br />
●Reuse the factory bolts and nuts including the banjo bolts.<br />
Tighten all bolts and nuts as instructed in D-1.<br />
CAUTION<br />
●The Turbocharger’s water cooling pipes must be routed properly. If not, the Turbocharger may<br />
overheat and become damaged.<br />
CAUTION<br />
● When installing the oil feed tube, do not use Teflon tape and/or liquid gasket to seal the tube.<br />
These materials may cause damage to the Turbocharger.<br />
- 14 -<br />
D-5
3. RE<strong>INSTALLATION</strong> OF FACTORY PARTS<br />
(1) Install the factory suction hose.<br />
●The EVO VI-IX hose can be installed as is.<br />
●To install the EVO IV–V hose, remove the rubber sleeve from the turbocharger side of the factory suction<br />
hose.<br />
D-6<br />
Rubber Sleeve<br />
Remove<br />
(2) Depending on the vehicle’s specifications, there may be a gap between the extension of the<br />
Turbocharger’s outlet side and the bracket connected to the engine. If this is the case, insert a washer<br />
with the appropriate thickness.<br />
- 15 -
(3) Cut off the shaded portion of the Turbocharger Heat Shield as illustrated in D-7 so it does not come in<br />
contact with the actuator.<br />
D-7<br />
(4) Reinstall all parts removed in section 1.<br />
(5) Refill the coolant, and bleed the air out.<br />
(6) Refill the designated amount of engine oil.<br />
(7) Reconnect the negative cable to the battery.<br />
Cut off<br />
4. CONFIRMATION AFTER INSTALLTION<br />
(1) After the installation process is complete, check all items listed in the “Confirmation after Installation”<br />
section of the Instruction Manual.<br />
(2) Replace the spark plugs if necessary.<br />
(3) The boost pressure may vary slightly depending on the vehicle and/or the other products installed on the<br />
vehicle.<br />
(4) Make sure the exhaust gas temperature is less than 900℃ at the exhaust manifold when using this kit.<br />
- 16 -
<strong>INSTALLATION</strong> SUPPLEMENT<br />
<strong>GTII</strong> 7460R Sport Turbo Kit<br />
Part No: 11004-AM001<br />
V060310<br />
NOTICE<br />
This manual assumes that you have and know how to use the tools and equipment necessary to safely perform<br />
service operations on your vehicle. This manual assumes that you are familiar with typical automotive systems and<br />
basic service and repair procedures. Do not attempt to carry out the operations shown in this manual unless these<br />
assumptions are correct. Always have access to a factory repair manual. To avoid injury, follow the safety<br />
precautions contained in the factory repair manual.<br />
1. Installing the bracket to connect the extension housing to the engine.<br />
2. Depending on the vehicle’s specifications, there may be a gap when installing the bracket<br />
and extension housing to the engine.<br />
3. Insert a washer with the appropriate thickness to fill the gap.<br />
4. Installing the Oil Feed Tube<br />
5. For EVO9, the factory parts can be reused.<br />
6. For EVO4 – 8 install the factory parts as shown below.<br />
(1) Bend the oil feed tube clamp as shown in the Diagram 1, then install it to the turbocharger.<br />
1<br />
Diagram 1
(2) Bend the oil feed tube pipe downward as shown in the Diagram 2; then, move the banjo<br />
closer to the engine connection.<br />
2<br />
Diagram 2


