Spring Cleaning 101 - Martha Stewart
Spring Cleaning 101 - Martha Stewart
Spring Cleaning 101 - Martha Stewart

You also want an ePaper? Increase the reach of your titles
YUMPU automatically turns print PDFs into web optimized ePapers that Google loves.
<strong>Spring</strong> <strong>Cleaning</strong> <strong>101</strong><br />
www.marthastewart.com<br />
C 2007 MARTHA STEWART LIVING OMNIMEDIA
...........................................................<br />
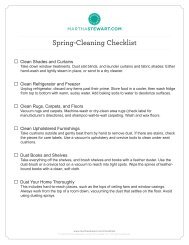
SPRING CLEANING CHECKLIST<br />
...........................................................<br />
CLEAN RUGS, CARPETS, AND FLOORS<br />
Vacuum rugs and carpets. Machine-wash or dry-clean area rugs (check label for<br />
manufacturer’s directions), and shampoo wall-to-wall carpeting. Wash and wax floors.<br />
(See page 3 for more tips.)<br />
CLEAN SHADES AND CURTAINS<br />
Take down window treatments. Dust slat blinds, and launder curtains and fabric shades:<br />
Either hand-wash and lightly steam in place, or send to a dry cleaner.<br />
WASH WINDOWS<br />
Remove dust, dirt, and cobwebs with a soft brush. Wash windows inside and out with a<br />
mild dilution of either ammonia or white vinegar in water; dry with a squeegee followed<br />
by a rag. (See page 4 for more tips.)<br />
REPLACE STORM WINDOWS WITH SCREENS<br />
Remove storm windows; replace cracked panes, recaulk windows, and repaint the<br />
frames before storing. Before installing screens, repair holes with tweezers (or replace<br />
entire screen).<br />
RENEW MATTRESSES AND CUSHIONS<br />
Vacuum mattresses and box springs. Rotate and flip mattresses before replacing them<br />
on the box springs. Flip sofa and chair cushions. (See page 5 for tips on removing<br />
stains from upholstered furniture.)<br />
SORT THROUGH WARDROBES<br />
Separate clothes into piles: off-season, donation, dry cleaner, tailor. Wash and mend<br />
clothing before putting back in closet or storing. (See page 6 for tips on removing stains<br />
from clothing.)<br />
CLEAN REFRIGERATOR AND FREEZER<br />
Unplug refrigerator; discard any items past their prime. Store food in a cooler, then<br />
wash fridge from top to bottom with warm, sudsy water. Add baking soda to water to<br />
deodorize surfaces. (See page 7 for more tips on cleaning home appliances.)<br />
PERFORM A SAFETY CHECK<br />
Check smoke detector batteries frequently; replace every six months. Test batteries in<br />
carbon-monoxide detectors and flashlights; inspect pressure gauges on fire<br />
extinguishers.<br />
REPLACE FILTERS<br />
Vacuum and clean grates, coils, and condensers on furnaces, refrigerators, stoves, and<br />
air conditioners. Remove filters in furnaces and air conditioners, and either clean or<br />
replace them.<br />
sponsored by:<br />
marthastewart.com PAGE 2
...........................................................<br />
MAINTAINING FLOORS<br />
...........................................................<br />
For any floor, vacuuming is the first step. Do this as often as daily and at least once a<br />
week; dust-mop for a quick fix. Removing the everyday accumulation of dirt makes<br />
mopping and waxing less arduous.<br />
The next step depends upon the type and finish of the floor. Here are some specific tips to<br />
follow.<br />
Wood Floors<br />
Vinyl Floors<br />
Marble,<br />
Ceramic Tile,<br />
and Stone Floors<br />
If floors are waxed, re-apply wax once or twice a year, and buff in<br />
between to revive the shine. Waxed wood should not be mopped—a<br />
wax seal is not watertight, and liquid could cause damage. Wipe<br />
spills with damp paper towels as soon as they hit the floor, and buff<br />
the area with a soft cloth. For wood floors with a polyurethane finish,<br />
damp-mop with a combination of 1 quart water and 1/4 cup vinegar.<br />
Wax vinyl forty-eight hours after installation and about every six<br />
months thereafter. Apply wax sparingly directly on the floor, and<br />
spread it into a very thin coat using long, straight strokes with a wax<br />
applicator or sponge mop. Open windows, and let dry to a shine.<br />
Damp-mopping with warm water brightens a less soiled floor;<br />
wet-mopping with vinyl-floor cleaner removes more substantial<br />
grime. Remove wax buildup with stripper about once a year.<br />
Masonry floors require care similar to that of vinyl, with the addition<br />
of an early step: sealing. Apply an all-purpose masonry-floor sealer<br />
(available at hardware stores) with a sponge mop or clean rags,<br />
following package directions. Once sealed, a stone floor should be<br />
waxed about once a year with an acrylic liquid or paste wax. To<br />
clean, damp-mop with water and mild soap, such as Ivory Liquid;<br />
rinse with clean water. After one or two waxings, repeat the process<br />
from the beginning: strip, seal, and rewax.<br />
General Floor Care Advice<br />
Give your floors a break. When you move anything, always lift and place; never slide. For<br />
heavy objects, slip a square of carpet, pile side down, under the points touching the floor (or<br />
try EZ Glide surface protectors). Attach felt or nylon glides to legs, and check the glides<br />
occasionally for dirt, which can scratch the floor.<br />
Mopping Tip From <strong>Martha</strong><br />
Replace old string mops and dust mops. Newer versions, such as mops with cloth strips or<br />
microfiber pads, and electrostatic sweepers, do their jobs better—and with less mess.<br />
DO YOU KNOW?<br />
America’s first vacuum cleaner was invented in 1865. Until electric vacuums took over in the<br />
‘teens, most models were powered by hand pumps, and some required the efforts of two<br />
people: one to pump, the other to sweep.<br />
marthastewart.com sponsored by:<br />
PAGE 3
Start With Storms<br />
Remove storm windows. Make sure they’re labeled with<br />
room and window location so you know where to replace<br />
them in the fall. Clean them, replace cracked panes,<br />
recaulk edges, and repaint frames before storing.<br />
Screens Come Next<br />
Take screens out of storage. Clean them, and inspect<br />
them for holes. If you find any, realign the wires using<br />
tweezers, patch the holes with another piece of screen,<br />
or replace the whole screen if necessary. Put screens up.<br />
Time It Right<br />
Prep the Site<br />
Get Going<br />
Or Try...<br />
...........................................................<br />
WINDOW UPKEEP<br />
...........................................................<br />
Choose a mild, cloudy day to do your window washing.<br />
Bright sun and strong heat can dry the cleaning solution,<br />
causing hard-to-remove streaks.<br />
Since they will need cleaning themselves and would get<br />
in the way, remove window coverings, such as curtains<br />
or blinds. Use a soft brush or the vacuum cleaner to<br />
remove dust and cobwebs from windowsills and frames.<br />
Gather your supplies; keep them all in a bucket so<br />
everything’s ready when you are. You can use a<br />
commercial window cleaner or a homemade mix; try 1/4<br />
cup white vinegar to 2 cups water. Paper towels and<br />
lintless cloths—such as tightly woven cotton, not terry<br />
cloth—both work well to remove the solution. (Some<br />
people swear by using newspaper, which is indeed<br />
effective, but wet newsprint can rub off onto sills and<br />
walls.) You’ll also need rubber gloves and a sturdy ladder<br />
for high spots. Spray the cleaner onto the cloth to<br />
prevent puddling, then wipe the window from top to<br />
bottom.<br />
Using a mild, soapy solution and a squeegee, a<br />
technique that works particularly well on really dirty<br />
windows. Dip a sponge into a bucket of soapy water<br />
made by mixing a few drops of mild dish soap and warm<br />
water, wring it lightly, and wipe down the windowpane.<br />
Moisten your squeegee blade—if it’s dry, it will skip—and<br />
draw it down the pane from top to bottom; continue,<br />
overlapping strokes (for large windows, “snake” the<br />
squeegee back and forth across the window). After each<br />
stroke, wipe the blade, and finish by drying the sill.<br />
Try <strong>Martha</strong>’s tips to ready your windows for spring.<br />
marthastewart.com sponsored by:<br />
PAGE 4
...........................................................<br />
CARING FOR HOUSEHOLD FABRICS<br />
...........................................................<br />
It can be difficult to determine the right technique to use when cleaning household fabrics. Store-bought curtains and<br />
slipcovers usually come with care tags, but custom ones don’t. And in the case of upholstery, the tags supply only<br />
coded messages to professional cleaners about which chemicals to use.<br />
The best routine care for household fabrics is vacuuming them with the upholstery attachment to remove grit, which<br />
can grind into fabric and damage its fibers over time. In the event of a spill, blot liquids immediately with clean white<br />
towels. For deep cleaning, the proper method depends largely on the type of fabric. Consult our chart below.<br />
F ABRIC DEEP CLEANING<br />
PLAIN-WEAVE LINEN<br />
AND COTTON<br />
CANVAS, CHINTZ,<br />
DENIM, GINGHAM,<br />
SAILCLOTH, SATEEN,<br />
TICKING, TOILE<br />
SILK (CREPE, TAFFETA)<br />
AND SATIN<br />
RAYON<br />
JACQUARDS<br />
BROCADE, DAMASK,<br />
MATELASSÉ, TAPESTRY<br />
PILE FABRICS<br />
CHENILLE, CORDUROY,<br />
VELVET, VELVETEEN<br />
WOOL<br />
Curtains, slipcovers, and other removable items are cold-water machine-<br />
washable, so long as they are preshrunk and colorfast (test by rubbing a wet<br />
white washcloth gently on a discreet area, such as a hidden seam, to see if any<br />
color comes off. For major cleaning, hire a professional. Glazed fabrics, such as<br />
chintz, should never be ironed because heat damages the shiny finish.<br />
These should be dry-cleaned. Satin, which can be woven from pure silk, rayon,<br />
acetate, or polyester, has a lustrous face and a dull underside; iron only the dull<br />
side. (Harsh sunlight is the enemy of silk, so if used for draperies, it should be<br />
lined with a cotton backing; position silk-upholstered furniture out of direct<br />
sunlight, or protect it with cotton slipcovers.)<br />
Although rayon itself is washable, it is often sized with coatings that are water<br />
soluble; professional cleaning is best unless a care tag directs otherwise.<br />
Any such pattern, which is created by the weave, requires mild washing. For<br />
cotton and linen, use the gentle cycle on the washing machine. If the fabric<br />
contains silk, dry-clean only. Before laundering, mend, clip, or point out any loose<br />
threads to a professional cleaner.<br />
If made of preshrunk cotton, these can be washed with water and detergent (test<br />
for colorfastness as with plain weaves). Avoid snags, which can destroy<br />
construction. Pile fabrics made of acetate, polyester, or rayon should be<br />
professionally cleaned. In either case, do not iron, because piles flatten easily<br />
from moisture and pressure.<br />
Dry-clean only. When vacuuming, be careful not to rub vigorously since wool is<br />
very difficult to repair or patch once it is torn.<br />
sponsored by:<br />
marthastewart.com PAGE 5
marthastewart.com<br />
................................................<br />
P R I N TA B L E STA I N C H A RT<br />
................................................<br />
The diluted dishwashing-soap solution called for below is made with 1 tablespoon of fragrance- and dye-free liquid soap (containing sodium laurel sulfate, or<br />
sodium laureth sulfate) and 9.5 ounces of water. Pour it into a tiny spray bottle. Do not use the enzyme detergent, called for below, on protein fibers, such as<br />
silk, wool, cashmere, or angora. Always wash fabric after using a dry solvent (such as mineral spirits or acetone), and do not use acetone on acetate.<br />
STAIN TREATMENT<br />
GREASE<br />
(butter, oil, mayonnaise)<br />
PROTEIN<br />
(blood, egg)<br />
FRUIT OR VEGETABLE<br />
(juice, jam)<br />
GRASS<br />
RED WINE<br />
WHITE WINE<br />
COFFEE OR TEA<br />
CHOCOLATE<br />
LIPSTICK<br />
WAX OR GUM<br />
MUSTARD<br />
SAUCES<br />
(tomato, ketchup, barbecue)<br />
SOY SAUCE<br />
VINAIGRETTE<br />
FELT-TIP INK<br />
BALLPOINT INK<br />
MUD<br />
Treat area with a dry solvent (such as mineral spirits or acetone) in a well-ventilated room. Using an eyedropper,<br />
rinse with isopropyl alcohol; dry well. Spray diluted dishwashing-soap solution on any remaining residue, and soak<br />
the item in an enzyme detergent before washing.<br />
Spray diluted dishwashing-soap solution on stain, and let it sit; rinse in tepid water. If stain remains, treat area<br />
with an enzyme detergent, and wash according to label instructions.<br />
Spray diluted dishwashing-soap solution on the stain to remove sugars. Using an eyedropper, flush the area with<br />
white vinegar and then hydrogen peroxide to remove any remaining color. Follow up with an enzyme detergent to<br />
remove residue before washing.<br />
Treat area with a dry solvent in a well-ventilated room. Press with cheesecloth; tamp with a soft-bristled brush.<br />
Repeat to remove as much pigment as possible. Flush area with isopropyl alcohol, tamp, and let dry. Follow up<br />
with an enzyme detergent to remove residue before washing.<br />
Spray diluted dishwashing-soap solution on stain; tamp with a soft-bristled brush. Flush with water, apply white<br />
vinegar, and tamp; let stand several minutes; flush again. If stain remains, apply hydrogen peroxide, and let stand.<br />
If stain persists, apply 1 or 2 drops of ammonia to wet area. Flush with water. Treat with an enzyme detergent; wash.<br />
If stain is still there, apply a powdered nonchlorinated color-safe bleach, such as sodium percarbonate; rewash.<br />
Flush the stain with cold water, and spray with diluted dishwashing-soap solution. Treat area with an enzyme<br />
detergent, and then wash.<br />
Using an eyedropper, flush area with lemon juice or white vinegar to remove stain; then treat with a stronger<br />
bleach, if necessary. To help remove sugar or milk, spray area with diluted dishwashing-soap solution, then wash<br />
with an enzyme detergent.<br />
Gently scrape off excess chocolate; spray area with diluted dishwashing-soap solution. Follow up with an<br />
enzyme detergent to remove residue before washing.<br />
Use a dull-edged knife to remove excess lipstick. Using an eyedropper, apply a dry solvent (such as mineral<br />
spirits or acetone) in a well-ventilated room; tamp with a soft-bristled brush. Flush area with isopropyl alcohol,<br />
and tamp. Repeat until all stain is removed, and let dry. Spray with diluted dishwashing-soap solution. Treat with<br />
an enzyme detergent, and wash.<br />
Use ice to freeze wax or gum, or place item in the freezer; scrape or crack off as much as you can, then remove<br />
residue with an oil solvent or mineral spirits. Rinse with isopropyl alcohol; let dry. Treat with an enzyme detergent; wash.<br />
Using an eyedropper, flush stain with vinegar; then wash with diluted dishwashing-soap solution.<br />
Scrape off sauce; spray area with diluted dishwashing-soap solution. Soak in tepid water. If color remains, apply<br />
white vinegar with an eyedropper. Treat with an enzyme detergent; wash. If color persists, apply several drops of<br />
hydrogen peroxide; let sit. Rinse; treat again with enzyme detergent, and wash.<br />
Spray with diluted dishwashing-soap solution; tamp with a soft-bristled brush. Flush with water, apply white vinegar,<br />
and tamp; let stand several minutes, and flush again. If stain remains, apply hydrogen peroxide, and let stand. If<br />
stain persists, apply 1 or 2 drops of ammonia to wet area. Flush with water. Treat with an enzyme detergent; wash.<br />
If stain is still there, apply a powdered nonchlorinated color-safe bleach, such as sodium percarbonate; rewash.<br />
First, treat stain as a grease stain (see grease, above). Then flush with white vinegar to remove any remaining spot.<br />
Follow up with an enzyme detergent to remove residue before washing.<br />
First, build a “dam” around stain with mineral oil or petroleum jelly. Always work within the confines of the dam.<br />
Test the ink with a cotton swab saturated with water and another one saturated with isopropyl alcohol to deterine<br />
whether the ink is oil-based or water-based. Whichever solvent pulls more pigment out of the stain is the one that<br />
should be used. If isopropyl alcohol is more effective, follow the steps for ballpoint ink stains below. If water is<br />
more effective, spray the stain with diluted dishwashing-soap solution, and then flush with cold water.<br />
Build a “dam” around the stain with mineral oil or petroleum jelly. Always work within the confines of the dam. Treat<br />
area with isopropyl alcohol using an eyedropper. Remove any remaining pigment with a dry solvent in a well-ventilated<br />
room; let dry. Rinse with diluted dishwashing-soap solution, then wash with an enzyme detergent in warm water.<br />
If stain is a combination of mud and grass, treat grass stain first (see grass, above). Shake or scrape off residue;<br />
pretreat stain with diluted dishwashing-soap solution, and soak. Then treat with an enzyme detergent; wash.<br />
s p o n sore d by :<br />
NOTE: This chart is for washable items only.<br />
PAGE 6
REFRIGERATOR<br />
...........................................................<br />
CLEANING APPLIANCES<br />
...........................................................<br />
If you wipe appliances regularly with a damp cloth or sponge, most will<br />
require little additional maintenance. A buildup of grime, however, calls<br />
for a bit more elbow grease and sometimes even a particular cleaning<br />
solution. Before you get to work, be sure to consult the owner’s manual<br />
or call the company’s customer-service line, since manufacturers use a<br />
variety of materials to make their appliances.<br />
A frost-free refrigerator dehydrates its interior, turning liquid spills into caked-on lumps. Soak removable parts in<br />
warm, slightly soapy water or a solution of 1 or 2 tablespoons baking soda for every quart warm water. Loosen a<br />
hardened spill on fixed parts by covering it with a damp sponge or cloth; use a toothbrush in crevices. Don’t use<br />
bleach or ammonia, which can damage some surfaces.<br />
Odors: Plastic linings absorb odors. Before tackling them, move food to a cooler or into paper bags wrapped in<br />
an old quilt or blanket for insulation. Unplug the refrigerator, wash the interior with the baking-soda solution, and<br />
wipe it dry. When the refrigerator is on again, slide a shallow pan of activated charcoal (available at plant<br />
nurseries and pet stores) onto a shelf. If odors return, recharge the charcoal in a 300° oven for an hour.<br />
If the bad smell isn’t gone in two weeks, place a small dish of vanilla extract in the refrigerator to mask it. Don’t<br />
use odor-control products with a lemon scent because the fragrance sinks into plastic and stays there. To avoid<br />
unpleasant odors in the future, store leftovers in covered containers or resealable plastic bags, and wipe up spills<br />
promptly. An open box of baking soda inside the refrigerator will trap smells; when you notice the odor, replace<br />
the box with a fresh one.<br />
Coils: Refrigerators cool by stripping heat from the air inside the compartment and releasing it through<br />
condenser coils. Dust acts like insulation on the coils and keeps them from releasing heat efficiently. Clean the<br />
coils with a vacuum wand or a long-handled brush. Older refrigerators may have coils located in the back. To<br />
avoid damaging your floor, try to clean them without moving the appliance. In newer ones, the coils are usually at<br />
the bottom, accessible by removing the front grill. Although some models have coils that their manufacturers say<br />
never need cleaning, pet dander can disprove that claim. Check coils periodically if you have cats or dogs.<br />
FREEZER<br />
See the refrigerator entry above for cleaning and odor control.<br />
Drain hole: In side-by-side refrigerator-freezers, ice can build up on the bottom and block the defrost drain tube.<br />
If you can see the drain hole, mix 1 teaspoon baking soda in 2 cups hot water, put it in a turkey baster, and squirt<br />
it into the hole. If this doesn’t work or if you can’t find the drain hole (in some models, it’s inaccessible), arrange<br />
for a service visit.<br />
Manual defrost: With chest freezers and old refrigerator-freezers, never try to pry off ice with a spatula or other<br />
tool; it might puncture the lining. Instead, turn off or unplug the appliance, and store food as suggested above for<br />
cleaning a refrigerator. Melt ice with a fan or a hair dryer set on low.<br />
marthastewart.com sponsored by:<br />
PAGE 7
OVEN<br />
...........................................................<br />
CLEANING APPLIANCES<br />
...........................................................<br />
When an oven starts smoking, it’s time for a heavy-duty cleaning. Wash racks by hand unless the owner’s manual<br />
says they’re dishwasher-safe. Then try this homemade cleanser from “Clean House, Clean Planet,” by Karen<br />
Logan (Pocket Books; 1997). Use aluminum foil to plug holes leading to the broiler. (Be sure to remove the foil<br />
after cleaning.) Mix 1/4 cup salt, 3/4 cup baking soda, and 1/4 cup water into a paste. Brush on, avoiding bare<br />
parts—salt corrodes metal. Let it sit overnight; remove mixture using a slotless spatula or a putty knife. Wipe<br />
with paper towels. Use a plastic scrubber or sponge to remove remaining spots.<br />
MICROWAVE OVEN<br />
Stains and odors are the biggest problems with microwaves.<br />
Plastic interiors: Wipe stains with warm, soapy water, then plain water. If that isn’t enough, clean with 1 or 2<br />
tablespoons baking soda mixed into 1 quart water. For caked-on residue, heat water in the microwave on high for<br />
3 minutes; let stand 5 minutes (keep the door closed), and then wipe interior. In the future, cover food with a<br />
paper towel before cooking or reheating.<br />
To remove odors, clean with the baking-soda solution, wipe surfaces dry, and leave the door open for a few<br />
hours. If the smell persists, stir 6 tablespoons baking soda or 1/2 cup lemon juice into 1 cup water. In a<br />
microwave-safe dish, heat mixture on high for 2 to 3 minutes. Then leave the door open for a few hours.<br />
Stainless-steel interiors: Use a plastic scrubber and a gentle abrasive. If that does not work (and you don’t mind<br />
scratching the surface), try soap-filled steel wool.<br />
Other parts: Clean doors with only warm, soapy water or a mild, nonabrasive cleaner, and a sponge or soft cloth.<br />
Wipe control panels with a barely damp (not wet) cloth; moisture behind the panel could ruin the oven.<br />
STOVE<br />
Electric burners: Wipe food off burners when they are cold. If residue remains, open windows or switch on an<br />
exhaust fan, turn burners to high, and let the food smoke off. If plastic melts onto a burner, scrape it off with a<br />
wooden spoon while coils are warm.<br />
Gas burners: You can wash porcelain-coated stovetop pans and grates by hand unless their manufacturer<br />
recommends putting them in a dishwasher. Dishwasher detergent is more alkaline than hand-dishwashing liquid,<br />
and the machines keep their contents damp longer. Both factors may cause rust at gaps in chrome or porcelain<br />
coatings. You may not see the gaps, but the dishwasher will find them. Uncoated metal parts are best soaked and<br />
then rubbed with a scouring pad.<br />
Glass cooktops: These must be protected from scratching. Clean with a pad safe for nonstick coatings, and<br />
dedicate it to only this use. Wipe up sugary spills while they are still warm. For burned-on food, use a razor blade<br />
fitted into a plastic handle: Hold it at an angle of about thirty degrees, and carefully scrape with the full width of<br />
the blade, not just a corner. Follow up with a dab of commercial cooktop cleaner on a dry paper towel, then wipe<br />
off the cleaner with another dry towel. If pans with copper or aluminum bottoms discolor your cooktop (and they<br />
might), switch to pans made of another material and use a cooktop cleaner recommended by the manufacturer;<br />
with daily application of the cleaner, stains should gradually disappear.<br />
sponsored by:<br />
marthastewart.com PAGE 8


![witch silo [Converted].ai - Martha Stewart](https://img.yumpu.com/11901278/1/190x245/witch-silo-convertedai-martha-stewart.jpg?quality=85)