

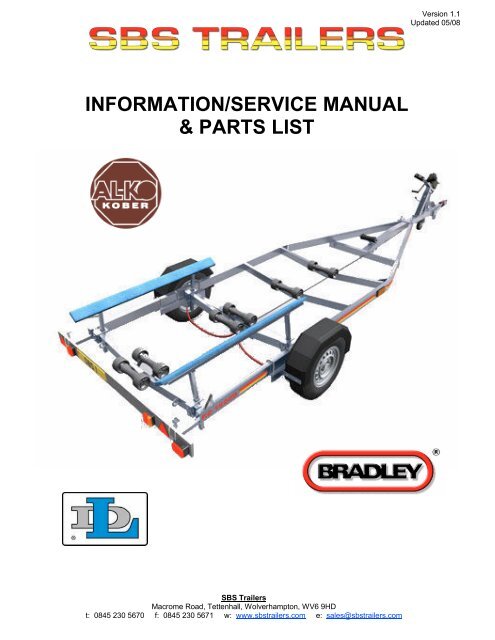
INFORMATION/SERVICE MANUAL & PARTS LIST - Boat Trailers
INFORMATION/SERVICE MANUAL & PARTS LIST - Boat Trailers
INFORMATION/SERVICE MANUAL & PARTS LIST - Boat Trailers

You also want an ePaper? Increase the reach of your titles
YUMPU automatically turns print PDFs into web optimized ePapers that Google loves.
<strong>INFORMATION</strong>/<strong>SERVICE</strong> <strong>MANUAL</strong><br />
& <strong>PARTS</strong> <strong>LIST</strong><br />
SBS <strong>Trailers</strong><br />
Macrome Road, Tettenhall, Wolverhampton, WV6 9HD<br />
t: 0845 230 5670 f: 0845 230 5671 w: www.sbstrailers.com e: sales@sbstrailers.com<br />
Version 1.1<br />
Updated 05/08
SBS <strong>Trailers</strong><br />
Macrome Road, Tettenhall, Wolverhampton, WV6 9HD<br />
t: 0845 230 5670 f: 0845 230 5671 w: www.sbstrailers.com e: sales@sbstrailers.com
TO TO BE BE COMPLETED COMPLETED BY BY DEALER<br />
DEALER<br />
Trailer Model<br />
Serial Number<br />
Date Of Manufacture<br />
Date Of Sale<br />
SBS <strong>Trailers</strong><br />
Macrome Road, Tettenhall, Wolverhampton, WV6 9HD<br />
t: 0845 230 5670 f: 0845 230 5671 w: www.sbstrailers.com e: sales@sbstrailers.com
SBS <strong>Trailers</strong><br />
Macrome Road, Tettenhall, Wolverhampton, WV6 9HD<br />
t: 0845 230 5670 f: 0845 230 5671 w: www.sbstrailers.com e: sales@sbstrailers.com
CONTENTS<br />
General Information 1<br />
1.1 You and your towing vehicle 1<br />
1.2 Your trailer 1<br />
1.2.1 Specification and loading 1<br />
1.2.2 Identification 1<br />
1.3 Axle plates 2<br />
1.4 Capacities 2<br />
1.5 Torque settings 3<br />
1.6 Tyre pressure information 3<br />
2. Loading, Towing and Unloading 4<br />
2.1 Loading your trailer 4<br />
2.2 Towing Your Trailer 4<br />
2.2.1 Attaching your trailer to your vehicle 4<br />
2.2.2 Checks before each journey 5<br />
2.2.3 Driving 6<br />
2.2.3.1 General 6<br />
2.2.3.2 Reversing 6<br />
2.3 Unloading your trailer 6<br />
3. General Maintenance 8<br />
4. Function 9<br />
4.1 Operation of the overrun brake system 9<br />
4.2 Service brake 9<br />
4.2.1 Reversing 10<br />
4.2.2 Parking brake 10<br />
4.3 Wheel bearing 11<br />
4.4 AL-KO hubs 12<br />
4.4.1 AL-KO 2051 euro hub 12<br />
4.4.2 AL-KO 2361 euro hub 13<br />
4.5 Coupling heads 14<br />
4.5.1 AL-KO 161S to suit 70mm box 14<br />
4.5.2 AL-KO 251S to suit 80mm box 15<br />
4.5.3 AL-KO 251S delta 16<br />
4.5.4 Info for all AL-KO couplings 17<br />
4.5.4 Bradley coupling head 17<br />
SBS <strong>Trailers</strong><br />
Macrome Road, Tettenhall, Wolverhampton, WV6 9HD<br />
t: 0845 230 5670 f: 0845 230 5671 w: www.sbstrailers.com e: sales@sbstrailers.com
4.6 Winches 18<br />
4.6.1 900lb winch 18<br />
4.6.2 1400lb winch & 1800lb single speed winch 19<br />
4.6.3 1800lb 2 speed winch & 2500lb 2 speed winch 21<br />
4.6.4 Information for all winches 22<br />
5. Servicing and Repair 23<br />
5.1 Brakes 23<br />
5.1.1 Adjusting the wheel brakes 23<br />
5.1.2 Servicing the wheel brakes 25<br />
5.1.3 Visual checks 26<br />
5.1.4 Function tests 26<br />
5.2 Replacing the brake shoes 27<br />
5.2.1 Expanding clutch 27<br />
5.2.2 Return springs 28<br />
5.2.3 Transmission lever 28<br />
5.2.4 Adjuster assembly 28<br />
5.2.5 Leaf springs (adjuster housing) 28<br />
5.3 Changing worn or damaged brake cables 28<br />
6. Troubleshooting 29<br />
SBS <strong>Trailers</strong><br />
Macrome Road, Tettenhall, Wolverhampton, WV6 9HD<br />
t: 0845 230 5670 f: 0845 230 5671 w: www.sbstrailers.com e: sales@sbstrailers.com
1. General Information<br />
1.1 You and your towing vehicle<br />
You are legally obliged to ensure the following:<br />
• That the towing limit recommended by your vehicle manufacturer is greater than the<br />
Gross Vehicle Weight (GVW) of your trailer. Your vehicles’ towing limit can be found<br />
in the vehicles’ handbook or on the VIN plate on the chassis.<br />
• That the tow bar fitted to your vehicle is appropriately rated.<br />
• That your driving licence permits you to tow the specified combined weight of your<br />
vehicle and trailer.<br />
Failure to do so is breaking the law!<br />
1.2 Your trailer<br />
1.2.1 Specification and loading<br />
Your trailer has been specified from information supplied to us about the craft you wish to<br />
tow (including weight, length and hull type). Do not attempt to carry any load other than<br />
that for which it has been specified.<br />
Consult your dealer or SBS <strong>Trailers</strong> if in doubt.<br />
1.2.2 Identification<br />
The unique serial number of<br />
your trailer can be found on the<br />
ID Plate at the front nearside of<br />
the A-Frame (Fig 1).<br />
Fig 1<br />
The ID Plate displays the trailer<br />
model, Serial Number, Capacity<br />
and Gross Vehicle Weight<br />
(GVW). Please ensure the ID<br />
Plate is kept in a legible<br />
condition. It is often the only means of identification and will make ordering spares,<br />
accessories or replacement parts easier. Also ensure that you have filled in the relevant<br />
information on the cover of this manual and refer to it when contacting us about your trailer.<br />
SBS <strong>Trailers</strong><br />
Macrome Road, Tettenhall, Wolverhampton, WV6 9HD<br />
t: 0845 230 5670 f: 0845 230 5671 w: www.sbstrailers.com e: sales@sbstrailers.com<br />
1
1.3 Axle plates<br />
Fig 2<br />
Fig 3<br />
1.4 Capacities<br />
• AL-KO axles are identified by the oval plate fitted<br />
on the rear of each axle. On UK production this<br />
is green in colour (Fig 2). The data on this plate<br />
is vital should information about the system be<br />
required.<br />
• The top line indicates the type of axles, the<br />
customer (using the NCC code), the year and<br />
month of manufacture.<br />
• The middle line, pre-fixed “LE” is the “Works<br />
Order” number, this is most important. On the<br />
other side of the securing pop rivet are the<br />
individual axle number and the quantity (i.e. 6 of<br />
36).<br />
• The third line is the maximum capacity of the axle<br />
and MUST NOT BE EXCEEDED. The “E” after<br />
this weight indicator stands for “Euro Axle”.<br />
• The fourth line confirms that the axle was<br />
designed for speeds in excess of 25km/h.<br />
German manufactured axles use a prefix “A” and<br />
“Achslast” (capacity) on rectangular plates (Fig 3).<br />
The vehicle weight must not exceed the maximum permissible weight. On<br />
tandem axle sets the correct capacity is NOT double that indicated on the<br />
axle (i.e. 2x750kgs = 1500kgs). Because of weight transference as axle<br />
transverse uneven ground the capacity of each axle is reduced by 100kgs to<br />
allow for the excess that may be loaded on one axle at a time. Therefore a<br />
tandem set of 2x750kg has a MAXIMUM CAPACITY of 1300kg NOT 1500kg.<br />
THIS RULE MUST BE OBSERVED.<br />
Never remove the axle identification plate from the axle tube.<br />
SBS <strong>Trailers</strong><br />
Macrome Road, Tettenhall, Wolverhampton, WV6 9HD<br />
t: 0845 230 5670 f: 0845 230 5671 w: www.sbstrailers.com e: sales@sbstrailers.com<br />
2
1.5 Torque settings<br />
Axle loading kg 900 1300 1750<br />
Wheel brake type 1637 2051 2361<br />
Bearing size 30/60-37 39/72-37 42/80-42<br />
Flange nut Clearance (mm 32/36 36/41<br />
Thread M24 x 1.5 M24 x 1.5 M27 x 2<br />
Tightening Torque (Nm)<br />
280-300<br />
290 +/- 10 (214 +/- 7.5 lbs/ft)<br />
DIN Back nut Clearance (mm) 36 46<br />
Thread M24 M30<br />
Tightening torque (Nm)<br />
600 to 650 700 to 750<br />
(DO NOT TOUCH – if disturbed return to AL-KO)<br />
Shock absorber attachment (Nm) 86 Nm (63.5 lbs/ft)<br />
Axle attachment (Nm) 86 Nm (63.5 lbs/ft)<br />
1.6 Tyre pressure information (at max load, to be used as guideline only)<br />
TYE SIZE PLY MAX PSI MAX BAR TYE SIZE PLY MAX PSI MAX BAR<br />
400 x 8 4 60 4.14 165 x 13 4 36 2.48<br />
520 x 10 4 32 2.21 165 x 13 8 65 4.48<br />
500 x 10 4 40 2.76 175 x 13 6 50 3.45<br />
500 x 10 6 60 4.14 175 x 13 8 65 4.48<br />
500 x 10 8 65 4.48 185/70R13 8 87 6.00<br />
145 x 10 4 35 2.41 195/50R13 8 80 5.52<br />
145 x 10 8 42 2.90 175 x 14 8 65 4.48<br />
155 x 13 4 42 2.90 185 x 14 8 65 4.48<br />
SBS <strong>Trailers</strong><br />
Macrome Road, Tettenhall, Wolverhampton, WV6 9HD<br />
t: 0845 230 5670 f: 0845 230 5671 w: www.sbstrailers.com e: sales@sbstrailers.com<br />
3
2. Loading, Towing and Unloading<br />
2.1 Loading your trailer<br />
• Recover the craft onto the trailer by using the trailer winch.<br />
• Check the winch and ratchet are undamaged then extend and attach the winch strap<br />
to the external bow eye on the hull of the craft.<br />
• Never use any other fitting on the boat to attach the winch strap. To unwind or reel<br />
out the strap, securely grip the winch handle and apply force in a clockwise direction<br />
so that the ratchet lever can be disengaged. Carefully turn the handle in a counterclockwise<br />
direction. Do not lose control.<br />
Never use the winch to pull the trailer up a slip or to let it down a slip. On<br />
many winches the handle cannot be disengaged. If the ratchet lever fails<br />
then the handle will also spin violently. Also, never exceed rated capacity –<br />
excess load may cause premature failure and could result in serious<br />
personal injury.<br />
• Never drive the boat onto the trailer as this can result in serious damage to the hull if<br />
you misjudge it.<br />
• Be aware of people in the water trying to help and make sure they stay away from the<br />
propeller.<br />
• Wind the winch strap onto the winch reel by turning the winch handle in a clockwise<br />
direction with the ratchet lever in up position. The ratchet should produce a loud<br />
clicking noise. Make sure that the ratchet lever is in up position and holding the load<br />
before releasing the handle.<br />
• Never apply load on the winch with the strap fully extended. Always leave at least<br />
three turns of strap on the reel.<br />
• Only operate the winch manually. The winch should not be operated by a motor of<br />
any kind. If the winch cannot be cranked easily with one hand then it is probably<br />
overloaded.<br />
• Never park your loaded trailer for any length of time with the handbrake on, as the<br />
brakes will bind to the drums. Always chock the wheels – do not rely on the<br />
handbrake to hold the trailer on an incline.<br />
2.2 Towing your trailer<br />
2.2.1 Attaching the trailer to your towing vehicle<br />
Become methodical about hitching up so you do not forget anything. Use the following<br />
instructions to safely attach your trailer to your vehicle.<br />
• Slowly reverse your vehicle to within a few feet of the coupling. You may need a<br />
helper to stand with their hands showing you where the hitch is.<br />
• Raise the front of the trailer by means of the jockey wheel assembly to the required<br />
height and roll the trailer up to the rear of the towing vehicle. Do not use the winch<br />
handle, jockey wheel or any other moving part for pulling or manoeuvring the trailer.<br />
SBS <strong>Trailers</strong><br />
Macrome Road, Tettenhall, Wolverhampton, WV6 9HD<br />
t: 0845 230 5670 f: 0845 230 5671 w: www.sbstrailers.com e: sales@sbstrailers.com<br />
4
• If the trailer has tandem axles then raising the jockey wheel sufficiently to raise the<br />
front wheels off the ground will aid manoeuvrability.<br />
• Lower the trailer by means of the jockey wheel assembly onto the tow ball of the<br />
vehicle. Some coupling heads have a locking handle which stays up and<br />
automatically locks onto the ball, others have to be held up and may have an indicator<br />
to show the ball is in place.<br />
• Once the coupling head appears to be locked on, lower the jockey wheel a few turns<br />
to lift the back of the vehicle to prove that the coupling head is on properly, then fully<br />
raise the wheel before unclamping it and, finally, locking it fully raised.<br />
• Check that the wheel is not interfering with the operation of the overrun mechanism –<br />
this could cause damage to your trailer or your vehicle.<br />
• Attach the safety breakaway cable to the rear of the vehicle. This cable will apply the<br />
handbrake if for any reason the trailer becomes detached whilst towing. (Clip the<br />
breakaway cable to the special rings that some tow bars have or loop it around the bar<br />
making sure not to foul the coupling head. Do not loop it around the tow ball neck<br />
unless you can find no alternative).<br />
• Check that the breakaway cable and lighting cables have enough slack for cornering<br />
but will not touch the ground.<br />
• Plug in the lighting plug and check all lights and indicators. The electrical plug only fits<br />
one way so line up its cutout with the lug on the bottom edge of the socket. Some<br />
cars have two sockets – use the one with the black cover flap. The white flap is for<br />
caravan supplementary electrical systems.<br />
2.2.2 Checks before each journey<br />
• If the trailer is laden is the load correctly distributed, i.e. not too much or too little nose<br />
weight?<br />
• Is the load within the trailers official payload?<br />
• Is the gross weight being towed within the towing vehicle manufacturers’<br />
recommended maximum limit (whether braked or unbraked)?<br />
• Is the load correctly secured?<br />
• Are all of the electrical components undamaged and working correctly?<br />
• Is the correct number plate fitted (both registration and style)?<br />
• Is the breakaway cable or secondary coupling undamaged and correctly connected to<br />
a suitable point on the tow bar or towing vehicle and the trailer correctly coupled to the<br />
tow ball?<br />
• Are the tyre pressures correct with all tyres free from cuts and bulges and do they<br />
have adequate tread (including the spare)? Tyres must have a continuous tread<br />
depth of at least 1.6mm on cars, light vans and trailers, across the centre three<br />
quarters of the width of the tyre (1mm for other vehicles)<br />
• Are the wheel nuts/bolts tightened to the correct torque?<br />
• Are the mudguards in satisfactory condition and secure?<br />
• Is the coupling height correct, i.e. not excessively nose down or nose up? Make sure<br />
that the trailer is level when coupled to the towing vehicle.<br />
• Unless the trailer is very light or unloaded is the nose weight between 50 and 100kg?<br />
• Are the jockey wheel and any corner steadies or prop stands fully wound up and<br />
secure?<br />
SBS <strong>Trailers</strong><br />
Macrome Road, Tettenhall, Wolverhampton, WV6 9HD<br />
t: 0845 230 5670 f: 0845 230 5671 w: www.sbstrailers.com e: sales@sbstrailers.com<br />
5
2.2.3 Driving<br />
2.2.3.1 General<br />
Always keep to the legal limit for the road that you are using. In the UK:<br />
• 30mph limit applies on all roads with street lighting unless signs show otherwise.<br />
• 50mph applies on singles carriageways unless signs show otherwise.<br />
• 60mph applies on dual carriageways, motorways and all other “National Speed Limit”<br />
roads.<br />
• You must not travel in the right-hand lane of a motorway with three lanes or more if<br />
you are towing a trailer.<br />
• Always drive at a speed that is well within your capabilities and is suitable for the road<br />
and weather conditions that prevail at the time.<br />
• If your trailer begins to snake or swerve ease of the accelerator and reduce speed<br />
GENTLY. This can happen if you are driving too fast or if load on the trailer is wrongly<br />
positioned.<br />
• Do NOT brake sharply on a bend (this could cause a possible jack-knife situation).<br />
Reduce speed before bends and use the appropriate gear for the speed that you are<br />
travelling then gently accelerate out of the bend.<br />
• When turning with your trailer, the overall length of your towing vehicle and trailer<br />
effectively lengthens the wheelbase. Consequently, it is necessary to compensate by<br />
slightly widening your turning circle to avoid curbing. Remember that your trailer does<br />
not follow the same line around a corner as the towing vehicle, it will cut the corner.<br />
2.2.3.2 Reversing<br />
Never reverse a trailer without checking behind you because of the large<br />
blind spot. Ideally, have someone see you back, especially in crowded<br />
places.<br />
Reversing a trailer is skill that can be mastered with a little perseverance by anyone who<br />
has learned the basic theory.<br />
Find somewhere with plenty of space and practice reversing. It helps to have someone<br />
who knows how to do it to tell you if and where you are going wrong.<br />
2.3 Unloading your trailer<br />
The first step to safely launching your craft is to check the ground over which the trailer and<br />
vehicle will be running. Ensure that it is relatively level and not too soft. Avoid launching<br />
on surfaces that are too soft and loose as it may cause difficulties when removing your<br />
trailer and vehicle from the launch area. Ensure that there is enough depth of water for<br />
your boat to clear any objects in the water or on the sea/river bed. Once you are satisfied<br />
with the launch area please follow these instructions to help you launch easily.<br />
• Ensure that all security straps are removed from over the boat and that the light set<br />
has been removed from the back of the trailer.<br />
SBS <strong>Trailers</strong><br />
Macrome Road, Tettenhall, Wolverhampton, WV6 9HD<br />
t: 0845 230 5670 f: 0845 230 5671 w: www.sbstrailers.com e: sales@sbstrailers.com<br />
6
• Reverse slowly down to the waters edge with the assistance of somebody in the boat<br />
and continue reversing until the boat begins to float.<br />
• If using a bunk style trailer you will need to submerge the trailer (on an average slope<br />
slipway) to roughly halfway up to the wheel. With a roller trailer you should be able to<br />
launch as soon as your boat has around 300mm clearance of water under the keel<br />
once floating.<br />
• Once you have reached this depth, push the boat off the trailer slowly.<br />
Never use the winch to pull the trailer up a slip or to let it down a slip. On<br />
many winches the handle cannot be disengaged. If the ratchet lever fails<br />
then the handle will also spin violently.<br />
• Be aware of any tidal or stream effects in the water otherwise you may end up with<br />
your boat floating in the wrong direction.<br />
• Once your boat has been launched, thoroughly rinse the trailer with fresh water – this<br />
will greatly increase the life of your trailer and its parts. In the case of braked trailers,<br />
once this has been done drive your trailer for a few hundred metres and apply the<br />
brakes a few times. This will heat up the brake drums and dry up any excess fresh<br />
water on the brake pads and drums.<br />
SBS <strong>Trailers</strong><br />
Macrome Road, Tettenhall, Wolverhampton, WV6 9HD<br />
t: 0845 230 5670 f: 0845 230 5671 w: www.sbstrailers.com e: sales@sbstrailers.com<br />
7
3. General Maintenance<br />
Due to the harsh environment many trailers operate in, the following points should be<br />
noted:<br />
• Whilst all components carry manufacturers warranty of 12months against defective<br />
parts, immersion in saltwater invalidates some warranties.<br />
• The frame and axle beam together are galvanised and hence offer the best protection<br />
against corrosion available. U-bolts, brake back plates, fastenings, winches and other<br />
fitments are electro plated which does not offer the extended protection of galvanised<br />
parts. Therefore special care of additional protective coatings should be applied to<br />
these components.<br />
• The Alko Euro hubs as described in this manual are fitted with the waterproof<br />
bearings. However this does not mean they are impervious to the vagaries of<br />
saltwater immersion. Regular service inspections are still necessary to ascertain the<br />
condition of the bearings. The simplest way to do this is with the wheels off the<br />
ground. Place the hands on the top of the free wheel and rock back and forth to check<br />
for bearing play. A small amount of play should be present. If the wheel rocks<br />
excessively – more than 2mm – the bearings are either worn or the flange nut needs<br />
to be checked that it is done up to the correct torque.<br />
• Also, at the same time the wheel can be spun. It should spin freely. If a rumbling or<br />
grinding noise can be heard it is likely that the bearing is worn and should be replaced.<br />
First check that any noise is not due to brakes binding. Once it is determined that the<br />
bearing is failing then the hub must be removed (see 5.1.2). If the hub found to be<br />
severely corroded then we recommend replacing the complete hub. Order from the<br />
hub reference no. stamped on the hub.<br />
• The principle cause of bearing failure, in our opinion, is due to poorly maintained or<br />
incorrectly adjusted brake cables. Due to their exposed position on the trailer they<br />
suffer from contamination from road salt and dirt and spray before they have even got<br />
near a launch site! These cables must be regularly checked to ensure that they allow<br />
the brake shoes to release fully. If not they can cause the shoes to bind on the hub<br />
causing excessive heat build up which literally boils the grease out of the bearing<br />
leading to inevitable failure.<br />
• <strong>Trailers</strong> from 2007 onwards are fitted with stainless steel cables. These are now<br />
available as retrofit for older trailers.<br />
• The winch-webbing strap must also be regularly checked for damage or wear.<br />
Replace when worn. As far as possible ensure that during recovery the strap lies flat<br />
against itself. This will help prolong its life and avoid snarl-ups.<br />
Following these simple and largely common sense guides, together with the service details<br />
outlined in this manual should ensure years of trouble free trailing.<br />
If you require clarification of any points or have any comments with regards to the quality<br />
and design of your SBS trailer we would be pleased to hear from you. Contact details are<br />
as below.<br />
SBS <strong>Trailers</strong><br />
Macrome Road, Tettenhall, Wolverhampton, WV6 9HD<br />
t: 0845 230 5670 f: 0845 230 5671 w: www.sbstrailers.com e: sales@sbstrailers.com<br />
8
4. Function<br />
4.1 Operation of the overrun brake system<br />
4.2 Service brake<br />
The overrun device can be described as the control device if the overrun brake system. A<br />
drawbar force is produced at the coupling point by reducing the speed of the towing<br />
vehicle. After the threshold level has been passed, the draw-shaft is pushed in, thus<br />
actuating the overrun lever, the wheel brakes (1, 2) are then applied via the expanding<br />
clutch (3) – (Fig 6).<br />
Fig 6<br />
Fig 5<br />
SBS <strong>Trailers</strong><br />
Macrome Road, Tettenhall, Wolverhampton, WV6 9HD<br />
t: 0845 230 5670 f: 0845 230 5671 w: www.sbstrailers.com e: sales@sbstrailers.com<br />
9
Fig 7<br />
4.2.1 Reversing<br />
When reversing, the towing vehicle pushes in<br />
the draw-shaft of the overrun device. The<br />
brake shoes (1, 2) are pressed against the<br />
brake drum via the transmission lever (4),<br />
brake linkage, Bowden cable and expander<br />
clutch (3). The brake drum turns backwards,<br />
taking the trailing shoe (1) with it. The<br />
transmission lever (4) swings back and offsets<br />
the whole pedal travel. The braking effect is<br />
virtually cancelled out and the bottom plate<br />
travels backwards (figs 6 and 7).<br />
4.2.2 Parking brake<br />
On the spring cylinder version, engage the<br />
hand-brake lever right up to the last tooth<br />
(90º). On the gas strut handbrake version,<br />
pull the handbrake over dead centre. The<br />
braking shoes (1, 2) are pressed against the<br />
brake drum by the brake linkage, Bowden<br />
cables and expander clutch (3), and this<br />
applies the trailer brakes (Fig 8).<br />
Fig 8<br />
When the caravan/trailer has been reversed,<br />
the brake drum will also rotate backwards.<br />
The trailing brake shoe (1) is taken with it and moves the transmission lever (4) back. This<br />
lever then pushes the leading brake shoe (2) against the stop (6). The caravan/trailer is<br />
then braked.<br />
Fig 9<br />
It must be noted that when the<br />
handbrake is applied, the<br />
vehicle may roll<br />
approximately 25cm (10”)<br />
backwards before the parking<br />
brake force is used to its<br />
fullest extent.<br />
SBS <strong>Trailers</strong><br />
Macrome Road, Tettenhall, Wolverhampton, WV6 9HD<br />
t: 0845 230 5670 f: 0845 230 5671 w: www.sbstrailers.com e: sales@sbstrailers.com<br />
10
Fig 10<br />
4.3 Wheel bearing<br />
The wheel bearing is a double-row inclined ball<br />
bearing. It has the following advantages over normal<br />
bearings:<br />
• No adjustment necessary.<br />
• Easy to maintain (lubricated for life and sealed).<br />
• Protected against dirt ingress (sealed unit).<br />
• Less sensitive to seizure than a taper roller<br />
bearing<br />
• All trailers from 2007 onwards are fitted with<br />
waterproof bearings.<br />
The bearing must not be pressed out<br />
of the drum as this may damage the<br />
bearing and brake drum.<br />
SBS <strong>Trailers</strong><br />
Macrome Road, Tettenhall, Wolverhampton, WV6 9HD<br />
t: 0845 230 5670 f: 0845 230 5671 w: www.sbstrailers.com e: sales@sbstrailers.com<br />
11
4.4 AL-KO hubs<br />
4.4.1 AL-KO 2361 euro hub<br />
SBS <strong>Trailers</strong><br />
Macrome Road, Tettenhall, Wolverhampton, WV6 9HD<br />
t: 0845 230 5670 f: 0845 230 5671 w: www.sbstrailers.com e: sales@sbstrailers.com<br />
12
4.4.1 AL-KO 2051 Euro Hub<br />
SBS <strong>Trailers</strong><br />
Macrome Road, Tettenhall, Wolverhampton, WV6 9HD<br />
t: 0845 230 5670 f: 0845 230 5671 w: www.sbstrailers.com e: sales@sbstrailers.com<br />
13
4.5 Coupling heads<br />
4.5.1 AL-KO 161S to suit 70mm box<br />
SBS <strong>Trailers</strong><br />
Macrome Road, Tettenhall, Wolverhampton, WV6 9HD<br />
t: 0845 230 5670 f: 0845 230 5671 w: www.sbstrailers.com e: sales@sbstrailers.com<br />
14
4.5.2 AL-KO 251S to suit 80mm box<br />
SBS <strong>Trailers</strong><br />
Macrome Road, Tettenhall, Wolverhampton, WV6 9HD<br />
t: 0845 230 5670 f: 0845 230 5671 w: www.sbstrailers.com e: sales@sbstrailers.com<br />
15
4.5.3 AL-KO 251S delta<br />
SBS <strong>Trailers</strong><br />
Macrome Road, Tettenhall, Wolverhampton, WV6 9HD<br />
t: 0845 230 5670 f: 0845 230 5671 w: www.sbstrailers.com e: sales@sbstrailers.com<br />
16
4.5.4 Info for all AL-KO couplings<br />
The coupling head is designed to engage automatically with the international 50mm towing<br />
ball recommended by British Standards Institution, National Caravan Council, Society of<br />
Motor Manufacturers and Traders and ISO.<br />
AL-KO coupling heads incorporate a correct attachment indicator.<br />
Coupling heads should never be drilled.<br />
AL-KO produce several types of coupling head each having provision for an anti-theft<br />
device as an optional extra which consists of a key operated brass insert. The anti-theft<br />
device comes complete with two keys. Securing the coupling head inhibits movement of<br />
the locking catch, making it possible to lock the coupling whether or not the towing ball is<br />
connected.<br />
4.5.4 Bradley coupling head<br />
SBS <strong>Trailers</strong><br />
Macrome Road, Tettenhall, Wolverhampton, WV6 9HD<br />
t: 0845 230 5670 f: 0845 230 5671 w: www.sbstrailers.com e: sales@sbstrailers.com<br />
17
4.6 Winches<br />
4.6.1 900lb winch<br />
Some winch spares may need to be ordered in specially.<br />
Please call for details.<br />
SBS <strong>Trailers</strong><br />
Macrome Road, Tettenhall, Wolverhampton, WV6 9HD<br />
t: 0845 230 5670 f: 0845 230 5671 w: www.sbstrailers.com e: sales@sbstrailers.com<br />
18
4.6.2 1400lb winch & 1800lb single speed winch<br />
SBS <strong>Trailers</strong><br />
Macrome Road, Tettenhall, Wolverhampton, WV6 9HD<br />
t: 0845 230 5670 f: 0845 230 5671 w: www.sbstrailers.com e: sales@sbstrailers.com<br />
19
Some winch spares may need to be ordered in specially. Please call for details.<br />
SBS <strong>Trailers</strong><br />
Macrome Road, Tettenhall, Wolverhampton, WV6 9HD<br />
t: 0845 230 5670 f: 0845 230 5671 w: www.sbstrailers.com e: sales@sbstrailers.com<br />
20
4.6.3 1800lb 2 speed winch & 2500lb 2 speed winch<br />
Some winch spares may need to be ordered in specially. Please call for details.<br />
SBS <strong>Trailers</strong><br />
Macrome Road, Tettenhall, Wolverhampton, WV6 9HD<br />
t: 0845 230 5670 f: 0845 230 5671 w: www.sbstrailers.com e: sales@sbstrailers.com<br />
21
4.6.4 Information for all winches<br />
SBS <strong>Trailers</strong><br />
Macrome Road, Tettenhall, Wolverhampton, WV6 9HD<br />
t: 0845 230 5670 f: 0845 230 5671 w: www.sbstrailers.com e: sales@sbstrailers.com<br />
22
5. Servicing and Repair<br />
5.1 Brakes<br />
5.1.1 Adjusting the wheel brakes<br />
Fig 12<br />
Fig 11<br />
Before adjusting the wheel<br />
brakes always rotate the<br />
wheel(s) in the forward<br />
direction.<br />
• Lift the caravan/trailer using a lifting<br />
platform.<br />
• Ensure the coupling head and overrun<br />
draw shaft are fully extended.<br />
• Release the handbrake completely.<br />
• Completely release the brake linkage<br />
on the balance bar (ball nut and<br />
hexagon nut, Fig 11)<br />
• Check the free play in the wheel<br />
brake.<br />
The free play should be as uniform as<br />
possible for 2 and 4 wheel brakes<br />
respectively.<br />
Nominal: 4-6mm on single axle<br />
6-8mm on tandem axles<br />
Measured on the Bowden inner cable<br />
where attached to abutment (bracket) on<br />
axle tube (on tandem axles the abutment is<br />
always on the forward axle).<br />
SBS <strong>Trailers</strong><br />
Macrome Road, Tettenhall, Wolverhampton, WV6 9HD<br />
t: 0845 230 5670 f: 0845 230 5671 w: www.sbstrailers.com e: sales@sbstrailers.com<br />
23
Fig 13<br />
Fig 14<br />
• Only ever set or adjust the wheel brake by<br />
means of the adjuster screw (1). Adjust in<br />
the direction of the arrow and release against<br />
the direction of the arrow (Fig 13).<br />
• Reconnect the brake linkage to the balance<br />
bar and apply the handbrake hard several<br />
times to allow the braking system to settle.<br />
Apply preload by tightening the ball nuts (i.e.<br />
the inner Bowden cables are easily pulled<br />
out, 1-2mm)<br />
• Use a locknut to locate the ball nuts to the<br />
hexagon nuts. Lubricate the contact surfaces<br />
of the ball nuts (Fig 11).<br />
• On the spring cylinder version (2), adjust<br />
the locking nuts M10 (1) to the spring<br />
cylinder until there is approximately 1mm<br />
free play between the tension bar (3) and<br />
the self-locking hexagon nuts M10 (Fig<br />
14). N.B on some chassis the locking<br />
nuts (1) are replaced with a single<br />
Nylock (self-locking) nut.<br />
Check the setting<br />
• Apply the handbrake lever up to the first or second tooth and when the wheels are<br />
turned in the direction of travel, check whether there is equal braking resistance. On<br />
the gas strut version; hold the handbrake lever on the first tooth manually.<br />
When adjusting the wheel brake, only turn the wheels in the forward<br />
direction so that reverse mode is not actuated.<br />
SBS <strong>Trailers</strong><br />
Macrome Road, Tettenhall, Wolverhampton, WV6 9HD<br />
t: 0845 230 5670 f: 0845 230 5671 w: www.sbstrailers.com e: sales@sbstrailers.com<br />
24
5.1.2 Servicing the wheel brakes<br />
Fig 15<br />
Fig 16<br />
• Replace worn brake drums showing<br />
grooves or significant corrosion.<br />
Brake drums must not be<br />
re-skimmed.<br />
• Completely release the handbrake.<br />
Loosen the linkages if necessary.<br />
• Remove the wheel rim and tyre.<br />
• Mark the position of the plastic cap on<br />
the rocker arm with a felt tip pen so<br />
that any movement can be detected<br />
(Fig 15).<br />
If the stub axle or back nut are<br />
moved in any way this will alter<br />
the toe-in and camber (resulting<br />
in excessive and unequal tyre<br />
wear). Should such movement<br />
take place the axle will have to be<br />
removed and returned to AL-KO<br />
to be re-aligned and or repaired.<br />
• Knock cap (1) with a hammer and a<br />
blunt chisel from below. When<br />
reinstalling, use a new cap (1) and<br />
locate using a former (2) (Fig 16).<br />
• Unscrew the flanged nut. When<br />
refitting, use a new self-locking flanged<br />
nut.<br />
• Before fitting a new flanged nut, a<br />
small amount of the special mineral<br />
grease (AL-KO Part No. 800052) must<br />
be applied to the stub axle thread.<br />
Note the tightening torque. The<br />
wheel bearing free play is<br />
adjustable via the tightening<br />
torque of the flanged nut (Section<br />
1.6, Torque Settings).<br />
• Turn the brake drum slightly by hand<br />
and remove. If necessary, hit the<br />
cooling fins with a rubber mallet.<br />
SBS <strong>Trailers</strong><br />
Macrome Road, Tettenhall, Wolverhampton, WV6 9HD<br />
t: 0845 230 5670 f: 0845 230 5671 w: www.sbstrailers.com e: sales@sbstrailers.com<br />
25
5.1.3 Visual checks<br />
Fig 17<br />
• Check the condition of the brake shoes<br />
The wear on the shoes is greatest where the inspection hole opening is located on the<br />
brake back plate. In the case of the simplex brake, the leading shoe (overrun shoe in the<br />
direction in which the drum turns) is pressed against the brake drum. The secondary shoe<br />
(trailing shoe) is pressed away from the drum against the direction in which the drum turns.<br />
This is why the two brake shoes have different degrees of wear.<br />
Fig 18<br />
5.1.4 Function tests<br />
• The transmission lever (1) must be abut<br />
on the adjusting housing (2) stop.<br />
• Check that the expander pivot, adjusting nut and transmission lever are moving<br />
smoothly. Check the adjuster housing and adjuster assembly are lubricated (use<br />
Molybdenum Disulphide grease).<br />
• Check the tension on the leaf spring and check that the adjusting nut is properly<br />
engaged.<br />
• Check the pressure on the brake shoe pressure springs.<br />
SBS <strong>Trailers</strong><br />
Macrome Road, Tettenhall, Wolverhampton, WV6 9HD<br />
t: 0845 230 5670 f: 0845 230 5671 w: www.sbstrailers.com e: sales@sbstrailers.com<br />
26
5.2 Replacing the brake shoes<br />
• If the individual parts are to be removed from the wheel brake, the Bowden cable on<br />
the balance bar must be loosened and unhooked from the expander clutch.<br />
• Replace brake shoes where linings have a residual thickness of less than 2mm. Use<br />
genuine AL-KO replacement parts.<br />
• Also replace the shoe pressure springs and cover plate if required.<br />
Fig 19<br />
Fig 20<br />
• On type 1637, the left and right brake shoes<br />
are different. The embossed markings (see<br />
arrows) must be followed when fitting brake<br />
shoes (Fig 19).<br />
• On types 2051 and 2361, the left and right<br />
shoes are identical.<br />
• Replace the brake shoe pressure springs if<br />
any signs of weakness.<br />
5.2.1 Expanding clutch<br />
• Lubricate stiff expander lever pivots.<br />
• Replace expanders that have seized-up<br />
pivots.<br />
• Note the correct position for fitting:<br />
Expander lever pivot arm (2) to transmission<br />
lever pivot bolt (1) (Fig 20). The two pivot points<br />
must always be on the same side of the overall<br />
assembly.<br />
If the above instructions are not<br />
followed the brake application<br />
stroke will be altered and the<br />
braking effect impaired.<br />
SBS <strong>Trailers</strong><br />
Macrome Road, Tettenhall, Wolverhampton, WV6 9HD<br />
t: 0845 230 5670 f: 0845 230 5671 w: www.sbstrailers.com e: sales@sbstrailers.com<br />
27
5.2.2 Return springs<br />
• Replace relaxed or damaged return (pull off) springs.<br />
5.2.3 Transmission lever<br />
• Remove stiff transmission levers and lubricate the pivot bolt.<br />
• Replace seized-up transmission levers together with pivot bolts.<br />
• If the transmission lever does not abut on the adjusting housing stop, the extension<br />
spring must be replaced (Fig 18).<br />
5.2.4 Adjusting assembly<br />
• Lubricate stiff adjusting nuts using Molybdenum Disulphide grease.<br />
• Unscrew the adjusting screw and lubricate the thread.<br />
• Replace seized-up adjusting screw together with adjusting nuts.<br />
5.2.5 Leaf springs (adjuster housing)<br />
• Replace relaxed leaf springs.<br />
N.B. The adjuster screw, nut and leaf springs are only supplies as a complete assembly.<br />
The part numbers for these are as follows: -<br />
System 1637 - 387706<br />
System 2051 - 387323<br />
System 2361 - 387323<br />
All friction points must be lubricated with Molybdenum Disulphide grease<br />
(AL-KO Part No. 800098)<br />
5.3 Changing worn or damaged brake cables<br />
Remove the control mechanism at the centre of the axle.<br />
Slacken and drop cable end from the centre axle bracket and detach cables.<br />
To refit, reverse the procedure.<br />
SBS <strong>Trailers</strong><br />
Macrome Road, Tettenhall, Wolverhampton, WV6 9HD<br />
t: 0845 230 5670 f: 0845 230 5671 w: www.sbstrailers.com e: sales@sbstrailers.com<br />
28
6. Troubleshooting<br />
Symptom Possible Cause Remedy<br />
Braking effect too weak Towing-shaft pushes in fully Adjust<br />
Linings not bedded in Will wear off after the<br />
vehicle has braked several<br />
times.<br />
Linings damaged Replace the shoe set<br />
Friction losses too great Ensure that the transmission<br />
Corrosion of the tow-shaft linage, including the brake<br />
control rod, is moving<br />
smoothly<br />
Reversal is sluggish or Only occurs if the braking Re-adjust the braking<br />
impossible<br />
system has been set too<br />
tightly<br />
system<br />
Brake overheats during<br />
forward travel<br />
Handbrake effect too weak<br />
Jerky braking<br />
Set incorrectly Re-adjust the braking<br />
system<br />
Braking system is not<br />
released properly during<br />
forward travel<br />
Release the handbrake<br />
Check the transmission<br />
linkage and transmission<br />
lever of the overrun device<br />
(check that they are moving<br />
smoothly)<br />
Wheel brake soiled Clean<br />
Cable or Bowden cable Replace Bowden cable<br />
buckled<br />
Return springs weak or Replace springs<br />
broken<br />
Rust beginning to form in Replace the brake drum<br />
the brake drum<br />
(see page 9) and also the<br />
brake shoes if necessary<br />
Linings not bedded in Will wear off after the<br />
vehicle has braked several<br />
times.<br />
Friction losses too great Ensure that the transmission<br />
linage, including the brake<br />
control rod, is moving<br />
smoothly<br />
Set incorrectly Re-adjust the braking<br />
system<br />
Defective shock absorber on Replace the shock absorber<br />
the overrun device<br />
Too much free play in the Re-adjust the braking<br />
braking system<br />
system<br />
SBS <strong>Trailers</strong><br />
Macrome Road, Tettenhall, Wolverhampton, WV6 9HD<br />
t: 0845 230 5670 f: 0845 230 5671 w: www.sbstrailers.com e: sales@sbstrailers.com<br />
29
SBS <strong>Trailers</strong><br />
Macrome Road, Tettenhall, Wolverhampton, WV6 9HD<br />
t: 0845 230 5670 f: 0845 230 5671 w: www.sbstrailers.com e: sales@sbstrailers.com<br />
30
You can order your spare parts or request this<br />
booklet in large print, full colour or soft copy by<br />
phone, fax or e-mail;<br />
Tel: 0845 230 5670<br />
Fax: 0845 230 5671<br />
e-mail: sales@sbstrailers.com<br />
You can also contact us at the usual address;<br />
SBS <strong>Trailers</strong><br />
Macrome Road<br />
Tettenhall<br />
Wolverhampton<br />
WV6 9HD<br />
SBS <strong>Trailers</strong><br />
Macrome Road, Tettenhall, Wolverhampton, WV6 9HD<br />
t: 0845 230 5670 f: 0845 230 5671 w: www.sbstrailers.com e: sales@sbstrailers.com