Owners Manua - BBQ Grills
Owners Manua - BBQ Grills
Owners Manua - BBQ Grills

You also want an ePaper? Increase the reach of your titles
YUMPU automatically turns print PDFs into web optimized ePapers that Google loves.
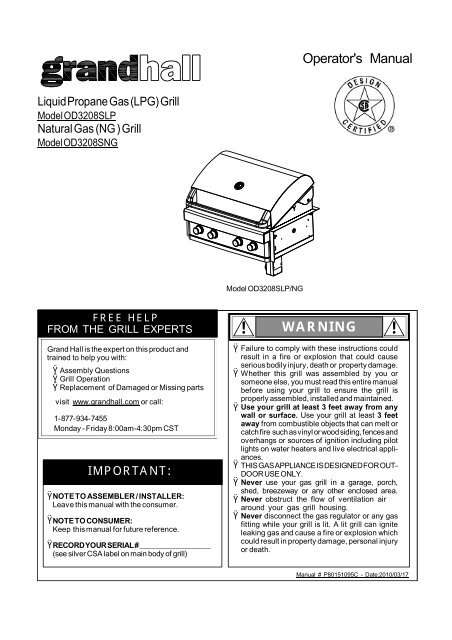
Liquid Propane Gas (LPG) Grill<br />
Model OD3208SLP<br />
Natural Gas (NG ) Grill<br />
Model OD3208SNG<br />
FREE HELP<br />
FROM THE GRILL EXPERTS<br />
Grand Hall is the expert on this product and<br />
trained to help you with:<br />
Assembly Questions<br />
Grill Operation<br />
Replacement of Damaged or Missing parts<br />
visit www.grandhall.com or call:<br />
1-877-934-7455<br />
Monday - Friday 8:00am-4:30pm CST<br />
IMPORTANT:<br />
NOTE TO ASSEMBLER / INSTALLER:<br />
Leave this manual with the consumer.<br />
NOTE TO CONSUMER:<br />
Keep this manual for future reference.<br />
RECORD YOUR SERIAL # __________________<br />
(see silver CSA label on main body of grill)<br />
Model OD3208SLP/NG<br />
Operator's <strong>Manua</strong>l<br />
! WARNING !<br />
Failure to comply with these instructions could<br />
result in a fire or explosion that could cause<br />
serious bodily injury, death or property damage.<br />
Whether this grill was assembled by you or<br />
someone else, you must read this entire manual<br />
before using your grill to ensure the grill is<br />
properly assembled, installed and maintained.<br />
Use your grill at least 3 feet away from any<br />
wall or surface. Use your grill at least 3 feet<br />
away from combustible objects that can melt or<br />
catch fire such as vinyl or wood siding, fences and<br />
overhangs or sources of ignition including pilot<br />
lights on water heaters and live electrical appliances.<br />
THIS GAS APPLIANCE IS DESIGNED FOR OUT-<br />
DOOR USE ONLY.<br />
Never use your gas grill in a garage, porch,<br />
shed, breezeway or any other enclosed area.<br />
Never obstruct the flow of ventilation air<br />
around your gas grill housing.<br />
Never disconnect the gas regulator or any gas<br />
fitting while your grill is lit. A lit grill can ignite<br />
leaking gas and cause a fire or explosion which<br />
could result in property damage, personal injury<br />
or death.<br />
<strong>Manua</strong>l # P80151095C - Date:2010/03/17
Table of Contents<br />
Primary Safety Warnings...........................1-3<br />
Pre-Assembly Instructions..............................3<br />
Part Diagrams and Lists ..........................4-7<br />
Assembly Instructions................................8-10<br />
LP Gas Tank Installation...................... 11-13<br />
Natural Gas Connection..............................14<br />
Use & Care Instructions:<br />
• Lighting Instructions.................................15<br />
• Troubleshooting.........................................16<br />
Cleaning and Maintenance..........................17<br />
Cooking Guide........................................ A1-A4<br />
Frequently Asked Questions ................ A5-A6<br />
Warranty Terms.............................Back Cover<br />
Registered and unregistered Trademarks held by<br />
Grand Hall include the following:<br />
Grand Hall and design®, DS Grill and design®,<br />
Crossray Lateral Infrared Burner Technology, Command<br />
Flame®, Smooth Start® Electronic Ignition System,<br />
Ceramic Savor Plates®, Sear-zzler®, Stainless Clad<br />
Therma-Core® Cooking Grids, Grand Café and design®,<br />
Grand Mark and design®, Grand Chef and design®,<br />
Grand Royale and design®, Globe Café and design®,<br />
Urban Café and design®, Smokeless Grill and design®.<br />
Patents held by Grand Hall include the following:<br />
The Crossray Burner System by Grand Hall is covered<br />
by Australian Patent No. 2006100635, Chinese Patent No.<br />
960361, European Patent No. 1886606, French Patent<br />
0607231, German Patent No. 20 2006 012 212.5, U.K<br />
Patent GB2440714, and U.S. Patent 7,475,632.<br />
©2008 Grand Hall. All Rights Reserved.<br />
1.<br />
2.<br />
! WARNING !<br />
Do not store or use gasoline or other<br />
flammable liquids or vapors in the vicinity<br />
of this or any other appliances.<br />
An LP cylinder not connected for use<br />
shall not be stored in the vicinity of<br />
this or any other appliance.<br />
2<br />
! WARNING !<br />
• LPG models must be used with Liquid Propane<br />
Gas and the regulator assembly supplied. Natural<br />
Gas models must be used with Natural Gas<br />
only. Any attempt to convert the grill from one fuel<br />
type to another is extremely hazardous and will<br />
void the warranty.<br />
•<br />
•<br />
•<br />
•<br />
Keep gas regulator hose away from hot grill<br />
surfaces and dripping grease. Avoid unnecessary<br />
twisting of hose. Visually inspect hose prior<br />
to each use for cuts, cracks, excessive wear or<br />
other damage. If the hose appears damaged do<br />
not use the gas grill. Call 1-877-934-7455 for a<br />
certified replacement hose.<br />
California Proposition 65<br />
Combustion byproducts produced when using this<br />
product contain chemicals known to the State of<br />
California to cause cancer, birth defects, or other<br />
reproductive harm.<br />
Brass components on the grill, such as hose fittings,<br />
propane cylinder valves (sold separately) and<br />
burner valve stems, contain lead which is known to<br />
the State of California to cause cancer, birth defects,<br />
or other reproductive harm.<br />
Never use charcoal or lighter fluid in this gas grill.<br />
Failure to comply with these instructions could<br />
result in a grease fire or explosion that could cause<br />
serious bodily injury, death or property damage.<br />
The Grease Tray must be visually inspected before<br />
each grill use. Remove any grease and wash Grease<br />
Tray with a mild soap and warm water solution.<br />
Failure to comply with these instructions could<br />
result in a grease fire or explosion that could<br />
cause serious bodily injury, death or property<br />
damage.<br />
! DANGER !<br />
If you smell gas:<br />
1.<br />
2.<br />
3.<br />
4.<br />
Shut off gas to the appliance.<br />
Extinguish any open flame.<br />
Open lid.<br />
If odor continues, keep away from<br />
the appliance and immediately call<br />
your gas supplier or your fire department.
Pre-Assembly Instructions For Your Safety<br />
Congratulations on your selection of one of the finest outdoor<br />
kitchen appliances available. Your Grill is equipped with<br />
the unique Crossray Infrared Cooking System® by Grand<br />
Hall, which offers restaurant style grilling performance.<br />
Infrared grilling technology cooks the food directly (and not<br />
the air around it) which offers many advantages over conven<br />
tional grilling systems:<br />
MORE FLAVORFUL FOOD as the intense heat sears<br />
the food and locks in the juices while also cooking it<br />
faster which usually means more succulence.<br />
FEWER FLAREUPS as the higher infrared heat vaporizes<br />
more drippings which also adds natural flavoring<br />
to your food.<br />
MORE EFFICIENCY AND CONVENIENCE as the higher<br />
heat means shorter cooking times, more fuel efficiency<br />
and easier year round grilling.<br />
To begin your “restaurant quality” grilling, become familiar<br />
with all of the cooking elements of your Grand Hall Grill lighting<br />
and operating instructions.<br />
US Patented No.: 7,475,632<br />
European Patent No. 1886606<br />
Australia Patent No.: 2006100635<br />
Germany Patent No.: 202006012212.5<br />
France Patent No.: 0607231<br />
UK Patent No.: GB2440714<br />
China Patent No.: 960361<br />
3<br />
PRE-ASSEMBLY<br />
Read and perform the following pre-assembly instructions:<br />
Tools Required for Assembly:<br />
• protective work gloves<br />
• protective eyewear<br />
• Phillips Head screwdriver<br />
You will need assistance from another person to<br />
handle the grill head and other large, heavy parts.<br />
Open Lid of shipping carton. Remove top sheet of<br />
cardboard and packing materials. Lay cardboard<br />
sheet on floor and use as a work surface to protect<br />
floor and grill parts from scratches.<br />
You may slice the carton front corners with a utility<br />
knife to lay open the carton front panel. This allows<br />
you to raise the Lid and remove the components<br />
packed inside, making it easier to lift.<br />
Use the Hardware and Part Diagrams to ensure all<br />
items are included and free of damage.<br />
Do not assemble or operate the grill if it appears damaged.<br />
If there are damaged or missing parts when<br />
you unpack the shipping box or you have questions<br />
during the assembly process call: 1-877-934-7455<br />
M-F 8AM-4:30PM CST for assistance.<br />
Grill Installation Codes<br />
The installation must conform with local codes or, in the<br />
absence of local codes, with either the National Fuel Gas<br />
Code, ANSI Z223.1/NFPA 54, Natural Gas and Propance<br />
Installation Code, CSA B149.1, or Propane Storage and<br />
Handling Code, B149.2.<br />
CSA Label<br />
located on the<br />
bowl rear panel
Hardware Pack Parts List for Models OD3208SLP & OD3208SNG<br />
PART # PART DESCRIPTION QTY PURPOSE OF PART<br />
P06030008A Hardware Pack 1 For use in assembly of Models OD3208SLP<br />
P06030009A Hardware Pack 1 For use in assembly of Models OD3208SNG<br />
S182G03061 Pan Head Screw 3/16"x3/8" 4 Install the Rear Trim Panel (For OD3208SLP/NG Models)<br />
S182G03061 Pan Head Screw 3/16"x3/8" 2 Install the Control Box (For OD3208SLP/NG Models)<br />
S182G03061 Pan Head Screw 3/16"x3/8" 2 Install the Regulator Bracket (For OD3208SLP Model)<br />
S182G0306A Pan Head Screw 3/16"x3/8" 3 Install Tank Tray Set (For OD3208SLP Model)<br />
Hardware Pack Diagram List for Models OD3208SLP & OD3208SNG<br />
Pan Head Screw 3/16"x3/8"<br />
Qty. 8 (For OD3208SLP Model)<br />
Qty. 6 (For OD3208SNG Model)<br />
Part # S182G03061<br />
* One Battery/AA and Four Batteries/AAA included in the Hardware Pack.<br />
4<br />
Pan Head Screw 3/16"x3/8"<br />
Qty. 3 (For OD3208SLP Model)<br />
Part # S182G0306A
Parts Diagram for Models OD3208SLP & OD3208SNG<br />
5<br />
38D<br />
38C<br />
23<br />
16<br />
7<br />
3<br />
2<br />
5<br />
12<br />
13<br />
14<br />
15<br />
4<br />
8<br />
9<br />
18<br />
27<br />
50<br />
51<br />
19<br />
42<br />
41<br />
40<br />
38A<br />
39<br />
38B<br />
37<br />
36<br />
35<br />
21<br />
22<br />
43<br />
25<br />
24<br />
33C<br />
34C<br />
28<br />
34D<br />
33D<br />
26<br />
30<br />
33B<br />
20<br />
33A<br />
32<br />
34B<br />
29<br />
31<br />
34A<br />
1<br />
23<br />
8<br />
10<br />
11<br />
44<br />
46<br />
45<br />
B1<br />
B3<br />
B2<br />
54<br />
52<br />
55<br />
53<br />
48<br />
21<br />
17<br />
49<br />
6<br />
47
Parts List for Models OD3208SLP & OD3208SNG<br />
KEY DESCRIPTION PART# QTY<br />
1 Lid Assembly P0014734AA 1<br />
2 Temperature Gauge P00601381A 1<br />
3 Lid Handle Bracket, Left P00307028E 1<br />
4 Lid Handle Bracket, Right P00308028E 1<br />
5 Lid Handle P00215036H 1<br />
6 Bowl Panel, Rear/Lower P0075803BC 1<br />
7 Lid Assembly Bracket, Left P03320007C 1<br />
8 Protective Pad P05518002I 4<br />
9 Lid Assembly Bracket, Right P03320008C 1<br />
10 Cooking Rack/Secondary P015160282 1<br />
11 Cooking Grid P01615038H 5<br />
12 Electric Wire Set P02627007A 1<br />
13 Electric Wire Protector P055330043 1<br />
14 Connection Hose - Long P03702037D 2<br />
15 Connection Hose - Short P03702038D 2<br />
16<br />
Bowl Panel, Rear/Upper (LPG)<br />
Bowl Panel, Rear/Upper (NG)<br />
P0073738BC<br />
P0073739BC<br />
1<br />
1<br />
17 Tank Tray Set (LPG) Y0340050 1<br />
18 Bowl Side Panel, Left P0072094EC 1<br />
19 Bowl Side Panel, Right P0072195EC 1<br />
20 Bowl P0071367EC 1<br />
21 Grease Shield, Upper P06902126C 2<br />
22 Hose, 12 FT (NG), 3/8" ID P03703001A 1<br />
23 Grease Shield, Lower P06902127C 2<br />
24 Infrared Burner Assembly P02005024B 4<br />
25<br />
Extension Fitting for Manifold with Orifice (LPG)<br />
Extension Fitting for Manifold with Orifice (NG)<br />
P06539032A<br />
P06539033A<br />
4<br />
4<br />
26 Cross Lighting Channel P02212377A 2<br />
27 Lid Hinge with Nut P05501136L 2<br />
28 Thermocouple Protector P03343017C 4<br />
29 Thermocouple Bracket P03327082C 2<br />
30 Thermocouple Bracket P03327083C 2<br />
31 Thermocouple for Gas Valve P05305054B 2<br />
32 Thermocouple for Gas Valve P05305055B 2<br />
33A Thermocouple for LED Light, Left Front P05305056B 1<br />
33B Thermocouple for LED Light, Left Rear P05305057B 1<br />
33C Thermocouple for LED Light, Right Rear P05305058B 1<br />
33D Thermocouple for LED Light, Right Front P05305059B 1<br />
34A Electrode, Left Front P02618046A 1<br />
34B Electrode, Left Rear P02618047A 1<br />
34C Electrode, Right Front P02618048A 1<br />
34D Electrode, Right Rear P02618049A 1<br />
35 Control Panel Heat Shield Bracket P0300612FD 1<br />
36 Control Panel Heat Shield P0300818AA 1<br />
37<br />
Gas Valve/Manifold Assembly (LPG)<br />
Gas Valve/Manifold Assembly (NG)<br />
Y0060679<br />
Y0060680<br />
1<br />
1<br />
38A LED Light with Wire - A P02615155A 1<br />
38B LED Light with Wire - B P02615156A 1<br />
38C LED Light with Wire - C P02615157A 1<br />
38D LED Light with Wire - D P02615158A 1<br />
39 Bowl Front Trim Plate Assembly P02915341S 1<br />
40 Control Panel P02915293X 1<br />
41 Control Knob Seat P03439014A 4<br />
42 Control Knob P03436053V 4<br />
43 Grease Tray Heat Shield P06903069C 1<br />
6
Parts List for Models OD3208SLP & OD3208SNG<br />
KEY DESCRIPTION PART# QTY<br />
44 Grease Tray Slide Bracket - Left P03328069C 1<br />
45 Grease Tray Slide Bracket - Right P03328070C 1<br />
46 Grease Tray Slide Set P05516140M 1<br />
47 Lid Trim Plate P0014735QJ 1<br />
48 Grease Tray Y0270020 1<br />
49 Regulator with Hose and Connector (LPG) Y0080036 1<br />
50 Regulator (NG) P03614005C 1<br />
51 Lighting Stick P05507140M 1<br />
52 Control Box P05545005M 1<br />
53 Control Box Bracket P03343022C 1<br />
54 LED Light Controller P05357013B 1<br />
55 Electric Ignitor, 4-Port P02502344C 1<br />
B1 Trim Panel, Left P07901033D 1<br />
B2 Trim Panel, Right P07901034D 1<br />
B3 Trim Panel, Rear P07901035D 1<br />
Hardware Pack (LPG) P06030008A 1<br />
Hardware Pack (NG) P06030009A 1<br />
Operator's <strong>Manua</strong>l P80151095C 1<br />
For the repair or replacement parts you need:<br />
Call 1-877-934-7455 M-F 8AM-4:30PM CST<br />
To obtain the correct replacement parts for your gas grill, please refer to the part numbers in this parts<br />
list. The following information is required to ensure you receive the correct parts:<br />
1. Model and Serial Number (see CSA label on grill)<br />
2. Part Number<br />
3. Part Description<br />
4. Quantity of parts needed<br />
Important: Use only Grand Hall replacement parts. The use of any part that is not a Grand Hall replacement<br />
part can be dangerous and will also void your product warranty. Keep this Operator's <strong>Manua</strong>l for<br />
convenient referral and for part replacement.<br />
7
Assembly Instructions<br />
CAUTION : While it is possible for one person to assemble this grill, obtain assistance from another person<br />
when handling some of the larger, heavier pieces.<br />
CAUTION: Build your grill island before installing the LP Gas Tank and Partition Panel (Not included in this<br />
unit). Refer to the heights listed in Fig. 4 for constructing your grill island. Make sure a set of doors is installed<br />
in your Island so that the Control Box can be accessed. An island unit is not included with the purchase<br />
of your Grill Head.<br />
1 Install Trim Panel, Rear onto Grill Head and Grease Tray<br />
Install the Trim Panel, Rear onto the Bowl Panel, Rear/Lower using 4 Pan Head Screws 3/16"x3/8"<br />
as shown in diagram.<br />
Slide the side tabs of the Grease Dranining Tray over the rails underneath the Grill Bowl as shown.<br />
Pan Head Screw<br />
3/16"x3/8"<br />
Qty. 4<br />
Part # S182G03061<br />
2<br />
Note: Press the Switch Button to turn on the LED Light Controller<br />
before using the grill. Press it again to turn off the LED Light<br />
Controller to save battery power when the grill is not in use.<br />
Cap of LED<br />
Light controller<br />
Set Grill Head into the Island. Install Control Box and Batteries<br />
Pan Head Screw<br />
3/16"x3/8"<br />
Qty. 2<br />
Part # S182G03061<br />
Raise the Grill Head and put the Control Box to the inside of the Island, then set Grill Head into<br />
the Island (not included in this unit) as shown.<br />
Open your Island Right Door, align the Control Box onto the right underside of the Grill Head (see<br />
diagram). Install 2 Pan Head Screws 3/16"x3/8" and tighten securely.<br />
Remove Caps from Control Box.<br />
Place 1 AA and 4 AAA batteries into the slots of the Control Box as shown below. (Note: The positive<br />
pole of the AA battery must face towards the cap. For the AAA batteries, 2 batteries must have the positive<br />
pole facing towards the cap and 2 batteries must have the negative poles facing away from the caps.)<br />
Position the caps onto the slots, and tighten them onto the Control Box.<br />
Switch Button OFF Switch Button ON<br />
8<br />
Cap of LED<br />
Light controller<br />
AA Battery<br />
Cap<br />
AAA Battery<br />
+ -<br />
Slot
1<br />
3<br />
4<br />
Install NG Regulator Assembly (For OD3208SNG Model)<br />
Install NG Regulator Assembly onto the Manifold.<br />
Connect the Swivel nut of the 12" Natural Gas Hose onto the vertical fitting of the NG Regulator.<br />
Manifold<br />
Swivel Nut<br />
Install LP Gas Tank (For OD3208SLP Model)<br />
Install the Bracket with Regulator onto the Island Side Panel using 2 Pan Head Screws 3/16"x3/8".<br />
Install the Stainless Steel Tube (not included in this unit) onto the manifold. Next, insert the other end<br />
of the Stainless Steel Tube through the hole on the Island Side Panel. Install the Stainless Steel Tube<br />
onto the male fitting of the Bracket.<br />
Install the Tank Tray Set onto the Island Bottom Panel. Secure the Tank Tray set by installing 3 Pan<br />
Head Screws 3/16"x3/8" as shown in Fig. 3. Place the LP Gas Tank into the Tank Tray. Make sure<br />
the Tank Valve faces the right corner of the cabinet. Tighten the Wing Bolt to secure the LP Gas Tank.<br />
Install the LP Regulator onto the LP Gas Tank.<br />
Pan Head Screw<br />
3/16"x3/8"<br />
Qty. 2 (For OD3208SLP Model)<br />
Part # S182G03061<br />
Pan Head Screw<br />
3/16"x3/8"<br />
Qty. 3 (For OD3208SLP Model)<br />
Part # S182G0306A<br />
1<br />
9<br />
Tank Tray Set<br />
Island Bottom<br />
Panel<br />
Fig. 3
Install Partition Panel (For OD3208SLP Model)<br />
5<br />
Install the Partition Panel (not included in this unit) onto the left island. Make sure there is 22-24"<br />
of clearance between the Partition Panel and the Tank Tray Set.<br />
6<br />
1/8"<br />
Main Burners Electrode Check. Perform<br />
this Electrode Check with the Assistance<br />
of Another Person<br />
This test will ensure that the Spark Electrode Tips<br />
are properly positioned so your grill lights easily<br />
and properly.<br />
Be sure all Control Knobs are set to "OFF"<br />
and open the Grill Lid.<br />
Have your assistant stand behind you to the<br />
right of the grill and look at both the front and<br />
rear burner locations of the grill bowl. Never<br />
put your face inside the Grill Bowl.<br />
Turn any of the Main Burner Control Knobs to<br />
and push in. Have your assistant watch for<br />
a blue spark within each Ignition Electrode.<br />
If no spark is seen, the Spark Gap needs to<br />
be adjusted as follows:<br />
• If the gap between the Spark Electrode Tip and<br />
Receiver is more than 1/8" wide, use needle<br />
nose pliers to gently squeeze the Electrode to<br />
narrow gap. Try the Electrode Check again. If<br />
no "clicking" sound is heard:<br />
-<br />
-<br />
5"<br />
5"<br />
1"<br />
Fig. 4<br />
AA Battery may be installed backwards.<br />
Electric wires may be loose. Remove the<br />
AA Battery and inspect the Ignitor Junction<br />
Box found in the Control Box and reconnect<br />
any loose wires.<br />
Spark Receiver<br />
Spark Gap 1/8"<br />
17"-19"<br />
Tank Tray Set<br />
Spark Electrode Tip<br />
Partition Panel<br />
(Above the Gas Tank)<br />
21" 22-24"<br />
10<br />
7<br />
Install Grease Tray Heat Shield<br />
and Cooking Components<br />
Install the Grease Tray Heat Shield by<br />
placing the 4 pins on the Grease Tray Heat<br />
Shield into the 4 Holes in the Grill Bowl.<br />
Place Cooking Grids on bowl ledge.<br />
Place the Secondary Cooking Rack into the<br />
slots on Grill Bowl Side Panels.<br />
Cooking Rack/<br />
Secondary<br />
Cooking<br />
Grids<br />
Final Grill Assembly Step<br />
When you have finished assembling your grill,<br />
be sure that all screws are tightened for safe<br />
operation of your grill.<br />
CAUTION: The Grease Tray should be inspected<br />
before each grill use to be sure there is no excessive<br />
grease buildup. Clean the Tray frequently to<br />
eliminate grease build-up and to prevent grease<br />
fires.
CORRECT LP GAS TANK USE<br />
LP Gas grill models are designed for use with a standard<br />
20 lb. Liquid Propane Gas (LP Gas) tank, not included with<br />
grill. Never connect your gas grill to an LP Gas tank that<br />
exceeds this capacity. A tank of approximately 12 inches in<br />
diameter by 18-1/2 inches high is the maximum size LP Gas<br />
tank to use. You must use an "OPD" gas tank which offers<br />
a listed Overfill Prevention Device. This safety feature<br />
prevents the tank from being overfilled which can cause a<br />
malfunction of the LP Gas Tank, regulator, and/or grill.<br />
The LP Gas tank must be constructed and marked<br />
in accordance with the Specifications for LP-Gas<br />
Cylinders of the U.S. Department of Transportation<br />
(D.O.T.) or the National Standard of Canada, CAN/<br />
CSA-B339, Cylinders, Spheres and Tubes for Transportation<br />
of Dangerous Goods; and Commission, as<br />
applicable.<br />
The LP Gas tank must have a shutoff valve, terminating<br />
in an LP Gas supply tank valve outlet, that is<br />
compatible with a Type 1 tank connection device. The<br />
LP Gas tank must also have a safety relief device<br />
that has a direct connection with the vapor space of<br />
the tank.<br />
The tank supply system must be arranged for vapor<br />
withdrawal.<br />
The LP Gas tank must have a collar to protect the<br />
tank valve.<br />
Never connect an unregulated LP gas tank to your gas<br />
grill. The gas regulator assembly supplied with your<br />
gas grill is adjusted to have an outlet pressure of 11"<br />
water column (W.C.) for connection to an LP gas tank.<br />
Only use the regulator and hose assembly supplied<br />
with your gas grill. Replacement regulators and hose<br />
assemblies must be those specified by Grand Hall.<br />
Have your LP Gas dealer check the release valve after<br />
every filling to ensure it remains free of defects.<br />
Always keep LP Gas tank in upright position.<br />
Do not subject the LP Gas tank to excessive heat.<br />
Never store an LP Gas tank indoors. If you store your<br />
gas grill in the garage always disconnect the LP Gas<br />
tank first and store it safely outside.<br />
LP Gas tanks must be stored outdoors in a wellventilated<br />
area and out of the reach of children.<br />
Disconnected LP Gas tanks must not be stored in a<br />
building, garage or any other enclosed area.<br />
The regulator and hose assembly can be seen after<br />
opening the island doors and must be inspected<br />
before each use of the grill. If your regulator and hose<br />
are damaged in any way, they must be replaced prior<br />
to using the grill again.<br />
Any attempt to convert the grill from one fuel type to another<br />
is extremely hazardous and will void your warranty.<br />
Never light your gas grill with the lid closed or before<br />
checking to ensure the burners are fully seated over<br />
the gas valve orifices.<br />
LP Gas Tank Installation<br />
11<br />
Never allow children to operate your grill. Do not allow<br />
children or pets to play near your grill. Always supervise<br />
children and pets if they are in the vicinity of the unit.<br />
Use of alcohol, prescription or non-prescription drugs<br />
can impair your ability to properly assemble and safely<br />
operate your grill.<br />
Keep fire extinguisher readily accessible. In the event<br />
of a oil/grease fire, do not attempt to extinguish with<br />
water. Use type B extinguisher or smother with dirt,<br />
sand or baking soda.<br />
In the event of rain, turn off the burners and gas supply.<br />
Wait for the grill to cool, and then place a cover on it.<br />
Use your grill on a level, stable surface in an area clear<br />
of combustible materials.<br />
Do not leave grill unattended when in use.<br />
Do not move the appliance when in use.<br />
Allow the grill to cool before moving or storing.<br />
Do not use your grill as a heater.<br />
Never use your gas grill on a balcony, deck, or patio<br />
above the ground floor of your home.<br />
This grill is not intended to be installed in or on<br />
recreational vehicles and/or boats.<br />
The grill is not intended for commercial use.<br />
Never use charcoal or lighter fluid in this gas grill.<br />
A.<br />
B.<br />
C.<br />
!<br />
! WARNING !<br />
Refer to this table when designing the island unit for<br />
the OD3208SLP/NG. Side* and Rear* show the minimum<br />
amount of distance the unit must be from<br />
combustibles (ex. Vinyl or wood siding, fences and<br />
overhangs) or sources of ignition (ex. Pilot lights on<br />
water heaters and live electrical appliances). Height*<br />
shows the minimum height the island unit must be<br />
starting from the ground up.<br />
Model Height Width Depth Side* Rear* Height*<br />
OD3208<br />
SLP/NG<br />
10-3/4" 33-5/8" 21" 14" 24" 29"<br />
Side*<br />
Height*<br />
WARNING !<br />
Do not store a spare LP-Gas tank under or near this<br />
appliance.<br />
Never fill the tank beyond 80 percent full; and<br />
If the information in "(a)" and "(b)" is not followed exactly,<br />
a fire causing death or serious injury may occur.<br />
Rear*<br />
Non-combustible<br />
Construction<br />
Width<br />
6" minimum<br />
clearance from<br />
cutout (for lid)<br />
Height<br />
Depth
NOTE about LP Gas Tank Exchange Programs<br />
Many retailers that sell grills offer you the option of replacing<br />
your empty LP Gas tank through an exchange service.<br />
Use only those reputable exchange companies that inspect,<br />
precision fill, test, and certify their tanks. Exchange<br />
your tank only for an OPD safety feature-equipped tank as<br />
described in the LP Gas tank section of this Guide.<br />
Always keep new and exchanged LP Gas tanks in an upright<br />
position during use, transit or storage.<br />
Leak test new and exchanged LP Gas tanks BEFORE<br />
connecting one to your grill.<br />
How to Leak Test your LP Gas Tank<br />
For your safety:<br />
All leak tests must be repeated each time your LP Gas<br />
tank is exchanged or refilled.<br />
When checking for gas leaks do not smoke.<br />
Do not use an open flame to check for gas leaks.<br />
Your grill must be leak tested outdoors in a well-ventilated<br />
area, away from ignition sources such as gas fired<br />
or electrical appliances. During the leak test, keep your<br />
grill away from open flames or sparks.<br />
Do not use household cleaning agents. Damage to gas<br />
assembly components can result.<br />
! WARNING !<br />
If growing bubbles appear do not use or move<br />
the LP Gas tank. Contact an LP Gas Supplier<br />
or your fire department!<br />
Note: The built-in appliance for use with a remote selfcontained<br />
LP Gas supply system must use rigid pipe,<br />
semi-rigid tubing or a connector complying with the<br />
Standard for Connections for Gas Appliance, ANZI Z21.24/<br />
CSA 6.10<br />
USE AND CARE INSTRUCTIONS<br />
Use a clean paintbrush and a 50/50 mild soap and<br />
water solution.<br />
Brush soapy solution onto LP Gas tank in the areas<br />
indicated by the arrows. See diagram.<br />
If growing bubbles appear do not use or move the<br />
LP Gas tank. Call an LP Gas Supplier or your Fire<br />
Department.<br />
12<br />
Secure a 20lb LP Gas Tank to Gas Grill<br />
Note: You can only use 20lb LP Gas Tank in this Gas<br />
Grill.<br />
NOTE: When using Liquid Propane (LP), EXTREME<br />
CAUTION should be used to provide ample ventilation<br />
of vapor from the enclosure. LP gas vapor is heavier<br />
than air and SERIOUS INJURY from a DANGEROUS<br />
EXPLOSION could occur if LP gas is allowed to<br />
accumulate in an enclosure and then ignited. Both the<br />
Barbecue enclosure and LP cylinder enclosure require<br />
venting that must be provided at the floor level<br />
of the enclosure to allow any leaking LP gas vapor<br />
to escape (see Fig.6).<br />
NOTE: When installing a barbeque equipped for liquid<br />
propane (LP) in an island, the LP tank must be in<br />
a separate enclosure that is completely isolated from<br />
the barbeque. It must be cross-ventilated in accordance<br />
with local codes. The LP tank MUST NEVER<br />
be installed directly under the barbeque.<br />
NOTE: The total of the upper ventilation openings<br />
must be a minimum of 20 sq. inches. The total of<br />
the lower ventilation openings must be a minimum<br />
of 10 sq. inches. Upper and lower ventilation openings<br />
MUST BE PROVIDED on both sides of built-in<br />
construction. The top of the upper ventilations openings<br />
must be located within 5" from the top of the<br />
island. The bottom of the lower ventilation openings<br />
must be at least 1" or less from the floor of the island.<br />
The top of the lower ventilation openings cannot be<br />
more than 5" from the floor of the island. Every<br />
ventilation opening must have a minimum of 1/8" (See<br />
Fig. 4 on page 10). Contact a Grand Hall associate<br />
for more details.<br />
Fig. 6<br />
CSA Approved<br />
Stainless Steel Tube<br />
Air Vents<br />
Partition Panel<br />
Air<br />
Vents<br />
Non-Combustible<br />
Construction, such as<br />
stone, marble, cement<br />
The Wing Bolt holds<br />
the Tank Foot in place.
LP Gas Model only:<br />
Connect Regulator with Hose to your LP Gas Tank<br />
!<br />
WARNING<br />
If you have a gas leak that cannot be repaired by<br />
tightening, turn off the gas at the source, disconnect<br />
fuel line from your grill and call 1-877-934-7455 or<br />
your gas supplier for repair assistance.<br />
1.<br />
2.<br />
3.<br />
4.<br />
!<br />
Turn all Burner Valves to the OFF position.<br />
Inspect the valve connection port and regulator<br />
assembly for damage or debris. Remove any debris.<br />
Never use damaged or plugged equipment.<br />
Connect the regulator assembly to the tank valve<br />
and HAND TIGHTEN nut clockwise to a full stop.<br />
DO NOT use a wrench to tighten because it could<br />
damage the Quick Coupling Nut and result in a gas<br />
leak/fire hazard.<br />
Open the tank valve (counterclockwise) 1/4 to 1/2<br />
of a full turn, and use a soapy water solution to<br />
check all connections for leaks before attempting<br />
to light your grill. See "Check all connections for<br />
LP Gas Leaks". If a leak is found, turn the tank valve<br />
off and do not use your grill until the leak is repaired.<br />
CAUTION: When the appliance is not in use the gas must<br />
be turned off at the tank. Place dust cap on cylinder valve<br />
outlet whenever the cylinder is not in use. Only install the<br />
type of dust cap on the cylinder valve outlet that is provided<br />
with the cylinder valve. Other types of caps or plugs may<br />
result in leakage of propane.<br />
WARNING<br />
Do not store spare LP cylinder within<br />
10 feet (3m) of this appliance.<br />
Do not store or use gasoline or other<br />
flammable liquids and vapors within 25<br />
feet (8m) of this appliance.<br />
When cooking with oil/grease, do not<br />
allow the oil/grease to get hotter 350°F<br />
(177°C)<br />
Do not leave oil/grease unattended.<br />
USE AND CARE INSTRUCTIONS<br />
Type 1 connection per<br />
ANSI Z21.58A-2008/CSA<br />
1.6A-2008<br />
Quick<br />
Coupling Nut<br />
!<br />
!<br />
13<br />
Check all connections for LP Gas Leaks<br />
Never test for leaks with an open flame. Prior to first<br />
use, at the beginning of each season, or every time<br />
your LP Gas tank is changed, you must check for gas<br />
leaks. Follow these three steps:<br />
Make a soap solution by mixing one part liquid<br />
detergent and one part water.<br />
Turn the grill Control Knobs to the full OFF position,<br />
then turn the gas ON at source.<br />
Apply the soap solution to all gas connections<br />
indicated by the arrows. See diagram. If bubbles<br />
appear in the soap solution the connections are<br />
not properly sealed. Check each fitting and tighten<br />
or repair as necessary.<br />
Gas Valve / Manifold<br />
Assembly<br />
Disconnecting A Liquid Propane Gas (LPG)<br />
Tank From Your Grill<br />
!<br />
LP Gas Tank<br />
Regulator with<br />
Hose (LPG)<br />
Make sure the Burner Valves and LP Gas tank valve<br />
are off. (Turn clockwise to close.)<br />
Detach the hose and regulator assembly from the<br />
LP Gas tank valve by turning the Quick Coupling<br />
Nut counterclockwise. Do not use a wrench or any<br />
tools when turning the Quick Coupling Nut.<br />
WARNING !<br />
Failure to read and follow the Use and Care<br />
Instructions could result in a fire or explosion that<br />
could cause serious bodily injury, death or property<br />
damage.
Fig.2<br />
To Grill<br />
Outside Wall<br />
Male Fitting<br />
Inside Wall<br />
Natural Gas Connection<br />
Natural Gas Model only:<br />
Gas Line Piping:<br />
Connecting Natural Gas To Your Grill<br />
If the length of line required does not exceed 50 feet,<br />
Connect the Swivel nut of the 12' Natural Gas use a 5/8" O.D. tube. One size larger should be used<br />
Hose to the horizontal fitting of NG Regulator as for lengths greater than 50 feet.<br />
shown in Fig.1. Connect the other hose end (male Gas piping must be copper tubing, type K or L; poly-<br />
plug) to the gas supply line from your home. Read ethylene plastic tube, with a minimum wall thickness of<br />
and follow the "Natural Gas Safety Instructions" 0.62 inch; or standard weight (schedule 40) steel or<br />
below.<br />
wrought iron pipe.<br />
Natural Gas Safety Instructions<br />
Copper tubing must be tin-lined if the gas contains more<br />
Your natural gas grill is designed for use with natural<br />
than 0.3 grams of hydrogen sulfide per 100 cubic feet<br />
gas (NG) only. The gas pressure Regulator sup- of gas.<br />
plied with this appliance must be installed and<br />
Plastic tubing is suitable only for outdoor, underground<br />
used on your grill. The unit and Regulator are set<br />
use.<br />
to operate with an outlet pressure of 4" W.C. Gas piping in contact with earth, or any other material<br />
Install a Shutoff Valve at the gas supply source out-<br />
which may corrode the piping, must be protected against<br />
doors at a point after the gas pipe exits the outside wall<br />
corrosion in an approved manner.<br />
and before the quick-disconnect hose. Or install it at Underground piping must have a minimum of 18" cover.<br />
the point before the gas line piping enters the ground.<br />
See Fig. 2.<br />
Pipe sealing compound or pipe thread tape resistant Fig.1<br />
to the action of natural gas must be used on all male<br />
pipe thread connections.<br />
Disconnect your gas grill from fuel source when the<br />
gas supply is being tested at high pressures. This gas<br />
grill and its individual shutoff valve must be discon- Vertical fitting<br />
nected from the gas supply pipe system during any<br />
pressure testing of that system at pressure in excess<br />
of 1/2 psi (3.5kpa).<br />
Swivel nut<br />
Turn off your gas grill when the gas supply is being<br />
Hose, 12 ft./ NG<br />
tested at low pressures. The grill must be isolated<br />
from the gas supply pipe system by closing its individual<br />
manual shutoff valve during any pressure testing<br />
of the gas supply pipe system at pressures equal<br />
to or less than 1/2 psi (3.5kpa).<br />
Check all connections for Natural Gas Leaks<br />
The Quick Disconnect connects to a 3/8 inch NPT Never test for leaks with an open flame. Prior to first use<br />
thread from the gas source. The Quick Disconnect and at the beginning of each season, you must check<br />
fitting is a hand operated device that automatically for gas leaks. Follow these three steps:<br />
shuts off the flow of gas from the source when it is<br />
disconnected.<br />
Make a soap solution by mixing one part liquid<br />
The Quick Disconnect fitting can be installed horizon-<br />
detergent and one part water.<br />
tally or pinpointing downward. DO NOT install the<br />
Turn the grill Control Knobs to their full OFF<br />
fitting with the opening pointing upward because the<br />
positions. Next, turn the gas ON at the source.<br />
fitting could collect water and debris.<br />
The Dust Covers (plastic plugs) provided with the<br />
Apply the soap solution to all gas connections<br />
Quick Disconnect Hose help keep the open ends<br />
indicated by the arrows. See Fig.3. If bubbles<br />
clean while disconnected.<br />
appear in the soap solution the connections are<br />
WARNING: Do not route the 12 Foot Quick Disconnect<br />
not properly sealed. Check each fitting and tighten<br />
Hose under a deck. The hose must be visible and<br />
or repair as necessary.<br />
inspected prior to each grill use.<br />
Gas Supply<br />
Shut Off<br />
Locking<br />
Shut Off<br />
Quick<br />
Disconnect<br />
Fig.3<br />
14<br />
Gas Valve / Manifold<br />
Assembly<br />
NG Regulator<br />
Hose, 12 ft./ NG
Grill Lighting Instructions<br />
1.<br />
2.<br />
3.<br />
4.<br />
5.<br />
6.<br />
Before each use, check all hoses for cracks, nicks, cuts,<br />
burns, or abrasions. If a hose is damaged in any way,<br />
do not use your grill before replacing the hose with an<br />
authorized part from the Parts List. Also make sure all<br />
gas supply connections are securely tightened.<br />
Familiarize yourself with the Safety and Use and Care<br />
instructions in this Guide. Do not smoke while lighting<br />
grill or checking gas supply connections.<br />
Be sure the LP Gas tank is filled, and lock Casters to<br />
prevent movement during grill operation.<br />
Open the Grill Lid.<br />
! WARNING !<br />
Failure to replace a faulty hose, secure gas supply<br />
connections or to open the Lid before proceeding to<br />
the Lighting Procedures could result in a fire or<br />
explosion that could cause serious bodily injury, death,<br />
or property damage.<br />
Set Control Knobs to OFF and open the LP Gas tank<br />
valve SLOWLY 1/4 of a full turn. For Natural Gas open<br />
the Shut Off Valve at the source.<br />
•<br />
OFF<br />
Push and turn the control knob to and hold it in 3~5<br />
seconds to ignite the Burner. Once the burner is ignited<br />
continue to depress the knob and rotate to . Hold the<br />
knob until burner indicator light turns on then release it.<br />
USE AND CARE INSTRUCTIONS<br />
Open LP Gas tank<br />
OFF<br />
! NOTE !<br />
Replace the batteries when low battery as noted<br />
below:<br />
1.<br />
2.<br />
•<br />
If LED burner indicator light does not work when<br />
burner is lit.<br />
If any of the LED indicator(s) is lit when its related<br />
burner is in "OFF" position.<br />
15<br />
7. If ignition does not occur in 5 seconds, turn gas off at<br />
source and turn Control Knobs OFF. Wait at least 5<br />
minutes for gas to clear, then retry. If your grill still fails<br />
to light turn the burner Control Knob(s) and gas source<br />
OFF and conduct a leak test of ALL gas connections<br />
and gas sources as explained in the Use and Care<br />
section of this guide. If no leaks are detected, wait 5<br />
minutes for any gas to clear and repeat the lighting<br />
procedure.<br />
8.<br />
9.<br />
Left Rear<br />
Burner<br />
Left Front<br />
Burner<br />
Right Front<br />
Burner<br />
Right Rear<br />
Burner<br />
If the burner indicator light does not work, check the<br />
batteries.<br />
After one Burner is lit, turn the tank valve SLOWLY one<br />
more 1/4 of a turn.<br />
10. To light more burners, turn each burner knob to , then<br />
back to .<br />
<strong>Manua</strong>lly Lighting Your Grill By Paper Match<br />
To light your gas grill by match, insert a match into the<br />
Lighting Stick and follow steps 1 through 5 of the Grill<br />
Lighting Instructions. Then, light the match and place<br />
Lighting Stick through the Cooking Grid on the grill as<br />
shown below. Turn the nearest Control Knob to the<br />
setting to release gas. The Burner should light immediately.<br />
Note: Island is shown for illustrative purposes only.<br />
Island is not included with grill unit.
Troubleshooting<br />
If the grill fails to light :<br />
1.<br />
2.<br />
3.<br />
Turn gas off at source and turn Control Knobs to<br />
OFF. Wait at least 5 minutes for gas to clear, then<br />
retry.<br />
If your grill still fails to light, check gas supply<br />
and connections.<br />
Repeat lighting procedure. If your grill still fails<br />
to operate, turn the gas off at source, turn the<br />
Control Knobs to OFF, then check the following:<br />
Obstruction in gas line<br />
Correction: Remove regulator hose from grill. Do not<br />
smoke! Open gas supply for one second to clear any<br />
obstruction from fuel line. Close off gas supply at<br />
source and reconnect fuel line to grill.<br />
WARNING<br />
Disconnected Electric Wires<br />
Correction: Inspect the Electric Ignitor (see Parts List)<br />
found in the Control Box. Connect loose Electric wires<br />
to Junction Box and try to light the grill.<br />
Weak AA or AAA Battery<br />
Correction: Remove the Ignitor Cap and replace the<br />
battery.<br />
If the grill still does not light you may need to purge<br />
air from the gas line or reset the regulator excess<br />
gas flow device. Note: This procedure should be<br />
done every time a new LP Gas tank is connected<br />
to your grill.<br />
! WARNING !<br />
Never lean over the grill cooking area while lighting<br />
your gas grill. Keep your face and body a safe distance<br />
(at least 18 inches) from the front of grill when lighting<br />
your grill by match.<br />
USE AND CARE INSTRUCTIONS<br />
GRILL INFORMATION CENTER<br />
Call 1-877-934-7455 Monday - Friday 8:00am-4:30pm CST<br />
16<br />
To purge air from your gas line and/or reset<br />
the regulator excess gas flow device:<br />
!<br />
Turn Control Knobs to the OFF position.<br />
Turn off the gas at the tank valve.<br />
Disconnect regulator from LP Gas tank.<br />
For Natural Gas disconnect regulator from<br />
12 ft. Natural Gas Hose.<br />
Let unit stand 5 minutes to allow air to purge<br />
from gas line.<br />
Reconnect regulator to the LP Gas tank.<br />
For Natural Gas reconnect regulator to<br />
12 ft. Natural Gas Hose.<br />
Turn tank valve on SLOWLY 1/4 of a turn.<br />
For Natural Gas open Shut Off valve.<br />
Open the Grill Lid.<br />
Push and turn the Control Knob to and hold<br />
it in 3-5 seconds to ignite the burner.<br />
WARNING !<br />
Should a FLASHBACK fire occur in or around the<br />
Burners, follow the instructions below. Failure to<br />
comply with these instructions could result in a fire<br />
or explosion that could cause serious bodily injury,<br />
death, or property damage.<br />
Shut off gas supply to the gas grill.<br />
Turn the Control Knobs to OFF position.<br />
Open the Grill Lid.<br />
Put out any flame with a Class B fire<br />
extinguisher.
CLEANING AND MAINTENANCE<br />
Proper care and maintenance will keep your grill in top operating<br />
condition and prolong its life. Follow these cleaning procedures<br />
on a timely basis and your grill will stay clean and operate<br />
with minimum effort.<br />
CAUTION: Be sure your grill is OFF and cool before cleaning.<br />
Cleaning The Cooking Grids<br />
Before initial use and periodically thereafter, wash your<br />
Cooking Grids in a mild soap and warm water solution.<br />
You can use a wash cloth or vegetable brush to clean<br />
your cooking grids.<br />
Cleaning The Grease Tray<br />
To reduce the chance of fire, the Grease Tray should be<br />
visually inspected before each grill use. Remove any<br />
grease and wash Grease Tray with a mild soap and<br />
warm water solution.<br />
Cleaning the Inside of the Grill Lid<br />
Grease can build up on the inside of the Grill lid over<br />
time. This grease can drip onto your deck or patio when<br />
the lid is opened. Visually inspect the inside of the Grill<br />
Lid before each grill use. Remove any grease and wash<br />
with a mild soap and warm water solution.<br />
Routine Cleaning of The Grill Interior<br />
1. Turn all Burner Knobs to the full OFF position.<br />
2. Turn the LP gas tank valve to the full OFF position.<br />
3.<br />
4.<br />
5.<br />
6.<br />
7.<br />
8.<br />
Burning-off excess food after every cookout will keep it<br />
ready for instant use. However, at least every 3 months<br />
you must give the entire grill a thorough cleaning to<br />
minimize your risk of grease fire and keep the grill in top<br />
shape. Follow these steps:<br />
Disconnect the regulator from the gas tank. Inspect the<br />
hose with regulator assembly for cracking, cuts or any<br />
other damage, and replace as neccessary. Refer to the<br />
Parts List in this Operator's <strong>Manua</strong>l.<br />
Remove and clean the Cooking Grids and Secondary<br />
Cooking Rack.<br />
Brush the inside and bottom of the grill with a fiber pad<br />
or nylon brush and wash with a mild soap and warm<br />
water solution. Rinse thoroughly and let dry.<br />
Check each Spark Electrode, adjusting as needed. The<br />
space between the Spark Electrode Tip and Spark<br />
Receiver should be approximately 1/8" (3.2mm).<br />
Replace the Cooking Grids and Secondary Cooking<br />
Rack.<br />
Reconnect the gas source and observe the Burner<br />
flame for correct operation.<br />
Cleaning Exterior painted Surfaces:<br />
Before initial use, and periodically thereafter, we suggest<br />
you wash your grill using a mild soap and warm water<br />
solution. You can use a wash cloth or sponge for this<br />
process. Do not use a stiff wire or brass brush. These will<br />
scratch stainless steel and chip painted surfaces (varies<br />
by model) during the cleaning process.<br />
! WARNING !<br />
Do not leave the grill unattended during burn off. Empty<br />
and clean the grease tray before doing burn-off.<br />
17<br />
Cleaning Exterior Stainless Steel Surfaces:<br />
Routine care and maintenance is required to preserve<br />
the appearance and corrosion resistance of stainless<br />
steel. The fact is stainless steel can corrode, rust and<br />
discolor under certain conditions. Rust is caused when<br />
regular steel particles in the atmosphere become attached<br />
to the stainless steel surface. Steel particles can<br />
also become attached to your grill if you use steel wool<br />
or stiff wire brushes to clean the grill instead of nonabrasive<br />
cloth, sponge or nylon cleaning tools. In coastal<br />
areas rust pits can develop on stainless surfaces that<br />
cannot be fully removed. Bleach and other chlorine based<br />
solutions used for household and pool cleaning can<br />
also cause corrosion to stainless steel. Weathering,<br />
extreme heat, smoke from cooking and machine oils<br />
used in the manufacturing process of stainless steel<br />
can cause stainless steel to turn tan in color. Although<br />
there are many factors which can affect the surface appearance<br />
of stainless steel, they do not affect the integrity<br />
of the steel or the performance of the grill.<br />
1.<br />
2.<br />
3.<br />
To help maintain the finish of stainless steel follow these<br />
cleaning tips for the best results:<br />
After every use (after your grill has cooled down), wipe<br />
stainless surfaces with a soft, soapy cloth or sponge<br />
then rinse with water. Be sure to remove all food particles,<br />
sauces or marinades from stainless steel because<br />
these can be highly acidic and damaging to stainless<br />
surfaces.<br />
Never use abrasive cleaners, scrubbers or stiff wire<br />
brushes of any type on your grill.<br />
Use a heat resistant Stainless Steel Cleaner and rub or<br />
wipe in the direction of the stainless steel grain or polish<br />
lines. Do not polish against the grain.<br />
! WARNING !<br />
Failure to comply with these instructions could<br />
result in a fire or explosion that could cause serious<br />
bodily injury, death or property damage.<br />
Keep grill area clear and free from combustible materials,<br />
gasoline and other flammable vapors and<br />
liquids.<br />
Do not obstruct the flow of air for combustion and<br />
ventilation.<br />
Keep the ventilation openings of the tank enclosure<br />
cabinet free and clear of debris.<br />
Visually check burner flames occasionally to ensure<br />
proper flame pattern as shown below.<br />
MAGNIFIED VIEW OF INFRARED BURNER FLAME THROUGH<br />
OPEN LID.
Burn-Off<br />
Infrared Grill Cooking Instructions<br />
Before cooking on your gas grill for the first time, you<br />
should "burn off" the grill to eliminate any odor or foreign<br />
matter. Ignite the burners, lower the Lid, and operate grill<br />
on setting for 3 to 5 minutes.<br />
CAUTION: Infrared cooking times will be much shorter<br />
than traditional grilling so never operate this appliance<br />
unattended.<br />
Preheating<br />
To preheat, light your grill on , lower the<br />
Lidand follow this timetable.<br />
For searing and high temperature cooking,<br />
preheat grill 3 to 5 minutes.<br />
For low temperature cooking, preheat grill<br />
3 minutes.<br />
To slow cook, preheating is not necessary.<br />
Control Knob Settings<br />
High setting: The Control Knob setting should only<br />
be used to pre-heat your grill the first 3-5 minutes, for<br />
searing foods and for burning food residue off the grill<br />
for 3-5 minutes after cooking is complete.<br />
CAUTION: Infrared burners burn much hotter than burners<br />
on traditional grills. Never operate this appliance<br />
unattended.<br />
Low setting : Most recipes specify the low setting for<br />
baking, roasting, rotisserie cooking and grilling delicate<br />
foods such as fish, vegetables and bread.<br />
An Important Note About Infrared Heat Settings<br />
The suggested heat settings and cooking times shown<br />
in the following pages are approximate. Unlike the<br />
controlled environment inside your kitchen, variables<br />
including outside temperatures, direction and conditions<br />
of wind, as well as grill location will affect your grill's<br />
heat distribution. Because these conditions vary, and no<br />
two backyards are alike, we offer these tips as general<br />
guidelines for your reference. We recommend you monitor<br />
your grill closely and rotate foods often to prevent<br />
overcooking and ensure the most delicious results<br />
every time.<br />
The heat from the front and rear infrared burners overlap<br />
in the mid section of each cooking grid. This area offers<br />
the most intense heat for quickly locking in the natural<br />
juices and flavor of poultry and meats.<br />
The Secondary Cooking Rack offers less intense heat<br />
for preparing breads and firm vegetables like potatoes<br />
and corn.<br />
Infrared heat sears the food surface and cooks from the<br />
inside out. Infrared heat does not cook through aluminum<br />
foil and reflective pans. For roasting and baking<br />
you'll find a cast-iron pan works beautifully as it absorbs<br />
and conducts the infrared heat very well.<br />
Direct Cooking<br />
The direct cooking method can be used with the food<br />
placed on the mid section of each cooking grid where the<br />
infrared heat is most intense. Direct Cooking requires<br />
the Grill Lid to be open. This method is ideal for searing<br />
and grilling as well as deep frying in a cast-iron pan or<br />
stir-frying in a steel wok.<br />
A-1<br />
Indirect Cooking<br />
To cook indirectly, the food should be placed on the<br />
left or right side of your grill (or Secondary Rack) with the<br />
Burners lit on the opposite side. Rotate the food as<br />
needed to ensure even browning. This is the slow<br />
cooking method. A faster indirect method is to place<br />
your food in an optional cast-iron cooking pan and place<br />
it in the center of the grill with all burners on LOW. Be<br />
sure to add liquid if using a pan to keep food moist. If<br />
higher heat is desired, turn Left Front (LF) and Right<br />
Rear (RR) burners on HIGH with Left Rear (LR) and<br />
Right Front (RF) burners on LOW to create a crossray<br />
cooking pattern. Either way, indirect cooking must be<br />
done with the Lid down.<br />
Prepare Cooking Grids for Grilling<br />
Greasing the cooking surface will help keep foods<br />
from sticking during the cookout, produces beautiful<br />
sear marks and reduces the amount of cleanup required.<br />
Use a brush to apply a thin layer of cooking oil<br />
or vegetable shortening onto each Cooking Grid before<br />
each cookout. We do not suggest spray type oils unless<br />
they are specified for high-temperature cooking.<br />
To Reduce Flare-Ups and Smoke<br />
Fat and juice dripping from grilled food can cause flareups<br />
and smoke. To minimize this, cook your food in the<br />
mid section of each cooking grid so drippings fall<br />
through the center of the grill into the Grease Tray<br />
below.<br />
! WARNING !<br />
Failure to comply with these instructions could result<br />
in a fire or explosion that could cause serious bodily<br />
injury, death or property damage.<br />
Never cover the cooking grids, bottom of grill bowl<br />
or Grease/Water Tray with charcoal, aluminum foil,<br />
and or any substance that can absorb grease.<br />
Before each use of your grill: Pull out the Grease Tray<br />
and remove all grease and food debris to prevent<br />
grease fire hazard.<br />
Use your grill at least 3 feet away from any wall<br />
or surface. Use your grill at least 3 feet away from<br />
combustible objects that can melt or catch fire<br />
(such as vinyl or wood siding, fences and overhangs)<br />
or sources of ignition including pilot lights<br />
on water heaters and live electrical appliances.<br />
Never use your gas grill on a balcony, deck, or<br />
patio above the ground floor of your home.<br />
Never use your gas grill in a garage, porch, shed,<br />
breezeway or any other enclosed area.<br />
Your grill will get very hot. Always wear a flame<br />
retardant <strong>BBQ</strong> Mitt when cooking on your grill and<br />
handling the Grease Tray. Never lean over cooking<br />
areas while using grill. Do not touch cooking surfaces,<br />
Lid, grill housing or other parts while grill is in<br />
operation, or until the grill has cooled down after use.
Grilling Steak and Ribs<br />
Guide to Infrared Grilling using the Direct Cooking Method<br />
Turn the grill Burners on , close the Lid and preheat your<br />
grill 3 to 5 minutes. Open Lid and place food on the mid<br />
section of a Cooking Grid. Sear 2-3 minutes on each side<br />
then adjust the Infrared Burners to LOW and continue<br />
cooking until desired doneness. You can also move the<br />
seared meat to the Secondary Cooking Rack to finish<br />
cooking. This method allows you to sear and prepare larger<br />
amounts of meat and keep cooked food warm. Grilling times<br />
will vary according to meat thickness.<br />
Grilling Hamburgers, Brats and Sausages<br />
Turn the grill Burners on , close Lid and preheat your grill<br />
3 to 5 minutes. Open Lid and place food on the mid section<br />
of a Cooking Grid. Sear 2-3 minutes on each side then<br />
adjust the Infrared Burners to LOW and continue cooking<br />
until desired doneness. Grilling times will vary according to<br />
meat thickness.<br />
Grilling Poultry<br />
Turn the grill Burners on , close Lid and preheat your grill<br />
2 to 3 minutes. Open Lid and place food on the mid section<br />
of a Cooking Grid. Sear 2-3 minutes on each side then adjust<br />
the Infrared Burners to LOW and continue cooking until<br />
desired doneness.<br />
To minimize flare-ups, use skinless poultry or use the<br />
indirect method. Place the poultry on one side of the grill with<br />
the opposing Burners on LOW heat, and lower the grill Lid.<br />
Grilling Pork<br />
Turn the grill Burners on , close Lid and preheat your grill<br />
3 to 5 minutes. Open Lid and place food on the mid section<br />
of a Cooking Grid. Sear 2-3 minutes on each side then adjust<br />
the Infrared Burners to LOW and continue cooking until<br />
desired doneness. Grilling times will vary according to meat<br />
thickness.<br />
Whole Fish and Whole Fillets<br />
Turn the grill Burners on , close Lid and preheat your grill<br />
3 to 5 minutes. Open Lid and place food (skin down) on the<br />
mid section of a Cooking Grid. Sear 2 minutes on each side<br />
then adjust the Infrared Burners to LOW and continue<br />
cooking until fish is opaque but still moist.<br />
Vegetables and Fruit<br />
Prepare your fruit or vegetables and brush with butter or<br />
basting sauce if desired. In some instances, you may want<br />
to grill vegetables and fruit directly over the heat, using the<br />
supplied Cooking Grids. Foods that work best with direct<br />
heat are relatively soft and require a short cooking time:<br />
mushrooms, zucchini, tomatoes and skewered fruit such as<br />
apricots, peaches, pineapple, strawberries and kiwis. Remember<br />
the Grill Lid must remain up when cooking directly.<br />
To cook indirectly, the food should be placed on the left or<br />
right side of your grill (or Secondary Rack) with the Burners<br />
lit on the opposite side. Either way, indirect cooking must<br />
be done with the Lid down.<br />
A-2<br />
Cut of Meat<br />
T-bone steak<br />
Sirloin steak<br />
Beef spare ribs<br />
Porterhouse Steak<br />
New York strip steak<br />
Hamburgers<br />
Brats<br />
Sausages<br />
Chicken breast<br />
(cook with bone down)<br />
Chicken wings<br />
Drumsticks<br />
Whole bird<br />
(cook with breast up)<br />
Chops<br />
Loins<br />
Cutlets<br />
Whole fish<br />
Whole fish fillets<br />
Approx. Total Cooking Times<br />
Rare: 4-6 minutes<br />
Medium: 6-8 minutes<br />
Well done: 8-10 minutes<br />
Rare: 3-4 minutes<br />
Medium: 5-6 minutes<br />
Well done: 6-8 minutes<br />
Direct method:<br />
approximately 6-8 minutes<br />
Indirect method:<br />
up to 30 minutes<br />
Indirect method:<br />
approximately 1 hour<br />
Medium: 10-12 minutes<br />
Well done: 12-14 minutes<br />
Approx. 8 - 18 minutes or<br />
until fish is opaque<br />
For very firm vegetables—particularly potatoes and yams,<br />
we recommend that you partially boil until almost cooked,<br />
before placing them on the grill.<br />
CAUTION: Infrared cooking times will be much shorter<br />
than traditional grilling so never operate this appliance<br />
unattended.<br />
NOTE: Do not use aluminum foil to wrap vegetables and fruit.<br />
Infrared heat does not cook through aluminum foil and<br />
reflective pans.
Type of Food<br />
Beef<br />
Lamb<br />
Guide to Roasting & Baking using the Indirect Cooking Method<br />
An Important Note About Infrared Heat Settings<br />
The suggested heat settings and cooking times shown are<br />
approximate. Unlike the controlled environment inside your<br />
kitchen, variables including outside temperatures, direction<br />
and conditions of wind, as well as grill location will affect your<br />
grill's heat distribution. Because these conditions vary, and<br />
no two backyards are alike, we offer these tips as general<br />
guidelines for your reference. We recommend you monitor<br />
your grill closely and rotate foods often to prevent overcooking<br />
and ensure the most delicious results every time.<br />
Preparing to Roast<br />
Roasting uses the indirect cooking method. Therefore, the<br />
food should be placed on the left or right side of your grill with<br />
the Burners lit on the opposite side. You can also use an<br />
optional cast-iron pan underneath food allowing you to collect<br />
juices for making gravies. Remember, indirect cooking requires<br />
the Lid of your grill to be down.<br />
Preheating your grill is not required for slow cooking methods<br />
such as roasting. If you do choose to preheat your grill before<br />
roasting, turn the Burners on HIGH and close Lid for approximately<br />
2 minutes.<br />
Veal<br />
Pork<br />
Chicken<br />
Duck<br />
Fish<br />
Turkey, under 16 pounds<br />
Turkey, over 16 pounds<br />
BAKING TECHNIQUES<br />
Preparing to Bake<br />
To bake in your new grill you'll need a baking dish or cast-iron<br />
cooking pan, and a pair of flame retardant <strong>BBQ</strong> Mitts. If the<br />
cooking pan is cast-iron be sure to season the pan before use.<br />
Preheat your grill 3 minutes, then lower heat as needed. Baking<br />
uses the indirect cooking method. To cook indirectly, the food<br />
should be placed on the left or right side of your grill with the<br />
Burners lit on the opposite side. This is the slow cooking<br />
method. A faster indirect method is to place your food in an<br />
optional cast-iron cooking pan and place it in the center of the<br />
grill with all burners on LOW. If higher heat is desired, turn Left<br />
Front (LF) and Right Rear (RR) burners on HIGH with Left Rear<br />
(LR) and Right Front (RF) burners on LOW to create a crossray<br />
cooking pattern. Either way, indirect cooking must be done<br />
with the Lid down.<br />
Tips for Baking<br />
Prepare your favorite recipe as you would in the kitchen. You will<br />
need to stir the food several times as it bakes, and add<br />
additional liquid as required. Watch the temperature, and<br />
adjust to cook according to your recipe directions.<br />
Oven Temperature<br />
Slow 300° - 340° F<br />
Moderate 355° - 390° F<br />
High 410° - 480° F<br />
A-3<br />
Food preparation<br />
Trim meat of excess fat. Truss meat and poultry with cooking<br />
string to retain shape if desired. Bacon strips can be used to<br />
cover the outside surface of lean meat and poultry to help<br />
prevent it from drying out. If using an optional cast-iron pan for<br />
cooking, you should also add liquid to prevent burning the<br />
bottom of your food.<br />
Tips for roasting<br />
Except when roasting with water in a roasting pan, the juices<br />
that collect in the pan can be used as the base for a tasty sauce<br />
or gravy. Place a cooking pan directly over the cooking grids,<br />
add extra butter if needed, then add several spoonfuls of flour<br />
to thicken sauce. Finally, add sufficient chicken or beef stock<br />
to obtain the desired consistency.<br />
Once the meat is cooked, remove it from your grill and cover<br />
with a piece of foil. Allow it to stand for 10-15 minutes which<br />
allows the juices to settle. This will make carving easier and<br />
ensure a tender, juicy roast.<br />
How Cooked<br />
Rare<br />
Medium<br />
Well done<br />
Medium<br />
Well done<br />
Approximate Cooking Times<br />
14 minutes per pound<br />
18 minutes per pound<br />
20 minutes per pound<br />
14 minutes per pound<br />
18 minutes per pound<br />
22 minutes per pound<br />
23-26 minutes per pound<br />
17-20 minutes per pound<br />
20 minutes per pound<br />
8 minutes per pound<br />
17-20 per pound + 20 minutes<br />
14-18 per pound + 10 minutes<br />
Fish<br />
Safe Minimum Internal Temperatures<br />
145ºF/63ºC<br />
Pork 160ºF/71ºC<br />
Egg Dishes 160ºF/71ºC<br />
Steaks and Roasts of Beef, Veal or<br />
Lamb<br />
145ºF/63ºC<br />
Ground Beef, Veal or Lamb 160ºF/71ºC<br />
Whole Poultry (Turkey, Chicken,<br />
Duck, etc.)<br />
Ground or Pieces Poultry (Chicken<br />
Breast, etc.)<br />
165ºF/74ºC<br />
165ºF/74ºC<br />
Recommended Grill Setting<br />
Left or right 2 burners on LOW<br />
All 4 burners on LOW<br />
LF + RR burners on HIGH and LR + RF burners on LOW
STIR-FRYING TECHNIQUES<br />
This method of cooking is popular around the world and can<br />
be easily accomplished outdoors on your gas grill. It's a quick<br />
and healthy way of preparing a complete meal using meat,<br />
poultry or seafood in infinite combinations with other interesting<br />
ingredients like vegetables, rice or noodles.<br />
Preparing to Stir-fry<br />
Although it is possible to stir fry in other dishes, a wok is your<br />
best tool. Its high sides enable the cook to stir food without<br />
spillage. Its construction allows you to cook quickly at high<br />
temperatures, with instant control of heat which is essential<br />
for successful stir frying.<br />
Food preparation<br />
Slice meat and poultry into long thin strips and cube fish fillets.<br />
Remove all fat from meat and poultry and cut large vegetables<br />
into even slices or cubes.<br />
Marinate foods for extra flavor and tenderness. Marinating<br />
times will vary for red meat, fish and or various cuts. Less<br />
tender cuts of meat should be marinated longer. Remember<br />
to always chill marinating food in the refrigerator prior to<br />
cooking.<br />
Stir-fry meats, poultry or fish first. Next, add hard vegetables<br />
like carrots. Then continue with softer vegetables like<br />
snowpeas and peppers. To ensure even cooking, continually<br />
stir and toss the food in the wok using a wooden spoon or<br />
spatula.<br />
Tips for Stir-frying<br />
Place a wok on a Cooking Grid in the path of direct infrared heat.<br />
Add only a small amount of food at a time to ensure fast<br />
cooking and also to allow the wok to reheat between ingredients.<br />
Vegetables are generally easy to cook on the grill. The<br />
Secondary Cooking Rack makes it convenient because you<br />
can still use the main cooking area while the vegetables are<br />
suspended above the grids.<br />
Pre-cook hard vegetables by briefly boiling or microwaving<br />
them before cooking on the grill. Do not grill your vegetables<br />
wrapped in aluminum foil. Infrared heat does not cook<br />
through aluminum foil and reflective pans. To keep vegetables<br />
moist, brush them with butter or oil often.<br />
Guide to Stir-Frying and Deep-Frying<br />
A-4<br />
DEEP-FRYING TECHNIQUES<br />
A wide variety of foods can be deep-fried outdoors on your<br />
grill, from potatoes, to seafood and chicken. Deep-frying<br />
uses a large portion of oil, preferably saturated. The outdoor<br />
location is ideal for deep-frying as smoke, grease and<br />
smells disperse in the open air instead of collecting on the<br />
ceiling of your kitchen.<br />
Preparing to Deep-fry<br />
Deep-fry on your grill using an optional cast-iron pan placed<br />
on a Cooking Grid in the path of direct infrared heat.<br />
Fill a cooking pan no more than half full of vegetable or corn<br />
oil. Turn the grill Burners on HI, close Lid and preheat your<br />
grill 3 to 5 minutes. Open Lid and place cast-iron pan on the<br />
mid section of a Cooking Grid then adjust the Infrared<br />
Burners to LOW.<br />
Check the temperature of the oil carefully with a frying<br />
thermometer or test with a cube of bread. The cube of bread<br />
should brown in about 30 seconds for most cooking needs.<br />
350°F(177°C) is the optimal temperature for preparing the<br />
majority of deep-fried foods.<br />
Food Preparation<br />
Foods being deep-fried taste better when coated with either<br />
batter or breadcrumbs to add flavor and prevent moisture<br />
from escaping.<br />
Tips for Deep-frying<br />
Wear a flame retardant <strong>BBQ</strong> Mitt and slowly lower foods<br />
into the hot oil using a wire scoop, fry-basket or stainless<br />
steel tongs. Add only a small quantity of food to the<br />
oil, allow it to cook, then repeat with another small<br />
quantity. This ensures the oil doesn't drop in temperature.<br />
Once the food is cooked, remove it carefully and<br />
drain onto a paper towel. Turn the heat off as soon as you<br />
have finished deep-frying and allow your pan to cool.<br />
When the oil is cool, remove all remnants of fried foods<br />
by straining it through a fine metal sieve, and store it in<br />
a clean bottle for future use.<br />
Guide to Using the Secondary Cooking Rack<br />
The Secondary Cooking Rack can be used for purposes<br />
other than just the obvious. Consider using the rack for<br />
warming French bread, garlic bread, croissants or even<br />
bagels.
FREQUENTLY ASKED QUESTIONS (FAQ'S)<br />
Question:<br />
Can I convert my grill from one fuel type to another in<br />
other words from LPG to NG or vice versa?<br />
Answer:<br />
No, your gas grill is manufactured to exact specifications<br />
and is certified for LPG (Liquid Propane Gas) or NG<br />
(Natural Gas) use only. For your safety, conversion kits are<br />
not available, nor will we sell or otherwise provide parts or<br />
information to be used to convert your grill. Any attempt to<br />
convert your grill is dangerous and will void your warranty.<br />
Question:<br />
Are the serial and model numbers of my grill listed<br />
somewhere for reference?<br />
Answer:<br />
The serial and model numbers are listed on a silver CSA<br />
label placed on the grill. Depending on the grill model the<br />
silver CSA label will be located on the left or right side<br />
bowl panel underneath the side shelf, underneath the<br />
right side of the control panel, outside left or right of control<br />
panel or on the back of the grill cabinet.<br />
Question:<br />
My grill will not light properly. Why?<br />
Answer:<br />
Always light the Main Burner farthest from the fuel source<br />
first. This will draw gas across the manifold helping prevent<br />
air pockets which obstruct gas-flow and prevent proper grill<br />
lighting. Also try this procedure:<br />
1.<br />
2.<br />
3.<br />
Question:<br />
If my ignitor or battery is not working how can I light my<br />
grill manually? And - Why would I need the silver lighting<br />
stick that hangs from the side of my grill?<br />
Answer:<br />
Turn gas off at source and turn Control Knobs OFF.<br />
Wait at least 5 minutes for gas to clear, then retry.<br />
If your grill still fails to light, turn the Burner Control<br />
Knob(s) and gas source OFF and conduct a leak test<br />
of ALL gas connections and gas sources as explained<br />
in the Use and Care section of this manual.<br />
If no leaks are detected, wait 5 minutes for any gas to<br />
clear and repeat the lighting procedure.<br />
If your ignition fails to work or if your battery needs<br />
replacing, you can light your grill using the <strong>Manua</strong>l<br />
Lighting Stick. The Lighting Stick is designed to hold a<br />
paper match and allows you to safely insert a match<br />
through the Cooking Grid without getting close to the<br />
Burner. To light your gas grill manually, insert a paper<br />
match into the <strong>Manua</strong>l Lighting Stick and follow steps 1<br />
through 5 of the Basic Lighting Procedures. Then, light<br />
the match and place the Lighting Stick through the<br />
Cooking Grid. Turn the nearest main Burner Control<br />
Knob to the setting to release gas. The Burner should<br />
light immediately.<br />
!<br />
WARNING !<br />
Never lean over the grill cooking area while lighting<br />
your gas grill. Keep your face and body a safe<br />
distance (at least 18 inches) from the front of grill<br />
when lighting your grill by match.<br />
A-5<br />
Question:<br />
Sometimes I hear a humming sound coming from my<br />
regulator. What causes this? And - My grill has a low<br />
flame and sometimes will not light. Why?<br />
Answer:<br />
The humming sound is gas flowing through the<br />
regulator. A low volume of sound is normal and will not<br />
interfere with the operation of your grill. Loud or<br />
excessive regulator humming and/or low flow and<br />
intermittent lighting may be caused by the regulator's<br />
excess gas flow device. Opening the tank valve all the<br />
way or too quickly is what triggers the regulator's safety<br />
device to restrict gas flow, preventing excess gas flow<br />
to your grill. Lighting the main Burner farthest from the<br />
fuel source every time will help eliminate air pockets in<br />
the manifold. Note: This procedure should be done<br />
every time a new LP Gas tank is connected to your grill.<br />
Turn all Control Knobs to the OFF position.<br />
Turn off the LP Gas tank at the tank valve.<br />
For Natural Gas shut off NG valve.<br />
Disconnect regulator from LP Gas tank.<br />
For Natural Gas disconnect regulator from 12 ft.<br />
Natural Gas Hose.<br />
Let unit stand for 5 minutes.<br />
Reconnect regulator to the LP Gas tank.<br />
For Natural Gas reconnect regulator to 12 ft. Natural<br />
Gas Hose.<br />
Open grill Lid.<br />
Turn the tank valve slowly ¼ of one turn.<br />
For Natural Gas open Shut Off valve.<br />
Light main Burner farthest from fuel source.<br />
Turn the tank valve slowly one more ¼ of one turn<br />
for ½ of one complete turn.<br />
Continue to light Burners moving towards the fuel<br />
source.<br />
Do not turn tank valve more than ½ of one turn on<br />
LPG models.<br />
Question:<br />
Where do I use my grill for safer operation and better<br />
performance?<br />
Answer:<br />
Strong winds and low temperatures can affect the<br />
heating and performance of your gas grill so factor<br />
in these elements when positioning your grill<br />
outdoors for cooking.<br />
In windy conditions, always position the front of<br />
grill to face oncoming wind to reduce smoke and<br />
heat blowing in your face and prevent potential<br />
hazards to self and grill.<br />
Use your grill at least 3 feet away from any wall or<br />
surface.<br />
Use your grill at least 3 feet away from combustible<br />
objects that can melt or catch fire (ex: vinyl or wood<br />
siding, fences and overhangs) or sources of<br />
ignition including pilot lights on water heaters and<br />
live electrical appliances.<br />
Never use your gas grill in a garage, porch, shed,<br />
breezeway or any other enclosed area.<br />
Never use your gas grill on a balcony, deck, or<br />
patio above the ground floor of your home.<br />
Never obstruct the flow of ventilation air around<br />
your gas grill housing.
Question:<br />
The Regulator and Hose supplied with my gas grill<br />
does not fit the older LP Gas tank I’ve used for years.<br />
Why not?<br />
Answer:<br />
The U.S. Government regulates gas appliances and LP<br />
Gas tanks. When regulations are changed the LP Gas<br />
tank fittings are altered to insure compliance. If your LP<br />
Gas tank does not fit the Regulator and Hose supplied<br />
with your new grill, the tank is outdated and must be<br />
replaced. Note: Effective April 1, 2002 all LP Gas tanks<br />
sold must include an “OPD” Overfill Prevention Device.<br />
The OPD tanks are identified by their triangular-shaped<br />
valve wheel. This internal device prevents the LP Gas<br />
tank from being overfilled. Tanks without an OPD valve<br />
can not be refilled.<br />
Question:<br />
What causes grill parts to rust and what effect does<br />
it have on my grill?<br />
Answer:<br />
Rusting is a natural oxidation process and will not affect<br />
the short term performance of your grill.<br />
To slow the rusting process on Cooking Grids we<br />
recommend greasing the grids before and after each<br />
cookout. Use a brush to apply a thin layer of cooking oil or<br />
vegetable shortening onto each grid. We do not suggest<br />
spray type oils unless they are specified for hightemperature<br />
cooking. If your Cooking Grids are Porcelain<br />
coated, be sure to coat the entire cooking surface including<br />
edges and any areas with chipped porcelain.<br />
Routine care and maintenance is required to preserve the<br />
appearance and corrosion resistance of stainless steel.<br />
The fact is stainless steel can corrode, rust and discolor<br />
under certain conditions. Rust is caused when regular steel<br />
particles in the atmosphere become attached to the stainless<br />
steel surface. Steel particles can also become attached<br />
to your grill if you use steel wool or stiff wire brushes to<br />
clean the grill instead of non-abrasive cloth, sponge or nylon<br />
cleaning tools. In coastal areas rust pits can develop on<br />
stainless surfaces that cannot be fully removed. Bleach<br />
and other chlorine based solutions used for household<br />
and pool cleaning can also cause corrosion to stainless<br />
steel.<br />
Weathering, extreme heat, smoke from cooking and machine<br />
oils used in the manufacturing process of stainless<br />
steel can cause stainless steel to turn tan in color. Although<br />
there are many factors which can affect the surface appearance<br />
of stainless steel, they do not affect the integrity of the<br />
steel or the performance of the grill. To help maintain the<br />
finish of stainless steel follow these cleaning procedures<br />
for the best results:<br />
A-6<br />
After every use (after your grill has cooled down), wipe<br />
stainless surfaces with a soft, soapy cloth or sponge<br />
then rinse with water. Be sure to remove all food particles,<br />
sauces or marinades from stainless steel because<br />
these can be highly acidic and damaging to stainless<br />
surfaces.<br />
Never use abrasive cleaners, scrubbers or stiff wire<br />
brushes of any type on your grill.<br />
Use a heat resistant Stainless Steel Cleaner and rub or<br />
wipe in the direction of the stainless steel grain or polish<br />
lines. Do not polish against the grain.<br />
FREQUENTLY ASKED QUESTIONS (FAQ'S)
Grand Hall will warrant to the ORIGINAL PURCHASER of this product that it will be free of defects in material<br />
and workmanship for set periods below from the date of purchase when used under normal outdoor use<br />
and correct assembly:<br />
Full Warranty on Grill - 1 year (except for paint loss, rusting and ignitor battery)<br />
Infrared Burners - 5 Years<br />
Grand Hall will require reasonable proof of your date of purchase. Therefore, you should send in the owner<br />
registration card or register online at www.grandhall.com. Save your receipt in case it is required as proof<br />
of purchase.<br />
This Limited Warranty is limited to replacement of parts at Grand Hall's option that proved to be defective<br />
under normal use and service.<br />
Grand Hall may require the return of defective parts for examination before issuing replacement parts. If you<br />
are required to return defective parts, shipping charges must be prepaid. No returns will be accepted without<br />
prior authorization from Grand Hall.<br />
Upon examination and to Grand Hall's satisfaction, if the original part is proven defective, Grand Hall may<br />
approve your claim and elect to replace such parts without charge. You will be charged for shipping and<br />
handling of the replacement parts.<br />
This Warranty does not cover any failures or operating difficulties due to accident, abuse, misuse, alteration,<br />
misapplication, vandalism, improper installation, maintenance, operation or service, as set out in the Operator's<br />
<strong>Manua</strong>l.<br />
This Warranty does not cover cosmetic wear and tear such as scratches, dents, corrosion or discoloration<br />
caused by weather, heat, chemicals, paint loss, or surface rust. Deterioration or damage due to severe weather<br />
conditions such as hail, hurricanes, earthquakes, tsunami, tornadoes, Act of God or terrorism is not covered<br />
by this Limited Warranty.<br />
To Obtain Warranty:<br />
Call 1-877-934-7455<br />
Monday-Friday 8AM-4:30PM CST<br />
Warranty Restrictions:<br />
•<br />
•<br />
•<br />
Grand Hall Limited Warranty<br />
This Warranty is non-transferable and is void if product is used for commercial or rental purposes.<br />
This Warranty applies only when the product is used in the United States or Canada.<br />
This Warranty gives you specific legal rights, and you may also have other rights which vary from state<br />
to state.<br />
Manufacturer:<br />
Grand Hall Enterprise Co., Ltd.<br />
9th Fl., No. 298, Rueiguang Rd., Neihu,<br />
Taipei, Taiwan (114)