ELECTRIC FLIGHT U.K. - British Electric Flight Association
ELECTRIC FLIGHT U.K. - British Electric Flight Association
ELECTRIC FLIGHT U.K. - British Electric Flight Association

You also want an ePaper? Increase the reach of your titles
YUMPU automatically turns print PDFs into web optimized ePapers that Google loves.
<strong>ELECTRIC</strong> <strong>FLIGHT</strong> U.K.<br />
ISSUE No. 72 SPRING 2003<br />
THE MAGAZINE OF THE<br />
BRITISH <strong>ELECTRIC</strong><br />
<strong>FLIGHT</strong> ASSOCIATION
http://www.ezonemag.com<br />
Visit the E-Zone on-line magazine – the best source of<br />
information for the electric flyer on the web today!<br />
� Monthly columns covering nearly all aspects of electric<br />
flight<br />
� Reviews on the hottest new aircraft and conversions<br />
� Pictures of reader’s projects from all over the globe<br />
� Showcase of manufacturers’ electric offerings<br />
� Join the E-flight mailing list and converse with hundreds<br />
of electric flyers from around the world<br />
� Four years of articles archived on-line<br />
� Classified ads<br />
� Links to numerous other electric internet sites<br />
Best of all – it’s free! Be sure to stop in!<br />
http://www.ezonemag.com
<strong>Electric</strong> <strong>Flight</strong> - U.K. Issue 72 - Spring 2003<br />
"To Encourage and Further all Aspects of <strong>Electric</strong> Model <strong>Flight</strong> in<br />
the <strong>British</strong> Isles and Elsewhere" - B.E.F.A. Constitution<br />
BEFA Committee 2003/4 ......................... 4<br />
Chairman's Chatter ................................. 5<br />
News from the AGM .............................. 6<br />
Current Lines ......................................... 7<br />
New-2-U ................................................. 8<br />
Readers' Models .................................. 11<br />
Living with the Piccolo ........................ 17<br />
TLC from your TLO .............................. 23<br />
Fun-Fly Competition Idea .................... 28<br />
BEFA Leagues Final Report ................. 32<br />
Letters to the Committee ...................... 33<br />
Model Motors MV2020/20 ................... 36<br />
Join the Cub! ........................................ 39<br />
CONTENTS<br />
Messerschmitt Me 262 “Schwalbe” ..... 44<br />
FanJet Trainer & Vampire ..................... 51<br />
The Ill-fated career of a Me 109 ............ 53<br />
The Martinet ........................................ 58<br />
“Pico-Stick” Developments .................. 60<br />
A Simple Motor Mount System ........... 62<br />
The Blue Max ....................................... 64<br />
Inspiration ............................................ 66<br />
Preset Speed Controller for FF ............. 73<br />
For Sale / Wanted................................. 76<br />
Event Calendar ..................................... 78<br />
New to <strong>Electric</strong> <strong>Flight</strong>? Start Here ........ 84<br />
BEFA Sales ........................................... 86<br />
Advertisers Index................................. 86<br />
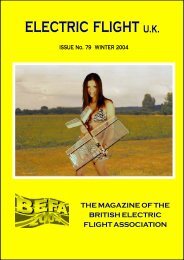
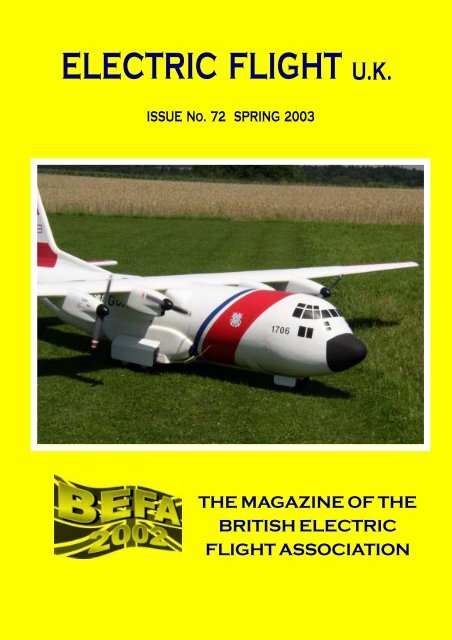
Cover Photo: The cover photograph is Hercules of Jörg Golombek and Michael<br />
Häberle. It is approximately 1/7th scale and spans 19’ 8½” (6m). See page 67 for<br />
more details.<br />
NEXT ISSUE. The copy date for the Summer 2003 issue is 1st June 2003, with<br />
the magazine due for publication by 1st July 2003.<br />
DISCLAIMER<br />
B.E.F.A. and <strong>Electric</strong> <strong>Flight</strong> U.K. wish to point out that the content, techniques<br />
and opinions expressed in this magazine are those of the individual authors and<br />
do not necessarily represent the views of either the Editor of this magazine or<br />
B.E.F.A. and its committee. All reasonable care is taken in the preparation and<br />
compilation of the magazine, but B.E.F.A. and its committee cannot be held liable<br />
for any error or omission in the content of this magazine or any subsequent<br />
damage or loss arising howsoever caused.<br />
To allow proper appreciation of the photographs used, colour copies of them will<br />
be posted on the B.E.F.A. website after publication of this magazine. If you can,<br />
check them out at www.befa.org.uk<br />
E.F.-U.K. 3
BEFA Committee 2003/4<br />
Chairman Robert Mahoney<br />
123 Lane End Road, High Wycombe, Bucks. HP12 4HF<br />
EMail: befa@rlmahoney.co.uk<br />
Secretary Peter Turner<br />
37 Church Street, Horsley, Derbyshire. DE21 5BQ<br />
Email: peter@alport.fsnet.co.uk<br />
Membership Secretary David Andrews<br />
2 Gainsborough Road, Kibworth Harcourt, Leicester. LE8 0SG<br />
Email: david@kibworth.fsnet.co.uk<br />
Treasurer Bob Smith<br />
1 Lynwood Avenue, Tollesby, Middlesborough, Cleveland. TS5 7PD<br />
Email: bobsmith@ntlworld.com<br />
Editor EF-UK Jan Bassett<br />
111 Plantagenet Chase, Yeovil, Somerset. BA20 2PR<br />
Tel. 01935 472743, E-mail: jan.bassett@electric-flight.org.uk<br />
EF-UK Printer Brian Boughton<br />
'Red Roofs', Vicarage Road, Thetford, Norfolk. IP24 2LH<br />
Events Co-ordinator Terry Stuckey<br />
31 Dysart Avenue, Kingston-upon-Thames, Surrey. KT2 5QZ<br />
Competition Secretary David Beavor<br />
34 Chestnut Close, Brampton, Huntingdon, Cambs.<br />
Midlands Representative Roger Winsor<br />
14 Butler Gardens, Market Harborough, Leics. LE16 9LY<br />
Email: Rogerwinsor7@aol.com<br />
Northern Representative Bob Smith, details as Treasurer<br />
Southern Representative Dave Chinery<br />
251 Station Road, Hayes, Middx. UB3 4JD<br />
South West Representative Jan Bassett, details as Editor EF-UK<br />
Indoor & Free-<strong>Flight</strong> Rep. Gordon Tarling<br />
87 Cowley Mill Road, Uxbridge, Middx. UB8 2QD<br />
Email: gordon.tarling@ntlworld.com<br />
Technical Liaison Officer Alan Bedingham<br />
17 Highcliffe Close, Wickford, Essex. SS11 8JZ<br />
Email: bbba18333@blueyonder.co.uk<br />
Public Relations Officer Dave Perrett<br />
10 High Lees, Sharnford, Leicester. LE10 3PW<br />
Tel: 01455 272297, Email: d.l.perrett@btinternet.com<br />
Webmaster Jan Bassett, details as Editor EF-UK - (www.befa.org.uk)<br />
Safety Adviser Stan Rose<br />
Tel: 01636 525029, Email: rose@elston4.freeserve.co.uk<br />
Please enclose an SAE with all postal correspondence to the committee.<br />
4 E.F.-U.K.
Dear Members<br />
Chairman’s Chatter<br />
We are now approaching the thirteenth year since being formed. In the<br />
last year I have attended the Dortmund Modellbau, Sandown Show and<br />
the BMFA Annual General Meeting, the latter with our Secretary Peter<br />
Turner. At these events, we have promoted our <strong>Association</strong> to flyers<br />
from all disciplines.<br />
Over the years I have tried to get flyers from over the channel to come<br />
to one of our events, and this year I succeeded in getting Jean-Paul<br />
Schlösser (JePe) over to the Middle Wallop event. The sight and sounds<br />
of his models said SPEED in a big way!<br />
There are now 400 members in the <strong>Association</strong>. We could double this<br />
amount if every member recruited just one member. It is up to you where<br />
our <strong>Association</strong> goes in the next few years. It would be nice to see the<br />
membership rise to over the 1000 barrier. Just think what the<br />
<strong>Association</strong> could do you for if we had this number of members.<br />
Your committee is now getting ready for the next round of Exhibitions<br />
that we display our wares at, and in organising the fly-ins that are<br />
included in the events pages of this issue and on the web site.<br />
Last year saw two new events on the BEFA calendar, An East Anglia<br />
event at the Phoenix Club’s flying site near Lowestoft and an event at<br />
the Exeter Club’s flying site at Exeter Racecourse. The numbers at these<br />
events were low, but that’s the way that events are formed.<br />
Some good news about Middle Wallop this year is that we have been<br />
granted our weekend event! In fact, we will be the only RC event on this<br />
site in 2003 due to difficulties last year. This is due to your fly-in crew<br />
leaving the airfield as we found it, or better!<br />
I would like to thank your Committee members for the hard work they<br />
have done during the past year.<br />
I wish you all the best for the 2003 flying season, so safe flying and<br />
KEEP THE WATTS UP!<br />
Robert Mahoney<br />
E.F.-U.K. 5
News from the AGM<br />
by the Editor<br />
Just a little note to inform members that could not make the Annual General<br />
Meeting (AGM) of the significant points of interest.<br />
• Firstly, I’m sure you’ll be interested to know the Membership fee for the coming<br />
year - well good news as they remain unchanged, which is £20 for UK members.<br />
• Constitution changes:<br />
• The post of Safety Officer has been changed to that of Safety Adviser to<br />
fall in line with the BMFA guidelines.<br />
• It was agreed at the AGM that Robert Mahoney and Bob Smith be granted<br />
life membership of the BEFA.<br />
• Election of Committee Officials.<br />
• The following individuals had been co-opted into committee positions at<br />
the last AGM and were elected to stand for 1 year to fall in line with the<br />
normally committee election cycle.<br />
• Secretary Peter Turner<br />
• Membership Secretary David Andrews<br />
• The following individuals were elected / re-elected to the committee:<br />
• Chairman Robert Mahoney<br />
• Treasurer Bob Smith<br />
• Public Relations Officer David Perrett<br />
• Competition Secretary David Beavor<br />
• Technical Officer: Alan Bedingham<br />
• Safety Adviser: Stan Rose<br />
• It was announced that the Membership incentive scheme will commence with<br />
effect from the next membership year (starting 1st April 2003). This takes the<br />
form of a £5 discount voucher for each new member that you introduce. The<br />
voucher(s) will be redeemable against your membership next year.<br />
• Award of Trophies / Certificates:<br />
• E400 League<br />
• 1st Trevor Grey<br />
• 2nd Bob West<br />
• 3rd Dave Perrett<br />
6 E.F.-U.K.
• Electroslot League<br />
• 1st Dave Perrett<br />
• 2nd Stephen Mettam<br />
• 3rd Stan Rose<br />
• The Exide / Drydex Trophy was awarded to Kevin Saunders for his<br />
Rafale ducted fan and Thunderbird 5 models.<br />
• The QFI Trophy was awarded to Bob Smith for the technical articles he<br />
has written for the modelling press.<br />
I unfortunately have to inform you that an item was stolen from the Bring & Buy<br />
stand. The committee work very hard on the Bring & Buy stand in an effort to<br />
help offset the cost of renting the centre for the AGM and Technical Workshop.<br />
This callous act made most of our effort pointless and directly impacts on the<br />
money available to the <strong>Association</strong>. The impact is not just restricted to the financial<br />
penalty, but also to the seriously demoralising influence it has on the committee.<br />
This theft will be raised at the BEFA committee meeting to discuss whether we<br />
continue the Bring & Buy stand. If we do decide to continue the Bring & Buy<br />
stand, we will almost certainly have to make some changes to the format.<br />
Current Lines<br />
from the Editor<br />
My thanks to everyone that has contributed to the magazine in the recent past,<br />
which made my job much easier due to the amount of information available.<br />
However, I have very little in reserve and will need more information for future<br />
issues. Please pen to paper, or fingers to keyboard and drop me some information.<br />
I have been promised a number of articles on a diverse range of subjects, which<br />
should make the next issue interesting if they all materialise. If you’ve promised<br />
me article, please send it in as soon as you can so I can get it ready for publication.<br />
The additional time also allows for any queries to be answered without affecting<br />
the publication date.<br />
I have been too busy to do any more on my D.H.2, but I have completed a small<br />
EDF Alpha Jet and a Multiplex Kranich for the coming season. I’m also planing a<br />
large model using a Torcman TM430 motor to provide about 1000W - more<br />
information on all these in a future issue.<br />
It is membership renewal time and this years form is included with this issue.<br />
David Andrews is waiting for the forms to appear, so don’t disappoint him.<br />
Remember that if you want to get something off your chest or to get the members<br />
views, you can always send in a letter for inclusion.<br />
Jan<br />
E.F.-U.K. 7
New-2-U<br />
A Brief Round-up of New Items of Interest<br />
Crossfire<br />
Howard Metcalf's fabulous design for 600 motors is now available again! Pre-cut<br />
fuselage sides and die cut ribs, together with top quality wood and fittings make<br />
this a superb aerobatic electric plane for the discerning builder and flier.<br />
This amazing aerobatic electric plane will fly quite adequately on a humble 600 -<br />
or for totally ballistic performance try a brushless motor! The speed range is<br />
incredible - at an all up weight of 40 ozs (1.1kg) and with full up elevator and<br />
trim, it will gently 'mush' rather than stall! Flat out with a brushless, the speed<br />
is breathtaking!<br />
With little effort, the Crossfire can also be flown as a slope soarer. (Look out for<br />
Slopefire coming soon!)<br />
The fully comprehensive kit is just £49.99 + £4.50 P&P and available on my mail<br />
order only from Peter Ross at S T C, 29 Hawkers Lane, Wells, Somerset BA5 3JJ.<br />
Tel.: 01749 679739. All major credit cards accepted.<br />
Editors Note: Having bought a Crossfire kit from Howard a few years ago, I<br />
thoroughly recommend it as a sport model - it is still one of my favourites.<br />
8 E.F.-U.K.
Max Rivers - Torcman Motors & Components<br />
Readers may remember the TorqueMax LRK brushless DIY motors from Issue 68.<br />
The main advantage of LRK motors is low rpm, high torque and the ability to<br />
turn large props without the use of a gearbox. For those who don't have access to<br />
a lathe the full range of parts, sub-assemblies, kits, finished motors, speed<br />
controllers and accessories are now available in the UK from importer Max Rivers.<br />
The aim of Max Rivers is to encourage wider understanding, innovation and to<br />
help promote enjoyment of LRK motor design principles. This type of motor springs<br />
from a series of articles published in a German magazine, since when many modellers<br />
have built their own examples using a lathe, salvaged stator parts and magnets.<br />
For those who want to experiment further the beautifully designed and engineered<br />
turned parts produced in Blaustein by Torcman are worthy of special attention.<br />
The parts of an Eco X motor kit with optional assembled & glued rotor<br />
Currently these parts are produced in 3 stator diameters (28, 35 & 43 mm) with<br />
up to 4 different stator lengths (from 5 to 30 mm). Altogether a set of 9 different<br />
sizes of motor ranging in capacity from around 40W to over 1.8kW. Also being<br />
developed is a 20mm size 'Baby' indoor motor. For those who can never get enough,<br />
the TM685-40 'Monster' can deliver up to 3.5kW, is made to limited order on an<br />
experimental basis while we wait for speed controller technology to fully catch up.<br />
By varying the coil windings Torcman motors can be optimised for different<br />
applications. The operating speed of each type of motor can be finely tuned from<br />
4,000 to 15,000 rpm by varying the number of turns and gauge of wire employed<br />
in the winding. This makes it possible to find the perfect power unit for almost<br />
every application of electric flight from slow flyers through sports, aerobatic and<br />
scale to high-performance hotliners and helicopters.<br />
E.F.-U.K. 9
A partially assembled TM350-28 motor with 12 turns<br />
One way to decide is to select a motor with the capacity to deliver the power<br />
required, then determine a winding to match the propeller to the airframe. The<br />
choice can sometimes be daunting because combinations of winding/prop/battery<br />
can lead to dozens of different performance profiles. Fortunately it is possible to<br />
accurately calculate the motor characteristics. Help is on hand as lots of<br />
information is already available (in English) on the Max Rivers web site<br />
(www.maxrivers.com)<br />
and friendly support is<br />
provided by telephone and<br />
email.<br />
Max Rivers supplies each<br />
motor ready to fly with a<br />
custom winding or in kit<br />
form for self-assembly.<br />
Contact details:<br />
Max Rivers,<br />
7 The Green Wye,<br />
Ashford,<br />
Kent,<br />
TN25 5AJ.<br />
Tel.: 01233 812507<br />
www.maxrivers.com The assembled TM350-28 motor, ready to run<br />
10 E.F.-U.K.
Readers' Models<br />
Your chance to show the members your model(s).<br />
The above photograph was sent in by Dick Godden and is his latest conversion to<br />
electric power. It was originally built in the late 60’s as a slope soarer and had<br />
been in his loft for 30 years.<br />
He says he is embarrassed because he can’t remember the name of the model. The<br />
only thing he remembers is that it was a plan in one of the modelling magazines<br />
and that a fibreglass fuselage was available separately.<br />
Motor: Graupner Speed 600 Race 8.4v motor & Graupner 2.8:1 gearbox<br />
Propeller: 14” x 9.5” CAM folding propeller<br />
Battery Pack: 7 x 2000mAh cells, which give a 4.5 minute motor run.<br />
All-up weight: 62 oz. (1.75kg).<br />
Maybe one of you recognises it and can help out.<br />
If you recognise the model, please contact the Editor with any information, who<br />
will pass on the message.<br />
E.F.-U.K. 11
This is Mike Pirie with his modified Multiplex Twin-Jet. It is powered by 2 Permax<br />
480 motors using Irvine 5” x 5” carbon propellers. Power is supplied by 8 Sanyo<br />
RC-2400 cells through 2 Schulze slim 26 speed controllers. The 2 speed controllers<br />
allow differential control of the motors (on the rudder stick) giving stall turns<br />
and interesting spins. The canopy hatch was built in an elongated form which<br />
allows easier access to the battery and speed controllers. The finish is roughly<br />
based on the MiG 21 “Fishbed” used by the Indian Air Force. The normal flight<br />
time is around 12 minutes.<br />
12 E.F.-U.K.
The second model from Mike Pirie is a modified Balsacraft Bristol Blenheim. Span<br />
60” (154 cm), wing area 530 sq. in. (34 dm 2 ) and weighs 64 oz. (1.8 kg). Power is<br />
from two 8.4v Speed 600 motors and Graupner 8” x 4” SlimProps on 6 Sanyo RC-<br />
3000HV cells giving 9 minute flights. It is modified to allow easy battery changes<br />
from under the wing (the original layout requires the wing to be removed). He<br />
E.F.-U.K. 13
also fitted a clear canopy and gun turret complete with crew (1.5g total weight<br />
from Small Scale Custom Services).<br />
Editor: Close-up of the glazing and crew of the Blenheim - it really does make a<br />
difference to the looks of the model and well worth the effort.<br />
This is another Mike Pirie model, a Voster Hercules. It is 72” (180 cm) span, 580<br />
sq. in. (37.4 dm 2 ) and weighs 116 oz. (3.3 kg). It is powered by 4 x 6v Speed 400<br />
motors with Aeronaut 2.64:1 gearboxes, Graupner 8” x 6” SlimProps and 18<br />
Sanyo CP-1700 cells giving flight times of 7 minutes. Mike says it needs bungee<br />
assistance for ROG, flies like a trainer and the gearboxes produce a very realistic<br />
sound. He also says the kit (bought 3 years ago) was let down by poor accessories<br />
and the lack of English instructions.<br />
14 E.F.-U.K.
Above is an aerobat, called Smooth-E, designed by Stuart Ord. It was designed 3<br />
years ago, and after a few teething troubles is a satisfying flyer. The aim to<br />
produce a model that was able to do big, smooth manoeuvres like i.c. aerobats and<br />
have power to spare. It is now powered by a Mega 22/30/4 brushless motor with a<br />
Robbe Planeta 4.6:1 gearbox, a Hacker controller on 26 to 30 cells and a 12” x 8”<br />
propeller. Span 62” (157 cm), area 650 sq. in. (42 dm 2 ), weight 136 oz. (3.86 kg).<br />
Another model sent in by Stuart Ord, and is a Nano Gnat. Span 28” (71 cm), wing<br />
area 262 sq. in. (16.9 dm 2 ), weight 7 oz. (200g) with 8 x 300mAh NiMH cells.<br />
Powered by a GWS IPS motor, 4:1 gearbox, 2A controller and 10” x 4.7” propeller.<br />
He also flies it with 6 x 300mAh NiMH cells, which saves some weight.<br />
E.F.-U.K. 15
Stuart Ord’s again. He says its not very vintage as it is covered in SolarFilm, but<br />
it looks good in the air. He says the wings a very prone to warping, but are sorted<br />
out easily with a heat gun. Powered by a Speed 600 motor, a 2:1 gearbox, 10” x 6”<br />
propeller on 8 cells.<br />
Below is the final model from Stuart Ord, another own design called Nemesis.<br />
Span 85” (216 cm), wing area 724 sq. in. (46.7 dm 2 ), weight 65 oz. (1.84 kg). It has<br />
a Graupner Speed 700 motor on 10 cells with a direct drive 10” x 8” propeller.<br />
The current draw is around 26A giving 260W. Control is rubber / elevator with an<br />
RC switch operating the motor.<br />
16 E.F.-U.K.
Living with the Piccolo<br />
by John Jackson<br />
Hi all, many of you have no doubt, like myself, have noted in passing the advent<br />
of the indoor helicopter, some may even have taken it up as an interest. Like most<br />
I had seen the adverts but taken no move to acquire one, until actually watching<br />
one fly indoors whilst on holiday, and I was just hypnotized. Maybe it was the<br />
wine, but watching it hanging there defying gravity left enough impression to<br />
trigger a buy a few weeks later.<br />
The Eco Piccolo from Ikarus is a half pound fixed pitch electric helicopter. It uses<br />
a variant of the 280-sized motor and its structure is a few bits of carbon rod and<br />
tube, several fairly complex plastic mouldings and a front canopy stuck together<br />
from thin vac-formed plastic parts. It can be assembled in one evening (honest!<br />
I’ve timed an assembly at just over 2 hours) and uses just two 6 gram servos. The<br />
build instructions are clear and it’s hard to get wrong. There, that doesn’t sound<br />
much does it? Fortunately that’s just the start of the fun.<br />
I took my newly assembled Piccolo to one of our occasional club indoor meets,<br />
and it skittered about the floor, wobbling and attacking ankles, sometimes rotating<br />
rapidly on its four polystyrene training balls. Talk about nervous, the sweat was<br />
making the transmitter slippery. After several hops and lurches some long dormant<br />
heli reactions awoke and I managed a few terrifying seconds of hover, the other<br />
club members watching warily from positions near the far wall. The heli sat in<br />
the air with the right skid low, later I learned this is characteristic for a clockwise<br />
rotor as the tail thrust tries to push the heli left.<br />
Hops got longer, mostly, and were punctuated by panic landings, many of which<br />
detached the rotor head completely, it flying then through the air like a whirling<br />
boomerang on its own, to the amusement of the spectators. This latter behaviour<br />
is a design feature, the<br />
head pops off the hub<br />
bearings to remove the<br />
energy in the spinning<br />
rotor and reduce damage<br />
to the rest of the<br />
mechanics.<br />
Over the course of several<br />
sessions I gained skill and<br />
confidence, until the<br />
training undercarriage<br />
was removed and the heli<br />
could now fly longer, freed<br />
of the extra weight.<br />
A Piccolo heavily disguised in a Bell 222 body kiy<br />
E.F.-U.K. 17
Two years later I’m still learning, and enjoying the thrill of just watching the<br />
little cutie whirring quietly around a hall. I’m getting to grips with flying nose-in<br />
towards me, and have tweaked, modified and generally tinkered with the machine<br />
to my satisfaction.<br />
Encouraged by my eventual ability to do a basic up-down hover, I wanted to meet<br />
with other enthusiasts, and have travelled up to 3 hours on occasion to Coventry,<br />
Halesowen, Dewsbury, Rotherham & Queensferry. These meetings are always in<br />
some sort of large hall, and sometimes have fixed wing fliers enjoying the weatherfree<br />
conditions too. I spent an enjoyable Saturday at Leominster recently at a<br />
heli-only event, we had 18 helis present, all variants on the Piccolo or Modelsport<br />
Hornet, which is Piccolo sized but very different in character. Go to a meeting like<br />
these, will you fellows, loads of tips to pick up and you can see if helis are for you.<br />
So what other kinds of tiny helis are there? Presently there are 3 generally available<br />
families, the Piccolo, Hornet & Mario Arguello’s MIA range (Robin and Housefly).<br />
The Piccolo is available<br />
in fixed pitch form, or<br />
can be converted to<br />
collective pitch, and<br />
just becoming available<br />
are slightly larger<br />
versions, the Eco &<br />
Pro. All have a fixed<br />
pitch tail where yaw<br />
(“rudder”) control is<br />
by varying the speed of<br />
the separate tail<br />
motor. The main<br />
motor is 280 sized, tail<br />
is N20 like the little<br />
Wattage B2 bomber, or<br />
An original Piccolo (left) and new larger Eco Piccolo<br />
150 size for the Pro.<br />
The Hornet is also to be had in fixed or collective pitch, but uses a shaft to take<br />
power to the tail and yaw control is by varying the tail rotor pitch, requiring a<br />
third servo. A 300 motor as per the Graupner version is used.<br />
The MIA designs seem to be rare over here in England, I haven’t seen one yet. The<br />
Robin is 280/300 sized, the smaller Housefly has a Mabuchi 180, it used to use a<br />
150 like the GWS IP series fixed wing motors. Tail motor for the housefly is N20.<br />
Getting going<br />
Any top tips for getting going with your first indoor heli? Yes I have a few:<br />
1. If you can, get someone competent to help tweak your new baby and trim it.<br />
18 E.F.-U.K.
2. Use a training undercarriage, it absorbs some of the shock from sudden landings.<br />
3. Fly in a large space preferably with a smooth floor, and no wind i.e. indoors.<br />
The heli tips over less and you can find lost bits easier.<br />
4. Some time on a simulator will help, but the real thing isn’t quite the same.<br />
5. Never surrender! If the flight goes badly pear-shaped, fight to the last inch to<br />
keep things upright, then shut the throttle promptly once the ground has arrived<br />
to reduce any damage.<br />
A few improvements<br />
What is it about helis that makes pilots so keen to mod. them? Witness the vast<br />
range of aftermarket stuff on heli dealers’ walls! I regularly log on to the Piccolo<br />
bulletin board on the web, and the swapping of ideas, mods., battery types,<br />
beginners’ tips is continuous, this is a very active board. Make no mistake, the<br />
Piccolo flies pretty good out of the box, and other than use an 8 cell NiMH pack<br />
instead of the standard 7 NiCd mine went months without anything except a bit<br />
of cyano here and there.<br />
OK so I glued a bit of balsa above the battery front to stop the battery rear<br />
sagging, glued a bead onto the tail skid to stop it snagging the floor, vented the<br />
canopy top (the motor gets very hot), glued the head bearings on, glued the motor<br />
pinion, weighted the main blade leading edges….see what I mean? By the time you<br />
read this I’ll have again filed, taped, lightened, replaced or bodged something.<br />
The list of things people have done to the Piccolo is really endless, here are some<br />
I have seen, most are applicable to fixed or collective pitch versions:<br />
1. Alloy hub. Recommended! To replace the plastic main rotor hub, which can<br />
break, and to prevent loss of the two ballraces. When the head pops off in a crash,<br />
sometimes the ballraces go<br />
with it and disappear into<br />
some dark corner. They<br />
can be tied on with dental<br />
floss or glued but this is a<br />
better solution.<br />
2. Anti-rotation link. This<br />
drives round the<br />
swashplate; the standard<br />
item is a wobbly thing<br />
with a stiff hinge. It is<br />
possible to make a better<br />
hinge from a control<br />
surface hinge though a<br />
CNC machined version is An experimental brushless motor from an old CD-ROM<br />
available, which also has motor. Rewinding 15 turns of 0.4mm wire and ballraces.<br />
E.F.-U.K. 19
The CD-ROM motor compared to the original motor<br />
the advantage of locating the swashplate properly. As standard this can float<br />
considerably up and down, losing control movement.<br />
3. Swashplate location. The plate has to swivel in 2 axes; the standard setup has<br />
no bearing at the centre, just a gap! Springs, balls, silicon rubber tube, pen parts<br />
have all been ingeniously applied to the shaft to locate the plate and stop it flapping<br />
up and down. A ball conversion is now available for the plate to swivel on, in<br />
conjunction with the above anti-rotation link makes for far more precise control.<br />
4. Main blade bolts. The standard nylon nuts & bolts are horrible, are you listening<br />
Ikarus? Easily replaced with slightly larger metal ones and Nyloc nuts, which<br />
stay adjusted for tightness.<br />
5. Adjustable servo links. Instead of squishing the dogleg in the wire, fit a straight<br />
wire and a screw type clamp on the servo arm.<br />
6. Undercarriage mods. Usually applied after beating the original carbon struts<br />
to death, some have used wire instead, or adapted the MIA kit.<br />
7. Tail skid. Often replaced with wire, from piano wire to paperclip.<br />
8. Cut blades with varying amounts trimmed from the main blade trailing edge to<br />
raise the revs. Improves hover stability, quicker response to controls, copes better<br />
with wind. Beware though, if the motor isn’t fast enough, the heli may not lift!<br />
9. Replacement blades. Carbon replacements from Robert Lee in Sheffield are tough<br />
and intended to improve forward flight. Hornet blades have been tried with success,<br />
they have less pitch so see the comments on cut blades.<br />
20 E.F.-U.K.
10. Tail boom. The original is adequate but seems to split if knocked. Replacements<br />
are available which are stronger or lighter, certainly cheaper, and inventive owners<br />
have used alloy or even dowel.<br />
11. Tail motor. Eventually burns out, more quickly on 8 cell packs. The Wattage<br />
B2 motor is cheaper, or TSH micro motor for electric control line planes. You do<br />
have to fit a pinion to these.<br />
12. Main motor. The standard 295 and 310 motors do work, the 295 doesn’t have<br />
much reserve of power. Normal hop-up is the Orion Elite Micro Modified, a coreless<br />
Swiss motor that requires lower gearing or even cut down blades. For more money<br />
the little Astro 010 or Hacker B20L bring brushless to the Piccolo.<br />
13. Batteries. The standard 250mAh 7-cell pack is good for about 4 minutes on a<br />
Piccolo. Use Sanyo or Panasonic AAA cells, the red JST connectors can be bettered<br />
but they work OK. For longer flights 8 AAA NiMH cells (not all types are good)<br />
give twice the flight time, but please let the motors cool between flights! The tail<br />
motor life will reduce. Some new Lithium polymer cells from Kokam look promising.<br />
14. JMP HF9-32 heli controller gives the tail virtually DC drive to cure the above!<br />
I’d better stop there, but many custom carbon and alloy parts are available, fins,<br />
swashplates, canopies, gears, bearings and shafts. Improvements in battery<br />
technologies, small radio and the increase in the indoor scene in general bode well<br />
for the future of the small helicopter and fliers are getting into rotary flight who<br />
would otherwise never have considered it. Enjoy the pictures enclosed, I enjoyed<br />
taking them and have met lots of grand folk in my microheli flight so far.<br />
If you are able, surf over to the Ikarus website and look in on us, on the Piccolo<br />
forum at http://www.ikarus-modellbau.de/Ikarus/<br />
John’s half Bell in flight at Leominster. The Tailboom is built from 1mm carbon rod to<br />
Rob Hemmings’ plan of the Bell 47 Sioux. Photo by Gary Wright<br />
E.F.-U.K. 21
Contacts for specialist items: Apologies for any not included here. I have left<br />
out the big advertisers, you can look them up yourselves:<br />
Piccolo upgrade parts. Ian Ankers, E-<strong>Flight</strong>, PO Box 432, Southport,<br />
Merseyside, PR8 4WX, UK. Tel: 0845 6446517 (Local Rate), Fax: 0870 7202778<br />
(National Rate). sales@e-flight.co.uk www.e-flight.co.uk<br />
Piccolo upgrades. Precision Model Products, 118B Long Pond Road, Plymouth,<br />
MA 02360, USA. Tel: 508747 4556.<br />
warcoly@aol.com www.precisionmodelproducts.com/<br />
Speed controllers. Castle Creations, 18773 W. 117th Street, Olathe, KS 66061,<br />
USA. Tel: (913)438-6325.<br />
info@castlecreations.com www.castlerc.com/index.html<br />
Microhelis and upgrades.<br />
Dreamhobbies, 2728 Delta Avenue, Long Beach, CA 90810, USA.<br />
steve@dreamhobbies.com http://dreamhobbies.com/<br />
Helihobby (electric helicopter specialist). www.helihobby.com/<br />
B2 motors. Hillcott Electronics, 40 Church Lane, Henbury, Macclesfield,<br />
Cheshire. SK11 9NN, UK. Tel: 01625 420247<br />
info@hillcott.plus.com www.hillcott.plus.com/<br />
Hornet upgrades, canopies.<br />
George Ioannidis, 96 Ripon Way, Borehamwood, Herts, WD6 2JA, UK.<br />
orders@electricrotors.com www.electricrotors.com/<br />
Hornet upgrades (and heli tips, mods). John Kallas, c/o Red Duck Music, 16033<br />
Bolsa Chica Rd, Huntington Beach, CA 92649, USA<br />
jrkallas@earthlink.net http://microhelis.homestead.com/index.html<br />
JMP controllers, WES gear pinions.<br />
RCS Technik, 22 Dartmouth Park Avenue, London NW5 1JN. 020 7267 9049<br />
sales@rcscale.co.uk www.rcscale.co.uk/<br />
Piccolo spares.. Graham Stanley, Wychwood House, North Brook Road,<br />
Coundon Green, Coventry, CV6 2AJ, UK. Tel: 02476 204818<br />
graham@modelfly.com http://modelfly.com<br />
Shulze, Hacker. Gordon Tarling, 87 Cowley Mill Road, Uxbridge, Middlesex.<br />
UB8 2QD. U.K. Tel: 01895 251551<br />
sales@gordontarling.com www.gordontarling.co.uk<br />
Robert Lee, carbon main blades and fin.<br />
Note these may be out of production for a while. Not too long I hope!<br />
rob@carbonblades.co.uk www.carbonblades.co.uk/<br />
22 E.F.-U.K.
TLC from your TLO<br />
by Alan Bedingham<br />
This time I'm going to look at the heavy metal end of our hobby, 14 cells and up.<br />
A lot of people seem to be reluctant to get into this size of 'plane which I find a<br />
little odd. In fact, I reckon the best way for an oily fan driver to try electric is to<br />
take an existing 40 size 'plane and stick some electrics in it. The logic is that the<br />
expense of converting an existing 40 size model to 14 cell electric is about the<br />
same as building a 7 cell model from scratch and 14 cell models are far more likely<br />
to fly successfully than some of the 7 cell stuff I've seen in model shops. You don't<br />
need to buy new lightweight radio, the motors are not that expensive, and if you<br />
find electric power doesn't suit you, just convert it back again! True, you've got to<br />
buy a decent charger but that won't be money wasted because it can be used to<br />
fast charge your radio batteries. All that hassle trying to decide whether to put<br />
your gear on overnight charge becomes a thing of the past.<br />
I once (rashly) said about ten years ago that we would all be flying electric models<br />
in 15 years' time and oily fans would have died out. Given the number of electric<br />
models appearing in my club and the way brushless motor prices are dropping,<br />
maybe I wasn't so far wrong. There's still some prejudice to get rid of though. I get<br />
sharp intakes of breath when I'm asked how much I paid for some of my motors,<br />
yet, when I query the cost of the four strokes in their models, and it's double what<br />
my motors cost, they don't think they're expensive. Odd that. And they don't seem<br />
to mind paying fifteen quid a gallon for fuel either!<br />
Anyway, off the hobby horse and on to the first query from Peter Shanks:-<br />
An ARF Conversion<br />
I am considering converting a Ripmax Citabria 40 to <strong>Electric</strong>. Essentials are<br />
1630mm (63") span and 2600g (92oz) weight. Would it work and what motor,<br />
battery, gearbox, prop equipment would you suggest I consider? I am looking for<br />
non frantic duration with ROG? I would rather not enter the world of brushless if<br />
possible, but if that is what is needed so be it! Hope this is enough info for<br />
suggestions. The Citabria is a Cub style ARTF built in traditional manner, balsa<br />
and SolarFilm. Ribbed wings are 590 sq ins , 12% thick with v slight curve to<br />
bottom of wings and a parallel chord of 10ins. The weight of all the components of<br />
the kit excluding any electrics, servos, or receiver is around 1500 g, so their<br />
quoted weight of 2300 - 2600g must be all up, with a .52 -.70 4-stroke.<br />
I think this looks like a practical conversion.<br />
You're looking at 14 or so cells, one possible motor/gearbox combination is the<br />
Graupner Speed 700 Neo geared (around £80 ) running an APC 12x8 prop. All up<br />
weight will be in the region of 102-105 oz, giving quite a reasonable wing loading<br />
of around 25 oz/sq. ft and a power loading of around 65W/lb. If you find you need<br />
more grunt, try a 13x9 which ups the current to 35A and the power loading to<br />
E.F.-U.K. 23
77W/lb. I'm flying a 'plane similar in size and weight to this on 14 cells with two<br />
direct drive Astro 05s on the wings and it's quite sprightly, including flying off<br />
water at 136 oz!<br />
Even Bigger Stuff<br />
Nick Marshall is into bigger planes than most of us and asked about a cost effective<br />
powertrain for a Sopwith Pup at 66in span and an estimated weight of 9 1/2lb. He<br />
tried to get a Speed 900 but they were out of stock and wondered about two Speed<br />
700s geared to a common shaft. He estimated he would need around 1000W to fly<br />
his beast. What I find impressive is that he's building and flying these big electric<br />
aeroplanes on an annual modelling budget of £250-300!<br />
I think your estimate of around 1000 Watts for the Pup is generous and you could<br />
probably get away with less - maybe 750Watts - but, as you say, finding a reasonable<br />
cost motor is difficult at this power level.<br />
I have some suggestions for you :-<br />
Your idea of using two speed 700s is a good one, the difficulty comes with finding<br />
a commercial gearbox to do the job. I would suggest you build your own -- gears,<br />
cogged belts and pulleys are available from :-<br />
S.H.Muffett Ltd,<br />
Ashdown House, Lamberts Road,<br />
North Farm Industrial Estate,<br />
Tunbridge Wells, Kent, TN2 3EH.<br />
Telephone: 01892 542111 / 01892 532900,<br />
Fax: 01892 545916<br />
http://www.muffett.co.uk/<br />
24 E.F.-U.K.
ElectriCalc suggests that two Speed 700 Neos (#6306) wired in series on 21 cells<br />
and geared to one propeller shaft at a ratio of 1.9:1 would drive a 14x8 APC to give<br />
a thrust of around 6 lb at a reasonable 36A. No need for advanced engineering<br />
skills, good quality ¼in ply is plenty strong enough to make the gearbox frame -<br />
- if you plan ahead, you can integrate it into the structure of the 'plane like I've<br />
done with my Bristol M1. (I owe Nick an apology here, the numbers I sent him in<br />
my original reply were wrong, bit of a cock up on the calculation front I'm afraid,<br />
must try harder. These I've checked three times!)<br />
Another route is to scour the second-hand market for something like an Astro 40<br />
geared or one of the big brushed motors from Graupner or Mega. I've seen big<br />
Astros in the bring and buy at Leamington Spa, so it might be worth putting a<br />
want ad in EF-UK and Q&EFI.<br />
Have you heard of the Dewalt motors that are popular in the US?<br />
Here's some info from the Modelair-Tech web site :-<br />
Dewalt 18.0V Motor. The Dewalt 18.0V motor (photograph overleaf) normally<br />
runs on 16-21 cells coupled with our H-1000 belt drive. This combination of the<br />
H-1000/Dewalt 18.0 motor is capable of flying 700-1400 sq. in. sport models weighing<br />
up to 12 lbs. The motor is supplied ready to install in our H-1000FW or our older<br />
H-1000BM. The motor needs to be modified to be used on the H-1000FW. This can<br />
be done by the modeller with a lathe and a good drill press, however, we suggest<br />
that you let us do it for a small fee. MSRP: $51<br />
E.F.-U.K. 25
The Dewalt Motor - Unmodified (left) and modified for use with the H-1000FW drive<br />
Special H-1000/motor combos. The H-1000FW is available with the popular Dewalt<br />
18.0 volt motor. We have found that the most useful ratios and cell counts for this<br />
combo to be 3.1:1 for 16-18 cells and 3.6:1 for 19-21 cells. Props range between 14”<br />
& 16" in diameter. If you desire to swing slightly smaller props, choose the 2.86:1<br />
ratio. Models it can fly range between 700 and 1300 sq. in. and weigh between 7<br />
and 10 lb. The motor has replaceable brushes and a ball bearing supported output<br />
shaft. Modelair-Tech has a "combo" nearly ready to install in your model.<br />
The Dewalt motor with Modelair-Tech H-1000FW belt drive<br />
MODELAIR-TECH, P.O. Box 1467, Lake Grove, N.Y. 11755-0867, USA<br />
Phone and Fax: 631-981-0372, E-Mail: modelairtech@rc-aero.com<br />
For Continental Europe and <strong>British</strong> Isle sales, please contact Gordon Tarling<br />
My experience is that US Dollar prices can be read as Pounds Sterling by the time<br />
the stuff gets over here and the VAT man has put his squeeze on.<br />
26 E.F.-U.K.
If you're willing to experiment, a really cheap route is to look at using car heater<br />
fan motors, they're designed to run at 12V for literally years, so I would have no<br />
hesitation running them at twice that for short periods and they're designed to<br />
run at low speed with big fans.<br />
Have a look in your local scrapyard for something from a medium size car like a<br />
Mondeo, stick 21 or 24 cells on it and see how big a prop it will turn, you may not<br />
need a gearbox at all. As you're building a model with a radial cowl, you might<br />
want to grab one of those 'pancake' style radiator cooling fan motors and try that<br />
as well. If it does work, I want to hear about it, so please do an article for EF-UK!<br />
Since I wrote this reply to Nick, the Flyware range of outrunner brushless motors<br />
have reached England, and include some designed for this sort of power level. I<br />
know this won't be an cheap way to go, but, spending some £200 gets you a<br />
brushless motor and controller that will handle 750 Watts and swing a big prop<br />
without a gearbox. It's not that long ago that this sort of money wouldn't have<br />
bought a 21 cell brushed rare earth motor without a controller!<br />
When you get past the 7 -8 cell range of models, the cost of brushless motors<br />
nowadays is often close to brushed motors, so the decision to go brushless, with<br />
all the benefits of low maintenance and higher efficiency that bring, becomes easy.<br />
Lead Acid Batteries - Again!<br />
My charging battery seemed to be down on capacity so I did a bit of digging<br />
around to see if I could find any help on the net. Sure enough, I found a site -<br />
http://www.uuhome.de/william.darden/ - that has all you need to know about the<br />
care and feeding of these unwieldy, recalcitrant beasts.<br />
One possibility suggested was that the battery might have sulphated up. Sulphation<br />
occurs when lead sulphate cannot be converted back to charged material and can<br />
happen when discharged batteries stand for a long time. The remedy is to (wait<br />
for it) apply a constant current of one to two amps for 48 to 120 hours at 14.4<br />
VDC. Yes, 2 to 5 days! I tried it, and it worked for me, so if you've got a battery<br />
that is feeling its age you may want to give it a whirl. Don't forget to check the<br />
electrolyte level and top up if necessary with de-ionised water, the battery will be<br />
losing water as it gasses.<br />
Perhaps I should explain - hydrogen and oxygen gas are produced as part of the<br />
reaction during charging, depleting the water content of the electrolyte and,<br />
incidentally, making one of the most explosive combinations of gasses known to<br />
man, so be careful about naked lights and sparks near the battery when it's on<br />
charge. Before you ask, yes, you can top up maintenance free batteries, just prise<br />
off the cell covers with a screwdriver. There's nothing you can do with gel-cell<br />
batteries if they're sulphated up except put them in the recycling bay at the tip.<br />
Next time, some aeroplane queries and some rules of thumb.<br />
Don't let the smoke out!<br />
E.F.-U.K. 27
Fun-Fly Competition Idea<br />
by John Bowerman<br />
Since getting into electric flight I have been constantly looking at getting back in<br />
to the area of modelling I was interested in when using the infernal combustion<br />
engine. I have always admired the elegant lines of gliders but never had the patience<br />
skill or the eyesight to be interested in participating in this side of the hobby. I<br />
much rather enjoy the sports aerobatic and scale side of the hobby, principally the<br />
sports aerobatic side over the last few years.<br />
As I have grown used to the electric motor so my aspirations have grown in terms<br />
of power, weight and capability of the aircraft have developed. My first real success<br />
was in converting the very suitable plan of the Ripmax Xtreme.<br />
By redrawing the outline of the aircraft and modifying it to suit electric power by<br />
the removal of all the plywood and making the fuselage a basic ¼ square structure.<br />
I made no alterations to the actual design only to the method of construction.<br />
This coupled with an Astro 40 plus Gearbox at 3.1:1, 16 x 3000 NiMH cells and a<br />
APC 13” x 7” propeller provides a very satisfactory power train to give good<br />
aerobatics for 6 minutes plus take off and landing. I learned a lot with this aircraft<br />
and it showed me that electric flight does not have to mean low performance.<br />
I wanted to develop the idea of the Xtreme, but around the 10 Cell power pack so<br />
my latest effort designed around the 3D principle is 650 sq. in., weights 37 ozs.<br />
dry (less battery) and 57 ozs. with a 10 cell RC-2000 pack. With an AXI 2820/10<br />
driving a wooden 11” x 7” propeller the static current is showing as 34A.<br />
The first flight was on the 28th December 2002. The patch was waterlogged so we<br />
decided to take off from the rough rather than a hand launch. I prefer to take off<br />
from the ground as this way you get a better feel for the aeroplane before you<br />
commit to aviation.<br />
In 3m it was airborne and it seemed like the most natural thing to do. The power<br />
of 360W made the climb easy and the thick wing section made every thing very<br />
slow and easy. The loading made the landing easy even in the fairly strong breeze.<br />
We only managed three flights before it became too unpleasant but I am convinced<br />
the idea will work.<br />
My prototype model has the following specification:<br />
Wing Span 48 in. Average Chord 12 in.<br />
Section Clark Y at 15% All up Weight 43.5 ounces<br />
Wing Loading 10.87 ozs / sq. ft Motor VM24/16<br />
Propeller: MA Wood 10” x 6” Batteries 10 Sanyo CP-1300<br />
Power input 366W (@ 35A) RPM 7500<br />
Where are we going with all this I hear you ask well here's the idea.<br />
28 E.F.-U.K.
John’s prototype model in translucent red and blue<br />
<strong>Electric</strong> Fun-Fly<br />
If you think about what the power boys do with their Fun-Flys it becomes clear<br />
that the flight time is only 2 minutes of power, give or take. The tasks they have<br />
to perform are Limbo, Touch & Go, Timed Glide and Loops and Rolls.<br />
These tasks are timed and I believe the max time is 2 minutes so what is to stop<br />
and electric style competition based upon this formula. We could not compete with<br />
them but I feel we could provide a competitive class within our own discipline.<br />
Looking very loosely at design criteria it seems to me that about 450 - 500 sq. in.<br />
of wing area would be necessary if the loading is to be kept down. The aircraft<br />
would need to be minimalist in its design, much like the current power Fun-Fly.<br />
Looking at classes there could be two as in the power regime, one for ferrite (No<br />
Cobalt) motors and standard control surfaces and one for brushless motors and<br />
control mixing. I would suggest the 600 size motor as a good starting point either<br />
direct drive or geared, certainly for the Standard Class. The other class could be<br />
left open and allow the battery size to be the limiting factor.<br />
Considering the current market place it should be possible to get the flight<br />
equipment weight down to 14 ounces. The airframe weight should be able to be<br />
constructed down to about 18 ounces with sensible structures. Power source could<br />
be the CP-1300 in a 10 Cell pack weighing in at 13 ounces.<br />
A 10-cell CP-1300 pack providing the motor with 26A (312W) will give 3 minutes<br />
at full bore and you are going to have the throttle closed for some of that time.<br />
E.F.-U.K. 29
The total of this little lot comes to 45 oz. so even with a few extra bits that always<br />
seem to accumulate it should be possible to have an all up weight of say 48 oz.<br />
(3lbs). The wing loading on this at 500 sq. in. would be around 14 oz. / sq. ft,<br />
which is not bad for a fun fly.<br />
There is a certain amount of interest in my own club and it is my intention to<br />
design and build an aircraft at 500 square inches to test the theory so to speak.<br />
Encouraged by this I have drawn up a simple set of rules, which could be adopted<br />
if there is enough interest.<br />
Common Rules<br />
1. 10 cells maximum.<br />
2. Allowed controls.<br />
a. Rudder<br />
b. Elevator<br />
c. Ailerons<br />
d. Throttle<br />
3. Same motor, propeller & battery combination to used for all events.<br />
4. Take off from the ground.<br />
Standard Class<br />
1. A single Ferrite motor only.<br />
2. No mixing of control surfaces. Note: Two servos can be used for<br />
aileron control, but they are to connected to the same Rx output.<br />
3. Take off from the ground.<br />
Class 1<br />
1. Any Motor(s) Brushed or Brushless.<br />
2. Mixing of all control surfaces allowed in any combination.<br />
Events<br />
Time Glide<br />
Motor power for 30 seconds and then switch off and longest glide.<br />
Bonus points for landing within 3m of the Landing Spot<br />
Touch & Go<br />
As many touch and goes within a 7.5m square box within 2 minute slots<br />
Limbo<br />
As many passes under a limbo tape within a 2-minute slot time to start<br />
after the first underpass.<br />
30 E.F.-U.K.
Another view of John’s prototype Fun-Fly<br />
As mentioned the rules above form a starting base for any interested parties. If<br />
there is any interest then I would be very interested in your responses. I can be<br />
contacted at john.Bowerman@virgin.net<br />
Good flying<br />
Editor’s Note:<br />
Due to the relatively small number of entries at fly-ins last season, the subject of<br />
competitions was discussed at a recent BEFA committee meeting.<br />
The committee consider that there is little point in continuing with the Vintage<br />
competition as the potential number of entries is extremely limited, and last season<br />
only one person registered at a couple of events.<br />
Due to the larger number of scale models flying it is intended to retain the Scale<br />
competition, subject to review during the season.<br />
This Fun-Fly idea was considered to have merit and the committee would consider<br />
running a form of this competition during one (or more) of the fly-ins this season.<br />
Whether this competition format takes-off (pun intended) is down to the<br />
membership, and specifically those attending fly-ins.<br />
It is requested that anyone interested in this type of event contact the Editor so that<br />
the level of interest can be gauged. See page 4 for contact details.<br />
E.F.-U.K. 31
BEFA Leagues Final Report<br />
by Dave Perrett<br />
In issue 70 of EF-UK, I penned a few paragraphs describing the progress of the<br />
BEFA League E 400 and Electroslot events culminating with the Nationals on the<br />
25th August. This note is to bring you up to date. The season concluded with two<br />
more events, one at York and the final one at Pillerton Hersey.<br />
York - 15th September.<br />
This venue, which more properly is at Haxby, ,just outside York, was provided for<br />
us by Mike Proctor and his crew. In the previous year at York the stubble remaining<br />
on the field was adequate to puncture fine holes in the covering, particularly if<br />
you were using the lighter weight of transparent Profilm. No problem this year<br />
and the weather conditions were quite good, even if the attendance was not.<br />
Pillerton Hersey - 22nd September.<br />
The following week we were at Pillerton for the second time in the year thanks to<br />
John Lewthwaite. Happily the conditions were good this time particularly as one<br />
or two final league positions were to be settled on the day. Unhappily, despite my<br />
attempt to persuade others to join the fun, the attendance was again low. (Perhaps<br />
you intending competitors had not yet completed models for these events!!) The<br />
results were very close. Out of a potential 100% the top three in E 400 were in the<br />
99% bracket and in Electroslot the top three exceeded 98%.<br />
The first three placings in these events were as follows:-<br />
E 400 York Pillerton Electroslot York Pillerton<br />
1st Steve Mettam Trevor Grey 1st Steve Mettam Steve Mettam<br />
2nd Dave Perrett Bob West 2nd Barry Flude Neil Stainton<br />
3rd Bob Smith Neil Stainton 3rd Bob Smith Dave Perrett<br />
The final league placings, for the best four events, were:-<br />
Place E400 Electroslot<br />
1st Trevor Grey Dave Perrett<br />
2nd Bob West Steve Mettam<br />
3rd Dave Perrett Stan Rose<br />
The calendar for the league events this year are in this issue, come & join us. The<br />
Electroslot competition rules are on the BEFA website and in the BMFA handbook.<br />
Most people seem to think that you need high tech models, but that is not so is<br />
confirmed by the above tables. Both Trevor Grey & Neil Stainton used well built<br />
and flown traditional balsa models. Should you not join the leaders straight away<br />
you will find it encouraging to improve at each, or at least every other event<br />
Whatever it is fun to fly with other like minded modellers and to learn from them!!<br />
See you there!!<br />
32 E.F.-U.K.
Letters to the Committee<br />
Dear Editor,<br />
I have just read the EF-UK Issue 71 very interesting Super 80 article and would<br />
like to take up one point. On page 64 the author stated he reinforced the web<br />
between the top and bottom wing spars so they were strongest AT THE TIP as<br />
that is where most deflection is observed.<br />
Unfortunately although wings deflect most at the tips both the shear and bending<br />
forces are concentrated at the wing root in all flight conditions. For a constant<br />
chord wing, the shear forces are at the maximum at the root and decrease<br />
approximately linearly to zero at the tip. Thus the webbing between the top and<br />
bottom spar caps should be thickest at the root (say 1/8" vertical grain balsa on a<br />
big 8lb model) and decrease in thickness to a minimum (say 1/16" vertical grain)<br />
at the tip. For D box wings the webbing should never be left off as it also serves to<br />
close off the D, increasing the wing’s torsional stiffness greatly.<br />
While talking about forces on<br />
a wing it may be worth noting<br />
that in a constant chord wing<br />
the bending forces decrease<br />
towards the tip according to<br />
a square law. Thus half way<br />
from the root to the tip the<br />
bending force has reduced to<br />
just one quarter of the root<br />
value. Ideally for maximum<br />
strength and minimum<br />
weight the spar caps should<br />
be tapered from the root to<br />
the tip in a similar manner.<br />
Of course all root<br />
reinforcements should be<br />
tapered off to avoid any stress<br />
risers.<br />
I hope this helps modellers build stronger and lighter wings,<br />
Neil Stainton.<br />
Response from the Editor:<br />
Not much I can say about this except that I should have spotted the error in the<br />
original article. Thanks to Neil for correcting this error and providing some useful<br />
guidance about bending moments and wing design.<br />
E.F.-U.K. 33
Dear Editor,<br />
The scale competition debate is similar to that which the BMFA have had recently<br />
and they have come up with the option of a flying scale competition for any models<br />
and a flying / static competition for self constructed planes.<br />
This was in a recent BMFA News, BEFA should adopt a similar approach, either<br />
accept all planes but only mark on the flying characteristics or include construction<br />
but exclude ARTF planes.<br />
Alternative options are just to fly for fun, prize for the best scale flight, and a<br />
prize for the best constructed plane - includes vintage and sport.<br />
I would appreciate a 30 min session AM and PM when scale planes could be flown<br />
without concern about fast fun planes being in the air.<br />
I am confused about the soaring spot, the technology allows flights of 40 minutes<br />
+ with no problem, what is the purpose and how long does it go on for?<br />
What are the events for? If they are to allow anyone to fly then the current peg<br />
system is fine, if you do want a display of electric flying, especially the larger<br />
planes, you may need to allow some time for groups of folk to fly specific schedules<br />
without the concern of who else is in the air.<br />
There have been very enjoyable displays of pico jets, scale planes, EDF and I<br />
would encourage you to enable more people to do some display flying. The<br />
alternative is spending the day flying large circuits missing the faster / slower<br />
planes. The public then never see a plane doing manoeuvres reasonably close.<br />
This probably varies according to the balance of flyers / spectators<br />
Mike Payne.<br />
Response from the Editor.<br />
Mike raises a number of interesting points here.<br />
The BMFA approach seems quite sensible. The biggest problem BEFA has is that<br />
most flyers don’t seem to want to take part in the Scale (or other) competitions. The<br />
limited number of entries makes it impractical to split the Scale competition into<br />
two groups as we may only have one entry in a class. I think that this will have to<br />
be discussed at the first fly-ins of the season to see what the consensus is.<br />
I personally think that dividing the fly-in into sessions for different types of model<br />
can work very well. Maybe we should try slots for Vintage, Scale and Fast Jets -<br />
something to consider between now and the start of the fly-in season.<br />
The soaring spot, commonly called the All-Up-Last-Down, or AULD, is a traditional<br />
event that is the most popular event BEFA runs. Mike is correct that flights of 40+<br />
minutes are possible, in fact I’ve been flying a Lithium Manganese powered model<br />
with a 50 minute motor run. The primary purpose is to simply see who can fly the<br />
longest in the prevailing conditions. It also serves a secondary purpose in giving<br />
34 E.F.-U.K.
the fly-in organisers a break for lunch. Given ideal soaring conditions, the AULD<br />
could potentially last all afternoon, but a number of options can be used to bring<br />
the event to a close in around an hour.<br />
The first option is to force entrants to perform a limbo below an imaginary line.<br />
When the requirement for a limbo is announced entrants have a limited time to<br />
perform the limbo and failure to descend low enough in the time frame means<br />
disqualification. Successive limbos can be called to drain battery packs.<br />
The Competition Director can also introduce any other restrictions, such as limiting<br />
the height of climbs. Once the number of flyers in the AULD is reduced to the last<br />
few, normally flying is allowed to resume.<br />
I think that some of the main reasons for people attending fly-ins are to see what<br />
interesting models are around and chatting about the latest ideas or equipment.<br />
Looking at the figures from the Sunday at Middle Wallop last year, we only had<br />
about 1/2 as many pilot’s registered as cars attending. This suggests that flying is<br />
at best secondary for some people attending the fly-ins. Unfortunately, we can’t tell<br />
how many of these are ‘general public’ coming to see what it is all about and how<br />
many are just not flying that day..<br />
Jan Bassett<br />
Please send any correspondence to the Editor, contact details on page 4.<br />
CROSSFIRE<br />
Howard Metcalf’s fabulous design for 600 motors is now available again! Pre-cut fuselage<br />
sides and die cut ribs, together with top quality wood and fittings make this a superb<br />
aerobatic electric plane for the discerning builder and flier.<br />
This amazing aerobatic electric plane will fly quite adequately on a humble 600, and for<br />
totally ballistic performance try a brushless motor!! The speed range is incredible – at an<br />
all up weight of 40 ozs and with full up elevator and trim, it will gently ‘mush’ rather than<br />
stall! Flat out with a brushless, the speed is breathtaking!<br />
Crossfire can also be flown as a slope<br />
soarer (Slopefire coming soon!)<br />
The fully comprehensive kit is<br />
just £49.99 + £4.50 P&P. All major<br />
credit cards accepted.<br />
Mail order only from Peter Ross<br />
at:<br />
S T C,<br />
29 Hawkers Lane,<br />
Wells,<br />
Somerset.<br />
BA5 3JJ<br />
Tel: 01749 679739.<br />
E.F.-U.K. 35
Model Motors MV2020/20<br />
by Bob Partington<br />
The MV 2020/20 motor is produced by Model Motors, the Czech Republic<br />
manufacturer. These motors were originally marketed under the Velcom banner.<br />
I have been very impressed by model goods from the Czech Republic.<br />
They are produced by good engineers, and therefore they are of high quality and<br />
also inexpensive, making them very good value for money. I got the motor from<br />
the importer Puffin Models.<br />
The motor is a 400 size brushed Neodym type, which is claimed to be suitable for<br />
use in electric ducted fans. Being of 400 size it fits the WeMoTec 480 Minifan. The<br />
dimensions are 27 mm diameter, 55 mm over all length and the weight is 105g.<br />
Suppressers are already fitted internally. The brushes are the same cross section<br />
as the Plettenberg, so from experience I expect a long brush life.<br />
Model Motors MV2020/20 with a Plettenberg 200-20-6 (on the left) for comparison<br />
I tested the motor in the Minifan on 10 x Sanyo CP-1700 cells. The current hot off<br />
the charger was about 33A with an average across the run of 24A.<br />
It is noteworthy that the data sheet included with the motor says that the highest<br />
efficiency is at that average current! The corresponding power was 330W and<br />
241W. In comparison on the same set-up the Plettenberg drew 30A (300W); and<br />
22A (239W).<br />
36 E.F.-U.K.
I checked the RPM at the average power and found it be almost exactly 28,000,<br />
which is about the same as the Plettenberg. The thrust corresponding to this<br />
figure was extrapolated from the WeMoTec data sheets giving 23 oz. (6.4N) at<br />
switch on, with an average of 18 oz. (5.0N) across the run.<br />
Glockner Sabre as used to test fly the motors<br />
Encouraged by these numbers I replaced the Plettenberg in my Glockner Sabre<br />
with the MV and flew it. As expected the performance was about the same and the<br />
duration only a bit shorter.<br />
I have just test flown my RBC kits Ta 183 Huckebein for the Minifan fitted with<br />
an MV 2020/20 for 10 cells (see the picture overleaf of the motor including it fitted<br />
in the model).<br />
The model at 44 oz (1.25kg) weighs the same as the Sabre and because the duct is<br />
short and straight through, with no obstruction (unlike the Sabre) the model is<br />
faster and duration the same.<br />
I have also bench tested the MV with 12 x Sanyo CP-1700 cells. The power was up<br />
from 241W to 353W with current up from 24A to 29A. The motor gave no sign of<br />
overheating, and indeed as can be seen in the picture the back of the motor is very<br />
open.<br />
However, I don’t intend to use the motor on 12 cells because I know from experience<br />
with the Plettenberg 200-25-4 that at these current levels brush life is frustratingly<br />
short.<br />
In summary this is a pretty good brushed motor for EDF.<br />
E.F.-U.K. 37
The RBC kits Ta 183 Huckebein. The view below shows the motor as fitted to the model<br />
using a WeMoTec 480 Minifan.<br />
38 E.F.-U.K.
Need a handy, tough little Park Flyer?<br />
Join the Cub!<br />
by Brian Rawnsley<br />
After a season of park flying with the GWS Pico-Stick last year, I was looking for<br />
a new and different park flier. Browsing the trade stands at the BEFA Technical<br />
Workshop last year brought me face to face with a GWS Pico Cub J3F kit. The<br />
price looked reasonable, the kit itself simple and attractive.<br />
But was it just a “dressed up” Pico Stick? Would the same GWS 150 power unit<br />
cope with the increased drag of a square fuselage and wing struts? After some<br />
dithering I jumped in and bought the kit. I have not regretted doing so.<br />
At home, out of the box came two fuselage halves, made of polystyrene foam. Then<br />
came Depron wings and tail, and a complete range of components including a<br />
motor, gearbox, propeller, pushrods, horns and glue. The fuselage, wings and tail<br />
are pre-coloured in “Cub Yellow”.<br />
Assembly of the fuselage was straightforward; the fuselage halves being joined<br />
sandwiching a single engine bearer. The instructions recommend holding the halves<br />
together using “paper tape”. I tried using masking tape for this, but found that<br />
even this relatively “low tack” tape lifted a bit of the yellow surface finish on the<br />
polystyrene foam. Maybe rubber bands would be a better idea.<br />
The GWS Cub waiting to take-off for another flight<br />
E.F.-U.K. 39
The GWS Cub climbing out.<br />
The Cub on a low(ish) fly-by<br />
40 E.F.-U.K.<br />
A
The wing struts are mounted by gluing little nylon brackets to the fuselage and<br />
wings. Each bracket has a single hole, and the bamboo struts have a “quick link”<br />
type pushrod-keeper fitted on each end. It is worth making sure that these<br />
mountings are firmly glued in, as the wing struts really do work for a living!<br />
The vacuum-formed plastic engine cowl looks flimsy, but in fact seems to bend<br />
rather than shatter in hard landings. Motor and propeller installation is<br />
straightforward, the propeller a GWS 10” x 4.7”.<br />
For the tail and fin, the instructions suggest applying transparent tape to the<br />
hinge lines, then to “carefully bend the surfaces 40° each side until they move<br />
comfortably”. To lighten the load on the servos I chose to cut through the rudder<br />
and elevator hinge lines with a balsa knife, chamfer the edges a bit and then hinge<br />
them with the transparent tape. This has worked well in service.<br />
A close pass at slow speed<br />
Addition of the radio, servos, undercarriage, fairings and other details was<br />
straightforward, and are well explained in the illustrated instruction manual.<br />
All in all, a couple of evenings’ work and I had a model ready to fly. Holding the<br />
model in my hand, it looked and felt very different in character from the Pico<br />
Stick. Somehow, the Cub feels tough, rigid and boxy, where the Pico Stick feels<br />
light and flexible, as if a puff of wind would blow it away.<br />
I use my favourite park-fly battery, the 300mAh 7-cell Nickel Metal Hydride unit<br />
supplied by Overlander. This required a little carving of the polystyrene foam<br />
E.F.-U.K. 41
An overhead pass showing the near scale outline<br />
around the battery compartment to fit, but seems to give about the right power to<br />
weight ratio. Despite warnings in the instructions not to use more than 7.2 volts<br />
(6 cells), I have not yet had any motor overheating or life-shortening problems.<br />
To fly, I adjourned to my local park during a rare spell of winter sunshine. Takeoff<br />
from the cricket pitch was nice, the tail showing little tendency to swing. The<br />
model was airborne in a few yards. The rate of climb was very positive, similar to<br />
the Pico-Stick. The first difference I noticed was when turning. The yaw / roll<br />
couple is much better than the Pico-Stick, so the Cub is easier to control in turns.<br />
This may be because the high wing and cabin give some additional dihedral effect.<br />
The second difference is much more profound, and gives the Cub a character all of<br />
its own. When I throttled back fully, I found that unlike the Pico Stick, the prop<br />
does not stop, but keeps on “windmilling”. The Cub then slows down and to keep<br />
it from stalling, you have to descend at quite a steep angle. With the large prop<br />
acting as an airbrake in this way, I found I could descend to land in true STOL<br />
fashion. Who needed flaps? Crossing the “crease” at about shoulder height, I<br />
found I could land and stop about half way along the cricket pitch. Having learned<br />
this party trick, the Cub became a fascinating aeroplane to fly. <strong>Flight</strong>s are typically<br />
ten to twelve minutes, and during one flight, I managed more than twenty circuits<br />
and touch-and-go landings. Ground handling is fine, and the Cub can be taxied<br />
and steered around quite precisely.<br />
The GWS park-fliers are supplied with very narrow, over-large, spoked wheels.<br />
These look fine on the Pico-Stick but I feel they just do not look right on the Cub.<br />
42 E.F.-U.K.
For this reason, I have now replaced them with some very light foam-rubber<br />
wheels with plastic hubs. These were again bought from a stand at the BEFA<br />
workshop event, and have proved fine in service.<br />
The Cub is at its best in calm conditions, and I only take it out in the evenings or<br />
early mornings. It can handle a little wind, but is not comfortable to fly in anything<br />
more than a “light air”. Over several park-fly sessions it has proved quite robustthe<br />
main “wear and tear” problem being with the Depron undercarriage fairings.<br />
This has resulted from many misjudged “STOL” landings where I have flared out<br />
too early or too late, the resulting “bounce” causing the undercarriage to flex,<br />
and the fairings to crinkle and crack a bit.<br />
In conclusion, I like the Pico J3F Cub. It is a useful, practical model with lots of<br />
character. For me, the “spirit” of park-flying is grabbing three battery packs, the<br />
tranny and model fully rigged, at the beginning or end of a normal day. Then a<br />
short walk from home to the field, or a stop on the way to work, for a quick half<br />
hour session. The Cub fills this requirement quite happily.<br />
If you have any queries or comments, you can contact Brian via email at<br />
sandra@brianrawnsley.freeserve.co.uk.<br />
Kit: Pico Cub J3-F from Grand Wing Servo (www.grandwing.com.tw)<br />
Span: 39.8” (1 m), Loading: 4.4 oz./sq.ft. (13.4 g/dm2 ), Flying weight: 8oz (225g)<br />
Fitted with: GWS Pico 4ch Receiver, GWS Pico 6gm servos, GWS Pico 2A Speed<br />
Controller, Overlander 300mAh NiMH Battery.<br />
The Cub looking longingly down the strip awaiting another go<br />
E.F.-U.K. 43
The Messerschmitt Me 262<br />
“Schwalbe”<br />
by Christian Hoffmann<br />
Before I began the planning of my new project, I had to decide which Ducted Fan<br />
(DF) would be used. As I am a promoter of 1/5th scale models I made calculations<br />
about the diameter of DF required.<br />
This would have to have been 120mm diameter and the model would have been<br />
2.5m span. This was too big for my taste, and would have broken the bank.<br />
Recalculate for 1/6th scale, and a 2m span model and a fan diameter of 80mm and<br />
90mm would also be possible - this was it!<br />
A 2m span model is an eye-catcher, and for propulsion 30 cells should be sufficient.<br />
As DF two Aeronaut Turbo-Fans were chosen. These are affordable and are very<br />
light in addition. Accordingly to the leaflet that comes with them, a thrust of 13N<br />
(47 oz.) at 15V when used with an Ultra 930-6 motor can be achieved.<br />
For 2 fans this would produce 26N thrust. The whole model ready to fly could be<br />
5 to 5.5kg and have a thrust to weight ratio of 50%. This would be adequate<br />
power for a jet-like performance. Now that the propulsion decisions were made,<br />
construction could begin.<br />
Looking down the rear fuselage<br />
44 E.F.-U.K.
The internal equipment - plenty of room<br />
Joesf Hösef was asked to enlarge a 3-view drawing to the required size - no need<br />
for time consuming drawings. Now I had some large sheets of paper with my<br />
dream model on at the correct scale of 1/6th.<br />
The fuselage sections of the 3-view were used to cut the formers. Building the<br />
fuselage was in the normal manner as half sections (like the full-size Mosquito).<br />
Formers were made from 4mm balsa ply (or 3mm liteply) with 5 x 10mm and 5 x<br />
5mm balsa longerons.<br />
The whole fuselage was sheeted with strips of 3mm balsa (which can be seen in<br />
some of the photographs). At the same time, the fairing between the fuselage and<br />
fin was built.<br />
A NACA 0010 section was used for tailplane, and a hole this shape was cut through<br />
the fin. The tailplane was made ribs and spars, sheeted with 1.5mm balsa and the<br />
elevator made from solid balsa.<br />
To improve the scale like appearance, counterbalance weights were fitted to rudder<br />
and elevator. After a final sanding, the fuselage was covered with 25g/m2 glassfibre<br />
cloth using DDS-Lack The tailplane was covered with a fabric covering. A<br />
canopy was vacuum-formed and a hatch cut in the fuselage for the battery packs.<br />
E.F.-U.K. 45
Battery packs & speed controller readily accessible from a hatch on top of the fuselage<br />
Special attention was paid to the decoration of the cockpit (Editor: which is clearly<br />
evident in the photographs). As I had a good picture of the pilot’s office, it was<br />
built as accurate as possible.<br />
The 1/6th pilot figure is something special. It was taken from the stock of<br />
Petrausch, and is extremely light and very realistic (I think that one of Pete’s<br />
pilots would also fit very nicely). Lots of small levers, instruments, switches and<br />
control stick make the final touches.<br />
It seems like a mad undertaking, while on the other hand you want to save every<br />
unnecessary gram on a DF model. But sometimes you can’t live without a certain<br />
touch of luxury on a scale model.<br />
Having made so much progress with the fuselage, the building of the wings could<br />
begin. As a wing section, I chose the Ritz 2-30-12. It had less camber than the<br />
NACA 2412 section and therefore should be better for greater speeds. Another<br />
point to consider was the depth of the undercarriage.<br />
The building technique was threading the ribs on an 8mm carbon tube like a<br />
shish-kebab, which makes building without a warp very easy and avoids the building<br />
of a crutch. The servo leads were also fed inside the tube.<br />
46 E.F.-U.K.
To achieve the necessary torsional stiffness, the tube was enclosed by an upper<br />
and lower spar and shear webs. The wing was only planked in front of the spar,<br />
therefore creating a ‘D’ box without adding much weight to the structure.<br />
The trailing edge was created by 2 narrow strips of balsa with a layer of 40g/m2 glass cloth between (carbon rovings could also be used). After cutting out the<br />
ailerons, the retracts were next.<br />
As the 100mm diameter wheels were width than the depth of the wing. However,<br />
the wheel boxes could sit above the top skin as they are inside the wide fuselage.<br />
A few ply plates were attached to the spar to provide mounting points.<br />
The model was then assembled for the first time and the wing fairings were<br />
completed. A very lightweight and fragile airframe stood in front of me. The control<br />
surfaces were then hinged.<br />
Just before I could commence building the nacelles, it was time for our club<br />
exhibition in Geisenhausen. The building of the nacelles required some thinking<br />
and patience. My first efforts were put into thrust tubes. These had to be 45cm<br />
long, because the fan unit had to be placed at the front for CofG reasons.<br />
The amazing cockpit and pilot - could be the real,thing<br />
E.F.-U.K. 47
The front hatch showing the nose leg mounting and speed controller<br />
To avoid losses in thrust, the inner surfaces needed to be very smooth. A simple,<br />
but ideal, solution was found by covering the 0.4mm ply with transparent Oracover<br />
(Profilm in the UK) and then rolling them into a tube. This had to be done carefully<br />
to avoid getting air bubbles between the film and ply. I would prefer to treat the<br />
ply with sanding sealer, or make the tubes from glass cloth.<br />
The rear 100mm of the thrust tube reduces from 90mm to 80mm diameter to<br />
produce a thrust cone and increase the efflux velocity. Two rings of rolled ply join<br />
the DF and tubes together. The whole assembly was completed by the addition of<br />
formers planked with 2mm ply.<br />
It should be pointed out that there is a long tube, ending in a cone, fitted to the<br />
rear of the motor. This is so that the cross-sectional area of the thrust tube remains<br />
constant along its entire length.<br />
The front and rear outer parts of the nacelles were vacuum formed from ABS. The<br />
rear section is glued in place, but the front part is detachable for maintenance of<br />
the motors. Finally the nacelles were covered with tissue and prepared for painting.<br />
The nacelles had now to be fitted to the wing. For this purpose square balsa was<br />
glued to the underside of the wing to take the stress. The nacelles were glued to<br />
the wing and fairing made using epoxy and micro-balloons.<br />
48 E.F.-U.K.
It was now time to cover the wing in iron-on fabric. This time iron-on covering<br />
from Conrad Electronics was used, which worked very well - no need to prime and<br />
a very reasonable price. Fuselage joint lines were imitated with thin stripes of<br />
film. Everything was finally sprayed in the paint scheme of 9 Staffel, Jagdgeschader<br />
7 Parchim. The first flight attempts were unsuccessful because the grass was too<br />
long, and the nose leg was too flimsy and had a lot of play.<br />
Adjustments were made getting ready for Aspach, where a successful maiden flight<br />
was achieved. However, before the second flight one Aeronaut DF disintegrated,<br />
which might have been due to a small stone being sucked in or poor bonding of<br />
the fan blades. The Aeronaut DFs were replaced with Schübelers. These produced<br />
2N more thrust each and I consider these are the best DF you can get for your<br />
money. The changing to the DS-51 fans had paid off without any question. More<br />
thrust and a higher speed fit perfectly with the whole appearance of the model.<br />
The flight time is around 5 minutes.<br />
The dream of this jet model cam true. The many hours spent in the workshop are<br />
more than compensated for by the fascinating looks of the model and the remarkably<br />
good performance.<br />
Maybe we will meet at a show in the future, but be ware the bug might bite you!<br />
One fan assembly with centre body<br />
E.F.-U.K. 49
Dimensions:<br />
Span: 200 cm 78.7”<br />
Length: 172 cm 67.7”<br />
Weight: 5.3 kg 187 oz. (11.7 lb.)<br />
Wing Area: 57.1 dm2 885 sq. in.<br />
Wing Loading: 92.8 g/dm2 30.4 oz. / sq. ft.<br />
Wing / Tail Sections:<br />
Equipment:<br />
Ritz 2-30-12 NACA 0010<br />
Impellers: 2 x DS 51, 90mm diameter<br />
Motors: 2 x Ultra 930-6<br />
Batteries: 32 cells Sanyo 1700 SCRC<br />
Speed Controller: Schulze d53/60bo<br />
Performance Figures (approximate):<br />
Thrust: 30N 108 oz. (6.75 lb.)<br />
Thrust : Weight 45%<br />
Jet Efflux: 48 m/s 107 m.p.h.<br />
Current: 30A<br />
Power: 1200W<br />
The tail fin showing the modified Swastika (a requirement in Germany)<br />
50 E.F.-U.K.
FanJet Trainer & Vampire<br />
by John Stennard<br />
After making and successfully flying an indoor model using the GWS DF unit I<br />
turned my thoughts to an outdoor model. I picked on the FanJet design as I had<br />
built a glow-powered version that had flown well.<br />
My indoor fan model used a moulded Depron wing available from Flitehook. These<br />
wings are 18" span and originally designed for a rubber-powered model. For the<br />
fan model I had cut and rejoined two wings to give a 24" span. I designed the<br />
FanJet around a strengthened version of this wing and it has been very successful.<br />
It was the free plan in the Sept Q&EFI. My test flights were done with a 6 x Sanyo<br />
120 mAh NiCd pack as used with the indoor model. The flight duration was rather<br />
short so I began experimenting with larger packs. My best results have been with<br />
a 6 x 600 mAh NiMH pack. In this configuration the AUW is around 190g (6.5oz).<br />
It will actually easily lift a 7 cell pack. This improves the performance but exceeds<br />
the manufactures specifications!<br />
FanJet with 6 x 600mAh battery pack<br />
With the FanJet flying well I looked for a second design and decided on the Vampire.<br />
This uses the same strengthened ‘cut and joined’ 24" Depron wing. The Vampire<br />
quite literally flew out of my hand and performs well. It is not as fast as the<br />
FanJet and really does need the 7 cell pack to get the same performance.<br />
E.F.-U.K. 51
The FanJet in flight with the 6 x 600mAh battery pack<br />
With the GWS DF units costing around £12 this is a very low cost way to enjoy<br />
some small jet flying. The models described here cost about £4 to make and really<br />
do fly well. Ideally a twin jet model is the way to go as for 30g extra weight you<br />
can double the power output. I note that the new GWS models to suit their units<br />
are both twins.<br />
My next model will definitely be a twin and for both light weigh and ease of<br />
construction a profile fuselage with Depron wings and tail surfaces makes sense.<br />
This will be my chosen construction method for a few more GWS jets.<br />
The Vampire with GWS DF<br />
52 E.F.-U.K.
The ill-fated career of a Me109<br />
by John Norman<br />
As an air-minded 10-year-old towards the end of World War Two I made my first<br />
attempt at a flying model aircraft: a Hurricane from an Astral kit. I happened to<br />
be the envied possessor of a quantity of single-edged razor blades and, with their<br />
help, I managed to create a bloodstained Obechi airframe covered in white tissue.<br />
I painted the whole lot with some light blue enamel which had been in the coal<br />
cupboard for as long as I could remember. Needless to say my Hurricane proved<br />
about as airworthy as the dustbin to which it was promptly consigned. The strange<br />
part is that I wasn't put off. I kept trying and, four or five years later, I actually<br />
got a model to fly properly. Someone once said to me, "born aeromodellers just<br />
don't give up!"<br />
This all came back to me as I looked at the remains of my Me109 waiting, as the<br />
photograph shows, for the bin-men.<br />
An ignominious end!<br />
E.F.-U.K. 53
The Me109 in its first incarnation<br />
The scratch built 109 started its life four years ago and, at its demise, had the<br />
following specs:-<br />
Span: 43" (110 cm)<br />
Controls: Ailerons, rudder, elevator, throttle.<br />
Motor : Pro 480 with Mini Olympus gearbox<br />
Propeller: 9” x 6” CAM SlimProp<br />
ESC: Multiplex Pico 400 with BEC<br />
Battery: 8 x Overlander 1300 NiMH cells<br />
Weight: 36 oz. (1.0 kg)<br />
Power: 90W at 12A<br />
I obtained the outlines of the model by roughly scaling up a beautiful Doug McHard<br />
plan for an 18" rubber-powered 109. The built-up balsa, liteply and foam structure<br />
was covered with panels of thin card and the whole job finished in desert camouflage<br />
using swatch pots of matt emulsion. A set of Flair decals completed the exercise.<br />
The model had been conceived as dual-purpose - powered scale with a battery pack<br />
or PSS without. In its PSS form it needed only 3 oz. of lead at the front to achieve<br />
balance. Everything seemed OK, but it just didn't fly. On the slope it just wobbled<br />
around and plonked into the ground.<br />
After the first set of repairs I decided to abandon PSS and concentrate on the<br />
powered option. At this stage the motor was a 6v Speed 400 with a Mini Olympus<br />
gearbox. Propellers are a problem with the Mini Olympus, and I ended up adapting<br />
one of those cheap black 9” x 4” folders which were very common a few years ago.<br />
54 E.F.-U.K.
Power was provided by a 6 cell NiCd pack. Sounds alright? Well it wasn't. After a<br />
reasonable, if short, climb-out she cavorted all over the place with me in a panic<br />
yanking at the sticks and, doubtless, making things worse.<br />
After an interval of some months I made the necessary repairs and tried again. I<br />
took the opportunity to increase the wing incidence slightly, move the balance<br />
point forward and fit a fixed 8” x 6” propeller. All to no avail: another short,<br />
hopeless flight and a bad crash.<br />
When, ultimately, I got round to the repairs, I decided to increase the wing area by<br />
inserting a 10" flat centre panel. Still no joy. Just another crash. My companion<br />
on the day, who had ACTUALLY SAT IN THE COCKPIT OF AN Me109, said,<br />
"Well, the full-size was like that - twitchy as hell."<br />
As the wing was broken I reverted it back to scale. I did away with the receiver<br />
battery and fitted the Multiplex controller with a BEC. I made up a pack of 10<br />
Foam ribbed wing was built on to thin card lower skin. Top covered with small panels.<br />
Technique involves coating both surface with white glue and ironing in place when dry<br />
E.F.-U.K. 55
The basis of the fuselage is a sheet balsa horizontal crutch which is used as a datum for<br />
the wing seat, tail seta, thrust-line and general alignment. Vertical upper and lower<br />
keels together with formers are added to achieve shape. The final airframe is completely<br />
covered in thin card supported where necessary by scraps of shaper foam<br />
NiMH 1000 cells to see if a little extra urge might help. Whew! It went off like a jet<br />
straight into a half-loop and inverted flight (I can't manage inverted yet!).<br />
More uncontrolled full-throttle aerobatics followed, during which we heard a loud<br />
crack. Until then I hadn't thought of throttling back! When I did, she suddenly<br />
smoothed out and flew a nice half-circuit around us and back into wind. Wow, I<br />
thought, I've got there. Not quite. The right wing folded upwards and she flopped<br />
down like a Monty Python parrot.<br />
To bin or not to bin? On and off for months I picked over the remains. Finally,<br />
encouraged partly by wifely optimism ("of course you can mend it") and partly by<br />
the memory of that miraculous half-circuit, I decided to have one last try.<br />
I took a lot of care over the repairs and improved the finish by stippling some grey<br />
over the rather bright sand coloured top surface. The 400 motor was replaced by<br />
a 480 and a 9” x 6” propeller fitted. I'd acquired some of Overlander's green 1300<br />
cells, eight of which - although theoretically down in the W/lb. department - seemed<br />
to offer plenty of oomph in practice.<br />
So, one fine October weekday I took her out to give it a go. I was pleased to be on<br />
my own. You don't feel such a chump when things go wrong if no one's about, do<br />
you? With no helper, I had to use my catapult self-launching set-up. The initial<br />
omens were not good.<br />
56 E.F.-U.K.
ME109 alongside two of John’s other card covered creations<br />
At the first release the bungee just dragged the model into the heather. At the<br />
second attempt the wings cleared the heather but clipped a small gorse bush. For<br />
the third attempt I propped the launch pad up with some boxes from my flight bag<br />
to give a higher angle of attack. At release the line slipped off the hook and shot<br />
off on its own. The shock was sufficient to topple the launch pad contraption and<br />
the Messerschmitt stood on its nose.<br />
I just laughed and started to set it all up again. At the fourth try patience got its<br />
reward. The Me109 went up straight and true to a good height. As she levelled off<br />
I slowly opened the throttle and climbed away. At a safe height I did a turn…and,<br />
well, a really exhilarating 10 minutes ensued.<br />
Some lovely banked turns, lowish passes and climb-out at realistic speeds, steady<br />
circuits at half-throttle and all to the accompaniment of a magical purr from the<br />
Mini-Olympus. Everything was just right. I didn't even think of touching a trim.<br />
The ending, of course, couldn't be totally happy. During the flight I had twice lost<br />
the orientation but had quickly regained it. When it happened a third time at low<br />
altitude I just lost it and in a second or two it was "Surrey all out", as my Granddad<br />
used to say. So it is definitely R.I.P. Me109.<br />
I suppose I couldn't blame people for thinking that I imagined the last part of this<br />
saga. When I told my friend - the one who had sat in the Me109 - I could see the<br />
doubt clouding over his face.<br />
I've no witnesses of course, and the only evidence I've got is of yet another crash.<br />
Perhaps I'll build a replica - that sounds like a good idea. In the meantime I've got<br />
the memory of those 10 minutes. They can't take that away!<br />
E.F.-U.K. 57
The Martinet<br />
by Stuart Ord.<br />
The Martinet was first designed and built about 8 years ago. It was an immediate<br />
success despite its low power & cheap (AA) cells. That model had 2 mini-servos<br />
for aileron & elevator. Motor control consisted of a blade fuse inserted just before<br />
launch! On 6 cells it was a tad leisurely despite the low 17 oz. (480 g) weight.<br />
The Martinet<br />
Since then, I’ve built four more. I don’t remember the exact history, but all had<br />
Graupner Speed 400 motors with 2.33:1 gearbox, giving the best performance<br />
with 8 or 9 cells on a 7.2v motor and a 7” x 6” propeller.<br />
Along the line, the models acquired a flight switch with BEC, a third servo for<br />
rudder, and a fourth to allow flaperons. I found that the flaperons action didn’t<br />
make much difference (Editor: sounds like insufficient flaperon throw to me). So<br />
the last Martinet went back to a single aileron servo to save weight.<br />
The construction is a little odd as the model is one piece with a blue foam wing<br />
which is only covered with SolarFilm directly on the foam. The original had a full<br />
depth balsa spar, but Martinet 1 suffered a wing failure during some tight loops.<br />
Since then a single tow of carbon has been lightly epoxied to the outer surface of<br />
the spar, with a second tow in the central region. Lightening holes are cut behind<br />
the spar, leaving around ½” (13 mm) wide foam “ribs”.<br />
58 E.F.-U.K.
Over the years the cells went from 500 mAh, to 600, then 700, and I’ve just<br />
bought some 1000s. I’ve still to find if they can take 8A discharge on a regular<br />
basis OK. Maybe I’ll try NiMH cells this year, or maybe my first small brushless.<br />
Over all this is a delightful, cheap model. It doesn’t have a high power to weight<br />
ratio so “prop hanging” is out of the question, but aerobatics are pretty good<br />
considering its size and power.<br />
As a famous full-size aerobatic pilot (Bob Hoover) once said, “it’s all about energy<br />
conservation”. It can fly in a very small cube of air (but it’s too quick for indoors)<br />
and can slip into the car boot without others noticing.<br />
Span: 36” 91 cm<br />
Wing Area: 246 sq. in. 15.9 dm2 Motor: Graupner Speed 400, 7.2v<br />
Gearbox: Graupner 2.33:1<br />
Propeller: 7” x 6”, pushed onto shaft<br />
Weight (8 cells) 21 oz. 600 g<br />
Current (8 cells) 6.2A<br />
Power (8 cells) 48W<br />
The plan for the Martinet is available at www.chestermodelflyingclub.co.uk,<br />
as is a construction article that can help during building one.<br />
Close-up of the internals - shoe horn anyone<br />
E.F.-U.K. 59
“Pico-Stick” Developments<br />
by Brian Rawnsley<br />
I have been experimenting with the Pico-Stick in an effort to find alternative<br />
solutions to making it flyable in a much smaller indoor space.<br />
The first solution was a “lightest possible wing loading for slowest possible flight”<br />
type solution. I have increased the chord to 10” (25 cm) and span to 48” (122 cm).<br />
The wing was built-up using 1/16” (1.6mm) balsa ribs, 3/16” (4.8mm) x 1/2”<br />
(12.7mm) balsa trailing edge, and a 3/8” (9.5mm) square shaped leading edge. The<br />
wing section is Eppler 387, but modified to have a flat bottom. It is covered with<br />
“Non-PVC Food-Wrap” aka Cling-Film from Sainbury’s, which is applied to top<br />
and bottom surfaces with Bostik all-purpose clean contact adhesive.<br />
The wing joiners are now 1.5mm carbon rod, sleeved with heat-shrink tubing for<br />
a positive fit and a bit of shock absorbing. The joiners are inserted in the normal<br />
Pico-Stick fuselage wing-mount. The dihedral is about twice that of a standard<br />
Pico-Stick. A large fin and barn-door rudder, made from 3mm Depron, replaces<br />
the original to give good directional control at slow speed. The 7-cell 300mAh<br />
NiMH pack is moved forward of the wing to counterbalance the new, heavier tail.<br />
This produces a model with about 1/2 the wing-loading of a standard Pico-Stick.<br />
It certainly does fly slower and turn tighter, and can therefore be flown in smaller<br />
spaces. I have flown it for a “season” indoors. The main lesson learned is that<br />
wooden wing joiners are not strong enough.<br />
The second version is a “Most Manoeuvrable” type, with a fun-fly type wing with<br />
strip ailerons. The aim was for a model with about the same flying speed as a<br />
standard Pico-Stick, but much more manoeuvrable. The wing structure is built-<br />
60 E.F.-U.K.
up from balsa similar to type 1, but with 3mm Depron ailerons added. The ailerons<br />
are “coupled” with the rudder, being pushrod actuated from the rudder servo.<br />
The wing span is 40” (102 cm) and chord 10” (25 cm), uses an Eppler 374 section<br />
and is covered in SolarFilm.<br />
This model is really fun to fly indoors and will fly in a smaller space than the<br />
standard Pico-Stick, but is a little “hairier” than the first type. I have also flown<br />
it outdoors and feel that it is capable of some manoeuvres if the speed range was<br />
not limited by the large geared propeller. The main lesson learned was that<br />
SolarFilm shrinks a bit too strongly for such a light structure, causing the trailing<br />
edge to warp. It was a case of using what I had available. (Editor: If you reduce the<br />
temperature right down, the shrinkage rate reduces dramatically.).<br />
The linkage arrangement for the rudder and ailerons<br />
E.F.-U.K. 61
A Simple Motor Mount System<br />
by M D Mackendrick of Phoenix MFC, Dorset<br />
This is an easy and strong motor mounting system for all electric flight motors,<br />
but particularly suited to outrunners and other brushless motors. This mounting<br />
method allows for easy setting of any required down & side thrust. It also reinforces<br />
the nose of the aircraft.<br />
The material required is flat alloy strip. I mostly use 10mm x 1.5mm strip bought<br />
at B&Q or any other hardware store. The finished mount is glued to the aircraft<br />
with epoxy. If I have to use 15 mm wide strip I drill lightening holes along the<br />
length of the strip where excessive strength is not necessary.<br />
Step 1. Select the mounting hole method - see diagrammed variants - decide on the<br />
length of the side pieces -I usually leave an excess to cut off later. Make the holes<br />
or notch in the middle of the strip to match the motor & its mounting screws.<br />
Step 2. Mount motor & mark width for<br />
bending. Then remove the motor and in<br />
a suitable vice carefully bend the corners<br />
as shown. It's best to clamp the weakened<br />
i.e. drilled part of the strip in the vice<br />
jaws to keep it flat.<br />
62 E.F.-U.K.
Step 3. Your airframe must be built with the nose section incomplete, usually<br />
sides only finished. Unless you are using the battery position to set the CofG,<br />
complete as far as possible the remainder of the model including covering and all<br />
fittings & electrics.<br />
Step 4. Put motor & mounting plates into nose & clamp with clips or pegs to get<br />
a satisfactory fit and move the position forward or back to establish the CG.<br />
Remember there will be a propeller, spinner & cowlings yet to add weight in front.<br />
Also don't forget to set any down thrust. Mark the exact position of the alloy<br />
strips; remove the motor & using epoxy glue the mount to the sides.<br />
Step 5 Re-mount the motor & build the front cowlings/hatches to match. I often<br />
use a plate of Ply held by the motor mount bolts to support the front of the<br />
cowlings Do remember to build in some cooling air access. Usually I have made<br />
some sort of intake underneath or even left the bottom of the motor uncovered i.e.<br />
no under-cowl.<br />
I have used this system to mount Aveox motors with gearboxes in 3 aircraft , an<br />
AXI Outrunner in an Alienator, an Astro Cobalt 05 & of course several speed<br />
400s, some with gearboxes.<br />
Tip- to remove the mount, heat with a largish soldering iron. The epoxy will<br />
soften & separate easily.<br />
You can easily bend the mount to fit curvature.<br />
E.F.-U.K. 63
The Blue Max<br />
by John Stennard<br />
Looking for a ‘bigger than normal’ model for electric power I came across the<br />
Global Models Blue Max. This model is sold in the UK by YT International. It is<br />
a ‘vintage, Eindecker’ style model of 1.7m (67") wingspan and is designed for a<br />
.40-.46 2-stroke or .52 4-stroke with an AUW of around 2.5kg (5.5lb.).<br />
I wanted to use an electric power unit that would give enough power from 2 x 7 or<br />
8 cell standard packs. I did not want to have to use larger packs. John Emms of<br />
Puffin Models was consulted and he was confident that a standard Model Motors<br />
24/12 or 24/16 brushed motor with a 3:1 gearbox would give the required power<br />
output. A test with the 3:1 geared 24/16 and a APC-E 14" x 7” showed that around<br />
300W+ were available with 14 or 16 cells, and on 16 cells gave around 6000 RPM.<br />
3000mAh NiMH cells were used for the tests using a Jeti 450 opto ESC controller.<br />
The excellent quality of this ARTF model made it a pleasure to assemble and the<br />
conversion to E-power was very easy. I may have ‘over engineered’ the motor<br />
mount but a 14" propeller at power encourages one to ensure the mounting is a<br />
secure and solid fixture! The final AUW is 3kg and the Blue Max has flown with<br />
both the 24/12 & 24/16 motors. The 24/12 can only be used up to 14 cells and a 12"<br />
prop. This motor flew the Blue Max adequately but is probably best suited to a 2-<br />
2.5kg size of model. The performance is better with the 24/16, 16 cells & 14"<br />
propeller combo, giving a very short take off run and 8+ minute flights.<br />
I think the performance using electric power is very appropriate for the type of<br />
model. A spritely takeoff, stable and pleasant handling characteristics in flight<br />
and easy landings make it a lovely aircraft to fly.<br />
64 E.F.-U.K.
I think my objectives of getting a ‘large’ electric model in the air, using coupled<br />
standard packs, has been very successful. Other than electric gliders my largest<br />
model to date has been the Multiplex Cargo. In fact the Blue Max has very similar<br />
flight characteristics.<br />
The 24/16 motor and excellent quality indrive gearbox from Puffin Models costs<br />
around £70. I think this represents a very good value for money power system for<br />
the Blue Max, and any model of the 2-3kg size.<br />
Would it be better with a brushless motor? As a regular user of brushless motors<br />
and AXI motors in particular, I am sure it would, but of course at a price. When<br />
the new larger version of the direct drive AXI arrives I will be able to give it a try<br />
and see how it compares.<br />
E.F.-U.K. 65
Inspiration<br />
The following photographs were submitted from various model events during the<br />
2002 season. They are included here to give illustrate what is possible and to<br />
inspire for the 2003 season.<br />
An Auster in yellow Army colours<br />
There are plenty of novelty designs out there<br />
66 E.F.-U.K.
The Hercules of Jörg Golombek and Michael Häberle. It is approximately 1/7th scale<br />
and spans 19’ 8½” (6m), has a wing area of 5200 sq .in. (335dm 2 ) and weighs 44 lb.<br />
(20kg). To get this brute off the ground, 4 Marx GT300/10 motors run through 5:1<br />
gearboxes and swing 20” x 10” propellers using a total of 48 cells.<br />
This is the Fiesler Storch of Klaus Seidel. It has a span of 9’ 5” (2.85m) and a flying<br />
weight of 12.1 lb. (5.5kg). It is powered by an Ultra 1600-8 motor coupled to a 2.4:1<br />
gearbox, a 20” x 6” propeller and 24 cells.<br />
E.F.-U.K. 67
This is Philipp Gardemin with his 1/6th scale Junkers Ju-52. It is almost 16’ (4.85m)<br />
span, has a wing area of 4620 sq. in. (300dm 2 ) and weighs 43.5 lb. (19.7kg). It is<br />
powered by 3 Torcman 350/28 22T brushless motors, sharing 48 cells and direct drive<br />
onto 17” x 8” propellers.<br />
A Gee Bee Model Z in yellow and black<br />
68 E.F.-U.K.
The large Messerschmitt Me Bf109G-6 of Christoph Meindl. Span is 2m (79”) and it<br />
weighs around 6kg (13 lb.). It is powered by a Graupner Ultra 3500 with a 2:1 gearbox<br />
with 36 x Sanyo RC-2400 cells and swinging a 24” x 14” propeller.<br />
The same Me 109 cutting a groove through the sky<br />
E.F.-U.K. 69
The Gotha Go 151 of Bruno Schmalzgruber. It is approximately 8’ (2.5m) span and has a<br />
flying weight of 12.3 lb. (5.6kg). Power is from 2 Keller 25/12 motors on 2.5:1<br />
gearboxes, turning 14” x 8” propellers on 16 cells.<br />
This is a model of a Boeing prototype aircraft of the “Blended Wing Body” type.<br />
70 E.F.-U.K.
A semi-scale Boulton-Paul P111 ducted fan in prototype yellow markings.<br />
A very nice Fouga Magister in dark blue with white wings and red tip tanks.<br />
E.F.-U.K. 71
In the foreground is a very sleek looking twin EDF model called Blade in blue and<br />
orange, judging by it’s looks it should really motor. Behind is an F9F Panther EDF in<br />
standard US Navy colours of dark blue with white trim.<br />
A very nicely finished scale ducted fan model of a Henschel Hs132A jet dive bomber. The<br />
Hs132 was designed as a jet replacement for the well known Ju87 Stuka, but never saw<br />
service as the first prototype were captured just before making its first flight.<br />
72 E.F.-U.K.
A Preset Speed Controller for<br />
Free-<strong>Flight</strong> Models<br />
by John Bunting<br />
With the advent of ultra-lightweight radio gear, the free-flight electric model may<br />
be a declining species. However, I like to have one or two such models to fly on<br />
calm evenings, or at meetings where radio flying is limited. In the interests of<br />
peace and quiet, I converted a small model from a ½cc diesel to electric power,<br />
using a KP02 power unit. This has a geared motor driving a 7” propeller and is<br />
powered by 3 small 110mAh NiCd cells. From a full charge, the motor draws<br />
about 5A and runs for about a minute.<br />
It occurred to me that if you have a little power to spare, it might be useful to be<br />
able to reduce the motor speed and fly the model with less power, but with a<br />
longer motor run. The best way to do this, without wasting any battery power,<br />
would be to use a circuit similar to the output stage of an RC Speed Controller; a<br />
MOSFET switch controlled by a signal of variable mark / space ratio. In this case<br />
the signal would be generated by a simple CMOS oscillator, with the mark / space<br />
ratio set by a small potentiometer before flight.<br />
However, the low battery voltage was a problem. CMOS circuits need a supply of<br />
at least 3v, and the MOSFET needs a gate-to-source voltage of between 3v to 6v,<br />
depending on the type, to switch fully ‘on’ for a current of 5A. The battery is<br />
nominally 3.6v, but can soon fall to less than 3v when the motor is running.<br />
I was about to drop the idea when a possible solution came to mind. When switching<br />
an inductive load, such as a motor or solenoid, an induced voltage peak is generated<br />
at the junction of switch and load, at the end of each ‘on’ phase of the switching<br />
E.F.-U.K. 73
cycle. The peak is of short duration, but can reach a level much higher than the<br />
supply voltage, and may exceed the safe working voltage of the MOSFET.<br />
For this reason, a reversed diode (D3 here), is usually connected in parallel with<br />
the load. When the induced peak voltage exceeds the supply voltage, the diode<br />
becomes forward-biased , and forms a low-resistance path from the MOSFET to<br />
the supply line. This limits the peak to a safe level, and in my test circuit the<br />
oscilloscope showed a peak amplitude of about 8v.<br />
If we now connect another diode (D4) and a capacitor (C2), as shown, we have<br />
what is called a ‘diode pump’ circuit. The capacitor is charged up, via the diode, to<br />
a voltage almost equal to the peak value and this gives a DC voltage, which can be<br />
used to power the CMOS oscillator. This will also give an output signal high<br />
enough to switch the MOSFET.<br />
This is possible because the oscillator needs only a very low supply current,<br />
typically 100µA. Provided that the battery voltage is initially high enough to get<br />
the circuit started, it then holds itself up by it’s own bootstraps, so to speak, and<br />
keeps working until the battery drops below 2v, and is therefore almost completely<br />
discharged.<br />
The circuit works well with the KP02 unit, allowing the motor to be set from a<br />
tick-over to almost full speed. The maximum speed is not quite as high as when<br />
running direct from the battery, as there must be at least a short ‘off’ period in the<br />
switching cycle to keep the diode pump working.<br />
If you want to keep the option of running at absolute top speed, a small 2-way<br />
switch or connector could be fitted top bypass the MOSFET and connect the<br />
motor straight to the negative terminal of the battery in the usual way. (Editor:<br />
alternatively just remove the unit and connect the battery to the motor).<br />
The circuit also worked with two other small motors from my junk box, but the<br />
DC voltage from the diode pump will depend on the motor characteristics, so in<br />
that respect the circuit should be regarded as the basis for further experiment.<br />
The MOSFET should be of a type with a low gate threshold voltage; the FP45N03L<br />
starts to conduct below 2v, and a search of RS or other suppliers’ lists should<br />
reveal a few other suitable types. If you are using a higher voltage battery, of 4.8v<br />
or more, you may find that the diode pump is unnecessary and the oscillator can<br />
be run direct from the battery. However, make sure that it’s output voltage remains<br />
high enough, at least until the battery is on the verge of being fully discharged. If<br />
the MOSFET gets more than slightly warm, it’s almost certainly not being switched<br />
fully on by the gate signal.<br />
For the oscillator, the pin connections are shown for a CD4001, but any other<br />
CMOS IC containing two or more inverters could be used (e.g. 4011 or 4069).<br />
With VR1 and C1 values shown, it runs at 3kHz. The circuit can be assembled on<br />
a piece of Veroboard just over 1” square, and weighs less than ½oz.<br />
74 E.F.-U.K.
Component List:<br />
IC1 CD4001 VR1 1M0 min. preset<br />
R1 820K Q1 FP45N03L or similar<br />
R2 47K D1, D2, D4 1N4148 or similar<br />
R3 100R D3 1N4001<br />
C1 220pF<br />
C2 22µF or 47µF, 16V min. electrolytic<br />
The above view shows<br />
the holes used from the<br />
component side and the<br />
track cut locations for<br />
reference.<br />
The top left view of the<br />
Veroboard is as seen<br />
from the track side after<br />
cutting the tracks as<br />
shown.<br />
The view on the left is the finished board<br />
complete with all components. Please pay<br />
attention to component orientation.<br />
(Editor: When fitted in the supply output from an RC switch, this design could be<br />
used to control the speed of motors used in electric retracts or similar devices).<br />
E.F.-U.K. 75
76 E.F.-U.K.<br />
FOR SALE / WANTED<br />
Member's Sales & Wants<br />
For Sale on behalf of the estate of the late Sqn Ldr Ken Wood, MBE. The models<br />
are all fully built & shipping is difficult, but delivery and/or viewing can be arrange<br />
at any of the BEFA fly-ins or the AGM. For more details (or digital photographs),<br />
contact Jan Bassett on 01935 472743 or jan.bassett@electric-flight.org.uk:<br />
• Goldberg Electra powered sailplane with modified nose shape (78” span<br />
single-piece wing of 663 sq. in.). Fitted with 1 Hitec HS-80 & 1 Futaba<br />
S143 servo. The motor mounting is designed for a Keller 22/12 motor, but<br />
would fit a 600 motor & compact gearbox with little or no modification.<br />
Covered in SolarFilm, the fuselage, fin & wing centre are red, with the<br />
tailplane, elevator & rudder in white and yellow outboard on the wings.<br />
Intended for 7 Sub-C cells, but would take 8 Sub-C or 10 4/5 Sub-C. Price<br />
for a quick sale to a good home at £40 ono.<br />
• Goldberg Electra powered sailplane with modified nose shape as above.<br />
Fitted with Fleet FPS-24A speed control, Micron Mini Rx and 2 Fleet<br />
FPS-18 mini servos. Covered overall in Fibafilm with the fuselage, elevator<br />
& rudder in white and the wings, tailplane & fin in red. Intended for 7<br />
Sub-C cells, but would take 8 Sub-C or 10 4/5 Sub-C. Price for a quick<br />
sale to a good home at £40 ono.<br />
For Sale by Eric Cable, the following motors which are boxed and unflown.<br />
Contact Eric on telephone 01935 478974 (Yeovil).<br />
• Plettenberg HP 200/20/12 motor - £75<br />
• Astro 05 FAI, 6 turn motor, geared 2.2:1 - £95<br />
• LRP Super 400 - £25<br />
Wanted by the Editor (contact details on page 4) any of the following:<br />
• General or Technical Articles.<br />
• Product Reviews.<br />
• New products.<br />
• <strong>Electric</strong> <strong>Flight</strong> Event write-ups.<br />
• Hints and Tips.
• Photographs of your models (with dimensions, equipment installed and<br />
flight performance please).<br />
• New items of interest for inclusion in this magazine.<br />
• Photograph prints supplied will be returned if you supply a return address,<br />
unless you specify otherwise.<br />
• Digital photographs should be at least 1000 pixels wide, in colour and<br />
uncompressed wherever possible.<br />
Requests for inclusion in the For Sale & Wanted pages can be made by email, post<br />
or by telephone, to the Editor using the contact details on page 4. Entries can also<br />
be submitted on-line from the For Sale & Wanted page on the BEFA website at<br />
www.befa.org.uk<br />
If you wish to have pictures included with your for sale or wanted entry, post<br />
photographs, or email graphic files, to the Editor. Graphic files should be in colour<br />
and uncompressed were possible.<br />
Adverts will be included in both E.F.-U.K. and on the BEFA Website unless<br />
instructed otherwise.<br />
uzzflight<br />
167 Duffield Road, Derby. DE22 1AJ<br />
Telephone: 01332 601693<br />
Email: pete@buzzflight.co.uk<br />
Website: www.buzzflight.co.uk<br />
Hummingbird<br />
the definitive control-line trainer - ideal for youngsters<br />
Deluxe Kit - complete with motor, propeller, prop. adapter, spinner, wheels, balsa,<br />
u/c wire, control-line / power wire, on-off switch, battery connectors, sundries,<br />
building instructions & full-size plan, bellcrank and control handle. The only<br />
other items needed are the covering and a 12v 7AH battery. £39.99 + £2.50 P&P.<br />
Standard Kit - contains balsa, u/c wire, control-line / power wire, on-off switch,<br />
battery connectors, sundries, building instructions & full-size plan, bellcrank and<br />
control handle. Again the covering and a 12v 7AH battery are not included. £24.99<br />
+ £2.50 P&P.<br />
Plans & Instructions - £7.99 including P&P, add £5.99 for control-line / power<br />
wire and switch. Please contact us for Overseas prices.<br />
Please make cheques payable to Buzzflight and allow 14 days for delivery.<br />
E.F.-U.K. 77
<strong>Electric</strong> <strong>Flight</strong> Calendar<br />
If you would like details of your event to appear in these pages please send full<br />
details to the Editor EF-UK, contact details on page 4. For last minute info check<br />
out the events list on the BEFA website at www.befa.org.uk<br />
Dates, times and, even, locations of events can change at the last minute. You are<br />
strongly advised to check on events with the given contacts before setting out on<br />
your journey to any event.<br />
You are asked to please check with the organisers of non-BEFA events for their<br />
qualification requirements before the event.<br />
All BEFA flying events require proof of BMFA or equivalent insurance<br />
to fly. Additionally, all models must have been satisfactorily test flown<br />
prior to the BEFA event to fly - NO TEST <strong>FLIGHT</strong>S ON THE DAY.<br />
The BEFA has not yet set minimum qualifications to fly at our events, i.e. no<br />
BMFA certificates are required to fly. Currently all that is expected of pilots is a<br />
reasonable level of flying competency.<br />
April 2003<br />
27th BEFA League Event at Pillerton Hersey. ElectroSlot / E400 league<br />
event. For info contact Dave Perrett at d.l.perrett@btinternet.com<br />
May 2003<br />
16th / 17th Brooklands Museum 60th Anniversary of the famous Dam<br />
Busters Raid. Brooklands Museum where Barnes Wallis developed<br />
many aircraft, but perhaps best known for his Dam Busting "bouncing<br />
bomb" will be marking the 60th anniversary of this raid on Friday<br />
16th & Saturday 17th May 2003.<br />
The main event will take place on the Saturday, where electric (&<br />
i.c.) Scale Model Flyers are invited to compete for the Barnes Wallis<br />
Memorial Cup & other prizes in an event guaranteed to test the flying<br />
skills of all B certificate pilots. As many will know, 3 aircraft types<br />
were used in the original development and final execution of the raid.<br />
The Vickers Wellington & Mosquito using the original Highball depth<br />
charge, and finally the Lancaster's of 617 Squadron for the raid.<br />
Modellers have to modify or build from scratch these aircraft, sized<br />
approximately to the scale of a solid practice golf ball. This to be<br />
carried in the bomb bay and released over water and a mock up of<br />
one of the original dams. Those perfectionists who consider they can<br />
go one better and spin up their golf ball in situ before release are<br />
welcome to incorporate an additional drive motor.<br />
78 E.F.-U.K.
As a further tribute to Barnes Wallis, who as you may know also did<br />
all the original design / development work on "Swing Wing" technology,<br />
we would welcome demonstrations of his R100 Airship, Vickers<br />
Wellesley, Wellington & Swallow aircraft. Many other types are also<br />
welcome, those built or flown from Brooklands, such as the Sopwith,<br />
Hawker and Supermarine. Where plans are not readily available, the<br />
Museum archive should be able to help. Back up crews and non flyers<br />
are welcome and we look forward to a great days flying.<br />
In order to plan everything well ahead, the Museum would appreciate<br />
getting an idea of numbers in advance, so please let them have your<br />
name and details by contacting Gemma Lane on 01932 857381 or via<br />
email at events@brooklandsmuseum.com<br />
18th BEFA League event at Leicester. ElectroSlot and E400 league event.<br />
For details contact Dave Perrett at d.l.perrett@btinternet.com<br />
June 2003<br />
1st BEFA League event at Leamington Spa. ElectroSlot / E400 league<br />
event. For info contact Dave Perrett at d.l.perrett@btinternet.com<br />
1st Hayes & District M.A.C.’s Diamond Jubilee <strong>Electric</strong> Fly-In at<br />
Cranford Country Park, Hayes, Middx. Pilots’ Briefing 10am, ends<br />
6pm. Full 35MHz band - Now ALL channels (odds & evens). Flyfor-fun<br />
plus informal Scale, Vintage and Last Down comps. Possibly<br />
a Pico-Jet Pylon Race! A Traders’ “village” is planned. (Trader’s setup<br />
from 8am) Bring the family to enjoy the beautiful woodlands,<br />
river and adventure playground. Toilets (incl. disabled) and<br />
refreshments available in the park. Further details from Dave Chinery<br />
0208 573 4687 or DavidDchinery@aol.com<br />
15th BMFA Southern Area Fly-In. Lovely site courtesy of Winchester<br />
MAC with large area of short mown grass, access off the A .52<br />
Winchester to Petersfield road. 10am - 5pm. Trophies for scale aircraft<br />
by popular vote. Other trophies. Lunchtime All Up Last Down<br />
Competition. Join us for a relaxing fly All frequencies can be used.<br />
Entry fee £3 per pilot. For more information see page 78 or contact<br />
Andy Palmer at 92 Durley Ave, Waterlooville, Hants, PO8 8TZ, email<br />
andy@palmer99.freeserve.co.uk or telephone 02392 253761, or<br />
Eddie Clowes at 7 Thatched Cottage Park, Southampton Road,<br />
Lyndhurst, Hants, SO43 7BW, telephone: 02380 282847.<br />
22nd Chester MFC - RC All <strong>Electric</strong> Fly-In at the Roodee Racecourse,<br />
Chester. Open duration, vintage & scale competitions - entries on<br />
the day. Extended sports flying. Pilot’s briefing at 9.30am. Enquiries<br />
to C R Filtness, 26 Raymond Street, Chester - Tel 01244 378476.<br />
E.F.-U.K. 79
June 2003 (continued)<br />
22nd The 12th annual Cumulus E-fly-in will be held at the Cumulus<br />
club field in Winssen near Nijmegen, the Netherlands. For more<br />
information, please http://home.hetnet.nl/~ronvans/<br />
28th / 29th Wings and Wheels Model Spectacular at North Weald Airfield,<br />
Essex. All the usual attractions of this annual event. Please see the<br />
advert on page 79 for more details.<br />
July 2003<br />
5th BEFA League event at Middle Wallop. ElectroSlot and E400 league<br />
event. Due to the field being shared with the fly-in only ODD<br />
frequencies are available on 35MHz. For more details contact<br />
Dave Perrett at d.l.perrett@btinternet.com.<br />
5th / 6th BEFA Fly-In at Middle Wallop. On the Saturday (5th) the site<br />
will be shared with the League events and therefore even frequencies<br />
only for 35MHz. No Free-<strong>Flight</strong>. The Sunday (6th) is Fly-In only<br />
with all frequencies available. For more information contact Robert<br />
Mahoney at befa@rlmahoney.co.uk<br />
20th Grand <strong>Electric</strong> Fly-In at Pontefract Park (off J 32 M62) presented<br />
by BMFA Northern Area with Pontefract & District Aeromodellers.<br />
10am to 5pm. Low key events for Scale (Flying), Sport, Vintage,<br />
AULD, & Helicopters (if numbers allow). Pilots £2 per event,<br />
spectators free. Proof of BMFA insurance essential. All frequencies.<br />
Raffle. Free boot sale. Traders by prior appointment only. Sorry no<br />
camping. For details see http://www.pandasclub.fsnet.co.uk/ or<br />
contact John Thompson on email j.thompson3@ntlworld.com or<br />
telephone 01924 515595 (reasonable hours please).<br />
27th BEFA League event at Leamington Spa. ElectroSlot / E400 league<br />
event. For info contact Dave Perrett at d.l.perrett@btinternet.com<br />
27th Bath SPARCS All <strong>Electric</strong> Fly-in at RAF Colerne Wiltshire.<br />
Airfield site with grass and tarmac runways. No competitions. Proof<br />
of BMFA insurance required. Regret no facilities for spectators. Pilots<br />
brief 1000. Contact Bob Partington Tel 01225 891441 or<br />
bob.partington@ukonline.co.uk<br />
August 2003<br />
3rd BEFA Fly-In at Woburn Abbey. For more information contact Robert<br />
Mahoney at befa@rlmahoney.co.uk<br />
10th BEFA Fly-In at Leamington Spa. For more information contact Jan<br />
Bassett at befa@electric-flight.org.uk<br />
80 E.F.-U.K.
16th/17th Greenacres Fun Fly at Walsall Airport. Cost per frequency £2.50.<br />
The usual arrangements for camping, trade, etc. For further<br />
information contact Andrew Moult on telephone 01922 724311 or<br />
email Andrew@tmoult.fsnet.co.uk or alternatively Peter Hubbard,<br />
on 07754 058872 or email hubbardp@blueyonder.co.uk<br />
17th BEFA East Anglia Fly-In at Phoenix MFC, Lowestoft. All electric<br />
flyers with BMFA insurance welcome. Fun flying with the addition<br />
of Scale, All-Up-Last-Down & Vintage competitions. Even frequencies<br />
only. Barbecue / liquid refreshments available. Pilots entrance fee of<br />
£2.00. Location at Pakefield, Lowestoft, Suffolk. For further info<br />
contact Tom Taylor, 01493-668555 or e-mail tom.t.usn@lineone.net.<br />
Additional information and location map available at the Phoenix<br />
MFC web site at www.phoenix-mfc.freeserve.co.uk<br />
31st Furness Model Aircraft Society annual <strong>Electric</strong> Fly-in<br />
beginning at 10am. The venue will be the Rakesmoor Lane flying site<br />
at Barrow-in-Furness, Cumbria. Entry fee will be £4 per modeller.<br />
Proof of insurance is required on the day. Further details from Gary<br />
Knight, 12 Dale Street, Askam-in-Furness, Cumbria. LA16 7DH. Tel.<br />
01229 467447 or email gp.knight@ukonline.co.uk<br />
September 2003<br />
7th Open <strong>Electric</strong> Day at North London RCMFC, Baldock. Entry<br />
£5 on the day. No Free-<strong>Flight</strong>. Limited Trade welcome by prior<br />
appointment only. Proof of insurance essential. Food & drink<br />
available. For more details call John Raines on 01462 893059.<br />
7th West Calder Aeromodellers fly-in. Tarmac & grass runways.<br />
Snacks available. Free entry. SAA/BMFA insurance required. 10am<br />
to 5pm, all welcome. More details at www.modelclub.org<br />
13th The Northern Area BMFA presents the Annual Pudsey Swap Meet<br />
and Indoor Free <strong>Flight</strong> event. Pudsey Civic Hall, near Leeds.<br />
Doors open 8.30am. Tables £3 each, admission £1. Flying starts 1pm.<br />
Classes for: Small Scale; ARTF Butterfly; Foam 200 & Civic / mini<br />
Gyminie Cricket; Dart; and Hamster. Charge will be £1 per class<br />
entered (Juniors free). Details Gordon Warburton 0113 2852947or<br />
Northern Area Website (http://members.aol.com/bmfanorth/) or<br />
email bmfanorth@aol.com<br />
14th BEFA League event at York. ElectroSlot / E400 league event. For<br />
more details contact Dave Perrett at d.l.perrett@btinternet.com<br />
21st Pillerton Hersey fly-in courtesy of John Lewthwaite, including an<br />
All-Up-Last-Down competition. Contact John Lewthwaite for more<br />
information on telephone 01789 740 688.<br />
E.F.-U.K. 81
September 2003 (continued)<br />
28th BEFA League event at Pillerton Hersey. ElectroSlot / E400 league<br />
event. More info from Dave Perrett at d.l.perrett@btinternet.com<br />
November 2003<br />
2nd BEFA Technical Workshop at the Royal Centre, Royal Leamington<br />
Spa. The usual Traders Fair and technical presentations.<br />
82 E.F.-U.K.
JUNE 28TH & 29TH 2003<br />
at North Weald Airfield, Essex<br />
(Just off Junction 7 - M11 motorway)<br />
The largest RC Model Show in the South<br />
<strong>Flight</strong> Line directed by The Ghost Squadron<br />
<strong>Electric</strong> Model Display Pilots welcome, pre booking required.<br />
Please contact us if you are interested in displaying your model.<br />
Other attractions include:- Large Model Boat Pool,<br />
Model Car displays, Over 70 Model Trade Stands,<br />
Gigantic Modellers Bring & Buy, Bar, Refreshments, Saturday Night<br />
Entertainment plus lots more!!<br />
See all about the 2002 Show on our web site<br />
www.wingsnwheelsspectacular.com<br />
Entrance Prices Advanced Prices<br />
Adult £ 7.00 Adult £ 6.00<br />
Concessions £ 6.00 Concessions £ 5.50<br />
Children (5-16) £ 4.00 Children (5-16) £ 3.50<br />
Family Ticket (in advance only)<br />
(2 adults & up to 4 children) £20.00<br />
You can telephone, fax, post or email your order to the address / contact details<br />
below. Applications for advance tickets much reach Wings & Wheels no later<br />
than 24 June 2003. No refunds will be made. Please allow 14 days for delivery.<br />
Tel./Fax: ++ 44 (0) 1480 462265<br />
email: wingsnwheels@dial.pipex.com<br />
Designaction Limited, Wings & Wheels, PO Box 284, HUNTINGDON. PE28 9AE<br />
E.F.-U.K. 83
New to <strong>ELECTRIC</strong> <strong>FLIGHT</strong>?<br />
START HERE . . . . .<br />
You may be taking up <strong>Electric</strong> <strong>Flight</strong> for the first time, you may be converting<br />
from another discipline. Whatever your situation, help and advice is available.<br />
BEFA has prepared an information sheet which details further sources of<br />
information which you may find useful when just joining the hobby. To receive a<br />
copy, please send a Stamped Addressed Envelope (SAE) to Robert Mahoney, address<br />
on page 4.<br />
BEGINNER'S GUIDE<br />
A Beginner’s Guide to <strong>Electric</strong> <strong>Flight</strong> is available, which explains many of the<br />
'Mysteries' of <strong>Electric</strong>s’ and will, hopefully, set you off on the right foot. Please<br />
send £3.00, per copy required, to The Editor of EF-UK at the address on page 4.<br />
Please add £1.00 extra for overseas postage and remit in Sterling, cheques payable<br />
to BEFA.<br />
TECHNICAL HELP SERVICE<br />
Technical help is now available again for the use of all members. We regret that<br />
no telephone service is available, but all questions in writing (or email) will be<br />
answered by our new Technical Liaison Officer (TLO). Please refer your queries<br />
to our TLO, to the postal or email address on page 4. Please ensure that you<br />
include an SAE for a reply.<br />
CONNECTIONS SERVICE<br />
Requests are frequently received from members who wish to be put in contact<br />
with other members living in the same area. The easiest method of doing this is<br />
to place a free 'wanted' advert in the classified section of this magazine.<br />
Alternatively, a request may be made IN WRITING to the Membership Secretary<br />
who is allowed to divulge such information to members ONLY. Please supply as<br />
much information about your location as possible and please remember to include<br />
an SAE for your reply.<br />
B.E.F.A. MEMBERSHIP<br />
Membership of the <strong>Association</strong> is open to all members of the BMFA. Those who<br />
are not members of our national controlling body may only subscribe to EF-UK<br />
with no other benefits of membership. Overseas members are very welcome and<br />
will be classed as full members if they belong to their own national controlling<br />
body.<br />
CONTACT<br />
For full details, please send an SAE to the Membership Secretary (address on page<br />
4) requesting a membership application form. Those with Internet access may<br />
visit the B.E.F.A. website at http://www.befa.org.uk, where you will find all the<br />
membership application form & information you should require.<br />
84 E.F.-U.K.
MAIL ORDER MODEL SUPPLY<br />
GOLD PLUGS Ideal for Speed 400/600<br />
2mm plug 75p; cuts into two giving one plug/socket<br />
2mm solder socket 43p. 2mm plug and a 2mm socket £1.15<br />
Lightweight 2mm plug and socket 55p; Max 15A motor current draw<br />
Spares. 2mm light plug 40p. 2mm light socket 20p<br />
Pack of red/black shrink: 3.2mm or 4.8mm 50p<br />
GOLD PLUGS 600 or larger motor<br />
4mm plug 90p; cuts into plug/socket. Very low resistance<br />
4mm hollow plug and a separate 4mm solder socket £1.15<br />
Spares. 4mm hollow plug 85p. 4mm solder socket 43p<br />
Lightweight 4mm plug and socket 75p; Max motor current 35A suggested<br />
Spares. 4mm light plug 55p. 4mm light socket 25p<br />
Pack of red/black shrink: 6.4mm £1.25: 4.8mm 75p<br />
Providing that you bear in mind the suggested amp ratings all the 2mm and 4mm plugs are<br />
interchangeable. All fit any of the same size.<br />
EXTRA FLEXIBLE WIRE. 0.5mm2 , 129 strands, Max 10A, 35p/metre<br />
Red or Black or White. Park Flyers etc. or servo extensions.<br />
EXTRA FLEXIBLE WIRE<br />
Supplied in packs of 1 metre of red and 1 metre of black, i.e. 2 metres of wire<br />
0.75mm2 , 196 strands; ideal for weight saving, Max 15A, £1.00/pack<br />
1.00mm2 , 258 strands; ideal for weight saving for speed 400, Max 19A, £1.40/pack<br />
1.50mm2 , 378 strands; ideal for speed 400, £2.00/pack<br />
4mm2 , 1036 strands; £3.50/pack<br />
SILICONE INSULATED WIRE. Pack of 1 metre of red and 1 metre of black<br />
1.5mm2 , 378 strands. £2.50<br />
2.5mm2 , 651 strands. £3.00<br />
All wire can be cut off the roll, in longer lengths if required.<br />
CELL HEATSHRINK metre lengths<br />
25mm 50p; suits single AAA or AA cells or any same size<br />
48mm 75p; suits single sub C cells/sticks or packs of dumpy 600<br />
65mm 85p; suits 1700 or 2000 packs, also RC oblong sticks etc.<br />
94mm 95p; suits double deck packs (1700 etc.)<br />
All sizes layflat width, supplied in clear. 48mm available in opaque blue also.<br />
WIRE HEATSHRINK metre lengths<br />
1.6mm 50p; 2.4mm 60p; 9.5mm £1.00. Black only<br />
3.2mm 75p; 4.8mm 80p; 6.4mm 95p. All in red or black.<br />
ALL ORDERS PLUS POSTAGE: 60p UK; £1.10 Europe; £1.70 World<br />
M. E. DONKIN, 37 WYDALE ROAD, OSBALDWICK, YORK, YO10 3PG<br />
Tel/Fax 01904 414738. Mobile 0771 202 8329.<br />
E-mail: michael@moms63.freeserve.co.uk or modelsupply@netscapeonline.co.uk<br />
All messages - an attempt will be made to contact you. (I work shifts)<br />
Computer faxes must send start signal before my fax will respond!<br />
E.F.-U.K. 85
86 E.F.-U.K.<br />
B.E.F.A. Sales<br />
BEFA Round, Coloured Rub-down Decals - 50p each<br />
BEFA 2000' Millennium Decals - £1.00 each<br />
Back Issues of EF-UK - No's 38, 40, 41, 44, 52, 53, 55 to 63 (inclusive) at £1.00<br />
each for BEFA members, or £2.00 each to non-members. Issues 64 to 70 are also<br />
available to BEFA members at £3.00 each, or £5.00 each to non-members. These<br />
prices include UK P&P, overseas rates on application.<br />
Please Note these are the ONLY back issues now available.<br />
EF-UK Index. A comprehensive index of EF-UK from issue 28 to 59 is available<br />
by sending a £1 coin to cover copying and postage cost.<br />
Binders:- are available to hold eight issues of <strong>Electric</strong> <strong>Flight</strong> U.K. Produced in<br />
dark blue with gold lettering on the spine, these cost £4.50 each including U.K.<br />
postage. Please add £1 for European postage and £2 for Worldwide postage.<br />
Sweat Shirts & Tee-Shirts: Stock of these is now almost all gone - please<br />
contact Robert Mahoney regarding remaining stock, sizes and prices.<br />
Please send all orders to Robert Mahoney at the address on page 4.<br />
PLEASE REMIT IN STERLING ONLY,<br />
WITH ALL CHEQUES MADE PAYABLE TO B.E.F.A.<br />
Advertisers Index<br />
BEFA Sales .................................................................. 86<br />
Buzzflight .................................................................... 77<br />
E-Zone ...............................................Inside Front Cover<br />
Fanfare ............................................... Inside Back Cover<br />
For Sale / Wanted ........................................................ 76<br />
Mail Order Model Supply............................................ 85<br />
S T C (Crossfire).......................................................... 35<br />
Traplet ............................................. Outside Back Cover<br />
Wings & Wheels .......................................................... 83<br />
E.F.-U.K. advertising rates are £20 per full page, £10 per half page, per issue.<br />
Please contact the Editor for further information (see page 4).
FANS<br />
Morley ‘Jet Elec’ Fan .............................. £15.00<br />
Adaptors for 480 & 410 motors .............. £3.00<br />
WeMoTec Micro-Fan (280/300/330) ..... £14.00<br />
WeMoTec Mini-Fan (400/480) ............... £28.00<br />
WeMoTec Midi-Fan (540/ 600/930) ....... £38.00<br />
MOTORS<br />
WEP Turbo 10 ........................................ £55.00<br />
Speed 500 E Race ................................. £13.00<br />
Speed 600 8.4v BB SP .......................... £15.00<br />
Speed 600 8.4v Race ............................ £18.00<br />
Speed 650 9.6v BB Race ...................... £33.00<br />
Speed 700 ............................ £14.00 to £22.00<br />
Speed 700 Neodym ............................... £38.00<br />
RE 380 / Rocket 400 ................................ £4.50<br />
Speed 480 PB .. £14.00 BB ................ £21.00<br />
Pro 400 ...............£5.00 Pro 480 HS .... £7.00<br />
MAXCIM BRUSHLESS<br />
Max Neo 13Y 1430 rpm/v ................... £160.00<br />
Max Neo 13D 2470 rpm/v .................... £160.00<br />
21 Cell Controller ................................. £140.00<br />
25 Cell Controller ................................. £180.00<br />
Superbox 1.6 to 4.28:1 ......................... £50.00<br />
Monsterbox 4 to 6.8:1 .......................... £60.00<br />
Motor Mount ........................................... £10.00<br />
CHARGERS<br />
Speed 1 Pulse / Pk<br />
Det 4-8 cells ........................................... £27.00<br />
Speed Ex Digital<br />
as above with discharge ...................... £55.00<br />
Simprop 25 cell .................................... £100.00<br />
– MAIL ORDER –<br />
SPORTS <strong>ELECTRIC</strong> <strong>FLIGHT</strong><br />
FANS AND GEARBOXES<br />
www.fanfare.f9.co.uk<br />
GEARBOXES<br />
Master Airscrew 2.5, 3, 3.5:1 ............... £16.00<br />
TAB Inline 2.65 540/600’s .................... £40.00<br />
TAB Inline 2.08 & 3.05 480’s ............. £40.00<br />
TAB Inline 2.1 700’s .............................. £50.00<br />
Mini Olympus .......£8.00 Olympus ...... £12.00<br />
MOTORS / GEARBOXES<br />
MFA 2.5:1 N.I.L. with 540 ...................... £21.00<br />
Speed 400 FG3 ..................................... £17.00<br />
SpeedGear 400 4:1 Inline ...................... £35.00<br />
SpeedGear 480 3.45:1 .......................... £48.00<br />
SpeedGear 500 2.8:1 ............................ £40.00<br />
SpeedGear 600 2.8:1 ............................ £41.00<br />
SpeedGear 700 2.7:1 9.6v .................... £60.00<br />
SpeedGear 700 Neo .............................. £82.00<br />
Mini-Olympus & RE380 .......................... £12.00<br />
Olympus & 540 ...................................... £19.00<br />
Robbe 410/35/45 ................................... £36.00<br />
PROPS<br />
M.A. Folding 12x8 ............... £14.00<br />
15x12 ............. £15.25<br />
M.A. Wood <strong>Electric</strong> 10x6/10x8 ........ £4.00<br />
11x7/11x9 ........ £4.25<br />
12x8/12x10 ...... £4.50<br />
13x8/13x10 ...... £5.00<br />
Carbon Folders 7x4 ................... £6.00<br />
(Perkins) 8x4.5 ................ £6.00<br />
11x8 ................. £9.00<br />
Slimprops 8x4, 8x6, 9x5, 9x6 .............. £3.50<br />
APC <strong>Electric</strong> 6” - 12” dia. .......... £3 to £4<br />
(full range available) 13 ” - 18” dia. ..... £5 to £10<br />
Selection of Graupner & Aeronaut<br />
folding & fixed props.<br />
Wheels, Wire, Servos, Fuses, Caps,<br />
Powerpole, 4mm & 2mm gold conns.<br />
FANFARE • 18 HILLSIDE ROAD • TANKERTON • WHITSTABLE • KENT • CT5 3EX<br />
‘Sports <strong>Electric</strong>’ Helpline - Phone / Fax: (01227) 771331 - E-mail: john.swain1@virgin.net<br />
Now online at - www.fanfare.f9.co.uk