Sony PCS-XG80 Operation Manual v2.3 - Vidofon
Sony PCS-XG80 Operation Manual v2.3 - Vidofon
Sony PCS-XG80 Operation Manual v2.3 - Vidofon

Create successful ePaper yourself
Turn your PDF publications into a flip-book with our unique Google optimized e-Paper software.
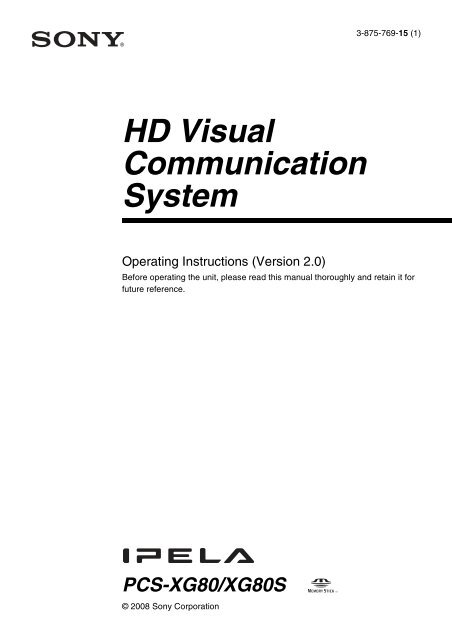
HD Visual<br />
Communication<br />
System<br />
Operating Instructions (Version 2.0)<br />
© 2008 <strong>Sony</strong> Corporation<br />
3-875-769-15 (1)<br />
Before operating the unit, please read this manual thoroughly and retain it for<br />
future reference.<br />
<strong>PCS</strong>-<strong>XG80</strong>/<strong>XG80</strong>S
Owner’s Record<br />
The model and the serial numbers are<br />
located at the bottom. Record the serial<br />
number in the space provided below. Refer<br />
to these numbers whenever you call upon<br />
your <strong>Sony</strong> dealer regarding this product.<br />
Model No. ______________<br />
Serial No. ______________<br />
WARNING<br />
To reduce a risk of fire or electric<br />
shock, do not expose this product<br />
to rain or moisture.<br />
To avoid electrical shock, do not<br />
open the cabinet. Refer servicing to<br />
qualified personnel only.<br />
IMPORTANT<br />
The nameplate is located on the bottom.<br />
Notice<br />
The <strong>PCS</strong>-<strong>XG80</strong>S and the <strong>PCS</strong>-<strong>XG80</strong> are<br />
systems each of which contains Model No.<br />
<strong>PCS</strong>-<strong>XG80</strong>S as a main unit. Always refer to<br />
Model No. <strong>PCS</strong>-<strong>XG80</strong>S for regulatory<br />
compliance purpose.<br />
WARNING<br />
Use the AC power adapter provided with<br />
this equipment as a power supply source.<br />
Manufacture Type No.<br />
<strong>Sony</strong> VGP-AC19V15<br />
Any other power sources may result in<br />
hazards such as a fire.<br />
Disconnect device of this equipment is the<br />
mains plug of the AC adapter.<br />
The mains plug on this equipment must be<br />
used to disconnect mains power.<br />
Please ensure that the socket outlet is<br />
installed near the equipment and shall be<br />
easily accessible.<br />
In the event of abnormal operations,<br />
disconnect the mains plug.<br />
2<br />
NOTICE<br />
Use the power cord set approved by the<br />
appropriate testing organization for the<br />
specific countries where this unit is to be<br />
used.<br />
NOTICE<br />
Each of <strong>PCS</strong>-<strong>XG80</strong>S, <strong>PCS</strong>-RF1 and <strong>PCS</strong>A-<br />
C<strong>XG80</strong> contains an RF (Radio Frequency)<br />
transmitting and receiving module.<br />
<strong>Operation</strong> is subject to applicable local radio<br />
communication regulations in each country.<br />
This equipment should be installed and<br />
operated with minimum distance 20cm<br />
between the radiator & your body. This<br />
transmitter must not be co-located or<br />
operating in conjunction with any other<br />
antenna or transmitter.<br />
CAUTION for LAN port<br />
For safety reasons, do not connect the LAN<br />
port to any network devices that might have<br />
excessive voltage.<br />
Installing batteries<br />
Two R06 (size AA) batteries are supplied for<br />
Remote Commander.<br />
To avoid risk of explosion, use R06 (size<br />
AA) manganese or alkaline batteries.<br />
CAUTION<br />
Danger of explosion if battery is incorrectly<br />
replaced. Replace only with the same or<br />
equivalent type recommended by the<br />
manufacturer. Dispose of used batteries<br />
according to the manufacturer’s<br />
instructions.<br />
For the customers in the USA<br />
WARNING<br />
This device complies with Part 15 of the<br />
FCC Rules.<br />
<strong>Operation</strong> is subject to the following two<br />
conditions: (1) This device may not cause<br />
harmful interference, and (2) this device<br />
must accept any interference received,<br />
including interference that may cause<br />
undesired operation.<br />
This equipment has been tested and found to<br />
comply with the limits for a Class A digital<br />
device, pursuant to Part 15 of the FCC
Rules. These limits are designed to provide<br />
reasonable protection against harmful<br />
interference when the equipment is operated<br />
in a commercial environment. This<br />
equipment generates, uses, and can radiate<br />
radio frequency energy and, if not installed<br />
and used in accordance with the instruction<br />
manual, may cause harmful interference to<br />
radio communications. <strong>Operation</strong> of this<br />
equipment in a residential area is likely to<br />
cause harmful interference in which case the<br />
user will be required to correct the<br />
interference at his own expense.<br />
You are cautioned that any changes or<br />
modifications not expressly approved in this<br />
manual could void your authority to operate<br />
this equipment.<br />
All interface cables used to connect<br />
peripherals must be shielded in order to<br />
comply with the limits for a digital device<br />
pursuant to Subpart B of Part 15 of FCC<br />
Rules.<br />
FCC Radiation Exposure Statement<br />
(<strong>PCS</strong>-<strong>XG80</strong>S/<strong>PCS</strong>-RF1):<br />
This equipment complies with FCC<br />
radiation exposure limits set forth for an<br />
uncontrolled environment. This equipment<br />
should be installed and operated with<br />
minimum distance 20 cm between the<br />
radiator & your body. This transmitter must<br />
not be co-located or operating in conjunction<br />
with any other antenna or transmitter.<br />
This manual focuses on using ISDN lines<br />
to conduct a videoconference, but it also<br />
covers non-ISDN lines. If you use ISDN<br />
lines, consult your <strong>Sony</strong> dealer for more<br />
information.<br />
The ISDN service may not be available<br />
in some areas.<br />
If you dispose the unit, consult your nearest<br />
<strong>Sony</strong> Service Center. The built-in battery<br />
must be treated as a chemical waste.<br />
For the customers in Canada<br />
This Class A digital apparatus complies with<br />
Canadian ICES-003.<br />
Cet appareil numérique de la classe A est<br />
conforme à la norme NMB-003 du Canada.<br />
IC Interference Statement (<strong>PCS</strong>-<br />
<strong>XG80</strong>S/<strong>PCS</strong>-RF1)<br />
This device complies with RSS-210 of the<br />
IC Rules. <strong>Operation</strong> is subject to the<br />
following two conditions:<br />
1. This device may not cause harmful<br />
interference, and<br />
2. This device must accept any interference<br />
received, including interference that may<br />
cause undesired operation.<br />
(<strong>PCS</strong>-<strong>XG80</strong>S)<br />
The term “IC:” before the radio certification<br />
number only signifies that Industry Canada<br />
technical specifications were met.<br />
IC:7424A-ZM100<br />
IC Radiation Exposure Statement:<br />
This equipment complies with IC RSS-102<br />
radiation exposure limits set forth for an<br />
uncontrolled environment.<br />
This equipment should be installed and<br />
operated with minimum distance 20 cm<br />
between the radiator & your body.<br />
For the customers in Europe<br />
The manufacturer of this product is <strong>Sony</strong><br />
Corporation, 1-7-1 Konan, Minato-ku,<br />
Tokyo, Japan.<br />
The Authorized Representative for EMC<br />
and product safety is <strong>Sony</strong> Deutschland<br />
GmbH, Hedelfinger Strasse 61, 70327<br />
Stuttgart, Germany. For any service or<br />
guarantee matters please refer to the<br />
addresses given in separate service or<br />
guarantee documents.<br />
(<strong>PCS</strong>-<strong>XG80</strong>S/<strong>PCS</strong>-RF1)<br />
This equipment conforms to R&TTE<br />
Directive 1999/5/EC. For details, please<br />
access the following URL:<br />
http://www.compliance.sony.de<br />
For the customers in Europe,<br />
Australia and New Zealand<br />
WARNING<br />
This is a Class A product. In a domestic<br />
environment, this product may cause radio<br />
interference in which case the user may be<br />
required to take adequate measures.<br />
In the case that interference should occur,<br />
consult your nearest authorized <strong>Sony</strong> service<br />
facility.<br />
3
This apparatus shall not be used in the<br />
residential area.<br />
For the customers in Taiwan only<br />
For the customers in Europe (<strong>PCS</strong>-<strong>XG80</strong>S)<br />
This product is intended to be used in the following countries:<br />
AT BE CY CZ DK EE FI FR DE GR HU<br />
IS IE IT LV LI LT LU MT NL NO PL<br />
PT RO SK SI ES SE CH GB BG<br />
Language Informal DoC<br />
Bulgarian<br />
Czech<br />
Danish<br />
Dutch<br />
English<br />
Estonian<br />
4<br />
С настоящето Сони Корпорация декларира, че този <strong>PCS</strong>-<strong>XG80</strong>S/HD<br />
Visual Communication System о тговаря на основните изисквания и<br />
другите сьответстващи клаузи на Директива 1999/5/EC. Подробности<br />
може да намерите на Интернет страницата : http://<br />
www.compliance.sony.de/<br />
<strong>Sony</strong> Corporation tímto prohlašuje, že tento <strong>PCS</strong>-<strong>XG80</strong>S/HD Visual<br />
Communication System je ve shodě se základními požadavky a dalšími<br />
příslušnými ustanoveními směrnice 1999/5/ES. Podrobnosti lze získat na<br />
následující URL: http://www.compliance.sony.de/<br />
Undertegnede <strong>Sony</strong> Corporation erklærer herved, at følgende udstyr <strong>PCS</strong>-<br />
<strong>XG80</strong>S/ HD Visual Communication System overholder de væsentlige krav og<br />
øvrige relevante krav i direktiv 1999/5/EF.<br />
For yderligere information gå ind på følgende hjemmeside:<br />
http://www.compliance.sony.de/<br />
Hierbij verklaart <strong>Sony</strong> Corporation dat het toestel <strong>PCS</strong>-<strong>XG80</strong>S/ HD Visual<br />
Communication System in overeenstemming is met de essentiële eisen en de<br />
andere relevante bepalingen van richtlijn 1999/5/EG. Nadere informatie kunt u<br />
vinden op: http://www.compliance.sony.de/<br />
Hereby, <strong>Sony</strong> Corporation, declares that this <strong>PCS</strong>-<strong>XG80</strong>S/ HD Visual<br />
Communication System is in compliance with the essential requirements and<br />
other relevant provisions of Directive 1999/5/EC. For details, please access the<br />
following URL: http://www.compliance.sony.de/<br />
<strong>Sony</strong> Corporation kinnitab käesolevaga seadme <strong>PCS</strong>-<strong>XG80</strong>S/ HD Visual<br />
Communication System vastavust 1999/5/EÜ direktiivi põhinõuetele ja<br />
nimetatud direktiivist tulenevatele teistele asjakohastele sätetele.<br />
Üksikasjalikum info: http://www.compliance.sony.de/.
Language Informal DoC<br />
Finnish<br />
French<br />
German<br />
Greek<br />
Hungarian<br />
Italian<br />
Latvian<br />
Lithuanian<br />
Norwegian<br />
Polish<br />
<strong>Sony</strong> Corporation vakuuttaa täten että <strong>PCS</strong>-<strong>XG80</strong>S/ HD Visual<br />
Communication System tyyppinen laite on direktiivin 1999/5/EY oleellisten<br />
vaatimusten ja sitä koskevien direktiivin muiden ehtojen mukainen. Halutessasi<br />
lisätietoja, käy osoitteessa: http://www.compliance.sony.de/<br />
Par la présente <strong>Sony</strong> Corporation déclare que l’appareil <strong>PCS</strong>-<strong>XG80</strong>S/ HD<br />
Visual Communication System est conforme aux exigences essentielles et aux<br />
autres dispositions pertinentes de la directive 1999/5/CE. Pour toute information<br />
complémentaire, veuillez consulter l’URL suivante: http://<br />
www.compliance.sony.de/<br />
Hiermit erklärt <strong>Sony</strong> Corporation, dass sich das Gerät <strong>PCS</strong>-<strong>XG80</strong>S/ HD Visual<br />
Communication System in Übereinstimmung mit den grundlegenden<br />
Anforderungen und den übrigen einschlägigen Bestimmungen der Richtlinie<br />
1999/5/EG befindet. Weitere Informationen erhältlich unter: http://<br />
www.compliance.sony.de/<br />
Με την η <strong>Sony</strong> Corporation δηλώνει τι <strong>PCS</strong>-<strong>XG80</strong>S/HD Visual<br />
και τις λ της 1999/5/EK. Για<br />
http://www.compliance.sony.de/<br />
Alulírott, <strong>Sony</strong> Corporation nyilatkozom, hogy a(z) <strong>PCS</strong>-<strong>XG80</strong>S/HD<br />
Visual Communication System megfelel a vonatkozó alapvető<br />
követelményeknek és az 1999/5/EC irányelv egyéb előírá sainak.<br />
További információkat a következő weboldalon találhat: http://<br />
www.compliance.sony.de/<br />
Con la presente <strong>Sony</strong> Corporation dichiara che questo <strong>PCS</strong>-<strong>XG80</strong>S/ HD Visual<br />
Communication System è conforme ai requisiti essenziali ed alle altre<br />
disposizioni pertinenti stabilite dalla direttiva 1999/5/CE. Per ulteriori dettagli,<br />
si prega di consultare il seguente URL: http://www.compliance.sony.de/<br />
Ar ðo <strong>Sony</strong> Corporation deklarç, ka <strong>PCS</strong>-<strong>XG80</strong>S/HD Visual<br />
Communication System atbilst Direktîvas 1999/5/EK bûtiskajâm prasîbâm<br />
un citiem ar to saistîtajiem noteikumiem. Plaðâka inform âcija ir pieejama:<br />
http://www.compliance.sony.de/<br />
Ðiuo <strong>Sony</strong> Corporation deklaruoja, kad ðis <strong>PCS</strong>-<strong>XG80</strong>S/HD Visual<br />
Communication System atitinka esminius reikalavimus ir kitas 1999/5/EB<br />
Direktyvos nuostatas. Susipaþinti su visu atitikties deklaracijos turiniu Jûs<br />
galite interneto tinklalapyje: http://www.compliance.sony.de/<br />
<strong>Sony</strong> Corporation erklærer herved at utstyret <strong>PCS</strong>-<strong>XG80</strong>S/ HD Visual<br />
Communication System er i samsvar med de grunnleggende krav og øvrige<br />
relevante krav i direktiv 1999/5/EF. For flere detaljer, vennligst se: http://<br />
www.compliance.sony.de/<br />
Niniejszym <strong>Sony</strong> Corporation oswiadcza, .e <strong>PCS</strong>-<strong>XG80</strong>S/ HD Visual<br />
Communication System jest zgodne z zasadniczymi wymaganiami oraz innymi<br />
stosownymi postanowieniami Dyrektywy 1999/5/WE. Szczególowe informacje<br />
znalezc mo.na pod nastepujacym adresem URL: http://<br />
www.compliance.sony.de/<br />
5
Language Informal DoC<br />
Portuguese<br />
Romanian<br />
Slovak<br />
Slovenian<br />
Spanish<br />
Swedish<br />
For the customers in Europe (<strong>PCS</strong>-RF1)<br />
This product is intended to be used in the following countries:<br />
6<br />
<strong>Sony</strong> Corporation declara que este <strong>PCS</strong>-<strong>XG80</strong>S/ HD Visual Communication<br />
System está conforme os requisitos essenciais e outras disposições da Directiva<br />
1999/5/CE. Para mais informacoes, por favor consulte a seguinte URL: http://<br />
www.compliance.sony.de/<br />
Por medio de la presente <strong>Sony</strong> Corporation declara que el <strong>PCS</strong>-<strong>XG80</strong>S/ HD<br />
Visual Communication System cumple con los requisitos esenciales y<br />
cualesquiera otras disposiciones aplicables o exigibles de la Directiva 1999/5/<br />
CE. Para mayor información, por favor consulte el siguiente URL: http://<br />
www.compliance.sony.de/<br />
Härmed intygar <strong>Sony</strong> Corporation att denna <strong>PCS</strong>-<strong>XG80</strong>S/ HD Visual<br />
Communication System står I ö verensstämmelse med de väsentliga<br />
egenskapskrav och övriga relevanta bestämmelser som framgår av direktiv<br />
1999/5/EG. För ytterligare information gå in på följande hemsida: http://<br />
www.compliance.sony.de/<br />
AT BE CY CZ DK EE FI FR DE GR HU<br />
IS IE IT LV LI LT LU MT NL NO PL<br />
PT RO SK SI ES SE CH GB BG<br />
Language Informal DoC<br />
Bulgarian<br />
Czech<br />
Prin prezenta, <strong>Sony</strong> Corporation declară că acest <strong>PCS</strong>-<strong>XG80</strong>S/HD Visual<br />
Communication System respectă cerinţele esenţiale s¸i este în conformitate<br />
cu prevederile Directivei 1995/5/EC. Pentru detalii, vă rugăm accesaţi<br />
următoarea adresă: http://www.compliance.sony.de/<br />
<strong>Sony</strong> Corporation týmto vyhlasuje, že <strong>PCS</strong>-<strong>XG80</strong>S/HD Visual<br />
Communication System splňa základné po žiadavky a všetky príslušné<br />
ustanovenia Smernice 1999/5/ES. Podrobnosti získate na nasledovnej<br />
webovej adrese: http://www.compliance.sony.de/<br />
<strong>Sony</strong> Corporation izjavlja, da je ta <strong>PCS</strong>-<strong>XG80</strong>S/HD Visual<br />
Communication System v skladu z bistvenimi zahtevami in ostalimi<br />
relevantnimi določili direktive 1999/5/ES. Za podrobnosti vas napro šamo,<br />
če pogledate na URL: http://www.compliance.sony.de/<br />
С настоящето Сони Корпорация декларира, че този <strong>PCS</strong>-RF1/RF<br />
Remote Commander о тговаря на основните изисквания и другите<br />
сьответстващи клаузи на Директива 1999/5/EC. Подробности може да<br />
намерите на Интернет страницата : http://www.compliance.sony.de/<br />
<strong>Sony</strong> Corporation tímto prohlašuje, že tento <strong>PCS</strong>-RF1/RF Remote<br />
Commander je ve shodě se základními požadavky a dalšími příslušnými<br />
ustanoveními směrnice 1999/5/ES. Podrobnosti lze získat na následující<br />
URL: http://www.compliance.sony.de/
Language Informal DoC<br />
Danish<br />
Dutch<br />
English<br />
Estonian<br />
Finnish<br />
French<br />
German<br />
Greek<br />
Hungarian<br />
Italian<br />
Latvian<br />
Undertegnede <strong>Sony</strong> Corporation erklærer herved, at følgende udstyr <strong>PCS</strong>-RF1/<br />
RF Remote Commander overholder de væsentlige krav og øvrige relevante krav<br />
i direktiv 1999/5/EF.<br />
For yderligere information gå ind på følgende hjemmeside:<br />
http://www.compliance.sony.de/<br />
Hierbij verklaart <strong>Sony</strong> Corporation dat het toestel <strong>PCS</strong>-RF1/ RF Remote<br />
Commander in overeenstemming is met de essentiële eisen en de andere<br />
relevante bepalingen van richtlijn 1999/5/EG. Nadere informatie kunt u vinden<br />
op: http://www.compliance.sony.de/<br />
Hereby, <strong>Sony</strong> Corporation, declares that this <strong>PCS</strong>-RF1/ RF Remote<br />
Commander is in compliance with the essential requirements and other relevant<br />
provisions of Directive 1999/5/EC. For details, please access the following<br />
URL: http://www.compliance.sony.de/<br />
<strong>Sony</strong> Corporation kinnitab käesolevaga seadme <strong>PCS</strong>-RF1/ RF Remote<br />
Commander vastavust 1999/5/EÜ direktiivi põhinõuetele ja nimetatud<br />
direktiivist tulenevatele teistele asjakohastele sätetele. Üksikasjalikum info:<br />
http://www.compliance.sony.de/.<br />
<strong>Sony</strong> Corporation vakuuttaa täten että <strong>PCS</strong>-RF1/ RF Remote Commander<br />
tyyppinen laite on direktiivin 1999/5/EY oleellisten vaatimusten ja sitä<br />
koskevien direktiivin muiden ehtojen mukainen. Halutessasi lisätietoja, käy<br />
osoitteessa: http://www.compliance.sony.de/<br />
Par la présente <strong>Sony</strong> Corporation déclare que l’appareil <strong>PCS</strong>-RF1/ RF Remote<br />
Commander est conforme aux exigences essentielles et aux autres dispositions<br />
pertinentes de la directive 1999/5/CE. Pour toute information complémentaire,<br />
veuillez consulter l’URL suivante: http://www.compliance.sony.de/<br />
Hiermit erklärt <strong>Sony</strong> Corporation, dass sich das Gerät <strong>PCS</strong>-RF1/ RF Remote<br />
Commander in Übereinstimmung mit den grundlegenden Anforderungen und<br />
den übrigen einschlägigen Bestimmungen der Richtlinie 1999/5/EG befindet.<br />
Weitere Informationen erhältlich unter: http://www.compliance.sony.de/<br />
τις<br />
http://www.compliance.sony.de/<br />
Alulírott, <strong>Sony</strong> Corporation nyilatkozom, hogy a(z) <strong>PCS</strong>-RF1/RF Remote<br />
Commander megfelel a vonatkozó alapvető követelményeknek<br />
és az 1999/5/EC irányelv egyéb előírá sainak. További információkat a<br />
következő weboldalon találhat: http://www.compliance.sony.de/<br />
Con la presente <strong>Sony</strong> Corporation dichiara che questo <strong>PCS</strong>-RF1/ RF Remote<br />
Commander è conforme ai requisiti essenziali ed alle altre disposizioni<br />
pertinenti stabilite dalla direttiva 1999/5/CE. Per ulteriori dettagli, si prega di<br />
consultare il seguente URL: http://www.compliance.sony.de/<br />
Ar ðo <strong>Sony</strong> Corporation deklarç, ka <strong>PCS</strong>-RF1/RF Remote Commander<br />
atbilst Direktîvas 1999/5/EK bûtiskajâm prasîbâm un citiem ar to<br />
saistîtajiem noteikumiem. Plaðâka inform âcija ir pieejama:<br />
http://www.compliance.sony.de/<br />
7
Language Informal DoC<br />
Lithuanian<br />
Norwegian<br />
Polish<br />
Portuguese<br />
Romanian<br />
Slovak<br />
Slovenian<br />
Spanish<br />
Swedish<br />
8<br />
Ðiuo <strong>Sony</strong> Corporation deklaruoja, kad ðis <strong>PCS</strong>-RF1/RF Remote<br />
Commander atitinka esminius reikalavimus ir kitas 1999/5/EB Direktyvos<br />
nuostatas. Susipaþinti su visu atitikties deklaracijos turiniu Jûs galite<br />
interneto tinklalapyje: http://www.compliance.sony.de/<br />
<strong>Sony</strong> Corporation erklærer herved at utstyret <strong>PCS</strong>-RF1/ RF Remote<br />
Commander er i samsvar med de grunnleggende krav og øvrige relevante krav i<br />
direktiv 1999/5/EF. For flere detaljer, vennligst se: http://<br />
www.compliance.sony.de/<br />
Niniejszym <strong>Sony</strong> Corporation oswiadcza, .e <strong>PCS</strong>-RF1/ RF Remote<br />
Commander jest zgodne z zasadniczymi wymaganiami oraz innymi stosownymi<br />
postanowieniami Dyrektywy 1999/5/WE. Szczególowe informacje znalezc<br />
mo.na pod nastepujacym adresem URL: http://www.compliance.sony.de/<br />
<strong>Sony</strong> Corporation declara que este <strong>PCS</strong>-RF1/ RF Remote Commander está<br />
conforme os requisitos essenciais e outras disposições da Directiva 1999/5/CE.<br />
Para mais informacoes, por favor consulte a seguinte URL: http://<br />
www.compliance.sony.de/<br />
Prin prezenta, <strong>Sony</strong> Corporation declară că acest <strong>PCS</strong>-RF1/RF Remote<br />
Commander respectă cerinţele esenţiale s¸i este în conformitate cu<br />
prevederile Directivei 1995/5/EC. Pentru detalii, vă rugăm accesaţi<br />
următoarea adresă: http://www.compliance.sony.de/<br />
<strong>Sony</strong> Corporation týmto vyhlasuje, že <strong>PCS</strong>-RF1/RF Remote Commander<br />
splňa základné po žiadavky a všetky príslušné ustanovenia Smernice<br />
1999/5/ES. Podrobnosti získate na nasledovnej webovej adrese:<br />
http://www.compliance.sony.de/<br />
<strong>Sony</strong> Corporation izjavlja, da je ta <strong>PCS</strong>-RF1/RF Remote Commander v<br />
skladu z bistvenimi zahtevami in ostalimi relevantnimi določili direktive<br />
1999/5/ES. Za podrobnosti vas napro šamo, če pogledate na URL: http://<br />
www.compliance.sony.de/<br />
Por medio de la presente <strong>Sony</strong> Corporation declara que el <strong>PCS</strong>-RF1/ RF<br />
Remote Commander cumple con los requisitos esenciales y cualesquiera otras<br />
disposiciones aplicables o exigibles de la Directiva 1999/5/CE. Para mayor<br />
información, por favor consulte el siguiente URL: http://<br />
www.compliance.sony.de/<br />
Härmed intygar <strong>Sony</strong> Corporation att denna <strong>PCS</strong>-RF1/ RF Remote Commander<br />
står I ö verensstämmelse med de väsentliga egenskapskrav och övriga relevanta<br />
bestämmelser som framgår av direktiv 1999/5/EG. För ytterligare information<br />
gå in på följande hemsida: http://www.compliance.sony.de/
Precautions<br />
Operating or storage location<br />
Avoid operating or storing the system in the<br />
following locations:<br />
Extremely hot or cold places<br />
Humid or dusty places<br />
Places exposed to strong vibration<br />
Close to sources of strong magnetism<br />
Close to sources of powerful<br />
electromagnetic radiation, such as radios<br />
or TV transmitters<br />
Noisy places<br />
Cleaning<br />
Use a soft, dry cloth to gently wipe the<br />
cabinet and panel when cleaning the unit.<br />
For heavier cleaning, use a cloth lightly<br />
moistened with a mild detergent to remove<br />
the dust, and finish by wiping again with a<br />
dry cloth. Do not use volatile solvents such<br />
as alcohol, benzene, thinners, or insecticides<br />
as they may damage the surface finishes.<br />
Note on laser beams<br />
Laser beams may damage a CMOS image<br />
sensor. You are cautioned that the surface<br />
of a CMOS image sensor should not be<br />
exposed to laser beam radiation in an<br />
environment where a laser beam device is<br />
used.<br />
9
Table of Contents<br />
Chapter 1: Installation and Preparation<br />
Using This <strong>Manual</strong> ................................................................................................. 16<br />
Features .................................................................................................................. 17<br />
System Components .............................................................................................. 19<br />
Basic System Components ............................................................................... 19<br />
Optional Equipment ......................................................................................... 21<br />
System Configuration ............................................................................................ 23<br />
System Configuration via a LAN ..................................................................... 23<br />
System Configuration via an ISDN .................................................................. 24<br />
System Configuration via a SIP ....................................................................... 25<br />
System Configuration Using Two LAN Connections ..................................... 26<br />
System Configuration via a LAN for Multipoint ............................................. 27<br />
System Configuration via an ISDN for Multipoint ......................................... 28<br />
System Configuration via a LAN and ISDN for Multipoint ........................... 29<br />
System Configuration Using the <strong>PCS</strong>A-A7 Microphones ............................... 30<br />
System Connections ............................................................................................... 31<br />
System Connection via a LAN ......................................................................... 32<br />
System Connection via an ISDN ...................................................................... 33<br />
System Connection via a SIP ........................................................................... 34<br />
Attaching the <strong>PCS</strong>A-C<strong>XG80</strong> HD Camera Unit to a Tripod ............................ 35<br />
Preparing the System ............................................................................................. 36<br />
Inserting Batteries into the Remote Commander ............................................. 36<br />
Programming the Remote Commander to Operate the Camera Unit .............. 37<br />
Turning the System On/Off ................................................................................... 40<br />
Turning On ....................................................................................................... 40<br />
Standby Mode Function ................................................................................... 41<br />
Setting the HD Visual Communication System to Standby Mode .................. 42<br />
Turning Off ...................................................................................................... 42<br />
Adjusting the Volume on the TV Monitor ....................................................... 43<br />
Setting Up the System Immediately after the Installation — Initial Setup<br />
Wizard .................................................................................................................... 44<br />
Using the Menus .................................................................................................... 47<br />
Identifying the Home Menu ............................................................................. 47<br />
<strong>Operation</strong> Using the Menu ............................................................................... 54<br />
Entering Characters Using the Remote Commander ....................................... 57<br />
Entering Characters Using the On-Screen Keyboard ....................................... 58<br />
10
Chapter 2: Registration and Setup for System<br />
Administrators<br />
Registering Local Information ............................................................................... 60<br />
Opening the Setup Menu .................................................................................. 60<br />
Line Interface Setup Menu ............................................................................... 64<br />
Dial Setup Menu ............................................................................................... 64<br />
Answer Setup Menu ......................................................................................... 65<br />
Multipoint Setup Menu .................................................................................... 65<br />
Communication Setup Menu ............................................................................ 66<br />
Audio Setup Menu ............................................................................................ 69<br />
Video Setup Menu ............................................................................................ 72<br />
LAN Setup Menu ............................................................................................. 74<br />
QoS Setup Menu .............................................................................................. 76<br />
TOS Setup Menu .............................................................................................. 77<br />
SIP Setup Menu ................................................................................................ 78<br />
ISDN Setup Menu ............................................................................................ 79<br />
SPID Settings for Customers in the USA and Canada ..................................... 79<br />
Annotation Setup Menu .................................................................................... 80<br />
Camera Setup Menu ......................................................................................... 81<br />
General Setup Menu ......................................................................................... 81<br />
Home Menu Setup Menu ................................................................................. 83<br />
Administrator Setup Menu ............................................................................... 85<br />
Encryption Setup Menu .................................................................................... 89<br />
Shared Phone Book Setup Menu ...................................................................... 90<br />
Displaying the Machine Status .............................................................................. 91<br />
Displaying the Machine Status Menu .............................................................. 91<br />
Machine Information ........................................................................................ 93<br />
Peripheral Status ............................................................................................... 93<br />
Communication Mode Status ........................................................................... 94<br />
LAN Line Status ............................................................................................... 94<br />
Network Routing Check ................................................................................... 95<br />
Restrictions on the Use of LAN2 ........................................................................... 95<br />
Restrictions on the Use of IPv6 .............................................................................. 96<br />
Setting Up the Network Configurations ................................................................. 97<br />
LAN Connection via DHCP (LAN1/LAN2) .................................................... 97<br />
LAN Connection through a Router (LAN1/LAN2) ......................................... 98<br />
LAN Connection through a Gatekeeper (LAN1 Only) .................................... 99<br />
LAN Connection through NAT (LAN1 Only) ............................................... 100<br />
LAN Connection with H.460 Firewall Traversal (LAN1 Only) .................... 101<br />
LAN Connection Using PPPoE (LAN1/LAN2) ............................................ 103<br />
ISDN Connections .......................................................................................... 104<br />
About the Network Routing Check ...................................................................... 105<br />
11
Chapter 3: Basic Connection<br />
Starting a Connection by Calling a Remote Party ............................................... 106<br />
Turning On the Power .................................................................................... 106<br />
Calling a Remote Party by Using the Connect Menu .................................... 107<br />
Calling a Remote Party by Entering Their Address or Number Directly (Direct<br />
Dial) .................................................................................................... 108<br />
Calling a Remote Party Using the One-Touch Dial Buttons ......................... 110<br />
Calling a Remote Party by Selecting Them in the History List ..................... 111<br />
Calling a Remote Party Registered in the Phone Book .................................. 112<br />
Calling a Remote Party Not Registered in the Phone Book ........................... 114<br />
Receiving a Call from a Remote Party ................................................................ 117<br />
Answering a Call from a Remote Party ......................................................... 117<br />
Ending the Connection ......................................................................................... 119<br />
Registering a Remote Party – Phone Book .......................................................... 120<br />
Registering a New Remote Party ................................................................... 120<br />
Editing the Contents of the Phone Book ........................................................ 123<br />
Copying a Registered Party in the Phone Book ............................................. 124<br />
Deleting the Registered Remote Party ........................................................... 124<br />
Creating a Group in the Phone Book (Group Edit) ........................................ 124<br />
Creating a Private Phone Book ...................................................................... 126<br />
Using the Shared Phone Book ........................................................................ 128<br />
Adjusting the Sound ............................................................................................. 131<br />
Adjusting the Volume of the Received Sound ............................................... 131<br />
Turning Off the Sound Momentarily – Muting Function .............................. 131<br />
Turning Off the Sound on Answering – Mic on Answer Function ................ 132<br />
Synchronizing Audio and Video – Lip Sync Function .................................. 132<br />
Reducing Echo – Echo Canceller ................................................................... 132<br />
Adjusting the Camera .......................................................................................... 134<br />
Adjusting the Camera Angle and Zoom ......................................................... 134<br />
Adjusting the Brightness ................................................................................ 135<br />
Using the Preset Function .............................................................................. 137<br />
Adjusting the Camera in the Detailed Setup Menu ........................................ 140<br />
Selecting the Input Picture and Sound ................................................................. 142<br />
Switching the Displayed Picture between the Local and Remote Pictures .... 142<br />
Selecting the Input Picture ............................................................................. 142<br />
Selecting the Video Input Using the F1 to F4 (Function) Buttons on the Remote<br />
Commander ......................................................................................... 143<br />
Switching the Sound to Be Sent to the Remote Party .................................... 143<br />
Switching Video and Audio at the Same Time .............................................. 143<br />
Switching the Picture from the Remote System ............................................ 143<br />
Switching the Picture Displayed on the Monitor Screen ..................................... 145<br />
Capturing the Screen ............................................................................................ 147<br />
12
Chapter 4: Connection with Optional Equipment<br />
Using a Tools Menu ............................................................................................. 149<br />
Using the Computer Picture for Presentation ...................................................... 152<br />
Installing the HD Data Solution Software ...................................................... 152<br />
Connecting a Computer .................................................................................. 153<br />
Making a Presentation .................................................................................... 153<br />
Streaming a Communication ................................................................................ 155<br />
Recording a Visual Communication .................................................................... 157<br />
Using the Annotation Function ............................................................................ 159<br />
Connecting a Pen Tablet ................................................................................. 159<br />
Using the Annotation Function while in Communication ............................. 159<br />
Using Multiple Microphones ............................................................................... 164<br />
Using the <strong>PCS</strong>A-A7 Microphones ....................................................................... 167<br />
Using a Second Camera ....................................................................................... 170<br />
Recording during a Communication .................................................................... 171<br />
Sending Audio/Video from the External Equipment to a Remote Party ............. 172<br />
Viewing the Picture from the System on a Monitor or Projector ........................ 174<br />
Communicating without the Picture – Voice Meeting ......................................... 176<br />
Controlling the Remote System with the Tone Signal – DTMF Transmission ... 177<br />
Accessing the Communication System ................................................................ 178<br />
Using a Web Browser ..................................................................................... 178<br />
Using Telnet ................................................................................................... 178<br />
Chapter 5: Encrypted Connection<br />
Preparing for an Encrypted Connection via LAN ................................................ 180<br />
Starting an Encrypted Connection ....................................................................... 182<br />
Chapter 6: Multipoint Connection<br />
Connection Examples of a Multipoint Connection .............................................. 185<br />
Using the LAN Connection (Up to Six Points) .............................................. 185<br />
Using the Cascade Connection via LAN (Up to 10 Points) ........................... 186<br />
Using the ISDN Connection ........................................................................... 187<br />
Using Both LAN and ISDN ........................................................................... 188<br />
Using the LAN Cascade and ISDN Connection ............................................ 189<br />
Installing the MCU Software ............................................................................... 190<br />
Confirming that the Installation of the Software is Complete ........................ 190<br />
Configuring Multipoint ........................................................................................ 191<br />
Setting Up Multipoint ..................................................................................... 191<br />
13
Registering the Remote Parties in the Multipoint Connection List ............... 191<br />
Starting a Multipoint Connection ........................................................................ 195<br />
Calling Remote Parties ................................................................................... 195<br />
Receiving a Call from a Remote Party ........................................................... 199<br />
Using the Display Control ................................................................................... 200<br />
Broadcast Mode ............................................................................................. 200<br />
Broadcast Modes and Displayed Windows .................................................... 202<br />
Switching the Broadcast Mode ...................................................................... 204<br />
Receiving the Broadcast Requested From Another Terminal ........................ 205<br />
Ending the Multipoint Connection ...................................................................... 206<br />
Notes on Secondary Terminals ............................................................................ 207<br />
Multipoint Attributes ........................................................................................... 208<br />
Chapter 7: Web Control Function<br />
Opening the Web Page ........................................................................................ 211<br />
Identifying a User ................................................................................................ 212<br />
Selecting a Menu ................................................................................................. 214<br />
How to Use [Home] Menu ................................................................................... 215<br />
How to Use [Download] Menu ............................................................................ 216<br />
How to Use [Remote Commander] Menu ........................................................... 217<br />
Selecting a Tool ................................................................................................... 218<br />
How to Use [Version Up] Page ........................................................................... 219<br />
How to Use [Streaming] Page ............................................................................. 220<br />
How to Use [Monitor] Page ................................................................................. 221<br />
Appendix<br />
Location and Function of Parts and Controls ...................................................... 222<br />
<strong>PCS</strong>-<strong>XG80</strong>S HD Visual Communication System .......................................... 222<br />
<strong>PCS</strong>A-C<strong>XG80</strong> HD Camera Unit (Supplied with <strong>PCS</strong>-<strong>XG80</strong>) ...................... 224<br />
<strong>PCS</strong>-RF1 RF Remote Commander (Supplied) .............................................. 225<br />
<strong>PCS</strong>A-B384S ISDN Unit (Optional) ............................................................. 226<br />
<strong>PCS</strong>A-B768S ISDN Unit (Optional) ............................................................. 227<br />
Indicators ............................................................................................................. 228<br />
On-Screen Messages ............................................................................................ 231<br />
Troubleshooting ................................................................................................... 233<br />
Specifications ....................................................................................................... 237<br />
<strong>PCS</strong>-<strong>XG80</strong>/<strong>XG80</strong>S HD Visual Communication System ............................... 237<br />
<strong>PCS</strong>-RF1 Remote Commander (Supplied with <strong>PCS</strong>-<strong>XG80</strong>/<strong>XG80</strong>S) ............ 238<br />
VGP-AC19V15 AC Adaptor (Supplied with <strong>PCS</strong>-<strong>XG80</strong>/<strong>XG80</strong>S) ............... 238<br />
14
<strong>PCS</strong>A-C<strong>XG80</strong> HD Camera Unit (Supplied with <strong>PCS</strong>-<strong>XG80</strong>) ....................... 239<br />
<strong>PCS</strong>-A1 Microphone (Supplied with <strong>PCS</strong>-<strong>XG80</strong>) ......................................... 239<br />
<strong>PCS</strong>A-A3 Microphone (Optional) .................................................................. 239<br />
<strong>PCS</strong>A-A7P4 Microphone (Optional) ............................................................. 239<br />
<strong>PCS</strong>A-B384S ISDN Unit (Optional) .............................................................. 240<br />
<strong>PCS</strong>A-B768S ISDN Unit (Optional) .............................................................. 240<br />
<strong>PCS</strong>A-DSG80 HD Data Solution Software (Optional) .................................. 240<br />
<strong>PCS</strong>A-MCG80 HD MCU Software (Optional) .............................................. 240<br />
Acceptable RGB Input/Output Signals .......................................................... 242<br />
Acceptable VIDEO IN (YPbPr) Signals ........................................................ 242<br />
Pin Assignments ............................................................................................. 243<br />
Pin Assignments on Optional Board Connectors ........................................... 245<br />
List of Port Numbers Used on the <strong>PCS</strong>-<strong>XG80</strong>/<strong>XG80</strong>S .................................. 246<br />
Meeting Room Layout ......................................................................................... 247<br />
“Memory Stick” Media ........................................................................................ 248<br />
Phenomena Specific to CMOS Image Sensors .................................................... 249<br />
Glossary ............................................................................................................... 250<br />
Menu Configuration ............................................................................................. 253<br />
“IPELA” and are trademarks of <strong>Sony</strong> Corporation.<br />
15
Chapter 1:<br />
Installation and<br />
Preparation<br />
Using This <strong>Manual</strong><br />
The chapters cover the following contents;<br />
please read the chapters that may be required<br />
for your type of communication.<br />
Chapter 1: Installation and<br />
Preparation<br />
This chapter guides you through the system<br />
configuration and information required to<br />
use your HD Visual Communication System<br />
for the first time. It shows you how to install<br />
and connect your Communication System,<br />
to turn the system on/off and how to access<br />
basic on-screen menus.<br />
Chapter 2: Registration and Setup for<br />
System Administrator<br />
This chapter describes how to register and<br />
set up all the necessary items for system<br />
administrators, using the on-screen menus.<br />
Chapter 3: Basic Connection<br />
This chapter guides you through the basic<br />
operations and settings for connecting to a<br />
remote party. You will learn how to start<br />
connection to finish it. It is recommended<br />
that this chapter be read by participants in a<br />
communication.<br />
Chapter 4: Connection With Optional<br />
Equipment<br />
This chapter shows advanced<br />
communication using the optional<br />
equipment, and functions such as streaming,<br />
recording, presentation and annotation.<br />
Chapter 5: Encrypted Connection<br />
This chapter shows how to connect to a<br />
remote party using an encrypted video and<br />
16 Using This <strong>Manual</strong><br />
audio data, and encrypted data from a<br />
computer.<br />
Chapter 6: Multipoint Connection<br />
This chapter shows you how to connect your<br />
system to multiple sites. Multipoint<br />
connection requires installation of the<br />
optional <strong>PCS</strong>A-MCG80 HD MCU software<br />
in your Visual Communication System.<br />
Chapter 7: Web Control Function<br />
This chapter shows you how to control the<br />
<strong>PCS</strong>-<strong>XG80</strong>/<strong>XG80</strong>S or set it up via a Web<br />
browser.<br />
Appendix<br />
The appendix contains descriptions of the<br />
controls and connectors on the components<br />
of the HD Visual Communication System,<br />
troubleshooting list, specifications, and a<br />
glossary.
Features<br />
The <strong>PCS</strong>-<strong>XG80</strong>/<strong>XG80</strong>S HD Visual<br />
Communication System is a communication<br />
system that provides face-to-face<br />
communications with a remote party by<br />
transmitting and receiving images and sound<br />
via LAN (Local Area Network) or ISDN<br />
(Integrated Services Digital Network)<br />
connections.<br />
Supports ITU-T international<br />
standard<br />
The HD Visual Communication System<br />
complies with ITU-T Recommendations<br />
defined by WTSC for easy connection with<br />
remote parties overseas.<br />
ITU: International Telecommunication<br />
Union<br />
WTSC: World Telecommunications<br />
Standardization Committee<br />
Transmission and reception of<br />
high-definition images enabled<br />
The Communication System supports the<br />
H.264 high-definition video compression<br />
format, enabling transmission and reception<br />
of interlaced video signals with a high<br />
resolution of 1920 × 1080 or 1280 × 720 by<br />
a maximum of 60 frames per second.<br />
Transmission and reception of<br />
wide range of stereo sound<br />
capability<br />
The audio compression format of the<br />
Communication System supports MPEG4<br />
AAC (Advanced Audio Coding) stereo<br />
sound and 22 kHz monaural sound, allowing<br />
high-quality audio transmission and<br />
reception. The built-in echo canceller<br />
supports up to 16 kHz.<br />
Supports data communication<br />
Installing the optional <strong>PCS</strong>A-DSG80 HD<br />
Data Solution Software into the<br />
Communication System enables<br />
transmission of output data from a computer.<br />
High transmission speeds and<br />
high-quality picture capability<br />
The Communication System accepts a LAN<br />
communication bit rate of up to 10 Mbps. It<br />
also allows you to connect to as many as<br />
three ISDN lines and use 6B channels with<br />
the optional <strong>PCS</strong>A-B384S ISDN Unit, and<br />
as many as six ISDN lines and use 12B<br />
channels with the optional <strong>PCS</strong>A-B768S<br />
ISDN Unit.<br />
Wide range of video/audio<br />
compression format selectable<br />
The Communication System supports the<br />
H.264, H.263+, H.261 and MPEG4 * video<br />
compression formats. It also supports the<br />
MPEG4 AAC ** , G.722, G.728, and G.711<br />
audio compression formats.<br />
* Supports MPEG4 only for connection using<br />
SIP.<br />
** Supports MPEG4 AAC only for IP and<br />
ISDN connection.<br />
Annotation capability<br />
The annotation function allows you to write<br />
letters or graphics on the screen or point with<br />
a pointer during communication using the<br />
optional pen tablet.<br />
BrightFace feature incorporated in<br />
the HD Camera Unit<br />
The supplied <strong>PCS</strong>A-C<strong>XG80</strong> HD Camera<br />
Unit incorporates the BrightFace feature,<br />
allowing detection of dark and bright<br />
shooting parts of a scene individually to<br />
make a dark scene brighter and a bright<br />
scene clearer.<br />
Up to 100 preset camera settings<br />
Up to 100 settings for camera angle and<br />
zoom can be registered in the preset memory<br />
of the System. You can easily switch the<br />
shooting area only by recalling the preset<br />
position.<br />
Features<br />
17<br />
Chapter 1: Installation and Preparation
RF (Radio Frequency) Remote<br />
Commander adopted<br />
The supplied Remote Commander controls<br />
the Communication System using the radio<br />
frequency of 2.4 GHz. The Remote<br />
Commander can be programmed for pairing<br />
with the System or the Camera Unit to<br />
prevent interference from other Systems and<br />
Camera Units.<br />
On-screen keyboard<br />
The on-screen keyboard displayed on the<br />
monitor screen allows you to input a<br />
number, address, etc. without moving your<br />
eyes away from the screen.<br />
QoS (Quality of Service) function<br />
for optimization of bandwidth and<br />
traffic packet through network<br />
The Communication System includes the<br />
“Packet Resend Request”, “Adaptive Rate<br />
Control”, and “Forward Error Correction”<br />
functions. Depending on the network status,<br />
these functions are used in Hybrid to<br />
guarantee consistent, high-quality<br />
communications.<br />
Compact size<br />
The compact size of the Communication<br />
System allows versatile installation layout.<br />
Echo cancelling microphone<br />
Up to 40 <strong>PCS</strong>A-A7 echo cancelling<br />
microphones (optional) can be connected to<br />
one port without losing sound quality, using<br />
a cascade connection.<br />
Equipped with an HDMI connector<br />
The HDMI connector allows you to connect<br />
an HDMI display unit to the Communication<br />
System easily.<br />
Equipped with a Memory Stick slot<br />
The Communication System is equipped<br />
with a Memory Stick slot, allowing you to<br />
save still images, create the Private Phone<br />
Book and store the customized settings in a<br />
“Memory Stick”.<br />
18 Features<br />
Video and audio recording<br />
Video and audio can be recorded in a<br />
“Memory Stick” and can be watched on a<br />
computer after.<br />
Streaming<br />
You can broadcast streaming video and<br />
audio. This allows people who cannot attend<br />
the communication to watch the proceedings<br />
over the Web using a computer. You can<br />
also select whether to broadcast both video<br />
and audio or audio only.<br />
Supports a connection using SIP<br />
The Communication System allows<br />
connection to a remote party with an IP<br />
phone, etc. using SIP (Session Initiation<br />
Protocol).<br />
Supports encrypted connection<br />
The system allows you to make a strictly<br />
confidential connection using standard<br />
encryption, which complies with the H.233,<br />
H.234 and H.235 standerdized by the ITU-T.<br />
Supports multipoint connection<br />
Installing the optional <strong>PCS</strong>A-MCG80 HD<br />
MCU software in your Visual<br />
Communication System allows connection<br />
among multiple points via a LAN or/and<br />
ISDN line.
System Components<br />
The <strong>PCS</strong>-<strong>XG80</strong>/<strong>XG80</strong>S HD Visual Communication System is composed of<br />
basic system components for a basic communication, and optional equipment<br />
for an enhanced communication.<br />
Basic System Components<br />
Note<br />
This manual explains how to operate the system using the <strong>PCS</strong>-<strong>XG80</strong> HD<br />
Visual Communication System Package that contains the <strong>PCS</strong>A-C<strong>XG80</strong> HD<br />
Camera Unit and two <strong>PCS</strong>-A1 microphones, and the <strong>PCS</strong>-<strong>XG80</strong>S HD Visual<br />
Communication System without the Camera Unit and microphones.<br />
Components packaged in the <strong>PCS</strong>-<strong>XG80</strong><br />
Unit Description<br />
<strong>PCS</strong>-<strong>XG80</strong>S HD Visual<br />
Communication System<br />
<strong>PCS</strong>-RF1<br />
Remote Commander<br />
Contains the video codec, audio codec, echo<br />
canceller, network interfaces and system controller.<br />
Used to control the HD Visual Communication<br />
System. Before using, pairing with the<br />
Communication System or HD Camera Unit is<br />
required.<br />
VGP-AC19V15 AC adaptor Supplies power to the Communication System.<br />
<strong>PCS</strong>A-C<strong>XG80</strong><br />
HD Camera Unit<br />
W<br />
T<br />
F1 F2 F3 F4<br />
/<br />
Camera to shoot high-definition images.<br />
System Components<br />
19<br />
Chapter 1: Installation and Preparation
Unit Description<br />
<strong>PCS</strong>-A1 Microphone Omni-directional microphone that picks up sound<br />
relatively from all directions, allowing participants to<br />
speak from any location. It is recommended to use in<br />
a quiet situation (two pieces supplied).<br />
Components packaged in the <strong>PCS</strong>-<strong>XG80</strong>S<br />
Unit Description<br />
<strong>PCS</strong>-<strong>XG80</strong>S HD Visual<br />
Communication System<br />
<strong>PCS</strong>-RF1<br />
Remote Commander<br />
20 System Components<br />
W<br />
T<br />
F1 F2 F3 F4<br />
/<br />
Contains the video codec, audio codec, echo<br />
canceller, network interfaces and system controller.<br />
Used to control the HD Visual Communication<br />
System. Before using, pairing with the<br />
Communication System or HD Camera Unit is<br />
required.<br />
VGP-AC19V15 AC adaptor Supplies power to the Communication System.
Optional Equipment<br />
TV monitor<br />
A TV or projector, etc. is required to monitor the images for the system.<br />
Unit Description<br />
TV, Projector, etc. Used as a monitor and speakers.<br />
When the TV monitor is connected to the HDMI<br />
connector on the Communication System, you can<br />
view the high-definition images.<br />
Optional equipment especially designed for use with the <strong>PCS</strong>-<strong>XG80</strong>/<strong>XG80</strong>S<br />
The following optional devices are used to enhance your videoconference.<br />
Unit Description<br />
<strong>PCS</strong>A-B384S ISDN Unit Used to connect to an ISDN line. Up to three ISDN<br />
lines; 6B channels usable.<br />
<strong>PCS</strong>A-B768S ISDN Unit Used to connect to an ISDN line. Up to six ISDN<br />
lines; 12B channels usable.<br />
<strong>PCS</strong>A-A3 microphone Unidirectional microphone. It is recommended when<br />
you want to pick up the voice of a speaker directed<br />
toward the microphone.<br />
<strong>PCS</strong>A-A7 microphone Directional microphones that feature high sound<br />
quality and a built-in monaural echo canceller.<br />
(Commercially available microphones are 4-piece<br />
set.) Several <strong>PCS</strong>A-A7 Microphones can be<br />
connected in cascade without reduceing sound<br />
quality. Recommended when many microphones are<br />
required.<br />
<strong>PCS</strong>A-DSG80 HD Data<br />
Solution Software<br />
<strong>PCS</strong>A-MCG80 HD MCU<br />
Software<br />
Software required for transmission of video and<br />
computer pictures at the same time by connecting a<br />
computer.<br />
Software required for multipoint connection using<br />
LAN or/and ISDN.<br />
System Components<br />
21<br />
Chapter 1: Installation and Preparation
Cable<br />
Use the following cable to connect a device in this system.<br />
Cable Part No. Number<br />
HDMI cable (3 m (9.8 ft)) 1-835-440-1x 1<br />
HDMI cable<br />
22 System Components
System Configuration<br />
The <strong>PCS</strong>-<strong>XG80</strong>/<strong>XG80</strong>S HD Visual Communication System has various<br />
system configuration capabilities using the basic components and optional<br />
equipment. This section describes the capabilities and necessary equipment for<br />
some typical configuration examples.<br />
System Configuration via a LAN<br />
/<br />
T<br />
W<br />
This allows you to:<br />
Have a point-to-point HD visual communication over LAN.<br />
Pick up sound in stereo by using two microphones connected to the system.<br />
System configuration<br />
/<br />
POWER/STANDBY<br />
/<br />
POWER/STANDBY<br />
1 <strong>PCS</strong>-<strong>XG80</strong>S HD Visual Communication<br />
System<br />
2 <strong>PCS</strong>A-C<strong>XG80</strong> HD Camera Unit<br />
3 <strong>PCS</strong>-RF1 Remote Commander<br />
4 TV monitor (not supplied)<br />
5 <strong>PCS</strong>-A1 Microphones<br />
System Configuration<br />
23<br />
Chapter 1: Installation and Preparation
System Configuration via an ISDN<br />
/<br />
F1 F2 F3 F4<br />
RF<br />
T<br />
W<br />
Connection to ISDN is required to use the <strong>PCS</strong>A-B384S or <strong>PCS</strong>A-B768S<br />
ISDN Unit especially designed for use with this system.<br />
/<br />
This allows you to:<br />
Have a point-to-point HD visual communication over ISDN.<br />
Pick up sound in stereo by using two microphones connected to the system.<br />
Hold an HD visual communication with high speeds and highest quality<br />
image transmission by connecting up to three ISDN lines (when using the<br />
<strong>PCS</strong>A-B384S) or by connecting up to six ISDN lines (when using the <strong>PCS</strong>A-<br />
B768S).<br />
System configuration<br />
POWER/STANDBY<br />
About the number of ISDN lines and B (bearer) channels<br />
Up to three ISDN lines (6B channels) with the <strong>PCS</strong>A-B384S ISDN Unit or up<br />
to six ISDN lines (12B channels) with the <strong>PCS</strong>A-B768S ISDN Unit can be<br />
connected to one <strong>PCS</strong>-<strong>XG80</strong>/<strong>XG80</strong>S. The more channels you use for a single<br />
communication, the faster speeds and higher-quality picture you can obtain for<br />
your network communication.<br />
Note<br />
When connecting to the ISDN Unit, Use the ports in ascending order.<br />
Yes: 1, 2, 3…<br />
No: 1, 6, 5…<br />
24 System Configuration<br />
/<br />
POWER/STANDBY<br />
1 <strong>PCS</strong>-<strong>XG80</strong>S HD Visual<br />
Communication System<br />
2 <strong>PCS</strong>A-C<strong>XG80</strong> HD Camera Unit<br />
3 <strong>PCS</strong>-RF1 Remote Commander<br />
4 TV monitor (not supplied)<br />
5 <strong>PCS</strong>A-B384S or <strong>PCS</strong>A-B768S<br />
ISDN Unit (not supplied)<br />
6 <strong>PCS</strong>-A1 Microphones<br />
This diagram depicts a system<br />
configuration using the <strong>PCS</strong>A-B768S<br />
ISDN Unit.
System Configuration via a SIP<br />
/<br />
T<br />
W<br />
/<br />
This allows you to:<br />
Have an HD visual communication with an IP telephone, etc. using SIP.<br />
Pick up sound in stereo by using two microphones connected to the system.<br />
System configuration<br />
POWER/STANDBY<br />
1<br />
1 <strong>PCS</strong>-<strong>XG80</strong>S HD Visual<br />
Communication System<br />
2 <strong>PCS</strong>A-C<strong>XG80</strong> HD Camera Unit<br />
3 <strong>PCS</strong>-RF1 Remote Commander<br />
4 TV monitor (not supplied)<br />
5 <strong>PCS</strong>-A1 Microphones<br />
6 SIP server<br />
7 IP telephone, etc.<br />
Note<br />
Use the 1 (LAN1) connector on the Communication System when connecting your<br />
system via a SIP. Connection to a SIP server through the 2 (LAN2) connector is not<br />
available.<br />
System Configuration<br />
25<br />
Chapter 1: Installation and Preparation
System Configuration Using Two LAN Connections<br />
This allows you to:<br />
Connect your system to two networks using the 1 (LAN1) and 2 (LAN2)<br />
connectors. You can use the 1 connector to connect a private network in<br />
your company and 2 connector to connect to an intranet outside your<br />
company.<br />
Note<br />
If your system is connected to a LAN using the 2 connector, some of the intranet/<br />
internet functions of your system, such as SIP server connection, gatekeeper<br />
connection, Telnet access, and Web access, are not available. If your system is<br />
connected to one LAN, use the 1 connector.<br />
For details, see “Restrictions on the Use of LAN2” on page 95.<br />
System configuration<br />
26 System Configuration<br />
/<br />
T<br />
W<br />
/<br />
POWER/STANDBY<br />
1 <strong>PCS</strong>-<strong>XG80</strong>S HD Visual Communication System<br />
2 <strong>PCS</strong>A-C<strong>XG80</strong> HD Camera Unit<br />
3 <strong>PCS</strong>-RF1 Remote Commander<br />
4 TV monitor (not supplied)<br />
5 <strong>PCS</strong>-A1 Microphones<br />
1<br />
2<br />
/<br />
POWER/STANDBY<br />
Internet
System Configuration via a LAN for Multipoint<br />
/<br />
T<br />
W<br />
You need to install the <strong>PCS</strong>A-MCG80 HD MCU software.<br />
This allows you to:<br />
Have a multipoint HD visual communication among up to 10 sites over LAN.<br />
System configuration<br />
/<br />
POWER/STANDBY<br />
1 <strong>PCS</strong>-<strong>XG80</strong>S HD Visual Communication System<br />
2 <strong>PCS</strong>A-C<strong>XG80</strong> HD Camera Unit<br />
3 <strong>PCS</strong>-RF1 Remote Commander<br />
4 TV monitor (not supplied)<br />
5 <strong>PCS</strong>-A1 Microphones<br />
6 <strong>PCS</strong>A-MCG80 HD MCU software (not supplied)<br />
/<br />
/<br />
/<br />
/<br />
POWER/STANDBY<br />
POWER/STANDBY<br />
POWER/STANDBY<br />
POWER/STANDBY<br />
/<br />
T<br />
W<br />
/<br />
POWER/STANDBY<br />
System Configuration<br />
/<br />
/<br />
/<br />
/<br />
POWER/STANDBY<br />
POWER/STANDBY<br />
POWER/STANDBY<br />
POWER/STANDBY<br />
27<br />
Chapter 1: Installation and Preparation
System Configuration via an ISDN for Multipoint<br />
You need to connect the optional <strong>PCS</strong>A-B384S or <strong>PCS</strong>A-B768S ISDN Unit<br />
especially designed for use with this system and to install the optional <strong>PCS</strong>A-<br />
MCG80 HD MCU software.<br />
This allows you to:<br />
Have a multipoint HD visual communication among up to six sites over ISDN.<br />
System configuration<br />
28 System Configuration<br />
/<br />
T<br />
W<br />
/<br />
POWER/STANDBY<br />
1 <strong>PCS</strong>-<strong>XG80</strong>S HD Visual Communication System<br />
2 <strong>PCS</strong>A-C<strong>XG80</strong> HD Camera Unit<br />
3 <strong>PCS</strong>-RF1 Remote Commander<br />
4 TV monitor (not supplied)<br />
5 <strong>PCS</strong>-A1 Microphones<br />
6 <strong>PCS</strong>A-MCG80 HD MCU software (not supplied)<br />
7 <strong>PCS</strong>A-B384S (not supplied) or <strong>PCS</strong>A-B768S (not supplied) ISDN Unit<br />
/<br />
POWER/STANDBY<br />
/<br />
POWER/STANDBY<br />
/<br />
/<br />
POWER/STANDBY<br />
POWER/STANDBY<br />
/<br />
POWER/STANDBY<br />
This diagram depicts a<br />
system configuration using<br />
the <strong>PCS</strong>A-B768S ISDN Unit.
System Configuration via a LAN and ISDN for Multipoint<br />
Installing the <strong>PCS</strong>A-MCG80 HD MCU software in two HD Visual<br />
Communication Systems enables you to connect to multiple sites up to 10 via<br />
mixed LAN and ISDN lines.<br />
This allows you to:<br />
Have a multipoint HD visual communication among up to 10 sites over LAN<br />
and ISDN.<br />
Note<br />
Be sure to connect two Communication Systems with the HD MCU software installed<br />
over LAN.<br />
System configuration<br />
/<br />
T<br />
W<br />
/<br />
POWER/STANDBY<br />
/<br />
/<br />
POWER/STANDBY<br />
/<br />
POWER/STANDBY<br />
POWER/STANDBY<br />
/<br />
POWER/STANDBY<br />
/<br />
POWER/STANDBY<br />
POWER/STANDBY<br />
/<br />
/<br />
/<br />
This diagram depicts a system<br />
configuration using the <strong>PCS</strong>A-<br />
B768S ISDN Unit.<br />
1 <strong>PCS</strong>-<strong>XG80</strong>S HD Visual Communication System<br />
2 <strong>PCS</strong>A-C<strong>XG80</strong> HD Camera Unit<br />
3 <strong>PCS</strong>-RF1 Remote Commander<br />
4 TV monitor (not supplied)<br />
5 <strong>PCS</strong>-A1 Microphones<br />
6 <strong>PCS</strong>A-MCG80 HD MCU software (not supplied)<br />
7 <strong>PCS</strong>A-B384S (not supplied) or <strong>PCS</strong>A-B768S (not supplied) ISDN Unit<br />
System Configuration<br />
POWER/STANDBY<br />
POWER/STANDBY<br />
/<br />
POWER/STANDBY<br />
29<br />
Chapter 1: Installation and Preparation
System Connections<br />
This section describes the typical system connections.<br />
Notes<br />
Be sure to turn off all the equipment before making any connections.<br />
Do not connect/disconnect the camera cable, interface cable, or pen tablet with the power<br />
on. Doing so may damage the Camera Unit, Communication System or ISDN Unit.<br />
For safety, do not connect the 100BASE-TX/10BASE-T connector to a network that<br />
applies excess voltage via the 100BASE-TX/10BASE-T connector.<br />
Used with the Camera Unit or ISDN Unit for the first time, the Communication<br />
System may automatically upgrade the software of the connected equipment.<br />
Upgrade the software according to the message displayed on the monitor screen. Be<br />
sure not to turn off the Communication System or disconnect the cable during<br />
upgrading. Otherwise, it may cause a malfunction of the system.<br />
System Connections<br />
31<br />
Chapter 1: Installation and Preparation
System Connection via a LAN<br />
Notes<br />
Normally, connect the UTP cable to the 1 (LAN1) connector (indicated in green).<br />
If the UTP cable is connected to the 2 (LAN2) connector, some of the functions<br />
of your system may be restricted.<br />
32 System Connections<br />
VISCA OUT<br />
Camera cable (supplied with the<br />
Camera Unit)<br />
to CAMERA<br />
* supplied<br />
** not supplied<br />
TERMINAL<br />
to MIC (A1/A3)<br />
to TERMINAL<br />
CAMERA S VIDEO IN RGB IN RGB OUT HDMI OUT ISDN UNIT AUX CONTROL<br />
EC-MIC(A7) MIC(A1/A3)<br />
1 2 1(R) 2(L)<br />
(PLUG IN POWER)<br />
R L R L<br />
AUDIO 1 IN AUDIO OUT<br />
R L<br />
REC OUT 1-EXT-2<br />
1<br />
2<br />
DC 19.5V<br />
to<br />
HDMI<br />
OUT<br />
HDMI<br />
cable*<br />
to<br />
HDMI<br />
IN<br />
<strong>PCS</strong>A-C<strong>XG80</strong> HD Camera Unit<br />
to<br />
<strong>PCS</strong>-A1 microphone<br />
<strong>PCS</strong>-<strong>XG80</strong>S HD Visual<br />
Communication System<br />
to DC19.5V<br />
VGP-AC19V15<br />
AC adaptor*<br />
UTP cable (category 5, straight)**<br />
TV monitor**<br />
to a wall outlet<br />
Power cord*<br />
For details, see “Restrictions on the Use of LAN2” on page 95.<br />
1<br />
to a wall outlet<br />
to LAN<br />
The REC OUT jack is used to make an audio recording of a communication. This is<br />
not used during regular communication.
System Connection via an ISDN<br />
Camera cable<br />
(supplied with<br />
the Camera<br />
Unit)<br />
to<br />
CAMERA<br />
* supplied<br />
** not supplied<br />
<strong>PCS</strong>A-C<strong>XG80</strong> HD Camera Unit<br />
VISCA OUT<br />
TERMINAL<br />
to TERMINAL<br />
to MIC<br />
(A1/A3)<br />
CAMERA S VIDEO IN RGB IN RGB OUT HDMI OUT ISDN UNIT AUX CONTROL<br />
EC-MIC(A7) MIC(A1/A3)<br />
1 2 1(R) 2(L)<br />
(PLUG IN POWER)<br />
R L R L<br />
AUDIO 1 IN AUDIO OUT<br />
R L<br />
REC OUT 1-EXT-2<br />
1<br />
2<br />
DC 19.5V<br />
to<br />
HDMI<br />
OUT<br />
HDMI<br />
cable*<br />
to<br />
HDMI<br />
IN<br />
Interface<br />
cable<br />
(supplied<br />
with ISDN<br />
Unit)<br />
to ISDN UNIT<br />
<strong>PCS</strong>-A1 Microphone<br />
to<br />
DC19.5V<br />
TV monitor**<br />
to TERMINAL<br />
<strong>PCS</strong>A-B384S ISDN Unit**<br />
to ISDN 1-3<br />
<strong>PCS</strong>A-B768S<br />
ISDN Unit**<br />
to ISDN 1-6<br />
ISDN Unit **<br />
ISDN modular cable**<br />
VGP-AC19V15<br />
AC adaptor*<br />
to a wall outlet<br />
to ISDN<br />
Power cord*<br />
to a wall outlet<br />
Note<br />
The REC OUT jack is used to make an audio recording of a communication. This is not<br />
used during regular conferences.<br />
System Connections<br />
33<br />
Chapter 1: Installation and Preparation
System Connection via a SIP<br />
<strong>PCS</strong>A-C<strong>XG80</strong> HD Camera Unit<br />
VISCA OUT<br />
Camera cable (supplied with<br />
the Camera Unit)<br />
to<br />
CAMERA<br />
* supplied<br />
** not supplied<br />
CAMERA S VIDEO IN RGB IN RGB OUT HDMI OUT ISDN UNIT AUX CONTROL<br />
EC-MIC(A7) MIC(A1/A3)<br />
1 2 1(R) 2(L)<br />
(PLUG IN POWER)<br />
R L R L<br />
AUDIO 1 IN AUDIO OUT<br />
R L<br />
REC OUT 1-EXT-2<br />
1<br />
2<br />
DC 19.5V<br />
Notes<br />
Normally, connect the UTP cable to the 1 (LAN1) connector (indicated in green).<br />
If the UTP cable is connected to the 2 (LAN2) connector, some of the functions<br />
of your system may be restricted.<br />
34 System Connections<br />
to MIC<br />
(A1/A3)<br />
TERMINAL<br />
to<br />
HDMI<br />
OUT<br />
HDMI<br />
cable*<br />
to<br />
HDMI<br />
IN<br />
to TERMINAL<br />
to<br />
1<br />
to DC19.5V<br />
UTP cable (category 5,<br />
straight)**<br />
<strong>PCS</strong>-A1 microphone<br />
VGP-AC19V15<br />
AC adaptor*<br />
Power cord*<br />
to LAN<br />
connector<br />
TV monitor**<br />
to a wall outlet<br />
For details, see “Restrictions on the Use of LAN2” on page 95.<br />
to a wall outlet<br />
SIP server<br />
to LAN<br />
connector<br />
to LAN<br />
connector<br />
IP<br />
telephone,<br />
etc.<br />
The REC OUT jack is used to make an audio recording of a communication. This is not<br />
used during regular communication.
Attaching the <strong>PCS</strong>A-C<strong>XG80</strong> HD Camera Unit to a Tripod<br />
To attach the Camera Unit to a tripod<br />
Attach a tripod to the screw hole used for attaching a tripod on the bottom of<br />
the Camera Unit.<br />
The tripod must be set up on a flat surface and tightened firmly by hand.<br />
Use a tripod with screws of the following specifications.<br />
4 = 4.5 – 6 mm<br />
4 = 0.18 – 0.24 inches<br />
System Connections<br />
35<br />
Chapter 1: Installation and Preparation
Preparing the System<br />
Inserting Batteries into the Remote Commander<br />
Most of the operations with the HD Visual Communication System can be<br />
controlled with the supplied Remote Commander.<br />
1 Remove the battery compartment cover.<br />
2 Insert two size AA (R6) batteries (supplied) with correct polarities into the<br />
battery compartment.<br />
3 Replace the cover.<br />
Note<br />
Be sure to insert the batteries E side first. Inserting them forcibly e side first may<br />
damage the insulated film covering the batteries and cause a short circuit.<br />
Battery life<br />
When the batteries are exhausted, the LED indicator does not light if you press<br />
any button and the Remote Commander does not function properly. Replace<br />
both batteries with new ones.<br />
Notes on batteries<br />
To avoid damage from possible battery leakage or corrosion, observe the<br />
following:<br />
Make sure to insert the batteries with the polarities in the correct direction.<br />
Do not mix old and new batteries, or different types of batteries.<br />
Do not attempt to charge the batteries.<br />
If you do not intend to use the Remote Commander for a long period of time,<br />
remove the batteries.<br />
36 Preparing the System
If battery leakage occurs, clean the battery compartment and replace all the<br />
batteries with new ones.<br />
Programming the Remote Commander to Operate the Camera Unit<br />
The supplied Remote Commander controls the HD Visual Communication<br />
System using the radio frequency of 2.4 GHz. The Remote Commander and<br />
the Communication System are paired to prevent interference from other<br />
Remote Commanders and Systems.<br />
Pairing between the Remote Commander and the Communication System is<br />
programmed at the factory. If the Communication System is installed in<br />
shielded locations, such as under a desk or in a rack, it may not be controlled<br />
by the Remote Commander, depending on the conditions of radio-wave<br />
reception. In this case, pair the <strong>PCS</strong>A-C<strong>XG80</strong> HD Camera Unit with the<br />
Remote Commander.<br />
Note<br />
When performing pairing procedure, be sure to turn off other HD Visual<br />
Communication Systems or HD Camera Units located nearby that are not targets for<br />
pairing. If multiple devices are turned on, the Remote Commander might pair device<br />
other than the target one.<br />
To pair the Camera Unit with the Remote Commander<br />
4<br />
3<br />
PRESENTATION<br />
/ /<br />
F1 F2 F3 F4<br />
LAYOUT VIDEO INPUT CAMERA<br />
VOLUME ZOOM<br />
RETURN<br />
ENTER<br />
T<br />
W<br />
BACK<br />
CONNECT SPACE DISCONNECT<br />
1 2ABC 3 DEF<br />
4 GHI 5 JKL 6MNO<br />
7PQRS 8TUV9WXYZ TONE DOT<br />
0<br />
ON/OFF<br />
MIC<br />
TOOLS<br />
POWER/STANDBY<br />
LED indicator<br />
?/1 (power) indicator<br />
1 Press the ?/1 (power) switch on the Communication System to turn it on.<br />
The ?/1 (power) indicator on the Communication System flashes. The<br />
indicator lights in green when the Communication System turns on.<br />
2 Set “RF Remote Control Reception” to “Camera” in the General setup<br />
menu.<br />
/<br />
1<br />
OPEN<br />
Preparing the System<br />
37<br />
Chapter 1: Installation and Preparation
Setup<br />
38 Preparing the System<br />
General<br />
General1<br />
Device Setup<br />
Camera LED Brightness<br />
RF Remote Control Reception Camera<br />
Terminal Name<br />
Standby Mode<br />
On<br />
Standby Time<br />
15minutes<br />
Last Number Registration Off<br />
Control by Far End On<br />
Language<br />
English<br />
System LED Brightness Dark<br />
Dark<br />
Save<br />
Cancel<br />
For details, see “RF Remote Control Reception” on the Device Setup page<br />
of the General setup menu on page 81.<br />
For the procedure on how to operate the menus, see “Opening the Setup<br />
Menu” on page 60.<br />
3 Within three minutes after the power of the Communication System is<br />
turned on, locate the Remote Commander closer to the RF receiver at the<br />
rear of the Camera Unit, and press the RETURN and TOOLS buttons at the<br />
same time.<br />
The Remote Commander and the Camera Unit enter pairing mode, and the<br />
LED indicator on the Remote Commander flashes rapidly.<br />
4 Press the ENTER button on the Remote Commander.<br />
If the LED indicator on the Remote Commander flashes more slowly,<br />
pairing the units has succeeded.<br />
The pairing between the Communication System and the Remote<br />
Commander is disabled.<br />
When pairing has failed<br />
The LED indicator on the Remote Commander continues flashing rapidly. In<br />
this case, press the ENTER button on the Remote Commander again.<br />
To cancel pairing<br />
Press the ?/1 (power) switch on the Communication System.<br />
Notes<br />
When the LED indicator does not flash even if you press any button on the Remote<br />
Commander, the batteries might be exhausted. Replace both batteries with new ones.<br />
Once pairing is established between the units, it will not be erased even if the batteries<br />
are replaced.<br />
Operable distance is 10 m (32.8 ft.). Depending on the circumstances, a longer<br />
operable distance may be possible.
To pair the Communication System with the Remote Commander again<br />
Follow the procedure below to release the paring with the Camera Unit, and to<br />
perform pairing with the System again.<br />
1 Turn on the Communication System.<br />
2 Set “RF Remote Control Reception” to “System” on the Device Setup page<br />
of the General setup menu (page 81).<br />
3 Within three minutes after the power is on, locate the Remote Commander<br />
closer to the Communication System, and press the RETURN and TOOLS<br />
buttons at the same time.<br />
The LED indicator flashes rapidly.<br />
4 Press the ENTER button on the Remote Commander.<br />
If the LED indicator flashes more slowly, pairing between the units has<br />
succeeded.<br />
Preparing the System<br />
39<br />
Chapter 1: Installation and Preparation
Turning the System On/Off<br />
Turning On<br />
This section describes how to turn on or off the Communication System.<br />
1 Turn on the TV monitor.<br />
2 Turn on the power of any other equipment to be used for this connection.<br />
3 Press the ?/1 (power) switch on the Communication System to turn it on.<br />
The ?/1 (power) indicator on the Communication System flashes. The<br />
indicator lights in green when the Communication System turns on.<br />
The Home menu will appear on the monitor screen and the picture shot by<br />
the local camera will also appear in the Home menu.<br />
Home menu<br />
For details on the Home menu, see “Identifying the Home Menu” on page 47.<br />
40 Turning the System On/Off<br />
/<br />
?/1 (power) switch<br />
?/1 (power) indicator<br />
Home<br />
Camera<br />
Connect<br />
POWER/STANDBY<br />
AAA IP:XXX.XXX.XXX.XXX<br />
Ready<br />
Ready to connect. 5/11/2008 13:00
Notes<br />
After the power is turned on, the camera moves automatically for trial operation. Be<br />
careful not to catch your finger.<br />
If you use force to prevent the camera from moving, the camera may stop moving and<br />
the picture may not be displayed. In this case, turn off the System, and turn it on again.<br />
When you turn on the power of the Communication System for the first time after<br />
installation, the setup wizard will appear after the self-diagnosis is completed. Set up<br />
your system following the wizard.<br />
For setups using the wizard, see “Setting Up the System Immediately after<br />
the Installation — Initial Setup Wizard” on page 44.<br />
Used with an optional device especially designed for use with this system, such as the<br />
Camera Unit and ISDN Unit, for the first time, the Communication System may<br />
automatically upgrade the software of the connected device. Upgrade the software<br />
according to the message displayed on the monitor screen. Be sure not to turn off the<br />
Communication System or disconnect the cable during upgrading. Otherwise, it may<br />
cause a malfunction of the system. System malfunction may also occur when a system<br />
power-off has been caused by an accidental problem such as a power interruption<br />
during upgrading. If connection of the Camera Unit, ISDN Unit, etc. to the<br />
Communication System is not re-established even after the system power is<br />
recovered, consult a <strong>Sony</strong> dealer.<br />
You can check the versions of the Communication System, optional dedicated<br />
equipment connected and the application software installed using the Machine Status<br />
menu.<br />
For details on the Machine Status menu, see page 91.<br />
Standby Mode Function<br />
To save power, the Communication System will enter standby mode if you do<br />
not operate it for a specified period of time. When the Communication System<br />
is in standby mode, the ?/1 indicator lights in orange.<br />
You can turn on the Communication System with any button on the Remote<br />
Commander if the System is in standby mode.<br />
Once the Communication System receives a call, the standby mode is<br />
automatically released.<br />
Turning the System On/Off<br />
41<br />
Chapter 1: Installation and Preparation
Setting the HD Visual Communication System to Standby Mode<br />
Turning Off<br />
1 Display the Home menu on the monitor screen, then press the @/1 button<br />
on the Remote Commander.<br />
The message “Power off?” appears on the monitor screen.<br />
2 Press the V, v, B or b button on the Remote Commander to select OK, then<br />
press the ENTER button.<br />
You may press the @/1 button on the Remote Commander.<br />
The Communication System enters standby mode and the @/1 indicator on<br />
the Communication System lights in orange.<br />
To cancel setting the system to standby<br />
Select “Cancel” with the V, v, B or b button on the Remote Commander, then<br />
press the ENTER button in step 2 above.<br />
To release the standby mode<br />
Press any button on the Remote Commander.<br />
To specify the standby time<br />
Specify the time that you want the system to remain on before entering into<br />
standby mode (1 to 99 minutes) by setting “Standby Time” of the Device Setup<br />
page of the General setup menu. If you do not want the system to enter the<br />
standby mode, set “Standby Mode” to “Off”.<br />
For the settings, see “Standby Time” and “Standby Mode” in the General<br />
setup menu on page 81.<br />
1 Press the @/1 (power) switch on the Communication System.<br />
The message “Power off?” appears on the monitor screen.<br />
2 Press the V, v, B or b button on the Remote Commander to select “Power<br />
off”, and press the ENTER button.<br />
You can power off the system by pressing the @/1 (power) button on the<br />
Remote Commander.<br />
The system turns off.<br />
3 Turn off the power of other equipment used for the communication.<br />
Notes<br />
Turn off the power switch on the Communication System when the system will not<br />
be used for an extended period. While the power switch is off, you cannot receive a<br />
call from a remote party.<br />
42 Turning the System On/Off
Be sure to unplug the power cord after the power of the system is turned off<br />
completely.<br />
If the system is unplugged for about 10 days or longer, the clock setting of the system<br />
may be reset. In this case, re-set the date and time in the Clock Set page of the General<br />
setup menu.<br />
Adjusting the Volume on the TV Monitor<br />
The procedure for volume adjustment during system setup differs from the<br />
procedure during communication.<br />
Adjust the volume on the TV monitor during system setup, and adjust the<br />
volume on the Communication System while in communication.<br />
Volume adjustment during setup<br />
Before adjusting the volume on the TV monitor, set the volume on the<br />
Communication System to the appropriate position.<br />
1 Press the VOLUME +/– buttons on the Remote Commander to set the<br />
volume level on the adjustment bar displayed on the screen to the middle<br />
position.<br />
2 Adjust the volume on the TV monitor so that you can properly hear a<br />
remote party’s speaking.<br />
Note<br />
Do not activate the TV’s surround sound feature as it may cause the echo canceller of<br />
the Communication System not to function properly and make strange sounds.<br />
Volume adjustment during communication<br />
Press the VOLUME +/– buttons on the Remote Commander to adjust the<br />
volume on the Communication System during communication.<br />
11<br />
Turning the System On/Off<br />
43<br />
Chapter 1: Installation and Preparation
Setting Up the System Immediately<br />
after the Installation — Initial Setup<br />
Wizard<br />
When you turn on the Communication System for the first time after<br />
installation and the self-diagnosis is completed, the setup wizard appears on<br />
the monitor screen. Register your local system data with the setup wizard using<br />
the Remote Commander.<br />
Notes<br />
You can change the settings made with the setup wizard later using the setup menus.<br />
The setup wizard will also be displayed when you install the <strong>PCS</strong>A-B384S or <strong>PCS</strong>A-<br />
B768S ISDN Unit to your system later. Perform the setup again.<br />
Wizard<br />
Home<br />
Back to Tools<br />
Select Language<br />
Set Region and Clock<br />
Select Line I/F<br />
Set up LAN<br />
Set up ISDN<br />
Set up SIP<br />
To select the on-screen language<br />
IP:192.168.0.11<br />
English<br />
2007.11.29 14:21<br />
IP<br />
XXX.XXX.XXX.XXX<br />
5/11/2008 13:00<br />
1 Use the V, v, B or b button on the Remote Commander to select “Select<br />
Language” in the setup wizard, then press the ENTER button.<br />
Wizard Select Language<br />
Select Language<br />
IP:192.168.0.11<br />
Select the on-screen language.<br />
5/11/2008 13:00<br />
44 Setting Up the System Immediately after the Installation — Initial Setup Wizard<br />
Save<br />
English<br />
Cancel
2 Use the V, v, B or b button on the Remote Commander to select the<br />
language to be used for the on-screen menus and messages.<br />
Select from among English, French, German, Japanese, Spanish, Italian,<br />
Simplified Chinese, Portuguese, Traditional Chinese, Korean, Dutch,<br />
Danish, Swedish, Finnish, Polish, Russian, Arabic, Thai, Turkish,<br />
Norwegian, Welsh, Czech and Hungarian.<br />
3 Use the V, v, B or b button on the Remote Commander to select “Save”,<br />
then press the ENTER button.<br />
The setup wizard is restored.<br />
To set the region and clock<br />
1 Use the V, v, B or b button on the Remote Commander to select “Set<br />
Region and Clock” in the setup wizard, then press the ENTER button.<br />
2 Set the region and clock items.<br />
Wizard<br />
Set Region and Clock<br />
Select the region<br />
Set Region and Clock<br />
Select the display pattern Year/Month/Day<br />
Enter the year<br />
Enter the month<br />
Enter the day<br />
Enter the time<br />
Select the region: Select the country or region where the system is used.<br />
Select the display pattern: Select the display pattern of year, month and<br />
day.<br />
Enter the year, Enter the month, Enter the day, Enter the time: Enter<br />
the date and time using the number buttons on the Remote<br />
Commander.<br />
For the procedure to enter the numbers using the Remote Commander, see<br />
“Entering Characters Using the Remote Commander” on page 57.<br />
3 Use the V, v, B or b button on the Remote Commander to select “Save”,<br />
then press the ENTER button.<br />
The setup wizard is restored.<br />
To select the line interface<br />
1 Use the V, v, B or b button on the Remote Commander to select “Select<br />
Line I/F” in the seup wizard, then press the ENTER button.<br />
Setting Up the System Immediately after the Installation — Initial Setup Wizard<br />
Save<br />
Cancel<br />
45<br />
Chapter 1: Installation and Preparation
2 Select the line interface to be used.<br />
Wizard<br />
Select Line I/F<br />
Which is your Line I/F? (Multiple selection available)<br />
Select Line I/F<br />
IP ISDN SIP<br />
Which is your primary Line I/F?<br />
IP ISDN SIP<br />
Which is your Line I/F?: Select from among IP, ISDN and SIP.<br />
Which is your primary Line I/F?: If you select two or more interfaces<br />
with “Which is your Line I/F?”, select the interface you most use.<br />
Select from among IP, ISDN and SIP.<br />
3 Use the V, v, B or b button on the Remote Commander to select “Save”,<br />
then press the ENTER button.<br />
The setup wizard appears.<br />
To set up a LAN connection<br />
Select “Set up LAN” in the setup wizard, then set up a LAN connection.<br />
To set up an ISDN line<br />
Select “Set up ISDN” in the setup wizard, then set up an ISDN line connection.<br />
To set up a SIP<br />
Select “Set up SIP” in the setup wizard, then set up a SIP connection.<br />
46 Setting Up the System Immediately after the Installation — Initial Setup Wizard<br />
Save<br />
Cancel
Using the Menus<br />
The HD Visual Communication System uses the on-screen menus to make<br />
various adjustments and settings. This section explains how to adjust or set the<br />
items in the menus and gives a brief introduction to the menus.<br />
Identifying the Home Menu<br />
The Home menu is displayed on the monitor screen when the system is<br />
turned on and has not been connected to a remote party. The Home menu<br />
displays the image shot by the local camera, local system name, current date<br />
and time and buttons to open the menus.<br />
You can select the items shown in the Home menu using the Home Menu1 to<br />
Home Menu3 pages in the Home Menu setup menu.<br />
The descriptions of the items displayed in the Home menu are given below<br />
using the default menu and the menu with all items shown, as the examples.<br />
Home menu (default)<br />
8<br />
qs<br />
1<br />
Home<br />
Camera<br />
Connect<br />
23 4 6 7<br />
AAA<br />
IP<br />
IP:XXX.XXX.XXX.XXX<br />
qf<br />
Ready 5/11/2008 13:00<br />
Dial<br />
Using the Menus<br />
47<br />
Chapter 1: Installation and Preparation
48 Using the Menus<br />
Home menu (with all items shown)<br />
8 9<br />
0 qa<br />
qd<br />
1<br />
Camera<br />
Tools<br />
History<br />
Phone Book<br />
Detailed Dial<br />
1 IPELA logo<br />
23<br />
4 5 6 7<br />
AAA<br />
F1 F2<br />
F3 F4<br />
Room 101<br />
Room 201<br />
Office A<br />
Office E<br />
B Background screen<br />
Image shot by the camera is displayed.<br />
C Local terminal name<br />
The local terminal name set in the menu is displayed.<br />
D IP address of the local system<br />
The IP address of the local system is shown.<br />
By changing the “Number Display” setting (page 83) on the Home Menu1<br />
page of the Home Menu setup menu, you can display the gatekeeper’s user<br />
name and user number, NAT address, etc. instead of the IP address.<br />
E ISDN line number<br />
The ISDN line number of the local system is shown.<br />
F Local system status<br />
The status on the local terminal is shown.<br />
G Date and time<br />
The current date and clock are displayed.<br />
IP<br />
IP:XXX.XXX.XXX.XXX<br />
Ready 5/11/2008 13:00<br />
Home NEAR<br />
qf qg qh qj qk<br />
H Camera button<br />
The Camera menu opens when you select the button and press the ENTER<br />
button on the Remote Commander.<br />
The Camera menu is used to adjust the camera angle or brightness, or to<br />
preset the camera adjustments and to move the camera to the preset<br />
position.<br />
Dial<br />
ql
Camera menu<br />
Camera<br />
For details on the Camera menu, see page 134.<br />
I Tools button<br />
The Tools menu opens when you select the button and press the ENTER<br />
button on the Remote Commander.<br />
The menu is used to carry out presentation, streaming, recording,<br />
annotation, etc. The Machine Status menu or Setup menus can be displayed<br />
using the buttons in the Tools menu.<br />
Tools menu<br />
Tools<br />
Home<br />
Machine Status<br />
Setup<br />
Previous<br />
Adjustments<br />
Brightness<br />
Preset<br />
Details<br />
Presentation<br />
Streaming<br />
Recording<br />
Annotation<br />
Icon display<br />
Reject Answer<br />
Screen Capture<br />
[Suspended]<br />
[Suspended]<br />
[Suspended]<br />
[Suspended]<br />
5/11/2008 13:00<br />
Execute<br />
Execute<br />
Execute<br />
Execute<br />
On<br />
Off<br />
Execute<br />
For details on the Tools menu, see page 149.<br />
For details on the Machine Status menu, see page 91.<br />
For details on the Setup menu, see page 60.<br />
J History button<br />
The History menu opens when you select the button and press the ENTER<br />
button on the Remote Commander.<br />
The menu is used to check the incoming call and outgoing call histories or<br />
to call a remote party from the history list.<br />
Using the Menus<br />
49<br />
Chapter 1: Installation and Preparation
50 Using the Menus<br />
History menu<br />
History<br />
Home<br />
Phone Book<br />
Detailed Dial<br />
Dial<br />
For details on the History menu, see page 111.<br />
K Phone Book button<br />
The Phone Book opens when you select the button and press the ENTER<br />
button on the Remote Commander.<br />
The menu is used to register a remote party to the Phone Book or to call a<br />
remote party registered in the Phone Book.<br />
Phone Book<br />
Phone Book<br />
Home<br />
New Entry<br />
Group Edit<br />
History<br />
Detailed Dial<br />
Answer<br />
Missed Call<br />
Default Group<br />
Group1<br />
Group2<br />
Group3<br />
Group4<br />
Group5<br />
Group6<br />
Group7<br />
Group8<br />
Group9<br />
IP:192.168.0.11<br />
5/11/2008 13:00<br />
Dial History1<br />
111.111.111.112 2008/05/01 00:00 (12:34:56)<br />
Dial History2<br />
555-555-555 2008/05/26 00:00 (03:25:45)<br />
Dial History3<br />
17.17.17.17 2008/05/26 00:00 (01:00:17)<br />
Dial History4<br />
18.18.18.18 2008/05/26 00:00 (01:00:18)<br />
Dial History5<br />
19.19.19.19 2008/05/26 00:00 (01:00:19)<br />
Dial History6<br />
20.20.20.20 2008/05/26 00:00 (01:00:20)<br />
Dial History7<br />
66.66.66.66 2008/05/26 00:08 (00:00:00)<br />
Dial History8<br />
88.88.88.88 2008/05/26 00:08 (01:00:06)<br />
Room 101<br />
ISDN 01-2345-6789<br />
Room 201<br />
IP 0.0.0.0<br />
Room 102<br />
IP 255.255.255.255<br />
Room 202<br />
IP 123.456.789.012<br />
Office A<br />
ISDN 98-7654-3210<br />
Office E<br />
ISDN 01-2345-6789<br />
For details on the Phone Book, see page 120.<br />
L Connect button<br />
The Connect menu opens when you select “Connect” in the Home menu<br />
and press the ENTER button on the Remote Commander.<br />
The Connect menu is used to call a remote party.
Connect menu<br />
Connect<br />
For details, see “Calling a Remote Party by Using the Connect Menu” on<br />
page 107.<br />
M Detailed Dial button<br />
The Detailed Dial menu opens when you select the Detailed Dial button<br />
and press the ENTER button on the Remote Commander.<br />
The menu is used to call a remote party by setting the details of the dial<br />
setup options.<br />
Detailed Dial menu<br />
Detailed Dial<br />
Home<br />
Phone Book<br />
History<br />
Dial to:<br />
Previous<br />
Enter Number/Address<br />
Select from Phone Book<br />
Select from History<br />
IP:192.168.0.11 5/11/2008 13:00<br />
Number of Connected Sites 1<br />
Line I/F IP<br />
Communication<br />
1024kbps<br />
Bit Rate<br />
Number of Lines 1B (64K)<br />
Cancel<br />
For details on the Detailed Dial menu, see page 114.<br />
N Instruction display<br />
The instructions for the operation in the Home menu are displayed.<br />
O Line interface select button<br />
Selecting the button opens the drop-down list of the line interface. Select<br />
the interface to be used, then press the ENTER button.<br />
P Number input box<br />
To call a remote party not registered in the Phone Book, select the box and<br />
enter the party’s IP address, Domain name, ISDN line number, etc.<br />
Using the Menus<br />
51<br />
Chapter 1: Installation and Preparation
52 Using the Menus<br />
Q Dial button<br />
To call a remote party whose number or address has been entered in the<br />
number input box, select this button, then press the ENTER button on the<br />
Remote Commander.<br />
R One-touch dial buttons<br />
The submenu is displayed when you select a thumbnail for a remote party<br />
you want to call and press the ENTER button on the Remote Commander.<br />
Using the submenu you can call the remote party.<br />
You can also call the remote parties assigned to the one-touch buttons by<br />
pressing the F1 to F4 buttons on the Remote Commander.<br />
S Display<br />
Home<br />
7<br />
1 2 3 4 5 6<br />
1 Video input<br />
The selected video input on the local system is displayed.<br />
The displayed video input is shown as the label set in “Custom Input<br />
Label” in the Video setup menu.<br />
2 Audio input<br />
The selected audio input on the local system is displayed.<br />
3 LAN status<br />
The current status of LAN connection is shown. The LAN indicator is<br />
shown in white when LAN is enabled for use and in gray when it is<br />
disabled.<br />
4 ISDN status<br />
The current status of the ISDN unit ports is shown. The port indicator is<br />
shown in white when it is enabled for use and in gray when it is disabled.<br />
5 Indicators<br />
The status indicators for when the microphone is off, a “Memory Stick” is<br />
inserted, a pen tablet is connected, streaming broadcast is being executed,<br />
recording is being executed, etc. are displayed.<br />
6 Audio level meter<br />
The current audio input level is displayed.<br />
8<br />
NEAR
7 Volume<br />
The volume-level bar is temporarily shown when you adjust the volume of<br />
the Communication System.<br />
8 Warning messages<br />
If system malfunction occurs, a warning, instruction, etc. are displayed.<br />
Using the Menus<br />
53<br />
Chapter 1: Installation and Preparation
<strong>Operation</strong> Using the Menu<br />
The basic operation through the menu is explained taking manual brightness<br />
adjustment in the Camera menu as an example.<br />
Buttons used for menu operations<br />
1 Display the Home menu.<br />
54 Using the Menus<br />
RETURN button<br />
Home<br />
Camera<br />
Connect<br />
PRESENTATION<br />
F1 F2 F3 F4<br />
LAYOUT VIDEO INPUT CAMERA<br />
VOLUME ZOOM<br />
RETURN<br />
CONNECT<br />
ENTER<br />
1 2 3<br />
4 5 6<br />
7 8<br />
0<br />
9<br />
<strong>PCS</strong>-RF1<br />
RF<br />
/<br />
T<br />
W<br />
BACK<br />
SPACE DISCONNECT<br />
ABC DEF<br />
GHI JKL MNO<br />
PQRS TUV WXYZ<br />
TONE DOT<br />
ON/OFF<br />
MIC<br />
TOOLS<br />
AAA IP:XXX.XXX.XXX.XXX<br />
Ready<br />
Ready to connect. 5/11/2008 13:00<br />
V/v/B/b buttons<br />
ENTER button<br />
Number buttons<br />
DOT button
2 Use the V, v, B or b button on the Remote Commander to select “Camera”,<br />
then press the ENTER button.<br />
The Camera menu appears.<br />
Camera<br />
Previous<br />
Adjustments<br />
Brightness<br />
Preset<br />
Details<br />
3 Use the V, v, B or b button on the Remote Commander to select<br />
“Brightness”, then press the ENTER button.<br />
The Brightness menu appears.<br />
Adjustments > Brightness<br />
Auto Adjustment<br />
Previous<br />
5/11/2008 13:00<br />
4 Press the ENTER button on the Remote Commander.<br />
Now you can select the adjustment mode.<br />
5 Use the V, v, B or b button to select the desired item from the drop-down<br />
list, then press the ENTER button.<br />
The menu goes to <strong>Manual</strong> Adjustment mode.<br />
Adjustments > Brightness<br />
<strong>Manual</strong> Adjustment<br />
Previous<br />
5/11/2008 13:00<br />
5/11/2008 13:00<br />
Using the Menus<br />
55<br />
Chapter 1: Installation and Preparation
6 Use the V, v, B or b button on the Remote Commander to select the<br />
brightness adjustment bar, then press the ENTER button.<br />
7 Use the V, v, B or b button to adjust the brightness of the image, then press<br />
the ENTER button.<br />
8 Use the V, v, B or b button on the Remote Commander to select<br />
“Previous”, then press the ENTER button after the adjustment is finished.<br />
You can also use the RETURN button on the Remote Commander.<br />
The Brightness menu is restored.<br />
9 Use the V, v, B or b button on the Remote Commander to select<br />
“Previous”, then press the ENTER button. You can also use the RETURN<br />
button on the Remote Commander.<br />
The Camera menu is restored.<br />
When the “Save” button is displayed in the menu<br />
When the setting or adjustment is finished, press the V, v, B or b button on the<br />
Remote Commander to select “Save” and press the ENTER button. The setting<br />
or adjusted value becomes effective.<br />
When the “Cancel” button is displayed in the menu<br />
If you press the V, v, B or b button on the Remote Commander to select<br />
“Cancel” and press the ENTER button, the setting or adjustment is canceled<br />
and the previous one is restored.<br />
56 Using the Menus<br />
Adjustments > Brightness<br />
<strong>Manual</strong> Adjustment<br />
Previous<br />
5/11/2008 13:00
Entering Characters Using the Remote Commander<br />
This section explains how to enter the letters, numbers or symbols in the text<br />
box in the menu using the Remote Commander.<br />
PRESENTATION<br />
To enter letters or numbers<br />
F1 F2 F3 F4<br />
LAYOUT VIDEO INPUT CAMERA<br />
VOLUME ZOOM<br />
RETURN<br />
CONNECT<br />
ENTER<br />
1 2 3<br />
4 5 6<br />
7 8<br />
0<br />
9<br />
<strong>PCS</strong>-RF1<br />
RF<br />
1 Press the F1 button repeatedly to enable the letters or numbers to be input.<br />
2 Press the number buttons to enter a letter or number you want.<br />
You can enter the letter shown on each button by pressing it repeatedly.<br />
You can enter the number shown on each button by pressing it once.<br />
To enter a symbol<br />
Press the F2 button repeatedly to select the desired symbol. Pressing the 0<br />
button repeatedly also enables you to enter a symbol.<br />
To enter a dot (.) for an IP address<br />
Press the b button or DOT button.<br />
To delete a character<br />
Press the BACK SPACE button. The last entered character is deleted.<br />
/<br />
T<br />
W<br />
BACK<br />
SPACE DISCONNECT<br />
ABC DEF<br />
GHI JKL MNO<br />
PQRS TUV WXYZ<br />
TONE DOT<br />
ON/OFF<br />
MIC<br />
TOOLS<br />
F1 button<br />
F2 button<br />
F3 button<br />
b button<br />
BACK SPACE button<br />
Number buttons<br />
DOT button<br />
Using the Menus<br />
57<br />
Chapter 1: Installation and Preparation
To delete all the characters entered<br />
Press the F3 button.<br />
Entering Characters Using the On-Screen Keyboard<br />
This section explains how to enter the letters or numbers in the text box in the<br />
menu using the on-screen keyboard displayed on the monitor screen.<br />
When “Display On-Screen Keyboard” is set to “On” in the Menu Screens page<br />
of the General setup menu (page 82), the on-screen keyboard automatically<br />
appears on the screen if character input is required in the menu.<br />
Note<br />
You can also use the buttons on the Remote Commander even when the on-screen<br />
keyboard is displayed on the screen.<br />
To enter letters or numbers<br />
1 Use the V, v, B or b button on the Remote Commander to select “Num”<br />
or “Alpha” on the on-screen keyboard, then press the ENTER button.<br />
Select “Num” to enter numbers, and “Alpha” to enter alphabetic letters.<br />
2 Use the V, v, B or b button on the Remote Commander to select the button<br />
on the on-screen keyboard on which the desired character is indicated, then<br />
press the ENTER button.<br />
When you select a number, the selected number is entered.<br />
When you select an alphabetic letter, a submenu with available letters<br />
appears on the on-screen keyboard. Select the desired letter and press the<br />
ENTER button on the Remote Commander. The selected letter is entered.<br />
58 Using the Menus<br />
Num 1 ABC DEF<br />
Alpha<br />
GHI JKL<br />
MNO<br />
PQRS TUV WXYZ Symbol<br />
Space<br />
Back<br />
Space<br />
0 Dot<br />
End Cancel
Alpha<br />
1 ABC DEF<br />
Back<br />
GHI Previous JKL MNO Space<br />
PQRS<br />
A B C<br />
TUV WXYZ Symbol<br />
a b c<br />
0 Dot<br />
Space<br />
End Cancel<br />
3 Repeat step 2 to enter all the letters or numbers.<br />
4 After the input is complete, select “End”, then press the ENTER button on<br />
the Remote Commander.<br />
To enter a symbol<br />
1 Select “Symbol” on the on-screen keyboard, then press the ENTER button<br />
on the Remote Commander.<br />
The submenu with available symbols are displayed.<br />
2 Use the V, v, B or b button on the Remote Commander to select the<br />
desired symbol, then press the ENTER button.<br />
The selected symbol is entered.<br />
3 Repeat steps 1 and 2 to enter all the symbols.<br />
4 After the input is complete, select “End”, then press the ENTER button on<br />
the Remote Commander.<br />
To enter a dot (.) for an IP address<br />
Select “b” or “Dot” on the on-screen keyboard, then press the ENTER button<br />
on the Remote Commander.<br />
To enter a space<br />
Select “Space”, then press the ENTER button on the Remote Commander.<br />
To delete a character<br />
To erase the last entered character, select “Back Space”, then press the ENTER<br />
button on the Remote Commander.<br />
To delete all the characters entered<br />
Select “Cancel”, then press the ENTER button on the Remote Commander.<br />
Pressing the F3 button on the Remote Commander also deletes all the<br />
characters entered.<br />
Using the Menus<br />
59<br />
Chapter 1: Installation and Preparation
Chapter 2:<br />
Registration and<br />
Setup for System<br />
Administrators<br />
This chapter describes the registration and settings to be carried out by the<br />
system administrator.The chapter is intended to be read by the system<br />
administrator.<br />
Registering Local Information<br />
Before connecting, set up the local system using the Setup menus. This section<br />
describes how to display the Setup menus and gives a introduction to the<br />
menus.<br />
Opening the Setup Menu<br />
1 Press the Tools button on the Remote Commander, or use the V, v, B or b<br />
button to select “Tools” in the Home menu, then press the ENTER button.<br />
The Tools menu appears on the monitor screen.<br />
Tools<br />
Home<br />
Machine Status<br />
Setup<br />
60 Registering Local Information<br />
Presentation<br />
Streaming<br />
Recording<br />
Annotation<br />
Icon display<br />
Reject Answer<br />
Screen Capture<br />
[Suspended]<br />
[Suspended]<br />
[Suspended]<br />
[Suspended]<br />
Execute<br />
Execute<br />
Execute<br />
Execute<br />
On<br />
Off<br />
Execute
2 Use the V, v, B or b button to select “Setup”, then press the ENTER button<br />
on the Remote Commander.<br />
The Setup menu appears on the monitor screen.<br />
Menus available from a setup menu<br />
The Setup menus are grouped into the following depending on the setting<br />
items. The setup menus that include many setting items are divided into<br />
multiple pages. Select an appropriate menu button to set the respective<br />
item.<br />
The commonly-used menu butttons are displayed on the screen at the<br />
factory. Pressing the F4 button on the Remote Commander allows you to<br />
display the maximum number of setup menu buttons. To restore the<br />
commonly-used setup display, press the F4 button again.<br />
Setup Line I/F<br />
Home<br />
Back to Tools<br />
Menu buttons<br />
Line I/F<br />
Dial<br />
Answer<br />
Multipoint<br />
Audio1<br />
Video2<br />
LAN<br />
LAN<br />
LAN<br />
SIP<br />
Line Interface<br />
IP<br />
Primary Line Interface<br />
Use LAN2 Off<br />
ISDN SIP<br />
IP ISDN SIP<br />
For a description of each setup menu, see the page for that menu indicated<br />
below.<br />
Line Interface setup menu (see page 64)<br />
Dial setup menu (see page 64)<br />
Answer setup menu (see page 65)<br />
Multipoint setup menu (see page 65)<br />
Communication setup menu (see page 66)<br />
Audio setup menu (see page 69)<br />
Video setup menu (see page 72)<br />
LAN setup menu (see page 74)<br />
QoS setup menu (see page 76)<br />
TOS setup menu (see page 77)<br />
SIP setup menu (see page 78)<br />
ISDN setup menu (see page 79)<br />
Annotation setup menu (see page 80)<br />
Camera setup menu (see page 81)<br />
General setup menu (see page 81)<br />
Home Menu setup menu (see page 83)<br />
Administrator setup menu (see page 85)<br />
Encryption setup menu (see page 89)<br />
Shared Phone Book setup menu (see page 90)<br />
Registering Local Information<br />
61<br />
Chapter 2: Registration and Setup for System Administrators
Note<br />
The Multipoint setup menu is displayed only when the <strong>PCS</strong>A-MCG80 HD MCU<br />
software is installed in the Communication System.<br />
3 Use the V, v, B or b button on the Remote Commander to select the menu<br />
button you want to set, then press the ENTER or b button.<br />
The selected setup menu appears.<br />
Setup Dial<br />
Dial<br />
4 Use the V, v, B or b button on the Remote Commander to select the setting<br />
item, then press the ENTER button.<br />
Setup Dial<br />
Menu button<br />
Dial<br />
5 Select the desired item from the drop-down list, or enter the characters in<br />
the text box.<br />
For individual items, see pages 64 to 89.<br />
6 After the selection or character input is completed, use the V, v, B or b<br />
button to select “Save”, then press the ENTER button.<br />
The setting is saved, and the Setup menu is restored.<br />
62 Registering Local Information<br />
Setting items<br />
Telephone Mode Auto<br />
More Options Enable On<br />
User Name Input On<br />
Prefix<br />
Prefix-None<br />
Prefix-A<br />
Prefix-B<br />
Prefix-C<br />
LAN Prefix<br />
Disable<br />
LAN Prefix<br />
Save<br />
Cancel<br />
Telephone Mode<br />
Auto<br />
Auto<br />
G.711 µ-law<br />
G.711 A-law<br />
Save<br />
Cancel
To cancel the setup<br />
Use the V, v, B or b button on the Remote Commander to select “Cancel”,<br />
then press the ENTER button. Or press the RETURN button on the Remote<br />
Commander.<br />
To return to the left column<br />
Press the B button or RETURN button on the Remote Commander.<br />
Registering Local Information<br />
63<br />
Chapter 2: Registration and Setup for System Administrators
Line Interface Setup Menu<br />
The Line Interface setup menu is used to<br />
select the line interface you use for<br />
connection with a remote party.<br />
Line I/F<br />
Line I/F<br />
Line Interface<br />
Allows you to select the line interface from<br />
among “IP”, “ISDN” and “SIP”. You can<br />
select multiple interfaces.<br />
Primary Line Interface<br />
Allows you to select the line interface you<br />
use most from among IP, SIP and ISDN.<br />
Use LAN2<br />
Allows you to select whether to use the 2<br />
(LAN2) connector on the rear of the<br />
Communication System.<br />
Off: Select when you do not use the 2<br />
(LAN2) connector.<br />
On: Select when you use the 2 (LAN2)<br />
connector.<br />
Note<br />
When “Use LAN2” is set to “On”, some of the<br />
functions using the 2 connector are<br />
restricted. For details, see “Restrictions on the<br />
Use of LAN2” on page 95.<br />
Dial Setup Menu<br />
The Dial setup menu is used to set the<br />
attributes for dialing.<br />
Dial<br />
Dial<br />
Telephone Mode<br />
Allows you to select the audio compression<br />
format when conducting a voice meeting.<br />
Auto: Selects an appropriate format<br />
automatically.<br />
G.711µ-law: Selects the format based on the<br />
G.711µ-law standard.<br />
G.711A-law: Selects the format based on<br />
the G.711A-law standard.<br />
64 Registering Local Information<br />
More Options Enable<br />
Allows you to select whether to display the<br />
More Options button in the List Edit menu<br />
of the Phone Book. You can set the detailed<br />
items for dialing in the List Edit menu by<br />
selecting the More Options button.<br />
On: Displays the More Options button.<br />
Off: Does not display the More Options<br />
button.<br />
User Name Input<br />
Allows you to select whether to register user<br />
names in the communications log when<br />
connection is made.<br />
Off: Disables the recording of the user<br />
names.<br />
On: Select when you want to record user<br />
names. Each time dialing takes place,<br />
the user name input menu appears.<br />
Prefix<br />
Select the prefix number (call number<br />
prefixed to a line number).<br />
Prefix-None: Select when you are not using<br />
a prefix number.<br />
Prefix-A: Select when you use the prefix set<br />
in “Prefix-A”.<br />
Prefix-B: Select when you use the prefix set<br />
in “Prefix-B”.<br />
Prefix-C: Select when you use the prefix set<br />
in “Prefix-C”.<br />
Prefix-A<br />
When “Prefix” is set to “Prefix-A”, the line<br />
number prefixed by the prefix (dial number)<br />
registered in this box is dialed.<br />
Prefix-B<br />
When “Prefix” is set to “Prefix-B”, the line<br />
number prefixed by the prefix (dial number)<br />
registered in this box is dialed.<br />
Prefix-C<br />
When “Prefix” is set to “Prefix-C”, the line<br />
number prefixed by the prefix (dial number)<br />
registered in this box is dialed.<br />
Note<br />
Enter “9” when this is required to make an<br />
outgoing call.
Select LAN Prefix<br />
Allows you to select whether to use the LAN<br />
prefix when dialing via a LAN.<br />
Disable: Disables the LAN prefix.<br />
Enable: Enables the LAN prefix.<br />
LAN Prefix<br />
When dialing using the IP connection, the<br />
information entered into this box is added to<br />
the beginning of the IP address. Select<br />
whether to use the LAN prefix in “Select<br />
LAN Prefix”.<br />
Answer Setup Menu<br />
The Answer setup menu is used to set up call<br />
reception.<br />
Answer<br />
Answer<br />
Auto Answer<br />
Allows you to select whether the system<br />
answers calls automatically.<br />
On: Answers calls automatically. When a<br />
call comes in, the line is automatically<br />
connected.<br />
Off: Allows you to answer calls manually.<br />
When a call comes in, the phone rings. If<br />
you select “OK” in the “Answer?”<br />
message, the line is connected.<br />
ISDN MSN<br />
Allows you to select whether you are using<br />
the Multiple Subscriber Number.<br />
Off: Select when you do not use the<br />
Multiple Subscriber Number.<br />
On: Select when you use the Multiple<br />
Subscriber Number.<br />
Mic on Answer<br />
Allows you to select whether to transmit<br />
audio from your site when you receive a call<br />
and connect it.<br />
On: Enables transmission of audio when<br />
answering a call.<br />
Off: Disables transmission of audio when<br />
answering a call.<br />
Reject Answer<br />
Allows you to select whether to connect a<br />
remote party’s calling during<br />
communication.<br />
On: Disables the connection of a remote<br />
party.<br />
Off: Enables the connection of a remote<br />
party.<br />
For details, see “Turning Off the Sound<br />
Momentarily – Muting Function” on page<br />
131.<br />
Multipoint Setup Menu<br />
The Multipoint setup menu is used to set up<br />
multipoint connection when the local<br />
system is used as the main terminal.<br />
The menu is displayed only when the <strong>PCS</strong>A-<br />
MCG80 HD MCU software is installed in<br />
the Communication System.<br />
For the procedure how to install the <strong>PCS</strong>A-<br />
MCG80 software, see page 190.<br />
Note<br />
When the local system is used as the main<br />
terminal and connected with remote terminals<br />
other than the <strong>PCS</strong>-<strong>XG80</strong>/<strong>XG80</strong>S, the<br />
maximum bandwidth to be used is restricted to<br />
4 Mbps.<br />
Multipoint<br />
Multipoint<br />
Multipoint Mode<br />
AUTO: Switches from point-to-point<br />
connection to multipoint connection<br />
automatically.<br />
On: Enables you to make a multipoint<br />
connection at any time.<br />
Broadcast Mode<br />
Allows you to select the broadcast mode.<br />
Split: Displays the picture from the<br />
connected terminals in split windows.<br />
Voice Activate: Detects the terminal where<br />
a speaker has the loudest voice, and<br />
automatically transmits the picture of<br />
this terminal to all other terminals.<br />
Voice Activate (720P): Enables<br />
transmission of pictures with resolution<br />
Registering Local Information<br />
65<br />
Chapter 2: Registration and Setup for System Administrators
of 720p (1280 × 720 pixels) in H.264<br />
Video Mode when “Voice Activate”<br />
mode is activated.<br />
Notes<br />
The “Voice Activate (720P)” mode cannot<br />
be selected when the communication is made<br />
via an ISDN or SIP connection. Even for an<br />
IP connection, this mode is not available if<br />
the remote party does not support H.264<br />
Video Mode.<br />
When “Broadcast Mode” is set to “Voice<br />
Activate (720P)”, you cannot change<br />
“Broadcast Mode” during communication.<br />
Select the Broadcast Mode before starting<br />
communication.<br />
Split<br />
Allows you to select the type of split display<br />
used to display local and remote pictures on<br />
a single monitor during a multipoint<br />
connection.<br />
Automatic: When there are two or three<br />
terminals connected, the display is<br />
automatically split into four parts. When<br />
there are four or five terminals<br />
connected, it is split into six parts.<br />
Six-screen Mosaic: The display is split into<br />
six parts regardless of the number of<br />
terminals connected.<br />
Note<br />
When there is only one terminal connected, the<br />
display switches to full screen regardless of the<br />
selection of the setting.<br />
Communication Setup Menu<br />
The Communication setup menu is used to<br />
set up communications.<br />
Note<br />
The contents of the Communication menu vary<br />
with “Line Interface” setting in the Line I/F<br />
setup menu, or “Individual Settings for<br />
Transmission/Reception” or “Individual<br />
Settings for Point-to-Point/Multipoint” setting<br />
in the Communication setup menu.<br />
The Communication page number after the<br />
Communication2 page also varies according to<br />
the number of setting items.<br />
66 Registering Local Information<br />
Communication IP<br />
The menu is used to set up the<br />
communication mode for the IP connection.<br />
Individual Settings for Transmission/<br />
Reception<br />
Allows you to select whether to configure<br />
the IP settings for transmission and<br />
reception individually.<br />
Off: Select to configure the IP settings for<br />
transmission and reception commonly.<br />
On: Select to configure the IP settings for<br />
transmission and reception individually.<br />
Individual Settings for Point-to-Point/<br />
Multipoint<br />
Allows you to select whether to configure<br />
the IP settings for a point-to-point<br />
connection and multipoint connection<br />
individually.<br />
Off: Select to configure the IP settings for<br />
both connections commonly.<br />
On: Select to configure the IP settings for a<br />
point-to-point connection and<br />
multipoint connection individually.<br />
Note<br />
The setting items and page numbers in the IP:<br />
Mode page vary according to the setting of<br />
“Individual Settings”.<br />
Communication<br />
IP: Mode<br />
Total Bandwidth<br />
Allows you to select the total bandwidth to<br />
be used with this system.<br />
In multipoint connection, the total<br />
bandwidth of all points is displayed.<br />
You can select from among 128Kbps,<br />
384Kbps, 512Kbps, 1Mbps, 2Mbps, 3Mbps,<br />
4Mbps, 5Mbps, 6Mbps, 7Mbps, 8Mbps,<br />
9Mbps, 10Mbps and Other.<br />
Note<br />
In multipoint connection, the actual<br />
Communication Bit Rate for each point is<br />
automatically adjusted so as not to exceed<br />
“Total Bandwidth”.
Communication Bit Rate<br />
Allows you to select the communication bit<br />
rate per point.<br />
When “Individual Settings for<br />
Transmission/Reception” or “Individual<br />
Settings for Point-to-Point/Multipoint” on<br />
the IP page is set to “On”, you can set this<br />
item for transmission and reception, and<br />
point-to-point and multipoint connections<br />
individually.<br />
You can select from among 128Kbps,<br />
384Kbps, 512Kbps, 1Mbps, 2Mbps, 3Mbps,<br />
4Mbps, 5Mbps, 6Mbps, 7Mbps, 8Mbps,<br />
9Mbps, 10Mbps and Other.<br />
Audio Mode<br />
Allows you to select the compression format<br />
of audio to be sent to a remote party. When<br />
“Individual Settings for Transmission/<br />
Reception” or “Individual Settings for Pointto-Point/Multipoint”<br />
on the IP page is set to<br />
“On”, you can set this item for transmission<br />
and reception, and point-to-point and<br />
multipoint connections individually.<br />
You can select multiple formats from among<br />
G.711, G.722, G.728 and MPEG4 (MPEG4<br />
AAC).<br />
Note<br />
When the remote system does not support the<br />
audio mode selected by the local site, the mode<br />
automatically becomes “G.711”.<br />
Far End Camera Control<br />
Allows you to select whether to enable the<br />
control of each other’s cameras from each<br />
other’s site.<br />
When “Individual Settings for Point-to-<br />
Point/Multipoint” for IP is set to “On”, you<br />
can set this item individually for point-topoint<br />
and multipoint connections.<br />
On: Enables the control of each other’s<br />
cameras. Normally, set to “On”.<br />
Off: Disables the control of each other’s<br />
cameras.<br />
H.239<br />
Use of the presentation mode complying<br />
with H.239 allows you to transmit the<br />
presentation data and picture from the<br />
camera simultaneously.<br />
This item allows you to select whether to use<br />
the presentation mode based on the H.239<br />
presentation standard.<br />
On: Enables the presentation mode based on<br />
the H.239 presentation standard.<br />
Off: Disables the presentation mode based<br />
on the H.239 presentation standard.<br />
H.239 Ratio<br />
When H.239 presentation transmissions are<br />
made with the system, the H.239<br />
presentation data shares bandwidth with<br />
camera images that are also being sent. This<br />
setting allows you to select how much of the<br />
total bandwidth to use for H.239<br />
presentation data transmissions.<br />
2/3: Use 2/3 of the total bandwidth for H.239<br />
presentation data transmissions.<br />
1/2: Use 1/2 of the total bandwidth for H.239<br />
presentation data transmissions.<br />
1/3: Use 1/3 of the total bandwidth for H.239<br />
presentation data transmissions.<br />
Screen Size<br />
Allows you to select the screen size of the<br />
picture to be transmitted or received.<br />
When “Individual Settings for<br />
Transmission/Reception” or “Individual<br />
Settings for Point-to-Point/Multipoint” on<br />
the IP page is set to “On”, you can set this<br />
item for transmission and reception, and<br />
point-to-point and multipoint connections<br />
individually.<br />
You can select from among 720, W4CIF,<br />
W432P, WCIF, 4CIF, CIF, QCIF and<br />
AUTO.<br />
Video Mode<br />
Allows you to select the compression format<br />
of pictures to be transmitted or received.<br />
When “Individual Settings for<br />
Transmission/Reception” or “Individual<br />
Settings for Point-to-Point/Multipoint” on<br />
the IP page is set to “On”, you can set this<br />
item for transmission and reception, and<br />
point-to-point and multipoint connections<br />
individually.<br />
You can select from among H.261, H.263+,<br />
and H.264.<br />
Video Frame<br />
Allows you to select the number of video<br />
frames during transmission or reception.<br />
Registering Local Information<br />
67<br />
Chapter 2: Registration and Setup for System Administrators
When “Individual Settings for<br />
Transmission/Reception” or “Individual<br />
Settings for Point-to-Point/Multipoint” on<br />
the IP page is set to “On”, you can set this<br />
item for transmission and reception, and<br />
point-to-point and multipoint connections<br />
individually.<br />
15fps: Send CIF format pictures at a<br />
maximum rate of 15 frames per second.<br />
30fps: Send CIF format pictures at a<br />
maximum rate of 30 frames per second.<br />
60fps: Send CIF format pictures at a<br />
maximum rate of 60 frames per second.<br />
AUTO: Switch the number of frames<br />
automatically.<br />
Communication ISDN<br />
The menu is used to set up the<br />
communication mode for an ISDN<br />
connection.<br />
Individual Settings for Point-to-Point/<br />
Multipoint<br />
Allows you to select whether to configure<br />
the ISDN settings for point-to-point and<br />
multipoint connections individually.<br />
Off: Select to configure the ISDN settings<br />
for both connections commonly.<br />
On: Select to configure the ISDN settings<br />
for point-to-point and multipoint<br />
connections individually.<br />
Note<br />
The setting items and page numbers for<br />
“ISDN: Mode” varies according to the setting<br />
of “Individual Settings”.<br />
Communication<br />
ISDN: Mode<br />
ISDN Bandwidth (Dial)<br />
Allows you to select the number of ISDN<br />
lines used for dialing.<br />
When “Individual Settings for Point-to-<br />
Point/Multipoint” on the ISDN page is set to<br />
“On”, you can set this item for point-to-point<br />
and multipoint connections individually.<br />
You can select from among 1B (64K), 2B<br />
(128K), 3B (192K), 4B (256K), 5B (320K),<br />
6B (384K), 8B (512K) and 12B (768K).<br />
68 Registering Local Information<br />
ISDN Bandwidth (Answer)<br />
Allows you to select the number of ISDN<br />
lines used for answering.<br />
You can select from among 1B (64K), 2B<br />
(128K), 3B (192K), 4B (256K), 5B (320K),<br />
6B (384K), 8B (512K) and 12B (768K).<br />
Audio Mode<br />
Allows you to select the compression format<br />
of audio to be sent to a remote party.<br />
You can select from among G.711, G.722,<br />
G.728 and MPEG4 (MPEG4 AAC).<br />
Note<br />
When the remote system does not support the<br />
audio mode selected by the local site, the mode<br />
automatically becomes “G.711”.<br />
Far End Camera Control<br />
Allows you to select whether to enable the<br />
control of each other’s cameras from each<br />
other’s site.<br />
On: Enables the control of each other’s<br />
cameras. Normally, set to “On”.<br />
Off: Disables the control of each other’s<br />
cameras.<br />
H.239<br />
Allows you to select whether to use the<br />
presentation mode based on the H.239<br />
presentation standard.<br />
On: Enables the presentation mode based on<br />
the H.239 presentation standard.<br />
Off: Disables the presentation mode based<br />
on the H.239 presentation standard.<br />
H.239 Ratio<br />
When H.239 presentation transmissions are<br />
made with the system, the H.239<br />
presentation data shares bandwidth with<br />
camera images that are also being sent. This<br />
setting allows you to select how much of the<br />
total bandwidth to use for H.239<br />
presentation data transmissions.<br />
2/3: Use 2/3 of the total bandwidth for H.239<br />
presentation data transmissions.<br />
1/2: Use 1/2 of the total bandwidth for H.239<br />
presentation data transmissions.<br />
1/3: Use 1/3 of the total bandwidth for H.239<br />
presentation data transmissions.
Restrict<br />
Allows you to select the ISDN transmission<br />
rate.<br />
Auto: Select when connecting a remote<br />
party via a normal ISDN line.<br />
56K: Select when connecting a remote party<br />
located in a region or country where the<br />
ISDN transmission rate is 56 Kbps.<br />
Note<br />
The system is set to connect an ISDN line at the<br />
transmission rate of 64 Kbps by default.<br />
However, some countries, such as the USA,<br />
and some regions may use the ISDN<br />
transmission rate of 64 Kbps and 56 Kbps. You<br />
may not communicate with such countries or<br />
regions at 64 Kbps, so you must therefore set<br />
“Restrict” to “56K” before dialing.<br />
Screen Size<br />
Allows you to select the screen size of the<br />
picture to be transmitted or received.<br />
You can select from among W4CIF,<br />
W432P, WCIF, 4CIF, CIF and AUTO.<br />
Video Mode<br />
Allows you to select the compression format<br />
of pictures to be transmitted or received.<br />
You can select from among H.261, H.263+,<br />
and H.264.<br />
Video Frame<br />
Allows you to select the number of video<br />
frames during transmission or reception.<br />
15fps: Send CIF format pictures at a<br />
maximum rate of 15 frames per second.<br />
30fps: Send CIF format pictures at a<br />
maximum rate of 30 frames per second.<br />
AUTO: Switch the number of frames<br />
automatically.<br />
Communication<br />
SIP: Mode<br />
Communication Bit Rate<br />
Allows you to select the communication bit<br />
rate per point<br />
You can select from among 128Kbps,<br />
384Kbps, 512Kbps, 1Mbps, 2Mbps, 3Mbps,<br />
4Mbps, 5Mbps, 6Mbps, 7Mbps, 8Mbps,<br />
9Mbps, 10Mbps and Other.<br />
Audio Mode<br />
Allows you to select the compression format<br />
of audio to be sent to a remote party.<br />
You can select from among G.728, G.722<br />
and G.711.<br />
Note<br />
When the remote system does not support the<br />
audio mode selected by the local site, the mode<br />
automatically becomes “G.711”.<br />
Far End Camera Control<br />
Allows you to select whether to enable the<br />
control of each other’s cameras from each<br />
other’s site.<br />
On: Enables the control of each other’s<br />
cameras. Normally, set to “On”.<br />
Off: Disables the control of each other’s<br />
cameras.<br />
Screen Size<br />
Allows you to select the screen size of the<br />
picture to be transmitted or received.<br />
You can select from among 720, W4CIF,<br />
W432P, WCIF, 4CIF, CIF, QCIF and<br />
AUTO.<br />
Video Mode<br />
Allows you to select the compression format<br />
of pictures to be transmitted or received.<br />
You can select from among H.261, H.263+,<br />
H.264 and MPEG4.<br />
Video Frame<br />
Allows you to select the number of video<br />
frames during transmission or reception.<br />
15fps: Send CIF format pictures at a<br />
maximum rate of 15 frames per second.<br />
30fps: Send CIF format pictures at a<br />
maximum rate of 30 frames per second.<br />
60fps: Send CIF format pictures at a<br />
maximum rate of 60 frames per second.<br />
AUTO: Switch the number of frames<br />
automatically.<br />
Audio Setup Menu<br />
The Audio setup menu is used to set various<br />
audio items.<br />
Registering Local Information<br />
69<br />
Chapter 2: Registration and Setup for System Administrators
Audio1<br />
Basic Setup1<br />
Audio Input<br />
Allows you to select the audio input.<br />
MIC: Inputs audio from the microphone.<br />
AUX: Inputs audio from auxiliary external<br />
equipment.<br />
MIC+AUX: Inputs audio from the<br />
microphone and auxiliary external<br />
equipment.<br />
Note<br />
When “Link to Audio Input” is set to “On” in<br />
the Video setup menu, “Audio Input”, “Input<br />
Select (MIC)” and “Input Select (AUX)”<br />
cannot be selected.<br />
Input Select (MIC)/<br />
Input Select (AUX)<br />
Allows you to select the microphone and/or<br />
external equipment from which an audio<br />
signal is input.<br />
The options that can be selected vary with<br />
the Autio Input setting.<br />
When you select “MIC” from “Audio<br />
Input”, you can select one of the following<br />
four options. When you select “AUX”, you<br />
can select “AUDIO 1” or “AUDIO 2”.<br />
When you select “MIC+AUX”, you can<br />
select two options: one microphone input<br />
from “MIC (A1/A3)”, “EC MIC (A7)”,<br />
“AUDIO 1” or “AUDIO 2”, and one<br />
auxiliary external input from “AUDIO 1” or<br />
“AUDIO 2”.<br />
MIC (A1/A3): Select use of the <strong>PCS</strong>-A1<br />
microphone (supplied with the <strong>PCS</strong>-<br />
<strong>XG80</strong>) or <strong>PCS</strong>A-A3 microphone (not<br />
supplied) connected to the MIC (A1/A3)<br />
jacks on the Communication System.<br />
EC-MIC (A7): Select use of the <strong>PCS</strong>A-A7<br />
echo canceling microphone (not<br />
supplied) connected to the EC-MIC<br />
(A7) jacks on the Communication<br />
System.<br />
AUDIO 1: Select to input the audio of<br />
external equipment connected to the<br />
AUDIO 1 IN jacks on the<br />
Communication System.<br />
AUDIO 2: Select to input the audio of<br />
external equipment connected to the<br />
70 Registering Local Information<br />
AUDIO 2 IN jacks on the<br />
Communication System.<br />
Echo Canceller<br />
Allows you to select whether to use the<br />
internal echo canceller.<br />
On: Enables the internal echo canceller.<br />
Off: Disables the internal echo canceller.<br />
Lip Sync<br />
Allows you to select whether to use the Lip<br />
Sync function.<br />
Auto: Enables the Lip Sync function.<br />
Off: Disables the Lip Sync function.<br />
Notes<br />
When “Adaptive Rate Control (ARC)”,<br />
“Packet Resend Request (ARQ)” or<br />
“Forward Error Correction (FEC)” is set to<br />
“On” in the QoS setup menu, you cannot set<br />
“Lip Sync” to “Off”.<br />
When “Lip Sync” is set to “Off”, you cannot<br />
change the setting for “Adaptive Rate<br />
Control (ARC)”, “Packet Resend Request<br />
(ARQ)” or “Forward Error Correction<br />
(FEC)” in the QoS setup menu.<br />
Recording Mute<br />
When you connect an audio recording<br />
device to the AUDIO 1 IN or AUDIO 2 IN<br />
and REC OUT jacks to record audio, this<br />
function reduces oscillations in sound that<br />
occur due to loop-back within audio<br />
recording device.<br />
Off: Disables the recording mute function.<br />
On: Enables the recording mute function.<br />
Notes<br />
When “Recording Mute” is set to “On”, only<br />
signals from external equipment are affected.<br />
Signals from the microphones or remote sites<br />
are not affected. Therefore, the Recording<br />
Mute functions only when “Audio Input” is<br />
set to “AUX” or “MIC+AUX.”<br />
When connecting an audio recording device<br />
to the AUDIO 1 IN or AUDIO 2 IN and REC<br />
OUT jacks, set “Recording Mute” to “On”<br />
and record the sound only from the audio<br />
recording device. If you want to record the<br />
sound on your site as well, also use the<br />
microphone input.
Input Mode<br />
Allows you to select the input audio mode.<br />
Stereo: Inputs audio to the R/L jacks of the<br />
audio input as stereo left and right<br />
sounds.<br />
Monaural: Inputs audio to the R/L jacks of<br />
the audio input as monaural sound.<br />
Output Mode<br />
Allows you to select the output audio mode.<br />
Stereo: Outputs audio from the AUDIO<br />
OUT R/L or HDMI OUT jacks as stereo<br />
left and right sounds.<br />
Monaural: Outputs audio from the AUDIO<br />
OUT R/L or HDMI OUT jacks as<br />
monaural sound.<br />
Audio2<br />
Basic Setup2<br />
AUX Local Monitor Out<br />
Allows you to select whether the audio input<br />
from the AUDIO 1 IN or AUDIO 2 IN jacks<br />
outputs to the audio output jacks on the<br />
Communication System.<br />
On: Enables output from the audio output.<br />
Off: Disables output from the audio output.<br />
Reversed MIC Inputs<br />
Allows you to select whether to transmit the<br />
audio input from the microphone with right<br />
and left reversed. If you select “On”, you can<br />
match the right and left of the camera image<br />
and audio.<br />
Off: Transmits the audio with right and left<br />
not reversed.<br />
On: Transmits the audio with right and left<br />
reversed.<br />
Audio Input Delay Setting<br />
Allows you to set Audio Input Delay to<br />
synchronize the audio with the video input.<br />
Default –100ms: Selects the default delay<br />
minus 100ms.<br />
Default –50ms: Selects the default delay<br />
minus 50ms.<br />
Default: Selects the default delay.<br />
Default + 50ms: Selects the default delay<br />
plus 50ms.<br />
Default + 100ms: Selects the default delay<br />
plus 100ms.<br />
Custom: Uses the Audio Input Delay you<br />
set.<br />
Audio Input Delay<br />
When you set “Audio Input Delay Setting”<br />
to “Custom”, you can set the delay time of<br />
the input audio to match the image and<br />
audio.<br />
Audio Output Delay Setting<br />
Allows you to set Audio Output Delay to<br />
synchronize the audio with the video output.<br />
Default –100ms: Selects the default delay<br />
minus 100ms.<br />
Default –50ms: Selects the default delay<br />
minus 50ms.<br />
Default: Selects the default delay.<br />
Default + 50ms: Selects the default delay<br />
plus 50ms.<br />
Default + 100ms: Selects the default delay<br />
plus 100ms.<br />
Custom: Uses the Audio Output Delay you<br />
set.<br />
Audio Output Delay<br />
When you set “Audio Output Delay Setting”<br />
to “Custom”, you can set the delay time of<br />
the output audio to match the image and<br />
audio.<br />
REC OUT Mode<br />
Stereo: The mixed sounds of the remote and<br />
local sites are output from the REC OUT<br />
R and L jacks in stereo.<br />
Monaural 2ch: The sounds of the remote<br />
and local sites are output from the REC<br />
OUT R and L jacks separately.<br />
Audio3<br />
Sound Effect<br />
Beep Sound<br />
Allows you to select the volume of the beep<br />
that sounds each time you press a button on<br />
the Remote Commander from among<br />
“Loud”, “Medium” and “Quiet”. You can<br />
also select “Off” for the beep not to sound.<br />
Sound Effect<br />
Allows you to select the volume of output<br />
sound when the system starts, or when<br />
connection starts or is disconnected from<br />
among “Loud”, “Medium” and “Quiet”.<br />
You can also select “Off” for the sound not<br />
to be output.<br />
Registering Local Information<br />
71<br />
Chapter 2: Registration and Setup for System Administrators
Dial Tone<br />
Allows you to select the volume of a ringback<br />
and busy tones when you are dialing<br />
from among “Loud”, “Medium” and<br />
“Quiet”. You can also select “Off” for the<br />
ring-back and busy tones not to be output.<br />
Ringer Tone<br />
Allows you to select the volume of a ring<br />
tone when you receive a call from among<br />
“Loud”, “Medium” and “Quiet”. You can<br />
also select “Off” for the ring tone not to be<br />
output.<br />
Video Setup Menu<br />
The Video setup menu is used to set up video<br />
input/output.<br />
Video1<br />
Basic Setup<br />
Video Input<br />
Allows you to select the video input.<br />
Camera: Selects the camera picture from<br />
the camera connected to the CAMERA<br />
connector.<br />
RGB: Selects the video signal from the<br />
external equipment connected to the<br />
RGB IN connector.<br />
YPbPr: Selects the video signal from the<br />
external equipment connected to the<br />
VIDEO IN YPbPr connector.<br />
S-VIDEO: Selects the video signal from the<br />
external equipment connected to the S<br />
VIDEO IN connector.<br />
Presentation Screen<br />
Allows you to select the display pattern of<br />
the presentation screen.<br />
Full Screen: Displays the computer picture,<br />
etc. from the external equipment<br />
connected to the RGB IN connector in<br />
full screen mode.<br />
PandP: Displays the computer picture, etc.<br />
from the external equipment connected<br />
to the RGB IN connector and the<br />
selected input picuture such as a camera<br />
picture in PandP mode.<br />
Side by Side: Displays the computer<br />
picture, etc. from the external equipment<br />
connected to the RGB IN connector and<br />
72 Registering Local Information<br />
the selected input picture such as a<br />
camera picture in Side by Side mode.<br />
Monitor Output<br />
Allows you to select the video signal output<br />
from the Communication System.<br />
HDMI: Outputs the video signal to the<br />
external equipment connected to the<br />
HDMI OUT connector.<br />
RGB: Outputs the video signal to the<br />
external equipment connected to the<br />
RGB OUT connector.<br />
HDMI+RGB: Outputs the video signal to<br />
the external equipment connected to the<br />
HDMI OUT and RGB OUT connectors.<br />
Notes<br />
If “Monitor Output” is set to “HDMI+RGB”<br />
when no HDMI monitor is connected to the<br />
Communication System, you cannot view<br />
the menus. Before making this setting, be<br />
sure to connect an HDMI monitor.<br />
When you change the setting of “Monitor<br />
Output” to an incorrect setting, no picture is<br />
displayed on the screen. In this case, select<br />
the correct setting for “Monitor Output”<br />
using the ?/1 (power) switch on the<br />
Communication System and the buttons on<br />
the Remote Commander.<br />
When the ?/1 (power) indicator on the<br />
Communication System stays lit, perform<br />
the steps below.<br />
1 Press the ?/1 (power) switch on the<br />
Communication System.<br />
2 Within five seconds after you pressed the<br />
?/1 switch, press the buttons on the<br />
Remote Commander described below<br />
depending on the desired “Monitor<br />
Output”.<br />
HDMI: VIDEO INPUT button (once)<br />
then Number button 3 (three times)<br />
RGB: VIDEO INPUT button (once) then<br />
Number button 4 (three times)<br />
HDMI+RGB: VIDEO INPUT button<br />
(once) then Number button 5 (three<br />
times)<br />
The setting of “Monitor Output” is changed,<br />
and the picture will be displayed on the screen.<br />
RGB Monitor Output Format<br />
Allows you to select the format of the signal<br />
output from the RGB OUT connector.<br />
SXGA: Outputs the SXGA signal.
XGA: Outputs the XGA signal.<br />
WXGA: Outputs the WXGA signal.<br />
Blanking Period<br />
Allows you to select the blackout period that<br />
occurs temporarily when the input picture is<br />
switched when the monitor is connected to<br />
the HDMI OUT connector.<br />
You can select among from Long, Medium<br />
and Short.<br />
Frequency<br />
Allows you to select the frequency of 50 Hz<br />
or 60 Hz for video input/output.<br />
Notes<br />
“Frequency” is set to “60 Hz” at the factory.<br />
Note that video may not be output or the<br />
menu not displayed on the screen when<br />
“Frequency” is set to “50 Hz” if the<br />
connected equipment does not support the<br />
frequency of 50 Hz.<br />
When you change the setting of<br />
“Frequency”, the system will reboot. If you<br />
change it to an incorrect setting, no picture is<br />
displayed on the screen after rebooting. In<br />
this case, select the correct setting for<br />
“Frequency” using the ?/1 (power) switch<br />
on the Communication System and the<br />
buttons on the Remote Commander.<br />
When the ?/1 (power) indicator on the<br />
Communication System blinks then stays lit<br />
after rebooting, perform the steps below.<br />
1 Press the ?/1 (power) switch on the<br />
Communication System.<br />
2 Within five seconds after you pressed the<br />
?/1 switch, press the buttons on the<br />
Remote Commander described below<br />
depending on the desired Frequency.<br />
60 Hz: VIDEO INPUT button (once)<br />
then Number button 1 (three times)<br />
50 Hz: VIDEO INPUT button (once)<br />
then Number button 2 (three times)<br />
The setting of “Frequency” is changed, and the<br />
system will reboot.<br />
Video2 Custom Input<br />
Label<br />
Allows you to set the names of the selected<br />
video inputs using up to 12 characters.<br />
Custom Input Label (Camera)<br />
Selects when “Camera” is selected in<br />
“Video Input”.<br />
Custom Input Label (RGB)<br />
Selects when “RGB” is selected in “Video<br />
Input”.<br />
Custom Input Label (YPbPr)<br />
Selects when “YPbPr” is selected in “Video<br />
Input”.<br />
Custom Input Label (S VIDEO)<br />
Selects when “S VIDEO” is selected in<br />
“Video Input”.<br />
Video3<br />
Link to Mic<br />
Allows you to select whether to link an<br />
audio input to the selected video input.<br />
Link to Audio Input<br />
Allows you to switch the audio input in<br />
conjunction with switching the video input<br />
by linking each video input and a specific<br />
microphone or other audio input.<br />
Off: Switches the video input and the<br />
microphone or other audio input<br />
separately.<br />
On: Links switching of the video input and<br />
the microphone or other audio input.<br />
Note<br />
When “Link to Audio Input” is set to “On”,<br />
“Audio Input”, “Input Select (MIC)” and<br />
“Input Select (AUX)” on the Basic Setup1<br />
page of Audio setup menu cannot be selected.<br />
Video Input<br />
Allows you to select the video input.<br />
Camera: Selects the camera picture from<br />
the camera connected to the CAMERA<br />
connector.<br />
S-VIDEO: Selects the picture from the<br />
external equipment connected to the S<br />
VIDEO IN connector.<br />
RGB: Selects the picture from the external<br />
equipment connected to the RGB IN<br />
connector.<br />
YPbPr: Selects the picture from the external<br />
equipment connected to the YPbPr<br />
jacks.<br />
Registering Local Information<br />
73<br />
Chapter 2: Registration and Setup for System Administrators
Audio Input<br />
Allows you to select the audio input which is<br />
linked to the video input selected in “Video<br />
Input” when “Link to Audio Input” is set to<br />
“On”.<br />
MIC: Inputs audio from the microphone.<br />
AUX: Inputs audio from the external<br />
equipment.<br />
MIC+AUX: Inputs audio both from the<br />
microphone and external equipment.<br />
Input Select (MIC)<br />
Input Select (AUX)<br />
Allows you to select the audio input from the<br />
microphone and/or external equipment<br />
when “Link to Audio Input” is set to “On”.<br />
The options that can be selected vary with<br />
the Audio Input setting.<br />
When you select “MIC” from “Audio<br />
Input”, you can select one of the following<br />
four options. When you select “AUX”, you<br />
can select “AUDIO 1” or “AUDIO 2”.<br />
When you select “MIC+AUX”, you can<br />
select two options: one microphone input<br />
from “MIC (A1/A3)”, “EC MIC (A7)”,<br />
“AUDIO 1” or “AUDIO 2”, and one<br />
auxiliary external input from “AUDIO 1” or<br />
“AUDIO 2”.<br />
MIC (A1/A3): Select use of the <strong>PCS</strong>-A1<br />
microphone (supplied with the <strong>PCS</strong>-<br />
<strong>XG80</strong>) or <strong>PCS</strong>A-A3 microphone (not<br />
supplied) connected to the MIC (A1/A3)<br />
jacks on the Communication System.<br />
EC-MIC (A7): Select use of the <strong>PCS</strong>A-A7<br />
echo canceling microphone (not<br />
supplied) connected to the EC-MIC<br />
(A7) jacks on the Communication<br />
System.<br />
AUDIO 1: Select to input the audio of<br />
external equipment connected to the<br />
AUDIO 1 IN jacks on the<br />
Communication System.<br />
AUDIO 2: Select to input the audio of<br />
external equipment connected to the<br />
AUDIO 2 IN jacks on the<br />
Communication System.<br />
LAN Setup Menu<br />
The LAN setup menu is used to set up LAN<br />
connection.<br />
74 Registering Local Information<br />
For details about the settings, consult your<br />
network administrator.<br />
Note<br />
The contents of the LAN setup menu vary with<br />
the “Use LAN2” setting in the Line Interface<br />
setup menu, or “Internet Protocol” setting in<br />
the Administrator setup menu.<br />
The LAN page number after the LAN2 page<br />
also varies according to the number of setting<br />
items.<br />
LAN<br />
Basic Setup<br />
Host Name<br />
Enter your host name (up to 30 characters).<br />
DHCP Mode<br />
Allows you to select whether the Dynamic<br />
Host Configuration Protocol (DHCP) server<br />
is enabled.<br />
Auto: The IP address, network mask,<br />
gateway address and DNS address are<br />
automatically assigned.<br />
Off: Disables the DHCP server. In this case,<br />
enter an IP address, network mask,<br />
gateway address and DNS address.<br />
Prefix Length<br />
Configure the prefix length of the IPv6<br />
address within the range of 0 to 128.<br />
IP Address<br />
Enter the IP address.<br />
Network Mask<br />
Enter the network mask.<br />
Gateway Address<br />
Enter the default gateway address.<br />
Primary DNS<br />
Enter a primary DNS address.<br />
Secondary DNS<br />
Enter a secondary DNS address.<br />
LAN Mode<br />
Allows you to select the interface type and<br />
the communication mode of the LAN<br />
connection.
Auto: The interface type and the<br />
communication mode are detected<br />
automatically.<br />
100Mbps Full Duplex: Connects via<br />
100BASE-TX in full duplex mode.<br />
100Mbps Half Duplex: Connects via<br />
100BASE-TX in half duplex mode.<br />
10Mbps Full Duplex: Connects via<br />
10BASE-T in full duplex mode.<br />
10Mbps Half Duplex: Connects via<br />
10BASE-T in half duplex mode.<br />
LAN<br />
PPPoE<br />
PPPoE<br />
Allows you to select whether to use PPPoE<br />
for LAN connection.<br />
When using PPPoE, you can use the B<br />
FLET’S* or FLET’S ADSL service without<br />
connecting a router.<br />
Off: Does not use PPPoE.<br />
LAN1: Uses PPPoE for LAN connection<br />
using the 1 (LAN1) connector.<br />
LAN2: Uses PPPoE for LAN connection<br />
using the 2 (LAN2) connector.<br />
Notes<br />
<strong>Operation</strong>s of PPPoE for LAN connection<br />
are presently verified only for the Japanese<br />
NTT B FLET’S and FLET’S ADSL services.<br />
The PPPoE registration status appears at the<br />
bottom of the screen for each page.<br />
* “FLET’S” is a trademark of NTT East and<br />
NTT West Corporations in Japan.<br />
User Alias<br />
Enter a user name when you use PPPoE for<br />
LAN connection.<br />
Password<br />
Enter a password when you use PPPoE for<br />
LAN connection.<br />
Fixed IP for PPPoE<br />
Select whether to make a PPPoE connection<br />
using a fixed IP address.<br />
Off: Does not use a fixed IP address for a<br />
PPPoE connection.<br />
On: Uses a fixed IP address for a PPPoE<br />
connection.<br />
Fixed IP Address for PPPoE<br />
Enter an IP address when “Fixed IP for<br />
PPPoE” is set to “On”.<br />
DNS<br />
Allows you to select whether to obtain DNS<br />
server addresses automatically or to specify<br />
them manually when connecting to a LAN<br />
using PPPoE.<br />
Obtain automatically: Assigns DNS server<br />
addresses automatically.<br />
Specify: Allows you to specify DNS server<br />
addresses.<br />
Primary DNS<br />
Enter a primary DNS address.<br />
Secondary DNS<br />
Enter a secondary DNS address.<br />
LAN<br />
NAT Setup<br />
NAT Mode<br />
Allows you to select whether you connect<br />
the system to a local network using Network<br />
Address Translation (NAT), which allows<br />
one IP address to be shared by several<br />
computers on the same LAN.<br />
Auto: Enables or disables the NAT mode by<br />
automatically detecting the use of NAT.<br />
This option is effective only when you<br />
use the UPnP router.<br />
On: Enables NAT mode.<br />
Off: Disables NAT mode.<br />
WAN IP Address<br />
Enter the IP address for the Wide Area<br />
Network (WAN).<br />
LAN<br />
Gatekeeper<br />
Gatekeeper Mode<br />
Allows you to select whether to use the<br />
gatekeeper to control access to a LAN.<br />
Using the gatekeeper allows you to dial<br />
using the user name or user number as well<br />
as dialing using the IP address.<br />
Auto: Automatically detects the gatekeeper<br />
and uses it.<br />
On: Enables the gatekeeper.<br />
Off: Disables the gatekeeper.<br />
Registering Local Information<br />
75<br />
Chapter 2: Registration and Setup for System Administrators
Gatekeeper Address<br />
Enter the address of the gatekeeper used<br />
when “Gatekeeper Mode” is set to “On”.<br />
User Alias<br />
Enter the user name (H.323 alias) registered<br />
in the gatekeeper.<br />
User Number<br />
Enter the user number (E.164 number)<br />
registered in the gatekeeper.<br />
H.460<br />
Allows you to select whether to use H.460 to<br />
traverse firewalls and connect to the<br />
terminals on other networks.<br />
On: Enables connection that traverses<br />
H.460 standard firewalls.<br />
Off: Disables connection that traverses<br />
firewalls.<br />
LAN Used Port<br />
Number, RTP/RTCP Setup<br />
Q.931<br />
Enter the Q.931 port number.<br />
H.245<br />
Enter the H.245 port number.<br />
RTP/RTCP<br />
Enter the RTP/RTCP port number.<br />
MTU Size<br />
Enter the MTU size.<br />
LAN<br />
SNMP<br />
SNMP Mode<br />
Allows you to select whether the Simple<br />
Network Management Protocol (SNMP)<br />
agent is enabled.<br />
On: Enables the SNMP agent.<br />
Off: Disables the SNMP agent.<br />
Trap Destination<br />
Enter the address of the trap destination<br />
SNMP manager.<br />
76 Registering Local Information<br />
Community<br />
Enter the community name managed by the<br />
SNMP manager (up to 24 characters). By<br />
default, “public” is entered.<br />
Description<br />
Enter the description of this terminal. By<br />
default, “Videoconference Device” is<br />
entered and can not be changed.<br />
Location<br />
Enter the location where this terminal is<br />
installed (up to 30 characters).<br />
Contact<br />
Enter information about the terminal<br />
administrator (up to 30 characters).<br />
QoS Setup Menu<br />
Specifies the functions for providing<br />
optimum consistent communication.<br />
Notes<br />
When “Lip Sync” is set to “Off” in the Audio<br />
setup menu, you cannot change the setting<br />
for “Adaptive Rate Control (ARC)”, “Packet<br />
Resend Request (ARQ)” or “Forward Error<br />
Correction (FEC)”.<br />
When “Adaptive Rate Control (ARC)”,<br />
“Packet Resend Request (ARQ)” or<br />
“Forward Error Correction (FEC)” is set to<br />
“On”, you cannot set “Lip Sync” to “Off” in<br />
the Audio setup menu.<br />
QoS1<br />
Basic Setup<br />
Adaptive Rate Control (ARC)<br />
Allows you to select whether to always<br />
optimize the LAN bandwidth.<br />
On: Always optimizes the LAN bandwidth.<br />
Off: Does not optimize the LAN bandwidth.<br />
Auto Bandwidth Detection<br />
Allows you to select whether you use the<br />
Auto Bandwidth Detection feature.<br />
On: Enables the Auto Bandwidth Detection<br />
feature.<br />
Off: Disables the Auto Bandwidth Detection<br />
feature.
TCP Port Number<br />
Enter the fixed TCP port number.<br />
UDP Port Number<br />
Enter the fixed UDP port number.<br />
For details on the port numbers used on the<br />
system, see “List of Port Numbers Used on<br />
the <strong>PCS</strong>-<strong>XG80</strong>/<strong>XG80</strong>S” on page 246.<br />
Packet Resend Request (ARQ)<br />
Allows you to select whether to request<br />
packet to be resent when packet losses occur<br />
during communication.<br />
On: Requests packets to be resent.<br />
Off: Does not request packets to be resent.<br />
Note<br />
When a multipoint connection is made among<br />
six points with “Packet Resend Request<br />
(ARQ)” set to “On”, the maximum bandwidth<br />
to be used is restricted to 7 Mbps.<br />
ARQ Buffering Time<br />
Set the buffering time used for “Packet<br />
Resend Request”.<br />
You can select from among “300ms”,<br />
“150ms”, “80ms”, “Auto” and “Custom”.<br />
When “Custom” is selected, you can specify<br />
any buffering time.<br />
ARQ Buffering Time<br />
Enter the buffering time (50 ms to 999 ms)<br />
when you select “Custom” in “ARQ<br />
Buffering Time”.<br />
Forward Error Correction (FEC)<br />
Allows you to select whether received<br />
packets are identified with an error<br />
correction mark.<br />
On: Identifies with an error correction mark.<br />
Off: Not identify with an error correction<br />
mark.<br />
Note<br />
When “Forward Error Correction (FEC)” is set<br />
to “On”, the maximum bandwidth to be used is<br />
restricted to 8 Mbps.<br />
FEC Redundancy<br />
Allows you to set redundancy of the packet<br />
used for the Forward Error Correction<br />
(FEC).<br />
You can select from among “8”, “4”, “2” and<br />
“Auto”. When you select “8”, “4” and “2”,<br />
the communication bit rate may be different<br />
from the specified value.<br />
Audio Duplex Transmission<br />
Allows you to select whether to<br />
automatically transmit audio in double when<br />
audio communication is interrupted<br />
depending on a network status.<br />
On: Enables the Audio Duplex<br />
Transmission feature.<br />
Off: Disables the Audio Duplex<br />
Transmission feature.<br />
Re-Order/Shaping<br />
Re-Order<br />
Allows you to select whether to correct reorder<br />
that may cause packet loss (invalid<br />
order of arrival in the packet). Correcting reorder<br />
enables smoother picture and sound.<br />
On: Corrects re-order.<br />
Off: Does not correct re-order.<br />
Re-Order Buffer<br />
Allows you to select re-order buffer.<br />
You can select from among “Auto”, “1”,<br />
“2” and “Custom”.<br />
Re-Order Buffer Rate<br />
Enter the re-order buffer rate. You can enter<br />
the value between 1 and 5.<br />
Shaping<br />
Allows you to select whether to use shaping,<br />
which adjusts the IP packet transfer rate.<br />
On: Uses shaping.<br />
Off: Does not use shaping.<br />
.<br />
QoS2<br />
TOS Setup Menu<br />
TOS<br />
TOS<br />
TOS Data Type<br />
Allows you to select the type of data for<br />
which you configure the TOS (Type of<br />
Service) field.<br />
Video: Configure the TOS field for video<br />
data.<br />
Registering Local Information<br />
77<br />
Chapter 2: Registration and Setup for System Administrators
Audio: Configure the TOS field for audio<br />
data.<br />
Data: Configure the TOS field for camera<br />
control signals, etc.<br />
Presentation: Configure the TOS field for<br />
the RGB presentation data.<br />
TOS<br />
Allows you to select how to define the TOS<br />
(Type of Service) field of the data selected in<br />
“TOS Data Type”.<br />
Off: Does not define the TOS field.<br />
IP Precedence: Defines the TOS field as IP<br />
Precedence.<br />
DSCP: Defines the TOS field as the<br />
Differentiated Services Code Point<br />
(DSCP). Enter the value between 0 and<br />
63.<br />
Precedence<br />
Enter the IP Precedence value between 0 and<br />
7.<br />
Low Delay<br />
Allows you to select whether to specify the<br />
Low Delay bit of the TOS field.<br />
On: Specifies the Low Delay bit of the TOS<br />
field.<br />
Off: Does not specify the Low Delay bit of<br />
the TOS field.<br />
High Throughput<br />
Allows you to select whether to specify the<br />
High Throughput bit of the TOS field.<br />
On: Specifies the High Throughput bit of<br />
the TOS field.<br />
Off: Does not specify the High Throughput<br />
bit of the TOS field.<br />
High Reliability<br />
Allows you to select whether to specify the<br />
High Reliability bit of the TOS field.<br />
On: Specifies the High Reliability bit of the<br />
TOS field.<br />
Off: Does not specify the High Reliability<br />
bit of the TOS field.<br />
Minimum Cost<br />
Allows you to select whether to specify the<br />
Minimum Cost bit of the TOS field.<br />
On: Specifies the Minimum Cost bit of the<br />
TOS field.<br />
78 Registering Local Information<br />
Off: Does not specify the Minimum Cost bit<br />
of the TOS field.<br />
DSCP<br />
Enter the DSCP value. This item only<br />
appears when “TOS” is set to “DSCP”.<br />
SIP Setup Menu<br />
The SIP setup menu is used to connect with<br />
an IP phone, etc. using the SIP (Session<br />
Initiation Protocol).<br />
SIP<br />
Basic Setup<br />
SIP Server Mode<br />
Allows you to select whether you use a SIP<br />
server or not.<br />
On: Enables use of the SIP server.<br />
Off: Disables use of the SIP server.<br />
Transport Protocol<br />
Allows you to select the protocol to be used<br />
for SIP.<br />
TCP: Uses TCP (Transmission Control<br />
Protocol).<br />
UDP: Uses UDP (User Datagram Protocol).<br />
This is the factory default setting.<br />
Port Number<br />
Enter the port number to be used for SIP.<br />
SIP Domain<br />
Enter the SIP domain name.<br />
Registered User Name<br />
Enter the user name for the terminal to be<br />
registered to the SIP server (up to 39<br />
characters).<br />
Password<br />
Set the password for the terminal to be<br />
registered to the SIP server (up to 39<br />
characters).<br />
SIP Server Address<br />
Enter the address of the SIP server.<br />
SIP Server Port<br />
Enter the port number used for<br />
communication with the SIP server.
ISDN Setup Menu<br />
The ISDN setup menu is used to set up ISDN<br />
lines.<br />
ISDN1<br />
Basic Setup<br />
Country/Region<br />
Allows you to select the country or region<br />
where you are using the Communication<br />
System.<br />
Protocol<br />
Allows you to select the protocol of the<br />
ISDN lines to be used. You can select<br />
National ISDN, Japan (NTT), Euro ISDN,<br />
Euro ISDN (France), 5ESS (P-P), or DMS-<br />
100, depending on the interface that you are<br />
using.<br />
For customers in the USA and Canada, see<br />
“SPID Settings for Customers in the USA<br />
and Canada” on page 79.<br />
ISDN2 Telephone<br />
Number<br />
Enter the area code and local number in the<br />
text boxes corresponding to the port<br />
numbers on the ISDN unit.<br />
The text boxes correspond to the port<br />
numbers on the ISDN unit in the following<br />
way.<br />
A1: Port 1 on the ISDN unit.<br />
A2: Port 1 on the ISDN unit.<br />
B1: Port 2 on the ISDN unit.<br />
B2: Port 2 on the ISDN unit.<br />
C1: Port 3 on the ISDN unit.<br />
C2: Port 3 on the ISDN unit.<br />
Area Code<br />
Enter the area code of the ISDN line to be<br />
used. Do not enter the first 0 of the area code.<br />
Local Number<br />
Enter the line number (local number) of the<br />
ISDN line to be used.<br />
Notes<br />
When you select an empty field and then<br />
press the ENTER button of the Remote<br />
Commander, the setting of the previous field<br />
is copied into the selected field.<br />
When using the <strong>PCS</strong>A-B768S ISDN Unit,<br />
selecting the ISDN3 button displays the D1<br />
to F2 text boxes. Fill in the D1 to F2 text<br />
boxes according to the lines that you are<br />
using.<br />
ISDN4 Sub Address<br />
The A1 to C2 (or A1 to F2) fields appear.<br />
Sub Address<br />
Enter sub-addresses when registering them.<br />
Sub-addresses can only be composed of<br />
numbers.<br />
ISDN5<br />
SPID<br />
The SPID (Service Profile Identifier) pages<br />
are used only for customers in the USA and<br />
Canada.<br />
For details, see “SPID Settings for<br />
Customers in the USA and Canada” on page<br />
79.<br />
SPID<br />
The A1 to C2 (or A1 to F2) fields appear.<br />
Enter SPID (Service Profile Identifier).<br />
Auto SPID<br />
When you select “Auto SPID”, you can<br />
automatically set up the Area Code and<br />
Local Number on the Telephone Number<br />
page and SPID items.<br />
SPID Settings for Customers<br />
in the USA and Canada<br />
If you connect to an ISDN switch type,<br />
configuration of SPID (Service Profile<br />
Identifier) is required.<br />
If “Auto SPID” is not available in your area,<br />
set up SPID manually using the ISDN setup<br />
menu.<br />
1 Open the Basic Setup page of the<br />
ISDN setup menu.<br />
Registering Local Information<br />
79<br />
Chapter 2: Registration and Setup for System Administrators
2 Enter the country code in the Country/<br />
Region Code text box depending on<br />
the network switch type you are using.<br />
AT&T 5ESS (National ISDN), NTI<br />
DMS-100 (National ISDN): Enter “1”.<br />
AT&T 5ESS (Point-to-Point Custom<br />
ISDN): Enter “1*12”.<br />
NTI DMS-100 (Custom ISDN): Enter<br />
“1*11”.<br />
3 Open the Telephone Number page to<br />
enter the LDN (Local Directory<br />
Number) in the Local Number text<br />
boxes.<br />
When you use the AT&T 5ESS<br />
(Point-to-Point Custom ISDN)<br />
switch type<br />
Enter the same LDNs in the A1 and<br />
A2 (B1 and B2, C1 and C2, depending<br />
on the number of lines you use) text<br />
boxes.<br />
When you use the NTI DMS-100<br />
(National ISDN) or NTI DMS-100<br />
(Custom ISDN) switch type<br />
Enter the different LDNs in the A1<br />
and A2 (B1 and B2, C1 and C2,<br />
depending on the number of lines you<br />
use) text boxes. These switch types are<br />
given a separate number for each<br />
channel.<br />
When you use the AT&T 5ESS<br />
(National ISDN) switch type<br />
You may enter the same or different<br />
numbers in two channels.<br />
4 Open the SPID page (ID page) to enter<br />
the SPID.<br />
The SPID is generally comprised of 12<br />
digits, including a 7 digit LDN (Local<br />
Directory Number). Be sure to enter the<br />
different SPID number in each of the<br />
A1 and A2 (B1 and B2, C1 and C2,<br />
depending on the number of lines you<br />
use) text boxes if you have entered the<br />
separate LDNs in the Local Number<br />
text boxes for each channel in step 3.<br />
80 Registering Local Information<br />
For the AT&T 5ESS (National<br />
ISDN) switch type<br />
Enter the SPID in the A1 text box<br />
only.<br />
For the NTI DMS-100 (National<br />
ISDN), NTI DMS-100 (Custom<br />
ISDN), AT&T 5ESS (National ISDN)<br />
switch type<br />
Enter the different SPID numbers in<br />
the A1 and A2 text boxes.<br />
For the AT&T 5ESS (Point-to-Point<br />
Custom ISDN) switch type<br />
You do not need to set up the SPID,<br />
then no entry in the A1 and A2 (B1<br />
and B2, C1 and C2, depending on the<br />
number of lines you use) is required.<br />
5 After the settings are completed,<br />
select “Save”, then press the ENTER<br />
button.<br />
Annotation Setup Menu<br />
The Annotation setup menu is used for the<br />
annotation function allowing you to write<br />
letters or graphics on the screen using a pen<br />
tablet.<br />
Annotation<br />
Annotation<br />
Enable<br />
Allows you to select whether the annotation<br />
function is enabled.<br />
On: Enables the annotation function.<br />
Off: Disables the annotation function.<br />
Color<br />
Allows you to select the color of the letters<br />
or graphics written on the screen with a pen<br />
tablet.<br />
You can select from among “Black”, “Red”,<br />
“Blue”, “Green”, “Yellow”, “Orange”,<br />
“Purple” and “White”.<br />
Line Density<br />
Allows you to select the density of the line<br />
written on the screen with a pen tablet.<br />
You can select from among “Thick”,<br />
“Medium” and “Thin”.
Camera Setup Menu<br />
Camera<br />
Camera<br />
Fade In<br />
Allows you to select whether to use the fadein<br />
function when the camera moves to the<br />
preset position. The picture in the preset<br />
position fades in on a monitor screen.<br />
On: Enables the fade-in function.<br />
Off: Disables the fade-in function.<br />
Second Camera Input<br />
Allows you to select the input connector on<br />
the Communication System to which the<br />
second camera is connected.<br />
RGB: Connects the second camera to the<br />
RGB IN connector.<br />
YPbPr: Connects the second camera to the<br />
VIDEO IN YPbPr jacks.<br />
S-VIDEO: Connects the second camera to<br />
the S VIDEO IN connector.<br />
General Setup Menu<br />
General1<br />
Device Setup<br />
Terminal Name<br />
Input the local terminal name transmitted to<br />
a remote party (up to 30 characters).<br />
Standby Mode<br />
Allows you to select whether the<br />
Communication System enters standby<br />
mode if it is idle for a specified period of<br />
time.<br />
On: Allows the System to go on standby.<br />
Off: Does not allow the System to go on<br />
standby.<br />
Standby Time<br />
Specify the time the system must remain idle<br />
before entering the standby mode. This time<br />
can be set between 1 and 99 minutes.<br />
For details on the standby mode, see<br />
“Standby Mode Function” on page 41.<br />
Last Number Registration<br />
Allows you to select whether to register the<br />
remote party in the Phone Book after the<br />
communication ends.<br />
Off: The registration of the remote party<br />
does not take place.<br />
On: If the remote party is not registered in<br />
the Phone Book, the message “Register<br />
this participant in the list?” appears on<br />
the monitor screen when communication<br />
ends. When you select “OK”, the List<br />
Edit menu opens.<br />
Control by Far End<br />
When “Far End Camera Control” is set to<br />
“On” in the Communication setup menu,<br />
you can temporarily reject the camera<br />
control command transmitted by the remote<br />
party.<br />
On: Accepts the camera control command.<br />
Off: Rejects the camera control command.<br />
Language<br />
Allows you to select the menu and display<br />
language used by the system. You can select<br />
from the following languages: English,<br />
French, German, Japanese, Spanish, Italian,<br />
Simplified Chinese, Portuguese, Traditional<br />
Chinese, Korean, Dutch, Danish, Swedish,<br />
Finnish, Polish, Russian, Arabic, Thai,<br />
Norwegian, Turkish, Welsh, Czech and<br />
Hungarian.<br />
System LED Brightness<br />
Allows you to select the LED brightness<br />
level of the Communication System.<br />
You can select from among “Bright”, “Off”<br />
and “Dark”.<br />
Camera LED Brightness<br />
Allows you to select the LED brightness<br />
level of the <strong>PCS</strong>A-C<strong>XG80</strong> HD Camera Unit<br />
connected.<br />
You can select from among “Bright”, “Off”<br />
and “Dark”.<br />
RF Remote Control Reception<br />
Allows you to select the receiver of the RF<br />
signal from the supplied <strong>PCS</strong>-RF1 Remote<br />
Commander.<br />
System: Receives the RF signal with the<br />
receiver on the Communication System.<br />
Registering Local Information<br />
81<br />
Chapter 2: Registration and Setup for System Administrators
Camera: Receives the RF signal with the<br />
receiver on the <strong>PCS</strong>A-C<strong>XG80</strong> HD<br />
Camera Unit.<br />
General2<br />
Clock Set<br />
NTP<br />
Allows you to select whether to obtain clock<br />
information from the server with NTP.<br />
On: Obtains clock information from the<br />
server.<br />
Off: Does not obtain clock information from<br />
the server.<br />
Primary NTP Server<br />
Enter the address of the primary NTP server<br />
from which the clock information is<br />
obtained.<br />
Secondary NTP Server<br />
Enter the address of the secondary NTP<br />
server from which the clock information is<br />
obtained.<br />
Time Zone<br />
Allows you to select the country or region<br />
where you are using the Communication<br />
System.<br />
Clock Display Pattern<br />
Allows you to select the display pattern of<br />
the clock.<br />
You can select from among “Year/Month/<br />
Day”, “Month/Day/Year”, “Day/Month/<br />
Year”, “Year-Month-Day” and<br />
“Day.Month.Year”.<br />
Date<br />
Enter the current date (year/month/day).<br />
Time<br />
Set the current clock.<br />
Time Update<br />
Selecting “Execute” and pressing the<br />
ENTER button on the Remote Commander<br />
updates the clock setting when “NTP” is set<br />
to “On”.<br />
82 Registering Local Information<br />
General3<br />
Menu Screens<br />
Allows you to select whether to display the<br />
items of the Tools and Setup menus.<br />
Display Time in Communication<br />
Off: Displays neither the elapsed nor current<br />
time during communication.<br />
Time Display: Displays the elapsed time<br />
during communication.<br />
Current Time: Displays the current time<br />
during communication.<br />
Display Terminal Name<br />
Off: Does not display the connected<br />
terminal names.<br />
Always show: Always displays the<br />
connected terminal names.<br />
Show temporarily: Displays the connected<br />
terminal names for a brief moment.<br />
Guide<br />
On: Displays the instruction that guides the<br />
operation.<br />
Off: Does not display the instructions.<br />
Display Indicator<br />
On: Displays the indicators such as<br />
“Memory Stick” and tablet.<br />
Off: Does not display the indicators.<br />
Communication Mode Display<br />
On: Displays the communication mode<br />
when the system is connected to the<br />
remote site.<br />
Off: Does not display the communication<br />
mode when the system is connected to<br />
the remote site.<br />
Display On-Screen Keyboard<br />
On: Displays the on-screen keyboard.<br />
Off: Does not display the on-screen<br />
keyboard.<br />
For details on the on-screen keyboard, see<br />
“Entering Characters Using the On-Screen<br />
Keyboard” on page 58.<br />
Menu Transparency<br />
Allows you to select the degree of<br />
transparency of the superimposed menu<br />
display over the background picture. You
can select from among “High”, “Medium”<br />
and “Low”.<br />
General4 Function Keys in<br />
Communication<br />
Allows you to switch the picture with one<br />
press of a button on the Remote<br />
Commander.<br />
You can set the function to be assigned to<br />
each of the F1 to F4 (function) buttons.<br />
Note<br />
You cannot set “Function Keys in<br />
Communication” during communication. Set<br />
this item before starting communication.<br />
F1<br />
Allows you to select the video input<br />
switched by pressing the F1 button on the<br />
Remote Commander. You can select from<br />
among “Far/Near”, “Camera”, “S-VIDEO”,<br />
“RGB”, “YPbPr” and “No <strong>Operation</strong>”.<br />
This item is preset to “Far/Near” at the<br />
factory. This setting allows you to switch the<br />
cameras to be controlled between the local<br />
and remote sites during communication by<br />
pressing the F1 button on the Remote<br />
Commander.<br />
Note<br />
Even if “F1” is set to any option other than<br />
“Far/Near”, “F1” is fixed to “Far/Near”<br />
while the Video Input or Layout menu is<br />
displayed on the screen. In some other cases,<br />
the function of the F1 to F4 buttons may be<br />
fixed regardless of the setting for practical<br />
convenience, in which case the functions of<br />
the button are shown in the instruction<br />
display.<br />
F2<br />
Allows you to select the video input<br />
switched by pressing the F2 button on the<br />
Remote Commander. You can select from<br />
among “Camera”, “S-VIDEO”, “RGB”,<br />
“YPbPr” and “No <strong>Operation</strong>”.<br />
F3<br />
Allows you to select the video input<br />
switched by pressing the F3 button on the<br />
Remote Commander. You can select from<br />
among “Camera”, “S-VIDEO”, “RGB”,<br />
“YPbPr”, “Zoom (RGB)” and “No<br />
<strong>Operation</strong>”.<br />
When “Zoom (RGB)” is selected, a 4:3<br />
aspect ratio picture will be enlarged.<br />
F4<br />
Allows you to select the video input<br />
switched by pressing the F4 button on the<br />
Remote Commander. You can select from<br />
among “Camera”, “S-VIDEO”, “RGB”,<br />
“YPbPr” and “No <strong>Operation</strong>”.<br />
Home Menu Setup Menu<br />
Home Menu1<br />
Home Menu1<br />
Allows you to select the items that show or<br />
hide in/from the Home menu.<br />
Note<br />
Some items may not be set during<br />
communication.<br />
Clock Display<br />
On: Allows display of the current time in the<br />
Home menu.<br />
Off: Does not display the current time.<br />
Local Terminal Name<br />
On: Displays the local terminal name in the<br />
Home menu.<br />
Off: Does not display the local terminal<br />
name.<br />
Number Display<br />
Allows you to select the identification of the<br />
local system, such as the IP address and user<br />
name, to be displayed in the Home menu.<br />
SIP:User Name: Displays the user name<br />
registered in the SIP server.<br />
SIP:Address: Displays the SIP address.<br />
GK:User Alias: Displays the user name<br />
registered in the gatekeeper when you<br />
use the gatekeeper.<br />
GK:User Number: Displays the user<br />
number registered in the gatekeeper<br />
when you use the gatekeeper.<br />
NAT:Address: Displays the NAT address<br />
when you connect the system to a<br />
network using NAT.<br />
Registering Local Information<br />
83<br />
Chapter 2: Registration and Setup for System Administrators
IP: Address: Displays the IP address.<br />
No display: Does not display any<br />
identification, such as the IP and user<br />
name, for the system.<br />
Terminal Status<br />
On: Displays the local terminal status in the<br />
Home menu.<br />
Off: Does not display the local terminal<br />
status.<br />
Warning Messages<br />
On: Displays a warning message in the<br />
Home menu when an abnormality<br />
occurs.<br />
Off: Does not display a warning message.<br />
Home Menu2<br />
Home Menu2<br />
Allows you to select whether to display the<br />
menu buttons in the Home menu.<br />
Connect Button Display<br />
Select the buttons for connection to be<br />
displayed in the Home menu.<br />
Simple: Displays “Connect” button only.<br />
Individual: Selects whether to display<br />
“Phone Book”, “History” or “Detailed<br />
Dial” depending on the setting of each<br />
button.<br />
Off: Does not display the buttons for<br />
connection.<br />
Phone Book Button<br />
On: Displays “Phone Book”.<br />
Off: Does not display “Phone Book”.<br />
History Button<br />
On: Displays “History”.<br />
Off: Does not display “History”.<br />
Detailed Dial Button<br />
On: Displays “Detailed Dial”.<br />
Off: Does not display “Detailed Dial”.<br />
Camera Button<br />
On: Displays “Camera”.<br />
Off: Does not display “Camera”.<br />
Tools Button<br />
Off: Does not display “Tools”.<br />
On: Displays “Tools”.<br />
84 Registering Local Information<br />
One-Touch Dial<br />
On: Displays the one-touch dial buttons.<br />
Off: Does not display the one-touch dial<br />
buttons.<br />
Direct Dial<br />
Off: Does not display “Dial” and the text<br />
box for direct dialing.<br />
On: Displays “Dial” and the text box for<br />
direct dialing.<br />
Home Menu3<br />
Home Menu3<br />
Allows you to select whether to display the<br />
indicators (status information) in the Home<br />
menu.<br />
Video Input Display<br />
On: Displays the current video input name.<br />
Off: Does not display the current video input<br />
name.<br />
Audio Input Display<br />
On: Displays the current audio input.<br />
Off: Does not display the current audio<br />
input.<br />
Audio Level Meter<br />
On: Displays the current audio input level.<br />
Off: Does not display the current audio input<br />
level.<br />
Volume<br />
On: Displays the volume meter for a certain<br />
duration when the volume is adjusted.<br />
Off: Does not display the volume meter.<br />
LAN Status<br />
On: Displays the current status of LAN<br />
connection.<br />
Off: Does not display the current status of<br />
LAN connection.<br />
ISDN Status<br />
On: Displays the currently used ISDN unit<br />
port.<br />
Off: Does not display the currently used<br />
ISDN unit port.
Administrator Setup Menu<br />
The Administrator setup menu is used for<br />
the system administrators. If you have set<br />
the password for each menu, you need to<br />
enter it when accessing the setup menus or<br />
Phone Book to change the items. Entering<br />
the password is also required to access the<br />
Administrator setup menu.<br />
Administrator1<br />
Password<br />
Administrator Password<br />
Set the system administrator password (up to<br />
8 characters). This allows the system<br />
administrator to modify the Setup and Phone<br />
Book items.<br />
Notes<br />
Be aware that setting other passwords but<br />
leaving “Administrator Password” blank<br />
allows for modification and connection<br />
without password input.<br />
Make sure to write down “Administrator<br />
Password”. If you should forget<br />
“Administrator Password”, consult your<br />
<strong>Sony</strong> dealer. In this case, the memory of the<br />
Communication System is initialized before<br />
repair, and the data in the Phone Book and<br />
History lists, as well as various setting data,<br />
are erased.<br />
Phone Book Modification Password<br />
Set the password used to modify the Phone<br />
Book (up to 8 characters).<br />
Save Settings Password<br />
Set the password used to save settings (up to<br />
8 characters).<br />
Remote Access Password<br />
Set the password to access the system<br />
through a Web browser (up to 8 characters).<br />
Streaming Broadcast Password<br />
Set the password used when a remote party<br />
receives streaming video and audio<br />
broadcast by the local party (up to 8<br />
characters).<br />
Administrator2<br />
Setup Password1<br />
Allows you to select whether to require<br />
“Save Settings Password” when saving each<br />
setting.<br />
Line Interface<br />
Enabled: Requires “Save Settings<br />
Password” when saving the Line<br />
Interface settings.<br />
Disabled: Does not require the password<br />
when saving the Line Interface settings.<br />
Dial<br />
Enabled: Requires “Save Settings<br />
Password” when saving the Dial setup<br />
settings.<br />
Disabled: Does not require the password<br />
when saving the Dial setup settings.<br />
Answer<br />
Enabled: Requires “Save Settings<br />
Password” when saving the Answer<br />
setup settings.<br />
Disabled: Does not require the password<br />
when saving the Answer setup settings.<br />
Multipoint<br />
Enabled: Requires “Save Settings<br />
Password” when saving the Multipoint<br />
settings.<br />
Disabled: Does not require the password<br />
when saving the Multipoint settings.<br />
IP Mode<br />
Enabled: Requires “Save Settings<br />
Password” when saving the IP Mode<br />
settings.<br />
Disabled: Does not require the password<br />
when saving the IP Mode settings.<br />
SIP Mode<br />
Enabled: Requires “Save Settings<br />
Password” when saving the SIP Mode<br />
settings.<br />
Disabled: Does not require the password<br />
when saving the SIP Mode settings.<br />
ISDN Mode<br />
Enabled: Requires “Save Settings<br />
Password” when saving the ISDN Mode<br />
settings.<br />
Registering Local Information<br />
85<br />
Chapter 2: Registration and Setup for System Administrators
Disabled: Does not require the password<br />
when saving the ISDN Mode settings.<br />
Audio<br />
Enabled: Requires “Save Settings<br />
Password” when saving the Audio setup<br />
settings.<br />
Disabled: Does not require the password<br />
when saving the Audio setup settings.<br />
Video<br />
Enabled: Requires “Save Settings<br />
Password” when saving the Video setup<br />
settings.<br />
Disabled: Does not require the password<br />
when saving the Video setup settings.<br />
LAN<br />
Enabled: Requires “Save Settings<br />
Password” when saving the LAN setup<br />
settings.<br />
Disabled: Does not require the password<br />
when saving the LAN setup settings.<br />
QoS<br />
Enabled: Requires “Save Settings<br />
Password” when saving the QoS setup<br />
settings.<br />
Disabled: Does not require the password<br />
when saving the QoS setup settings.<br />
TOS<br />
Enabled: Requires “Save Settings<br />
Password” when saving the TOS setup<br />
settings.<br />
Disabled: Does not require the password<br />
when saving the TOS setup settings.<br />
SIP<br />
Enabled: Requires “Save Settings<br />
Password” when saving the SIP setup<br />
settings.<br />
Disabled: Does not require the password<br />
when saving the SIP setup settings.<br />
ISDN<br />
Enabled: Requires “Save Settings<br />
Password” when saving the ISDN setup<br />
settings.<br />
86 Registering Local Information<br />
Disabled: Does not require the password<br />
when saving the ISDN setup settings.<br />
Administrator3 Setup Password2<br />
Administrator4<br />
Setup Password3<br />
General<br />
Enabled: Requires “Save Settings<br />
Password” when saving the General<br />
setup settings.<br />
Disabled: Does not require the password<br />
when saving the General setup settings.<br />
Home Menu<br />
Enabled: Requires “Save Settings<br />
Password” when saving the Home Menu<br />
setup settings.<br />
Disabled: Does not require the password<br />
when saving the Home Menu setup<br />
settings.<br />
Administrator<br />
Enabled: Requires “Save Settings<br />
Password” when saving the<br />
Administrator setup settings.<br />
Disabled: Does not require the password<br />
when saving the Administrator setup<br />
settings.<br />
Annotation<br />
Enabled: Requires “Save Settings<br />
Password” when saving the Annotation<br />
setup settings.<br />
Disabled: Does not require the password<br />
when saving the Annotation setup<br />
settings.<br />
Camera<br />
Enabled: Requires “Save Settings<br />
Password” when saving the Camera<br />
setup settings.<br />
Disabled: Does not require the password<br />
when saving the Camera setup settings.<br />
Encryption<br />
Enabled: Requires “Save Settings<br />
Password” when saving the Encryption<br />
setup settings.<br />
Disabled: Does not require the password<br />
when saving the Encryption setup<br />
settings.
Shared Phone Book<br />
Enabled: Requires “Save Settings<br />
Password” when saving the Shared<br />
Phone Book settings.<br />
Disabled: Does not require the password<br />
when saving the Shared Phone Book<br />
settings.<br />
Administrator5<br />
Recording<br />
Streaming/<br />
Streaming<br />
Select whether to enable the streaming<br />
broadcast.<br />
Enabled: Permits the streaming broadcast.<br />
Disabled: Does not permit the streaming<br />
broadcast of a videoconference.<br />
Recording<br />
Select whether to enable the recording of<br />
video and audio to a “Memory Stick.”<br />
Enabled: Permits the recording.<br />
Disabled: Does not permit the recording.<br />
Video<br />
Select a bit rate for streaming and recording<br />
video.<br />
Off: Disables the streaming and recording of<br />
video.<br />
64Kbps: Streams and records video at<br />
64 Kbps.<br />
128Kbps: Streams and records video at<br />
128 Kbps.<br />
384Kbps: Streams and records video at<br />
384 Kbps.<br />
512Kbps: Streams and records video at<br />
512 Kbps.<br />
Note<br />
When “Off” is selected, only audio can be<br />
streamed and recorded.<br />
Multicast Address<br />
Enter the multicast address for streaming<br />
broadcasts.<br />
Note<br />
You can enter the unicast address in this menu.<br />
If you set the unicast address, enter two or more<br />
different numbers in “Audio Port Number” and<br />
“Video Port Number” for streaming<br />
broadcasts.<br />
Audio Port Number<br />
Enter the audio port number for streaming<br />
broadcasts.<br />
Video Port Number<br />
Enter the video port number for streaming<br />
broadcasts.<br />
HOP<br />
Enter a number from 0 to 255 as the HOP for<br />
streaming broadcasts.<br />
Administrator6<br />
Access Permit<br />
Web Monitor<br />
Allows you to permit the monitoring<br />
communication status through a Web<br />
browser (automatic update of JPEG images).<br />
On: Permits monitoring with a Web<br />
browser.<br />
Off: Does not permit monitoring with a Web<br />
browser.<br />
Web Access<br />
Select whether to permit access to the<br />
Communication System via a Web browser.<br />
Enabled: Permits access via a Web browser.<br />
Disabled: Prohibits access via a Web<br />
browser.<br />
Telnet Access<br />
Select whether to permit access to the<br />
Communication System via Telnet.<br />
Enabled: Permits access via Telnet.<br />
Disabled: Prohibits access via Telnet.<br />
SSH Access<br />
Allows you to select whether to permit<br />
access to the Communication System via<br />
SSH (Secure Shell).<br />
Enabled: Permits access via SSH.<br />
Disabled: Prohibits acces via SSH<br />
Image Flip for First Camera<br />
Allows you to select whether to rotate the<br />
camera image 180 degrees when the first<br />
camera is installed on a ceiling.<br />
Flip Vertical: Rotates the image 180<br />
degrees.<br />
Off: Does not rotate the image 180 degrees.<br />
Registering Local Information<br />
87<br />
Chapter 2: Registration and Setup for System Administrators
Image Flip for Second Camera<br />
Allows you to select whether to rotate the<br />
camera image 180 degrees when the second<br />
camera is installed on a ceiling.<br />
Flip Vertical: Rotates the image 180<br />
degrees.<br />
Off: Does not rotate the image 180 degrees.<br />
Notes<br />
The “Image Flip” function will be enabled<br />
after system rebooting.<br />
The “Image Flip” function cannot be used<br />
with the <strong>PCS</strong>A-C<strong>XG80</strong> HD Camera Unit.<br />
Administrator7<br />
Other<br />
Use History<br />
Select whether to display the history lists in<br />
order to use for dialing, etc.<br />
On: Displays the history lists.<br />
Off: Does not display the history lists.<br />
Save Setup<br />
Saves the data for each setting to a “Memory<br />
Stick”. The data for each setting saved on the<br />
“Memory Stick” is overwritten.<br />
Note<br />
Phone Book and History data are not saved.<br />
Load Setup<br />
Loads the data for each setting from a<br />
“Memory Stick”. The data for each setting<br />
saved on the System is overwritten.<br />
Note<br />
When saving and loading settings, make sure<br />
that the version of the system from which the<br />
data was originally saved is the same as the<br />
version of the local system. If the versions<br />
differ, the data may not be properly recognized.<br />
AMX Device Discovery<br />
Select whether to export AMX Device<br />
Discovery information onto the network.<br />
Off: Disables this function.<br />
On: Enables this function.<br />
When the AMX system is connected to the<br />
Communication System via serial<br />
connection, AMX Device Discovery<br />
information is output via that serial<br />
connection.<br />
88 Registering Local Information<br />
AMX systems are external control devices<br />
that can be used to control the<br />
Communication System. When the AMX<br />
system receives Device Discovery<br />
information from the Communication<br />
System, the System automatically falls<br />
under the control of the AMX system.<br />
HOP<br />
Enter a number from 0 to 255 as the HOP<br />
Display Terminal Name.<br />
1080i Mode<br />
Allows you to select whether to transmit or<br />
receive the picture in 1080i mode.<br />
Transmission and reception of the picture in<br />
1080i mode is available only for connection<br />
via LAN.<br />
You can connect to a remote party in 1080i<br />
mode only by using the button in the Home<br />
menu.<br />
Off: Does not use 1080i video format.<br />
On: Uses 1080i video format. When set to<br />
“On”, the system reboots automatically.<br />
Notes<br />
The 1080i Mode is not available for S video<br />
or RGB input signal.<br />
When “1080i Mode” is set to “On”, a remote<br />
party must enable communication in 1080i<br />
video format.<br />
When “1080i Mode” is set to “On”,<br />
presentation and PinP, PandP and Side by<br />
Side displays are not available.<br />
When “1080i Mode” is set to “On”, the<br />
Annotation function is not available.<br />
When “1080i Mode” is set to “On”, the Web<br />
Access function is not available even if<br />
“Web Access” is set to “Enabled” in the<br />
Administrator setup menu.<br />
Auto Restore<br />
Allows you to select whether to<br />
automatically turn on the Communication<br />
System if an power interruption occurs and<br />
is then restored.<br />
On: Enables the Auto Restore function.<br />
Off: Disables the Auto Restore function.<br />
Internet Protocol<br />
IPv4: Uses the internet protocol version 4<br />
(IPv4) that is commonly used.
IPv6: Uses the next-generation internet<br />
protocol version 6 (IPv6).<br />
Notes<br />
The setting of “Internet Protocol” is common<br />
to both LAN1 and LAN2.<br />
When “Internet Protocol” is set to “IPv6”,<br />
some of the functions of this system are<br />
restricted, and some of the Administrator<br />
setup menu are not displayed.<br />
For details, see “Restrictions on the Use<br />
of IPv6” on page 96.<br />
Administrator8<br />
Phone Book<br />
Save Phone Book<br />
Allows you to save the data in the Phone<br />
Book on a “Memory Stick”. The data<br />
already stored on the “Memory Stick” is<br />
overwritten.<br />
Load Phone Book<br />
Allows you to load the data in the Phone<br />
Book from a “Memory Stick.” The data<br />
already stored in the Phone Book is<br />
overwritten.<br />
Note<br />
When loading Phone Book data, make sure that<br />
the version of the system from which the data<br />
was originally saved is the same as the version<br />
of the local system. If the versions differ, the<br />
data may not be properly recognized.<br />
Clear Phone Book<br />
Allows you to delete a Phone Book on the<br />
system.<br />
Auto Dialing<br />
Allows you to select whether to<br />
automatically dial a specified remote party<br />
in the Private Phone Book created in a<br />
“Memory Stick”, when the “Memory Stick”<br />
is inserted.<br />
On: Enables the Auto Dialing function.<br />
Off: Disables the Auto Dialing function.<br />
For details, see “To dial a specified remote<br />
party in a Private Phone Book<br />
automatically” on page 128.<br />
Create Private Phone Book<br />
Allows you to create an empty folder and<br />
file for a Private Phone Book on a “Memory<br />
Stick” inserted into the system.<br />
For details, see “Creating a Private Phone<br />
Book” on page 126.<br />
Delete Private Phone Book<br />
Allows you to delete the Private Phone Book<br />
on a “Memory Stick” inserted into the<br />
system.<br />
Copy to Private Phone Book<br />
Allows you to copy the entire contents of the<br />
Phone Book to a Private Phone Book on a<br />
“Memory Stick” inserted into the system.<br />
Encryption Setup Menu<br />
The Encryption setup menu is used to<br />
connect to a remote party using the<br />
encryption function.<br />
The encryption function allows you to hold<br />
a strictly confidential connection.<br />
For details on an encrypted connection, see<br />
Chapter 5.<br />
Note<br />
When an encrypted connection is made, the<br />
maximum bandwidth to be used is restricted to<br />
6 Mbps.<br />
Encryption<br />
Encryption<br />
Encryption Mode<br />
Select whether you use the encryption<br />
feature.<br />
Off: Disables use of the encryption feature.<br />
Connect Priority: Connects with the<br />
encryption feature to a remote party with<br />
standard encrypted connection enabled.<br />
Connects without the encryption feature<br />
to a remote party with standard<br />
encrypted connection disabled or with<br />
the encryption feature set to off.<br />
Encrypt Priority: Connects only to a<br />
remote party with standard encrypted<br />
connection enabled.<br />
Registering Local Information<br />
89<br />
Chapter 2: Registration and Setup for System Administrators
Shared Phone Book Setup<br />
Menu<br />
This menu is used to configure the settings<br />
when using the Shared Phone Book located<br />
on the server.<br />
For details on the Shared Phone Book, see<br />
“Using the Shared Phone Book” on page<br />
128.<br />
Shared Phone Book<br />
Book<br />
Shared Phone<br />
SPB Mode<br />
Selects whether to use the server managing<br />
the Shared Phone Book.<br />
On: Enables use of the server managing the<br />
Shared Phone Book.<br />
Off: Disables use of the server managing the<br />
Shared Phone Book.<br />
SPB Server Address<br />
Enter the IP address for the server managing<br />
the Shared Phone Book.<br />
SPB Server Password<br />
Enter the password for the server managing<br />
the Shared Phone Book.<br />
90 Registering Local Information
Displaying the Machine Status<br />
The Machine Status menu allows display of the versions, communication<br />
mode, line connection quality, etc. of the Communication System and the<br />
connected equipment.<br />
Displaying the Machine Status Menu<br />
1 Press the TOOLS button on the Remote Commander or use the V, v, B or<br />
b button to select “Tools”, then press the ENTER button.<br />
The Tools menu appears,<br />
Tools<br />
Home<br />
Machine Status<br />
Setup<br />
Presentation<br />
Streaming<br />
Recording<br />
Annotation<br />
Icon display<br />
Reject Answer<br />
Screen Capture<br />
[Suspended]<br />
[Suspended]<br />
[Suspended]<br />
[Suspended]<br />
Execute<br />
Execute<br />
Execute<br />
Execute<br />
On<br />
Off<br />
Execute<br />
2 Use the V, v, B or b button on the Remote Commander to select “Machine<br />
Status”, then press the ENTER button.<br />
The Machine Status menu appears.<br />
Machine Status<br />
Home<br />
Back to Tools<br />
Machine Information<br />
Peripheral Status<br />
Communication Mode Status<br />
LAN Line Status<br />
Network Routing Check<br />
Information screens enabled for display by the Machine Status<br />
menu<br />
Machine Information (see page 93)<br />
Peripheral Status (see page 93)<br />
Communication Mode Status (see page 94)<br />
LAN Line Status (see page 94)<br />
Network Routing Check (see page 105)<br />
Displaying the Machine Status<br />
91<br />
Chapter 2: Registration and Setup for System Administrators
3 Use the V, v, B or b button on the Remote Commander to select the<br />
information to be displayed, then press the ENTER button.<br />
The selected display appears.<br />
92 Displaying the Machine Status
Machine Information<br />
The Machine Information menu shows the<br />
versions of the HD Visual Communication<br />
System and the connected equipment for<br />
exclusive use, installed software versions,<br />
etc.<br />
Host Version<br />
Displays the software version of the HD<br />
Visual Communication System.<br />
Software Option<br />
Displays the optional software installed.<br />
None: No software is installed.<br />
Presentation: The <strong>PCS</strong>A-DSG80 HD Data<br />
Solution software is installed.<br />
Multipoint: The <strong>PCS</strong>A-MCG80 HD MCU<br />
software is installed.<br />
Option I/F<br />
Displays the optional connected equipment.<br />
None: No optional equipment is connected.<br />
ISDN (B768): The <strong>PCS</strong>A-B768S ISDN<br />
Unit is connected.<br />
ISDN (B384): The <strong>PCS</strong>A-B384S ISDN<br />
Unit is connected.<br />
Tablet: Pen tablet (Bamboo MTE-450<br />
manufactured by Wacom Co., Ltd.) is<br />
connected.<br />
Host Name<br />
Displays the host name.<br />
IP Address<br />
Displays the IP address for LAN1.<br />
IP Address (LAN2)<br />
Displays the IP address for LAN2.<br />
MAC Address<br />
Displays the MAC address for LAN1.<br />
MAC Address (LAN2)<br />
Displays the MAC address for LAN2.<br />
Serial Number<br />
Displays the serial number.<br />
Machine version<br />
Selecting “Next” in the Machine<br />
Information menu shows the codec version,<br />
etc.<br />
Peripheral Status<br />
Video Input<br />
Displays the input video name.<br />
Audio Input (MIC)<br />
Displays microphone input name.<br />
Audio Input (AUX)<br />
Displays the external audio input name.<br />
Video Output<br />
Displays the On/Off setting of “1080i<br />
Mode” and the 50 Hz/60 Hz setting of<br />
“Frequency”.<br />
Audio Output<br />
Displays the audio output equipped with this<br />
system.<br />
LAN Mode (LAN1)<br />
Displays the LAN Mode for LAN1.<br />
LAN Mode (LAN2)<br />
Displays the LAN Mode for LAN2.<br />
Gatekeeper<br />
Displays the status of registration to<br />
gatekeeper with the following messages:<br />
Gatekeeper Requested, Gatekeeper<br />
Confirmed, Gatekeeper Reject, Registration<br />
Requested, Registration Confirmed,<br />
Registration Failed, Registration Rejected,<br />
Registration Timeout, Unregistration<br />
Requested and Unregistration Confirmed.<br />
First Camera<br />
Displays the name of the first camera.<br />
Second Camera<br />
Displays the name of the second camera.<br />
Displaying the Machine Status<br />
93<br />
Chapter 2: Registration and Setup for System Administrators
Communication Mode Status<br />
The Communication Mode Status menu<br />
shows the status of current communication<br />
when communication is in progress, and the<br />
status of previous communications when<br />
communication is not in progress.<br />
The ISDN Line Status, LAN Line Status or<br />
LAN Connection Status will also be<br />
displayed depending on the line interface<br />
used.<br />
Communication Mode Status<br />
The current communication status will be<br />
displayed. When two or more points are<br />
connected to the system, selecting “Next” in<br />
the lower part of the page displays the next<br />
page.<br />
For the items described with both “(Encode)”<br />
and “(Decode)”, the descriptions under<br />
“(Encode)” show the setting status of the local<br />
system and those under “(Decode)” show the<br />
status of the receiving.<br />
Far End Terminal Name<br />
Displays the terminal name of a remote<br />
party.<br />
Remote Address<br />
Displays the address of a remote party.<br />
Audio Mode<br />
Displays the current audio encoding format.<br />
Video Mode<br />
Displays the current video encoding format.<br />
Note<br />
The audio encoding and video encoding<br />
formats used for communication with a remote<br />
party may differ from the settings in this menu,<br />
depending on the status of the system on the<br />
remote site.<br />
Frame Rate<br />
Displays the maximum frame rate of motion<br />
pictures.<br />
Rate<br />
Displays in real time the number of<br />
connected lines and their transfer rates.<br />
94 Displaying the Machine Status<br />
Line I/F<br />
Displays the line interface being used.<br />
Camera Control<br />
Displays whether the unit is ready to operate<br />
both cameras.<br />
H239<br />
Displays whether the unit is ready to use the<br />
H.239 presentation mode.<br />
Check Code<br />
Displays the encryption check code.<br />
LAN Line Status<br />
The LAN line status will be displayed on<br />
one page for each point connected to the<br />
system. The connected point is shown at the<br />
upper left corner of each page. Selecting<br />
“Next” in the lower part of the page displays<br />
the next page.<br />
Bit rate - Encode<br />
Displays by category (audio, video and<br />
H.239 (presentation)) the transfer rates for<br />
sending data.<br />
Bit rate - Decode<br />
Displays by category (audio, video and<br />
H.239 (presentation)) the transfer rates for<br />
receiving data.<br />
Number of lost packets<br />
Displays by category (audio, video and<br />
H.239 (presentation)) the number of packets<br />
lost during transfer on the network.<br />
Number of recovered packets<br />
Displays by category (audio, video and<br />
H.239 (presentation)) the number of lost<br />
packets that were recovered with the<br />
system’s QoS function.<br />
Number of received packets<br />
Displays by category (audio, video and<br />
H.239 (presentation)) the number of packets<br />
received during communication.
Network Routing Check<br />
The Network Routing Check menu is used to<br />
check the network routing, and it shows the<br />
checking results.<br />
You can start the network routing check by<br />
selecting “Start Measurement” in the lower<br />
part of the menu.<br />
For details, see “About the Network Routing<br />
Check” on page 105.<br />
IP address of remote site<br />
Enter the IP address of the remote terminal<br />
you want to check.<br />
Line I/F<br />
LAN1: Select to perform the routing check<br />
for the network connected to the 1<br />
connector.<br />
LAN2: Select to perform the routing check<br />
for the network connected to the 2<br />
connector.<br />
Gateway<br />
Displays the results of check for the default<br />
gateway.<br />
ping<br />
Displays the results of check for<br />
reachability, packet loss, RTT (Round-Trip<br />
Time) and H.323 (H.323 communication<br />
availability).<br />
traceroute<br />
Displays the results of check for HOP<br />
(number of routers passed through to reach<br />
the remote site) and total RTT.<br />
Start Measurement<br />
Select this button to start a network routing<br />
check.<br />
Previous<br />
Select this button to restore the Machine<br />
Status menu.<br />
Restrictions on the<br />
Use of LAN2<br />
When you use two LAN connections, use<br />
the 1 (LAN1) connector to connect a<br />
private network in your company and the<br />
2 (LAN2) connector to connect to an<br />
intranet outside your company.<br />
The following functions of the system are<br />
restricted when using the 2 (LAN2)<br />
connector.<br />
Note<br />
In the event of using the 1 (LAN1)<br />
connector to connect to an intranet outside your<br />
company, make sure to set “Web Access”,<br />
“Telnet Access” and “SSH Access” to<br />
“Disabled” on the Access Permit page of the<br />
Administrator setup menu (page 87).<br />
Items that cannot be set with LAN2<br />
NAT Mode<br />
Gatekeeper<br />
SNMP Mode<br />
SIP<br />
NTP<br />
Shared Phone Book<br />
AMX Device Discovery<br />
H.460<br />
DNS<br />
Streaming<br />
IPv6<br />
Web Access, Telnet Access, SSH Access<br />
Item that can be set with either<br />
LAN1 or LAN2<br />
PPPoE<br />
Items to be set with LAN1 or LAN2<br />
individually<br />
DHCP Mode<br />
IP Address<br />
Network Mask<br />
Gateway Address<br />
LAN Mode<br />
Restrictions on the Use of LAN2<br />
95<br />
Chapter 2: Registration and Setup for System Administrators
Items to be set with LAN1 and LAN2<br />
commonly<br />
Used Port Number (TCP, UDP)<br />
QoS<br />
TOS<br />
Auto Answer<br />
Reject Answer<br />
Note<br />
Do not set the same subnet for the LAN1 and<br />
LAN2 connections.<br />
96 Restrictions on the Use of IPv6<br />
Restrictions on the<br />
Use of IPv6<br />
The functions of the system are restricted as<br />
follows when using the Internet Protocol<br />
IPv6.<br />
Unusable functions with IPv6<br />
SNMP Mode<br />
NTP<br />
Shared Phone Book<br />
TOS<br />
Network Routing Check<br />
AMX Device Discovery<br />
LAN2
Setting Up the Network Configurations<br />
This section describes how to set up the network configurations for use with<br />
various networks.<br />
For details on the LAN setup menu, see “LAN Setup Menu” (page 74).<br />
For details on configurations, consult with the system administrator.<br />
LAN Connection via DHCP (LAN1/LAN2)<br />
Configuration example<br />
LAN (A) LAN (B)<br />
/ /<br />
DHCP Server 1<br />
Set “DHCP Mode” to “Auto” under the Basic Setup page in the LAN setup<br />
menu.<br />
Setup LAN<br />
Basic Setup<br />
LAN1<br />
Host Name<br />
DHCP Mode<br />
IP Address<br />
Network Mask<br />
Gateway Address<br />
Primary DNS<br />
Secondary DNS<br />
LAN Mode<br />
The setting has been configured properly if the IP address appears in the Home<br />
menu.<br />
To connect to a remote party<br />
Select “IP” under “Line I/F”, enter the remote party’s IP address, and dial.<br />
Save<br />
Auto<br />
Auto<br />
Cancel<br />
Setting Up the Network Configurations<br />
97<br />
Chapter 2: Registration and Setup for System Administrators
LAN Connection through a Router (LAN1/LAN2)<br />
Configuration example<br />
LAN (A)<br />
192.100.10.1<br />
/<br />
192.100.10.10<br />
Router<br />
Virtual<br />
Private<br />
Network<br />
(VPN)<br />
Enter a name in “Host Name” under the Basic Setup page in the LAN setup<br />
menu, and enter the appropriate values for “IP Address”, “Network Mask”,<br />
and “Gateway Address”.<br />
Setup LAN<br />
Basic Setup<br />
LAN1<br />
Host Name<br />
DHCP Mode<br />
IP Address<br />
Network Mask<br />
Gateway Address<br />
Primary DNS<br />
Secondary DNS<br />
LAN Mode<br />
The setting has been configured properly if the correct IP address appears in<br />
the Home menu.<br />
To connect to a remote party<br />
Select “IP” under “Line I/F”, enter the remote party’s IP address, and dial.<br />
98 Setting Up the Network Configurations<br />
Router<br />
Save<br />
<strong>Sony</strong><br />
Off<br />
192.100. 10. 10<br />
255.255.255. 0<br />
192.100. 10. 1<br />
Auto<br />
Cancel<br />
/<br />
LAN (B)<br />
192.100.20.1<br />
192.100.20.20
LAN Connection through a Gatekeeper (LAN1 Only)<br />
Configuration example<br />
LAN (A)<br />
/<br />
192.100.10.1<br />
192.100.10.10<br />
User alias: <strong>PCS</strong>-A<br />
User number: 100<br />
Gatekeeper<br />
192.100.10.20<br />
Router Router<br />
1 Enter a name in “Host Name” under the Basic Setup page in the LAN setup<br />
menu, and enter the appropriate values for “IP Address”, “Network Mask”,<br />
and “Gateway Address”.<br />
Setup LAN<br />
Basic Setup<br />
LAN1<br />
Host Name<br />
DHCP Mode<br />
IP Address<br />
Network Mask<br />
Gateway Address<br />
Primary DNS<br />
Secondary DNS<br />
LAN Mode<br />
<strong>Sony</strong><br />
Off<br />
192.100. 10. 10<br />
255.255.255. 0<br />
192.100. 10. 1<br />
2 Set “Gatekeeper Mode” to “On” under the Gatekeeper page of the LAN<br />
setup menu, and enter the appropriate values for “Gatekeeper Address”,<br />
“User Alias”, and “User Number”.<br />
Setup LAN<br />
Gatekeeper<br />
LAN4<br />
Gatekeeper Mode<br />
Gatekeeper Address<br />
User Alias<br />
User Number<br />
H.460<br />
The IP address registered is displayed in the Home menu.<br />
Save<br />
Save<br />
Auto<br />
On<br />
192.100. 10. 20<br />
<strong>PCS</strong>-A<br />
100<br />
Off<br />
Cancel<br />
Cancel<br />
/<br />
LAN (B)<br />
192.100.20.1<br />
192.100.20.20<br />
User alias: <strong>PCS</strong>-B<br />
User number: 200<br />
Setting Up the Network Configurations<br />
99<br />
Chapter 2: Registration and Setup for System Administrators
To connect to a remote party<br />
Select “IP” under “Line I/F”, enter the user name or user number set by the<br />
remote party, and dial.<br />
LAN Connection through NAT (LAN1 Only)<br />
Connection using NAT allows one IP address to be shared by several<br />
computers on the same LAN. This section describes how to set up visual<br />
communication in NAT and global IP environments.<br />
Configuration example<br />
192.100.10.1<br />
/<br />
192.100.10.10<br />
210.10.10.1<br />
1 Enter a name in “Host Name” under the Basic Setup page in the LAN setup<br />
menu, and enter the appropriate values for “IP Address”, “Network Mask”,<br />
and “Gateway Address”.<br />
2 Set “NAT Mode” to “On” in the NAT Setup page of the LAN setup menu,<br />
and enter the appropriate IP address in “WAN IP Address”.<br />
100 Setting Up the Network Configurations<br />
Internet<br />
Router Router<br />
Setup LAN<br />
Basic Setup<br />
LAN1<br />
Host Name<br />
DHCP Mode<br />
IP Address<br />
Network Mask<br />
Gateway Address<br />
Primary DNS<br />
Secondary DNS<br />
LAN Mode<br />
Save<br />
<strong>Sony</strong><br />
Off<br />
192.100. 10. 10<br />
255.255.255. 0<br />
192.100. 10. 1<br />
Auto<br />
Cancel<br />
/<br />
210.20.20.1<br />
210.20.20.2<br />
(Global address)
Setup LAN<br />
IP:192.168.0.11<br />
NAT Setup<br />
LAN3<br />
NAT Mode<br />
WAN IP Address<br />
On<br />
210. 10. 10. 1<br />
5/11/2008 13:00<br />
The setting has been configured properly if the correct WAN IP address<br />
appears in the Home menu.<br />
To display the NAT address in the Home menu, you must set “Number<br />
Display” to “NAT:Address” in the Home Menu1 page of the Home Menu<br />
setup menu (page 83).<br />
3 Remote parties must configure the Basic Setup page in the LAN setup<br />
menu in the same way.<br />
Note<br />
Remote parties do not need to configure the settings in the NAT Setup page of the<br />
LAN setup menu as they are not in a NAT environment.<br />
To connect to a remote party<br />
Select “IP” under “Line I/F”, enter the remote party’s IP address, and dial.<br />
Note<br />
When using the terminal in the NAT environment, you can connect to a remote party<br />
(global IP), but for a remote party to connect to you, you must configure your router<br />
settings. For details on router settings, consult with the system administrator.<br />
LAN Connection with H.460 Firewall Traversal (LAN1 Only)<br />
You can use H.460 to traverse firewalls and connect with the terminals on<br />
other networks.<br />
Save<br />
Cancel<br />
Setting Up the Network Configurations<br />
101<br />
Chapter 2: Registration and Setup for System Administrators
Configuration example<br />
192.100.10.1<br />
/ LAN ALERT 1 LAN ALERT 2<br />
/ LAN ALERT 1 LAN ALERT 2<br />
OPEN<br />
192.100.10.10<br />
User Alias: <strong>PCS</strong>-A<br />
User Number: 100<br />
1 Enter a name in “Host Name” under the Basic Setup page in the LAN setup<br />
menu, and enter the appropriate values for “IP Address”, “Network Mask”,<br />
and “Gateway Address”.<br />
2 Set “H.460” to “On” under the Gatekeeper page of the LAN setup menu.<br />
Set “Gatekeeper Mode” to “On” and enter the appropriate value for<br />
“Gatekeeper Address”.<br />
The IP address registered is displayed in the Home menu.<br />
To conduct a video conference<br />
Select “IP” under “Line I/F”, enter the remote party’s IP address, and dial.<br />
102 Setting Up the Network Configurations<br />
OPEN<br />
Internet<br />
Router Router<br />
Setup LAN<br />
Basic Setup<br />
LAN1<br />
Host Name<br />
DHCP Mode<br />
IP Address<br />
Network Mask<br />
Gateway Address<br />
Primary DNS<br />
Secondary DNS<br />
LAN Mode<br />
Setup LAN<br />
Gatekeeper<br />
LAN 4<br />
Gatekeeper Mode<br />
Gatekeeper Address<br />
User Alias<br />
User Number<br />
H.460<br />
Traversal<br />
server<br />
210.20.20.10<br />
(Global address)<br />
Save<br />
Save<br />
<strong>Sony</strong><br />
Off<br />
192.100. 10. 10<br />
255.255.255. 0<br />
192.100. 10. 1<br />
Auto<br />
On<br />
210. 20. 20. 10<br />
<strong>PCS</strong>-A<br />
100<br />
On<br />
Cancel<br />
Cancel<br />
192.200.20.1<br />
192.200.20.10
LAN Connection Using PPPoE (LAN1/LAN2)<br />
When using PPPoE, you can connect via LAN without a router.<br />
A modem (using bridge mode) is required when using FLET’S ADSL.<br />
Configuration example<br />
/<br />
210.10.10.10<br />
ONU<br />
B FLET’S<br />
Local IP<br />
network<br />
Internet<br />
B FLET’S ONU<br />
1 Set “PPPoE” to “LAN1” or “LAN2” under the PPPoE page in the LAN<br />
setup menu, and enter the PPPoE user name and PPPoE password given to<br />
you by the provider.<br />
Setup LAN<br />
PPPoE<br />
LAN2<br />
PPPoE<br />
LAN1<br />
User Alias<br />
<strong>Sony</strong>@aaa.ne.jp<br />
Password<br />
abcdefg<br />
Fixed IP for PPPoE On<br />
Fixed IP Address for PPPoE 210. 10. 10. 10<br />
DNS<br />
Primary DNS<br />
Secondary DNS<br />
Obtain automatically<br />
2 If you have a fixed IP from the provider, set “Fixed IP for PPPoE” to “On”,<br />
and enter your fixed IP address for PPPoE in “Fixed IP Address for<br />
PPPoE” under the PPPoE page in the LAN setup menu.<br />
The setting has been configured properly if the correct IP address appears<br />
in the Home menu.<br />
Note<br />
If the fixed DNS server address is specified by the provider, set “DNS” to<br />
“Specify”, and enter the specific addresses in “Primary DNS” and “Secondary<br />
DNS”.<br />
3 Remote parties must configure in the same way.<br />
To connect to a remote party<br />
Select “IP” under “Line I/F”, enter the remote party’s IP address, and dial.<br />
Save<br />
Cancel<br />
/<br />
211.10.10.10<br />
Setting Up the Network Configurations<br />
103<br />
Chapter 2: Registration and Setup for System Administrators
ISDN Connections<br />
1 Enter the appropriate numbers for “Area Code” and “Local Number” in the<br />
Telephone Number page of the ISDN setup menu.<br />
Note<br />
Do not enter the first 0 of the area code.<br />
For details on the ISDN setup menu, see “ISDN Setup Menu” (page 79).<br />
For details on configurations, consult with the system administrator.<br />
Setup ISDN<br />
Number<br />
ISDN2<br />
The setting has been configured properly if the correct line number appears<br />
in the Home menu.<br />
2 Remote parties must configure in the same way.<br />
Note<br />
When connecting to the ISDN unit, use the ports in ascending order.<br />
Yes: 1, 2, 3…<br />
No: 1, 6, 5…<br />
To connect to a remote party<br />
Select “ISDN” under “Line I/F”, enter the remote party’s line number, and<br />
dial.<br />
For details on how to start a visual communication, see “Starting a<br />
Connection by Calling a Remote Party” (page 106).<br />
104 Setting Up the Network Configurations<br />
Area Code Local Number<br />
A1<br />
A2<br />
B3<br />
B2<br />
C1<br />
C2<br />
Auto SPID<br />
Execute<br />
Save<br />
Cancel
About the Network Routing Check<br />
Before connecting a remote system, you can check the network routing to<br />
assure smooth connection with the system.<br />
For the network routing check, knowledge of network is required. Consult your<br />
network administrator or <strong>Sony</strong> dealer.<br />
If you have any questions about the checked result, consult your network<br />
administrator or <strong>Sony</strong> dealer.<br />
To start the network routing check<br />
Open the Network Routing Check menu of the Machine Status menu on the<br />
local system that performs the routing check, then set the necessary items on<br />
the menu.<br />
Select “Start Measurement” to start the network routing check.<br />
Machine Status > Network Routing Check<br />
IP Address of Remote Site XXX.XXX.XXX.XXX<br />
Line I/F<br />
LAN1<br />
Gateway Result<br />
ping<br />
Result<br />
Packet Loss (%)<br />
Network Routing Check<br />
RTT<br />
H.323 Communication<br />
traceroute HOP<br />
Total RTT<br />
Start Measurement<br />
For the procedure how to open the Network Routing Check menu, see<br />
“Displaying the Machine Status” on page 91.<br />
Note<br />
While the network routing check is being performed, you cannot use any other functions<br />
including communication. When the routing check is complete, the checked results are<br />
displayed on the Network Routing Check menu.<br />
End<br />
About the Network Routing Check<br />
105<br />
Chapter 2: Registration and Setup for System Administrators
Chapter 3: Basic<br />
Connection<br />
This chapter describes how to connect to a remote party after the administrator<br />
has completed various registrations and settings for the system.<br />
The chapter explains a point-to-point communication via a LAN connection,<br />
ISDN connection using the optional <strong>PCS</strong>A-B384S or <strong>PCS</strong>A-B768S ISDN<br />
Unit or SIP.<br />
For use of optional equipment, see Chapter 4.<br />
To conduct an encrypted communication, see Chapter 5.<br />
To conduct a multipoint communication, see Chapter 6.<br />
Starting a Connection by Calling a<br />
Remote Party<br />
You can start a communication with a remote party by dialing. Once you have<br />
made a connection to the remote party, you can begin talking just as with a<br />
normal phone call and start communication.<br />
You can call a remote party using the various methods described below. Use<br />
any one depending on the settings in the Home menu or connecting status.<br />
To call a remote party by using the Connect menu (page 107)<br />
To call a remote party by entering their address or number directly (Direct<br />
Dial) (page 108)<br />
To call a remote party by using the one-touch dial buttons (page 110)<br />
To call a remote party by using the history list (page 111)<br />
To call a remote party registered in the Phone Book (page 112)<br />
To call a remote party not registered in the Phone Book by setting the<br />
necessary items in the Detailed Dial menu (page 114)<br />
Turning On the Power<br />
1 Turn on the TV monitor.<br />
2 Turn on other equipment you are using for the communication.<br />
3 Press the ?/1 (power) switch on the Communication System to turn it on.<br />
106 Starting a Connection by Calling a Remote Party
The indicator on the System starts flashing, then lights in green when the<br />
power is on.<br />
The Home menu appears on the monitor screen and the picture shot by the<br />
local camera also appears.<br />
Note<br />
After the power is turned on, the camera moves automatically for trial operation. Be<br />
careful not to catch your finger.<br />
Calling a Remote Party by Using the Connect Menu<br />
This method is available when the Connect button is displayed in the Home<br />
menu.<br />
Home<br />
?/1 (power) switch<br />
?/1 (power) indicator<br />
Camera<br />
Connect<br />
AAA IP:XXX.XXX.XXX.XXX<br />
Ready Ready to connect. 5/11/2008 13:00<br />
Connect button<br />
1 Use the V, v, B or b button on the Remote Commander to select “Connect”<br />
in the Home menu, then press the ENTER button.<br />
The Connect menu appears.<br />
POWER/STANDBY<br />
Starting a Connection by Calling a Remote Party<br />
107<br />
Chapter 3: Basic Connection
2 Use the V, v, B or b button on the Remote Commander to select how to<br />
call a remote party, then press the ENTER button.<br />
The menu screen will change according to the item you select.<br />
.<br />
Connect<br />
Previous<br />
Enter Number/Address<br />
Select from Phone Book<br />
Select from History<br />
Enter Number/Address: The Detailed Dial menu appears on the screen.<br />
For the procedure to be followed, see “Calling a Remote Party Not<br />
Registered in the Phone Book” on page 114.<br />
Select from Phone Book: The Phone Book appears on the screen.<br />
For the procedure to be followed, see “Calling a Remote Party Registered<br />
in the Phone Book” on page 112.<br />
Select from History: The history list appears on the screen.<br />
For the procedure to be followed, see “Calling a Remote Party by<br />
Selecting Them in the History List” on page 111.<br />
Calling a Remote Party by Entering Their Address or Number<br />
Directly (Direct Dial)<br />
When “Direct Dial” is set to “On” in the Home Menu setup menu, the number<br />
input box, Dial button, etc. are displayed in the Home menu, allowing you to<br />
use the direct dial function.<br />
Home<br />
108 Starting a Connection by Calling a Remote Party<br />
IP<br />
IP:192.168.0.11 5/11/2008 13:00<br />
AAA IP:XXX.XXX.XXX.XXX<br />
Ready Ready to connect. 5/11/2008 13:00<br />
Line interface<br />
Number input box<br />
Dial<br />
Dial
1 Use the V, v, B or b button on the Remote Commander to select “Line I/<br />
F” in the Home menu, then press the ENTER button.<br />
2 Use the V, v, B or b button on the Remote Commander to select the line<br />
interface to be used, then press the ENTER button.<br />
IP: Connects to the system on the remote site via a LAN connected to the<br />
1 (LAN1) connector.<br />
ISDN: Connects to the system on the remote site via an ISDN line.<br />
TEL: Connects to a phone on the remote site via an ISDN line for a voice<br />
meeting.<br />
Notes<br />
When a checkmark is put to “SIP” under “Line Interface” of the Line Interface<br />
setup menu, you can select “SIP” from the line interface select box.<br />
When “Use LAN2” is set to “On”, you can select “IP(2)” from the line interface<br />
select box.<br />
3 Use the V, v, B or b button on the Remote Commander to select the<br />
number input box, then press the ENTER button.<br />
4 Enter the remote party’s IP address or line number with the number buttons<br />
on the Remote Commander, then press the ENTER button.<br />
Note<br />
The format of the address for a SIP connection is the following:<br />
4000 (number assigned by the SIP server)<br />
4000@sip.com<br />
192.168.1.1 (when the IP address and SIP server are not used)<br />
5 Press the CONNECT ( ) button on the Remote Commander. Or use the<br />
V, v, B or b button on the Remote Commander to select “Dial”, then press<br />
the ENTER button.<br />
The system begins dialing the IP address or telephone number entered in<br />
step 4. “Dialing” appears on the monitor screen.<br />
When the system connects to the remote system, the message “Session<br />
Connected.” appears on the screen and the picture on the remote site is<br />
displayed. Now you can start communication with the remote party.<br />
Picture on the local site<br />
Picture on the remote site<br />
Starting a Connection by Calling a Remote Party<br />
109<br />
Chapter 3: Basic Connection
To cancel dialing before connecting with the remote party<br />
While “Dialing” is displayed on the monitor screen, press the DISCONNECT<br />
( ) button or the ENTER button on the Remote Commander.<br />
Calling a Remote Party Using the One-Touch Dial Buttons<br />
When “One-Touch Dial” is set to “On” in the Home Menu setup menu, the<br />
one-touch dial buttons are displayed in the Home menu, allowing you to use<br />
the one-touch dial function.<br />
For registration of the one-touch dial buttons, see “Registering a Remote<br />
Party – Phone Book” on page 120.<br />
1 Open the Home menu.<br />
2 Select the one-touch dial button for which the remote party you want to call<br />
is registered with one of the F1 to F4 buttons on the Remote Commander.<br />
Or select the one-touch dial button you want to call in the Home menu by<br />
pressing the V, v, B or b button on the Remote Commander, then press the<br />
ENTER button. Select “Connect” from the displayed submenu with the V,<br />
v, B or b button, and press the ENTER button.<br />
Home<br />
Camera<br />
Tools<br />
History<br />
Phone Book<br />
Detailed Dial<br />
AAA IP:XXX.XXX.XXX.XXX<br />
Ready Ready to connect.<br />
F1 F2<br />
F3 F4<br />
Room 101<br />
Room 201<br />
Office A<br />
Office E<br />
The system begins dialing the selected remote party. “Dialing” appears on<br />
the monitor screen. When the system connects to the remote system,<br />
“Session Connected.” appears on the screen and the picture on the remote<br />
site is displayed. Now you can start communication with the remote party.<br />
To cancel dialing before connecting with the remote party<br />
While “Dialing” is displayed on the monitor screen, press the DISCONNECT<br />
( ) button or the ENTER button on the Remote Commander.<br />
110 Starting a Connection by Calling a Remote Party<br />
IP<br />
Dial<br />
One-touch dial buttons<br />
5/11/2008 13:00
Calling a Remote Party by Selecting Them in the History List<br />
1 Use the V, v, B or b button on the Remote Commander to select “History”<br />
in the Home menu, then press the ENTER button. Or select “Connect” in<br />
the Home menu with the V, v, B or b button and the ENTER button to<br />
display the Connect menu, then select “Select from History”.<br />
The History menu appears.<br />
History<br />
Home<br />
Phone Book<br />
Detailed Dial<br />
Dial<br />
Answer<br />
Missed Call<br />
IP:192.168.0.11<br />
5/11/2008 13:00<br />
Dial History1<br />
111.111.111.112 2008/05/01 00:00 (12:34:56)<br />
Dial History2<br />
555-555-555 2008/05/26 00:00 (03:25:45)<br />
Dial History3<br />
17.17.17.17 2008/05/26 00:00 (01:00:17)<br />
Dial History4<br />
18.18.18.18 2008/05/26 00:00 (01:00:18)<br />
Dial History5<br />
19.19.19.19 2008/05/26 00:00 (01:00:19)<br />
Dial History6<br />
20.20.20.20 2008/05/26 00:00 (01:00:20)<br />
Dial History7<br />
66.66.66.66 2008/05/26 00:08 (00:00:00)<br />
Dial History8<br />
88.88.88.88 2008/05/26 00:08 (01:00:06)<br />
Note<br />
You can display the History menu by selecting “History” from the Phone Book or<br />
Detailed Dial menu.<br />
2 Use the V, v, B or b button on the Remote Commander to select “Dial<br />
(outgoing call history)”, “Answer (incoming call history)” or “Missed Call<br />
(incoming call history in absence)”, then press the ENTER button or b<br />
button.<br />
The selected history list appears.<br />
History<br />
Home<br />
Phone Book<br />
Detailed Dial<br />
Dial<br />
Answer<br />
Missed Call<br />
IP:192.168.0.11<br />
5/11/2008 13:00<br />
Dial History1<br />
111.111.111.112 2008/05/01 00:00 (12:34:56)<br />
Dial History2<br />
555-555-555 2008/05/26 00:00 (03:25:45)<br />
Dial History3<br />
17.17.17.17 2008/05/26 00:00 (01:00:17)<br />
Dial History4<br />
18.18.18.18 2008/05/26 00:00 (01:00:18)<br />
Dial History5<br />
19.19.19.19 2008/05/26 00:00 (01:00:19)<br />
Dial History6<br />
20.20.20.20 2008/05/26 00:00 (01:00:20)<br />
Dial History7<br />
66.66.66.66 2008/05/26 00:08 (00:00:00)<br />
Dial History8<br />
88.88.88.88 2008/05/26 00:08 (01:00:06)<br />
3 Use the V, v, B or b button on the Remote Commander to select the remote<br />
party you want to call.<br />
4 Press the CONNECT ( ) button on the Remote Commander. Or press<br />
the ENTER button to display the submenu, select “Connect” with the V, v,<br />
B or b button, and press the ENTER button.<br />
The system begins dialing the selected party. “Dialing” appears on the<br />
monitor screen. When the system connects to the remote system, “Session<br />
Starting a Connection by Calling a Remote Party<br />
111<br />
Chapter 3: Basic Connection
Connected.” appears on the screen and the picture on the remote site is<br />
displayed. Now you can start communication with the remote party.<br />
To cancel dialing before connecting with the remote party<br />
While “Dialing” is displayed on the monitor screen, press the DISCONNECT<br />
( ) button or the ENTER button on the Remote Commander.<br />
Note<br />
You can select the items below from the submenu:<br />
“Cancel”: Cancels selection from the history list.<br />
“Edit”: Displays the List Edit menu for registration in the Phone Book.<br />
“Delete”: Deletes the selected call from the history list.<br />
Calling a Remote Party Registered in the Phone Book<br />
For the registration in the Phone Book, see “Registering a Remote Party –<br />
Phone Book” on page 120.<br />
1 Use the V, v, B or b button on the Remote Commander to select “Phone<br />
Book” in the Home menu, then press the ENTER button. Or select<br />
“Connect” in the Home menu with the V, v, B or b button and the ENTER<br />
button to display the Connect menu, then select “Select from Phone Book”.<br />
The Phone Book appears on the monitor screen.<br />
Phone Book<br />
Home<br />
New Entry<br />
Group Edit<br />
History<br />
Detailed Dial<br />
Default Group<br />
Group1<br />
Group2<br />
Group3<br />
Group4<br />
Group5<br />
Group6<br />
Group7<br />
Group8<br />
Group9<br />
Room 101<br />
ISDN 01-2345-6789<br />
Room 201<br />
IP 0.0.0.0<br />
Room 102<br />
IP 255.255.255.255<br />
Room 202<br />
IP 123.456.789.012<br />
2 Use the V, v, B or b button on the Remote Commander to select the Group<br />
in which the remote party you want to call is registered, then press the<br />
ENTER button.<br />
3 Use the V, v, B or b button on the Remote Commander to select the remote<br />
party you want to call.<br />
4 Press the CONNECT ( ) button on the Remote Commander. Or press<br />
the ENTER button to display the submenu, select “Connect” with the V, v,<br />
B or b button, and press the ENTER button.<br />
112 Starting a Connection by Calling a Remote Party<br />
Office A<br />
ISDN 98-7654-3210<br />
Office E<br />
ISDN 01-2345-6789
Phone Book<br />
Home<br />
New Entry<br />
Group Edit<br />
History<br />
Detailed Dial<br />
Default Group<br />
Room 101<br />
ISDN 01-2345-6789<br />
The system begins dialing the selected party. “Dialing” appears on the<br />
monitor screen. When the system connects to the system on the remote site,<br />
the message “Session Connected.” appears on the screen, and the picture<br />
on the remote site is displayed.<br />
Now you can start communication with the remote party.<br />
To cancel dialing before connecting<br />
While “Dialing” is displayed on the monitor screen, press the DISCONNECT<br />
( ) button or the ENTER button on the Remote Commander.<br />
To switch the display in the Phone Book between the list and the<br />
thumbnails<br />
Each time the F1 button on the Remote Commander is pressed, the display<br />
changes between the list and the thumbnails.<br />
To change the order of display<br />
Each time the F2 button on the Remote Commander is pressed, the display<br />
changes between the list of remote parties’ names in ascending alphabetical<br />
order and that list in descending alphabetical order.<br />
To display the Phone Book during communication<br />
Press the button on the Remote Commander during communication.<br />
To call a remote party registered in the Private Phone Book<br />
Cancel<br />
Connect<br />
Edit<br />
Copy<br />
Delete<br />
1 Insert the “Memory Stick” that contains the Private Phone Book into the<br />
Memory Stick slot on the Communication System.<br />
The Phone Book changes to the Private Phone Book.<br />
2 Select “Private Phone Book” in the Home menu, and press the ENTER<br />
button.<br />
3 Use the V, v, B or b button on the Remote Commander to select a remote<br />
party you want to call from the Private Phone Book.<br />
4 Press the CONNECT ( ) button on the Remote Commander. Or press<br />
the ENTER button to display the submenu, select “Connect” with the V, v,<br />
B or b button, and press the ENTER button.<br />
Starting a Connection by Calling a Remote Party<br />
113<br />
Chapter 3: Basic Connection
Note<br />
If the auto dialing feature of the Private Phone Book is activated, the system begins<br />
dialing when the “Memory Stick” is inserted.<br />
Calling a Remote Party Not Registered in the Phone Book<br />
1 Use the V, v, B or b button on the Remote Commander to select “Detailed<br />
Dial” in the Home menu, then press the ENTER button. Or select<br />
“Connect” in the Home menu with the V, v, B or b button and the ENTER<br />
button to display the Connect menu, then select “Enter Number/Address”.<br />
The Detailed Dial menu appears on the screen.<br />
Detailed Dial<br />
Home<br />
Phone Book<br />
History<br />
Dial to:<br />
2 Select the line interface to be used for connection.<br />
Use the V, v, B or b button to select “Line I/F”, then press the ENTER<br />
button. The setting items appear. Press the V, v, B or b button to select the<br />
line interface to be used to connect to the remote party, then press the<br />
ENTER button.<br />
IP: Connects to a remote party via a LAN connected to the 1 (LAN1)<br />
connector.<br />
ISDN: Connects to a remote party via an ISDN.<br />
ISDN (2B): Connects to the H.221-format system via 2B channels of the<br />
ISDN connection.<br />
TEL: Connects to the phone of a remote party to conduct a voice meeting<br />
via the ISDN connection.<br />
Notes<br />
When a checkmark is put to “SIP” under “Line Interface” of the Line Interface<br />
setup menu, you can select “SIP” from “Line I/F”.<br />
When “Use LAN2” is set to “On”, you can select “IP(2)” from “Line I/F”.<br />
3 Configure the LAN or ISDN line to be used for connection.<br />
When using the LAN<br />
1 Enter the IP address of a remote party to connect in the IP text box.<br />
Use the V, v, B or b button on the Remote Commander to select the IP<br />
text box, then press the ENTER button. Next, enter the IP address with<br />
the number buttons on the Remote Commander or the on-screen<br />
keyboard, and press the ENTER button.<br />
114 Starting a Connection by Calling a Remote Party<br />
Line I/F IP<br />
Communication<br />
1024kbps<br />
Bit Rate<br />
Number of Lines 1B (64K)<br />
Cancel
Enter the host name and domain name (ex. host.domain) when using<br />
the DNS server, or enter the party’s user name and user number<br />
registered in the LAN setup menu on the remote party’s system when<br />
using the gatekeeper, then press the ENTER button.<br />
Notes<br />
You can enter a dot (.) with the b or DOT button on the Remote Commander,<br />
or “b” or “Dot” on the on-screen keyboard.<br />
To delete the last entered character, use the BACK SPACE button on the<br />
Remote Commander or “Back Space” on the on-screen keyboard.<br />
To delete the entered IP address, use the RETURN button on the Remote<br />
Commander or “Cancel” on the on-screen keyboard.<br />
2 Select the communication bit rate.<br />
Use the V, v, B or b button to select “Communication Bit Rate”, then<br />
press the ENTER button. Press the V, v, B or b button to select the<br />
communication bit rate from the displayed submenu, then press the<br />
ENTER button.<br />
When using the ISDN<br />
1 Enter the telephone number of a remote party to connect in the A text<br />
box.<br />
Use the V, v, B or b button on the Remote Commander to select the A<br />
text box, then press the ENTER button. Next, enter the telephone<br />
number with the number buttons on the Remote Commander or onscreen<br />
keyboard, and press the ENTER button.<br />
Notes<br />
Do not enter the prefix number in the telephone number text box, when the prefix<br />
setting is on. For details on prefix settings, see “Dial Setup Menu” on page 64.<br />
Even when you connect multiple ISDN lines (2B (128K) or more number of<br />
lines), entering one telephone number of the remote party enables you to connect<br />
all the lines used automatically.<br />
When you select ISDN (2B (128K)), the A1 and A2 text boxes appear. You can<br />
enter a separate ISDN line number in each text box. Pressing the ENTER button<br />
on the Remote Commander while the A2 text box is selected copies the number<br />
entered in the A1 text box to the A2 text box.<br />
To delete the last entered character, use the BACK SPACE button on the Remote<br />
Commander or “Back Space” on the on-screen keyboard.<br />
To delete the entered ISDN telephone number, use the RETURN button on the<br />
Remote Commander or “Cancel” on the on-screen keyboard.<br />
2 Select the number of ISDN lines to use during the call.<br />
Use the V, v, B or b button on the Remote Commander to select<br />
“Number of Lines”, then press the ENTER button. Press the V, v, B or<br />
b button to select the number of channels to be used when calling a<br />
remote party from the displayed items, then press the ENTER button.<br />
Starting a Connection by Calling a Remote Party<br />
115<br />
Chapter 3: Basic Connection
Note<br />
To connect to the remote party by entering all the telephone numbers for the<br />
ISDN lines used<br />
If the system of the remote party is not equipped with the bonding function, entering<br />
one remote party’s telephone number does not allow automatic connection of<br />
multiple ISDN lines used to connect to the remote party. To connect to the remote<br />
party by entering all the telephone numbers, register the remote party’s telephone<br />
numbers for the ISDN lines to be used referring to “Registering a Remote Party –<br />
Phone Book”(page 120), then connect to the remote party according to the<br />
procedure described in “Calling a Remote Party Registered in the Phone Book”<br />
(page 112).<br />
4 Press the CONNECT ( ) button on the Remote Commander, or use the<br />
V, v, B or b button to select “Connect” in the lower part of the menu, then<br />
press the ENTER button on the Remote Commander.<br />
The system begins dialing the IP address or ISDN telephone number<br />
entered in step 3. “Dialing” appears on the monitor screen.<br />
When the system connects to the remote system, the message “Session<br />
Connected.” appears on the screen, and the picture on the remote site is<br />
displayed. Now you can start communication with the remote party.<br />
To cancel dialing before connecting<br />
While “Dialing” is displayed on the monitor screen, press the DISCONNECT<br />
( ) button or the ENTER button on the Remote Commander.<br />
To save the entered IP address or ISDN telephone number in the<br />
Phone Book<br />
When you enter the IP address or ISDN telephone number, the Save button<br />
appears at the lower part of the menu.<br />
Select “Save” with the V, v, B or b button, then press the ENTER button on<br />
the Remote Commander. The List Edit menu is displayed. Save the address or<br />
number you entered into the Phone Book.<br />
For details on the List Edit menu, see “Registering a Remote Party – Phone<br />
Book” on page 120.<br />
Redial function<br />
Once you have input the IP address or ISDN telephone number using the<br />
Detailed Dial menu, it will be entered in the text box of the Detailed Dial menu<br />
the next time you open the menu.<br />
Note<br />
The redial function is not available:<br />
Once you have turned off the power of the system or set it to standby mode.<br />
When you cancel dialing the entered IP address or ISDN telephone number.<br />
116 Starting a Connection by Calling a Remote Party
Receiving a Call from a Remote Party<br />
<strong>Operation</strong>s for answering a call differ depending on the setting of the answer<br />
mode.<br />
Auto answer mode<br />
The system automatically receives a call from a remote party and you can start<br />
connecting. Although no operation is necessary to start, the picture on the local<br />
site will be displayed on the remote site screen even if you are not ready to<br />
begin.<br />
<strong>Manual</strong> answer mode<br />
When there is an incoming call, the Communication System rings. You need<br />
to connect the call manually.<br />
You can start connecting when you are ready.<br />
Notes<br />
You cannot answer the call unless the power switch on the Communication System is<br />
on.<br />
Make sure that the TV monitor is turned on.<br />
For setting of the answer mode, see “Auto Answer” in the Answer setup menu<br />
on page 65.<br />
Answering a Call from a Remote Party<br />
To answer a call in auto answer mode<br />
When you receive a call, the Communication System rings and the message<br />
“Answering...” appears on the monitor screen. The system is automatically<br />
connected and the picture of the remote party is displayed on the local monitor<br />
screen and the sound is heard. The picture and sound on the local site will be<br />
enabled on the remote site at the same time.<br />
The message “Session Connected.” appears on the monitor screen.<br />
You are now ready to start communication.<br />
Picture on the local site<br />
Picture on the remote site<br />
Receiving a Call from a Remote Party<br />
117<br />
Chapter 3: Basic Connection
Note<br />
See pages 131 to 141 to adjust the sound and picture during communication.<br />
To receive a call in manual answer mode<br />
When you receive a call, the Communication System rings and the message<br />
“Incoming call. Answer?” appears on the monitor screen.<br />
Press V, v, B or b to select “OK”, then press the ENTER button. The system<br />
is then connected. Once the connection is made, the picture of the remote party<br />
is displayed on the local monitor screen and the sound is heard. The picture and<br />
sound on the local site will be enabled on the remote site at the same time.<br />
The message “Session Connected.” appears on the monitor screen.<br />
You are now ready to start a communication.<br />
Note<br />
See pages 131 to 141 to adjust the sound and picture during communication.<br />
When you do not want to answer the call<br />
Press V, v, B or b to select “Cancel”, then press the ENTER button. Ringing<br />
stops, and the connection is canceled.<br />
When the system fails to make an ISDN connection<br />
If the system fails to connect to the remote party, the message “Cannot<br />
complete connection. (an ISDN cause code and a message are displayed here)”<br />
appears on the monitor screen.<br />
For details on ISDN cause codes and messages, see “On-Screen Messages”<br />
on page 231.<br />
118 Receiving a Call from a Remote Party
Ending the Connection<br />
1 Press the DISCONNECT ( ) button on the Remote Commander.<br />
The message “Disconnect?” appears on the monitor screen.<br />
2 Press the DISCONNECT ( ) button on the Remote Commander again,<br />
or press the V, v, B or b button on the Remote Commander to select “OK”,<br />
then press the ENTER button.<br />
The system is disconnected.<br />
Note<br />
The power of the Communication System remains on even if the system is<br />
disconnected.<br />
To cancel disconnection of the system<br />
Select “Cancel” with the V, v, B or b button on the Remote Commander, then<br />
press the ENTER button.<br />
To register the connected remote party in the Phone Book<br />
You can easily register the remote party who has just disconnected.<br />
If you set “Last Number Registration” to “On” on the Device Setup page of the<br />
General setup menu, the message “Register this participant in the list?”<br />
appears after a communication with an unregistered remote party is finished.<br />
When you select “OK”, the List Edit menu appears.<br />
Note<br />
If the “Last Number Registration” is set to “Off”, the message does not appear.<br />
For “Last Number Registration” setting, see “General Setup Menu” on page<br />
81.<br />
Ending the Connection<br />
119<br />
Chapter 3: Basic Connection
Registering a Remote Party – Phone<br />
Book<br />
You can register the telephone number or IP address of a remote party in the<br />
Phone Book, allowing you to dial the party very easily.<br />
Up to 1000 remote parties can be registered in the Phone Book. You can also<br />
store a still image such as a participant’s portrait in the index list.<br />
You can also create a Private Phone Book on a “Memory Stick” separately<br />
from the Phone Book in the Communication System.<br />
Registering a New Remote Party<br />
1 Use the V, v, B or b button on the Remote Commander to select “Phone<br />
Book” in the Home menu, then press the ENTER button. Or select<br />
“Connect” in the Home menu with the V, v, B or b button and the ENTER<br />
button to display the Connect menu, then select “Select from Phone Book”.<br />
The Phone Book opens.<br />
Phone Book > Default Group<br />
Home<br />
Find Name by First Initial<br />
New Entry<br />
Group Edit<br />
Shared Phone Book<br />
History<br />
Detailed Dial<br />
Default Group<br />
IP:192.168.0.11<br />
Note<br />
The Phone Book can be displayed by selecting “Phone Book” in the History or<br />
Detailed Dial menu.<br />
2 Use the V, v, B or b button on the Remote Commander to select “New<br />
Entry”, then press the ENTER button.<br />
The List Edit menu appears.<br />
120 Registering a Remote Party – Phone Book<br />
5/11/2008 13:00
Phone Book<br />
Index<br />
Group Select<br />
Dial to: IP<br />
More Options<br />
None Specified<br />
One-Touch Dial<br />
Specified<br />
Line I/F<br />
IP<br />
Communication<br />
Bit Rate<br />
1024Kbps<br />
Number of Lines 2B (128K)<br />
Save<br />
None Specified<br />
3 Set the items in the List Edit menu.<br />
Use the V, v, B or b button and the ENTER button on the Remote<br />
Commander to select the setup item.<br />
To enter the characters, use the number buttons on the Remote Commander<br />
or the displayed on-screen keyboard, and press the ENTER button. To<br />
select the item, use the V, v, B or b button and press the ENTER button.<br />
Index<br />
Enter the name of a remote party in the Index text box. You can use up to<br />
39 letter and number characters.<br />
Group Select<br />
Select the group set in the Phone Book.<br />
Dial to:<br />
Enter the IP address or line number of a remote party depending on the line<br />
interface you select.<br />
When you select “IP” from “Line I/F”: Enter the remote party’s IP<br />
address. Enter the host name and domain name (ex. host.domain) when<br />
using the DNS server, or enter the party’s user name and user number<br />
when using the gatekeeper (page 75).<br />
When you select “ISDN” from “Line I/F”: Enter the remote party’s line<br />
number. If you register the sub-address in the Phone Book, enter an<br />
asterisk between the line number and sub-address. The sub-address can<br />
only be composed of numbers.<br />
When “More Options Enable” is set to “On” in the Dial setup menu<br />
(page 64), six line input text boxes, A1, A2, B1, B2, C1 and C2, are<br />
displayed. Be sure to enter the remote party’s number to the A1 text<br />
box.<br />
When you select “TEL” from “Line I/F”: Enter the telephone number of<br />
a remote party. (ex. 0390123456)<br />
When you select “SIP” from “Line I/F”: Enter the address of a remote<br />
party or the number assigned by the SIP server.<br />
The format of the address is the following:<br />
4000 (number assigned by the SIP server)<br />
4000@sip.com<br />
192.168.1.1 (when the IP address and SIP server are not used)<br />
Cancel<br />
Registering a Remote Party – Phone Book<br />
121<br />
Chapter 3: Basic Connection
Icon/Image<br />
Select the icon or a still image stored on a “Memory Stick” to be displayed<br />
on the Phone Book.<br />
Note<br />
You cannot select a still image unless a “Memory Stick” in which still images are<br />
stored is inserted.<br />
One-Touch Dial Specified<br />
Select whether to display the one-touch dial buttons in the Home menu.<br />
Assign the F1, F2, F3 or F4 function button on the Remote Commander to<br />
each one-touch dial button.<br />
Line I/F<br />
Select the line interface you are using to connect to a remote party. Select<br />
from among IP, ISDN, TEL and SIP. Selecting any interface switches the<br />
setting items in the List Edit menu.<br />
Notes<br />
When a checkmark is put to “SIP” under “Line Interface” of the Line Interface<br />
setup menu, you can select “SIP” from “Line I/F”.<br />
When “Use LAN2” is set to “On”, you can select “IP(2)” from “Line I/F”.<br />
Communication Bit Rate<br />
Select the communication bit rate when you select “IP” or “SIP” with<br />
“Line I/F”.<br />
Number of Lines<br />
Select the number of ISDN channels to be used when you select “ISDN”<br />
with “Line I/F”.<br />
Note<br />
You can select “Number of Lines” only when the <strong>PCS</strong>A-MCG80 HD MCU<br />
software is installed in the Communication System.<br />
Auto Dial<br />
Set this item only for the Private Phone Book (page 126). Setting “Auto<br />
Dial” to “On” allows you to automatically dial one of the lists in the Private<br />
Phone Book simply by inserting the “Memory Stick” in which the Private<br />
Phone Book is registered.<br />
4 Use the V, v, B or b on the Remote Commander to select “Save”, then<br />
press the ENTER button.<br />
The settings are registered in the Phone Book.<br />
Note<br />
When a connection with a remote party not registered in the Phone Book is terminated,<br />
you can register this remote party to the Phone Book. In this case, the IP address or line<br />
number is shown in “Index” as the name of the remote party. Modify it if necessary.<br />
122 Registering a Remote Party – Phone Book
To connect to the remote party without using bonding<br />
If the system of the remote party is not equipped with the bonding function,<br />
entering one telephone number does not allow you to connect all the line<br />
numbers used to connect to the remote party. To connect to the remote party<br />
by entering all the ISDN line numbers used, you can set the connection without<br />
using the bonding function of this system.<br />
When you set “More Options Enable” to “On” in the Dial setup menu (page<br />
64), the A1, A2, B1, B2, C1 and C2 text boxes appear in the List Edit menu.<br />
Enter all the telephone numbers for the ISDN lines selected by “Number of<br />
Lines”.<br />
Note<br />
When you set “Number of Lines” to “2B”, you can connect to the remote party by<br />
selecting “ISDN (2B)” from “Line I/F” in the Detailed Dial menu.<br />
To set up more detailed options<br />
When “More Options Enable” is set to “On” in the Dial setup menu, the More<br />
Options button is shown at the lower part of the List Edit menu.<br />
Select the More Options button with the V, v, B or b button on the Remote<br />
Commander and press the ENTER button to open a menu for more detailed<br />
dial settings. You can change the settings of the desired items.<br />
Note<br />
The contents set with the More Options button have priority over those set in the Dial<br />
setup menu.<br />
Editing the Contents of the Phone Book<br />
You can edit the telephone number, IP address, name or setting registered in<br />
the Phone Book.<br />
1 Open the Phone Book.<br />
2 Use the V, v, B or b button on the Remote Commander to select the remote<br />
party to be modified, then press the ENTER button.<br />
The submenu appears.<br />
Cancel<br />
Connect<br />
Edit<br />
Copy<br />
Delete<br />
3 Press the V, v, B or b button on the Remote Commander to select “Edit”,<br />
then press the ENTER button.<br />
The List Edit menu appears.<br />
Registering a Remote Party – Phone Book<br />
123<br />
Chapter 3: Basic Connection
4 Modify the telephone number, IP address, name or setting.<br />
5 Use the V, v, B or b button on the Remote Commander to select “Save”,<br />
then press the ENTER button.<br />
The modification is completed.<br />
Copying a Registered Party in the Phone Book<br />
1 Open the Phone Book.<br />
2 Use the V, v, B or b button on the Remote Commander to select the remote<br />
party to be copied, then press the ENTER button.<br />
The submenu appears.<br />
3 Press the V, v, B or b button on the Remote Commander to select “Copy”,<br />
then press the ENTER button.<br />
The items for the selected party are copied, and the name is followed by “–<br />
2”. You can use the setting after modifying the necessary items.<br />
Deleting the Registered Remote Party<br />
1 Open the Phone Book.<br />
2 Use the V, v, B or b button on the Remote Commander to select the remote<br />
party to be deleted from the Phone Book, then press the ENTER button.<br />
The submenu appears.<br />
3 Press the V, v, B or b button on the Remote Commander to select<br />
“Delete”, then press the ENTER button.<br />
The message “Delete Entry?” appears.<br />
4 Use the V, v, B or b button on the Remote Commander to select “OK”,<br />
then press the ENTER button.<br />
The selected party is deleted.<br />
To cancel deleting<br />
Select “Cancel” in step 4, then press the ENTER button.<br />
Creating a Group in the Phone Book (Group Edit)<br />
You can create groups into which the registered remote parties are grouped.<br />
To register a new group<br />
1 Open the Phone Book.<br />
124 Registering a Remote Party – Phone Book
2 Use the V, v, B or b button on the Remote Commander to select “Group<br />
Edit”, then press the ENTER button.<br />
The Phone Book > Group Edit menu appears.<br />
Phone Book > Group Edit<br />
Previous<br />
3 Use the V, v, B or b button on the Remote Commander to select “New<br />
Entry”, then press the ENTER button.<br />
The group name input menu appears.<br />
Phone Book > Group Edit<br />
Previous<br />
New Entry<br />
New Entry<br />
4 Enter the group name using the number buttons on the Remote<br />
Commander and the on-screen keyboard, then press the ENTER buttons.<br />
You can use the alphabetical letters, numbers and symbols.<br />
5 Use the V, v, B or b button on the Remote Commander to select “Save”,<br />
then press the ENTER button.<br />
The registered group button is displayed.<br />
Phone Book > Group Edit<br />
Previous<br />
Group Edit<br />
New Entry<br />
TOKYO TOKYO<br />
Cancel<br />
Registering a Remote Party – Phone Book<br />
125<br />
Chapter 3: Basic Connection
6 Use the V, v, B or b button on the Remote Commander to select<br />
“Previous”, then press the ENTER button.<br />
The Phone Book is restored.<br />
To modify the group name<br />
1 Open the Phone Book > Group Edit menu, select the group button you<br />
want to modify using the V, v, B or b button on the Remote Commander,<br />
and press the ENTER button.<br />
The submenu appears.<br />
Phone Book > Group Edit<br />
Previous<br />
New Entry<br />
TOKYO Cancel<br />
Edit<br />
Delete<br />
2 Use the V, v, B or b button on the Remote Commander to select “Edit”,<br />
then press the ENTER button.<br />
The group name input menu appears.<br />
3 Modify the group name using the number buttons on the Remote<br />
Commander and the on-screen keyboard, then press the ENTER buttons.<br />
4 Use the V, v, B or b button on the Remote Commander to select “Save”,<br />
then press the ENTER button.<br />
The modified group button is displayed in the Phone Book > Group Edit<br />
menu.<br />
Notes<br />
You can operate the following with a submenu in the Group Edit menu.<br />
“Cancel”: Cancels selection of the group button.<br />
“Delete”: Deletes a group in which no party is registered.<br />
You cannot delete a group button for which any remote parties are registered.<br />
Creating a Private Phone Book<br />
You can create your own Phone Book (Private Phone Book) on a “Memory<br />
Stick”. Once the Private Phone Book is registered, inserting the “Memory<br />
Stick” into the Communication System changes the Phone Book to the Private<br />
Phone Book. You can also activate the Auto Dial feature, allowing you to<br />
126 Registering a Remote Party – Phone Book
automatically start dialing one of the remote parties registered in the Private<br />
Phone Book simply by inserting the “Memory Stick”.<br />
To register a new remote party in a Private Phone Book<br />
1 Insert a “Memory Stick” in which you want to register a remote party into<br />
the Memory Stick slot on the Communication System.<br />
Insert the “Memory Stick” in the direction of the arrow with the mark<br />
facing upward.<br />
2 Open the Phone Book page in the Administrator setup menu.<br />
Setup Administrator Phone Book<br />
Administrator8<br />
Save Phone Book<br />
Load Phone Book<br />
Clear Phone Book<br />
Auto Dialing<br />
Execute<br />
Execute<br />
Create Private Phone Book Execute<br />
Delete Private Phone Book Execute<br />
Copy to Private Phone Book Execute<br />
For how to open the menu, see “Registering Local Information” on page<br />
60.<br />
3 Select “Create Private Phone Book”.<br />
An empty folder and file for a Private Phone Book are created in the<br />
“Memory Stick”.<br />
4 Register a new remote party.<br />
The procedure is the same as that for registering in the Phone Book.<br />
Proceed with steps 2 to 4 in “Registering a New Remote Party” on page<br />
120.<br />
Execute<br />
On<br />
The procedures for how to edit the contents of the Private Phone Book,<br />
how to delete the registered remote party, or how to copy one of the<br />
registered parties in the Private Phone Book are the same as those for the<br />
Phone Book. Open the Private Phone Book and proceed with the steps<br />
described on pages 123 to 124.<br />
Cancel<br />
Registering a Remote Party – Phone Book<br />
127<br />
Chapter 3: Basic Connection
To copy all the contents of the Phone Book to the Private Phone Book<br />
Insert the “Memory Stick” in which you want to store the Private Phone Book<br />
into the Memory Stick slot on the Communication System, then select “Copy<br />
to Private Phone Book” in the Administrator setup menu. All the data<br />
registered in the Phone Book are copied to the inserted “Memory Stick”.<br />
To delete the Private Phone Book from the “Memory Stick”<br />
Insert the “Memory Stick” from which you want to delete the registered<br />
Private Phone Book into the Memory Stick slot on the Communication<br />
System, then select “Delete Private Phone Book” on the Phone Book page in<br />
the Administrator setup menu. All the data are deleted from the inserted<br />
“Memory Stick”.<br />
To dial a specified remote party in a Private Phone Book automatically<br />
If you set “Auto Dialing” in the Administrator setup menu to “On”, you can<br />
automatically dial one of the registered remote parties in the Private Phone<br />
Book simply by inserting the “Memory Stick” in which the Private Phone<br />
Book is registered.<br />
1 Open the Private Phone Book.<br />
2 Use the V, v, B or b button on the Remote Commander to select the remote<br />
party to dial automatically, then press the ENTER button.<br />
3 Press the V, v, B or b button on the Remote Commander to select “Edit”,<br />
then press the ENTER button.<br />
The List Edit menu appears.<br />
4 Use the V, v, B or b button on the Remote Commander to select “Auto<br />
Dialing”, then press the ENTER button.<br />
The setting is registered and “AUTO” appears in the Private Phone Book.<br />
Using the Shared Phone Book<br />
Using the Shared Phone Book function enables multiple <strong>Sony</strong> Visual<br />
Communication Systems to access to a Phone Book located on a server.<br />
For detailed configuration, consult your network administrator.<br />
Notes<br />
You can dial a remote party registered in the Shared Phone Book in the same manner<br />
as with the Phone Book. However, you cannot dial a remote party registered in a<br />
multipoint connection list.<br />
128 Registering a Remote Party – Phone Book
You cannot register a new party, delete a registered party, attach an image, or edit the<br />
Shared Phone Book. In addition, you cannot copy the remote parties registered in the<br />
Shared Phone Book to the Private Phone Book.<br />
System configuration example<br />
In this system configuration, sharing of a Phone Book using H.350 is enabled.<br />
/ LAN ALERT 1 LAN ALERT 2<br />
/ LAN ALERT 1 LAN ALERT 2<br />
/ LAN ALERT 1 LAN ALERT 2<br />
/ LAN ALERT 1 LAN ALERT 2<br />
/ LAN ALERT 1 LAN ALERT 2<br />
OPEN<br />
OPEN<br />
OPEN<br />
OPEN<br />
OPEN<br />
Shared Phone<br />
Book server<br />
H.350/LDAP<br />
Directory server<br />
Using the Shared Phone Book<br />
Check that “SPB Mode” is set to “On” in the Shared Phone Book setup menu,<br />
and enter appropriate values for “SPB Server Address” and “SPB Server<br />
Password”.<br />
Setup Shared Phone Book<br />
Shared Phone Book<br />
SPB Mode<br />
SPB Server Address<br />
SPB Server Password<br />
On<br />
Save<br />
When “SPB Mode” is set to “On”, the Shared Phone Book menu button<br />
appears on the screen.<br />
Cancel<br />
Registering a Remote Party – Phone Book<br />
129<br />
Chapter 3: Basic Connection
To display the Shared Phone Book<br />
Select “Shared Phone Book” in the Phone Book, and press the ENTER button.<br />
The display switches to the Shared Phone Book.<br />
Phone Book<br />
Home<br />
New Entry<br />
Group Edit<br />
Phone Book<br />
History<br />
Detailed Dial<br />
Default Group<br />
Room 101<br />
ISDN 01-2345-6789<br />
Room 102<br />
IP 255.255.255.255<br />
To restore the Phone Book, select “Phone Book” in the menu, and press the<br />
ENTER button.<br />
The procedure for dialing the registered remote party in the Shared Phone<br />
Book is the same as that for the Phone Book.<br />
For details on dialing, see see “Calling a Remote Party Registered in the<br />
Phone Book” on page 112.<br />
130 Registering a Remote Party – Phone Book
Adjusting the Sound<br />
Adjusting the Volume of the Received Sound<br />
You can adjust the volume of the sound to be received from a remote party.<br />
Press the VOLUME + button on the Remote Commander to increase the<br />
volume, VOLUME – button to decrease it. The volume level indicator appears<br />
on the monitor screen. The indicator will automatically disappear if you do not<br />
operate the buttons for a certain time.<br />
Notes<br />
You need to set the volume of the TV monitor to an appropriate level first.<br />
If feedback or distortion caused by increasing the volume occurs, decrease the<br />
volume.<br />
Turning Off the Sound Momentarily – Muting Function<br />
You can momentarily turn off the sound to be sent to the remote party during<br />
communication.<br />
Press the MIC ON/OFF button on the Remote Commander.<br />
The sound of the local party is not heard by the remote party. The NEAR<br />
indicator appears on the monitor screen of the local site.<br />
The indicator appears on the monitor screen of the remote site,<br />
indicating that the sound of the local party is not transmitted.<br />
To restore the sound<br />
Press the MIC ON/OFF button again.<br />
The NEAR<br />
indicator on the local site and the indicator on the remote<br />
site disappear and the sound is heard by the remote party.<br />
11<br />
Adjusting the Sound<br />
131<br />
Chapter 3: Basic Connection
Turning Off the Sound on Answering – Mic on Answer Function<br />
You can turn off the sound to be sent to a remote party when you have<br />
answered a call from the remote party.<br />
If you set “Mic on Answer” to “Off” in the Answer setup menu, only the<br />
picture on the local party will be sent to the remote party when answering a<br />
call. The NEAR indicator appears on the monitor screen.<br />
For the setting, see “Mic on Answer” in the Answer setup menu on page 65.<br />
To send the sound to the remote party<br />
Press the MIC ON/OFF button on the Remote Commander.<br />
The NEAR<br />
indicator disappears and the sound is heard by the remote party.<br />
Synchronizing Audio and Video – Lip Sync Function<br />
During the communication a time lag may occur between the sound and<br />
picture to be sent to the remote party, which prevents smooth communication.<br />
Using the Lip Sync function adjusts to synchronize audio and video. However,<br />
this may delay transmission of audio synchronized with video.<br />
The Lip Sync function is enabled if you set “Lip Sync” to “Auto” on the Basic<br />
Setup1 page in the Audio setup menu.<br />
For the setting, see “Lip Sync”in the Audio setup menu on page 70.<br />
Note<br />
To enable the Lip Sync function of the remote party, you have to ask them to do so.<br />
Reducing Echo – Echo Canceller<br />
The Communication System is equipped with the echo canceller function,<br />
allowing the echo that occurs during audio transmission to be reduced.<br />
Setting “Echo Canceller” to “On” on the Basic Setup1 page in the Audio setup<br />
menu activates the built-in echo canceller.<br />
When using an external echo canceller, set “Echo Canceller” to “Off”.<br />
For details on the setting, see “Echo Canceller” in the Audio setup menu on<br />
page 70.<br />
132 Adjusting the Sound
Connection example for using an external echo canceller<br />
VISCA OUT<br />
TERMINAL<br />
CAMERA S VIDEO IN RGB IN RGB OUT HDMI OUT ISDN UNIT AUX CONTROL<br />
EC-MIC(A7) MIC(A1/A3)<br />
1 2 1(R) 2(L)<br />
R L R L R L<br />
DC 19.5V<br />
(PLUG IN POWER) AUDIO 1 IN AUDIO OUT REC OUT 1-EXT-2<br />
1<br />
2<br />
to AUDIO 1 IN<br />
Speaker<br />
LINE<br />
OUT<br />
LINE IN<br />
External echo canceller<br />
to AUDIO OUT<br />
External microphone<br />
mixer<br />
<strong>PCS</strong>-A1 Microphone<br />
(not supplied)<br />
For details on connecting the external echo canceller, refer to the operating<br />
instructions for the echo canceller you are using.<br />
Adjusting the Sound<br />
133<br />
Chapter 3: Basic Connection
Adjusting the Camera<br />
You can adjust the image shot by the local camera that is sent to the remote<br />
party to obtain the desired angle and size.<br />
During communication you can also control the camera on the remote site to<br />
adjust the image shot by the remote camera.<br />
Adjusting the Camera Angle and Zoom<br />
Determine the angle of view and the size of the picture to be displayed on the<br />
monitor screen by adjusting the angle and zoom.<br />
1 Press the CAMERA button on the Remote Commander, or press the V, v,<br />
B or b button to select “Camera” in the Home menu and press the ENTER<br />
button.<br />
The Camera menu appears.<br />
Camera<br />
2 Select the camera to be adjusted.<br />
During communication pressing the F1 button on the Remote Commander<br />
switches between the camera on the local site and that on the remote site.<br />
When two cameras are connected, pressing the F2 button on the Remote<br />
Commander switches between the first and second cameras.<br />
The selected camera is shown at the top of the Camera menu.<br />
3 Use the V, v, B or b button on the Remote Commander to select<br />
“Adjustments”, then press the ENTER button.<br />
The Adjustments menu appears.<br />
134 Adjusting the Camera<br />
Previous<br />
Adjustments<br />
Brightness<br />
Preset<br />
Details<br />
5/11/2008 13:00
4 Adjust the camera angle so that the desired angle of view is obtained with<br />
the V, v, B or b button on the Remote Commander.<br />
The selected camera pans and tilts, then the adjusted picture will be<br />
displayed in the small window or in full screen.<br />
5 Use the ZOOM button on the Remote Commander to zoom in or out.<br />
Press the T (Telephoto) button to zoom in and the W (Wide angle) button<br />
to zoom out.<br />
For details on digital zoom, see “To use the digital zoom function” on page<br />
140.<br />
To control the remote camera<br />
To control the remote camera, set “Far End Camera Control” (page 68) to<br />
“On” in the Communication setup menu for both the local and remote sites.<br />
If this setting is not configured properly, you will not be able to control the<br />
remote camera.<br />
You cannot control the remote camera during a session if the remote control<br />
format of the remote camera is not H.281. If you cannot control the remote<br />
camera, ask the remote party about the remote control format of his camera.<br />
If the local and remote parties try to control the same camera at the same<br />
time, the camera may not operate correctly.<br />
Adjusting the Brightness<br />
Adjustments > Camera Angle<br />
Local Camera : First Camera<br />
T<br />
Pan/tilt indicator<br />
Normally, the brightness is automatically adjusted to obtain optimum levels.<br />
You can also adjust it manually.<br />
It is recommended that the brightness be adjusted automatically to obtain<br />
optimum brightness.<br />
To adjust the brightness manually<br />
W<br />
Zoom indicator<br />
1 Press the CAMERA button on the Remote Commander, or press the V, v,<br />
B or b button to select “Camera” in the Home menu and press the ENTER<br />
button.<br />
Adjusting the Camera<br />
135<br />
Chapter 3: Basic Connection
136 Adjusting the Camera<br />
The Camera menu appears.<br />
Camera<br />
Previous<br />
Adjustments<br />
Brightness<br />
Preset<br />
Details<br />
2 Select the camera to be adjusted.<br />
During communication pressing the F1 button on the Remote Commander<br />
switches between the camera on the local site and that on the remote site.<br />
When two cameras are connected, pressing the F2 button on the Remote<br />
Commander switches between the first and second cameras.<br />
The selected camera is shown at the top of the Camera menu.<br />
3 Use the V, v, B or b button on the Remote Commander to select<br />
“Brightness”, then press the ENTER button.<br />
The Brightness adjustment menu appears.<br />
Adjustments > Brightness<br />
Auto Adjustment<br />
Previous<br />
5/11/2008 13:00<br />
5/11/2008 13:00<br />
4 Press the ENTER button on the Remote Commander.<br />
5 Use the V, v, B or b button on the Remote Commander to select “<strong>Manual</strong><br />
Adjustment”, then press the ENTER button.<br />
The brightness adjustment bar is selected.
6 Use the V, v, B or b button button on the Remote Commander to adjust<br />
the brightness of the screen.<br />
Pressing the b button increases the brightness, and pressing the B button<br />
decreases it.<br />
Using the Preset Function<br />
The settings for local or remote camera angle and zoom can be registered in<br />
the preset memory. Once you have stored the settings, you can easily recall<br />
them to move the camera.<br />
Up to 100 settings can be registered for the local camera and up to 6 settings<br />
for the remote camera.<br />
The original position of the camera is registered in the Preset number 1 button<br />
at the factory.<br />
To register the preset setting<br />
Adjustments > Brightness<br />
<strong>Manual</strong> Adjustment<br />
Previous<br />
Brightness adjustment bar<br />
5/11/2008 13:00<br />
1 Press the CAMERA button on the Remote Commander, or press the V, v,<br />
B or b button to select “Camera” in the Home menu and press the ENTER<br />
button.<br />
The Camera menu appears.<br />
Camera<br />
Previous<br />
Adjustments<br />
Brightness<br />
Preset<br />
Details<br />
5/11/2008 13:00<br />
2 Select the camera whose angle and zoom setting you want to preset.<br />
Adjusting the Camera<br />
137<br />
Chapter 3: Basic Connection
138 Adjusting the Camera<br />
During communication pressing the F1 button on the Remote Commander<br />
switches between the camera on the local site and that on the remote site.<br />
When two cameras are connected, pressing the F2 button on the Remote<br />
Commander switches between the first and second cameras.<br />
The selected camera is shown at the top of the Camera menu.<br />
3 Use the V, v, B or b button on the Remote Commander to select “Preset”,<br />
then press the ENTER button.<br />
The Preset Setting List appears.<br />
Adjustments > Preset Setting List<br />
Local Camera : First Camera<br />
New Entry<br />
Back to Home<br />
1 2 3<br />
4 5 6<br />
4 Use the V, v, B or b on the Remote Commander to select “New Entry”,<br />
then press the ENTER button.<br />
The Preset Save menu appears.<br />
Adjustments > Preset Save<br />
Preset Number<br />
1<br />
Camera Angle Adjustments<br />
Thumbnails Register in Thumbnail/List<br />
Save<br />
Cancel<br />
5 Use the V, v, B or b button on the Remote Commander to select “Preset<br />
Number”, then select the number to which the setting is stored.<br />
Only the numbers that have not been used for presetting are selectable.<br />
6 Use the V, v, B or b button on the Remote Commander to select<br />
“Adjustments” under “Camera Angle”, then press the ENTER button, if<br />
you want to adjust the camera zoom and angle.<br />
The Adjustments menu is displayed and you can adjust the zoom and<br />
angle.<br />
For the adjustment procedures, see “Adjusting the Camera Angle and<br />
Zoom” on page 134.
7 After the adjustment is finished, press the RETURN button or the ENTER<br />
button on the Remote Commander.<br />
The Preset Save menu is restored.<br />
8 When you want to register a thumbnail, use the V, v, B or b button on the<br />
Remote Commander to select “Thumbnails” and press the ENTER button<br />
to check the checkmark for “Register in Thumbnail/List”.<br />
9 Use the V, v, B or b button on the Remote Commander to select “Save”,<br />
then press the ENTER button.<br />
The angle and zoom settings are stored in the selected number, and the<br />
preset number is listed in the Preset Setting List.<br />
To move the camera to the preset position<br />
1 Press the CAMERA button on the Remote Commander, or press the V, v,<br />
B or b button to select “Camera” in the Home menu and press the ENTER<br />
button.<br />
The Camera menu appears.<br />
2 Use the V, v, B or b button on the Remote Commander to select “Preset”<br />
in the Camera menu, then press the ENTER button.<br />
The Preset Setting List appears.<br />
Adjustments > Preset Setting List<br />
Local Camera : First Camera<br />
New Entry<br />
Back to Home<br />
1 2 3<br />
4 5 6<br />
3 Use the V, v, B or b button on the Remote Commander to select the preset<br />
number you want to recall, then press the ENTER button.<br />
You can also recall the preset numbers 1 to 6 by pressing the number<br />
buttons 1 to 6 on the Remote Commander.<br />
The submenu appears.<br />
4 Press the V, v, B or b button on the Remote Commander to select “Load”,<br />
then press the ENTER button.<br />
The camera moves to the selected preset position.<br />
Note<br />
You can select the items below from the submenu:<br />
“Cancel”: Cancels selection of the preset position.<br />
“Edit”: Changes the selected preset position.<br />
Adjusting the Camera<br />
139<br />
Chapter 3: Basic Connection
140 Adjusting the Camera<br />
“Delete”: Deletes the selected preset position.<br />
Adjusting the Camera in the Detailed Setup Menu<br />
When you select “Details” in the Camera menu, the more detailed setup menu<br />
opens. You can adjust various items for camera adjustment.<br />
Digital Zoom<br />
Backlight<br />
White Balance<br />
Focus<br />
Focus Adjustment<br />
BrightFace<br />
Noise Reduction Filter<br />
On<br />
On<br />
Auto<br />
Auto<br />
Medium<br />
Medium<br />
To use the digital zoom function<br />
Set “Digital Zoom” to “On”.<br />
To use backlight compensation function<br />
When the subject is shot with a bright background, set “Backlight” to “On”.<br />
The backlight compensation is activated and you can obtain a bright picture.<br />
To adjust the white balance<br />
Set the white balance depending on the shooting location.<br />
Auto: Adjusts the white balance automatically.<br />
Indoor: Select when shooting the subject indoors.<br />
Outdoor: Select when shooting the subject outdoors.<br />
ONE PUSH: Select when adjusting the white balance by shooting a white<br />
object in the center of the screen.<br />
To adjust the focus automatically<br />
Select “Auto” in the Focus drop-down list and press the ENTER button. The<br />
focus is automatically adjusted.<br />
To adjust the focus manually<br />
OK<br />
1 Select “<strong>Manual</strong>” in the Focus drop-down list.<br />
2 Select “Focus Adjustment” and press the ENTER button.<br />
3 Adjust the focus using the V, v, B or b button on the Remote Commander.<br />
To focus on a distant subject, press the b button.<br />
To focus on a near subject, press the B button.
To use the BrightFace function<br />
The BrightFace function is provided if the scene is shot by the <strong>PCS</strong>A-C<strong>XG80</strong><br />
HD Camera Unit. When the function is enabled, brightness and contrast are<br />
automatically adjusted and as the result the dark part of a scene is shot brighter<br />
and the bright part is shot clearer. Even when the scene is shot in a dark room<br />
or a backlit room with a window or window shade, human faces are shot<br />
brighter.<br />
To use the BrightFace function, set “BrightFace” to “High”, “Medium” or<br />
“Low”.<br />
Set “BrightFace” to “Off” when you do not use the BrightFace function.<br />
Note<br />
The BrightFace function is not available with other camera than the <strong>PCS</strong>A-C<strong>XG80</strong>.<br />
To use the Noise Reduction Filter<br />
If you set up Noise Reduction Filter, picture noise can be reduced. You can<br />
select the noise reduction level from among “High”, “Medium” and “Low”. If<br />
you do not use Noise Reduction Filter, set it to “Off”.<br />
Adjusting the Camera<br />
141<br />
Chapter 3: Basic Connection
Selecting the Input Picture and Sound<br />
You can switch the picture displayed on the monitor screen, and switch<br />
between the input picture and audio.<br />
Switching the Displayed Picture between the Local and Remote<br />
Pictures<br />
When the displayed picture on the monitor can be switched during<br />
communication, pressing the LAYOUT button on the Remote Commander<br />
displays the indication “F1: Switches the monitored picture between the<br />
remote and local sites.” at the bottom of the monitor.<br />
Each press of the F1 button on the Remote Commander switches the displayed<br />
picture between those on the local and remote sites.<br />
Selecting the Input Picture<br />
1 Press the VIDEO INPUT button on the Remote Commander.<br />
The Video Input > Near menu appears.<br />
Video Input > Near<br />
CAMERA<br />
S VIDEO<br />
2 Use the V, v, B or b button on the Remote Commander to select the video<br />
input on the local site, then press the ENTER button.<br />
The picture input from the selected equipment is displayed on the monitor<br />
screen.<br />
CAMERA: Selects the picture from the camera connected to the<br />
CAMERA connector.<br />
S VIDEO: Selects the picture from the equipment (second camera, etc.)<br />
connected to the S VIDEO IN connector.<br />
RGB: Selects the picture from the equipment connected to the RGB IN<br />
connector.<br />
YPbPr: Selects the picture from the equipment connected to the VIDEO<br />
IN YPbPr jacks.<br />
3 To store the selected input in the memory of the system, use the V, v, B or<br />
b button on the Remote Commander to select “Save”, then press the<br />
ENTER button.<br />
The Video Input menu disappears.<br />
142 Selecting the Input Picture and Sound<br />
RGB<br />
YPbPr<br />
Save Cancel
The stored video input is not deleted even after the system is turned off, and<br />
is selected when the power is turned on again.<br />
To change the video input name displayed in the Video Input menu<br />
You can label the desired name for each video input on the Custom Input Label<br />
page in the Video setup menu. When you switch the video input in step 2<br />
above, the name you set is displayed in the Video Input menu.<br />
For example, you can label: Camera1, Camera2, None, etc.<br />
For details, see“Custom Input Label” in the Video setup menu on page 73.<br />
Selecting the Video Input Using the F1 to F4 (Function) Buttons on<br />
the Remote Commander<br />
If you assign the video input (Camera, S-VIDEO, RGB or YPbPr) to any of the<br />
F1 to F4 buttons on the Remote Commander in “Function Keys in<br />
Communication” of the General setup menu, you can quickly switch the video<br />
input only by pressing one of the F1 to F4 buttons.<br />
For details, see “Function Keys in Communication” in the General setup<br />
menu on page 83.<br />
Switching the Sound to Be Sent to the Remote Party<br />
You can switch the sound sent to the remote party between the sound from the<br />
microphone and that from the connected equipment. Use “Audio Input” in the<br />
Audio setup menu.<br />
For details, see “Audio Input” in the Audio setup menu on page 70.<br />
Switching Video and Audio at the Same Time<br />
Set “Link to Audio Input” to “On” on the Link to Mic page of the Video setup<br />
menu. When you switch the video input, the audio input automatically<br />
switches to the one which has been set to link to the switched video input.<br />
For details, see“Link to Audio Input” in the Video setup menu on page 73.<br />
Switching the Picture from the Remote System<br />
You can switch the picture output from the remote system during<br />
communication.<br />
Press the VIDEO INPUT button, then F1 button on the Remote Commander.<br />
The Video Input > Far menu appears.<br />
Selecting the Input Picture and Sound<br />
143<br />
Chapter 3: Basic Connection
Video Input > Far<br />
CAMERA<br />
Sub Camera<br />
S VIDEO<br />
Document Camera<br />
Use the V, v, B or b button on the Remote Commander to select the picture<br />
output from the equipment connected to the remote system, then press the<br />
ENTER button. The selected picture is input to the local system and is<br />
displayed on the monitor screen.<br />
Note<br />
You can only select the picture that can be output from the remote system.<br />
144 Selecting the Input Picture and Sound<br />
RGB<br />
YPbPr<br />
Sub Document Camera<br />
Save Cancel
Switching the Picture Displayed on the<br />
Monitor Screen<br />
You can display the pictures on the local and remote sites on the monitor<br />
screen at the same time. This enables you to check how your own party is<br />
monitored on the remote site.<br />
1 Press the LAYOUT button on the Remote Commander.<br />
The Layout menu appears.<br />
Layout<br />
Screen Display Patterns<br />
Full<br />
PandP<br />
PinP<br />
PinP<br />
Monitor Select Mode<br />
Side by Side<br />
PinP<br />
HDMI RGB HDMI+RGB<br />
PinP<br />
PinP<br />
Save Cancel<br />
2 Use the V, v, B or b button on the Remote Commander to select one of the<br />
screen display patterns, then press the ENTER button.<br />
You can select from among the following eight patterns:<br />
Full: Displays the remote picture in full screen.<br />
PandP: Displays the remote picture on the left of the screen in large size<br />
and the local picture on the right in small size.<br />
Side by Side: Displays the remote and local pictures side by side.<br />
PinP: Displays the local window picture in the remote full picture.<br />
You can select the location of the window picture from among five<br />
patterns.<br />
3 To store the selected screen display pattern in the memory of the system,<br />
use the V, v, B or b button on the Remote Commander to select “Save”,<br />
then press the ENTER button.<br />
The Layout menu disappears.<br />
To swap the location of the remote and local pictures<br />
When the displayed picture can be switched during communication, pressing<br />
the LAYOUT button on the Remote Commander displays the indication “F1:<br />
Switching the Picture Displayed on the Monitor Screen<br />
145<br />
Chapter 3: Basic Connection
Switches the monitored picture between the remote and local sites.” at the<br />
bottom of the monitor.<br />
Each press of the F1 button on the Remote Commander swaps the location of<br />
both pictures.<br />
To switch the display to the received RGB picture<br />
When you receive an RGB computer picture from a remote party during<br />
communication, the instruction “F2: Switches to the RGB monitor screen.” is<br />
displayed at the bottom of the monitor. The RGB picture is displayed by<br />
pressing the F2 button on the Remote Commander.<br />
To restore the previously displayed picture, press the F2 button again.<br />
Note<br />
When you connect two monitors and set “Monitor Select Mode” to “HDMI+RGB”, you<br />
cannot switch to RGB picture by pressing the F2 button.<br />
146 Switching the Picture Displayed on the Monitor Screen
Capturing the Screen<br />
You can capture the image displayed on the screen by using “Screen Capture”<br />
in the Tools menu and display the captured image on the Phone Book. The<br />
captured image is stored in the “Memory Stick”.<br />
To capture the local image<br />
1 Insert a “Memory Stick” in which you want to save the capturing image<br />
into the Memory Stick slot on the Communication System.<br />
2 Display the image you want to capture on the monitor screen.<br />
For details on adjusting the camera, see “Adjusting the Camera” on page<br />
134.<br />
3 Press the TOOLS button on the Remote Commander, or press the V, v, B<br />
or b button to select “Tools” in the Home menu and press the ENTER<br />
button.<br />
The Tools menu appears.<br />
4 Press the b button on the Remote Commander, and select “Execute” for<br />
“Screen Capture” with the V, v, B or b button then press the ENTER<br />
button.<br />
Tools<br />
Home<br />
Memory Stick<br />
Machine Status<br />
Setup<br />
The image displayed on the monitor is captured and stored in the “Memory<br />
Stick”.<br />
For the procedure how to display the captured image on the Phone Book,<br />
see “Registering a New Remote Party” on page 120.<br />
To capture the remote image<br />
Presentation<br />
Streaming<br />
Recording<br />
Annotation<br />
Icon display<br />
Reject Answer<br />
Screen Capture<br />
[Suspended]<br />
[Suspended]<br />
[Suspended]<br />
[Suspended]<br />
Execute<br />
Execute<br />
Execute<br />
Execute<br />
On<br />
Off<br />
Execute<br />
1 Display the image of the remote site you want to capture on the monitor<br />
screen during communication.<br />
For details on adjusting the remote camera, see “Adjusting the Camera”<br />
on page 134.<br />
Capturing the Screen<br />
147<br />
Chapter 3: Basic Connection
2 Press the TOOLS button on the Remote Commander to display the Tools<br />
menu.<br />
3 Use the V, v, B or b button on the Remote Commander to select “Execute”<br />
for “Screen Capture”, then press the ENTER button.<br />
The remote picture is captured and is stored in the “Memory Stick”.<br />
148 Capturing the Screen
Chapter 4:<br />
Connection with<br />
Optional<br />
Equipment<br />
This chapter describes the various connections using the optional equipment in<br />
addition to the components contained in the <strong>PCS</strong>-<strong>XG80</strong>/<strong>XG80</strong>S HD Visual<br />
Communication System.<br />
To make a multipoint connection, see chapter 6.<br />
Using a Tools Menu<br />
Pressing the TOOLS button on the Remote Commander opens the Tools menu<br />
on the monitor screen.<br />
The Tools menu allows you to perform operations often used simply by<br />
selecting the item in the menu.<br />
Tools<br />
Home<br />
Machine Status<br />
Setup<br />
Presentation<br />
Streaming<br />
Recording<br />
Annotation<br />
Icon display<br />
Reject Answer<br />
Screen Capture<br />
[Suspended]<br />
[Suspended]<br />
[Suspended]<br />
[Suspended]<br />
Execute<br />
Execute<br />
Execute<br />
Execute<br />
On<br />
Off<br />
Execute<br />
Pressing the b button on the Remote Commander, selecting each item with the<br />
V, v, B or b button and pressing the ENTER button enable the following<br />
operations:<br />
Notes<br />
“Presentation” is displayed only when the <strong>PCS</strong>A-DSG80 HD Data Solution software<br />
(not supplied) is installed in the Communication System.<br />
“Reject Answer” is available only when the <strong>PCS</strong>A-MCG80 HD MCU software (not<br />
supplied) is installed in the Communication System.<br />
Using a Tools Menu<br />
149<br />
Chapter 4: Connection with Optional Equipment
Presentation<br />
Pressing the ENTER button on the Remote Commander allows you to transmit<br />
an RGB picture input from a connected computer to a remote party. During<br />
transmission, the message “Executing” appears and the selectable item<br />
changes to “Stop”. To stop transmitting the RGB picture, select “Stop” and<br />
press the ENTER button.<br />
For details on presentation, see “Using the Computer Picture for<br />
Presentation” on page 152.<br />
Streaming<br />
Pressing the ENTER button on the Remote Commander allows you to<br />
broadcast live stream of the visual communication, and people who do not<br />
participate in the communication can watch it over the Web. During<br />
broadcasting, the message “Executing” appears and the selectable menu item<br />
changes “Stop”. To stop broadcasting a live stream, select “Stop” and press the<br />
ENTER button.<br />
150 Using a Tools Menu<br />
For details, see “Streaming a Communication” on page 155.<br />
Recording<br />
Pressing the ENTER button on the Remote Commander allows you to save the<br />
video and audio of the visual communication in progress in a “Memory Stick”.<br />
While the recording is being saved, the message “Executing” appears and the<br />
selectable menu item changes to “Stop”. Selecting “Stop” and pressing the<br />
ENTER button stops recording.<br />
For details on recording, see “Recording a Visual Communication” on page<br />
157.<br />
Annotation<br />
Pressing the ENTER button displays the Annotation Start menu. You can<br />
transmit the picture with letters and graphics overwritten with a commercially<br />
available pen tablet or display a pointer on the screen (Annotation function).<br />
While the annotation function is being executed, the message “Executing”<br />
appears and the selectable menu item changes to “Stop”. Selecting “Stop” and<br />
pressing the ENTER button ends annotation.<br />
For details on annotation, see “Using the Annotation Function” on page 159.<br />
Icon Display<br />
Pressing the ENTER button on the Remote Commander and selecting “On”<br />
with the V, v, B or b button display the indicators on the screen. Selecting<br />
“Off” hides the indicators.<br />
Reject Answer<br />
Pressing the ENTER button and selecting “On” with the V, v, B or b button<br />
enables you to reject incoming calls from other terminals during<br />
communication. Selecting “Off” results in accepting the incoming calls.
Screen Capture<br />
Pressing the ENTER button on the Remote Commander allows you to save the<br />
picture displayed on the screen in a “Memory Stick” as a still image.<br />
For details on screen capture, see “Capturing the Screen” on page 147.<br />
Using a Tools Menu<br />
151<br />
Chapter 4: Connection with Optional Equipment
Using the Computer Picture for<br />
Presentation<br />
If you install the optional <strong>PCS</strong>A-DSG80 HD Data Solution software in your<br />
system, you can transmit an RGB picture input from a computer, etc. with the<br />
local picture simultaneously to a remote party.<br />
Note<br />
You can receive a computer picture transmitted from the remote party even if the <strong>PCS</strong>A-<br />
DSG80 HD Data Solution software is not installed.<br />
Installing the HD Data Solution Software<br />
1 Ensure that the Communication System is turned off.<br />
2 Insert the Key Module of the HD Data Solution software into the TABLET<br />
connector.<br />
to TABLET<br />
3 Press the ?/1 (power) switch on the System to turn it on.<br />
The <strong>PCS</strong>A-DSG80 HD Data Solution software is installed in the System.<br />
152 Using the Computer Picture for Presentation<br />
<strong>PCS</strong>A-DSG80 HD Data Solution software
Connecting a Computer<br />
Making a Presentation<br />
To configure the presentation mode<br />
When you transmit an RGB picture from a computer, etc. and a camera picture<br />
simultaneously to a remote party, the remote party can view both pictures<br />
simultaneously. This function is called “to make a presentation using the<br />
presentation mode complying with H.239”. Using this function allows smooth<br />
reproduction of both camera and computer pictures. To make a presentation<br />
using the presentation mode complying with H.239, it is necessary to turn on<br />
the presentation mode on both the local and remote systems. If the presentation<br />
mode on either of the systems is turned off, a presentation complying with<br />
H.239 cannot be made.<br />
To configure the presentation mode, set “H.239” to “On” on the IP: Mode page<br />
(page 66) or on the ISDN: Mode page (page 68) of the Communication setup<br />
menu.<br />
To start a presentation<br />
VISCA OUT<br />
Connecting cable with the<br />
D-sub 15-pin connectors<br />
(not supplied)<br />
CAMERA S VIDEO IN RGB IN RGB OUT HDMI OUT ISDN UNIT AUX CONTROL<br />
EC-MIC(A7) MIC(A1/A3)<br />
1 2 1(R) 2(L)<br />
R L R L R L<br />
DC 19.5V<br />
(PLUG IN POWER) AUDIO 1 IN AUDIO OUT REC OUT 1-EXT-2<br />
1<br />
2<br />
to RGB OUT<br />
TERMINAL<br />
to RGB IN<br />
Computer<br />
1 Press the TOOLS button on the Remote Commander to open the Tools<br />
menu.<br />
2 Press the b button on the Remote Commander and press the V, v, B or b<br />
button to select “Execute” for “Presentation”.<br />
Using the Computer Picture for Presentation<br />
153<br />
Chapter 4: Connection with Optional Equipment
The RGB picture from the computer is transmitted to the remote party.<br />
While presentation is being executed, the message “Executing” appears on<br />
the screen.<br />
Tools<br />
Home<br />
Machine Status<br />
Setup<br />
Presentation<br />
Streaming<br />
Recording<br />
Annotation<br />
Icon display<br />
Reject Answer<br />
Screen Capture<br />
[Executing]<br />
[Suspended]<br />
[Suspended]<br />
[Suspended]<br />
Note<br />
You can also transmit the computer picture to the remote party by pressing the<br />
PRESENTATION button on the Remote Commander instead of performing steps<br />
1 and 2 above.<br />
To change the display pattern of the presentation when the H.239 function<br />
is disabled<br />
Select the display pattern for the presentation with “Presentation Screen” on<br />
the Basic Setup page of the Video setup menu (page 72) before starting a<br />
presentation.<br />
Full Screen: The computer picture to be transmitted from the local system is<br />
displayed in full screen.<br />
PandP: The computer picture to be transmitted from the local system and the<br />
selected input picture (local camera picture, etc.) are displayed in PandP<br />
mode.<br />
Side by Side: The computer picture to be transmitted from the local system<br />
and the selected input picture (local camera picture, etc.) are displayed in<br />
Side by Side mode.<br />
Note<br />
If the remote system does not support H.239, you cannot transmit the input picture<br />
(camera picture, etc.) and the computer picture as two streams, even if “H.239” is set<br />
to “On” on your system.<br />
To stop the presentation<br />
Select “Stop” for “Presentation” in the Tools menu and press the ENTER<br />
button on the Remote Commander. Transmission of the computer picture<br />
stops.<br />
You can also stop the presentation by pressing the PRESENTATION button<br />
on the Remote Commander.<br />
154 Using the Computer Picture for Presentation<br />
Stop<br />
Execute<br />
Execute<br />
Execute<br />
On<br />
Off<br />
Execute
Streaming a Communication<br />
By broadcasting a stream of a visual communication, people who cannot<br />
attend the communication can watch the proceedings over the Web using a<br />
computer.<br />
Before broadcasting a live stream, be sure to configure the live stream<br />
permission setting.<br />
For details on viewing a streamed communication, see Chapter 7.<br />
For details on the streaming settings, see “Streaming” on the Streaming/<br />
Recording page of the Administrator setup menu on page 87.<br />
Starting a streaming broadcast<br />
1 Press the TOOLS button on the Remote Commander to open the Tools<br />
menu.<br />
2 Press the b button on the Remote Commander and press the V, v, B or b<br />
button to select “Execute” for “Streaming”, then press the ENTER button.<br />
The streaming broadcast starts, and the communication in progress can be<br />
watched from a computer over the Web.<br />
While the streaming broadcast is running, the message “Streaming<br />
[Executing]” is displayed in the Tools menu and the menu item changes to<br />
“Stop”.<br />
Tools<br />
Home<br />
Machine Status<br />
Setup<br />
Presentation<br />
Streaming<br />
Recording<br />
Annotation<br />
Icon display<br />
Reject Answer<br />
Screen Capture<br />
[Suspended]<br />
[Executing]<br />
[Suspended]<br />
[Suspended]<br />
Execute<br />
Stop<br />
Execute<br />
Execute<br />
On<br />
Off<br />
Execute<br />
Notes<br />
If you start streaming before a communication begins, the broadcast will continue<br />
streaming after the communication begins.<br />
Depending on Web access limitations, about 10 terminals can view a streaming<br />
broadcast simultaneously. The actual number of terminals that can view the broadcast<br />
simultaneously depends on your system’s operating environment.<br />
Streaming a Communication<br />
155<br />
Chapter 4: Connection with Optional Equipment
To stop a streaming broadcast<br />
Selecting “Stop” for “Streaming” in the Tools menu and pressing the ENTER<br />
button stop the streaming broadcast.<br />
Notes<br />
Even if the Communication System is turned off while the streaming broadcast is<br />
being executed, the streaming broadcast continues.<br />
The streaming broardcast cannot be executed during encrypted connection.<br />
156 Streaming a Communication
Recording a Visual Communication<br />
The video and audio of a visual communication can be saved in a “Memory<br />
Stick” in MPEG4 format. The saved data can then be viewed on a computer.<br />
For details on the recording settings, see “Recording” on the “Streaming/<br />
Recording” page of the Administrator setup menu on page 87.<br />
To start recording<br />
1 Insert a “Memory Stick” into the Memory Stick slot.<br />
2 Press the TOOLS button on the Remote Commander to open the Tools<br />
menu.<br />
3 Press the b button on the Remote Commander and press the V, v, B or b<br />
button to select “Execute” for “Recording”, then press the ENTER button.<br />
The message “Start recording?” appears.<br />
4 Use the V, v, B or b button on the Remote Commander to select “OK”,<br />
then press the ENTER button.<br />
Recording in the “Memory Stick” starts.<br />
During recording, the message “Recording [Executing]” is displayed in the<br />
Tools menu and the menu item changes to “Stop”.<br />
Tools<br />
Home<br />
Machine Status<br />
Setup<br />
Presentation<br />
Streaming<br />
Recording<br />
Annotation<br />
Icon display<br />
Reject Answer<br />
Screen Capture<br />
[Suspended]<br />
[Suspended]<br />
[Executing]<br />
[Suspended]<br />
Execute<br />
Execute<br />
Stop<br />
Execute<br />
On<br />
Off<br />
Execute<br />
Recording a Visual Communication<br />
157<br />
Chapter 4: Connection with Optional Equipment
To stop recording<br />
1 Select “Stop” for “Recording” in the Tools menu, then press the ENTER<br />
button on the Remote Commander.<br />
The message “Stop recording?” appears.<br />
2 Use the V, v, B or b button on the Remote Commander to select “OK”,<br />
then press the ENTER button.<br />
Recording in the “Memory Stick” stops.<br />
Notes<br />
If the remaining capacity of the “Memory Stick” is no longer enough for storage<br />
during recording, the recording stops automatically and a notification message<br />
appears.<br />
Although the recorded MPEG4 files have the same file type name as the MPEG4<br />
files that can be played on the PSP or other devices that support the “Memory<br />
Stick” video format, you cannot play the files on these devices even after the files<br />
are recognized and moved to the file directories of these devices.<br />
Recording cannot be executed during encrypted connection.<br />
158 Recording a Visual Communication
Using the Annotation Function<br />
During communication you can transmit or receive letters and graphics written<br />
on the screen with a pen tablet as they are written. You can also point the<br />
camera picture or computer picture with a pointer. This function is called<br />
“Annotation”.<br />
The pen tablet that can be used for the annotation function is<br />
BambooMTE450 * manufactured only by Wacom Co., Ltd.<br />
* Wacom and the Wacom logo are registered trademarks of Wacom Co., Ltd.<br />
Bamboo is a trademark.<br />
For details on the BambooMTE450, consult with a <strong>Sony</strong> dealer.<br />
Note<br />
The communication using a pen tablet is only available for communication between the<br />
<strong>PCS</strong>-<strong>XG80</strong>/<strong>XG80</strong>S Communication Systems. A pen tablet cannot be used for<br />
communication with other <strong>Sony</strong> communication systems.<br />
Connecting a Pen Tablet<br />
1 Turn off the Communication System.<br />
2 Connect the pen tablet to the TABLET connector on the front panel of the<br />
Communication System.<br />
3 Press the ?/1 (power) switch on the System to turn it on.<br />
To start annotation<br />
Pen tablet<br />
1 Start communication.<br />
to TABLET<br />
Using the Annotation Function while in Communication<br />
Using the Annotation Function<br />
159<br />
Chapter 4: Connection with Optional Equipment
2 Press the TOOLS button on the Remote Commander to open the Tools<br />
menu.<br />
3 Press the b button on the Remote Commander and press the V, v, B or b<br />
button to select “Execute” for “Annotation”, then press the ENTER button.<br />
Tools<br />
Home<br />
Machine Status<br />
Setup<br />
The Annotation Start menu appears.<br />
4 Use the V, v, B or b button on the Remote Commander to select<br />
“Background Screen” for executing the annotation function and press the<br />
ENTER button.<br />
Background Screen<br />
Local Picture<br />
Received Computer<br />
Picture<br />
Annotation Mode<br />
Remote Picture: Selects the picture on the remote site as the background<br />
Local Picture: Selects the picture on the local site as the background<br />
Received Computer Picture: Selects the computer picture received from<br />
the remote site as the background<br />
Transmitting Computer Picture: Selects the computer picture on the<br />
local site as the background<br />
Notes<br />
“Received Computer Picture” can be selected only when the computer picture is<br />
being received from the remote site.<br />
“Transmitting Computer Picture” can be selected only when the computer picture<br />
is being transmitted from the local site.<br />
5 Use the V, v, B or b button on the Remote Commander to select<br />
“Annotation Mode” and press the ENTER button.<br />
Drawing: Allows you to write letters or graphics on the screen.<br />
Pointing: Allows display of a pointer on the screen.<br />
160 Using the Annotation Function<br />
Presentation<br />
Streaming<br />
Recording<br />
Annotation<br />
Icon display<br />
Reject Answer<br />
Screen Capture<br />
[Suspended]<br />
[Suspended]<br />
[Suspended]<br />
[Executing]<br />
Execute<br />
Execute<br />
Execute<br />
Stop<br />
On<br />
Off<br />
Remote Picture<br />
Drawing Pointing<br />
Start<br />
Execute<br />
Transmitting<br />
Computer Picture<br />
Cancel
6 Use the V, v, B or b button on the Remote Commander to select “Start”<br />
and press the ENTER button.<br />
The indicator indicating that the local party uses annotation<br />
appears.<br />
When the Drawing mode is selected, (pen) indicator appears on the<br />
monitor screen and (pointer) appears when the Pointing mode is<br />
selected.<br />
7 Write letters or graphics on the screen with a pen supplied with the pen<br />
tablet, or move the pointer on the screen.<br />
The written data is displayed on the screen in live.<br />
/<br />
Monitor screen<br />
For details on how to use the pen tablet, refer to the instruction manual<br />
supplied with the pen tablet.<br />
<strong>Operation</strong>s during pointing<br />
You can point to any desired portion on the monitor screen with a pointer. You<br />
cannot write letters and graphics in pointing mode.<br />
<strong>Operation</strong>s during drawing<br />
Operate using the function keys on the tablet and the buttons on the pen.<br />
Using the Annotation Function<br />
161<br />
Chapter 4: Connection with Optional Equipment
Start Stop<br />
Drawing Rights Erase All<br />
To start drawing<br />
Press the < key on the tablet.<br />
To stop drawing<br />
Press the > key on the tablet.<br />
To change the color<br />
Press the lower pen button. Each press changes the color. You can select from<br />
among black, red, blue, green, yellow, orange, purple and white.<br />
To change the line density<br />
Press the upper pen button. Each press changes the line density. You can select<br />
from three different line densities.<br />
To erase with the eraser<br />
Touch the tail switch (eraser) of the pen onto the tablet and move it on the<br />
letters or graphics you want to erase.<br />
To erase all written letters and graphics<br />
Press the FN2 key on the tablet.<br />
To obtain the drawing rights<br />
Normally, the drawing rights belong to the party who starts annotation. In the<br />
case that the remote party starts annotation, the Obtain Drawing Rights button<br />
appears and the indicator (Drawing executed by the remote party) on<br />
the monitor screen on the local site.<br />
If you want to obtain the drawing rights, press the FN1 key on the tablet. The<br />
indicator (Drawing executed by the local party) appears on the monitor<br />
screen, and you are allowed to write letters and graphics on the screen.<br />
To save the drawings written using annotation<br />
1 Insert a “Memory Stick” in which you want to save the drawings using<br />
annotation into the Communication System.<br />
162 Using the Annotation Function<br />
Eraser<br />
Select Line Density<br />
Select Color
2 Press the TOOLS button on the Remote Commander to open the Tools<br />
menu.<br />
3 Select “Execute” for “Screen Capture” in the Tools menu.<br />
The drawing using annotation on the screen is saved in the “Memory<br />
Stick” as a still image.<br />
To end the annotation mode<br />
1 Press the TOOLS button on the Remote Commander to open the Tools<br />
menu.<br />
2 Use the V, v, B or b button on the Remote Commander to select “Stop”<br />
for “Annotation”, then press the ENTER button.<br />
The annotation mode ends.<br />
The letters and graphics written using the annotation function are deleted<br />
when the communication ends.<br />
Using the Annotation Function<br />
163<br />
Chapter 4: Connection with Optional Equipment
Using Multiple Microphones<br />
You can input the stereo sound from two <strong>PCS</strong>-A1 (supplied with the <strong>PCS</strong>-<br />
<strong>XG80</strong>) or <strong>PCS</strong>A-A3 (not supplied) microphones to the system.<br />
If you are using an echo canceling microphone, see “Using the <strong>PCS</strong>A-A7<br />
Microphones” on page 167.<br />
To connect the microphones<br />
Connect the optional microphones to the MIC (A1/A3) 1 (R) and 2 (L) jacks<br />
on the Communication System. Power is supplied to the microphones from the<br />
System.<br />
to MIC (A1/A3)<br />
1 (R)<br />
VISCA OUT<br />
To use the connected microphones<br />
Set “Audio Input” to “MIC” on the Basic Setup1 page of the Audio setup<br />
menu, and set “Input Select (MIC)” to “MIC (A1/A3)” (page 70).<br />
To input the stereo sound from two microphones, set “Input Mode” to “Stereo”<br />
(page 71). Set it to “Monaural” to input monaural sound from two<br />
microphones.<br />
Notes on installation of the microphones<br />
Install microphone about 50 cm (1.6 ft) away from the participants.<br />
Place the microphone in a quiet, echo-free location.<br />
164 Using Multiple Microphones<br />
TERMINAL<br />
CAMERA S VIDEO IN RGB IN RGB OUT HDMI OUT ISDN UNIT AUX CONTROL<br />
EC-MIC(A7) MIC(A1/A3)<br />
1 2 1(R) 2(L)<br />
R L R L R L<br />
DC 19.5V<br />
(PLUG IN POWER) AUDIO 1 IN AUDIO OUT REC OUT 1-EXT-2<br />
1<br />
2<br />
to MIC (A1/A3)<br />
2 (L)<br />
<strong>PCS</strong>-A1 (supplied with the <strong>PCS</strong>-<strong>XG80</strong>) or<br />
<strong>PCS</strong>A-A3 microphone (not supplied)<br />
Microphone (Left)<br />
Microphone (Right)
Install the speakers so that the participants do not come between it and the<br />
microphones.<br />
Install microphones away from equipment that may cause noise.<br />
Avoid covering the microphones, with paper for example, or carrying the<br />
microphones and moving them. If you do either, extreme noise and echo may<br />
be heard temporarily by the remote party. In this case, wait until the echo<br />
disappears.<br />
When stereo sound is input, locate the microphone connected to the MIC<br />
(A1/A3) 1 (R) jack on the right of the camera and the microphone connected<br />
to the MIC (A1/A3) 2 (L) jack on the left.<br />
Using Multiple Microphones<br />
165<br />
Chapter 4: Connection with Optional Equipment
Microphone layout examples<br />
<strong>PCS</strong>-A1 microphones<br />
<strong>PCS</strong>A-A3 microphones<br />
166 Using Multiple Microphones<br />
<strong>PCS</strong>A-A3<br />
<strong>PCS</strong>-A1<br />
<strong>PCS</strong>-<strong>XG80</strong>/<strong>XG80</strong>S<br />
<strong>PCS</strong>-<strong>XG80</strong>/<strong>XG80</strong>S
Using the <strong>PCS</strong>A-A7 Microphones<br />
Connection of multiple <strong>PCS</strong>A-A7 microphones (not supplied) allows<br />
communication among a large number of participants.<br />
The <strong>PCS</strong>A-A7 microphones have the following characteristics:<br />
Built-in echo canceller<br />
Noise reduction<br />
High quality sound<br />
Several <strong>PCS</strong>A-A7 microphones can be connected in cascade without losing<br />
sound quality.<br />
Note<br />
The <strong>PCS</strong>A-A7 is a monaural microphone and cannot pick up sound in stereo.<br />
To connect the <strong>PCS</strong>A-A7 microphones<br />
Connect the <strong>PCS</strong>A-A7 microphones to the EC-MIC (A7) 1 and EC-MIC (A7)<br />
2 connectors of the Communication System. Power to the microphones is<br />
supplied by the Communication System.<br />
to EC-MIC (A7) 1<br />
VISCA OUT<br />
TERMINAL<br />
CAMERA S VIDEO IN RGB IN RGB OUT HDMI OUT ISDN UNIT AUX CONTROL<br />
EC-MIC(A7) MIC(A1/A3)<br />
1 2 1(R) 2(L)<br />
R L R L R L<br />
DC 19.5V<br />
(PLUG IN POWER) AUDIO 1 IN AUDIO OUT REC OUT 1-EXT-2<br />
1<br />
2<br />
to EC-MIC (A7) 2<br />
<strong>PCS</strong>A-A7 microphones (<strong>PCS</strong>A-A7P4: 4-piece set, not supplied)<br />
Using the <strong>PCS</strong>A-A7 Microphones<br />
167<br />
Chapter 4: Connection with Optional Equipment
To use the microphones<br />
Set “Audio Input” to “MIC”, and “Input Select (MIC)” to “EC-MIC (A7)” on<br />
the Basic Setup1 page of the Audio setup menu. (page 69)<br />
Notes on placing the <strong>PCS</strong>A-A7 microphones<br />
Position the microphones about 50 cm (1.6 ft) away from the participants.<br />
When using speakers, do not place them in front of the microphones. In<br />
addition, avoid placing the speakers where participants may come between<br />
it and the microphones.<br />
Configuration using the <strong>PCS</strong>A-A7 microphones<br />
Power is supplied to up to eight microphones connected to the Visual<br />
Communication System or the AC adaptor, including cascade connections.<br />
However, using the 8-meter microphone cable counts as 4 microphones.<br />
Power is not supplied to any connected microphones that exceed this limit.<br />
You can add more microphones, by connecting the AC adaptor to the first nonpowered<br />
microphone.<br />
Setup example 1:<br />
Notes<br />
Up to 40 <strong>PCS</strong>A-A7 microphones can be connected to one port, using a cascade<br />
connection.<br />
The POWER LED turns off on a microphone with no power supply.<br />
5 6 7 8 9 10<br />
The 8-meter microphone cable counts as four microphones, and power is<br />
supplied to only the first four microphones. The same is true if the 8-meter<br />
microphone cable is used in the middle of the connections.<br />
168 Using the <strong>PCS</strong>A-A7 Microphones
Setup example 2:<br />
Setup example 3:<br />
1 2 3 4 5 6 7 8 9 10<br />
Up to eight microphones are powered by the AC adaptor, counting from the<br />
microphone connected to the AC adaptor.<br />
1 2 7 8 9 10<br />
The 8-meter microphone cable is used in the middle of the connections, and<br />
counts as four microphones. Up to four microphones are powered by the AC<br />
adaptor, counting from the microphone connected to the AC adaptor.<br />
Microphones layout example<br />
<strong>PCS</strong>A-A7<br />
<strong>PCS</strong>-<strong>XG80</strong>/<strong>XG80</strong>S<br />
Using the <strong>PCS</strong>A-A7 Microphones<br />
169<br />
Chapter 4: Connection with Optional Equipment
Using a Second Camera<br />
You can connect the second camera through the <strong>PCS</strong>A-C<strong>XG80</strong> Camera Unit.<br />
Connection example for a second camera<br />
/<br />
to VIDEO IN<br />
YPbPr<br />
First camera (<strong>PCS</strong>A-C<strong>XG80</strong>)<br />
VISCA OUT<br />
VIDEO IN AUDIO 2 IN<br />
Pb L R<br />
Y Pr<br />
TERMINAL<br />
MAINTENANCE<br />
Connect the video output connector on the second camera to the VIDEO IN<br />
YPbPr jacks on the front of the Communication System or the S VIDEO IN or<br />
RGB IN connector at the rear.<br />
Select “YPbPr”, “S-VIDEO” or “RGB” in “Second Camera Input” of the<br />
Camera setup menu depending on the connector to which the camera is<br />
connected.<br />
To switch the picture shot by two cameras<br />
When you open the Camera menu, the instruction “F2: Switches to the first<br />
camera.” or “F2: Switches to the second camera.” is displayed at the bottom of<br />
the monitor screen. Each press of the F2 button on the Remote Commander<br />
changes the picture shot by each camera.<br />
For the procedure how to open the Camera menu, see “Adjusting the Camera”<br />
on page 134.<br />
170 Using a Second Camera<br />
OPEN<br />
VISCA cable<br />
(not supplied)<br />
to VISCA OUT to VISCA IN<br />
Video cable (not supplied)<br />
Second camera<br />
to Video<br />
output<br />
(YPbPr)
Recording during a Communication<br />
You can record the voices of participants on both the remote and local sites<br />
during a communication if you connect an audio recorder to the REC OUT<br />
jack on the Communication System.<br />
This is convenient for taking minutes of the communication.<br />
To connect an audio recorder<br />
Audio recording device<br />
to audio<br />
inputs<br />
Audio cable (not supplied)<br />
When recording with an audio recorder<br />
When an audio recorder is connected to both the AUDIO IN and REC OUT<br />
jacks, set “Recording Mute” to “On” on the Basic Setup1 page of the Audio<br />
setup menu, since the echo may cause and is transmitted to a remote party<br />
(page 69).<br />
To record the sound output from the REC OUT L/R jacks in 2-channel<br />
monaural, set “REC OUT Mode” to “Monaural 2ch” on the Basic Setup2 page<br />
of the Audio setup menu.<br />
VISCA OUT<br />
TERMINAL<br />
CAMERA S VIDEO IN RGB IN RGB OUT HDMI OUT ISDN UNIT AUX CONTROL<br />
EC-MIC(A7) MIC(A1/A3)<br />
1 2 1(R) 2(L)<br />
R L R L R L<br />
DC 19.5V<br />
(PLUG IN POWER) AUDIO 1 IN AUDIO OUT REC OUT 1-EXT-2<br />
1<br />
2<br />
to REC OUT L/R<br />
Recording during a Communication<br />
171<br />
Chapter 4: Connection with Optional Equipment
Sending Audio/Video from the External<br />
Equipment to a Remote Party<br />
The Communication System allows you to send the picture and sound output<br />
from the connected equipment such as a VCR to a remote party.<br />
To connect the video equipment for input<br />
The Communication System is equipped with two video inputs.<br />
/<br />
VISCA OUT<br />
VIDEO IN AUDIO 2 IN<br />
Pb L R<br />
Y Pr<br />
TERMINAL<br />
CAMERA S VIDEO IN RGB IN RGB OUT HDMI OUT ISDN UNIT AUX CONTROL<br />
EC-MIC(A7) MIC(A1/A3)<br />
1 2 1(R) 2(L)<br />
R L R L R L<br />
DC 19.5V<br />
(PLUG IN POWER) AUDIO 1 IN AUDIO OUT REC OUT 1-EXT-2<br />
1<br />
2<br />
MAINTENANCE<br />
to VIDEO IN<br />
YPbPr<br />
OPEN<br />
to S<br />
VIDEO IN<br />
S-video cable (not supplied)<br />
to AUDIO 1<br />
IN<br />
to AUDIO 2 IN<br />
To input audio/video from external equipment<br />
Audio cable (not<br />
supplied)<br />
Audio cable (not<br />
supplied)<br />
Video cable (not supplied)<br />
VCR, etc.<br />
HD player, etc.<br />
To input video<br />
Press the VIDEO INPUT button on the Remote Commander to open the Video<br />
Input >Near menu, then select the video you want to input.<br />
172 Sending Audio/Video from the External Equipment to a Remote Party<br />
to S-video output<br />
to audio<br />
output<br />
to audio output<br />
to video output<br />
(YPbPr)
Video Input > Near<br />
CAMERA<br />
S VIDEO<br />
RGB<br />
YPbPr<br />
Save Cancel<br />
Use the V, v, B or b button on the Remote Commander to select the external<br />
equipment connected to each video input on the Communication System, then<br />
press the ENTER buttton.<br />
The picture from the selected equipment is displayed.<br />
CAMERA: Video shot by the camera unit connected to the CAMERA<br />
connector.<br />
S VIDEO: Video of the camera or video equipment connected to the S VIDEO<br />
IN connector.<br />
RGB: Video of a computer, etc. connected to the RGB IN connector.<br />
YPbPr: Video of the camera or video equipment connected to the VIDEO IN<br />
YPbPr jacks.<br />
To save the selected input, press the V, v, B or b button on the Remote<br />
Commander to select “Save”, then press the ENTER button.<br />
To input audio<br />
Set “Audio Input” to “AUX” or “MIC+AUX” on the Basic Setup1 page of the<br />
Audio setup menu (page 69).<br />
When set to “AUX”, the sound from the external equipment is input and the<br />
sound from a microphone is deactivated. When set to “MIC+AUX”, both<br />
sounds are input.<br />
To switch to the sound from the external equipment connected to the AUDIO<br />
1 IN or AUDIO 2 IN jacks, set “Input Select (AUX)” to “AUDIO1” or<br />
“AUDIO2” on the Basic Setup1 page of the Audio setup menu (page 70).<br />
To switch the input video and audio at the same time<br />
Set “Link to Audio Input” to “On” on the Link to Mic page of the Video setup<br />
menu (page 73) so as to link the audio you want to switch at the same time with<br />
the video input.<br />
When the video input is switched, the audio input is simultaneously switched<br />
to the one linked to the video input.<br />
Sending Audio/Video from the External Equipment to a Remote Party<br />
173<br />
Chapter 4: Connection with Optional Equipment
Viewing the Picture from the System on<br />
a Monitor or Projector<br />
When the monitor or projector is connected to the Communication System,<br />
you can view the picture from the system.<br />
To connect a monitor or projector<br />
VISCA OUT<br />
TERMINAL<br />
CAMERA S VIDEO IN RGB IN RGB OUT HDMI OUT ISDN UNIT AUX CONTROL<br />
EC-MIC(A7) MIC(A1/A3)<br />
1 2 1(R) 2(L)<br />
R L R L R L<br />
DC 19.5V<br />
(PLUG IN POWER) AUDIO 1 IN AUDIO OUT REC OUT 1-EXT-2<br />
1<br />
2<br />
to RGB<br />
OUT<br />
to HDMI OUT<br />
HDMI cable<br />
(supplied)<br />
Connecting cable with D-sub 15-pin<br />
connectors<br />
to HDMI IN<br />
To use the connected display equipment<br />
When outputting the picture both to the monitor connected to the HDMI OUT<br />
connector and the display equipment connected to the RGB OUT connector,<br />
set “Monitor Output” to “HDMI+RGB” on the Basic Setup page of the Video<br />
setup menu (page 72).<br />
For RGB output, you can select the video format of the signal output from the<br />
RGB OUT connector with “RGB Monitor Output Format”. You can select<br />
“SXGA”, “XGA” or “WXGA” (page 72).<br />
Notes<br />
The HDMI output is available only when the output signal is of 1080i video format.<br />
If “Monitor Output” is set to “HDMI+RGB” when no HDMI monitor is connected to<br />
the Communication System, you cannot view the menus. Before making this setting,<br />
be sure to connect an HDMI monitor.<br />
174 Viewing the Picture from the System on a Monitor or Projector<br />
Monitor<br />
Monitor,<br />
projector, etc.<br />
to RGB IN
Pictures displayed on the two monitors<br />
During communication, the following images are displayed on the two<br />
monitors.<br />
Picture displayed on the first monitor<br />
The local or remote picture shot by the camera (moving picture) is monitored<br />
on the first monitor connected to the HDMI OUT connector.<br />
To switch between the local and remote pictures, press the LAYOUT button,<br />
then F1 button on the Remote Commander.<br />
F1 button<br />
Remote camera picture<br />
Local camera picture<br />
Local camera picture<br />
Remote camera picture<br />
Picture displayed on the second monitor<br />
The picture shot by the local camera or the RGB picture transmitted from the<br />
remote party can be displayed on the second monitor connected to the RGB<br />
OUT connector.<br />
Viewing the Picture from the System on a Monitor or Projector<br />
175<br />
Chapter 4: Connection with Optional Equipment
Communicating without the Picture –<br />
Voice Meeting<br />
The Visual Communication System enables a voice only communication using<br />
telephones via an ISDN line. (Voice Meeting)<br />
Basic connecting procedures are the same as those for normal communication<br />
with audio/video.<br />
Conducting a voice meeting with a remote party not registered in the phone<br />
book<br />
Set “Line I/F” to “TEL” in the Detailed Dial menu.<br />
During the Voice Meeting, the “Voice Only” indicator is displayed.<br />
For “Line I/F” setting, see “Calling a Remote Party Not Registered in the<br />
Phone Book” on page 114.<br />
To register a remote party for a Voice Meeting<br />
Set “Line I/F” to “TEL” in the List Edit menu displayed from the Phone Book.<br />
For registration, see “Registering a Remote Party – Phone Book” on page<br />
120.<br />
To set the audio compression format<br />
Select the audio compression format by setting “Telephone Mode” of the Dial<br />
setup menu.<br />
When you initiate the voice meeting, set “Telephone Mode” to “Auto” (page<br />
64). When set to “Auto”, the G.711 µ-law format is automatically selected.<br />
You need not set the audio compression format when receiving a call for a<br />
Voice Meeting from the remote party.<br />
176 Communicating without the Picture – Voice Meeting
Controlling the Remote System with the<br />
Tone Signal – DTMF Transmission<br />
The Visual Communication System enables you to control the remote system<br />
connected by transmitting the tone signal (DTMF: Dual Tone Multi<br />
Frequency) assigned to the numbers for dialing (0-9, , ).<br />
1 Press the TONE ( ) button on the Remote Commander during<br />
communication.<br />
The DTMF menu appears on the monitor screen.<br />
2 Press one of the number buttons (0-9, , ) on the Remote Commander<br />
corresponding to the tone signal you want to transmit to the remote party.<br />
The tone signal will be transmitted when the button is pressed.<br />
3 To stop transmitting the tone signal, press the ENTER button on the<br />
Remote Commander.<br />
The DTMF menu disappears.<br />
Note<br />
The microphone is automatically turned off while the DTMF menu is displayed.<br />
Controlling the Remote System with the Tone Signal – DTMF Transmission<br />
177<br />
Chapter 4: Connection with Optional Equipment
Accessing the Communication System<br />
The following controls are available to access the Communication System. For<br />
details on each control, consult your <strong>Sony</strong> dealer.<br />
Using a Web Browser<br />
Using Telnet<br />
You can control or set up the Communication System by accessing it from a<br />
Web browser.<br />
To access the Communication System from a Web browser, set “Web<br />
Monitor” to “On” and “Web Access” to “Enabled” on the Access Permit page<br />
of the Administrator setup menu (page 87).<br />
For details on Web operation, see Chapter 7, “Web Control Function”.<br />
You can control or set up the Communication System by accessing it with<br />
Telnet.<br />
To access the Communication System from Telnet, set “Telnet Access” to<br />
“Enabled” on the Access Permit page of the Administrator setup menu (page<br />
87).<br />
178 Accessing the Communication System
Chapter 5:<br />
Encrypted<br />
Connection<br />
When a strictly confidential communication is required, the communication<br />
system enables a connection with encrypted video and audio. A connection<br />
conducted using this feature is known as an encrypted connection.<br />
This chapter describes how to conduct an encrypted connection.<br />
The Communication System is equipped with standard encryption, which<br />
complies with the H.233, H.234 and H.235 standerdized by the ITU-T.<br />
Notes<br />
Streaming and recording are not available during an encrypted connection.<br />
The maximum bandwidth for encrypted connections is 6 Mbps.<br />
179<br />
Chapter 5: Encrypted Connection
Preparing for an Encrypted Connection<br />
via LAN<br />
To start an encrypted connection, “Encryption Mode” must be set in the<br />
Encryption setup menu.<br />
Set “Encryption Mode” to “Connect Priority” or “Encrypt Priority” in the<br />
Encryption setup menu.<br />
Setup Encryption<br />
Encryption<br />
Connect Priority<br />
Connects with encryption to a remote party with standard encrypted connection<br />
enabled. Connects without encryption to parties unable to connect with<br />
standard encryption or parties with encryption set to off.<br />
Local system:<br />
Standard encrypted connection available<br />
Local system:<br />
Standard encrypted connection available<br />
IP:192.168.0.11<br />
Encryption Mode<br />
180 Preparing for an Encrypted Connection via LAN<br />
Save<br />
Connect Priority<br />
Connect with encryption<br />
Connect without encryption<br />
5/11/2008 13:00<br />
Cancel<br />
Remote system:<br />
Standard encrypted connection available<br />
Remote system:<br />
Standard encrypted connection unavailable
Encrypt Priority<br />
Connects only to remote parties with standard encrypted connection enabled.<br />
Local system:<br />
Standard encrypted connection available<br />
Local system:<br />
Standard encrypted connection available<br />
Connect with encryption<br />
Do not connect<br />
Remote system:<br />
Standard encrypted connection available<br />
Remote system:<br />
Standard encrypted connection unavailable<br />
Preparing for an Encrypted Connection via LAN<br />
181<br />
Chapter 5: Encrypted Connection
Starting an Encrypted Connection<br />
You can start an encrypted connection by calling a remote party in the same<br />
manner as a daily connection.<br />
During an encrypted connection, the encryption icon, , is displayed.<br />
Note<br />
If there is no icon displayed, transmitted and received data are not encrypted. Confirm<br />
if an icon is displayed before starting a connection.<br />
When the encrypted connection is disabled<br />
If the following message appears when you call a remote party, an encrypted<br />
connection is not available.<br />
Error Messages Causes<br />
The far-end system is not<br />
compatible with the encryption<br />
feature.<br />
The encryption feature on a farend<br />
system is disabled.<br />
The encryption feature on a farend<br />
system is enabled.<br />
The conference could not start<br />
because the encryption feature at<br />
the near-end side was disabled.<br />
The conference could not start<br />
because the encryption feature at<br />
the far-end side was disabled.<br />
The conference could not start<br />
because the signal encryption<br />
method at the near-end side<br />
differed from that of the far-end<br />
side.<br />
182 Starting an Encrypted Connection<br />
H<br />
The remote system is not equipped with an<br />
encryption feature.<br />
The encryption feature on a remote system is<br />
turned off or the signal encryption method setting<br />
on the remote system is different from that on the<br />
local system.<br />
The encryption feature on a remote system is<br />
turned on.<br />
“Encryption Mode” is set to “Off” on the local<br />
system.<br />
The encryption feature on the remote system is<br />
disabled.<br />
The encryption method setting on the remote<br />
system is not the same as that on the local<br />
system.
Error Messages Causes<br />
The standard encryption<br />
videoconference with SIP<br />
connection is not available.<br />
You are connected to the remote system via SIP<br />
connection.<br />
Starting an Encrypted Connection<br />
183<br />
Chapter 5: Encrypted Connection
Chapter 6:<br />
Multipoint<br />
Connection<br />
184<br />
This chapter describes how to connect your system to multiple points.<br />
For multipoint connection, installation of the optional <strong>PCS</strong>A-MCG80 HD<br />
MCU software is required.<br />
When connecting via a LAN, multipoint connection among up to 10 points<br />
including your site is available. When connecting via an ISDN, multipoint<br />
connection among up to six points including your site is available, and a phone<br />
can be used at up to five points among six.<br />
A multipoint connection using LAN and ISDN mixed is also available.<br />
Restrictions on the use of the MCU software<br />
When a multipoint connection is made via LAN, you can set up the total<br />
communication bit rate for all the connecting points with “Total Bandwidth”<br />
in the Communication setup menu. As the communication bit rate for each<br />
point is automatically adjusted so as not to exceed the value selected in<br />
“Total Bandwidth”, actual bit rate per point may differ from that selected for<br />
that point.<br />
When a multipoint connection is made via an ISDN, the same number of<br />
channels should be used on all the points and the total channels must not<br />
exceed 12B.<br />
The H.264, H.263+ and H.261 video modes are supported.<br />
The G.711, G.722, G.728 and MPEG4 AAC audio modes are supported.<br />
A multipoint connection including a SIP connection is not available.<br />
Only the <strong>PCS</strong>-<strong>XG80</strong>/<strong>XG80</strong>S is enabled for use as a main terminal for the<br />
cascade connection.<br />
When the local system is used as the main terminal and connected with<br />
remote terminals other than the <strong>PCS</strong>-<strong>XG80</strong>/<strong>XG80</strong>S, the maximum<br />
bandwidth to be used is restricted to 4 MHz.
Connection Examples of a Multipoint<br />
Connection<br />
Using the LAN Connection (Up to Six Points)<br />
Installing the optional <strong>PCS</strong>A-MCG80 HD MCU software in an HD Visual<br />
Communication System allows you to connect multiple points up to six.<br />
If you have already made a point-to-point connection when a third point calls,<br />
the system automatically starts multipoint connection.<br />
/<br />
POWER/STANDBY<br />
to 1 or 2<br />
(100BASE-TX/<br />
10BASE-T)<br />
<strong>PCS</strong>A-MCG80 HD<br />
MCU software<br />
UTP cable (category 5, straight)<br />
(not supplied)<br />
to LAN<br />
Note<br />
For a multipoint connection only the Communication System with the <strong>PCS</strong>A-MCG80<br />
HD MCU software installed can be used as main terminal. If you want to use multiple<br />
Communication Systems as main terminals depending on the type of connection, the<br />
same number of HD MCU software as that of main terminals is required to install.<br />
Connection Examples of a Multipoint Connection<br />
/<br />
/<br />
/<br />
/<br />
/<br />
POWER/STANDBY<br />
POWER/STANDBY<br />
POWER/STANDBY<br />
POWER/STANDBY<br />
POWER/STANDBY<br />
185<br />
Chapter 6: Multipoint Connection
Using the Cascade Connection via LAN (Up to 10 Points)<br />
/<br />
/<br />
/<br />
/<br />
POWER/STANDBY<br />
POWER/STANDBY<br />
POWER/STANDBY<br />
POWER/STANDBY<br />
Installing the optional <strong>PCS</strong>A-MCG80 HD MCU software in two HD Visual<br />
Communication Systems enables cascade connection with two main terminals,<br />
allowing you to make a multipoint connection among up to ten points by<br />
connecting four to each main terminal.<br />
/<br />
Notes<br />
Even if the <strong>PCS</strong>A-MCG80 HD MCU software is installed in three or more<br />
Communication Systems, cascade connection is not available.<br />
For cascade connection, “Broadcast Mode” can be set to “Voice Activate” mode only<br />
during communication. The “Split” and “Split (fixed)” modes are not available.<br />
Only the <strong>PCS</strong>-<strong>XG80</strong>/<strong>XG80</strong>S is enabled for use as a main terminal on the remote site.<br />
186 Connection Examples of a Multipoint Connection<br />
POWER/STANDBY<br />
<strong>PCS</strong>A-MCG80 HD<br />
MCU software<br />
/<br />
POWER/STANDBY<br />
<strong>PCS</strong>A-MCG80 HD<br />
MCU software<br />
/<br />
/<br />
/<br />
/<br />
POWER/STANDBY<br />
POWER/STANDBY<br />
POWER/STANDBY<br />
POWER/STANDBY
Using the ISDN Connection<br />
/<br />
POWER/STANDBY<br />
Installing the optional <strong>PCS</strong>A-MCG80 HD MCU software in an HD Visual<br />
Communication System allows you to connect to multiple systems up to six by<br />
using the optional <strong>PCS</strong>A-B768S, or up to four by using the optional <strong>PCS</strong>A-<br />
B384S ISDN Unit.<br />
/<br />
POWER/STANDBY<br />
/<br />
POWER/STANDBY<br />
<strong>PCS</strong>A-MCG80 HD<br />
MCU software<br />
/<br />
POWER/STANDBY<br />
/<br />
POWER/STANDBY<br />
/<br />
POWER/STANDBY<br />
to ISDN lines<br />
The illustration shows an example using the<br />
<strong>PCS</strong>A-B768S ISDN Unit.<br />
<strong>PCS</strong>A-B384 or <strong>PCS</strong>A-<br />
B768S ISDN Unit<br />
ISDN modular cables<br />
(not supplied)<br />
to ISDN1 to 6<br />
Notes on the number of ISDN lines used and number of remote<br />
parties for a multipoint connection<br />
You can select the number of ISDN channels to be used for the remote point<br />
connected first using “ISDN Bandwidth” on the ISDN: Mode page of the<br />
Communication setup menu (page 68).<br />
However, if the number of remote points connected increases as a result of<br />
dialing from the main terminal, some of the channels used for the first point<br />
will be cut off and used for newly connected points instead. For example,<br />
if you use six ISDN lines (up to 12B channels available), 12B channels will be<br />
used for the first remote point only when no other points are connected. When<br />
the system connects to a second point, the number of channels for the first<br />
point decreases, and 6B channels will be used for both the first and second<br />
points.<br />
Even if one of the remote points in a multipoint connection is disconnected, the<br />
number of channels used for the remaining points will not increase.<br />
Connection Examples of a Multipoint Connection<br />
187<br />
Chapter 6: Multipoint Connection
Note<br />
When you are called from a remote party and the remote party has set up a lower number<br />
of ISDN channels than that in your terminal, the setting on the remote party’s terminal<br />
has priority.<br />
To connect with a normal phone<br />
When you are using an ISDN connection, a normal phone can be connected at<br />
up to five points.<br />
Only the 1B (64K) connection is available for a normal phone.<br />
Notes<br />
When using the ISDN connection, installing the <strong>PCS</strong>A-MCG80 HD MCU software<br />
in two or more Communication Systems does not allow cascade connection.<br />
For multipoint connection, only the Communication System with the <strong>PCS</strong>A-MCG80<br />
HD MCU software installed can be used as main terminal. If you want to use two or<br />
more Communication Systems as main terminals depending on the type of<br />
connection, the same number of HD MCU software installations as that of main<br />
terminals is required.<br />
Using Both LAN and ISDN<br />
to 1 or 2<br />
(100BASE-TX/<br />
10BASE-T)<br />
/<br />
POWER/STANDBY<br />
/<br />
Installing the <strong>PCS</strong>A-MCG80 HD MCU software in one HD Visual<br />
Communication System enables a multipoint connection with the terminals<br />
connected via a LAN and ISDN.<br />
to LAN<br />
/<br />
POWER/STANDBY<br />
POWER/STANDBY<br />
UTP cable (category 5,<br />
straight) (not supplied)<br />
/<br />
POWER/STANDBY<br />
188 Connection Examples of a Multipoint Connection<br />
/<br />
POWER/STANDBY<br />
The illustration shows an example<br />
using the <strong>PCS</strong>A-B768S ISDN Unit.<br />
to ISDN1 to 6<br />
to ISDN lines<br />
/<br />
<strong>PCS</strong>A-B384S or <strong>PCS</strong>A-<br />
B768S ISDN Unit<br />
POWER/STANDBY<br />
ISDN modular cables<br />
(not supplied)
Note<br />
The connection example described above includes four terminals via a LAN connection<br />
and one terminal via an ISDN connection. The number of the systems for LAN and<br />
those for ISDN connections is not fixed.<br />
Using the LAN Cascade and ISDN Connection<br />
/<br />
Installing the <strong>PCS</strong>A-MCG80 HD MCU software in two HD Visual<br />
Communication System enables cascade connection including two main<br />
terminals. Connecting four terminals to one main terminal allows you to make<br />
a multipoint connection via a LAN and ISDN with up to ten points.<br />
POWER/STANDBY<br />
<strong>PCS</strong>A-MCG80<br />
HD MCU software<br />
/<br />
POWER/STANDBY<br />
/<br />
/<br />
POWER/STANDBY<br />
POWER/STANDBY<br />
/<br />
POWER/STANDBY<br />
/<br />
LAN<br />
Notes<br />
Be sure to use LAN connection between two Communication Systems connected with<br />
cascade. Cascade connection via an ISDN is not available.<br />
For cascade connection, “Broadcast Mode” can be set to “Voice Activate” mode only<br />
during communication. The “Split” and “Split (fixed)” modes are not available.<br />
Only the <strong>PCS</strong>-<strong>XG80</strong>/<strong>XG80</strong>S is enabled for use as a main terminal on the remote site.<br />
POWER/STANDBY<br />
<strong>PCS</strong>A-MCG80 HD<br />
MCU software<br />
/<br />
Connection Examples of a Multipoint Connection<br />
POWER/STANDBY<br />
/<br />
/<br />
POWER/STANDBY<br />
POWER/STANDBY<br />
/<br />
POWER/STANDBY<br />
189<br />
Chapter 6: Multipoint Connection
Installing the MCU Software<br />
1 Turn off the power of the Communication System.<br />
2 Insert the Key Module of the <strong>PCS</strong>A-MCG80 HD MCU software into the<br />
TABLET connector.<br />
3 Press the ?/1 (power) switch on the System to turn it on.<br />
The <strong>PCS</strong>A-MCG80 HD MCU software is installed in the System.<br />
Confirming that the Installation of the Software is Complete<br />
The installed software is indicated in “Software Option” under the Machine<br />
Information page of the Machine Status menu.<br />
For details, see “Machine Information” on page 93.<br />
190 Installing the MCU Software<br />
to TABLET<br />
Machine Status > Machine Information<br />
<strong>PCS</strong>A-MCG80 HD MCU software<br />
Host Version<br />
Machine Information<br />
Software Option<br />
2.00<br />
Multipoint<br />
Option I/F<br />
None<br />
Host Name<br />
pcshost<br />
IP Address<br />
0:0:0:0:0:0:0:0<br />
IP Address(LAN2) 0:0:0:0:0:0:0:0<br />
MAC Address 00-1A-80-78-6F-C8<br />
MAC Address(LAN2) 00-1A-80-78-6F-C9<br />
Serial Number 4294967295<br />
Previous Save<br />
Cancel
Configuring Multipoint<br />
Setting Up Multipoint<br />
1 Open the Multipoint setup menu, set “Multipoint Mode” to “AUTO”, and<br />
make the necessarysettings.<br />
Setup Multipoint<br />
Multipoint<br />
Multipoint Mode<br />
Broadcast Mode<br />
Split<br />
AUTO<br />
Split<br />
Automatic<br />
For details on “Broadcast Mode” and “Split”, see “Using the Display<br />
Control” on page 200.<br />
2 Open the Communication setup menu and make the necessary settings.<br />
For details, see “Communication Setup Menu” on page 66.<br />
Registering the Remote Parties in the Multipoint Connection List<br />
Save<br />
Setup Communication IP<br />
Communication1<br />
Individual Settings for Transmission/Reception Off<br />
Individual Settings for Point-to-Point/Multipoint Off<br />
Save<br />
You can register a multipoint connection list that includes all remote parties for<br />
a multipoint connection in the Phone Book. It allows you to dial all the parties<br />
simultaneously.<br />
You can enter new remote parties to register in the multipoint connection list<br />
or add the parties registered in the Phone Book to the multipoint connection<br />
list.<br />
Cancel<br />
Cancel<br />
Configuring Multipoint<br />
191<br />
Chapter 6: Multipoint Connection
To register a multipoint connection list in the Phone Book<br />
The basic procedure for registration is the same as when registering a remote<br />
party for a point-to-point connection. For details on the procedure, see<br />
“Registering a New Remote Party” on page 120.<br />
1 Select “New Entry” in the Phone Book to display the List Edit menu, then<br />
enter the name of the multipoint connection list in the Index text box.<br />
Phone Book<br />
Index<br />
Group Select<br />
Dial to:<br />
2 Select “Number of Connected Sites” and select the number of sites to<br />
which you want to connect.<br />
The “Dial to:” text boxes that correspond to the selected numbers of sites<br />
are displayed.<br />
Phone Book<br />
Index<br />
3 Select the line interface icon or a still image to be displayed in the Phone<br />
Book.<br />
You can select “ ” as an icon for a multipoint connection list.<br />
4 Set up the line interface of the remote parties you want to register in a<br />
multipoint connection list in the “Dial to:” text boxes.<br />
Select the line interface from the drop-down list on the left, and enter the<br />
number of a remote party in the text box.<br />
For LAN connection: Select “IP” from the drop-down list (when using the<br />
1 connector), and enter the IP address.<br />
For ISDN connection: Select “ISDN” from the drop-down list, and enter<br />
the line number.<br />
For ISDN (Telephone) connection: Select “TEL” from the drop-down<br />
list, and enter the telephone number. (ex. : 0390123456).<br />
192 Configuring Multipoint<br />
MULTI LIST<br />
IP<br />
Group Select<br />
Dial to:<br />
Dial to:<br />
Dial to:<br />
MULTI LIST<br />
IP<br />
IP<br />
IP<br />
None Specified<br />
None Specified<br />
One-Touch Dial Specified None Specified<br />
Number of Connected Sites 1<br />
Line I/F<br />
IP<br />
Communication Bit Rate 1024Kbps<br />
Number of Lines 28(128K)<br />
Save<br />
Cancel<br />
One-Touch Dial Specified None Specified<br />
Number of Connected Sites 3<br />
Line I/F<br />
Communication Bit Rate 1024Kbps<br />
Number of Lines<br />
Save<br />
IP<br />
28(128K)<br />
Cancel
Enter all the parties to which you want to make a multipoint connection.<br />
Phone Book<br />
Index<br />
Group Select<br />
Dial to:<br />
Dial to:<br />
Dial to:<br />
MULTI LIST<br />
IP<br />
IP<br />
IP<br />
None Specified<br />
123.123.123.1<br />
123.123.123.2<br />
123.123.123.3<br />
One-Touch Dial Specified None Specified<br />
Number of Connected Sites 3<br />
Line I/F<br />
IP<br />
Communication Bit Rate 1024Kbps<br />
Number of Lines 28(128K)<br />
5 Set up other items.<br />
For details on the setup, see step 3 in “Registering a New Remote Party”<br />
on page 121.<br />
6 Select “Save”, then press the ENTER button on the Remote Commander.<br />
Registration of the multipoint connection list is completed.<br />
To specify a remote party registered in the Phone Book to the multipoint<br />
connection list<br />
Save<br />
1 Use the V, v, B or b button on the Remote Commander to select the name<br />
you want to register in the multipoint connection list.<br />
2 Press the button on the Remote Commander. Or press the ENTER<br />
button on the Remote Commander to display the submenu, press the V, v,<br />
B or b button to select “ On”, then press the ENTER button.<br />
Phone Book<br />
Default Group<br />
Room 101<br />
ISDN 01-2345-6789<br />
Cancel<br />
On<br />
Connect<br />
Edit<br />
Copy<br />
Delete<br />
Multipoint<br />
The (multipoint) mark is added to the lower right of the selected list,<br />
and the remote party is registered in the multipoint connection list.<br />
You can add the marks to up to five parties using the same procedure as<br />
above. The marks that correspond to the number of the parties you have<br />
registered appear as dark marks on the upper right of the Phone Book.<br />
Cancel<br />
Configuring Multipoint<br />
193<br />
Chapter 6: Multipoint Connection
Phone Book<br />
194 Configuring Multipoint<br />
Default Group<br />
Room 101<br />
ISDN 01-2345-6789<br />
Room 102<br />
IP 255.255.255.255<br />
Number of specified points<br />
Office A<br />
ISDN 98-7654-3210<br />
Multipoint mark<br />
Note<br />
To delete the mark from the name list, press the button on the Remote<br />
Commander again, or press the ENTER button on the Remote Commander to<br />
display the submenu, press the V, v, B or b button to select “<br />
the ENTER button.<br />
Off”, then press<br />
3 Select one of the remote parties with the mark, then press the ENTER<br />
button.<br />
4 Press the V, v, B or b button to select “ Edit” from the submenu, then press<br />
the ENTER button.<br />
The List Edit menu appears. All the IP addresses or telephone numbers of<br />
the parties marked with are entered in the number text boxes.<br />
Phone Book<br />
Index<br />
Group Select<br />
Dial to:<br />
Dial to:<br />
Dial to:<br />
MULTI LIST<br />
ISDN<br />
IP<br />
ISDN<br />
None Specified<br />
01-2345-6789<br />
255.255.255.255<br />
98-7654-3210<br />
One-Touch Dial Specified None Specified<br />
Number of Connected Sites 3<br />
Line I/F<br />
Communication Bit Rate 1024Kbps<br />
Number of Lines<br />
5 Enter the name of the multipoint connection list in the Index text box.<br />
6 Select “Save”, then press the ENTER button.<br />
The registration of the multipoint connection list is completed.<br />
Save<br />
IP<br />
28(128K)<br />
Cancel
Starting a Multipoint Connection<br />
Calling Remote Parties<br />
To call remote parties registered in the multipoint connection lists<br />
1 Select the multipoint connection list registered in the Phone Book.<br />
2 Press the CONNECT ( ) button on the Remote Commander, or press the<br />
ENTER button on the Remote Commander to display the submenu, press<br />
the V, v, B or b button to select “Connect”, then press the ENTER button.<br />
Phone Book<br />
Default Group<br />
Room 101<br />
ISDN 01-2345-6789<br />
Cancel<br />
On<br />
Connect<br />
Edit<br />
Copy<br />
Delete<br />
Multipoint<br />
The system begins dialing the remote parties registered in the multipoint<br />
connection list. “Dialing” appears on the monitor screen. When the system<br />
connects to all the remote points, the message “Session Connected.”<br />
appears on the screen, and the pictures of the remote parties are displayed<br />
on the screen.<br />
To call remote parties by selecting from the Phone Book<br />
1 Select a remote party to which you want to connect for a multipoint<br />
connection from the Phone Book.<br />
2 Press the button on the Remote Commander, or press the ENTER button<br />
on the Remote Commander to display the submenu, press the V, v, B or b<br />
button to select “ On”, then press the ENTER button.<br />
Starting a Multipoint Connection<br />
195<br />
Chapter 6: Multipoint Connection
Phone Book<br />
Default Group<br />
The (multipoint) mark is added to the lower right of the selected name<br />
in the Phone Book list and the remote party is specified to the party for the<br />
multipoint connection.<br />
You can add the marks for up to five parties using the same procedure<br />
as above. The marks that correspond to the number of the parties you<br />
have selected appear as dark marks on the upper right of the Phone Book.<br />
Phone Book<br />
Default Group<br />
Note<br />
To delete the mark from the name list, press the button on the Remote<br />
Commander again, or press the ENTER button to display the submenu, press the V,<br />
v, B or b button to select “ Off”, then press the ENTER button.<br />
3 Select one of the remote parties with the mark.<br />
4 Press the CONNECT ( ) button on the Remote Commander, or press the<br />
ENTER button on the Remote Commander to display the submenu, press<br />
the V, v, B or b button to select “Connect”, then press the ENTER button.<br />
The system begins dialing the remote parties with the marks. “Dialing”<br />
appears on the monitor screen.<br />
When the system connects to all the remote points, the message “Session<br />
Connected.” appears on the screen, and the pictures of the remote parties<br />
are displayed on the screen.<br />
196 Starting a Multipoint Connection<br />
Room 101<br />
ISDN 01-2345-6789<br />
Cancel<br />
On<br />
Connect<br />
Edit<br />
Copy<br />
Delete<br />
Room 101<br />
ISDN 01-2345-6789<br />
Room 102<br />
IP 255.255.255.255<br />
Number of specified points<br />
Office A<br />
ISDN 98-7654-3210<br />
Multipoint mark
To call remote parties not registered in the Phone Book<br />
Basic operations are the same as those for a point-to-point connection.<br />
For details, see “Calling a Remote Party Not Registered in the Phone Book”<br />
on page 114.<br />
1 Select “Detailed Dial” in the Home menu or press the CONNECT ( )<br />
button on the Remote Commander to open the Detailed Dial menu.<br />
2 Select “Number of Connected Sites” and select the number of the points to<br />
which you want to connect.<br />
The “Dial to:” text boxes that correspond to the selected number of points<br />
appear.<br />
Detailed Dial<br />
Home<br />
Phone Book<br />
History<br />
Dial to: IP<br />
Dial to: IP<br />
Dial to: IP<br />
3 Set up the line interface of the remote parties in the “Dial to:” text boxes.<br />
Select the line interface from the drop-down list on the left, and enter the<br />
number of a remote party in the text box.<br />
For LAN connection: Select “IP” from the drop-down list (when using the<br />
1 connector), and enter the IP address.<br />
For ISDN connection: Select “ISDN” from the drop-down list, and enter<br />
the line number.<br />
For ISDN (Telephone) connection: Select “TEL” from the drop-down<br />
list, and enter the telephone number (ex. : 0390123456).<br />
Enter all the parties with which you want to make a multipoint connection.<br />
Detailed Dial<br />
Home<br />
Phone Book<br />
History<br />
Dial to: IP<br />
Dial to: IP<br />
Dial to: IP<br />
123.123.123.1<br />
123.123.123.2<br />
123.123.123.3<br />
Number of Connected Sites 3<br />
Line I/F<br />
Communication Bit Rate 2Mbps<br />
For details on the setup, see “Calling a Remote Party Not Registered in the<br />
Phone Book” on page 114.<br />
IP<br />
Number of Lines 1B(64K)<br />
Number of Connected Sites 3<br />
Line I/F<br />
IP<br />
Communication Bit Rate 2Mbps<br />
Number of Lines<br />
1B(64K)<br />
Cancel<br />
Cancel<br />
Starting a Multipoint Connection<br />
197<br />
Chapter 6: Multipoint Connection
4 Select “Connect”, and press the ENTER button on the Remote<br />
Commander, or press the CONNECT ( ) button on the Remote<br />
Commander.<br />
The system begins dialing the remote parties selected in step 3. “Dialing”<br />
appears on the monitor screen.<br />
When the system connects to all the remote points, the message “Session<br />
Connected.” appears on the screen, and the pictures of the remote parties<br />
are displayed on the screen.<br />
To call additional remote parties<br />
After starting communication with the first party, press the CONNECT ( )<br />
button on the Remote Commander to display the menu.<br />
Previous<br />
Enter Number/Address<br />
Select from Phone Book<br />
Select from History<br />
Call the second remote party by using one of the procedures described in<br />
“Starting a Connection by Calling a Remote Party” on page 106 depending on<br />
the registration status of the party. When you press the CONNECT ( )<br />
button on the Remote Commander after the communication starts with the<br />
second remote party, the above menu opens again and you can call the next<br />
party.<br />
Notes<br />
When “Direct Dial” or “One-Touch Dial” is set to “On” in the Home Menu setup<br />
menu, selecting “Previous” from the above menu displays the necessary items for<br />
direct dialing or the one-touch dial buttons on the monitor screen.<br />
The Phone Book opens when you press the button during communication. It is<br />
convenient for calling a remote party registered in the Phone Book.<br />
If some points are not connected<br />
The following dialog appears. Only the connected points are shown as dark<br />
circles. Select the desired item.<br />
198 Starting a Multipoint Connection
Some positions were not connected.<br />
Start Meeting<br />
Disconnect All<br />
Redial<br />
Start Meeting: Starts communication with remote parties connected.<br />
Disconnect All: Cancels all the connections and restores the Home menu.<br />
Redial: Redials the numbers of the points that you failed to connect.<br />
Note on multipoint videoconferences using ISDN<br />
If the number of remote points connected increases as a result of dialing from<br />
the main terminal while making a multipoint connection using ISDN, some of<br />
the channels that have been used for connection will be cut off and used for the<br />
newly connected points instead. For example, if you use six ISDN lines (up to<br />
12B channels available), 12B channels will be used for the first remote point<br />
only when no other points are connected. When the system connects to a<br />
second point, the number of channels for the first point decreases, and 6B<br />
channels will be used for both the first and second points.<br />
Even if one of the remote points in a multipoint connection is disconnected, the<br />
number of channels used for the remaining points will not increase.<br />
Receiving a Call from a Remote Party<br />
<strong>Operation</strong>s are the same as those for a point-to-point connection.<br />
For details, see “Receiving a Call from a Remote Party” on page 117.<br />
Starting a Multipoint Connection<br />
199<br />
Chapter 6: Multipoint Connection
Using the Display Control<br />
During a multipoint connection you can control the following operations.<br />
Broadcast Mode<br />
There are four broadcast modes, “Split” and “Voice Activate”, and “Split<br />
(fixed)” and the broadcast select mode.<br />
You can set up “Split” and “Voice Activate” modes in “Broadcast Mode” of<br />
the Multipoint setup menu.<br />
You can select “Split (fixed)” and broadcast select modes in the Layout menu<br />
during communication.<br />
Split mode<br />
This mode allows display of the pictures of the connected remote terminals and<br />
the picture of the local terminal by splitting the monitor screen.<br />
You can select “Six-screen Mosaic” or “Automatic” in “Split” of the<br />
Multipoint setup menu. When “Six-screen Mosaic” is selected, the display is<br />
split into six regardless of the number of terminals. When “Automatic” is<br />
selected, the display is automatically split into four if two or three terminals are<br />
connected or into six when four or five terminals are connected.<br />
The split windows A to C or A to E display the pictures of the remote terminals<br />
in the connected sequence.<br />
Four-split window Six-split window<br />
Picture A Picture B<br />
Picture C<br />
Picture on the<br />
local terminal<br />
Notes<br />
When the six-split window is displayed, the system detects the terminal including the<br />
loudest voice among all the terminals and displays the picture of that terminal in the<br />
lower right window. The picture on the local terminal is then displayed in the window<br />
where the picture of the detected terminal was displayed.<br />
200 Using the Display Control<br />
Picture D<br />
Picture E<br />
Picture A Picture B Picture C<br />
Picture on the<br />
local terminal
If you switch the broadcast mode from “Split” to “Voice Activate” in which the<br />
picture of a specified terminal is displayed in full screen during communication, the<br />
location of Pictures A to E will be changed when “Split” mode is restored.<br />
When there is one terminal, the picture is displayed in full screen regardless of the<br />
setting.<br />
When the six-split window with a terminal specified is displayed, the picture from the<br />
specified terminal is always displayed in the lower-right window.<br />
When “Split” mode is selected, you cannot control the camera on any connected<br />
remote terminals.<br />
Voice Activate mode<br />
This mode allows you to detect the terminal with the loudest voice among the<br />
connected terminals and to display the picture of that terminal in full screen on<br />
all other terminals. The “ ” indicator appears when “Voice Activate”<br />
mode is activated. The indicator with an alphabetic letter (ex. : ) indicating<br />
the terminal of the displayed picture also appears. The indicator is<br />
displayed on the monitor screen while the local picture is broadcast.<br />
Note<br />
To transmit pictures with resolution of 720p (1280 × 720 pixels) in H.264 Video Mode<br />
when “Voice Activate” is activated, select “Voice Activate (720P)” in “Broadcast<br />
Mode” of the Multipoint setup menu. However, the “Voice Activate (720P)” mode<br />
cannot be selected when the communication is made via an ISDN or SIP connection.<br />
Even for an IP connection, this mode is not available if the remote party does not<br />
support H.264 Video Mode.<br />
Fixed split mode<br />
The pictures from the connected remote terminals and the picture of the local<br />
terminal are displayed in split windows on the monitor screen as the same<br />
manner as those in “Split” mode.<br />
You can specify a picture among the split windows to fix it in the lower right<br />
window for the six-split mode. Pictures other than the specified one are<br />
displayed in the split windows in the connected sequence.<br />
Six-split window<br />
The picture of the specified terminal is<br />
always displayed in this window.<br />
Broadcast select mode<br />
You can specify a terminal to display the picture of that terminal in full screen<br />
on all other terminals. The indicator with an alphabetic letter (ex. )<br />
Using the Display Control<br />
201<br />
Chapter 6: Multipoint Connection
indicating the terminal of the displayed picture also appears. The indicator<br />
is displayed on the monitor screen while the local picture is broadcast.<br />
Broadcast Modes and Displayed Windows<br />
The chart described below shows the window displayed on the monitor screen<br />
when you select one of the broadcast modes. According to the connection<br />
status of your system, some modes cannot be selected. You cannot select the<br />
broadcast mode if your connection status corresponds to that with no display<br />
window in the chart below.<br />
Connection status Non-cascade connection Cascade connection<br />
202 Using the Display Control<br />
LAN connection<br />
(page 185)<br />
ISDN connection<br />
(page 187)<br />
LAN & ISDN connection<br />
(page 189)<br />
LAN cascade connection<br />
(page 186)<br />
LAN cascade & ISDN<br />
connection<br />
(page 189)<br />
Connecting points (max.) 6 10<br />
Automatic 2 or 3<br />
terminals<br />
connected<br />
Four-split window –<br />
Broadcast mode<br />
Before communication<br />
4 or 5<br />
terminals<br />
connected<br />
Six-split window –<br />
Six-screen Mosaic Six-screen mosaic –
Connection status Non-cascade connection Cascade connection<br />
Broadcast mode<br />
During communication<br />
Split<br />
(fixed)<br />
2 or 3<br />
terminals<br />
connected<br />
4 or 5<br />
terminals<br />
connected<br />
– –<br />
Six-split window –<br />
Voice Activate Full screen Full screen<br />
Broadcast Select Full screen –<br />
Using the Display Control<br />
203<br />
Chapter 6: Multipoint Connection
Switching the Broadcast Mode<br />
At the beginning of the connection, the broadcast mode set in “Broadcast<br />
Mode” and “Split” of the Multipoint setup menu is applied. You can change<br />
the mode during communication using the Layout menu.<br />
Note<br />
If “Broadcast Mode” of the Multipoint setup menu is set to “Voice Activate (720P)”,<br />
you cannot switch “Broadcast Mode” during communication as the “Broadcast Mode”<br />
does not appear in the Layout menu. Set “Broadcast Mode” before starting<br />
communication.<br />
1 Press the LAYOUT button on the Remote Commander.<br />
The Layout menu appears.<br />
2 Use the V, v, B or b button on the Remote Commander to select the mode<br />
to which you want to switch from “Broadcast Mode”, then press the<br />
ENTER button.<br />
Layout<br />
Screen Display Patterns<br />
Full<br />
PinP<br />
Monitor Select Mode<br />
Split: Selects the Split mode.<br />
Split (A fixed): Fixes the picture of the terminal connected first in the<br />
specified window of the fixed split mode.<br />
Split (B fixed): Fixes the picture of the terminal connected second in the<br />
specified window of the fixed split mode.<br />
Split (C fixed): Fixes the picture of the terminal connected third in the<br />
specified window of the fixed split mode.<br />
Split (D fixed): Fixes the picture of the terminal connected fourth in the<br />
specified window of the fixed split mode.<br />
204 Using the Display Control<br />
PandP<br />
PinP<br />
Terminal<br />
0<br />
Side by Side<br />
PinP<br />
HDMI RGB HDMI+RGB<br />
Broadcast Mode<br />
Split<br />
PinP<br />
PinP<br />
Save Cancel
Split (E fixed): Fixes the picture of the terminal connected fifth in the<br />
specified window of the fixed split mode.<br />
Split (Near End Fixed): Fixes the local picture in the specified window of the<br />
fixed split mode.<br />
Voice Activate: Selects “Voice Activate” mode.<br />
Self Broadcast: Broadcasts the local picture in broadcast select mode.<br />
A Broadcast: Broadcasts the picture of the terminal connected first in<br />
broadcast select mode.<br />
B Broadcast: Broadcasts the picture of the terminal connected second in<br />
broadcast select mode.<br />
C Broadcast: Broadcasts the picture of the terminal connected third in<br />
broadcast select mode.<br />
D Broadcast: Broadcasts the picture of the terminal connected fourth in<br />
broadcast select mode.<br />
E Broadcast: Broadcasts the picture of the terminal connected fifth in<br />
broadcast select mode<br />
To display the local picture in “Voice Activate” mode<br />
You can display the local picture only on your monitor screen even if “Voice<br />
Activate” mode is activated. All other terminals remain in “Voice Activate”<br />
mode.<br />
1 Press the LAYOUT button on the Remote Commander to display the<br />
Layout menu.<br />
The instruction “F1: Switches the monitored picture between the remote<br />
and local sites.” appears in the lower part of the screen.<br />
2 Press the F1 button on the Remote Commander.<br />
The local picture appears on your monitor screen.<br />
To restore “Voice Activate” mode on the local site<br />
Press the F1 button on the Remote Commander again.<br />
Receiving the Broadcast Requested From Another Terminal<br />
When you receive the “Self Broadcast” command from one of the terminals<br />
connected, the picture of that terminal is broadcast in full screen.<br />
When you receive the “Stop Broadcast” command from one of the terminals<br />
connected, the system returns to the previous mode.<br />
Note<br />
If you have received the “Self Broadcast” command from another terminal, the<br />
operation above will not be carried out.<br />
Using the Display Control<br />
205<br />
Chapter 6: Multipoint Connection
Ending the Multipoint Connection<br />
1 Press the CONNECT ( ) button on the Remote Commander.<br />
The following menu appears:<br />
Disconnect A Disconnect B<br />
Disconnect D<br />
Disconnect E<br />
Cancel<br />
The alphabetic letters A to E (or A to C) indicate the connected sequence<br />
of terminals.<br />
The terminal names are displayed in the menu if you set “Display Terminal<br />
Name” to “Show temporarily” or “Always show” on the Menu Screens<br />
page in the General setup menu.<br />
2 Use the V, v, B or b button on the Remote Commander to select the<br />
terminal to be disconnected, then press the ENTER button.<br />
Disconnect A: Disconnects the terminal connected first.<br />
Disconnect B: Disconnects the terminal connected second.<br />
Disconnect C: Disconnects the terminal connected third.<br />
Disconnect D: Disconnects the terminal connected fourth.<br />
Disconnect E: Disconnects the terminal connected fifth.<br />
Disconnect All: Disconnects all the terminals.<br />
The selected terminal is disconnected.<br />
You can also disconnect all the terminals by pressing the DISCONNECT<br />
( ) button on the Remote Commander.<br />
To cancel the disconnection<br />
Select “Cancel” in step 2, then press the ENTER button on the Remote<br />
Commander.<br />
206 Ending the Multipoint Connection<br />
Disconnect All<br />
Disconnect C
Notes on Secondary<br />
Terminals<br />
If there is a terminal that is not adequate for<br />
the settings set by this system, that terminal<br />
is called a secondary terminal.<br />
Communication capabilities between<br />
secondary terminal and this system are<br />
shown below.<br />
Transmitting/receiving audio<br />
Receiving video from a secondary<br />
terminal<br />
Disables transmission of video to a<br />
secondary terminal<br />
For details on secondary terminals, see<br />
“Glossary” on page 250.<br />
When a normal phone is connected<br />
The audio mode of the Visual<br />
Communication Systems is not affected if a<br />
normal phone is connected or disconnected<br />
at any time.<br />
When a 56K network is mixed among<br />
the terminals if the connection is<br />
made via a 64K network<br />
The connection automatically changes to<br />
that via the 56 K network. Terminals that<br />
cannot change to that network are regarded<br />
as secondary terminals, and the transmission<br />
of video is not available, although<br />
transmission/reception of audio and<br />
reception of video are available.<br />
When a terminal with different audio<br />
mode is connected and its video bit<br />
rate is different<br />
The connection is made in the audio mode of<br />
the terminal with the lowest video bit rate.<br />
Any terminal that cannot conform to the<br />
audio mode is regarded as a secondary<br />
terminal, and the transmission of video is not<br />
available, although transmission/reception<br />
of audio and reception of video are<br />
available.<br />
Notes on Secondary Terminals<br />
207<br />
Chapter 6: Multipoint Connection
Multipoint Attributes<br />
Number Attribute Value (H.320 MCU) Value (H.323 MCU)<br />
1 Maximum number of terminals<br />
that can be connected to a single<br />
MCU<br />
2 Maximum number of<br />
concurrent (independent)<br />
connections that can be<br />
supported in a single MCU<br />
208 Multipoint Attributes<br />
5 (6 when including the<br />
local terminal)<br />
1 1<br />
5 (6 when including the<br />
local terminal)<br />
3 Maximum number of ports that<br />
can be connected to other<br />
MCUs<br />
0 1<br />
4.1 Network interfaces at each port BRI LAN<br />
4.2 Restricted network capability Restrict_Required –<br />
5 Transmission rates available at 1B, 2B, 4B, 6B (BRI) Restricted on maximum<br />
each port<br />
value of total bit rate of<br />
all points<br />
6 Audio Processor Equipped Equipped<br />
6.1 Mixed/switched<br />
Mixed<br />
Mixed<br />
Noise/echo suppression on<br />
“silent” ports<br />
No<br />
No<br />
6.2 Audio algorithm at each port G.711, G.728, G.722, G.711, G.728, G.722,<br />
MPEG4 AAC (monaural MPEG4 AAC (monaural<br />
only)<br />
only)<br />
7 Video Processor (motion<br />
pictures)<br />
Equipped Equipped<br />
7.1 Switched/mixed Voice activated/four- Voice activated/foursplit/six-split/user<br />
control split/six-split/user control<br />
7.2 Video algorithm at each port H.261, H.263, H.264 H.261, H.263, H.264<br />
8 Data Processor Equipped Equipped<br />
8.1 Data broadcast facility, LSD Equipped<br />
–<br />
Data broadcast facility, HSD No<br />
–<br />
8.2 MLP Processor Equipped –<br />
9 Encryption Support Support
Number Attribute Value (H.320 MCU) Value (H.323 MCU)<br />
10 Method of choosing Selected<br />
Communication Mode - SCM<br />
11 Capability of secondary<br />
terminals<br />
Custom:<br />
Number of lines (1B/<br />
2B/4B/6B)<br />
Audio algorithm<br />
(G.711, G.728, G.722,<br />
MPEG4 AAC)<br />
Auto:<br />
Video frame rate (7.5/<br />
10/15/30fps)<br />
Video encoding mode<br />
(CIF/QCIF)<br />
Fixed or switched<br />
automatically:<br />
Video algorithm<br />
(H.261 fixed, H.261,<br />
H.263 or H.264<br />
switched<br />
automatically)<br />
Restrict (56K fixed/<br />
Auto)<br />
Capable of audio<br />
transmitting/receiving<br />
and video receiving only.<br />
Capable of audio<br />
transmitting/receiving<br />
only via a normal phone.<br />
12 Call setup provision(s) No call/receive<br />
reservation<br />
13 Control capabilities – –<br />
13.1 Numbering of terminals<br />
Simple chair control using BAS<br />
No<br />
No<br />
Custom:<br />
LAN bandwidth<br />
(Restricted on maximum<br />
value of total bit rate of<br />
all points)<br />
Audio algorithm<br />
(G.711, G.728, G.722,<br />
MPEG4 AAC)<br />
Auto:<br />
Video frame rate (7.5/<br />
10/15/30fps)<br />
Video encoding mode<br />
(CIF/QCIF)<br />
Fixed or switched<br />
automatically:<br />
Video algorithm<br />
(H.261 fixed, H.261,<br />
H.263 or H.264<br />
switched<br />
automatically)<br />
Capable of audio<br />
transmitting/receiving<br />
and video receiving only.<br />
Capable of audio<br />
transmitting/receiving<br />
only via a normal phone.<br />
No call/receive<br />
reservation<br />
Equipped<br />
No<br />
13.2 MLP facilities (T.120) No No<br />
13.3 H.224 (simplex data) Equipped Equipped<br />
14 Cascading No Equipped<br />
14.1 Fixed rates (“simple”) No No<br />
14.2 Master/Slave No Equipped<br />
15 Terminal identification No Equipped<br />
16 MBE capability No –<br />
Multipoint Attributes<br />
209<br />
Chapter 6: Multipoint Connection
Chapter 7:<br />
Web Control<br />
Function<br />
210<br />
This chapter describes the Web Control Functions used when operating the<br />
<strong>PCS</strong>-<strong>XG80</strong>/<strong>XG80</strong>S. The Web Control Function helps you control the <strong>PCS</strong>-<br />
<strong>XG80</strong>/<strong>XG80</strong>S, or change its setup configuration, using a Web browser<br />
installed on your PC, such as Internet Explorer.<br />
Internet Explorer is a product of the Microsoft Corporation. Please use Version<br />
5.0, or above (Version 6.0 recommended).
Opening the Web Page<br />
Enter the IP address assigned to the <strong>PCS</strong>-<strong>XG80</strong>/<strong>XG80</strong>S in the address line of<br />
your browser.<br />
The format of an address is:<br />
http://XXX.XXX.XXX.XXX/<br />
For instance, if the IP address is “192.47.100.117”, enter “http://<br />
192.47.100.117/” in the address line.<br />
Note<br />
When a proxy server in an external network segment has been set, the Gateway address<br />
in the <strong>PCS</strong>-<strong>XG80</strong>/<strong>XG80</strong>S LAN setup must also be set. Or set your Web browser proxy<br />
setting to “No Proxy” for the <strong>PCS</strong>-<strong>XG80</strong>/<strong>XG80</strong>S.<br />
Opening the Web Page<br />
211<br />
Chapter 7: Web Control Function
Identifying a User<br />
212 Identifying a User<br />
Once you reach the Web page, the following window will be displayed asking<br />
you to identify yourself as the user.<br />
Enter one of the following user names (see below) into the “User Name” box<br />
and the corresponding password into the “Password” box, then click the [OK]<br />
button.<br />
Each character of a password is shown as “*” on the screen.<br />
When the user name and password are correct, the “Home” menu will come<br />
up.<br />
If an incorrect user name or password is entered, you are asked to enter it again.<br />
When the incorrect entries are made three times, an error message appears on<br />
the screen.<br />
You can select a user name from the following and enter the password for the<br />
selected user name.<br />
[remote]<br />
Enter the Remote Access Password set in the Administrator setup menu. You<br />
can access and check the “Phonebook” and “Setup” pages.<br />
[address]<br />
Enter the Phone Book Modification Password set in the Administrator setup<br />
menu. You can access the “Phonebook” page, change the setting of the page,<br />
and register a new entry onto the page. And you can check the “Setup” pages.<br />
[sonypcs]<br />
Enter the Administrator Password set in the Administrator setup menu. You<br />
can access the “Phonebook” page, change the setting of the page, and register<br />
a new entry onto the page. And you can check and modify the “Setup” pages.
[streaming]<br />
Enter the Streaming Broadcast Password of the terminal transmitting via<br />
streaming broadcast. You can receive and view the contents of the transmitted<br />
communication.<br />
[setting]<br />
Enter the Save Settings Password set in the Administrator setup menu. You can<br />
access the “Phonebook” page, change the setting of the page, and register a<br />
new entry onto the page. And you can check and modify the “Setup” pages<br />
other than the Administrator setup menu.<br />
Notes<br />
If the corresponding password is not assigned, leave the “Password” box blank and<br />
click the [OK] button.<br />
Administrator Password, Phone Book Modification Password, Save Settings<br />
Password, Remote Access Password and Streaming Broadcast Password settings are<br />
set in the Administrator setup menu.<br />
Identifying a User<br />
213<br />
Chapter 7: Web Control Function
Selecting a Menu<br />
214 Selecting a Menu<br />
By clicking a menu name on the left part of the page, you can display the<br />
corresponding menu page.<br />
Menu items<br />
[Home]<br />
Displays the “Home” menu to select the line I/F to connect to a remote party,<br />
enter the address of the remote party and dial. The information icons for this<br />
system are also displayed.<br />
[Download]<br />
Displays the “Download” menu to download logs.<br />
[Control Pad]<br />
Displays the control panel to control the system.<br />
[Remote Controller]<br />
Displays the image of the Remote Commander (<strong>PCS</strong>-RF1) supplied with the<br />
system. It allows you to perform the same operations as those on the Remote<br />
Commander.
How to Use [Home] Menu<br />
When you click [Home] on the left part of the page, the Home menu appears.<br />
You can also display the Home menu by entering the correct password on the<br />
name entry screen.<br />
To dial by entering a number<br />
1 Select the line interface (IP, ISDN or SIP).<br />
2 Enter the telephone number or address of a remote party into the text box.<br />
3 Click the [Connect] button.<br />
How to Use [Home] Menu<br />
215<br />
Chapter 7: Web Control Function
How to Use [Download] Menu<br />
When you click [Download] on the left part of the page, the Download menu<br />
appears.<br />
Various log files can be shown.<br />
Select the log file you want to display, and click the [Download] button. You<br />
can check the log files in a separate window.<br />
216 How to Use [Download] Menu
How to Use [Remote Commander] Menu<br />
When you click [Remote Commander] on the left part of the screen, the<br />
Remote Commander image appears.<br />
By clicking the various buttons on the Remote Commander image, you can<br />
control the system in the same way you can when using a real Remote<br />
Commander (<strong>PCS</strong>-RF1), operating the camera, and dialing phone numbers.<br />
How to Use [Remote Commander] Menu<br />
217<br />
Chapter 7: Web Control Function
Selecting a Tool<br />
218 Selecting a Tool<br />
By clicking the tools button on the top part of the page, you can jump to the<br />
corresponding tools page.<br />
[Connect/Disconnect]<br />
Calls a remote party using direct dialing and ends a communication.<br />
[Phonebook]<br />
Displays the dial list of the Phonebook.<br />
Connects from the Phonebook.<br />
Registers, confirms, or edits the dial list.<br />
For a private phone book, the “Phonebook” button changes to the “Private<br />
Phonebook” button.<br />
[Shared Phonebook]<br />
You can use the Shared Phone Book.<br />
[History]<br />
Displays the Dial, Answer and Missed Call history lists.<br />
Dials from the history.<br />
Deletes an unnecessary history record.<br />
[Setup]<br />
Confirms or modifies the setup.<br />
[Information]<br />
Confirms the machine information, peripheral status and communication<br />
mode.<br />
You can also check the network routing, and can display the recorded files in<br />
a “Memory Stick”.<br />
[Monitor]<br />
You can monitor the picture on the Communication System.<br />
Note<br />
When “Web Monitor” is set to “Off” on the Access Permit page of the Administrator<br />
setup menu, you cannot use the [Monitor] page.<br />
[Streaming]<br />
You can watch the live stream of a communication.<br />
Notes<br />
QuickTime version 6.0 or above is needed to view a communication.<br />
When “Streaming” is “Disabled” on the Streaming/Recording page of the<br />
Administrator setup menu, the communication cannot be watched. If “Video” is set<br />
to “Off” on the Streaming/Recording page, only the audio stream of the<br />
communication is broadcast, and video cannot be watched.
How to Use [Version Up] Page<br />
When you click [Setup] on the top part of the page, [Version Up] appears on<br />
the lower left of the page.<br />
Clicking [Version Up] displays the [Version Up] page.<br />
Version Up<br />
Click [Reference] and select the software you want to upgrade, then click the<br />
[Upload] button.<br />
When the version upgrade is complete and a message appears, reboot the<br />
Communication System.<br />
How to Use [Version Up] Page<br />
219<br />
Chapter 7: Web Control Function
How to Use [Streaming] Page<br />
1 On the user name entry screen, enter “streaming” in the [User Name] box<br />
and the Streaming Password of the terminal transmitting via streaming<br />
broadcast in the [Password] box.<br />
2 Click the [Streaming] button to start QuickTime and start watching a<br />
communication.<br />
Notes<br />
QuickTime version 6.0 or above is required to view a communication. If QuickTime<br />
is not installed on your computer, download it for free from the following Web site:<br />
http://www.apple.com/quicktime/download/<br />
When “Streaming” is “Disabled” on the Streaming/Recording page of the<br />
Administrator setup menu, the communication cannot be watched. If “Video” is set<br />
to “Off” on the Streaming/Recording page, only the audio stream of the<br />
communication is broadcast, and video cannot be watched.<br />
Depending on Web access limitations, about 10 terminals can view a streaming<br />
broadcast simultaneously. The actual number of terminals that can view the broadcast<br />
simultaneously depends on your system’s operating environment.<br />
220 How to Use [Streaming] Page
How to Use [Monitor] Page<br />
When you click [Monitor] of the tools buttons, the [Monitor] page opens. You<br />
can monitor the picture on the Communication System.<br />
Note<br />
When “Web Monitor” is set to “Off” on the Access Permit page of the Administrator<br />
setup menu, or while the encrypted connection is made, you cannot use the [Monitor]<br />
page.<br />
How to Use [Monitor] Page<br />
221<br />
Chapter 7: Web Control Function
Appendix<br />
Location and<br />
Function of Parts<br />
and Controls<br />
<strong>PCS</strong>-<strong>XG80</strong>S HD Visual<br />
Communication System<br />
Front<br />
1234 5 6 7<br />
/<br />
LAN 1 ALERT LAN 2 ALERT<br />
VIDEO IN AUDIO 2 IN<br />
Pb L R<br />
Y Pr<br />
a ?/1 (power) switch<br />
Turns on/off the system.<br />
MAINTENANCE<br />
8 9 q;<br />
b ?/1 (power) indicator<br />
Starts blinking in green when the power<br />
switch is pressed to on, then lights in<br />
green. Lights in orange when the system<br />
is set to standby mode.<br />
c LAN 1 ALERT indicator<br />
When the system is connected to LAN<br />
via the 1 connector on the rear, this<br />
indicator lights in yellow when packet<br />
error (loss) or link error occurs during<br />
communication.<br />
d LAN 2 ALERT indicator<br />
When the system is connected to LAN<br />
via the 2 connector on the rear, this<br />
indicator lights in yellow when packet<br />
222 Location and Function of Parts and Controls<br />
OPEN<br />
OPEN<br />
error (loss) or link error occurs during<br />
communication.<br />
e Communication status indicator<br />
Lights in white for several seconds then<br />
goes out when the system starts.<br />
Blinks while dialing or receiving a call,<br />
and the indicator stays lit during<br />
communication.<br />
f TABLET connector<br />
Connect to a pen tablet (not supplied) for<br />
annotation, or the Key Module (not<br />
supplied) for software installation.<br />
g Memory Stick slot<br />
Insert a “Memory Stick” (not supplied)<br />
into this slot.<br />
A “Memory Stick Duo” can also be<br />
inserted.<br />
h VIDEO IN YPbPr (component<br />
input) jacks (phono jack)<br />
Connect to the component (YPbPr)<br />
signal outputs of the optional camera or<br />
external video equipment.<br />
i AUDIO 2 IN L/R jacks (phono jack)<br />
Connect to the audio outputs of the<br />
optional camera or audio equipment.<br />
j MAINTENANCE connector (D-sub<br />
9-pin)<br />
Used for maintenance service.
Rear<br />
8<br />
1 2 3 4 5 6 7<br />
CAMERA S VIDEO IN RGB IN RGB OUT HDMI OUT ISDN UNIT AUX CONTROL<br />
EC-MIC(A7) MIC(A1/A3)<br />
1 2 1(R) 2(L)<br />
R L R L R L<br />
DC 19.5V<br />
(PLUG IN POWER) AUDIO 1 IN AUDIO OUT REC OUT 1-EXT-2<br />
1<br />
2<br />
9<br />
0<br />
qa<br />
qs<br />
qd<br />
a CAMERA connector<br />
Connect to the TERMINAL connector<br />
on the <strong>PCS</strong>A-C<strong>XG80</strong> HD Camera Unit.<br />
b S VIDEO IN connector (mini DIN<br />
7-pin)<br />
Connect to the S-video output on the<br />
optional second camera or video<br />
equipment.<br />
c RGB IN connector (D-sub 15-pin)<br />
Connect to the RGB output of the<br />
optional computer or video equipment.<br />
d RGB OUT connector (D-sub<br />
15-pin)<br />
Connect to the RGB input of the<br />
optional projector or display unit.<br />
e HDMI OUT connector<br />
Connect to the HDMI input of the<br />
optional TV monitor.<br />
f ISDN UNIT connector<br />
Connect to the TERMINAL connector<br />
on the optional <strong>PCS</strong>A-B384S or<br />
<strong>PCS</strong>A-B768S ISDN Unit.<br />
g AUX CONTROL connector (D-sub<br />
9-pin)<br />
Used for maintenance service.<br />
h I (ground) terminal<br />
Connect a ground wire.<br />
qf<br />
qg qh qj<br />
i EC-MIC (A7) 1/2 (Echo canceling<br />
microphone) jacks<br />
Connect to optional <strong>PCS</strong>A-A7 echo<br />
canceling microphones.<br />
j MIC (A1/A3) 1 (R)/2 (L) jacks<br />
(minijack)<br />
Connect to the <strong>PCS</strong>-A1 microphones<br />
(supplied with <strong>PCS</strong>-<strong>XG80</strong>) or <strong>PCS</strong>A-A3<br />
microphones (optional). Power is<br />
supplied to the microphones from the<br />
System.<br />
k AUDIO 1 IN L/R jacks (phono jack)<br />
Connect to the audio outputs of the<br />
optional VCR or audio equipment.<br />
l AUDIO OUT L/R jacks (phono<br />
jack)<br />
Connect to the audio inputs of the TV<br />
monitor.<br />
m REC OUT L/R connectors (phono<br />
jack)<br />
Used when recording the audio signals<br />
to minute a communication. The mixed<br />
sounds of the local and remote parties<br />
are output from these connectors.<br />
n EXT (external equipment) 1/2<br />
connectors<br />
Not used with the system of this version.<br />
o 1 (LAN1) connector<br />
(100BASE-TX/10BASE-T, 8-pin<br />
modular)<br />
Used to connect via a LAN or a SIP.<br />
Connect to a hub or a SIP server using<br />
the category 5 cable.<br />
p 2 (LAN2) connector<br />
(100BASE-TX/10BASE-T, 8-pin<br />
modular)<br />
Used to connect via a LAN. Connect to<br />
a hub, etc. using the category 5 cable.<br />
q DC 19.5V jack<br />
Connect the supplied VGP-AC19V15<br />
AC Power Adaptor.<br />
Location and Function of Parts and Controls<br />
223<br />
Appendix
<strong>PCS</strong>A-C<strong>XG80</strong> HD Camera<br />
Unit (Supplied with<br />
<strong>PCS</strong>-<strong>XG80</strong>)<br />
Note<br />
This Camera Unit is not supplied with<br />
<strong>PCS</strong>-<strong>XG80</strong>S.<br />
Front<br />
Rear<br />
Bottom<br />
VISCA OUT<br />
POWER/STANDBY<br />
TERMINAL<br />
224 Location and Function of Parts and Controls<br />
1<br />
2<br />
3<br />
4<br />
5<br />
6<br />
7<br />
8<br />
a Lens<br />
This is a 10-magnification optical zoom<br />
lens.<br />
b POWER/STANDBY indicator<br />
Lights in green when the System is<br />
turned on. When the System is set to<br />
standby mode or is turned off, it lights in<br />
orange.<br />
c TERMINAL connector<br />
Connect to the CAMERA connector on<br />
the System.<br />
d Receiver of the RF Remote<br />
Commander<br />
Point the supplied RF Remote<br />
Commander at this receiver when<br />
pairing with the Camera Unit.<br />
e VISCA OUT connector<br />
Used for VISCA communications.<br />
When a second camera is connected to<br />
the System, connect to the VISCA IN<br />
connector on the second camera.<br />
f Tripod attachment screw hole<br />
Use to attach the camera to a tripod.<br />
For details on the tripod screw, see<br />
“Attaching the <strong>PCS</strong>A-C<strong>XG80</strong> HD<br />
Camera Unit to a Tripod” on page 35.<br />
g Fixing screw holes<br />
Use to fix the camera to a fitting.<br />
h Attachment locations for<br />
hook-and-loop pads<br />
When you use the supplied<br />
hook-and-loop pads, stick them to these<br />
locations.
<strong>PCS</strong>-RF1 RF Remote<br />
Commander (Supplied)<br />
1<br />
2<br />
3<br />
4<br />
5<br />
6<br />
7<br />
8<br />
9<br />
PRESENTATION<br />
F1 F2 F3 F4<br />
LAYOUT VIDEO INPUT CAMERA<br />
VOLUME ZOOM<br />
RETURN<br />
CONNECT<br />
ENTER<br />
1 2 3<br />
4 5 6<br />
7 8<br />
0<br />
9<br />
<strong>PCS</strong>-RF1<br />
RF<br />
You can set the volume of beep that sounds<br />
by pressing a button on the Remote<br />
Commander using the menu. You can also<br />
set for the beep not to sound.<br />
For the setting, see “Beep Sound” in the<br />
Audio setup menu on page 71.<br />
a PRESENTATION button<br />
Starts or stops transmission of<br />
presentation data.<br />
b F1 to F4 (function) buttons<br />
The function buttons are used for<br />
various operations according to the<br />
situation.<br />
The current function of the buttons is<br />
guided at the bottom of the menu screen.<br />
c LAYOUT button<br />
/<br />
T<br />
W<br />
ABC DEF<br />
GHI JKL MNO<br />
PQRS TUV WXYZ<br />
ON/OFF<br />
MIC<br />
TOOLS<br />
BACK<br />
SPACE DISCONNECT<br />
TONE DOT<br />
0<br />
qa<br />
qs<br />
qd<br />
qf<br />
qg<br />
qh<br />
qj<br />
qk<br />
Displays the Layout menu to select the<br />
screen display pattern or monitor select<br />
mode.<br />
d VOLUME +/– buttons<br />
Adjust the volume of the sound received<br />
from a remote party.<br />
+: to increase the volume<br />
–: to decrease the volume<br />
e Arrow buttons (V/v/B/b)<br />
Used to select the menu or make various<br />
settings in the menu.<br />
f ENTER button<br />
Executes the selection or setting in the<br />
menu and goes to the next step.<br />
g RETURN button<br />
Used to return to the previous step.<br />
h CONNECT ( ) button<br />
Used to connect a remote party for<br />
communication.<br />
i Number (0-9, , ) buttons<br />
Used to enter the letters or numbers of a<br />
telephone number, etc.<br />
j Battery compartment (rear)<br />
Insert two size AA (R6) batteries.<br />
k @/1 (power on/off) button<br />
Sets the System to standby mode when it<br />
is turned on. Turns on the System when<br />
it is in standby.<br />
l VIDEO INPUT button<br />
Displays the Video Input menu to switch<br />
the video input signal to be displayed on<br />
the monitor TV.<br />
m CAMERA button<br />
Displays the Camera menu to adjust the<br />
camera angle, brightness, etc.<br />
n ZOOM (T/W) buttons<br />
Zooms in or out.<br />
T: to enlarge the picture<br />
W: to reduce the picture<br />
Location and Function of Parts and Controls<br />
225<br />
Appendix
o TOOLS button<br />
Displays the Tools menu.<br />
p DISCONNECT ( ) button<br />
Used to disconnect a remote party in<br />
communication.<br />
q BACK SPACE button<br />
Deletes the letter entered last.<br />
r MIC ON/OFF button<br />
Turns off the local sound to be sent to a<br />
remote party. To restore the sound, press<br />
the button again.<br />
226 Location and Function of Parts and Controls<br />
<strong>PCS</strong>A-B384S ISDN Unit<br />
(Optional)<br />
Front/Upper panel<br />
Rear<br />
a POWER indicator<br />
Lights in orange when power is supplied<br />
to the ISDN Unit. When initializing is<br />
complete, blinks in green.<br />
b STATUS 1-3 indicators<br />
Lights in orange when link<br />
synchronization of each ISDN connector<br />
is established. Lights in yellow when<br />
each ISDN line is connected.<br />
c ISDN 1-3 terminals (8-pin modular<br />
jack)<br />
Connect to the ISDN lines using the<br />
ISDN modular cable.<br />
d TERMINAL connector<br />
Connect to the ISDN UNIT connector<br />
on the System with the interface cable<br />
supplied with the ISDN Unit.
<strong>PCS</strong>A-B768S ISDN Unit<br />
(Optional)<br />
Front/Upper panel<br />
Rear<br />
a POWER indicator<br />
Lights in orange when power is supplied<br />
to the ISDN Unit. When initializing is<br />
complete, blinks in green.<br />
b STATUS 1-6 indicators<br />
Lights in orange when link<br />
synchronization of each ISDN connector<br />
is established. Lights in yellow when<br />
each ISDN line is connected.<br />
c ISDN 1-6 terminals (8-pin modular<br />
jack)<br />
Connect to the ISDN lines using the<br />
ISDN modular cable.<br />
d TERMINAL connector<br />
Connect to the ISDN UNIT connector<br />
on the System with the interface cable<br />
supplied with the ISDN Unit<br />
Location and Function of Parts and Controls<br />
227<br />
Appendix
Indicators<br />
228 Indicators<br />
The following icons appear on the monitor depending on the functions being used.<br />
Indicator Name Description<br />
Near camera Local camera being controlled<br />
NEAR control<br />
NEAR<br />
Far camera<br />
control<br />
Mic off<br />
(Near)<br />
Remote camera being controlled<br />
Local microphone is turned off in<br />
communication or not in<br />
communication.<br />
Mic off (Far) Remote microphone is turned<br />
off in communication or not in<br />
communication.<br />
Volume Volume of remote party’s voice<br />
being adjusted<br />
Audio level<br />
(stereo)<br />
Audio level<br />
(monaural)<br />
Character<br />
input mode<br />
LAN status<br />
(LAN1)<br />
LAN status<br />
(LAN2)<br />
LAN status<br />
(LAN1,<br />
IPv6)<br />
Audio input level of stereo sound<br />
Audio input level of monaural<br />
sound<br />
Character input available<br />
LAN connected via the 1<br />
connector using Internet Protocol<br />
version 4 (IPv4).<br />
LAN connected via the 2<br />
connector using IPv4.<br />
LAN connected via the 1<br />
connector using Internet Protocol<br />
version 6 (IPv6).<br />
ISDN status Used ISDN ports<br />
Audio input Selected audio input (example of<br />
the input from the EC-MIC(A7)<br />
connector)
Indicator Name Description<br />
–<br />
Video input Selected video input (example of<br />
the video from the S VIDEO IN<br />
connector)<br />
1080i 1080i video mode in use<br />
ISDN<br />
(telephone)<br />
mode<br />
“Memory<br />
Stick”<br />
Audio only communication in<br />
progress<br />
“Memory Stick” is inserted into<br />
the System.<br />
Preset load Recalling the preset camera<br />
settings (1-6)<br />
Presentation<br />
(transmitting)<br />
Presentation<br />
(receiving)<br />
Presentation Executing<br />
(transmitting the presentation data<br />
to a remote party)<br />
Receiving the presentation data<br />
from a remote party<br />
Streaming Stream broadcast in progress<br />
Recording Recording in progress<br />
Tablet Pen tablet connected<br />
Drawing<br />
(near)<br />
Drawing rights belong to the local<br />
party.<br />
Drawing (far) Drawing rights belong to the<br />
remote party.<br />
Pointer (near) Local party’s pointer<br />
Indicators<br />
229<br />
Appendix
230 Indicators<br />
Indicator Name Description<br />
–<br />
Pointer (far) Remote party’s pointer<br />
Encryption Connected with encryption<br />
Packet loss Packet loss occurring<br />
Voice<br />
Activate<br />
mode<br />
Broadcast<br />
(Near)<br />
Broadcast<br />
(A-E)<br />
“Voice Activate” is selected in<br />
“Broadcast Mode” in a multipoint<br />
connection.<br />
Local picture is broadcast in a<br />
multipoint connection.<br />
Terminal A (-E) connected first<br />
(-fifth) is broadcast in a multipoint<br />
connection.
On-Screen Messages<br />
Check the following if a message appears on the TV monitor when operating<br />
the Communication System.<br />
Message<br />
Cannot complete connection. (The following code and message appear.)<br />
0 Unknown network error: Try again later.<br />
1 Number does not exist: Check the number and try again.<br />
2 Network congestion: Try again later.<br />
3 Try again later.<br />
16 Normal disconnection: (The line has been disconnected normally.)<br />
17 Line is busy: Try again later.<br />
18,19 System not responding: Check if the remote system is connected.<br />
20 No such subscriber: Confirm the site number.<br />
21 Call rejected: Check if the remote system is connected.<br />
22 Called party number changed: Check the number and try again.<br />
26 Connection restoration request: Try again later.<br />
27 Remote system out of order: Check if the remote system is operational.<br />
28 Invalid number entered: Check the number and try again.<br />
31, 41 – 43, 47<br />
Network not available: Try again later.<br />
33, 34<br />
Line is busy. Try to dial again later.<br />
44 Network not available: Line is busy. Try again later.<br />
50 Not a Subscriber: Check the remote party’s facility contract.<br />
57,58 Bearer capability not authorized: Check if “Restrict” is set correctly.<br />
70 Restricted capability: Set “Restrict” to “56K” and try again.<br />
88 Terminal attribute error: Check the connection of the remote system.<br />
91, 95 – 102, 111<br />
Protocol error: Turn off and restart the system and try again.<br />
128 H.221 negotiation timeout: Restart the system and connect again.<br />
131 Board mismatch: Check the optional line interface boards.<br />
132 Invalid SPID: Reregister the SPID.<br />
134 Physical link synchronization error: Check the connection of the ISDN cable.<br />
144, 145<br />
The remote terminal may not be compatible with the BONDING function.<br />
177 LAN connection timeout: Try again later.<br />
On-Screen Messages<br />
231<br />
Appendix
Message<br />
178 LAN connection rejected: Try again later.<br />
179 DNS error.<br />
180 Dialing your own number is invalid.<br />
181 GateKeeper error.<br />
192 PPPoE server admission has failed. Check the PPPoE User Name and Password are<br />
entered correctly.<br />
195 Now obtaining an IP address via DHCP.<br />
196 Configure the DNS address or use the IP address to dial.<br />
205 Check the user name or user number for dialing is correct.<br />
207 The remote terminal may not be registered in gatekeeper. Contact the gatekeeper<br />
administrator.<br />
209 – 212<br />
Gatekeeper does not respond. Contact the gatekeeper administrator, or use the IP address<br />
to dial.<br />
201, 217<br />
Call not responded.<br />
218 Local number is not set correctly in the ISDN Setup menu. Set it correctly. Line<br />
connected with 1B (64K).<br />
219 Local number setting for ISDN configuration may not be correct in the remote party.<br />
Line connected with 1B (64K).<br />
230, 231<br />
PPPoE server admission fails. Dial again after confirmation of the PPPoE settings.<br />
232 Access to the DNS server has failed. Check the PPPoE DNS settings.<br />
233 Connection to the remote party via DNS disabled. Dial using IP address.<br />
234 Dialing the same address is invalid.<br />
235 Regarded as a secondary terminal as the number of lines for ISDN configuration is<br />
different.<br />
236 Regarded as a secondary terminal as Far End Camera Control is set to Off.<br />
237 Check the line interface or the IP address is set correctly.<br />
238 The conference could not start because the encryption feature at the near-end side was<br />
disabled.<br />
239 The conference could not start because the encryption feature at the far-end side was<br />
disabled.<br />
240 The conference could not start because the signal encryption method at the near-end side<br />
differed from that of the far-end side.<br />
241 The standard encryption videoconference with SIP connection is not available.<br />
242 The Proprietary encryption videoconference with ISDN connection is not available.<br />
243 Connection with the current communication mode is not available via the specified line<br />
interface.<br />
244 Disconnected due to failure to receive packet from remote site.<br />
232 On-Screen Messages
Troubleshooting<br />
If the Communication System does not function correctly, check the following.<br />
Symptom Cause Solution<br />
The power is not<br />
turned on.<br />
The Remote<br />
Commander does<br />
not operate.<br />
No sound or the<br />
volume is very low.<br />
The power switch is not set to on. Press the power switch to turn on the<br />
power of the system (page 40).<br />
The batteries in the Remote<br />
Commander are low or dead.<br />
It is isolated from the<br />
communication system.<br />
Pairing with the Remote<br />
Commander fails.<br />
The volume of the system is too<br />
low.<br />
The volume of the TV monitor is<br />
too low.<br />
The microphone on the remote<br />
party is turned off.<br />
Audio input is not selected<br />
properly.<br />
The microphone or external<br />
equipment is not connected<br />
correctly.<br />
Picture is blurred. <strong>Manual</strong> focus is selected but picture<br />
remains blurred.<br />
When auto focus is selected, the<br />
background is too bright, contrast is<br />
too high, or the background or the<br />
participants’ clothes contain fine<br />
line patterns.<br />
Replace the batteries with new ones<br />
(page 36).<br />
Perform pairing of the Remote<br />
Commander with the Camera (page<br />
37).<br />
Perform pairing of the Remote<br />
Commander with the System or<br />
Camera Unit (page 37).<br />
Adjust the sound volume by pressing<br />
the VOLUME +/– buttons on the<br />
Remote Commander (page 43).<br />
Adjust the volume of the TV monitor.<br />
Ask the remote party to turn on the<br />
microphone.<br />
Set up “Input Select (MIC)” on the<br />
Basic Setup1 page of the Audio<br />
setup menu properly (page 70).<br />
Set up “Audio Input” properly on<br />
the Basic Setup1 page of the Audio<br />
setup menu (page 70).<br />
Check the connection (pages 164, 167<br />
and 172).<br />
Adjust the focus (page 140).<br />
Select manual focus and adjust<br />
manually (page 140).<br />
Troubleshooting<br />
233<br />
Appendix
Symptom Cause Solution<br />
No picture. The selected picture source is not<br />
tuned on.<br />
Turn on the selected video equipment.<br />
Video input is not selected properly. Select the video input properly (page<br />
142).<br />
The selected picture source is not<br />
correctly connected to the system.<br />
Check the connections (page 172).<br />
A voice meeting is held. This is not a malfunction.<br />
234 Troubleshooting<br />
Movement of the camera is<br />
prevented.<br />
Turn off the system, then turn it on<br />
again.<br />
No connection. Wrong number was dialed. Check the entered number.<br />
The setting of “Line I/F” is not<br />
correct (when using direct dialing).<br />
The registered items in the Phone<br />
Book are not correct.<br />
Some of the system settings are not<br />
correct.<br />
The IP address and network mask<br />
are not set correctly (when using<br />
LAN).<br />
The LAN cable is connected to the<br />
2 connector.<br />
The LAN or ISDN cable is<br />
disconnected.<br />
The LAN or ISDN cable is<br />
connected to the incorrect<br />
connector.<br />
Set “Line I/F” to correct interface<br />
referring to “Calling a Remote Party”<br />
(page 108).<br />
Register the party correctly referring<br />
to “Registering a Remote Party –<br />
Phone Book” (page 120).<br />
Set the system settings correctly<br />
referring to “Registering Local<br />
Information” (page 60).<br />
Ask the system administrator to set<br />
them correctly (page 74).<br />
Set “Use LAN2” to “On” in the Line<br />
I/F setup menu (page 64).<br />
Some of the functions are restricted<br />
when connecting the LAN cable to<br />
the 2 connector. SIP connection,<br />
use of gatekeeper and SNMP, and<br />
Web and Telnet accesses are not<br />
available.<br />
Connect correctly (pages 32, 33).<br />
Connect correctly (pages 32, 33).<br />
The LAN or ISDN cable is down. Replace the cable with a new one.<br />
The cable exclusively designed for Use the cable for LAN connection.<br />
the ISDN connection is used for<br />
LAN connection (when using<br />
LAN).<br />
Incorrect type of cable (cross or<br />
straight cable) is used for the LAN<br />
or ISDN connection.<br />
The DSU is turned off (when using<br />
ISDN).<br />
Use the correct type of cable.<br />
Turn on the DSU.
Symptom Cause Solution<br />
No connection. If you disconnect the<br />
communication with an abnormal<br />
procedure, e.g., unplugging an<br />
ISDN cable or turning off the<br />
system during communication, you<br />
may not connect to the ISDN line<br />
for a while (when using ISDN).<br />
If you repeat plugging/unplugging<br />
or turning on/off, you may not<br />
connect to the network for a while<br />
(when using LAN).<br />
LAN connection timeout (when<br />
using LAN).<br />
Packet for communication is not<br />
acceptable under the current LAN<br />
environment (when using LAN).<br />
The remote terminal is not turned<br />
on.<br />
It takes a long time for the remote<br />
party to be able to answer from the<br />
standby mode.<br />
The remote party is in<br />
communication with another party.<br />
Answering the call is not permitted<br />
by the remote terminal as it is<br />
operating for setups, etc.<br />
The remote terminal is not set to<br />
auto answer mode.<br />
The ISDN telephone numbers are<br />
not set up in the remote terminal<br />
(when using bonding).<br />
The eighth digit and up of the ISDN<br />
telephone numbers are not the same<br />
when connecting using bonding<br />
(when the remote party uses the<br />
communication system of an older<br />
model such as the <strong>PCS</strong>-1600).<br />
There is some problem with the<br />
remote terminal.<br />
Turn off the power of the system and<br />
wait for a few minutes before turning<br />
it on again.<br />
Turn off the power of the system and<br />
wait for a few minutes before turning<br />
it on again.<br />
Try again later.<br />
Consult with the system administrator<br />
so that the packet for Communication<br />
becomes acceptable under your LAN<br />
environment.<br />
Ask the remote party to turn on the<br />
terminal.<br />
Ask the remote party to cancel the<br />
standby mode.<br />
Call the remote party after they end<br />
the communication with another<br />
party.<br />
Ask the remote party to permit<br />
answering a call.<br />
Ask the remote party to set the<br />
terminal to auto answer mode, or to<br />
answer a call manually.<br />
Ask the remote party to set up “Area<br />
Code” and “Local Number” in the<br />
ISDN Setup menu correctly (page<br />
79).<br />
Connect without using bonding, or<br />
use the ISDN telephone numbers that<br />
are the same in the eighth digit and<br />
up.<br />
Try to dial the number of another<br />
terminal.<br />
A message appears on the screen. See “On-Screen Messages” (page<br />
231).<br />
Troubleshooting<br />
235<br />
Appendix
Symptom Cause Solution<br />
Still pictures or the<br />
Phone Book cannot<br />
be saved to the<br />
“Memory Stick.”<br />
236 Troubleshooting<br />
The write-protect tab on the<br />
“Memory Stick” is set to LOCK.<br />
The “Memory Stick” has already<br />
been recorded to full capacity.<br />
Release the lock (page 248).<br />
Use another “Memory Stick.”
Specifications<br />
<strong>PCS</strong>-<strong>XG80</strong>/<strong>XG80</strong>S HD Visual<br />
Communication System<br />
This unit is compliant with ITU-T<br />
Recommendations H.320 and H.323.<br />
Motion picture<br />
Operating bandwidth<br />
64 Kbps to 10 Mbps (standard,<br />
LAN connection)<br />
56 Kbps to 768 Kbps (when<br />
installing the <strong>PCS</strong>A-B768S,<br />
ISDN connection)<br />
56 Kbps to 384 Kbps (when<br />
installing the <strong>PCS</strong>A-B384S,<br />
ISDN connection)<br />
Coding H.261/H.263/H.263+/H.263++/<br />
H.264<br />
MPEG4 Simple Profile (when<br />
using SIP)<br />
Picture elements<br />
CIF: 352 pixels × 288 lines<br />
QCIF: 176 pixels × 144 lines<br />
4CIF: 704 pixels × 576 lines<br />
WCIF (W288p): 512 pixels × 288<br />
lines<br />
W432p: 768 pixels × 432 lines<br />
W4CIF: 1024 pixels × 576 lines<br />
720p: 1280 pixels × 720 lines<br />
1080i: 1920 pixels × 1080 lines<br />
Sound<br />
Bandwidth 22 kHz (MPEG4 AAC)<br />
14 kHz (MPEG4 AAC)<br />
7 kHz (G.722 compliant with<br />
ITU-T Recommendation)<br />
3.4 kHz (G.711/G.728 compliant<br />
with ITU-T Recommendation)<br />
Transmission rate<br />
56 Kbps, 64 Kbps (G.711<br />
compliant with ITU-T<br />
Recommendation)<br />
48 Kbps, 56 Kbps, 64 Kbps (G.722<br />
compliant with ITU-T<br />
Recommendation)<br />
64 Kbps, 96 Kbps (MPEG4 AAC)<br />
(when using LAN)<br />
24 Kbps, 32 Kbps<br />
16 Kbps (G.728 compliant with<br />
ITU-T Recommendation)<br />
8 Kbps<br />
5.3 Kbps, 6.3 Kbps<br />
48 Kbps (MPEG4 AAC) (when<br />
using ISDN)<br />
Network<br />
Multiplexing<br />
Video, audio, data<br />
Frame format<br />
H.221 (compliant with ITU-T<br />
Recommendation)<br />
Interface LAN (standard), 64 Kbps to<br />
10 Mbps<br />
ISDN (BRI), up to 3 lines (when<br />
installing the <strong>PCS</strong>A-B384S)<br />
up to 6 lines (when installing the<br />
<strong>PCS</strong>A-B768S)<br />
Data transmission rate<br />
LSD 1.2 Kbps, 4.8 Kbps, 6.4 Kbps<br />
MLP 6.4 Kbps, 24 Kbps, 32 Kbps<br />
HMLP 62.4 Kbps, 64 Kbps, 128<br />
Kbps<br />
LAN protocol supported<br />
HTTP<br />
Telnet<br />
RTP/RTCP<br />
TCP/UDP<br />
SNMP<br />
Remote control<br />
Far end camera control<br />
H.281 (compliant with ITU-T<br />
Recommendation)<br />
General<br />
Power requirements<br />
DC 19.5 V<br />
Current consumption<br />
5 A<br />
Operating temperature<br />
5°C to 35°C (41°F to 95°F)<br />
Operating humidity<br />
20% to 80%<br />
Storage temperature<br />
–20°C to +60°C (–4°F to +140°F)<br />
Storage humidity<br />
20% to 80% (no condensation)<br />
Dimensions 282 × 56 × 244 mm (W × H × D)<br />
(11 1 /8 × 2 1 /4 × 9 5 /8 inches)<br />
(not including projections<br />
except for the feet)<br />
Mass Approx. 2.2 kg (4 lb 14 oz)<br />
Supplied accessories<br />
<strong>PCS</strong>-RF1 RF Remote Commander<br />
(1)<br />
Size AA (R6) batteries for RF<br />
Remote Commander (2)<br />
Specifications<br />
237<br />
Appendix
238 Specifications<br />
HDMI cable (3 m) (9.8 feet) (1)<br />
VGP-AC19V15 AC adaptor (1)<br />
Power cord (1)<br />
CD-ROM (1)<br />
Before Using this Unit (1)<br />
Installation Guide (1)<br />
Quick Connection Guide/Remote<br />
Commander Guide (1)<br />
Important Notice Regarding<br />
Software (1)<br />
Warranty booklet (1)<br />
<strong>PCS</strong>-RF1 Remote<br />
Commander (Supplied with<br />
<strong>PCS</strong>-<strong>XG80</strong>/<strong>XG80</strong>S)<br />
Signal format<br />
Compliant with IEEE802.15.4<br />
Control DC 3V using two size AA (R6)<br />
batteries<br />
VGP-AC19V15 AC Adaptor<br />
(Supplied with <strong>PCS</strong>-<strong>XG80</strong>/<br />
<strong>XG80</strong>S)<br />
Power requirements<br />
100 to 240 V AC, 50/60 Hz,<br />
1.6 A to 0.7 A<br />
Output DC 19.5 V, 6.2 A<br />
Operating temperature<br />
5°C to 35°C (41°F to 95°F)<br />
Operating humidity<br />
20% to 80%<br />
Storage temperature<br />
–20°C to +60°C (–4°F to +140°F)<br />
Storage humidity<br />
20% to 80% (no condensation)<br />
Dimensions 155 × 67 × 36.5 mm (W × H × D)<br />
(6 1 /8 × 2 3 /4 × 1 7 /16 inches)<br />
(not including projections)<br />
Mass Approx. 550 g (20.5 oz)
<strong>PCS</strong>A-C<strong>XG80</strong> HD Camera<br />
Unit (Supplied with<br />
<strong>PCS</strong>-<strong>XG80</strong>)<br />
Video signal 1080i/59.94, 1080i/50<br />
Synchronization<br />
Internal synchronization<br />
Image device 1/3 type (6 mm), CMOS<br />
Effective picture elements:<br />
Approx. 2,000,000 pixels<br />
Lens 10× (optical) (40× (digital))<br />
f = 3.4 – 33.9 mm, F1.8 – F2.1<br />
Horizontal angle: 8 (TELE end) to<br />
70 degrees (WIDE end)<br />
Minimum object distance<br />
100 mm (4 inches) (WIDE end)<br />
Minimum illumination<br />
15 lux (F1.8) with 50 IRE<br />
Pan/tilt action Horizontal: ±100 degrees<br />
Maximum panning speed: 300<br />
degrees/sec.<br />
Vertical: ±25 degrees<br />
Maximum tilting speed: 125<br />
degrees/sec.<br />
Input voltage 19.5 V DC<br />
Current consumption<br />
1 A max.<br />
Operating temperature<br />
5ºC to 35ºC (41ºF to 95ºF)<br />
Storage temperature<br />
–20ºC to +60ºC (–4ºF to +140ºF)<br />
Dimensions 240 × 152 × 173 mm (10 1 /4 × 6 ×<br />
6 3 /4 inches) (w/h/d) (including<br />
the feet)<br />
Mass Approx. 2 kg (4 lb 7 oz)<br />
Installation angle<br />
Less than ±15 degrees to the<br />
horizontal surface<br />
Supplied accessories<br />
Camera cable (3 m) (9.8 ft) (1)<br />
Hook-and-loop pads (2 sets)<br />
Operating Instructions (1)<br />
Warranty booklet (1)<br />
<strong>PCS</strong>-A1 Microphone<br />
(Supplied with <strong>PCS</strong>-<strong>XG80</strong>)<br />
Bandwidth 13 kHz<br />
Directional characteristic<br />
Omnidirectional<br />
Dimensions 74 × 16 × 93 mm (W × H × D)<br />
(3 × 21 /32 × 3 3 /4 inches)<br />
Mass Approx. 170 g (6 oz)<br />
Power Plug in power<br />
Cable length 8 m (26.2 ft)<br />
<strong>PCS</strong>A-A3 Microphone<br />
(Optional)<br />
Bandwidth 13 kHz<br />
Directional characteristic<br />
Unidirectional<br />
Dimensions 68 × 16 × 96 mm (W × H × D)<br />
(2 3 /4 × 21 /32 × 3 7 /8 inches)<br />
Mass Approx. 200 g (7 oz)<br />
Power Plug in power<br />
Cable length 8 m (26.2 ft)<br />
<strong>PCS</strong>A-A7P4 Microphone<br />
(Optional)<br />
Dimensions 64 × 26 × 102 mm (W × H × D)<br />
(2 5 /8 × 1 1 /16 × 4 1 /8 inches)<br />
(including the feet)<br />
Mass Approx. 130 g (4.6 oz)<br />
Power requirements<br />
DC 12 V, powered by the System<br />
or AC adaptor<br />
Power consumption<br />
less than 2.5 W (per microphone)<br />
Operating temperature<br />
5°C to 35°C (41°F to 95°F)<br />
Operating humidity<br />
20% to 80%<br />
Storage temperature<br />
–20°C to +60°C (–4°F to +140°F)<br />
Storage humidity<br />
20% to 80% (no condensation)<br />
Supplied accessories<br />
<strong>PCS</strong>A-A7 Microphone (4)<br />
Microphone cable (8 m, 26.3 ft)<br />
(2)<br />
Microphone cable (1.5 m, 4.9 ft)<br />
(4)<br />
MPA-AC1 AC adaptor (1)<br />
Power cord (one for each region:<br />
North America, Europe, Japan)<br />
Cord adaptor (1)<br />
DC cord (1)<br />
Operating Instructions (1)<br />
Warranty card (1)<br />
Specifications<br />
239<br />
Appendix
<strong>PCS</strong>A-B384S ISDN Unit<br />
(Optional)<br />
Power requirements<br />
DC 19.5 V<br />
Current consumption<br />
0.3 A<br />
Operating temperature<br />
5°C to 35°C (41°F to 95°F)<br />
Operating humidity<br />
20% to 80%<br />
Storage temperature<br />
–20°C to +60°C (–4°F to +140°F)<br />
Storage humidity<br />
20% to 80% (no condensation)<br />
Dimensions 166 × 34 × 128 mm (W × H × D)<br />
(6 9 /16 × 1 3 /8 × 5 1 /16 inches)<br />
(not including projections<br />
except for the feet)<br />
Mass Approx. 400 g (14 oz)<br />
Supplied accessories<br />
Interface cable (5 m) (16.4 ft) (1)<br />
Operating Instructions (1)<br />
Warranty booklet (1)<br />
<strong>PCS</strong>A-B768S ISDN Unit<br />
(Optional)<br />
Power requirements<br />
DC 19.5 V<br />
Current consumption<br />
0.5 A<br />
Operating temperature<br />
5°C to 35°C (41°F to 95°F)<br />
Operating humidity<br />
20% to 80%<br />
Storage temperature<br />
–20°C to +60°C (–4°F to +140°F)<br />
Storage humidity<br />
20% to 80% (no condensation)<br />
Dimensions 166 × 34 × 128 mm (W × H × D)<br />
(6 9 /16 × 1 3 /8 × 5 1 /16 inches)<br />
(not including projections<br />
except for the feet)<br />
Mass Approx. 400 g (14 oz)<br />
Supplied accessories<br />
Interface cable (5 m) (16.4 ft) (1)<br />
Operating Instructions (1)<br />
Warranty booklet (1)<br />
240 Specifications<br />
<strong>PCS</strong>A-DSG80 HD Data<br />
Solution Software (Optional)<br />
Dimensions 72.5 × 11 × 20 mm (W × H × D)<br />
(2 7 /8 × 7 /16 × 13 /16 inches)<br />
Mass Approx. 10 g (0.02 oz)<br />
Supplied accessories<br />
Serial number seal (1)<br />
Operating Instructions (1)<br />
<strong>PCS</strong>A-MCG80 HD MCU<br />
Software (Optional)<br />
Dimensions 72.5 × 11 × 20 mm (W × H × D)<br />
(2 7 /8 × 7 /16 × 13 /16 inches)<br />
Mass Approx. 10 g (0.02 oz)<br />
Supplied accessories<br />
Serial number seal (1)<br />
Operating Instructions (1)<br />
Design and specifications are subject to change<br />
without notice.<br />
Note<br />
Always verify that the unit is operating properly<br />
before use. SONY WILL NOT BE LIABLE<br />
FOR DAMAGES OF ANY KIND<br />
INCLUDING, BUT NOT LIMITED TO,<br />
COMPENSATION OR REIMBURSEMENT<br />
ON ACCOUNT OF THE LOSS OF PRESENT<br />
OR PROSPECTIVE PROFITS DUE TO<br />
FAILURE OF THIS UNIT, EITHER DURING<br />
THE WARRANTY PERIOD OR AFTER<br />
EXPIRATION OF THE WARRANTY, OR<br />
FOR ANY OTHER REASON<br />
WHATSOEVER.
Sales and distribution of MPEG-4<br />
Visual encoders/decoders<br />
THIS PRODUCT IS LICENSED UNDER<br />
THE MPEG-4 VISUAL PATENT<br />
PORTFOLIO LICENSE FOR THE<br />
PERSONAL AND NON-COMMERCIAL<br />
USE OF A CONSUMER FOR<br />
(i) ENCODING VIDEO IN COMPLIANCE<br />
WITH THE MPEG-4 VISUAL<br />
STANDARD (“MPEG-4 VIDEO”)<br />
AND/OR<br />
(ii) DECODING MPEG-4 VIDEO THAT<br />
WAS ENCODED BY A CONSUMER<br />
ENGAGED IN A PERSONAL AND<br />
NON-COMMERCIAL ACTIVITY AND/<br />
OR WAS OBTAINED FROM A VIDEO<br />
PROVIDER LICENSED BY MPEG LA<br />
TO PROVIDE MPEG-4 VIDEO.<br />
NO LICENSE IS GRANTED OR SHALL BE<br />
IMPLIED FOR ANY OTHER USE.<br />
ADDITIONAL INFORMATION<br />
INCLUDING THAT RELATING TO<br />
PROMOTIONAL, INTERNAL AND<br />
COMMERCIAL USES AND LICENSING<br />
MAY BE OBTAINED FROM MPEG LA,<br />
LLC. SEE HTTP://WWW.MPEGLA.COM<br />
MPEG LA is offering licenses for<br />
(i) manufacturing/sales of any storage media<br />
storing MPEG-4 Visual video information<br />
(ii) distribution/broadcasting of MPEG-4<br />
Visual video information in any manner<br />
(such as online video distribution service,<br />
internet broadcasting, TV broadcasting).<br />
Other usage of this product may be required to<br />
obtain license from MPEG LA.<br />
Please contact MPEG LA for any further<br />
information. MPEG LA, L.L.C., 250 STEELE<br />
STREET, SUITE 300, DENVER,<br />
COLORADO 80206,<br />
http://www.mpegla.com<br />
Sales and distribution of MPEG-4<br />
AVC (3-1) encoders/decoders<br />
THIS PRODUCT IS LICENSED UNDER<br />
THE AVC PATENT PORTFOLIO LICENSE<br />
FOR THE PERSONAL AND<br />
NON-COMMERCIAL USE OF A<br />
CONSUMER TO<br />
(i) ENCODE VIDEO IN COMPLIANCE<br />
WITH THE AVC STANDARD (“AVC<br />
VIDEO”)<br />
AND/OR<br />
(ii) DECODE AVC VIDEO THAT WAS<br />
ENCODED BY A CONSUMER<br />
ENGAGED IN A PERSONAL AND<br />
NON-COMMERCIAL ACTIVITY AND/OR<br />
WAS OBTAINED FROM A VIDEO<br />
PROVIDER LICENSED TO PROVIDE AVC<br />
VIDEO. NO LICENSE IS GRANTED OR<br />
SHALL BE IMPLIED FOR ANY OTHER<br />
USE. ADDITIONAL INFORMATION MAY<br />
BE OBTAINED FROM MPEG LA, L.L.C.<br />
SEE HTTP://MPEGLA.COM<br />
Specifications<br />
241<br />
Appendix
Acceptable RGB Input/Output Signals<br />
<strong>PCS</strong>-<strong>XG80</strong>S HD Visual Communication System (RGB OUT)<br />
Picture element Signal format fH (kHz) fV (Hz) Sync<br />
1024 × 768 XGA VESA 60 Hz 48.363 60.004 H-neg V-neg<br />
1280 × 1024 SXGA VESA 60 Hz 63.981 60.02 H-pos V-neg<br />
1280 × 768 WXGA VESA 60<br />
Hz<br />
47.776 59.870 H-neg V-pos<br />
<strong>PCS</strong>-<strong>XG80</strong>S HD Visual Communication System (RGB IN)<br />
Picture<br />
element<br />
Signal format fH (kHz) fV (Hz) Sync<br />
640 × 480 VGA mode 3 31.469 59.94 H-neg V-neg<br />
VGA VESA 72 Hz 37.861 72.809 H-neg V-neg<br />
VGA VESA 75 Hz 37.5 75 H-neg V-neg<br />
VGA VESA 85 Hz 43.269 85.008 H-neg V-neg<br />
800 × 600 SVGA VESA 56 Hz 35.156 56.25 H-pos V-pos<br />
SVGA VESA 60 Hz 37.879 60.317 H-pos V-pos<br />
SVGA VESA 72 Hz 48.077 72.188 H-pos V-pos<br />
SVGA VESA 75 Hz 46.875 75 H-pos V-pos<br />
SVGA VESA 85 Hz 53.674 85.061 H-pos V-pos<br />
1024 × 768 XGA VESA 60 Hz 48.363 60.004 H-neg V-neg<br />
XGA VESA 70 Hz 56.476 70.069 H-neg V-neg<br />
XGA VESA 75 Hz 60.023 75.029 H-pos V-pos<br />
XGA VESA 85 Hz 68.667 84.997 H-pos V-pos<br />
1280 × 1024 SXGA VESA 60 Hz 63.981 60.02 H-pos V-pos<br />
Acceptable VIDEO IN (YPbPr) Signals<br />
Picture element Remarks (SMPTE-274M) fH (kHz) fV (Hz)<br />
1920 × 1080 1920 × 1080/59.94/1:1 67.43 59.94<br />
1920 × 1080 1920 × 1080/50/1:1 56.25 50<br />
242 Specifications
Pin Assignments<br />
100BASE-TX/10BASE-T jack<br />
Modular jack<br />
Pin Signal Description<br />
1 TPOPTX+ Transmit+<br />
2 TPONTX– Transmit–<br />
3 TPIPRX+ Receive+<br />
4 NC —<br />
5 NC —<br />
6 TPINRX– Receive–<br />
7 NC —<br />
8 NC —<br />
ISDN UNIT connector<br />
USB connector<br />
1 8<br />
2 14<br />
1 13<br />
Pin Signal Description<br />
1 GND Ground<br />
2 19.5V 19.5V<br />
3 DCLK+ Clock+<br />
4 DCLK– Clock–<br />
5 DR+ Receive data+<br />
6 DR– Receive data–<br />
7 FS+ Frame sync+<br />
8 FS– Frame sync–<br />
9 DX+ Transmit data+<br />
10 DX– Transmit data–<br />
11 RX Serial receive data<br />
12 TX Serial transmit data<br />
13 19.5V 19.5V<br />
Pin Signal Description<br />
14 GND Ground<br />
S VIDEO IN connector<br />
4<br />
2<br />
Mini-DIN 7-pin connector<br />
Pin Signal Description<br />
1 Y.GND Brightness signal ground<br />
2 C.GND Chrominance signal<br />
ground<br />
3 Y Brightness signal<br />
4 C Chrominance signal<br />
5 COMP.GN<br />
D<br />
Composite signal ground<br />
6 COMP.GN<br />
D<br />
Composite signal ground<br />
7 COMP Composite signal<br />
The S-Video input is only available for the<br />
Visual Communication System.<br />
CAMERA connector<br />
D-sub 15-pin connector (female)<br />
6<br />
7<br />
Pin Signal Description<br />
1 Y Brightness signal<br />
2 Y.GND Brightness signal ground<br />
3 Pb Color difference signal<br />
(B – Y)<br />
4 Pb.GND Color difference signal<br />
(B – Y) ground<br />
5 Pr Color difference signal<br />
(R – Y)<br />
6 Pr.GND Color difference signal<br />
(R – Y) ground<br />
7 TXD No connection<br />
5<br />
3<br />
1<br />
8 1<br />
15 9<br />
Specifications<br />
243<br />
Appendix
Pin Signal Description<br />
8 RXD No connection<br />
9 19.5V 19.5 V<br />
10 LVDS-RX Multiplexed receive<br />
D+ signal (+)<br />
11 LVDS-RX Multiplexed receive<br />
D– signal (–)<br />
12 SIRCS No connection<br />
13 LVDS-TX Multiplexed transmit<br />
D+ signal (+)<br />
14 LVDS-TX Multiplexed transmit<br />
D– signal (–)<br />
15 GND Ground<br />
The pin assignment above is used to connect<br />
the <strong>PCS</strong>A-C<strong>XG80</strong> Camera Unit.<br />
RGB OUT/IN connector<br />
Mini D-sub 15-pin (female)<br />
Pin Signal Description<br />
1 RED R (red)<br />
2 GREEN G (green)<br />
3 BLUE B (blue)<br />
4 NC –<br />
5 GND Ground<br />
6 RED.GND R (red) signal ground<br />
7 GREEN.GND G (green) signal<br />
ground<br />
8 BLUE.GND B (blue) signal<br />
ground<br />
9 NC –<br />
10 SYNC.GND Sync signal ground<br />
11 NC –<br />
12 NC –<br />
13 HSYNC Horizontal sync<br />
14 VSYNC Vertical sync<br />
15 NC –<br />
244 Specifications<br />
5 1<br />
10 6<br />
15 11<br />
EC-MIC (A7) 1 and 2 connectors<br />
10<br />
9<br />
8<br />
Pin Signal Description<br />
1 GND Ground<br />
2 TXD+ Transmit data+<br />
3 TXD– Transmit data–<br />
4 NC –<br />
5 NC –<br />
6 MICDET Microphone detect<br />
7 GND Ground<br />
8 RXD+ Receive data+<br />
9 RXD– Receive data–<br />
10 +12 V Power supply+12 V<br />
3<br />
2<br />
1
Pin Assignments on Optional<br />
Board Connectors<br />
TERMINAL connector<br />
(<strong>PCS</strong>A-C<strong>XG80</strong>)<br />
8 1<br />
15 9<br />
D-sub 15-pin connector (female)<br />
Pin Signal Description<br />
1 Y-OUT Brightness signal<br />
2 Y.GND Brightness signal<br />
ground<br />
3 Pb-OUT Color difference signal<br />
(B – Y)<br />
4 Pb-GND Color difference signal<br />
(B – Y) ground<br />
5 Pr-CAM Color difference signal<br />
(R – Y)<br />
6 Pr-GND Color difference signal<br />
(R – Y) ground<br />
7 No connection –<br />
8 No<br />
Connection<br />
–<br />
9 +19.5 V +19.5 V<br />
10 LVDS-TXD+ Multiplexed transmit<br />
signal (+)<br />
11 LVDS-TXD– Multiplexed transmit<br />
signal (-)<br />
12 No connection –<br />
13 LVDX-RXD+ Multiplexed receive<br />
signal (+)<br />
14 LVDS-RXD– Multiplexed receive<br />
signal (-)<br />
15 GND Ground<br />
ISDN 1-3 jacks (<strong>PCS</strong>A-B384S)<br />
ISDN 1-6 jacks (<strong>PCS</strong>A-B768S)<br />
Modular jack<br />
Pin Signal Description<br />
1 NC –<br />
2 NC –<br />
3 TA Transmit+<br />
4 RA Receive+<br />
5 RB Receive–<br />
6 TB Transmit–<br />
7 NC –<br />
8 NC –<br />
TERMINAL connector<br />
(<strong>PCS</strong>A-B384S/<strong>PCS</strong>A-B768S)<br />
USB connector<br />
1 8<br />
2 14<br />
1 13<br />
Pin Signal Description<br />
1 GND Chassis ground<br />
2 19.5V 19.5V<br />
3 DCLK+ Clock+<br />
4 DCLK– Clock–<br />
5 DR+ Transmit data+<br />
6 DR– Transmit data–<br />
7 FS+ Frame sync+<br />
8 FS– Frame sync–<br />
9 DX+ Receive data+<br />
10 DX– Receive data–<br />
11 TX Serial transmit data<br />
12 RX Serial receive data<br />
13 19.5V 19.5V<br />
14 GND Ground<br />
Specifications<br />
245<br />
Appendix
List of Port Numbers Used on the <strong>PCS</strong>-<strong>XG80</strong>/<strong>XG80</strong>S<br />
For point-to-point connection<br />
Signal Port number Type<br />
RAS 1719 UDP<br />
Gatekeeper Discovery 224.0.1.41:1718 UDP Multicast<br />
Q.931 (dial) 2253-2263 TCP<br />
Q.931 (answer) 1720 TCP<br />
H.245 2253-2263 TCP<br />
Audio RTP 49152-49159 UDP<br />
Audio RTCP 49152-49159 UDP<br />
Video RTP 49152-49159 UDP<br />
Video RTCP 49152-49159 UDP<br />
FECC RTP 49152-49159 UDP<br />
FECC RTCP 49152-49159 UDP<br />
2nd Video RTP 49152-49159 UDP<br />
2nd Video RTCP 49152-49159 UDP<br />
SIP 5060 UDP/TCP<br />
Auto bandwidth detection 51234-51235 UDP/TCP<br />
For multipoint connection<br />
Signal Port number of the<br />
first point<br />
Note<br />
The port numbers for RTCP that can be set are 49152 to 65535.<br />
246 Specifications<br />
Port numbers of the second to<br />
fifth points<br />
RAS 1719 UDP<br />
Gatekeeper Discovery 224.0.1.41:1718 UDP Multicast<br />
Q.931 (dial) 2253-2263 TCP<br />
Q.931 (answer) 1720 TCP<br />
H.245 2253-2263 TCP<br />
Audio RTP<br />
Audio RTCP<br />
Video RTP<br />
Video RTCP<br />
FECC RTP<br />
FECC RTCP<br />
2nd Video RTP<br />
2nd Video RTCP<br />
49152-49159<br />
second point: 49172-49179<br />
third point: 49192-49199<br />
forth point: 49212-49219<br />
fifth point: 49232-49239<br />
Type<br />
UDP<br />
SIP 5060 UDP/TCP<br />
Auto bandwidth<br />
detection<br />
51234-51235 UDP/TCP
Meeting Room<br />
Layout<br />
Be sure to position camera and microphone<br />
appropriately in your meeting room.<br />
Camera Range<br />
represents the shooting area of the<br />
camera when the zoom has been extended<br />
fully. indicates the shooting area of<br />
the camera when the angling function is<br />
fully utilized. Use the measurements below<br />
as a guide for the layout of your meeting<br />
room.<br />
Top view (horizontal range at<br />
maximum zoom-out)<br />
Lighting Considerations<br />
Do not point the camera toward a window<br />
where sunlight comes in as back lighting<br />
may decrease the contrast. If it is necessary,<br />
cover the window with a thick curtain.<br />
Adjust room lighting so that it falls on the<br />
participants. Avoid direct light on the TV<br />
monitor. Light intensity on faces should be<br />
about 300 lux or more.<br />
Meeting Room Layout<br />
247<br />
Appendix
“Memory Stick”<br />
Media<br />
Use a “Memory Stick PRO” or “Memory<br />
Stick PRO Duo” for the Visual<br />
Communication System.<br />
Notes on using “Memory Stick”<br />
media<br />
When you set the “Memory Stick” erasure<br />
prevention switch to “LOCK”, data cannot<br />
be recorded, edited, or deleted.<br />
Terminal<br />
Erasure<br />
prevention<br />
switch<br />
Label area<br />
The position and shape of the write-protect<br />
switch may differ between the various<br />
types of “Memory Stick”.<br />
Do not remove the “Memory Stick” while<br />
it is reading or writing data.<br />
Data may be damaged if:<br />
–The “Memory Stick” is removed or the<br />
unit is turned off while reading or<br />
writing.<br />
–You use the “Memory Stick” in a<br />
location subject to the effects of static<br />
electricity or electric noise.<br />
We recommend that you back up<br />
important data recorded on the “Memory<br />
Stick”.<br />
Do not affix anything other than the<br />
supplied label to the “Memory Stick” label<br />
area.<br />
Affix the label so that it does not stick out<br />
beyond the label area.<br />
When storing or carrying a “Memory<br />
Stick”, keep it in its original case.<br />
Do not touch the terminal of the “Memory<br />
Stick” with anything, including your<br />
fingers or metallic objects.<br />
Do not strike, bend, or drop the “Memory<br />
Stick”.<br />
Do not disassemble or modify the<br />
“Memory Stick”.<br />
248 “Memory Stick” Media<br />
Do not allow the “Memory Stick” to get<br />
wet.<br />
Do not use or store the “Memory Stick” in<br />
locations subject to:<br />
–Extreme heat, such as in a closed car<br />
parked in the sun.<br />
–Direct sunlight.<br />
–Humidity or corrosive substances.<br />
About data<br />
When you set the “Memory Stick” erasure<br />
prevention switch to “LOCK”, data such<br />
as images and mails cannot be recorded,<br />
edited, or deleted. Be sure to unlock the<br />
switch before transferring or copying data<br />
on the unit to the “Memory Stick”, or<br />
erasing data on the “Memory Stick”.<br />
We recommend that you make a backup<br />
copy of important data on another<br />
“Memory Stick” or on a hard disk using a<br />
computer.<br />
Notes on using “Memory Stick<br />
Duo”<br />
Use a pointed object, such as a ballpoint<br />
pen, to move the “Memory Stick Duo”<br />
write-protect switch.<br />
Do not write forcefully on the “Memory<br />
Stick Duo” memo area.<br />
Terminal<br />
Write-protect<br />
switch<br />
Memo area<br />
Format that can be used with this<br />
unit<br />
The unit can use the picture files recorded on<br />
a “Memory Stick” in the following format:<br />
Image files (DCF-compatible)<br />
compressed in the JPEG (Joint<br />
Photographic Experts Group) format<br />
(extension: .jpg)
Memory Stick TM , Memory Stick Duo TM ,<br />
Memory Stick PRO TM , Memory Stick<br />
PRO Duo TM and are trademarks of<br />
<strong>Sony</strong> Corporation.<br />
Phenomena Specific<br />
to CMOS Image<br />
Sensors<br />
The following phenomena that may appear<br />
in images are specific to CMOS<br />
(Complementary Metal Oxide<br />
Semiconductor) image sensors. They do not<br />
indicate malfunctions.<br />
White flecks<br />
Although the CMOS image sensors are<br />
produced with high-precision technologies,<br />
fine white flecks may be generated on the<br />
screen in rare cases, caused by cosmic rays,<br />
etc.<br />
This is related to the principle of CMOS<br />
image sensors and is not a malfunction.<br />
The white flecks especially tend to be seen<br />
in the following cases:<br />
when operating at a high environmental<br />
temperature<br />
when you have raised the gain (sensitivity)<br />
This phenomenon may be improved when<br />
you turn the power of the System off and on.<br />
Aliasing<br />
When fine patterns, stripes, or lines are shot,<br />
they may appear jagged or flicker.<br />
Phenomena Specific to CMOS Image Sensors<br />
249<br />
Appendix
Glossary<br />
ARC<br />
An abbreviation for Adaptive Rate Control.<br />
Technology which automatically lowers a<br />
video streaming bitrate against network<br />
congestion.<br />
ARQ<br />
An abbreviation for Automatic Repeat<br />
reQuest. Error control method in which the<br />
receiver requests a retransmission from the<br />
transmitter when a packet loss occurs.<br />
Auto Bandwidth Detection<br />
Detects the network bandwidth and others<br />
before communication. By using this value<br />
for the QoS function, optimum QoS control<br />
is available from the beginning of the<br />
communication.<br />
Bonding*<br />
Bonding is one of the Inverse Multiplexing<br />
methods allowing the connection of the<br />
communication system with multiple ISDN<br />
lines. Dialing the first ISDN line enables you<br />
to connect all other lines. Dialing the second<br />
and later lines is done automatically by the<br />
communication between the communication<br />
systems on both sites. To use bonding, it is<br />
required that both communication systems<br />
be equipped with the bonding function and<br />
that “Area Code” and “Local Number” in the<br />
ISDN Setup menu of the answering site be<br />
set correctly. As the communication<br />
between the systems when using the<br />
bonding function is made via the ISDN<br />
numbers of the answering site, the “Area<br />
Code” and “Local Number” settings in the<br />
ISDN Setup menu are not essential at the<br />
dialing site.<br />
* Bonding (Bandwidth on Demand<br />
Interoperability Group) is a registered<br />
trademark of THE BONDING<br />
CONSORTIUM.<br />
BRI<br />
An abbreviation for Basic Rate Interface.<br />
Basic interface standardized by the ITU-T.<br />
Single ISDN has two B channels and one D<br />
channel.<br />
250 Glossary<br />
Codec<br />
An abbreviation for Coder-Decoder. An<br />
integrated device of a coder that converts an<br />
analog audio/video signal to a digital data<br />
stream and compresses it, and a decoder for<br />
expanding to restore the original analog<br />
signal.<br />
DHCP<br />
An abbreviation for Dynamic Host<br />
Configuration Protocol. Manages IP<br />
addresses in the network.<br />
DNS<br />
An abbreviation for Domain Name System.<br />
Defines the domain name system.<br />
Echo Canceller<br />
Device to eliminate echo that occurs when<br />
transmitting audio.<br />
FEC<br />
An abbreviation for Forward Error<br />
Correction. Error control method in which<br />
the receiver can correct errors without<br />
requesting a retransmission from the<br />
transmitter.<br />
Frame rate<br />
The number of frames which can be<br />
encoded/decoded in one second.<br />
G.711<br />
Audio encoding/decoding format<br />
recommended by the ITU-T. A phone<br />
bandwidth audio signal is converted to a<br />
digital signal with a data rate of 64 Kbps. It<br />
can be transmitted with a data rate of 56<br />
Kbps.<br />
G.722<br />
Audio encoding/decoding format<br />
recommended by the ITU-T. A 7-kHz<br />
bandwidth audio signal is converted to a<br />
digital signal with a data rate of 48 Kbps, 56<br />
Kbps or 64 Kbps.<br />
G.728<br />
Audio encoding/decoding format<br />
recommended by the ITU-T. A phone<br />
bandwidth audio signal is converted to a<br />
digital signal with a data rate of 16 Kbps.
Gatekeeper<br />
Controls the access of H.323<br />
communication devices on a network.<br />
Administers the zone, access limitation,<br />
audio/video bandwidth, and alias etc.<br />
H.221<br />
Frame structure for a digital channel in<br />
audiovisual teleservices.<br />
H.239<br />
ITU-T standard for sharing data and<br />
presentations with video. This supports the<br />
dual video presentation mode, enabling<br />
endpoints to receive and transmit video and<br />
presentation data simultaneously.<br />
H.261<br />
Video codec for audio/visual services as p ×<br />
64 Kbps. A standard that defines a video<br />
coding algorithm, picture format and error<br />
correcting technology for communication<br />
between different manufacturers’ video<br />
codecs.<br />
H.263<br />
A video coding algorithm based on the<br />
H.261 standard. This format enables<br />
communication via a lower bit rate.<br />
H.263+<br />
Video encoding/decoding format based on<br />
the H.263 standard, added by the Annex I to<br />
T (I, J, K …… T), that allows enhanced<br />
picture quality and error resistance.<br />
Normally, this format is a profile used with<br />
a combination of some of the Annex for<br />
H.263/H.263+.<br />
H.264<br />
A video coding algorithm standardized by<br />
the ITU-T in May 2003. This format realizes<br />
high-quality picture via a lower bit rate. It<br />
provides an equal picture quality via half as<br />
low bit rate as the H.263 format. The H.264<br />
format is also called as MPEG4 Advanced<br />
Video Coding (AVC).<br />
H.320<br />
A standard for communication between<br />
different communication systems.<br />
H.323<br />
This enables communications on the<br />
non-Qos (Quality of Service) LAN.<br />
HD<br />
An abbreviation for High Definition. High<br />
Definition television provides a<br />
high-resolution and high-quality picture.<br />
There are 1080i and 720P HD formats.<br />
HMLP<br />
See “MLP”.<br />
HOP<br />
Number of routers that have passed through<br />
to reach the remote party.<br />
I-MUX<br />
An abbreviation for Inverse Multiplexer.<br />
This protocol allows you to transmit the data<br />
at 384 Kbps via 6B-channel.<br />
ISDN<br />
An abbreviation for Integrated Services<br />
Digital Network. This is a communication<br />
protocol by CCITT on transmission of<br />
integrated voice, video, and data.<br />
Bandwidths include basic (64 Kbps) and<br />
primary rate (1.544 and 2.048 Mbps).<br />
ITU-T<br />
An abbreviation for International<br />
Telecommunication Union,<br />
Telecommunications.<br />
Lip synchronization<br />
A function that synchronizes sound with<br />
motion. Sound processing is much faster<br />
than motion processing, thus sound and<br />
motion sometimes get out of step with each<br />
other.<br />
MLP<br />
Data communication is also available during<br />
communication of video/audio signals<br />
between the communication systems. The<br />
MLP or HMLP is a protocol for data<br />
communication such as NetMeeting. Using<br />
the HMLP protocol allows faster data<br />
transmission.<br />
Glossary<br />
251<br />
Appendix
NTSC<br />
An abbreviation for National TV Standards<br />
Committee. NTSC is the television system<br />
in use in Japan, the United States, etc.<br />
It is not compatible with the PAL system.<br />
PAL<br />
An abbreviation for Phase Alternation Line.<br />
PAL is the television system in use in<br />
Europe, China, etc.<br />
It is not compatible with the NTSC system.<br />
P in P<br />
An abbreviation for “Picture in Picture.”<br />
This is a function which allows you to<br />
monitor your own party on a small window<br />
on your TV monitor.<br />
QoS<br />
An abbreviation for Quality of Service. QoS<br />
reserves a bandwidth for specific<br />
communication in the network and<br />
guarantees a given communication speed.<br />
SIP<br />
An acronym for Session Initiation Protocol.<br />
SIP is a communication control protocol<br />
used for Internet telephony, instant<br />
messaging, etc.<br />
SNMP<br />
An abbreviation for Simple Network<br />
Management Protocol. This protocol is for<br />
management information between the<br />
management station and the managed<br />
terminals. This enables the monitoring of<br />
<strong>Sony</strong> Communication Systems.<br />
SPID<br />
An abbreviation for Service Profile ID.<br />
Streaming<br />
A technology that allows audio and video<br />
data to be played back as it is downloaded<br />
for real time viewing over a network, such as<br />
the Internet.<br />
Sub-address<br />
An identification number given to devices<br />
sharing a common ISDN line.<br />
252 Glossary<br />
TOS<br />
Inputting the information data in the TOS<br />
field of the IP address allows the<br />
communication system to judge the packet<br />
transmission priority, etc. It also enables<br />
change of path according to the types of<br />
service (Delay or Size).<br />
YPbPr<br />
Component video that is transmitted with<br />
three signal cables Y, Pb and Pr.
Menu Configuration<br />
The menus of the HD Visual Communication System are configured as<br />
described below.<br />
For detailed information, see pages in parentheses. The initial settings of each<br />
item are bolded.<br />
Home Camera Adjustments Camera Angle<br />
(page 47) (page 134) Brightness Auto Adjustment, <strong>Manual</strong> Adjustment<br />
Preset Preset Setting List<br />
New Entry Preset Number, Camera<br />
Angle, Thumbnails<br />
Details Digital Zoom Off, On<br />
Backlight On, Off<br />
White Balance Auto, Indoor, Outdoor,<br />
ONE PUSH<br />
Focus<br />
Focus Adjustment<br />
Auto, <strong>Manual</strong><br />
BrightFace Off, High, Medium, Low<br />
Noise Reduction<br />
Filter<br />
Off, High, Medium, Low<br />
Tools<br />
(page 149)<br />
Presentation<br />
(page 152)<br />
Execute, Stop<br />
Streaming<br />
(page 155)<br />
Execute, Stop<br />
Recording<br />
(page 157)<br />
Execute, Stop<br />
Annotation<br />
(page 159)<br />
Execute<br />
Stop<br />
Background Screen,<br />
Annotation Mode, Start<br />
Icon Display On, Off<br />
Reject Answer On, Off<br />
Screen Capture<br />
(page 147)<br />
Execute<br />
Machine Status<br />
(page 91)<br />
Machine Information<br />
Peripheral Status<br />
Communication Mode Status<br />
LAN Line Status<br />
Network Routing Check<br />
Setup<br />
(page 60)<br />
Line I/F<br />
Dial<br />
A<br />
B<br />
Answer C<br />
Multipoint D<br />
Communication E<br />
Audio F<br />
Video G<br />
LAN H<br />
QoS I<br />
TOS J<br />
SIP K<br />
Continued on next page Continued on next page<br />
Menu Configuration<br />
253<br />
Appendix
254 Menu Configuration<br />
ISDN L<br />
Annotation M<br />
Camera N<br />
General O<br />
Home Menu P<br />
Administrator Q<br />
Encryption R<br />
Shared Phone Book S<br />
History Dial, Answer, Missed Call<br />
(page 111) Phone Book “Phone Book”<br />
Detailed Dial “Detailed Dial”<br />
Phone Book/ Phone Book List<br />
Private Phone New Entry Index, Group Select, Dial to:, Auto Dial, Image,<br />
Book<br />
(page 120)<br />
One-Touch Dial Specified, Line I/F, Communication<br />
Bit Rate, Number of Lines, More Options “More<br />
Options”<br />
One-Touch Dial F1, F2, F3, F4<br />
(page 110)<br />
Group Edit<br />
History “History”<br />
Detailed Dial “Detailed Dial”<br />
Direct Dial Line interface IP, IP(2), ISDN, TEL, SIP<br />
(page 108) IP address, Telephone number<br />
Dial<br />
Connect<br />
(page 107)<br />
Enter Number/Address<br />
Select from Phone Book<br />
“Detailed Dial”<br />
“Phone Book”<br />
Select from History “History”<br />
Detailed Dial<br />
(page 114)<br />
Detailed Dial Dial to:, Line I/F, Communication Bit Rate,<br />
Number of Lines<br />
Phone Book “Phone Book”<br />
History “History”<br />
More Options Enable “List Edit”<br />
A Line I/F<br />
(page 64)<br />
Line Interface IP, ISDN, SIP<br />
Primary Line Interface IP, ISDN, SIP<br />
Use LAN2 Off, On
B Dial Telephone Mode Auto, G.711 -law, G711A-law<br />
(page 64) More Options Enable Off, On<br />
User Name Input Off, On<br />
Prefix<br />
Prefix-A<br />
Prefix-B<br />
Prefix-C<br />
Prefix-None, Prefix-A, Prefix-B, Prefix-C<br />
Select LAN Prefix<br />
LAN Prefix<br />
Disable, Enable<br />
C Answer Auto Answer On, Off<br />
(page 65) ISDN MSN Off, On<br />
Mic on Answer On, Off<br />
Reject Answer On, Off<br />
D Multipoint<br />
(page 65)<br />
Mlutipoint Mode AUTO, On<br />
Broadcast Mode Split, Voice Activate, Voice Activate (720P)<br />
Split Automatic, Six-screen Mosaic<br />
Menu Configuration<br />
255<br />
Appendix
E Communication IP Individual Settings for Off, On<br />
(page 66)<br />
(Communication) Transmission/Reception<br />
Individual Settings for<br />
Point-to-Point/Multipoint<br />
Off, On<br />
256 Menu Configuration<br />
IP:Mode Total Bandwidth 128Kbps, 384Kbps,<br />
(Communication) 4) 512Kbps, 768Kbps,<br />
1Mbps, 2Mbps, 3Mbps,<br />
4Mbps, 5Mbps, 6Mbps,<br />
7Mbps, 8Mbps, 9Mbps,<br />
10Mbps, Other<br />
Communication Bit Rate 1) 128Kbps, 384Kbps,<br />
512Kbps, 768Kbps,<br />
1Mbps, 2Mbps, 3Mbps,<br />
4Mbps, 5Mbps, 6Mbps,<br />
7Mbps, 8Mbps, 9Mbps,<br />
10Mbps, Other<br />
Audio Mode 1) G.711, G.722, G.728,<br />
MPEG4<br />
Far End Camera Control 2) On, Off<br />
H.239 On, Off<br />
H.239 Ratio 2/3, 1/2, 1/3<br />
Screen Size 1) 720, W4CIF, W432P,<br />
WCIF, 4CIF, CIF, QCIF,<br />
AUTO<br />
Video Mode 1) H.261, H.263+, H.264<br />
Video Frame 1) 15fps, 30fps, 60fps, AUTO<br />
ISDN Individual Settings for Off, On<br />
Point-to-Point/Multipoint<br />
ISDN:Mode ISDN Bandwidth (Dial) 3) 1B(64K), 2B(128K),<br />
(Communication) 4) 3B(192K), 4B(256K),<br />
5B(320K), 6B(384K),<br />
8B(512K), 12B(768K)<br />
ISDN Bandwidth 1B(64K), 2B(128K),<br />
(Answer) 3) 3B(192K), 4B(256K),<br />
5B(320K), 6B(384K),<br />
8B(512K), 12B(768K)<br />
Audio Mode 3) G.711, G.722, G.728,<br />
MPEG4<br />
Far End Camera Control 3) On, Off<br />
H.239 On, Off<br />
H.239 Ratio 2/3, 1/2, 1/3<br />
Restrict Auto, 56K<br />
Screen Size 3) W4CIF, W432P, WCIF,<br />
4CIF, CIF, AUTO<br />
Video Mode 3) H.261, H.263+, H.264<br />
Video Frame 3) 15fps, 30fps, AUTO<br />
Continued on next page
SIP:Mode Communication Bit Rate 128Kbps, 384Kbps,<br />
(Communication) 4) 512Kbps, 768Kbps,<br />
1Mbps, 2Mbps, 3Mbps,<br />
4Mbps, 5Mbps, 6Mbps,<br />
7Mbps, 8Mbps, 9Mbps,<br />
10Mbps, Other<br />
Audio Mode G.728, G.722, G.711<br />
Far End Camera Control On, Off<br />
Screen Size 720, W4CIF, W432P,<br />
WCIF, 4CIF, CIF, QCIF,<br />
AUTO<br />
Video Mode H.261, H.263+, H.264,<br />
MPEG4<br />
Video Frame 15fps, 30fps, 60fps, AUTO<br />
1) When “Individual Settings for Transmission/Reception” or “Individual Settings for Point-to-Point/<br />
Multipoint” is set to “On” on the IP page, the item is set up for transmission, reception, point-to-point<br />
and multipoint individually.<br />
2) When “Individual Settings for Point-to-Point/Multipoint” is set to “On” on the IP page, the item is<br />
set up for point-to-point and multipoint individually.<br />
3) When “Individual Settings for Point-to-Point/Multipoint” is set to “On” on the ISDN page, the item<br />
is set up for point-to-point and multipoint individually.<br />
4) The page number after “Communication2” varies with the on/off setting in “Individual Settings for<br />
Transmission/Reception” or “Individual Settings for Point-to-Point/Multipoint”.<br />
Menu Configuration<br />
257<br />
Appendix
F Audio Basic Setup1 Audio Input MIC, AUX, MIC+AUX<br />
(page 69) (Audio1) Input Select (MIC)/ MIC(A1/A3), EC-MIC(A7),<br />
Input Select (AUX) AUDIO 1, AUDIO 2<br />
Echo Canceller On, Off<br />
Lip Sync Auto, Off<br />
Recording Mute Off, On<br />
Input Mode Stereo, Monaural<br />
Output Mode Stereo, Monaural<br />
258 Menu Configuration<br />
Basic Setup2 AUX Local Monitor Out On, Off<br />
(Audio2) Reversed MIC Inputs Off, On<br />
Audio Input Delay Setting Default–100ms, Default–50ms,<br />
Default, Default+50ms,<br />
Default+100ms, Custom<br />
Audio Input Delay<br />
Audio Output Delay Setting Default–100ms, Default–50ms,<br />
Default, Default+50ms,<br />
Default+100ms, Custom<br />
Audio Output Delay<br />
REC OUT Mode Stereo, Monaural 2ch<br />
Sound Effect Beep Sound Loud, Medium, Quiet, Off<br />
(Audio3) Sound Effect Loud, Medium, Quiet, Off<br />
Dial Tone Loud, Medium, Quiet, Off<br />
Ringer Tone Loud, Medium, Quiet, Off<br />
G Video Basic Setup Video Input Camera, RGB, YPbPr, S VIDEO<br />
(page 72)<br />
(Video1) Presentation Screen Full Screen, PandP, Side by Side<br />
Monitor Output HDMI, RGB, HDMI+RGB<br />
RGB Monitor Output Format SXGA, XGA, WXGA<br />
Blanking Period Long, Medium, Short<br />
Frequency 60Hz, 50Hz<br />
Custom Input Custom Input Label (Camera)<br />
Label Custom Input Label (RGB)<br />
(Video2) Custom Input Label (YPbPr)<br />
Custom Input Label (S VIDEO)<br />
Link to Mic Link to Audio Input Off, On<br />
(Video3) Video Input Camera, S-VIDEO, RGB, YPbPr<br />
Audio Input MIC, AUX, MIC+AUX<br />
Input Select (MIC) MIC(A1/A3), EC-MIC(A7)<br />
Input Select (AUX) AUDIO 1, AUDIO 2
H LAN Basic Setup 1) Host Name<br />
(page 74)<br />
(LAN) DHCP Mode<br />
Prefix Length<br />
IP Address<br />
Network Mask<br />
Gateway Address<br />
Primary DNS<br />
Secondary DNS<br />
Auto, Off<br />
LAN Mode Auto, 100Mbps Full Duplex, 100Mbps<br />
Half Duplex, 10Mbps Full Duplex,<br />
10Mbps Half Duplex<br />
PPPoE PPPoE Off, LAN1, LAN2<br />
(LAN) User Alias<br />
Password<br />
Fixed IP for PPPoE Off, On<br />
Fixed IP Address for PPPoE<br />
DNS Obtain automatically, Specify<br />
Primary DNS<br />
Secondary DNS<br />
NAT Setup NAT Mode Auto, On, Off<br />
(LAN) WAN IP Address<br />
Gatekeeper Gatekeeper Mode Auto, On, Off<br />
(LAN) Gatekeeper Address<br />
User Alias<br />
User Number<br />
Used Port Q.931<br />
Number, H.245<br />
RTP/RTCP Setup RTP/RTCP<br />
(LAN) MTU Size<br />
SNMP SNMP Mode On, Off<br />
(LAN) Trap Destination<br />
Community<br />
Description<br />
Location<br />
Contact<br />
1) When “Use LAN2” is set to “On” in the Line I/F setup menu, the Basic Setup pages<br />
for LAN1 and LAN2 are displayed, and you can set up the items on those pages.<br />
Menu Configuration<br />
259<br />
Appendix
I QoS<br />
(page 76)<br />
Basic Setup<br />
(QoS1)<br />
Adaptive Rate Control (ARC)<br />
Auto Bandwidth Detection<br />
TCP Port Number<br />
UDP Port Number<br />
On, Off<br />
On, Off<br />
Packet Resend Request(ARQ) On, Off<br />
ARQ Buffering Time<br />
ARQ Buffering Time<br />
300ms, 150ms, 80ms, Auto, Custom<br />
Forward Error Correction(FEC) On, Off<br />
FEC Redundancy 8, 4, 2, Auto<br />
Audio Duplex Transmission On, Off<br />
260 Menu Configuration<br />
Re-Order/Shaping Re-Order On, Off<br />
(QoS2) Re-Order Buffer Auto, 1, 2, Custom<br />
Re-Order Buffer Rate<br />
Shaping On, Off<br />
J TOS<br />
(page 77)<br />
TOS Data Type<br />
TOS<br />
Precedence<br />
Video, Audio, Data, Presentation<br />
Off, IP Precedence, DSCP<br />
Low Delay On, Off<br />
High Throughput On, Off<br />
High Reliability On, Off<br />
Minimum Cost<br />
DSCP<br />
On, Off<br />
K SIP<br />
(page 78)<br />
Basic Setup<br />
(SIP)<br />
SIP Server Mode<br />
Transport Protocol<br />
Port Number<br />
SIP Domain<br />
Registered User Name<br />
Password<br />
SIP Server Address<br />
SIP Server Port<br />
On, Off<br />
TCP, UDP
L ISDN Basic Setup Country/Region Country/region selectable<br />
(page 79) (ISDN1)<br />
Protocol Japan(NTT), National ISDN, Euro ISDN,<br />
Euro ISDN(France), 5ESS(P-MP),<br />
5ESS(P-P), DMS-100<br />
Telephone Number Area Code (A1, A2, B1, B2, C1, C2)<br />
(ISDN2) Local Number (A1, A2, B1, B2, C1, C2)<br />
Telephone Number Area Code (D1, D2, E1, E2, F1, F2)<br />
(ISDN3) Local Number (D1, D2, E1, E2, F1, F2)<br />
Sub Address Sub Address (A1, A2, B1, B2, C1, C2, D1, D2, E1, E2, F1, F2)<br />
(ISDN4)<br />
SPID SPID (A1, A2, B1, B2, C1, C2, D1, D2, E1, E2, F1, F2, Auto SPID)<br />
(ISDN5)<br />
M Annotation Enable On, Off<br />
(page 80)<br />
Color Black, Red, Blue, Green, Yellow, Orange,<br />
Purple, White<br />
Line Density Thick, Medium, Thin<br />
N Camera Fade In On, Off<br />
(page 81)<br />
Second Camera Input RGB, YPbPr, S-VIDEO<br />
Menu Configuration<br />
261<br />
Appendix
O General<br />
(page 81)<br />
Device Setup<br />
(General1)<br />
Terminal Name<br />
Standby Mode On, Off<br />
Standby Time 1-99 minutes<br />
Last Number Registration Off, On<br />
Control by Far End On, Off<br />
Language Japanese, English, French, German,<br />
Spanish, Italian, Simplified Chinese,<br />
Portuguese, Traditional Chinese, Korean,<br />
Dutch, Danish, Swedish, Finnish, Polish,<br />
Russian, Arabic, Thai, Norwegian, Turkish,<br />
Welsh, Czech, Hungarian<br />
System LED Brightness Bright, Off, Dark<br />
Camera LED Brightness Bright, Off, Dark<br />
RF Remote Control<br />
Reception<br />
System, Camera<br />
Continued on next page<br />
262 Menu Configuration<br />
Clock Set NTP On, Off<br />
(General2) Primary NTP Server<br />
Secondary NTP Server<br />
Time Zone<br />
Clock Display Pattern Year/Month/Day, Month/Day/Year,<br />
Day/Month/Year, Year-Month-Day,<br />
Day.Month.Year<br />
Date<br />
Time<br />
Time Update Execute<br />
Menu Screens Display Time in Off, Time Display, Current Time<br />
(General3) Communication<br />
Display Terminal Name Off, Always Show, Show Temporarily<br />
Guide On, Off<br />
Display Indicator On, Off<br />
Communication Mode On, Off<br />
Display<br />
Display On-Screen On, Off<br />
Keyboard<br />
Menu Transparency High, Medium, Low
Function Keys F1 Far/Near, Camera, S-VIDEO, RGB, YPbPr,<br />
in Communication No <strong>Operation</strong><br />
(General4) F2 Camera, S-VIDEO, RGB, YPbPr, No <strong>Operation</strong><br />
F3 Camera, S-VIDEO, RGB, YPbPr, Zoom (RGB),<br />
No <strong>Operation</strong><br />
F4 Camera, S-VIDEO, RGB, YPbPr, No <strong>Operation</strong><br />
P Home Menu Home Menu1 Clock Display On, Off<br />
(page 83)<br />
(Home Menu1) Local Terminal Name On, Off<br />
Number Display IP:Address, SIP:User Name, SIP:Address,<br />
GK:User Alias, GK:User Number,<br />
NAT:Address, No Display<br />
Terminal Status On, Off<br />
Warning Messages On, Off<br />
Home Menu2 Connect Button Display Simple, Individual, Off<br />
(Home Menu2) Phone Book Button On, Off<br />
History Button On, Off<br />
Detailed Dial Button On, Off<br />
Camera Button On, Off<br />
Tools Button Off, On<br />
One-Touch Dial On, Off<br />
Direct Dial Off, On<br />
Home Menu3 Video Input Display On, Off<br />
(Home Menu3) Audio Input Display On, Off<br />
Audio Level Meter On, Off<br />
Volume On, Off<br />
LAN Status On, Off<br />
ISDN Status On, Off<br />
Menu Configuration<br />
263<br />
Appendix
Q Administrator Password Administrator Password<br />
(page 85)<br />
(Administrator1) Phone Book Modification Password<br />
Save Settings Password<br />
Remote Access Password<br />
Streaming Broadcast Password<br />
Continued on next page<br />
264 Menu Configuration<br />
Setup Password1 Line I/F Enabled, Disabled<br />
(Administrator2) Dial Enabled, Disabled<br />
Answer Enabled, Disabled<br />
Multipoint Enabled, Disabled<br />
IP Mode Enabled, Disabled<br />
SIP Mode Enabled, Disabled<br />
ISDN Mode Enabled, Disabled<br />
Setup Password2 Audio Enabled, Disabled<br />
(Administrator3) Video Enabled, Disabled<br />
LAN Enabled, Disabled<br />
QoS Enabled, Disabled<br />
TOS Enabled, Disabled<br />
SIP Enabled, Disabled<br />
ISDN Enabled, Disabled<br />
Setup Password3 General Enabled, Disabled<br />
(Administrator4) Home Menu Enabled, Disabled<br />
Administrator Enabled, Disabled<br />
Annotation Enabled, Disabled<br />
Camera Enabled, Disabled<br />
Encryption Enabled, Disabled<br />
Shared Phone Book Enabled, Disabled<br />
Streaming/Recording Streaming Enabled, Disabled<br />
(Administrator5) Recording Enabled, Disabled<br />
Video Off, 64Kbps, 128Kbps,<br />
384Kbps, 512Kbps<br />
Multicast Address<br />
Audio Port Number<br />
Video Port Number<br />
HOP<br />
Access Permit 1) Web Monitor On, Off<br />
(Administrator6) Web Access Enabled, Disabled<br />
Telnet Access Enabled, Disabled<br />
SSH Access Enabled, Disabled<br />
Image Flip for First Camera Flip Vertical, Off<br />
Image Flip for Second Camera Flip Vertical, Off<br />
1) The items on the Access Permit page are displayed and can be set only when<br />
“Internet Protocol” is set to “IPv4”.
Other Use History On, Off<br />
(Administrator7) Save Setup Execute<br />
Load Setup Execute<br />
AMX Device Discovery Off, On<br />
HOP<br />
1080i Mode Off, On<br />
Auto Restore On, Off<br />
Internet Protocol IPv4, IPv6<br />
Phone Book Save Phone Book Execute<br />
(Administrator8) Load Phone Book Execute<br />
Clear Phone Book Execute<br />
Auto Dialing On, Off<br />
Create Private Phone Book Execute<br />
Delete Private Phone Book Execute<br />
Copy to Private Phone Book Execute<br />
R Encryption Encryption Mode Off, Connect Priority, Encrypt Priority<br />
(page 89)<br />
S Shared Phone Book SPB Mode On, Off<br />
(page 90)<br />
SPB Server Address<br />
SPB Server Password<br />
Menu Configuration<br />
265<br />
Appendix
<strong>Sony</strong> Corporation