HyperLynx 教程 - Read
HyperLynx 教程 - Read
HyperLynx 教程 - Read
- TAGS
- hyperlynx
- read.pudn.com

You also want an ePaper? Increase the reach of your titles
YUMPU automatically turns print PDFs into web optimized ePapers that Google loves.
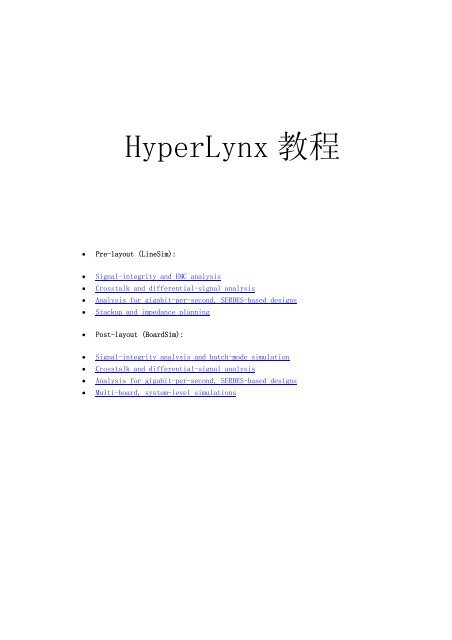
<strong>HyperLynx</strong> <strong>教程</strong><br />
• Pre-layout (LineSim):<br />
• Signal-integrity and EMC analysis<br />
• Crosstalk and differential-signal analysis<br />
• Analysis for gigabit-per-second, SERDES-based designs<br />
• Stackup and impedance planning<br />
• Post-layout (BoardSim):<br />
• Signal-integrity analysis and batch-mode simulation<br />
• Crosstalk and differential-signal analysis<br />
• Analysis for gigabit-per-second, SERDES-based designs<br />
• Multi-board, system-level simulations
Pre-Layout Analysis: LineSim<br />
Pre-Layout Analysis: LineSim<br />
User Quotes<br />
... LineSim is installed and working just great! ... It's terrific. It should be on every engineer's PC.<br />
- Engineer, and new LineSim User<br />
... a great tool for emergencies when we found a problem in production ... It let me try a number<br />
of solutions quickly... and reduce the time it took to get the fix done.... I proved the accuracy to<br />
myself and others by comparing LineSim results to actual measured waveforms. Even our<br />
consultant was so impressed that he bought it for himself.<br />
- Technical Specialist/Manager, Fortune 500 Office Equipment Manufacturer<br />
... the most user-friendly signal integrity software on the market.<br />
- PCI Bus Pioneer, Large Microprocessor Manufacturer<br />
The rapid prototyping capabilities and ease-of-use of the tool (LineSim) allowed multiple<br />
topologies to be tried and simulated ... Without this tool, the circuit would have failed in the lab,<br />
and ... would not have been able to be corrected without a board re-spin. With the rising cost of<br />
board re-spins and the need to shrink a product's time to market, it is essential that a tool of this<br />
nature be employed ... in order to get new designs and upgrades right the first time.<br />
- Hardware Engineer, Computer Systems Manufacturer<br />
Introduction<br />
Some designers assume that signal-integrity, crosstalk, and EMC analysis begin after a PCB is laid out. But<br />
one of the <strong>HyperLynx</strong> tools — LineSim – allows you to consider all of these effects much earlier in the design<br />
process, before layout even starts. Working at this early stage, you can develop constraints for PCB<br />
placement and routing that will give you the greatest chance of producing a successful first-prototype board.<br />
Why initiate signal-integrity, crosstalk, and EMC analysis early in the design process? Because, the<br />
earlier you begin, the earlier you catch mistakes; and the sooner you catch mistakes, the less time and<br />
money you spend fixing them. It's been estimated that it costs 10 times more to fix a mistake after PCB<br />
layout than before, and another 10 times more to fix it after prototyping than before. That's a factor of 100<br />
— in terms of real, total cost – you can save by starting early.<br />
How LineSim Works<br />
LineSim allows you to quickly enter and solve "what-if" signal-integrity, crosstalk, SERDES, and EMC<br />
problems at any stage of the design cycle. Analysis is based on your choice of two unique editors created<br />
specifically for entering schematics representing physical interconnects (as you need to for signal-integrity<br />
and EMC simulations). LineSim’s “classic” editor is a super-fast, point-and-click way of very quickly entering<br />
transmission-line schematics (especially smaller ones). LineSim’s "free-form” editor is also easy to use and<br />
learn, but better-suited for larger schematics or designs involving external SPICE or Touchstone models.<br />
Using either editor, signal-integrity and crosstalk results appear as waveforms or eye diagrams in an<br />
oscilloscope; EMC simulation occurs in the frequency domain and results appear in a spectrum analyzer.<br />
To run LineSim, you do not need to interface to any other software tool, e.g., PCB layout. Instead, you enter<br />
problems directly in LineSim's special interface, then get immediate results.<br />
Why does LineSim work from a special "interconnect" or "transmission-line" schematic rather than<br />
an ordinary PCB schematic? Because ordinary PCB schematics do not contain the physical information<br />
needed for signal-integrity, crosstalk, GHz-level, and EMC analysis.<br />
Consider a clock net on a PCB schematic: it is drawn as a "wire" that connects a driver IC to several<br />
receiver ICs. However, the schematic tells nothing about how the "wire" is actually constructed. For<br />
example, is it a simple PCB trace on a board's outer layer, or a more-complex trace that uses outer and<br />
inner layers, and passes through one or more vias? These kinds of physical details determine how the<br />
clock net behaves from a signal-integrity and EMC standpoint.<br />
LineSim is optimized for efficient input of physical schematics, allowing easy what-if analysis. Circuit<br />
mk:@MSITStore:D:\<strong>HyperLynx</strong>75\demo.chm::/demo/pre_layout_analysis_li...<br />
页码,1/9<br />
2007-3-26
Pre-Layout Analysis: LineSim<br />
elements – transmission lines, ICs, and passive components – are added with a simple click of the mouse<br />
button. Physical parameters – including coupled cross sections for transmission lines – are modeled by<br />
right-clicking on any element.<br />
Simulating a Simple Clock Net In LineSim<br />
Suppose you're about to start a board design. Of all the signals on a PCB, clock nets are usually the most<br />
critical from a high-speed-design standpoint. (SERDES-based designs don’t use clock signals, but here we're<br />
discussing traditional, synchronous designs.) Let's see how LineSim could help you make important signalintegrity<br />
decisions about your clock net before you even begin drawing your board's logic schematic. Since<br />
this example involves just a simple interconnect schematic (as an introduction to the tool), let’s use the<br />
“classic” LineSim “cell-based” editor. In later examples, we’ll try the free-form editor.<br />
Load the Demo Schematic "Clock.tln"<br />
In this demonstration, you can only simulate the schematics supplied with the demo (you can't create your<br />
own). Let's begin by loading a schematic representing a simple clock net.<br />
Load the demo schematic "Clock.tln" using File > Open LineSim Schematic:<br />
1. On the File menu, select Open LineSim Schematic. A dialog box opens.<br />
2. Double-click on the file name "Clock.tln". (Schematics drawn with the cell-based editor use the .TLN<br />
extension.) The dialog box closes and a schematic appears in LineSim's editor.<br />
The schematic is drawn vertically to fit better in LineSim's half window for this demo. The triangular symbol at<br />
the top represents a driver IC. Next are two transmission-line symbols, one labeled as "microstrip" and one as<br />
"stripline." In the middle and at the bottom are more triangular symbols, representing receiver ICs. Together,<br />
these make up a schematic of a simple clock net with a driver IC, a PCB trace routed on a board's outer layer<br />
(the "microstrip") to a receiver IC, and a trace routed on an inner layer (the "stripline") to another receiver.<br />
In a moment, we'll see how this schematic was drawn. But first, let's run a quick simulation to see how this<br />
hypothetical daisy-chained clock net would behave if you actually built it on a board.<br />
Simulate the Clock Net<br />
Before simulating, notice in the schematic that each IC symbol is marked with a colored arrow. These indicate<br />
that the ICs are attached to oscilloscope probes; the arrow color corresponds to the channel color in the<br />
oscilloscope.<br />
Now, simulate the clock net using Simulate > Run Interactive Simulation; set the oscilloscope to a 50-MHz<br />
clock and the timebase to 5 nsec/div:<br />
1. On the Simulate menu, select Run Interactive Simulation. The Digital Oscilloscope dialog box opens; you<br />
can increase its size by dragging its corners with the mouse.<br />
2. In the Driver Waveform area, select the Oscillator radio button.<br />
3. In the MHz box, type "50".<br />
4. In the Horizontal Scale area, click the up arrow button twice to change the timebase to 5 nsec/div.<br />
5. Click the Start Simulation button.<br />
Unless your computer is quite slow, the simulation should take only a few seconds or so to complete.<br />
The waveforms on the screen are the actual voltages you'd see if you built the clock net described on the<br />
schematic. Notice that the voltages at the receiver ICs (the yellow and purple oscilloscope traces) show a<br />
large amount of overshoot / undershoot – so much that the receiver ICs "see" at least one extra clock edge<br />
per cycle. To view this problem more clearly, let’s plot the receiver ICs' thresholds in the oscilloscope.<br />
Display a receiver’s threshold by choosing component U(A1) in the Thresholds For combo box:<br />
� In the oscilloscope, pull down the Threshold For combo box and select component U(A1).<br />
页码,2/9<br />
Notice that two dashed, dark blue horizontal lines appear in the oscilloscope; these are the receiver ICs’ 0.8-V<br />
and 2.0-V input thresholds (Vil and Vih). (They were read automatically by LineSim from the receiver’s IC<br />
models.) Sure enough, the falling-edge waveform crosses the Vil threshold three times, which could cause<br />
double-clocking. (If you built this clock net, your board would probably fail.)<br />
mk:@MSITStore:D:\<strong>HyperLynx</strong>75\demo.chm::/demo/pre_layout_analysis_li...<br />
2007-3-26
Pre-Layout Analysis: LineSim<br />
Also, there is considerable high-frequency content in the waveform; that is a likely source of serious EMC<br />
trouble (more on that later).<br />
Fixing the Clock Net<br />
Let's determine how to fix this clock net. Termination (i.e., adding passive components to match transmissionline<br />
impedances) is a good way of fixing many kinds of basic signal-integrity problems.<br />
In this demo version of LineSim, you can modify a schematic, but you can't modify a schematic and simulate<br />
it. You can simulate the schematics supplied with this demo (as long as you don't modify them). Therefore,<br />
we'll make changes to the schematic to see how editing is done, then load another schematic – which we can<br />
simulate – that has the same changes made in it.<br />
Add a Terminator to the End of the Net<br />
Add a parallel AC terminator to the end of the clock net by clicking in a resistor and capacitor; set the resistor<br />
to 50 ohms and the capacitor to 150 pF:<br />
1. Close the oscilloscope by clicking the Close button.<br />
2. Near the receiver IC, just below and to the right of the green "CELL:A2" label, point to the pull-down<br />
resistor shape. When you point to it, a red box appears around the resistor.<br />
3. Click once (with the left mouse button) to make the resistor "activate." It changes color and appears in the<br />
schematic.<br />
4. Immediately below the resistor, point to the capacitor shape, and left-click once to make it activate.<br />
5. Point back to the resistor, and with the right mouse button, click once. The Edit Resistor Values dialog<br />
box opens.<br />
6. In the Resistance box, type "50". Click OK.<br />
7. Point to the capacitor, and again with the right mouse button, click once. The Edit Capacitor Values dialog<br />
box opens.<br />
8. In the Capacitance box, type "150". Click OK.<br />
This demonstrates how schematics are created in LineSim’s fast, cell-based editor:<br />
� left-click on grayed-out elements (transmission lines, ICs, terminating components) to activate them and<br />
add them to the schematic<br />
� right-click on an element to model its physical characteristics (select an IC model, specify an impedance,<br />
change a value, and so forth)<br />
Notice how fast this is: there are no symbols to select and even no wiring to perform.<br />
The 50-ohm value for the terminating resistor is a guess based on the fact that a terminator should match the<br />
impedance of the transmission line it's terminating (note that the second line in the schematic has an<br />
impedance of about 50 ohms). The capacitor value is also a guess; generally, the longer the line being<br />
terminated, the larger the capacitor should be. (Later, we'll see how LineSim can automatically find the best<br />
terminating-component values, so you don't have to make guesses.)<br />
About modeling transmission lines and ICs: If you want more information about modeling transmission<br />
lines (as PCB cross sections, as part of a stackup, with connector models, etc.) or modeling ICs, click one<br />
of the topics below.<br />
- Click here for more information on how transmission lines are modeled (cross sections, stackups,<br />
connectors).<br />
- Click here for more information on how IC drivers and receivers are modeled.<br />
Simulate the Terminated Net<br />
页码,3/9<br />
Now let's simulate to see if the clock net has an improved waveform; load the schematic "Clockfix.tln" and<br />
simulate it:<br />
1. Since you edited the schematic, it can't be simulated in the demo version of LineSim. Instead, on the File<br />
menu, select Open LineSim Schematic. A dialog box opens.<br />
2. Double-click on the file name "Clockfix.tln". The dialog box closes and a schematic identical to the one<br />
mk:@MSITStore:D:\<strong>HyperLynx</strong>75\demo.chm::/demo/pre_layout_analysis_li...<br />
2007-3-26
Pre-Layout Analysis: LineSim<br />
you just created appears in LineSim's editor.<br />
3. On the Simulate menu, select Run Interactive Simulation. The Digital Oscilloscope dialog box opens.<br />
4. In the Driver Waveform area, select the Oscillator radio button.<br />
5. In the MHz box, type "50".<br />
6. In the Horizontal Scale area, click the up arrow button twice to change the timebase to 5 nsec/div.<br />
7. Click the Start Simulation button.<br />
This time, the receiver ICs' waveforms (yellow and purple) look considerably better: almost all of the<br />
overshoot is gone. By increasing the capacitor's value, you could further "tune" the waveform to eliminate all<br />
of the negative overshoot – this is one of LineSim's strengths: how easy it is to perform "what-if" analysis. But<br />
let's look at another circuit, and in the process, find out about an even easier way to determine optimal<br />
termination values.<br />
A Series-Terminated Net with IBIS Model<br />
We fixed the clock net by adding a parallel AC terminator at the end of the net. Let's look briefly at another net<br />
that is series terminated. Also, let's use an IBIS-format model for the driver IC. (For details on the IBIS format<br />
and how ICs are modeled generally, click here.)<br />
Load the Schematic "Ser_ibs.tln"<br />
Load the schematic "Ser_ibs.tln":<br />
1. Click the Close button to close the oscilloscope.<br />
2. On the File menu, select Open LineSim Schematic. A dialog box opens.<br />
3. Double-click on the file name "Ser_ibs.tln". The dialog box closes and a new schematic appears.<br />
On this net, an IC – modeled with an IBIS model – drives a transmission line and receiver IC. (Scroll the<br />
schematic to the right to see the receiver, if needed.) The driver is series-terminated with a resistor, whose<br />
value is temporarily 0.0 ohms.<br />
Simulate the net with the 0-ohm resistor; set the IBIS model to Slow-Weak:<br />
1. On the Simulate menu, select Run Interactive Simulation.<br />
2. In the IC Modeling area, click the Slow-Weak radio button.<br />
3. Click the Start Simulation button.<br />
The simulator runs, showing what the falling-edge signal on this net would look like: it has very little ringing.<br />
IBIS models can include min/typ/max data; let's change the model to run with best-case-fast/strong<br />
parameters.<br />
Re-simulate with the 0-ohm resistor, but change the IBIS model to run Fast-Strong:<br />
1. In the IC Modeling area, click the Fast-Strong radio button.<br />
2. Click the Start Simulation button.<br />
The simulation runs again, plotting over the previous simulation's results. Note how the waveform has<br />
changed: now there is considerable ringing. We need to terminate this net to protect against the faster<br />
versions of our driver IC.<br />
Run the Terminator Wizard to Find an Optimal Termination<br />
Let's change the series resistor to a value that will actually terminate the net. But instead of picking the value<br />
ourselves and "tweaking" it until it works perfectly, let's ask LineSim to pick the best value for us. This shows a<br />
powerful feature of both LineSim and BoardSim: the Terminator Wizard, a "smart" tool that can analyze nets<br />
in detail and automatically pick the best terminations to use (types and values).<br />
Run the Terminator Wizard; "apply" the resistor value it recommends; and re-simulate:<br />
1. On the Wizards menu, click Run Terminator Wizard. A dialog box opens.<br />
mk:@MSITStore:D:\<strong>HyperLynx</strong>75\demo.chm::/demo/pre_layout_analysis_li...<br />
页码,4/9<br />
2007-3-26
Pre-Layout Analysis: LineSim<br />
2. In the Select a Device Pin list box, double-click U(A0). The dialog box closes, and the Terminator Wizard<br />
opens and performs its analysis. It is recommending a 28.1-ohm terminating resistor.<br />
3. "Apply" the Wizard's recommendation to the resistor in the schematic by clicking the Apply Values button<br />
(upper right corner).<br />
4. Close the Terminator Wizard by clicking OK.<br />
When you run the Terminator Wizard, LineSim automatically analyzes the selected net, presents a list of trace<br />
statistics, and, at the bottom of the list, makes suggestions for termination values. In this case, the Wizard<br />
correctly determines that the termination type is "series," and makes suggestions for the optimum value of R.<br />
In these calculations, LineSim automatically accounts for such effects as capacitive loading of receiver ICs,<br />
total line length, and driver impedance.<br />
In the schematic editor, notice that, because we clicked the Apply button, the resistor has changed from 0<br />
ohms to the Terminator Wizard's recommended value of 28 ohms. Now let's simulate to see if the terminator<br />
works.<br />
Re-simulate the net; then reset the oscilloscope to 'Typical' IC modeling:<br />
1. In the oscilloscope, click the Erase button.<br />
2. Click the Start Simulation button.<br />
3. Before proceeding to the following sections of the demonstration, click the Typical radio button in the IC<br />
Modeling area so that simulations are again running from typical IC data.<br />
Note how dramatically improved the waveform is. At the receiver (yellow trace), the signal is nearly perfect. By<br />
allowing just a small amount of undershoot at the receiver, the Terminator Wizard has achieved the least<br />
possible delay to the receiver IC, yet ensured that the receiver's low-side clamp diode is not turned on.<br />
The Terminator Wizard is a sophisticated tool. For example, in the analysis you just ran, it automatically<br />
determined the following information (all displayed in the Wizard dialog box):<br />
- switching impedance of the driver IC (average of high-side and low-side values)<br />
- driver slew time (again, average of high and low)<br />
- total net physical length<br />
- nominal characteristic impedance of the net<br />
- adjusted, "effective" impedance of the net, given receiver-IC loading<br />
- what kind of terminator (e.g., series, parallel AC, etc.) you're using<br />
- topology of the net, so that the Wizard knows what termination style to recommend if no terminator is<br />
present<br />
- driver-to-series-resistor stub length, in case the distance is too long<br />
- the optimal termination value to use, given all of the above<br />
Note: If you run an EMC analysis on this schematic, you won't get any radiation because the transmission<br />
line is modeled non-physically as a "simple" line. LineSim's EMC-analysis engine must have physical data<br />
about a transmission line (e.g., where it is in a PCB's stackup) in order to calculate radiation.<br />
EMC Analysis of the Clock Net<br />
We've investigated several nets' signal integrity. Now, let's consider how the clock net we saw earlier might<br />
behave from an EMC standpoint. (Later, we’ll look at more signal-integrity simulations, for example, for a DDR<br />
design and SERDES example.)<br />
About EMC-Analysis Tools: EMC-analysis software is roughly divided into two categories – back-end,<br />
system-level verification tools and front-end, what-if design tools. Verification tools, because they attempt<br />
to perform system-level simulations, are so modeling-intensive and cumbersome that they tend to be<br />
impractical. LineSim is a front-end design tool that's easy to run and attacks EMC problems early in the<br />
design cycle.<br />
Run the Spectrum Analyzer on the Clock Net<br />
First, re-load the original version of the clock net's schematic (load "Clock.tln"):<br />
1. On the File menu, select Open LineSim Schematic. A dialog box opens.<br />
页码,5/9<br />
2. Double-click on the file name "Clock.tln". The dialog box closes and the original version of the clock net –<br />
without a terminator – appears in the editor.<br />
mk:@MSITStore:D:\<strong>HyperLynx</strong>75\demo.chm::/demo/pre_layout_analysis_li...<br />
2007-3-26
Pre-Layout Analysis: LineSim<br />
Then, simulate the net to find its radiation profile, using Simulate > Run Interactive EMC Simulation.<br />
First, set up the EMC-analysis probe, using the Set button:<br />
1. On the Simulate menu, select Run Interactive EMC Simulation. The Spectrum Analyzer dialog box opens;<br />
you can increase its size by dragging its corners with the mouse.<br />
2. In the Probe area, click the Set button. The Set Spectrum Analyzer Probing dialog box opens.<br />
At this point, we have a decision to make. EMC behavior can be investigated by predicting the net's far-field<br />
radiation, or simply by probing its trace current directly and viewing the current in the frequency domain. Use<br />
of a current probe is especially appropriate in LineSim, because radiation prediction requires physical detail<br />
which is sometimes missing in a LineSim schematic: it's not possible to predict radiation from a purely<br />
electrical transmission line, for example (radiation algorithms require detailed stackup knowledge). But<br />
LineSim can always collect trace-current data, no matter how you construct your schematic.<br />
Note: Some EMC experts always prefer dealing just with trace currents, rather than radiation predictions.<br />
<strong>HyperLynx</strong>'s radiation algorithm is powerful, but it is admittedly not able to account for the effects of<br />
attached cables, the product's enclosure, etc. By concentrating on just the frequency content of a net's<br />
currents – which LineSim can predict with high accuracy – you can very effectively manage your EMC<br />
problems.<br />
Let's continue, then, using a current probe:<br />
1. In the Probe Type area, notice that both antenna and current probes are available. Select the Current<br />
radio button. Most controls in the dialog box gray out.<br />
2. In the Pins list box, double-click on pin U(A0). The dialog box closes.<br />
Then, run the EMC simulation:<br />
1. In the spectrum analyzer, verify that the Vertical Offset is set to 100 mA.<br />
2. Click the Start Simulation button.<br />
The simulation runs. The spectrum analyzer works first in the time domain, collecting data, then runs an FFT<br />
to transform the current waveform into the frequency domain.<br />
Examine the Spectrum Analyzer's Results<br />
LineSim's spectrum analyzer works just like a real analyzer connected directly to a current probe. The yellow<br />
vertical bars show you the magnitude of the current at every frequency at which there is significant radiation.<br />
Notice that the current spectrum has a strong peak at the simulation's base frequency; the current level is<br />
close to 100 mA. If this net were on a real board, you would probably want to see if you could lower this peak<br />
somewhat.<br />
EMC Analysis of the Terminated Clock Net<br />
Now, let's run the "fixed" version of the clock net (the one with the AC parallel terminator added) to see if its<br />
EMC profile looks better than the unterminated net's. Remember that in the licensed version of LineSim, you<br />
could do this easily by adding the resistor and capacitor at the net's end. In this demo version, you must load<br />
a separate schematic.<br />
Run the Spectrum Analyzer on the Terminated Net<br />
First, re-load the "fixed" version of the clock net's schematic (load "Clockfix.tln"):<br />
1. On the File menu, select Open LineSim Schematic. A dialog box opens.<br />
2. Double-click on the file name "Clockfix.tln". The dialog box closes and the fixed version of the clock net –<br />
with the terminator added – appears in the editor.<br />
Then, simulate the net to find its EMC profile, using Simulate > Run Interactive EMC Simulation:<br />
页码,6/9<br />
1. On the Simulate menu, select Run Interactive EMC Simulation. The Spectrum Analyzer dialog box opens.<br />
mk:@MSITStore:D:\<strong>HyperLynx</strong>75\demo.chm::/demo/pre_layout_analysis_li...<br />
2007-3-26
Pre-Layout Analysis: LineSim<br />
2. In the Probe area, click the Set button. A dialog box opens.<br />
3. In the Probe Type area, verify that the Current radio button is selected.<br />
4. In the Pins list box, double-click on pin U(A0). The dialog box closes.<br />
5. In the spectrum analyzer, set the Vertical Offset to 100 mA.<br />
6. Click the Start Simulation button.<br />
Notice that the clock net's peak current level is now substantially improved: reduced in fact, by approximately<br />
half. (It may look at first glance like less than half, but note that the vertical scale is logarithmic.) This net will<br />
therefore radiate substantially less than the unterminated version. Notice that we've made this improvement<br />
even before PCB layout: a proactive way of treating EMC problems that catches problems early in the design<br />
cycle and significantly reduces the likelihood of certification failure and redesign downstream. Notice also the<br />
connection between good signal-integrity and EMC design: the same termination improved both the signal<br />
quality and EMC behavior.<br />
About LineSim’s Free-Form Schematic Editor<br />
In the examples shown earlier in this demonstration, we used LineSim’s cell-based editor, which is optimized<br />
for very quick drawing of simple interconnect schematics. In the following sections, we’ll switch to using<br />
LineSim’s “free-form” editor, which more easily handles larger schematics (and allows for including SPICE or<br />
Touchstone models.) When you actually begin using LineSim, you’ll have a choice of which editor to learn –<br />
or you may wish to use both, for maximum flexibility. Note that the underlying dialog boxes in both editors are<br />
identical, so learning both is fairly easy.<br />
Signal-Integrity of a DDR Data Path<br />
The examples you saw earlier in this section were instructive, but very simple. Let’s look at one more example<br />
– for the signal integrity of a DDR data path – that is more similar to the type of work you’d actually do using<br />
LineSim.<br />
Load the Demo Schematic "DDR_4DIMM_data_min.ffs"<br />
Begin by loading a schematic that represents a typical DDR data path.<br />
Load the demo schematic "DDR_4DIMM_data_min.ffs" using File > Open LineSim Schematic:<br />
1. On LineSim's File menu, select Open LineSim Schematic. A dialog box opens.<br />
2. Double-click on the file name "DDR_4DIMM_data_min.ffs". The dialog box closes and a schematic<br />
appears in LineSim's free-form editor.<br />
Note: Running half-screen in the demonstration version, the details of the schematic are difficult to see<br />
(because the schematic automatically fits to the screen width). If you wish, you can use the View > Zoom<br />
Area In menu command to zoom into the schematic and see it in more detail. However, this is not<br />
necessary, and the instructions below are written assuming that you stay at the present zoom level.<br />
Note the difference between this editor and the one you saw in earlier examples. The free-form editor<br />
functions more like a “standard” schematic tool: you choose symbols from a palette, and wire them together.<br />
This technique tends to work better for large or complex designs. But otherwise, there’s not much difference<br />
between the two editors: all of the associated dialog boxes (for modeling transmission line or ICs, for<br />
example) are identical.<br />
The schematic we’ve loaded represents a typical topology for a DDR data path, implemented in LineSim’s<br />
free-form schematic editor. (The schematic was drawn so that the entire design fits on a single page, but it<br />
could just have easily been “stretched” out to fit on multiple screens.) The DDR bus could be run at various<br />
speeds, but we’ll try to make it work at 266 Mbs (133 MHz). The design is based on the minimum interconnect<br />
lengths allowed by the JEDEC spec; trace widths and stackup have been designed to give the desired<br />
impedances.<br />
Looking from left-to-right, the design incorporates these elements:<br />
� A DDR controller, represented by an IBIS model for a Xilinx Virtex-4 SSTL2 driver<br />
页码,7/9<br />
� Several transmission lines representing extra package parasitics (recommended by Xilinx in their IBIS<br />
model), breakout routing, and routing to the first DIMM module; plus a series termination resistor just after<br />
the breakout<br />
mk:@MSITStore:D:\<strong>HyperLynx</strong>75\demo.chm::/demo/pre_layout_analysis_li...<br />
2007-3-26
Pre-Layout Analysis: LineSim<br />
� The first of four DIMM modules, consisting of the following elements:<br />
� A transmission line representing the DIMM’s connector<br />
� Transmission lines representing routing to a series resistor on the DIMM, and then more routing<br />
� A “T” in the routing, with transmission-line branches going to two SDRAM data inputs, each represented<br />
by a Micron Technology MT46V16M8A0 IBIS model<br />
� A transmission line representing more routing, between DIMM 1’s and DIMM 2’s connectors<br />
� Then DIMM2 (a copy of DIMM 1’s structure); DIMM2-DIMM3 routing; DIMM3; DIMM3-DIMM4 routing; and<br />
DIMM4<br />
� Finally, a parallel pull-up-resistor terminator, to 1.25V<br />
Simulating the DDR Data Path<br />
Let’s attach some oscilloscope probes, then simulate to see how the data bus’s signal integrity looks.<br />
Assign probes using Simulate > Attach Scope Probes to the following device pins – controller.dqs,<br />
dimm1.front, dimm2.front, dimm3.front, and dimm4.front; in the oscilloscope, select an oscillator stimulus and<br />
set it to 133 MHz; set the horizontal scale to 2 ns/div and vertical scale to 500 mV/div; and display the<br />
thresholds at one of the receiver pins:<br />
1. On the Simulate menu, select Attach Scope Probes. A dialog box opens.<br />
2. In the Pins list, locate pin “controller.dqs”, then double-click on it; a probe is attached. Repeat for pins<br />
“dimm1.front”, “dimm2.front”, “dimm3.front”, and “dimm4.front”. Then click OK to close the probing dialog<br />
box. In the schematic, notice that a colored probe has appeared at each selected pin.<br />
3. On the Simulate menu, select Run Interactive Simulation. The oscilloscope dialog box opens.<br />
4. In the Driver Waveform area, click the Oscillator radio button. In the MHz box, type “133”. In the IC Model<br />
area, verify that the Typical radio button is selected.<br />
5. In the Horizontal Scale area, click the up arrow once to set the scale to 2 ns/div. In the Vertical Scale<br />
area, click the down arrow once to set the scale to 500 mV/div.<br />
6. In the Threshold For combo box, choose pin “dimm1.back”. The receivers’ Vil and Vih threshold values<br />
are plotted in the oscilloscope display, as dashed blue lines.<br />
7. Then click the Start Simulation button to begin simulating.<br />
The resulting waveforms show a problem: at the left-most of the DIMMs (yellow waveform), there is a<br />
noticeable anti-reflection that causes DIMM 1’s received signal to dip back slightly above the high threshold.<br />
This means that there is at least a possibility that DIMM 1 would get double-clocked. Some versions of this<br />
design would fail in the field.<br />
Improving the Data Path’s Signal Integrity<br />
There are various ways you could potentially improve the data path’s waveforms. One possibility is by<br />
changing termination values (especially the series resistor at the driver or pull-up at the end of the bus, which<br />
are not on the DIMM modules and therefore under our control). Let’s trying changing the pull-up’s value.<br />
Change the pull-up resistor’s value to 22 ohms, then re-simulate:<br />
1. Minimize the oscilloscope by clicking its minimize button (in the upper right corner: “–“).<br />
页码,8/9<br />
2. In the schematic, point to the pull-up resistor (at the far right edge), and right-click with the mouse. On the<br />
pop-up menu, select Edit Value and Parasitics. The Edit Resistor Values dialog box opens.<br />
3. In the Resistance box, type “22”. Then click OK.<br />
4. Find the minimized oscilloscope, and click on its restore button (“double boxes”); the oscilloscope reappears.<br />
Click the Erase button to clear the old waveforms.<br />
5. Click Start Simulation to re-simulate. New waveforms appear.<br />
Notice that the rising edge waveform is now OK: the ringback at DIMM 1 (yellow waveform) is well above the<br />
Vih threshold. It is still marginal, though, on the falling edge (versus Vil).<br />
To improve the falling edge, recall that the schematic uses the minimum possible interconnect lengths (per<br />
the JEDEC spec). Sometimes, it actually helps to increase routing length. Let’s see if that’s true in this case.<br />
mk:@MSITStore:D:\<strong>HyperLynx</strong>75\demo.chm::/demo/pre_layout_analysis_li...<br />
2007-3-26
Pre-Layout Analysis: LineSim<br />
Right-click on the three transmission lines that represent the routing between DIMMs 1-2, 2-3, and 3-4;<br />
increase each line’s length to 1.2 inches:<br />
1. Minimize the oscilloscope.<br />
2. To display all of the schematic in the window, LineSim zoomed out quite far. Let's zoom in to make it easy<br />
to read the component text. On the View Menu, click Zoom Area In. Then drag the dashed zoom<br />
rectangle around the driver for the DDR controller and the first three transmission lines connected to it.<br />
3. Using the scroll bar near the bottom of the schematic, scroll to the right until you see TL20, labeled<br />
“DIMM1 – DIMM2”. (If the entire label is not displayed, touch it with the mouse; a tool tip appears.) Rightclick<br />
on it; on the pop-up menu, select Edit Type and Values. In the Edit Transmission Line dialog box,<br />
click on the Values tab; in the Length box, type “1.2”. Then click OK.<br />
4. Repeat step 3 for each of transmission lines TL26 and TL53.<br />
5. Then restore the oscilloscope; click Erase; and click Start Simulation to re-simulate.<br />
Success! We’ve made the signal quality on all receivers on the DDR data bus “clean” enough to work reliably.<br />
About Modeling ICs<br />
页码,9/9<br />
An important aspect of simulation is the modeling of ICs, particularly driver ICs. So far, we have not<br />
addressed this topic in any detail. If you continue through this demonstration, you'll learn more about IC<br />
modeling. If modeling is of particular concern to you, click here to jump ahead to some information specifically<br />
about IC modeling.<br />
Click here to continue with the front-to-back <strong>HyperLynx</strong> demonstration; next, we turn our attention to<br />
pre-layout crosstalk analysis and simulation of differential pairs.<br />
Click here to return to the main menu.<br />
mk:@MSITStore:D:\<strong>HyperLynx</strong>75\demo.chm::/demo/pre_layout_analysis_li...<br />
2007-3-26
LineSim's Crosstalk and Differential-Signal Features<br />
LineSim's Crosstalk and Differential-Signal Features<br />
If you started this demonstration at the beginning, you've already seen how LineSim's signal-integrity and<br />
EMC analysis features can help you prevent signal-integrity and EMC problems early in the design cycle.<br />
LineSim's crosstalk-analysis features extend the advantages of working up-front to two further high-speed<br />
areas: crosstalk and differential signaling. In this section, we'll see some examples of each.<br />
How LineSim's Crosstalk Analysis Works<br />
As demonstrated in the overview of LineSim's "base" features, LineSim allows you to quickly construct<br />
schematics of various interconnect scenarios, and simulate to see the resulting waveforms. LineSim's<br />
crosstalk-analysis option lets you go a step further and add line-to-line coupling into your schematics. With<br />
this capability, you can:<br />
� accurately predict how much crosstalk will occur when two or more PCB traces are routed near each other<br />
� efficiently specify maximum parallelism, minimum line separation, and other routing constraints<br />
� see the effects on crosstalk waveforms of trace separation; trace width; dielectric thickness; driver-IC edge<br />
rate and impedance; parallel run length; and so forth<br />
� confidently design high-speed buses that meet tight timing and low-crosstalk-noise requirements<br />
� learn the difference between forward and backward crosstalk, and develop an intuitive sense of when<br />
crosstalk occurs and how to minimize it<br />
� implement resistor-termination strategies that can greatly reduce or eliminate end-of-the-line crosstalk<br />
A key technical element of LineSim's ability to analyze coupled transmission lines is its fast, built-in boundaryelement<br />
field solver. In one of the examples below, you'll have the opportunity to explore a few of the solver's<br />
features in detail.<br />
Using LineSim for Differential-Signal Analysis<br />
LineSim's coupled-line analysis features are also valuable in the design of differential signals, since the same<br />
line-to-line coupling that causes crosstalk on unrelated signals also creates differential impedance and other<br />
electrical characteristics important in differential signaling. Differential pairs are common in very-high-speed<br />
design, and are used widely in gigabit-per-second, SERDES-based designs.<br />
Specifically, you can use LineSim to:<br />
� Accurately simulate differential signals, taking full account of the coupling between traces<br />
� Explore termination options for differential signals, and determine when a single line-to-line resistor is<br />
sufficient or when a full "array" termination is required<br />
LineSim also offers features that make it easy to plan for targeted differential impedance. This happens<br />
mostly in the stackup editor; to see an example of differential-Z0 planning, click here.<br />
In the following sections, we'll look at some examples of how LineSim's crosstalk-analysis option can make<br />
preventing crosstalk and designing differential signals easier.<br />
Crosstalk Example: Planning Minimum Trace Separation on a Bus<br />
Suppose you're designing a bus, and you want to guarantee that no more than 300 mV of crosstalk can occur<br />
between any of the bus' signals. Let's see how LineSim's crosstalk option could help you meet this design<br />
goal, and develop the proper routing constraints to achieve it.<br />
How to Simulate Crosstalk on a Bus<br />
页码,1/7<br />
A typical parallel-style bus in a digital system contains many physically parallel traces – 16, 32, 64, maybe<br />
even more signals. (This is not true of gigabit-per-second, SERDES-based designs, which emphasize serial<br />
links, but here we're talking about traditional synchronous-style designs.) However, when you simulate to<br />
predict crosstalk on such a bus, you definitely would not bother simulating all of the signals. Rather, you would<br />
take advantage of the fact that the crosstalk driven into a given "victim" trace comes predominantly from two<br />
other traces: the neighboring ones on either side. So, typically, you would bother to simulate only a set of<br />
mk:@MSITStore:D:\<strong>HyperLynx</strong>75\demo.chm::/demo/linesim_s_crosstalk_an...<br />
2007-3-26
LineSim's Crosstalk and Differential-Signal Features<br />
three traces (or maybe five), as shown in this example.<br />
Load the Demo Schematic "XT_Trace_Separation.ffs"<br />
In this demonstration, you can only simulate the schematics supplied with the demo (you can't create your<br />
own). Let's begin by loading a schematic representing three adjacent traces on a bus.<br />
Load the demo schematic "XT_Trace_Separation.ffs" using File > Open LineSim Schematic:<br />
1. On LineSim's File menu, select Open LineSim Schematic. A dialog box opens.<br />
2. Double-click on the file name "XT_Trace_Separation.ffs". The dialog box closes and a schematic appears<br />
in LineSim's free-form editor.<br />
In the schematic, the three transmission lines represent the side-by-side traces on the bus described above.<br />
The triangular IC-driver symbols at the left end of each line show that all three traces are being driven from<br />
the left side. Each line also has a receiver IC at its right end. The ICs are modeled with a generic 3.3-V fast<br />
CMOS model from the <strong>HyperLynx</strong>-supplied library “EASY.MOD.”<br />
"Victim" versus "Aggressor" Traces<br />
Look at how the driver ICs are set up in the Assign Models dialog box; note that the middle trace's driver is set<br />
to "Stuck Low" rather than "Output":<br />
1. Point to any of the left-end driver-IC symbols in the schematic. Double-click on the symbol; the Assign<br />
Models dialog box opens.<br />
2. In the Pins list, highlight IC pin U1.1 by clicking once on it. Look in the Buffer Settings area to the right and<br />
note that this pin (the driver IC on the uppermost trace) has been set to be an "Output," meaning that it<br />
will switch high/low or low/high when simulation runs.<br />
3. Similarly, in the Pins list box, highlight pin U1.3 (third in the list). It is also set as an "Output."<br />
4. Now highlight pin U1.2. This is the driver on the middle trace. Notice in the Buffer Settings area that it has<br />
been set to "Stuck Low." This means that it will NOT switch when simulation is run.<br />
5. Click OK to close the dialog box. Back in the schematic editor, note that middle-trace driver has a "0" near<br />
its symbol, indicating visually that it is "stuck low."<br />
The reason that the driver ICs are set up this way (middle trace "stuck low" and outer traces switching) is that<br />
we want the middle signal to be the "victim" in our analysis and the outer signals the "aggressors," i.e., we<br />
want to see how much crosstalk develops on the middle trace when its neighboring traces switch. But notice<br />
that we didn't leave the middle trace completely undriven; rather, we applied a driver-IC model, but held it in a<br />
static state. Modeling driver ICs on victim traces is very important, since low-impedance drivers reflect rather<br />
than absorb crosstalk energy.<br />
About "victims" and "aggressors": LineSim will simulate any mixture of "victim" and "aggressor" traces -<br />
in fact, the simulator makes no distinction between the two. Generally, you would refer to traces which are<br />
actively switching as "aggressors" and those on which you're trying to observe the resulting crosstalk as<br />
"victims." In this simulation, we could just as well have made the middle trace also switch, in which case it<br />
would have been both an aggressor to the other traces AND their victim.<br />
How the Traces' Coupling was Defined<br />
页码,2/7<br />
LineSim's crosstalk option lets you add coupling information to any LineSim schematic. (For more information<br />
on LineSim's basic, non-crosstalk features, click here.) The drawing for this example was created by entering<br />
a LineSim schematic with three transmission lines and their driver and receiver ICs; then adding information<br />
about how the three lines are coupled together. Any line in a schematic can be made coupled simply by rightclicking<br />
on it and changing its type to "coupled stackup" (not in the demonstration version, though). Any<br />
number of "coupling regions" can be defined, and any line can be added into any coupling region.<br />
When a transmission line is coupled, it displays differently in the schematic editor than when uncoupled.<br />
Notice that the t-lines in this schematic have “rat’s nest” lines between them, indicating that they’re coupled<br />
together.<br />
Once transmission lines are gathered into a coupling region, the region's cross-section properties and length<br />
can be defined to match exactly the problem you want to simulate. The definition you make is geometric; it is<br />
LineSim's job to convert this data into electromagnetic parameters.<br />
Right-click on a transmission line to edit it and click the Edit Coupling Regions tab; look at how a region's<br />
mk:@MSITStore:D:\<strong>HyperLynx</strong>75\demo.chm::/demo/linesim_s_crosstalk_an...<br />
2007-3-26
LineSim's Crosstalk and Differential-Signal Features<br />
cross section is defined geometrically:<br />
1. Point to any of the transmission lines in the schematic, and right-click with the mouse. A menu appears.<br />
2. Select Edit Type and Values. The Edit Transmission Line dialog box opens.<br />
3. Click on the Edit Coupling Regions tab.<br />
4. Notice how the dialog box allows you to completely define the coupling region's geometry. The Coupling<br />
Regions list box (on the left) shows a "tree list" of the region's stackup layers and transmission lines, and<br />
a graphical view of the current definition. The various edit boxes on the right let you change geometric<br />
parameters for the currently highlighted trace (or in some cases, globally for the entire region). The<br />
Impedance list box (lower right) gives a summary of the resulting electrical characteristics (much more<br />
electrical data is available elsewhere; see below).<br />
This coupling region is currently defined as follows:<br />
� traces are together on an inner, "stripline" layer<br />
� traces are 6 mils wide and 8 mils apart (edge-to-edge)<br />
� the region's cross section applies over a length of 12 inches<br />
Before we actually make any changes to the coupling region, let's run a simulation to see how much crosstalk<br />
occurs with the current arrangement. (Perhaps our design goal of no more than 300 mV of crosstalk voltage is<br />
already satisfied.)<br />
Run a Simulation with Existing Coupling to See How Much Crosstalk Occurs<br />
Simulate the existing schematic and coupling region using Simulate > Run Interactive Simulation; set the<br />
oscilloscope timebase to 2 nsec/div, and simulate once with a falling edge and once with rising:<br />
1. Click OK to close the Edit Coupling Regions dialog box.<br />
2. On the Simulate menu, select Run Interactive Simulation. The Digital Oscilloscope dialog box opens.<br />
3. Verify that the Driver Waveform is set to Edge, Falling Edge, and the IC Modeling to Typical.<br />
4. In the Horizontal Scale area, click the up arrow button once to change the timebase to 2 nsec/div.<br />
5. Click the Start Simulation button.<br />
6. When the simulation is complete, change the Driver Waveform to Rising Edge, and re-simulate.<br />
The green and yellow waveforms show the crosstalk voltages on the middle, "victim" trace, at the receiver and<br />
driver ends, respectively. That the yellow waveform hardly moves is no surprise, since this end of the line is<br />
held low by a low-impedance CMOS driver. But the situation is very different at the green, receiver end: there<br />
is more than 1V of crosstalk when the aggressor signals are driving high. (To see which waveforms<br />
correspond to which driver edge, in the Display area, toggle the Previous Results check box on and off; the<br />
waveform that persists is for the rising-edge simulation.) >1V is well above our design criterion of 300 mV<br />
maximum crosstalk.<br />
When we simulated, LineSim ran its built-in boundary-element field solver to convert all of the geometric data<br />
we entered into electromagnetic coupling parameters. In this example, we won't look specifically at the results<br />
generated by the field solver (though they are always available in the Edit Transmission Line dialog box's<br />
Field Solver tab, by clicking the View button). Later, in a differential-pair example, we'll look at the solver's<br />
output in detail.<br />
Note: It is the backward-crosstalk pulse reflecting off the victim line's driver IC that generates the 1-V<br />
problem. With a little experience using LineSim, you will be able to comfortably distinguish forward<br />
crosstalk from backward. Backward crosstalk persists for twice the delay length of the aggressor net that<br />
creates it (compare the length in time of the pulses in the green waveform to the transmission-line delay<br />
reported in the schematic).<br />
Increase the Trace Separation to Decrease the Crosstalk<br />
页码,3/7<br />
One obvious way to decrease the crosstalk is to increase the separation between the traces.<br />
Edit the coupling region, increase the trace separation from 8 mils to 12, and re-simulate to see by how much<br />
the crosstalk is reduced:<br />
mk:@MSITStore:D:\<strong>HyperLynx</strong>75\demo.chm::/demo/linesim_s_crosstalk_an...<br />
2007-3-26
LineSim's Crosstalk and Differential-Signal Features<br />
1. Point to any of the transmission lines in the schematic (you don't need to close the oscilloscope first), and<br />
right-click with the mouse and select Edit Type and Values to re-open the Edit Transmission Line dialog<br />
box.<br />
2. Click on the Edit Coupling Regions tab.<br />
3. In the Coupling Regions list box, highlight the middle trace. There are two ways to do this: either click<br />
once on transmission line "TL2" in the tree list; or carefully point to the middle trace in the graphical<br />
viewer, and click.<br />
4. In the Trace-to-Trace Separation area, in both the Left and Right edit boxes, type "12" to increase the<br />
separation from the aggressor traces. The separations become wider in the graphical viewer.<br />
5. Click OK to close the dialog box, then back in the oscilloscope, click the Start Simulation button.<br />
Notice that the maximum crosstalk (green waveform) has indeed been reduced, but only to about 750 mV, still<br />
well above the acceptable level.<br />
Decrease the Stackup Dielectric Thickness<br />
There are many ways besides trace separation to affect crosstalk. One that is sometimes overlooked is the<br />
PCB stackup. Let's try making a simple stackup change to further decrease the amount of crosstalk on our<br />
bus.<br />
Edit the PCB stackup and decrease the separation between the plane layers and the inner signal layers from<br />
10 mils to 5; then re-simulate:<br />
1. On the Edit menu, select Stackup. The stackup editor opens.<br />
2. Verify that the Basic tab is selected.<br />
3. In the Thickness cell for the dielectric between layers "VCC" and "Inner1" (i.e., row 5 of the spreadsheet),<br />
type "5". Press or click some other cell in the spreadsheet to tell the stackup editor to accept the<br />
new value.<br />
4. Repeat for the dielectric layer between layers "Inner2" and "GND" (row 9); type "5".<br />
5. Verify in the graphical stackup viewer that the desired layers display as 5 mils thick. Then click OK to<br />
close the editor.<br />
6. Back in the oscilloscope, click the Start Simulation button.<br />
Now the maximum crosstalk at the victim trace's receiver end (green waveform) is sharply reduced, to about<br />
280 mV. This meets our design goal, with a little margin to spare.<br />
In general, crosstalk is a complex effect that is influenced by many different factors: e.g., driver-IC technology,<br />
trace separation, trace width, line length, line-end termination (crosstalk generally requires more-complex<br />
termination than single-line reflections), and PCB stackup (layer ordering and dielectric thickness/material).<br />
LineSim lets you rapidly explore many different options to see which combinations most effectively meet your<br />
requirements.<br />
One of the most powerful uses for LineSim is the development of routing guidelines and constraints. For<br />
example, in this case, we now know that the routing for this bus must be set to a minimum trace separation of<br />
12 mils. We also have a stackup constraint: we know that two of our dielectrics need to be 5 mils thick.<br />
Differential-Trace Example<br />
Differential signaling is a technology that actually takes advantage of the coupling between neighboring<br />
traces. When you design a differential pair, you often deliberately couple the two traces together fairly<br />
strongly, so that any signal induced by external noise on one is also induced on the other – and then rejected<br />
by the differential receiver at the ends of the lines.<br />
However, differential-pair design involves non-trivial issues like determining what geometries to pick to<br />
achieve a specific differential impedance. Terminating differential traces can also sometimes be challenging.<br />
LineSim's crosstalk option is a powerful tool for differential-signal applications, because of the built-in<br />
boundary-element field solver. The field solver automatically calculates differential impedances, determines<br />
coupling parameters, and suggests termination values.<br />
Achieving a Specific Differential Impedance<br />
页码,4/7<br />
It's common in differential signaling for IC vendors or bus specifications to recommend specific differential-<br />
mk:@MSITStore:D:\<strong>HyperLynx</strong>75\demo.chm::/demo/linesim_s_crosstalk_an...<br />
2007-3-26
LineSim's Crosstalk and Differential-Signal Features<br />
impedance targets. There are several ways LineSim can help you plan for differential impedances. For<br />
example, when you enter a differential trace pair in LineSim's schematic editor, LineSim immediately makes<br />
the pair's differential impedance available to you. Let's see an example.<br />
Load the Demo Schematic "XT_Coupled_Differential.ffs"<br />
Load the demo schematic "XT_Coupled_Differential.ffs" using File > Open LineSim Schematic:<br />
1. On LineSim's File menu, select Open LineSim Schematic. A dialog box opens.<br />
2. Double-click on the file name "XT_Coupled_Differential.ffs". The dialog box closes and a schematic<br />
appears in LineSim's editor.<br />
The schematic contains two transmission lines; they are coupled together, as you can see by the dashed rat's<br />
nest line between them. At the left end of the lines is a differential driver IC; here, we're using a high-speed,<br />
low-swing LVDS driver pair (whose total swing voltage is about 400 mV). At the right line ends is a differential<br />
receiver. The line’s receiver ends have been terminated with a 100-ohm differential resistor.<br />
The circuit is set up to run differentially because one of the drivers has its polarity inverted relative to the<br />
other.<br />
Look at how the driver IC is are set up in the Assign Models dialog box; note that pin U1.2 is inverted:<br />
1. Point to the driver-IC symbol in the schematic, and double-click. The Assign Models dialog box opens.<br />
2. In the Pins list, highlight IC pin U1.3 by clicking once on it. Look in the Buffer Settings area to the right and<br />
note that this pin (the lower of the two pins in the schematic) is set to "Output Inverted." This makes it<br />
switch oppositely versus the upper pin.<br />
3. Click OK to close the dialog box.<br />
Suppose our design goal (perhaps specified by the driver-IC manufacturer) is to achieve a 100-ohm<br />
differential impedance with our trace pair. (The differential terminator has already been set to this value.) Let's<br />
see how we can use LineSim to plan for this.<br />
Determine Differential Impedance of Coupled Traces<br />
Note: This section assumes that you're somewhat familiar, from the preceding trace-separation example,<br />
with the concept of a "coupling region." If not, see the example above, then return to this section.<br />
LineSim makes it easy to find the differential impedance of any two-trace coupling region – the value is<br />
calculated automatically. This calculation is performed by LineSim's built-in boundary-element field solver, an<br />
"engine" that can accurately and quickly determine the electromagnetic parameters of any PCB cross section.<br />
Check the differential impedance in the Edit Coupling Regions dialog box, in the Impedance area:<br />
1. Point to either of the transmission lines in the schematic; right-click with the mouse and select Edit Type<br />
and Values.The Edit Transmission Line dialog box opens.<br />
2. Click on the Edit Coupling Regions tab.<br />
3. In the Impedance area (in the lower right corner), look for the entry "(Differential)". This gives the<br />
differential impedance, for the current geometric properties of the coupling-region cross section.<br />
The line-to-line differential impedance is currently 124 ohms, considerably higher than the design goal of 100<br />
ohms.<br />
Note: In the following sections, we'll adjust the differential impedance interactively to achieve our goal of<br />
100 ohms. There's another way to solve for differential impedances, in LineSim's stackup editor. We'll see<br />
details in a later section covering the stackup editor, or click here now.<br />
Decrease the Differential Impedance by Reducing the Trace Separation<br />
One way to decrease differential impedance is by coupling the traces more strongly together.<br />
Decrease the trace separation from 8 mils to 6, and re-check the differential impedance:<br />
页码,5/7<br />
� In the Trace-to-Trace Separation area, in either the Left or Right box (whichever one is not grayed out),<br />
mk:@MSITStore:D:\<strong>HyperLynx</strong>75\demo.chm::/demo/linesim_s_crosstalk_an...<br />
2007-3-26
LineSim's Crosstalk and Differential-Signal Features<br />
type "6" to decrease the separation of the traces; press to “accept” the value.<br />
Notice that the differential impedance has dropped to 114, better than before, but still too high.<br />
Decrease the Stackup Dielectric Thickness<br />
There are many ways besides trace separation to affect differential impedance. As in the previous example,<br />
let's try a simple stackup change.<br />
Edit the PCB stackup and decrease the separation between the TOP and VCC layers from 10 mils to 5; then<br />
re-check the differential impedance:<br />
1. In the Edit Transmission Lines dialog box, click the Edit Stackup button. The stackup editor opens.<br />
2. Verify that the Basic tab is selected.<br />
3. In row 3 of the spreadsheet, click in the Thickness column and type to change the value to "5". Press<br />
or click some other cell in the spreadsheet to accept the new value.<br />
4. Verify in the graphical stackup view that the top-most dielectric layer displays as 5 mils thick. Then click<br />
OK to close the editor.<br />
5. Back in the Edit Transmission Lines dialog box, check the new differential-impedance value in the<br />
Impedance area.<br />
The differential impedance is now reduced to 98 ohms. This is very close to our design goal.<br />
View Detailed Results from the Field Solver<br />
The Impedance area on the Edit Coupling Regions tab gives only a brief summary of the data actually<br />
calculated by <strong>HyperLynx</strong>'s field solver.<br />
View the full set of field-solver results by clicking on the Field Solver tab, then clicking the View button:<br />
1. With the Edit Coupling Regions tab still open and selected, click the Field Solver tab.<br />
2. In the Numerical Results area, click the View button. A report file opens in the <strong>HyperLynx</strong> File Editor.<br />
The report file contains the following sections:<br />
� Impedance and Termination Summary - gives a detailed list of possible termination values to use for the<br />
differential pair<br />
� Physical Input Data - records the cross section that was analyzed, for future reference<br />
� Field-Solver Output Data - gives the detailed electrical characteristics of the cross section, including<br />
characteristic-impedance matrix, capacitance matrix, inductance matrix, and propagation speeds<br />
You can also plot the field lines calculated by the field solver (to help give you a feel for how a cross section is<br />
coupled, or just for fun).<br />
Close the File Editor, then set the Propagation mode to Differential and plot the cross section's field lines by<br />
clicking the Start button:<br />
1. Close the File Editor by selecting Exit from its File menu.<br />
2. In the Edit Transmission Line dialog box, in the Field Plotting area, verify that the selection in the<br />
Propagation Mode combo box is Differential.<br />
3. Click the Start button.<br />
The field solver plots the field lines it has calculated. Electric-field lines are shown in blue, and electric<br />
equipotentials are displayed in red. The plot assumes opposed, differential currents in the two traces.<br />
Simulating the Differential Circuit (Optional)<br />
页码,6/7<br />
If you want, you can simulate the differential circuit to see the resulting waveforms.<br />
Close the Edit Transmission Line dialog box, and simulate using Simulate > Run Interactive Simulation; set<br />
the oscilloscope timebase to 500 psec/div and the Vertical Scale to 500 mV/div:<br />
mk:@MSITStore:D:\<strong>HyperLynx</strong>75\demo.chm::/demo/linesim_s_crosstalk_an...<br />
2007-3-26
LineSim's Crosstalk and Differential-Signal Features<br />
1. Click OK to close the Edit Transmission Line dialog box.<br />
2. On the Simulate menu, select Run Interactive Simulation. The Digital Oscilloscope dialog box opens.<br />
3. In the Horizontal Scale area, click the down arrow button once to change the timebase to 500 psec/div.<br />
4. In the Vertical Scale area, click the down arrow button once to change the scale to 500 mV/div.<br />
5. Click the Start Simulation button.<br />
页码,7/7<br />
Waveforms appear, showing the signals in several different ways. (Remember that LVDS drivers have an<br />
approximately 400-mV total swing.) The red, purple, yellow, and blue waveforms are taken with single-ended<br />
oscilloscope probes, at the two driver and two receiver pins. The green and orange waveforms are from<br />
differential probes, one at the driver and one at the receiver. LineSim allows any probe to be single-ended or<br />
differential – your choice.<br />
Click here to continue with the front-to-back <strong>HyperLynx</strong> demonstration; next, we turn our attention to<br />
advanced features intended specifically for analysis of SERDES and other GHz-level designs.<br />
Click here to return to the main menu.<br />
mk:@MSITStore:D:\<strong>HyperLynx</strong>75\demo.chm::/demo/linesim_s_crosstalk_an...<br />
2007-3-26
LineSim's GHz Features<br />
LineSim's GHz Features<br />
If you started this demonstration at the beginning, you've already seen how LineSim's signal-integrity,<br />
crosstalk, and EMC analysis features can help you prevent various problems early in the design cycle.<br />
However, all of the examples so far have been oriented around traditional, synchronous-style digital designs.<br />
In the past few years, a substantially different kind of signaling has appeared: gigabit-per-second or SERDESbased<br />
design, a technology that emphasizes very-high-speed data streams traveling on narrow, serialized<br />
data paths. Along with this new kind of signaling comes requirements for different types of analysis – for<br />
example, lossy simulation and advanced via modeling, and sometimes even the use of SPICE-based driver<br />
models.<br />
In this section, we'll see examples of how LineSim can perform pre-layout simulation for GHz-level designs.<br />
Note: <strong>HyperLynx</strong>'s main GHz-level features are lossy transmission-line simulation, advanced via<br />
modeling, eye diagrams, integrated SPICE (HSPICE and Eldo) simulation, and Touchstone (Sparameter)<br />
support. In this demonstration, we've chosen to show lossy simulation, eye diagrams, SPICE<br />
simulations, and Touchstone modeling in this section, running in LineSim; and to show advanced via<br />
modeling in a later section, running in BoardSim. If you want to look immediately at via modeling, click here<br />
to jump to the BoardSim section. Note that all of these features are available in both LineSim and<br />
BoardSim (except via modeling in LineSim, which is coming in a future version), so the division of features<br />
across pre- and post-layout used in this demonstration is only for convenience.<br />
Lossy Simulations<br />
About Loss<br />
As driver-IC switching times grow shorter, the frequency content of the resulting signals increases. Older-style<br />
designs might have a fundamental frequency of, say, 133 MHz, and significant energy content at several<br />
higher harmonics, but little content at or above 1 GHz. Gigabit-per-second designs, though, use very-highspeed<br />
serialized bit streams that demand extremely sharp switching edges; those edges have harmonic<br />
content well above the 1-GHz level.<br />
As a result, physical effects – collectively called "loss" – that play only a minor role in traditional designs<br />
become important in GHz-level designs; and simulators must include those effects in their results. The losses<br />
that occur on PCBs are of two types: one is due to the resistance in the trace metal, and the other is due to<br />
the lossy nature of the surrounding dielectric layers. (The FR-4 material used in typical PCB manufacturing is<br />
particularly prone to loss, compared to other more-expensive types of dielectric.)<br />
Both of these effects – usually known, respectively, as "skin effect" and "dielectric loss" – are complex to<br />
simulate in the time domain because each is frequency dependent, meaning basically that each gets worse<br />
as signal frequency increases. "Skin effect" refers to the fact that the current in a trace tends to crowd more<br />
and more to the edges of the trace cross section as frequency increases; because there is more crowding at<br />
higher frequencies, there is more resistance. Dielectric loss works similarly; the higher the signal frequency,<br />
the higher the loss.<br />
These two factors combine to change the shape of a signal launched at a driver IC as it travels down a trace:<br />
higher-frequency components of a signal are attenuated more severely than lower, which tends to "soften" a<br />
signal's shape and drop its amplitude. Shape changes also result from the fact the different frequencies<br />
propagate at different speeds. The sum total of these lossy effects changes what a signal at the end of a PCB<br />
trace looks like compared to when it was launched by a driver. This in turn means that timing and other critical<br />
signal-quality factors are significantly altered by loss. In SERDES-based systems, it is not uncommon for<br />
signals to be attenuated greatly before arriving at receiver ICs.<br />
Running a Lossy Simulation in LineSim<br />
Fortunately, the algorithmic complexities of accurately predicting frequency-dependent loss are buried away<br />
inside the <strong>HyperLynx</strong> simulator. It's a simple matter for you to enable lossy simulations for designs which need<br />
it, as the following example shows.<br />
Note: To simulate loss, <strong>HyperLynx</strong> uses the well-known and trusted “W-element” algorithm (although with<br />
some added improvements).<br />
Load the Demo Schematic "Lossy.ffs"<br />
Load the demo schematic "Lossy.ffs" using File > Open LineSim Schematic:<br />
mk:@MSITStore:D:\<strong>HyperLynx</strong>75\demo.chm::/demo/linesim_s_ghz_level_fe...<br />
页码,1/11<br />
2007-3-26
LineSim's GHz Features<br />
1. On LineSim's File menu, select Open LineSim Schematic. A dialog box opens.<br />
2. Double-click on the file name "Lossy.ffs". The dialog box closes and a schematic appears in LineSim's<br />
editor.<br />
The schematic is very simple: a driver IC, 20 inches of transmission line buried in FR-4 on a PCB's inner<br />
layer, and a receiver IC. The ICs were modeled for simplicity with the fastest driver in the EASY.MOD library:<br />
a generic 3.3-V CMOS driver with a nominal switching time of 300 ps. (Many SERDES-type drivers have even<br />
faster edges.)<br />
Simulate First with No Loss<br />
First, let's run a simulation with no loss; then we'll compare to a lossy simulation.<br />
Simulate the schematic using Simulate > Run Interactive Simulation; verify first that lossy analysis is disabled<br />
and set the driver modeling to Fast-Strong:<br />
1. On the Simulate menu, select Run Interactive Simulation. The Digital Oscilloscope dialog box opens.<br />
2. On LineSim's main menu bar, select Lossy and verify that Enable Lossy Simulation is not enabled.<br />
3. Back in the oscilloscope, in the IC Modeling area, select the Fast-Strong radio button. (This will give us<br />
the fastest possible edge time for this driver, which should show the most loss.)<br />
4. Click the Start Simulation button.<br />
In the oscilloscope display, note a sharp driver waveform in red, and after a time delay corresponding to the<br />
20 inches of trace length, a similarly sharp receiver waveform in yellow.<br />
Simulate with Loss Enabled<br />
Now, let's enable a lossy simulation of the same circuit and see if there's any visible difference.<br />
Simulate the schematic again using Simulate > Run Scope; but first use the Lossy menu to enable lossy<br />
simulation:<br />
1. On LineSim's Lossy menu, select Enable Lossy Simulation. Notice on the toolbar that a button with an<br />
attenuating blue waveform is depressed, indicating that loss is enabled.<br />
2. In the oscilloscope, click the Start Simulation button again.<br />
The new waveform at the receiver (in yellow) – generated with lossy analysis turned on – does indeed look<br />
different than the previous, lossless waveform: it is delayed compared to and has less amplitude than its<br />
predecessor. If the switching edge were even faster, or the trace longer, or the PCB's dielectric material<br />
lossier, the effect would be even stronger.<br />
Look also at the red driver waveform, just past time 7 ns (toward the right side of the display). The disturbance<br />
in the waveform is due to a reflection from the receiver IC's input capacitance. Note how much less severe<br />
(i.e., how attenuated) it is in the lossy simulation versus in the lossless.<br />
Viewing Loss in the Frequency Domain<br />
In GHz-level designs, it is often useful to consider loss (and other effects) in the frequency domain. Some<br />
specifications, for example, discuss total loss in dB terms at a key frequency. LineSim gives you an easy way<br />
to view loss in the frequency domain for any transmission line in a schematic.<br />
Note: Actually, a few conditions must be met for frequency-domain loss information to be available. First,<br />
the transmission line must be modeled with a "style" that's tied to a PCB stackup or cross section (because<br />
prediction of loss is based on knowledge of cross-section geometry and materials). Second, lossy analysis<br />
must be enabled.<br />
Let's view the loss associated with the 20-inch transmission line in the current schematic.<br />
View the transmission line's loss by right-clicking on it and selecting the Loss tab:<br />
页码,2/11<br />
1. Click Close to close the oscilloscope.<br />
2. In the schematic, point to the transmission line and right-click on it; select Edit Type and Values. The Edit<br />
Transmission Line dialog box opens.<br />
mk:@MSITStore:D:\<strong>HyperLynx</strong>75\demo.chm::/demo/linesim_s_ghz_level_fe...<br />
2007-3-26
LineSim's GHz Features<br />
3. Click the Loss tab. A special viewer appears.<br />
Note several aspects of the loss viewer:<br />
� the graph shows attenuation (loss) versus frequency<br />
� three curves are plotted:<br />
� resistive (skin effect) loss in red<br />
� dielectric loss in green<br />
� total loss in blue<br />
When Does Dielectric Loss Dominate?<br />
Dielectric loss increases with frequency more strongly than resistive. (Dielectric loss grows linearly with<br />
frequency, and skin effect only as the square root of frequency.) As a result, dielectric loss at some point<br />
begins to dominate resistive loss. It's easy in LineSim's loss viewer to see exactly where the cross-over point<br />
is.<br />
In the loss viewer, drag out a "box" with the mouse around the area where the crossover occurs, in order to<br />
zoom in for a closer look:<br />
1. Look for the area in the lower right of the loss graph, where the red and green curves intersect.<br />
2. Use the mouse to click and drag a rectangular area around the intersection point.<br />
3. Release the mouse; the graph is zoomed to the area you specified.<br />
Note that the green curve crosses over the red one a little above 700 MHz, meaning that at that frequency,<br />
dielectric loss becomes more important than skin-effect loss.<br />
Actually, there's an even easier way to find out where dielectric loss dominates: note the Dielectric Loss<br />
Dominates At box at the bottom right of the dialog box. It automatically calculates at exactly what frequency<br />
the crossover occurs.<br />
Close the loss-viewer dialog box, and disable loss for later sections of the demonstration:<br />
1. Click OK to close the Edit Transmission Line dialog box.<br />
2. On LineSim's main menu bar, select Lossy, then re-select Enable Lossy Simulation to turn it off. The bluewaveform<br />
button on the toolbar should no longer be depressed.<br />
Integrated SPICE Simulations<br />
Vendors of some very-high-speed driver (and receiver) ICs make models available for their components only<br />
in SPICE format. While this is not always necessary, it is true that some devices have subtle behavior which is<br />
difficult to model accurately in the IBIS behavioral format. In almost all cases, these SPICE models are<br />
provided in a proprietary format: either HSPICE or Eldo (and sometimes using encryption, which hides all<br />
model details from the user).<br />
HSPICE is a well-known industry SPICE simulator. Eldo is an alternative SPICE-based simulator from Mentor<br />
Graphics; it has a robust HSPICE-compatible mode, and offers some features not found in HSPICE (like an<br />
industry-leading dielectric model for its lossy transmission line, and a unique method of simulating Sparameter<br />
models in the time domain that is extra-fast and stable.) When you need to run signal-integrity<br />
simulations with SPICE-based models, <strong>HyperLynx</strong> provides a seamless interface to both HSPICE and Eldo.<br />
(A special version of Eldo – “Eldo for <strong>HyperLynx</strong>” – is available to <strong>HyperLynx</strong> users.)<br />
Because of the need sometimes to use SPICE models, some designers have concluded that they need to<br />
drop their traditional signal-integrity tools and proceed using only a SPICE simulator. But there are a number<br />
of disadvantages to this approach:<br />
� "Raw" SPICE has a primitive, unfriendly user interface compared to tools like <strong>HyperLynx</strong>; much valuable<br />
design time ends up being wasted on set-up<br />
� SPICE interconnect netlists have to be created manually in a text editor; even for simple "what-if"<br />
scenarios, this is time-consuming and error prone, while for post-route scenarios it's essentially impossible<br />
� Field solutions to convert geometric cross sections into electrical parameters have to be generated<br />
mk:@MSITStore:D:\<strong>HyperLynx</strong>75\demo.chm::/demo/linesim_s_ghz_level_fe...<br />
页码,3/11<br />
2007-3-26
LineSim's GHz Features<br />
manually; again this is error-prone, and impossible for complex interconnect scenarios which involve many<br />
different cross sections<br />
� Stimulus for an eye diagram has to be manually generated – again, a tedious and error-prone task<br />
A better approach is to integrate the SPICE simulation engine into the robust, friendly <strong>HyperLynx</strong><br />
environment, an approach that offers the best of both worlds: you get the extra accuracy of running SPICE IC<br />
models, and all the convenience and productivity of the <strong>HyperLynx</strong> environment.<br />
In the following example, we'll see how a SPICE simulation is set up and run using <strong>HyperLynx</strong>.<br />
Note: The dependency of high-speed designers on SPICE simulation may be temporary. In the past, all<br />
digital buffers could be modeled accurately in the non-proprietary IBIS format. Now, some devices have<br />
appeared which their vendors feel are more accurately represented in SPICE. However, very advanced<br />
driver models currently in design reportedly have simplified analog characteristics (to enforce strict<br />
linearity); there are early indications that IBIS modeling may once again suffice to capture the analog<br />
behavior. Also, SERDES-type I/O's have increasingly large amounts of associated digital logic (to generate<br />
pre-emphasized driver signals or implement receiver equalization circuits), which may have to be modeled<br />
in mixed analog/digital languages like VHDL-AMS or Verilog-AMS – SPICE is unable to handle significant<br />
amounts of digital logic.<br />
Whatever the future holds, <strong>HyperLynx</strong> is committed to providing its customers with all of the analysis<br />
engines required to handle relevant types of models.<br />
Setting Up a SPICE Simulation<br />
Note: LineSim does not include a built-in SPICE simulator. To use LineSim's integration with SPICE, you<br />
need a separate SPICE license – for either HSPICE or Eldo. But if you do have it, <strong>HyperLynx</strong> will wrap<br />
itself around your choice of SPICE engine to give you a much easier-to-use, more-productive simulation<br />
environment than you'd have with just "raw" SPICE. Again, a special version of the Eldo SPICE engine is<br />
available for <strong>HyperLynx</strong> customers, at a reasonable cost.<br />
Change the Schematic's Driver Model to a SPICE Model<br />
For this demonstration, two SPICE models have been provided. For simplicity, they're not real models from a<br />
semiconductor vendor – in fact, they have no analog "internals" at all. But it doesn't matter for this demo:<br />
we're going to look at how SPICE models are set up in LineSim, and at how SPICE results are loaded<br />
automatically into the oscilloscope after simulation, though we're not actually going to run SPICE.<br />
Using the schematic "Lossy.ffs", change the driver-IC model to SPICE model "Fast_Drv.sp":<br />
1. If the schematic "Lossy.ffs" is already open from the previous section on "loss," go to the next step.<br />
Or<br />
If you jumped to this section from another topic, use File > Open LineSim Schematic; then double-click<br />
"Lossy.ffs".<br />
2. In the schematic, point to the driver-IC symbol (left end of the transmission line) with the mouse, and<br />
double-click. The Assign Models dialog box opens.<br />
3. In the Pins list, double-click on pin U1.1. The Select IC Model dialog box opens.<br />
4. Select the SPICE radio button; the Files list shows only the two SPICE models shipped with the<br />
demonstration software.<br />
5. In the Files list, click once to highlight model Fast_Drv.sp.<br />
6. In the Models list, double-click on model Fast_Drv to select it. The dialog box closes.<br />
页码,4/11<br />
Now we're back in the Assign Models dialog box. Note that a small spreadsheet has appeared. The purpose<br />
of the spreadsheet is to help you make connections to all of the "ports" on the SPICE model. (The model's<br />
ports are its external connection points, e.g., for a stimulus waveform, for power supplies, for its output pins,<br />
etc.).<br />
This particular SPICE model has four ports: "Vin" (where the model expects to be stimulated), "Vout" (its<br />
output pin, which should be connected in the schematic), and "Vcc" and "Gnd" (the model's power-supply<br />
pins). Note that LineSim has automatically recognized the names "Vcc" and "Gnd" and guessed that they<br />
should be connected to LineSim's built-in power supplies. (If a SPICE model had more-obscure supply<br />
mk:@MSITStore:D:\<strong>HyperLynx</strong>75\demo.chm::/demo/linesim_s_ghz_level_fe...<br />
2007-3-26
LineSim's GHz Features<br />
names, you could connect them manually.)<br />
LineSim couldn't guess how to connect the stimulus and output ports, so we'll make the connections<br />
manually.<br />
In the SPICE-port-mapping spreadsheet, map the model's "Vin" port to LineSim's built-in "Stimulus," and the<br />
model's "Vout" port to pin "U1.1" in the schematic:<br />
1. In the port-mapping spreadsheet, in the Circuit Connection cell for the "Vin" port, click to open the combobox<br />
list of possible connections. The SPICE model's Vin port expects digital stimulus, so select the<br />
"Stimulus" item in the list.<br />
2. In the Circuit Connection cell for the "Vout" port, click to open the combo box. The Vout port is the pin on<br />
the SPICE model that should be connected in the schematic, so scroll down and choose item "U1.1", the<br />
driver-pin name in the schematic.<br />
The SPICE driver model has now been assigned and completely hooked up. Next, let's assign and connect a<br />
SPICE receiver model.<br />
Note: An important difference between SPICE and IBIS IC models is that SPICE models have "explicit"<br />
ports. This means that with a SPICE model, you're forced to manually connect power supplies, one or<br />
more input stimulus pins, possibly some control pins (there weren't any in this example), and one or more<br />
output pins. Compare this to using IBIS models: the input/stimulus, power-supply, and control pins are<br />
"implicit" and LineSim can connect them automatically for you. This difference results because SPICE<br />
models are inherently "lower level" than IBIS models. Fortunately, through its port-mapping spreadsheet,<br />
LineSim (and BoardSim) makes it fairly easy to make and manage these extra connections.<br />
Change the Receiver Model to a SPICE Model<br />
Change the receiver-IC model to SPICE model "Fast_Rcv.sp"; in the port-mapping spreadsheet, map the<br />
model's "Vin" port to pin "U2.1" in the schematic:<br />
1. In the Pins list, double-click on pin U2.1. The Select IC Model dialog box opens.<br />
2. Select the SPICE radio button.<br />
3. In the Files list, click once to highlight model Fast_Rcv.sp.<br />
4. In the Models list, double-click on model Fast_Rcv to select it. The dialog box closes.<br />
5. In the spreadsheet, in the Circuit Connection cell for the "Vin" port, click to open the combo box. The Vin<br />
port is the pin on the SPICE model that should be connected in the schematic, so scroll to the bottom of<br />
the list and choose item "U2.1", the receiver-pin name in the schematic.<br />
We're done assigning and hooking up our SPICE models. Now let's look at how you'd run a SPICE simulation.<br />
Run a SPICE Simulation<br />
Since you may not have HSPICE or Eldo installed on your machine, we can't actually run a SPICE simulation.<br />
But we can see how the simulation is launched, and how SPICE waveforms are automatically read back into<br />
LineSim's oscilloscope.<br />
Close the Assign Models dialog box, then use Simulate > Run Interactive Simulation to open the oscilloscope;<br />
click on Start Simulation to launch a SPICE simulation:<br />
1. Click OK to close the Assign Models dialog box.<br />
2. On the Simulate menu, select Run Interactive Simulation. The Digital Oscilloscope dialog box opens.<br />
3. If there's waveform in the oscilloscope, click Erase to clear it.<br />
4. Click the Start Simulation button. A message box opens.<br />
页码,5/11<br />
The message appears because LineSim has noticed that you're running with SPICE models, not IBIS models.<br />
As a result, it wants to switch automatically to a SPICE simulator rather than "native” – <strong>HyperLynx</strong> simulator,<br />
which is exactly what we want. Notice under the Start Simulation button that we could have changed the<br />
radio-button setting and manually chosen Eldo. If you were an HSPICE rather than Eldo user, a one-time<br />
Preferences change would re-label this radio button to “HSPICE.”<br />
Click OK in the message box to open the Run Eldo Simulation dialog box; click OK to begin running the<br />
SPICE simulator:<br />
mk:@MSITStore:D:\<strong>HyperLynx</strong>75\demo.chm::/demo/linesim_s_ghz_level_fe...<br />
2007-3-26
LineSim's GHz Features<br />
1. Click OK to close the message box. The radio-button setting below the Start Simulation button changes<br />
automatically to Eldo, and the Run Eldo Simulation dialog box opens.<br />
2. The default settings in the dialog box are fine; click OK to run a SPICE simulation.<br />
Again, we're not actually running SPICE in this demonstration. But if we were, the following steps would now<br />
occur:<br />
� LineSim would create a SPICE netlist (targeted to your choice of HSPICE or Eldo) representing the<br />
schematic; the SPICE driver and receiver models would be included with all of the connections you made<br />
in the port-mapping spreadsheet.<br />
� For each transmission line in the schematic, LineSim would invoke the <strong>HyperLynx</strong> field solver to determine<br />
its electrical characteristics, then write out the electrical data in HSPICE or Eldo matrix format. If lossy<br />
analysis was enabled, the transmission-line data would include skin-effect and dielectric-loss parameters.<br />
� If any Touchstone (S-parameter) models were in the schematic (there were none in this example), they<br />
would be included in the netlist.<br />
� LineSim would invoke HSPICE or Eldo on the netlist.<br />
� Assuming a SPICE license were found, a window would open and HSPICE or Eldo would begin running in<br />
it; all of the SPICE messages would be visible so that you could track its simulation progress in detail.<br />
� If there were an error in one of the SPICE files – for example, a syntax error in one of the models we<br />
assigned – then the SPICE window would automatically jump to the location of the first error message, for<br />
convenience.<br />
Since we're not actually running these steps in the demonstration, a message box opens instead.<br />
Note: If you happen to be running this demonstration with the “real” (not demo) version of <strong>HyperLynx</strong> and<br />
have Eldo installed, then Eldo will actually begin running on the schematic, and the detailed instructions in<br />
this section won’t be followed. Also, Eldo will report a model error, since the models used in the schematic<br />
are “phony” and don’t actually contain any transistor data.<br />
View SPICE Results in the Oscilloscope<br />
If we'd actually run HSPICE or Eldo, then:<br />
� At the end of simulation, the SPICE window would close.<br />
� LineSim would automatically read the SPICE simulation results and load them into the oscilloscope, where<br />
you could view them like any other <strong>HyperLynx</strong> waveform.<br />
We didn't run the SPICE simulation here, but the demonstration does include a real SPICE results file. Let's<br />
make LineSim read it in.<br />
In the message box, click OK; the demonstration software looks for a stored SPICE results file, reads it, and<br />
presents the waveforms in the oscilloscope.<br />
Note that the waveform behaves no differently than if it were generated by the native <strong>HyperLynx</strong> simulator:<br />
you can scale it, scroll around in it, etc.<br />
Touchstone (S-Parameter) Modeling<br />
Introduction to Touchstone<br />
页码,6/11<br />
SPICE models aren’t the only new type of model appearing in signal-integrity simulations due to the higher<br />
frequencies of today’s designs (especially SERDES technology). Increasingly, models for passive<br />
interconnect structures (like connectors and IC packages) are being provided in “Touchstone” format.<br />
Touchstone models come from the RF/microwave-engineering world, where they’ve been used for many<br />
years to accurately characterize ultra-high-speed devices and structures.<br />
Touchstone models differ fundamentally from the other types of models (IBIS, SPICE, etc.) used in signal<br />
integrity, because they’re based in the frequency domain. The Touchstone format can be used to describe<br />
several types of “network parameters” – S (scattering), Z (impedance), and Y (admittance) parameters. Each<br />
of these types considers the structure being modeled in a very generic way (as a “multi-port” black box), and<br />
at every frequency of interest, gives a matrix describing how each port behaves.<br />
mk:@MSITStore:D:\<strong>HyperLynx</strong>75\demo.chm::/demo/linesim_s_ghz_level_fe...<br />
2007-3-26
LineSim's GHz Features<br />
Because the models are expressed in the frequency domain, they can’t be directly simulated in the time<br />
domain like, say, an IBIS model. Fortunately, most SPICE simulators (including HSPICE and Eldo) can use<br />
Touchstone models in transient simulation, using one of several possible techniques, the most-common being<br />
“convolution.” A particular strength of the Eldo simulator is its ability to “fit” S-parameter models (using<br />
complex poles), which has various advantages over simple convolution (model compression, speed,<br />
passivation, and causality enforcement).<br />
In the signal-integrity world, S-parameter models are by far the most-common type of Touchstone model in<br />
use. One typical way of creating such models is by measurement, using a vector network analyzer, which<br />
directly outputs S-parameter data. Another possibility is to model the structure using 3-D electromagnetic<br />
software; these tools also typically output S parameters.<br />
Including Touchstone Models in a LineSim Schematic<br />
As with the SPICE-model simulation in the previous section, because we’re not actually running a SPICE<br />
engine in this demonstration, we can’t simulate a Touchstone model. However, we can easily show how to<br />
include and set up a typical Touchstone model in a LineSim free-form schematic – it’s actually even easier<br />
than with a SPICE driver model.<br />
Let’s modify our existing schematic (the one used in the previous lossy and SPICE-IC sections) and show<br />
how a hypothetical 4-port Touchstone model (of, say, a small section of a connector) could be added.<br />
Close the oscilloscope, then use Ctrl+C / Ctrl+V to make a copy of the existing driver-tline-receiver circuit;<br />
delete both transmission lines, then click the drawing palette’s Add Package/Connector button and place the<br />
new symbol between the four dangling wires:<br />
1. Click Close to close the oscilloscope dialog box.<br />
页码,7/11<br />
2. Since we’re using a 4-port Touchstone connector model, we need two drivers for the input side and two<br />
receivers for the output. The easiest way to create this is to make a copy of the existing driver-tlinereceiver<br />
circuitry. Start by dragging with the mouse a rectangle around the existing symbols; then release<br />
the mouse button. The existing symbols all highlight in red.<br />
3. On the keyboard, press Ctrl+C (or from the Edit menu, select Copy). Then press Ctrl+V (or from the Edit<br />
menu, select Paste). A copy of the selected symbols appears in the editor, highlighted in red. Note that<br />
the new symbols have unique, new reference designators.<br />
4. Place the mouse over one of the new symbols, and drag the new symbols as a group to be just below the<br />
previously existing symbols (so that the drivers are immediately above/below each other, and same for<br />
the transmission lines and the receivers).<br />
5. For this simulation, let’s replace the transmission lines with the Touchstone interconnect model. So point<br />
with the mouse to the first t-line, right-click, and on the pop-up menu, select Delete. The t-line disappears.<br />
Then, repeat and delete the second t-line.<br />
6. Now, add a package/connector symbol: on the free-form schematic editor’s drawing palette (arranged<br />
vertically along the left margin of the editor’s window), click the Add Package/Connector symbol (near the<br />
bottom). A red symbol attaches itself to the cursor; move it to a position between the four dangling wires in<br />
the schematic, and click once to place it.<br />
So far, we’ve placed an empty symbol on the schematic. It could actually be used to house any passive (nondriving)<br />
SPICE or Touchstone model; in this case we’re going to assign a 4-port S-parameter model to it. The<br />
model we’ll use is “phony”: it contains a valid “introductory” line, but no modeling data. For this demonstration,<br />
though, it doesn’t matter, since we’re only looking at how Touchstone assignments are made.<br />
Double-click on the package/connector symbol, and in the Assign Package / Connector Model dialog box,<br />
choose model “Example.s4p”; move ports 2 and 4 to the right side of the symbol; then close the Assign<br />
Package / Connector Model dialog box and wire the Touchstone symbol to the drivers and receivers:<br />
1. Point with the mouse to the empty package/connector symbol, and double-click. The Assign Package /<br />
Connector Model dialog box opens.<br />
2. In the Model Type combo box, select Touchstone Models. Only one Touchstone file is shipped with the<br />
demo software; verify that Example.s4p is highlighted in both the Libraries and Devices list boxes. Click<br />
the OK button; the Assign Package / Connector Model dialog box closes.<br />
3. In the schematic, the empty symbol has been replaced by one labeled “Example.s4p” and showing 4 ports<br />
on its left side. Let’s assume that this model is arranged with two internal paths, one from port 1 to port 2,<br />
and the other from port 3 and port 4. (Probably, the two interconnects are coupled to each other.)<br />
4. Double-click the Touchstone symbol again. In the Assign Package / Connector Model dialog box, in the<br />
mk:@MSITStore:D:\<strong>HyperLynx</strong>75\demo.chm::/demo/linesim_s_ghz_level_fe...<br />
2007-3-26
LineSim's GHz Features<br />
Side column for both port 2 and 4, click and select “right.” Then click OK.<br />
5. Back in the schematic, note that the Touchstone symbol now has two ports on each side. (If the complete<br />
port names are not displayed, touch each pin name with the mouse; a tool tip displays the full name.)<br />
6. Finally, wire the IC-buffer symbols to the nearest ports. First, connect driver pin U1.1 to Touchstone port 1<br />
by placing the mouse over the “dot” at U1.1 (note that the mouse cursor changes to a “cross”), then<br />
dragging a wire from it to the connector’s port-1 dot, then releasing the mouse. Repeat to connect driver<br />
pin U3.1 to port 3.<br />
7. For variety, connect the remaining two wires in an alternate way: click on receiver symbol U2.1, and with<br />
the mouse button held down, drag U2.1 until its pin dot touches port 2’s dot. Release the mouse button<br />
briefly, then press it down again and drag U2.1 away from the Touchstone symbol; a wire appears<br />
between the two symbols. Repeat to connect U4.1 to port 4.<br />
If you complete all of the steps above correctly, your resulting schematic should look something like this:<br />
At this point, if you were running a “real” copy of <strong>HyperLynx</strong> and had either the HSPICE or Eldo SPICE<br />
simulators installed, you could immediately open the oscilloscope, and see the effects of driving the sample Sparameter<br />
model. In this demonstration, we can’t actually do it. But the preceding example shows how easily<br />
S-parameter (and other Touchstone) models are included in a LineSim free-form schematic.<br />
Note: Actually, if you happen to be running this demonstration with the “real” (not demo) version of<br />
<strong>HyperLynx</strong> and Eldo, then Eldo will actually begin running on the schematic, but end up reporting a model<br />
error. The reason is that the model used in this example is “phony” and doesn’t actually contain any matrix<br />
data.<br />
Eye Diagrams and Multi-Bit Stimulus<br />
USB 2.0 Example<br />
About Eye Diagrams<br />
页码,8/11<br />
All of the waveforms generated in earlier portions of this demonstration were based on single switching edges<br />
or oscillating waveforms. Indeed, these types of analysis are the backbone of traditional, synchronous digital<br />
design.<br />
However, very-high-speed SERDES-style designs are usually examined in the time domain in a different way<br />
– by the use of eye diagrams. Eye diagrams superimpose large numbers of bit transitions one over the other<br />
to build up a view of a data stream in which new measures of signal quality – like jitter and eye opening – can<br />
readily be judged. Many modern oscilloscopes can run either in traditional, single-edge mode or in eyediagram<br />
mode. Likewise, in the <strong>HyperLynx</strong> GHz products, LineSim's and BoardSim's oscilloscope can run in<br />
either "standard" or eye-diagram mode.<br />
Generating eye diagrams with a simulation tool is more difficult than generating them in the lab with real<br />
hardware. First, in the lab, it takes only a brief amount of time to capture hundreds of millions of bit cycles<br />
from a data stream. But in a software-based simulator (especially if advanced IC modeling is required), it may<br />
take many minutes to generate a thousand or even a few hundred cycles. Second, whereas in the lab, test<br />
equipment is readily available to generate statistically useful bit sequences, in software the user has the<br />
responsibility of creating the stimulus that should be used to drive the generation of an eye diagram.<br />
Note that eye diagrams can only be constructed by driving a sequence of bits down a trace. This means that<br />
in order to generate an eye diagram, you must define multi-bit stimulus. Thus, these two features – eye<br />
mk:@MSITStore:D:\<strong>HyperLynx</strong>75\demo.chm::/demo/linesim_s_ghz_level_fe...<br />
2007-3-26
LineSim's GHz Features<br />
diagrams and multi-bit driving – are tightly linked, and we'll demonstrate them together in this section.<br />
About Multi-Bit Stimulus<br />
Some designers of SERDES-based designs today use standalone SPICE netlists to create eye diagrams.<br />
While possible (and sometimes even necessary because a certain IC model is available only in SPICE<br />
format), using "raw" SPICE for eyes is usually cumbersome and time-consuming. SPICE simulations often run<br />
very slowly, and setting up for simulation (especially, generating stimulus patterns) is awkward.<br />
LineSim and BoardSim, by contrast, make the generation of eye diagrams fairly easy. As the following<br />
example will show, set-up activities, like defining a stimulus pattern, are much easier in <strong>HyperLynx</strong> than in<br />
SPICE. And when simulations can be performed using IBIS models, eye diagrams are created quickly. Nor is<br />
it a requirement to run simulations in <strong>HyperLynx</strong>'s native simulator: eye diagrams are created as easily for<br />
SPICE simulations as they are for <strong>HyperLynx</strong> simulations. (Both LineSim and BoardSim offer integrated<br />
SPICE simulation; for details and a demonstration using LineSim, click here.)<br />
Let’s look at an example of an eye diagram, for a typical USB 2.0 link modeled in LineSim’s free-form<br />
schematic editor. This example is more complex than many of the others used in this demonstration, to<br />
remind you that <strong>HyperLynx</strong> products are regularly used, world-wide, on large and realistic design problems.<br />
Load Schematic "USB_link.ffs" and Look at the USB 2.0 Design<br />
Load the schematic "USB_link.ffs" using File > Open LineSim Schematic:<br />
1. On LineSim’s File menu, select Open LineSim Schematic. A dialog box opens.<br />
2. Double-click on the file name USB_link.ffs. The dialog box closes and a schematic appears in LineSim’s<br />
free-form editor.<br />
3. If the entire schematic doesn’t appear on the screen, then on the View menu, select Fit to Window. The<br />
schematic zoom level automatically adjusts.<br />
The schematic we’ve loaded represents a typical topology for a USB 2.0 implementation, implemented in<br />
LineSim’s free-form schematic editor. Looking from left-to-right, the design incorporates these elements:<br />
� A differential driver pair on a USB 2.0 host controller; the differential buffer is modeled using an IBIS model<br />
from Cypress Semiconductor<br />
� A pair of coupled transmission lines, representing the differential-pair routing from the host controller to a<br />
ribbon cable<br />
� A model of three side-by-side differential pairs in a 28-AWG ribbon cable, constructed by coupling six<br />
transmission lines together in a single LineSim coupling region (for basic information on “coupling regions”<br />
and how LineSim represents and simulates crosstalk, click here)<br />
� Another pair of coupled transmission lines, representing more differential-pair trace routing between the<br />
ribbon cable and a USB cable<br />
� Another pair of coupled transmission lines, representing a 5-meter USB cable<br />
� Another pair of coupled transmission lines, representing the routing in the USB peripheral device<br />
� A differential receiver pair on a USB 2.0 peripheral controller, again modeled using a Cypress<br />
Semiconductor IBIS model<br />
Essentially, the system in this schematic consists of a USB host controller, linked through a ribbon cable (with<br />
a short amount of differential-trace routing on each end) and 5-meter USB cable to a USB peripheral (with<br />
routing and controller input pair). The interconnect lengths are “stressed” to the maximum delay lengths<br />
allowed by the USB 2.0 specification. Will the design actually work? Let’s create an eye diagram, compare it<br />
to the spec’s minimum allowed eye opening, and find out.<br />
Setting Up an Eye Diagram<br />
页码,9/11<br />
It's easy to tell LineSim’s oscilloscope to generate an eye diagram, and to create the required multi-bit<br />
stimulus to drive it.<br />
First, open the oscilloscope using Simulate > Run Interactive Simulation, and set the oscilloscope to eyediagram<br />
mode; click the Configure button to open the Configure Eye Diagram dialog box:<br />
1. On the Simulate menu, select Run Interactive Simulation. The Digital Oscilloscope dialog box opens.<br />
mk:@MSITStore:D:\<strong>HyperLynx</strong>75\demo.chm::/demo/linesim_s_ghz_level_fe...<br />
2007-3-26
LineSim's GHz Features<br />
2. In the oscilloscope, in the Operation area, select the Eye Diagram radio button.<br />
3. In the Eye Diagram area, click the Configure button; the Configure Eye Diagram dialog box opens.<br />
With a single radio-button click, we've told the oscilloscope to generate an eye diagram. But before we can<br />
simulate, we have to tell LineSim’s simulator what bit sequence to drive down the differential pair. Fortunately,<br />
this is easy to do in the dialog box that's now open.<br />
The most common type of stimulus used in eye-diagram generation is the "PRBS" or "pseudo-random bit<br />
sequence." However, some technology-specific specifications (like USB 2.0) prescribe their own worst-case<br />
patterns. LineSim allows you to choose between several “built-in” patterns (some configurable, like PRBS<br />
stimulus, for which you can set length, repetition count, starting state, etc.); or your own custom pattern. For<br />
this case, LineSim has the worst-case USB 2.0 pattern built-in.<br />
In the dialog box, choose the USB 2.0 Compliance pattern:<br />
� In the Bit Pattern area, pull down the Sequence combo box, and select USB 2.0 Compliance.<br />
Note that the graphical view updates to show the bit pattern that will be driven during simulation. The<br />
sequence is 330 bits long (per the USB 2.0 specification); you can scroll the sequence viewer, if you want, to<br />
see all of it.<br />
We’re not quite finished specifying the stimulus. We still need to make choices about the length of each bit’s<br />
interval, how many times (if any) to have the pattern repeat, whether to skip any bits at the beginning of the<br />
pattern, and even the number of eyes to show. Also any real driver suffers from a certain amount of inherent<br />
jitter, i.e., a certain amount of random uncertainty in the times at which switching edges are delivered relative<br />
to each other. We can include this effect in our simulations by specifying a jitter percentage.<br />
Set the bit interval to 2.08 ns and the sequence repetitions to 1; select to skip the first 20 bits of output; and<br />
set the jitter to 6% of the bit interval:<br />
1. In the Stimulus area, in the Bit Interval box, type “2.08”. In the Sequence Repetitions box, type (or select)<br />
“1”.<br />
2. In the Display area, in the Skip First box, type “20”. In the Show combo box, select “1”.<br />
3. In the Random Jitter area, in the Amount box, type “6” (and verify that the associated combo box is set to<br />
“% of interval”). Verify that the Distribution combo box is set to “Gaussian”.<br />
With these steps, you’ve completely specified the eye diagram’s stimulus. However, before simulating, there<br />
is another optional step that will make it easier to judge whether the resulting eye diagram is acceptable or<br />
not. Eyes are judged by the extent of their “opening”; each SERDES technology typically specifies a minimum<br />
allowed opening, which can be translated into an “eye mask” that visually defines a “keep-out” region. If a<br />
given eye penetrates this region, then the eye fails to meet the spec’s minimum requirements for signal<br />
quality. Even if the eye is open, the mask gives a quick visual impression of how much margin the eye has.<br />
Similar to eye patterns, LineSim (and BoardSim) includes some built-in masks, and allow you to define your<br />
own. Once again (since USB 2.0 is a common and important signaling technology), the mask we need is built<br />
in to the <strong>HyperLynx</strong> mask library.<br />
Switch to the Eye Mask tab, and choose the "USB2.0-High_Speed_RX" mask:<br />
1. Click on the Eye Mask tab.<br />
2. In the Mask Library area, pull down the combo box and select the "USB2.0-High_Speed_RX" mask. The<br />
numeric values that define the mask in the picture change to match the new selection.<br />
Now, the stimulus to create the eye diagram and the mask to judge its success are both ready. Let’s run a<br />
simulation and see whether our USB topology will actually work.<br />
Creating the Eye Diagram<br />
Close the Configure Eye Diagram dialog box; set the oscilloscope's display to a horizontal scale of 500 ps/div,<br />
a vertical scale of 200 mV/div, and a vertical position of –400 mV; set the horizontal delay to 1.4 ns; attach a<br />
differential probe to the receiver pins Device.D+ and Device.D-; and use Lossy > Enable Lossy Simulation to<br />
turn on lossy analysis:<br />
1. Click OK to close the Configure Eye Diagram dialog box.<br />
mk:@MSITStore:D:\<strong>HyperLynx</strong>75\demo.chm::/demo/linesim_s_ghz_level_fe...<br />
页码,10/11<br />
2007-3-26
LineSim's GHz Features<br />
2. In the oscilloscope, in the Horizontal Scale area, click the down arrow button once to set the horizontal<br />
scale to 500 ps/div.<br />
3. In the Vertical Scale area, click the down arrow button twice to set the vertical scale to 200 mV/div.<br />
4. In the Vertical Position area, in the box, type “-400”.<br />
5. In the Horizontal Delay area, in the box, type “1.4”.<br />
6. In the Show area, click the Eye Mask check box to enable it. A portion of a mask appears in the<br />
oscilloscope’s viewer.<br />
7. At the right edge of the oscilloscope’s viewer, drag the horizontal scroll bar down until a dashed green<br />
ground line appears in the center of the viewer. Positioned symmetrically around the green line, you<br />
should also see a six-sided blue shape that defines the eye mask’s keep-out region.<br />
8. Then click the Attach Probes button. The Attach Oscilloscope Probes dialog box appears.<br />
9. Verify that two differential probes (red and yellow) are set, one for the driver pin pair (Host.D+/-), and one<br />
for the receiver (Device.D+/-).<br />
0. Click OK to close the dialog box and return to the oscilloscope.<br />
1. In the Show area, note that both the red and yellow probes are enabled. Since we’re interested in the eye<br />
diagram only at the receiver IC, click the red probe’s check box to disable it.<br />
2. Finally, before simulating, from LineSim’s main menu, on the Lossy menu, select Enable Lossy<br />
Simulation. (This is essential to producing an accurate eye diagram.)<br />
Now, generate the eye diagram: click the Start Simulation button.<br />
It takes longer to generate an eye diagram than a regular single-edge simulation, since so many switching<br />
edges have to be generated. Still, unless your computer is very slow, this 330-bit diagram builds at a<br />
reasonable speed. Note that unlike SPICE and other analog simulation tools, LineSim does not make you wait<br />
until the simulation is finished to see the results – instead, you actually see the eye diagram being built in realtime.<br />
This is sometimes quite advantageous, because it makes it quick to see whether you’ve made an error<br />
in your set-up; if so, you can stop the simulation immediately and not waste time on a “bad” simulation.<br />
Note that this eye is fairly "open," indicating reasonable signal quality. To see this very clearly, you can center<br />
the eye mask on the eye.<br />
Click the Adjust Mask button, and drag the mask with the mouse until it is centered:<br />
1. Below the oscilloscope display window, click the Adjust Mask button.<br />
页码,11/11<br />
2. In the display window, place the mouse near the center of the mask’s keep-out region, then drag the mask<br />
with the mouse button down, until the mask is reasonably centered in the eye.<br />
Now you can see exactly how open your eye is compared to the USB 2.0’s requirements, and judge whether<br />
your margin is sufficient.<br />
Note how easy it was to generate a complex eye diagram: we switched the oscilloscope's mode, selected<br />
some parameters (including a built-in stimulus pattern and eye mask), and clicked Start Simulation. After a<br />
brief delay, we had an eye diagram to look at.<br />
Although in this case we used IBIS models, you can use exactly the same procedures in LineSim or<br />
BoardSim to drive a SPICE simulation. There, the set-up savings are tremendous: defining eye-diagram<br />
stimulus (including jitter and bit-skipping) in a SPICE netlist is tedious and error-prone.<br />
Click here to continue with the front-to-back <strong>HyperLynx</strong> demonstration; next, we look at how to plan<br />
stackups and trace impedances.<br />
Click here to return to the main menu.<br />
mk:@MSITStore:D:\<strong>HyperLynx</strong>75\demo.chm::/demo/linesim_s_ghz_level_fe...<br />
2007-3-26
Modeling a PCB Stackup<br />
Modeling a PCB Stackup<br />
Introduction<br />
LineSim and BoardSim include a special editor for creating and planning PCB stackups.<br />
In LineSim, you can create a stackup, then tie any of the transmission lines in a schematic to the stackup.<br />
(For each line, you specify a trace width and select which layer of the stackup the line is on.) If you<br />
subsequently change the stackup, every line tied to the stackup changes its impedance and delay<br />
automatically.<br />
In BoardSim, a stackup usually accompanies the .HYP file representing your PCB. If the stackup is not correct<br />
or – more importantly – if you want to alter it to see how the stackup affects your board's signal-integrity,<br />
crosstalk, and EMC behavior, you can use the stackup editor to make changes. BoardSim's built-in field<br />
solver immediately recalculates all of the trace impedances/delays on your board in response.<br />
But the stackup editor is more than just a way to manage a stackup during simulation of a transmission-line<br />
schematic or a PCB – it's really a powerful tool for planning stackups, designing controlled impedances, and<br />
even documenting stackups for your PCB fabricator. In the next few sections, you'll see some examples of<br />
how the <strong>HyperLynx</strong> stackup editor accomplishes these goals.<br />
Note: In this demonstration version of <strong>HyperLynx</strong>, some of the parameters in the stackup editor cannot be<br />
edited, for example dielectric constants. However, in spite of this limitation, you'll easily see in the following<br />
examples how useful the stackup editor is as a planning tool.<br />
Overview of the Stackup Editor<br />
页码,1/3<br />
It is possible to view the stackup in any LineSim design. A default stackup is created every time you create a<br />
new LineSim schematic. (The details of the default stackup are user-definable.) Here, we'll open – just for<br />
purposes of looking at the stackup – a design that is used in another section of this demonstration.<br />
Load the demo schematic "XT_Trace_Separation.ffs" using File > Open LineSim Schematic; then open the<br />
stackup editor and select the Basic tab:<br />
1. Close any open dialog boxes.<br />
2. On the File menu, select Open LineSim Schematic. A dialog box opens.<br />
3. Double-click on the file name "XT_Trace_Separation.ffs". The dialog box closes and a schematic appears<br />
in LineSim's editor.<br />
4. On the Edit menu, select Stackup. The Stackup Editor dialog box opens.<br />
5. Verify that the Basic tab is selected.<br />
First, note some of the features of the stackup editor. On the left, the data defining the stackup is entered in a<br />
spreadsheet; each row of the spreadsheet represents one layer – metal or dielectric – in the stackup. On the<br />
right is a graphical view, which visually summarizes the key data (like layer names and thicknesses) in the<br />
stackup.<br />
The complete set of data that makes up or affects a stackup is complex. To help you navigate this information<br />
efficiently, the stackup editor uses a series of tabs to sub-divide the data. Let's take a quick look at what each<br />
tab contains:<br />
The Basic tab is the one you're looking at currently. It places the most commonly accessed data defining the<br />
stackup in one convenient location. You can use this tab to set each layer's type (e.g., is it metal or dielectric?;<br />
signal or plane,?; etc.); to change layer thicknesses; to set dielectric constants; and to find out the impedance<br />
of each layer, for any trace width. You can also control the units of the stackup parameters (metric/English;<br />
thickness/weight) from this tab. For basic design work, you may rarely need to access any tabs other than this<br />
one.<br />
Click on the Dielectric tab.<br />
The Dielectric tab contains more-detailed information about the dielectric layers in your stackup. From here,<br />
you can specify whether each dielectric layer is made of "core" or "prepreg" material, whether the dielectric<br />
constant on metal layers should automatically be the same as that on surrounding dielectric layers or be<br />
entered as a "custom" value, and what the loss tangent of each layer's dielectric material is. (Loss tangent<br />
determines how much dielectric loss there is during lossy simulations.)<br />
mk:@MSITStore:D:\<strong>HyperLynx</strong>75\demo.chm::/demo/modeling_a_pcb_stackup...<br />
2007-3-26
Modeling a PCB Stackup<br />
Click on the Metal tab.<br />
The Metal tab contains more-detailed information about the metal layers in your stackup. (Re-size the<br />
stackup-editor dialog box or scroll horizontally, if needed, to see all columns in the spreadsheet.) You can<br />
specify what type of metal is used on each layer, and if a "custom" metal is chosen, what its resistivity and<br />
temperature coefficient of resistivity are. (Resistivity affects lossy simulations.) As on the Basic tab, you can<br />
set "test" trace widths for each layer and instantly see what impedances result. On this tab, impedances also<br />
appear in the stackup's graphical view.<br />
Click on the Z0 Planning tab.<br />
The Z0 Planning tab offers a special set of features for planning controlled-impedance stackups. This is a<br />
powerful feature in <strong>HyperLynx</strong> that uses the built-in boundary-element field solver to find optimal geometric<br />
solutions for desired "target" impedances. In the next section, we'll look in more detail at impedance planning.<br />
Click on the Custom View tab.<br />
The Custom View tab lets you build up your own version of the stackup spreadsheet, displaying whatever<br />
combination of columns/data is most useful to you.<br />
How to Do Impedance Planning<br />
页码,2/3<br />
In high-speed design, it's often necessary to plan stackups and trace widths in such a way that traces have<br />
certain desired characteristic impedances. Some standard buses, for example, mandate that trace<br />
impedances be in a certain range, e.g., 60 - 100 ohms.<br />
Designers often rely on reference books or closed-form equations to perform such impedance planning. But<br />
the <strong>HyperLynx</strong> stackup editor is a considerably better way to plan impedances than "manual" methods, for<br />
several reasons. First, it's more accurate: rather than relying on equations, which are approximate and suffer<br />
from significant error outside certain geometric ranges, the stackup editor runs a powerful, fast field solver in<br />
the background to accurately calculate impedance (and delay). Second, it's faster: the stackup editor's Z0<br />
Planning tab has a "back solver" which instantly calculates geometric values (like trace width) based on<br />
desired target impedances.<br />
Click again on the Basic tab; adjust the spreadsheet's horizontal scroll bar, if needed, to see the Test Width<br />
and Z0 columns, at the far right of the spreadsheet.<br />
Note that on this tab, the impedance of each signal layer in the stackup is displayed in the Z0 column. Of<br />
course, impedance can be calculated only for a specific trace width; you specify the width for each layer's<br />
traces in the Test Width column. In this demonstration version of the software, you can't change some of the<br />
values in the spreadsheet (like the width), but in the real program you can quickly alter trace width, dielectric<br />
constant, etc. to see exactly how each change affects impedance. Let's try changing a dielectric thickness and<br />
see how it affects trace impedance:<br />
Change the thickness of the dielectric on layer 3 to 5 mils; note the instantaneous impedance change:<br />
1. In row 3 in the spreadsheet (the top-most dielectric layer), click in the Thickness column and type to<br />
change the value to "5". Press or click some other cell in the spreadsheet to tell the stackup<br />
editor to accept the new value.<br />
2. Note how the impedance value for signal layer 2 ("TOP") changes instantly from 73.1 ohms to 51.4 ohms.<br />
The response from the field solver is instantaneous. Performing what-if changes like this in an interactive<br />
spreadsheet tied directly to a field solver is much faster and less error-prone than calculating impedances with<br />
approximate equations or reference charts.<br />
Now click on the Z0 Planning tab; verify that the Plan For combo box is set to Single Trace:<br />
1. Click on the Z0 Planning tab.<br />
2. Verify that the Plan For combo box in the stackup editor's lower left is set to Single Trace mode. This tells<br />
the editor that we're currently interested in the impedances of single traces, not differential pairs.<br />
This tab gives you an even faster and more powerful way of planning impedances. Note the Target Z0<br />
column; in these cells you can specify a desired impedance for each signal layer. In this example, 75 ohms is<br />
achieved on the bottom layer at about 7.5 mils width, and on the other signal layers at about 3.3 mils. Let's try<br />
changing the target impedance to force a different geometric solution.<br />
Change the target impedance of layer 2 to 50 ohms; note how quickly a new trace width is calculated:<br />
mk:@MSITStore:D:\<strong>HyperLynx</strong>75\demo.chm::/demo/modeling_a_pcb_stackup...<br />
2007-3-26
Modeling a PCB Stackup<br />
1. In row 2 of the spreadsheet, click in the Target Z0 column and type to change the value to "50". Press<br />
or click some other cell in the spreadsheet to tell the stackup editor to accept the new value.<br />
2. Note how layer 2's value of Width changes instantly to about 8.4 mils, which is the trace width required on<br />
this layer to match the new target Z0.<br />
Impedance Planning for Differential Pairs<br />
The Z0-planning feature works also for differential pairs, helping you to find target differential impedances as<br />
easily as single-trace Z0's. (Differential signaling is widely used at very high data rates, especially in SERDES<br />
designs.) Let's look at an example.<br />
Change the impedance strategy in the Plan For combo box to Differential Pair; verify that the Strategy combo<br />
box is set to Solve for Separation:<br />
1. In the Plan For combo box in the stackup editor's bottom left, change the selection to Differential Pair.<br />
Note that the title of the Target Z0 column changes to Diff Z0.<br />
2. Verify that the Strategy combo box is set to Solve for Separation.<br />
页码,3/3<br />
With these changes, the stackup editor now interprets the target Z0 values as the differential impedance of a<br />
pair of traces. Setting the Strategy combo box to Solve for Separation means that the editor is solving for the<br />
trace separation (or "gap") that, given the specified trace width, meets the target differential impedance.<br />
For the inner signal layers, the solved-for separation value is about 4.5 mils. But what about for the outer<br />
layers – the gap value reads "error." Is this a problem with the software? No! The stackup editor is telling you<br />
that with the current stackup, differential impedances of 50 and 75 ohms are physically impossible on the<br />
outer layers. If we had more time in this demonstration, we could change the geometry of the stackup to make<br />
75 ohms physically possible (or we might want to target a higher differential impedance, like 100 ohms).<br />
For differential pairs, you can also specify the separation and solve for trace width (the opposite of what we<br />
just did), or most powerfully of all, solve for both separation and width simultaneously. Let's look at an<br />
example of solving for both.<br />
Change the impedance strategy using the Strategy combo box to Solve for Both; click layer 12's (BOTTOM's)<br />
View button to display a curve of width-vs-separation for 75 ohms differential impedance:<br />
1. In the Strategy combo box, change the selection to Solve for Both. The Width and Gap columns gray out<br />
and View buttons appear in the Z0 Curve column for each layer.<br />
2. In row 12 (layer BOTTOM), click the View button in the Curve column. After a few seconds of running the<br />
field solver, a dialog box appears.<br />
The resulting graph shows a curve of constant 75-ohm differential impedance (the target impedance for this<br />
layer), allowing you to choose a range of either trace widths or separations, and read for each value the<br />
corresponding other value. For example, the curve shows that at 5 mils separation, you need a trace about 17<br />
mils wide to achieve 75 ohms differential impedance. You can see now why at our earlier trace width of 8<br />
mils, 75 ohms differential Z0 was physically impossible: the trace separation would have been nearly zero to<br />
achieve the target.<br />
There are still many features in LineSim that we have not explored, but in the interest of time, let's see how<br />
you'd analyze a simple PCB in the <strong>HyperLynx</strong>'s post-layout analysis tool, BoardSim. This part of the<br />
demonstration will show how BoardSim handles both interactive and batch-mode simulation. At the end of the<br />
demo, you are welcome to explore any of the features we have not highlighted here.<br />
Click here to continue with the front-to-back <strong>HyperLynx</strong> demonstration; next we move to a<br />
demonstration of post-layout signal-integrity, crosstalk, EMC, and GHz-level analysis, using<br />
BoardSim.<br />
Click here to return to the main menu.<br />
mk:@MSITStore:D:\<strong>HyperLynx</strong>75\demo.chm::/demo/modeling_a_pcb_stackup...<br />
2007-3-26
Post-Layout Analysis: BoardSim and Batch Mode<br />
Post-Layout Analysis: BoardSim and Batch Mode<br />
User Quotes<br />
I couldn't do my job without it.<br />
- Hardware Engineer, PC Motherboard Manufacturer<br />
I immediately installed it and was simulating my design within two hours.<br />
- Electrical Engineer, University Radiation Oncology Dept.<br />
Testing of our prototypes agreed with what we had seen using BoardSim and reaffirmed our<br />
confidence that we had the best possible signal integrity solution. Board Wizard allowed me to<br />
check the entire board in seconds by setting up parameter checks. It would have taken days to<br />
check all the nets manually. The frequency response of components could be displayed allowing<br />
easier selection of items such as ferrite beads. BoardSim provides all the information needed to<br />
ensure a reliable board design and does so in an easy and intuitive manner.<br />
- Hardware Engineer, Leading Avionics Manufacturer<br />
...The risk of transmission line-induced faults on a board of this size easily justifies the purchase<br />
price of this product.<br />
- Engineer, Imaging System Manufacturer<br />
I received my first pass of the routed 16 layer card ... and <strong>HyperLynx</strong> paid for itself in the first<br />
four hours of use ... I'm very happy with both the product and the support.<br />
- Hardware Engineer, Computer Systems Integrator<br />
Introduction<br />
If you started this demonstration at the beginning, you've already seen how LineSim can help you prevent<br />
signal-integrity, crosstalk, EMC, and GHz-level SERDES problems even before you begin PCB layout. (Click<br />
here if you want to go through the LineSim/pre-layout portion of the demo before reading this section.)<br />
Using the data from your actual routed PCB layout, BoardSim moves <strong>HyperLynx</strong>'s analysis into the postlayout<br />
phase of your design cycle. Typically, BoardSim is used after placement and routing; the analysis is<br />
based on the actual details of your board's routing. But you can also analyze a board as soon as it's placed,<br />
before routing (using Manhattan routes that BoardSim creates); or when your board is placed and only<br />
partially routed.<br />
How BoardSim Works<br />
BoardSim reads the data representing a routed PCB and performs signal-integrity, crosstalk, and EMC<br />
analysis on the actual layout. In BoardSim, signal-integrity and crosstalk results appear either as signal<br />
waveforms in an oscilloscope (interactive mode) or in a multi-net analysis report (batch mode). EMC analysis<br />
works the same way, except that it occurs in the frequency domain and interactive results appear in a<br />
spectrum analyzer. Eye diagrams for high-speed serial designs are produced in BoardSim's oscilloscope.<br />
Translating your Board into BoardSim's Format<br />
In actual use, the first step for running BoardSim is to translate your PCB layout into BoardSim's file format<br />
(".HYP"). In some PCB-layout tools, a BoardSim translator is built-in and accessed from a menu pick; for<br />
other tools, you run an external translator supplied with BoardSim. Either way, the end result is a .HYP file<br />
that can be read by BoardSim.<br />
BoardSim supports the following PCB-layout tools (check with Mentor Graphics for the latest,<br />
updated list):<br />
� Accel EDA<br />
� Cadence Allegro<br />
� Mentor Graphics Board Station<br />
mk:@MSITStore:D:\<strong>HyperLynx</strong>75\demo.chm::/demo/post_layout_analysis_b...<br />
页码,1/8<br />
2007-3-26
Post-Layout Analysis: BoardSim and Batch Mode<br />
� Mentor Graphics Expedition<br />
� PADS Layout<br />
� SPECCTRA DSN<br />
� Valor ODB++<br />
� Zuken CR-3000<br />
� Zuken CR-5000 Board Designer<br />
� Zuken Visula / CADSTAR for Windows<br />
Note that BoardSim may be able to interface to PCB-layout tools not listed above through the SPECCTRA (or<br />
"CCT") format, since almost all PCB-layout tools can write a SPECCTRA DSN file.<br />
For this portion of the demo, the .HYP file has already been created for you. It's called "Demo.hyp."<br />
Loading and Viewing a PCB<br />
Of all the signals on a PCB, clock nets are typically the most critical from signal-integrity, crosstalk, and EMC<br />
standpoints. (SERDES-based designs may not even use clock signals, but here we're discussing traditional,<br />
synchronous designs.) Let's see how BoardSim could help you check the clock and other edge-sensitive nets<br />
on a board, based on the actual routed layout.<br />
LineSim could have prevented many of the problems you're about to see! LineSim is an excellent tool<br />
for solving signal-integrity, crosstalk, and EMC problems early in the design cycle, before you begin PCB<br />
layout. Problems like those you're about to see on the demo PCB – for example, clock nets that are<br />
improperly designed – can also be solved up-front, before time is invested in board layout.<br />
However, other types of problems can only be found after PCB layout. For example, even a properly<br />
designed net can be negatively affected by the layout process, e.g., if the trace's length is not constrained<br />
properly during routing, or if the router can’t meet the constraint that was set, or if a net wanders through<br />
too many vias. Also, it is sometimes difficult to pre-plan nets beyond the truly critical ones on a board.<br />
Addressing these kinds of problems is the purpose of BoardSim.<br />
Load the Demo Board "Demo.hyp"<br />
Let's begin by loading the demo PCB.<br />
Load the demo PCB "Demo.hyp" using File > Open BoardSim Board:<br />
1. If you previously ran the LineSim portion of the demo, close any open dialog boxes.<br />
2. On the File menu, select Open BoardSim Board. A dialog box opens.<br />
3. Double-click on the file Demo.hyp.<br />
Since the demo board is small, loading takes only a few seconds. When loading is done, you see the board in<br />
BoardSim's viewer.<br />
About the Demo Board<br />
The demo board is admittedly a very simple mixed-technology PCB (through-hole and surface-mount); trace<br />
widths are fairly large. The board is not completely routed. We've deliberately kept the board small so that it’s<br />
easy to focus on a few key features.<br />
In real use, BoardSim runs with PCBs of any size; the only limit is the amount of memory in your computer.<br />
<strong>HyperLynx</strong> customers routinely run BoardSim on a huge variety of PCBs, including very large designs.<br />
The Board Viewer<br />
页码,2/8<br />
Notice that BoardSim includes a physical board viewer. If you don't have access to your PCB-layout software<br />
(e.g., your boards are laid out by a service bureau, or on a UNIX workstation but you work on a PC),<br />
BoardSim provides a convenient way to view your board. And as we’ll see a few examples of later,<br />
BoardSim’s viewer has special features (not found in PCB layout tools) that appeal to electrical engineers.<br />
Right now, the viewer is showing the demo board's entire layout, including each net's routing, as well as the<br />
PCB's outline, component outlines, and reference designators. Once we begin simulating specific nets in the<br />
mk:@MSITStore:D:\<strong>HyperLynx</strong>75\demo.chm::/demo/post_layout_analysis_b...<br />
2007-3-26
Post-Layout Analysis: BoardSim and Batch Mode<br />
next section, the nets being analyzed will be shown in the foreground and other nets will “dim” into the<br />
background.<br />
Batch Analysis of the Entire Board for Signal-Integrity, Crosstalk, and<br />
EMC Problems<br />
BoardSim includes a powerful batch-mode feature (organized as a step-by-step “wizard”) which allows you to<br />
scan/simulate your entire PCB in a single operation. The batch wizard offers both a set of "quick-analysis"<br />
features that can run very quickly on an entire PCB, scanning for likely signal-integrity, crosstalk, and EMC<br />
problems; and detailed-analysis features which perform automated simulations on a selected set of nets,<br />
reporting accurate “flight times” for each net and analyzing in detail for other parameters, such as overshoot,<br />
threshold violations, and crosstalk. Many of these can be automatically checked against user-defined<br />
"violation" limits, which, for example, can flag nets with out-of-range delays, excess overshoot, or crosstalk,<br />
and so forth.<br />
The batch quick-analysis features are an excellent place to begin if you don't know where on your board<br />
problems may lie. Results are reported in a text output file that you can use to guide further, more-detailed<br />
analysis. Quick analysis makes a great planning tool, for example, if you didn’t perform much pre-layout<br />
analysis, just got a board back from layout, and want to get a quick idea of your design's quality.<br />
In this section of the demonstration, we'll concentrate on quick analysis, and run it on the entire demo board.<br />
In the next section, we'll try a few of the detailed-simulation features on a set of critical nets.<br />
Run Quick Analysis on the Entire Demo Board<br />
Run the batch quick-analysis features on the demo PCB, using Simulate > Run Batch Simulation; set the<br />
default rise/fall time to 2 ns for this example.<br />
1. On the Simulate menu, select Run Batch Simulation. The batch-mode “wizard” dialog box opens.<br />
2. Set the check boxes on the wizard's first page as follows: the first six Quick Analysis check boxes<br />
enabled, and the remainder disabled; both Detailed Simulations check boxes (near the top) disabled. This<br />
will include the most-interesting information in the wizard's quick-analysis report, and leave detailed<br />
simulations disabled for now.<br />
3. Click Next twice, so that you move to the Batch-Mode Setup - Default IC Model Settings page.<br />
4. In the Rise/Fall Time box, verify that the default switching time is set to 2 ns.<br />
5. Click Next several more times, until the Batch-Mode – Run Simulation and Show Results page and the<br />
Finish button appear. Click Finish.<br />
Notice that we didn’t bother specifying specific IC models for the nets on the PCB; on the Default IC Model<br />
Settings page, we told the batch engine to assume that any nets not yet populated with models have driver<br />
ICs with approximately 2-ns switching times. (On this board, some nets do have models assigned, but others<br />
don’t.) The ability to assign “default” IC characteristics allows you get results quickly, even before you make<br />
detailed model assignments.<br />
The batch wizard's quick analysis begins running, reporting its percent-done status as it analyzes the nets on<br />
the board. Because the demo board is small, the wizard's analysis – even though it includes every net on the<br />
board – takes only seconds to complete. The <strong>HyperLynx</strong> File Editor opens on the wizard’s output.<br />
Examine the Batch Quick-Analysis Output<br />
The file viewer has special searching capabilities (when it’s opened by the batch wizard) for finding signalintegrity<br />
violations.<br />
Search for warnings in the report file using the yellow "find warning" button (button is yellow with a black<br />
checkmark):<br />
1. In the file viewer, click the yellow "Find Warning" button (yellow with a black checkmark). The viewer<br />
jumps to the first location of the text "warning."<br />
2. Click the Find Warning button several more times. The Viewer jumps to various nets that are likely to have<br />
signal-integrity problems because they are physically long but have no termination, or that have nonoptimal<br />
terminating-component values.<br />
You can use the batch wizard to automatically identify "problem" nets, and as a guide to further detailed<br />
analysis and problem fixing.<br />
mk:@MSITStore:D:\<strong>HyperLynx</strong>75\demo.chm::/demo/post_layout_analysis_b...<br />
页码,3/8<br />
2007-3-26
Post-Layout Analysis: BoardSim and Batch Mode<br />
For example, look at the wizard's report for the net "datald":<br />
1. In the file viewer, on the Edit menu, select Find. A dialog box opens.<br />
2. In the Find What box, type "datald". Click to enable the Wrap Around Search check box.<br />
3. Click the Find Next button.<br />
The viewer jumps to net "datald's" section. Here the batch engine is reporting that "datald" has no terminator,<br />
but given the default rise/fall time of 2 ns, "datald" is too long to be unterminated. The wizard gives a<br />
suggestion for the maximum length of the net, if it remains unterminated.<br />
Close the file viewer:<br />
� In the viewer (not in BoardSim), on the File menu, select Exit.<br />
Detailed Batch Analysis of Critical Nets<br />
Now let's re-run batch-mode analysis, but this time using the batch wizard's detailed-analysis capabilities on<br />
several of the demonstration PCB's nets. Compared to the quick-analysis features that we just ran, the<br />
detailed simulations offer an additional level of accuracy that can report, at every receiver-IC pin on a net,<br />
detailed min and max flight times, overshoots, threshold violations, and crosstalk levels. On a real PCB, of<br />
course, you would be likely to examine a much larger set of nets than we will in this brief demo. However,<br />
even one or two nets are enough to show quickly how the batch feature’s detailed simulations work.<br />
Note: For detailed simulation, the Board Wizard is capable of performing not only signal-integrity, but also<br />
crosstalk and EMC analysis. In this example, we'll look at the signal-integrity features, and later in this<br />
demonstration, at crosstalk features.<br />
In general, there are two major reasons that designers run batch-mode signal-integrity simulations. One is to<br />
find out what the min and max delays (or “flight times”) on a collection of nets are. This makes sense: digital<br />
design is heavily centered on timing, and with today’s tighter margins, it’s important to include the effects of<br />
interconnect delays in timing budgets. The second reason is to scan for other (non-timing) kinds of signalintegrity<br />
trouble, for example, overshoot or crosstalk problems. (You can look for both types of issues<br />
simultaneously using BoardSim’s batch feature.)<br />
In the following sections, let’s simulate an example net, first with an eye to calculating accurate timing delays,<br />
and then with a focus on non-timing signal-integrity issues.<br />
Improve the Signal Integrity on Net “datald”<br />
In a moment, we’ll run some batch simulations of the demo PCB’s net “datald.” Before we do it, though, let’s<br />
improve the signal quality on the net, so that we get realistic results. First we'll interactively assign an IC<br />
model to U3, pin 20.<br />
Select net “datald”; assign the CMOS,5V,FAST model to U3, pin 20 and set it to output state:<br />
1. On the Select menu, choose Net by Name. A dialog box opens.<br />
页码,4/8<br />
2. In the list of nets, look for “datald,” and double-click on it. The dialog boxes closes. In the board viewer,<br />
note that most of the board’s routing appears “dimmed,” in the background, except for a net (the one you<br />
just selected) in the PCB’s lower left.<br />
3. On the Select menu, select Component Models or Edit Values. The Assign Models dialog box opens.<br />
4. In the Pins list box, double-click on "U3.20". The Select IC Model dialog box opens.<br />
5. Click the EASY.MOD button to select a library of <strong>HyperLynx</strong>-supplied generic “technology” models.<br />
6. In the Devices list box, double-click on the model CMOS,5V,FAST. The Select IC Model dialog box<br />
closes.<br />
7. In the Buffer Settings area, click the Output radio button. Then click Close. U3, pin 20 is now modeled as<br />
a fast 5V CMOS driver.<br />
Now we'll run the Terminator Wizard to automatically identify and apply optimal termination to improve the<br />
signal integrity on net "datald."<br />
Run the Terminator Wizard on it and apply the series resistor it recommends:<br />
mk:@MSITStore:D:\<strong>HyperLynx</strong>75\demo.chm::/demo/post_layout_analysis_b...<br />
2007-3-26
Post-Layout Analysis: BoardSim and Batch Mode<br />
1. On the Wizards menu, select Run Terminator Wizard. A dialog box opens.<br />
2. Note that the wizard is recommending that a series terminator be added to the net, to improve signal<br />
quality. In cases where a terminator is recommended but isn’t present in the routed design, the Terminator<br />
Wizard can add the terminator "virtually,” with the appropriate component value. (BoardSim calls this a<br />
“Quick Terminator.”) Add the terminator to “datald” by clicking the Apply Values button. Click OK to close<br />
the wizard.<br />
Calculate Flight Times for Net “datald”<br />
Now, we’re ready to run some batch-mode simulations and calculate flight times. Run the Board Wizard's<br />
detailed-simulation feature on net "datald"; run signal-integrity simulation only (not EMC); for output reporting,<br />
choose the CSV file:<br />
1. On the Simulate menu, select Run Batch Simulation. The batch-wizard dialog box opens.<br />
2. On the first page of the Wizard, disable all of the Quick Analysis features (turn "off" their check boxes);<br />
then in the Detailed Simulations area, enable the Run Signal-Integrity and Crosstalk Simulations check<br />
box. (Leave the Run EMC Simulations check box disabled.) Click Next, so that you move to the Select<br />
Nets and Constraints for Signal-Integrity Simulation page.<br />
3. Click the SI Nets Spreadsheet button (in the upper left). This opens a spreadsheet in which you can select<br />
nets for detailed signal-integrity analysis and set constraints for them. (You can re-size the spreadsheet, if<br />
you wish, to make it bigger.)<br />
4. All of the nets on the PCB are listed, in alphabetic order. Locate net “datald,” near the top of the list.<br />
Enable simulation for this net by clicking once in its SI Enable column. When you make the selection, the<br />
previously grayed-out columns turn white and “activate.”<br />
5. For this net, we’re mostly interested in getting min/max interconnect delays in the batch feature’s output<br />
report. The default rules for overshoot are a little “strict,” so reduce them: in each of the Max Rise (and<br />
Fall) Rail Overshoot and Max Rise (and Fall) SI Overshoot columns (four columns total), type “1000” to<br />
allow 1V of margin. Then click OK to close the spreadsheet.<br />
6. In the wizard, click Next, so that you move to the Set Driver/Receiver Options page. Make/verify the<br />
following settings: Driver Round Robin off (later, we’ll enable it); and Fast-Strong, Typical, and Slow-Weak<br />
IC-model corners all on. (Leave other settings at their defaults.)<br />
7. Click Next to move to the Set Delay and Transmission-Line Options page. Click to enable the Flight-Time<br />
Compensation check box.<br />
8. Click Next four times, making no more changes until you move to the Select Reporting Options page. In<br />
the After the Batch Run Completes area, click to disable the Summary Report File check box, and to<br />
enable the CSV File check box. Leave the “If opening Excel, auto-format” check box disabled.<br />
Here’s what you’ve done in the preceding steps:<br />
� enabled detailed simulation on net "datald"<br />
页码,5/8<br />
� enabled simulation at all IC operating “corners” (i.e., told the batch engine to run three sets of simulations,<br />
one with the IC models in their Fast-Strong settings, one in Typical, and one in Slow-Weak); this will<br />
produce valid, worst-case min and max delays in the output report<br />
� enabled “flight-time compensation,” meaning that for each driver-to-receiver pin pair in the output report,<br />
the delays will automatically have the driver’s “time-to-Vmeasure” value subtracted; this means that the<br />
flight times can be added directly to a timing spreadsheet<br />
If you’re not familiar with “flight-time compensation” or “driver time-to-Vmeasure,” see the next paragraph.<br />
About flight-time compensation: The delays reported in signal-integrity simulations (like the one we’re<br />
about to run) are intended to represent the interconnect delays between drivers and receivers on your<br />
routed PCB. You can add these delays to your timing spreadsheet to make your calculations more<br />
accurate.<br />
However, there’s a possible problem: the Tco (clock-to-output) delays for driver ICs in your spreadsheet<br />
already contain built-in delays that represent what happens outside the IC when it drives a load. Worse,<br />
the built-in delay is into some reference load (like a 15-pF capacitor) that doesn’t match the actual<br />
transmission-line load on your board. If you add to Tco in your spreadsheet the delays calculated by<br />
BoardSim, you’ll account for two output loads: you’ll get the effects of both the real transmission-line load<br />
(calculated by BoardSim) plus the reference load (assumed by your IC vendor in the datasheet Tco).<br />
mk:@MSITStore:D:\<strong>HyperLynx</strong>75\demo.chm::/demo/post_layout_analysis_b...<br />
2007-3-26
Post-Layout Analysis: BoardSim and Batch Mode<br />
To eliminate this problem, if you enable the Flight-Time Compensation check box in the wizard, BoardSim’s<br />
batch engine will automatically determine how much reference-load delay is present for each driver’s Tco,<br />
and subtract this value from all reported delays. (The reference-load delay is sometimes called the driver’s<br />
“time-to-Vmeasure” value). With this "compensation” in place, you can add the batch report’s numbers<br />
directly to your timing spreadsheet, and your Tco values will automatically be adjusted to remove the effect<br />
of the extra, incorrect reference load.<br />
This is a valuable “bookkeeping” feature that BoardSim’s batch feature performs automatically for you. (It<br />
knows how to do this, by the way, based on simulating with reference-load information that’s contained in<br />
each driver’s IC model.)<br />
9. Now, click the Next button to move to the Run Simulation and Show Results page. Then click the Finish<br />
button. If queried about whether to overwrite the .RPT we previously generated, click Yes.<br />
After you click Finish, the batch-mode engine begins running, reporting its percent-done status. Because<br />
batch simulation was enabled on only one net, it does not take long to run; however, because we chose to<br />
simulate all three IC corners for the net, there are six simulations to perform (three corners X (rising + falling<br />
edges)).<br />
When the simulations have finished, the batch engine automatically writes out three files:<br />
� a CSV (comma-separated values) file, suitable for loading into a spreadsheet application or parsing with a<br />
custom script<br />
� a text file (“.RPT”) file suitable for viewing in a text editor<br />
� an SDF (“standard delay format”) file suitable for passing to timing-analysis and other tools that read the<br />
format<br />
Examine the Batch Engine’s Detailed-Simulation Output (CSV File)<br />
We chose to have the CSV file opened by the batch wizard. On many Windows computers, the .CSV<br />
extension is "associated” with Microsoft Excel; if it is on your machine, then Excel will open automatically on<br />
the results. (Excel may not come to the “top” of your desktop; look to see if it’s open and behind the<br />
<strong>HyperLynx</strong> windows.) If you do not have Excel or if the CSV extension is not mapped on your computer, then<br />
manually look for the output file DEMO-SI.CSV in the “Demo_files” sub-directory under wherever you installed<br />
the <strong>HyperLynx</strong> demo software. Open it, if possible, in a spreadsheet application.<br />
Note that the CSV data contains a header row (labeling the columns), and then a series of rows, each<br />
reporting simulation results. (If you want, you can reformat the spreadsheet to more easily see the headers. If<br />
we had chosen auto-formatting, the batch wizard would have attempted to do this automatically.)<br />
Look at the Driver, Receiver, and Simulation Corner columns. Note that for each IC-model corner we chose<br />
(Slow-Weak, Typical, and Fast-Strong), a row is output for each driver-receiver pin pair. Further to the right in<br />
each row are the automatically measured results of each simulation.<br />
For this batch run, we were interested primarily in the flight times associated with each pin pair. These are<br />
listed in the Rise (and Fall) Min (and Max) Delay columns. Since the values are compensated (with the Tco<br />
reference-load delay already removed), they are ready to be placed into a timing budget.<br />
If Excel or another tool is open on the CSV file, close it (we’ll let the batch wizard re-open it in the next<br />
section.)<br />
Run with Driver “Round Robin” and Some Non-Timing Constraints<br />
页码,6/8<br />
Now, let’s re-run net “datald,” but with some other batch-mode features enabled. (Again, if this were a real<br />
design, you would typically be running many more nets simultaneously – maybe hundreds or even thousands.<br />
But here, we’re trying to be quick and just show some basic features on a sample net.)<br />
Open the Assign Models dialog box; on the IC tab, assign U3.20’s model to all pins on the net; then use the<br />
Quick Terminator tab to remove the terminator you applied earlier:<br />
1. On the Select menu, choose Component Models or Edit Values. The Assign Models dialog box opens.<br />
2. With the IC tab selected, click once to highlight the first pin in the Pins list, then scroll down the list,<br />
watching the Buffer Settings area to the right. Notice that for the previous simulation, the first four pins in<br />
the list all had input-only (receiver) models attached, and pin U3.20 had an I/O pin that was manually set<br />
mk:@MSITStore:D:\<strong>HyperLynx</strong>75\demo.chm::/demo/post_layout_analysis_b...<br />
2007-3-26
Post-Layout Analysis: BoardSim and Batch Mode<br />
to state “output.” For the next simulation, we want to see what happens if all pins are I/Os, so…<br />
3. …with pin U3.20 highlighted, in the Buffer Settings area, click the Input radio button. In the Model to Paste<br />
area, click the Copy button, then click the Paste All button. Now scroll the highlight through the Pins list,<br />
and notice that every pin is assigned an I/O model, and all are currently set to state “input.”<br />
4. Select the Quick Terminator tab. For the next simulation, we’re also interested in seeing how signalintegrity<br />
violations of various types are flagged in the batch-mode results. One easy was to create some<br />
errors is to unterminate the net; so…<br />
5. …highlight pin U3.20 in the Pins list, then in the Terminator Style area, click the None radio button. Click<br />
Close to close the dialog box and click OK. If you get a warning that no pin has a driver, click OK.<br />
Here’s what you’ve done in the preceding steps:<br />
� changed all IC pins on net “datald” to have an I/O (bidirectional) model<br />
� unterminated the net to create some “interesting” signal-integrity problems<br />
Now, consider the current state of the net’s IC models: they’re all I/Os. This is the same situation as on any<br />
real, “multi-drop” net on which multiple I/Os exist, any one of which may turn on and drive at any time. What<br />
should be done in batch simulation for such a net?<br />
For a net populated with multiple bidirectional buffers, it’s important for timing delays to be calculated for each<br />
driver that can turn on. Maybe the maximum delay, for example, will occur when a driver at one end of the bus<br />
is enabled (but which end?); or maybe (because the driver has to drive two traces simultaneously), the longer<br />
delay will come from driving in the middle. You really can’t know for sure without running multiple sets of<br />
simulations, one for each possible driver.<br />
Setting up such simulations manually would be extremely time-consuming. Fortunately, BoardSim’s batch<br />
engine has an option called “driver round robin” which, if enabled, will automatically walk through all possible<br />
driver states, and run simulations for each. Let’s try running with it.<br />
Open the batch wizard; turn off IC corners other than Fast-Strong, and enable round-robin simulation; for<br />
reporting, again choose the CSV file:<br />
1. On the Simulate menu, select Run Batch Simulation. The batch-wizard dialog box opens.<br />
2. Click the Next button twice to move to the Set Driver/Receiver Options page. Click to enable the Driver<br />
Round Robin check box. In the IC-Model Corners area, disable the Typical and Slow-Weak check boxes<br />
(but leave Fast-Strong enabled).<br />
3. Click Next five times to move to the Select Reporting Options page. Verify that the Summary Report File<br />
check box is still disabled and CSV File is enabled.<br />
4. Then click Next, then Finish, to run a new set of simulations. If a message asks whether to overwrite the<br />
earlier report files, click Yes. (Make sure that Excel is not open currently on the old spreadsheet, so that it<br />
can be re-created.)<br />
The batch engine runs, reporting its status. When it completes, (as above) the results open in Excel or<br />
another application mapped to the .CSV file extension. (If no application is mapped, manually open the file<br />
DEMO-SI.CSV in a spreadsheet.)<br />
Examine the New Batch-Engine Output<br />
页码,7/8<br />
Notice some differences in the results this time compared to the previous. First, in the left-most column of the<br />
spreadsheet, note that some simulations are marked as “fail.” To see why, find a failing row, and look at its<br />
four Rise (and Fall) Overshoot Rail (and SI) columns. You’ll see that at least one column has a value greater<br />
than the 1-V constraint we set before the previous run.<br />
In general, the batch engine can automatically check and flag any simulation which fails any constraint you<br />
set in the Nets spreadsheet. (Look at the other reporting columns in the spreadsheet for more details on what<br />
kinds of measurements and constraints are supported.)<br />
In the results, notice also which simulations were performed. In the Simulation Corner column (near the left<br />
side), all simulations were marked as using the IC models’ Fast-Strong corner (as we requested). But in the<br />
Driver and Receiver columns, note that simulations occur in groups of four, with first one I/O being turned on<br />
and driving, and delays reported to each of the other four I/Os; then the first I/O turning off and the next<br />
turning on to drive; and so forth until all possibilities are exercised. This shows the automatic driver-roundrobin<br />
feature in action.<br />
mk:@MSITStore:D:\<strong>HyperLynx</strong>75\demo.chm::/demo/post_layout_analysis_b...<br />
2007-3-26
Post-Layout Analysis: BoardSim and Batch Mode<br />
页码,8/8<br />
Note that some users may wish to parse all of this delay data from the CSV file using a custom program or<br />
script. Since the CSV file is ASCII and simply formatted, this is not difficult to do. <strong>HyperLynx</strong> is committed to<br />
preserving the format of the CSV file, so any investment in custom scripting that a customer makes will be<br />
preserved in the future.<br />
Close Excel (or whichever spreadsheet application is open on the results.)<br />
Although there are many more advanced features which could be explored in BoardSim’s batch wizard, there<br />
isn’t time in this introductory demonstration to cover them. (You’re welcome to experiment with more of them<br />
or read about them in the Help system later, after completing this demo.)<br />
Click here to continue with the front-to-back <strong>HyperLynx</strong> demonstration; next, we look at more postlayout<br />
features in BoardSim.<br />
Click here to return to the main menu.<br />
mk:@MSITStore:D:\<strong>HyperLynx</strong>75\demo.chm::/demo/post_layout_analysis_b...<br />
2007-3-26
BoardSim's Crosstalk and Differential-Signal Features<br />
BoardSim's Crosstalk and Differential-Signal Features<br />
Introduction<br />
If you started this demonstration at the beginning, you've already seen how LineSim's signal-integrity,<br />
crosstalk, and EMC analysis features can help you identify and prevent signal-reflection and radiatedemissions<br />
problems early in the design cycle. You've also seen how BoardSim can be used for basic postlayout<br />
signal-integrity analysis (batch and interactive).<br />
BoardSim's Crosstalk option adds to the "base" BoardSim product the ability to perform crosstalk analysis of a<br />
board after layout. Crosstalk (like other signal-integrity problems) can negatively impact your final design and<br />
manifest as false clocking, intermittent data errors, or other difficult-to-find and potentially serious problems. It<br />
can also be difficult to know where crosstalk is likely to occur, and eliminating it can be even trickier than fixing<br />
single-trace signal-integrity problems.<br />
Click here if you want to review LineSim Crosstalk's description of crosstalk fundamentals before you<br />
continue.<br />
If you want to review BoardSim's uncoupled signal-integrity features, including batch and interactive modes,<br />
click here.<br />
How BoardSim's Crosstalk Analysis Works<br />
BoardSim allows you to simulate in both batch and interactive modes. Batch-mode simulation includes<br />
detailed simulation (with timing and crosstalk data saved into a report file), as well as a "Quick Analysis"<br />
feature that we saw earlier, that can rapidly scan your entire PCB. An aspect of Quick Analysis not highlighted<br />
earlier is a crosstalk feature that can provide a list – sorted from most to least – of the amount of crosstalk that<br />
could potentially appear on each of your board's nets. This list is particularly powerful because it helps you<br />
determine very quickly which nets on your board are likely to have crosstalk trouble, and merit further<br />
investigation.<br />
BoardSim Crosstalk also offers a unique way of automatically determining which nets are coupled to any net<br />
that is selected for simulation (interactively or in batch mode). Rather than forcing you to specify a geometric<br />
"zone" around each net in which to find aggressor nets, BoardSim Crosstalk allows you simply specify an<br />
electrical crosstalk threshold. For example, you can say, "I want to include all nets in simulation that could<br />
generate 100 mV or more of crosstalk on my victim nets," and BoardSim will automatically find them for you.<br />
This is a much easier, less-error-prone, more-powerful way of finding aggressor nets than by crude geometric<br />
methods.<br />
With BoardSim Crosstalk's features, you can:<br />
� quickly predict which nets are likely to suffer the most crosstalk, and have BoardSim determine<br />
automatically which nets are the likely "aggressors"<br />
� use electrical rather than geometric thresholds, for more-accurate and faster simulations (but geometric<br />
thresholds are available, too, in case you prefer them)<br />
� simulate a large number of nets in batch mode, with each net's numerical results (timing, overshoot,<br />
crosstalk) saved into a report file<br />
� simulate interactively to see in oscilloscope waveforms the exact amplitude of crosstalk on a victim net<br />
� see the effects on crosstalk results of changing parameters like stackup layer, dielectric thickness, driver-<br />
IC slew rate, driver impedance, line termination, and so forth<br />
� confidently design high-speed buses and other PCB structures that meet tight timing and low-crosstalknoise<br />
requirements<br />
� select termination strategies that greatly reduce or eliminate the crosstalk seen at receiver ICs<br />
Using BoardSim Crosstalk for Differential-Signal Analysis<br />
页码,1/7<br />
BoardSim's coupled-line analysis features are also valuable in the design of differential signals, since the<br />
same line-to-line coupling that causes unwanted crosstalk on unrelated signals also generates the differential<br />
impedance and other electrical characteristics important in differential signaling. Specifically, you can use<br />
BoardSim to:<br />
mk:@MSITStore:D:\<strong>HyperLynx</strong>75\demo.chm::/demo/boardsim_s_crosstalk_a...<br />
2007-3-26
BoardSim's Crosstalk and Differential-Signal Features<br />
� determine the differential impedance of trace pairs on your routed board, and observe the effects of<br />
stackup layer, dielectric thickness, and so forth<br />
� accurately simulate differential signals, taking into account the coupling between traces and the presence<br />
of nearby aggressor and reference (power/ground) traces<br />
� analyze both differential- and common-mode propagation, or any mix of the two<br />
� easily design terminations that work for both the differential- and common-mode components of your<br />
signals<br />
Crosstalk Example: Predicting Crosstalk on a Clock Net<br />
Suppose you're designing a critical clock net, and you want to guarantee that no more than 50 mV of crosstalk<br />
can be coupled onto the "victim" net from any nearby, "aggressor" nets. Let's see how BoardSim's Crosstalk<br />
option could help you meet this design goal.<br />
Load Board "Demo2.hyp"<br />
A typical net in a modern digital system will be in close proximity to many trace segments belonging to other<br />
nets. This makes the net a potential victim of crosstalk generated by the other nearby aggressor traces.<br />
The most important step to analyzing such a situation is accurately identifying all of the aggressors that<br />
contribute significantly to crosstalk on the victim net. In BoardSim Crosstalk, aggressors are automatically<br />
selected using an algorithm that chooses only those neighboring nets with the potential to generate crosstalk<br />
above a specified threshold on your victim net. This threshold is conveniently described in electrical terms<br />
(i.e., mV of crosstalk) rather than being geometric (although you have the option of using geometric<br />
thresholds, if you prefer).<br />
In this section of the demonstration, we'll use a board called "Demo2.hyp." It is the same PCB as used<br />
elsewhere in this demo to show BoardSim's non-crosstalk signal-integrity features, except that its IC models<br />
are set up differently to show more crosstalk amplitude (the ICs are faster). Let's begin by loading the HYP<br />
file.<br />
Load the board "Demo2.hyp" using File > Open BoardSim Board; use the Crosstalk menu to verify that<br />
crosstalk simulation is disabled:<br />
1. On BoardSim's File menu, select Open BoardSim Board. (If any dialog boxes are open from an earlier<br />
portion of this demonstration, close them first.) A dialog box opens. (If you’re prompted to save session<br />
edits, click No.)<br />
2. Double-click on the file name Demo2.hyp. The dialog box closes and a board layout appears in<br />
BoardSim's viewer.<br />
3. Click on the Crosstalk menu, and verify that Enable Crosstalk Simulation is disabled, i.e., not checked.<br />
This board has three clock nets, "clk," "clk2," and "clkin." Let's run an analysis of "clk2."<br />
Automatically Finding "Aggressor" Nets<br />
页码,2/7<br />
An important feature of BoardSim Crosstalk is that it automatically identifies which other nets are coupled<br />
strongly enough to the selected victim net to be "aggressors." You don't have to guess, or (like in other<br />
crosstalk-analysis tools) specify a geometric "zone" which you hope is wide enough to include all of the<br />
important aggressor nets. (For more information on this powerful capability, see the section "Electrical versus<br />
Geometric Thresholds" below.)<br />
Let's select net "clk2" and see which other nearby nets BoardSim Crosstalk thinks are likely to be aggressor<br />
nets.<br />
Select net "clk2" using Select > Net by Name; then enable crosstalk simulation using Crosstalk/Enable<br />
Crosstalk Simulation:<br />
1. On the Select menu, select Net by Name. A dialog box opens. In the Sort Nets By area, click on the Name<br />
radio button.<br />
2. Double-click on "clk2" to select the net. It appears in the board viewer, with other nets dimmed in the<br />
background.<br />
3. On the Crosstalk menu, select Enable Crosstalk Simulation.<br />
mk:@MSITStore:D:\<strong>HyperLynx</strong>75\demo.chm::/demo/boardsim_s_crosstalk_a...<br />
2007-3-26
BoardSim's Crosstalk and Differential-Signal Features<br />
By default, BoardSim Crosstalk searches for aggressor nets whose individual crosstalk contributions to the<br />
selected victim net exceed or equal 150 mV. Of course, you can adjust this threshold up or down as needed<br />
to meet the requirements of your particular boards and nets.<br />
Notice in the board viewer that only net "clk2" and its associated net "n00077" (they're connected together<br />
through a series resistor) are visible in the foreground. This means that BoardSim predicts that no other nets<br />
will generate 150 mV of crosstalk or more on net "clk2." (This demo board is low-density, for simplicity, so it's<br />
not surprising that it doesn't exhibit a lot of crosstalk.) But now let's adjust the threshold down and see if any<br />
nets exceed the new value.<br />
Drop the crosstalk threshold to 50 mV using Crosstalk/Crosstalk Thresholds:<br />
1. On the Crosstalk menu, select Set Crosstalk Thresholds. A dialog box opens.<br />
2. Verify that the Use Electrical Thresholds radio button is selected. In the Include Nets with Coupled<br />
Voltages Greater Than box, type "50."<br />
3. Click OK.<br />
Notice that more nets have now appeared in the foreground in the board viewer; each one shows with a<br />
dashed line. These are the aggressor nets that could potentially contribute more than 50 mV of crosstalk to<br />
the victim "clk2" net.<br />
Use Reports > Net Statistics to see exactly which nets are aggressors to "clk2":<br />
1. On the Reports menu, select Net Statistics. A dialog box opens.<br />
2. In the Associated Nets area, note the list of nets. Nets "setsec," "datald," and "reset" are aggressor nets to<br />
"clk2'; note that they are labeled with "By Coupling." Net "n00077" is not coupled; rather it is "associated"<br />
to "clk2" conductively, through a series resistor.<br />
3. Click OK.<br />
Set Up IC Models for Simulation<br />
During crosstalk simulations, BoardSim Crosstalk is capable of simulating any number of victim and<br />
aggressor nets, and each victim or aggressor may be either actively switching or static (i.e., "stuck").<br />
However, it is much easier to see the crosstalk amplitude and waveform if the victim net's driver IC is not<br />
switching.<br />
Use Select > Component Models or Edit Values to set the driver on victim net "clk2" (U2.1) to be stuck low;<br />
change the aggressor-net I/O models (U11.6 and U3.20) to be "Output":<br />
1. On the Select menu, select Component Models or Edit Values. The Assign Models dialog box opens.<br />
2. In the Pins list, note that some pins have a "coupled" icon just to the left of the reference-designator/pin<br />
label; these are the component pins on the aggressor nets. Pins on the selected, victim net have no icon.<br />
3. The victim net's driver IC is U2.1. Find it in the list, then click once on it to highlight it.<br />
4. With U2.1 highlighted, in the Buffer Settings area, click the Stuck Low radio button.<br />
5. Click on pin U11.6 (at the bottom of the list). It has an I/O model that is currently set to buffer direction<br />
"Input." In the Buffer Settings area, change this by clicking the "Output" radio button.<br />
6. Repeat step 5 for pin U3.20.<br />
7. Click Close.<br />
Look at Coupling Regions where Crosstalk is Actually Generated<br />
Before we actually simulate to see how much crosstalk appears on net "clk2," we can view the "coupling<br />
regions" – i.e., sections along the coupled nets – which will generate the crosstalk.<br />
Use Crosstalk > Walk Coupling Regions to view some of the coupling regions along the victim and aggressor<br />
nets:<br />
1. On the Crosstalk menu, select Walk Coupling Regions.<br />
2. Use the mouse to move the dialog box so it doesn't overlap the visible nets.<br />
3. In the board viewer, note the set of segments highlighted in white with yellow boxes as endpoint markers.<br />
4. In the Coupling Region dialog box, click the Next button; another coupling region is highlighted.<br />
mk:@MSITStore:D:\<strong>HyperLynx</strong>75\demo.chm::/demo/boardsim_s_crosstalk_a...<br />
页码,3/7<br />
2007-3-26
BoardSim's Crosstalk and Differential-Signal Features<br />
In the Coupling Region viewer, you'll see the names of the coupled nets, information about how far apart they<br />
are in the currently displayed region, and a graphical stackup cross-section showing the nets. If you click on<br />
the Impedance button, an impedance and termination summary is added to the window. You can stretch the<br />
entire window vertically to more easily see its contents, or re-size individual panes in the window.<br />
Note that even this simple net requires several different coupling regions to be accurately simulated. On real<br />
nets on a dense board, it is not uncommon to have a hundred or more regions; BoardSim Crosstalk dutifully<br />
and automatically models all of them for you. In the viewer, coupling regions are sorted (as you walk through<br />
them) from strongest coupling to weakest.<br />
� Click Close to close the coupling-region viewer.<br />
Driver-IC Slew Rates Affect Crosstalk and Aggressor Nets<br />
When BoardSim chose aggressor nets for "clk2," it accounted for many factors that influence crosstalk: trace<br />
separation, dielectric thickness, IC models, and so forth. The forward component of crosstalk, in particular, is<br />
sensitive to the slew rate of the driver ICs on the aggressor net; the faster the aggressing drivers, the more<br />
crosstalk tends to develop. Let's see the effect of slew rate on the aggressor-selection algorithm, by slowing<br />
down one of the drivers.<br />
Use Select > Component Models or Edit Values to change the IC model for pin U3.20 to CMOS,5V,MEDIUM:<br />
1. On the Select menu, select Component Models or Edit Values. The Assign Models dialog box opens.<br />
2. In the Pins list, double-click on pin U3.20. The Select IC Model dialog box opens.<br />
3. In the Device list box, double-click on model CMOS,5V,MEDIUM (it has a slower slew rate than the<br />
previous model).<br />
4. Click OK to close the Select IC Model dialog box.<br />
5. The aggressor net "datald" is no longer visible in the board viewer, since its driver is now not fast enough<br />
to cause crosstalk above our 50-mV threshold.<br />
Electrical versus Geometric Thresholds<br />
There are a variety of possible ways to select aggressors for crosstalk analysis: e.g., nearest-neighbor,<br />
geometric "zone," and electrical estimation. The more aggressor nets that are selected, the slower simulations<br />
will run (crosstalk analysis is CPU-intensive), so it is desirable to select only those nets that are significantly<br />
coupled to the victim net.<br />
Often, the greatest amount of crosstalk on a given section of a victim net is due to the nearest trace on either<br />
side, but a fast driver can cause a more distant net to be the strongest aggressor. Using a traditional<br />
geometric "coupling window" or "zone," these more distant nets with faster drivers would be missed and nets<br />
in closer proximity with slow drivers would be needlessly included. This in turn would lead to a significant<br />
underestimation of the crosstalk on the victim net.<br />
Or, if you chose to be conservative and increased the width of the coupling zone, you might catch furtheraway<br />
aggressor nets, but in many cases you would also include many nets which are not significant<br />
aggressors and whose presence would simply slow your simulations.<br />
By default, BoardSim Crosstalk uses "smart" electrical thresholds (as we've seen in this demonstration). This<br />
approach has several major benefits. First, more distant nets with fast drivers are correctly found by the<br />
aggressor-finding algorithm. Second, nearby nets with slower drivers are included only if they contribute<br />
crosstalk above the threshold you specify. The result is a minimum but correct sets of nets to simulate, which<br />
can cut analysis time significantly, and increase accuracy. Finally, electrical thresholds let you think in natural<br />
terms about crosstalk: mV of noise (rather than geometric limits).<br />
Note: BoardSim Crosstalk offers geometric thresholds, if that's your preference. (See the Set Crosstalk<br />
Thresholds dialog box.) But electrical thresholds are easier to use and more powerful.<br />
Simulate Net "clk2" Interactively<br />
页码,4/7<br />
Now let's actually look at net "clk2's" crosstalk waveform.<br />
Use Simulate > Run Interactive Simulation to simulate the crosstalk on net "clk2"; place oscilloscope probes<br />
at IC pins U8.9 and U11.6; change the vertical scale to 50 mV/div:<br />
1. On the Simulate menu, select Run Interactive Simulation. The Digital Oscilloscope dialog box opens.<br />
mk:@MSITStore:D:\<strong>HyperLynx</strong>75\demo.chm::/demo/boardsim_s_crosstalk_a...<br />
2007-3-26
BoardSim's Crosstalk and Differential-Signal Features<br />
2. In the oscilloscope, click the Attach Probes button. A dialog box opens.<br />
3. In the Pins list, double-click on each of the following IC pins: U8.9, then U11.6. (U8.9 is the receiver IC on<br />
the victim net).<br />
4. Click OK.<br />
5. In the oscilloscope, click Start Simulation. The crosstalk simulation runs.<br />
6. The red waveform is from the probe at the victim net's receiver IC. Change the vertical scale to 50 mV/div,<br />
so you can clearly see the crosstalk shown by this probe; move the scroll bar at the right side of the<br />
oscilloscope's display down until you see the red waveform again.<br />
Because this simple demonstration board is not densely routed and does not use close trace spacing, it does<br />
not show a great deal of crosstalk. (Also, we significantly slowed one of the aggressor net's driver ICs.)<br />
Nevertheless, you can see that about +/-50 mV of crosstalk does appear at net "clk2's" receiver IC.<br />
Again, it's worth noting that BoardSim will simulate any mixture of victim and aggressor traces; in fact, the<br />
simulator really makes no distinction between the two. Generally, you'd prefer to have the victim nets (nets on<br />
which you want to measure crosstalk) sitting stuck low or stuck high, but in this simulation we could just as<br />
well have made "clk2" also switch, in which case it would have been both an aggressor to the other nets AND<br />
their victim.<br />
Quick Analysis: Generating a Crosstalk Strength Report for an Entire<br />
PCB<br />
You may be wondering how you would decide on which nets on a large PCB to run crosstalk simulation; after<br />
all, your board may have several thousand nets. Focusing on all of them interactively would be nearly<br />
impossible (too time-consuming).<br />
Fortunately, BoardSim Crosstalk gives you two methods for dealing with a large board, or any board on which<br />
you don't know where the crosstalk problems may be hiding. The first is the "Crosstalk Strength Report," a<br />
powerful and fast feature that can quickly generate a report estimating the amount of crosstalk for every net<br />
on your board.<br />
The second method is detailed batch-mode simulation, in which you can queue up a large set of nets for<br />
simulation and then run all of them in batch fashion. Results are presented in a report file, as in the earlier<br />
batch-mode examples. (If you want to review those now, click here.<br />
This section talks about the first method, the Crosstalk Strength Report. For most boards, this is actually the<br />
first feature you'll use, because the data it provides can serve as a powerful guide to which nets you need to<br />
look at in detail – and which others you can stop worrying about altogether.<br />
Use Wizards > Board Wizard to run the Board Wizard; disable all features except Crosstalk Strength<br />
Estimates; set the crosstalk threshold to 50 mV and run:<br />
1. In the oscilloscope, click Close.<br />
2. On the Simulate menu, select Run Batch Simulation. The batch wizard opens to its starting page.<br />
3. On the opening page, disable all feature check boxes except Show Crosstalk Strength Estimates (in the<br />
Quick Analysis area).<br />
4. Click the Next button. On the Set Delay and Transmission-Line Options page, in the For Quick Analysis…<br />
Include Nets with Coupled Voltages Greater Than box, type "50."<br />
5. Click the Next button again. On the Default IC Model Settings page, leave the settings as is. These values<br />
will be used only for nets where a specific IC model has not been loaded.<br />
6. Click Next three more times, then on the Run Simulation and Show Results page, click Finish.<br />
Reviewing the Crosstalk Strength Report<br />
页码,5/7<br />
The batch engine runs briefly, generating a crosstalk strength report. Note how fast each net is processed. A<br />
board of this size is finished in only a very short time; a large board might take several minutes.<br />
The completed report displays automatically in the <strong>HyperLynx</strong> File Editor.<br />
Use the file editor to look at the data in the batch-mode report:<br />
1. In the file editor, page through the Crosstalk Report - Quick Analysis section. Note that for each net on the<br />
board with more possible crosstalk than the specified 50-mV threshold, the file editor gives a list of each<br />
net's aggressor nets and an estimate of how much crosstalk each aggressor could generate. The<br />
mk:@MSITStore:D:\<strong>HyperLynx</strong>75\demo.chm::/demo/boardsim_s_crosstalk_a...<br />
2007-3-26
BoardSim's Crosstalk and Differential-Signal Features<br />
contribution of the two strongest aggressors is summed to give a realistic overall crosstalk estimate. Nets<br />
are sorted from most to least crosstalk; this gives you a powerful and simple way to see which nets on<br />
your board are most likely to suffer from crosstalk.<br />
2. On the editor's File menu, select Exit to close the file editor.<br />
Again, it should be emphasized that a Crosstalk Strength Report is a powerful guide to further simulations on<br />
any given board. Since it is electrically based, it is usually considerably more accurate than a simple<br />
geometric “parallelism” report. It can be generated very quickly (even before final IC model assignments are<br />
made), and serves as an excellent guide to which nets on the board need further analysis: interactive, batchmode,<br />
or a mix of the two.<br />
Running Detailed Batch-Mode Crosstalk Simulations<br />
As an example of how BoardSim Crosstalk analyzes a net in batch mode, let's run on net "clk2." Of course, if<br />
"clk2" were the only net we wanted to analyze, we'd probably just run it interactively. But if we wanted results<br />
for a large number of nets, then we'd use batch mode. (To keep this demonstration moving quickly, we'll run<br />
only on this one net.)<br />
Use Simulate > Run Batch Simulation to run the batch wizard; enable only detailed SI and crosstalk<br />
simulation; use the Nets Spreadsheet to enable specifically net "clk2"; set its threshold to 50 mV, and run<br />
simulation:<br />
1. On the Simulate menu, select Run Batch Simulation.<br />
2. On the wizard's first page, in the Detailed Simulations area, enable the first check box, Run Signal-<br />
Integrity and Crosstalk Simulations on Selected Nets. Disable all other features.<br />
3. Click Next.<br />
4. Click on the SI Nets Spreadsheet button. The spreadsheet opens.<br />
5. Since we are only interested in simulating net "clk2," click the check box in the SI Enable column only for<br />
net "clk2." Lower in the spreadsheet, note that the associated net "n00077" is automatically selected also<br />
(since it is connected to "clk2" through a resistor).<br />
6. For "clk2," change the value in the Max Rise/Fall Crosstalk column from "150" to "50." "n00077's" value<br />
changes, too.<br />
7. Click OK to close the spreadsheet.<br />
8. Back in the wizard, click Next. Then on the Set Driver/Receiver Options page, in the IC-Model Corners<br />
area, enable only Fast/Strong driver IC models.<br />
9. Click Next three more times. On the Set Options for Crosstalk Analysis page, click the Crosstalk<br />
Simulation check box to enable it. Leave the Selected Nets as Victims Stuck Low check box (which just<br />
ungrayed) enabled.<br />
0. Click Next three more times, until you move to the Run Simulation and Show Results page. Then click<br />
Finish to start the Wizard running. If prompted about whether to overwrite the previously generated .RPT<br />
file, click Yes.<br />
After a short period of time, depending on the speed of your computer, the batch engine finishes the<br />
requested simulations on net "clk2" and opens its report file.<br />
Use the file editor to look at the data in the batch-mode report:<br />
1. The report contains a detailed table for net "clk2," summarizing its signal-integrity and crosstalk behavior.<br />
Several nets are identified as aggressor nets. After the numerical data, warnings are issued to indicate<br />
these nets have no driver-IC model (this helps you know whether any IC models are missing during<br />
simulations). The numerical data gives the rising- and falling-edge pin-to-pin delays for the driver IC and<br />
each receiver, as well as the maximum overshoot and peak-value crosstalk that occurred. If any<br />
thresholds defined in the Nets Spreadsheet are exceeded, the report flags them as warnings. In this case,<br />
we see that crosstalk on clk2 exceeds our 50 mV threshold on both edges.<br />
2. On the editor's File menu, select Exit to close the report.<br />
页码,6/7<br />
Note that in this case, we looked at the batch engine’s human-readable text output (.RPT file). If you ran the<br />
earlier section on BoardSim’s batch-mode features, you saw the alternative .CSV file, which is optimized for<br />
viewing in a spreadsheet application (or parsing by a custom, external script).<br />
BoardSim Crosstalk is useful not only for identifying crosstalk problems, but also fixing them. There are a<br />
mk:@MSITStore:D:\<strong>HyperLynx</strong>75\demo.chm::/demo/boardsim_s_crosstalk_a...<br />
2007-3-26
BoardSim's Crosstalk and Differential-Signal Features<br />
页码,7/7<br />
number of ways to reduce crosstalk, including changing driver ICs (slower slew rates are better), altering<br />
board stackup, and adding line termination. We won't explore any of these options in detail now, but, for<br />
example, if you want, try simulating net "clk2" as is; then using the stackup editor (Edit > Stackup) to reduce<br />
the board's dielectric thicknesses to 5 mils; then re-simulating to see how the amount of crosstalk is changed.<br />
Click here to continue with the front-to-back <strong>HyperLynx</strong> demonstration; next, we turn our attention to<br />
advanced features intended specifically for post-layout analysis of GHz-level, SERDES-based<br />
designs.<br />
Click here to return to the main menu.<br />
mk:@MSITStore:D:\<strong>HyperLynx</strong>75\demo.chm::/demo/boardsim_s_crosstalk_a...<br />
2007-3-26
BoardSim's GHz Features<br />
BoardSim's GHz Features<br />
Introduction<br />
If you started this demonstration at the beginning, you've already seen how LineSim's signal-integrity,<br />
crosstalk, EMC, and GHz-level analysis features can help you identify and prevent signal-reflection and<br />
radiated-emissions problems early in the design cycle, for both traditional synchronous and new SERDESstyle<br />
designs. You've also seen how BoardSim can be used for post-layout signal-integrity and crosstalk<br />
analysis. So far, though, we haven't demonstrated any of BoardSim's features that are specific to GHz-level<br />
designs. In this section, we'll examine an important one: the ability to model vias in very-high-speed signal<br />
paths.<br />
In general, <strong>HyperLynx</strong> offers these major features for GHz-level designs:<br />
� Eye diagrams<br />
� Multi-bit stimulus<br />
� Lossy transmission-line analysis<br />
� Advanced via modeling<br />
� Integration with SPICE simulation (HSPICE or Eldo)<br />
� Touchstone (S-parameter) modeling<br />
In an earlier section, we showed many of these features (eye diagrams with multi-bit stimulus, lossy-line<br />
analysis, integrated SPICE simulation, and Touchstone modeling) in the context of LineSim. In this section,<br />
we'll look at via modeling. However, eye diagrams, lossy analysis, integrated SPICE simulation, and<br />
Touchstone modeling are available in BoardSim, just as they are in LineSim. Click here if you want to<br />
review these features, by running them in LineSim.<br />
If you want to review any of BoardSim's traditional, non-GHz-specific features, click here.<br />
Advanced Via Modeling<br />
In the earlier GHz portion of the LineSim demonstration, we saw the effects of lossy-transmission-line<br />
simulation, especially an increase in receiver delay times when loss was accounted for. But at GHz-level<br />
frequencies, a second phenomenon is often equally noticeable – and sometimes more so: the<br />
electromagnetic effects of PCB vias. Vias can cause unexpected delays and, especially as frequencies grow<br />
higher, signal distortion due to via inductance and capacitance. In this section, we'll look at how BoardSim<br />
models vias.<br />
Load Board "Demo.hyp" and Select Net "clk"<br />
Load the board "Demo.hyp" using File > Open BoardSim Board; use Select > Net by Name to select net "clk":<br />
1. On BoardSim's File menu, select Open BoardSim Board. Another dialog box opens. If prompted to save<br />
session edits, click No.<br />
2. Double-click on the file name Demo.hyp. The dialog box closes and a board layout appears in BoardSim's<br />
viewer.<br />
3. On the Select menu, select Net by Name.<br />
4. Double-click on "clk" to select the net.<br />
Note that this net is poorly routed from a high-speed standpoint: it contains multiple vias.<br />
Change the Driver IC to a Faster Model<br />
页码,1/4<br />
The effects of vias are easiest to see with fast switching edges; this occurs because to higher-frequency<br />
signals, vias look "electrically longer" and cause more signal distortion. Let's apply a faster IC model to the<br />
selected net.<br />
Using Select > Component Models or Edit Values, change driver pin U1.13 to model "CMOS,3.3V, ULTRA-<br />
FAST" from library EASY.MOD:<br />
mk:@MSITStore:D:\<strong>HyperLynx</strong>75\demo.chm::/demo/boardsim_s_ghz_level_f...<br />
2007-3-26
BoardSim's GHz Features<br />
1. On the Select menu, choose Component Models or Edit Values; the Assign Models dialog box opens.<br />
2. In the Pins list, double-click on pin U1.13; the Select IC Model dialog box opens.<br />
3. Click the EASY.MOD button.<br />
4. In the Devices list box, double-click on "CMOS,3.3V, ULTRA-FAST" to choose the model; then click Close<br />
to close the Assign Models dialog box.<br />
Simulate First with No Via Modeling<br />
First, we'll run a simulation with via modeling disabled. Then we'll re-simulate with via modeling enabled, and<br />
compare waveforms.<br />
Disable via modeling entirely, using Edit > Via Modeling; disable the Include Via L and C check box:<br />
1. On the Edit menu, select Via Modeling. The Select Method of Simulating Vias dialog box opens.<br />
2. At the top of the dialog box is the Include Via L and C check box, which controls whether any via modeling<br />
is used during simulation. Disable the check box to turn off all via modeling; the options lower in the dialog<br />
box all gray out.<br />
3. Click OK to close the dialog box.<br />
Then open the oscilloscope using Simulate > Run Interactive Simulation; set IC Modeling to Fast-Strong; and<br />
click Start Simulation:<br />
1. On the Simulate menu, select Run Interactive Simulation; the Digital Oscilloscope dialog box opens.<br />
2. In the IC Modeling area, select Fast-Strong, to simulate with the fastest possible driver edge.<br />
3. Click the Start Simulation button; a waveform appears.<br />
Re-Simulate with Via Modeling Enabled<br />
Now let's enable automatic modeling of vias in BoardSim, then immediately re-simulate to see the effect.<br />
Enable automatic via modeling, using Edit > Via Modeling; enable the Include Via L and C check box; verify<br />
that the Auto-calculate radio button is selected:<br />
1. On the Edit menu, select Via Modeling. The Select Method of Simulating Vias dialog box opens again.<br />
2. Enable the Include Via L and C check box to turn back on via modeling; the options lower in the dialog<br />
box re-enable.<br />
3. Verify that the Auto-Calculate radio button is selected. This tells BoardSim to use its built-in automatic<br />
modeling algorithms for vias.<br />
4. Click OK to close the dialog box.<br />
Now, re-simulate:<br />
� Click the Start Simulation button; a new waveform appears.<br />
Compare the two waveforms; note that there is a clear difference in delay at the receiver ICs (yellow and<br />
purple waveforms). The delays are pushed out when via modeling is added to the simulation. The effect is<br />
reminiscent overall of the increased delay caused by the addition of lossy transmission-line analysis, as we<br />
saw earlier in the LineSim GHz portion of the demonstration, meaning that for accurate delay calculations, it’s<br />
often important to use accurate via modeling. Note that in BoardSim’s batch-mode wizard, you can enable<br />
both lossy transmission-line and via modeling.<br />
Different Types of Via Modeling<br />
Let's re-open the via-modeling dialog box and briefly discuss the various methods of via modeling supported<br />
by BoardSim.<br />
Re-open the via-modeling dialog box using Edit > Via Modeling:<br />
1. Click Close to close the oscilloscope.<br />
2. On the Edit menu, select Via Modeling.<br />
mk:@MSITStore:D:\<strong>HyperLynx</strong>75\demo.chm::/demo/boardsim_s_ghz_level_f...<br />
页码,2/4<br />
2007-3-26
BoardSim's GHz Features<br />
3. Select the User-Supplied Padstack-Specific L and C radio button; a spreadsheet appears and values are<br />
filled in after a short delay.<br />
The radio-button choices in the top half of the dialog box offer three types of via modeling:<br />
� Auto-calculate – the most powerful method, this tells BoardSim to invoke internal algorithms to<br />
automatically model each instance of a via; these algorithms decompose each via into sections and call<br />
fast solvers, section-by-section, accounting for detailed effects such as the frequency-dependent<br />
inductance of a via as it changes its signal's reference planes; includes the effects of different signal entry<br />
and exit layers<br />
� User-supplied global L and C – allows knowledgeable users to supply a single L and C value to be used<br />
for all vias on a board<br />
� User-supplied padstack-specific L and C – a more-advanced type of user-supplied value, managed in a<br />
spreadsheet; the user can mix auto-calculated values for some vias and specify custom values for certain<br />
other padstacks<br />
In the spreadsheet, in the Padstack Name column, the names appear as “AutoPadstk_X.” This is an artifact of<br />
the demonstration PCB; if you were running with one of your own designs, you would see the actual padstack<br />
names that you or your layout designer created in your PCB tool.<br />
Most users will prefer the automated algorithms (because they’re quite accurate and powerful), but<br />
sophisticated users may wish to supply their own L's and C's, based perhaps on the results of external<br />
electromagnetic extractions or lab-measured data.<br />
Look briefly at the contents of the padstack spreadsheet. Until you disable some Auto check boxes, each<br />
padstack shows its auto-calculated value. Note the typical values: hundreds of pH and fF, for L and C<br />
respectively. For padstacks that cause their signals to change reference planes at least once, the L value is<br />
frequency-dependent; BoardSim displays it in the spreadsheet at f=250 MHz, but during simulation uses the<br />
"knee frequency" of each net's driver-IC switching edge as the calculation frequency.<br />
Visualizing a Via’s Geometric/Electrical Characteristics<br />
Because accurate via modeling is so important in higher-speed designs, BoardSim offers a special feature<br />
called the “Via Visualizer” which enables you to examine in detail the characteristics of any via on your PCB.<br />
Accessible directly from BoardSim’s board viewer, the Visualizer automatically invokes the <strong>HyperLynx</strong> via<br />
calculator on any via you select, and shows you both the geometric and electrical model of a single via or a<br />
pair of coupled differential vias. Note that in SERDES and other high-speed differential paths, accurately<br />
modeling via coupling is essential for accurate simulation results.<br />
In this section, we’ll look briefly at the Via Visualizer for a sample differential via pair.<br />
Load the board "Demodiff.hyp" using File > Open BoardSim Board; use Select > Net by Name to select net<br />
"DRV1_OUT1+":<br />
1. In the Select Method of Simulating Vias dialog box, click OK.<br />
页码,3/4<br />
2. On BoardSim's File menu, select Open BoardSim Board. A dialog box opens. If prompted to save session<br />
edits, click No.<br />
3. Double-click on the file name Demodiff.hyp. The dialog box closes and the Restore Session Edits dialog<br />
box opens. Click OK. A board layout appears in BoardSim's viewer. If prompted to restore sessions edits<br />
for this new design, click OK.<br />
4. On the Select menu, select Net by Name.<br />
5. Double-click on "DRV1_OUT1+" to select the net.<br />
6. Click on the Crosstalk menu, and verify that Enable Crosstalk Simulation is enabled, i.e., checked.<br />
Note that in the board viewer, other nets are dimmed and net DRV1_OUT1+ and its companion net<br />
(DRV1_OUT1-) appear, as a differential pair.<br />
Looking at the routing of this pair, it’s easy to see several possible problems. First, it does not appear<br />
completely symmetric, which could introduce skew between the two halves of the pair (and therefore convert<br />
a pure differential driver signal at least partially into common mode). Second, it includes two via pairs. While<br />
vias are not “forbidden” in differential signaling, their detailed electromagnetic effects need to be watched and<br />
simulated with great care.<br />
mk:@MSITStore:D:\<strong>HyperLynx</strong>75\demo.chm::/demo/boardsim_s_ghz_level_f...<br />
2007-3-26
BoardSim's GHz Features<br />
Let’s examine one of the via pairs with the Via Visualizer.<br />
Use View > Zoom Area to zoom into the region around the left-hand of the selected nets’ two via pairs; point<br />
to one of the vias with the mouse, right-click, and select View Via Properties:<br />
1. On the View menu, select Zoom Area. The mouse cursor changes into a magnifying-glass shape.<br />
页码,4/4<br />
2. With the left mouse button pressed, drag a box around the area of the left-hand of the selected nets’ two<br />
via pairs, then release the mouse. The viewer zooms in and the vias appear larger.<br />
3. Point to one of the two vias in the pair, until it its round top-layer pad highlights in black. (Be careful not to<br />
highlight one of the connecting trace segments instead.)<br />
4. Then right-click with the mouse. A pop-up menu appears; select View Via Properties. The Via Visualizer<br />
opens. Drag its bottom edge, if necessary, to see the entire graphic in the Visualizer.<br />
The Via Visualizer has opened on the selected via pair. It recognizes (after running a fast geometric/electrical<br />
check) that the via you actually pointed to has a coupled, partner via, and displays both of them. As the dialog<br />
box opens, the Visualizer runs BoardSim’s fast via calculator to determine the via pair’s coupled electrical<br />
characteristics.<br />
In detail, the Via Visualizer is showing the following information:<br />
� the detailed stackup of the PCB; signal layers are shown in solid color and plane layers with “hatched”<br />
colors; all metal is displayed in its layer color<br />
� the exact visual geometry of each via in the differential pair, including connected traces, pads and antipads,<br />
and drill hole<br />
� labeling for all geometric dimensions (including pad shapes/diameters, anti-pad diameters, drill-hole<br />
diameter, and separation between the two vias)<br />
� to the side of each via, the via’s electrical model (including the effects of coupling between vias), including<br />
the impedance and delay of the via (drawn as a labeled transmission line), 3-D pad capacitance for entry<br />
and exit layers (drawn as a lumped capacitor)<br />
� the impedances of connecting traces (labeled with “Z0=xxx”)<br />
� a message in red at the bottom of the dialog warning that there seems to be an impedance discontinuity<br />
between the surrounding traces and the via pair (simulation will tell whether the mismatch is serious or not)<br />
Remember that all of this information is automatically calculated and used by BoardSim’s simulator whenever<br />
via modeling is enabled. However, the Via Visualizer makes the modeling information explicit and accessible<br />
to the user (rather than completely hidden, like it is in some other signal-integrity tools).<br />
Note also one other feature: by clicking the Export to SPICE button (at the dialog box’s bottom), you can<br />
easily create a SPICE sub-circuit of the entire via structure.<br />
Click here to continue with the front-to-back <strong>HyperLynx</strong> demonstration; in this final section we take a<br />
quick look at how BoardSim handles multi-board, system-level simulations.<br />
Click here to return to the main menu.<br />
mk:@MSITStore:D:\<strong>HyperLynx</strong>75\demo.chm::/demo/boardsim_s_ghz_level_f...<br />
2007-3-26
BoardSim's MultiBoard Feature<br />
BoardSim's MultiBoard Feature<br />
Introduction<br />
If you've run the post-layout BoardSim portion of this demonstration, you've already seen how BoardSim can<br />
comprehensively analyze your PCBs, providing you with detailed information about your board's signalquality,<br />
crosstalk, EMC, and GHz-level behavior. Up to this point, we've focused on analyzing single PCBs.<br />
However, many modern designs involve multiple, interconnected PCBs – for example, a motherboard with<br />
one or more memory modules plugged in, or a system consisting of several boards joined by connectors and<br />
cables.<br />
BoardSim's MultiBoard option adds the ability to load multiple boards simultaneously, "virtually" interconnect<br />
them, and simulate them together as a system. Each board can be in the form either of a .HYP file, or a type<br />
of IBIS board model called ".EBD" ("Electrical Board Description"). If the system you're analyzing consists<br />
entirely of your own PCBs, then you would likely load all of your boards into BoardSim as .HYP files. If some<br />
of the boards come from third parties (for example, memory modules), then those 3rd-party boards might be<br />
provided in EBD format.<br />
Note: The EBD format is a portion of the IBIS specification. IBIS is best-known for modeling IC buffers.<br />
However, its EBD format allows random interconnect to be modeled, and can be used to represent PCBs,<br />
complex IC packages, and so forth.<br />
The main difference between a .HYP file and an EBD model is that the .HYP file is physical: it contains details<br />
about trace routing, stackup, etc. EBD models, on the other hand, are purely electrical: the interconnect is<br />
represented as transmission lines, with already-calculated inductance and capacitance, or impedance and<br />
delay. Thus, a .HYP file can be viewed (there is physical routing to display), while an EBD file can't (there's no<br />
physical information to show). Also, EBD files can't represent coupling. However, either type of file can be<br />
used to include the effects of plug-in modules and boards in a multi-board simulation.<br />
MultiBoard Example: Checking the Signal Quality of a Net Crossing Two<br />
Boards<br />
Suppose you had a system consisting of a main board and two smaller plug-in PCBs. Some nets in the<br />
system start on the main board but run through connectors onto both of the plug-in boards, and you're<br />
interested in seeing the signals when they reach the receiver ICs on the daughter boards. Let's see how<br />
BoardSim's MultiBoard option could help you easily perform this analysis.<br />
Load the MultiBoard Project<br />
For efficiency, we'll load an existing multi-board project. However, it's easy to connect multiple boards<br />
together in BoardSim, and we'll take a quick look at the wizard that helps you do this.<br />
Load the multi-board project "Demo_MultiBoard.PJH" using MultiBoard > Open MultiBoard Project:<br />
1. If any dialog boxes are open from a previous portion of the demonstration, close them.<br />
2. On the MultiBoard menu, select Open MultiBoard Project. A dialog box opens.<br />
3. Double-click on the file name Demo_MultiBoard.PJH. (A ".PJH" file stores information about a MultiBoard<br />
project; it points to the .HYP files which make up the project.) If prompted to save session edits, click No.<br />
BoardSim loads each of the boards in the project, similar to how you've already seen it load single .HYP files<br />
– except that in this case, there are three boards involved. Notice that in the board viewer, all three boards are<br />
visible at one time.<br />
Look at How the Project is Constructed in the MultiBoard Wizard<br />
Let's take a quick look at how this MultiBoard project was constructed.<br />
Open the MultiBoard Wizard, and look at the information on the first three pages; click Cancel on the third<br />
page rather than Finish, to avoid reloading the project:<br />
1. On the MultiBoard menu, select Edit MultiBoard Project. The MultiBoard Project Wizard opens.<br />
页码,1/3<br />
The Wizard's first page lists the boards in the project. Adding boards to a project is easy: just click the<br />
mk:@MSITStore:D:\<strong>HyperLynx</strong>75\demo.chm::/demo/boardsim_s_multiboard_...<br />
2007-3-26
BoardSim's MultiBoard Feature<br />
Insert button and choose the board's .HYP file. This example project consists of a main board and two<br />
identical plug-in modules. Note that a comment has been added beside each board's .HYP-file name;<br />
we'll see these labels later in BoardSim's dialog boxes.<br />
2. Click the Next button.<br />
The Wizard's second page shows the connections between boards. In the Interconnection List, the main<br />
board's connector J1 is connected to plug-in PCB #1's J1, and main board's J2 is connected to plug-in<br />
#2's J1. For any two connector halves whose pin names match, a single entry is all that's required in the<br />
Interconnection List; BoardSim automatically does the pin-by-pin mating. (If you have connectors whose<br />
pin names don't match, or a connector half that connects to more than one other connector, there's a way<br />
to list explicit pin-by-pin connections.)<br />
3. Click Next again.<br />
The Wizard's third page shows the electrical characteristics of each board-to-board connector. You can<br />
specify a connector's electrical behavior by providing either a capacitance and inductance, or a delay and<br />
impedance. For most connectors, the manufacturer can provide this information.<br />
4. Click Cancel, to avoid re-loading the project.<br />
Simulate Net "A0"<br />
Now let's simulate a net which is driven from the main board and has receiver ICs on each of the plug-in<br />
boards.<br />
Select net "A0" on the main board; attach oscilloscope probes to the main board's U100.AE19, plug-in #1's<br />
U2.20, and plug-in #2's U2.20; and simulate:<br />
1. On the Select menu, select Net by Name. A dialog box opens.<br />
2. Note that the dialog box's Design File (at the bottom) is set to "B00 Main board"; this means we are<br />
selecting a net on the main board. In the list box above, double-click on net "A0." (If you don't see "A0" in<br />
the list, in the Sort Nets By area click on Name to sort alphabetically.) The dialog box closes, and net A0<br />
is highlighted on the main board, along with the nets on the plug-in boards to which it connects. "Rat's<br />
nest" lines show the connections between boards, through connectors.<br />
3. On the Simulate menu, select Attach Scope Probes. The Attach Oscilloscope Probes dialog box opens.<br />
4. Verify that the dialog's Design File combo box is set to "B00 Main board." In the Pins list, double-click pin<br />
U100.AE19 to attach it to scope channel 1. (This is the driver pin on the main board.)<br />
5. Then switch to the first plug-in board by pulling down the Design File combo box and selecting "B01 Plugin<br />
board #1." Double-click on pin U2.20. (This is the receiver pin on the first plug-in board.)<br />
6. Switch to the second plug-in board by pulling down the Design File combo box and selecting "B02 Plug-in<br />
board #2." Double-click on pin U2.20. (This is the receiver pin on the second plug-in board.)<br />
7. Click OK to close the dialog box. Note that colored arrows display on each of the boards, showing the<br />
locations of the probes we just assigned.<br />
8. On the Simulate menu, select Run Interactive Simulation. The Digital Oscilloscope dialog box opens.<br />
9. In the Driver Waveform Area, click on the Oscillator radio button.<br />
0. Click the Start Simulation button.<br />
The yellow and purple oscilloscope waveforms show the signals at the receiver-IC pins, on the plug-in boards.<br />
Note that there is some overshoot at the receivers. The waveforms you would have seen if you had simulated<br />
with just the main board or just one of the plug-in PCBs would be different: only by combining the traces from<br />
both boards in the simulation do you see the actual, system-level waveforms.<br />
Other Analysis Features and MultiBoard Designs<br />
页码,2/3<br />
If you've already gone through the other portions of the BoardSim demonstration, this should be enough to<br />
show you the primary differences between simulating with one board, versus multiple boards using<br />
BoardSim's MultiBoard option. In addition to simulating interactively, as you've just seen, you can run Board<br />
Wizard's batch analysis on multiple boards, enabling delays (and other effects) to be calculated for a complete<br />
multi-board system.<br />
mk:@MSITStore:D:\<strong>HyperLynx</strong>75\demo.chm::/demo/boardsim_s_multiboard_...<br />
2007-3-26
BoardSim's MultiBoard Feature<br />
And this power does not come with an ease-of-use penalty: BoardSim is hardly any more difficult to use for<br />
multi-board analysis than for single boards. If your connectors use consistent pin names between the mating<br />
halves, you can usually set up a multi-board project in a matter of just a few minutes.<br />
Simulating with EBD Models<br />
页码,3/3<br />
Sometimes, you may have a PCB in a multi-board design that is modeled with an IBIS EBD file rather than<br />
a .HYP file. This would be typical of 3rd-party boards that you're including in your system, for example,<br />
memory modules. (See above for a general description of EBD and how it differs technically from using .HYP<br />
files.)<br />
Generally, EBD models are treated like IC models rather than explicitly like .HYP boards. The mapping of an<br />
EBD model to a reference designator happens in the .REF or .QPL IC Automapping files, just like any other<br />
IBIS model.<br />
When you auto-map an EBD model and begin analysis, BoardSim automatically creates a board<br />
representation of it in memory, and its circuit effects are automatically included in simulations. You can even<br />
probe inside an EBD model, just like you did with the plug-in boards in the multi-board example above. You<br />
can't view an EBD file physically, however, and EBD files can't model coupling – so when you have a choice<br />
of EBD or .HYP files, .HYP files offer better ease-of-use.<br />
Click here to move to the conclusion of the demo.<br />
Click here to return to the main menu.<br />
mk:@MSITStore:D:\<strong>HyperLynx</strong>75\demo.chm::/demo/boardsim_s_multiboard_...<br />
2007-3-26