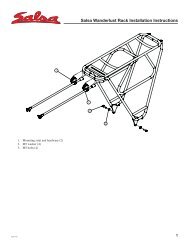
Anything Cage Assembly Instructions - Salsa Cycles
Anything Cage Assembly Instructions - Salsa Cycles
Anything Cage Assembly Instructions - Salsa Cycles

You also want an ePaper? Increase the reach of your titles
YUMPU automatically turns print PDFs into web optimized ePapers that Google loves.
WARNING<br />
Installing this <strong>Salsa</strong> product on a bicycle requires in-depth knowledge<br />
of bicycle mechanics and professional-grade tools. If you do not have<br />
the proper tools or knowledge to perform this installation, please take<br />
your bicycle to your local bicycle dealer. Failure to appropriately install<br />
this product may lead to component failure, resulting in serious injury<br />
or death. We recommend that you have this product installed, adjusted<br />
and maintained by a professional bicycle mechanic.<br />
Tools: 4mm hex wrench, torque wrench<br />
<strong>Anything</strong> <strong>Cage</strong> Installation<br />
The <strong>Anything</strong> <strong>Cage</strong> mounts to standard water bottle cage bosses with<br />
M5 bolts. However, it’s designed with three bolt holes for use with<br />
Fargo, Mukluk and Enabler forks featuring our three-bolt bosses.<br />
WARNING: The <strong>Anything</strong> <strong>Cage</strong> will mount to your bicyle in several<br />
different ways. Where you position the cage will depend on personal<br />
preference, frame size and geometry, as well as the gear you choose<br />
to use. Make sure that neither the <strong>Anything</strong> <strong>Cage</strong> nor your gear<br />
interferes with the function of your bicycle BEFORE attempting<br />
to ride.<br />
Three-Bolt Configuration (for <strong>Salsa</strong> Forks)<br />
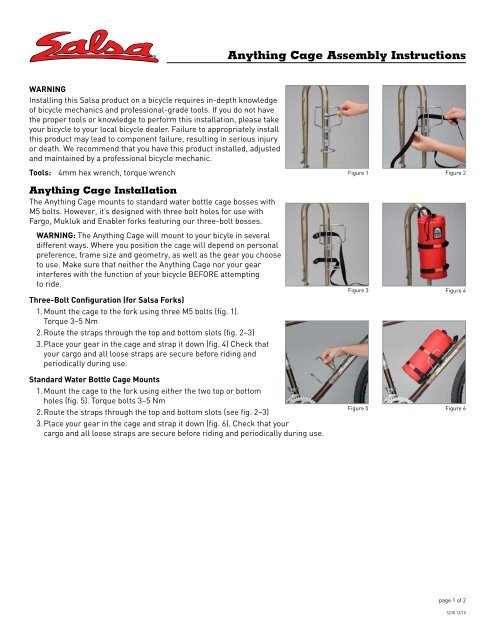
1. Mount the cage to the fork using three M5 bolts (fig. 1).<br />
Torque 3–5 Nm<br />
2. Route the straps through the top and bottom slots (fig. 2–3)<br />
3. Place your gear in the cage and strap it down (fig. 4) Check that<br />
your cargo and all loose straps are secure before riding and<br />
periodically during use.<br />
Standard Water Bottle <strong>Cage</strong> Mounts<br />
1. Mount the cage to the fork using either the two top or bottom<br />
holes (fig. 5). Torque bolts 3–5 Nm<br />
2. Route the straps through the top and bottom slots (see fig. 2–3)<br />
3. Place your gear in the cage and strap it down (fig. 6). Check that your<br />
cargo and all loose straps are secure before riding and periodically during use.<br />
<strong>Anything</strong> <strong>Cage</strong> <strong>Assembly</strong> <strong>Instructions</strong><br />
Figure 1<br />
Figure 3 Figure 4<br />
Figure 5<br />
Figure 2<br />
Figure 6<br />
page 1 of 2<br />
5230 12/10
<strong>Salsa</strong> <strong>Cycles</strong><br />
6400 West 105th Street, Bloomington, MN 55438<br />
Tel: 877-MOTO-ACE Fax: 952-983-6210<br />
www.salsacycles.com<br />
<strong>Anything</strong> <strong>Cage</strong> <strong>Assembly</strong> <strong>Instructions</strong> cont’d<br />
Hose Clamp Mounting<br />
We designed the <strong>Anything</strong> <strong>Cage</strong> with slots to accommodate hose clamps for mounting to frames or forks without the<br />
necessary braze-ons. Hose clamps should be used only as a last resort.<br />
WARNING: Hose clamps are designed to generate a large amount of clamping force: use at your own risk. <strong>Salsa</strong> is not<br />
responsible for bodily injury or damage to your frame or fork as a result of installing hose clamps.<br />
• Do not use hose clamps on carbon fiber frames or forks<br />
• Do not use hose clamps on thin-walled aluminum frames or forks<br />
• Use of hose clamps may void the frame or fork warranty. Check with the manufacturer<br />
To install:<br />
1. Wrap the clamping area with a rubber shim to avoid scratching your frame<br />
2. Route the clamp through the slots in the <strong>Anything</strong> <strong>Cage</strong> and around the frame/fork tube<br />
3. Snug the clamp with a screwdriver<br />
WARNING<br />
• Do not modify the <strong>Anything</strong> <strong>Cage</strong>. Doing so will void the warranty (see below)<br />
• Make sure your load is secure before riding (i.e. no loose straps to get caught in the wheels)<br />
• Weight limit: 4 lb<br />
Warranty<br />
<strong>Salsa</strong> <strong>Cycles</strong> warrants this new <strong>Salsa</strong> product against defects in materials and workmanship for five (5) years from the<br />
original date of retail purchase by the consumer. This limited warranty is expressly limited to the repair or replacement<br />
of the original product, at the option of <strong>Salsa</strong> <strong>Cycles</strong>, and is the sole remedy of the warranty. This limited warranty applies<br />
only to the original purchaser of the <strong>Salsa</strong> product and is not transferable. In no event shall <strong>Salsa</strong> <strong>Cycles</strong> be liable for any<br />
loss, inconvenience or damage, whether direct, incidental or consequential or otherwise resulting from breach of any<br />
express or implied warranty or condition, of merchantability, fitness for a particular purpose, or otherwise with respect<br />
to this product except as set forth herein.<br />
This warranty does not cover the following:<br />
• Damage due to improper assembly or follow-up maintenance or lack of skill, competence or experience<br />
of the end user<br />
• Products that have been modified, neglected, used in competition or for commercial purposes, misused or abused,<br />
involved in accidents or anything other than normal use<br />
• Damage or deterioration to the surface finish, aesthetics or appearance of the product<br />
• Normal wear and tear<br />
• Labor required to remove and/or refit and re-adjust the product within the bicycle assembly<br />
This warranty gives the consumer specific legal rights, and those rights and other rights may vary from state to state.<br />
page 2 of 2<br />
5230 12/10