Cencon 4 Getting Started Guide - Kaba Mauer GmbH
Cencon 4 Getting Started Guide - Kaba Mauer GmbH
Cencon 4 Getting Started Guide - Kaba Mauer GmbH

You also want an ePaper? Increase the reach of your titles
YUMPU automatically turns print PDFs into web optimized ePapers that Google loves.
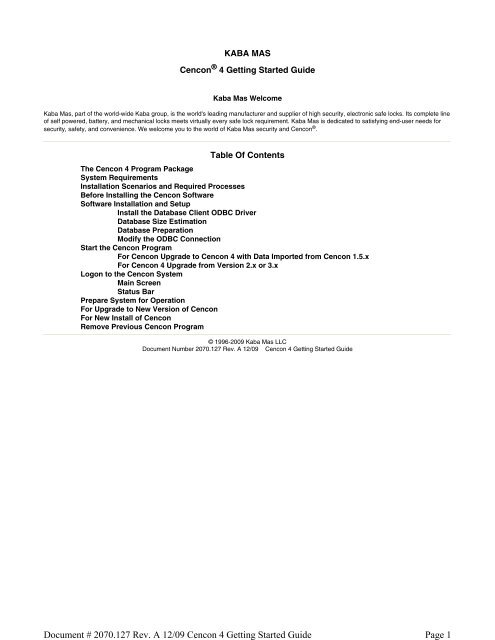
KABA MAS<br />
<strong>Cencon</strong> ® 4 <strong>Getting</strong> <strong>Started</strong> <strong>Guide</strong><br />
<strong>Kaba</strong> Mas Welcome<br />
<strong>Kaba</strong> Mas, part of the world-wide <strong>Kaba</strong> group, is the world's leading manufacturer and supplier of high security, electronic safe locks. Its complete line<br />
of self powered, battery, and mechanical locks meets virtually every safe lock requirement. <strong>Kaba</strong> Mas is dedicated to satisfying end-user needs for<br />
security, safety, and convenience. We welcome you to the world of <strong>Kaba</strong> Mas security and <strong>Cencon</strong> ® .<br />
Table Of Contents<br />
The <strong>Cencon</strong> 4 Program Package<br />
System Requirements<br />
Installation Scenarios and Required Processes<br />
Before Installing the <strong>Cencon</strong> Software<br />
Software Installation and Setup<br />
Install the Database Client ODBC Driver<br />
Database Size Estimation<br />
Database Preparation<br />
Modify the ODBC Connection<br />
Start the <strong>Cencon</strong> Program<br />
For <strong>Cencon</strong> Upgrade to <strong>Cencon</strong> 4 with Data Imported from <strong>Cencon</strong> 1.5.x<br />
For <strong>Cencon</strong> 4 Upgrade from Version 2.x or 3.x<br />
Logon to the <strong>Cencon</strong> System<br />
Main Screen<br />
Status Bar<br />
Prepare System for Operation<br />
For Upgrade to New Version of <strong>Cencon</strong><br />
For New Install of <strong>Cencon</strong><br />
Remove Previous <strong>Cencon</strong> Program<br />
© 1996-2009 <strong>Kaba</strong> Mas LLC<br />
Document Number 2070.127 Rev. A 12/09 <strong>Cencon</strong> 4 <strong>Getting</strong> <strong>Started</strong> <strong>Guide</strong><br />
Document # 2070.127 Rev. A 12/09 <strong>Cencon</strong> 4 <strong>Getting</strong> <strong>Started</strong> <strong>Guide</strong><br />
Page 1
Manual Conventions<br />
This <strong>Cencon</strong> <strong>Getting</strong> <strong>Started</strong> <strong>Guide</strong> contains information on the installation and set up of the hardware and software required to manage <strong>Cencon</strong><br />
users and locks. Some conventions that are followed are:<br />
� The Smart Keys needed for a particular operation will be shown beside the flowcharts that describe the operation.<br />
� The screens shown in the manual that speak to inserting a key in a reader may depict either the use of the 4-port Key Reader in association<br />
with the PCI card or the 2-port USB Key Box.<br />
� Input to the PC will be shown in bold type.<br />
� The screen samples may not look exactly as they do on your system depending on which version of the Windows operating system you are<br />
using. Some samples in this document are from Windows XP and some are from Windows Vista.<br />
� Highlighted items:<br />
Note<br />
Indicates a point to consider.<br />
Important Note<br />
Indicates information that is very important to know.<br />
Helpful Hint<br />
Indicates a technique or method that works well.<br />
Caution<br />
Indicates the need for care and caution to be observed during a procedure or process.<br />
Warning<br />
Indicates the possibility of loss of data or system integrity.<br />
Before reading the <strong>Cencon</strong> <strong>Getting</strong> <strong>Started</strong> <strong>Guide</strong>, you should be familiar with basic Windows concepts and techniques. For detailed information, refer<br />
to your Windows documentation.<br />
Document # 2070.127 Rev. A 12/09 <strong>Cencon</strong> 4 <strong>Getting</strong> <strong>Started</strong> <strong>Guide</strong><br />
Page 2
Trademarks<br />
The following items are trademarks or registered trademarks of <strong>Kaba</strong> Mas in the United States and/or other countries.<br />
� <strong>Cencon</strong> System 2000<br />
� <strong>Cencon</strong><br />
� PowerStar Technology<br />
� Smart Key<br />
Adobe and Adobe Reader are registered trademarks of Adobe Systems Incorporated in the United States and/or other countries.<br />
iButton is a registered trademark of Dallas Semiconductor.<br />
Microsoft, Windows, Windows Server are registered trademarks or trademarks of Microsoft Corporation in the United States and/or other countries.<br />
Notice: The information in this manual is subject to change without notice and does not represent a commitment on the part of <strong>Kaba</strong> Mas. <strong>Kaba</strong> Mas<br />
shall not be liable for technical or editorial errors or omissions contained herein; nor for incidental or consequential damages resulting from the<br />
furnishing, performance or use of this material.<br />
Document # 2070.127 Rev. A 12/09 <strong>Cencon</strong> 4 <strong>Getting</strong> <strong>Started</strong> <strong>Guide</strong><br />
Page 3
The following items are required to implement the <strong>Cencon</strong> 4 Software:<br />
The <strong>Cencon</strong> 4 Software Package<br />
� <strong>Cencon</strong> 4 Server License Kit: (Single Server Option - p/n 201190.)<br />
� Install CD (Includes <strong>Cencon</strong> 4 Software, <strong>Cencon</strong> Database Setup Utility, Software Reference Manual, and Adobe Reader)<br />
� <strong>Cencon</strong> 4 Single Server License Certificate<br />
� Software <strong>Getting</strong> <strong>Started</strong> <strong>Guide</strong><br />
� Quick Reference Cards (1 set)<br />
� <strong>Cencon</strong> Software Maintenance & Support (CSM&S) Agreement Form<br />
� 1 Change Key<br />
� 7 <strong>Cencon</strong> Smart Keys:<br />
� 2 red SA Keys<br />
� 3 black Logon Keys<br />
� 1 white Clock Set Key (for Gen2 locks)<br />
� 1 grey ReSync Key (for Gen2 locks)<br />
� Mode Authorization License(s) (One or more)<br />
� Bank Mode (p/n 201191). Includes 2 green B keys.<br />
� FLM Mode (p/n 201192). Includes 2 blue F keys.<br />
� Route Mode (p/n 201193). Includes 2 yellow R keys.<br />
� <strong>Cencon</strong> 4 Installation Key (p/n 202202) - Orange key programmed for installation. Uniquely coded and tagged per company. Packaged and<br />
shipped separately for security reasons.<br />
� <strong>Cencon</strong> 4 Dispatch Kit: (p/n 201181)<br />
� <strong>Cencon</strong> USB Key Box - Uniquely coded per company.<br />
� USB cable<br />
FCC Notice<br />
F<br />
CENCON KEY BOX<br />
MODEL 202201<br />
The <strong>Cencon</strong> Key Box is manufactured by <strong>Kaba</strong> Mas LLC, 749 W. Short Street, Lexington, KY, 40508, U.S.A., 859-253-4744, HTTP://www.kabamas.com.<br />
This device complies with Part 15 of the FCC Rules. Operation is subject to the following two conditions: (1) this device may not cause<br />
harmful interference, and (2) this device must accept any interference received, including interference that may cause undesired operation.<br />
An Enterprise / Multi-Server License Kit also is available - p/n 201194. This kit option includes all items in the Single Server Option and all 3 Mode<br />
Authorization Licenses shown above. A <strong>Cencon</strong> 4 Enterprise / Multi-Server License Certificate is provided instead of the Single Server License<br />
Certificate. The Installation Key and Dispatch Kits are still required for implementation and are still ordered separately.<br />
If you are missing any of the above items, contact <strong>Kaba</strong> Mas Technical Support at 1 (800) 950-4744.<br />
Optional Order Items:<br />
� <strong>Cencon</strong> 4 Software Maintenance & Support Agreement<br />
� <strong>Cencon</strong> On-Site Training for hands-on lock installation and complete lock and software operation.<br />
� CenTran 4 (XML) Software (p/n 201182)<br />
� <strong>Cencon</strong> Key Maintenance Utility (KMU) Software Kit (p/n 201126)<br />
(See www.<strong>Kaba</strong>Mas.com/cencon4 for more information.)<br />
System Requirements<br />
Note<br />
The minimum system requirements identified for <strong>Cencon</strong> must be met in addition to whatever is required for the PC operating system and the<br />
Database Management System. Please refer to the <strong>Kaba</strong> Mas web site to review the appropriate system requirements at: www.kabamas.com/cencon4.<br />
<strong>Cencon</strong> System Requirements<br />
To use the <strong>Cencon</strong> program, the following minimum hardware and software requirements must be met:<br />
� IBM compatible PC that is capable of running Windows and has an available USB port for the <strong>Kaba</strong> Mas USB Key Box.<br />
Note<br />
The <strong>Cencon</strong> Key Box requires a fully compliant USB 2.0 connection. Some computers, especially laptops and notebooks, may not provide<br />
sufficient power for the <strong>Cencon</strong> Key Box. In these cases it may be necessary to use a powered USB hub to attach the <strong>Cencon</strong> Key Box. On<br />
laptops or notebooks with “power saving” features that turn off USB power, the computer’s Operating System (OS) could disconnect from<br />
the <strong>Cencon</strong> Key Box. In this instance, after awakening the computer and <strong>Cencon</strong> 4 software, unplug and re-plug the USB cable between<br />
the computer and the <strong>Cencon</strong> Key Box.<br />
Document # 2070.127 Rev. A 12/09 <strong>Cencon</strong> 4 <strong>Getting</strong> <strong>Started</strong> <strong>Guide</strong><br />
Page 4
� 2 GB RAM<br />
� CD-ROM Drive<br />
� Hard Disk Drive with at least 50 megabytes disk space free<br />
Important Note<br />
If you are upgrading from a previous version of <strong>Cencon</strong>, you should also allow ample disk space for database growth.<br />
� Windows XP 32 bit Professional (Service Pack 3), Windows Vista 32/64 bit (SP 2), or Windows 7 32/64 bit<br />
� You must be logged into Windows with Admin authority<br />
� Windows Vista 64 bit and Windows 7 64 bit are supported for the <strong>Cencon</strong> USB Key Box only. The <strong>Cencon</strong> PCIO card is not supported<br />
under the Windows Vista or Windows 7 64 bit operating systems.<br />
� An installed Database Management System (DBMS) - Microsoft SQL Server 2005 or SQL 2008 (including the SQL Server Express,<br />
Standard, or Enterprise Editions.)<br />
� The SQL Server installation does not have to be on the same computer as <strong>Cencon</strong>. You will need to have a valid ODBC connection to<br />
SQL Server for <strong>Cencon</strong> to use.<br />
� The above computer requirements do not include the requirements for SQL Server. If SQL Server is being run on the same computer as<br />
<strong>Cencon</strong>, then the total requirements will be the requirements of <strong>Cencon</strong> plus those of SQL Server.<br />
� The requirements of the SQL Server installation will vary depending on the number of locks and users being used by <strong>Cencon</strong> and the<br />
number of <strong>Cencon</strong> installations connected to that DBMS.<br />
Note<br />
If you do not have an existing Microsoft SQL Server database, you can download a free copy of the latest Microsoft SQL Server Express Edition<br />
from the Microsoft web site at http://www.microsoft.com/express/sql/default.aspx You should also download and install the SQL Server<br />
Management Studio.<br />
Be sure to read the sections on system requirements and prerequisites. Contact <strong>Kaba</strong> Mas Technical Support for additional information.<br />
Document # 2070.127 Rev. A 12/09 <strong>Cencon</strong> 4 <strong>Getting</strong> <strong>Started</strong> <strong>Guide</strong><br />
Page 5
Installation Scenarios and Required Processes<br />
There are 4 different installation scenarios under which the <strong>Cencon</strong> 4 Software can be installed. There are unique installation processes for each of<br />
the 4 scenarios as follows:<br />
1. New Install<br />
� Contact <strong>Kaba</strong> Mas to review system requirements and database setup<br />
� Review Software Maintenance Agreement<br />
� Identify Company ID<br />
� Install <strong>Cencon</strong> USB KeyBox<br />
� Install <strong>Cencon</strong> USB KeyBox drivers<br />
� If you do not already have a database management system (DBMS), download and install Microsoft SQL Server Express 2008 and SQL<br />
Server Management Studio Express.<br />
� Create a Database Client ODBC connection<br />
� Run the <strong>Cencon</strong> 4 <strong>Cencon</strong>DBSetupUtility to set up the Database<br />
� Install <strong>Cencon</strong> 4<br />
� Start <strong>Cencon</strong> 4 Program and Identify Database Connection<br />
� Add Special Supervisor and Supervisor<br />
� Logon to <strong>Cencon</strong> 4<br />
� Define and Add Regions (if applicable)<br />
� Define and add Bank Branches (if applicable)<br />
� Define and add Customers (if applicable)<br />
� Add additional users<br />
� Customize Authorizations<br />
� Activate Locks<br />
2. <strong>Cencon</strong> Upgrade to <strong>Cencon</strong> 4 with Data Imported from <strong>Cencon</strong> 1.5.x or lower<br />
� Contact <strong>Kaba</strong> Mas to review system requirements and database setup<br />
� Review Software Maintenance Agreement<br />
� Record Current Authorization Levels<br />
� Install <strong>Cencon</strong> USB Key Box<br />
� Install <strong>Cencon</strong> USB Key Box drivers<br />
� If you do not already have a database management system (DBMS), download and install Microsoft SQL Server Express 2008 and SQL<br />
Server Management Studio Express.<br />
� Create a Database Client ODBC connection<br />
� Run the <strong>Cencon</strong> 4 <strong>Cencon</strong>DBSetupUtility to create a Database and import the existing <strong>Cencon</strong> data<br />
� Install <strong>Cencon</strong> 4 Program<br />
� Start <strong>Cencon</strong> 4 Program and Identify Database Connection<br />
� Logon to <strong>Cencon</strong> 4 Program<br />
� Define and Merge Regional Databases (if applicable)<br />
� Define and add Bank Branches (if applicable)<br />
� Define and add Customers (if applicable)<br />
� Customize Authorization Levels<br />
3. <strong>Cencon</strong> Upgrade from Version 2.x to 4<br />
� Install <strong>Cencon</strong> USB Key Box<br />
� Install <strong>Cencon</strong> USB Key Box drivers<br />
� Upgrade database to at least Microsoft SQL Server 2005 (or 2005 Express) if at a previous version<br />
� Install <strong>Cencon</strong> 4 Program<br />
� Run the <strong>Cencon</strong> 4 <strong>Cencon</strong>DBSetupUtility to convert the existing database to the <strong>Cencon</strong> 4 configuration<br />
� Logon to <strong>Cencon</strong> 4 Program<br />
� Define and Merge Regional Databases (if applicable)<br />
� Define and add Bank Branches (if applicable)<br />
� Define and add Customers (if applicable)<br />
� Customize Authorization Levels<br />
4. <strong>Cencon</strong> 4 Upgrade from Version 3.0 or 3.1<br />
� Install <strong>Cencon</strong> USB Key Box<br />
� Install <strong>Cencon</strong> USB Key Box drivers<br />
� Upgrade database to at least Microsoft SQL Server 2005 (or 2005 Express) if at a previous version<br />
� Run the <strong>Cencon</strong> 4 <strong>Cencon</strong>DBSetupUtility to convert the existing database to the <strong>Cencon</strong> 4 configuration<br />
� Install <strong>Cencon</strong> 4 Program<br />
� Logon to <strong>Cencon</strong> 4 Program<br />
� Define and Merge Regional Databases (if applicable)<br />
� Define and add Bank Branches (if applicable)<br />
� Define and add Customers (if applicable)<br />
� Customize Authorization Levels<br />
Document # 2070.127 Rev. A 12/09 <strong>Cencon</strong> 4 <strong>Getting</strong> <strong>Started</strong> <strong>Guide</strong><br />
Page 6
Before Installing the <strong>Cencon</strong> Software<br />
Important Note<br />
It is required that you contact <strong>Kaba</strong> Mas Technical Support at 1(800) 950-4744 before installing or upgrading the <strong>Cencon</strong> software to review<br />
minimum system requirements and database setup (including upgrading the database from a previous version of <strong>Cencon</strong>), and to perform data<br />
validity checks on any current <strong>Cencon</strong> data.<br />
Review Software Maintenance Agreement<br />
A hard copy of the <strong>Cencon</strong> Software Maintenance & Support Agreement has been included in the software package. It is recommended that you<br />
review the Maintenance Agreement at this time. You also have the option to view and print the Maintenance Agreement when you install the software,<br />
and you can also review the Maintenance Agreement online at www.kaba-mas.com\cencon4.<br />
WARNING<br />
Identify Company ID<br />
Company ID<br />
During the installation process, you will be required to enter a unique four-digit Company ID. If you are a branch of a larger company, this ID must<br />
be identical to that used for all other <strong>Cencon</strong> installations by your company. YOU MUST determine what the four-digit number is before you<br />
begin the installation process. Once chosen and input into the system, you should record and secure the Company ID since the number<br />
becomes encrypted and cannot be changed.<br />
Important Note<br />
Locks that have been initialized in a different company’s system can only be activated in your company’s system after having been “shelved” in<br />
their original system.<br />
Document # 2070.127 Rev. A 12/09 <strong>Cencon</strong> 4 <strong>Getting</strong> <strong>Started</strong> <strong>Guide</strong><br />
Page 7
Complete the following steps to install the software:<br />
Software Installation and Setup<br />
1. Logon to the PC system as a user with Local Admin (or higher) rights in order to successfully install the software.<br />
2. Verify that your Windows operating system is at the latest service level. (See your Window's Help and Support function if you need assistance<br />
with this.)<br />
Caution<br />
Be extremely cautious in bringing the Windows operating system to the latest service level. With the release of Windows 7,<br />
running a Windows Update on a Windows Vista system will update the operating system to Windows 7.<br />
3. Check the PC Date and Time Properties (date, time, time zone, DST adjustment setting) from the Control Panel to ensure accuracy. Adjust, if<br />
necessary, before proceeding.<br />
Note<br />
It is strongly recommended that you close all other applications before installing the <strong>Cencon</strong> software. It is also recommended that you<br />
review the <strong>Cencon</strong> Reference Manual before installing the software.<br />
4. If you have a previous version of <strong>Cencon</strong> installed, you should ensure that data has been archived in accordance with the customer archive<br />
requirements and then backup the current <strong>Cencon</strong> database.<br />
5. Insert the <strong>Cencon</strong> 4 Install CD into an appropriate CD-ROM drive on the PC.<br />
If the <strong>Cencon</strong> installation program does not start automatically:<br />
a. Select the Start icon in the lower left of the Windows screen.<br />
b. Next select the Run icon from the Windows menu. The Run Window is displayed.<br />
c. Enter the letter designation for the CD-ROM drive followed by launch.exe as shown above.<br />
d. Click on the OK button.<br />
The <strong>Cencon</strong> Version 4.0 Software Installation dialog is loaded and the Main Menu is displayed:<br />
Document # 2070.127 Rev. A 12/09 <strong>Cencon</strong> 4 <strong>Getting</strong> <strong>Started</strong> <strong>Guide</strong><br />
Page 8
6. From the Main Menu, click on the Install button.<br />
The first software installation screen is displayed:<br />
Different drivers and software are required depending on whether you are running the 32 bit or the 64 bit version of Windows. If you need help<br />
determining which version of Windows you are running, visit: http://support.microsoft.com/kb/827218.<br />
7. Press the button corresponding to your operating system (the following screen samples are for a 32 bit system):<br />
Document # 2070.127 Rev. A 12/09 <strong>Cencon</strong> 4 <strong>Getting</strong> <strong>Started</strong> <strong>Guide</strong><br />
Page 9
8. Install the Software Prerequisites<br />
Click the Prerequisites button to install the required support software, primarily Microsoft .NET 3.5. If you know that .NET 3.5 is already on<br />
your system, you can skip this very lengthy step.<br />
Depending on what is already installed on your system, you may see forms requesting permission to install Windows Installer, .NET 3.5, and<br />
C++ Runtime libraries. The following is an example:<br />
These Windows related components are not part of the <strong>Cencon</strong> software but are required for it to operate properly. All the necessary<br />
prerequisite components will be installed automatically but you must press the appropriate Next or Install buttons for them to proceed. Note<br />
that there may be a considerable delay if all of them must be installed. The .NET installation can be especially lengthy.<br />
9. Install the hardware drivers<br />
<strong>Cencon</strong> 4 supports both the <strong>Cencon</strong> PCIO based key readers and the new <strong>Cencon</strong> Key Boxes.<br />
Click the Windows Drivers button to automatically install the appropriate hardware drivers using the <strong>Cencon</strong> driver installation utility:<br />
Document # 2070.127 Rev. A 12/09 <strong>Cencon</strong> 4 <strong>Getting</strong> <strong>Started</strong> <strong>Guide</strong><br />
Page 10
The driver installation utility generates detailed status information and does not require user input. The completed driver installation display:<br />
10. Install the <strong>Cencon</strong> 4 Program<br />
Complete the following steps to install the software:<br />
a. From the Install Software Menu click the <strong>Cencon</strong> 4.0 button.<br />
Document # 2070.127 Rev. A 12/09 <strong>Cencon</strong> 4 <strong>Getting</strong> <strong>Started</strong> <strong>Guide</strong><br />
Page 11
The <strong>Cencon</strong> 4.0 Setup Wizard screen is displayed. The Setup Wizard is a Windows program that will take you through the rest of the<br />
setup process. Once completed, you will be returned to the <strong>Cencon</strong> Version 4.0 Install Program screen.<br />
b. Click on Next > to continue with the installation.<br />
The Software License Agreement acceptance screen is displayed.<br />
Document # 2070.127 Rev. A 12/09 <strong>Cencon</strong> 4 <strong>Getting</strong> <strong>Started</strong> <strong>Guide</strong><br />
Page 12
c. Read the Software License Agreement, select "I Agree", and then click on the Next > button to continue.<br />
The Select Installation Folder window is displayed to allow you to select the program folder to which the <strong>Cencon</strong> 4 programs will be<br />
added.<br />
Installation Directory<br />
The default installation directory is shown. It is recommended that you install the software to the default folder (i..e.,<br />
<strong>Cencon</strong>4.) If you want the <strong>Cencon</strong> 4 software installed in another directory, click on the Browse button and select the<br />
new path.<br />
It is strongly recommended that you not change the installation directory to c:\Program Files on Windows Vista and<br />
above.<br />
d. Click on the Next > button to add the programs to the designated folder.<br />
The Confirm Installation screen is displayed:<br />
Document # 2070.127 Rev. A 12/09 <strong>Cencon</strong> 4 <strong>Getting</strong> <strong>Started</strong> <strong>Guide</strong><br />
Page 13
e. If there is anything you wish to change, click on the < Back button. Otherwise, click on Next > to install the program with the designated<br />
settings.<br />
The Installing <strong>Cencon</strong> 4.0 screen displays an indication of the installation progress.<br />
f. Click on the Next > button to continue.<br />
The Installation Complete screen is then displayed indicating that the <strong>Cencon</strong> 4 program has been successfully installed:<br />
Document # 2070.127 Rev. A 12/09 <strong>Cencon</strong> 4 <strong>Getting</strong> <strong>Started</strong> <strong>Guide</strong><br />
Page 14
g. Click on the Close button to return to the Software Install screen.<br />
Document # 2070.127 Rev. A 12/09 <strong>Cencon</strong> 4 <strong>Getting</strong> <strong>Started</strong> <strong>Guide</strong><br />
Page 15
Note<br />
Install the Database Client ODBC Driver<br />
If you are upgrading a previous version of <strong>Cencon</strong>, you should already have an ODBC connection. You have the option to skip ahead to the section<br />
titled Database Preparation ; however, due to differences between the previous connection type and the new Native Client connection, it is highly<br />
recommended that you go ahead and create a new ODBC connection for maximum efficiency of data handling.<br />
Each DBMS has an ODBC driver that must be installed on the system that is going to be running <strong>Cencon</strong>. It is possible that this system is the same<br />
one that is running the DBMS, or the DBMS may be on a server.<br />
The administrator is required to install the ODBC driver for the DBMS being used with <strong>Cencon</strong> and to configure it to connect to the <strong>Cencon</strong> database<br />
that has been set up.<br />
1. From the Windows Start button, select Control Panel, Administrative Tools, and finally, Data Sources (ODBC). This opens the Windows<br />
ODBC Data Source Administrator window:<br />
2. From the ODBC Data Source Administrator window, select the System DSN tab:<br />
This selection displays a listing of existing system data source names.<br />
3. To create a new data source for the <strong>Cencon</strong> connection (including the server and the default database), click on the Add button. The Create<br />
New Data Source screen is displayed. This selection displays a listing of drivers for data sources:<br />
Document # 2070.127 Rev. A 12/09 <strong>Cencon</strong> 4 <strong>Getting</strong> <strong>Started</strong> <strong>Guide</strong><br />
Page 16
4. Select the driver for SQL Server Native Client (if available) and click on Finish If the Native Client driver is not available, the SQL Server<br />
driver will work but usually provides slower data transfer.<br />
The Create A New Data Source to SQL Server screen is displayed:<br />
5. Enter the name for your new data source.<br />
6. Enter a description of the new data source.<br />
7. Enter the name of the SQL Server computer and instance to which the data source will connect for <strong>Cencon</strong> processing.<br />
Example<br />
If the default instance was selected for a SQL Server Express 2005 data source, the entry for the server should be Computer<br />
Name\SQLEXPRESS. To determine your computer's name:<br />
1. Select and right click on the My Computer icon from your desktop (or from Folders.)<br />
2. Select the Properties menu item. The System Properties screen is displayed.<br />
3. Click on the Computer Name tab.<br />
Document # 2070.127 Rev. A 12/09 <strong>Cencon</strong> 4 <strong>Getting</strong> <strong>Started</strong> <strong>Guide</strong><br />
Page 17
4. The Computer Name can be identified by taking the full computer name and then removing the Domain name from it. In our example<br />
above the computer name is “engsfcomp”.<br />
8. Click on Next > to display the Microsoft SQL Server DSN Configuration screen:<br />
9. Select the desired method of authentication.<br />
10. Ensure that the checkbox for accessing SQL Server to obtain other default settings is checked.<br />
11. Click on Next> to continue to the DSN Configuration:<br />
Document # 2070.127 Rev. A 12/09 <strong>Cencon</strong> 4 <strong>Getting</strong> <strong>Started</strong> <strong>Guide</strong><br />
Page 18
The default database should be left as “master” for the time being. Once you have created the database, you will be instructed to return to this<br />
location to change the default database to the name of the new database.<br />
12. Click on Next > to continue. The next screen of the DSN Configuration is displayed:<br />
13. Click on Finish to continue. The ODBC Microsoft SQL Server Setup screen is displayed:<br />
Document # 2070.127 Rev. A 12/09 <strong>Cencon</strong> 4 <strong>Getting</strong> <strong>Started</strong> <strong>Guide</strong><br />
Page 19
14. You should test the ODBC connection to ensure that it is good by clicking the Test Data Source button.<br />
The SQL Server ODBC Data Source Test screen is displayed and will report the results of the test:<br />
15. Click on OK to continue. The ODBC Microsoft SQL Server Setup screen is redisplayed.<br />
Document # 2070.127 Rev. A 12/09 <strong>Cencon</strong> 4 <strong>Getting</strong> <strong>Started</strong> <strong>Guide</strong><br />
Page 20
16. Click on OK to continue to complete setup of the new ODBC data source.<br />
The ODBC Data Source Administrator screen is redisplayed with the new data source reflected in the System DSN list:<br />
Document # 2070.127 Rev. A 12/09 <strong>Cencon</strong> 4 <strong>Getting</strong> <strong>Started</strong> <strong>Guide</strong><br />
Page 21
Database Conversion - Estimate Space Requirements<br />
The <strong>Cencon</strong> Database Estimator is provided to estimate the additional disk space required on your database server(s) when converting <strong>Cencon</strong> 2 or<br />
<strong>Cencon</strong> 3 databases to the <strong>Cencon</strong> 4 format.<br />
Before Estimating Space Requirements<br />
If your database and/or your logs physically reside on a network drive or drives that you do not currently have mapped to a local drive, you must map<br />
them so that they can be accessed by the estimator. From the Control Panel, select Tools-> Map Network Drive. The Map Network Drive screen is<br />
displayed and you can map the location(s).<br />
Estimating Space Requirements<br />
1. Select the Start icon from the Windows task bar.<br />
2. Next select the Run icon from the Windows menu. The Run Window is displayed.<br />
3. With the <strong>Cencon</strong> 4 Install CD still in the CD-ROM drive, enter the letter designation for the CD-ROM drive followed by<br />
DBSetupUtility\<strong>Cencon</strong>DBEstimator.exe as shown below. You can alternatively select the location via the Browse button.<br />
4. Click on the OK button.<br />
The first window of the <strong>Cencon</strong> Database Estimator is displayed:<br />
Document # 2070.127 Rev. A 12/09 <strong>Cencon</strong> 4 <strong>Getting</strong> <strong>Started</strong> <strong>Guide</strong><br />
Page 22
5. Click on Next >> to go to the select ODBC Connection window:<br />
Document # 2070.127 Rev. A 12/09 <strong>Cencon</strong> 4 <strong>Getting</strong> <strong>Started</strong> <strong>Guide</strong><br />
Page 23
6. Click on the Select ODBC Data Source button to continue to the Select ODBC Connection for Data Source screen:<br />
7. Click on the Machine Data Source tab to select the ODBC data source to be used. This selection displays a listing of existing data source<br />
names:<br />
8. Select the Data Source for the database to be created and click on OK.<br />
The SQL Server Login prompt window is displayed.<br />
Note<br />
If SQL Server authentication was selected when defining the data source, you will also be prompted to enter the password.<br />
9. Click on OK to continue. The next screen displays a summary of your database connection settings:<br />
Document # 2070.127 Rev. A 12/09 <strong>Cencon</strong> 4 <strong>Getting</strong> <strong>Started</strong> <strong>Guide</strong><br />
Page 24
10. Click on Next >> to continue. The next screen allows you to specify where your database physically resides:<br />
Document # 2070.127 Rev. A 12/09 <strong>Cencon</strong> 4 <strong>Getting</strong> <strong>Started</strong> <strong>Guide</strong><br />
Page 25
11. Click on the Windows drive letter for the physical location of the database and also the drive letter for the physical location of the log. If you<br />
don't know the location, you can select "???" (question marks), but the estimator will not be able to determine if the converted database will "fit"<br />
on your selected drive(s).<br />
12. Click on Next >> to continue to the Estimation Results screen.<br />
Document # 2070.127 Rev. A 12/09 <strong>Cencon</strong> 4 <strong>Getting</strong> <strong>Started</strong> <strong>Guide</strong><br />
Page 26
The program will proceed to estimate the additional space required for the new <strong>Cencon</strong> 4 database. The processing time will vary depending<br />
on the original database size, anywhere from 30 seconds to 15 minutes.<br />
13. When the estimation process completes, the Estimation Results screen will display the results:<br />
Document # 2070.127 Rev. A 12/09 <strong>Cencon</strong> 4 <strong>Getting</strong> <strong>Started</strong> <strong>Guide</strong><br />
Page 27
The size of the added database storage required in megabytes, the size of the added transaction log file in mega-bytes, the size of the<br />
available storage on the drive containing the database in megabytes, and the size of the available storage on the drive containing the<br />
transaction log file in megabytes, are all displayed. Also displayed is a summary of whether the estimated additional space required will<br />
comfortably (by at least 50%) "fit" in the available space.<br />
Note<br />
If the space available says 0 (zero) then the drive letter is probably not mapped to real storage. Go back to step 9 and choose the correct<br />
drive and / or map the drive.<br />
Document # 2070.127 Rev. A 12/09 <strong>Cencon</strong> 4 <strong>Getting</strong> <strong>Started</strong> <strong>Guide</strong><br />
Page 28
Note<br />
Database Preparation<br />
Refer to the <strong>Kaba</strong> Mas web site to review the appropriate database setup procedures at: www.kaba-mas.com/cencon4.<br />
Set Up the Database<br />
Important Note<br />
Contact <strong>Kaba</strong> Mas Technical Support regardless of whether you are importing/converting data from a previous installation or doing a new<br />
installation.<br />
The <strong>Cencon</strong> Database Setup Utility is provided to create and initialize or update a <strong>Cencon</strong> 4 database on your database server. The Setup Utility is<br />
configured as a ‘Wizard’ type of user interface. It is found on the <strong>Cencon</strong> 4 Install CD and can be accessed by running it from the via the Start menu.<br />
Warning<br />
If you are importing data from a previous system and you had previously defined software authorizations for your logon users, the old<br />
authorization settings will be deleted in the import process. Record your current authorization settings before importing the data to the new<br />
database. Since the <strong>Cencon</strong> 4 software uses role based operations as the new method to control access to software functions, you will have to<br />
use/create new role based user authorizations (using the new version of the software) that are based on the old individual software authorization<br />
settings.<br />
1. Select the Start icon from the Windows task bar.<br />
2. With the <strong>Cencon</strong> 4 Install CD in the CD-ROM drive, enter the letter designation for the CD-ROM drive followed by<br />
DBSetupUtility\<strong>Cencon</strong>DBSetupUtility.exe as shown below. You can alternatively select the location via the Browse button.<br />
3. Click on the OK button.<br />
The first window of the <strong>Cencon</strong> Database Setup Utility is displayed:<br />
Document # 2070.127 Rev. A 12/09 <strong>Cencon</strong> 4 <strong>Getting</strong> <strong>Started</strong> <strong>Guide</strong><br />
Page 29
4. Click on Next >> to continue to the Select Operation window:<br />
Document # 2070.127 Rev. A 12/09 <strong>Cencon</strong> 4 <strong>Getting</strong> <strong>Started</strong> <strong>Guide</strong><br />
Page 30
The <strong>Cencon</strong> Database Setup Utility requires an ODBC connection to the database that <strong>Cencon</strong> 4 is going to be using (this was initialized in the<br />
previous section). It can be used to set up a new blank database, set up a database and import data from a previous version of <strong>Cencon</strong>, or<br />
update and verify the format of a prior version of a <strong>Cencon</strong> 4 database. The items in the left column of this form are highlighted as you<br />
progress through this setup process. Note that you will not stop at all of the items depending on which functions you select as you proceed -<br />
some may be performed automatically and some may be skipped.<br />
If you are setting up a new database, check the "Create a new database catalog to contain the new <strong>Cencon</strong> database". Select "Create a<br />
new database schema to contain the new <strong>Cencon</strong> database" if specified by your database administrator (not normally required).<br />
5. Make the desired selection and click on Next >> to go to the select ODBC Connection window:<br />
6. Click on the Select ODBC Data Source button to continue to the Select ODBC Connection for Data Source screen:<br />
Document # 2070.127 Rev. A 12/09 <strong>Cencon</strong> 4 <strong>Getting</strong> <strong>Started</strong> <strong>Guide</strong><br />
Page 31
7. Click on the Machine Data Source tab to select the ODBC data source to be used. This selection displays a listing of existing data source<br />
names:<br />
8. Select the Data Source for the database to be created and click on OK.<br />
The SQL Server Login prompt window is displayed.<br />
Note<br />
If SQL Server authentication was selected when defining the data source, you will also be prompted to enter the password.<br />
9. Click on OK to continue. The next screen displays a summary of your database connection settings:<br />
Document # 2070.127 Rev. A 12/09 <strong>Cencon</strong> 4 <strong>Getting</strong> <strong>Started</strong> <strong>Guide</strong><br />
Page 32
10. Click on Next >> to continue.<br />
If you are creating a new <strong>Cencon</strong> database (you checked the "Create a new database catalog to contain the new <strong>Cencon</strong> database" option<br />
previously), the Create ODBC Catalog screen is displayed, allowing you to name your <strong>Cencon</strong> 4 database.<br />
Document # 2070.127 Rev. A 12/09 <strong>Cencon</strong> 4 <strong>Getting</strong> <strong>Started</strong> <strong>Guide</strong><br />
Page 33
If a database administrator has already set up the database that is to be used and has configured it under the ODBC connection, then you you<br />
can use the ODBC connection default catalog under <strong>Cencon</strong>DBSetupUtility. If not, then you need to specify and possibly create the catalog<br />
(database) to use.<br />
If you need to use a catalog other than the default, uncheck the Use selected ODBC connection default catalog box and enter the name of<br />
the catalog (database) where the <strong>Cencon</strong> files are stored or are to be stored.<br />
11. Click on Next >> to continue to the Select ODBC Schema screen.<br />
Document # 2070.127 Rev. A 12/09 <strong>Cencon</strong> 4 <strong>Getting</strong> <strong>Started</strong> <strong>Guide</strong><br />
Page 34
A Schema Name assigns ownership to a set of database tables. It is associated with a user logon. If you need to use a schema other than dbo,<br />
uncheck the Use selected ODBC connection default schema box and enter the name of your schema.<br />
12. Click on Next >> to continue to the Import <strong>Cencon</strong> 1.5.X Data screen.<br />
Document # 2070.127 Rev. A 12/09 <strong>Cencon</strong> 4 <strong>Getting</strong> <strong>Started</strong> <strong>Guide</strong><br />
Page 35
This screen may be used if you are upgrading from a version of <strong>Cencon</strong> earlier that 2.0. It allows you to import the <strong>Cencon</strong> 1.5.X data files into<br />
the <strong>Cencon</strong> 4 database.<br />
13. Click on Next >> to continue to the Import CenBank screen.<br />
Document # 2070.127 Rev. A 12/09 <strong>Cencon</strong> 4 <strong>Getting</strong> <strong>Started</strong> <strong>Guide</strong><br />
Page 36
This window is used if you are importing data from CenBank to <strong>Cencon</strong> 4 Bank Mode. It allows you to import the CenBank data files into the<br />
<strong>Cencon</strong> 4 database. Select the appropriate button for your installation scenario. The option you choose will determine the next screen that<br />
appears when you click on Next >> to continue.<br />
14. If you have imported data from previous <strong>Cencon</strong> or CenBank systems where the region was not previously identified, then you should address<br />
the assignment of regions to your data through the Assign Import Region option.<br />
Document # 2070.127 Rev. A 12/09 <strong>Cencon</strong> 4 <strong>Getting</strong> <strong>Started</strong> <strong>Guide</strong><br />
Page 37
The Data Validation window is useful for identifying and correcting data errors in the existing <strong>Cencon</strong> data. It is recommended that you<br />
perform this operation.<br />
15. Click on Next >> to continue to the Data Validation window.<br />
Document # 2070.127 Rev. A 12/09 <strong>Cencon</strong> 4 <strong>Getting</strong> <strong>Started</strong> <strong>Guide</strong><br />
Page 38
The Data Validation window is useful for identifying and correcting data errors in the existing <strong>Cencon</strong> data. It is recommended that you<br />
perform this operation.<br />
16. Click on Next >> to continue to the Confirmation screen for an Operation Summary:<br />
Document # 2070.127 Rev. A 12/09 <strong>Cencon</strong> 4 <strong>Getting</strong> <strong>Started</strong> <strong>Guide</strong><br />
Page 39
The Operation Summary information contains the parameters that have been defined for creating a new database.<br />
17. Review the parameters to ensure that they are correct and click on Next >> to continue to set up all tables, views, and stored procedures<br />
required by <strong>Cencon</strong> 4. The only data placed into the tables will be an initial entry in the configuration table and a default set of user<br />
authorizations.<br />
A running log of operations and results is displayed as the setup proceeds. The administrator can save this to a text file for review by clicking<br />
on the Save icon.<br />
Document # 2070.127 Rev. A 12/09 <strong>Cencon</strong> 4 <strong>Getting</strong> <strong>Started</strong> <strong>Guide</strong><br />
Page 40
18. Click on Close to complete the database setup.<br />
Modify the ODBC Connection<br />
If you have just created a new database, you must now return to the ODBC Data Source Administrator to change the default database for the<br />
ODBC connection. It must be changed to the name of the database that you created using the <strong>Cencon</strong> Database Setup Utility. In our example the<br />
database name is cencon4data.<br />
1. From the Windows Start button, select Control Panel, Administrative Tools, and finally, Data Sources (ODBC). This opens the Windows<br />
ODBC Data Source Administrator window:<br />
Document # 2070.127 Rev. A 12/09 <strong>Cencon</strong> 4 <strong>Getting</strong> <strong>Started</strong> <strong>Guide</strong><br />
Page 41
2. From the ODBC Data Source Administrator window, select the System DSN tab:<br />
This selection displays a listing of existing system data source names.<br />
3. Select your new <strong>Cencon</strong> data source and click the Configure button to access the Microsoft SQL Server DSN Configuration window.<br />
4. Click Next > two times to access the window which allows you to change the default database:<br />
5. Check the box "Change the default data base to:" and select your <strong>Cencon</strong> database in the selection box.<br />
6. Click Next > and then Finish to complete the process.<br />
Document # 2070.127 Rev. A 12/09 <strong>Cencon</strong> 4 <strong>Getting</strong> <strong>Started</strong> <strong>Guide</strong><br />
Page 42
To start the <strong>Cencon</strong> program:<br />
1. Select the Start icon from the Windows task bar.<br />
2. Select the Programs menu item.<br />
3. Select the <strong>Cencon</strong> menu item and then the <strong>Cencon</strong> 4 icon:<br />
Initial <strong>Cencon</strong> 4 Startup screen:<br />
Start the <strong>Cencon</strong> Program<br />
4. If you are going to use the <strong>Cencon</strong> USB Key Box, the first task is to initialize it. Verify that the <strong>Cencon</strong> USB Key Box is plugged into any USB<br />
port on your computer and select <strong>Cencon</strong> PCIO Card and Key Box Settings to display the Configuration Settings screen.<br />
5. Ensure that the Use <strong>Cencon</strong> USB Key Box radio button is selected.<br />
6. Enter your Company ID.<br />
The value entered for this field can be any complex four-digit number you wish to identify your company. You should choose a number that is,<br />
in some way, meaningful to your company. Record the Company ID and store it in a secure place.<br />
Document # 2070.127 Rev. A 12/09 <strong>Cencon</strong> 4 <strong>Getting</strong> <strong>Started</strong> <strong>Guide</strong><br />
Page 43
Warning:<br />
Record the Company ID and store it in a secure place. Once this ID is set, it becomes encrypted and it cannot be changed. If you are a<br />
branch of a larger company, you must enter the Company ID that has already been chosen for your company. If you are planning to activate<br />
locks from a remote PC, the Company ID must be the same on all systems involved in the process.<br />
7. Insert the Orange Install Key into the right Key Box reader position (the green LED on the right should be blinking) and press the Read Key<br />
Box Install Key button. The following message indicates successful initialization:<br />
Important Note:<br />
Remove the Key Box Install Key and store it in a safe place. You must have this key and the information on the attached key tag if you ever<br />
need to reinstall the <strong>Cencon</strong> Key Box or order replacement parts. You have a limited number of installs associated with the Key Box Install<br />
Key.<br />
8. Select Database Connection Settings to access the dialogs which allow you to identify the appropriate <strong>Cencon</strong> database.<br />
If the input field for Set this ODBC Connection as fixed database logon is checked, <strong>Cencon</strong> remembers the database connection for the<br />
next time the program is loaded.<br />
9. Select the button labeled Select ODBC Data Source to select the ODBC connection for the database to be used with the <strong>Cencon</strong> 4 system.<br />
10. Select the Catalog tab if you need to modify the database catalog name:<br />
Document # 2070.127 Rev. A 12/09 <strong>Cencon</strong> 4 <strong>Getting</strong> <strong>Started</strong> <strong>Guide</strong><br />
Page 44
11. Select the Schema tab if you need to modify the database schema:<br />
If using the default schema of "dbo" with one of the versions of Microsoft SQL Server, (i.e. Microsoft SQL Server 2005, 2008, 2008 Express,<br />
etc) you do not have to update the schema name.<br />
12. The following window is displayed when a database is successfully identified:<br />
Document # 2070.127 Rev. A 12/09 <strong>Cencon</strong> 4 <strong>Getting</strong> <strong>Started</strong> <strong>Guide</strong><br />
Page 45
13. Some initialization information must be entered before using <strong>Cencon</strong> for the first time. Select the Create First Logon for New <strong>Cencon</strong><br />
Installation icon to start the setup wizard which will walk you through this process:<br />
14. Click on Next > to continue.<br />
The Setup Region tab allows you to set up the Region Control feature. The Region Control feature allows the grouping of users, locks, and<br />
routes into specific regions. Global data access can be given to some users while data access can be limited for other users to only the users,<br />
locks and routes in a specific region. Note that this screen does not activate the <strong>Cencon</strong> region control feature - it defines a global region and<br />
assigns it to the initial user in case the region feature is activated at a later time.<br />
Document # 2070.127 Rev. A 12/09 <strong>Cencon</strong> 4 <strong>Getting</strong> <strong>Started</strong> <strong>Guide</strong><br />
Page 46
15. Follow the instructions on the screen to Add an initial region.<br />
16. Click on Next > to continue:<br />
Note<br />
Suggested User IDs: User IDs are very critical in the <strong>Cencon</strong> System. They can be up to sixty-four (64) characters in length. However, if<br />
you are using CenTran in conjunction with your <strong>Cencon</strong> system, you need to consider that the CenTran User ID field is limited to 20<br />
characters. Using “Bill” as a user ID is valid, however, you may have more than one “Bill” in your organization. Using “98709003” as a user<br />
ID is also valid but may get confusing. Additionally, in dispatching a person we know as “Bill” using the number “98709003” as the user ID<br />
can also be confusing. It is suggested that user IDs be alpha or alphanumeric. It is also suggested that you use “Nicknames”. For example,<br />
a user can be identified as “FLM1” and use “Bill N” in the Nickname field. Another example could be a user identified as “Tom1” and use<br />
“Flemming” (last name) in the Nickname field. Spaces are allowed in ID fields so “Bill Jones” is valid. However you choose to identify users,<br />
some thought should be given to it before you begin. Case sensitivity will apply if it has been selected in SQL Server as a requirement for<br />
the database.<br />
17. Follow the instructions on the screen to create an initial user. Keep in mind that this field may be case sensitive (depending on the SQL Server<br />
settings) and recognizes spaces as well as characters.<br />
Caution<br />
Document # 2070.127 Rev. A 12/09 <strong>Cencon</strong> 4 <strong>Getting</strong> <strong>Started</strong> <strong>Guide</strong><br />
Page 47
Nicknames can be up to sixty-four (64) characters in length. However, if you are using CenTran 3.x (and below) in conjunction<br />
with your <strong>Cencon</strong> system, you need to consider that the CenTran Nickname field is limited to 10 characters. The CenTran 4<br />
XML schema allows the use of longer names.<br />
18. Click on Next > to enter the password for the user.<br />
Note<br />
User Passwords are case sensitive and can be up to sixty-four (64) characters in length. Since the User Passwords for Software Users<br />
(black SS, S, and D keys) are used as logon passwords for the software, they should be kept secret.<br />
19. Enter a password (and the confirmation) and click on Next >.<br />
20. Place a black logon type key into the right hand position of the <strong>Cencon</strong> Key Box (note the blinking green LED). Follow the instructions on the<br />
screen for creating a user key and optional Windows logon. Press the Finished button when the users have been created.<br />
Document # 2070.127 Rev. A 12/09 <strong>Cencon</strong> 4 <strong>Getting</strong> <strong>Started</strong> <strong>Guide</strong><br />
Page 48
21. Click OK and then Finished to complete the start up process.<br />
22. Press Finished to end this part of the start up process.<br />
23. You are next given the opportunity to configure settings which affect all users of your <strong>Cencon</strong> installation. See the <strong>Cencon</strong> Reference Manual<br />
for details. You can return to this function at any time by selecting the Change Configuration Settings icon on the main screen.<br />
24. Finally, you can set preferences which apply to the current PC. See the <strong>Cencon</strong> Reference Manual for details. You can return to this function at<br />
any time by selecting the Change Preferences icon on the main screen.<br />
Document # 2070.127 Rev. A 12/09 <strong>Cencon</strong> 4 <strong>Getting</strong> <strong>Started</strong> <strong>Guide</strong><br />
Page 49
Logon to the <strong>Cencon</strong> 4 System<br />
The <strong>Cencon</strong> 4 startup window controls access to configuration settings and logon:<br />
<strong>Cencon</strong> allows a user to logon using either an authorized Special Supervisor, Supervisor, or Dispatcher key.<br />
Note<br />
Key Box : Place the logon key in the left key position.<br />
PCIO Key reader: Place your logon key only in position 0, 1 or 2.<br />
To logon using a key, select Logon to <strong>Cencon</strong> with Key. If the key is recognized as valid, enter the password as requested.<br />
Remember that this field is case sensitive and recognizes spaces as well as characters.<br />
Note<br />
You cannot logon to the system using a nickname, or a user ID. You must use the password specified for the key in the key reader. The key in the<br />
key reader identifies the user trying to log onto the <strong>Cencon</strong> 4 System.<br />
Hint<br />
If a window is displayed indicating that the User ID doesn't pass authority check, first check to make sure that the appropriate key is in the reader<br />
and that the reader is properly connected.<br />
After a successful logon, the <strong>Cencon</strong> 4 Main Menu window is displayed. Some of the items in the below window may not be displayed on your system<br />
depending on your user authority settings.<br />
Document # 2070.127 Rev. A 12/09 <strong>Cencon</strong> 4 <strong>Getting</strong> <strong>Started</strong> <strong>Guide</strong><br />
Page 50
The Status Bar is located at the bottom of the <strong>Cencon</strong> Main Menu screen. Prior to logon, this area displays the <strong>Cencon</strong> software version information.<br />
After logon, this bar displays the name of current logged on user, their assigned role, and region information (if region control is active).<br />
Document # 2070.127 Rev. A 12/09 <strong>Cencon</strong> 4 <strong>Getting</strong> <strong>Started</strong> <strong>Guide</strong><br />
Page 51
Prepare System for Operation<br />
Before Creating Users and Activating Locks...<br />
Depending on how you are using <strong>Cencon</strong>, certain information must be predefined so that it is available for selection during the<br />
process of creating users and activating locks. This data includes:<br />
� Bank Branches: If you are going to create any Bank users or locks, you must first define the Bank Branches to which they<br />
will be assigned using the Bank Branch Report.<br />
� User Types: If want to assign a customized authorization role to any new users, you need to create the new user roles before<br />
creating the users. See User Authorization for more information.<br />
� Region Definitions: If you are going to use Region control, you should first define your regions using the Region Report.<br />
� Customer ID: If you are going to assign a Customer ID to your users or locks, you should first define the Customers using the<br />
Customer Report.<br />
For New Install of <strong>Cencon</strong><br />
The following activities must be performed to prepare the <strong>Cencon</strong> for operation.<br />
1. Add appropriate FLM, Route, and Bank users<br />
2. Activate Locks<br />
Please refer to the <strong>Cencon</strong> Reference Manual (Document # 2071.127), found on the <strong>Cencon</strong> 4 Software Installation CD, for detailed instruction.<br />
The <strong>Cencon</strong> Reference Manual<br />
The <strong>Cencon</strong> 4 Reference Manual is best viewed in your web browser as a normal web page. It can be accessed by pressing the Help button on the<br />
main <strong>Cencon</strong> Window or by selecting Start → All Programs → <strong>Cencon</strong> 4 → <strong>Cencon</strong> 4 Reference Manual. If you want to print the current page of the<br />
manual, select File → Print on you web browser. If you want to print the entire Reference Manual or this <strong>Getting</strong> <strong>Started</strong> <strong>Guide</strong>:<br />
1. Insert the <strong>Cencon</strong> 4 Install CD into the appropriate drive of the PC.<br />
2. Select the Start icon in the lower left of the Windows screen.<br />
3. Next select the Run icon from the Windows menu. The Run Window will be displayed. If necessary, change the path to point to the drive being<br />
used to install the software.<br />
4. Click on the OK button.<br />
The <strong>Cencon</strong> 4 Installation Browser is loaded and the Main Menu of the Browser is displayed.<br />
5. Select the Reference Manual or <strong>Getting</strong> <strong>Started</strong> <strong>Guide</strong> button to load the selected manual into your web browser.<br />
6. Select Print from the File Menu to Print the document.<br />
Note<br />
If your printer has duplexing capability, you may want to select that as a Print option for the Reference Manual.<br />
7. Click on the Main Menu button to return to the Main Menu.<br />
Remove Previous <strong>Cencon</strong> and Cenbank Software<br />
If you had a previous Windows based version of the <strong>Cencon</strong> software installed and have now upgraded to <strong>Cencon</strong> 4, you should at some point<br />
remove the old version of the software. It is recommended that you ensure the upgrade to the new <strong>Cencon</strong> 4 software completed successfully and<br />
that all old data has been brought successfully into the new database before you remove the old software.<br />
Note<br />
Removal of the previously installed program will not affect any currently existing data files.<br />
Document # 2070.127 Rev. A 12/09 <strong>Cencon</strong> 4 <strong>Getting</strong> <strong>Started</strong> <strong>Guide</strong><br />
Page 52
Complete the following steps to remove the previous <strong>Cencon</strong> programs (this example shows the removal of <strong>Cencon</strong> 3.0/3.1):<br />
1. Select the Start icon in the lower left of the Windows screen.<br />
2. Next select the Settings icon from the Windows menu.<br />
3. Next select the Control Panel icon. The Control Panel Window is displayed:<br />
4. Click on the Add or Remove Programs icon. The Add or Remove Programs window is displayed:<br />
5. Select <strong>Cencon</strong> Software in the Currently installed programs list and click on the Change/Remove button.<br />
The <strong>Cencon</strong> Software - InstallShield Wizard window will appear:<br />
Document # 2070.127 Rev. A 12/09 <strong>Cencon</strong> 4 <strong>Getting</strong> <strong>Started</strong> <strong>Guide</strong><br />
Page 53
Note<br />
Removing the currently installed <strong>Cencon</strong> application and all of its components will not affect any currently existing database information.<br />
6. Click on Remove and then click the Next > button.<br />
The verify removal message is displayed:<br />
7. Click on the Yes button to continue. The Maintenance Complete window indicates successful removal:<br />
Document # 2070.127 Rev. A 12/09 <strong>Cencon</strong> 4 <strong>Getting</strong> <strong>Started</strong> <strong>Guide</strong><br />
Page 54
8. Click on Finish to return to the Add/Remove window.<br />
The <strong>Cencon</strong> software program will be removed from the list.<br />
9. Click on OK to return to the Control Panel window.<br />
10. Select Close from the File menu list to close the Control Panel window.<br />
Document # 2070.127 Rev. A 12/09 <strong>Cencon</strong> 4 <strong>Getting</strong> <strong>Started</strong> <strong>Guide</strong><br />
Page 55