INSTALLATION MANUAL ENGLISH - Solarfox
INSTALLATION MANUAL ENGLISH - Solarfox
INSTALLATION MANUAL ENGLISH - Solarfox

Create successful ePaper yourself
Turn your PDF publications into a flip-book with our unique Google optimized e-Paper software.
<strong>INSTALLATION</strong> <strong>MANUAL</strong><br />
<strong>ENGLISH</strong>
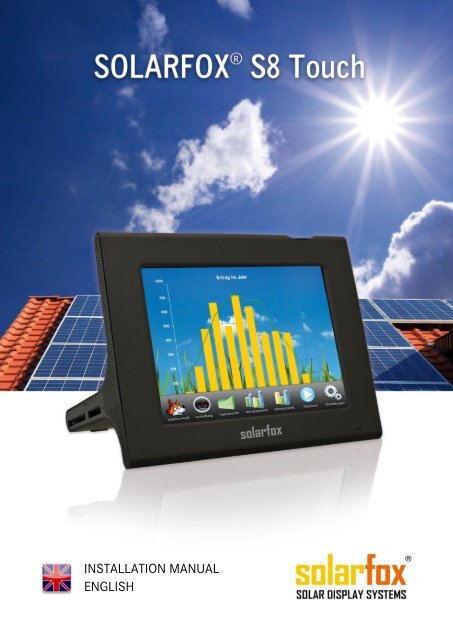
SOLARFOX® S8 SOLAR DISPLAY SYSTEMS| www.solar-fox.com<br />
Content<br />
I. Introduction ...................................................... Fehler! Textmarke nicht definiert.<br />
II. Display Installation ............................................................................................. 5<br />
1. Selecting the display location ................................................ Fehler! Textmarke nicht definiert.<br />
2. Start of <strong>Solarfox</strong> display setup .................................................................................................. 6<br />
2.1. Select your language ............................................................................................................. 6<br />
2.2. Setup-Wizard ......................................................................................................................... 6<br />
2.3. Internet connection ......................................................... Fehler! Textmarke nicht definiert.<br />
2.4. Advanced Settings .................................................................................................................... 8<br />
III. Options configuration ...................................... Fehler! Textmarke nicht definiert.<br />
1. Navigation Menu ................................................................. Fehler! Textmarke nicht definiert.<br />
2. Slideshow configuration .......................................................................................................... 11<br />
3. Standby-Funktion..................................................................................................................... 12<br />
4. Weather configuration ...................................................... Fehler! Textmarke nicht definiert.<br />
5. Audio & Music configuration ................................................................................................... 12<br />
6. Media-Player ............................................................................................................................ 13<br />
7. Visualization of Energyconsumption ....................................................................................... 13<br />
8. FAQ .......................................................................................................................................... 13<br />
9. Personal notes ......................................................................................................................... 14<br />
Please consider the environment before printing this manual.<br />
You can save15 pages of recycled papier, 1.5 l. of Water and 66 g. of CO2.<br />
Page 2 of 14 | <strong>Solarfox</strong>® S8 Touch - Setup Manual | July. 2012 V.1.1 | Firmwareversion 1.0.2
SOLARFOX® S8 SOLAR DISPLAY SYSTEMS| www.solar-fox.com<br />
I. Introduction<br />
Please read the complete manual before starting the <strong>Solarfox</strong>® S8 Display-System. The<br />
manual will guide you step- by- step through the setup procedures. Setup usually takes less<br />
than 5 minutes.<br />
ATTENTION!<br />
IMPORTANT SETUP NOTICE<br />
Please register your <strong>Solarfox</strong>®® S8 display before continuing!<br />
Your <strong>Solarfox</strong>®® account will usually be activated within 24 hours on weekdays.<br />
After activation you will receive your username and password for your account.<br />
Setup of your <strong>Solarfox</strong>® S8 Display will require the following steps:<br />
1) Selection of display location (WLAN / WiFi reception and electrical connection).<br />
2) Online- Registration of the display (please see page 4)<br />
3) Receiving your user- data (user name and password) via eMail<br />
4) Display configuration over “TouchScreen”, entry of user- data<br />
5) Starting <strong>Solarfox</strong>®® slideshow<br />
6) Change contents when logged on to: www.solarshow.net<br />
<strong>Solarfox</strong>® supports the following data sources:<br />
1) Solar-Log WEB Classic 1<br />
2) Solar-Log WEB Classic 2<br />
3) Solar-Log WEB Commercial<br />
4) Other Source / Your Website or FTP<br />
Important:<br />
Please note the instructions for display registration below:<br />
Page 3 of 14 | <strong>Solarfox</strong>® S8 Touch - Setup Manual | July. 2012 V.1.1 | Firmwareversion 1.0.2
SOLARFOX® S8 SOLAR DISPLAY SYSTEMS| www.solar-fox.com<br />
<strong>Solarfox</strong>® Online-Activation:<br />
1) Solar-Log WEB Classic 1:<br />
Solar-Log WEB Classic 1 is the classic Solar-Log website which has been offered since 2006. It is also<br />
known as www.SolarLog-home.eu . To use this older system, please enter http://setup.solar-fox.de in<br />
your web browser.<br />
2) Solar-Log WEB Classic 2:<br />
Log in to: http://home.SolarLog-web.eu/ with your user name and password. This takes you to your<br />
PV system automatically. Click on “Configuration”, in the left navigation menu. Fill out all required<br />
information and click on “Apply“. Scroll down and click below the <strong>Solarfox</strong>® logo on „Register<br />
now“. You will be redirected to the <strong>Solarfox</strong>® registration form. This creates a data interface to your<br />
Solar-Log. Fill in all required fields and click on submit. Your data will be approved by the <strong>Solarfox</strong>®<br />
support team.<br />
3) Solar-Log WEB Commercial:<br />
To connect a <strong>Solarfox</strong>® S8 display to Solar-Log WEB Commercial, please create a new module in<br />
Solar-Log WEB. At “Pages” you can find a module with the name “<strong>Solarfox</strong>®”. Select the Solar-Log <br />
(data logger) and enter a password. Activate the checkbox “module visible“. Save all Settings and edit<br />
the module, again click the <strong>Solarfox</strong>® logo. You will be redirected to the <strong>Solarfox</strong>® registration<br />
form. This is an automatic data interface which connects the <strong>Solarfox</strong>®® display to your Solar-<br />
Log. Fill in all required fields on the form and click on submit.<br />
4) Other sources:<br />
If you are uploading your Solar-Log monitoring data to your own web page or your own FTP account,<br />
you can also access this data with the <strong>Solarfox</strong>® system. Please use the <strong>Solarfox</strong>® registration form<br />
(http://setup.solar-fox.de) and enter the link / data source.<br />
Please note - online registration:<br />
Detailed information on initial operation can be found at: http://setup.solar-fox.de<br />
IMPORTANT: Data retrieval requires an active Internet connection and data logger.<br />
Page 4 of 14 | <strong>Solarfox</strong>® S8 Touch - Setup Manual | July. 2012 V.1.1 | Firmwareversion 1.0.2
SOLARFOX® S8 SOLAR DISPLAY SYSTEMS| www.solar-fox.com<br />
Page Contents<br />
The <strong>Solarfox</strong>® S8 display system contains:<br />
� <strong>Solarfox</strong>® S8 display<br />
� Power supply for Solar-Fox® S8 display<br />
� RJ-45 – USB LAN adapter (optional)<br />
II. Display Installation<br />
1. Selecting the display location<br />
When choosing a place for your S8 display system, take care that a power outlet and a good WiFi<br />
(WLAN) access are available.<br />
Page 5 of 14 | <strong>Solarfox</strong>® S8 Touch - Setup Manual | July. 2012 V.1.1 | Firmwareversion 1.0.2
SOLARFOX® S8 SOLAR DISPLAY SYSTEMS| www.solar-fox.com<br />
5V DC<br />
AC<br />
Audio<br />
AC<br />
The SOLARFOX® S8 will start automatically, when connected to power. The <strong>Solarfox</strong>® logo will<br />
appear and the boot sequence usually takes 1 to 2 minutes. Please do not disconnect the system from<br />
power when booting is in process. If the display does not show the <strong>Solarfox</strong>® logo, switch on the<br />
display using the ON- OFF button on the top of the display.<br />
2. Starting <strong>Solarfox</strong>® S8 Touch Display<br />
The <strong>Solarfox</strong>® logo is displayed along with the navigation menu. The navigation menu can be<br />
opened and closed by pressing the button on top of the housing. The navigations menu can be<br />
scrolled left and right to view all options.<br />
2.1. Select your language<br />
Once the logo is displayed choose the Configuration icon<br />
in the navigations menu to configure your system. Choose<br />
your desired language.<br />
2.2. Setup-Wizard<br />
USB x 2<br />
Choose the “Launch Setup Wizard”. The Setup Wizard will<br />
guide you step by step through the configuration process.<br />
Please do not disconnect the display during the setup<br />
process!<br />
SOLARFOX® S8 Display<br />
Page 6 of 14 | <strong>Solarfox</strong>® S8 Touch - Setup Manual | July. 2012 V.1.1 | Firmwareversion 1.0.2
SOLARFOX® S8 SOLAR DISPLAY SYSTEMS| www.solar-fox.com<br />
2.3. Internet connection<br />
WiFi (WLAN) (Ethernet) SOLARFOX® S8 supports WLAN/WIFI.<br />
Step 1 of 9 (configure a WiFi/WLAN network)<br />
Search for WiFi/WLAN networks available, which will be<br />
shown in a list. The overview of networks available will also<br />
show you, if the particular network is encoded. In that<br />
case you will see the type of encoding, e.g. WPA2. If you<br />
are unsure about the WPA password of your WLAN<br />
network, you will usually find it printed on the bottom of<br />
your WiFi/WLAN router. Signal strength of your network will be shown as a percentage. Attention: To<br />
secure trouble-free operation of your display, WiFi/WLAN signal strength should be at least 40%.<br />
Once you have selected your WiFi / WLAN network press “continue”.<br />
Step 2 of 9 (manual WiFi/WLAN configuration)<br />
Please note: You will have to take this step only, if you want<br />
to enter the network settings manually! If your WLAN<br />
network is hidden, you can enter a SSID manually. To do<br />
this, choose “Enter WiFi/WLAN ID manually (SSID)”. Please<br />
take care for correct spelling and the use of small and<br />
capital letters.<br />
Step 3 of 9 (enter WiFi/WLAN password)<br />
For encoded networks a WLAN password is required. Please use the correct spelling! Press<br />
“continue”.<br />
Step 4 of 9 (network configuration)<br />
Please enter the network settings that are required to<br />
provide the <strong>Solarfox</strong>® Display with internet access.<br />
Generally the network settings can be obtained<br />
automatically (DHCP). This means, your network is ready<br />
to connect the display to the internet automatically. You<br />
may also enter your network settings manually. If you chose to automatically obtain the network data<br />
please go directly to step 6 now, skipping step 5.<br />
Step 5 of 9 (manual network configuration)<br />
Please note: You will have to take this step only, if you want to enter the network settings manually!<br />
Please enter the required data. Ask your network- administrator for help, if you don’t know the<br />
required data.<br />
Page 7 of 14 | <strong>Solarfox</strong>® S8 Touch - Setup Manual | July. 2012 V.1.1 | Firmwareversion 1.0.2
SOLARFOX® S8 SOLAR DISPLAY SYSTEMS| www.solar-fox.com<br />
It may be helpful to list the data in the following chart:<br />
IP-Adress<br />
Subnetmask<br />
Standard Gateway<br />
Router IP-address<br />
DNS-Server<br />
IP-address: Use arrow keys to switch<br />
between input fields. Please enter the IP-<br />
Address which you want the <strong>Solarfox</strong>®<br />
computer to use. Take care that this IP-<br />
address is not being used yet in the<br />
network. Use the arrow keys to switch to<br />
the next box.<br />
Subnetmask: Please enter the<br />
Subnetmask. This will usually be 255.255.255.0, but it may differ in your network. If you are not<br />
certain about the correct IP, you may check another PC linked to the same network or ask your<br />
network administrator. Use the arrow keys to switch to the next box.<br />
Standard Gateway: Please enter the IP address of your Standard Gateway. In most cases, it’s the IP<br />
address of your router. Use the arrow keys to switch to the next box.<br />
DNS-Server: Now enter the IP address of the DNS-Server. In some cases this may be the same as the<br />
router IP-Address. Use the arrow keys to switch to the next box.<br />
2.4. Advanced Options<br />
Proxy-server: If you use a proxy then you can configure it here. This is normally only in a company<br />
network.<br />
Firmwareupdate: When a new firmware version is available the Display software can be updated over<br />
the Internet.<br />
Note! Do not shut-off or disconnected the device from the internet as long as the firmware update is<br />
running!<br />
Page 8 of 14 | <strong>Solarfox</strong>® S8 Touch - Setup Manual | July. 2012 V.1.1 | Firmwareversion 1.0.2
SOLARFOX® S8 SOLAR DISPLAY SYSTEMS| www.solar-fox.com<br />
Step 6 of 9 (<strong>Solarfox</strong>® account data / user data)<br />
User name: Please enter your <strong>Solarfox</strong>® user name. If<br />
you don’t have a user name yet, please register your<br />
display now at: http://setup.solar-fox.de . You will<br />
receive your user name and password via email after<br />
registering online.<br />
Password: Now enter your <strong>Solarfox</strong>® password. Press “continue”.<br />
Step 7 of 9 (Network Settings)<br />
Please check all settings you have made. To do this, you<br />
are shown all data at a glance. You will also find the MAC<br />
address of the <strong>Solarfox</strong>® S8 which you possibly need for<br />
your network or firewall settings.<br />
Press “continue” if all settings are correct, otherwise<br />
choose “back” to change your settings.<br />
Step 8 of 9 (connection test)<br />
In the connection test the <strong>Solarfox</strong>® S8 software will<br />
check for possible problems with your internet<br />
connection. If a failure is detected, a red notice will<br />
appear in the list. In that case please consult the<br />
Solar-fox FAQ section to find a solution for the<br />
problem. Further information can be found at:<br />
http://www.solar-fox.de � INFO � FAQ<br />
Step 9 of 9 (setup completion)<br />
Setup is now complete. Now your display is ready for use. The next step is to configure the slideshow<br />
to fit your requirements. See Section III (Options configuration).<br />
Page 9 of 14 | <strong>Solarfox</strong>® S8 Touch - Setup Manual | July. 2012 V.1.1 | Firmwareversion 1.0.2
SOLARFOX® S8 SOLAR DISPLAY SYSTEMS| www.solar-fox.com<br />
III. Options configuration<br />
1. Navigation Menu Overview<br />
Configuration Start-up configuration<br />
Slideshow (Start) Slideshow start<br />
Options<br />
Clock Clock start<br />
Slideshow, S0 data connection, Timer and Weather<br />
configurations<br />
Weather Weather location configuration<br />
Capacity Utilization The current load utilization % of your facility/plant.<br />
Daily Revenue Daily produced Revenue<br />
Monthly Revenue Monthly produced Revenue<br />
Annual Revenue Yearly produced Revenue<br />
Daily Balance Daily production and consumption comparison<br />
Monthly Balance Monthly production and consumption comparison<br />
Annual Balance Yearly production and consumption comparison<br />
Daily Consumption Daily Consumption Levels<br />
Monthly Consumption Monthly Consumption Levels<br />
Annual Consumption Yearly Consumption Levels<br />
Page 10 of 14 | <strong>Solarfox</strong>® S8 Touch - Setup Manual | July. 2012 V.1.1 | Firmwareversion 1.0.2
SOLARFOX® S8 SOLAR DISPLAY SYSTEMS| www.solar-fox.com<br />
2. Slideshow configuration:<br />
In the delivery status the Slideshow must be configured to present your PV data. Click on “Add<br />
Module to edit and add your desired module (s) to the slideshow.<br />
Arrow buttons on the left side of the screen: Used to change the order of the<br />
slide within the presentation.<br />
Slide name: Definition of slide content<br />
Picture select button: Pictures, logos and/or advertisements can be accessed<br />
from a USB-stick.<br />
Insert an USB stick into the back of the unit and then press the “Picture select”<br />
button. Choose the desired image using the “next” or “previous” buttons then<br />
choose “close”. The image will be automatically uploaded to the slide where you<br />
pressed the “picture” button. Full screen images need to have a resolution of<br />
800 x 600 pixels.<br />
Slide duration (counted in seconds): Using the – or + buttons the duration of the<br />
individual slide can be lengthened or shortened.<br />
Slide delete: Unwanted slides can be removed from the presentation. Deleted<br />
slides are stored in the memory and can be recalled with the “Add module” tab<br />
in the top right of the screen.<br />
Page 11 of 14 | <strong>Solarfox</strong>® S8 Touch - Setup Manual | July. 2012 V.1.1 | Firmwareversion 1.0.2
SOLARFOX® S8 SOLAR DISPLAY SYSTEMS| www.solar-fox.com<br />
3. Standby-Funktion<br />
The standard on/off times are 07:00 & 21:00<br />
(7am & 9 pm). These times can be changed<br />
to whatever times you would like. Simply<br />
touch the time and day that you would like to<br />
change and then choose the new hour or<br />
minutes.<br />
4. Weather Display Configuration<br />
Touch the buttons and enter the correct data<br />
for your location.<br />
5. Audio & Music configuration<br />
Sound Controls: Volume and loudness controls for all audio sounds. Touch one of the<br />
slider controls to adjust the volume.<br />
Mediaplayer: Use this slider to configure the<br />
volume of playback music.<br />
Notifications: System volume control for<br />
Touchscreen buttons.<br />
Back-ground Sounds: Volume control for<br />
back-ground sounds.<br />
The stop/play control turns off or starts the back-ground sounds.<br />
Page 12 of 14 | <strong>Solarfox</strong>® S8 Touch - Setup Manual | July. 2012 V.1.1 | Firmwareversion 1.0.2
SOLARFOX® S8 SOLAR DISPLAY SYSTEMS| www.solar-fox.com<br />
6. Media-Player<br />
Webradio and MP3 Player<br />
configuration. Simply choose a<br />
webradio site from the list or click<br />
on MP3 Player to play a song from a<br />
USB stick and then press play.<br />
7. Power Consumption<br />
If you would like to activate or de-activate the power consumption slide in the presentation just<br />
follow the the folowwing steps:<br />
In the navigations Menu select “Options”<br />
Then select “Consumption Overview” (green for on) or (red for off)<br />
To view the power consumption of your facility you need a Power-meter with a pulse-trigger that<br />
feeds into the data-logger over a S0-bus cable from the PV facility..<br />
Contact your data-logger suplier for further details.<br />
When the S0-bus information is available the S8 “Consumption Overview” can be activated to<br />
present the power consumption of your building and compare it to power generated from the PV<br />
facility.<br />
8. FAQ<br />
There is a list of frequently asked questions (FAQ) on www.solar-fox.com, which is regularly updated.<br />
Page 13 of 14 | <strong>Solarfox</strong>® S8 Touch - Setup Manual | July. 2012 V.1.1 | Firmwareversion 1.0.2
SOLARFOX® S8 SOLAR DISPLAY SYSTEMS| www.solar-fox.com<br />
9. Personal notes<br />
Use the following area to keep track of your S8 information.<br />
<strong>Solarfox</strong> S8 Serial Number:<br />
<strong>Solarfox</strong> S8 User name:<br />
Solarox Password:<br />
SOLARFOX® Solar Display Systems<br />
SOLEDOS GmbH, Karl-Groß-Str. 3, D-63584 Gründau, Germany<br />
Technischer Support:<br />
Tel. +49 (0) 18 03 – 50 40 25<br />
(9 Cent/Min. dt. Festnetz; max. 42 Cent/Min. Mobil)<br />
E-Mail: support@solar-fox.de<br />
Web: www.solar-fox.de/support<br />
Page 14 of 14 | <strong>Solarfox</strong>® S8 Touch - Setup Manual | July. 2012 V.1.1 | Firmwareversion 1.0.2