K' volution - Dental Kiefer
K' volution - Dental Kiefer
K' volution - Dental Kiefer

Create successful ePaper yourself
Turn your PDF publications into a flip-book with our unique Google optimized e-Paper software.
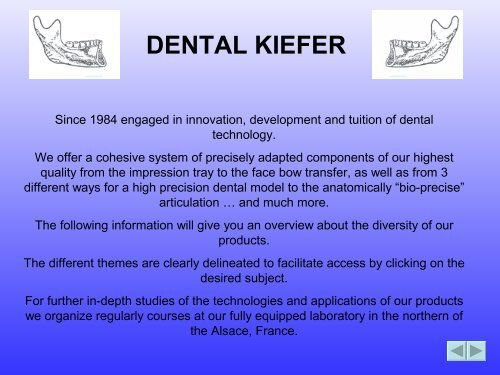
DENTAL KIEFER<br />
Since 1984 engaged in innovation, development and tuition of dental<br />
technology.<br />
We offer a cohesive system of precisely adapted components of our highest<br />
quality from the impression tray to the face bow transfer, as well as from 3<br />
different ways for a high precision dental model to the anatomically “bio-precise”<br />
articulation … and much more.<br />
The following information will give you an overview about the diversity of our<br />
products.<br />
The different themes are clearly delineated to facilitate access by clicking on the<br />
desired subject.<br />
For further in-depth studies of the technologies and applications of our products<br />
we organize regularly courses at our fully equipped laboratory in the northern of<br />
the Alsace, France.
Contents<br />
• Some useful ideas about preparations<br />
• Impression taking with „Twin Jection“<br />
• Face bow use on the patient – preparation for its<br />
dispatch special<br />
• Tray according to M.D.dent. Fischer<br />
• Poly Plus 2000 S<br />
• Steamcleaner DD 1500 AS<br />
• K‘<strong>volution</strong> – our fastest precision model<br />
production<br />
• Precision model production according to <strong>Kiefer</strong><br />
• Articulation and face bow application<br />
• Some clinical cases
Useful tips for the preparation<br />
We had an idea how the dental preparation might be facilitated-but<br />
unfortunately, somebody else has been decidedly faster.<br />
In the interest to spread knowledge we feel, nevertheless, compelled to<br />
acquaint all possible user with this idea.<br />
Thanking the originators „Brasseler-Komet“ for providing this documentation<br />
to us, we append hereunder some explanations about their technology.<br />
The work on the<br />
patient is<br />
encumbered with<br />
many problems. To<br />
warrant the best<br />
results and to<br />
facilitate our work, it<br />
is the more important<br />
to select the most<br />
suitable products.
The polished guiding pin offers a reliable support during the preparation,<br />
cleanses the part below the preparation‘s border to permit a proper<br />
impression taking and, at the same time, permits to dilate the root of the<br />
tooth.<br />
As actually already requested in 1977 by Professor Martingnoni, Rom, Italy.
And that leads us the problem<br />
of the precise impression<br />
which is considerably<br />
facilitated by the use of this<br />
diamond studded guiding pin.<br />
Which, under normal<br />
circumstances, obviates the<br />
need for coagulation<br />
measures.
High quality plastics molding materials:<br />
one of the bases of our inventions!<br />
stable, disinfectable ( up to 80 ° C ) reusable
Twimptray<br />
Can be used with most techniques and<br />
materials<br />
Opened impression tray for upper and lower<br />
impression at one time and in occlusion<br />
If needed, the palatal can<br />
be fixed
Twimptray<br />
Have a look at the perforations of<br />
occlusal contacts<br />
Beautiful antagonist impression<br />
For its protection, the impression is<br />
hanged on our shipping box
Twinvacuation<br />
innovative evacuation – and – pression technique<br />
Our tray is hollowed out. 2 holes at the inner<br />
sides ( molar area) are connected with the<br />
green tube.<br />
Under the handle, a conical injection channel<br />
allows to inject the cleaning liquids, correcting<br />
material, a.s.o.<br />
Specially designed for the<br />
most difficult cases:<br />
Its tube is fixed at the<br />
absorber of the dentists unit
DENTAL KIEFER<br />
TWIN JECTION
Corrective material only<br />
on the prepared stumps<br />
…..<br />
Common mistakes<br />
…. is the reason that the stumps also by using a<br />
precision model will be lower than the remaining<br />
teeth. The result: --► wrong articulation !<br />
Crowns and bridges will be to high in patients<br />
mouth = doctor has to grind !!<br />
Pre-impression taking after the preparation<br />
contributes to compression of the corrective<br />
materials and results in too small stumps.
„Drayh“- Box<br />
All parts of the system<br />
are reusable and can<br />
be sterilized !
Each size is available<br />
in short or long<br />
version =<br />
offering more comfort<br />
for the patient and<br />
saving material<br />
4 sizes – by colourcode<br />
Size 1 – red<br />
Size 2 – blue<br />
size 3 – orange<br />
size universal - green<br />
OK (upper) and<br />
UK (lower)– version<br />
UK with reinforcement<br />
Lower walls for the counter<br />
impression<br />
With the usual quantity for<br />
just one impression<br />
Twin Jection offers precision<br />
impression for both sides at<br />
the same time !<br />
OK with guide for the palate
Technical characteristics<br />
the “Wilson” curve<br />
With its sophisticated<br />
design and appropriate<br />
materials the<br />
impression tray is<br />
sturdier than most<br />
metal ones.<br />
The height for two<br />
impression is equal to<br />
other impression trays<br />
for only one !<br />
“Spee`sche” curve and closing angle were considered. The sturdy bottom<br />
saves material and enhances stability. Different thickness in front and<br />
backside!
Palate impression<br />
The reusable palate bit is<br />
simply to be put on the<br />
tray – it locks on !<br />
Routinely there is no need for<br />
a palate bit<br />
= no risk of gagging<br />
Where it is, however,<br />
indicated – e.g.<br />
Combinations or Totals
All impression trays‘ sizes are<br />
also available in transparent<br />
material<br />
- i.e. ideal to determine the size<br />
according to the patient‘s<br />
physical requirements.<br />
reusable elastic space holders may<br />
be cut to required length<br />
= saving corrective material.<br />
Elastic space holder<br />
Short version - white<br />
Long version - blue
Channel in bottom part on<br />
preparation side<br />
Extreme sturdy holder<br />
Conical bore of the<br />
injection aperture
Single phase<br />
e.g. polyether<br />
Twin Jection<br />
Twin Jection allows using practically<br />
any material and technique<br />
Or corrective impression taking by external dynamic injection<br />
Double mix
Theory<br />
Hydro, single phase, double mix, or corrective impression<br />
Common mistakes at the corrective impression:<br />
2. Pre-impression taking after the preparation<br />
3. Insufficient clearance = putty touches the gum. During the corrective<br />
impression the putty is pushed against the stump.<br />
If around the stump there is no clearance, how can the corrective<br />
material flow and reproduce the exact image of the preparation ?
Twin Jection:<br />
Technique 1<br />
The injection channel lays<br />
above the teeth occlusion<br />
Theory<br />
We recommend pre-impression prior to the preparation –<br />
providing the space for the corrective material and obviate<br />
cutting later on.<br />
Plus, the putty has enough time to harden.
Twin Jection:<br />
Technique 2<br />
Theory<br />
At the corrective impression with Twin Jection the material<br />
flows under pressure from occlusal along the prepared walls<br />
in the direction of sulcus. Impurities, such as blood, saliva and<br />
air bubbles are pushed out through the elastic gum. As the<br />
injection pistol with the corrective material will immediately be<br />
withdrawn after the injection, the produced pressure will fast<br />
dissipate without any deformation or overpressure of the<br />
impression.
Techniques<br />
4. Also the counter part!<br />
1. Putting the space holder<br />
2. Apply some putty<br />
and allow it to<br />
harden<br />
3. Fill the tray until the rim
The counter
The technique<br />
Following the hardening of<br />
the first impression<br />
– the elastic space holder<br />
will be retracted.
The technique<br />
Opening the injection<br />
channel between teeth<br />
center and main channel
The corrective impression<br />
The same to the counter side<br />
At first we fill the main channel<br />
Applying corrective material<br />
onto the impression –<br />
preparation side
The corrective impression<br />
After the prepared impression has been<br />
put into the patient`s mouth<br />
– Attention ! – the mouth should not be<br />
opened unduly to prevent spasm of the<br />
jaw muscles; which, in turn, might<br />
render insertion of the impression tray<br />
more difficult.<br />
Always insert OK (upper) first then the<br />
UK (lower ).Subsequently the patient<br />
should exert his bite without undue<br />
force.<br />
The unique advantage of our technology relying on external pressure<br />
results in a dynamic flow of the corrective material expelling blood, saliva<br />
and air bubbles through the elastic gum.
The result<br />
Equal distribution of the corrective material – to prevent<br />
differing heights of the stumps in the model.<br />
Quite obvious :<br />
The even<br />
distribution of the<br />
corrective material<br />
and is connection<br />
to the main<br />
channel
Dual opening<br />
for cleansing<br />
the channel or<br />
to cut septic<br />
parts.<br />
Novelty : Dual instrument for<br />
„Twin Jection“<br />
Round hole to<br />
clear above<br />
single stumps<br />
or for<br />
preparation of<br />
temporaries.
Novelty : Dual instrument for<br />
Examples for its use :<br />
„Twin Jection“<br />
Direct connection to the<br />
injection channel<br />
Cutting septic parts and<br />
undercuts<br />
Holed end comes useful in<br />
preparing single crowns and<br />
temporaries
Iron rules for successful impressions with<br />
„Twin Jection“<br />
• Selection of the optimal impression tray size is mandatory for the corrective<br />
material – channel must be exactly in the middle of the occlusion<br />
• Pre – impression before the preparation<br />
• Pre – impression to start invariably on the preparation`s side observing<br />
strictly proper alignment – then to close counter<br />
• At the pre – impression it is imperative to leave enough putty around the<br />
stump – approx. 3-4 millimeters and that the same thickness is also above<br />
the preparation`s borders adjoining the gum.<br />
• With more putty applied in the pre – impression phase it may provide a layer<br />
around the impression tray`s border – thus enhancing more stability.<br />
• For single crowns just a hole to the main channel is punched with our<br />
special tool – for several crowns or bridges a linear opening suffices.<br />
• Corrective impression always first to be put in upper jaw – even though the<br />
lower has been prepared. The patient will find the right position with the<br />
lower invariably.<br />
• Putty should preferentially have hard shore quality<br />
• Correcting material should have medium viscosity
The result :<br />
An even distribution<br />
of the corrective<br />
material across the<br />
whole impression.<br />
The only way to<br />
avoid differing<br />
heights of stone<br />
model dies.<br />
Single crowns<br />
Pre – impression before<br />
preparation – followed by opening<br />
the channel using the round hole
Bridge impression<br />
Bridge impression :<br />
- Pre – impression before preparation<br />
- Linear cutting to main channel<br />
That way one recognizes the mounting<br />
angle of the root. A prerequisite for is<br />
transfer to the replacement tooth
Inlay impression<br />
Considerably more<br />
economical than<br />
„Kofferdam“ – the rubber<br />
band for sports.<br />
For the pre – impression<br />
we cut a piece of that<br />
rubber foil.<br />
The transparent impression tray will<br />
be marked where the inlay<br />
preparation will be effected
Inlay impression<br />
The rubber piece is located in<br />
the desired area to create the<br />
occlusal space for the<br />
correcting material.<br />
For the corrective impression we remove<br />
the holder. The gap to the remaining teeth<br />
will ensure an adequate thickness of the<br />
corrective material around the area of<br />
preparation.
The result:<br />
An even distribution of the<br />
corrective material assures<br />
a perfect occlusion.<br />
Inlay impression<br />
Linear cutting in preparations area
Twin Jection in the orthodontics<br />
If children already obviously enjoy shooting pictures<br />
in the impression taking „Twin Jection“ must be<br />
comfortable.<br />
both jaws in one go<br />
Minimal material spent<br />
Super fast<br />
And agreeable<br />
Naturally also using alginat<br />
Just using putty<br />
– a perfect result
The produced precision models :<br />
Poly Plus 2000 S on the basis of<br />
„<strong>Kiefer</strong> Plus“ model system<br />
Partial work<br />
Impression – upper<br />
and lower in one – as<br />
usual. Resulting in a<br />
superior quality and<br />
surface than with<br />
alginat.
With thanks to „City <strong>Dental</strong> Laboratory<br />
Becker“ Neunkirchen,Germany<br />
Partial work
A correct bite occurs<br />
automatically – an<br />
ideal basis for a<br />
functional<br />
impression.<br />
Impression for totals<br />
Since it is a closed mouth<br />
impression „Twin jection“<br />
is ideal for total protetics<br />
and comfortable for the<br />
patient.<br />
Again a fast and<br />
distortion - free face bow<br />
transfer using our<br />
„speedy transfer“
Mounting of the upper<br />
Totals<br />
Without any further ado the position of the teeth in<br />
the articulator was the same as in the mouth.<br />
Vertical adaptability of<br />
our „WK light“ proves is<br />
worth.<br />
Old against new.<br />
The former dentist<br />
was of the opinion<br />
that a better basis<br />
prosthetics were<br />
unattainable.
Temporaries with „Twin jection“<br />
A pre – impression with putty will be made<br />
prior to the preparation. The special tool<br />
again serves to open the channel<br />
The external dynamic injection technology serves<br />
ideally also for the production of temporaries<br />
Modern self – mixing resins are used – those<br />
do not react with the „Twin jection“ tray<br />
material.
Temporaries with „Twin Jection“<br />
The result<br />
If for instance, a temporary with an<br />
intermediate part should be made, an<br />
artificial tooth takes its place in<br />
patient`s mouth to permit checking of<br />
the occlusion. Subsequently we take a<br />
pre – impression.<br />
The temporary in the impression – to remove<br />
it one may cut the putty.
Face bow transfer<br />
After the injection of the corective<br />
material<br />
The end holder of „speedy transfer“ is<br />
being placed. Concomitant – face bow<br />
transfer during impression taking.
speedy transfer<br />
Vertikal support for articulator<br />
Adjusting device<br />
Ear plug - opened<br />
End holder
Both sides :<br />
Equidistant<br />
adjustment of the<br />
ear plugs<br />
speedy transfer<br />
Vertical adjustment<br />
orienting on orbital<br />
point<br />
The impression<br />
and its tray also<br />
serves as bite<br />
fork.
Fixation with gypsum,<br />
no screwing required<br />
= i.e. elimination of<br />
distortion<br />
speedy transfer<br />
The height is marked Immersion in the soft<br />
gypsum<br />
Until the corrective material has hardened,<br />
the gypsum has also petrified.<br />
Thus producing quality and saving time
The transport to the lab<br />
Impression fixed in the<br />
transport - box<br />
hanging free = no fear<br />
of distortion for the<br />
impression material.<br />
Closing the lid – ready for the<br />
transport to the laboratory<br />
Preparation side<br />
counter
World novelty<br />
K‘<strong>volution</strong><br />
our fastest and most economical precision model base.<br />
Preparation time approx. 1 minute<br />
70 g dental gypsum – that` s it.<br />
An astute model preparing<br />
technique
K‘<strong>volution</strong><br />
Integrated split cast –<br />
extremely low!<br />
„K`<strong>volution</strong>“ model bases in 3 colours – or by special order other colours<br />
with lab logo.<br />
Split cast counter - on the base with<br />
retentions for the articulation stone ,<br />
different colours available.
K‘<strong>volution</strong><br />
our fastest method: Fix the „K`<strong>volution</strong>“<br />
simply with 4 pins centrally above the cut<br />
impression – far away from prepared<br />
segments.<br />
Seal with „Silifix“ SC and fill up the<br />
„K`<strong>volution</strong>“ base.<br />
70 g of dental stone – less than one<br />
minute of preparation time !
K‘<strong>volution</strong><br />
After completition of<br />
the hardening<br />
process remove the<br />
upper part – it can –<br />
and will - now further<br />
expand.!<br />
For the central<br />
division of the base –<br />
stone expansion is<br />
limited to half the<br />
model.<br />
Subsequently to<br />
sawing with our<br />
diamond disc the<br />
various segments are<br />
placed to perfection.
K‘<strong>volution</strong><br />
The bottom screws are<br />
fixed to prevent soiling<br />
the segments.<br />
By pushing from the<br />
bottom each segment<br />
can be removed.
Accessories for K‘ <strong>volution</strong><br />
Split cast protector –<br />
reusable<br />
Take off stamp for K‘ <strong>volution</strong> :<br />
Take off stamp with its<br />
screw<br />
Put it precisely under the<br />
model and screw without<br />
any strength<br />
Space holders in<br />
silicon – reduces<br />
stone expansion<br />
– less stone<br />
needed<br />
Use the „<strong>Kiefer</strong>“<br />
hammer on extern<br />
borders and screws
K‘ <strong>volution</strong> – taking off and sawing<br />
Uncut element does not fit<br />
because the stone<br />
expanded !<br />
Stone model taken<br />
off<br />
The final model, after<br />
the cutting – always<br />
after max.3 teeth –<br />
each segment fits<br />
perfectly – stone<br />
expansion has been<br />
compensated !<br />
First cut – always in the<br />
center<br />
Easy taking off !!!
K‘ <strong>volution</strong> for implant models<br />
see how easy hat is !
K‘ <strong>volution</strong> – for CAD / CAM or<br />
elektrophorese<br />
Classical dental<br />
model – here „Cross<br />
Pins“ have been<br />
used.<br />
For its base we use<br />
our<br />
„Poly Plus 2000 S“<br />
polyurethane =<br />
no guiding needed ,<br />
no abrasion , just 30 g<br />
of material needed !
K‘ <strong>volution</strong> – for CAD / CAM or<br />
elektrophorese<br />
This way we get a<br />
classical model – only<br />
much faster and less<br />
material needed..<br />
Magnetic split cast<br />
integrated and reusable.<br />
For scanning – the base<br />
can be cut in bridge<br />
distance , dies can be<br />
taken off and the whole<br />
can easily be remounted<br />
in the complete model`<br />
s base.
Fixing and sealing with<br />
„Silifix“ SC<br />
K‘<strong>volution</strong><br />
Half impression trays including counter with<br />
prepared bases, space holders and ORBIX can<br />
be reused indefinitely. The lateral screw prevents<br />
tilting of the model.<br />
Fast, precise and clean !
A clinical case:<br />
The precise<br />
antagonist<br />
Special diamond<br />
(Teamziereis)<br />
K‘<strong>volution</strong><br />
Nice preparation<br />
The preparationside
K‘<strong>volution</strong><br />
Method 2: Some “Silifix BW” “glues<br />
the impression under our positioner<br />
The elastic holds the impression<br />
Boxing with<br />
“Silifix SC”<br />
Working time : less than a minute !
2. The with “Break Agent”<br />
isolated K`<strong>volution</strong> tray is<br />
positioned on it<br />
The green spacers<br />
again save material<br />
K‘<strong>volution</strong><br />
1. Fill the<br />
impression with the<br />
dental stone<br />
Silicone spacers can save material !<br />
For its hardening,<br />
the whole is put on<br />
its ground plate
The relatively elastic<br />
frontside of the<br />
positioner can now be<br />
removed carefully<br />
K‘<strong>volution</strong><br />
After the stone hardening, both screws<br />
are opened, taken off and the backside<br />
of our positioner is removed
K‘<strong>volution</strong><br />
To take the model off, our stamp is fixed and slightly<br />
screwed under the model<br />
Hold the stone model and<br />
hammer only on extern screws<br />
It shouldn`t be any problem !
K‘ aiserplatte<br />
A base to simply glue the opposite<br />
model<br />
Cheep, reusable, several articulation<br />
methods integrated
… can also be drilled as<br />
known …<br />
K‘ aiserplatte<br />
Cheep model base to glue several types of<br />
stone models which do not have to be cut…<br />
3 ways for its<br />
articulation:<br />
Screwing<br />
Magnet splitcast<br />
To be clued on<br />
“Orbix”
„ORBIX“<br />
Our adapter for “Orbix” is mounted on<br />
the K`<strong>volution</strong> base.<br />
The models are hold in their occlusion<br />
and glued at “Orbix”.
After its opening, the “Orbix”<br />
articulator allows very<br />
anatomical movements ….<br />
„ORBIX“
…. As by our experience, these<br />
movements are more effective than<br />
most high tech ( and price ) dental<br />
articulators. ( enough teeth guiding<br />
needed ! )<br />
The models can easily be<br />
removed and reclosed<br />
„ORBIX“
Screws prevent<br />
soiling<br />
Lateral<br />
reinforcements<br />
Sturdy support for<br />
the stumps –<br />
4 mm<br />
K‘<strong>volution</strong><br />
20 years experience<br />
and quality combined<br />
Internal and external stops for the model material warrant perfect positioning
When sawing pay attention to<br />
leave enough material for the<br />
segments in - and outside as<br />
guide.<br />
Observe the small base area for<br />
the frontal segments – a way to<br />
save material<br />
K‘<strong>volution</strong><br />
14 segments upper case – no<br />
problem absolutely rigid – no<br />
additional retaining elements needed.
Dispatch and archive bases – to<br />
preserve the valuable „K`<strong>volution</strong>“<br />
precision base for further use.<br />
K‘<strong>volution</strong><br />
„K`<strong>volution</strong>“ the simple<br />
technology for the<br />
knowledgeable
Precision model production<br />
<strong>Kiefer</strong> Plus<br />
– renowned since 1984
The book<br />
<strong>Kiefer</strong>system<br />
Baseplates reusable<br />
No drilling<br />
No trimming<br />
No isolating<br />
no glueing of pins<br />
No second socle<br />
A scant 70 grammes of<br />
dental stone per model<br />
Compensation for the stone`<br />
expansion<br />
Upper baseplate –<br />
pin positions pre -<br />
selected
Test plate „<strong>Kiefer</strong>“<br />
Control measuring by caliper rule<br />
For testing sundry materials<br />
Impression piece adjoined
The values :
Theory of expansion
Technology of „<strong>Kiefer</strong> Plus“<br />
Cutting the impression Defining the centre Embedding in „Silifix“ W<br />
Placing the guiding<br />
plate<br />
Correcting position of the<br />
impression<br />
Forming the frame
Silifix „W“<br />
A metal tray at room temperature<br />
reduces silicon to around 18 ° C. But it<br />
had been taken at 36 ° C !!! Therefore<br />
we use „Silifix“ W – wax based – and<br />
heat it to 36 ° C. At this temperature it<br />
becomes soft and , nevertheless, lead<br />
dead. I.e. there is no danger of<br />
deformation for the impression material<br />
or a recoil effect to it.
Theory<br />
Marking the envisaged<br />
sawcuts<br />
Pilot pins in the „pilot<br />
plate“<br />
Each segment separated by<br />
sawcut is fixed with at least 2<br />
pins. The pins are placed at<br />
random somewhere between the<br />
envisaged sawcuts. Larger<br />
segments must be cut to<br />
compensate the stone expansion.
mounting the selfadhesive<br />
foil<br />
Transfer to the base plate<br />
Pilot plate and special pilot pins are<br />
reusable indefinitely.<br />
Applying the foil renders the plate reusable<br />
and offers a mirror-smooth and isolation –<br />
free stone base<br />
Transfer of the pin positions from the „pilot plate“<br />
onto the foil of the „<strong>Kiefer</strong> Plus“ working plate
Preparation of the model base<br />
Cleansing the holes with our special handheld<br />
foil mill<br />
Optional: Threaded pins of<br />
stainless steel - reusable<br />
Placing working pins<br />
70 grammes of stone, putting the plate<br />
– now do not touch these pins !
down under<br />
- bathing the model<br />
For hardening the impression including stone model<br />
directly be placed in 36 ° C warm water.<br />
Why ?<br />
Temperature<br />
continuously<br />
adjustable<br />
from 0 ° C –<br />
40 ° C.<br />
Again the imression is heated to mouth temperature,<br />
we smoothen the stone surface and reinforce<br />
borders.<br />
Once the stone has hardened it is not allowed any<br />
more to get in contact with water or steam. But its<br />
hardening in the water bath leads to much higher<br />
material quality!
First separate the<br />
counter<br />
Unforming<br />
Its silicon removed<br />
The tray removed = leaving only impression material above the master model =<br />
avoiding the danger of breakage to fragile stumps.
A sign of quality – a mirror<br />
finish stone base<br />
Sawing<br />
The stone expansion:<br />
Without sawcuts the<br />
hardened stone model will<br />
not fit its base plate<br />
because the stone has<br />
expanded – as it would in<br />
any other model system.<br />
The special 26 mm diamond disc<br />
Since 1984 - our way to cut<br />
The sawcuts are<br />
now precisely where<br />
they had been<br />
marked at the<br />
impression.
The precise master model<br />
Quality and aesthetic in evidence
The „Combi“ model<br />
All to be realized on just one<br />
model<br />
Higher segments can be<br />
screwed = providing for<br />
optimum stability
Orbix – a quickie
Orbix – a quickie<br />
Adapter for glueing Fixing of the holders<br />
Glueing the joints<br />
Activator spray
Orbix – a quickie<br />
done<br />
opened<br />
After unlocking the joints – there is free articulation guided<br />
by the teeth
Reusable inserts are fixed in<br />
ORBIX - spezial
ORBIX - spezial<br />
Thus you have a side support for these small models
This can simply be<br />
fixed or even be<br />
screwed on the<br />
working plate.<br />
The articulation<br />
The pins looking out on the<br />
articulation side permit<br />
removing segments by<br />
pressing from below<br />
To avoid gypsum to enter<br />
the pin holes from the<br />
articulation side we offer a<br />
reusable articulation plate.
Preparation of the articulation plate<br />
The articulation side<br />
of the base plate and<br />
the articulation plate<br />
will be sprayed with<br />
„Break Agent“<br />
The 4 stainless<br />
articulation pins long<br />
are inserted –<br />
flattened part towards<br />
vestibular side –<br />
The 3 nuts in their<br />
holes too
Preparation of the articulation plate<br />
The parts are put together and screwed
Preparation of the articulation plate<br />
Several pre – prepared parts are put –<br />
preferentially on „Silifix“ SC – and filled<br />
with „Poly Plus 2000 S“. At the elapse of<br />
approx. one hour the screws will be<br />
loosened, the base plate knocked off<br />
and all be cleaned. That ensures<br />
continuous precision at the articulation.
The face bow transfer<br />
The „Twin Jection“ impression is fixed<br />
and the upper model with it articulation<br />
plate can be mounted<br />
On our articulator „WK light“<br />
we remove the inzisal pin<br />
and - mounting the aluminum<br />
ring under the centric pin the<br />
upper part is hanging free<br />
and parallel to the lower.<br />
Now the face bow is fixed –<br />
any face bow can be used –<br />
and stabilized by the<br />
stainless steel supports.
All components can be reused!<br />
The articulation<br />
Our „Quattro Split“ with<br />
„Poly Plus 2000 S“<br />
counter.<br />
We put on some<br />
gypsum and close<br />
the articulator.<br />
Attempting to wash<br />
is uncalled for as<br />
the water – in that<br />
case – doesn’t do<br />
any good to the<br />
gypsum.<br />
Nothing can be<br />
soiled
Condylus condome<br />
How does the human condyle work ?<br />
Where is there any precision ?<br />
Should the articulator<br />
imitate „discus<br />
articularis“ , before<br />
mounting the lower<br />
model – we administer<br />
the soft 2 mm „condylus<br />
condome“<br />
– this is the only way to<br />
imitate anatomical<br />
movements!
Condylus compression test<br />
As soon as the patient exerts<br />
a pressure on that foil – the<br />
„human discus articularis“ is<br />
compressed being pulled by<br />
the muscles. This has an<br />
important influence to the<br />
occlusion and articulation.<br />
For testing the compression of the<br />
human discus articularis we take a<br />
0,15 mm strong foil
Screwed - on<br />
articulation plate<br />
Mounting the lower<br />
Saving again material<br />
Models are glued externally – to obviate later<br />
steaming.
Quality is fun !<br />
„Biological precision“<br />
What does it<br />
mean?<br />
Simply to apply<br />
precision where it<br />
is anatomically<br />
indicated –<br />
and<br />
to respect the<br />
human anatomy.
Details to „WK light“<br />
A 3 point rubber band needs<br />
no additional springs.<br />
10 years warranty for all<br />
parts of the articulator !<br />
Fully adjustable condyle body with<br />
guiding window. For to see one` s work<br />
a clear view is indispensable.
„<strong>Kiefer</strong> Plus“ System model samples<br />
Upper 14 elements<br />
Total – without any<br />
cut<br />
Screwable pins<br />
Combi model
A case<br />
Devitalized stump Impression by<br />
„Twin Jection“<br />
The precision model –<br />
observe the sawcuts !
Details that become obvious only with a<br />
precise counter impression<br />
Perfect fitting ?<br />
Precision inlay ?<br />
Deep pockets !
3 D duplication with „Superdub“<br />
The compensators for<br />
vertical investment<br />
expansion 0,05 mm<br />
Off the silicon.<br />
Massive metal cuvette<br />
Sealed with „Silifix<br />
W“<br />
We merely<br />
duplicate what<br />
is essential.
ceramics<br />
Refractory die – integrated in the model<br />
Perfect fit<br />
in the<br />
model
Transport and archive<br />
Saving space and money: Stumps and foil are<br />
put in a transparent bag with the patient` s<br />
name and number – settled.<br />
For reconstruction, the segments may be<br />
transplanted to any „<strong>Kiefer</strong> Plus“ base plate !<br />
Stumps for dispatch and to archive are put on the<br />
cheep „archive“ plate.<br />
This done we remove the<br />
individual foil – the valuable<br />
base plate can thus be<br />
reused!
A patient case done at a ceramic<br />
course<br />
Prior the preparation Proper preparation<br />
Dr.L.Prosper , Italy<br />
A genuine precision model. Also the counter ,<br />
articulation in anatomical perfection.<br />
Perfect impression with<br />
„Twin Jection“<br />
Perfect ceramics by<br />
Klaus Müterthies
Next case<br />
Preparation and finish by W.Dietz<br />
M.D.dent. Germany
Next case<br />
„Twin Jection“<br />
impression<br />
The fastest face bow<br />
„speedy transfer“<br />
Safe transport to the<br />
dental laboratory<br />
Precision model<br />
production with „<strong>Kiefer</strong><br />
Plus“
Next case<br />
WK - light
Next case<br />
3 D refractory<br />
duplicating technique<br />
with „Superdub“ -<br />
renowned since 1987.<br />
Compensation of<br />
vertical material<br />
expansion through<br />
foils of 0,05 mm<br />
thickness.<br />
One fire resistant and one<br />
double conical pin is used<br />
Permits working in the articulator until<br />
glacing !
Extreme concentration<br />
Next case<br />
An adequate result<br />
Greatest care
Next case<br />
Artificial beauty - will be continued
Next case<br />
Ugly fillings<br />
Preparation, impression with<br />
„Twin Jection“ face bow transfer<br />
with „speedy transfer“
A good temporary<br />
Next case<br />
Perfect crowns – made by<br />
Klaus Müterthies<br />
Precise model
Our second face bow<br />
easy transfer<br />
Biteforks fixed on a<br />
magnetic splitcast<br />
Bipupillarlineindicator<br />
Frontlineindicator<br />
Midleline indicator
High quality molded materials:<br />
made for you !
Orderly tray ( According to Fischer<br />
M.D.dent<br />
A tidy arrangement saves time or even mistakes e. g. while cimentation or at<br />
imlantology<br />
Light grey colour Light blue colour<br />
Both – spray disinfection
„“Poly Plus 2000 S“<br />
has proved its worth<br />
since many years<br />
with regard to<br />
precision, stability<br />
and resistance to<br />
abrasion.<br />
Poly Plus 2000 S<br />
Work with „Poly Plus 2000 S“ requires meticulous<br />
adherence to the prescribed procedure and safety<br />
advice.
Denta Dampf 1500 AS<br />
Cross cut of the cauldron<br />
Its special feature: the heating<br />
element is an integral part of the<br />
solid aluminum bottom. It can` t<br />
calcify.<br />
Body of stainless steel – 10 years<br />
warranty for he body – capacity 1,5<br />
liters – 4,5 bar pressure – 12 V<br />
micro switch in handle – robust and<br />
proven since 1986<br />
3 years<br />
warranty for<br />
the<br />
cauldron –<br />
with us<br />
standard<br />
since 1986.
conclusion<br />
To produce extraordinary<br />
results requires know how<br />
and dedication. By applying<br />
modern technology and<br />
advanced techniques we<br />
succeed in doing it more<br />
precisely, more<br />
economically, faster and<br />
simpler.<br />
In addition, this way work is<br />
fun again.<br />
Perfection from the impression via face bow to the master model, as from the<br />
counter to the „bioprecision“ articulation characterizes our achievements.<br />
<strong>Dental</strong> <strong>Kiefer</strong> – stands for 21 years progress in studies and<br />
development in the field of dental medicine and technology
Professional sessions and<br />
You are welcome to visit us<br />
at one of our regular training<br />
courses.<br />
We offer : 9 work – stations<br />
in the training lab,<br />
2 apartments / flats,<br />
4 double rooms with<br />
WC/shower and 16 guest<br />
beds.<br />
training<br />
We like to thank Dr. Loris Prosper,<br />
Werner Dietz, Klaus Müterthies,<br />
Frank Willershäuser, Nikolaus<br />
Langner and all our faithful customers<br />
for their support and encouragement!<br />
the end