Curriculum (PDF) - Biovision
Curriculum (PDF) - Biovision
Curriculum (PDF) - Biovision

Create successful ePaper yourself
Turn your PDF publications into a flip-book with our unique Google optimized e-Paper software.
���������������������������������������������
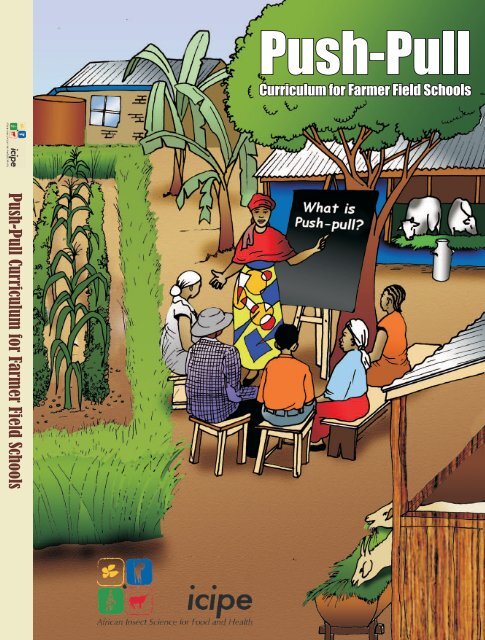
Push-pull <strong>Curriculum</strong> for<br />
Farmer Field Schools
Push-pull <strong>Curriculum</strong> for<br />
Editors<br />
Farmer Field Schools<br />
Z. R. Khan, D. M. Amudavi, C. Midega, J. Pittchar, D. Nyagol, G. Genga, A. Ndiege and P.<br />
Akelo (icipe, Kenya)<br />
J. A. Pickett and L. J. Wadhams (Rothamsted Research, UK)<br />
F. Muyekho (KARI, Kenya)<br />
B. Nyateng (Farmer, Lambwe, Kenya)<br />
Compiled by: Sospeter Kaai Gatobu, Nairobi, Kenya.<br />
Graphic designer: Nyotumba Bonaventure, Skyward Marketing Ltd, Nairobi, Kenya.<br />
Donors<br />
Kilimo Trust, Uganda<br />
<strong>Biovision</strong>, Switzerland
icipe’s mission is to help alleviate poverty, ensure food security and improve the overall health<br />
status of peoples of the tropics by developing and extending management tools and strategies<br />
for harmful and useful arthropods, while preserving the natural resource base through<br />
research and capacity building.<br />
Copyright © 2007 International Centre of Insect Physiology and Ecology. All rights reserved.<br />
Correct citation<br />
ICIPE. 2007. Push-pull <strong>Curriculum</strong> for Farmer Field Schools. International Centre of Insect<br />
Physiology and Ecology, Nairobi, Kenya.<br />
ISBN 92 9064 188 6
Acknowledgements<br />
This curriculum would not have been completed without the input of the workshop participants<br />
from Kenya, Uganda and Tanzania, who met at icipe Thomas Odhiambo Campus from 18-21<br />
September, 2006. We appreciate the time and the effort they put to develop this curriculum<br />
and their desire to see Push-pull expand to the rest of Africa.<br />
We are also grateful to Sospeter Kaai Gatobu and his team, Hellen Maleche and Bonaventrue<br />
Nyotumba, for facilitating the <strong>Curriculum</strong> Development Workshop and for putting together this<br />
curriculum.<br />
Push-pull curriculum | i
List of participants<br />
The following participated and contributed to the development of this curriculum in a<br />
workshop held at icipe Thomas Odhiambo Campus from 18-21 September 2006.<br />
Aloice Ndiege, Technician, icipe, Bungoma, Kenya<br />
Benedict M. Sarara, Farmer, Suna, Migori, Kenya<br />
Benson Chibinda, Secretary/FFS Facilitator Bungoma Umbrella FFS Network, Bungoma,<br />
Kenya<br />
Betty Ajambo, Chairperson, Busia District FFS Network, Busia, Uganda<br />
Bonaventure Nyotumba, Facilitator, Skyward Marketing Ltd, Nairobi, Kenya<br />
Caroline A. Kamau, District FFS Coordinator, Ministry of Agriculture, Bungoma, Kenya<br />
Charles A.O. M. Lusweti, Senior Research Officer, Kenya Agricultural Research Institute<br />
(KARI), Kitale, Kenya<br />
Charles Midega, Post Doctoral Fellow, icipe, Mbita, Kenya<br />
Charles Mwendia, Administrator, icipe Thomas Odhiambo Campus, Mbita, Kenya<br />
Christian Borgemeister, Director General, icipe, Nairobi, Kenya<br />
David M. Amudavi, Post Doctoral Fellow, icipe, Mbita, Kenya<br />
Elkana Nyambati, Senior Research Officer, KARI, Kitale, Kenya<br />
Everina Lukonge, Agricultural Research Officer, ARI - Ukiriguru, Mwanza, Tanzania<br />
Flora K. Khisa, Farmer, Bungoma, Kenya<br />
Francis N. Muyekho, Centre Director, KARI, Kakamega, Kenya<br />
George O. Genga, Technician, icipe, Mbita, Kenya<br />
George W. Otando, FFS Facilitator, Ministry of Agriculture, Busia, Kenya<br />
Gladys Nabiswa, Executive Director, Community Research in Environmental and<br />
Development Initiatives (CREADIS), Bungoma, Kenya<br />
Godrick Khisa, National FFS Project Coordinator, FAO, Kakamega, Kenya<br />
Hellen N. Maleche, Facilitator, Communications Specialist, Nairobi, Kenya<br />
James Robert Okoth, National FFS Project Coordinator, FAO, Kampala, Uganda<br />
James Waituka, Farmer-Teacher, Maragua, Kenya<br />
January Mafuru, Senior Agricultural Economist, ARDI-Ukiriguru, Mwanza, Tanzania<br />
Jimmy Pittchar, Consultant Social Scientist, icipe, Mbita, Kenya<br />
ii | Push-pull curriculum
John Lynam, Managing Director, Kilimo Trust, Kampala, Uganda<br />
John Peter Opio, Project Coordinator, Africa 2000 Network/FAO, Tororo, Uganda<br />
John Steven Okanya, Technician, NARO/NAARI, Kampala, Uganda<br />
Julius M. Sonoko, District Crop Officer, Tarime District Council, Tarime, Tanzania<br />
Lawrence Odeck, Farmer-Teacher, Ogongo, Kenya<br />
Lester Wadhams, Principal Scientist, Rothamsted Research, UK<br />
Margaret Afandi Mogaka, Farmer, Busia, Kenya<br />
Margaret Ayugi, Technician, icipe, Mbita, Kenya<br />
Margaret Etyang, Farmer, Amagoro, Teso, Kenya<br />
Margaret Kamidi, Maize Agronomist, KARI, Kitale, Kenya<br />
Matilda Ouma, Research Assistant, icipe, Mbita, Kenya<br />
Nactical Sufu Kutayi, Farmer, Luanda, Kenya<br />
Peter Waboya, Farmer, Bungoma Umbrella FFS Network, Bungoma, Kenya<br />
Philip Mwangi, Technician, FAO, Nairobi, Kenya<br />
Philip O. Akelo, Technical Assistant, icipe, Kitale, Kenya<br />
Pius Mayende, Divisional Agricultural Extension Officer (DAEO), Ministry of Agriculture,<br />
Shinyalu, Kenya<br />
Samuel N. Njihia, Agricultural Researcher, KARI, Muguga South, Nairobi, Kenya<br />
Sospeter K. Gatobu, Lead Facilitator, Development Communication Specialist, Nairobi,<br />
Kenya<br />
Stella Kimutai, District Extension Research Liaison and Training Officer (DERLTO), Ministry<br />
of Agriculture, Kitale, Kenya<br />
Vincent Okumu, Farmer, Bungoma FFS Network, Bugembe, Kenya<br />
Zakayo M. Magara, Provincial Director of Agriculture (PDA), Nyanza Province, Kisumu,<br />
Kenya<br />
Zeyaur R. Khan, Principal Scientist, icipe, Mbita, Kenya<br />
Push-pull curriculum | iii
Contents<br />
Illustrations ....................................................................................... x<br />
Foreword ....................................................................................... xii<br />
Preface ......................................................................................... xiii<br />
Acronyms ...................................................................................... xv<br />
iv | Push-pull curriculum<br />
Preseason<br />
Introduction ..................................................................................... 3<br />
Pest problems of maize ...........................................................................................................3<br />
Control of stemborers and striga weed using the Push-pull strategy .......................................5<br />
Week 1 ............................................................................................. 7<br />
Preparing to launch a Farmer Field School (FFS) in a community ..........................................7<br />
Topic: Initial ground working ....................................................................................................7<br />
Week 2 ............................................................................................. 9<br />
Topic 1: Introduction to Farmer Field Schools ..........................................................................9<br />
Topic 2: Levelling of expectations ...........................................................................................10<br />
Topic 3: Setting of learning norms ..........................................................................................10<br />
Week 3 ........................................................................................... 13<br />
Topic 1: Introduction to Farmer Field School implementation ................................................13<br />
Topic 2: Introduction to Participatory Monitoring & Evaluation (PM&E) .................................14<br />
Week 4 ........................................................................................... 17<br />
Topic 1: Field observations .....................................................................................................17<br />
Topic 2: Attending FFS regularly ............................................................................................17<br />
Topic 3: Keeping farm records ................................................................................................17<br />
Topic 4: Enterprise budgets ....................................................................................................18<br />
Week 5 ........................................................................................... 19<br />
Topic: Tools of Participatory Monitoring & Evaluation ..........................................................19
Season 1<br />
Week 1 ........................................................................................... 23<br />
Topic 1: Preparing and laying out the Push-pull plot ..............................................................23<br />
Topic 2: Planting the Push-pull and the Check plots ..............................................................24<br />
Week 2 ........................................................................................... 29<br />
Topic 1: Gapping maize .........................................................................................................29<br />
Topic 2: Preparing land to plant desmodium for seeds ........................................................29<br />
Topic 4: Introduction to Ecosystems ......................................................................................30<br />
Week 3 ........................................................................................... 33<br />
Topic 1: Gapping Napier .......................................................................................................33<br />
Topic 2: Introduction to Agroecosystem Analysis (AESA) ......................................................33<br />
Topic 3: Group assessment ....................................................................................................34<br />
Week 4 ........................................................................................... 37<br />
Topic: Sources of stemborer infestation ................................................................................37<br />
Week 5 ........................................................................................... 39<br />
Topic 1: 1 st weeding, thinning and top dressing maize in both Push-pull and Check plots ...39<br />
Topic 2: Weeding and top dressing Napier grass ..................................................................40<br />
Topic 3: Identifying desmodium seedlings .............................................................................40<br />
Topic 4: Hand weeding and gapping desmodium .................................................................41<br />
Week 6 ........................................................................................... 45<br />
Topic 1: Identifying stemborers ..............................................................................................45<br />
Topic 2: Identifying Striga ......................................................................................................46<br />
Topic 3: Gapping of desmodium on the seed production plot ...............................................46<br />
Week 7 ........................................................................................... 49<br />
Topic 1: 2 nd weeding of maize .................................................................................................49<br />
Topic 2: 2nd weeding of Napier grass ...................................................................................49<br />
Topic 3: 2nd hand weeding desmodium ................................................................................50<br />
Topic 4: 1st hand weeding desmodium seed production plot .................................................50<br />
Week 8 ........................................................................................... 53<br />
Topic 1: Stemborer damage and symptoms ...........................................................................53<br />
Topic 2 Identifying striga .........................................................................................................54<br />
Week 9 ........................................................................................... 55<br />
Topic 1: The biology of stemborers ........................................................................................55<br />
Topic 2: 2nd weeding of desmodium seed multiplication plot ................................................55<br />
Push-pull curriculum | v
Week 10 ......................................................................................... 57<br />
Topic: Biology of striga ...........................................................................................................57<br />
Week 11 ......................................................................................... 59<br />
Topic: Introduction to Profitability Analysis ............................................................................59<br />
Week 12 ......................................................................................... 63<br />
Topic: Group assessment .......................................................................................................63<br />
Week 13 ......................................................................................... 65<br />
Topic 1: Harvesting Napier and desmodium from Push-pull .................................................65<br />
Topic 2: Utilization of Napier and desmodium from Push-pull ................................................66<br />
Week 14 ......................................................................................... 69<br />
Topic: Conserving Napier and desmodium from Push-pull ...................................................69<br />
Week 15 ......................................................................................... 73<br />
Topic: Using gross margins in profitability analysis ................................................................73<br />
Week 16 ......................................................................................... 77<br />
Topic 1: Collecting, storing and applying animal manure on Napier grass .............................77<br />
Topic 2: Collecting, storing and applying slurry to Napier grass .............................................78<br />
Topic 3: Making and utilizing desmodium hay ......................................................................78<br />
Week 17 ......................................................................................... 81<br />
Topic: Recording desmodium pests ......................................................................................81<br />
Week 18 ......................................................................................... 83<br />
Topic 1: Harvesting maize ......................................................................................................83<br />
Topic 2. Storing maize stover ...............................................................................................84<br />
Week 19 ......................................................................................... 87<br />
Topic 1: Shelling and storage of maize ...................................................................................87<br />
Topic 2: Harvesting desmodium pods ....................................................................................87<br />
Week 20 ......................................................................................... 91<br />
Topic 1: Processing and marketing desmodium seeds ..........................................................91<br />
Topic 2: Improving soil fertility ................................................................................................92<br />
Week 21 ......................................................................................... 95<br />
vi | Push-pull curriculum
Topic 1: Feeding silage to dairy animals ................................................................................95<br />
Topic 2: Harvesting the desmodium multiplication plot ..........................................................95<br />
Off season<br />
Week 1 ........................................................................................... 99<br />
Topic 1: Land preparation ......................................................................................................99<br />
Topic 2: Processing desmodium seed from multiplication plot ...............................................99<br />
Topic 3: Addressing risk and uncertainty ................................................................................99<br />
Week 2 ......................................................................................... 103<br />
Topic 1: Gender in Push-pull ...............................................................................................103<br />
Topic 2: HIV and Push-pull ..................................................................................................104<br />
Season 2<br />
Week 1 ......................................................................................... 109<br />
Topic 1: Preparing the Push-pull plot for 2 nd and subsequent season planting .................109<br />
Topic 2: Laying out and establishing a new Push-pull plot using desmodium vines ............109<br />
Topic 3: Managing desmodium seed multiplication plot ...................................................... 111<br />
Week 2 ......................................................................................... 115<br />
Topic: Participatory Monitoring & Evaluation (PM&E) ..........................................................115<br />
Week 3 ......................................................................................... 117<br />
Topic 1: Gapping maize ........................................................................................................117<br />
Topic 2: Weeding and topdressing desmodium seed multiplication plot ..............................117<br />
Week 4 ......................................................................................... 119<br />
Topic 1: Gapping Napier in the new plot ...............................................................................119<br />
Topic 2: Group assessment ..................................................................................................119<br />
Week 5 ......................................................................................... 123<br />
Topic 1: Analysis of household assets ..................................................................................123<br />
Topic 2: Emerging issues of interest .....................................................................................123<br />
Week 6 ......................................................................................... 125<br />
Topic 1: 1 st weeding, thinning and top dressing of maize ...................................................125<br />
Topic 2: 1 st weeding and top dressing Napier grass in both Push-pull plots ........................125<br />
Topic 3: Weeding and trimming desmodium (established Push-pull crop) ...........................125<br />
Topic 4: 1 st weeding desmodium in the vine-established Push-pull plot ...............................125<br />
Topic 5: Weeding and rouging on the desmodium seed multiplication plot ..........................126<br />
Week 7 ......................................................................................... 129<br />
Push-pull curriculum | vii
Topic 1: Utilization of fresh desmodium and hay .................................................................129<br />
Topic 2: Comparing stemborer and striga damage between Push-pull and Check plots .....129<br />
Week 8 ......................................................................................... 133<br />
Topic 1: 2 nd weeding of maize and Napier and 2 nd trimming and weeding of<br />
desmodium in established Push-pull plot .............................................................................133<br />
Topic 2: Utilization of trimmed desmodium ...........................................................................133<br />
Week 9 ......................................................................................... 137<br />
Topic 1: Comparing stemborers and striga between Push-pull plots and Check plot .........137<br />
Topic 2: 2 nd Weeding and rouging of desmodium seed plot .................................................138<br />
Week 10 ....................................................................................... 141<br />
Topic: Improving soil fertility .................................................................................................141<br />
Week 11 ....................................................................................... 143<br />
Topic 1: Maize diseases .......................................................................................................143<br />
Topic 2: Imazapyr-Resistant (IR) Maize ...............................................................................144<br />
Topic 3: Field Day planning ..................................................................................................144<br />
Week 12 ....................................................................................... 147<br />
Topic 1: Napier stunt disease and its management .............................................................147<br />
Topic 2: Recording desmodium pests on Push-pull and seed multiplication plots ...............148<br />
Week 13 ....................................................................................... 151<br />
Topic: Planning for Field Day ................................................................................................151<br />
Week 14 ....................................................................................... 153<br />
Topic 1: Comparing stemborers and striga between Push-pull plots and Check plot ..........153<br />
Topic 2: Training in fodder preparation from Push-pull and home made ration formulation 154<br />
Topic 3: Field Day! ................................................................................................................156<br />
Week 15 ....................................................................................... 157<br />
Topic 1: Final group assessment ..........................................................................................157<br />
Topic 2: Planning for Field Day .............................................................................................158<br />
Week 16 ....................................................................................... 161<br />
Field Day ..............................................................................................................................161<br />
Week 17 ....................................................................................... 163<br />
Report of the Field Day ........................................................................................................163<br />
viii | Push-pull curriculum
Week 18 ....................................................................................... 165<br />
Topic: Harvesting maize .......................................................................................................165<br />
Week 19 ....................................................................................... 169<br />
Topic 1 : 2 nd Harvesting Desmodium from the two Push-pull plots and the<br />
desmodium multiplication plot ..............................................................................................169<br />
Topic 2: Shelling and storage of maize ................................................................................169<br />
Week 20 ....................................................................................... 173<br />
Topic: Processing desmodium seed .....................................................................................173<br />
Week 21 ....................................................................................... 175<br />
Topic 1: Managing the desmodium ......................................................................................175<br />
Topic 2: Gross margin analysis ............................................................................................175<br />
Week 22 ....................................................................................... 177<br />
Topic 1: Evaluating the Push-pull <strong>Curriculum</strong> for FFS .........................................................177<br />
Topic 2: Preparing for graduation .........................................................................................179<br />
Week 23 ....................................................................................... 181<br />
Graduation and Certification.................................................................................................181<br />
Frequently asked questions ...................................................... 183<br />
Push-pull curriculum | ix
List of illustrations<br />
Fig 1. Deadheart caused by stemborer larvae ..........................................................................................................3<br />
Fig 2. Tunnelling of maize stalk by stemborer larva ................................................................................................3<br />
Fig 3. Busseola fusca .................................................................................................................................................3<br />
Fig 4. Chilo partellus ....................................................................................................................................................3<br />
Fig 5. Busseola fusca laying eggs ............................................................................................................................4<br />
Fig 6. Chilo partellus laying eggs ...............................................................................................................................4<br />
Fig 7. Life cycle of Busseola fusca stemborer ............................................................................................................4<br />
Fig 8. Life cycle of Chilo partellus stemborer .............................................................................................................4<br />
Fig 9. Striga weed attached to maize roots ...............................................................................................................4<br />
Fig 10. Measuring a Push-pull plot ...........................................................................................................................23<br />
Fig 11. A laid-out Push-pull plot ...............................................................................................................................24<br />
Fig 12. Hole for planting cane or root split ..............................................................................................................24<br />
Fig 13. Applying fertiliser or manure .......................................................................................................................25<br />
Fig 14. Two nodes of cane in a hole .......................................................................................................................25<br />
Fig 15. Cane covered with soil ..................................................................................................................................25<br />
Fig 16. Rows and plants at 75 cm apart .................................................................................................................25<br />
Fig 17. Planting splits ................................................................................................................................................25<br />
Fig 18. Strings running across the plot ...................................................................................................................25<br />
Fig 19. Mixing desmodium with fine sand...............................................................................................................26<br />
Fig 20. Making a furrow for drilling desmodium .....................................................................................................26<br />
Fig 21. Drilling desmodium into furrows .................................................................................................................26<br />
Fig 22. An AESA session .........................................................................................................................................34<br />
Fig 23. Signal grass ..................................................................................................................................................37<br />
Fig 24. Wild Sorghum ...............................................................................................................................................37<br />
Fig 25. Napier grass ...................................................................................................................................................37<br />
Fig 26. Weeding maize with a hoe ............................................................................................................................39<br />
Fig 27. Weeding desmodium by hand ......................................................................................................................41<br />
Fig 28. Busseola fusca .............................................................................................................................................45<br />
Fig 29. Chilo partellus ................................................................................................................................................45<br />
Fig 30. Busseola fusca laying eggs on maize ........................................................................................................45<br />
Fig 31. Chilo partellus laying eggs on maize leaf ...................................................................................................45<br />
Fig 32. Striga hermonthica: pinkish flowers ...........................................................................................................46<br />
Fig 33. Striga asiatica: deep red flowers .................................................................................................................46<br />
Fig 34. Striga weed attached to maize roots ...........................................................................................................46<br />
Fig 35. Weeding the desmodium plot ......................................................................................................................50<br />
Fig 36. Maize leaves showing damage caused by stemborer ...............................................................................53<br />
Fig 37. Deadheart caused by stemborer larvae feeding inside maize plants .....................................................53<br />
x | Push-pull curriculum
Fig 38. A stemborer larva feeding inside maize stem ............................................................................................53<br />
Fig 39. Desmodium plant at an early stage (3 weeks old) .....................................................................................55<br />
Fig 40. Harvesting Napier grass ...............................................................................................................................65<br />
Fig 41. Harvesting desmodium .................................................................................................................................66<br />
Fig 42. Chopping desmodium and Napier grass and feeding to livestock ..........................................................66<br />
Fig 43. Chopping desmodium and Napier grass ....................................................................................................69<br />
Fig 44. Diluting molasses with water .......................................................................................................................70<br />
Fig 45. Putting the mixture of desmodium and Napier grass in the gunny bag .................................................70<br />
Fig 46. Digging shallow pit for silage .......................................................................................................................70<br />
Fig 47. Filling the silage pit .......................................................................................................................................71<br />
Fig 48. Compacting silage with a drum ...................................................................................................................71<br />
Fig 49. Bottomless wooden boxes ...........................................................................................................................79<br />
Fig 50. Putting and compressing hay ......................................................................................................................79<br />
Fig 51. Tying the box .................................................................................................................................................79<br />
Fig 52. Removing the bales from the box ................................................................................................................79<br />
Fig 53. Blister beetle ..................................................................................................................................................81<br />
Fig 54. Storing maize stover in a shade ..................................................................................................................84<br />
Fig 55. Harvesting desmodium pods .......................................................................................................................88<br />
Fig 56. Threshing of desmodium pods ....................................................................................................................91<br />
Fig 57. Winnowing desmodium seed .......................................................................................................................91<br />
Fig 58. A laid-out Push-pull plot .............................................................................................................................110<br />
Push-pull curriculum | xi
Foreword<br />
This push-pull curriculum for farmer field schools (FFS) is a major step towards getting the<br />
push-pull technology into the national extension systems in eastern and southern Africa. The<br />
FFS approach aims at supporting farmers by improving the quality of disseminating technology<br />
to ensure that majority of the farmers benefit from innovative technologies.<br />
While research institutions have developed a range of technologies to solve local production<br />
problems in most smallholder farming systems, agricultural productivity has continued to<br />
decline. Many of the technologies have not been effectively disseminated to majority of the<br />
farmers and hence remain largely unknown except in few pilot areas. Still, others have not<br />
been tested on-farm by the farmers to allow adjustment to local conditions. Inappropriate management<br />
practices and increased pressures on resources, especially natural and economic<br />
resources, worsen the situation.<br />
The push-pull strategy is a platform technology that has potential to improve livelihoods of<br />
smallholder farmers and rural families, to increase agricultural productivity and to improve<br />
environmental sustainability. These outcomes can be achieved by addressing problems of<br />
striga weed, stemborers, and low soil fertility. These are major problems that constrain cereal<br />
production in sub-Saharan Africa in general and Eastern Africa region in particular. Research<br />
conducted by icipe in collaboration with its partners, particularly KARI, Ministry of Agriculture,<br />
Ministry of Livestock and Fisheries in Kenya, and Rothamsted Research in UK, has shown<br />
that planting Napier grass (especially Bana variety) around a maize field intercropped with<br />
a fodder legume, desmodium (Silverleaf or Greenleaf), significantly reduces the problems of<br />
striga and stemborers.<br />
The Push-pull technology is now practiced by more than 7000 farmers in 19 districts in Kenya,<br />
5 districts in Uganda, and training and demonstrations have started in Tanzania. Our aim is<br />
to expand this technology to as many farmers as possible in different agro ecological zones,<br />
districts, and regions. To do so, the use of the Farmer Field School (FFS) approach is appropriate.<br />
Push-pull is a knowledge-intensive technology and requires a well-designed curriculum<br />
to enable farmers to understand and apply it on their farms. The curriculum is a roadmap for<br />
providing a range of learning opportunities for the various entry points of the technology for<br />
the smallholder farmers. It is also an important resource for the national extension system, the<br />
NGOs and the community-based organizations.<br />
icipe hopes that this curriculum will enhance farmers’ understanding of their agro-ecosystems,<br />
cereal production constraints and the potential of Push-pull technology to address them. It is<br />
also hoped that it shall strengthen local decision-making and technology development capacities<br />
for more productive and sustainable agriculture.<br />
Director General, icipe,<br />
Nairobi, Kenya<br />
xii | Push-pull curriculum
Preface<br />
Smallholder farmers in Africa face many problems. Their plots are too small to be economically<br />
productive; they have little or no money to invest in farm equipment; crop pests and diseases<br />
destroy most of their crops. The list is endless. The result is a vicious cycle of poverty<br />
and malnutrition.<br />
Many efforts are being put into addressing the problems of smallholder farmers. This curriculum<br />
addresses the major problems that affect cereal production in Africa: Stemborers and<br />
Striga weed, and low soil fertility. Where these have not been addressed, agricultural production<br />
has been severely affected. In some instances, crop failure of up to 100% has been<br />
recorded.<br />
By combating the twin problem of stemborers and striga weed through the use of the Pushpull<br />
technology, the smallholder farmer can maximize production and improve household<br />
health and income.<br />
Purpose of the curriculum<br />
The purpose of this curriculum is to guide farmers in learning the principles and practices of<br />
the Push-pull technology so that they can apply them on their farms. Push-pull is a knowledge-intensive<br />
technology, and there is a need to have a curriculum to guide the process of<br />
acquiring knowledge and skills in the use of the technology.<br />
Target of the curriculum<br />
The curriculum is aimed at the farmer, the extension staff, NGOs, collaborators and all others<br />
who are interested in the Push-pull technology. It has been written in a simple language<br />
to enable farmers and others to read and understand it with ease.<br />
Parts of the curriculum<br />
The curriculum is divided into four main parts.<br />
1. The pre-season weeks: This part covers activities that prepare the ground for an effective<br />
Push-pull Farmer Field School.<br />
2. Season 1: This corresponds with the first maize cropping season. All activities follow the<br />
growth of the maize crop.<br />
3. The first off-season: This is the period after the first maize crop season. Relevant learning<br />
activities are incorporated for the farmers to do before the next season.<br />
4. Season 2: This corresponds to the second maize cropping season, and like Season 1,<br />
activities follow the growth of maize.<br />
How the curriculum was developed<br />
This curriculum is a product of several people from the three Eastern Africa countries:<br />
Kenya, Uganda and Tanzania. They includ farmers, research scientists, agricultural extension<br />
officers from the Ministry of Agriculture and Ministry of Livestock and Fisheries, practitioners<br />
from NGOs, and donors. It was developed at icipe Thomas Odhiambo Campus in<br />
Mbita, Kenya. Later, a small group of experts fine-tuned the material from the workshop to<br />
Push-pull curriculum | xiii
enable easy facilitation and learning. A full list of the workshop participants is included in this<br />
curriculum.<br />
Implementation<br />
Push-pull is a knowledge-intensive technology that needs a curriculum designed to guide<br />
learning at various entry points of the technology for the smallholder farmers. This curriculum<br />
covers the key components of the Push-pull technology written for direct implementation by<br />
farmer groups and individual farmers. It will be covered and applied by majority of small-scale<br />
farmers in the region through Farmer Field Schools (FFS).<br />
The FFS offers farmers opportunities aimed at enhancing learning by doing, getting involved<br />
in experimentation, problem solving, discussion and decision-making. The school aims to<br />
educate farmers to understand their environment and farming practices, thus enabling them<br />
to make rational decisions in the use of resources and to identify appropriate practices and<br />
technologies that are relevant to their farming systems.<br />
Assessment of the curriculum coverage<br />
Participants in the Push-pull Farmer Field School will evaluate the curriculum through active<br />
involvement. Lessons will involve a participatory approach in making field observations,<br />
experimentation, developing indicators/parameters, recording and analyzing information. The<br />
curriculum includes Participatory Monitoring and Evaluation (PM&E) activities and tools to help<br />
the farmers, researchers and extensions agents to monitor and evaluate the technology.<br />
Principal Scientist / Programme Leader, icipe<br />
Mbita, Kenya<br />
xiv | Push-pull curriculum
Acronyms<br />
AESA Agroecosystem Analysis<br />
CAN Calcium Ammonium Nitrate<br />
CBO Community Based Organization<br />
CREADIS Community Research in Environmental and Development Initiatives<br />
CYMMIT International Maize and Wheat Improvement Centre, Nairobi, Kenya<br />
DERLTO District Extension Research Liaison and Training Officer<br />
FAO Food and Agriculture Organization of the United Nations<br />
FFS Farmer Field School<br />
GM Gross Margin<br />
HIV Human immunodeficiency virus<br />
icipe International Centre of Insect Physiology and Ecology<br />
IR-Maize Imazapyr-Resistant Maize<br />
KARI Kenya Agricultural Research Institute<br />
NAADS National Agricultural Advisory Services (Uganda)<br />
NAARI Namulonge Agricultural and Animal Research Institute<br />
NARO National Agricultural Research Organization<br />
NGO Nongovernmental Organization<br />
PDA Provincial Director of Agriculture<br />
PM&E Participatory monitoring and evaluation<br />
TVC Total Variable Costs<br />
Push-pull curriculum | xv
xvi | Push-pull curriculum
Preseason
Introduction<br />
Pest problems of maize<br />
Stemborers and striga weeds are the most<br />
destructive pests of cereal crops and can<br />
greatly reduce yields of maize on smallholder<br />
farms. You can get yield losses of<br />
30 to 100% if stemborers and striga are<br />
not controlled. Control of stemborers by<br />
insecticides and control of striga weeds by<br />
herbicides is very expensive for resourcepoor<br />
farmers. It is also not good for the<br />
environment.<br />
Stemborers<br />
Stemborers are important pests of maize<br />
in Africa, but they also attack other crops<br />
such as sorghum, millet and sugarcane.<br />
Damage is caused by larvae which first<br />
feed on young leaves, but soon enter into<br />
the stems. During the early stage of crop<br />
growth the larvae may kill the growing<br />
points resulting in deadhearts (Fig 1).<br />
Fig 1. Deadheart caused by stemborer larvae<br />
At a later stage of larva growth, extensive<br />
tunneling (Fig 2) inside the stem weakens<br />
the stalk so that it breaks and then lodges.<br />
Damage caused by stemborers could<br />
result into 20% to 40% reduction in grain<br />
yields.<br />
Fig 2. Tunnelling of maize stalk by stemborer larva<br />
Adult moths of stemborers are seldom<br />
seen in farmers’ fields as they are inactive<br />
during the day. They become active after<br />
sunset and lay their eggs during the night.<br />
In eastern Africa there are two species of<br />
stemborers which cause heavy damage to<br />
cereal crops –Busseola fusca (Fig 3) and<br />
Chilo partellus (Fig 4).<br />
Busseola fusca is an African stemborer<br />
and is present in high and mid altitude<br />
areas (3500 ft and above) like Kitale. Chilo<br />
partellus accidentally came to Africa from<br />
Asia in 1930s. Chilo partellus is present on<br />
low and mid altitude areas (below 4000 ft)<br />
like Kenyan coast.<br />
Fig 3. Busseola fusca Fig 4. Chilo partellus<br />
Adult moths lay eggs on maize plants (Figs<br />
5 and 6). The eggs then hatch into larvae<br />
which, after feeding on leaves for two to<br />
three days, enter inside maize stems. Busseola<br />
fusca lays its eggs between stem<br />
and leafsheaths (Fig 5), whereas Chilo<br />
partellus lays its eggs on plant surface in<br />
form of egg batches (Fig 6).<br />
Push-pull curriculum | 3
Fig 5. Busseola fusca<br />
laying eggs<br />
4 | Push-pull curriculum<br />
Fig 6. Chilo partellus<br />
laying eggs<br />
After larvae bore into maize stems, they<br />
feed and grow within the stems for 2-3<br />
weeks.<br />
Pupa<br />
develops<br />
into moth<br />
Larva turns<br />
into pupa.<br />
Remains for 7-14<br />
days as pupa<br />
Moth lays eggs on<br />
plants. Egg to larva<br />
in 5-7 days<br />
Egg hatches into<br />
larva. Larva feeds on<br />
plants and grows<br />
Fig 7. Life cycle of Busseola fusca stemborer<br />
Adult<br />
moth<br />
Pupa<br />
Moth lays<br />
eggs on<br />
plant<br />
Larva<br />
Fig 8. Life cycle of Chilo partellus stemborer<br />
When larvae are fully grown, they pupate<br />
and remain inside the maize stem for 7-14<br />
days. Adults emerge from pupae and come<br />
out of the stem. They mate and lay eggs<br />
on maize plants again and continue damaging<br />
the crop.<br />
Striga weeds<br />
Striga or witchweeds are parasitic weeds<br />
that affect maize in many parts of Africa<br />
reducing production by 30% to 100%.<br />
When a farm is infested with striga, the<br />
affected maize hardly grows more than<br />
one foot tall. The weed does not grow on<br />
its own but grows by attaching itself onto<br />
the host plants (Fig 9). Each striga plant<br />
can produce 20,000-80,000<br />
seeds, which lie dormant in<br />
the soil until a maize crop is<br />
planted again. This dormancy<br />
can last for over 15<br />
years. As striga germinates,<br />
its roots grow towards the<br />
maize crop, penetrate the<br />
roots of the maize and<br />
start to draw nutrients from<br />
there. This causes severe<br />
stunting of the maize and<br />
yield loss.<br />
Fig 9. Striga weed attached<br />
to maize roots<br />
In east Africa, there are two common species<br />
of the witchweed, Striga hermonthica<br />
and Striga asiatica. Striga hermonthica is<br />
common around the Lake Victoria basin<br />
while Striga asiatica is mainly found in the<br />
coastal areas. The most affected crops include<br />
maize, sorghum, rice and sugarcane.<br />
Farmers should control striga before it<br />
emerges from the ground because by the<br />
time it emerges, much damage will have<br />
been caused. Although various control<br />
methods have been proposed, few farmers<br />
are able to avoid yield loss by these<br />
means. For example, though manual<br />
removal reduces re-infestation, it is uneconomical<br />
since most damage is done even<br />
before the weed emerges. Therefore, any<br />
control strategy has to begin within the soil.
Control of stemborers and<br />
striga weed using the Pushpull<br />
strategy<br />
What is the "Push-pull" strategy?<br />
ICIPE and its partners have developed<br />
an effective, cheap and environmentally<br />
friendly technology known as “Push-pull”<br />
for the control of stemborers and suppression<br />
of striga weeds in maize.<br />
It is a simple cropping strategy, where the<br />
farmers use Napier grass and desmodium<br />
legume (Silverleaf or Greenleaf) for control<br />
of stemborer and striga weed in maize<br />
fields.<br />
Desmodium is planted between the rows of<br />
maize. It produces a smell that stemborer<br />
moths do not like. The smell “pushes”<br />
away the moths from the maize crop.<br />
Napier grass is planted around the maize<br />
crop as a trap plant. Napier grass is more<br />
attractive to female moths and it pulls the<br />
moths to lay their eggs on it. But Napier<br />
grass does not allow stemborer larvae to<br />
develop on it. When the eggs hatch and<br />
the small larvae bore into Napier grass<br />
stem, the plant produces a sticky substance<br />
like glue, which traps them and they<br />
die. So, very few stemborer larvae survive<br />
and maize is saved.<br />
In addition, desmodium, interplanted<br />
among the maize, reduces striga weed.<br />
It has been shown that nitrogen fixed by<br />
desmodium and chemicals produced by<br />
the roots of desmodium are responsible for<br />
suppressing the striga weed. Therefore,<br />
striga does not grow in the maize-desmodium<br />
intercrop.<br />
Benefits of adopting the Push-pull<br />
strategy<br />
When you adopt the Push-pull strategy you<br />
will:<br />
Increase maize yields by 25–30% in<br />
the areas where only stemborers are<br />
a problem but more than 100% where<br />
both stemborer and striga are problems<br />
Increase supply of cattle feed from<br />
Napier grass and desmodium<br />
Fix nitrogen into your farm by<br />
desmodium legume, so you save on<br />
fertilizer costs<br />
Protect soil from erosion as desmodium<br />
acts as a cover crop<br />
Retain soil moisture in your plot<br />
because desmodium acts as a mulch<br />
Get money from sale of desmodium<br />
seed at an attractive price<br />
Make more money from increased milk<br />
production and sales<br />
Save on farm labour as you do not have<br />
to manually remove striga weed from<br />
the farm<br />
Protect maize from strong winds when<br />
surrounded by Napier grass<br />
In this curriculum you will learn how to<br />
establish and maintain Push-pull plots and<br />
increase your maize yield by controlling<br />
stemborers and striga and improving soil<br />
health.<br />
For more information contact:<br />
Director General,<br />
ICIPE, P. O. Box 30772-00100,<br />
Nairobi, Kenya.<br />
Tel: 254-20-8632000<br />
District Agricultural Officers near you<br />
Push-pull curriculum | 5
Week 1<br />
Topic Duration What you need for this lesson<br />
1 Initial ground working 2 weeks Meeting place<br />
Preparing to launch a Farmer<br />
Field School (FFS) in a<br />
community<br />
A Farmer Field School is a process, not<br />
a goal. It aims to increase the capacity of<br />
farmers to test new technologies in their<br />
own fields and assess results and their relevance<br />
to particular circumstances. Farmers<br />
interact with researchers and extension<br />
workers on a demand driven basis, only<br />
asking for help where they are unable to<br />
solve a problem themselves.<br />
FFS is a dynamic process that is practised,<br />
controlled and owned by farmers to help<br />
them transform their observations to create<br />
a better understanding of their crops and<br />
livestock.<br />
The initial step in formation of a Farmer<br />
Field School involves what we call ground<br />
working.<br />
Topic: Initial ground working<br />
Learning objective<br />
On completion of this topic participants will:<br />
Become aware of FFS<br />
Understand the importance of FFS<br />
Learning activities<br />
The Ministry of Agriculture and partners<br />
can conduct a series of formal or informal<br />
meetings with interested farmers and community<br />
members, local government officers<br />
and non-governmental organisations<br />
before starting the FFS. The first meeting<br />
should be reasonably informal to introduce<br />
the FFS idea and to raise interest among<br />
potential participants.<br />
Ground working is important because of<br />
the following reasons:<br />
It introduces the FFS idea and to<br />
creates interest among potential<br />
participants<br />
It assesses the level of interest in the<br />
community<br />
It creates a basis for ownership in the<br />
FFS to be formed<br />
FFSs are likely to be effective if the participants<br />
reside in the same village. This<br />
enhances the chances of community members<br />
establishing an FFS in the village and<br />
encourages the participants to continue<br />
with group activities after the FFS season<br />
ends. Such groups provide good entry<br />
points for other development efforts in the<br />
community.<br />
Ideally, a request for a field school should<br />
come from the community itself. People<br />
who request training are likely to be motivated<br />
and responsible than those forced<br />
into a programme by some authority. Field<br />
days arranged by existing FFS can trigger<br />
such requests. In areas where the idea of<br />
FFS is not known, interest can be created<br />
by working through active local leaders or<br />
exchange visits to an area where a FFS<br />
exists.<br />
The timing of initial ground working is<br />
important. It should not be held at a time<br />
when potential participants, be it men or<br />
women, are engaged in other activities<br />
that might exclude them from participating.<br />
Through these initial meetings it will be<br />
possible to confirm or identify the farming<br />
community’s main interest areas or problems,<br />
and to check whether the community<br />
members are sufficiently interested to attend<br />
a season-long course on the subject.<br />
The groups are responsible for the care<br />
and maintenance of the study enterprise<br />
covering all aspects of the cropping cycle,<br />
from soil preparation, through planting,<br />
Push-pull <strong>Curriculum</strong> | 7
weed control, pest and disease control,<br />
harvesting, processing, post harvest storage,<br />
to marketing of produce. The approach<br />
is a season-long training following<br />
the seasonal activities of a crop. Issues<br />
related to financing of the FFS should be<br />
openly discussed, to make all arrangements<br />
transparent and to build trust.<br />
8 | Push-pull <strong>Curriculum</strong><br />
It is important to spend time discussing<br />
potential participants’ expectations, and<br />
getting the group to decide whether any<br />
of these are unrealistic to avoid problems<br />
later. The potential adult learners should be<br />
given enough opportunity to ask questions,<br />
get clarifications, and make suggestions.
Week 2<br />
Topic Duration What you need for this lesson<br />
1 Introduction of Farmer Field Schools 1 hour Pieces of paper/ flip – charts, pens/<br />
2 Levelling expectations 1 hour<br />
markers, a tick or more than one (or<br />
any other insect that is common), a<br />
3 Setting of learning norms 1 hour<br />
board to display<br />
Introduction<br />
Farmer Field Schools (FFSs) are informal<br />
hands-on schools for adults who come together<br />
on a regular basis to learn the “how<br />
and why” of a particular topic. The FFS<br />
uses participatory methods to help farmers<br />
develop their analytical skills, critical thinking,<br />
and creativity, and to help them learn<br />
to make better decisions.<br />
This lesson will introduce the community to<br />
what a field school is, the number of people<br />
involved, setting of norms and levelling<br />
of expectations in an FFS.<br />
Topic 1: Introduction to<br />
Farmer Field Schools<br />
Learning objectives<br />
This topic serves to:<br />
Introduce the FFS methodology to the<br />
community and FFS members<br />
Establish the interest of the community<br />
in using the FFS to learn about Pushpull<br />
Outline the principles and objectives of<br />
FFS<br />
Learning activities<br />
Facilitator-led introduction to FFS<br />
Facilitator-led discussion on the need<br />
for FFS<br />
Facilitator-led discussion on objectives<br />
and principles of FFS<br />
Facilitation procedure<br />
The facilitator initiates the activity by asking<br />
the farmers to draw a maize plant<br />
Everybody knows how a maize plant looks<br />
like. Each person in the crowd can carry<br />
out this exercise or a few volunteers can<br />
make a drawing of a maize plant<br />
The facilitator collects the drawings and<br />
displays them on a board or a place where<br />
all the participants present can clearly see<br />
them<br />
The facilitator asks participants to name<br />
the parts of the maize plant on the drawing<br />
and indicate the role of the different parts.<br />
The participants look, name and discuss<br />
whether the plant parts are labelled correctly<br />
and what role the parts do<br />
If the parts on the drawing are not labelled<br />
correctly, the facilitator asks the participants<br />
to explain the reason for the difference<br />
in observation<br />
Then the facilitator brings out a maize plant<br />
and shows it to the farmers, asking them to<br />
have a look and confirm the labelling and<br />
the role the different parts play<br />
Participants discuss the different parts<br />
of the maize plant and the role each part<br />
plays<br />
Principles of FFS<br />
What the farmer wants rules<br />
The field is the learning ground<br />
Learning by doing<br />
Extension workers are facilitators and<br />
not teachers<br />
participatory learning out of mistakes<br />
Push-pull curriculum | 9
Systematic training process<br />
Learn how to learn<br />
Unity is strength<br />
Problem-posing/problem-solving<br />
Every FFS is unique<br />
Topic 2: Levelling of<br />
expectations<br />
To avoid disappointing FFS participants<br />
and making some even drop out, it is important<br />
that the participants become aware<br />
of what they expect. At this very early<br />
stage participants can level out unrealistic<br />
expectations before committing themselves<br />
to participate in the FFS.<br />
Learning objectives<br />
On completion of this topic participants will<br />
be able to:<br />
Indicate what they expect from the FFS<br />
course<br />
Understand that not all their<br />
expectations are achievable through the<br />
FFS course<br />
Learning activity<br />
Facilitator-led introduction: Why would<br />
you like to join an FFS? What do you<br />
hope to gain? What do you expect from<br />
the facilitator?<br />
Group exercise – participants divide into<br />
smaller groups discuss questions and<br />
present to the whole group their ideas<br />
Facilitator-led discussion on unrealistic<br />
and realistic expectations<br />
How to level expectations<br />
Level expectations after the participants<br />
have introduced themselves. You can<br />
do this exercise with the whole group or<br />
with smaller groups<br />
Ask the following questions.<br />
• Why have you joined the FFS?<br />
• What do you hope to gain?<br />
• What do you expect from the<br />
facilitator?<br />
10 | Push-pull curriculum<br />
• What do you think the facilitator<br />
expects from you?<br />
Divide the group into sub-groups of at<br />
most 5 participants and give them time<br />
to discuss the questions<br />
One participant in the sub-group can<br />
write the answers on a flip-chart<br />
Invite a representative of each subgroup<br />
to present their responses to the<br />
whole group/class<br />
Summarize the group expectations<br />
Guide the discussions and respond<br />
to each expectation. Ask the group<br />
members what they think about each<br />
expectation and whether it is realistic<br />
and achievable within the FFS cycle<br />
It is the responsibility of the facilitator to<br />
make sure that unrealistic expectations are<br />
levelled out and realistic expectations are<br />
made part of the FFS programme.<br />
Topic 3: Setting of learning<br />
norms<br />
For the smooth running of the FFS, it is<br />
important to set ground rules and norms<br />
to ensure a suitable learning environment.<br />
Interruptions such as people coming late or<br />
under influence of alcohol, mobile phones,<br />
absenteeism, domineering people, cases<br />
of non- participation, are not good for a<br />
learning environment.<br />
Learning objectives<br />
On completion of this topic participants will<br />
be able to:<br />
Create a climate that enhances the<br />
learning process<br />
Prevent negative influences that would<br />
interfere with the success of the FFS<br />
Enhance members’ accountability to the<br />
group<br />
Train other participants how to organize<br />
and better manage themselves
Learning activities<br />
Divide the class into groups of 4-6<br />
members to discuss and list norms to<br />
guide good conduct in an FFS<br />
Facilitator-led discussion on norms and<br />
reinforcements of the FFS programme<br />
Listing of acceptable norms and<br />
reinforcements of the FFS<br />
How to set norms<br />
Find out from the group what learning<br />
norms are<br />
Ask group members to list the learning<br />
norms<br />
Guide the group to come up with<br />
more norms and suggestions on what<br />
should be done when a member does<br />
not respect the norms. For example,<br />
what should be done in the following<br />
instances?<br />
• Late comers: member has to pay a<br />
fine; member has to dance, etc.<br />
• Absenteeism: group can decide on<br />
how many sessions a participant<br />
needs to attend to be able to<br />
graduate (e.g. an attendance of 75%<br />
will be required)<br />
• Dominant people or lack of order<br />
in the group (you can use the stick,<br />
only the person holding the stick<br />
is allowed to speak. A person who<br />
would like to speak must raise<br />
his/her hand and be given the stick.<br />
Or use a slogan to get the group's<br />
attention)<br />
• People not contributing to group<br />
work: should pay for a day's labour.<br />
• Members who do not respect<br />
other people's opinions should be<br />
reprimanded<br />
The learning norms should be pinned<br />
on the wall for everybody to see<br />
Push-pull curriculum | 11
Week 3<br />
Topic Duration What you need for this lesson<br />
1 Introduction to Farmer Field<br />
School Implementation<br />
2 Introduction to Participatory<br />
Monitoring and Evaluation<br />
Introduction<br />
2 hours Facility to visualise the main points of the discussion e.g.,<br />
flip charts/chalkboards, markers, masking tapes; list of 1-2<br />
names of successful projects and 1-2 names of failed projects<br />
introduced into the village or in the neighbouring village.<br />
2 hours<br />
Adult learners volunteer to participate in a<br />
field school. To make the decision to participate<br />
they need enough information on<br />
how the school will meet their needs and<br />
interests. This lesson will introduce participants<br />
to the importance of a field school.<br />
Topic 1: Introduction<br />
to Farmer Field School<br />
implementation<br />
Learning objectives<br />
On completing this topic participants will:<br />
Understand the objectives of the FFS<br />
Identify where to locate the FFS<br />
Identify activities to learn through FFS<br />
Plan for official opening of the field<br />
school<br />
Learning activities<br />
Facilitator-led introduction on the<br />
objectives of FFS<br />
Brainstorming and group discussion on<br />
appropriate location of FFS, learning<br />
activities, and the appropriate time to<br />
open the school officially<br />
Facilitator-led discussion on importance<br />
of having a productive and effective<br />
FFS<br />
Objectives of FFS<br />
Empower farmers with knowledge and<br />
skills<br />
Sharpen the farmers’ ability to make<br />
critical and informed decisions that<br />
make their farming profitable and<br />
sustainable<br />
Sensitise farmers in new ways of<br />
thinking and problem solving<br />
Help farmers learn how to organise<br />
themselves and their communities<br />
Enhance relationship between farmers,<br />
extensionists and researchers to work<br />
together in testing, assessing and<br />
adapting a variety of options within their<br />
specific local conditions<br />
Identifying the suitable time for the FFS<br />
Participants should be involved in scheduling<br />
the day of the week and time of the day<br />
and the frequency with which to hold the<br />
FFS meetings. Women may not have the<br />
same availability as men. It is also usually<br />
easier to gather farmers together for a<br />
meeting early in the day, before they start<br />
their routine activities. Meetings of about 4<br />
hours may suit the majority of farmers, but<br />
the timing needs to be discussed with all<br />
the participants. The sessions of the initial<br />
phase of the school can commence before<br />
the start of the cropping season/cycle,<br />
when farmers are less busy with farm<br />
work. During the cropping season/cycle,<br />
sessions should be held regularly every<br />
one to two weeks.<br />
Push-pull curriculum | 13
Identifying the location of the school<br />
Ensure that all participants’ opinions regarding<br />
the proposed location are heard.<br />
The school should be located at a place<br />
that is:<br />
Accessible and acceptable to all the<br />
farmers<br />
Suitable for the proposed enterprise<br />
and within or next to the community<br />
Near a shade and in a comfortable,<br />
secure area for the group to draw,<br />
analyse the data and discuss findings.<br />
Identifying the FFS activities<br />
In order to start to identify initial topics that<br />
the FFS participants might like to learn, the<br />
participants can carry out a problem analysis<br />
for maize crop in the village. 3-4 volunteers<br />
from the group can do this. These<br />
volunteers can talk about their experiences<br />
with maize production, and the problems<br />
and successes they have had. The group<br />
can brainstorm on key cross cutting points<br />
from the different farmers’ presentations<br />
which will help define the initial activities<br />
the group will learn about.<br />
In order to develop skills needed to design<br />
and implement their experiments it is important<br />
that a session on experimentation<br />
is conducted very early in the FFS season.<br />
Participants can return to the topic of<br />
experimentation later during the season as<br />
they build their own skills and ideas.<br />
Opening the FFS officially<br />
For the development of the school and to<br />
ensure community support and replication<br />
of similar activities it is important to start<br />
the school with a proper opening ceremony.<br />
This will give the local authorities,<br />
including farmer leaders, the opportunity<br />
to express to the participants their support<br />
and interest in the school.<br />
14 | Push-pull curriculum<br />
Topic 2: Introduction to<br />
Participatory Monitoring &<br />
Evaluation (PM&E)<br />
Introduction<br />
Participatory monitoring & evaluation<br />
(PM&E) is a process through which stakeholders<br />
at various levels are involved<br />
in monitoring or evaluating the process<br />
and results of a particular project or programme.<br />
The stakeholders may include<br />
local people, researchers, NGOs, and<br />
policy makers. Evaluation is a process<br />
of determining whether the design and<br />
delivery of a programme were effective<br />
and whether the proposed outcomes were<br />
met. It begins in the initial planning phase<br />
and continues throughout the life of the<br />
programme. Evaluation done to improve<br />
or change the program is called formative<br />
evaluation. The evaluation that focuses on<br />
the results or outcomes of a programme<br />
while it is in progress is called summative<br />
evaluation. Good programme evaluation<br />
provides useful feedback to all those concerned<br />
with a certain programme<br />
PM&E aims at measuring the effectiveness<br />
of a project, building ownership and<br />
empowering you, building accountability<br />
and transparency; and enabling you take<br />
corrective actions to improve achievement<br />
of better outcomes.<br />
In this lesson, you will learn why you<br />
should monitor and evaluate the farm<br />
activities you undertake in your farm or in<br />
a FFS.<br />
Learning objectives<br />
On completion of this topic participants will<br />
be able to:<br />
Understand and explain the importance<br />
of PM&E<br />
Discuss the principles of PM&E
Learning Activities<br />
Notes<br />
Facilitator-led introduction on<br />
importance of participatory monitoring<br />
and evaluation<br />
Divide participants into groups of 4-6<br />
and let them brainstorm the on need<br />
for PM&E and write on flip charts (Lead<br />
questions: Why should you be involved<br />
in monitoring and evaluating what<br />
group activities you are doing? What<br />
guidelines would you follow in doing<br />
PM&E?)<br />
Groups make presentations to the<br />
bigger group<br />
Facilitator-led discussion on importance<br />
and principles of PM&E<br />
(1) Purposes of PM&E<br />
Assess what has been achieved<br />
Measure progress in line with the set<br />
objectives<br />
Improve monitoring for better<br />
management<br />
Identify strengths and weaknesses<br />
Check on the effectiveness of effort - is<br />
there a difference<br />
Do cost benefit analysis- were the<br />
costs reasonable<br />
Collect information to plan<br />
Share experience with others<br />
(2) Principles of PM&E<br />
PM&E seeks to involve programme participants<br />
in reflecting and assessing the<br />
progress of their project. Core principles of<br />
PM&E:<br />
It involves you as active participants<br />
– you actively participate in making<br />
decisions about your project/program<br />
activities<br />
It builds your capacity to analyze, reflect<br />
and take action<br />
It encourages joint learning of<br />
stakeholders at various levels.<br />
It promotes commitment to taking<br />
corrective actions. Facilitators are<br />
catalysts<br />
Emphasizes people-centeredness -<br />
relies on your creativity and knowledge<br />
about your environment<br />
It draws on your local resources and<br />
capacities (abilities)<br />
It is gender-sensitive – considers both<br />
men and women as important players.<br />
It promotes empowerment in which you<br />
and the community are encouraged<br />
to take ownership, management<br />
and control of your own choices and<br />
decisions.<br />
It encourages partnership and<br />
sustainability.<br />
HOW? WHO? WHERE? WITH WHAT? WHEN?<br />
Indicators Tools<br />
Push-pull curriculum | 15
Week 4<br />
Topic Duration What you need for this lesson<br />
1 Field observations 30 Minutes Records showing inputs and costs; crops and livestock<br />
2 Attending FFS regularly 30 Minutes<br />
information; record sheets; and flip charts/chalkboards,<br />
markers, exercise books, pens.<br />
3 Keeping farm records 1 hour 30 minutes<br />
4 Enterprise budgets 1 hour 30 minutes<br />
Introduction<br />
Observing and keeping records are two<br />
important things on your farm. You learn<br />
a lot from the observations you make and<br />
the records you keep about what is happening<br />
on your crops and livestock. This in<br />
turn enables you to make good decisions.<br />
Records are essential for good planning<br />
and use of your limited resources. Without<br />
proper understanding of record keeping,<br />
you may not succeed in today’s business<br />
world.<br />
In this lesson, you will learn about:<br />
Field observations<br />
Farm records<br />
Enterprise budgets<br />
Topic 1: Field observations<br />
Learning objectives<br />
On completion of this topic participants will<br />
be able to explain the importance of making<br />
field observations.<br />
Learning activities<br />
Facilitator-led discussion on the<br />
importance of field observations<br />
Facilitator-led discussion on how to<br />
make field observations and how to<br />
record observations<br />
Field walk to observe, identify and<br />
discuss the kinds of insects in a farm<br />
and the damage/benefits of such<br />
insects<br />
Topic 2: Attending FFS<br />
regularly<br />
The success of an FFS depends on all<br />
members attending all the learning activities<br />
regularly and being involved in all<br />
group activities. Participants are expected<br />
to apply directly what they learn in the FFS.<br />
Therefore, it is important that every participant<br />
attends all the field school sessions.<br />
Learning objective<br />
On completion of this topic participants will<br />
be able to understand the importance of<br />
attending FFS sessions regularly.<br />
Learning activities<br />
Facilitator-led introduction on the<br />
importance of attending all sessions<br />
regularly<br />
Brainstorm on rules to guide attendance<br />
of meetings<br />
Learn how to use the attendance roll<br />
Topic 3: Keeping farm records<br />
Learning objectives<br />
On completion of this topic participants will<br />
be able to:<br />
Explain the importance of farm record<br />
keeping<br />
Prepare and explain the different types<br />
of farm records<br />
Push-pull curriculum | 17
Learning activities<br />
Note<br />
Facilitator-led introduction: importance<br />
of keeping farm records<br />
Facilitator-led discussion on types of<br />
farm records and their preparation<br />
• If you keep records properly, they will provide you<br />
with answers that lead to better farm management<br />
decisions<br />
• Record keeping should be simple to make it easy<br />
for you to use and to avoid making mistakes<br />
• For you to get maximum value out of your records<br />
make sure you update them regularly and timely<br />
Topic 4: Enterprise budgets<br />
A budget provides the answer to the question:<br />
what will be the profit or loss of doing<br />
a certain enterprise? Budgeting relates to<br />
the future. It tells us what the profitability<br />
of an enterprise or activity will be if we<br />
decide to use a certain production technology.<br />
Budgeting is a planning tool used by<br />
several kinds of people including farmers,<br />
managers, extension specialists, and<br />
policy makers.<br />
Learning objectives<br />
On completion of this topic participants will<br />
be able to:<br />
Understand the importance of budgets<br />
as a tool in management of farm<br />
business<br />
Develop budgets to compare the<br />
inputs used in various enterprises and<br />
eventually their net profits<br />
Learning activities<br />
Facilitator-led introduction on meaning<br />
of enterprise budgets (What is an<br />
enterprise budget?)<br />
Facilitator-led discussion of format for<br />
enterprise budgets<br />
18 | Push-pull curriculum<br />
Brainstorm on the uses of enterprise<br />
budgets (Are enterprise budgets<br />
necessary?)<br />
Give examples for group exercise<br />
Enterprise budgets<br />
Single budgets are easier to use,<br />
monitor and evaluate<br />
Single enterprise budgeting has several<br />
uses:<br />
• Helps in considering the profitability<br />
of a single enterprise – Using the<br />
budgeting method helps one to<br />
investigate the profitability of a<br />
particular enterprise regardless of<br />
other farm enterprises<br />
• Helps in monitoring and control<br />
– Budgeting can be used for<br />
comparing actual implementation<br />
with planning, in order to identify and<br />
solve problems during the production<br />
season<br />
• Helps in whole farm planning – The<br />
most important component of<br />
any planning method is the list of<br />
enterprise budgets and their gross<br />
margins. The single enterprise<br />
budget also enables the planner to<br />
‘grade’ enterprises, and classify them<br />
according to their characteristics<br />
and profitability with regard to the<br />
production factors<br />
• Helps in preparing normative<br />
budgets – Budgets of single<br />
enterprises are compiled by<br />
government agencies for planning<br />
and policy implementation for<br />
providing ‘know-how’ and information<br />
to the farmers and advising them on<br />
what to grow
Week 5<br />
Topic Duration What you need for this lesson<br />
1 Tools of Participatory<br />
Monitoring & Evaluation<br />
Introduction<br />
Any activity, project or programme requires<br />
resources in developing and implementing<br />
it. It is therefore important that you check<br />
on how you begin. You need to choose<br />
and use the appropriate method or tool<br />
that will provide quality feedback. This will<br />
help to show whether the resources you<br />
are investing in the project are producing<br />
benefits or making profits<br />
PM&E tools help you to observe and<br />
analyse situations and performance and<br />
to understand what you are observing.<br />
Participatory monitoring and evaluation<br />
(PM&E) is management tools to enhance<br />
your learning and enable you take correct<br />
actions. In this lesson, you will also learn<br />
how to use relevant (PM&E) tools.<br />
Topic: Tools of Participatory<br />
Monitoring & Evaluation<br />
Learning objectives<br />
On completion of this topic participants will<br />
be able to:<br />
Carry out evaluation using different<br />
PM&E tools<br />
Reflect on what to monitor to measure<br />
success, and identify appropriate<br />
indicators to measure the identified<br />
parameters<br />
Decide how to monitor parameters, who<br />
should do it, where, with what and when<br />
Learning activities<br />
Facilitator-led introduction to tools of<br />
PM&E<br />
4 hours Facility to visualise the main points of the discussion e.g.,<br />
Flip charts/chalkboards, markers, masking tapes; list of 1-2<br />
names of successful projects and 1-2 names of failed projects<br />
introduced into the village or in the neighbouring village.<br />
Notes<br />
Identify practical cases of community<br />
projects that were successful or<br />
unsuccessful (failed) and brainstorm<br />
why they succeeded or failed<br />
Identify and discuss the indicators of<br />
project success or failure<br />
(1) Examples of PM&E Tools<br />
Sketches and maps<br />
Sketches and maps can be used at the<br />
beginning of the programme (for planning<br />
purposes), during the process (for monitoring<br />
purposes) and at the end of the programme<br />
(for evaluation purposes) in order<br />
to locate the changes in the programme.<br />
Semi-structured interviews<br />
Informal dialogue and interviewing is generally<br />
one of the first steps in participatory<br />
planning activities. Taking time to talk to<br />
people will set the right atmosphere.<br />
Focus-group discussion<br />
A focus group consists of 4–8 people who<br />
collect information, clarify details or gather<br />
opinions about an issue. It facilitates the<br />
exchange of experiences. The group usually<br />
records its discussion and shares with<br />
rest of the group.<br />
Daily activity analysis/diaries<br />
A diary keeps a record of events over time<br />
and can used to collect information regarding<br />
changes in the field, lives of individuals<br />
or groups, etc. Diaries are simple records<br />
of facts, such as the attendance of participants<br />
in the FFS.<br />
Push-pull curriculum | 19
Change or success stories<br />
The change or success story of an individual<br />
or group identifies significant changes<br />
– positive and negative – relating to an activity.<br />
This highlights a project’s impact and<br />
people’s perception of it. Stories document<br />
a sequence of events over time related to a<br />
person, location, household or organisation<br />
and help you to understand the history of a<br />
community or the impact of a programme.<br />
Stories also help the group to learn about<br />
people’s experiences and expectations and<br />
can help highlight obstacles to plans.<br />
Transect walk<br />
The transect walk helps in mapping information<br />
collected and monitoring. The<br />
participants take a structured walk (for<br />
example, in a zigzag) through a selected<br />
area, making observations using chosen<br />
indicators.<br />
Direct observation<br />
This includes any approach, which relies<br />
on directly observing objects, events, or<br />
relationships in the field, and keeping a<br />
record of the observations. Counting the<br />
number of stemborers or other insects and<br />
their predators, for example, helps farmers<br />
and outsiders to understand how the stemborers<br />
spread and endanger the crop.<br />
Evaluation wheel<br />
This uses indicators such as attendance,<br />
appreciation of the specific content of the<br />
session, performance of the facilitator, level<br />
of overall satisfaction, participation by all<br />
members, etc. The FFS group ranks these<br />
aspects on an agreed scale, say a ranking<br />
of 1-5. The reasons behind each score<br />
are discussed and solutions suggested for<br />
improvement.<br />
20 | Push-pull curriculum<br />
(2) Procedure for sharing success stories<br />
Step 1: Ask one participant to describe one<br />
important enterprise introduced in the area<br />
that was a success. All participants should<br />
listen carefully to the story.<br />
Step 2: In groups of 4 – 6, participants discuss.<br />
(Lead question: what do you need<br />
to monitor to be able to measure success<br />
both on the group activities and among<br />
individual members?) Write the parameters<br />
on cards.<br />
Step 3: Let each group present its results. Fix<br />
the list of measurements and respective<br />
indicators on a chart for everyone to see.<br />
Step 4: Look at the indicators and identify the<br />
ones that are suitable and easy to measure,<br />
i.e. most SMART: specific, measurable,<br />
attainable, relevant and timely.<br />
Step 5: Divide the things discussed with the<br />
defined indicators among the groups.<br />
Step 6: Each group discusses which tools to<br />
use to measure the indicator (HOW), WHO<br />
should be responsible, WITH WHAT and<br />
WHEN and document their decisions in<br />
a table as below. The group can use the<br />
format of the table below<br />
Step 7: Repeat Step 1-6 with another participant<br />
for an enterprise or project that was<br />
not successful. Get consensus from the<br />
others (if they come from the same village).<br />
Step 8: In the larger group go over the presentations<br />
of the group works with especial<br />
emphasis on how realistic the monitoring<br />
plan is, the costs involved and where will<br />
the funds come from, level of knowledge<br />
the participants have in monitoring the<br />
tasks, whether they have resource persons,<br />
what training they require, etc.<br />
How Who Where With what When<br />
Indicators Tools
Season 1
Week 1<br />
Topic Duration What you need for this lesson<br />
1 Preparing and laying out the<br />
Push-pull plot<br />
2 Planting the Push-pull and<br />
the Check plots<br />
Introduction<br />
Two things are necessary when establishing<br />
a good and easy to manage Push-pull<br />
plot: proper land preparation and careful<br />
layout of the field. Proper land preparation<br />
has the following advantages:<br />
It helps control weeds<br />
It facilitates easy sowing and helps to<br />
establish good seed and soil contact<br />
It helps the seeds to absorb moisture<br />
easily<br />
It provides sufficient aeration<br />
It helps improve the water holding<br />
capacity of the soil<br />
If you follow good management practices<br />
the Napier grass and desmodium you will<br />
establish this year will benefit your Pushpull<br />
plot for 5 or more years.<br />
This week’s lesson is about these two<br />
important activities. Participants will learn<br />
how to prepare and lay out the Push-pull<br />
plot and the Check plots.<br />
Topic 1: Preparing and laying<br />
out the Push-pull plot<br />
Learning objective<br />
On completion of this topic the participants<br />
will be able to demonstrate how to prepare<br />
and lay out land for the first season.<br />
Learning activities<br />
Facilitator-led introduction on<br />
preparation and laying out of Push-pull<br />
plot and Check plots<br />
2 hours Ruler/tape measure, string, pegs, sticks for measurement,<br />
mallet hammer, polyethylene tags or marker pens,<br />
push-pull manual<br />
2 hours Jembes/hoes, pangas, pegs, sticks, fertilizer, seed materials,<br />
napier grass cane cuttings or root splits, dry sand,<br />
small bucket, small container (pot, tin, etc) of good soil<br />
Practical preparation of the two plots<br />
Facilitator-led discussion on<br />
requirements for preparing and laying<br />
out Push-pull plots<br />
How to prepare the Push-pull plot<br />
Note<br />
If your land is slopping, the desmodium and maize<br />
rows must run across the slope to avoid surface<br />
runoff and to reduce soil erosion.<br />
Step 1: Mark out a plot measuring 21m by<br />
21m using a tape measure, pegs and<br />
strings (To make sure it is a square, use a<br />
string to ensure the two diagonals have the<br />
same length).<br />
21 meter<br />
21 meter 75cm<br />
Fig 10. Measuring a Push-pull plot<br />
Step 2: Put a peg at each corner of the<br />
measured area. Starting from a peg at one<br />
corner, put more pegs all around the plot at<br />
intervals of 75 cm.<br />
Step 3: Run a string from the first peg in one<br />
corner to the first peg on the opposite side<br />
of the field.<br />
Push-pull curriculum | 23
Step 4: Run the second string from the second<br />
peg to the second peg on the opposite<br />
side.<br />
Step 5: Run the third string from the third peg<br />
to the third peg on the opposite side.<br />
Step 6: Repeat Steps 3, 4 and 5 for all the<br />
other sides, until you have a plot looking<br />
like Fig 11 below.<br />
The Push-pull plot is now ready for planting.<br />
Area for planting Napier grass<br />
around the maize<br />
24 | Push-pull curriculum<br />
Area for maize<br />
and desmodium<br />
intercropping<br />
1 metre path round<br />
Area for planting Napier grass<br />
around the maize<br />
Fig 11. A laid-out Push-pull plot<br />
How to prepare the Check plot<br />
Step 1: Demarcate a plot measuring 21m by<br />
21m.<br />
Step 2: Starting from one corner put pegs<br />
along two opposite sides of the square at<br />
75 cm intervals.<br />
Step 3: Run a string across from the first peg<br />
from a corner to the first peg on the opposite<br />
side and do the same up to the last<br />
pegs.<br />
What NOT to do<br />
Do not remove the pegs until your plot<br />
is fully planted<br />
Do not plant Push-pull in less than 21m<br />
by 21m plots as Napier grass tends<br />
to grow tall and therefore creating a<br />
shading effect on the maize crop<br />
Topic 2: Planting the Pushpull<br />
and the Check plots<br />
This topic covers:<br />
Planting of Napier grass canes or root<br />
splits<br />
Planting the desmodium<br />
Planting the maize<br />
Learning objective<br />
On completion of this topic participants will<br />
be able to demonstrate how to plant on<br />
both Push-pull and Check plots.<br />
Learning activities<br />
Facilitator-led introduction on planting<br />
the Push-pull plot<br />
Practical activities on planting of Pushpull<br />
(maize, desmodium and Napier<br />
grass) and the Check plots<br />
Discussions on planting all plots<br />
Planting order<br />
(1) Planting Napier grass<br />
Bana is the best variety of Napier grass for<br />
use in Push-pull.<br />
Follow these steps when planting Napier<br />
grass in your Push-pull plot.<br />
Step 1: Dig a hole at each peg on the border<br />
of the marked plot.<br />
Fig 12. Hole for planting cane or root split<br />
Step 2: Apply one tea spoonful of triple super<br />
phosphate fertilizer or 2 hand-fulls of well<br />
decomposed farmyard manure in each<br />
hole (Fig 13).
Fig 13. Applying fertiliser or manure<br />
Step 3: Place a three node cane into each<br />
hole at an angle of 30 o -45 o all facing one<br />
direction (Fig 14).<br />
Fig 14. Two nodes of cane in a hole<br />
Step 4: Cover with soil ensuring that two<br />
nodes of the cane are well covered (Fig<br />
15).<br />
Fig 15. Cane covered with soil<br />
Step 5: Repeat Steps 1 to 4 for the second<br />
and third rows, ensuring that the rows are<br />
75 cm apart and 75 cm between the plants<br />
within the rows.<br />
When complete, you will have three rows<br />
of Napier grass all round the maize field.<br />
Fig 16. Rows and plants at 75 cm apart<br />
Note<br />
If you are using root splits, place them upright<br />
into the planting holes and cover with<br />
soil (Fig 17 below).<br />
Fig 17. Planting splits<br />
Some farmers prefer to establish Napier grass<br />
in the short rains. The desmodium and maize<br />
intercrop are established in the subsequent<br />
season. This helps to control stemborer in the<br />
first season of Push-pull establishment.<br />
(2) Planting desmodium<br />
Step 1: Start from the fourth peg at the corner<br />
of the marked plot and run a string to the<br />
fourth peg on the opposite side. Do the<br />
same for all the sides (Fig 18).<br />
Fig 18. Strings running across the plot<br />
Step 2: Mix thoroughly desmodium with fine<br />
sand in the ratio of one part desmodium<br />
seed to two parts dry sand (Fig 19).<br />
To plant a 21m by 21m plot you need<br />
250g to 300g of desmodium seed<br />
Push-pull curriculum | 25
desmodium<br />
seed<br />
26 | Push-pull curriculum<br />
Fine sand<br />
Fig 19. Mixing desmodium with fine sand<br />
Step 3: Using a sharp pointed stick, make a<br />
furrow 1-2 cm deep along the string lines.<br />
Leave a 75 cm space at the end of each<br />
row between the end of the desmodium<br />
row and the inner row of Napier grass (Fig<br />
20).<br />
Fig 20. Making a furrow for drilling desmodium<br />
Step 4: Drill fertilizer or farmyard manure<br />
along the furrows, and mix with soil, using<br />
a stick, without covering or disturbing the<br />
furrow.<br />
Step 5: Drill the desmodium/sand mixture prepared<br />
in Step 2 into the furrow and cover<br />
with a light amount of soil (Fig 21).<br />
Note<br />
Fig 21. Drilling desmodium into furrows<br />
Desmodium is drilled in the furrows at<br />
75 cm row to row distance<br />
Plant desmodium with the rains for maximum<br />
germination<br />
Planting desmodium in a straight line will save you<br />
a lot of time when you come for the first weeding<br />
after 3 weeks. It will also help you to distinguish<br />
desmodium seedlings from weeds<br />
If you do not have desmodium seeds, you can use<br />
desmodium vines from any neighbouring farm.<br />
This should be done when there is adequate<br />
soil moisture to ensure good establishment.<br />
(See Season 2 Week 1 on desmodium vine<br />
propagation)<br />
Step 6: Plant desmodium in a small container<br />
(pot, tin, etc.) and keep it in a<br />
shade and watered. These seedlings will<br />
help you to identify desmodium seedlings<br />
in the field.<br />
(3) Planting maize<br />
(a) Push-pull plot<br />
Step 1: Maize is planted in straight lines between<br />
the rows of desmodium<br />
Ensure that the first row of maize is at<br />
least 1 m away from the inner row of<br />
Napier grass<br />
The recommended spacing for maize<br />
is 75 cm between rows and 30 cm<br />
between hills in a row
Step 2: Apply one tea spoonful or soda bottle<br />
top of triple super phosphate or two<br />
spoonfuls of single super phosphate per<br />
hole. You may also use a handful of good<br />
quality manure per hole. Cover with a small<br />
amount of soil.<br />
Step 3: Plant two maize seeds per hole and<br />
then thin to one plant per hill after first<br />
weeding (see Season 1, Week 5).<br />
Note<br />
Planting in this way ensures that maize rows<br />
alternate with Napier grass rows (i.e. they should<br />
not be on the same row with Napier). This helps<br />
make ploughing easier in the next season.<br />
(b) Check plot<br />
In the Check plot, the same maize variety<br />
is planted in the entire 21 m by 21 m plot.<br />
Labour costs<br />
Push-pull Plot Field layout<br />
Total<br />
Activity No of people<br />
working on<br />
this activity<br />
Planting Napier<br />
Planting Desmodium<br />
Planting maize<br />
Fertilizer application<br />
Manure application<br />
Any other activity<br />
Check Plot Field layout<br />
Total<br />
Planting maize<br />
Fertilizer application<br />
Manure application<br />
Any other activity<br />
Step 1: Dig holes at 75 cm between rows and<br />
30 cm within the rows.<br />
Step 2: Apply one tea spoonful or soda bottle<br />
top of triple super phosphate or two spoonfuls<br />
of single super phosphate in each<br />
hole. You may also use a handful of good<br />
quality manure per hole. Cover with a small<br />
amount of light soil.<br />
Step 3: Plant two maize seeds per hole.<br />
When the maize germinates you will thin<br />
to one plant per hill after the first weeding<br />
(see Season 1, Week 5).<br />
What NOT to do<br />
Do not do any planting if moisture is not<br />
enough or if the field is too dry.<br />
Time taken to<br />
complete the<br />
activity (hours)<br />
Cost of<br />
labour per<br />
day<br />
Total cost of<br />
this activity<br />
Push-pull curriculum | 27
Input costs<br />
Push-pull Plot Maize seed<br />
Total<br />
28 | Push-pull curriculum<br />
Input used Quantity used Cost<br />
Desmodium seed<br />
Napier<br />
Fertilizer<br />
Manure<br />
Other<br />
Check Plot Maize seed<br />
Total<br />
Farmer’s fields<br />
Fertilizer<br />
Manure<br />
Other<br />
General information<br />
Date<br />
Variety of maize<br />
planted<br />
Date of planting: Fertilizer applied:<br />
Observations Farmer’s comments<br />
Low Medium High<br />
Rainfall: Number of<br />
days it rained the<br />
week before: ____<br />
Soils<br />
• Soil colour:<br />
• Soil moisture:<br />
• Soil depth:<br />
Weather: Sunny/Cloudy/Rainy Windy/Still Hot/ Cold
Week 2<br />
Topic Duration What you need for this lesson<br />
1 Gapping maize 30 Minutes Maize seeds, pen, jembes/hoes, pegs, sticks, strings,<br />
2 Land preparation for planting of<br />
desmodium for seed production<br />
1 hour<br />
3 Planting desmodium 30 Minutes<br />
tape measure, ruler, desmodium seeds (100 grams) and<br />
TSP fertilizer.<br />
4 Introduction to Ecosystems 1 hour Pieces of paper/ flip – charts, pens/ markers and a board<br />
to display.<br />
Introduction<br />
It takes about 4 – 5 days for the maize to<br />
germinate. At times some of the maize<br />
seeds do not germinate. This leaves gaps<br />
in the field that need to be filled. This is<br />
called gapping. Gapping should be done<br />
at this stage so that the new maize can<br />
catch up with the rest of the crop.<br />
Topic 1: Gapping maize<br />
Learning objectives<br />
On completion of this topic participants will<br />
understand and explain the importance<br />
and timing of gapping.<br />
Learning activities<br />
Facilitator-led introduction on the<br />
importance and time of gapping<br />
Practical activities on gapping of maize<br />
Discussion<br />
How to gap maize (both in Push-pull and<br />
Check plot)<br />
Step 1: Walk along the rows, identify gaps<br />
where maize seeds have failed to germinate<br />
and dig holes.<br />
Step 2: Plant two maize seeds per hole and<br />
then thin to one plant per hill after first<br />
weeding (in Week 5).<br />
Note<br />
You do not have to apply fertilizer at this<br />
stage since you had applied earlier.<br />
Be careful not to step on the germinating<br />
desmodium seedlings in the Push-pull plot<br />
Topic 2: Preparing land to<br />
plant desmodium for seeds<br />
Desmodium is expensive to buy and the<br />
demand for planting material by farmers is<br />
high. This lesson will enable the farmer to<br />
produce desmodium from seed or vines for<br />
their own use or for sale.<br />
Learning objectives<br />
On completion of this topic participants<br />
will demonstrate how to prepare a plot for<br />
desmodium seed production.<br />
Learning activities<br />
Facilitator-led introduction on<br />
desmodium seed bed preparation<br />
Practical activities on seed bed<br />
preparation<br />
Discussion<br />
How to prepare land for planting<br />
desmodium<br />
Step 1: Mark out a 10 m by 10m plot<br />
Step 2: Before the onset of rains, you will<br />
have ploughed or dug your land by hand<br />
and broken the soil into fine particles.<br />
Desmodium has very small seeds.<br />
Push-pull curriculum | 29
Therefore, the soil should be carefully<br />
prepared so that it is as fine and clean as<br />
possible.<br />
Step 3: Starting from one corner of the plot,<br />
put pegs along two opposite sides of the<br />
square at 75 cm intervals (Fig 10).<br />
Step 4: Run a string across from the first peg<br />
to the first peg on the opposite side. Do the<br />
same for all the pegs (Fig 11).<br />
Note<br />
A 10 m by 10 m desmodium plot can produce 3-4<br />
kg of seed for sale and vines to establish your<br />
next Push-pull plot.<br />
Topic 3: Planting desmodium<br />
Learning objectives<br />
On completion of this topic participants will<br />
plant desmodium for seed production.<br />
Learning activities<br />
Facilitator-led introduction on planting of<br />
desmodium seeds<br />
Practical activities on seed planting<br />
Discussion<br />
Step 1: For a 10 m by 10 m plot, mix thoroughly<br />
100 g of desmodium seed with<br />
200g fine sand, or a ratio of one part<br />
desmodium to two parts sand (Fig 19).<br />
Step 2: Using a strong pointed stick, make a<br />
furrow 1-2 cm deep along the string lines<br />
(Fig 20).<br />
Step 3: Drill TSP fertilizer or farmyard manure<br />
along the furrows, and mix with soil, using<br />
a stick, without covering or disturbing the<br />
furrow.<br />
Step 4: Drill the desmodium/sand mixture prepared<br />
in Step 1 into the furrow and cover<br />
with a light amount of soil.<br />
Step 5: Plant desmodium in a small container<br />
30 | Push-pull curriculum<br />
Note<br />
(pot, tin, etc.) and keep it in a shade and<br />
watered. These seedlings will help you to<br />
identify desmodium seedlings in the field.<br />
• Plant desmodium with the rains for maximum<br />
germination.<br />
• Planting desmodium in a straight line will save you<br />
a lot of time when you come for the first weeding<br />
after 3 weeks. It will also help you to distinguish<br />
desmodium seedlings from weeds.<br />
Topic 4: Introduction to<br />
Ecosystems<br />
Introduction<br />
An ecosystem (short for ecological system)<br />
consists of both living and non-living things<br />
and the physical environment (habitat).<br />
A habitat is the place where a population<br />
lives. A population is a group of living<br />
organisms of the same kind living in the<br />
same place at the same time. All of the<br />
populations interact and form a community.<br />
The community of living things interacts<br />
with the non-living world around it to form<br />
the ecosystem. Ecosystem consists of<br />
many smaller complete ecosystems in a<br />
habitat. The habitat supplies organisms<br />
with food, water, warmth, air and minerals.<br />
Some interactions of the components<br />
result in higher benefits while others lead<br />
to losses.For crops and livestock, positive<br />
interactions result in higher productivity<br />
while negative interactions lead to lower<br />
yields.<br />
Farmers need to understand these interactions<br />
so as to maximize the positive ones<br />
for higher production and minimize the<br />
negative ones through better management.<br />
It is important for them to understand the<br />
functions and interactions of the various<br />
components, the living, the non-living and<br />
the physical environment.
Learning objectives<br />
On completion of this topic, participants will<br />
be able to:<br />
Understand different types of<br />
ecosystems<br />
Build awareness of the relationships<br />
that exist between living and non-living<br />
things found in their environment<br />
Appreciate that if one thing in the<br />
network of interaction is changed, it can<br />
influence all of the components of the<br />
ecosystem<br />
Learning activities<br />
Facilitator-led introduction on meaning<br />
and importance of ecosystem<br />
Through focus groups, farmers critically<br />
observe, analyze and make decisions<br />
on their field problems (Lead question:<br />
What relationships exist between living<br />
and non-living things in the farm?)<br />
Facilitator-led discussion on elements of<br />
an ecosystem<br />
Labour costs<br />
Push-pull plot Gapping maize<br />
Check plot Gapping maize<br />
Seed multiplication<br />
plot<br />
Activity No of people<br />
working on<br />
this activity<br />
Preparing land<br />
Planting desmodium<br />
Input Costs for desmodium multiplication plot<br />
Total<br />
Step 1: Divide the group into small groups of<br />
4-6 members. Each group will go to the<br />
field and do the following:<br />
Look around and as far as they can see<br />
List all the living and non-living things<br />
they can see<br />
Discuss how the things observed are<br />
connected or how they affect each other<br />
Step 2: After 20 minutes of observation, discussion<br />
and note-taking return to the meeting<br />
place. Each group will do the following:<br />
Draw a picture showing all the things<br />
that they observed and draw lines to<br />
show which things are connected or<br />
affect each other<br />
Make a presentation to the big group to<br />
explain what they have drawn<br />
Time taken to<br />
complete the<br />
activity (hours)<br />
Cost of<br />
labour per<br />
day<br />
Input used<br />
Desmodium seed<br />
Quantity used Cost<br />
Fertilizer<br />
Manure<br />
Other<br />
Total cost of<br />
this activity<br />
Push-pull curriculum | 31
Farmer’s fields<br />
General information<br />
Date<br />
Age of maize in<br />
weeks<br />
Germination<br />
• Maize<br />
• Desmodium<br />
Poor Average Good<br />
Observations Farmer’s comments<br />
Low Medium High<br />
Soil moisture<br />
Weather: Sunny/Cloudy/Rainy Windy/Still Hot/ Cold<br />
Indicator Observation<br />
Emergence count<br />
Maize germination<br />
Seedling damage observations<br />
32 | Push-pull curriculum<br />
Push-pull field Check plot
Week 3<br />
Topic Duration What you need for this lesson<br />
1 Gapping Napier 30 MInutes Napier grass cuttings/root splits, hoe/stick,<br />
2 Agro Ecosystem Analysis (AESA) 1 hour<br />
Push-pull manual, pen and paper, markers,<br />
flip charts<br />
3 Group Assessment 2 hours 3 minutes<br />
Introduction<br />
Napier grass stem cuttings take two weeks<br />
to sprout while the root splits can start<br />
sprouting in one week. Sometimes some<br />
of the planted Napier grass cuttings or root<br />
splits fail to sprout. Therefore, you need to<br />
gap at this stage so that later in the season<br />
there is enough Napier grass to protect<br />
your maize crop against stemborers, and<br />
to produce more fodder for your livestock.<br />
Topic 1: Gapping Napier<br />
Learning objectives<br />
On completion of this topic, participants<br />
will be able to understand and explain the<br />
importance and timing of gapping Napier<br />
grass.<br />
Learning activities<br />
Facilitator-led introduction on the<br />
importance and time of gapping<br />
Practical activities on gapping of Napier<br />
grass<br />
Discussion<br />
Gapping Napier grass<br />
Step 1: Walk along the rows and mark the<br />
gaps where Napier grass has not sprouted.<br />
Step 2: Place a three node cane ensuring two<br />
nodes are well covered with soil. The new<br />
canes should all face the same direction as<br />
those planted earlier.<br />
If you are using root splits, place them into<br />
the holes and cover with soil.<br />
Topic 2: Introduction to<br />
Agroecosystem Analysis<br />
(AESA)<br />
The AESA is a field-based analysis of the<br />
relationships of components observed in<br />
the field such as soil, water, pests and their<br />
relationships. Participants learn to make<br />
regular field observations, analyze problems<br />
and opportunities encountered in the<br />
field and learn to improve decision-making<br />
skills regarding farm management. Participants<br />
thus develop the ability to assess<br />
and analyze problems, adopting a scientific<br />
procedure that consists of observation and<br />
analysis, followed by recommendations.<br />
In this topic participants will learn how to<br />
conduct AESA by visiting the experimental<br />
plots/farms by observing the ecosystem,<br />
including interactions and ecological processes.<br />
They do so by sampling, observing,<br />
recording and making comparison and<br />
analysis of information.This helps them to<br />
take actions based on sound information.<br />
Learning objectives<br />
On completion of this topic participants will<br />
be able to:<br />
Become more aware of the things<br />
and interactions that make up the<br />
ecosystem of their fields- the “agroecosystem”<br />
Develop indicators for monitoring<br />
interactions and processes in the<br />
ecosystem<br />
Use their understanding and<br />
observations of the agro-ecosystem as<br />
a basis for decision making about crop/<br />
livestock management<br />
Push-pull curriculum | 33
Learning activities<br />
Facilitator-led introduction on meaning and importance of AESA<br />
Group observations and discussions of the components of an agroecosystem (Lead<br />
question: What relationships exist between humans, crops, livestock and the physical<br />
environment?)<br />
Facilitator-led discussion on indicators of monitoring elements of an agro-ecosystem<br />
Procedure<br />
Step 1: Divide the group into small groups of 4-6 members. Each group will go to the field and do<br />
the following:<br />
Look around the host farm and list all the living<br />
(crops and livestock, insects) and non-living<br />
things they can see<br />
Discuss how they are connected or how they<br />
affect each other<br />
Step 2: After 20 minutes of observation, recording and<br />
discussion return to the meeting place. Each group<br />
will do the following:<br />
Draw a picture showing all the things that they<br />
observed and draw lines to show which things<br />
Fig 22. An AESA session<br />
are connected or affect each other<br />
Make a presentation to explain what they have drawn to the big group<br />
Examples of Indicators for monitoring interactions and processes through AESA<br />
Examples of Indicators for monitoring interactions and processes through AESA<br />
Frequency of monitoring Indicators<br />
At start of experiment Initial land use, soil type, soil moisture, land area, date of planting, germination<br />
rate, etc<br />
Periodically Signs of stemborer and striga infestation, other pests, soil cover, soil life,<br />
soil moisture, etc<br />
Frequently Rainfall, plant growth, pest and diseases, soil moisture, moisture stress,<br />
management practices carried out, labor input, benefits obtained<br />
At end of experiment Crop height, grain yield, biomass yield, soil nutritional level, total labour<br />
input, total benefits, cost/benefit analysis<br />
Topic 3: Group assessment<br />
Introduction<br />
There is a lot to learn and this can be very<br />
challenging. People learn at different rates.<br />
Some find it easy, while others may find it<br />
34 | Push-pull curriculum<br />
difficult. The aim of group learning lesson<br />
is to maximize the resource of the fast<br />
learners for the benefit of the whole group,<br />
through sharing of experiences and challenges.<br />
If you achieve all the above you will<br />
have a very effective FFS experience.
Do not use negative criticism, be objective<br />
and positive in your comments.<br />
Now you have been working together as<br />
a group for 6-7 weeks, and you have had<br />
time to apply on your farm what you have<br />
learnt in the field school. It is time to go<br />
out and see how you and your colleagues<br />
have laid out your Push-pull and the Check<br />
plots. The purposes of this are:<br />
To maximize your group learning (social<br />
learning)<br />
To learn from each other’s experiences<br />
To correct any errors that may have<br />
been made<br />
Learning objective<br />
The objective of this assessment is to<br />
maximize interactive learning through<br />
group discussion and evaluation.<br />
What to do in the assessment<br />
Step 1: Form groups of 4-6 members.<br />
Step 2: Each group visits each farm represented<br />
by the members in the group.<br />
Step 3: Use the table below to assess the<br />
Push-pull and the Check plots, and discuss<br />
with the farmer. Rate each farm using this<br />
scale:<br />
1 = Poor 2 = Average 3 = Good<br />
Push-pull plot Check plot<br />
What to check<br />
Field preparation<br />
Rating Comments Rating Comments<br />
Layout of the field<br />
Cleanliness of the plots<br />
Germination of maize<br />
Napier grass establishment<br />
Germination of desmodium<br />
Germination of desmodium in the<br />
pots<br />
Record-keeping<br />
Total rates<br />
Other comments _____________________________________________________________<br />
___________________________________________________________________________<br />
____________________________________________________________________________________________<br />
____________________________________________________________________________________________<br />
____________________________________________________________________________________________<br />
____________________________________________________________________________________________<br />
Push-pull curriculum | 35
Labour cost<br />
Push-pull<br />
Plot<br />
Farmer’s field<br />
36 | Push-pull curriculum<br />
Activity No of people<br />
working on<br />
this activity<br />
Gapping Napier<br />
Other<br />
Time taken to<br />
complete the<br />
activity (hours)<br />
Cost of<br />
labour per<br />
day<br />
General information<br />
Date<br />
Variety of maize<br />
planted<br />
Date of planting: Fertilizer applied:<br />
Observations Farmer’s comments<br />
Low Medium High<br />
Rainfall: Number of<br />
days it rained the<br />
week before: ____<br />
Soils<br />
• Soil colour:<br />
• Soil moisture:<br />
• Soil depth:<br />
Weather: Sunny/Cloudy/Rainy Windy/Still Hot/ Cold<br />
Total cost of this<br />
activity
Week 4<br />
Topic Duration What you need for this lesson<br />
1 Sources of stemborer infestation<br />
Introduction<br />
1 hour 30<br />
Minutes<br />
Many types of wild grasses grow in Africa.<br />
Stemborers live and feed on some of these<br />
grasses. Similarly, many types of useful<br />
insects that attack and destroy stemborers<br />
also live on these grasses. This lesson will<br />
show the farmers how wild grasses contribute<br />
to the overall management of stemborers<br />
in the Push-pull strategy.<br />
Topic: Sources of stemborer<br />
infestation<br />
Learning objective<br />
On completion of this topic, participants<br />
will be able to identify grasses on which<br />
stemborers prefer to live.<br />
Learning activities<br />
Facilitator-led introduction on the<br />
various type of grasses on which<br />
stemborers prefer to live.<br />
Field visits to observe the presence of<br />
stemborers on various grasses.<br />
Discussion (Lead question: Which<br />
grasses have the highest stemborer<br />
presence?)<br />
Duration: 1 hour 30 minutes<br />
Identifying host grasses<br />
Form groups of 4 to 6 members.<br />
Step 1: Facilitator leads groups in a field walk<br />
collecting 5 different types of grasses and<br />
dissecting 10 stems of each.<br />
Step 2: Groups use the pictures provided to<br />
try and find out their names. Figs 23 -25<br />
are examples of common grasses.<br />
Pictures and samples of grasses, hand lens (if available),<br />
sharp knives or blades, vials, petri dishes, small containers<br />
e.g., shoe polish containers; plastic buckets (5 litres)<br />
Step 3: Groups give the local names of the<br />
grasses they have collected.<br />
Step 4: The participants count and record<br />
the number of larvae present on each<br />
dissected grass type.<br />
Fig 23. Signal grass<br />
Fig 24. Wild Sorghum<br />
Fig 25. Napier grass<br />
Push-pull curriculum | 37
Step 5: The participants place this in 20 plastic pots.<br />
Grass name Local name Total no of<br />
stems dissected<br />
1.<br />
2.<br />
3.<br />
4.<br />
5.<br />
6.<br />
7.<br />
38 | Push-pull curriculum<br />
Total no of<br />
stemborer larvae<br />
General information<br />
Date<br />
Crop Health<br />
• Maize Push-pull Plot<br />
• Maize Check Plot<br />
• Napier grass<br />
• Desmodium<br />
Poor Average Good<br />
Observations Farmer’s comments<br />
Low Medium High<br />
Rainfall: Number of<br />
days it rained the<br />
week before: ____<br />
Soil moisture<br />
Weather: Sunny/Cloudy/Rainy Windy/Still Hot/ Cold<br />
Farmers’ comments after the lesson:<br />
Number of<br />
larvae per stem<br />
___________________________________________________________________________<br />
___________________________________________________________________________<br />
__________________________________________________________________________________________________<br />
_________________________________________________________________________________________________
Week 5<br />
Topic Duration What you need for this lesson<br />
1 1 st weeding, thinning and top dressing maize<br />
in both Push-pull and Check plots<br />
2 Weeding (and top dressing) of Napier grass 1 hour<br />
3 Identifying desmodium seedlings 30 Minutes<br />
4 Hand weeding and gapping desmodium 1 hour<br />
Introduction<br />
Weeds compete with your crops (maize,<br />
desmodium and Napier grass) for water,<br />
soil nutrients, light and space. Therefore,<br />
early weeding of crops is very important.<br />
It is essential to carry out the first weeding<br />
when maize is three weeks old. If you<br />
delay the weeding your crops will not be<br />
healthy.<br />
Thinning of maize to one plant per hill is<br />
essential. If there are too many maize<br />
plants per hill they will compete with each<br />
other for food and light, and not grow well.<br />
Top dressing is particularly important in the<br />
poor soils associated with striga, and for<br />
growing hybrid maize. At the time of topdressing<br />
maize should be free of weeds.<br />
The need for top dressing is less after the<br />
third season in the Push-pull plot.<br />
Topic 1: 1 st weeding, thinning<br />
and top dressing maize in<br />
both Push-pull and Check<br />
plots<br />
Learning objectives<br />
On completion of this topic, participants<br />
will:<br />
Understand and explain the importance<br />
and proper timing, weeding, thinning<br />
and top-dressing maize<br />
Demonstrate proper weeding, thinning<br />
and top dressing maize<br />
2 hours Jembe, CAN fertiliser, teaspoon/soda bottle<br />
top, desmodium seedling planted in a pot/<br />
tin in Week 1, small amounts of desmodium<br />
seeds; fine dry sand.<br />
Learning activities<br />
Facilitator-led introduction on<br />
importance and proper timing of<br />
weeding, thinning and top dressing<br />
maize<br />
Practical activities on weeding, thinning<br />
and top dressing maize<br />
Discussion<br />
The growth of maize plants in the first<br />
week is rather slow and it is during this<br />
period that weeds establish rapidly and<br />
become competitive.<br />
Weed competition is highest during the<br />
period of 2 to 6 weeks after sowing.<br />
This time is critical for weed control<br />
It is important to keep your plot free of<br />
weeds during this critical period of weed<br />
competition<br />
Step 1: Carefully weed your maize using a<br />
Jembe or hoe (Fig 26).<br />
Fig 26. Weeding maize with a hoe<br />
Push-pull curriculum | 39
Step 2: Thin the maize to one plant per hill,<br />
leaving the healthiest plant.<br />
Step 3: Top dress the maize with CAN at the<br />
rate of one teaspoon or soda bottle top per<br />
plant. Scoop the fertilizer and sprinkle it<br />
around the base of the maize plants leaving<br />
a space of 1 inch around the base. If<br />
the fertilizer is sprinkled on the stem it can<br />
burn the maize.<br />
Note<br />
In places where striga is a problem, farmers<br />
apply half rates of fertilizer: one half during the<br />
first weeding and the other half during the second<br />
weeding.<br />
Be careful not to step on the desmodium<br />
seedlings planted in between the maize<br />
rows.<br />
Topic 2: Weeding and top<br />
dressing Napier grass<br />
Learning objectives<br />
On completion of this topic, participants<br />
will:<br />
Understand and explain the importance<br />
and the timing of weeding and topdressing<br />
Napier grass<br />
Demonstrate weeding and top dressing<br />
Napier grass<br />
Learning activities<br />
Facilitator-led introduction on<br />
importance and time of weeding and top<br />
dressing Napier grass<br />
Practically weed and top dress Napier<br />
grass<br />
Discussions<br />
40 | Push-pull curriculum<br />
1 st Weeding Napier grass in Push-pull<br />
plot<br />
Step 1: Carefully weed your Napier grass<br />
using a jembe or hoe.<br />
Step 2: (Optional step if your Napier is not<br />
growing well) Top dress the Napier grass<br />
with CAN at the rate of one teaspoon or<br />
soda bottle top per plant. Scoop the CAN<br />
fertilizer and sprinkle it around the base of<br />
the Napier grass. Leave a space of 1 inch<br />
around the base. If the fertilizer is sprinkled<br />
on the stem it can burn the Napier grass.<br />
Topic 3: Identifying<br />
desmodium seedlings<br />
Learning objectives<br />
On completion of this topic participants will<br />
recognise desmodium seedlings and differentiate<br />
them from weeds.<br />
Learning activities<br />
Facilitator-led introduction on identifying<br />
desmodium seedlings<br />
Practical observation of desmodium<br />
seedlings and weeds of the same age<br />
Discussion<br />
Identifying desmodium seedlings<br />
Step 1: Walk around and pick the weeds<br />
growing around the plot.<br />
Step 2: Compare the weeds you have picked<br />
with the desmodium seedlings in the<br />
pot/tins planted in Season 1 Week 1 and<br />
identify the differences.<br />
Step 3: Walk through the field and see whether<br />
you can tell the difference between<br />
the desmodium seedlings and the weeds<br />
growing on the plot.
Topic 4: Hand weeding and<br />
gapping desmodium<br />
Learning objectives<br />
On completion of this topic participants will:<br />
Understand the importance of timing<br />
of hand weeding and gapping of<br />
desmodium seedlings<br />
Hand weed, gap and top dress<br />
desmodium seedlings<br />
Learning activities<br />
Facilitator-led introduction on the<br />
importance and proper timing for hand<br />
weeding and gapping of desmodium<br />
Hand weeding and gapping of<br />
desmodium seedlings<br />
Discussion<br />
Hand weeding and gapping desmodium<br />
Once you can tell the difference between<br />
the desmodium seedlings and weeds, it will<br />
be easier for you to weed the desmodium<br />
seedling rows.<br />
Weeding<br />
Step 1: Carefully walk down the desmodium<br />
rows and look for weeds.<br />
Step 2: Pull the weeds out gently by hand<br />
using a small sharp stick (Fig 27). Continue<br />
till the whole plot is weeded.<br />
Fig 27. Weeding desmodium by hand<br />
Gapping<br />
Step 1: Walk down the desmodium rows and<br />
identify the gaps.<br />
Step 2: Mix thoroughly desmodium seeds<br />
with fine sand in the ratio of one part<br />
desmodium to two parts sand (Week 1, Fig<br />
19).<br />
Step 3: Using a strong pointed stick, make a<br />
furrow 1-2 cm deep along the desmodium<br />
lines where they need gapping.<br />
Step 4: Drill the desmodium/sand mixture prepared<br />
in Step 2 into the furrow and cover<br />
with a light amount of soil.<br />
Note<br />
• If the soil is light and there is heavy rain just after<br />
planting, farmers may find the desmodium rows<br />
have slightly moved. Therefore they should make<br />
the rows straight after the first weeding. If you do<br />
this immediately after rains you may straighten the<br />
rows by gently pushing the soil and the seedlings<br />
with your hands.<br />
• Weeding should only be done when the soil is<br />
moist. Weeding when the soil is dry disturbs the<br />
roots of desmodium seedlings and can kill the<br />
young seedlings.<br />
Push-pull curriculum | 41
Labour costs<br />
Push-pull Plot<br />
Total<br />
42 | Push-pull curriculum<br />
Activity No of people<br />
working on<br />
this activity<br />
Maize: Weeding,<br />
thinning<br />
and top-dressing<br />
Weeding<br />
and gapping<br />
desmodium<br />
Weeding (and<br />
top dressing)<br />
Napier<br />
Any other<br />
Activity<br />
Check Plot Maize: Weeding,<br />
thinning<br />
and top-dressing<br />
Total<br />
Input costs<br />
Any other<br />
Activity<br />
Push-pull plot Fertilizer<br />
Total<br />
Time taken to<br />
complete the<br />
activity (hours)<br />
Input used Quantity used Cost<br />
Other<br />
Check plot Fertilizer<br />
Total<br />
Other<br />
Cost of labour<br />
per day<br />
Total cost of<br />
this activity
General observations (AESA): Farmer’s fields<br />
General information<br />
Date<br />
Crop age<br />
Crop health Poor Average Good<br />
• Maize Push-pull plot<br />
• Napier grass<br />
• Desmodium<br />
Observations Farmer’s comments<br />
Rainfall: Number of days<br />
it rained the week before:<br />
______<br />
Soil moisture<br />
Low Medium High<br />
Weather: Sunny/Cloudy/Rainy Windy/Still Hot/ Cold<br />
Push-pull curriculum | 43
Week 6<br />
Topic Duration What you need for this lesson<br />
1 Identifying stemborers 1 hour 30<br />
minutes<br />
Understanding striga 1 hour 30<br />
minutes<br />
Stemborers: Picture of moths and real moths; stemborer<br />
eggs<br />
• Samples of striga at various stages of growth<br />
• Knives, pictures of damaged plants, hoe, flip<br />
charts, posters, marker pens, masking tapes<br />
2 Gapping of desmodium (seed plot) 40 minutes Small amounts of desmodium seeds, fine sand to<br />
gap the desmodium seedling rows<br />
Introduction<br />
Stemborers are a big threat to maize and<br />
cereal production in Africa. The Push-pull<br />
technology aims to eliminate this problem<br />
and hence improve the agricultural productivity<br />
of the small-scale farmer. This topic is<br />
designed to help you to identify and understand<br />
stemborers.<br />
Topic 1: Identifying<br />
stemborers<br />
Learning objectives<br />
On completion of this topic farmers will:<br />
Identify the stemborer egg, larva, pupa<br />
and adult moth<br />
Describe the life cycle of stemborers<br />
Learning activities<br />
Facilitator-led introduction on<br />
identification of stemborers<br />
Field walks to identify stemborers<br />
Facilitator-led discussion on description<br />
of life cycle of stemborers<br />
Step 1: The facilitator shows the farmers<br />
pictures of the two types of stemborers:<br />
Busseola fusca (Fig 28) and Chilo partellus<br />
(Fig 29).<br />
Step 2: Farmers walk around the plots and<br />
collect stemborers from grasses by dissecting<br />
the plants.<br />
Fig 28. Busseola fusca Fig 29. Chilo partellus<br />
Step 3: Farmers note the type of grass where<br />
the stemborers are most present.<br />
Step 4: Farmers come together and try to<br />
identify which of the stemborers are Chilo<br />
partellus and which are Busseola fusca.<br />
Step 5: Farmers walk into the Check plot and<br />
identify the eggs of stemborers in maize.<br />
Note<br />
Busseola fusca lays its eggs between stem<br />
and leafsheaths (Fig 30) and Chilo partellus<br />
lays its eggs on plant surface in form of<br />
egg batches (Fig 31).<br />
Fig 30. Busseola fusca<br />
laying eggs on maize<br />
Fig 31. Chilo partellus<br />
laying eggs on maize leaf<br />
Push-pull curriculum | 45
Step 6: Farmers infest the potted plants<br />
(planted in Season 1 Week 4) with stemborer<br />
eggs.<br />
Topic 2: Identifying Striga<br />
Introduction<br />
Striga or witchweeds are parasitic weeds<br />
that affect cereal crops in many parts of<br />
Africa, causing up to total loss of the crop.<br />
The weed does not grow on its own. It<br />
grows by attaching itself onto a host plant.<br />
As striga seed germinates, its roots grow<br />
and penetrate and attach to the host crop’s<br />
roots to get food. This makes the crops<br />
stop growing normally (severe stunting)<br />
leading to huge yield loss. The most affected<br />
crops include maize, sorghum, rice<br />
and millet.<br />
Many farmers cannot identify different<br />
types of striga and some do not know what<br />
a dangerous weed it is. This topic will help<br />
you to understand striga and identify the<br />
damage it causes to your maize.<br />
Learning objectives<br />
On completion of this topic farmers will:<br />
Identify different types of striga weed<br />
Describe striga biology and the damage<br />
it causes to maize plants<br />
Learning activities<br />
Facilitator-led introduction on<br />
identification of striga<br />
Field walks to identify striga<br />
Facilitator-led discussion on description<br />
of striga biology and damage<br />
46 | Push-pull curriculum<br />
Fig 32. Striga hermonthica:<br />
pinkish flowers<br />
Fig 33. Striga asiatica:<br />
deep red flowers<br />
Step 1: Farmers are shown samples of striga<br />
weed Striga hermonthica (Fig 32) and<br />
Striga asiatica (Fig 33).<br />
Step 2: Farmers observe<br />
and discuss<br />
features of striga.<br />
Step 3: Farmers are<br />
shown samples<br />
of striga-infested<br />
maize (Fig 34).<br />
Step 4: Farmers walk<br />
in the fields around<br />
the plots and see<br />
whether they can<br />
identify striga.<br />
Step 5: Mark 10 striga-infested plants for<br />
observation in week 10.<br />
Topic 3: Gapping of<br />
desmodium on the seed<br />
production plot<br />
Introduction<br />
Some of the desmodium seeds that were<br />
drilled into the soils may not germinate.<br />
This is easy to tell from the gaps between<br />
the growing seedlings. Gapping or filling<br />
the spaces where desmodium did not<br />
grow, needs to be done early so that the<br />
whole crop can grow together.<br />
Learning objectives<br />
Fig 34. Striga weed<br />
attached to maize roots<br />
On completion ot this topic participants will
demonstrate proper gapping of desmodium<br />
seedlings on the seed production plot.<br />
Learning activities<br />
Facilitator-led discussion on importance<br />
and the proper ways of gapping of<br />
desmodium<br />
Actual gapping of the desmodium<br />
Step 1: Walk along the rows of desmodium<br />
and mark the gaps where desmodium has<br />
not grown. Take care not to step on the<br />
Note<br />
• You do not need fertilizer during gapping because the fertilizer you applied during planting is still in the soil<br />
• You should gap when the soil is moist so that the<br />
seeds can germinate and catch up with the already<br />
growing crop<br />
Labour cost<br />
Seed multiplication<br />
plot<br />
Activity No of people<br />
working on<br />
this activity<br />
Gapping<br />
Desmodium<br />
Other<br />
General observations (AESA): Farmer’s fields<br />
General information<br />
Date<br />
Crop age<br />
Crop health Poor Average Good<br />
• Maize Push-pull plot<br />
• Napier grass<br />
• Desmodium<br />
Time taken to<br />
complete the<br />
activity (hours)<br />
Cost of<br />
labour per<br />
day<br />
Observations Farmer’s comments<br />
Stemborers<br />
striga<br />
Rainfall: Number of days<br />
it rained the week before:<br />
______<br />
Soil moisture<br />
Low Medium High<br />
Weather: Sunny/Cloudy/Rainy Windy/Still Hot/ Cold<br />
young seedlings<br />
Step 2: Mix thoroughly desmodium with fine<br />
sand in the ratio of one part desmodium<br />
seed to two parts sand (Fig 19).<br />
Step 3: Using a strong pointed stick, make a<br />
furrow 1-2 cm deep along the desmodium<br />
lines where they need gapping.<br />
Step 4: Drill the desmodium/sand mixture prepared<br />
in Step 2 into the furrow and cover<br />
with a light amount of soil.<br />
Total cost of<br />
this activity<br />
Push-pull curriculum | 47
Farmers’ comments after the lesson: _____________________________________________<br />
___________________________________________________________________________<br />
___________________________________________________________________________<br />
___________________________________________________________________________<br />
48 | Push-pull curriculum
Week 7<br />
Topic Duration What you need for this lesson<br />
1 2 nd weeding of maize 45 minutes Jembe, hoe, sharp stick.<br />
2 2 nd weeding of Napier grass 30 minutes<br />
3 2 nd hand weeding of desmodium 1 hour<br />
4 1 st hand weeding of desmodium seed production plot 1 hour<br />
Introduction<br />
By now your maize is five weeks old and<br />
new weeds have grown which you will<br />
need to remove otherwise they will affect<br />
the growth of your maize crop. Similarly,<br />
new weeds have grown in your Napier and<br />
desmodium. This time desmodium has<br />
grown and you can easily recognize it.<br />
Topic 1: 2 nd weeding of maize<br />
Learning objective<br />
On completion of this topic participants will<br />
be able to:<br />
Understand the importance of 2nd weeding of maize<br />
Demonstrate proper weeding of maize<br />
Learning activities<br />
Facilitator-led introduction on the<br />
importance of 2nd weeding of maize<br />
Actual weeding on both Push-pull and<br />
the Check plots<br />
Discussions on weeding maize fields<br />
Carefully weed your maize using a Jembe<br />
or a hoe.<br />
Make sure you cover the bottom part of<br />
the maize plants with ample soil<br />
If you are in areas where striga weed is<br />
a problem, you may have applied the<br />
first half of fertilizer on your maize plot.<br />
Now you can apply the second half<br />
Topic 2: 2 nd weeding of Napier<br />
grass<br />
Learning objectives<br />
On completion of this topic participants will:<br />
Understand and explain the importance<br />
and the timing of 2nd weeding of Napier<br />
grass<br />
Demonstrate proper weeding of Napier<br />
grass<br />
Learning activities<br />
Facilitator-led introduction on the<br />
importance and time of 2nd weeding of<br />
Napier grass<br />
Practically weed Napier grass<br />
Discussions on weeding Napier grass<br />
How to weed Napier grass<br />
Carefully weed your Napier grass using a<br />
Jembe or hoe.<br />
Take care not to weed very close to<br />
the base of the growing canes and the<br />
young root splits otherwise you will<br />
interfere with the roots. The weeds<br />
close to the base can be pulled out by<br />
hand<br />
There is no need to add fertilizer to your<br />
Napier grass at this stage<br />
Push-pull curriculum | 49
Topic 3: 2 nd hand weeding<br />
desmodium<br />
Learning objectives<br />
On completion of this topic participants will:<br />
Understand the importance and timing<br />
of 2 nd hand weeding of desmodium<br />
Practically demonstrate the 2 nd hand<br />
weeding of the desmodium<br />
Learning activities<br />
Facilitator-led introduction on<br />
importance and the proper time for 2 nd<br />
hand weeding<br />
Actual hand weeding<br />
Discussions on weeding desmodium<br />
Hand weeding and gapping of<br />
desmodium<br />
At this time you can easily tell the difference<br />
between the desmodium seedlings<br />
and weeds but remember that the gapped<br />
plants will be much smaller than the original<br />
crop.<br />
Walk down the rows of desmodium seedlings<br />
and look for the weeds. Carefully<br />
pull them out by hand using a small sharp<br />
stick (Fig 35). Continue till the whole plot is<br />
weeded.<br />
Fig 35. Weeding the desmodium plot<br />
50 | Push-pull curriculum<br />
Note<br />
It is not necessary to apply fertilizer at this stage.<br />
Topic 4: 1 st hand weeding<br />
desmodium seed production<br />
plot<br />
Learning objectives<br />
On completion of this topic participants will<br />
be able to:<br />
Understand the importance of<br />
hand weeding desmodium in the<br />
multiplication plot<br />
Hand weed the desmodium seed<br />
production plot<br />
Learning activities<br />
Note<br />
Facilitator-led introduction on<br />
importance and the proper time for hand<br />
weeding and gapping of desmodium<br />
Hand weeding and gapping of<br />
desmodium seedlings<br />
Discussions<br />
Now that you can easily tell the difference<br />
between the desmodium seedlings<br />
and weeds, it is easy for you to weed the<br />
desmodium seedlings.<br />
Walk down the rows of desmodium seedlings<br />
in the seed production plot and look<br />
for the weeds. Carefully pull them out by<br />
hand using a small sharp stick (Fig 35).<br />
Continue till the whole plot is weeded.<br />
Weeding should only be done when the soil is<br />
moist. Weeding when the soil is dry disturbs the<br />
roots of desmodium seedlings. This can kill the<br />
young seedlings.
Labour costs<br />
Push-pull Plot Weeding maize<br />
Total<br />
Check Plot<br />
Total<br />
Seed Multiplication<br />
Plot<br />
Total<br />
Activity No of people<br />
working on<br />
this activity<br />
Weeding desmodium<br />
Weeding Napier<br />
Any other activity<br />
Maize: Weeding<br />
Any other activity<br />
Desmodium weeding<br />
Any other activity<br />
General observations (AESA): Farmer’s fields<br />
General information<br />
Date<br />
Crop age<br />
Crop health Poor Average Good<br />
• Maize Push-pull plot<br />
• Napier grass<br />
• Desmodium<br />
Time taken to<br />
complete the<br />
activity (hours)<br />
Cost of<br />
labour per<br />
day<br />
Observations Farmer’s comments<br />
Stemborers<br />
Striga<br />
Rainfall: Number of days<br />
it rained the week before:<br />
______<br />
Soil moisture<br />
Low Medium High<br />
Weather: Sunny/Cloudy/Rainy Windy/Still Hot/ Cold<br />
Total cost of<br />
this activity<br />
Push-pull curriculum | 51
Week 8<br />
Topic Duration What you need for this lesson<br />
1 Stemborer damage and symptoms 1 hour Samples of striga at various stages of growth, knives,<br />
pictures of damaged plants, hoe, flip charts, posters,<br />
marker pens, masking tapes<br />
2 Topic 2 Identifying striga 30 minutes<br />
Introduction<br />
Now that you already know what stemborers<br />
are, it is important that you are also<br />
able to identify the damage they cause to<br />
your crop, and the damage symptoms.<br />
Topic 1: Stemborer damage<br />
and symptoms<br />
Learning objective<br />
On completion of this topic participants will<br />
be able to recognize damage caused by<br />
stemborers in maize and their symptoms.<br />
Learning activities<br />
Note<br />
Facilitator-led introduction on stemborer<br />
damage and the effects on maize plants<br />
Identifying damages caused by<br />
stemborers<br />
Field walks to observe stemborer<br />
infestation and damage level<br />
Observing the plants in pots (from<br />
Week 6) for stemborer damage<br />
Discussions<br />
• Stemborers are most destructive at larvae stage.<br />
The larvae first feed on young leaves but soon<br />
enter into the stems where they feed and grow for<br />
2-3 weeks (Fig 36).<br />
• During early stage of the crop growth larvae may<br />
kill the growing points resulting in deadhearts (Fig<br />
37).<br />
• At a later stage of growth, extensive tunneling<br />
inside the stem weakens the stalk so that the plant<br />
breaks or lodges. (Fig 38)<br />
Fig 36. Maize leaves showing damage caused by<br />
stemborer<br />
Fig 37. Deadheart caused by stemborer larvae<br />
feeding inside maize plants<br />
Fig 38. A stemborer larva feeding inside maize stem<br />
ICIPE | 53
Topic 2 Identifying striga<br />
This is a continuation of Week 6 Topic 2.<br />
By this stage some of the striga plants<br />
have emerged above the ground. Some<br />
level of damage is also obvious.<br />
Learning objectives<br />
On completion of this topic participants will<br />
be able to:<br />
54 | ICIPE<br />
Identify emerging striga weed<br />
General observations (AESA): Farmer’s fields<br />
General information<br />
Date<br />
Crop age<br />
Crop health Poor Average Good<br />
• Maize Push-pull plot<br />
• Napier grass<br />
• Desmodium<br />
Identify symptoms of damage on crops<br />
that are infested with striga<br />
Learning activities<br />
Facilitator-led introduction on how to<br />
identify striga weed<br />
Observation of striga plants in the field<br />
Measure the height of healthy and striga<br />
infested maize plants marked in Week 6<br />
Discussions on observations made<br />
Observations Farmer’s comments<br />
Stemborers<br />
Striga<br />
Rainfall: Number of days<br />
it rained the week before:<br />
______<br />
Soil moisture<br />
Low Medium High<br />
Weather: Sunny/Cloudy/Rainy Windy/Still Hot/ Cold<br />
Indicator Observation<br />
Height of maize (in cm or ft)<br />
Natural weeds<br />
No. of striga plants<br />
Stemborer infestation on maize (Y/N)<br />
Stemborer infestation on Napier (Y/N)<br />
Number of larvae on 5 damaged plants<br />
Number of larvae on 5 potted plants<br />
from Week 6<br />
Push-pull field Check plot
Week 9<br />
Topic Duration What you need for this lesson<br />
1 The Biology of Stemborer 1 hour Petri-dishes/Shoe polish containers,<br />
2 2<br />
Sharp knives<br />
nd weeding of desmodium seed<br />
multiplication plot<br />
30 minutes<br />
Introduction<br />
This week is a continuation of topics on<br />
stemborer and striga covered in Weeks 6<br />
and 8.<br />
Topic 1: The biology of<br />
stemborers<br />
Learning objectives<br />
On completion of this topic participants will<br />
understand and describe the life cycle of<br />
stemborers from egg to larval/caterpillar<br />
stages.<br />
Learning activities<br />
Facilitator-led introduction on the<br />
stemborer life cycle from eggs to larvae<br />
Field walks to identify and collect<br />
stemborer damaged plants<br />
Observe the potted plants from Week 6<br />
for stemborer damage<br />
Discussion<br />
Step 1: Collect 5 damaged plants from the<br />
field and 5 potted plants which were infested<br />
with eggs in Week 6.<br />
Step 2: Dissect carefully the plants and<br />
observe and count the stemborer larvae<br />
inside the stem and in the whorl/funnel.<br />
Step 3: Record the damage and the number<br />
and size of stemborer larvae.<br />
Topic 2: 2 nd weeding<br />
of desmodium seed<br />
multiplication plot<br />
Learning objectives<br />
On completion of this topic participants will<br />
be able to:<br />
Understand and explain the importance<br />
of hand weeding of desmodium<br />
Carry out hand weeding of the<br />
desmodium seed production plot<br />
Learning activities<br />
Facilitator-led discussion on importance<br />
and the proper time for hand weeding<br />
and gapping of desmodium<br />
Carry out hand weeding and gapping of<br />
desmodium seedlings<br />
Now that you are able to tell the difference<br />
between desmodium seedlings and weeds,<br />
it is easy for you to weed the desmodium<br />
seedlings.<br />
Fig 39. Desmodium plant at<br />
an early stage (3 weeks old)<br />
Just walk down the<br />
rows of desmodium<br />
seedlings and<br />
look for the weeds.<br />
Carefully pull them<br />
out by hand using a<br />
small sharp stick as<br />
in Fig 35. Continue<br />
till the whole plot is<br />
weeded.<br />
ICIPE | 55
Note<br />
• Weeding should only be done when the soil is moist. Weeding when the soil is dry disturbs the roots of<br />
desmodium seedlings. This can kill the young seedlings.<br />
• Care must be taken not to dig so close to the base of the desmodium as this can weaken the root.<br />
Labour costs<br />
Seed multiplication<br />
plot<br />
Total<br />
56 | ICIPE<br />
Activity No of people<br />
working on<br />
this activity<br />
Weeding<br />
desmodium<br />
Any other<br />
Activity<br />
General observations (AESA): Farmer’s fields<br />
General information<br />
Date<br />
Crop age<br />
Crop health Poor Average Good<br />
• Maize Push-pull plot<br />
• Napier grass<br />
• Desmodium<br />
Time taken to<br />
complete the<br />
activity (hours)<br />
Cost of<br />
labour per<br />
day<br />
Observations Farmer’s comments<br />
Stemborers<br />
Striga<br />
Rainfall: Number of days<br />
it rained the week before:<br />
______<br />
Soil moisture<br />
Low Medium High<br />
Weather: Sunny/Cloudy/Rainy Windy/Still Hot/ Cold<br />
Stemborer infestation<br />
Indicator Observation<br />
Number of stemborer larvae on 5 damaged plants<br />
Average size of stemborer larvae on 5 damaged plants<br />
Number of stemborer larvae on 5 potted plants<br />
Average size of stemborer larvae on 5 potted plants<br />
Total cost of<br />
this activity<br />
Push-pull Check plot Potted plants
Week 10<br />
Topic Duration What you need for this lesson<br />
1 Biology of striga 1 hour Jembe, Basin, Water (to wash the roots),<br />
Tape measure to measure the height<br />
Introduction<br />
By now you can identify the striga weed<br />
and explain how it affects your crops. Our<br />
topic this week will help you understand<br />
how it grows and multiplies.<br />
Topic: Biology of striga<br />
Learning objectives<br />
On completion of this topic participants will<br />
be able to understand and describe striga<br />
growth and multiplication.<br />
Learning activities<br />
Facilitator-led introduction on striga<br />
biology<br />
Observations on striga growth<br />
Discussions<br />
Procedure<br />
Indicator Observation<br />
Average Height of 10 healthy maize<br />
plants (in cm)<br />
Average Height of 10 marked striga<br />
infested maize plants (in cm)<br />
Average No. of striga plants around 10<br />
marked maize plants<br />
Average No. of striga plants below<br />
ground<br />
Step 1: Measure the height of 10 striga infested<br />
plants that were marked in Week 6<br />
and compare with 10 healthy plants.<br />
Step 2: Observe and count the number of<br />
striga above the ground 15cm around the<br />
maize plant.<br />
Step 3: Dig carefully 15 cm around the 5<br />
smallest striga infested maize plants<br />
and lift them out with the soil around their<br />
roots.<br />
Step 4: Wash the soil carefully from the roots<br />
and observe:<br />
Push-pull plot Check plot<br />
How the striga roots are attached to the<br />
maize plant roots<br />
The number of striga plants that have<br />
come above the ground and those that<br />
have not emerged<br />
Step 5: Record the number of striga per<br />
maize plant.<br />
Push-pull curriculum | 57
General observations (AESA): Farmer’s fields<br />
General information<br />
Date<br />
Crop age<br />
Crop health Poor Average Good<br />
• Maize Push-pull plot<br />
• Napier grass<br />
• Desmodium<br />
Observations Farmer’s comments<br />
Stemborers<br />
Striga<br />
Rainfall: Number of days<br />
it rained the week before:<br />
______<br />
Soil moisture<br />
58 | Push-pull curriculum<br />
Low Medium High<br />
Weather: Sunny/Cloudy/Rainy Windy/Still Hot/ Cold<br />
Farmers’ comments after the lesson: _________________________________________<br />
_______________________________________________________________________<br />
_______________________________________________________________________<br />
_______________________________________________________________________
Week 11<br />
Topic Duration What you need for this lesson<br />
1 Introduction to Profitability Analysis 2 hours All records, calculator, flip charts, marker pens;<br />
Record samples of receipts and expenses on crops<br />
and livestock enterprises; record sheets; and flip<br />
charts/chalkboards, markers, exercise books, pens.<br />
Introduction<br />
This lesson aims to familiarize participants<br />
with the basic methods of checking whether<br />
a farming enterprise is making or losing<br />
money.<br />
This is what you would put in any activity<br />
on your farm (Costs):<br />
Money to buy inputs and pay hired<br />
workers<br />
The time your family and you spend on<br />
that enterprise<br />
This is what you get out of the enterprise<br />
(income):<br />
Use it yourself and not have to buy it<br />
from the shop/market. You can then<br />
save the money you could have spent<br />
and use it for another enterprise<br />
Sell produce from that enterprise<br />
You need to keep proper records of what<br />
you put in (cost) and what you get from any<br />
farming enterprise (income or benefit) so<br />
that you can know whether that enterprise<br />
is making money, or making a loss for you.<br />
This lesson will introduce you to two main<br />
types of records called the costs and benefits<br />
records. You will learn why you need<br />
to keep them and how to use them.<br />
Topic: Introduction to<br />
Profitability Analysis<br />
Learning objectives<br />
On completion of this topic participants will<br />
be able to:<br />
Explain the importance of recording<br />
costs incurred and benefits received<br />
Compare the costs and the benefits of<br />
two enterprises (Push-pull and Check<br />
plots)<br />
Learning activities<br />
Facilitator-led introduction on the<br />
importance of keeping receipts and<br />
expense records<br />
Exercise on provided examples of<br />
receipts (revenues) and expenses<br />
(costs)<br />
Calculating total expenses and total<br />
income<br />
Discussion on record keeping<br />
Recording expenses and receipts for<br />
push-pull and Check plots<br />
Step 1: Facilitate discussion on costs related<br />
to farmers’ own practices and Push-pull<br />
plots (seed, Napier, fertilizer, labour for<br />
land preparation, planting, weeding, etc.)<br />
Step 2: List all the possible costs in both the<br />
Push-pull and Check plots.<br />
Step 3: Facilitate discussion on possible<br />
incomes related to farmers’ own practices<br />
and Push-pull plots (yield, fodder, milk,<br />
etc.).<br />
Step 4: List all the possible incomes in both<br />
the Push-pull and Check plots.<br />
Step 5: Facilitate brief discussion on how to<br />
keep good income records and how to<br />
calculate the total income received.<br />
Push-pull curriculum | 59
Exercise on recording expenses (costs)<br />
and receipts (income)<br />
Step 1: Facilitator to explain the general<br />
procedure of the activity and participants’<br />
role in it.<br />
Step 2: Ask one of the participants with experience<br />
of recording costs of farm inputs to<br />
develop a record sheet for expenses and<br />
incomes of a specific farm enterprise (e.g.,<br />
crop).<br />
Procedure for calculating expenses and income<br />
Cost analysis of Push-pull and Check plot expenses<br />
Activity Input<br />
Land preparation Labour<br />
Equipment<br />
Planting<br />
Desmodium,<br />
maize, Napier<br />
Weeding<br />
Gapping<br />
60 | Push-pull curriculum<br />
Labour<br />
Seed<br />
Fertilizer<br />
Labour<br />
Top dressing Fertilizer<br />
Labour<br />
Harvesting Labour<br />
Transport<br />
Processing Labour<br />
Total Costs (T)<br />
Step 3: Ask another participant with experience<br />
of recording costs of farm inputs to<br />
develop a record sheet for expenses and<br />
income of another farm enterprise (e.g.,<br />
livestock).<br />
Step 4: Ask participants to calculate the total<br />
costs and the income received on both<br />
enterprises.<br />
Push-pull Check plot<br />
Qty Unit<br />
price<br />
Total value Qty Unit<br />
price<br />
Total value<br />
a b c = a x b d e f = d x e<br />
Benefits Analysis of revenues from Push-pull and Check plot (After compiling benefits<br />
in each season)<br />
Enterprise Push-pull Check plot<br />
Maize - (bags)<br />
Napier- 10 kg<br />
(bundles/wheelbarrows)<br />
Desmodium- (3 kgs)<br />
(Other produce)<br />
Total Gross value<br />
Qty Unit Gross value Qty Unit Gross value
General observations (AESA): Farmer’s fields<br />
General information<br />
Date<br />
Crop age<br />
Crop health Poor Average Good<br />
• Maize Push-pull plot<br />
• Napier grass<br />
• Desmodium<br />
Observations Farmer’s comments<br />
Stemborers<br />
Striga<br />
Rainfall: Number of days<br />
it rained the week before:<br />
______<br />
Soil moisture<br />
Low Medium High<br />
Weather: Sunny/Cloudy/Rainy Windy/Still Hot/ Cold<br />
Push-pull curriculum | 61
Week 12<br />
Topic Duration What you need for this lesson<br />
1 Group assessment 4 hours All records, calculator, flip chart, marker pens;<br />
record samples of receipts and expenses on crops and<br />
livestock enterprises; record sheets; and flip charts/<br />
chalkboards, markers, exercise books, pens.<br />
Introduction<br />
Now you have been working together as a<br />
group for 16-17 weeks, and you have had<br />
time to apply on your farm what you have<br />
learnt in the field school. It is time to go<br />
out and see what you and your colleagues<br />
have done so that you can all learn from<br />
each other’s experiences.<br />
This is the second group learning activity<br />
since you started the Push-pull farmer<br />
field school. At this stage you have mature<br />
Push-pull fields.<br />
Topic: Group assessment<br />
Learning objective<br />
The objective of this group learning activity<br />
is to maximize interactive learning through<br />
group evaluation of individual farm activities<br />
related to the FFS experiment.<br />
What to check<br />
Establishment of maize<br />
Weeding of maize<br />
Establishment of Napier<br />
Weeding of Napier<br />
Establishment of desmodium<br />
Weeding of desmodium<br />
Record keeping<br />
Total rates<br />
Learning activities<br />
Facilitator-led introduction on the<br />
procedure of doing group evaluations<br />
Farm visits in groups formed in Week 3<br />
Discussion of group results<br />
What to do in the assessment<br />
Step 1: Join the groups that you formed in<br />
Week 3. Each group can be made up of<br />
4-6 members.<br />
Step 2: Visit each farm represented by the<br />
members in the group.<br />
Step 3: Use the table below to assess the<br />
Push-pull and the Check plots, and discuss<br />
with the host farmer. Rate each farmer<br />
using this scale:<br />
1 = Poor 2 = Average 3 = Good<br />
Push-pull plot Check plot<br />
Rating Comments Rating Comments<br />
Push-pull curriculum | 63
Comment on Desmodium seed multiplication plot (Rate 1 – 3) _________<br />
(1 = Poor 2 = Average 3 = Good)<br />
Other comments _____________________________________________________________<br />
___________________________________________________________________________<br />
_______________________________________________________________________<br />
General observations (AESA): Farmer’s fields<br />
General information<br />
Date<br />
Crop age<br />
Crop Health Poor Average Good<br />
• Maize Push-pull plot<br />
• Napier grass<br />
• Desmodium<br />
Observations Farmer’s comments<br />
Stemborers<br />
Striga<br />
Rainfall<br />
Soil moisture<br />
64 | Push-pull curriculum<br />
Low Medium High<br />
Weather: Sunny/Cloudy/Rainy Windy/Still Hot/ Cold
Week 13<br />
Topic Duration What you need for this lesson<br />
1 Harvesting Napier and desmodium from Push-pull 1 hour A panga, ruler or tape measure,<br />
2 Utilization of Napier and desmodium from Push-pull 1 hour<br />
jembe, chopping log, gunny bags,<br />
polythene sheets<br />
Introduction<br />
One of the benefits of Push-pull is the rich<br />
fodder that can be used to improve the<br />
productivity of your livestock. As long as<br />
you practice Push-pull, you will have fodder<br />
to feed your livestock. This lesson will<br />
show you how to use fresh Napier grass<br />
and desmodium to feed your livestock and<br />
provide you with your first benefit from your<br />
Push-pull plot.<br />
Topic 1: Harvesting Napier<br />
and desmodium from Pushpull<br />
Learning objective<br />
On completion of this topic participants will<br />
demonstrate how to correctly and systematically<br />
harvest Napier from a Push-pull<br />
plot.<br />
Learning activities<br />
Facilitator–led introduction on<br />
importance of harvesting Napier and<br />
desmodium at correct stage and in a<br />
systematic manner<br />
Practical activities on Napier grass<br />
harvesting<br />
Practical activities on desmodium<br />
harvesting<br />
Facilitator-led discussion on fodder<br />
production from Push-pull. (Lead<br />
question: What are the advantages and<br />
disadvantages of weeding and applying<br />
slurry daily or after harvesting an entire<br />
row?)<br />
Note<br />
The best time to harvest Napier grass to feed your<br />
livestock is when the grass is 3 to 4 ft (1 to 1.5<br />
metres) high. Do not let your Napier to get too old<br />
(to form canes) because it becomes poor quality<br />
livestock feed.<br />
Step 1: Start harvesting the inner row nearest<br />
the maize and harvest this row around<br />
the field first, as much as your livestock<br />
needs each day (see ration tables at the<br />
end of this lesson). Always leave a stem<br />
height of 2 to 4 inches (5 to 10cm) from the<br />
ground at harvesting.<br />
Fig 40. Harvesting Napier grass<br />
Step 2: After you have completed harvesting<br />
the inner row, start harvesting the middle<br />
row. As you cut the grass weed, apply manure,<br />
slurry or CAN between the cut lines.<br />
Push-pull curriculum | 65
How to correctly harvest desmodium for<br />
fodder<br />
The best stage for harvesting desmodium is<br />
when it has covered the ground and is starting<br />
to flower. For the first season, desmodium<br />
can be ready for harvesting when maize<br />
is physiologically mature.<br />
Start harvesting desmodium from one side<br />
of the plot as per the daily utilization needs.<br />
Collect and take it to the feeding place.<br />
See topic on feed utilization below. Always<br />
leave a stem height of 2 to 4 inches (5 to<br />
10cm) from the ground at harvesting. See<br />
Fig 41.<br />
66 | Push-pull curriculum<br />
Fig 41. Harvesting desmodium<br />
What NOT to do<br />
Do not cut or harvest the Napier grass<br />
across the Napier rows so as to leave an<br />
opening into the Push-pull maize plot.<br />
During the first season do not harvest<br />
the desmodium until it has established<br />
well, or if it has not covered the ground.<br />
Topic 2: Utilization of Napier<br />
and desmodium from Pushpull<br />
Learning objective<br />
On completion of this topic, the participants<br />
will demonstrate how to prepare and mix<br />
Napier grass and desmodium to feed livestock.<br />
Learning activities<br />
Facilitator–led introduction on the<br />
importance of a balanced animal ration<br />
Facilitator–led discussion on importance<br />
of Napier and desmodium as feed<br />
Practical activities on Napier grass and<br />
desmodium chopping<br />
Practical activities on desmodium and<br />
Napier ration mixture making<br />
Discussion on utilization of Push-pull<br />
products<br />
How to correctly utilize fodder from<br />
Push-pull<br />
During the wet season cut Napier and<br />
leave it in the open for at least 30 minutes<br />
before chopping. This allows the Napier to<br />
lose some water (wilt) and increases the<br />
roughage eaten by the livestock.<br />
Step 1: Carry the harvested fodder to the<br />
chopping area, preferably near the feeding<br />
area.<br />
Step 2: Chop the harvested Napier grass and<br />
desmodium separately into small pieces of<br />
about 1 inch (2 cm).<br />
Fig 42. Chopping desmodium and Napier grass and<br />
feeding to livestock<br />
Step 3: Mix three parts of chopped Napier<br />
with one part of chopped desmodium.
Note<br />
• To avoid wastage the chopped forage should be fed to livestock in a feed trough.<br />
• During the dry season, chop the maize stover (see utilization of Maize stover in Week 17) into small pieces<br />
and mix with the chopped Napier grass and desmodium.<br />
Always remember to give your livestock the recommended mineral supplements.<br />
What NOT to do<br />
Never allow livestock to graze in the Push-pull plot as they will destroy the desmodium and the<br />
Napier grass.<br />
Napier grass and desmodium requirements for various breeds of livestock during the<br />
rainy season<br />
BREED Napier grass desmodium Total forage<br />
Kg/day Gunny bags/day Kg/day Gunny bags/day Kg/day Gunny bags/day<br />
Friesian/Ayshire 68 - 82 1.47-1.78 22 - 28 0.47-0.60 90 - 110 1.94- 2.38<br />
Guernsey/Jersey 49 – 64 1.06- 1.39 16 - 21 0.34-0.45 65 - 85 1.40- 1.84<br />
Zebu cattle 49 1.06 16 0.34 65 1.11<br />
Dairy bull 34 – 49 0.74 -1.06 11 - 16 0.24 - 0.34 45 - 65 0.98- 1.40<br />
Dairy goat 7.5 - 11 0.16- 0.24 2.5 - 4 0.05-0.08 10 - 15 0.21- 0.32<br />
Napier grass and desmodium requirements for various breeds of livestock during the<br />
dry season<br />
BREED Napier grass desmodium Total forage<br />
Kg/day Gunny bags/<br />
day<br />
Kg/day Gunny bags/<br />
day<br />
Kg/day Gunny bags/<br />
day<br />
Friesian/Ayrshire 53 - 60 1.15 – 1.30 17 - 20 0.36 – 0.4 70 - 80 1.51 - 1.70<br />
Guernsey/Jersey 41 – 49 0.89 – 1.06 14 - 16 0.30 – 0.35 55 - 65 1.19 - 1.21<br />
Zebu cattle 39 0.84 14 0.30 55 1.14<br />
Dairy bull 26 - 39 0.56 – 0.84 9 - 14 0.2 – 0.3 35 - 55 0.76 - 1.14<br />
Dairy goat 6 – 10 0.13 - 0.21 2 - 3 0.04-0.06 8.5–13.5 0.17 - 0.27<br />
Note<br />
One gunny bag of chopped material weighs approximately 46 kg<br />
Push-pull curriculum | 67
Labour Costs<br />
Push-pull plot<br />
68 | Push-pull curriculum<br />
Activity No of people<br />
working on<br />
this activity<br />
Harvesting 10 kg<br />
of Napier grass *<br />
Harvesting 3 kg of<br />
desmodium*<br />
Any other activity<br />
Total<br />
*These amounts can feed one dairy goat per day.<br />
Note<br />
Time taken to<br />
complete the<br />
activity (hours)<br />
Cost of<br />
labour per<br />
day<br />
Total cost of<br />
this activity<br />
Now that you have calculated the cost of cutting fresh fodder you do not have to do this again. All you have to<br />
do is enter in the table below the amount of fodder you use each week.<br />
Benefits<br />
Push-pull plot 10 kg Napier grass<br />
Type of benefit Quantity Amount (market price)<br />
3 kg Desmodium<br />
Other benefit<br />
General Observations (AESA): Farmer’s Fields<br />
General information<br />
Date<br />
Crop age<br />
Crop Health Poor Average Good<br />
• Maize Push-pull plot<br />
• Napier grass<br />
• Desmodium<br />
Observations Farmer’s comments<br />
Stemborers<br />
Striga<br />
Rainfall<br />
Soil moisture<br />
Low Medium High<br />
Weather: Sunny/Cloudy/Rainy Windy/Still Hot/ Cold
Week 14<br />
Topic Duration What you need for this lesson<br />
1 Conserving Napier and desmodium<br />
from push-pull<br />
Introduction<br />
One of the benefits of Push-pull is the rich<br />
fodder that can be used to improve the<br />
productivity of your livestock. In a good<br />
rainy season farmers may have surplus<br />
forage beyond what the animals can eat.<br />
The excess fodder can be conserved for<br />
dry season feeding. This lesson will show<br />
you how to conserve the excess or surplus<br />
Napier grass and desmodium for use when<br />
needed.<br />
Topic: Conserving Napier and<br />
desmodium from Push-pull<br />
Learning objectives<br />
On completion of this topic, participants will<br />
be able to demonstrate how to correctly<br />
conserve and utilize surplus fodder and<br />
crop residue from the Push-pull plot.<br />
Learning activities<br />
Facilitator-led introduction on the<br />
importance of dry season feeding and<br />
forage conservation<br />
Practical activities on silage making<br />
• pit silage<br />
• gunny bag silage<br />
Discussion on conserving Push-pull<br />
products<br />
How to make silage from surplus Pushpull<br />
fodder<br />
Making silage is a way of conserving<br />
fodder without losing much of its quality.<br />
In this way fodder can be preserved for<br />
several years. The method used in silage<br />
3 hours A panga, chopping log, gunny bags, polythene<br />
sheets, molasses, water, buckets, sprinkler [sample<br />
of silage and hay (optional)], a hoe and a 120 litre<br />
drum full of water. This is for pressing down the<br />
fodder.<br />
making is determined by available materials<br />
and the farmers’ needs. Small scale<br />
farmers can use either the gunny bag or<br />
small pits system.<br />
Making silage in a gunny bag<br />
Step 1: Cut and wilt the Napier and desmodium,<br />
before chopping (30 minutes to 1<br />
hour).<br />
Step 2: Chop the grass and desmodium<br />
separately into pieces of about 1- 4 inches<br />
(2 -8 cm)<br />
Fig 43. Chopping desmodium and Napier grass<br />
Step 3: Mix 3 parts of chopped Napier with 1<br />
part of chopped desmodium.<br />
Step 4: Spread 50 to 70 kg of the chopped<br />
Napier and desmodium mixture on a polythene<br />
sheet or a gunny bag on flat ground.<br />
Step 5: Dilute 1 litre of molasses with 3 litres<br />
of water.<br />
Push-pull curriculum | 69
Fig 44. Diluting molasses with water<br />
Step 6: Sprinkle the mollases-water mixture<br />
on the chopped Napier and desmodium<br />
mixture as evenly as possible. Turn and<br />
mix the forage repeatedly to ensure an<br />
even spread of the molasses on the material.<br />
Step 7: Put the material into a polythene lined<br />
gunny bag and compact it thoroughly using<br />
a pestle or heavy stick until the bag is<br />
almost full. Leave enough space to tie the<br />
top of the bag.<br />
Fig 45. Putting the mixture of desmodium and<br />
Napier grass in the gunny bag<br />
Step 8: Tightly tie the end of the bag with a<br />
string ensuring that no air remains in the<br />
bag. Air in the bag ruins the silage.<br />
Store the silage filled bag upright, away<br />
from sunlight or rain. Place a weight like a<br />
heavy stone, on the tied end of the bag to<br />
maintain the compacting.<br />
70 | Push-pull curriculum<br />
Making silage in a pit<br />
Step 1: Make a shallow pit, preferably on a<br />
slightly sloping ground. The depth of the pit<br />
should decrease from the higher ground<br />
to the lower ground giving a wedge-like<br />
shape.<br />
For small scale production a pit of 8ft x<br />
4ft x 3ft deep is enough to produce about<br />
1000 kg of silage. If you do not have<br />
enough material you can dig a smaller pit.<br />
Fig 46. Digging shallow pit for silage<br />
Step 2: Prepare a mixture of molasses and<br />
water: You need 20 litres of molasses with<br />
60 litres of water. This is enough for the<br />
whole pit.<br />
Step 3: Chop the forage to lengths of about<br />
1- 4 inches long using a panga or a chaff<br />
cutter.<br />
Step 4: Spread polythene sheeting over<br />
the sides and floor of the pit so that the<br />
chopped materials do not come into contact<br />
with soil.<br />
Step 5: Pour the chopped material into the<br />
polythene lined pit. Spread evenly until the<br />
pit is one third ( 1 / 3 ) full. Use the drum of<br />
water to compact the mixture (Fig 47).
Fig 47. Filling the silage pit<br />
polythene<br />
paper<br />
Step 6: Stir the mixture prepared in Step 2.<br />
Take out 40 litres and sprinkle evenly over<br />
the chopped forage in the silo. (You can<br />
also use a garden sprayer).<br />
Step 7: For subsequent additions add and<br />
spread 2 bags of chopped material, sprinkle<br />
with the molasses mixture evenly and<br />
compact with the drum (Fig 48). You can<br />
also use a log of wood to compact the<br />
mixture.<br />
Labour costs<br />
Silage making Digging pit<br />
Total<br />
Activity No of people<br />
working on<br />
this activity<br />
Harvesting<br />
and chopping<br />
Napier grass<br />
Harvesting<br />
and chopping<br />
desmodium<br />
Filling and<br />
compressing<br />
pit<br />
Other activities<br />
Fig 48. Compacting silage with a drum<br />
Step 8: Repeat Step 7 until the pit is full. Remember<br />
to stir molasses mixture each time<br />
before drawing.<br />
Step 9: Repeat Step 6 and 7 until the pit is full<br />
and dome shaped.<br />
Step 10: Cover the pit after a final pressing<br />
with a polythene sheet and dig a small<br />
trench around the sides of the pit. Then<br />
cover with a soil layer of at least 1ft (30cm)<br />
thickness to keep the air out, prevent poly<br />
thene damage (by rain, birds and rodents)<br />
and to further compress the material.<br />
Note<br />
The silage made should be ready for use in one<br />
month (30 days). Under proper storage conditions<br />
i.e., not allowing air and water into the silage,<br />
silage can be kept for up to 3 years.<br />
Time taken to<br />
complete the<br />
activity (hours)<br />
Cost of<br />
labour per<br />
day<br />
Total cost of<br />
this activity<br />
Push-pull curriculum | 71
Costs<br />
Silage making<br />
Total<br />
72 | Push-pull curriculum<br />
Input used Quantity used Cost<br />
Molasses<br />
Gunny bags<br />
Polythene sheets<br />
Other items<br />
Benefits ( Please keep filling the number of units each week as you cut)<br />
Push-pull plot 10 Kg Napier grass<br />
(1 Unit)<br />
Type of benefit Quantity Unit market price Total value<br />
3 Kg desmodium<br />
(1 Unit)<br />
Milk<br />
Other benefit<br />
General Observations (AESA): Farmer’s Fields<br />
General information<br />
Date<br />
Crop age<br />
Crop health Poor Average Good<br />
• Maize Push-pull plot<br />
• Napier grass<br />
• Desmodium<br />
Observations Farmer’s comments<br />
Stemborers<br />
Striga<br />
Rainfall<br />
Soil moisture<br />
Low Medium High<br />
Weather: Sunny/Cloudy/Rainy Windy/Still Hot/ Cold
Week 15<br />
Topic Duration What you need for this lesson<br />
1 Using gross margins in profitability<br />
analysis<br />
Introduction<br />
When establishing a new enterprise, it is<br />
important to consider the economic value<br />
it will contribute to your whole farm business.<br />
There are three ways of calculating<br />
this: the gross margin, return to land<br />
and return to labour. Gross margin is the<br />
simplest and the most commonly used.<br />
Gross margin is difference between the<br />
gross income earned from an enterprise<br />
and the variable costs (see the table)<br />
incurred in the enterprise for a given period<br />
of time (usually per year or per cropping<br />
season). A gross margin enables you to<br />
evaluate the performance of enterprises<br />
that have similar requirements for capital<br />
and labour.<br />
Gross margins provide a useful tool in<br />
terms of farm management, budgeting and<br />
estimating the likely returns or losses of a<br />
particular enterprise (say, crop). They can<br />
therefore help you to improve your management<br />
or streamline your production.<br />
This week’s lesson will show you how to<br />
calculate gross margins of Push-pull and<br />
Check plot enterprises on your farm. The<br />
same approach can be used in determining<br />
gross margins of any other enterprises on<br />
your farm.<br />
Topic: Using gross margins in<br />
profitability analysis<br />
Learning objectives<br />
On completion of this topic participants will<br />
be able to:<br />
Explain the importance of gross margins<br />
and how to use it<br />
2 hourss Record of receipts and expenses (optional); record<br />
sheets; calculator, and flip charts/chalkboards, markers,<br />
exercise books, pens.<br />
Calculate gross margins for the two<br />
farm enterprises: Push-pull and Check<br />
plots<br />
Learning activities<br />
Facilitator-led introduction on the<br />
importance of gross margins and how to<br />
use it (Provide examples of receipts and<br />
expenses from growing a given crop in<br />
a given season)<br />
Calculate total revenues (income)<br />
received and total expenditures (all<br />
the input costs and the cost of all hired<br />
services) incurred to get gross margins.<br />
Facilitator-led discussion on importance<br />
of gross margins<br />
Procedure of calculating gross margins<br />
Step 1: Facilitator to explain the general procedure<br />
of the activity and the participants’<br />
role in it.<br />
Step 2: Using the previous records of costs<br />
incurred on the Push-pull and Check plots,<br />
the participants add up all the variable<br />
costs incurred, e.g., costs of seed, Napier,<br />
fertilizer, labour costs.<br />
Step 3: Similarly, using the records of incomes<br />
from the Push-pull plot and Check<br />
plot the participants add up all the income<br />
received, if any from maize, fodder, milk<br />
etc. If no income has been received,<br />
reaonable imaginary numbers can be used<br />
to learn how to calculate gross margins.<br />
Step 4: Subtract the total expenses from the<br />
total income to get the gross margin.<br />
Step 5: Compare the gross margins from the<br />
Push-pull and the Check plots per unit area<br />
Push-pull curriculum | 73
Note<br />
(per-acre/hectare basis). This is a useful means of comparing the enterprises against each<br />
other.<br />
Variable costs: These are costs that vary directly with the level of output of an activity. For example, if<br />
the area under maize is increased by 50% then seed, fertilizer, and labour will also increase (though not<br />
necessarily by about 50%). Variable costs may determine the yield (level of output) of that activity.<br />
Fixed costs: These are costs that do not vary with the level of output of an activity. Example: If you own land<br />
that is your fixed cost.<br />
Total variable costs (TVC) = Inputs + Operational + Equipment costs<br />
Total revenue (TR) = Revenue from Maize + Desmodium + Napier +…<br />
Gross Margin = TR - TVC<br />
Cost analysis of Push-pull and Check plots<br />
Activity Input<br />
Land preparation Labour<br />
Equipment<br />
Planting<br />
Desmodium,<br />
maize, Napier<br />
Weeding/<br />
Gapping<br />
74 | Push-pull curriculum<br />
Labour<br />
Seed<br />
Fertilizer<br />
Labour<br />
Top dressing Fertilizer<br />
Labour<br />
Harvesting maize Labour<br />
Transport<br />
Harvesting fodder Labour<br />
Making silage Labour<br />
Inputs<br />
Processing Labour<br />
Total costs (T)<br />
Push-pull Check plot<br />
Qty Unit Total value Qty Unit Total value<br />
price<br />
price<br />
a b c = a x b d e f = d x e
Benefit analysis of Push-pull and Check plot (After compiling benefits in each season)<br />
Enterprise Push-pull Check plot<br />
Maize - (bags)<br />
Napier- Units of 10 Kg<br />
Milk<br />
Other produce<br />
Total Gross value<br />
Qty Unit Gross value Qty Unit Gross value<br />
Benefits ( Please keep filling the number of units each week as you cut)<br />
Push-pull plot 10 Kg Napier grass<br />
(1 Unit)<br />
Type of benefit Quantity Unit market<br />
price<br />
3 Kg Desmodium<br />
(1 Unit)<br />
Milk<br />
Other benefit<br />
General observations (AESA): Farmer’s fields<br />
General information<br />
Date<br />
Crop age<br />
Crop Health Poor Average Good<br />
• Maize Push-pull plot<br />
• Napier grass<br />
• Desmodium<br />
Observations Farmer’s comments<br />
Stemborers<br />
Striga<br />
Rainfall<br />
Soil moisture<br />
Low Medium High<br />
Weather: Sunny/Cloudy/Rainy Windy/Still Hot/ Cold<br />
Total value<br />
Push-pull curriculum | 75
Week 16<br />
Topic Duration What you need for this lesson<br />
1 Animal manure collection, storage and application to<br />
Napier grass<br />
2 Collecting, storing and applying slurry to Napier grass 30 minutes<br />
3 Making and utilizing desmodium hay 2 hours<br />
Introduction<br />
Push-pull has many by-products. Some of<br />
them are useful in improving the soil health<br />
on the Push-pull and on other parts of the<br />
farm. This lesson will show you how to use<br />
compost, manure and slurry from animals<br />
to improve your land. The lesson will also<br />
show you how to conserve some of the byproducts<br />
of Push-pull to feed your animal.<br />
Topic 1: Collecting, storing<br />
and applying animal manure<br />
on Napier grass<br />
Napier grass is a heavy feeder of soil nutrients,<br />
and the soil needs to be replenished<br />
regularly. Farm yard manure is a good and<br />
cheap way of doing this. The best results<br />
can be achieved during the rainy season.<br />
Farm yard manure is a decomposed mixture<br />
of livestock dung and urine with straw<br />
and litter used as bedding material and<br />
residue from the fodder fed to the livestock.<br />
Manure improves soil fertility where fodder<br />
and crops are grown. Manure also improves<br />
the soil texture and the capacity the<br />
soil to absorb and hold water.<br />
Learning objective<br />
On completion of this topic participants will:<br />
Understand the importance of farm<br />
yard manure<br />
Collect and store manure<br />
Apply manure to Napier grass<br />
1 hour Shovels, jembes, wheelbarrows,<br />
basins, drum, zero grazing unit<br />
with slurry pit, well decomposed<br />
manure, panga or a sickle,<br />
string, gunny bag, rake.<br />
Learning activities<br />
Facilitator–led introduction to<br />
importance of farm yard manure and<br />
handling to apply it to Napier grass<br />
Practical activities on collection, storage<br />
and manure application to Napier grass<br />
Facilitator–led discussions (lead<br />
question: what makes good quality<br />
manure?)<br />
Procedures<br />
(1) How to collect and store manure<br />
Note<br />
Manure quality will be good if the cows are fed<br />
with high quality feed such as legumes and Napier<br />
grass.<br />
Step 1: Collect manure from the animal<br />
boma regularly and heap in a pit or above<br />
the ground under a shade.<br />
Step 2: Turn the manure using a shovel or a<br />
jembe at most twice a month to ensure all<br />
the material is well decomposed.<br />
Leave the well decomposed manure<br />
under the shade until you are ready to<br />
use it<br />
(2) How to apply manure to Napier grass<br />
Step 1: After cutting the Napier grass, first<br />
apply manure and then weed. This allows<br />
the manure to mix well with the soil.<br />
Step 2: Spread two handfuls of well decomposed<br />
manure on and around the base of<br />
cut Napier and weed.<br />
Push-pull curriculum | 77
What NOT to do<br />
Do not heap soil and manure on Napier<br />
grass during weeding. This will expose the<br />
shallow roots and reduce the plant growth.<br />
Topic 2: Collecting, storing<br />
and applying slurry to Napier<br />
grass<br />
Cattle slurry is a mixture of cow dung,<br />
urine, and feed left over, available from the<br />
zero-grazing stable.<br />
Learning objective<br />
On completion of this topic participants<br />
will demonstrate how to collect, store and<br />
apply slurry to Napier grass.<br />
Learning activities<br />
Facilitator–led introduction to the<br />
importance and use of slurry<br />
Practical activities on slurry application<br />
to Napier grass<br />
Facilitator-led discussion<br />
How to collect and apply slurry to Napier<br />
grass<br />
Step 1: Collect fresh slurry in a pit or drum<br />
and allow to ‘mature’ by keeping it covered<br />
for at least 2 weeks.<br />
Step 2: Pour mature slurry in furrows dug<br />
between Napier grass rows and cover<br />
with soil. This will reduce loss of Nitrogen.<br />
Best results can be achieved if this is done<br />
after harvest during the rainy season.<br />
Note<br />
600 to 700kg of liquid slurry is enough for Napier<br />
grass in a 21 m by 21 m Push-pull plot for a year.<br />
What NOT to do<br />
Do not spread the fresh slurry directly<br />
on Napier grass or you will burn it.<br />
Never leave the slurry pit or drum<br />
uncovered because it will lose nitrogen.<br />
78 | Push-pull curriculum<br />
Topic 3: Making and utilizing<br />
desmodium hay<br />
Introduction<br />
You can use the desmodium you trim from<br />
your plot to feed your livestock. The surplus<br />
can then be conserved in the form of<br />
hay for use later.<br />
Learning objective<br />
On completion of this topic participants<br />
will demonstrate how to make and utilize<br />
desmodium hay.<br />
Learning activities<br />
Facilitator–led introduction to the<br />
importance of and the procedures for<br />
making quality hay from desmodium<br />
Practical activities on desmodium hay<br />
making and utilization<br />
Facilitator-led discussion on importance<br />
and procedures of desmodium hay<br />
making<br />
Source of material for making hay<br />
The trimmed desmodium during<br />
(Season 2, Week 6 and 8)<br />
When you cut back desmodium after<br />
the seed has been harvested (Season<br />
2, Week 21)<br />
Note<br />
For the first season, desmodium can be ready for<br />
harvesting when maize is physiologically mature.<br />
Procedure<br />
Step 1: Cut half a row of desmodium, transfer<br />
immediately to a shade. Spread to dry.<br />
Always leave a stem of 2 to 4 inches (5 to<br />
10cm) high from the ground at harvesting.<br />
Note<br />
You will need the desmodium vines from the<br />
Push-pull plot to establish your new Push-pull<br />
plot in the second season. Once you have the<br />
vines from the new plot you can harvest all<br />
the desmodium and make hay. You can make<br />
desmodium hay from any amount of desmodium.
Step 2: Use a rake to turn the cut desmodium<br />
once a day to allow for quick wilting. Avoid<br />
over-drying the hay. 2 to 4 days drying is<br />
sufficient depending on the moisture content<br />
of the plant. Well dried hay should not<br />
break easily on handling.<br />
Step 3: Collect and store the hay in a dry<br />
place away from rain and any form of<br />
moisture. If you leave it outside, cover with<br />
tarpaulin or polythene sheet. For small<br />
amounts put in bundles or gunny bags and<br />
keep in a store.<br />
How to make bales<br />
For large amounts you can reduce the<br />
space needed for storage by making bales.<br />
Step 1. Make a bottomless wooden baling<br />
box 3 feet by 2.5 feet by 2.5 feet. Arrange<br />
strings across the box as shown in Fig 49.<br />
Fig 49. Bottomless wooden boxes<br />
Step 2: Put the hay in the box in layers.<br />
Step 3: Compress by trampling on the material<br />
in the box (Fig 50).<br />
Fig 50. Putting and compressing hay<br />
Step 4: Once the box is full and compacted,<br />
tie the strings from the opposite sides of<br />
the box very tightly (Fig 51). Properly compressed<br />
hay should weigh 15-20 kg.<br />
Fig 51. Tying the box<br />
Step 5: Remove the bale from the box and<br />
store in a raised place free of moisture (Fig<br />
52). Allow plenty of air circulation to prevent<br />
mould from forming.<br />
Fig 52. Removing the bales from the box<br />
Use the desmodium hay to improve the nutritive<br />
value of Napier grass. Mix one part<br />
of desmodium hay to five parts of chopped<br />
fresh Napier grass (1:5).<br />
Refer to desmodium feeding table in<br />
week 13.<br />
What NOT to do<br />
Do not dry the cut desmodium directly<br />
in the sun<br />
The desmodium hay should not be<br />
exposed to rain<br />
Push-pull curriculum | 79
Labour Costs<br />
Push-pull plot Harvesting<br />
desmodium<br />
Total<br />
80 | Push-pull curriculum<br />
Activity No of people<br />
working on<br />
this activity<br />
Any other<br />
activity<br />
Time taken to<br />
complete the<br />
activity (hours)<br />
Cost of labour<br />
per day<br />
Benefits ( Please keep filling the number of units each week as you cut).<br />
Push-pull plot 10 Kg Napier grass<br />
(1 Unit)<br />
Total cost of<br />
this activity<br />
Type of benefit Quantity Unit market price Total value<br />
3 Kg desmodium (1<br />
Unit)<br />
1 kg Desmodium hay<br />
(1 unit)<br />
Milk<br />
Other benefit<br />
General Observations (AESA): Farmer’s Fields<br />
General information<br />
Date<br />
Crop age<br />
Crop health Poor Average Good<br />
• Maize Push-pull plot<br />
• Napier grass<br />
• Desmodium<br />
Observations Farmer’s comments<br />
Stemborers<br />
Striga<br />
Rainfall<br />
Soil moisture<br />
Low Medium High<br />
Weather: Sunny/Cloudy/Rainy Windy/Still Hot/ Cold
Week 17<br />
Topic Duration What you need for this lesson<br />
1 Recording desmodium pests 2 hours Plastic jars or clear bottles, clear plastic bags for handling<br />
the beetles<br />
Introduction<br />
Blister beetles are the most common pests<br />
of desmodium. They are brightly coloured<br />
beautiful insects. They have orange/yellow<br />
or red bands (spots) on their backs often<br />
with coloured antenna. However, some<br />
types of Blister beetles have uniform metallic<br />
black colour. Blister beetles are also<br />
major pests of other crops such as okra,<br />
cowpeas, beans and sweet potatoes.<br />
Adult beetles eat up the flowers of desmodium<br />
so that you do not get any seeds from<br />
the affected plant. The larvae do not feed<br />
on desmodium; they feed on grasshopper<br />
eggs.<br />
Blister beetles appear on desmodium<br />
around October/November just after the<br />
rains.<br />
They are called Blister beetles because if<br />
you touch them they produce a chemical<br />
that can cause blisters on your skin.<br />
Topic: Recording desmodium<br />
pests<br />
Learning objectives<br />
On completion of this topic participants will<br />
identify and record some common types of<br />
Blister beetles found in desmodium crops<br />
Learning activities<br />
Facilitator led introduction on<br />
importance of recording desmodium<br />
pests<br />
Practical exercise (Field walks to collect<br />
Blister beetles)<br />
Discussion (Lead question: How<br />
important are blister beetles and other<br />
flower pests to farmers?)<br />
Step 1: Walk in the desmodium plot and collect<br />
samples of Blister beetles. Use plastics<br />
bags or gloves. Do not handle them with<br />
your bare hands. Use the drawings to identify<br />
the Beetles.<br />
Step 2: Walk around the farm and record<br />
the number of Blister beetles on different<br />
crops.<br />
Step 3: Destroy the beetles.<br />
At the moment there is no affordable<br />
method to control Blister beetles for small<br />
scale farmers. The record you are making<br />
now will help scientists to develop affordable<br />
control measures.<br />
Fig 53. Blister beetle<br />
Push-pull curriculum | 81
Plot Type 1 Type 2 Type 3 Type 4 Grasshoppers<br />
Established Push-pull plot<br />
Desmodium multiplication plot<br />
Check plot<br />
Other crops<br />
1<br />
2<br />
3<br />
4<br />
Please write the name of the crops<br />
Benefits (Please keep filling the number of units each week as you cut)<br />
82 | Push-pull curriculum<br />
Type of benefit Quantity Unit market<br />
price<br />
Push-pull plot 10 Kg Napier grass (1 Unit)<br />
3 Kg Desmodium (1 Unit)<br />
1 kg Desmodium hay (1 unit)<br />
Milk<br />
Other benefit<br />
General observations (AESA): Farmer’s fields<br />
General information<br />
Date<br />
Crop age<br />
Crop health Poor Average Good<br />
• Maize Push-pull plot<br />
• Napier grass<br />
• Desmodium<br />
Observations Farmer’s comments<br />
Stemborers<br />
Striga<br />
Rainfall: Number of days<br />
it rained the week before:<br />
______<br />
Soil moisture<br />
Low Medium High<br />
Weather: Sunny/Cloudy/Rainy Windy/Still Hot/ Cold<br />
Total value
Week 18<br />
Topic Duration What you need for this lesson<br />
1 Harvesting maize 2 hours Tape measure, weighing balance, panga, wheelbarrows or<br />
sacks for carrying the maize cobs, poles, string.<br />
2 Storing maize stover 45 minutes<br />
Introduction<br />
This is the time you have been waiting for.<br />
Your maize is now ready for harvesting and<br />
storing. This lesson discusses when and<br />
how to harvest and store maize.<br />
You have two plots: The Push-pull and the<br />
Check plot. Make sure that you harvest<br />
each plot separately and keep the maize<br />
from each plot separately. This will help<br />
you to know the difference in yields between<br />
the two plots.<br />
Topic 1: Harvesting maize<br />
Learning objective<br />
On completion of this topic participants will<br />
be able to:<br />
Explain the right time to harvest maize<br />
Demonstrate how to harvest maize<br />
Learning activities<br />
Facilitator-led introduction on timing of<br />
maize harvesting<br />
Practical exercise:<br />
• Measuring the height of the maize<br />
• Harvesting<br />
• Dissecting some stalks to check for<br />
stemborers<br />
Discussions (Lead questions: What<br />
is the relationship between maize<br />
height and yield? What happens to the<br />
stemborers that are in the stover?)<br />
When to harvest maize<br />
The grain crop can be harvested when<br />
cob-sheath turns brownish and grains<br />
become hard and shiny<br />
In high altitude areas, maize may take<br />
up to a month longer to mature<br />
The difference in length of growing<br />
season between early and late hybrids<br />
is more in the number of days from<br />
planting to silking than in the days from<br />
silking to maturity<br />
How to harvest maize<br />
There are two methods of maize harvesting:<br />
1. Plucking of cobs: The maize cobs are<br />
removed from the standing plants and<br />
placed in the open to dry in the sun.<br />
The maize stalks are later cut and fed to<br />
animals.<br />
2. Stalk cutting: The plants are cut and<br />
piled up in the field and the cobs are<br />
removed when they are dry. The dried<br />
stalks are fed to animals.<br />
Sorting and drying of maize cobs<br />
After harvest, sort out all off-type<br />
maize cobs, particularly those showing<br />
different colours and texture, and the<br />
diseased cobs, before placing them in<br />
bins to dry<br />
A good sorting at this time considerably<br />
reduces the task of sorting after the<br />
maize cobs have been dried to the<br />
desired extent (10 to 15 percent<br />
moisture content)<br />
Step 1: Starting from one corner of a plot walk<br />
to the opposite corner (diagonally). As you<br />
walk stop at every fifth plant, measure<br />
and record its height and then cut it at the<br />
base. Carry all the plants you have cut out<br />
of the plot and dissect them. Observe and<br />
record the number of stemborer larvae and<br />
pupae.<br />
Push-pull curriculum | 83
Step 2: Harvest the maize<br />
Cob plucking method: Harvest and take<br />
the weight of the cobs in both the Push-pull<br />
and the Check plots and leave them in the<br />
open to dry.<br />
Stalk cutting method: Leave stalks from<br />
Push-pull and Check plots in separate piles<br />
until they are dry. Then take the weight of<br />
cobs. Keep the records from the two plots<br />
separately.<br />
Step 3: Walk through the plot and randomly<br />
select 30 stalks from the Push-pull plot and<br />
30 stalks from the Check plot and dissect<br />
them. Count the number of stemborer larvae<br />
and pupae in each stem.<br />
Topic 2. Storing maize stover<br />
Introduction<br />
Maize stover from your last crop can be<br />
used to feed your livestock. Apart from<br />
providing feed during the dry season when<br />
other materials are in short supply, this<br />
also helps remove stemborer larvae and<br />
pupae from the field.<br />
Learning objective<br />
On completion of this topic participants will<br />
demonstrate how to store and utilize maize<br />
stover.<br />
Learning activities<br />
Facilitator–led introduction on the<br />
importance of maize stover as a dry<br />
season livestock feed<br />
Practical activities on maize stover<br />
storage and utilization<br />
Discussion<br />
How to store maize stover<br />
Maize stover can be stored either loose<br />
or baled. Loose storage is easier for the<br />
small scale farmer.<br />
84 | Push-pull curriculum<br />
Step 1: Cut and assemble stover into bundles<br />
that are easy to carry.<br />
Step 2: Identify the place for storage. This<br />
can be against a tree or three poles tied<br />
together at the top. This should be placed<br />
under a shade.<br />
Step 3: Carry the stover to the selected storage<br />
place. Stack it in a slanting position<br />
to allow the rain water to run off (Fig 54).<br />
This will ensure that only the stover on the<br />
surface will be spoiled while the inner ones<br />
retain their good quality.<br />
Fig 54. Storing maize stover in a shade<br />
Step 4: To feed stover to your animals cut<br />
it into small pieces (2 to 4 inches) as per<br />
your daily need. Stover is not very good<br />
quality feed and protein rich materials like<br />
desmodium hay and fodder should be<br />
added to it.<br />
Note<br />
Make sure you have used up all the stover before<br />
the start of the next season or the stemborers that<br />
are in the stover will go to your new crop.<br />
What NOT to do<br />
Do not leave stover intended for livestock<br />
feed on the ground in the Push-pull farm.
Labour costs<br />
Push-pull plot Harvesting<br />
maize<br />
Total<br />
Check plot<br />
Total<br />
Estimated benefits<br />
Stover from Push-pull<br />
Stover from Check Plot<br />
Activity No of people<br />
working on<br />
this activity<br />
Collecting and<br />
stacking stover<br />
Other activity<br />
Harvesting<br />
maize<br />
Collecting and<br />
stacking stover<br />
Other activity<br />
Time taken to<br />
complete the<br />
activity (hours)<br />
Estimated quantity Value<br />
Benefits (Please keep filling the number of units each day as you cut)<br />
Cost of labour<br />
per day<br />
Total cost of<br />
this activity<br />
Type of benefit Quantity Unit market price Total value<br />
Push-pull plot 10 Kg Napier grass (1 Unit)<br />
3 Kg Desmodium (1 Unit)<br />
1 kg Desmodium hay (1 unit)<br />
Milk<br />
Other benefit<br />
Push-pull curriculum | 85
General Observations (AESA): Farmer’s Fields<br />
General information<br />
Date<br />
Crop age<br />
Observations Farmer’s comments<br />
Rainfall<br />
Soil moisture<br />
86 | Push-pull curriculum<br />
Low Medium High<br />
Weather: Sunny/Cloudy/Rainy Windy/Still Hot/ Cold<br />
Stemborer assessment at harvest<br />
Indicator Observation<br />
Number of stemborer larvae on 5 damaged plants<br />
Average size of stemborer larvae on 5 damaged plants<br />
Push-pull Check Plot
Week 19<br />
Topic Duration What you need for this lesson<br />
1 Shelling and storage of maize 1 hour Gunny bags, balance, 2kg tins (gorogoro), maize<br />
sheller (optional)<br />
2 Harvesting desmodium pods 45 minutes<br />
Introduction<br />
This week has two topics:<br />
Shelling and storage of maize<br />
Harvesting desmodium pods<br />
Topic 1: Shelling and storage<br />
of maize<br />
Note<br />
Last week you discussed when and how<br />
to harvest maize. You then harvested the<br />
maize. This week you will look at how to<br />
shell and store the maize.<br />
It is important to select only healthy and clean<br />
cobs for shelling. The diseased and rotten cobs<br />
must be destroyed because they may contain<br />
aflatoxin that is poisonous to you and to your<br />
livestock.<br />
Do not eat or feed them to your livestock.<br />
After harvest, cobs must be dried in the<br />
sun for 4 to 5 days and shelled when<br />
completely dry (at 10 to 15 per cent<br />
moisture). If you do not dry the maize<br />
well, it can attract storage pests which<br />
may bring aflatoxin<br />
Shelling can be done by hand or power<br />
sheller<br />
After shelling, the grain should be dried<br />
for 3 or more days, cleaned and stored<br />
in a dry place protected from rats<br />
After removing the grains, the cobs can<br />
be used as livestock feed particularly<br />
during the dry season<br />
Learning objectives<br />
On completion of this topic participants will<br />
be able to:<br />
Explain the appropriate methods of<br />
shelling and storing maize<br />
Demonstrate how to shell and store<br />
maize<br />
Learning activities<br />
Facilitator-led introduction on maize<br />
shelling and storage<br />
Practical exercise:<br />
• Shelling the maize cobs<br />
• Cleaning and weighing, shelled<br />
maize<br />
• Recording weights of shelled maize<br />
Discussions<br />
Things to do<br />
Step 1: Shell the cobs that you harvested<br />
and left to dry last week.<br />
Step 2: Clean and weigh them. Keep separate<br />
records for Push-pull and for Check<br />
plots.<br />
Topic 2: Harvesting<br />
desmodium pods<br />
After you have harvested maize you can<br />
start harvesting desmodium pods. You can<br />
continue harvesting the pods for another<br />
2-3 weeks. As not all the pods will be ready<br />
at the same time, today we will discuss<br />
when and how to harvest mature pods.<br />
Learning objective<br />
On completion of this topic participants will<br />
be able to:<br />
Explain the appropriate method of<br />
harvesting desmodium pods<br />
Demonstrate how to harvest<br />
desmodium pods<br />
Push-pull curriculum | 87
Learning activities<br />
Facilitator-led introduction on<br />
desmodium harvesting<br />
Practical exercise:<br />
• Harvesting desmodium pods<br />
Discussions<br />
Things to do<br />
Step 1: Walk around the edge of the Pushpull<br />
plot and pick pods that are either<br />
green, yellow or brown.<br />
Step 2: Break open the pods and observe the<br />
seeds inside.<br />
Note<br />
The seeds inside the green pods<br />
are soft and green and not ready for<br />
harvesting<br />
In the yellowish or brownish pods the<br />
seeds are brownish green and hard.<br />
These are ready for harvesting<br />
If you delay harvesting when the pods are<br />
brownish, you will lose the seeds as the pods may<br />
fall due to rain and wind.<br />
Step 3: How to harvest the pods<br />
Harvest the pods every 3 – 4 days when<br />
the pods have turned yellow and brown<br />
Labour costs<br />
88 | Push-pull curriculum<br />
Activity No of people<br />
working on<br />
this activity<br />
Push-pull plot Harvesting<br />
desmodium pods<br />
Check plot<br />
Shelling maize<br />
Other activity<br />
Shelling maize<br />
Other activity<br />
Note<br />
Put on an apron made of polythene<br />
material. This stops the pods from<br />
sticking to your clothes<br />
Walk through the plot and hand-strip<br />
the ripe pods and place them in an<br />
open tin (Fig 55)<br />
Fig 55. Harvesting desmodium pods<br />
Keep the open tin in a shaded but<br />
secure place for 3 days. This will allow<br />
them to ferment<br />
After the 3 days dry them in the sun for<br />
another 4 days<br />
One acre of well managed and properly harvested<br />
desmodium seed crop can give 50 to 60 kg of<br />
seed. In Kenya, this can earn a farmer between<br />
Ksh 30,000/= and 50,000/= when sold at the<br />
current market price of Ksh 600/= to 800/= per kg<br />
of seed.<br />
Time taken to<br />
complete the<br />
activity (hours)<br />
Cost of<br />
labour per<br />
day<br />
Total cost of<br />
this activity
Benefits (Please keep filling the number of units each day as you cut)<br />
Type of benefit Quantity Unit market price Total value<br />
Push-pull plot 10 Kg Napier grass (1 Unit)<br />
3 Kg desmodium (1 Unit)<br />
1 kg Desmodium hay (1 Unit)<br />
Milk<br />
Other benefit<br />
General observations (AESA): Farmer’s fields<br />
General information<br />
Date<br />
Crop age<br />
Observations Farmer’s comments<br />
Rainfall<br />
Soil moisture<br />
Low Medium High<br />
Weather: Sunny/Cloudy/Rainy Windy/Still Hot/ Cold<br />
Push-pull curriculum | 89
Week 20<br />
Topic Duration What you need for this lesson<br />
1 Processing and marketing<br />
desmodium seeds<br />
2 Improving soil fertility 45 minutes<br />
Introduction<br />
Desmodium seed is very valuable either<br />
for expanding your push-pull or for sale.<br />
In this topic we discuss the processing of<br />
the pods harvested in Week 19. We also<br />
discuss how you can market your seeds.<br />
Topic 1: Processing and<br />
marketing desmodium seeds<br />
Lesson objective<br />
On completion of this topic participants will<br />
learn how to process and discuss how to<br />
market their desmodium seeds.<br />
Learning activities<br />
Facilitator-led introduction on<br />
processing and marketing desmodium<br />
Practical work on seed processing<br />
Discussions (Questions to guide<br />
discussions: e.g., How can we create<br />
market for desmodium seeds?)<br />
Processing desmodium seeds<br />
Step 1: After the pods have been sun-dried<br />
thresh them using a stone and an old rubber<br />
shoe sole (Fig 56).<br />
Fig 56. Threshing of desmodium pods<br />
2 hours Weighing balance, containers (2 Kg tins), a flat grinding<br />
stone, rubber sole of an old shoe, wire mesh (30cm by 30<br />
cm), polythene clothing, Jembe, Panga, clear polythene<br />
bags.<br />
You can also put the pods in a gunny bag<br />
and thresh them, but this can damage<br />
some of the seed and they will not germinate<br />
when planted.<br />
Step 2: After threshing, winnow the seeds to<br />
remove husks and dust (Fig 57).<br />
Fig 57. Winnowing desmodium seed<br />
Step 3: Sieve the seeds using a 30 cm by 30<br />
cm wire mesh (the type used for mosquito<br />
screen on windows). This will give you<br />
clean seed. Weigh the seeds.<br />
Step 4: Store the seeds in a dry, clean tin or<br />
an airtight container.<br />
Step 5: The husks can be used to feed your<br />
animals.<br />
Marketing desmodium seeds<br />
Desmodium seeds are expensive and the<br />
farmer can sell them for extra income.<br />
Many farmers are taking up Push-pull and<br />
so they need the seeds. The seed companies<br />
are also looking for seeds to sell to<br />
more farmers.<br />
Push-pull curriculum | 91
The ready market for desmodium seeds<br />
comes with challenges. If you want to sell<br />
to seed companies, you need to be organized<br />
into a group so that you can be<br />
certified. In Kenya the recognized authority<br />
is the Kenya Plant Health Inspectorate<br />
Service (KEPHIS).<br />
Topic 2: Improving soil<br />
fertility<br />
Taking good care of your soil will keep it<br />
healthy. Soils need enough moisture, air<br />
and supplies of food (soil nutrients). These<br />
help plants to grow better and sustain good<br />
living things in the soil, such as earthworms.<br />
Push-pull plays an important role in conserving<br />
and improving the health of the<br />
soil.<br />
The Napier grass that is grown around the<br />
maize crop helps conserve and improve<br />
soil fertility in many ways by:<br />
Stopping soil erosion through run-off<br />
92 | Push-pull curriculum<br />
Binding the soil and acting as a wind<br />
breaker<br />
Desmodium helps improve soil health by:<br />
Providing good ground cover, thus<br />
preventing erosion and helping retain<br />
soil moisture during dry season<br />
Fixing nitrogen, thus enriching the soil<br />
with nutrients for growing plants<br />
Increasing soil fertility with leaves that<br />
fall on the ground as it grows<br />
This lesson covers the various aspects of<br />
soil conservation and shows how Push-pull<br />
helps improve soil health.<br />
Learning objectives<br />
How to tell if your soil is getting healthier<br />
Here are things to observe in the Push-pull and the Check plot<br />
On completion of this topic particiapnst will<br />
understand the important aspects of soil<br />
fertility and how Push-pull helps improve<br />
soil health.<br />
Learning activities<br />
Facilitator-led introduction on how to tell<br />
a healthy soil from poor soil<br />
Observations of soil fertility indicators<br />
Facilitator-led discussions<br />
Push-pull plot Check Plot<br />
Soil quality<br />
indicator<br />
Soil quality indicator questions Yes No Yes No<br />
Organic matter Is the soil getting darker?<br />
Soil structure Is the soil getting softer underfoot? Is it easier to work on?<br />
Runoff Does rain soak into the soil quickly? (Rain soaks fast and<br />
water does not stay on the surface.)<br />
Soil moisture Does the soil stay moist for longer period after rains?<br />
Soil life (aeration) Does the soil have many earthworms? Are there many<br />
holes in the soil, and worm casts on the surface?<br />
Crops’ health Do your crops look vigorous and healthy?<br />
Crop yields Are your yields improving?<br />
Root growth Do the crop roots grow well?<br />
Presence of Do the soils have the type of weeds that like to grow on<br />
Weeds<br />
fertile soils?<br />
If you answered Yes to these questions, your soil is getting better!<br />
Note<br />
Improving soil can take several seasons. This is still an early stage to see much improvement.
Labour costs<br />
Push-pull plot<br />
Activity No of people<br />
working on<br />
this activity<br />
Processing<br />
desmodium seed<br />
Other activity<br />
Benefits from desmodium seed<br />
Push-pull plot Desmodium seed<br />
Time taken to<br />
complete the<br />
activity (Hours)<br />
Cost of labour<br />
per day<br />
Total Cost of<br />
this Activity<br />
Type of Benefit Quantity Unit Market price Total Value<br />
Desmodium husks<br />
Other benefit<br />
Benefits (Please keep filling the number of units each day as you cut)<br />
Type of Benefit Quantity Unit Market price Total Value<br />
Push-pull plot 10 Kg Napier grass (1 Unit)<br />
3 Kg Desmodium (1 Unit)<br />
1 kg Desmodium hay (1 unit)<br />
Milk<br />
Other benefit<br />
General observations (AESA): Farmer’s fields<br />
General Information<br />
Date<br />
Observations Farmer’s comments<br />
Rainfall<br />
Soil moisture<br />
Low Medium High<br />
Weather: Sunny/Cloudy/Rainy Windy/Still Hot/ Cold<br />
Push-pull curriculum | 93
Week 21<br />
Topic Duration What you need for this lesson<br />
1 Feeding silage to dairy animals 30 minutes Silage, a jembe, shovel, buckets<br />
2 Harvesting the desmodium multiplication<br />
plot<br />
Introduction<br />
In Week 14 you learnt how to conserve excess<br />
fodder as silage that can be used to<br />
feed your animals during dry season when<br />
fodder is scarce. This week you will learn<br />
how to utilize it.<br />
Topic 1: Feeding silage to<br />
dairy animals<br />
Learning objectives<br />
On completion of this topic participants will<br />
be able to recognize good quality silage<br />
and how to use it.<br />
Learning activities<br />
Facilitator-led introduction on how to<br />
recognize good quality silage feed<br />
Practical exercise: feeding animals<br />
Discussions (How do you differentiate<br />
between good and poor silage?)<br />
Step 1: How to tell the quality of your<br />
silage<br />
Open the silage pit or gunny bag. Smell the<br />
silage and look at the colour. This will tell<br />
you the quality of the silage.<br />
Good silage has a sweet smell and has<br />
a shiny yellow brown colour<br />
Poor silage has a rotten smell and has<br />
a dark and mouldy colour. Your animals<br />
will not eat poor quality silage<br />
Step 2: How to use the silage<br />
From the gunny bag silage, open the<br />
tied end and quickly remove enough for<br />
one day’s feeding then immediately tie<br />
the bag up again. This will be a daily<br />
routine until the silage is finished. If you<br />
do not tie the bag immediately, air will<br />
get in and spoil the silage<br />
Open the pit silo from the lower side<br />
of the slope. Quickly remove enough<br />
material for one day’s feeding and then<br />
immediately cover the open end again.<br />
This will be a daily routine until the<br />
silage is finished<br />
Step 3: Put silage in a trough just like you do<br />
with fresh forage.<br />
Note<br />
Feed after milking or at least 3 hours<br />
before to eliminate the silage smell in<br />
the milk<br />
A grade cow may eat up to 40 kg and a crossbreed<br />
less, about 20 kg of silage per day. The<br />
silage given to livestock should not be more than<br />
60% of the total feed consumed by the livestock<br />
daily.<br />
Topic 2: Harvesting the<br />
desmodium multiplication plot<br />
It is now time to harvest seed from your<br />
desmodium multiplication plot. You will<br />
have learnt how to do this on the Push-pull<br />
plot in Week 19.<br />
Push-pull curriculum | 95
Labour costs<br />
Desmodium<br />
multiplication<br />
plot<br />
96 | Push-pull curriculum<br />
Activity No of people<br />
working on<br />
this activity<br />
Harvesting desmodium<br />
pods<br />
Other activity<br />
Time taken to<br />
complete the<br />
activity (hours)<br />
Benefits (Please keep filling the number of units each day as you cut)<br />
Cost of<br />
labour per<br />
day<br />
Total cost of<br />
this activity<br />
Type of benefit Quantity Unit market price Total value<br />
Push-pull plot 10 Kg Napier grass (1 Unit)<br />
3 Kg Desmodium (1 Unit)<br />
1 kg Desmodium hay (I unit)<br />
Milk<br />
5 Kg Silage (1 unit)*<br />
Other benefit<br />
*5 Kg of silage is what a dairy goat consumes in a day.<br />
General observations (AESA): Farmer’s fields<br />
General Information<br />
Date<br />
Observations Farmer’s comments<br />
Rainfall:<br />
Soil moisture<br />
Low Medium High<br />
Weather: Sunny/Cloudy/Rainy Windy/Still Hot/ Cold
Off Season
Week 1<br />
Topic Duration What you need for this lesson<br />
1 Land preparation Ploughs, jembes/hoes, pegs, sticks, strings, tape measure,<br />
ruler, desmodium vines and TSP fertilizer<br />
2 Processing desmodium seed<br />
from multiplication plot<br />
Weighing balance, containers (2 Kg tins), a flat grinding<br />
stone, rubber sole of an old shoe, wire mesh (30cm by 30<br />
cm), clear polythene bags.<br />
3 Addressing risk and uncertainty 1 hour Record of receipts and expenses (optional); record sheets;<br />
calculator, and flip charts/chalkboards, markers, exercise<br />
books, pens.<br />
This week you need to prepare the land for<br />
planting the Check plot and the new Pushpull<br />
plot to be planted with vines.<br />
Topic 1: Land preparation<br />
Note<br />
Clear your land during the dry season<br />
Plough and harrow your land to a fine<br />
tilth (until the soil has no large lumps)<br />
before the onset of the rains<br />
For the established Push-pull plot the land<br />
preparation and planting will be done together<br />
after the onset of rain.<br />
Topic 2: Processing<br />
desmodium seed from<br />
multiplication plot<br />
You need to process the desmodium seed<br />
which you harvested in multiplication<br />
plot. Please refer to Week 20 lesson on<br />
processing.<br />
Topic 3: Addressing risk and<br />
uncertainty<br />
Risk and uncertainty are important factors<br />
that influence the chances of a farmer<br />
adopting a new technology. Decision-making,<br />
which involves choosing between<br />
possible alternative actions, is one of the<br />
most important activities that a farmer has<br />
to do to adopt the technology. It is also an<br />
act of management that cannot be ignored<br />
or postponed. A farmer making a decision<br />
with some knowledge of the probability<br />
(chance) of making a good decision does<br />
so under condition of risk. On the other<br />
hand, a farmer making decisions without<br />
knowledge of the probability of making a<br />
‘good’ or ‘bad’ decision does so under the<br />
condition of uncertainty. However, there<br />
is no certainty that a ‘good’ decision will<br />
be the ‘right’ decision. That is, while the<br />
farmer may act reasonably well and follow<br />
the right procedures, he/she has no control<br />
over the outcome. This is because farmers<br />
make decisions in a risky and ever-changing<br />
environment. Information and experience<br />
are important conditions in determining<br />
the quality of decisions farmers make.<br />
Changes in technologies, markets, government<br />
policies and social factors all contribute<br />
to the risky environment that farmers<br />
carry out their activities in. For example,<br />
households may be willing to take more<br />
risks if they receive insurance/support from<br />
social networks, governmental and nongovernmental<br />
organizations.<br />
This lesson will provide an introduction to<br />
the terminology, types, and strategies used<br />
in addressing risk and uncertainty in dayto-day<br />
activities.<br />
Learning objectives<br />
On completion of this topic participants will<br />
be able to:<br />
Explain the importance of addressing<br />
risk and uncertainty<br />
Push-pull curriculum | 99
Identify various types of risks that affect<br />
farming decisions<br />
Suggest strategies of addressing risk<br />
and uncertainty<br />
Learning activities<br />
Facilitator-led introduction on<br />
importance of addressing risk and<br />
uncertainty<br />
Form 3 sub-groups of 6-8 members to<br />
brainstorm on the various types of risks<br />
they operate in and the strategies they<br />
use to address them.<br />
• Group 1. Common production<br />
problems - risks and uncertainties<br />
and what action(s) they propose to<br />
address these.<br />
• Group 2. Common marketing<br />
problems - risks and uncertainties<br />
and what action(s) they propose to<br />
address these.<br />
• Group 3. Common financial<br />
problems - risks and uncertainties<br />
and what actions (s) they suggest to<br />
address these.<br />
Facilitator-led discussion on options the<br />
participants wish to test and to agree on<br />
Labour costs<br />
100 | Push-pull curriculum<br />
Activity No of people<br />
working on<br />
this activity<br />
Multiplication plot Processing<br />
desmodium seed<br />
Check plot Land preparation<br />
Other activity<br />
Push-pull vine plot Land preparation<br />
Other activity<br />
Benefits from desmodium seed<br />
Multiplication plot Desmodium seed<br />
Notes<br />
a) what information will be required and<br />
from what sources, b) how to record the<br />
information and c) how to analyse the<br />
information.<br />
Types of risks<br />
· Production and technical risks (drought,<br />
insufficient fodder, problems in adapting new<br />
technologies to local conditions e.g. appropriate<br />
cover crop species, pests and diseases)<br />
· Marketing and price risks (price fluctuations of<br />
inputs and outputs)<br />
· Financial risks (interest payments, changes in<br />
interest rates, ability to generate cash)<br />
· Institutional risks (breakdown in services supply,<br />
management problems in FFS, change in support<br />
and subsidies)<br />
· Human and personal risks (sickness).<br />
Effective risk management may involve:<br />
Anticipating that an unfavourable event<br />
may occur and acting to reduce the<br />
chance of it happening; and,<br />
Taking actions to reduce the adverse<br />
consequences of risk should an<br />
unfavourable event occur<br />
Time taken to<br />
complete the<br />
activity (hours)<br />
Cost of<br />
labour per<br />
day<br />
Total cost of<br />
this activity<br />
Type of benefit Quantity Unit market price Total value<br />
Desmodium husks<br />
Other benefit
Benefits of livestock feed (Please keep filling the number of units each day as you cut)<br />
Type of benefit Quantity Unit market price Total value<br />
Push-pull plot 10 Kg Napier grass (1 Unit)<br />
3 Kg Desmodium (1 Unit)<br />
1 kg Desmodium hay<br />
5 Kg Silage (1 unit)*<br />
Other benefit<br />
*5 Kg of silage is what a dairy goat eats in a day.<br />
General observations (AESA): Farmer’s fields<br />
General information<br />
Date<br />
Crop age<br />
Observations Farmer’s comments<br />
Rainfall: Number of<br />
days it rained the week<br />
before______<br />
Soil moisture<br />
Low Medium High<br />
Weather: Sunny/Cloudy/Rainy Windy/Still Hot/ Cold<br />
Note<br />
You need to watch for the rain. If it is raining enough for planting you should plan for planting next week. If not,<br />
continue with the Gross Margin Analysis (Season 2, Week 2).<br />
Push-pull curriculum | 101
Week 2<br />
Topic Duration What you need for this lesson<br />
1 Gender in Push-pull 2 hours Questionnaires, access and control of resources<br />
chart<br />
2 HIV and Push-pull<br />
Introduction<br />
Gender refers to how the society looks at<br />
the relations between men and women.<br />
These relations, and the roles women and<br />
men play are determined by culture. The<br />
roles differ from one society to another with<br />
respect to age, class, race, ethnicity, abilities<br />
and disabilities.<br />
Topic 1: Gender in Push-pull<br />
Learning objective<br />
On completion of this topic participants will<br />
evaluate the gender issues that may affect<br />
the adoption of Push-pull technology.<br />
Learning activities<br />
Facilitator led discussions on the<br />
importance of gender issues in new<br />
programmes<br />
Issues to discuss<br />
Fill in the role played by men and women in<br />
the table below.<br />
Issue<br />
Labour<br />
Income<br />
Information and Knowledge<br />
on new technologies<br />
Decision on resources<br />
use<br />
Decisions on utilization<br />
of benefits<br />
Land ownership<br />
Priority setting<br />
Freedom of expression<br />
Use of time<br />
Men Women Children<br />
Group discussions<br />
The gender priority areas for Push-pull are:<br />
How to involve men, women and<br />
children in Push-pull.<br />
The place of rural women as a valuable<br />
resource and driver of local livelihoods<br />
and how Push-pull can address their<br />
specific needs.<br />
What you can do<br />
One way of addressing gender issues in<br />
Push-pull is to remember that different<br />
communities have different cultural and<br />
social ways of addressing issues. Try and<br />
understand these factors in your community<br />
by discussing the following questions.<br />
1. If you want to introduce a new technology<br />
in the community, who should you involve<br />
first?<br />
2. Find out the relationships that exist between<br />
men and women. For instance, are<br />
they allowed to attend meetings alone?<br />
3. What time of the day can you involve<br />
women and men, or women alone?<br />
4. What activities on the farm are specifically<br />
for men?<br />
5. What activities on the farm are specifically<br />
for women?<br />
6. Are there crops that should be grown and<br />
tended by either the men or the women?<br />
7. Who sells the farm products?<br />
8. Who keeps the money?<br />
9. Who decides what to spend the money on?<br />
Push-pull curriculum | 103
10. How do both women and men access<br />
information?<br />
11. What roles do children play at home and in<br />
the community?<br />
The answers to these questions will help<br />
you to design activities that take into<br />
account the needs of men, women and<br />
children.<br />
Topic 2: HIV and Push-pull<br />
Introduction<br />
HIV/AIDS is a serious threat to farming<br />
in general and Push-pull is not exempted<br />
from its effects. As the technology is being<br />
implemented, issues relating to the disease<br />
need to be addressed. Remember the following<br />
important facts.<br />
People with HIV/AIDS need additional<br />
nutrition to fight the disease.<br />
Unproductive land means there less<br />
food for everyone. HIV patients may be<br />
stigmatized by the community, so are<br />
often the first to be left without food<br />
An unhealthy population is not<br />
productive. Ill people cannot look for<br />
work on their farms. HIV reduces the<br />
number of hands that can be put to<br />
work<br />
The number of orphans increases. This<br />
puts an extra burden on the households<br />
that take the children in, and on the<br />
community as a whole. The orphans do<br />
not get enough to eat as parents may<br />
feed their own children first<br />
Women have more work because they<br />
care for both AIDS patients and orphans<br />
HIV/AIDS spreads quickly for several<br />
reasons: cultural practices, lack of basic<br />
health care services, poor information<br />
about the disease and sudden increase in<br />
income.<br />
Learning objectives<br />
On completion of this topic participants will<br />
understand issues of HIV that may affect<br />
104 | Push-pull curriculum<br />
the farmers ability to benefit from Pushpull.<br />
Learning activities<br />
Facilitator-led introduction of HIV and<br />
its relationship to household health and<br />
Push-pull<br />
Group Discussions<br />
Presentations by guest speakers<br />
Duration 2 hours<br />
the disease.<br />
Why you should openly discuss HIV?<br />
HIV puts a double burden on households:<br />
they need extra resources to take care<br />
of the sick, but HIV takes away the most<br />
productive members of the household thus<br />
impoverishing people. The following are<br />
some of the consequences of HIV.<br />
Poverty makes people more vulnerable<br />
to HIV. There is little information about<br />
the disease in remote areas, and<br />
many people cannot read the literature<br />
warning them about its dangers. Many<br />
believe that the disease is a problem<br />
only in the towns. Some assume that<br />
people in rural areas cannot be infected<br />
People engage in various activities<br />
that expose them to unprotected<br />
sex and multiple partners. In farming<br />
communities, men go to towns to sell<br />
farm products or to work. They may<br />
have girlfriends or use the services of<br />
prostitutes there<br />
Some women and men have multiple<br />
partners. Women may engage in<br />
commercial sex work to try and make<br />
ends meet<br />
Traditional liquor is brewed in most rural<br />
areas. People who drink these brews<br />
are at risk because they lack judgment<br />
and may practice unsafe sex in their<br />
drunken state<br />
The following are some of the traditional<br />
practices that facilitate the spread of the<br />
disease.
People living with HIV are commonly<br />
stigmatized and so people may be<br />
afraid to use testing and counselling<br />
centres because they are afraid of being<br />
shunned by their own communities<br />
In most communities it is a taboo<br />
to discuss sex related issues. It is<br />
therefore difficult to disseminate<br />
information about HIV<br />
Some communities view HIV as a<br />
curse, and a result of being bewitched.<br />
They do not relate it to human<br />
behaviour<br />
Some people have taken a fatalistic<br />
attitude. They believe that death in any<br />
form is death and see no need to be<br />
careful about their sex life<br />
Men may go away to urban areas for<br />
long periods to work or to look for work.<br />
This exposes them and their wives to<br />
casual sex partners<br />
Some communities encourage<br />
polygamy. If the husband or one of the<br />
wives is infected, the others will contract<br />
the HIV virus too<br />
In some communities, a deceased's<br />
brother inherits his widow. If the man<br />
died of a HIV related disease, the<br />
woman spreads the disease to her new<br />
husband<br />
Most farming communities practice<br />
circumcision for boys and girls in<br />
groups. The tools used may not be<br />
cleaned and sterilized. If one person is<br />
infected the whole group is exposed to<br />
the disease.<br />
Most babies are delivered by poorly<br />
trained and ill equipped traditional birth<br />
attendants. They do not use protective<br />
measures, and rarely sterilize the blade<br />
they use to cut umbilical cords. If the<br />
mother or the attendant is infected, the<br />
disease may spread easily<br />
Risky and No-Risky behaviours<br />
Definitely a Risk<br />
• Having sexual intercourse with multiple partners<br />
without a condom<br />
• Sharing a needle for drug use or for injections<br />
• Sharing knives for circumcision<br />
• Sharing needles for ear piercing<br />
Probably a Risk<br />
• Being born to a mother who is HIV positive<br />
(Mother-to-child transmission)<br />
• Getting blood transfusion<br />
• Sharing a toothbrush<br />
• Kissing<br />
Definitely NOT a Risk<br />
• Abstaining from sexual intercourse<br />
• Being close to a person with HIV who is coughing<br />
• Donating blood<br />
• Using a public telephone<br />
• Shaking hands with a person with HIV<br />
• Hugging a person with HIV or AIDS<br />
• Living with a person with AIDS<br />
• Being bitten by a mosquito<br />
• Having a mutually monogamous and faithful<br />
relationship with a person who has tested negative<br />
for HIV.<br />
From: KARHP, PATH and Population Council<br />
Push-pull curriculum | 105
Season 2
Week 1<br />
Topic Duration What you need for this lesson<br />
1 Preparing the Push-pull plot for 2 nd<br />
and subsequent season planting<br />
2 Laying out and establishing a new<br />
Push-pull plot using desmodium vines<br />
3 Managing desmodium seed multiplication<br />
plot<br />
Note<br />
1 hour Panga, jembe, sacks to carry the cut material, hoe<br />
and 2kg TSP fertilizer, bucket/watering can.<br />
1 hour 30<br />
minutes<br />
1 hour<br />
This lesson only to be done if there is enough rain<br />
for planting. If Not, continue with Gross Margin<br />
Analysis in Second Season Week 2, and wait for<br />
the rains to come)<br />
Introduction<br />
This is the start of the second season. We<br />
have three topics to discuss this week:<br />
1. How to prepare the land for the planting<br />
2nd season maize in the Push-pull plot<br />
established during the 1st season.<br />
2. We will also learn how to establish a<br />
new Push-pull plot using desmodium<br />
vines from your already established<br />
desmodium seed multiplication plot.<br />
3. Managing desmodium multiplication plot<br />
for the second season.<br />
Topic 1: Preparing the<br />
Push-pull plot for 2 nd and<br />
subsequent season planting<br />
Learning objective<br />
On completion of this topic participants will<br />
prepare a Push-pull plot for the second and<br />
subsequent seasons.<br />
Learning activities<br />
Facilitator-led introduction on activities<br />
of the week<br />
Field work: land preparation and<br />
planting in established Push-pull plots<br />
Discussion on the exercise<br />
Ruler/tape measure, string, pegs, sticks for<br />
measurement, mallet hammer, polyethylene tags or<br />
marker pens, Push-pull manual<br />
How to prepare the 2 nd season Push-pull<br />
plot<br />
Step 1: Cut back the desmodium leaving<br />
a stubble of 6cm above the ground to<br />
encourage regrowth. Keep and feed to<br />
livestock.<br />
Step 2: Hand weed the desmodium.<br />
Step 3: Dig or plough well between the rows<br />
of desmodium.<br />
Step 4: Weed the Napier grass.<br />
Step 5: Plant maize in between desmodium<br />
rows at spacing of 30cm. Apply 1 spoonful<br />
or soda bottle top of TSP or DAP fertilizer.<br />
You may also use a handful of well-decomposed<br />
manure per hole.<br />
Topic 2: Laying out and<br />
establishing a new Push-pull<br />
plot using desmodium vines<br />
Learning objective<br />
On completion of this topic participants will<br />
be able to demonstrate that they understand<br />
how to lay out and establish a new<br />
Push-pull plot using desmodium vines.<br />
Learning activities<br />
Facilitator-led introduction and<br />
discussions on the use of desmodium<br />
vines to establish a Push-pull plot<br />
Practical on the layout and planting of<br />
the Push-pull plot<br />
Discussion (lead question on the<br />
economics of using vines as compared<br />
to seed)<br />
Push-pull curriculum | 109
How to lay out the Push-pull plot<br />
Note<br />
If your land is sloping, it is essential that the<br />
planted rows on your plot run across the slope.<br />
Step 1: Mark out a plot measuring 21 m by 21<br />
m square, using a tape measure, pegs and<br />
string.<br />
Step 2: Put a peg at each corner of the<br />
measured area. Starting from this peg put<br />
pegs along all sides of the square at 75 cm<br />
intervals.<br />
Step 3: Run a string from the first peg to the<br />
first peg on the opposite side of the plot.<br />
Step 4: Run a second string from the second<br />
peg to a second peg on the opposite side.<br />
Step 5: Run a third string from the third peg to<br />
the third peg on the opposite side.<br />
Step 6: Repeat Steps 3, 4 and 5 for all the<br />
other sides, until you have a plot looking<br />
like (Fig 58).<br />
Area for planting Napier grass<br />
around the maize<br />
What NOT to do<br />
Note<br />
Area for maize<br />
and desmodium<br />
intercropping<br />
110 | Push-pull curriculum<br />
1 metre path round<br />
Area for planting Napier grass<br />
around the maize<br />
Fig 58. A laid-out Push-pull plot<br />
Do not remove the pegs or string until<br />
your plot is fully planted (Season 1,<br />
Week 1 on planting)<br />
Do not plant Push-pull in less than 21<br />
m by 21 m plots as Napier grass tends<br />
to grow and to have a shading effect on<br />
the maize crop<br />
The Push-pull plot should be planted in this order<br />
1. Planting Napier grass<br />
Step 1: Dig a hole at each peg on the border<br />
of the marked plot.<br />
Step 2: Apply one tea spoonful of triple super<br />
phosphate fertilizer or 2 hand-fulls of well<br />
decomposed farmyard manure in each<br />
hole.<br />
Step 3: Place a three node cane into each<br />
hole at an angle of 30 o -45 o all facing one<br />
direction.<br />
Step 4: Cover with soil ensuring that two<br />
nodes of the cane are well covered.<br />
Step 5: If you are using root splits, place them<br />
upright in the hole and cover with soil.<br />
(For illustration see Season 1, Week 1).<br />
2. Planting desmodium vines<br />
Step 1: Use the vines from the seed multiplication<br />
plot and the established Push-pull<br />
plot. Use mature vines with at least three<br />
to four internodes with hair roots to establish<br />
desmodium.<br />
Step 2: Using a sharp pointed stick make a<br />
furrow 1 cm to 2 cm deep along the string<br />
lines. Leave 75 cm space between the<br />
ends of the desmodium row and inner row<br />
of the Napier grass. Place the vines in the<br />
furrows with the hair roots facing down.<br />
Step 3: Cover the vines, including the leaves<br />
with light soil if the moisture level is low.<br />
This ensures that the leaves do not lose<br />
moisture. Otherwise if it is raining just<br />
cover the vines only.<br />
Note<br />
For good establishment of the desmodium, ensure<br />
there is enough moisture in the soil. Do Not plant<br />
the vines if it is dry.<br />
3. Planting maize in Push-pull plot<br />
Plant maize in between desmodium rows<br />
at spacing of 30cm. Apply 1 spoonful or
soda bottle top of TSP or DAP fertilizer.<br />
You may also use a handful of well-decomposed<br />
manure per hole.<br />
4. Planting maize in Check plot<br />
Step 1: Plant maize in the entire 21 m by 21<br />
m plot in straight lines at 75 cm between<br />
rows and 30 cm between hills in a row.<br />
Step 2: Apply one tea spoonful or soda bottle<br />
top of triple super phosphate or two spoonfuls<br />
of single super phosphate per hole.<br />
You may also use a handful of good quality<br />
manure (Season 1, Week 2) per hole.<br />
Topic 3: Managing desmodium<br />
seed multiplication plot<br />
Now that you have harvested all the pods<br />
and used the mature vines to establish<br />
your new Push-pull plot it is time to manage<br />
the seed multiplication plot to ensure<br />
that you have a healthy crop for the next<br />
season. Cutting back the desmodium now<br />
allows you to:<br />
Weed the crop thus encouraging<br />
vigorous regrowth in the next season<br />
Get fodder and hay for your animals in<br />
the dry season<br />
Get vines for establishing a new<br />
desmodium multiplication plot<br />
(Optional)<br />
Learning objective<br />
On completion of this topic farmers will<br />
learn how to manage their desmodium<br />
seed multiplication plot in the second and<br />
subsequent seasons.<br />
Learning activities<br />
Facilitator-led introduction on<br />
management of desmodium for<br />
the second season, and (Optional)<br />
establishment of desmodium vine<br />
nursery<br />
Practical exercise: Cutting back and<br />
weeding desmodium, and (Optional)<br />
establishing a new nursery<br />
Note<br />
Facilitator-led discussions on the<br />
advantages and disadvantages of<br />
establishing a desmodium seed nursery<br />
by use of vines (Optional)<br />
• Steps 1 to 5 are optional if you want to establish a<br />
new desmodium multiplication plot.<br />
• Steps 6 and 7 must be done to maintain your<br />
desmodium multiplication plot in good condition<br />
for your second season.<br />
Step 1: Identify a suitable site near a water<br />
source where you can prepare a 10 metre<br />
by 10 metre desmodium vine nursery. Ensure<br />
the soil is broken down until it is fine,<br />
and ensure the soil has enough moisture<br />
for planting vines. If not, water the seed<br />
bed.<br />
Step 2: Select vines from the seed multiplication<br />
plot and the established Push-pull plot.<br />
Use mature vines with at least three to<br />
four internodes with hair roots to establish<br />
desmodium in between maize rows.<br />
Step 3: Cut the vines close to the main plant<br />
and carefully pull it out. Try not to damage<br />
the hair roots.<br />
Step 4: Using a sharp pointed stick make a<br />
furrow 1 cm to 2 cm deep along the line in<br />
your new nursery. The lines should be 75<br />
cm apart. Place the vines in the furrows<br />
with the hair roots facing down.<br />
Step 5: Cover the vines. If there is no rain,<br />
water the vines at least twice a week.<br />
Step 6: After you have cut the vines and<br />
planted them in the nursery, cut the<br />
desmodium leaving stubble 4-6 cm above<br />
the ground to encourage regrowth. Use the<br />
cut material as fodder for your livestock or<br />
to make hay.<br />
Step 7: Weed the desmodium using a hoe or<br />
a jembe and apply half kilogramme (kg) of<br />
TSP or 1 kg DAP fertilizer to the whole plot.<br />
Labour costs<br />
Push-pull curriculum | 111
Push-pull Vine<br />
Plot<br />
Total<br />
Established<br />
Push-pull plot<br />
Total<br />
112 | Push-pull curriculum<br />
Activity No of people<br />
working on<br />
this activity<br />
Field layout<br />
Planting Napier<br />
Planting Desmodium<br />
Planting maize<br />
Fertilizer application<br />
Any other activity<br />
Cutting back desmodium<br />
Land preparation and<br />
weeding of desmodium<br />
Weeding Napier<br />
Planting maize<br />
Fertilizer application<br />
Any other activity<br />
Check Plot Field layout<br />
Total<br />
Old desmodium<br />
seed multiplication<br />
plot<br />
Total<br />
Planting maize<br />
Fertilizer application<br />
Any other activity<br />
Cutting back desmodium<br />
Weeding desmodium<br />
Fertilizer application<br />
Time taken to<br />
complete the<br />
activity (hours)<br />
Cost of<br />
labour per<br />
day<br />
Total cost of<br />
this activity
Input costs<br />
Push-pull Vine<br />
Plot<br />
Total<br />
Input Used Quantity Used Cost<br />
Maize seed<br />
Desmodium vines<br />
Napier<br />
Fertilizer<br />
Manure<br />
Other<br />
Push-pull plot Maize seed<br />
Total<br />
Fertilizer<br />
Other<br />
Check Plot Maize seed<br />
Total<br />
Seed Multiplication<br />
plot<br />
Total<br />
Fertilizer<br />
Manure<br />
Other<br />
Fertilizer<br />
Other<br />
Benefits of livestock feed (Please keep filling the number of units each week as you cut)<br />
Type of Benefit Quantity Unit Market price Total Value<br />
Push-pull plot 10 Kg Napier grass (1 Unit)<br />
3 Kg desmodium (1 Unit)<br />
Desmodium vines<br />
5 kg Silage (1 unit)<br />
Milk (litre)<br />
Other benefit<br />
Push-pull curriculum | 113
General observations (AESA): Farmer’s fields<br />
General Information<br />
Date<br />
Planting date<br />
Variety<br />
Observations Farmer’s comments<br />
Rainfall: Number of days<br />
it rained the week before:<br />
______<br />
Soil moisture<br />
114 | Push-pull curriculum<br />
Low Medium High<br />
Weather: Sunny/Cloudy/Rainy Windy/Still Hot/ Cold
Week 2<br />
Topic Duration What you need for this lesson<br />
1 Calculations of Real Gross Margins<br />
for Push-pull plot, Check plot and<br />
Seed Multiplication plot<br />
Record of receipts and expenses (optional); record<br />
sheets; calculator, and flip charts/chalkboards,<br />
markers, exercise books, pens.<br />
Topic: Participatory Monitoring & Evaluation (PM&E)<br />
You did this lesson in Week 1, lesson 15. Refer to it for this lesson.<br />
Calculations of Real Gross Margins for Push-pull plot, Check plot and Seed Multiplication plot.<br />
Benefits of livestock feed (Please keep filling the number of units each week as you cut)<br />
Push-pull<br />
plot<br />
Type of benefit Quantity Unit market price Total value<br />
10 Kg Napier grass (1 Unit)<br />
3 Kg desmodium (1 Unit)<br />
Desmodium vines<br />
5 kg Silage (1 unit)<br />
Milk (litre)<br />
Other benefit<br />
General observations (AESA): Farmer’s fields<br />
General information<br />
Date<br />
Planting date<br />
Variety<br />
Observations Farmer’s comments<br />
Rainfall: Number of days<br />
it rained the week before:<br />
_______<br />
Soil moisture<br />
Low Medium High<br />
Weather: Sunny/Cloudy/Rainy Windy/Still Hot/ Cold<br />
Push-pull curriculum | 115
Week 3<br />
Topic Duration What you need for this lesson<br />
1 Gapping maize 30 minutes Maize seeds, pen, Jembes/hoes, Pegs, Sharp<br />
2 Weeding and topdressing desmodium<br />
seed multiplication plot<br />
Topic 1: Gapping maize<br />
Duration: 30 minutes<br />
Note<br />
30 minutes<br />
You did this lesson in First Season, Week<br />
2. Please refer to details in the lesson.<br />
Remember that you do not need to apply fertilizer<br />
during gapping because you applied when you<br />
planted your maize<br />
Labour costs<br />
Push-pull Vine<br />
Plot<br />
Total<br />
Established Pushpull<br />
plot<br />
Total<br />
Check Plot<br />
Total<br />
Seed Multiplication<br />
plot<br />
Total<br />
Activity No of people<br />
working on<br />
this activity<br />
Gapping<br />
maize<br />
Any other<br />
activity<br />
Gapping<br />
maize<br />
Any other<br />
activity<br />
Gapping<br />
maize<br />
Any other<br />
activity<br />
Fertilizer application<br />
sticks, strings, tape measure, ruler, desmodium<br />
seeds (100 grams) and TSP fertilizer.<br />
Topic 2: Weeding and<br />
topdressing desmodium seed<br />
multiplication plot<br />
You did this lesson in First Season. Please<br />
refer to details in Season 1, Week 7.<br />
Time taken to<br />
complete the<br />
activity (hours)<br />
Cost of<br />
labour per<br />
day<br />
Total cost of<br />
this activity<br />
Push-pull curriculum | 117
Input costs<br />
Seed Multiplication<br />
plot<br />
Total<br />
118 | Push-pull curriculum<br />
Input used Quantity used Cost<br />
Fertilizer<br />
Other<br />
Benefits of livestock feed (Please keep filling the number of units each week as you cut)<br />
Push-pull<br />
plot<br />
Type of benefit Quantity Unit market price Total value<br />
10 Kg Napier grass (1 Unit)<br />
3 Kg Desmodium (1 Unit)<br />
Desmodium vines<br />
5 kg Silage (1 unit)<br />
Milk (litre)<br />
Other benefit<br />
General observations (AESA): Farmer’s fields<br />
General information<br />
Date<br />
Planting date<br />
Variety<br />
Crop Emergence<br />
Observations Farmer’s comments<br />
Rainfall: Number of days<br />
it rained the week before:<br />
______<br />
Soil moisture<br />
Low Medium High<br />
Weather: Sunny/Cloudy/Rainy Windy/Still Hot/ Cold
Week 4<br />
Topic Duration What you need for this lesson<br />
1 Gapping Napier in the new plot 30 minutes Napier grass cuttings/root splits/vines, hoe/stick, Push-pull<br />
manual, pen and paper<br />
2 Group assessment 3 hours All records, Calculator, Flip chart, Marker pens;<br />
Record samples of receipts and expenses on crops and<br />
livestock enterprises; record sheets; and flip charts/chalkboards,<br />
markers, exercise books, pens.<br />
Topic 1: Gapping Napier in the<br />
new plot<br />
You did this lesson in Season 1. Please<br />
refer to the details in Season 1, Week 3.<br />
Topic 2: Group assessment<br />
Introduction<br />
Now you have been working together as<br />
a group for several months and you have<br />
had time to apply on your farm what you<br />
have learnt in the field school. It is time<br />
to go out and see how you and your colleagues<br />
have laid out your new Push-pull<br />
and how you are managing your established<br />
plot so that you can:<br />
1. Maximise your learning from each<br />
other’s experiences<br />
2. Correct any mistakes that may have<br />
been made.<br />
This is the third group assessment since<br />
you started the Push-pull farmer field<br />
school. As with the first assessment in<br />
Season 1,Week 3, and second group<br />
assessment in Season 1, Week 12 this<br />
is a good time to check that everything is<br />
being done properly and if not, correct any<br />
mistakes.<br />
Learning objective<br />
The objective of this assessment is to<br />
maximize learning through group evaluation.<br />
Learning activities<br />
Facilitator-led introduction on group<br />
evaluation<br />
Form evaluation groups<br />
Farm visits, observations and<br />
completion of evaluation forms by<br />
groups<br />
Discussion<br />
What to do in the assessment<br />
Step 1: Make groups of 4-6 members.<br />
Step 2: Visit each farm represented by the<br />
members in the group.<br />
Step 3: Use the table on the next page to<br />
assess the Push-pull and the Check plots,<br />
and discuss with the host farmer. Rate<br />
each farm using this scale:<br />
1 = Poor 2 = Average 3 = Good<br />
Push-pull curriculum | 119
120 | Push-pull curriculum<br />
2 Nd season push-pull<br />
plot<br />
2 Nd season check<br />
plot<br />
1 St season push-pull with<br />
vines<br />
What to check Rating Comments Rating Comments Rating Comments<br />
Field preparation<br />
Layout of the field<br />
Cleanliness of the plots<br />
Germination of maize<br />
Napier grass establishment<br />
Napier grass maintenance<br />
Napier grass cutting<br />
Trimming desmodium<br />
Weeding desmodium<br />
Sprouting of desmodium<br />
vines<br />
Record-keeping<br />
Total rates<br />
Other comments on the Seed multiplication plot (Rate 1 to 3):<br />
1 = poor 2 = Average 3 = good<br />
More comments:______________________________________________________<br />
__________________________________________________________________<br />
_____________________________________________________________________________________<br />
_____________________________________________________________________________________<br />
_____________________________________________________________________________________<br />
____________________________________________________________________________________<br />
Labour costs<br />
Push-pull Vine<br />
Plot<br />
Total<br />
Activity No of people<br />
working on<br />
this activity<br />
Gapping<br />
Napier<br />
Any other<br />
Activity<br />
Time taken to<br />
complete the<br />
activity (hours)<br />
Cost of<br />
labour per<br />
day<br />
Total cost of<br />
this activity
Benefits (Please keep filling the number of units each week as you cut)<br />
Push-pull<br />
plot<br />
Type of benefit Quantity Unit market price Total value<br />
10 Kg Napier grass (1 Unit)<br />
3 Kg Desmodium (1 Unit)<br />
Desmodium vines<br />
1 kg Desmodium hay<br />
5 kg Silage (1 unit)<br />
Milk (litre)<br />
Other benefit<br />
General observations (AESA): Farmer’s fields<br />
General information<br />
Date<br />
Crop Health Poor Average Good<br />
• Maize Push-pull plot<br />
• Napier grass sprouting<br />
• Desmodium<br />
Observations Farmer’s comments<br />
Stemborers<br />
Striga<br />
Rainfall: Number of days<br />
it rained the week before:<br />
______<br />
Soil moisture<br />
Low Medium High<br />
Weather: Sunny/Cloudy/Rainy Windy/Still Hot/ Cold<br />
Push-pull curriculum | 121
Week 5<br />
Topic Duration What you need for this lesson<br />
1 Analysis of household assets 2 hours Push-pull manual, pen, markers, flips charts.<br />
2 Emerging issues of interest 2 hours<br />
Topic 1: Analysis of household<br />
assets<br />
Learning objectives<br />
On completion of this topic participants will<br />
be able to:<br />
Explain the different types of assets<br />
Discuss how Push-pull can contribute to<br />
household assets<br />
Learning activities<br />
Notes<br />
Facilitator-led introduction on meaning<br />
and importance of doing asset analysis<br />
Groups of 4-6 members brainstorm on<br />
the various types of assets and how<br />
Push-pull can contribute to these<br />
Facilitator-led discussion on asset<br />
analysis and how asset growth can be<br />
influenced by adoption of Push-pull<br />
• Financial - This denotes the financial resources<br />
that people use to achieve their livelihood<br />
objectives. It includes the availability of cash or<br />
equivalent that enables people to adopt different<br />
livelihood strategies<br />
• Human - This represents the skills, knowledge,<br />
ability to labour and good health that together<br />
enable people to pursue different livelihood<br />
strategies and achieve their livelihood objectives<br />
• Social - This is taken to mean the social<br />
resources upon which people draw in pursuit of<br />
their livelihood objectives<br />
• Physical - This represents capital that is created<br />
by economic production. It includes infrastructure<br />
such as roads, irrigation works, electricity,<br />
housing, etc.<br />
Natural - This consists of land, water and<br />
biological resources such as trees, pastures and<br />
biodiversity<br />
Topic 2: Emerging issues of<br />
interest<br />
When farmers meet in groups, they discuss<br />
the results of their experimentation,<br />
learning from one another and devising<br />
new ways to solve problems. Training in<br />
groups is helpful in many ways: mutual<br />
learning is encouraged, solidarity is built,<br />
and a base is created for further technological<br />
discussion and problem solving. This<br />
process brings up new issues of interest to<br />
farmers. This session is meant to discuss,<br />
clarify, and/or plan for appropriate action.<br />
Learning objectives<br />
On completion of this topic participants will<br />
be able to:<br />
Discuss some key issues that have<br />
emerged after attending the field school<br />
so far<br />
Plan for appropriate action<br />
Learning activities<br />
Facilitator-led introduction on the<br />
importance of addressing emerging new<br />
issues<br />
Through focus groups, participants<br />
brainstorm on new emerging issues<br />
(Lead questions: What interesting issue<br />
have you observed or felt that requires<br />
discussion with the rest of the group?<br />
How does it affect you? How does it<br />
affect other members? What needs to<br />
be done to address the issue?)<br />
Facilitator-led discussion on key issue<br />
summarized from group presentations<br />
Push-pull curriculum | 123
Benefits (Please keep filling the number of units each week as you cut)<br />
Push-pull<br />
plot<br />
124 | Push-pull curriculum<br />
Type of benefit Quantity Unit market price Total value<br />
10 Kg Napier grass (1 Unit)<br />
3 Kg Desmodium (1 Unit)<br />
Desmodium vines<br />
1 kg Desmodium hay<br />
5 kg Silage (1 unit)<br />
Milk (litre)<br />
Other benefit<br />
General observations (AESA): Farmer’s fields<br />
General information<br />
Date<br />
Crop age<br />
Crop Health Poor Average Good<br />
• Maize<br />
• Napier grass<br />
• Desmodium<br />
Observations Farmer’s comments<br />
Rainfall: Number of days:<br />
____<br />
Soil moisture<br />
Low Medium High<br />
Weather: Sunny/Cloudy/Rainy Windy/Still Hot/ Cold<br />
Other comments:<br />
___________________________________________________________________________<br />
___________________________________________________________________________<br />
___________________________________________________________________________<br />
___________________________________________________
Week 6<br />
Topic Duration What you need for this<br />
lesson<br />
1 1 st weeding, thinning and top dressing of maize 1 hour 30<br />
minutes<br />
2 1 st weeding and top dressing of Napier grass in both push-pull<br />
plots<br />
1 hour<br />
3 Desmodium weeding and trimming (established Push-pull crop) 30 minutes<br />
4 1 st weeding desmodium in the vine-established Push-pull plot 30 minutes<br />
5 Weeding and rouging (removing off-types) on the desmodium<br />
seed multiplication plot<br />
Topic 1: 1 st weeding, thinning<br />
and top dressing of maize<br />
Follow instructions in Season 1, Week 5<br />
Topdress after the dew has dried from the<br />
leaves; fertilizer falling on the leaves burns<br />
them.<br />
Topic 2: 1 st weeding and top<br />
dressing Napier grass in both<br />
Push-pull plots<br />
Follow the instructions for the lesson in<br />
First Season 1, Week 5<br />
Topdress after the dew has dried from the<br />
leaves. This way, if any fertilizer falls on the<br />
leaves, it will not burn the plant.<br />
Topic 3: Weeding and<br />
trimming desmodium<br />
(established Push-pull crop)<br />
Introduction<br />
If you managed your desmodium well in<br />
the first season, it is now well established.<br />
If let alone it can grow faster than your<br />
maize. You must trim it so that it does not<br />
compete with your maize for soil nutrients<br />
and light. If you delay in trimming, it can<br />
suppress the growth of maize and so reduce<br />
the yields from your plot.<br />
After you have trimmed the desmodium,<br />
30 minutes<br />
Jembe, hoe, Sharp<br />
stick., CAN fertiliser,<br />
teaspoon/soda bottle top<br />
you must also weed it otherwise weeds will<br />
compete for nutrients and light.<br />
If managed properly the desmodium will<br />
last for more than five years.<br />
Refer to Season 1, Weeks 5 and 7.<br />
Topic 4: 1 st weeding<br />
desmodium in the vineestablished<br />
Push-pull plot<br />
Introduction<br />
The desmodium plot you established using<br />
vines is now ready for weeding. The vines<br />
grow faster than seedlings. However, some<br />
weeds still grow within the vines and they<br />
must be removed.<br />
Step 1: Walk between the rows of desmodium<br />
vines. Using a sharp stick loosen the soils<br />
around the weeds and carefully remove the<br />
weeds by hand.<br />
Note<br />
Do not weed if the soil is dry as this can destroy<br />
the desmodium roots and kill the plant.<br />
Push-pull curriculum | 125
Topic 5: Weeding and rouging (removing off-types) on the<br />
desmodium seed multiplication plot<br />
Introduction<br />
If you are maintaining a desmodium seed multiplication plot you must:<br />
Weed the plot<br />
Keep the surrounding 2 m clear of all other plants. As the desmodium grows it will spread<br />
and cover the 2 m space<br />
Ensure that there are no off-types present in the plot<br />
Step 1: Clear a 2 m strip around the desmodium plot using a panga and a jembe.<br />
Step 2: Walk within the vines and using a sharp stick loosen the soils around the weeds and<br />
carefully remove weeds and off-types by hand.<br />
Input costs<br />
Established Pushpull<br />
plot<br />
Total<br />
Vine Push-pull<br />
plot<br />
Total<br />
126 | Push-pull curriculum<br />
Input used Quantity used Cost<br />
Fertilizer<br />
Other<br />
Fertlizer<br />
Other<br />
Check plot Fertilizer<br />
Total<br />
Seed Multiplication<br />
plot<br />
Total<br />
Other<br />
Fertilizer<br />
Other
Labour costs<br />
Push-pull<br />
Vine Plot<br />
Total<br />
Established Pushpull<br />
plot<br />
Total<br />
Check plot<br />
Total<br />
Seed Multiplication<br />
plot<br />
Total<br />
Activity No of people<br />
working on<br />
this activity<br />
Weeding and<br />
thinning maize<br />
Top dressing<br />
maize<br />
Weeding and<br />
top dressing<br />
Napier<br />
Weeding<br />
desmodium<br />
Any other<br />
activity<br />
Weeding and<br />
thinning maize<br />
Top dressing<br />
maize<br />
Weeding and<br />
top dressing<br />
Napier<br />
Weeding<br />
and trimming<br />
desmodium<br />
Any other<br />
activity<br />
Weeding and<br />
thinning maize<br />
Top dressing<br />
maize<br />
Weeding and<br />
rouging<br />
Fertilizer application<br />
Time taken to<br />
complete the<br />
activity (hours)<br />
Cost of<br />
labour per<br />
day<br />
Total cost of<br />
this activity<br />
Push-pull curriculum | 127
Benefits (Please keep filling the number of units each week as you cut)<br />
Push-pull<br />
plot<br />
128 | Push-pull curriculum<br />
Type of benefit Quantity Unit market price Total value<br />
10 Kg Napier grass (1 Unit)<br />
3 Kg Dsmodium (1 Unit)<br />
Desmodium vines<br />
5 kg Silage (1 unit)<br />
1 kg Desmodium hay (1 unit)<br />
Milk (litre)<br />
Other benefit<br />
General observations (AESA): Farmer’s fields<br />
General information<br />
Date<br />
Planting date<br />
Crop emergence<br />
Maize Napier grass Desmodium<br />
Observations Farmer’s comments<br />
Rainfall: Number of<br />
days it rained the week<br />
before: ______<br />
Soil moisture<br />
Low Medium High<br />
Weather: Sunny/Cloudy/Rainy Windy/Still Hot/ Cold
Week 7<br />
Topic Duration What you need for this lesson<br />
1 Utilization of fresh desmodium and hay 1 hour A panga, ruler or tape measure, jembe, chopping<br />
log, gunny bags, polythene sheets<br />
2 Comparison of stemborer and striga<br />
damage between Push-pull and control<br />
plots<br />
Topic 1: Utilization of fresh<br />
desmodium and hay<br />
You learnt how to use fresh desmodium<br />
and how to prepare desmodium hay in<br />
Season 1, Week 13 and Week 16. Please<br />
follow the same instructions.<br />
Learning activities<br />
Facilitator–led introduction on<br />
importance of a balanced animal ration<br />
Practical activities on Napier grass and<br />
desmodium chopping<br />
Practical activities on desmodium and<br />
Napier ration mixture<br />
Facilitator–led discussion on importance<br />
of Napier and desmodium as feed<br />
How to correctly utilize fodder from<br />
Push-pull<br />
Note<br />
• During the wet season cut Napier and leave it in<br />
the open for at least 30 minutes before chopping.<br />
This allows the Napier to lose some water (wilt)<br />
and increases the roughage eaten by the livestock<br />
• To avoid wastage the chopped forage should be<br />
fed to livestock in a feed trough<br />
• During the dry season, chop the maize stover into<br />
small pieces and mix with the chopped Napier<br />
grass and desmodium<br />
• Always remember to give your livestock the<br />
recommended mineral supplements<br />
• Never allow livestock to graze in the Push-pull<br />
plot as they will destroy the desmodium and the<br />
Napier grass<br />
2 hours Samples of striga at various stages of growth,<br />
knives, pictures of damaged plants, hoe, flip<br />
charts, posters, marker pens, masking tapes<br />
Topic 2: Comparing stemborer<br />
and striga damage between<br />
Push-pull and Check plots<br />
By now your maize is 6 weeks old and it<br />
will be showing signs of striga and stemborer<br />
damage. It is time to start evaluating<br />
how your Push-pull plots are performing as<br />
compared to your Check plot, as you did<br />
in Season1, Week 8. The first thing is to<br />
check for stemborers and striga attack.<br />
Learning objectives<br />
On completion of this topic participants will<br />
start to evaluate the effectiveness of Pushpull<br />
in controlling stemborers and striga.<br />
Learning activities<br />
Facilitator-led introduction to stemborer<br />
and striga damage<br />
Field exercises<br />
Discussions (Are there any differences<br />
between the plots?)<br />
Step 1: Starting from one corner, walk to the<br />
opposite corner (diagonally) of any plot. As<br />
you walk stop at every fifth plant and look<br />
for any sign of stemborer and striga damage.<br />
Record what you have noticed.<br />
Look for:<br />
Signs of stemborer damage<br />
• Leaf damage<br />
• Deadheart<br />
Push-pull curriculum | 129
Signs of striga damage<br />
• Stunted growth<br />
The number of striga plants within 15<br />
cm around the plant<br />
Step 2: Repeat Step 1 from a different corner<br />
and walk diagonally to the opposite corner.<br />
2 nd season Push-pull plot<br />
What to record Number *Percent damage<br />
Total number of plants observed<br />
Total number of plants with signs of stemborer leaf damage<br />
Total number of plants with deadheart<br />
Total number of striga stunted plants<br />
Total number of striga weeds around maize plants (15 cm)<br />
*The facilitator will work out the percentages and discuss them with the farmers<br />
Vine established Push-pull plot<br />
What to record Number *Percent damage<br />
Total number of plants observed<br />
Total number of plants with signs of stemborer leaf damage<br />
Total number of plants with deadheart<br />
Total number of striga stunted plants<br />
Total number of striga weeds around maize plants (15 cm)<br />
*The facilitator will work out the percentages and discuss them with the farmers<br />
Check plot<br />
What to record Number *Percent damage<br />
Total number of plants observed<br />
Total number of plants with signs of stemborer leaf damage<br />
Total number of plants with deadheart<br />
Total number of striga stunted plants<br />
Total number of striga weeds around maize plants (15 cm)<br />
*The facilitator will work out the percentages and discuss them with the farmers<br />
130 | Push-pull curriculum<br />
Step 3: Repeat Steps 1 and 2 in the other<br />
plots.<br />
Note<br />
At the end of the exercise you will have looked at<br />
more plants in the Check plot than in the Push-pull<br />
plots.
Labour costs<br />
Established<br />
Push-pull plot<br />
Total<br />
Vine Push-pull<br />
plot<br />
Total<br />
Activity No of people<br />
working on<br />
this activity<br />
Harvesting 10<br />
kg of Napier<br />
grass *<br />
Harvesting 3<br />
kg of desmodium*<br />
Any other<br />
activity<br />
Harvesting 10<br />
kg of Napier<br />
grass *<br />
Harvesting 3<br />
kg of desmodium*<br />
Any other<br />
activity<br />
Time taken to<br />
complete the<br />
activity (hours)<br />
Benefits (Please keep filling the number of units each week as you cut)<br />
Push-pull<br />
plot<br />
Vine Pushpull<br />
Cost of<br />
labour per<br />
day<br />
Total cost of<br />
this activity<br />
Type of benefit Quantity Unit market price Total value<br />
10 Kg Napier grass (1 Unit)<br />
3 Kg desmodium (1 Unit)<br />
Desmodium vines<br />
5 kg Silage (1 unit)<br />
1 Kg Desmodium hay (Unit)<br />
Milk (litre)<br />
Other benefit<br />
10 Kg Napier grass (1 Unit)<br />
3 Kg Desmodium (1 Unit)<br />
1 Kg Desmodium vines (Unit)<br />
5 kg Silage (1 unit)<br />
1 Kg hay (Unit)<br />
Milk (litre)<br />
Other benefit<br />
Push-pull curriculum | 131
General observations (AESA): Farmer’s fields<br />
General information<br />
Date<br />
Date planted<br />
Crop Health Poor Average Good<br />
• Maize Push-pull plot<br />
• Napier grass<br />
• Desmodium<br />
Observations Farmer’s comments<br />
Stemborers<br />
Striga<br />
Rainfall: Number of days<br />
it rained the week before:<br />
______<br />
Soil moisture<br />
132 | Push-pull curriculum<br />
Low Medium High<br />
Weather: Sunny/Cloudy/Rainy Windy/Still Hot/ Cold
Week 8<br />
Topic Duration What you need for this lesson<br />
1 2 nd weeding of maize and Napier and 2 nd trimming and<br />
weeding of desmodium in established Push-pull plot<br />
1 hour 30<br />
minutes<br />
2 Utilization of trimmed desmodium 2 hours<br />
Topic 1: 2 nd weeding of maize<br />
and Napier and 2 nd trimming<br />
and weeding of desmodium in<br />
established Push-pull plot<br />
It is two weeks since you last weeded<br />
your plots and new weeds have now<br />
grown. You must weed them to keep<br />
your plot free of weeds<br />
It is also two weeks since you last<br />
trimmed the desmodium in your<br />
established Push-pull plot. It is now time<br />
to trim it again, otherwise it will compete<br />
with your maize. It is also time to weed<br />
the desmodium<br />
The desmodium in the vine established<br />
Push-pull plot may also need trimming,<br />
depending on the amount of rain<br />
you have received. It may also need<br />
weeding<br />
Learning activities<br />
Facilitator-led introduction to the<br />
importance of trimming desmodium and<br />
weeding all the crops: maize, Napier<br />
and desmodium<br />
Practical activities on trimming and<br />
weeding<br />
Facilitator led discussions<br />
A panga, ruler or tape measure,<br />
jembe, chopping log, gunny bags,<br />
polythene sheets<br />
Desmodium cuttings<br />
Desmodium trimming and weeding<br />
Step 1: Using a sharp panga, trim the desmodium<br />
so that its leaves do not touch the<br />
base of the maize. Feed the cut desmodium<br />
to your livestock. See Topic 2 below.<br />
Step 2: Weed the desmodium using a panga<br />
or a small narrow hoe.<br />
Maize and Napier weeding<br />
Note<br />
Carefully weed your maize and Napier<br />
grass using a jembe or hoe.<br />
As you learnt in Season 1, some farmers in striga<br />
infested areas apply fertilizer when maize is 3<br />
weeks and when it is 5 weeks old.<br />
Topic 2: Utilization of trimmed<br />
desmodium<br />
Introduction<br />
When you trim desmodium, especially in<br />
the Second Season, you might have more<br />
fodder than you need for the day. You can<br />
conserve the extra desmodium as hay<br />
to use in times of need ( See Season 1,<br />
Week 13 and Week 16).<br />
The freshly-trimmed desmodium can be<br />
used directly as livestock feed (Please see<br />
Season 1, Week 13).<br />
Push-pull curriculum | 133
Labour costs<br />
Established<br />
Push-pull plot<br />
Total<br />
Vine-established<br />
Push-pull<br />
Total<br />
Check plot<br />
Total<br />
134 | Push-pull curriculum<br />
Activity No of people<br />
working on<br />
this activity<br />
Weeding<br />
maize<br />
Weeding<br />
Napier<br />
Trimming<br />
desmodium<br />
Any other<br />
activity<br />
Weeding<br />
maize<br />
Weeding<br />
Napier<br />
Trimming<br />
desmodium<br />
Any other<br />
activity<br />
Weeding<br />
maize<br />
Other activity<br />
Time taken to<br />
complete the<br />
activity (hours)<br />
Cost of<br />
labour per<br />
day<br />
Benefits (Please keep filling the number of units each week as you cut)<br />
Total cost of<br />
this activity<br />
Type of benefit Quantity Unit market price Total value<br />
Push-pull plot 10 Kg Napier grass (1 Unit)<br />
3 Kg Desmodium (1 Unit)<br />
1 kg Desmodium hay (1 unit)<br />
5 kg Silage (1 unit)<br />
Milk (litre)<br />
Other benefit
General observations (AESA): Farmer’s fields<br />
General information<br />
Date<br />
Crop age<br />
Crop health Poor Average Good<br />
• Maize Push-pull plot<br />
• Napier grass<br />
• Desmodium<br />
Observations Farmer’s comments<br />
Stemborers Low Medium High<br />
• Established Push-pull plot<br />
• Vine Push-pull plot<br />
• Check plot<br />
Striga Low Medium High<br />
• Established Push-pull plot<br />
• Vine Push-pull plot<br />
• Check plot<br />
Rainfall: Number of days<br />
it rained the week before:<br />
____<br />
Soil moisture<br />
Weather: Sunny/Cloudy/Rainy Windy/Still Hot/ Cold<br />
Note<br />
Please record stemborer and striga damage as Low, Medium, or High<br />
Push-pull curriculum | 135
Week 9<br />
Topic Duration What you need for this lesson<br />
1 Comparng stemborers and striga between<br />
Push-pull plots and Check plot<br />
2 2 nd Weeding and rouging of desmodium<br />
seed plot<br />
Topic 1: Comparing<br />
stemborers and striga<br />
between Push-pull plots and<br />
Check plot<br />
By now your maize is 8 weeks old and it<br />
will be showing more signs of striga and<br />
stemborer damage. You need to continue<br />
monitoring how your Push-pull plots are<br />
performing as compared to your Check<br />
plot.<br />
Learning objectives<br />
In this lesson participants will continue their<br />
evaluation of the effectiveness of Push-pull<br />
in controlling stemborers and striga.<br />
Learning activities<br />
Facilitator-led introduction on stemborer<br />
and striga damage<br />
Field exercise<br />
Discussions<br />
Step 1: Starting from one corner, walk to the<br />
opposite corner (diagonally) of any plot. As<br />
2 nd season Push-pull plot<br />
2 hours Samples of striga at various stages of growth,<br />
knives, pictures of damaged plants, hoe, flip<br />
1 hour 30<br />
minutes<br />
charts, posters, marker pens, masking tapes,<br />
sharp sticks<br />
you walk stop at every fifth plant and look<br />
for any sign of stemborer and striga damage.<br />
Record what you have noticed.<br />
Look for:<br />
Signs of stemborer damage<br />
• Leaf damage<br />
• Deadheart<br />
Signs of striga damage<br />
• Stunted growth<br />
• The number of striga plants within 15<br />
cm around the plant<br />
Step 2: Repeat Step 1 from a different corner<br />
and walk diagonally to the opposite corner.<br />
Step 3: Repeat Steps 1 and 2 in the other<br />
plots.<br />
Note<br />
At the end of the exercise you will have looked at<br />
more plants in the Check plot than in the Push-pull<br />
plots.<br />
What to record Number *Percent damage<br />
Total number of plants observed<br />
Total number of plants with signs of stemborer leaf damage<br />
Total number of plants with deadheart<br />
Total number of striga stunted plants<br />
Total number of striga weeds around maize plants (15 cm)<br />
*The facilitator will work out the percentages and discuss them with the farmers<br />
Push-pull curriculum | 137
Vine established Push-pull plot<br />
What to record Number *Percent damage<br />
Total number of plants observed<br />
Total number of plants with signs of stemborer leaf damage<br />
Total number of plants with deadheart<br />
Total number of striga stunted plants<br />
Total number of striga weeds around maize plants (15 cm)<br />
*The facilitator will work out the percentages and discuss them with the farmers<br />
Check plot<br />
What to record Number *Percent damage<br />
Total number of plants observed<br />
Total number of plants with signs of stemborer leaf damage<br />
Total number of plants with deadheart<br />
Total number of striga stunted plants<br />
Total number of striga weeds around maize plants (15 cm)<br />
*The facilitator will work out the percentages and discuss them with the farmers<br />
Topic 2: 2 nd Weeding and rouging of desmodium seed plot<br />
Introduction<br />
It is three weeks since you last weeded and rogued the desmodium seed multiplication plot. It<br />
is now time to do it again.<br />
Step 1: Clear a 2 m strip around the desmodium plot using a panga and a jembe.<br />
Step 2: Walk within the vines and using a sharp stick loosen the soils around the weeds and<br />
carefully remove weeds and off-types by hand (See Week 28).<br />
Labour costs<br />
Seed multiplication<br />
plot<br />
Total<br />
138 | Push-pull curriculum<br />
Activity No of people<br />
working on<br />
this activity<br />
Weeding<br />
and rouging<br />
desmodium<br />
Any other<br />
activity<br />
Time taken to<br />
complete the<br />
activity (hours)<br />
Cost of<br />
labour per<br />
day<br />
Total cost of<br />
this activity
Benefits of livestock feed (Please keep filling the number of units each week as you cut)<br />
Push-pull<br />
plot<br />
Type of benefit Quantity Unit market price Total value<br />
10 Kg Napier grass (1 Unit)<br />
3 Kg Desmodium (1 Unit)<br />
1 kg Desmodium hay<br />
5 kg Silage (1 unit)<br />
Milk (litre)<br />
Other benefit<br />
General observations (AESA): Farmer’s fields<br />
General information<br />
Date<br />
Crop age<br />
Crop health Poor Average Good<br />
• Maize Push-pull plot<br />
• Napier grass<br />
• Desmodium<br />
Observations Farmer’s comments<br />
Stemborers Low Medium High<br />
• Established Push-pull plot<br />
• Vine Push-pull plot<br />
• Check plot<br />
Striga Low Medium High<br />
• Established Push-pull plot<br />
• Vine Push-pull plot<br />
• Check plot<br />
Rainfall: Number of days<br />
it rained the week before:<br />
____<br />
Soil moisture<br />
Weather: Sunny/Cloudy/Rainy Windy/Still Hot/ Cold<br />
Farmers’ comments after the lesson: _____________________________________________<br />
__________________________________________________________________________________<br />
___________________________________________________________________________________<br />
__________________________________________________________________<br />
Push-pull curriculum | 139
Week 10<br />
Topic Duration What you need for this lesson<br />
1 Improving soil fertility 45 minutes Jembe, Panga, Clear polythene bags. Pens, flip chart<br />
Topic: Improving soil fertility<br />
In Season 1, Week 20 we discussed the<br />
need to keep your soil healthy. It is now<br />
time to see if there are any changes in the<br />
soil.<br />
Learning objectives<br />
On completion of this topic farmers will understand<br />
more about the important aspects<br />
of soil fertility and how Push-pull helps<br />
improve soil health.<br />
Learning activities<br />
Facilitator-guided introduction on<br />
improving soil fertility<br />
Observations of soil fertility indicators<br />
Soil quality<br />
indicator<br />
Discussions of any changes in the plots<br />
between Season 1, Week 22 and now<br />
How to tell if your soil is getting<br />
healthier<br />
Step 1: Go to the established Push-pull plot<br />
and pull out 10 mature vines and wash the<br />
roots carefully. Observe for nodules.<br />
Note<br />
The nodules have good bacteria (rhizobium) that<br />
helps to add nitrogen to your soil that your plants<br />
can use (Nitrogen fixation). If the nodules are<br />
bigger, there is more nitrogen fixation in your soil.<br />
Step 2: Walk around the Push-pull plots<br />
and Check plot, observe and fill the table<br />
below.<br />
Established.<br />
Push-pull plot<br />
Push-pull plot<br />
with vines<br />
Check plot<br />
Soil quality indicator questions Yes No Yes No Yes No<br />
Organic matter Is the soil getting darker?<br />
Soil structure Is the soil getting softer underfoot?<br />
Is it easier to work on?<br />
Runoff Does rain soak into the soil quickly?<br />
(Rain soaks fast and water<br />
does not stay on the surface.)<br />
Soil moisture Does the soil stay moist for longer<br />
period after rains?<br />
Soil life (aeration) Does the soil have many earthworms?<br />
Are there many holes in<br />
the soil, and worm casts on the<br />
surface?<br />
Crop yields Are your yields improving?<br />
Roots Do the crop roots grow well?<br />
Presence of<br />
weeds<br />
Do the soils have the type of<br />
weeds that like to grow on fertile<br />
soils?<br />
If you answered Yes to these questions, your soil is getting better! If you answered No, discuss the reasons<br />
Push-pull curriculum | 141
Benefits of livestock feed (Please keep filling the number of units each week as you cut)<br />
142 | Push-pull curriculum<br />
Type of benefit Quantity Unit market price Total value<br />
Push-pull plot 10 Kg Napier grass (1 Unit)<br />
3 Kg Desmodium (1 Unit)<br />
1 kg Desmodium hay<br />
5 kg Silage (1 unit)<br />
Milk (litre)<br />
Other benefit<br />
General observations (AESA): Farmer’s fields<br />
General information<br />
Date<br />
Crop age<br />
Crop Health Poor Average Good<br />
• Maize Push-pull plot<br />
• Napier grass<br />
• Desmodium<br />
Observations Farmer’s comments<br />
Stemborers Low Medium High<br />
• Established Push-pull plot<br />
• Vine Push-pull plot<br />
• Check plot<br />
Striga Low Medium High<br />
• Established Push-pull plot<br />
• Vine Push-pull plot<br />
• Check plot<br />
Rainfall: Number of days<br />
it rained the week before:<br />
____<br />
Soil moisture<br />
Weather: Sunny/Cloudy/Rainy Windy/Still Hot/ Cold<br />
Farmers’ comments after the lesson: ______________________________________________<br />
___________________________________________________________________________<br />
___________________________________________________________________________<br />
___________________________________________________________________________
Week 11<br />
Topic Duration What you need for this lesson<br />
1 Maize diseases 4 hours Pictures of diseased maize, flip charts, pens, marker<br />
pens, samples of IR-maize<br />
2 IR maize<br />
3 Planning Field Day<br />
Topic 1: Maize diseases<br />
Introduction<br />
Some of the common diseases that affect<br />
maize include: Maize streak, Smut, Grey<br />
leaf spot, Leaf rust and Blight. In each area<br />
there are maize varieties that are resistant<br />
or tolerant to these diseases. In order to<br />
maximize maize production from Push-pull,<br />
farmers must use the right variety of maize.<br />
Learning objective<br />
On completion of this topic farmers will<br />
know more about maize diseases and the<br />
available disease resistant varieties of<br />
maize in their area.<br />
Learning activities<br />
Facilitator-led introduction on maize<br />
diseases<br />
Practical exercise: Participants list<br />
maize diseases, their symptoms and<br />
disease-resistant maize varieties<br />
Discussion: (Lead question: What do<br />
farmers know about maize diseases,<br />
and what resistant varieties are locally<br />
available?)<br />
Maize diseases and disease-resistant<br />
maize varieties<br />
The following are some of the diseases<br />
that affect maize, and how to recognize<br />
them.<br />
1. Gray Leaf Spot (GLS)<br />
This disease is common in eastern and<br />
southern Africa. It is caused by a fungus.<br />
The development of the disease is fa-<br />
voured by long periods of leaf wetness and<br />
cloudy conditions. This can result in severe<br />
leaf death after flowering causing poor<br />
grain fill.<br />
Symptoms: The disease begins as small,<br />
regular, long brown-gray spots growing<br />
parallel to the leaf veins. The spots can<br />
reach 3 cm in length. Minimum tillage<br />
practices have been associated with an<br />
increased incidence of GLS.<br />
2. Maize streak virus (MSV)<br />
This disease is caused by a virus transmitted<br />
by a leafhopper called Cicadulina. It is<br />
presently reported in many African countries.<br />
Severe infection causes stunting, and<br />
plants can die prematurely or if they do not,<br />
they may not produce any cob.<br />
Symptoms: Early disease symptoms<br />
begin within a week after infection and consist<br />
of very small, round, scattered spots in<br />
the youngest leaves. The number of spots<br />
increase with plant growth: they enlarge<br />
parallel to the leaf veins. Soon more spots<br />
can be seen at leaf bases particularly<br />
on the youngest leaves. Fully elongated<br />
leaves develop broken yellow streaks<br />
along the veins, contrasting with the dark<br />
green colour of normal leaf.<br />
3. Blight<br />
Leaf blight (for example northern leaf<br />
blight) occurs throughout the world and<br />
particularly in areas where high humidity<br />
and moderate temperatures occur during<br />
Push-pull curriculum | 143
the maize growing season. When infection<br />
occurs before and at silking and conditions<br />
are humid and warm, the disease may<br />
cause significant losses in maize production.<br />
Symptoms: Early symptoms are easily<br />
recognized; slightly egg-shaped, watersoaked,<br />
small spots produced on the<br />
leaves. These grow into long, narrow,<br />
spindle-shaped disease areas on the leaf.<br />
They may appear first on lower leaves and<br />
increase in number as the plant develops,<br />
and can lead to complete burning of the<br />
leaves.<br />
Topic 2: Imazapyr-Resistant<br />
(IR) Maize<br />
CIMMYT and KARI have developed a<br />
new approach for striga control in maize.<br />
This technology combines low doses of a<br />
herbicide (Imazapyr), as a seed coat with<br />
herbicide-resistant maize. This prevents<br />
striga from attaching itself to the roots of<br />
maize plant. The herbicide also kills other<br />
surrounding weeds. Extensive on-farm testing<br />
in several countries in Africa has shown<br />
that the herbicide is highly effective. The<br />
treatment leaves a field virtually clear of<br />
emerging striga. This allows intercropping<br />
with legumes and increases yields by up to<br />
three-times. The herbicide does not affect<br />
intercrops when they are planted at least<br />
10 cm from maize hills.<br />
144 | Push-pull curriculum<br />
Trials have shown that IR maize could be<br />
used with the Push-pull system, particularly<br />
in the first season, when the desmodium is<br />
establishing.<br />
Topic 3: Field Day planning<br />
Field day is only five weeks away. There<br />
is a lot of work to do to make it a success.<br />
There are some suggestions in Season 2,<br />
Week 15 that you can use as a guide.<br />
To help you select the member’s farm to<br />
host the field day, we suggest that you use<br />
some or all of the criteria in tables referred<br />
to above.<br />
You will have a lot of things to do. Here<br />
are some suggestions:<br />
1. Assign responsibilities for the field day<br />
2. Tell people about it – the farming<br />
community, colleagues from other field<br />
schools, the provincial administration<br />
(DO, Chief, Assistant Chief, etc.), the<br />
Ministry of Agriculture, Livestock and<br />
Fisheries Extension staff, NGOs and<br />
CBOs, Church groups, schools, and the<br />
media (posters, radio, newspaper, etc.).<br />
3. Make a programme and agree on the<br />
time, what is to be covered, and stick to<br />
it.<br />
4. Make a budget.<br />
5. Prepare an evaluation sheet.<br />
Benefits of livestock feed (Please keep filling the number of units each week as you cut)<br />
Push-pull<br />
plot<br />
Type of benefit Quantity Unit market price Total value<br />
10 Kg Napier grass (1 Unit)<br />
3 Kg Desmodium (1 Unit)<br />
1 kg Desmodium hay<br />
5 kg Silage (1 unit)<br />
Milk (litre)<br />
Other benefit
General observations (AESA): Farmer’s fields<br />
General information<br />
Date<br />
Crop age<br />
Crop health Poor Average Good<br />
• Maize Push-pull plot<br />
• Napier grass<br />
• Desmodium<br />
Observations Farmer’s comments<br />
Stemborers Low Medium High<br />
• Established Push-pull plot<br />
• Vine Push-pull Plot<br />
• Check plot<br />
Striga Low Medium High<br />
• Established Push-pull plot<br />
• Vine Push-pull plot<br />
• Check plot<br />
Rainfall: Number of days<br />
it rained the week before:<br />
____<br />
Soil moisture<br />
Weather: Sunny/Cloudy/Rainy Windy/Still Hot/ Cold<br />
Push-pull curriculum | 145
Week 12<br />
Topic Duration What you need for this lesson<br />
1 Napier stunt disease and its management 2 hours Samples of a diseased plant (Must be destroyed<br />
immediately after use), a jembe<br />
2 Recording desmodium pests on Push-pull<br />
and seed multiplication plots<br />
Topic 1: Napier stunt disease<br />
and its management<br />
Introduction<br />
In eastern Africa (including Ethiopia), the<br />
major threat to livestock production and<br />
the adoption of Push-pull strategy comes<br />
from Napier stunt disease. The disease<br />
causes severe stunting of the Napier grass<br />
and a severe yield reduction creating a<br />
shortage of livestock feed. Napier stunt disease<br />
is spread by insects.<br />
At present, for small scale farmers, there<br />
is no affordable control for Napier stunt<br />
disease other than to remove and destroy<br />
the affected plants. If you do not remove<br />
the affected plants the disease will spread<br />
very quickly to the healthy plants.<br />
The symptoms of the disease appear only<br />
during the regrowth of harvested Napier.<br />
You need to recognize these symptoms<br />
so that you can reduce the spread of the<br />
disease.<br />
Learning objective<br />
On completion of this topic participants<br />
will recognize symptoms of Napier stunt<br />
disease and how to reduce its spread.<br />
Learning activity<br />
Facilitator-led introduction on:<br />
• The importance of the disease and<br />
how farmers can reduce its spread<br />
both on their farms and on the other<br />
farms<br />
• Recognizing the symptoms of the<br />
disease<br />
1 hours Plastic jars or clear bottles, clear plastic bags<br />
for handling the beetles<br />
Practical exercise: Identifying and<br />
destroying the affected plants<br />
Discussions<br />
Step 1: Discuss the symptoms<br />
What to look<br />
at<br />
Healthy plant Diseased<br />
plant<br />
Colour Green Yellow<br />
Leaves Wide Narrow<br />
Height Tall Stunted<br />
Internodes Long Short<br />
Step 2: Walk in the field and identify and<br />
record the diseased plants in the Push-pull<br />
plots and other Napier grass on the farm.<br />
Remove and destroy the diseased plants.<br />
Step 3: Take a root split from a healthy Napier<br />
grass and plant it where you uprooted the<br />
diseased plant.<br />
Note<br />
The new plant will not be affected by the disease<br />
simply by being planted in the same hole. The<br />
disease is spread by insects.<br />
Napier stunt disease incidence<br />
Established<br />
Push-pull<br />
Vine established<br />
Push-pull<br />
Other Napier<br />
grass on the farm<br />
Yes No Number of<br />
infected plants<br />
Push-pull curriculum | 147
Note<br />
To reduce the spread as much as possible you<br />
should walk around the farm and remove and<br />
destroy all the affected plants.<br />
Topic 2: Recording<br />
desmodium pests on Push-pull<br />
and seed multiplication plots<br />
Introduction<br />
In Season 1, Week 17 you learnt about<br />
Blister beetle pests of desmodium. We<br />
need to continue observing them and the<br />
flowers they are feeding on.<br />
Remember they are called Blister beetles<br />
because if you touch them they produce a<br />
chemical that can cause blisters on your<br />
skin.<br />
Learning objectives<br />
Participants continue to identify and record<br />
the common types of Blister beetles found<br />
on desmodium and what other crops they<br />
are damaging.<br />
148 | Push-pull curriculum<br />
Learning activities<br />
Facilitator-led introduction on the<br />
common types of Blister beetles found<br />
on desmodium and what other crops<br />
they damage<br />
Practical exercise (Field walks to collect<br />
Blister beetles)<br />
Discussions<br />
Procedure<br />
Step 1: Walk in the desmodium plot and collect<br />
samples of Blister beetles. Use plastic<br />
bags or gloves. Do not handle them with<br />
your bare hands. Use the drawings to<br />
identify the Beetles.<br />
Step 2: Walk around the farm and record<br />
the number of Blister beetles on different<br />
crops.<br />
Step 3: Destroy the beetles.<br />
Remember that at the moment there is no<br />
affordable method to control Blister beetles<br />
for small scale farmers. The record you are<br />
making now will help scientists to develop<br />
affordable control measures.<br />
Plot Type1 Type2 Type3 Type4 Grasshoppers<br />
Established Push-pull plot<br />
Desmodium multiplication plot<br />
Vine established Push-pull plot<br />
Check plot<br />
Other crops<br />
1<br />
2<br />
3<br />
4<br />
Please write the name of the crop.
Benefits (Please keep filling the number of units each week as you cut)<br />
Push-pull<br />
plot<br />
Type of Benefit Quantity Unit Market<br />
price<br />
10 Kg Napier grass (1 Unit)<br />
3 Kg Desmodium (1 Unit)<br />
1 kg Desmodium hay (1 unit)<br />
5 kg Silage (1 unit)<br />
Milk (litre)<br />
Other benefit<br />
General observations (AESA): Farmer’s fields<br />
General Information<br />
Date<br />
Crop age<br />
Crop Health Poor Average Good<br />
• Maize Push-pull plot<br />
• Napier grass<br />
• Desmodium<br />
Observations Farmer’s comments<br />
Stemborers Low Medium High<br />
• Established Push-pull plot<br />
• Vine Push-pull plot<br />
• Check plot<br />
Striga Low Medium High<br />
• Established Push-pull plot<br />
• Vine Push-pull plot<br />
• Check plot<br />
Rainfall: Number of days<br />
it rained the week before:<br />
____<br />
Soil moisture<br />
Weather: Sunny/Cloudy/Rainy Windy/Still Hot/ Cold<br />
Total Value<br />
Push-pull curriculum | 149
Week 13<br />
Topic Duration What you need for this lesson<br />
1 Planning Field Day 3 hours<br />
Topic: Planning for Field Day<br />
Field day is only three weeks away. There<br />
is a lot of work to do to make it a success.<br />
The suggestions in Season 2, Week 15<br />
should guide you to prepare for this important<br />
day.<br />
Benefits (Please keep filling the number of units each week as you cut)<br />
Established<br />
Push-pull plot<br />
Vine-establishedPushpull<br />
plot<br />
To help you select the member’s farm, we<br />
suggest that you use some or all of the<br />
criteria in tables above.<br />
You will have a lot of things to do as<br />
you prepare for the field day. Take time<br />
and use the guidelines given in Season 2,<br />
Week 11 to prepare for it.<br />
Type of benefit Quantity Unit market price Total value<br />
10 Kg Napier grass (1 Unit)<br />
3 Kg Desmodium (1 Unit)<br />
1 kg Desmodium hay (unit)<br />
5 kg Silage (1 unit)<br />
Milk (litre)<br />
Other benefit<br />
10 Kg Napier grass (1 Unit)<br />
3 Kg Desmodium (1 Unit)<br />
1 kg Desmodium hay (unit)<br />
5 kg Silage (1 unit)<br />
Milk (litre)<br />
Other benefit<br />
Push-pull curriculum | 151
General observations (AESA): Farmer’s fields<br />
General information<br />
Date<br />
Crop age<br />
Crop health Poor Average Good<br />
• Maize Push-pull plot<br />
• Napier grass<br />
• Desmodium<br />
Observations Farmer’s comments<br />
Stemborers Low Medium High<br />
• Established Push-pull plot<br />
• Vine Push-pull plot<br />
• Check plot<br />
Striga Low Medium High<br />
• Established Push-pull plot<br />
• Vine Push-pull plot<br />
• Check plot<br />
Rainfall: Number of days<br />
it rained the week before:<br />
____<br />
Soil moisture<br />
Weather: Sunny/Cloudy/Rainy Windy/Still Hot/ Cold<br />
152 | Push-pull curriculum
Week 14<br />
Topic Duration What you need for this lesson<br />
1 Comparison of stemborers and striga<br />
between Push-pull plots and Check plot<br />
2 Training in fodder preparation from Pushpull<br />
and home made ration formulation<br />
1 hour 3<br />
minutes<br />
1 hour 30<br />
minutes<br />
3 Planning Field Day 1 hour<br />
Topic 1: Comparing<br />
stemborers and striga<br />
between Push-pull plots and<br />
Check plot<br />
By now your maize is 14 weeks old and it<br />
will be showing more signs of striga and<br />
stemborer damage. You need to continue<br />
evaluating how your Push-pull plots are<br />
performing compared to your Check plot.<br />
Learning objectives<br />
In this lesson, participants will continue<br />
their evaluation of the effectiveness of<br />
Push-pull in controlling stemborers and<br />
striga.<br />
Learning activities<br />
Facilitator-led introduction on the<br />
effectiveness of Push-pull in controlling<br />
stemborers and striga<br />
Field exercise of checking stemborer<br />
and striga damage<br />
Discussions (Lead question: Which<br />
plot is most affected by stemborers and<br />
striga weeds?)<br />
2 nd season Push-pull plot<br />
Field records, pens, napier, desmodium,<br />
maize grain, minerals, panga, buckets, chopping<br />
log, polythene sheet, gunny bags, water<br />
wheelbarrows,<br />
Step 1: Starting from one corner, walk to the<br />
opposite corner (diagonally) of any plot. As<br />
you walk stop at every fifth plant and look<br />
for any sign of stemborer and striga damage.<br />
Record what you have noticed.<br />
Look for:<br />
Signs of stemborer damage<br />
• Leaf damage<br />
• Cob damage<br />
Signs of striga damage<br />
• Stunted growth<br />
The number of striga plants within 15<br />
cm around the plant<br />
Step 2: Repeat Step 1 from a different corner<br />
and walk diagonally to the opposite corner.<br />
Step 3: Repeat Steps 1 and 2 in the other<br />
plots.<br />
Note<br />
At the end of the exercise you will have looked at<br />
more plants in the Check plot than in the Push-pull<br />
plots.<br />
What to record Number *Percent damage<br />
Total number of plants observed<br />
Total number of plants with signs of stemborer leaf damage<br />
Total number of damaged cobs by stemborers<br />
Total number of striga stunted maize plants<br />
Total number of striga weeds around maize plants (15 cm)<br />
*The facilitator will assist the farmers to work out the percentages and discuss them.<br />
Push-pull curriculum | 153
Vine established Push-pull<br />
What to record Number *Percent damage<br />
Total number of plants observed<br />
Total number of plants with signs of stemborer leaf damage<br />
Total number of cobs damaged by stemborers<br />
Total number of striga stunted maize plants<br />
Total number of striga weeds around maize plants (15 cm)<br />
*The facilitator will assist the farmers to work out the percentages and discuss with them.<br />
Check plot<br />
What to record Number *Percent damage<br />
Total number of plants observed<br />
Total number of plants with signs of stemborer leaf damage<br />
Total number of cobs damaged by stemborers<br />
Total number of striga stunted maize plants<br />
Total number of striga weeds around maize plants (15 cm)<br />
*The facilitator will assist the farmers to work out the percentages and discuss them.<br />
Topic 2: Training on fodder<br />
preparation from Pushpull<br />
and home made ration<br />
formulation<br />
Introduction<br />
On the farm there are various feed types,<br />
including products from the Push-pull<br />
plot. Some of these feeds can be used to<br />
formulate cheap and balanced concentrate<br />
rations at reduced costs.<br />
Learning objective<br />
At the end of this lesson, participants will<br />
be able to identify different feed sources<br />
on the farm and make simple concentrate<br />
rations that can be utilized by livestock at a<br />
reduced cost.<br />
Learning activities<br />
Facilitator–led introduction on key<br />
issues to consider when formulating a<br />
ration for livestock.<br />
154 | Push-pull curriculum<br />
Practical activities on livestock ration<br />
formulation<br />
Discussions (Lead question: How much<br />
can you feed to your livestock each<br />
day?)<br />
How to make a ration<br />
Note<br />
When formulating a good ration you should<br />
consider the feed requirements for the animal to<br />
be fed.<br />
A good concentrate ration should consist of<br />
the following ingredients:<br />
Energy (Maize), Protein (Desmodium) and<br />
Minerals (Commercial mineral licks).<br />
How to mix<br />
Before formulating, the farmer is advised<br />
to seek expert opinion from livestock<br />
agencies on the nutritive value and mixing<br />
levels.
Ensure that maize and desmodium are<br />
properly dried. Well dried desmodium hay<br />
will make good ingredient if available. It is<br />
advisable to make the desmodium hay in<br />
advance before formulating your ration.<br />
(See Season 1, Week 16 Topic 3: Making<br />
and utilizing desmodium hay).<br />
Step 1: Collect and assemble the ingredients<br />
to be used in making the concentrate ration.<br />
Step 2: Chop the desmodium hay into small<br />
pieces.<br />
Step 3: Mix at a ratio of four parts of maize<br />
grain with one part of the chopped desmodium<br />
hay.<br />
Step 4: Mill the mixture into coarse flour,<br />
using a hammer mill.<br />
In situations where desmodium hay and<br />
maize mixture is not accepted by the millers,<br />
you can mill the maize separately. The<br />
desmodium hay can be ground or hand<br />
crushed separately. Thereafter thoroughly<br />
mix the two ingredients as recommended.<br />
Step5: Your concentrate ration is ready for<br />
use or storage. Put it in a gunny bag and<br />
store in a dry place. It is advisable to use<br />
the concentrate ration within 2 months.<br />
Step6: If the ration is used as a substitute to<br />
commercial dairy meal, give 4kgs (2 “goro<br />
goro’”) per milking session for a dairy cow<br />
or 2kg (1 “goro goro’”) for a dairy goat.<br />
What NOT to do:<br />
Benefits (Please keep filling the number of units each week as you cut)<br />
Established Pushpull<br />
plot<br />
Vine-established<br />
Push-pull plot<br />
Do not use rotten maize or store the ration<br />
in a moist place, to avoid aflatoxins.<br />
Type of benefit Quantity Unit market<br />
price<br />
10 Kg Napier grass (1 Unit)<br />
3 Kg Desmodium (1 Unit)<br />
1kg Desmodium hay (1 unit)<br />
5 kg Silage (1 unit)<br />
Milk (litre)<br />
Other benefit<br />
10 Kg Napier grass (1 Unit)<br />
3 Kg Desmodium (1 Unit)<br />
1 kg Desmodium hay (Unit)<br />
5 kg Silage (1 unit)<br />
Milk (litre)<br />
Other benefit<br />
Total value<br />
Push-pull curriculum | 155
General observations (AESA): Farmer’s fields<br />
General information<br />
Date<br />
Crop age<br />
Crop health Poor Average Good<br />
• Maize Push-pull plot<br />
• Napier grass<br />
• Desmodium<br />
Observations Farmer’s comments<br />
Stemborers Low Medium High<br />
• Established Push-pull plot<br />
• Vine Push-pull plot<br />
• Check plot<br />
Striga Low Medium High<br />
• Established Push-pull plot<br />
• Vine Push-pull plot<br />
• Check plot<br />
Rainfall: Number of days<br />
it rained the week before:<br />
____<br />
Soil moisture<br />
Weather: Sunny/Cloudy/Rainy Windy/Still Hot/ Cold<br />
Topic 3: Field Day!<br />
Field day is only two weeks away. There is a lot of work to do to make it a success. There are<br />
some suggestions in Second Season, Week 15 on what to do. Use them as a guide.<br />
156 | Push-pull curriculum
Week 15<br />
Topic Duration What you need for this lesson<br />
1 Final group assessment 3 hours Pens, checklist of performance and man-<br />
2 Field day planning 1 hour<br />
agement of enterprises, farmers’ records,<br />
flip charts, marker pens, checklist for field<br />
day events.<br />
Topic 1: Final group<br />
assessment<br />
Introduction<br />
Now you have been working together as a<br />
group for two seasons, and you have had<br />
time to apply on your farm what you have<br />
learnt in the field school. It is time to go<br />
out for the fourth and last time to see what<br />
you and your colleagues have done so that<br />
you can all learn from each other’s experiences,<br />
and select the best Push-pull plots<br />
so that you can hold the Field Day there<br />
next week.<br />
Learning objective<br />
The objective of this assessment is to<br />
maximize learning through group evaluation<br />
of individual plots.<br />
2 Nd season push-pull<br />
plot<br />
What to do in the assessment<br />
Step 1: Join the groups that you formed in<br />
Season 1, Week 3. Each group should<br />
have 4-6 members.<br />
Step 2: Visit each farm represented by the<br />
members in the group.<br />
Step 3: Use the table below to assess the<br />
Push-pull and the Check plots.<br />
Discuss with the host farmer. Rate each<br />
farm using this scale:<br />
1 = Poor 2 = Average 3 = Good<br />
2 Nd season check<br />
plot<br />
1 St season push-pull with<br />
vines<br />
What to check<br />
Overall field management<br />
Weeding of the plots<br />
Maize stand<br />
Rating Comments Rating Comments Rating Comments<br />
Napier grass management<br />
Desmodium management<br />
Record-keeping<br />
Total rates<br />
Push-pull curriculum | 157
158 | Push-pull curriculum<br />
Desmodium multiplication plot<br />
What to check Rating Comments<br />
Stand of desmodium<br />
Weeding of the plot<br />
Off-types<br />
Quantity of seed produced<br />
Quality of seed<br />
Record keeping<br />
Total rates<br />
Topic 2: Planning for field day<br />
Field Day is next week. You need to select<br />
one of the participant’s farm, where you will<br />
be able to observe, exchange experiences<br />
and show the general farming community<br />
the result of your work. This is an excellent<br />
opportunity for the community to gain<br />
a better understanding of what happens in<br />
an FFS and what the benefits and problems<br />
of this approach are.<br />
To help you select the member’s farm, you<br />
should use some or all of the criteria in<br />
tables above.<br />
You will have to check on the things<br />
you want to do. Here are some suggestions<br />
discussed earlier:<br />
1. Assign responsibilities for the field day.<br />
2. Tell people about it – the farming<br />
community, colleagues from other field<br />
schools, the provincial administration<br />
(DO, Chief, Asst. Chief, etc.), the<br />
Ministry of Agriculture, livestock and<br />
fisheries Extension staff, NGOs and<br />
CBOs, Church groups, schools, and the<br />
media.<br />
3. Make a programme and agree on the<br />
time and what is to be covered.<br />
4. Make a budget.<br />
5. Prepare evaluation form.<br />
Benefits (Please keep filling the number of units each week as you cut).<br />
Type of benefit Quantity Unit market price Total value<br />
Push-pull plot 10 Kg Napier grass (1 Unit)<br />
3 Kg Desmodium (1 Unit)<br />
1 kg Desmodium hay (1 unit)<br />
5 kg Silage (1 unit)<br />
Milk (litre)<br />
Other benefit<br />
General observations (AESA): Farmer’s fields
General information<br />
Date<br />
Crop age<br />
Crop health Poor Average Good<br />
• Maize Push-pull plot<br />
• Napier grass<br />
• Desmodium<br />
Observations Farmer’s comments<br />
Stemborers Low Medium High<br />
• Established Push-pull plot<br />
• Vine Push-pull Plot<br />
• Check plot<br />
Striga Low Medium High<br />
• Established Push-pull plot<br />
• Vine Push-pull plot<br />
• Check plot<br />
Rainfall: Number of days<br />
it rained the week before:<br />
____<br />
Soil moisture<br />
Weather: Sunny/Cloudy/Rainy Windy/Still Hot/ Cold<br />
Push-pull curriculum | 159
Week 16<br />
Topic Duration What you need for this lesson<br />
1 Field Day 4 hours Chairs, tables, posters, Push-pull brochures, Push-pull<br />
FFS curriculum, refreshments, writing material, pens,<br />
displays of Push-pull materials and produce, collaborators<br />
and guest of honour<br />
Field Day<br />
It will still be necessary to carry out and record the activities you need to do on this day.<br />
Start on time<br />
Each participant to do his/her duty<br />
Ensure everything planned is in place<br />
Follow the programme<br />
Benefits (Please keep filling the number of units each week as you cut)<br />
Push-pull plot<br />
Type of benefit Quantity Unit market price Total value<br />
10 Kg Napier grass (1 Unit)<br />
3 Kg Desmodium (1 Unit)<br />
1 kg Desmodium hay (Unit)<br />
5 kg Silage (1 unit)<br />
Milk (litre)<br />
Other benefit<br />
Push-pull curriculum | 161
General observations (AESA): Farmer’s fields<br />
General information<br />
Date<br />
Crop age<br />
Crop health Poor Average Good<br />
• Maize Push-pull plot<br />
• Napier grass<br />
• Desmodium<br />
Observations Farmer’s comments<br />
Stemborers Low Medium High<br />
• Established Push-pull plot<br />
• Vine Push-pull plot<br />
• Check plot<br />
Striga Low Medium High<br />
• Established Push-pull plot<br />
• Vine Push-pull plot<br />
• Check plot<br />
Rainfall: Number of days<br />
it rained the week before:<br />
____<br />
Soil moisture<br />
Weather: Sunny/Cloudy/Rainy Windy/Still Hot/ Cold
Week 17<br />
Topic Duration What you need for this lesson<br />
1 Report of the Field Day 4 hours Data on field day (list of visitors, new farmers),<br />
record of questions asked and responses,<br />
record of desmodium sales and orders, formal<br />
evaluation questionnaires of field day<br />
Report of the Field Day<br />
After your Field Day write a brief report on<br />
it. This shall be used as one of the indicators<br />
in your final evaluation of he Farmer<br />
Field School in Second Season, Week 23.<br />
Things to note<br />
1. Attendance.<br />
2. Areas of interest from non-group<br />
farmers<br />
3. What went on well?<br />
4. What did not go well?<br />
5. Suggestions for improvement.<br />
Type of benefit Quantity Unit market price Total value<br />
Push-pull plot 10 Kg Napier grass (1 Unit)<br />
3 Kg Desmodium (1 Unit)<br />
1 kg Desmodium hay<br />
5 kg Silage (1 unit)<br />
Milk (litre)<br />
Other benefit<br />
General observations (AESA): Farmer’s fields<br />
General information<br />
Date<br />
Crop age<br />
Observations Farmer’s comments<br />
Size of cobs Small Medium Large<br />
• Established Push-pull plot<br />
• Vine Push-pull plot<br />
• Check plot<br />
Rainfall: Number of days<br />
it rained the week before:<br />
____<br />
Soil moisture<br />
Weather: Sunny/Cloudy/Rainy Windy/Still Hot/ Cold<br />
Push-pull curriculum | 163
Week 18<br />
Topic Duration What you need for this lesson<br />
1 Harvesting maize 2 hours Tape measure, weighing balance, panga, wheelbarrows<br />
or sacks for carrying the maize cobs.<br />
Introduction<br />
Your maize is now ready for harvesting.<br />
You have three plots: Two Push-pull and<br />
one Check plot. As in last season make<br />
sure that you harvest each plot separately<br />
and keep the maize from each plot separately.<br />
This will help you to know the difference<br />
in yields between the three plots.<br />
You will also measure the height of the<br />
maize plants and dissect them to observe<br />
the number of stemborer larvae and<br />
pupae.<br />
Topic: Harvesting maize<br />
Learning objective<br />
On completion of this topic participants will<br />
be able to:<br />
Explain the right time to harvest maize<br />
Demonstrate how to harvest maize<br />
Learning activities<br />
Practical exercise:<br />
Measuring the height of the maize<br />
Harvesting<br />
Dissecting some stalks to check for<br />
stemborers<br />
Facilitator-led discussions on the<br />
relationship between maize height,<br />
stemborer damage (including larvae<br />
and pupae) and maize yield<br />
Remember some key points about sorting<br />
and drying maize ears:<br />
After harvesting, sort out all off-type<br />
maize ears, particularly those showing<br />
different colours and texture, and the<br />
diseased ears, before placing them to<br />
dry for 4 to 5 days. Remember, if you<br />
do not dry the maize well, it can attract<br />
storage pests which will bring aflatoxin<br />
Note<br />
A good sorting at this time considerably<br />
reduces the task of sorting after the<br />
maize ears have been dried to the<br />
desired extent (10 to 15 percent<br />
moisture content)<br />
• Steps 1 to 3 below can be done only on the<br />
Farmer-Field school plot<br />
• Step 4 should be done on each farmer’s plot<br />
Step 1: Starting from one corner of a plot walk<br />
to the opposite corner (diagonally). As you<br />
walk stop at every fifth plant, measure<br />
and record its height and then cut it at the<br />
base. Carry all the plants you have cut out<br />
of the plot and dissect them and record the<br />
number of stemborer larvae and pupae.<br />
Step 2: Repeat Step 1 from a different corner<br />
and walk diagonally to the opposite corner.<br />
Step 3: Repeat Steps 1 and 2 in the other<br />
plots.<br />
Note<br />
At the end of the exercise you will have looked at<br />
more plants in the Check plot than in the Push-pull<br />
plots.<br />
Step 4: Now harvest the crop keeping separate<br />
records for each plot.<br />
Cob plucking method: Harvest and<br />
take the weight of the cobs in both the<br />
push-pull and the Check plots and leave<br />
them in the open to dry<br />
Stalk cutting method: Leave stalks<br />
from Push-pull and Check plots in<br />
separate piles until they are dry. Then<br />
take the weight of cobs<br />
Keep the records from the three plots<br />
separately<br />
Push-pull curriculum | 165
Labour costs<br />
Established<br />
Push-pull plot<br />
Total<br />
Vine-Established<br />
Push-pull<br />
Total<br />
Check plot<br />
Total<br />
Estimated benefits<br />
Established Pushpull<br />
Vine Push-pull<br />
166 | Push-pull curriculum<br />
Activity No of people<br />
working on<br />
this activity<br />
Harvesting<br />
maize<br />
Collecting and<br />
stacking stover<br />
Other activity<br />
Harvesting<br />
maize<br />
Collecting and<br />
stacking stover<br />
Other activity<br />
Harvesting<br />
maize<br />
Collecting and<br />
stacking stover<br />
Other activity<br />
Time taken to<br />
complete the<br />
activity (hours)<br />
Cost of<br />
labour per<br />
day<br />
Product Estimated quantity Estimated value<br />
Maize (50 kg bag)<br />
Stover<br />
Maize (50 kg bag)<br />
Stover<br />
Check plot Maize (50 kg bag)<br />
Stover<br />
Total cost of<br />
this activity
Benefits of livestock feed (Please keep filling the number of units each week as you cut)<br />
Push-pull plot<br />
Type of benefit Quantity Unit market price Total value<br />
10 Kg Napier grass (1 Unit)<br />
3 Kg Desmodium (1 Unit)<br />
1 kg Desmodium hay<br />
5 kg Silage (1 unit)<br />
Milk (litre)<br />
Other benefit<br />
General observations (AESA): Farmer’s fields<br />
General information<br />
Date<br />
Observations Farmer’s comments<br />
Rainfall: Number of days,<br />
week before: ____<br />
Soil moisture<br />
Weather: Sunny/Cloudy/Rainy Windy/Still Hot/ Cold<br />
Farmers’ comments after the lesson: ______________________________________________<br />
___________________________________________________________________________<br />
______________________________________________________________________________<br />
_____________________________________________________________________________<br />
Push-pull curriculum | 167
Week 19<br />
Topic Duration What you need for this lesson<br />
1 2 nd Harvesting Desmodium from the two pushpull<br />
plots and the desmodium multiplication plot<br />
2 Shelling and storage of maize 2 hours<br />
Topic 1 : 2 nd Harvesting<br />
Desmodium from the two<br />
Push-pull plots and the<br />
desmodium multiplication plot<br />
After you have harvested maize you can<br />
start harvesting desmodium pods and continue<br />
harvesting for another 2-3 weeks. As<br />
not all the pods will be ready at the same<br />
time, today we will discuss when and how<br />
to harvest.<br />
You learned how to harvest desmodium<br />
from the Push-pull plots in Season 1,<br />
Week 19.<br />
Please refer to the lesson details. Remember:<br />
this is a continuous activity that should<br />
continue for the next two to three weeks as<br />
the pods mature.<br />
Topic 2: Shelling and storage<br />
of maize<br />
Last week we discussed when and how<br />
to harvest maize. We then harvested the<br />
maize. This week we look at how to shell<br />
and store the maize.<br />
2 hours Gunny bags, balance, 2kg tins (gorogoro)<br />
Maize sheller (optional)<br />
Note<br />
Note<br />
It is important to select only healthy and clean<br />
cobs for shelling. The diseased and rotten cobs<br />
must be destroyed because they may contain<br />
aflatoxin.<br />
After shelling, the grain should be dried<br />
for 3 or more days, cleaned and stored<br />
in a dry place protected from rats<br />
After removing the grains, the cobs can<br />
be used as livestock feed particularly<br />
during the dry season (See Season 1,<br />
Week 19)<br />
Keep separate records for Push-pull plots and for<br />
the Check plot.<br />
Push-pull curriculum | 169
Labour Costs<br />
Established<br />
Push-pull plot<br />
Total<br />
Vine-Established<br />
Push-pull<br />
Total<br />
170 | Push-pull curriculum<br />
Activity No of people<br />
working on<br />
this activity<br />
Shelling maize<br />
Harvesting<br />
desmodium<br />
Other activity<br />
Shelling maize<br />
Harvesting<br />
desmodium<br />
Other activity<br />
Check plot Shelling maize<br />
Total<br />
Estimated benefits<br />
Other activity<br />
Established Push-pull Maize (Gorogoro)<br />
Vine Push-pull Maize (Gorogoro)<br />
Check plot Maize (Gorogoro)<br />
Time taken to<br />
complete the<br />
activity (Hours)<br />
Cost of<br />
labour per<br />
day<br />
Product Quantity Local market value<br />
Benefits of livestock feed (Please keep filling the number of units each week)<br />
Total cost of<br />
this activity<br />
Type of Benefit Quantity Unit market price Total value<br />
Push-pull plot 10 Kg Napier grass (1 Unit)<br />
3 Kg desmodium (1 Unit)<br />
1 kg hay<br />
5 kg Silage (1 unit)<br />
Milk (litre)<br />
Other benefit
General observations (AESA): Farmer’s Fields<br />
General information<br />
Date<br />
Observations Farmer’s comments<br />
Rainfall: Number of days<br />
it rained the week before:<br />
____<br />
Soil moisture<br />
Weather: Sunny/Cloudy/Rainy Windy/Still Hot/ Cold<br />
Farmers’ comments after the lesson: ______________________________________________<br />
___________________________________________________________________________<br />
______________________________________________________________________________<br />
_____________________________________________________________________________<br />
Push-pull curriculum | 171
Week 20<br />
Topic Duration What you need for this lesson<br />
1 Processing desmodium seed 2 hours Weighing balance, containers (2 kg tins), a flat grinding<br />
2 Hand out the final assessment<br />
questionnaire<br />
30 minutes<br />
Topic: Processing desmodium seed<br />
stone, rubber sole of an old shoe, wire mesh (30cm by 30<br />
cm), polythene clothing, jembe, panga, clear polythene bags.<br />
You learned how to process desmodium in Season 1, week 20. Please refer to that lesson for<br />
details.<br />
Labour costs<br />
Activity No of people<br />
working on<br />
this activity<br />
Push-pull plot Processing<br />
desmodium seed<br />
Other activity<br />
Benefits from desmodium seed<br />
Push-pull plot Desmodium seed<br />
Time taken to<br />
complete the<br />
activity (Hours)<br />
Cost of<br />
labour per<br />
day<br />
Total Cost of<br />
this Activity<br />
Type of Benefit Quantity Unit Market price Total Value<br />
Desmodium husks<br />
Other benefits<br />
Benefits of livestock feed (Please keep filling the number of units each week)<br />
Push-pull plot<br />
Type of Benefit Quantity Unit Market price Total Value<br />
10 Kg Napier grass (1 Unit)<br />
3 Kg desmodium (1 Unit)<br />
1 kg hay<br />
5 kg Silage (1 unit)<br />
Milk (litre)<br />
Other benefits<br />
Push-pull curriculum | 173
General observations (AESA): Farmer’s fields<br />
General Information<br />
Date<br />
Observations Farmer’s comments<br />
Rainfall: Number of days,<br />
week before: ____<br />
Soil moisture<br />
Weather: Sunny/Cloudy/Rainy Windy/Still Hot/ Cold<br />
Hand out the final assessment questionnaire<br />
174 | Push-pull curriculum
Week 21<br />
Topic Duration What you need for this lesson<br />
1 Managing the desmodium 1 hour Panga, jembe, chopping log, gunny bag, polythene sheet,<br />
mollases, bucket, sprinkler, string, rake<br />
2 Gross margin analysis 2 hours<br />
Topic 1: Managing the<br />
desmodium<br />
Now that you have harvested all the pods<br />
from your Push-pull plots and seed multiplication<br />
plot, you have two choices:<br />
1. Harvest the desmodium for fodder and<br />
hay-making (see Season 1, week 13,<br />
14, and 16).<br />
2. Leave the desmodium to produce<br />
mature vines (as we did in Season 1) to<br />
establish new Push-pull plots or for sale<br />
of vines to neighbouring farmers.<br />
Topic 2: Gross margin analysis<br />
Note<br />
In Season 1, Week 15 you learned about<br />
Gross Margin Analysis. Please refer to the<br />
lesson details.<br />
Assessment of adoption rates (farmers practising<br />
PP). To be factored in the questionnaire.<br />
(Questionnaires returned)<br />
Push-pull curriculum | 175
Week 22<br />
Topic Duration What you need for this lesson<br />
1 Evaluation of the FFS<br />
<strong>Curriculum</strong><br />
3 hours 30<br />
minutes<br />
Push-pull manual, pen, markers, flips charts<br />
2 Preparation for Graduation 30 minutes Certificates, questionnaires,<br />
Topic 1: Evaluating the Pushpull<br />
<strong>Curriculum</strong> for FFS<br />
Now that you have come to the end of your<br />
field school in learning about the Push-pull<br />
technology, you need to assess the value<br />
of what you have been doing. Evaluation<br />
looks at programme activities, human<br />
resources, material resources, information<br />
and facts in order to monitor progress and<br />
effectiveness, consider costs and efficiency,<br />
show where changes are needed and<br />
to help to plan more effectively.<br />
This lesson shows you how to evaluate the<br />
school that you have been attending for<br />
over forty weeks.<br />
Learning objectives<br />
On completion of this topic participants will<br />
be able to:<br />
State and explain reasons for evaluating<br />
the Push-pull curriculum for FFS<br />
Importance of doing evaluation<br />
Evaluation in FFS is important in several ways.<br />
1. Achievement – assessing what has been<br />
achieved (knowledge, skills, attitudes, etc).<br />
2. Measuring progress in accordance with<br />
the objectives of the school.<br />
3. Improving monitoring for better management.<br />
4. Identifying strengths and weaknesses to<br />
strengthen the school and programme.<br />
5. Checking if the school or programme efforts<br />
made a difference.<br />
Discuss and explain reasons for<br />
success or failure of the field school<br />
Explain the effectiveness of the<br />
technology in making a difference in<br />
crop yields and incomes<br />
Learning activities<br />
Facilitator-led introduction on meaning<br />
and importance of curriculum evaluation<br />
Groups of 4-6 members discuss overall<br />
performance of the FFS<br />
Divide a wall chart into 3 parts and<br />
brainstorm on these questions focusing<br />
on things that went well, things that<br />
did not go well or things were not<br />
useful, and suggestions for next time/<br />
improvements. Groups then to present<br />
their discussions<br />
Facilitator-led discussion on relevance<br />
of the curriculum, duration of the school<br />
(too short / too long), effectiveness and<br />
quality of facilitation, integration of the<br />
FFS curriculum into farmer’s interests<br />
and way of life<br />
6. Checking the cost-benefit of the FFS, to<br />
assess whether the costs were reasonable<br />
compared to the benefits achieved.<br />
7. Collecting information to plan and manage<br />
programme activities later.<br />
8. Sharing experiences to prevent others<br />
from making mistakes or encouraging<br />
them to use similar methods.<br />
9. Improving effectiveness to have more<br />
impact.<br />
10. Allowing for better planning more in<br />
line with the needs of participants, especially<br />
at the community level.<br />
Push-pull curriculum | 177
Note<br />
Facilitator to inform the participants that in addition to the group evaluation of the FFS curriculum, information<br />
related to the individual FFS members will be gathered through a questionnaire to be given some time later.<br />
The individuals will provide answers to a set of questions to find out what has happened after the school.<br />
Some questions to help in assessing the FFS curriculum<br />
1. What were the most valuable things for you about the FFS?<br />
2. What was the least valuable thing about the FFS?<br />
3. Did you find it easy to participate in the school?<br />
4. How did you find the quality of facilitation in terms of:<br />
a) Presentation skills<br />
b) Listening skills<br />
c) Interest in what people have to offer<br />
d) Clear thinking and observation of the whole group<br />
e) Understanding of the overall objectives<br />
f) Helping participants make use of the most decisions to do their tasks<br />
5. Does the technology work for you?<br />
6. How many other farmers have adopted the technology from you?<br />
7. What suggestions do you have for improving the performance of the school?<br />
178 | Push-pull curriculum
Example of a table that can be filled to establish impact among individual FFS<br />
members and the group<br />
Name of FFS Participant:_________________ Name of FFS:______________________<br />
District_______________________ Division:_______________ Sex: 1=Male 2=Female<br />
Parameter<br />
Livelihood / food security information<br />
Size of land under Push-pull technology<br />
At start of ffs First season Second season<br />
Number of food secure months during<br />
Yearly income from farm<br />
Yearly income from Push-pull<br />
Yield per unit area<br />
Amount of milk per month<br />
Number of livestock on the farm<br />
a) Dairy cows<br />
b) Dairy goats<br />
c) Other<br />
Use of manure (quantity per acre)<br />
Use of fertilizer (quantity per acre)<br />
Number of other farmers adopting Push-pull<br />
AND SO ON…<br />
Topic 2: Preparing for graduation<br />
Like all schools, the FFS must come to and end. Members need to develop some basic criteria<br />
of who qualifies to graduate. They may for instance use the attendance records or other considerations.<br />
The graduation event marks the end of the FFS session (cycle/season) and is a<br />
festive moment where farmers celebrate their achievements. Such an event requires invitation<br />
of key stakeholders to grace the occasion and in order to establish future collaboration and<br />
support. The members need to decide where the graduation event will be held, who will be<br />
invited, activities to be performed on this day, allocation of responsibilities, graduation certificates,<br />
etc.<br />
Push-pull curriculum | 179
Week 23<br />
Graduation and Certification Duration<br />
Things that should be in place<br />
• Program<br />
• Place for the event,<br />
• Furniture,<br />
• Certificates,<br />
• Meals (optional)<br />
Graduation and Certification<br />
The whole day<br />
Group members to ensure that all the things planned for the graduation are in place. Good<br />
organization of the event will lead to an interesting and motivating graduation.<br />
Follow-up<br />
Follow up after graduation is very important. At the end of a learning cycle and graduation<br />
ceremony, the FFS in most cases continues as a farmer group. The group may have problems<br />
that were not addressed in the study cycle, hence the need to plan for post-FFS. This could<br />
cover both technical and socio-economic activities. Such a follow-up activity may or may not<br />
require a facilitator to assist the group or funds for the study process. The FFS graduates can<br />
use the group to engage in other productive activities aimed at improving their livelihoods.<br />
Push-pull curriculum | 181
Frequently asked questions<br />
Q. What is the maximum and minimum<br />
size of the Push-pull plot?<br />
A. A Push-pull plot can range from 50 m X<br />
50 m to any size of the farm provided the<br />
fields are demarcated into 50m by 50m<br />
using border rows of Napier grass.<br />
Q. What is the minimum width of Push-pull<br />
plot?<br />
A. Not less than 10 meters<br />
Q. How long can the Push-pull plot be<br />
kept?<br />
A. You could benefit from your Push-pull plot<br />
for 5 or more years if well managed<br />
Q. Can I graze my cattle directly on the<br />
Push-pull plot?<br />
A. No. Grazing destroys desmodium and<br />
Napier grass.<br />
Q. Can I practice Push-pull if I don’t have<br />
livestock?<br />
A. Yes, because you can sell Napier and<br />
desmodium forage and seed to your neighbour<br />
and desmodium can improve fertility<br />
of your soil.<br />
Q. Can I intercrop other crops and trees in<br />
the Push-pull plot?<br />
A. No.<br />
Q. Are there alternatives to Napier grass<br />
and desmodium?<br />
A. Yes. Forage sorghums like Sudan grass<br />
can be used to trap stemborers instead<br />
of Napier grass and molasses grass can<br />
be used to repel stemborers instead of<br />
desmodium. However, molasses grass<br />
does not control Striga weed.<br />
Q. How long can desmodium survive in a<br />
prolonged drought?<br />
A. Desmodium can always regenerate after<br />
a drought. However you are advised to<br />
plough and re-established a Push-pull<br />
plot incase of a prolonged drought where<br />
desmodium fails to regenerate.<br />
Q. Can I plant maize first, then Napier<br />
grass after a few weeks?<br />
A. No. You are advised to plant Napier grass<br />
before planting maize or if late plant both<br />
crops at the same time.<br />
Q. When do I start reaping the benefits of<br />
the Push-pull plot?<br />
A. You can reap benefits during second cropping<br />
season in areas where farmers plant<br />
maize twice in a year and during the second<br />
year in areas where farmers only plant<br />
once in a year.<br />
Q. Can I use Push-pull on sorghum?<br />
A. You can intercrop Greenleaf desmodium<br />
with sorghum to repel stemborers and control<br />
Striga weed.<br />
Q. Is Push-pull effective against other<br />
weeds and insect pests?<br />
A. Desmodium in the Push-pull can reduce<br />
other weeds by smothering them but both<br />
Napier grass and desmodium may not<br />
reduce other insect pests.<br />
Q. Where can I obtain Napier grass and<br />
desmodium seeds?<br />
A. Napier grass can be obtained from neighbour<br />
who have planted their farms with<br />
Push-pull. Desmodium seed is sold by<br />
Western Seed Company in Kitale.<br />
Q. What can I do if I don’t get desmodium<br />
seeds?<br />
A. Use desmodium root splits or cuttings from<br />
your neighbour. However, ensure that you<br />
plant them immediately and, when there is<br />
adequate soil moisture.<br />
Q. How effective is Push-pull against stemborer<br />
and striga weed?<br />
Push-pull curriculum | 183
A. Push-pull is very effective. It is even better<br />
than insecticides for the control of stemborer<br />
and better than manual removal of striga<br />
weed, both in terms of cost and effective<br />
control.<br />
Q. Can I be given a dairy animal if I establish<br />
a Push-pull plot?<br />
A. No. But you can qualify for various<br />
projects on dairy animals.<br />
Q. If I don’t have desmodium seed, can I<br />
plant only Napier grass in my Push-pull<br />
plot?<br />
A. Yes. If you plant only Napier you will be<br />
able to reduce stemborers on maize but<br />
you will not be able to control striga weed.<br />
Q. Can Push-pull technology work in all<br />
parts of Kenya or Africa?<br />
184 | Push-pull curriculum<br />
A. Yes but only in areas recommended for<br />
growing desmodium. You will need to consult<br />
your agricultural extension staff.<br />
Q. Can I use other varieties of Napier grass<br />
other than Bana grass?<br />
A. Yes. You can plant Clone 13 Napier<br />
grass, French Cameroon, Kakamega 1,<br />
Kakamega 2 or Kakamega 3. However,<br />
they are not as good trap plants as Bana<br />
grass.<br />
Q. Can I use other species of desmodium<br />
other than silverleaf?<br />
A. Yes. You can use Greenleaf desmodium,<br />
but the results of silverleaf with maize are<br />
the best. Greenleaf desmodium do best in<br />
in dryer areas.