aeroplus m Preliminary statement - Kröber Medizintechnik GmbH
aeroplus m Preliminary statement - Kröber Medizintechnik GmbH
aeroplus m Preliminary statement - Kröber Medizintechnik GmbH

Create successful ePaper yourself
Turn your PDF publications into a flip-book with our unique Google optimized e-Paper software.
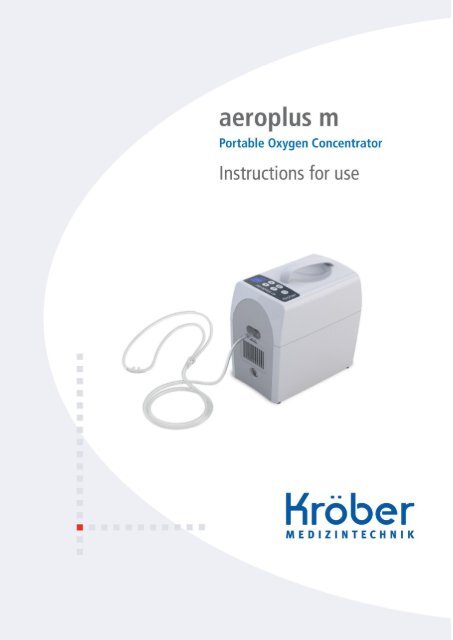
<strong>aeroplus</strong> m<br />
<strong>Preliminary</strong> <strong>statement</strong><br />
1
<strong>aeroplus</strong> m<br />
2<br />
<strong>Preliminary</strong> <strong>statement</strong><br />
© Kröber <strong>Medizintechnik</strong> <strong>GmbH</strong><br />
Salzheck 4<br />
D-56332 Dieblich<br />
Germany<br />
Dok-ID:<br />
Tel.: +49 (0) 2607 94040<br />
Fax: +49 (0) 2607 940422<br />
E-Mail: info@kroeber.de<br />
Internet: www.kroeber.de<br />
Version: 2 dated 25.09.2012
Table of contents<br />
<strong>aeroplus</strong> m<br />
<strong>Preliminary</strong> <strong>statement</strong><br />
1 <strong>Preliminary</strong> <strong>statement</strong> ................................................................................................ 6<br />
2 General ........................................................................................................................ 7<br />
2.1 Information in these instructions for use ............................................................... 7<br />
2.2 Liability and warranty ........................................................................................... 7<br />
2.3 Explanation of symbols ........................................................................................ 7<br />
2.4 Copyright protection ............................................................................................. 8<br />
2.5 Return and waste disposal ................................................................................... 8<br />
2.6 Customer service ................................................................................................. 9<br />
3 Safety ......................................................................................................................... 10<br />
3.1 General .............................................................................................................. 10<br />
3.2 Operator’s Responsibility ................................................................................... 10<br />
3.3 Intended Use ..................................................................................................... 10<br />
3.4 Dangers which may arise from the unit .............................................................. 11<br />
3.5 What to do if a hose caught fire ......................................................................... 13<br />
4 Design and function ................................................................................................. 16<br />
4.1 General description............................................................................................ 16<br />
4.2 Design ............................................................................................................... 16<br />
4.3 Keypad .............................................................................................................. 17<br />
4.4 Display............................................................................................................... 18<br />
5 Technical Data .......................................................................................................... 19<br />
6 Transport, packaging and storage .......................................................................... 20<br />
6.1 Transport inspection .......................................................................................... 20<br />
6.2 Storage .............................................................................................................. 21<br />
6.3 Mobile Use ........................................................................................................ 21<br />
7 Taking into service ................................................................................................... 22<br />
7.1 Before assembling ............................................................................................. 22<br />
7.1 Choosing the location ........................................................................................ 22<br />
8 Short operating instructions .................................................................................... 23<br />
9 Main operating functions ......................................................................................... 25<br />
9.1 Furnish the power supply ................................................................................... 25<br />
9.1.1 Connecting to the mains power ......................................................................... 25<br />
9.1.2 Disconnecting from mains.................................................................................. 26<br />
9.1.3 Battery operation ............................................................................................... 26<br />
Internal battery charging ............................................................................................. 26<br />
Charging the battery externally ................................................................................... 27<br />
Determining the remaining battery operation time ...................................................... 28<br />
9.2 Starting the therapy ........................................................................................... 28<br />
3
<strong>aeroplus</strong> m<br />
4<br />
<strong>Preliminary</strong> <strong>statement</strong><br />
9.3 Self test ............................................................................................................. 29<br />
9.4 Terminating or interrupting the therapy .............................................................. 29<br />
9.5 Adjusting the therapy setting .............................................................................. 30<br />
10 Menu and advanced settings ................................................................................... 31<br />
10.1 Menu operation .................................................................................................. 31<br />
10.2 Menu structure ................................................................................................... 31<br />
10.3 Information ......................................................................................................... 32<br />
10.4 Therapy setting .................................................................................................. 34<br />
10.5 Lower limit for the therapy setting ...................................................................... 35<br />
10.6 Upper limit for the therapy setting ...................................................................... 36<br />
10.7 Trigger ............................................................................................................... 37<br />
10.8 Language........................................................................................................... 38<br />
10.9 Button tone volume ............................................................................................ 39<br />
10.10 Alarm tone volume ............................................................................................. 40<br />
10.11 Trigger signal volume......................................................................................... 41<br />
11 Messages and Alarms .............................................................................................. 42<br />
11.1 Alarm priority ..................................................................................................... 42<br />
11.2 Information messages........................................................................................ 42<br />
11.3 Alarms ............................................................................................................... 43<br />
11.4 Alarm muting ..................................................................................................... 46<br />
12 Maintenance .............................................................................................................. 47<br />
12.1 Safety ................................................................................................................ 47<br />
12.2 General notes .................................................................................................... 47<br />
12.2.1 Cleaning ........................................................................................................ 47<br />
12.2.2 Disinfecting ................................................................................................... 47<br />
12.3 Maintenance plan .............................................................................................. 48<br />
12.4 Maintenance work .............................................................................................. 50<br />
13 Accessories............................................................................................................... 52<br />
14 Appendix ................................................................................................................... 53<br />
14.1 EMC regulations ................................................................................................ 53<br />
14.1.1 Electromagnetic compatibility, interference emission..................................... 53<br />
14.1.2 Electromagnetic compatibility, interference emission..................................... 54<br />
14.1.3 Recommended safety distances ................................................................... 57<br />
15 Symbols ..................................................................................................................... 58<br />
16 Index .......................................................................................................................... 61
<strong>aeroplus</strong> m<br />
<strong>Preliminary</strong> <strong>statement</strong><br />
5
<strong>aeroplus</strong> m<br />
6<br />
<strong>Preliminary</strong> <strong>statement</strong><br />
1 <strong>Preliminary</strong> <strong>statement</strong><br />
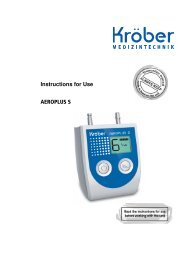
Your doctor has found that you require an additional oxygen supply. With the <strong>aeroplus</strong> m you<br />
received a German brand product for oxygen supply, which has been developed on the basis<br />
of the latest knowledge in both medical engineering and electronics. Permanent quality<br />
inspections ensure uniform quality on the highest level.<br />
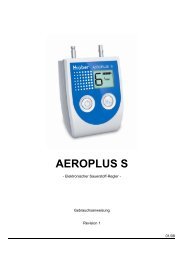
The <strong>aeroplus</strong> m is a highly reliable portable oxygen concentrator , intended for mobile or<br />
stationary use in homes or at home, as well as for clinical applications.<br />
However, should problems arise with the <strong>aeroplus</strong> m, you may contact your dealer at any<br />
time.<br />
This medical care product from Kröber <strong>Medizintechnik</strong> is labeled with the CE-sign according<br />
to MDD (Medical Device Directive ).<br />
Only use the <strong>aeroplus</strong> m after a medical indication and only in compliance with the<br />
doctor's orders by following these instructions for use.<br />
If side effects or extreme health restrictions occur during the therapy, you should<br />
immediately consult your doctor.
2 General<br />
2.1 Information in these instructions for use<br />
<strong>aeroplus</strong> m<br />
General<br />
These instructions for use describe the installation, operation and maintenance of the unit.<br />
Strict compliance with the stated notes on safety and instructions for use is a prerequisite for<br />
safe and proper work with the unit.<br />
Moreover, compliance with the accident prevention instructions valid at the location of use<br />
and the general safety regulations is mandatory.<br />
This instruction manual is part of the product and should be kept near the unit so that it is at<br />
any time available for personnel involved in installation, operation, maintenance and<br />
cleaning.<br />
The graphic illustrations in this manual may perhaps differ slightly from the actual design of<br />
the unit.<br />
2.2 Liability and warranty<br />
All details and notes for the operation, maintenance and cleaning of the unit are made to the<br />
best of our knowledge taking into consideration our experience and knowledge gained up to<br />
now.<br />
We reserve the right to make technical changes to the machine dealt with in these<br />
instructions for use within the context of ongoing development.<br />
Translations are also carried out to the best of knowledge. We do not accept any liability for<br />
errors in translation. The German version of the instructions for use, which is also delivered<br />
with the unit, is the definitive version.<br />
Texts and illustrations do not necessarily correspond to the scope of delivery. The drawings<br />
and graphics are not to scale 1:1.<br />
Read instructions for use carefully before starting operation of the unit!<br />
The manufacturer will not assume liability for damage or disruptions that occur as a result of<br />
non-compliance with the instructions for use.<br />
Handing over these instructions for use to third parties is not permitted and results in the<br />
obligation for compensation.<br />
2.3 Explanation of symbols<br />
Important safety and equipment related notes in these instructions for use are highlighted by<br />
symbols. These notes must be strictly adhered to in order to avoid accidents, personal<br />
injuries and damage to property.<br />
WARNING!<br />
This symbol warns of dangers that can lead to adverse effects on health,<br />
injuries, permanent physical damage or to death.<br />
Strictly comply with all notes regarding work safety, and be particularly careful in<br />
these situations.<br />
7
<strong>aeroplus</strong> m<br />
8<br />
General<br />
WARNING! Danger of electric current!<br />
This symbol draws attention to dangerous situations involving electrical<br />
currents. There is a danger of serious injury or death if the safety notes are not<br />
complied with. The related work may only be carried out by qualified electricians.<br />
ATTENTION!<br />
Information highlighted with this symbol must be strictly complied with in order<br />
to avoid damage to the machine, malfunction and/or breakdown.<br />
NOTE!<br />
This symbol highlights hints and information to be observed for efficient and nondisrupted<br />
operation of the unit.<br />
2.4 Copyright protection<br />
These instructions for use are to be treated confidentially. They should only be used by<br />
persons who have been authorized accordingly. It may only be passed on to third parties<br />
with the written consent of the manufacturer.<br />
All documents are protected by copyright protection law.<br />
It is not permissible to pass on or reproduce the documents, either as a whole or excerpts<br />
thereof, to evaluate or communicate their content, unless explicitly entitled to do so. Any<br />
violations are liable to prosecution and require compensation.<br />
We reserve the right to exercise industrial property rights.<br />
2.5 Return and waste disposal<br />
– If the unit has been delivered through a parcel service and not directly by a dealer you<br />
should keep the packaging material for possible service instances.<br />
– If there is no corresponding agreement regarding the return of packing material, then<br />
the packing material remains with the customer. He is responsible for environmental<br />
waste disposal in accordance with the applicable waste disposal legislation.<br />
– After use the unit may be returned to the dealer, who is then responsible for proper<br />
disposal of the unit.<br />
– Non-infectious used accessories (e.g. nasal cannula) can be disposed off as domestic<br />
waste<br />
– Infectious accessories (e.g. nasal cannula of an infected user) must be disposed of<br />
through a specially approved waste disposal company. Addresses are available from<br />
your local municipality.
2.6 Customer service<br />
Service work should normally be carried out by your local authorized dealer.<br />
You can contact the customer service team of Kröber <strong>GmbH</strong> as follows:<br />
Office hours: Mo - Fr 8.00 a.m. -3.30 p.m.<br />
Address: Kröber <strong>Medizintechnik</strong> <strong>GmbH</strong><br />
Salzheck 4<br />
D-56332 Dieblich<br />
Germany<br />
Phone: +49 (0) 2607 – 94040<br />
Fax: +49 (0) 2607 – 940422<br />
Internet: www.kroeber.de<br />
eMail: info@kroeber.de<br />
<strong>aeroplus</strong> m<br />
General<br />
9
<strong>aeroplus</strong> m<br />
Safety<br />
3 Safety<br />
This section provides an overview over all important safety aspects for safe and trouble-free<br />
operation of the unit.<br />
The individual chapters additionally contain actual safety notes highlighted with symbols,<br />
which will help to avoid immediate dangers.<br />
3.1 General<br />
The machine is built according to the currently applicable rules of technology and is safe to<br />
operate.<br />
However, dangers may still arise from the unit if it is incorrectly operated or used for<br />
purposes it is not intended for.<br />
Any persons using this unit must have read and understood these instructions before starting<br />
operation. This also applies if the person in question has already worked with just such a unit<br />
or similar equipment or was trained by the manufacturer.<br />
Knowing the content of these instructions for use is a prerequisite for the avoidance of<br />
mistakes and for safe and trouble-free operation of the unit.<br />
Neither changes nor conversions may be carried out on the equipment, which have not been<br />
explicitly authorized by the manufacturer, to avoid dangers and to ensure optimal<br />
performance.<br />
All safety decals and operating signs on the unit must be kept well legible at all times.<br />
Damaged or illegible decals must be replaced immediately.<br />
3.2 Operator’s Responsibility<br />
These instructions for use must be kept near the unit, so that it is available for the user at any<br />
time.<br />
Apart from the notes on safety mentioned in this manual, all generally valid safety and<br />
accident prevention instructions must also be observed and adhered to.<br />
The machine may only be operated in a technically perfect condition and if operationally<br />
safe.<br />
The information contained in the instruction manual is complete and must be adhered to<br />
without limitation.<br />
3.3 Intended Use<br />
The operational safety of the unit is only assured when used for the purpose it is intended<br />
for, as specified in the instructions for use.<br />
The <strong>aeroplus</strong> m solely intended for use within the scope of a medical therapy for the<br />
additional, non-life-sustaining supply of oxygen. The unit may thereby be used in hospitals,<br />
homes or at home on mobile or portable basis.<br />
The unit must only be used according to the medical indication and only in accordance with<br />
the doctor's prescription by following these instructions for use<br />
The intended use also includes the compliance with the assembly instructions, as well as the<br />
notes on cleaning and maintenance of the unit.<br />
Any other use of the unit beyond these limits is prohibited and is not considered as<br />
unintended use! Claims of any kind against the manufacturer and/or his authorized<br />
10
<strong>aeroplus</strong> m<br />
Safety<br />
representatives resulting from damage caused by unintended use of the unit are<br />
excluded. The customer is solely liable for any damage resulting from unintended use.<br />
3.4 Dangers which may arise from the unit<br />
The unit was subjected to a risk analysis. The resultant construction and design of the unit<br />
corresponds to the current status of technology.<br />
However, there is still a remaining risk!<br />
The unit requires responsibly minded and cautious operation. Improper operation or<br />
operation by unauthorized persons can endanger persons.<br />
WARNING! Risk of health damage!<br />
If an absolutely safe oxygen supply is required, it is strictly necessary to have a<br />
second, independent oxygen source available as replacement (e.g. a mobile<br />
oxygen savings system with an oxygen cylinder).<br />
If the patient or the operator notices at any time that the available amount of<br />
oxygen is not sufficient, you should immediately contact your dealer and/or<br />
doctor.<br />
WARNING! Risk of health damage!<br />
Particular supervision is required if the unit is to be used in the vicinity of<br />
children or bedfast persons. The unit must under no circumstances be used with<br />
children without additional supervision!<br />
WARNING! Danger of side effects!<br />
If side effects or extreme health restrictions occur during the therapy, you<br />
should immediately consult your doctor.<br />
11
<strong>aeroplus</strong> m<br />
Safety<br />
12<br />
WARNING! Fire hazard caused by oxygen!<br />
Oxygen is vital, but in concentrators with only a few percentage points above the<br />
normal oxygen content in the air it is a highly dangerous fire accelerant. There<br />
are only a few materials which will not burn off like an explosion under a raised<br />
concentration of oxygen.<br />
Therefore:<br />
– Oxygen may only be handled by trained or specially instructed persons!<br />
– The misuse of oxygen, e.g. to cool down or improve the ambient air, to cool<br />
down and dust or blow off of persons, clothes, furniture etc. is dangerous<br />
and therefore prohibited!<br />
– Smoking and handling ignition sources and open flames is prohibited when<br />
working with oxygen!<br />
– Keep a minimum distance of 2 metres from all spark generating equipment<br />
and open fire!<br />
– After having stayed in a possible oxygen saturated atmosphere you should<br />
thoroughly aerate your cloths, because oxygen adheres to the clothes very<br />
well! An ignition source, e.g. a burning cigarette, could easily cause<br />
burning of your clothes.<br />
– Materials that do not burn in air may burn very vigorously and even<br />
spontaneously in oxygen or oxygen enriched air. This already applies for<br />
an enrichment of only a few percent!<br />
– Oil and grease (even creams and gels) can react in an explosion like<br />
manner when coming in contact with oxygen. It is therefore mandatory to<br />
keep the unit free of oil and grease!<br />
– Oxygen considerably increases the temperature of a flame and the speed of<br />
combustion!<br />
– Do not fill the moisturizer with inflammable fluids!<br />
WARNING! Danger of electric current!<br />
Electric energies can cause severe injury. Damaged insulation or components<br />
cause a danger to life.<br />
Therefore:<br />
– Work on the equipment must only be performed by trained professionals.<br />
– Pull the mains plug out and remove also the battery before starting work on<br />
the unit!<br />
– Check mains leads for damage before every use.
<strong>aeroplus</strong> m<br />
Safety<br />
ATTENTION! Observe high frequency safety!<br />
Medical equipment can be influenced by (mobile) HF communication equipment<br />
(e.g. mobile phones).<br />
Do not use mobile radio equipment in the immediate vicinity of the <strong>aeroplus</strong> m.<br />
ATTENTION! Observe electromagnetic compatibility!<br />
Electrical medical equipment is subjected to stringent protective measures<br />
concerning electromagnetic compatibility (EMC) and must be installed and<br />
operated in accordance with the EMC information contained in the<br />
accompanying documents. The following should be noted in particular:<br />
– Floors should be made of wood or concrete or should be covered with<br />
ceramic tiles. If the floor is covered with a synthetic material, the relative<br />
humidity must be at least 30%.<br />
– During operation the unit must therefore not be exposed to extremely<br />
strong magnetic fields.<br />
– Magnetic fields at mains frequency must comply with the typical values<br />
found in business or hospital environments.<br />
ATTENTION! Keep the minimum distance!<br />
The air intake of the <strong>aeroplus</strong> m is located on the front side of the unit, the<br />
following is therefore of importance:<br />
– There should be a minimum distance of 30cm from walls, curtains and<br />
other large objects (e.g. cupboards), so that an unrestricted entry of air is<br />
assured at the back of the unit.<br />
– The <strong>aeroplus</strong> m must not be used directly beside with other equipment.<br />
ATTENTION! Avoid overheating!<br />
The unit is air cooled, in order to avoid overheating it must not be placed near<br />
heaters, etc.<br />
3.5 What to do if a hose caught fire<br />
Should a hose catch fire despite all protective measures, it is not enough to just switch the<br />
unit off, because oxygen will continue to flow for a while after the unit has been switched off.<br />
Take the following steps:<br />
– Pull the oxygen hose off the unit to interrupt the oxygen supply.<br />
– Choke the flames (e.g. with a blanket).<br />
– Ventilate well after extinguishing the fire, because a burning PVC-hose will emit<br />
toxic gases.<br />
The metal connection on the oxygen outlet acts as a fire inhibitor, preventing the flames from<br />
spreading into the unit.<br />
13
<strong>aeroplus</strong> m<br />
Safety<br />
14
<strong>aeroplus</strong> m<br />
Safety<br />
15
<strong>aeroplus</strong> m<br />
Design and function<br />
4 Design and function<br />
4.1 General description<br />
The <strong>aeroplus</strong> m oxygen concentrator for has been optimized for the oxygen supply at home.<br />
The electronically controlled oxygen concentrator separates the oxygen from the ambient air<br />
and supplies the user through the nasal cannula with highly concentrated oxygen with each<br />
detected breath.<br />
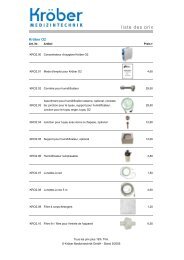
4.2 Design<br />
16<br />
3<br />
2<br />
1<br />
3<br />
1<br />
2<br />
1 Carrying handle<br />
2 Keypad<br />
3 Color display<br />
1 Oxygen outlet<br />
2 Coarse dust filter<br />
3 DC Voltage input
1 Battery drawer<br />
NOTE!<br />
The typeplate of the <strong>aeroplus</strong> m is located underneath.<br />
4.3 Keypad<br />
1<br />
1 Color display<br />
2 Arrow-up-key<br />
3 Alarm-mute key<br />
4 On-/Off key<br />
5 Menu key<br />
6 Arrow-up key<br />
<strong>aeroplus</strong> m<br />
Design and function<br />
17
<strong>aeroplus</strong> m<br />
Design and function<br />
4.4 Display<br />
18<br />
1 Mains supply<br />
2 Battery capacity<br />
3 Therapie setting<br />
4 Message line<br />
5 System state<br />
green: all systems o.k.<br />
blue: information message<br />
yellow: alarm status
5 Technical Data<br />
Model <strong>aeroplus</strong> m<br />
MDD Classification IIa<br />
<strong>aeroplus</strong> m<br />
Technical Data<br />
Power Supply 100 - 240 V~, 50/60 Hz<br />
Desktop power supply: Type APS 100EM-190530-8<br />
19 V DC<br />
Battery: Type 49-5010<br />
14.4 V 97 Wh Lithium Ion<br />
Environmental conditions: Operating temperature: +5 to +40°C<br />
Storage temperature: -25 to +70°C<br />
Relative humiity: 15% - 93 % r.F., non-condensing<br />
Pressure: 700 to 1060 mbar<br />
Noise level: < 40 dB(A)<br />
Power consumption max. 100 W<br />
Coarse dust filter underneath the oxygen outlet<br />
Finefilter inside<br />
Interface USB (mini)<br />
Weight 3.6 kg unit<br />
0.7 kg battery<br />
Dimensions (HxBxT) (25 x 23 x 16) cm<br />
Warranty of the manufacturer 2 years<br />
WARNING! Unsafe connection!<br />
Use only authorized and approved equipment on this<br />
interface.<br />
O2-Abgabe CMV 150 ml per setting (CMV = constant minute volume)<br />
10 therapy settings from 0.5 to 5.0<br />
O2-Konzentration > 90%<br />
Trigger frequency < 30 bpm<br />
Trigger sensitivity: 0.1 cmH2O, 0.2 cmH2O<br />
Battery operation: @ setting 2: 4 h, @ setting 5: 2 h<br />
Recharging duration<br />
(for 80% battery capacity)<br />
90 min with device shut off or in stand-by<br />
180 min with device switched on<br />
19
<strong>aeroplus</strong> m<br />
Transport, packaging and storage<br />
6 Transport, packaging and storage<br />
20<br />
The following should be noted when transporting the <strong>aeroplus</strong> m (without operation):<br />
– The unit should only be shipped and transported in its original packaging.<br />
– Remove the battery before transport.<br />
– For transport, e.g. by car, the unit may stand.<br />
– Open the transport box from the top. Do not stand the transport carton upside<br />
down or on one of its sides.<br />
NOTE!<br />
Mit dem Tragegriff an der Oberseite des Geräts kann das Gerät sicher angehoben<br />
werden.<br />
During mobile use, the <strong>aeroplus</strong> m should be placed in its carrying case. This case offers<br />
enough storage space for the accessories and has the necessary opernings for air in- and<br />
outlet as well as for the nasal cannula and the power supply cord.<br />
ATTENTION! Quiet alarm signals!<br />
The alarm signals are quieter when the device is operated in the carrying case.<br />
Take the <strong>aeroplus</strong> m oxygen concentrator out of the carrying case whenever it is<br />
possible and use this bag for transport only!<br />
6.1 Transport inspection<br />
It is highly recommended to check the complete delivery for completeness and possible<br />
transport damage, immediately after receipt.<br />
In case of externally detectable transport damage you should not accept the delivery, or only<br />
with reservation. Acknowledge the receipt only with reservation (e.g. on the freight<br />
document). Specify the expected damage and inform the manufacturer immediately.<br />
Hidden damage should be claimed immediately after detection, because damage claims can<br />
only be lodged within the applicable claims periods.<br />
The packaging material should be saved, it may be needed if the unit has to be returned.
6.2 Storage<br />
<strong>aeroplus</strong> m<br />
Transport, packaging and storage<br />
If the package is to be stored before it is taken into service, please observe the following<br />
instructions:<br />
– Store in a dry environment. Relative humidity: max. 93 %.<br />
– It must be assured that the package is not stored outdoors.<br />
It must also be assured that the floor used for storage is dry over the entire storage<br />
period.<br />
– Storage temperature -20 to +70°C.<br />
– Store in a dust-free environment.<br />
– Avoid mechanical shocks and damages.<br />
6.3 Mobile Use<br />
To use the <strong>aeroplus</strong> m mobilely:<br />
Insert the <strong>aeroplus</strong> m into the carryin case and close the zippers.<br />
Connect the nasal cannula.<br />
Flip the caddy open.<br />
Let the carrying case slide over the leverage.<br />
21
<strong>aeroplus</strong> m<br />
Taking into service<br />
7 Taking into service<br />
7.1 Before assembling<br />
Check before assembling whether all components needed for correct operation are available.<br />
22<br />
NOTE!<br />
For assistance during assembly, operation or maintenance, contact the manufacturer<br />
or the your local service. The address of the manufacturer can be found on page<br />
Fehler! Textmarke nicht definiert.. The address of your local service provider should<br />
be handed over briefing.<br />
You should also contact the a.m. companies in case of unexpected operating<br />
conditions or events.<br />
8<br />
7<br />
6<br />
5<br />
7.1 Choosing the location<br />
1 <strong>aeroplus</strong> m<br />
2 nasal cannula<br />
3 battery<br />
4 power supply<br />
5 instructions for use<br />
6 coarse dust filter<br />
7 carrying case<br />
8 caddy<br />
Please consider the following when choosing the location:<br />
– The unit should have 30cm clearance from any walls, curtains and other large objects<br />
(e.g. cupboards), to ensure unrestricted entry of air through the back of the unit.<br />
– The unit is air cooled. It must therefore not be placed near heaters, etc. At such a<br />
location there is a risk of overheating.<br />
NOTE!<br />
The unit can be safely lifted and moved by the carrier handle on top of the unit.<br />
ATTENTION! Ensure a sufficient air supply!<br />
The <strong>aeroplus</strong> m oxygen concentrator must not be operated directly next to or<br />
even stacked with other equipment. Ensure a sufficient distance from the walls,<br />
etc.!<br />
1<br />
2<br />
3<br />
4
8 Short operating instructions<br />
Insert the battery.<br />
<strong>aeroplus</strong> m<br />
Short operating instructions<br />
Check the condition of the coarse dust filter and replace it if needed.<br />
Connect the power supply to the mains and to the <strong>aeroplus</strong> m.<br />
Connect the nasal cannula.<br />
Insert both cannula openings into your nose.<br />
Place both feed hoses over your ears. Pull the sling with the sliding<br />
piece tight under your chin<br />
23
<strong>aeroplus</strong> m<br />
Short operating instructions<br />
24<br />
WARNING! Strangulation danger!<br />
Pay attention for a proper tubing routing without any loops to<br />
reduce the risk of strangulation.<br />
WARNUNG! Skin irritations!<br />
Pay attention for a proper fit of the nasal cannula to avoid any<br />
skin irritation caused by movements of the device .<br />
WARNUNG! Missing trigger!<br />
Eventually, the <strong>aeroplus</strong> m is not able to detect all breathing<br />
efforts. Optimize the trigger sensitivity and adjust the placement<br />
of the nasal cannula prongs.<br />
Press the ON-/Off-button to start the therapy.<br />
WARNING! Strangulation danger!<br />
Pay attention for a proper tubing routing without any loops to reduce the risk of<br />
strangulation and tripping hazards.
9 Main operating functions<br />
<strong>aeroplus</strong> m<br />
Main operating functions<br />
WARNING! Health risk!<br />
Inappropriate use of the <strong>aeroplus</strong> m can lead to severe personal and/or material<br />
damage.<br />
You should therefore only start up the unit in strict compliance with the<br />
instructions for use and the notes on safety.<br />
9.1 Furnish the power supply<br />
The <strong>aeroplus</strong> m oxygen concentrator can be alternatively supplied by mains or by the internal<br />
rechargeable battery.<br />
It is advisable to keep and charge the battery in the device during mains operation. Thereby<br />
an optimal charging state and availibility can be maintained, in case the mains supply is<br />
interrupted fails.<br />
However if the <strong>aeroplus</strong> m oxygen concentrator is not in use for a longer period of time,<br />
remove the battery from the system to ensure optimum battery lifetime.<br />
9.1.1 Connecting to the mains power<br />
For connecting to the mains power system, first connect the desktop<br />
power adapter with a wall outlet.<br />
Plug in the DC connector into the mating jack on the <strong>aeroplus</strong> m.<br />
The connector must snap into place.<br />
In the display, the power plug symbol is turned on.<br />
After every first energyzing cycle (that is to say: from a currentless<br />
state / no battery), the <strong>aeroplus</strong> m perform a selftest:<br />
Display and loudspeaker functions are checked:<br />
� Display shows a black / white pattern.<br />
� Sound signal is activated.<br />
After that the <strong>aeroplus</strong> m goes automatically into standby-state.<br />
NOTE!<br />
If the battery has not been inserted, only the power plug<br />
symbol is activated.<br />
25
<strong>aeroplus</strong> m<br />
Main operating functions<br />
9.1.2 Disconnecting from mains<br />
9.1.3 Battery operation<br />
Internal battery charging<br />
26<br />
With inserted battery:<br />
Both power plug symbol and the remaining battery capacity in<br />
percent value are displayed.<br />
A charging process is presented by a wandering arrow.<br />
For disconnecting, de-latch the dc connector by pulling back the<br />
Überwurfhülse entrasten and remove the whole conector.<br />
In the display, the mains power symbol goes dark.<br />
NOTE!<br />
While the <strong>aeroplus</strong> is used, after disconnection from the mains<br />
supply, the unit goes unterbrechungsfrei in battery operation<br />
mode, if the installed battery has sufficient capacity.<br />
NOTE!<br />
If a battery has not been installed, the whole device will be<br />
without current: the display goes dark.<br />
For charging the battery internally, connect the <strong>aeroplus</strong> m tot he<br />
mains power. Both in operation and when turned off, the battery will<br />
be charged.<br />
Chargign durations for a complete cycle.<br />
� unit turned on: 300 minutes<br />
� unit turned off: 90 minutes
Charging the battery externally<br />
<strong>aeroplus</strong> m<br />
Main operating functions<br />
Alternatively, the battery can be charged externally – outside of the <strong>aeroplus</strong> m – by the<br />
external charger (p/n 49-5003).<br />
Open the battery drawer. For that purpose, push both<br />
sliders to the middle.<br />
Pull out the drawer including battery<br />
Remove the battery from the drawer. For doing so, lift<br />
the battery at the connector and pull the battery out.<br />
Charge the battery in the external charger. Observe<br />
additional instructions for use for this optional<br />
accessory!<br />
Insert the charged battery into the drawer; the<br />
connector must match into corresponding opening of<br />
the drawer.<br />
27
<strong>aeroplus</strong> m<br />
Main operating functions<br />
Determining the remaining battery operation time<br />
9.2 Starting the therapy<br />
28<br />
Insert battery drawer including battery into the battery<br />
compartment and close the latch. You must clearly<br />
identify a clicking sound for completed action.<br />
When sufficiently charged, the <strong>aeroplus</strong> m can be used for battery<br />
mode operation.<br />
In stand-by-mode, the remaining battery capacity in % is displayed.<br />
In therapy mode, the remaining battery capacity is displayed in<br />
minutes of operation.<br />
NOTE!<br />
The remaining capacity is continuously updated according to<br />
the actual settings. Depending on the therapy setting and<br />
breathing frequency, this figure can slightly fluctuate.<br />
To start the therapy, press the on-/off-button shortly.<br />
The <strong>aeroplus</strong> m starts the oxygen production process. During this<br />
preparation phase, the remaining time duration until reaching<br />
readiness for oxygen delivery is displayed.
9.3 Self test<br />
<strong>aeroplus</strong> m<br />
Main operating functions<br />
After the preparation phase, oxygen is available for therapy.<br />
The therapy setting is displayed in the display.<br />
The <strong>aeroplus</strong> m runs an internal self test after power-up cycle. In case of a detected error, a<br />
correspinding error message is displayed. In addition, all systems undergo systematic cyclic<br />
testing during operation. For manual control, perform an inspiration and check for oxygen<br />
delivery. If proper oxygen delivery is detected, the system is ready for operation.<br />
In addition always check for the remaining battery capacity!<br />
9.4 Terminating or interrupting the therapy<br />
NOTE!<br />
There is no distinction between an interruption or a termination of the therapy. In both<br />
situations, the <strong>aeroplus</strong> m is set into stand-by mode:<br />
For termination, press the On-/Off button .<br />
The oxygen production process is terminated; the system is shut<br />
down.<br />
The <strong>aeroplus</strong> m goes into stand-by mode.<br />
29
<strong>aeroplus</strong> m<br />
Main operating functions<br />
9.5 Adjusting the therapy setting<br />
30<br />
ATTENTION!<br />
The patient-specific settings must be determined for each patient individually.<br />
Settings known from continuous flow oxygen therapy cannot be transferred<br />
without professional medical consultation!<br />
To adjust the therapy setting, press the arrow-up or arrow-down<br />
button .<br />
The arrow-up button increases the oxygen dose while the arrowdoan<br />
button decreases the volume.<br />
NOTE!<br />
The settings can be adjusted in steps of 0.5.<br />
If activated in the menu, each button activation is confirmed with a<br />
short acoustical signal.<br />
NOTE!<br />
The therapy setting can also be adjusted through the main<br />
menu, see chapter 10.4 Therapy setting.<br />
NOTE!<br />
The maximum gas output temperature is maximum 6 degree higher than the ambient<br />
temperature.<br />
ATTENTION!<br />
The unit has been designed for operation at altitudes of up to 2000 m above seal<br />
level. If the unit is used beyond this specification, compliance with the specified<br />
performance data can no longer be guaranteed.
10 Menu and advanced settings<br />
<strong>aeroplus</strong> m<br />
Menu and advanced settings<br />
With the advanced settings in the menu, the <strong>aeroplus</strong> m can be individually configured and<br />
customized to the needs of the user.<br />
10.1 Menu operation<br />
10.2 Menu structure<br />
To call the menu, press the menu button .<br />
The menu list is displayed, starting with the first menu entry:<br />
Information.<br />
With the arrow-up-button and the arrow-down-button<br />
respectively, it is possible to select the previous or next menu item<br />
of the list. The selected menu item is inverted.<br />
With the menu button , the inverted menu item is selected and<br />
can be further adjusted.<br />
In addition, this button has a confirming function.<br />
Following menu and submenu items can be selected:<br />
Menu level 1 Menu level 2 Description<br />
Information Operating hours Operating hours counter for device operation<br />
Therapy hours Operating hours counter for therapy sessions<br />
Software version Software revisions<br />
Serial numbers Seral number of modules<br />
Setting Therapy settings<br />
O2-Min Lower limit for therapy setting<br />
O2-Max Upper limit for therapy setting<br />
Trigger Setting of the trigger sensitivity<br />
Language Choice of menu language<br />
Volume button Volume setting for button click<br />
Volume alarm tone Volume setting for button click<br />
31
<strong>aeroplus</strong> m<br />
Menu and advanced settings<br />
Menu level 1 Menu level 2 Description<br />
Volume trigger<br />
signal<br />
10.3 Information<br />
Display/Message Description<br />
32<br />
Volume setting for inspiration detection<br />
To choose menu item Information, select and confirm this choice<br />
in the main menu with the menu button .<br />
First information displayed are the operating hours in format<br />
hours:minutes (here: 211 hours, 50 minutes).<br />
Either press arrow-up - or arrow-down-button to access<br />
further information or confirm return with the menu button to<br />
return to the main menu.<br />
The arrow-up-button leads to the therapy hours in format<br />
hours:minutes (hier: 25 hours, 40 minutes).<br />
Either press arrow-up - or arrow-down-button to access<br />
further information or confirm return with the menu button to<br />
return to the main menu.<br />
The arrow-up button leads to the display of the installed<br />
Software revisions for both microprocessor systems (here: V-1.01<br />
and V-1.00).<br />
Either press arrow-up - or arrow-down-button to access<br />
further information or confirm return with the menu button to<br />
return to the main menu.
<strong>aeroplus</strong> m<br />
Menu and advanced settings<br />
The arrow-up button leads to the display of the serial number of<br />
the rechargeable battery (here: S/N 119).<br />
Either press arrow-up - or arrow-down-button to access<br />
further information or confirm return with the menu button to<br />
return to the main menu.<br />
In case that no battery is detected, dashes appear.<br />
One further press on the arrow-up button leads to the<br />
operating hours counter menu item.<br />
33
<strong>aeroplus</strong> m<br />
Menu and advanced settings<br />
10.4 Therapy setting<br />
In this menu, the therapy setting and thus the delivered amount of oxygen per breath can be<br />
set.<br />
Display/Message Description<br />
34<br />
To choose menu item Setting, select and confirm this choice in the<br />
main menu with the menu button . The selection is inverted with<br />
white back ground color<br />
NOTE!<br />
The therapy setting can already be seen here (setting 3). It is<br />
not necessary to enter the submenu just for control of the<br />
setting.<br />
To increase the setting press the arrow-up-button .<br />
To decrease the setting press the arrow-down-button .<br />
To leave this menu, press the menu button (=return).<br />
The new therapy setting is already active.
10.5 Lower limit for the therapy setting<br />
<strong>aeroplus</strong> m<br />
Menu and advanced settings<br />
In order to limit the therapy range, a lower (minimum oxygen volume, O2-Min) and an upper<br />
limit (maximum oxygen volume, O2-Max) can be stored. These limits ensure the operation<br />
only between the applied limits.<br />
Display/Message Description<br />
To set the lower limit, select menu item O2-Min. in the main menu;<br />
the selection is inverted with white back ground color.<br />
NOTE!<br />
Already in the main menu, the current setting can be controlled<br />
(here: setting 0.5). It is not necessary to call the submenu.<br />
Confirm selected menu item with the menu button .<br />
To increase the setting press the arrow-up-button .<br />
To decrease the setting press the arrow-down-button .<br />
To leave this menu, press the menu button (=return).<br />
NOTE!<br />
If the lower limit has the same value as the upper limit, this will<br />
freeze the therapy setting.<br />
NOTE!<br />
The lower limit can only be set between 0.5 and the upper<br />
therapy limit. If applicable, the upper limit must be modified<br />
first; not till then the lower limit can be adjusted as desired.<br />
35
<strong>aeroplus</strong> m<br />
Menu and advanced settings<br />
10.6 Upper limit for the therapy setting<br />
In order to limit the therapy range, a lower (minimum oxygen volume, O2-Min) and a upper<br />
limit (maximum oxygen volume, O2-Max) can be stored. These limits ensure the operation<br />
only between the applied limits.<br />
Display/ Message Description<br />
36<br />
To set the upper limit, select menu item O2-Max. in the main menu;<br />
the selection is inverted with white back ground color.<br />
NOTE!<br />
Already in the main menu, the current setting can be controlled<br />
(here: setting 5.0). It is not necessary to call the submenu.<br />
Confirm selected menu item with the menu button .<br />
To increase the setting press the arrow-up-button .<br />
To decrease the setting press the arrow-down-button .<br />
To leave this menu, press the menu button (=return).<br />
NOTE!<br />
The upper limit can only be set between the lower therapy limit<br />
and 5.0. If applicable, the lower limit must be modified first; not<br />
till then the upper limit can be adjusted as desired.<br />
NOTE!<br />
If the lower limit has the same value as the upper limit, this will<br />
freeze the therapy setting.
10.7 Trigger<br />
<strong>aeroplus</strong> m<br />
Menu and advanced settings<br />
The sensitivity of the inspiration trigger can be optimized to the user’s needs: The trigger can<br />
be set to either normal or sensitive.<br />
NOTE!<br />
The setting “sensitive” implies that the trigger is more susceptible for disturbances.<br />
NOTE!<br />
The trigger sensitivity setting is displayed only in the menu but not in the standard<br />
screen.<br />
Display/Message Description<br />
To adjust the trigger sensitivity, select menu item Trigger in the<br />
main menu; the selection is inverted with white back ground color.<br />
Confirm selected menu item with the menu button .<br />
To toggle the setting press arrow-up- or arrow-down button .<br />
NOTE!<br />
Setting normal (N) corresponds with a trigger sensitivity of 0.2<br />
cmH2O.<br />
Setting sensitive (S) corresponds with a trigger sensitivity of<br />
0.1 cmH2O.<br />
To exit the menu, press the menu button (=return).<br />
37
<strong>aeroplus</strong> m<br />
Menu and advanced settings<br />
10.8 Language<br />
It is possible to select different languages for the menu.<br />
38<br />
NOTE!<br />
The list of available languages will be constantly ammended.<br />
Display/Message Description<br />
To change menu the language, select menu item Language in the<br />
main menu; the selection is inverted with white back ground color.<br />
Confirm selected menu item with the menu button .<br />
To change the language setting, press arrow-up- or arrow-down<br />
button . All currently available languages are displayed.<br />
Select the desired language and/or exit the menu by pressing the<br />
menu button (=return).
10.9 Button tone volume<br />
<strong>aeroplus</strong> m<br />
Menu and advanced settings<br />
This menu item allows for adjustment of the button tone volume, the confirmation message<br />
after a press of the button.<br />
Display/Message Description<br />
To change the Button tone volume, select menu item Button Vol.<br />
in the main menu; the selection is inverted with white back ground<br />
color.<br />
Confirm selected menu item with the menu button .<br />
To set the volume, press arrow-up- or arrow-down button .<br />
The sound level can be set between 0 (= off) and 9 (= very loud).<br />
NOTE!<br />
With each modification, a sample tone with the set volume is<br />
generated.<br />
To leave this menu, press the menu button (=return).<br />
39
<strong>aeroplus</strong> m<br />
Menu and advanced settings<br />
10.10 Alarm tone volume<br />
This menu item allows for adjustment of the alarm tone volume.<br />
Display/Message Description<br />
40<br />
To change the Alarm Tone Volume, select menu item Alarm Vol.<br />
in the main menu; the selection is inverted with white back ground<br />
color.<br />
Confirm selected menu item with the menu button .<br />
To set the volume, press arrow-up- or arrow-down button .<br />
The volume can be set between 0 (= off) and 9 (= very loud).<br />
NOTE!<br />
With each modification, a sample tone with the set volume is<br />
generated.<br />
To leave this menu, press the menu button (=return).
10.11 Trigger signal volume<br />
<strong>aeroplus</strong> m<br />
Menu and advanced settings<br />
It is possible to activate a trigger signal tone and to adjust its volume. The bolus tone<br />
indicates a successful trigger effort to the user.<br />
Display/Message Description<br />
To adjust the Trigger signal volume select menu item Trigger V.<br />
in the main menu; the selection is highlighted with white back<br />
ground color.<br />
Confirm selected menu item with the menu button .<br />
To set the volume, press arrow-up- or arrow-down button .<br />
The volume can be set between 0 (= off) and 9 (= very loud).<br />
NOTE!<br />
With each modification, a sample tone with the set volume is<br />
generated.<br />
To leave this menu, press the menu button (=return).<br />
41
<strong>aeroplus</strong> m<br />
Messages and Alarms<br />
11 Messages and Alarms<br />
11.1 Alarm priority<br />
On the <strong>aeroplus</strong> m, in addition to information messages there are only alarms with low<br />
priority:<br />
Alarm priority Description<br />
Low priority: An increased level of alertness of the user is necessary.<br />
Alarm regime<br />
beepbeep - - 30 sec. pause - - beepbeep - - 30 sec. pause - -<br />
11.2 Information messages<br />
Information messages have an advising and oftentimes technical character and are<br />
supposed to suppport the user to maintain a trouble-free operation of the <strong>aeroplus</strong> m.<br />
Display/Message Description<br />
Low battery<br />
capacity<br />
Low battery<br />
temperature<br />
42<br />
The battery capacity is low (< 10 % or remaining operation<br />
time < 15 minutes). Only shortterm operation possible.<br />
Counter measures:<br />
� Charge the battery.<br />
� Connect the <strong>aeroplus</strong> m to the mains power supply.<br />
� Replace the depleted battery with charged spare battery.<br />
� Where appropriate, decrease the therapy setting (increases the<br />
remaining operation time).<br />
Temperature of the battery is too low to start the charging<br />
process. Charging function is interrupted.<br />
Counter measures:<br />
� Take the <strong>aeroplus</strong> m into a higher ambient temperature.<br />
NOTE!<br />
The charging process will automatically continue at a battery<br />
temperature of > 3° Celsius.
Display/Message Description<br />
High battery<br />
temperature<br />
11.3 Alarms<br />
<strong>aeroplus</strong> m<br />
Messages and Alarms<br />
Temperature of the battery is too high for the charging<br />
process. Charging function is interrupted.<br />
Counter measures:<br />
Following low-priority alarms can be triggered:<br />
Alarm category/<br />
Display<br />
Oxygen<br />
Pressure<br />
� Take the <strong>aeroplus</strong> m into a lower ambient temperature.<br />
NOTE!<br />
The charging process will automatically continue at a battery<br />
temperature of < 42° C.<br />
Description<br />
The product gas does not have the specified oxygen<br />
concentration.<br />
The oxygen concentrator <strong>aeroplus</strong> m is equipped with an innovative<br />
multifunctional sensor that monitors constantly the oxygen<br />
concentration of the production process.<br />
In case of a deviation from the technical specifications, the oxygen<br />
alarm is triggered.<br />
Counter measures<br />
� with constant alarms, consult technical service.<br />
The pressure in the oxygen reservoir is too low.<br />
Counter measures:<br />
� Re-boot the unit. If alarm still continues, contact the technical<br />
service.<br />
43
<strong>aeroplus</strong> m<br />
Messages and Alarms<br />
Alarm category/<br />
Display<br />
Sensor<br />
Asphyxia<br />
Battery capacity<br />
44<br />
Description<br />
There is malfunction of the multifunctional sensor.<br />
The sensor is not able to detect the oxygen concentration with<br />
sufficient accuracy.<br />
However, the unit can be used.<br />
Counter measures<br />
� Re-boot the unit. If alarm still continues, contact the technical<br />
service.<br />
The maximum time to detect an inspiration has been<br />
exceeded.<br />
Counter measures<br />
� Possibly the nasal cannula is slipped away: check the fit and<br />
position of the nasal prongs.<br />
� Possibly the tubing is blocked: check the routing for kinks.<br />
� Possibly the nasal cannula is not connected properly: check the<br />
connection to the oxygen outlet at the <strong>aeroplus</strong> m.<br />
� Possibly the inspiration trigger signal is too weak: set the<br />
inspiration trigger sensitivity to „sensitive“.<br />
The battery capacity is no longer sufficient to ensure a safe<br />
operation. The <strong>aeroplus</strong> m stopps operations automatically<br />
and performs a controlled shut-down.<br />
Counter measures:<br />
� Connect the <strong>aeroplus</strong> m to the mains supply.<br />
� Charge the battery.<br />
� Install a charged spare battery.
Alarm category/<br />
Display<br />
Battery<br />
temperature<br />
Compressor<br />
temperature<br />
System<br />
Battery type<br />
Description<br />
<strong>aeroplus</strong> m<br />
Messages and Alarms<br />
The temperature of the battery is too high. The <strong>aeroplus</strong> m<br />
stopps operations automatically and performs a controlled<br />
shut-down.<br />
Counter measures:<br />
� Take the <strong>aeroplus</strong> m to a lower ambient temperature.<br />
� Remove the battery. Then connect the <strong>aeroplus</strong> m to the mains<br />
supply.<br />
NOTE!<br />
Under this circumstance, the system re-boots meanwhile.<br />
� Replace the battery with a charged spare battery.<br />
The temperature of the compressor is too high for operation.<br />
The <strong>aeroplus</strong> m stopps operations automatically and performs<br />
a controlled shut-down.<br />
Counter measures:<br />
� Take the <strong>aeroplus</strong> m to a lower ambient temperature.<br />
� Check the fan for proper operation. (Check at the air in- and<br />
outlet for air flow).<br />
System failure<br />
Counter measures:<br />
� Disconnect battery and(!) mains supply.<br />
� Re-connect device to mains supply.<br />
� Re-boot the unit. If alarm still continues, contact the technical<br />
service.<br />
This battery type is not recognized/supported by the unit.<br />
Operation is not possible.<br />
Counter measures:<br />
� Use only original battery type<br />
45
<strong>aeroplus</strong> m<br />
Messages and Alarms<br />
46<br />
WARNING! Danger of Health Impairments!<br />
Before taking the device into service again, make sure that the cause of the<br />
failure has been professionally fixed.<br />
11.4 Alarm muting<br />
When during an alarm the alarm mute button is pressed, the acoustical alarm is muted<br />
for the preset duration of 120 seconds.<br />
In the display, the remaining duration for alarm muting is displayed<br />
(here 115 seconds).<br />
NOTE!<br />
A repeated press of the alarm mute button resets the<br />
muting counter to 120 seconds.
12 Maintenance<br />
12.1 Safety<br />
<strong>aeroplus</strong> m<br />
Maintenance<br />
WARNING! Danger of electric current!<br />
Before starting cleaning the unit must be switched off and disconnected from the<br />
mains supply.<br />
12.2 General notes<br />
Cleanliness is a prerequisite for the success of an oxygen therapy at home. The specified<br />
cleaning intervals must therefore strictly adhered to!<br />
12.2.1 Cleaning<br />
– The unit should be cleaned with a damp (not wet) cloth, so that not fluid can enter.<br />
– You should only use commercial cleansing agents (e.g. washing-up liquid).<br />
– Aggressive cleansers must not be used under any condition!<br />
12.2.2 Disinfecting<br />
– Any commercial disinfectant can be used for disinfecting. An up-to-date list is available<br />
from the manufacturer.<br />
– The information for use issued by the disinfectant manufacturer must be strictly<br />
complied with..<br />
47
<strong>aeroplus</strong> m<br />
Maintenance<br />
12.3 Maintenance plan<br />
Maintenance and cleaning work must be performed at regular intervals as specified in the<br />
table below.<br />
Interval Cleaning work<br />
daily The humidifier must be cleaned and disinfected every day.<br />
daily<br />
(when used in homes or<br />
for nursing care)<br />
every 14 days<br />
earlier if necessary<br />
48<br />
Clean the nasal cannula.<br />
The <strong>aeroplus</strong> m must be cleaned with a damp cloth and<br />
disinfected after.<br />
every 4 weeks Replace the coarse dust filter<br />
every 4 weeks<br />
(when used in homes or<br />
for nursing care)<br />
annually / after 5000<br />
operating hours<br />
Replace the nasal cannula.<br />
Replace the air intake filter<br />
NOTE!<br />
With extremely dirty ambient air the filter must be<br />
changed earlier.<br />
with changing patients The <strong>aeroplus</strong> m must be cleaned with a damp cloth and<br />
disinfected after.<br />
with changing patients Replace the humidifier.<br />
with changing patients Replace the nasal cannula.<br />
WARNING! Health risk!<br />
In order to avoid cross infection, each user of the<br />
<strong>aeroplus</strong> m should wear his/her own nasal cannula.<br />
after infections After an infection a new nasal cannula should be used to<br />
prevent re-infection.<br />
after service work The <strong>aeroplus</strong> m must be cleaned with a damp cloth and<br />
disinfected after.
Interval Cleaning work<br />
<strong>aeroplus</strong> m<br />
Maintenance<br />
after service work Nasal cannula should be disposed of and replaced by a new<br />
one.<br />
after service work Replace the coarse dust filter<br />
after service work Replace the internal air intake filter (performed by a qualified<br />
technician).<br />
Interval Inspection<br />
annually Safety inspection<br />
Lifetimes are expected as follows:<br />
article Expected lifetime<br />
<strong>aeroplus</strong> m min. 5 years<br />
Nasal cannula 1 month<br />
Coarse dust filter 1 months with average air pollution<br />
49
<strong>aeroplus</strong> m<br />
Maintenance<br />
12.4 Maintenance work<br />
Wartungsarbeit<br />
Cleaning the nasal<br />
cannula<br />
Replacing the<br />
coarse dust filter<br />
50<br />
Beschreibung<br />
1 Disconnect the hose of the nasal cannula from the <strong>aeroplus</strong> m.<br />
2 Clean the nasal cannula in warm soapsuds. You may<br />
alternatively use a weak acetic solution (10% vinegar, 90%<br />
water).<br />
3 Rinse the nasal cannula with lots of clear water.<br />
4 Let the nasal cannula dry in air. The nasal cannula may only be<br />
used again for the therapy after it has properly dried.<br />
1 Remove the nasal cannula from the <strong>aeroplus</strong> m.<br />
2 Remove coarse dust filter drawer from the fron oft he <strong>aeroplus</strong><br />
m: press the latch down and pull out the drawer.<br />
3 Remove the used coarse dust filter.<br />
4 Insert the new filter.<br />
5 Reinstall the drawer. Insert the bottom part first and snap in the<br />
top part.<br />
WARNING! USB interface!<br />
Use only authorized and approved equipment on this interface.
<strong>aeroplus</strong> m<br />
51
<strong>aeroplus</strong> m<br />
Accessories<br />
13 Accessories<br />
52<br />
ATTENTION!<br />
The intended use of the equipment is only possible when using approved<br />
accessories. The use of accessories that have not been designed for use with<br />
this unit, can severely affect the performance of the unit.<br />
The following article numbers should be used when ordering:<br />
Article Number Designation<br />
AEm.00 Instructions for Use <strong>aeroplus</strong> m<br />
KRO2.07 Nasal Cannula, 2 m<br />
AEm.09 Coarse dust filter (set of 3)<br />
AEm.01 Power adapter<br />
AEm.01.1 Power cord for power adapter, EU plug<br />
AEm.02 Battery<br />
AEm.03 Carrying Case<br />
AEm.06 Caddy<br />
AEm.04 External Charger
14 Appendix<br />
14.1 EMC regulations<br />
14.1.1 Electromagnetic compatibility, interference emission<br />
Regulations and declaration of manufacturer -<br />
Electromagnetic compatibility, interference emission<br />
<strong>aeroplus</strong> m<br />
Appendix<br />
The <strong>aeroplus</strong> m is intended for use in an environment as described below. The operator of the<br />
<strong>aeroplus</strong> m must make sure that the unit is operated in such an environment.<br />
Measurement of interference<br />
emission<br />
HF emissions acc. to<br />
CISPR 11<br />
HF emissions acc. to<br />
CISPR 11<br />
Emission of harmonics acc. to<br />
IEC 61000-3-2<br />
Emission of voltage<br />
fluctuations/flickers acc. to IEC<br />
61000-3-3<br />
Compatibility<br />
Group 1<br />
Class B<br />
Class A<br />
compatible<br />
Table 1: Electromagnetic compatibility, interference emission<br />
Electromagnetic environment<br />
- regulations<br />
The <strong>aeroplus</strong> m uses HF energy<br />
solely for its own function. The HF<br />
emission is therefore very low and<br />
any interference with adjacent<br />
electronic equipment is very<br />
unlikely.<br />
The <strong>aeroplus</strong> m is intended for use<br />
in all facilities, including living<br />
quarters and other environments<br />
that are connected to the public<br />
supply network, which also<br />
supplies buildings used for the<br />
purpose of living.<br />
53
<strong>aeroplus</strong> m<br />
Appendix<br />
14.1.2 Electromagnetic compatibility, interference emission<br />
54<br />
Regulations and declaration of manufacturer -<br />
Electromagnetic compatibility, interference emission<br />
The <strong>aeroplus</strong> m is intended for use in an environment as described below. The operator of the<br />
<strong>aeroplus</strong> must make sure that the unit is operated in such an environment.<br />
Immunity test IEC 60601 test level Compatibility level<br />
Discharge of static<br />
electricity acc. to<br />
IEC<br />
61000-4-2<br />
fast transient<br />
electric<br />
interference/bursts<br />
acc. to IEC 61000-<br />
4-4<br />
Surge voltages acc.<br />
to<br />
IEC 61000-4-5<br />
Voltage dips, shortterm<br />
interruptions<br />
and fluctuations in<br />
supply voltage<br />
IEC 61000-4-11<br />
Magnetic field at a<br />
supply frequency<br />
(50 Hz) acc. to<br />
IEC 61000-4-8<br />
±6 kV contact<br />
discharge<br />
±8 kV Air discharge<br />
±2 kV for mains leads<br />
±1 kV for input/output<br />
leads<br />
±1 kV Push-pull<br />
< 5 % UT<br />
(>95 % dip in UT) for ½<br />
period<br />
40 % UT<br />
(60 % dip in UT) for 5<br />
periods<br />
70 % UT<br />
(30 % dip in UT) for 25<br />
periods<br />
Immunity test IEC 60601 test level Compatibility level<br />
radiated HF<br />
interference acc. to<br />
IEC 61000-4-3<br />
3 V/m<br />
80 MHz to 2.5 GHz<br />
3 V/m<br />
<strong>aeroplus</strong> m<br />
Appendix<br />
Electromagnetic<br />
environment - regulations<br />
transmission frequency.<br />
Recommended safety<br />
distance:<br />
d= 1.2 √P for 80 MHz to<br />
800 MHz<br />
d= 2.3 √P for 800 MHz to<br />
2.5 GHz<br />
55
<strong>aeroplus</strong> m<br />
Appendix<br />
Immunity test IEC 60601 test level Compatibility level<br />
directed HF<br />
interference acc. to<br />
IEC 61000-4-6<br />
56<br />
3 Veff<br />
150 kHz to 80 MHz<br />
NOTE 1 For 80 MHz the higher value is valid.<br />
3 Veff<br />
Electromagnetic<br />
environment - regulations<br />
d= 1.2 √P<br />
with P being the rated<br />
power of the transmitter in<br />
Watt (W) acc. to the<br />
specifications of the<br />
transmitter manufacturer<br />
and d being the<br />
recommended safety<br />
distance in metres (m).<br />
According to an in-situ<br />
examination a the field<br />
intensity of stationary radio<br />
transmitters is with all<br />
frequencies lower than the<br />
compatibility level b .<br />
In environments marked<br />
with the following symbol<br />
interferences are possible:<br />
NOTE 2 These regulations may not apply in all situations. The propagation of electromagnetic waves is influenced by the<br />
absorption and reflection by building, objects and persons.<br />
a The field intensity of stationary transmitters, such as base stations of radiophones and land mobile services, amateur<br />
stations, AM- and FM-radio and television stations can theoretically not be exactly predetermined. In order to determine the<br />
electromagnetic environment and the effect of stationary HF transmitters, it is recommend to examine the corresponding<br />
location. If the detected field intensity at the location of the <strong>aeroplus</strong> m exceeds the compatibility level specified above, the<br />
<strong>aeroplus</strong> m must be examined at a different location, with respect to its normal operation. If unusual performance<br />
characteristics are detected, it may be necessary to apply additional measures, such as reorientation or relocation of the<br />
<strong>aeroplus</strong> m.<br />
b Beyond the frequency range from 150 kHz to 80 MHz the field intensity is less than 3 V/m.<br />
Table 2: Electromagnetic compatibility, interference emission
14.1.3 Recommended safety distances<br />
Recommended safety distances between portable and<br />
mobile HF communication equipment and the <strong>aeroplus</strong> m<br />
<strong>aeroplus</strong> m<br />
Appendix<br />
The <strong>aeroplus</strong> m is intended for operation in an electromagnetic environment with controlled HF interferences.<br />
The customer or user of the <strong>aeroplus</strong> m can help to avoid electromagnetic interferences by maintaining<br />
minimum distances between the portable and mobile HF communication equipment (transmitters) and the<br />
<strong>aeroplus</strong> m, according to the maximum output power of the communication equipment, as recommended below<br />
.<br />
Rated power of transmitter<br />
W<br />
150 kHz to 80 MHz<br />
d=1.2√P<br />
Safety distance acc. to transmitting frequency<br />
m<br />
80 MHz to 800 MHz<br />
d=1.2√P<br />
800 MHz to 2.5 GHz<br />
d=2.3√P<br />
0,01 0,12 0,12 0,23<br />
0,1 0,38 0,38 0,73<br />
1 1,2 1,2 2,3<br />
10 3,8 3,8 7,3<br />
100 12 12 23<br />
For transmitters for which the rated power is not contained in the tale above, the distance can be calculated<br />
using the equation for the corresponding column, whereby P represents the rated power of the transmitter in<br />
Watt (W), specified by the transmitter manufacturer.<br />
NOTE 1 For calculation of the recommended safety distance for transmitters in the frequency range from 80<br />
MHz to 2.5 GHz an additional factor of 10/3 was used, in order to reduce the likelihood that a mobile/portable<br />
communication unit, that has unintentionally been brought near the patient, will trigger an interference.<br />
NOTE 2 These regulations may not apply in all situations. The propagation of electromagnetic waves is<br />
influenced by the absorption and reflection by building, objects and persons.<br />
Table 3: Recommended safety distances<br />
57
<strong>aeroplus</strong> m<br />
Symbols<br />
15 Symbols<br />
58<br />
Symbol Meaning<br />
IP 21<br />
Attention, observe notices in the instruction for use.<br />
Attention, observe notices in the instruction for use.<br />
Applied part type BF (body floating)<br />
Class of protection II<br />
Degree of protection IP 21, Finger protection and protection against<br />
dripping water<br />
Notified Body: TÜV Rheinland LGA<br />
On-/Off key<br />
Menu key<br />
Arrow-up key: increase values; in menu: navigate up<br />
Arrow-down key: decrease values; in menu: navigate down<br />
Alarm tone mute key<br />
No smoking!<br />
No open flames!
Symbol Meaning<br />
Do not use any grease or oil!<br />
Do not remove any covers!<br />
Do not dispose of into standard household waste!<br />
<strong>aeroplus</strong> m<br />
Symbols<br />
59
<strong>aeroplus</strong> m<br />
60
16 Index<br />
A<br />
Accessories ........................................... 52<br />
Accident ................................................. 13<br />
Advanced settings ................................. 31<br />
Alarm priorities ....................................... 42<br />
Alarm tone volume ................................. 40<br />
Alarm, asphyxia ..................................... 44<br />
Alarm, battery ........................................ 44<br />
Alarm, battery temperature .................... 45<br />
Alarm, compressor temperature ............. 45<br />
Alarm, oxygen ........................................ 43<br />
Alarm, pressure ..................................... 43<br />
Alarm, sensor......................................... 44<br />
Alarm, system failure ............................. 45<br />
Alarm-mute key ...................................... 17<br />
Alarms ................................................... 42<br />
Arrow-down key ..................................... 17<br />
Arrow-up-key ......................................... 17<br />
Assembly ............................................... 22<br />
B<br />
Battery capacity ..................................... 18<br />
Battery drawer ....................................... 17<br />
Bolus tone .............................................. 41<br />
Button tone volume ................................ 39<br />
C<br />
Caddy .................................................... 21<br />
Carrying handle ..................................... 16<br />
Choosing the location ............................ 22<br />
Cleaning intervals .................................. 47<br />
Cleanliness ............................................ 47<br />
Coarse dust filter .................................... 16<br />
Color display .......................................... 16<br />
Color display .......................................... 17<br />
Connecting to mains .............................. 25<br />
Copyright protection ................................. 8<br />
D<br />
Dangers ........................................... 11, 13<br />
<strong>aeroplus</strong> m<br />
Index<br />
DC Voltage input ................................... 16<br />
Design ................................................... 16<br />
Disconnecting from mains ..................... 26<br />
Disinfecting ............................................ 47<br />
Display .................................................. 18<br />
E<br />
EMC ...................................................... 13<br />
EMC regulations .................................... 53<br />
Entry of air ............................................. 22<br />
F<br />
Fire hazard ............................................ 12<br />
Funktion ................................................ 16<br />
G<br />
General description ............................... 16<br />
H<br />
HF communication equipment ............... 13<br />
High battery temperature ....................... 43<br />
Hose fire ................................................ 13<br />
I<br />
Information ............................................ 32<br />
Information messages ........................... 42<br />
Inspiration trigger ................................... 37<br />
Instructions for use .................................. 7<br />
Intended use.......................................... 10<br />
K<br />
Keypad .................................................. 17<br />
Keypad .................................................. 16<br />
L<br />
Language .............................................. 38<br />
Liability .................................................... 7<br />
Location ............................................... 13<br />
Low battery capacity .............................. 42<br />
Low battery temperature ........................ 42<br />
Lower limit O2 ....................................... 35<br />
61
<strong>aeroplus</strong> m<br />
Index<br />
M<br />
Main operating functions ........................ 25<br />
Mains supply .......................................... 18<br />
Maintenance .......................................... 47<br />
Maintenance plan................................... 48<br />
Maintenance work .................................. 50<br />
Medical Device Directive .......................... 6<br />
Menu ...................................................... 31<br />
Menu key ............................................... 17<br />
Menu structure ....................................... 31<br />
Message line .......................................... 18<br />
Messages .............................................. 42<br />
Mobile phones ....................................... 13<br />
O<br />
O2-Max .................................................. 36<br />
O2-Min ................................................... 35<br />
On-/Off key ............................................ 17<br />
Operating hours ..................................... 32<br />
Operation ............................................... 25<br />
Operator’s responsibility ......................... 10<br />
Oxygen .................................................. 12<br />
Oxygen concentrator ................................ 6<br />
Oxygen cylinder ..................................... 11<br />
Oxygen outlet ......................................... 16<br />
Oxygen savings system ......................... 11<br />
Oxygen supply ......................................... 6<br />
62<br />
P<br />
Power supply ......................................... 25<br />
S<br />
Safety .................................................... 10<br />
Safety during maintenance .................... 47<br />
Short operating instructions ................... 23<br />
Side effects ........................................ 6, 11<br />
Stand-by ................................................ 29<br />
Storage .................................................. 21<br />
Symbols .................................................. 7<br />
System state .......................................... 18<br />
T<br />
Technical Data ...................................... 19<br />
Therapy setting ...................................... 34<br />
Therapy setting ................................ 18, 30<br />
Transport ............................................... 20<br />
Transport carton .................................... 20<br />
Transport damage ................................. 20<br />
Transport inspection .............................. 20<br />
Trigger ................................................... 37<br />
Trigger signal volume ............................ 41<br />
U<br />
Upper limit O2 ....................................... 36<br />
W<br />
Warranty .................................................. 7<br />
Waste disposal ........................................ 8