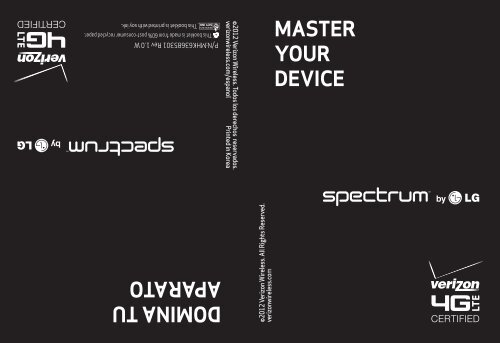
MASTER YOUR DEVICE DOMINA TU APARATO
MASTER YOUR DEVICE DOMINA TU APARATO
MASTER YOUR DEVICE DOMINA TU APARATO

Create successful ePaper yourself
Turn your PDF publications into a flip-book with our unique Google optimized e-Paper software.
This booklet is printed with soy ink.<br />
This booklet is made from 60% post-consumer recycled paper.<br />
P/N:MHK63685301 Rev 1.0 W<br />
<strong>APARATO</strong><br />
©2012 Verizon Wireless. Todos los derechos reservados.<br />
<strong>MASTER</strong><br />
©2012 Verizon Wireless. All Rights Reserved.<br />
verizonwireless.com<br />
<strong>YOUR</strong><br />
<strong>DEVICE</strong><br />
verizonwireless.com/espanol Printed in Korea <strong>DOMINA</strong> <strong>TU</strong>
For an interactive guide to your new wireless device,<br />
go to verizonwireless.com<br />
Para una guía interactiva de tu nuevo aparato móvil,<br />
ve a verizonwireless.com/espanol
CONTENTS<br />
MY VERIZON<br />
Manage your account online or from your<br />
phone with My Verizon Mobile.<br />
BASICS<br />
How to use your new phone—from charging<br />
the battery and placing calls to checking<br />
voicemail.<br />
APPS AND FEA<strong>TU</strong>RES<br />
It’s a mobile world and it’s yours to conquer—<br />
with music, video, web browsing, email and<br />
picture messaging, plus tools for navigation<br />
and family safeguards.<br />
ACCESSORIES<br />
Always on-the-go? Outfit your new phone<br />
with accessories that compliment your<br />
lifestyle.<br />
CONTENTS<br />
1
WELCOME<br />
2<br />
WELCOME<br />
THANK YOU FOR CHOOSING<br />
VERIZON WIRELESS<br />
You’re now connected to the blazingly fast,<br />
powerfully brilliant Verizon 4G Network.<br />
That’s ten times faster than 3G. So go ahead,<br />
make yourself heard. For more information,<br />
visit verizonwireless.com/4GLTE.<br />
This book will show you how to unleash the<br />
potential of your new device. Assistance is<br />
at your fingertips at verizonwireless.com.<br />
Customer Service is at your disposal at<br />
1-800-922-0204 or at any Verizon Wireless<br />
Store. A comprehensive User Guide is<br />
available on demand—simply download one at<br />
support.vzw.com/phones or call<br />
1-877-268-7589 to order a copy.<br />
NOTE : Devices and software are constantly evolving—the<br />
screen images and icons displayed are for reference only and<br />
may differ from your device.
IMPORTANT CUSTOMER INFORMATION<br />
DATA PLANS AND FEA<strong>TU</strong>RES:<br />
Content and Internet Access<br />
Many services and applications offered<br />
through your device may be provided by<br />
third parties. Before you use, link to or<br />
download a service provided by a third<br />
party, or an application such as a non-<br />
Verizon Wireless location-based GPStype<br />
service, chat room, marketplace<br />
or social network from your device, you<br />
should review the terms of such service or<br />
application and applicable privacy policy.<br />
Personal information you submit may be<br />
read, collected or used by the service or<br />
application provider and/or other users of<br />
those forums.<br />
Verizon Wireless is not responsible for<br />
any infor mation, content or services you<br />
access, download or use from the Internet.<br />
You are responsible for maintaining virus<br />
and other Internet security protections<br />
when accessing service. For additional<br />
information, visit the Verizon Content<br />
IMPORTANT CUSTOMER INFORMATION<br />
3
IMPORTANT CUSTOMER INFORMATION<br />
4<br />
Policy at responsibility.verizon.com/<br />
contentpolicy. Your Verizon Wireless<br />
Customer Agreement terms and conditions<br />
and certain other specially identified terms<br />
govern your use of any Verizon Wireless<br />
products and services.
MY VERIZON<br />
Save time. Save money. Register now at<br />
verizonwireless.com/myverizon.<br />
≠ Manage your account. Quickly check<br />
your voice, text and data usage or make<br />
adjustments to your Plan at any time.<br />
≠ Get personalized support. My Support<br />
answers your questions quickly.<br />
≠ Pay bills your way. Go green and set<br />
up Paperless Billing, make a one-time<br />
payment, or use Auto Pay and never<br />
worry about missing a payment.<br />
≠ Much more. Transfer your contacts in<br />
no time with Backup Assistant SM , move<br />
your media, pick your Friends & Family®,<br />
or view email in one place from popular<br />
internet-based email accounts, including<br />
Yahoo!®, AOL®, Gmail® and Windows Live.<br />
MY VERIZON<br />
5
6<br />
PHONE FEA<strong>TU</strong>RES<br />
9<br />
8<br />
BASICS BASICS<br />
1<br />
2<br />
3<br />
4<br />
5<br />
6<br />
7<br />
1. EARPIECE<br />
2. PROXIMITY<br />
SENSOR<br />
3. FRONT CAMERA<br />
LENS<br />
4. TOUCHSCREEN<br />
5. QUICK KEYS<br />
( PHONE/ CONTACTS/<br />
MESSAGING/ APPS)<br />
6. BACK KEY<br />
7. MICROPHONE<br />
8. HOME KEY<br />
9. MENU KEY<br />
NOTES: All screen shots in this guide are simulated. Actual<br />
displays may vary.<br />
Instructions to perform tasks in this guide are based on<br />
the default phone settings and may change depending<br />
on the software version on your phone.
BASICS<br />
PHONE FEA<strong>TU</strong>RES<br />
(REAR AND SIDE VIEWS)<br />
10. REAR CAMERA<br />
LENS<br />
11. BACK COVER<br />
12. SPEAKER<br />
10<br />
11<br />
12<br />
13<br />
14<br />
15<br />
16<br />
13. VOLUME KEYS<br />
14. POWER/ LOCK KEY<br />
15. USB/CHARGING<br />
PORT<br />
16. HEADSET JACK<br />
BASICS<br />
7
BASICS<br />
8<br />
FIRST STEPS<br />
REMOVING THE BATTERY COVER & BATTERY<br />
Turn the power off and use the fingertip cutout<br />
at the bottom of the phone to remove the back<br />
cover (as shown below). Then use the fingertip<br />
cutout at the bottom left corner of the battery<br />
compartment to lift the battery out.<br />
INSERTING A MICROSD CARD*<br />
Turn the power off and remove the battery<br />
cover (as demonstrated in the previous<br />
instructions). Locate the microSD card slot.<br />
Position the microSD card with the label side<br />
facing up and slide it into place until it is fully<br />
inserted and locked in place.<br />
NOTE: The microSD card can be easily damaged by improper<br />
operation. Please be careful when<br />
inserting, removing or handling it.<br />
* microSD card is pre-installed on the<br />
device.
TO REMOVE THE MICROSD CARD<br />
Turn the power off and remove the battery<br />
cover. Locate the microSD card slot. Gently<br />
pull the microSD card out to remove it.<br />
INSTALLING THE 4G SIM CARD*<br />
Turn the power off. Remove the battery<br />
cover and take the battery out. Locate the<br />
4G SIM card slot. Position the 4G SIM card<br />
with the label side facing up and slide it into<br />
place until it is fully inserted and locked in<br />
place.<br />
BASICS<br />
9
BASICS<br />
10<br />
*A Subscriber Identity Module (SIM Card) is a “smartcard”<br />
that houses personal information, such as your mobile<br />
phone number, calling plan, account information, and<br />
content, such as contacts and text messages.<br />
The Verizon Wireless 4G SIM Card is compatible with<br />
Verizon Wireless 4G certified devices. You can move<br />
the 4G SIM Card from one device to another and your<br />
wireless service will work seamlessly as long as you have a<br />
compatible device and service plan. To see which devices<br />
are compatible with the Verizon Wireless 4G SIM Card, visit<br />
verizonwireless.com/certifieddevice.<br />
REMOVING THE 4G SIM CARD<br />
Turn the power off. Remove the battery<br />
cover and take the battery out. Locate the<br />
4G SIM card slot. Gently slide the 4G SIM<br />
card out to remove it.<br />
CHARGING <strong>YOUR</strong> BATTERY<br />
Your phone comes with a Wall/USB Charger<br />
and a USB Cable which connect together to<br />
charge your phone. To charge your phone:
1. Connect the USB Cable into the Wall/<br />
USB Charger. When connecting, as shown<br />
below, the LG logo on the USB Cable<br />
should face toward you.<br />
USB Cable<br />
2. Plug the USB Cable (as shown below) into<br />
the phone’s USB/Charging Port.<br />
NOTE: Make sure the 'B' side<br />
is facing toward you when<br />
inserting the USB Cable into<br />
the phone.<br />
3. Plug the other end into a wall socket.<br />
Wall/USB<br />
charger<br />
NOTE: When charging a completely drained battery, the<br />
touch key lights on the device will flash. Once the device has<br />
enough battery charge to be turned on, a battery animation<br />
will appear on the screen and the keys will stop flashing.<br />
WARNING! Please use only an approved charging accessory<br />
to charge your device. Improper handling of the USB/<br />
Charging Port, as well as the use of an incompatible charger,<br />
may cause damage to your device and void the warranty.<br />
BASICS<br />
11
BASICS<br />
12<br />
POWERING <strong>YOUR</strong> PHONE ON/OFF<br />
It’s important to fully charge the battery<br />
before turning on your phone.<br />
1. To turn on the phone, press and hold the<br />
Power/Lock Key for a couple of<br />
seconds until the screen lights up.<br />
2. To turn off the phone, press and hold<br />
the Power/Lock Key until the menu<br />
appears.<br />
3. Touch Power off, then touch OK to<br />
confirm that you want to turn off the<br />
phone.
HOME SCREEN<br />
The Home screen is your starting point<br />
to access all the features on your phone.<br />
It displays application shortcuts, icons,<br />
widgets, and other features.<br />
Status Bar<br />
Shows device status information,<br />
including the time, signal<br />
strength, battery status, and<br />
notification icons.<br />
Application Icon<br />
Touch an icon (application, folder,<br />
etc.) to open the application and<br />
use it.<br />
Quick Keys<br />
Provides easy, one-touch access<br />
to the functions you use the most.<br />
Apps Key<br />
Touch to open the Applications<br />
screen to view all of your installed<br />
applications.<br />
BASICS<br />
13
BASICS<br />
14<br />
Quick Keys<br />
The Quick Keys are located at the bottom of<br />
the Home screen and Applications screen.<br />
: Opens the Phone application which<br />
displays the dialpad so you can dial<br />
an unsaved number. It also provides<br />
additional tabs to access the Call log,<br />
Contacts, and your Groups.<br />
: Opens your Contacts list. You can also<br />
access the Phone application, Call log,<br />
and your Groups by touching the tabs<br />
across the top of the screen.<br />
: Opens the Messaging application.<br />
: Opens the Applications screen and<br />
displays phone options and applications.<br />
TO RE<strong>TU</strong>RN TO THE HOME SCREEN<br />
Touch the Home Key at any time, from<br />
any application.<br />
TO VIEW OTHER HOME SCREEN CANVASES<br />
Slide your finger left or right across the<br />
Home screen. The Home screen spans seven<br />
screen widths, allowing more space for icons,<br />
widgets, shortcuts, and other items.
Home screen canvas indicator<br />
The dots near the top of the screen indicate which<br />
Home screen canvas you are viewing.<br />
SETTING UP <strong>YOUR</strong> <strong>DEVICE</strong><br />
When you turn on your wireless device<br />
for the first time, you have the option to<br />
quickly set up various accounts, such as<br />
Google, Microsoft® Exchange ActiveSync®,<br />
other email accounts, and sign in to social<br />
networking sites. Simply follow the<br />
on-screen instructions to complete the<br />
initial setup of your wireless device.<br />
For more information on how to set up your<br />
email, visit smartphones.verizonwireless.<br />
com/. Click on the Smartphone Support tab<br />
and select your phone.<br />
BASICS<br />
15
BASICS<br />
16<br />
Setting up your Google Account<br />
1. At the setup screen, touch Create or Sign in.<br />
2. Enter your username and password or any<br />
other necessary information (if creating<br />
an account).<br />
3. Touch Sign in.<br />
Now your Gmail, Google contacts, and<br />
Google calendar events will all be loaded to<br />
your phone automatically.<br />
Use the area below to record your Google<br />
account information for future reference.<br />
Username: @gmail.com<br />
Password:<br />
Setting up an Email account<br />
1. Touch the Apps Key , then touch Email .<br />
2. Select the type of Email account you want<br />
to set up.<br />
3. Type in the Email address or User name<br />
and Password.<br />
4. Touch Next. Set-up is completed and you<br />
are given the option to configure your<br />
Account display name and your name.<br />
5. Touch Done to see your Inbox.
NOTE: If you choose the Other option during set-up, you<br />
will be required to enter the Email address, User name, and<br />
Password. IMAP/SMTP Server address, Port number and<br />
Secure type.<br />
Backup AssistantSM Backup Assistant is a free service from<br />
Verizon Wireless which saves your phone’s<br />
address book to a secure server. If your<br />
phone is lost or damaged, or if you upgrade<br />
to a new phone, Backup Assistant will<br />
restore your contacts.<br />
Note: Subject to specific terms of use. Results may<br />
vary based on backup schedule and other factors. See<br />
verizonwireless.com/backupassistant for more details.<br />
MAKE A CALL<br />
1. Touch the Phone Key to open the dial<br />
pad.<br />
2. Enter the phone number using the keypad.<br />
3. Touch the Call Key to dial the number<br />
that you entered.<br />
4. Touch the End Key to end the call.<br />
BASICS<br />
17
BASICS<br />
18<br />
MAKE A CALL FROM OUTSIDE THE U.S.<br />
1. From the Home screen, touch the Menu<br />
Key , then touch Settings and Call<br />
settings.<br />
2. Touch Assisted dialing.<br />
3. Touch Reference country and select the<br />
country you are visiting from the list.<br />
4. When you come back to the U.S., touch<br />
Current Country and select United<br />
States Of America.<br />
RECEIVING CALLS<br />
≠ Touch the Answer Key .<br />
≠ If the phone is locked, slide the screen up<br />
.<br />
NOTE: CDMA coverage is required for calls placed outside<br />
the U.S. Additional charges may apply. For more information,<br />
visit verizonwireless.com/global.
VOICEMAIL<br />
SETTING UP VOICEMAIL<br />
1. Touch the Phone Key and enter *86<br />
(*VM). Then touch the Call Key . You can<br />
also touch and hold .<br />
2. Follow the setup tutorial.<br />
3. Select a password.<br />
4. Record a voice signature and greeting.<br />
ACCESSING <strong>YOUR</strong> VOICEMAIL FROM<br />
<strong>YOUR</strong> PHONE<br />
1. Touch the Phone Key and enter *86<br />
(*VM). Then touch the Call Key . You can<br />
also touch and hold . When you hear<br />
the greeting, touch to interrupt it.<br />
2. Follow the prompts to enter your<br />
password and retrieve your messages.<br />
BASICS<br />
19
BASICS<br />
20<br />
ACCESSING <strong>YOUR</strong> VOICEMAIL FROM<br />
ANY PHONE<br />
1. Dial your wireless number. When you hear<br />
the greeting, touch to interrupt it.<br />
2. Follow the prompts to enter your<br />
password and retrieve your messages.<br />
RESETTING <strong>YOUR</strong> VOICEMAIL PASSWORD<br />
To learn how to reset your password<br />
or discover other features, visit<br />
verizonwireless.com/myverizon.<br />
NOTE: Voice mailboxes not set up within 45 days will<br />
be cancelled. Your Verizon Wireless voice mailbox is<br />
not password protected until you create a password by<br />
following the setup tutorial.
VISUAL VOICE MAIL<br />
One glance tells you all you need to know.<br />
View a list of messages without dialing into<br />
a mailbox. Listen or erase with the touch of<br />
a button.<br />
Setting up Visual Voice Mail<br />
1. If you are a new Verizon Wireless<br />
subscriber, first touch the Phone Key<br />
then dial * 86 (*VM) and touch the Call<br />
Key , to set up your voice mail service.<br />
You can also touch and hold .<br />
2. From the Home screen, touch Voicemail<br />
.<br />
3. Touch OK to accept the Terms &<br />
Conditions.<br />
4. Enter your password and touch Next.<br />
Please note that it may take five minutes for Visual Voice<br />
Mail to set up. Your password and voicemail messages will<br />
be stored on the device and messages will be available to<br />
anyone with access to the device. To limit unauthorized<br />
access to the voicemail, consider locking the device when<br />
not in use. To cancel your Visual Voice Mail service, go to<br />
verizonwireless.com/myverizon or contact Customer<br />
Service. V Block must be removed to use Visual Voice Mail.<br />
Data charges apply only to the application download, which<br />
requires approximately 1 MB of data.<br />
BASICS<br />
21
BASICS<br />
22<br />
LOCKING/UNLOCKING <strong>YOUR</strong> PHONE<br />
1. Press the Power/Lock Key to lock<br />
your phone. The screen will turn off.<br />
2. Press the Power/Lock Key . Your Lock<br />
Screen will appear.<br />
3. Slide the screen up to unlock it<br />
. The last screen you were<br />
working on opens.<br />
USING SPEAKERPHONE<br />
1. During a call, touch .<br />
2. The Speaker Key lights up to indicate that<br />
the speakerphone is on. The Speaker icon<br />
will appear in the Notifications Panel<br />
and the sound from your call is played<br />
through the phone’s speaker.<br />
3. When viewing the current call screen,<br />
you can turn the speakerphone off by<br />
touching the Speaker Key again.<br />
The speaker is turned off automatically<br />
when the call ends.
RINGTONES<br />
Make your phone dance to your tune. Choose<br />
a ringtone, change the tone, or silence your<br />
phone.<br />
SELECTING A RINGTONE<br />
1. From the Home screen, touch the Menu<br />
Key , then touch Settings and Sound.<br />
2. On the Incoming calls section, touch<br />
Phone ringtone.<br />
3. Touch the ringtone to select it and listen<br />
to it.<br />
4. Touch OK to save your settings.<br />
SETTING RINGTONE TO VIBRATE<br />
1. From the Home screen, touch the Menu<br />
Key and touch Settings.<br />
2. Touch Sound and then Vibrate. Select<br />
from the following options: Always,<br />
Never, Only in Silent mode, or Only when<br />
not in Silent Mode.<br />
BASICS<br />
23
BASICS<br />
24<br />
BLUETOOTH®<br />
Bluetooth is a short-range wireless<br />
communications technology that devices<br />
can use to exchange information over a<br />
distance of about 30 feet. The most common<br />
Bluetooth devices are headphones for<br />
making calls or listening to music, hands-free<br />
kits for cars, and other portable devices,<br />
including laptops and cell phones.<br />
There are several Bluetooth profiles that<br />
define the features and communications<br />
standards for Bluetooth devices.<br />
<strong>TU</strong>RNING ON BLUETOOTH<br />
To turn Bluetooth on or off<br />
1. From the Home screen, touch the Menu<br />
Key .<br />
2. Touch Settings, then touch Wireless &<br />
networks.<br />
3. Touch Bluetooth to turn the Bluetooth<br />
function on or off. A blue checkmark<br />
indicates that the function is on.
PAIRING <strong>YOUR</strong> BLUETOOTH HEADSET WITH<br />
<strong>YOUR</strong> PHONE<br />
To pair your phone with a Bluetooth device<br />
You must pair your phone with another<br />
device before you can connect to it.<br />
1. From the Home screen, touch the Menu<br />
Key .<br />
2. Touch Settings > Wireless & networks ><br />
Bluetooth settings.<br />
NOTE: If Bluetooth is off, touch Bluetooth to turn it on.<br />
3. Touch Scan for devices to scan for and<br />
display the IDs of all available Bluetooth<br />
devices.<br />
4. Touch the name of the device you want to<br />
pair with your phone.<br />
NOTE: Depending on the type of device you are pairing<br />
with, you will be asked to enter a passkey, confirm matching<br />
passkeys, or the device will automatically pair.<br />
BASICS<br />
25
BASICS<br />
26<br />
HEARING AID COMPATIBILITY<br />
INFORMATION<br />
This phone has been tested and rated for use<br />
with hearing aids for some of the wireless<br />
technologies that it uses. However, there<br />
may be some newer wireless technologies<br />
used in this phone that have not been tested<br />
yet for use with hearing aids. It is important<br />
to try the different features of this phone<br />
thoroughly and in different locations,<br />
using your hearing aid or cochlear implant,<br />
to determine if you hear any interfering<br />
noise. Consult your service provider or the<br />
manufacturer of this phone for information<br />
on hearing aid compatibility. If you have<br />
questions about return or exchange policies,<br />
consult your service provider or phone<br />
retailer.
APPS AND FEA<strong>TU</strong>RES<br />
Make your phone do more with music,<br />
ringtones, wallpapers, Applications and<br />
games. Check the latest scores, keep up<br />
with Twitter and Facebook, even plan a<br />
vacation, we’ve got Applications that help<br />
you do it all. For details and pricing, go to<br />
verizonwireless.com.<br />
Data charges may apply.<br />
USING ANDROID MARKET<br />
Android Market provides direct access to<br />
useful applications and fun games which you<br />
can download and install.<br />
NOTE: You need to be signed in to your Google Account to<br />
use Android Market.<br />
DOWNLOADING APPLICATIONS FROM<br />
ANDROID MARKET<br />
1. From the Home screen, touch Market .<br />
2. Navigate or search for the item you want<br />
to download and then select it.<br />
3. On the application details screen, tap<br />
Install.<br />
APPS AND FEA<strong>TU</strong>RES<br />
27
APPS AND FEA<strong>TU</strong>RES<br />
28<br />
NOTE: You will receive a notification when your application<br />
is fully downloaded. After it has been downloaded,<br />
you can find it on the Applications screen.<br />
SEND <strong>YOUR</strong> MESSAGE<br />
Talk with your fingers. Make a bold<br />
statement with the touch of a button. For<br />
rates and complete information, go to<br />
verizonwireless.com/messaging.<br />
TEXT MESSAGING<br />
Sending a new text message to a phone<br />
1. From the Home screen, touch the<br />
Messaging Key .<br />
2. Touch New message to start a new text<br />
or multimedia message.<br />
3. Enter a mobile phone number or email<br />
address in the To field. As you type<br />
matching contacts appear. You can touch<br />
a suggested contact or continue typing.<br />
4. Touch the text field to start entering your<br />
message.<br />
5. Touch Send to send the message.
TEXT MESSAGING (FROM OUTSIDE THE U.S.)<br />
Sending a new text message<br />
1. From the Home screen, touch the<br />
Messaging Key .<br />
2. Touch New message to start a new text<br />
message.<br />
3. Enter the 10-digit phone number of the<br />
message recipient (just as if sending a<br />
domestic text message).<br />
NOTE: To send a text message to a destination that does<br />
not use 10-digit dialing, enter 011 + Country Code + Phone<br />
Number.<br />
4. Touch the text field to start entering your<br />
message.<br />
5. Touch Send to send the message.<br />
Text/Multimedia Messages are charged in accordance<br />
with your Messaging Plan. Higher rates may apply for<br />
International Text/Multimedia Messaging (when available).<br />
NOTE: CDMA coverage is required for messages sent<br />
outside the U.S. Additional charges may apply. For more<br />
information, visit verizonwireless.com/global<br />
APPS AND FEA<strong>TU</strong>RES<br />
29
APPS AND FEA<strong>TU</strong>RES<br />
30<br />
PIC<strong>TU</strong>RE MESSAGING<br />
Take pictures that you can send to virtually<br />
any wireless number or email address.<br />
Send a picture message<br />
1. On the Messaging screen, touch New message.<br />
2. Enter a mobile phone number or email<br />
address in the To field. As you type,<br />
matching contacts appear. You can touch<br />
a suggested contact or continue typing.<br />
3. Touch the text field to start entering your<br />
message.<br />
4. Touch Attach .<br />
5. Touch Pictures and select the picture you<br />
want to send from the Gallery.<br />
6. You can preview or remove the picture<br />
before you send your message.<br />
7. Send the message by touching Send MMS.<br />
Snap a photo and share it<br />
1. From the Home screen, touch the Apps<br />
Key , then touch Camera .<br />
2. Using the phone screen as your<br />
viewfinder, touch to take a picture.<br />
3. Touch Share.<br />
4. Touch the application you want to use to<br />
share the selected picture.
5. Enter the necessary information and<br />
share it.<br />
Touch the screen to<br />
display options to change<br />
the settings.<br />
Drag to switch between<br />
Camera and Video<br />
modes.<br />
Touch to take a picture,<br />
or to begin/stop<br />
recording a video.<br />
Touch to access your<br />
Gallery.<br />
Delete a picture message<br />
1. From the Home screen, touch the<br />
Messaging Key .<br />
2. Touch the message thread that contains<br />
the picture message you wish to delete.<br />
3. Touch and hold the picture message and<br />
touch Delete message.<br />
4. Touch OK to confirm.<br />
VIDEO MESSAGING<br />
Record and send videos to virtually any<br />
wireless number or email address.<br />
Send a video message<br />
1. On the Messaging screen, touch New<br />
message.<br />
APPS AND FEA<strong>TU</strong>RES<br />
31
APPS AND FEA<strong>TU</strong>RES<br />
32<br />
2. Enter a mobile phone number or email<br />
address in the To field. As you type,<br />
matching contacts appear. You can touch<br />
a suggested contact or continue typing.<br />
3. Touch the text field to start entering your<br />
message.<br />
4. Touch Attach .<br />
5. Touch Videos and select the Video you<br />
want to send from the Gallery.<br />
6. Send the message by touching Send MMS.<br />
Record a video and share it<br />
1. From the Home screen, touch the Apps<br />
Key and then touch Camera .<br />
2. Drag down to Video mode.<br />
3. Using the phone screen as your<br />
viewfinder, touch to begin recording.<br />
Then touch to stop.<br />
4. Touch Share.<br />
5. Touch the application you want to use to<br />
share the selected video.<br />
6. Enter the necessary information and<br />
share it.
Delete a video message<br />
1. From the Home screen, touch the<br />
Messaging Key .<br />
2. Touch the message thread that contains<br />
the video message you wish to delete.<br />
3. Touch and hold the video message and<br />
touch Delete message.<br />
4. Touch OK to confirm.<br />
DATA<br />
Tap into a powerful stream of data—it’s all in<br />
the palm of your hand.<br />
EMAIL<br />
Check email on the go with popular internetbased<br />
email accounts. Yahoo!®, AOL®, Gmail®<br />
and Windows Live. Access email by touching<br />
. The email accounts can also be accessed<br />
from vzw.com/sync.<br />
MOBILE WEB<br />
Take the Internet with you wherever you<br />
go. You can read the latest news, get the<br />
weather and follow your stocks.<br />
APPS AND FEA<strong>TU</strong>RES<br />
33
APPS AND FEA<strong>TU</strong>RES<br />
34<br />
BE A MEDIA MOGU L<br />
Let your music flood the airwaves. Your<br />
airwaves.<br />
RINGTONES<br />
Pick from our over 90,000 tracks and assign<br />
a different song to each person in your<br />
address book.<br />
RINGBACK TONES<br />
Entertain your callers with Ringback<br />
Tones—songs or sounds they’ll hear while<br />
waiting for you to answer.<br />
V CAST MEDIA MANAGER<br />
Transfer pictures, videos and music<br />
between your phone and computer with<br />
just a USB Cable connection. Includes<br />
a media player and media management<br />
tools. Go to verizonwireless.com/vmm to<br />
download your free copy.<br />
System requirements: Windows® XP, Windows Vista® or<br />
Windows 7.
VERIZON WIRELESS MEDIA STORE<br />
Go online to find loads of cool Applications,<br />
as well as the latest games and music.<br />
Make your purchase online, download<br />
Applications straight to your phone. Visit<br />
verizonwireless.com/Applications.<br />
V CAST MUSIC<br />
Buy and download individual tracks or<br />
subscribe to get unlimited access to millions<br />
of songs.<br />
System requirements: Windows® XP, Windows Vista® or<br />
Windows 7.<br />
SEE IT ALL<br />
Watch what you want, when you want, right<br />
on your phone.<br />
V CAST VIDEO ON DEMAND<br />
Catch your favorite shows and live sports<br />
from anywhere in the V CAST coverage<br />
area. View more than 100 channels, with<br />
additional shows added every day in<br />
on-demand, full-length episodes. Go to<br />
verizonwireless.com/video.<br />
APPS AND FEA<strong>TU</strong>RES<br />
35
APPS AND FEA<strong>TU</strong>RES<br />
36<br />
PLAY IT UP<br />
There’s plenty to play, with hundreds of<br />
gaming Applications:<br />
≠ Browse, buy and download games on your<br />
phone via Market Applications.<br />
≠ Browse and buy games online at<br />
verizonwireless.com/games.<br />
Data charges may apply.<br />
VERIZON SAFEGUARDS<br />
Your family; your call. Verizon safeguards<br />
give you peace of mind with Content Filters,<br />
Spam Controls, Usage Controls and more. Go<br />
to verizonwireless.com/spamcontrols or<br />
verizonwireless.com/usagecontrols.<br />
GETTING STARTED WITH LOCATION-BASED<br />
SERVICES (LBS)<br />
Verizon Wireless values your privacy.<br />
Because of this, your phone is defaulted to<br />
only acquire your location when you dial 911.<br />
To use Location-Based Services, you must<br />
first enable location services on your phone:<br />
1. From the Home screen, touch the Apps<br />
Key .
2. Touch Settings , then touch Location.<br />
3. Under My Location, tap the location<br />
services you want to use.<br />
Your wireless device can determine its (and your)<br />
physical, geographical location (“Location Information”)<br />
and can associate Location Information with other data.<br />
Additionally, certain applications, services and programs are<br />
capable of accessing, collecting, storing and using Location<br />
Information and disclosing Location Information to others.<br />
You should use caution when determining whether or not<br />
Location Information should be made available to others and<br />
you should review any applicable third party privacy policies<br />
before providing access. To limit potential unauthorized<br />
access to your Location Information, Verizon Wireless<br />
phones are preset to E911 only, which will only allow<br />
emergency response personnel to locate you if you dial 911<br />
from your phone. Other wireless devices (such as Broadband<br />
Data Cards or devices without a keypad or user interface)<br />
may or may not have such limitation and location settings<br />
available. By enabling location settings you are permitting<br />
third party access to Location Information through<br />
software, widgets or peripheral components you choose to<br />
download, add or attach to your wireless device or through<br />
web access, messaging capabilities or other means and you<br />
are authorizing Verizon Wireless to collect, use and disclose<br />
your Location Information as appropriate to provide you<br />
with any location services that you enabled.<br />
APPS AND FEA<strong>TU</strong>RES<br />
37
APPS AND FEA<strong>TU</strong>RES<br />
38<br />
VZ NAVIGATOR®<br />
More than just directions, VZ Navigator<br />
gets you where you’re going and keeps<br />
you informed once you get there. Receive<br />
traffic alerts, find gas prices and directions<br />
to the station, search local businesses,<br />
share your location with friends, or<br />
speed-dial roadside assistance. Go to<br />
verizonwireless.com/navigator.<br />
TOTAL EQUIPMENT COVERAGE<br />
Sign up for Total Equipment Coverage and<br />
if your device breaks, gets lost or stolen,<br />
or malfunctions after the manufacturer’s<br />
warranty expires, you’re covered.<br />
Total Equipment Coverage combines<br />
Verizon Wireless Extended Warranty<br />
and Asurion’s Wireless Phone Protection.<br />
For details, go to verizonwireless.com/<br />
equipmentprotection.
GO GLOBAL<br />
Verizon Wireless keeps you connected<br />
around the corner and around the world. For<br />
up-to-date information on destinations and<br />
rates, go to verizonwireless.com/vzglobal<br />
and select from the following programs:<br />
INTERNATIONAL LONG DISTANCE<br />
You can call over 190 destinations from the<br />
U.S. with your Verizon phone. Simply add<br />
I-DIAL to your account and for reduced rates,<br />
select our International Long Distance Value<br />
Plan or for occasional international calls, use<br />
our Per-Minute Rates.<br />
INTERNATIONAL TEXT MESSAGING<br />
You can send text messages to<br />
customers onparticipating carriers<br />
in over 150 countries around the<br />
world. Visit verizonwireless.com/<br />
internationalmessaging for more details.<br />
APPS AND FEA<strong>TU</strong>RES<br />
39
APPS AND FEA<strong>TU</strong>RES<br />
40<br />
INTERNATIONAL ROAMING<br />
Traveling outside of the U.S.? With any<br />
Verizon phone you can stay connected in<br />
over 35 destinations including Canada,<br />
Mexico, China, Israel, Brazil and Jamaica.<br />
Dial * 611 from your phone or call 1-800-<br />
922-0204 and speak with a Verizon Wireless<br />
representative to enable International<br />
Roaming. A full list of destinations and<br />
rates can be found at verizonwireless.com/<br />
internationalroam.<br />
GLOBAL TRAVEL PROGRAM<br />
Available in more than 220 voice countries,<br />
more than 200 data countries and more than<br />
115 countries with 3G, this is the perfect shortterm<br />
solution for the occasional or infrequent<br />
global traveler who needs to stay in touch when<br />
traveling outside of the U.S. to GSM locations.<br />
This program is ideal when your travel duration<br />
is less than 21 days. There is no rental fee or<br />
security deposit, and all charges will be applied<br />
to your current Verizon Wireless bill. For more<br />
information on the Global Travel Program,<br />
visit verizonwireless.com/globaltravel. To<br />
place an order, contact our Global Services<br />
Activation Specialists at 1-800-711-8300.
ACCESSORIES<br />
Give your phone the solutions it deserves by<br />
pairing it with accessories (sold separately)<br />
that compliment your tech-savvy lifestyle.<br />
Take your multimedia experience to the next<br />
level with the Media Charging Dock. Keep<br />
your phone and your apps within arm’s reach<br />
while on the go by placing it in the Navigation<br />
Mount. And when you get to your destination<br />
use the Wireless Charging Battery Cover and<br />
compatible Wireless Charging Pad to keep<br />
your phone at full power.<br />
NOTE: Optional accessories are available for purchase at<br />
Verizon Wireless locations or www.verizonwireless.com<br />
ACCESSORIES<br />
41
ACCESSORIES<br />
42<br />
MEDIA CHARGING DOCK<br />
Use the Media Charging Dock to keep your<br />
phone and extra battery charged while<br />
enjoying your favorite multimedia content on<br />
the phone’s large 4.5” display. Or use Clock<br />
Mode, activated when your phone is docked,<br />
to keep you on schedule with the large, easy<br />
to read numbers.<br />
Compatible with Standard and Extended<br />
Battery Doors. (Extended Battery and<br />
Extended Battery Door are sold separately)
NAVIGATION MOUNT<br />
Whether you’re taking a road trip or a short<br />
drive, the Navigation Mount will hold your<br />
phone in place while mounted to your car’s<br />
windshield or dashboard. Once your phone<br />
is attached, Car Mode is enabled on your<br />
handset which gives you access to useful<br />
apps like Navigation, Contacts, and Maps.<br />
Compatible with Standard, Extended and<br />
Wireless Charging Doors. (Extended Battery<br />
and Cover, as well as Wireless Charging Doors<br />
are sold separately.)<br />
ACCESSORIES<br />
43
ACCESSORIES<br />
44<br />
WIRELESS CHARGING BATTERY COVER<br />
Attach the optional Wireless Charging<br />
Battery Cover to your handset for a cablefree<br />
charging experience. Center your phone<br />
on a compatible Qi enabled Wireless Charging<br />
Pad (sold separately) for optimal charging.
WIRELESS CHARGING PAD<br />
Enjoy cable-free charging when you use<br />
the Wireless Charging Pad, along with a<br />
compatible phone and Wireless Charging<br />
Cover (sold separately).<br />
The wireless charging pad can accommodate<br />
one phone at a time and includes Power and<br />
Charging Status LEDs.<br />
A placement guide and built-in magnet help<br />
you center your phone for optimal charging<br />
and audio feedback confirms your phone’s<br />
presence.<br />
ACCESSORIES<br />
45
NOTES<br />
NOTES
NOTES<br />
NOTES
ÍNDICE<br />
MI VERIZON<br />
Administra tu cuenta por Internet o desde tu<br />
teléfono con Mi Verizon Móvil.<br />
LO BÁSICO<br />
Cómo usar tu nuevo teléfono: desde cargar<br />
la batería y hacer llamadas, hasta revisar el<br />
buzón de voz.<br />
APLICACIONES Y FUNCIONES<br />
Es un mundo móvil y es tuyo para conquistar:<br />
con música, videos, navegación por Internet,<br />
correo electrónico y fotomensajería, además<br />
de herramientas de navegación y protección<br />
familiar.<br />
ACCESORIOS<br />
¿Siempre en viaje? Equipa tu nuevo teléfono<br />
con los accesorios que complementan tu<br />
estilo de vida.<br />
ÍNDICE<br />
1
BIENVENIDO<br />
2<br />
BIENVENIDO<br />
GRACIAS POR ELEGIR<br />
VERIZON WIRELESS<br />
Ahora estás conectado a la hiperrápida y<br />
superpoderosa red 4G de Verizon. Eso es 10<br />
veces más veloz que 3G. Así que, adelante<br />
y hazte escuchar. Para más información,<br />
visita verizonwireless.com/red4GLTE.<br />
Este libro te enseñará cómo desatar el<br />
potencial de tu nuevo aparato. La asistencia<br />
está a tu alcance en verizonwireless.<br />
com/espanol. El servicio al cliente está<br />
a tu disposición en el 1-800-922-0204<br />
o en cualquier tienda de Verizon Wireless.<br />
Una Guía del Usuario completa está<br />
disponible a pedido; simplemente descarga<br />
una en support.vzw.com/phones o llama al<br />
1-877-268-7589 para solicitar una copia.<br />
NOTA: Los aparatos y software están evolucionando<br />
constantemente—las imágenes de pantalla y los íconos<br />
que se muestran sólo para referencia y pueden ser<br />
diferentes a los de su teléfono.
INFORMACIÓN IMPORTANTE AL<br />
CONSUMIDOR<br />
PLANES Y FUNCIONES DE DATOS:<br />
Contenido y acceso a Internet<br />
Muchos servicios y aplicaciones ofrecidos<br />
a través de su aparato pueden ser<br />
proporcionados por terceros. Antes de<br />
usar, enlazar o descargar un servicio<br />
proporcionado por terceros, o una<br />
aplicación como un servicio de tipo GPS<br />
basado en la ubicación, una sala de chat,<br />
tienda o red social que no pertenezca a<br />
Verizon Wireless, desde su aparato, deberá<br />
leer detenidamente los términos de dicho<br />
servicio o aplicación, así como la política de<br />
privacidad correspondiente. La información<br />
personal que usted envíe puede ser leída,<br />
recopilada o usada por el proveedor del<br />
servicio o aplicación y/u otros usuarios de<br />
esos foros.<br />
INFORMACIÓN IMPORTANTE AL CONSUMIDOR<br />
3
INFORMACIÓN IMPORTANTE AL CONSUMIDOR<br />
4<br />
Verizon Wireless no se hace responsable<br />
por ningún tipo de información, contenido<br />
o servicio al que tenga acceso, descargue<br />
o use en Internet. Usted es responsable<br />
de mantener activas sus protecciones<br />
antivirus y otras protec ciones de seguridad<br />
de Internet cuando acceda al servicio.<br />
Para más información, visite la Política de<br />
Contenido de Verizon en responsibility.<br />
verizon.com/contentpolicy. Los términos y<br />
condiciones de su acuerdo con el cliente de<br />
Verizon Wireless, así como otros términos<br />
identificados especialmente, rigen su<br />
uso de cualquier producto y servicio de<br />
Verizon Wireless.
MI VERIZON<br />
Ahorra tiempo. Ahorra dinero. Regístrate<br />
ahora en verizonwireless.com/miverizon.<br />
≠ Administra tu cuenta. Revisa<br />
rápidamente el uso de tus servicios de<br />
voz, textos y datos o haz ajustes a tu plan<br />
en cualquier momento.<br />
≠ Obtén asistencia personalizada. Mi<br />
Asistencia responde rápidamente a tus<br />
preguntas.<br />
≠ Paga tus facturas a tu manera. Cuida<br />
el medio ambiente y configura la<br />
facturación electrónica, haz un pago<br />
único, o usa el pago automático Auto Pay<br />
y deja de preocuparte por que se te olvide<br />
hacer un pago.<br />
MI VERIZON<br />
5
MI VERIZON<br />
6<br />
≠ Mucho más. Transfiere tus contactos<br />
en un instante con la copia del directorio<br />
Backup Assistant SM , transfiere tus<br />
archivos multimedia, elige a tus<br />
contactos de Friends & Family® o mira<br />
tu correo electrónico en un solo lugar de<br />
cuentas populares de correo electrónico<br />
basadas en Internet, incluidas las de<br />
Yahoo!®, AOL®, Gmail® y Windows Live.
LO BÁSICO<br />
CARACTERÍSTICAS DEL TELÉFONO<br />
9<br />
8<br />
1<br />
2<br />
3<br />
4<br />
5<br />
6<br />
7<br />
1. AURICULAR<br />
2. SENSOR DE<br />
PROXIMIDAD<br />
3. LENTE DE CÁMARA<br />
DE FRENTE<br />
4. PANTALLA TÁCTIL<br />
5. TECLAS RÁPIDAS<br />
( TELÉFONO/<br />
CONTACTOS/<br />
MENSAJERÍA/<br />
APLICACIONES)<br />
6. TECLA ATRÁS<br />
7. MICRÓFONO<br />
8. TECLA INICIO<br />
9. TECLA MENÚ<br />
NOTAS: Todas los imágenes de pantalla en esta guía son<br />
simulados. Las pantallas actuales puede variar.<br />
Las instrucciones para realizar tareas en esta guía se<br />
basan en la configuración predeterminada del teléfono<br />
y podrán cambiar dependiendo de la versión del<br />
software en su teléfono.<br />
LO BÁSICO<br />
7
LO BÁSICO<br />
8<br />
CARACTERÍSTICAS DEL TELÉFONO<br />
(VISTA FRONTAL Y POSTERIOR)<br />
10<br />
11<br />
12<br />
10. LENTE DE<br />
LA CÁMARA<br />
POSTERIOR<br />
11. TAPA POSTERIOR<br />
12. ALTAVOZ<br />
13. TECLAS DE<br />
VOLUMEN<br />
13<br />
14<br />
15<br />
16<br />
14. TECLA ENCENDER/<br />
BLOQUEAR<br />
15. PUERTO PARA<br />
USB/CARGAR<br />
16. TOMA PARA<br />
AURICULARES
PRIMEROS PASOS<br />
RETIRANDO LA TAPA POSTERIOR Y LA BATERÍA<br />
Apague el teléfono y use la abertura de dedo<br />
en la parte inferior del teléfono para retirar<br />
la tapa de la batería (consulte la ilustración a<br />
continuación). Luego use la abertura de dedo en<br />
la esquina inferior izquierda del compartimiento<br />
de batería para levantar la batería y retirarla.<br />
INSERTAR UNA TARJETA MICROSD *<br />
Apague el teléfono y retire la tapa posterior<br />
(como se indica en las instrucciones anteriores).<br />
Localice la ranura para tarjeta microSD. Coloque<br />
la tarjeta microSD con la etiqueta orientada hacia<br />
arriba y deslícela hasta que quede bien insertada<br />
y trabada en su lugar.<br />
NOTA: Si se utiliza de manera inadecuada,<br />
la tarjeta microSD puede dañarse con<br />
facilidad. Inserte, retire o manipule la<br />
tarjeta con cuidado.<br />
*La tarjeta microSD está preinstalada<br />
en el teléfono.<br />
LO BÁSICO<br />
9
LO BÁSICO<br />
10<br />
PARA RETIRAR LA TARJETA MICROSD<br />
Apague el teléfono y retire la tapa posterior.<br />
Localice la ranura para tarjeta microSD. Tire<br />
la tarjeta suavemente para retirarla.<br />
PARA INSTALAR LA TARJETA SIM DE 4G<br />
Apague el teléfono. Retire la tapa de la<br />
batería y saque la batería. Localice la ranura<br />
para Tarjeta SIM de 4G. Coloque la Tarjeta<br />
SIM de 4G con la etiqueta orientada hacia<br />
arriba y deslícela en su lugar hasta que quede<br />
bien insertada y trabada en su lugar.<br />
* Un módulo de identificación del suscriptor (Tarjeta SIM)<br />
es una “tarjeta inteligente” que contiene la información<br />
personal, como su número telefónico móvil, plan de<br />
llamadas, información de la cuenta, y contenido, como<br />
contactos y mensajes de texto.
La Tarjeta SIM de 4G de Verizon Wireless es compatible<br />
con dispositivos de Verizon Wireless certificados para<br />
4G. Puede mover la Tarjeta SIM de 4G de un dispositivo a<br />
otro. Sus servicios inalámbricos funcionan perfectamente<br />
siempre que tenga un dispositivo compatible y un plan<br />
de servicios. Para ver qué dispositivos son compatibles<br />
con la Tarjeta SIM de 4G de Verizon Wireless, visite<br />
verizonwireless.com/certifieddevice.<br />
PARA RETIRAR LA TARJETA SIM DE 4G<br />
Apague el teléfono. Retire la tapa de la<br />
batería y saque la batería. Localice la ranura<br />
para Tarjeta SIM de 4G. Deslice la Tarjeta<br />
SIM de 4G suavemente para retirarla.<br />
PARA CARGAR LA BATERÍA<br />
Su teléfono viene con un Cargador de Pared/<br />
USB y un Cable USB que se conectan para<br />
poder cargar su teléfono. Para cargar el<br />
teléfono:<br />
LO BÁSICO<br />
11
LO BÁSICO<br />
12<br />
1. Conecte el Cable USB dentro del Cargador<br />
de Pared/USB. Al conectarlo, como se<br />
muestra a continuación, el logo LG del<br />
Cable USB debe orientarse hacia usted.<br />
Cable USB<br />
2. Enchufe el Cable USB (como se muestra<br />
a continuación) dentro del Puerto para<br />
USB/Cargador del teléfono.<br />
NOTA: Asegúrese que el<br />
lado ‘B’ esté orientado hacia<br />
usted al insertar el Cable<br />
USB dentro del teléfono.<br />
3. Enchufe el otro extremo en un<br />
tomacorrientes de pared.<br />
Cargador de<br />
Pared/USB
NOTA: Al cargar una batería completamente agotada, la<br />
luz de las teclas táctiles parpadean. Cuando la batería del<br />
teléfono tiene suficiente carga para encender el teléfono,<br />
una animación de batería aparece en la pantalla y la luz de las<br />
teclas terminan de parpadear.<br />
¡CUIDADO! Para cargar su aparato, por favor sólo use un<br />
cargador aprobado. Un manejo incorrecto del Puerto para<br />
USB/Cargador, así como el uso de un cargador incompatible,<br />
pueden causar daños a su aparato y anular la garantía.<br />
PARA ENCENDER O APAGAR <strong>TU</strong> TELÉFONO<br />
Es importante cargar completamente la<br />
batería antes de encender tu teléfono.<br />
1. Para encender el teléfono, mantenga<br />
oprimida la Tecla Encender/Bloquear<br />
por unos segundos hasta que se<br />
encienda la pantalla.<br />
2. Para apagar el teléfono, mantenga<br />
oprimida la Tecla Encender/Bloquear<br />
hasta que el menú se muestre.<br />
3. Toque Apagar y luego toque Aceptar para<br />
confirmar que desea apagar el teléfono.<br />
LO BÁSICO<br />
13
LO BÁSICO<br />
14<br />
PANTALLA PRINCIPAL<br />
La Pantalla principal es el punto de inicio<br />
para acceder a todas las characterísticas<br />
en su teléfono. Muestra accesos directos<br />
a aplicaciones, iconos, widgets y otras<br />
characterísticas.<br />
Barra de estado<br />
Muestra información de estado<br />
del teléfono, incluyendo la hora,<br />
potencia de la señal, estado de<br />
batería e iconos de notificación.<br />
Icono de aplicación<br />
Toque un icono (aplicación,<br />
carpeta, etc.) para abrir la<br />
aplicación y usarla.<br />
Teclas Rápidas<br />
Proporciona acceso fácil y de un<br />
toque a las funciones que usa más.<br />
Tecla Aplicaciones<br />
Toque para abrir la Pantalla<br />
de aplicaciones para ver las<br />
aplicaciones instaladas.
Teclas Rápidas<br />
En la Pantalla principal, las Teclas Rápidas se<br />
encuentran en una barra a lo largo de la parte<br />
inferior de la Pantalla principal y la Pantalla<br />
de aplicaciones.<br />
: Abre la aplicación Teléfono que muestra<br />
el teclado de marcación para marcar<br />
un número no guardado. También<br />
proporciona fichas adicionales para<br />
acceder el Registro, Contactos y Grupos.<br />
: Abre la Lista de Contactos. También puede<br />
acceder a Teléfono, Registro y Grupos si<br />
toca las fichas que se encuentran en la<br />
parte superior de la pantalla.<br />
: Abre la aplicación Mensajes.<br />
: Abre la Pantalla de aplicaciones y muestra<br />
las opciones y aplicaciones del teléfono.<br />
PARA VOLVER A LA PANTALLA PRINCIPAL<br />
Toque la Tecla Inicio en cualquier<br />
momento, desde cualquier aplicación.<br />
LO BÁSICO<br />
15
LO BÁSICO<br />
16<br />
PARA VER OTROS PANELES DE LA<br />
PANTALLA PRINCIPAL<br />
Deslice el dedo hacia la izquierda o derecha<br />
por la Pantalla principal. La Pantalla principal<br />
se expande hasta siete paneles adicionales, lo<br />
que permite más espacio para iconos, widgets,<br />
accesos directos, y otros elementos.<br />
Indicador de panel de Pantalla principal<br />
Los puntos en la parte superior de la pantalla indican cual panel<br />
de la Pantalla principal está viendo.<br />
PARA CONFIGURAR <strong>TU</strong> <strong>APARATO</strong><br />
Al encender tu aparato móvil por primera vez,<br />
tienes la opción de configurar rápidamente<br />
varias cuentas como Google, Microsoft®<br />
Exchange ActiveSync®, otras cuentas de<br />
correo electrónico e iniciar sesión a sitios<br />
de redes sociales. Simplemente sigue las
instrucciones en pantalla para completar la<br />
configuración inicial de tu aparato móvil.<br />
Para más información sobre cómo configurar<br />
tu correo electrónico, visita smartphones.<br />
verizonwireless.com. Haz clic en la sección<br />
Smartphone Support (Asistencia para<br />
smartphones) y selecciona tu teléfono.<br />
Para configurar tu cuenta de Google<br />
1. En la pantalla de configuración, toque<br />
Crear o Iniciar sesión.<br />
2. Introduzca su nombre de usuario y<br />
contraseña y cualquier otra información<br />
necesaria (si está creando una cuenta).<br />
3. Toque Iniciar sesión.<br />
Ahora tu Gmail, contactos de Google y<br />
los eventos del calendario de Google se<br />
cargarán a tu teléfono automáticamente.<br />
Usa el área a continuación para registrar la<br />
información de tu cuenta de Google para tu<br />
referencia futura.<br />
Nombre de usuario: @gmail.com<br />
Contraseña:<br />
LO BÁSICO<br />
17
LO BÁSICO<br />
18<br />
Para configurar una cuenta de correo<br />
electrónico<br />
1. Toque la Tecla Menú y luego toque<br />
Correo electrónico .<br />
2. Seleccione el tipo de cuenta de correo<br />
electrónico que desea configurar.<br />
3. Escriba la dirección de correo electrónico<br />
o nombre de usuario y contraseña.<br />
4. Toque Siguiente. La instalación se<br />
completa y se le solicita la opción de<br />
configurar su nombre de cuenta mostrado<br />
solicita y su nombre.<br />
5. Toque Hecho para ver la bandeja de<br />
entrada.<br />
NOTA: Si elige la opción Otros durante la instalación, se le<br />
pedirá que introduzca la dirección de correo electrónico,<br />
nombre de usuario y contraseña.<br />
Backup AssistantSM Backup Assistant es un servicio gratis de<br />
Verizon Wireless que guarda tu directorio<br />
telefónico en un servidor seguro. Si<br />
tu teléfono se pierde o se daña, o si te<br />
actualizas a un nuevo teléfono, Backup<br />
Assistant restablecerá tus contactos.
NOTA: Sujeto a términos específicos de uso. Los resultados<br />
pueden variar según la programación del respaldo y otros<br />
factores. Para más detalles, visite verizonwireless.com/<br />
backupassistant.<br />
HAZ UNA LLAMADA<br />
1. Toque la Tecla Teléfono para abrir el<br />
teclado de marcación.<br />
2. Introduzca el número de teléfono usando<br />
el teclado.<br />
3. Toque la Tecla Llamar para marcar el<br />
número que ha introducido.<br />
4. Toque la Tecla Finalizar para finalizar<br />
la llamada.<br />
HAZ UNA LLAMADA DESDE FUERA DE<br />
EE.UU.<br />
1. Desde la Pantalla principal, oprima<br />
la Tecla Menú y luego toque<br />
Configuración y Config. de llamada.<br />
2. Toque Marcación asistida.<br />
3. Toque País de referencia y seleccione el<br />
país que está visitando de la lista.<br />
4. Cuando regrese a EE.UU., toque País<br />
actual y seleccione United States Of<br />
America (EE.UU.).<br />
LO BÁSICO<br />
19
LO BÁSICO<br />
20<br />
PARA RECIBIR LLAMADAS<br />
≠ Toque la Tecla Responder .<br />
≠ Si el teléfono está bloqueado, arrastre la<br />
pantalla hacia arriba .<br />
NOTA: La cobertura de CDMA es requerida para llamadas<br />
realizadas fuera de los EE.UU. Cargos adicionals<br />
pueden aplicar. Para más información, visite<br />
verizonwireless.com/global.<br />
BUZÓN DE VOZ<br />
PARA CONFIGURAR EL BUZÓN DE VOZ<br />
1. Toque la Tecla Teléfono e introduzca<br />
*86 (*VM). Luego toque la Tecla Llamar<br />
. También puede mantener oprimida .<br />
2. Sigue las instrucciones del tutorial de<br />
configuración.<br />
3. Seleccione una contraseña.<br />
4. Graba un nombre y un saludo.<br />
PARA ACCEDER A <strong>TU</strong> BUZÓN DE VOZ DESDE<br />
<strong>TU</strong> TELÉFONO<br />
1. Toque la Tecla Teléfono e introduzca<br />
*86 (*VM). Luego toque la Tecla Llamar .<br />
También puede mantener oprimida .<br />
Cuando escuche el saludo, toque para<br />
interrumpirlo.
2. Sigue las instrucciones para ingresar tu<br />
contraseña y escuchar tus mensajes.<br />
PARA ACCEDER A <strong>TU</strong> BUZÓN DE VOZ DESDE<br />
CUALQUIER TELÉFONO<br />
1. Marca tu número de móvil. Cuando<br />
escuches el saludo, toque para<br />
interrumpirlo.<br />
2. Sigue las instrucciones para ingresar tu<br />
contraseña y escuchar tus mensajes.<br />
PARA CAMBIAR LA CONTRASEÑA DE <strong>TU</strong><br />
BUZÓN DE VOZ<br />
Para saber cómo cambiar tu contraseña<br />
o descubrir otras funciones, visita<br />
verizonwireless.com/miverizon.<br />
NOTA: Los buzones de voz que no se configuren en 45 días<br />
serán cancelados. Su buzón de voz de Verizon Wireless<br />
no está protegido con contraseña hasta que usted cree<br />
una contraseña siguiendo las instrucciones del tutorial<br />
de configuración.<br />
CORREO DE VOZ VISUAL<br />
Un solo vistazo te dirá todo lo que necesitas<br />
saber. Mira la lista de mensajes sin tener que<br />
marcar a tu buzón. Escúchalos o bórralos con<br />
sólo oprimir un botón.<br />
LO BÁSICO<br />
21
LO BÁSICO<br />
22<br />
Para configurar el Correo de Voz Visual<br />
1. Si eres un nuevo suscriptor de<br />
Verizon Wireless, primero toque la Tecla<br />
Teléfono , luego marque * 86 (*VM) y<br />
toque la Tecla Llamar para establecer<br />
su servicio de Correo de Voz. También<br />
puede mantener oprimida .<br />
2. En la pantalla principal, toque Correo de<br />
Voz Visual .<br />
3. Toque Aceptar para aceptar los Términos<br />
y Condiciones.<br />
4. Introduzca su contraseña y toque<br />
Siguiente.<br />
Por favor, tenga en cuenta que configurar el Correo de Voz<br />
Visual puede tomar cinco minutos. Su contraseña y mensajes<br />
del buzón de voz quedarán almacenados en el aparato, y<br />
los mensajes estarán disponibles a cualquier persona con<br />
acceso al aparato. Para limitar el acceso no autorizado al<br />
buzón de voz, considere la posibilidad de bloquear el aparato<br />
cuando no se esté usando. Para cancelar el servicio de su<br />
Correo de Voz Visual, visite verizonwireless.com/miverizon<br />
o contacte a servicio al cliente. Debe eliminarse el bloqueo<br />
V Block para usar el Correo de Voz Visual. Aplican cargos<br />
por datos sólo para bajar la aplicación, lo que requiere<br />
aproximadamente 1 MB de datos.
PARA BLOQUEAR O DESBLOQUEAR<br />
<strong>TU</strong> TELÉFONO<br />
1. Oprima la Tecla Encender/Bloquear<br />
para bloquear su teléfono. La pantalla se<br />
apagará.<br />
2. Oprima la Tecla Encender/Bloquear .<br />
Su Pantalla de Bloqueo aparecerá.<br />
3. Toque y arrastre la pantalla hacia arriba<br />
. La última pantalla en la<br />
cual trabajó se abrirá.<br />
PARA USAR EL ALTAVOZ<br />
1. Durante una llamada, toque .<br />
2. La Tecla Altavoz se ilumina para indicar<br />
que el altavoz está encendido. El icono<br />
Altavoz aparecerá en el Panel de<br />
Notificaciones y el sonido de su llamada<br />
se reproduce por el altavoz del teléfono.<br />
3. Mientras ve la pantalla de llamada actual,<br />
puede apagar el altavoz al tocar la Tecla<br />
Altavoz de nuevo.<br />
El altavoz se apaga automáticamente<br />
cuando la llamada se finaliza.<br />
LO BÁSICO<br />
23
LO BÁSICO<br />
24<br />
TIMBRES<br />
Haz que tu teléfono se mueva a tu ritmo.<br />
Elige un timbre, cambia el tono o haz que tu<br />
teléfono no suene.<br />
PARA SELECCIONAR UN TIMBRE<br />
1. Desde la Pantalla principal, toque la Tecla<br />
Menú y luego toque Configuración y<br />
Sonido.<br />
2. En la sección Llamadas entrantes, tocar<br />
Tono de llamada del tel.<br />
3. Toque el timbre para seleccionar y<br />
escucharlo.<br />
4. Toque Aceptar para guardar la<br />
configuración.<br />
PARA PROGRAMAR EL TIMBRE A<br />
VIBRACIÓN<br />
1. Desde la Pantalla principal, oprima la<br />
Tecla Menú y toque Configuración.<br />
2. Toque Sonido y luego Vibrar. Seleccione<br />
de las siguientes opciones: Siempre,<br />
Nunca, Sólo en modo silencioso o Sólo<br />
cuando no esté en modo silencioso.
BLUETOOTH®<br />
Bluetooth es una tecnología de<br />
comunicaciones de rango corto que aparatos<br />
pueden usar para intercambiar información<br />
sobre una distancia de 30 pies. Los aparatos<br />
Bluetooth más comunes son auriculares<br />
para hacer llamadas o escuchar música,<br />
kits manos libres de coche y otros aparatos<br />
portátiles, incluyendo computadoras<br />
portátiles y teléfonos celulares. Hay varios<br />
perfiles de Bluetooth que definen las<br />
características y normas de comunicaciones<br />
para aparatos Bluetooth.<br />
PARA ENCENDER EL BLUETOOTH<br />
Para encender o apagar Bluetooth<br />
1. Desde la Pantalla principal, oprima la<br />
Tecla Menú .<br />
2. Toque Configuración y luego toque<br />
Conexiones inalámbricas y redes.<br />
3. Toque Bluetooth para encender o apagar<br />
la función Bluetooth. Una marca de<br />
verificación azul indica que la función está<br />
encendida.<br />
LO BÁSICO<br />
25
LO BÁSICO<br />
26<br />
PARA CONECTAR <strong>TU</strong> AUDÍFONO BLUETOOTH<br />
A <strong>TU</strong> TELÉFONO<br />
Para emparejar su teléfono con un aparato<br />
Bluetooth<br />
Debe emparejar su teléfono con otro aparato<br />
antes de conectarlos.<br />
1. Desde la Pantalla principal, oprima la<br />
Tecla de Menú .<br />
2. Toque Configuración > Conexiones<br />
inalámbricas y redes > Config. de<br />
Bluetooth.<br />
NOTA: Si Bluetooth está apagado, toque Bluetooth para<br />
encenderlo.<br />
3. Toque Buscar dispositivos para buscar y<br />
mostrar los nombres de identificación de<br />
todos los aparatos Bluetooth disponibles.<br />
4. Toque el nombre de identificación del<br />
aparato que quiere emparejar con el<br />
teléfono.<br />
NOTA: Dependiendo en el tipo del aparato con cual está<br />
emparejando, se le solicitará que introduzca un código,<br />
confirmar códigos coincidentes o los aparatos se<br />
emparejarán automáticamente.
NFORMACIÓN SOBRE<br />
COMPATIBILIDAD CON EQUIPOS DE<br />
ASISTENCIA AUDITIVA<br />
Este teléfono ha sido probado y clasificado<br />
para su uso con equipos de asistencia<br />
auditiva para ciertas tecnologías de servicio<br />
móvil que usa. Sin embargo, pueden existir<br />
ciertas tecnologías nuevas de servicio móvil<br />
usadas en este teléfono que no han sido<br />
probadas aún para su uso con equipos de<br />
asistencia auditiva. Es importante probar<br />
minuciosamente y en diferentes sitios las<br />
distintas funciones de este teléfono, usando<br />
su equipo de asistencia auditiva o implante<br />
coclear, para determinar si usted escucha<br />
algún ruido de interferencia. Consulte con<br />
su proveedor de servicio o el fabricante<br />
de este teléfono para información sobre<br />
compatibilidad con equipos de asistencia<br />
auditiva. Si tiene preguntas sobre las<br />
políticas de devolución o cambios, consulte<br />
con su proveedor de servicio o vendedor de<br />
teléfonos.<br />
LO BÁSICO<br />
27
APLICACIONES Y FUNCIONES<br />
28<br />
APLICACIONES Y FUNCIONES<br />
Saca más provecho a tu teléfono con música,<br />
timbres, fondos de pantalla, aplicaciones y<br />
juegos. Revisa los resultados más recientes,<br />
interactúa con Twitter y Facebook, e<br />
incluso planea tus vacaciones: tenemos<br />
aplicaciones que te ayudarán con todo<br />
eso. Para detalles y precios, visita<br />
verizonwireless.com/espanol.<br />
Pueden aplicar cargos por datos.<br />
PARA USAR LA TIENDA DE ANDROID<br />
La Tienda de Android te ofrece acceso<br />
directo a aplicaciones útiles y juegos<br />
divertidos que puedes descargar e instalar.<br />
NOTA: Debe ingresar a su cuenta de Google para usar la<br />
Tienda de Android.
PARA DESCARGAR APLICACIONES DE LA<br />
TIENDA DE ANDROID<br />
1. Desde la pantalla principal, toque Tienda<br />
.<br />
2. Navegue y busque las aplicaciones<br />
o juegos que desea descargar y<br />
selecciónelos.<br />
3. En la pantalla de detalles de la aplicación,<br />
toque Instalar.<br />
NOTA: Recibirá una notificación cuando la aplicación se<br />
descargue completamente. Después de descargarla,<br />
la puede encontrar en la pantalla de menú de<br />
aplicaciones.<br />
APLICACIONES Y FUNCIONES<br />
29
APLICACIONES Y FUNCIONES<br />
30<br />
ENVÍA <strong>TU</strong> MENSAJE<br />
Habla con tus dedos. Exprésate a lo<br />
grande con sólo oprimir un botón. Para<br />
tarifas e información completa, ve a<br />
verizonwireless.com/messaging.<br />
MENSAJERÍA DE TEXTO<br />
Para enviar un nuevo mensaje de texto a un<br />
teléfono<br />
1. Desde la Pantalla principal, oprima la<br />
Tecla Mensajería .<br />
2. Toque Mensaje nuevo para empezar un<br />
nuevo mensaje de texto o multimedia.<br />
3. Introduzca un número de teléfono móvil<br />
o correo electrónico en el campo Para. Al<br />
escribir, contactos coincidentes aparecen.<br />
Puede tocar un contacto sugerido o siga<br />
escribiendo.<br />
4. Toque el campo de texto para introducir<br />
su mensaje.<br />
5. Toque Enviar para enviar el mensaje.
MENSAJERÍA DE TEXTO (DESDE FUERA DE<br />
EE.UU.)<br />
Enviar un nuevo mensaje<br />
1. Desde la Pantalla principal, oprima la<br />
Tecla Mensajería .<br />
2. Toque Mensaje nuevo para empezar un<br />
nuevo mensaje de texto.<br />
3. Introduzca el numero de teléfono de 10<br />
dígitos del destinatario (como si fuera<br />
mensaje doméstico).<br />
NOTA: Para enviar un mensaje de texto a un destinatario que<br />
no usa la marcación de 10 dígitos, introduzca 011 + Código<br />
de país + Número telefónico.<br />
4. Toque el campo de texto para introducir<br />
su mensaje.<br />
5. Toque Enviar para enviar el mensaje.<br />
Los mensajes de multimedia se cobran según su plan<br />
de mensajería. Pueden aplicar tarifas más altas para<br />
la mensajería de multimedia internacional (donde esté<br />
disponible).<br />
NOTA: La cobertura de CDMA es requerida para mensajes<br />
enviados fuera de los EE.UU. Cargos adicionals pueden<br />
aplicar. Para más información, visite verizonwireless.com/<br />
global.<br />
APLICACIONES Y FUNCIONES<br />
31
APLICACIONES Y FUNCIONES<br />
32<br />
FOTOMENSAJERÍA<br />
Toma fotos que podrás enviar a<br />
prácticamente cualquier número de teléfono<br />
móvil o dirección de correo electrónico.<br />
Envía un fotomensaje<br />
1. Desde la pantalla Mensajería, toque<br />
Mensaje nuevo.<br />
2. Introduzca un número de teléfono móvil<br />
o correo electrónico en el campo Para. Al<br />
escribir, contactos coincidentes aparecen.<br />
Puede tocar un contacto sugerido o siga<br />
escribiendo<br />
3. Toque el campo de texto para introducir<br />
su mensaje.<br />
4. Toque Adjuntar .<br />
5. Toque Imágenes y seleccione la imagen<br />
que desea enviar de la Galería.<br />
6. Puede ver o eliminar la imagen antes de<br />
enviar el mensaje.<br />
7. Toque Enviar MMS para enviar el<br />
mensaje.
Toma una foto y compártela<br />
1. Desde la Pantalla principal, toque la Tecla<br />
Aplicaciones y luego toque Cámara .<br />
2. Usando la pantalla del teléfono como<br />
visor, toque para tomar una foto.<br />
3. Toque Comp.<br />
4. Toque la aplicación que desea usar para<br />
compartir la imagen.<br />
5. Ingrese cualquier informacion necesaria y<br />
compártela con sus amigos.<br />
Toque la pantalla para<br />
mostrar las opciones para<br />
cambiar la configuración.<br />
Arrastre para cambiar<br />
entre Modos Cámara<br />
y Video.<br />
Toque para tomar una<br />
foto o iniciar/detener la<br />
grabación de video.<br />
Toque para acceder a la<br />
Galería.<br />
APLICACIONES Y FUNCIONES<br />
33
APLICACIONES Y FUNCIONES<br />
34<br />
Borra un fotomensaje<br />
1. Desde la pantalla principal, oprima la<br />
Tecla Mensajería .<br />
2. Toque la conversación que contiene el<br />
fotomensaje que desea borrar.<br />
3. Toque y mantenga oprimido el<br />
fotomensaje y toque Eliminar mensaje.<br />
4. Toque Aceptar para confirmar.<br />
VIDEOMENSAJERÍA<br />
Graba y envía videos a prácticamente<br />
cualquier número de móvil o dirección de<br />
correo electrónico.<br />
Envía un videomensaje<br />
1. Desde la pantalla Mensajería, toque<br />
Mensaje nuevo.<br />
2. Introduzca un número de teléfono móvil o<br />
correo electrónico en el campo Para.<br />
Al escribir, contactos coincidentes<br />
aparecen. Puede tocar un contacto<br />
sugerido o siga escribiendo<br />
3. Toque el campo de texto para introducir su<br />
mensaje.<br />
4. Toque Adjuntar .
5. Toque Videos y seleccione el video que<br />
desea enviar de la Galería.<br />
6. Toque Enviar MMS para enviar el<br />
mensaje.<br />
Graba un video y compártelo<br />
1. Desde la Pantalla principal, toque la Tecla<br />
Aplicaciones y luego toque Cámara .<br />
2. Arrastre hacia abajo para cambiar al<br />
Modo de Video.<br />
3. Usando la pantalla del teléfono como<br />
visor, toque para iniciar la grabación<br />
de video. Luego toque para detener la<br />
grabación de video.<br />
4. Toque Compart.<br />
5. Toque la aplicación que desea usar para<br />
compartir la imagen.<br />
6. Ingrese cualquier informacion necesaria y<br />
compártela con sus amigos.<br />
Borra un videomensaje<br />
1. Desde la pantalla principal, oprima la<br />
Tecla Mensajería .<br />
2. Toque la conversación que contiene el<br />
videomensaje que desea borrar.<br />
APLICACIONES Y FUNCIONES<br />
35
APLICACIONES Y FUNCIONES<br />
36<br />
3. Toque y mantenga oprimido el<br />
videomensaje y toque Eliminar mensaje.<br />
4. Toque Aceptar para confirmar.<br />
DATOS<br />
Aprovecha una fuerte corriente de datos—<br />
todo en la palma de tu mano.<br />
CORREO ELECTRÓNICO<br />
Revisa tu correo electrónico cuando quieras<br />
con cuentas populares de correo electrónico<br />
basadas en Internet. Yahoo!®, AOL®, Gmail®<br />
y Windows Live . Puede acceder su correo<br />
electrónico tocando . También puede<br />
acceder a las cuentas de correo electrónico<br />
desde vzw.com/sync.<br />
SERVICIO DE INTERNET MÓVIL MOBILE WEB<br />
Llévate Internet contigo dondequiera que<br />
vayas. Puedes leer las últimas noticias,<br />
obtener información sobre el estado del<br />
tiempo y estar al tanto de tus inversiones.
SÉ UN MAGNATE DE LA MULTIMEDIA<br />
Deja que tu música inunde la señal. Tu señal.<br />
TIMBRES<br />
Elige entre nuestras más de 90,000<br />
canciones y asigna una canción distinta a<br />
cada una de las personas que aparecen en<br />
tu directorio telefónico.<br />
TIMBRES PARA LLAMADAS ENTRANTES<br />
Entretén a quienes te llamen con timbres<br />
para llamadas entrantes: canciones o<br />
sonidos que escucharán mientras esperan<br />
que contestes.<br />
V CAST MEDIA MANAGER<br />
Transfiere fotos, videos y música entre<br />
tu teléfono y tu computadora con sólo<br />
una conexión de Cable USB. Incluye un<br />
reproductor multimedia y herramientas de<br />
administración multimedia. Para descargar<br />
tu copia gratuita, visita verizonwireless.<br />
com/vmm.<br />
Requisitos del sistema: Windows® XP, Windows Vista®<br />
o Windows 7.<br />
APLICACIONES Y FUNCIONES<br />
37
APLICACIONES Y FUNCIONES<br />
38<br />
TIENDA MULTIMEDIA DE<br />
VERIZON WIRELESS<br />
Ve a Internet y encuentra miles de fabulosas<br />
aplicaciones, así como lo último en juegos<br />
y música. Haz tu compra por Internet y baja<br />
las aplicaciones directamente a tu teléfono.<br />
Visita verizonwireless.com/apps.<br />
MÚSICA V CAST<br />
Compra y descarga canciones individuales<br />
o suscríbete para obtener acceso ilimitado<br />
a millones de canciones.<br />
Requisitos del sistema: Windows® XP, Windows Vista®<br />
o Windows 7.<br />
MÍRALO TODO<br />
Mira lo que quieras, cuando quieras, directo<br />
en tu teléfono.<br />
V CAST VIDEO ON DEMAND<br />
Mira tus programas favoritos y deportes<br />
en vivo desde cualquier lugar en el área de<br />
cobertura de V CAST. Disfruta de más de 100<br />
canales, con programas adicionales agregados<br />
diariamente en episodios completos a pedido.<br />
Visita verizonwireless.com/video.
DISFRÚTALAS AL MÁXIMO<br />
Hay muchas para disfrutar, con cientos de<br />
aplicaciones para juegos:<br />
≠ Busca, compra y baja juegos en tu<br />
teléfono a través de las aplicaciones de la<br />
Tienda de Android.<br />
≠ Busca y compra juegos por Internet en<br />
verizonwireless.com/juegos.<br />
Pueden aplicar cargos por datos.<br />
SISTEMAS DE PROTECCIÓN<br />
VERIZON SAFEGUARDS<br />
Es tu familia, es tu decisión. Los sistemas de<br />
protección Verizon Safeguards te ofrecen<br />
tranquilidad con filtros de contenido,<br />
controles de correo spam, controles de uso<br />
y mucho más. Visita verizonwireless.com/<br />
spamcontrols o verizonwireless.com/<br />
controlesdeuso.<br />
APLICACIONES Y FUNCIONES<br />
39
APLICACIONES Y FUNCIONES<br />
40<br />
PARA COMENZAR CON LOS SERVICIOS<br />
BASADOS EN UBICACIÓN (LBS)<br />
Verizon Wireless respeta tu privacidad.<br />
Por ello, tu teléfono viene programado para<br />
mostrar tu ubicación sólo cuando marcas<br />
911. Para usar LBS, primero deberás activar<br />
los servicios de ubicación en tu teléfono:<br />
1. Desde la Pantalla principal, toque la Tecla<br />
Aplicaciones .<br />
2. Toque Config. y luego toque Ubicación.<br />
3. En la sección Mi ubicación, toque los<br />
servicios de ubicación que desea usar.<br />
Su aparato móvil puede determinar la ubicación geográfica<br />
y física de sí mismo (y de usted) (“Información de su<br />
ubicación”) y puede asociar la información de su ubicación<br />
con otros datos. Además, ciertas aplicaciones, servicios<br />
y programas pueden acceder, recopilar, almacenar y<br />
usar la información de su ubicación, así como divulgar la<br />
información de su ubicación a otros. Usted deberá tener<br />
precaución al determinar si la información de su ubicación<br />
debe o no estar disponible a otros y deberá leer todas las<br />
políticas de privacidad correspondientes a terceros antes<br />
de permitir el acceso. Para limitar un posible acceso no<br />
autorizado a la información de su ubicación, los teléfonos<br />
de Verizon Wireless están programados únicamente para<br />
E911, lo cual sólo permitirá al personal de respuesta de<br />
emergencia localizarle si marca 911 desde su teléfono.<br />
Otros aparatos móviles (como las tarjetas de datos de banda<br />
ancha o aparatos sin teclado o interfaz de usuario) pueden
tener o no dicha limitación y programación de ubicación<br />
disponible. Al permitir la programación de ubicación, usted<br />
está permitiendo el acceso de terceros a la información de<br />
su ubicación a través de software, widgets o componentes<br />
periféricos que decida descargar, añadir o adjuntar a su<br />
aparato móvil o por medio de acceso a Internet, capacidades<br />
de mensajería u otros medios, y usted está autorizando que<br />
Verizon Wireless recopile, use y divulgue la información de<br />
su ubicación según corresponda para ofrecerle todos los<br />
servicios de ubicación que usted habilite.<br />
SISTEMA DE NAVEGACIÓN<br />
VZ NAVIGATOR®<br />
Ofreciéndote mucho más que simples<br />
indicaciones, VZ Navigator te ayuda a llegar<br />
a tu destino y te mantiene informado una<br />
vez que llegas. Recibe alertas de tráfico,<br />
encuentra precios de gasolina e indicaciones<br />
para llegar a gasolineras, busca negocios<br />
locales, informa de tu ubicación a tus amigos<br />
u obtén auxilio vial a través de marcado<br />
rápido. Visita verizonwireless.com/<br />
navigator.<br />
APLICACIONES Y FUNCIONES<br />
41
APLICACIONES Y FUNCIONES<br />
42<br />
COBER<strong>TU</strong>RA TOTAL DEL EQUIPO<br />
Suscríbete a la cobertura total del equipo<br />
y si tu aparato se rompe, se te pierde, te lo<br />
roban o no funciona bien una vez vencida la<br />
garantía del fabricante, estás protegido. La<br />
cobertura total del equipo combina la garantía<br />
extendida de Verizon Wireless y la protección<br />
del teléfono móvil de Asurion. Para<br />
más detalles, visita verizonwireless.com/<br />
equipmentprotection.<br />
GLOBALÍZATE<br />
Verizon Wireless te mantiene conectado<br />
a la vuelta de la esquina y por todo<br />
el mundo. Para obtener información<br />
actualizada sobre destinos y tarifas, visita<br />
verizonwireless.com/vzglobal y selecciona<br />
uno de los siguientes programas:<br />
LARGA DISTANCIA INTERNACIONAL<br />
Puedes llamar a más de 190 destinos<br />
desde EE.UU. con tu teléfono de Verizon.<br />
Simplemente añade I-DIAL a tu cuenta y,<br />
para tarifas reducidas, selecciona nuestro<br />
Plan Superior de Llamadas Internacionales
o, para llamadas internacionales ocasionales,<br />
utiliza nuestras tarifas por minuto.<br />
MENSAJERÍA DE TEXTO INTERNACIONAL<br />
Puedes enviar mensajes de texto a clientes<br />
de proveedores de servicio participantes en<br />
más de 150 países por todo el mundo. Para<br />
más detalles, visita verizonwireless.com/<br />
internationalmessaging.<br />
ROAMING INTERNACIONAL<br />
¿Vas a viajar fuera de EE.UU.? Con cualquier<br />
teléfono de Verizon puedes mantenerte<br />
en contacto en más de 35 destinos, como<br />
Canadá, México, China, Israel, Brasil y<br />
Jamaica. Marca *611 desde tu teléfono o<br />
llama al 1-800-922-0204 y habla con un<br />
representante de Verizon Wireless para<br />
habilitar el roaming internacional. En<br />
verizonwireless.com/internationalroam<br />
encontrarás una lista completa de destinos<br />
y tarifas.<br />
APLICACIONES Y FUNCIONES<br />
43
APLICACIONES Y FUNCIONES<br />
44<br />
PROGRAMA GLOBAL DE VIAJES<br />
Disponible en más de 220 países con<br />
servicio de voz, más de 200 países con<br />
servicio de datos y más de 115 países con<br />
3G, es la solución perfecta a corto plazo<br />
para el viajero global ocasional o poco<br />
frecuente que necesita mantenerse en<br />
contacto mientras viaja fuera de EE.UU. a<br />
sitios GSM. Este programa es ideal cuando<br />
la duración de tu viaje es inferior a 21 días.<br />
No hay cargo de alquiler ni depósito de<br />
garantía, y todos los cargos se aplicarán<br />
a tu factura de Verizon Wireless en curso.<br />
Para más información sobre el programa<br />
global de viajes, visita verizonwireless.<br />
com/globaltravel. Para hacer un pedido,<br />
comunícate con nuestros especialistas<br />
de activación de servicios globales al<br />
1-800-711-8300.
ACCESORIOS<br />
Dale las soluciones que se merece a<br />
tu teléfono; puede combinarlo con los<br />
accesorios (se venden por separado) que<br />
complementan su estilo de vida de conocedor<br />
de la tecnología. Lleva tu experiencia<br />
multimedia a otro nivel con la base de carga.<br />
Mantenga su teléfono y sus aplicaciones al<br />
alcance del brazo mientras está en marcha<br />
colocándolo en el Montaje para ventana. Y al<br />
llegar a su destino, utilice la Cubierta de carga<br />
inalámbrica y compatible Base de carga móvil<br />
para mantener su teléfono a plena potencia.<br />
NOTA: Los accesorios opcionales están disponibles<br />
para su compra en ubicaciones Verizon Wireless o<br />
www.verizonwireless.com.<br />
Accesorios<br />
45
Accesorios<br />
46<br />
BASE DE CARGA<br />
Use la Base de carga para mantener su<br />
teléfono y batería extra cargada mientras<br />
que disfruta de sus contenidos multimedia<br />
favoritos en la pantalla grande de 4.5” del<br />
teléfono. O use el Modo reloj, activado cuando<br />
su teléfono se acopla, para mantenerlo en<br />
horario con los números grandes y fácil de leer.<br />
Compatible con las cubiertas de batería<br />
estándar y extendida (la batería extendida y<br />
cubierta extendida se venden por separado).
MONTAJE PARA VENTANA<br />
Ya sea que usted esté tomando un viaje corto<br />
o largo, el Montaje para ventana sostiene<br />
su teléfono en su lugar mientras se monta<br />
en la ventana o el tablero de su carro. Una<br />
vez que su teléfono se adjunta, el modo de<br />
coche se activa en su teléfono y le da acceso<br />
a aplicaciones útiles, como la navegación,<br />
contactos y mapas. Compatible con las<br />
cubiertas de batería estándar, extendida e<br />
inalámbrica(la batería extendida y cubierta<br />
extendida, así como las cubiertas de carga<br />
inalámbricas, se venden por separado).<br />
Accesorios<br />
47
Accesorios<br />
48<br />
CUBIERTA DE CARGA INALÁMBRICA<br />
Conecte una cubierta de carga inalámbrica<br />
opcional a su teléfono para una experiencia<br />
de carga inalámbrica. Coloque su teléfono en<br />
el centro de una base de carga móvil (se vende<br />
por separado) compatible habilitada con Qi<br />
para una carga óptima.
BASE DE CARGA MÓVIL<br />
Disfruta de una carga inalámbrica cuando<br />
se utiliza la base de carga móvil, junto con<br />
un teléfono y cubierta de carga inalámbrica<br />
compatible (se vende por separado).<br />
La base de carga móvil puede acomodar<br />
un teléfono a la vez e incluye LEDs de<br />
alimentación y de estado de carga.<br />
Una guía para la colocación e imán le ayudan<br />
colocar el teléfono en el centro para una<br />
carga óptima y la retroalimentación de audio<br />
confirma la presencia de su teléfono.<br />
Accesorios<br />
49
NOTAS
NOTAS