Configuring Your SMC7804WBRA
Configuring Your SMC7804WBRA
Configuring Your SMC7804WBRA

You also want an ePaper? Increase the reach of your titles
YUMPU automatically turns print PDFs into web optimized ePapers that Google loves.
Model Number: <strong>SMC7804WBRA</strong><br />
Issue: November 2003<br />
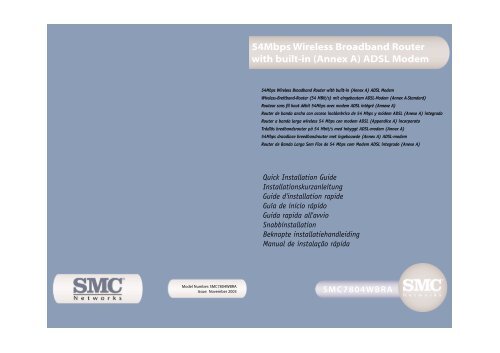
54Mbps Wireless Broadband Router<br />
with built-in (Annex A) ADSL Modem<br />
54Mbps Wireless Broadband Router with built-in (Annex A) ADSL Modem<br />
Wireless-Breitband-Router (54 MBit/s) mit eingebautem ADSL-Modem (Annex A-Standard)<br />
Routeur sans fil haut débit 54Mbps avec modem ADSL intégré (Annexe A)<br />
Router de banda ancha con acceso inalámbrico de 54 Mbps y módem ADSL (Anexo A) integrado<br />
Router a banda larga wireless 54 Mbps con modem ADSL (Appendice A) incorporato<br />
Trådlös bredbandsrouter på 54 Mbit/s med inbyggt ADSL-modem (Annex A)<br />
54Mbps draadloze breedbandrouter met ingebouwde (Annex A) ADSL-modem<br />
Router de Banda Larga Sem Fios de 54 Mbps com Modem ADSL integrado (Anexo A)<br />
Quick Installation Guide<br />
Installationskurzanleitung<br />
Guide d'installation rapide<br />
Guía de inicio rápido<br />
Guida rapida all'avvio<br />
Snabbinstallation<br />
Beknopte installatiehandleiding<br />
Manual de instalação rápida<br />
<strong>SMC7804WBRA</strong>
Contents<br />
1<br />
Contents<br />
English 2 - 49<br />
Deutsch 50 - 97<br />
Français 98 - 145<br />
Español 146 - 193<br />
Italiano 194 - 243<br />
Svenska 244 - 289<br />
Nederlands 290 - 337<br />
Português 338 - 385<br />
Compliances & Information 386 - 390<br />
Introduction<br />
The SMC ADSL Barricade TM g, <strong>SMC7804WBRA</strong> is a 54Mbps Wireless<br />
Broadband Router with built-in (Annex A) ADSL Modem. This<br />
product is designed to share Internet Access, provide security,<br />
and network multiple devices for a variety of users. The<br />
<strong>SMC7804WBRA</strong>’s simple installation and setup can be carried<br />
out by the least experienced users, while providing networking<br />
professionals with easy to configure advanced features. Please<br />
read the User Guide for advanced features of this product.<br />
2<br />
English
English<br />
3<br />
Package Contents<br />
• One ADSL BarricadeTM g.<br />
• One Power Adapter.<br />
• One CD with Complete Documentation.<br />
• One Category 5 Fast Ethernet Cable.<br />
• One Telephone patch cable (RJ-11).<br />
• Splitter is provided (NL, FR and UK models only).<br />
• Telephone Connector Kit (NL model only).<br />
Installation Requirements<br />
Before proceeding with the installation of your <strong>SMC7804WBRA</strong>,<br />
please be sure you have the following:<br />
• ADSL line installed by your ISP.<br />
• ADSL Micro filter/Splitter.<br />
• A computer equipped with a 10/100Mbps Network Adapter<br />
or an IEEE802.11g wireless network adapter.<br />
• TCP/IP network protocols installed on each PC that will<br />
access the Internet.<br />
• A Java enabled web browser such as Microsoft Internet<br />
Explorer 5.0 or above installed.<br />
• <strong>Your</strong> Windows CD, if your computer is running Windows 95,<br />
98, or Me.<br />
4<br />
English
English<br />
5<br />
Hardware<br />
The front panel of the <strong>SMC7804WBRA</strong> includes LED indicators<br />
for easy monitoring.<br />
The following table defines the function of each LED.<br />
LED Status Description<br />
PWR On The Barricade TM is receiving<br />
power. Normal operation.<br />
Off Power off or failure.<br />
ADSL Sync On ADSL connection is syncronized.<br />
Flashing The Barricade is establishing an<br />
DSL link.<br />
Off ADSL connection is not established.<br />
ADSL Data Flashing The indicated ADSL port is sending<br />
or receiving data.<br />
WLAN Off No data is being transferred.<br />
Flashing The WLAN port is sending or<br />
receiving data.<br />
Ethernet On Ethernet connection is established.<br />
(4LEDs)<br />
Flashing The indicated LAN port is sending<br />
or receiving data.<br />
Off There is no LAN connection on<br />
the port.<br />
Connecting Devices<br />
LAN Ports Reset Button WAN Port<br />
Power inlet<br />
1. Connect computers directly to the <strong>SMC7804WBRA</strong> on ports 1-4<br />
on the rear panel. If you have more than 4 computers to plug<br />
in, connect a hub or a switch and connect additional computers<br />
to that device. To connect wirelessly refer to the User Guide for<br />
your wireless adapter.<br />
2. Connect supplied RJ-11 cable from ADSL Micro filter/Splitter<br />
to the ADSL WAN port on the <strong>SMC7804WBRA</strong>.<br />
3. Plug the power cord into the power jack.<br />
6<br />
English
English<br />
7<br />
<strong>Configuring</strong> <strong>Your</strong> Computer<br />
This Quick Installation Guide provides configuration instructions<br />
for Windows 95, 98, Me, NT 4.0, 2000 and XP, and for Macintosh<br />
OS 7.x and above. Please be sure that you are following the<br />
instructions that correspond to your operating system:<br />
• <strong>Configuring</strong> <strong>Your</strong> Computer with Windows 95/98/Me.<br />
• <strong>Configuring</strong> <strong>Your</strong> Computer with Windows 2000.<br />
• <strong>Configuring</strong> <strong>Your</strong> Computer with Windows XP.<br />
• <strong>Configuring</strong> <strong>Your</strong> Computer with Windows NT 4.0.<br />
• <strong>Configuring</strong> <strong>Your</strong> Macintosh Computer.<br />
<strong>Configuring</strong> your computer with Windows 95/98/Me<br />
You may find that the instructions here do not exactly match your<br />
version of Windows. This is because these steps and screenshots<br />
were created from Windows 98. Windows 95 and Windows Me are<br />
very similar, but not identical, to Windows 98.<br />
Step 1. Configure TCP/IP Settings<br />
After you have completed the hardware setup by connecting your<br />
devices, you need to configure your computer to connect to your<br />
<strong>SMC7804WBRA</strong>.<br />
1. From the Windows<br />
desktop, click the<br />
[Start] button. Choose<br />
[Settings], then click<br />
[Control Panel].<br />
8<br />
English
English<br />
2<br />
2. From [Control Panel], double-click the [Network] icon.<br />
3. In the [Network] window, under the [Configuration] tab,<br />
double click [TCP/IP] in the list of your network card.<br />
4. Select the [IP Address] tab.<br />
If [Obtain an IP address automatically] is already selected, your<br />
computer is already configured for DHCP. Click [Cancel] to close<br />
each window, and skip to Step 2 Disable HTTP Proxy.<br />
5. Click [Obtain an IP address automatically].<br />
9 10<br />
English
English<br />
2 Configuration<br />
11<br />
6. Click the [Gateway] tab and<br />
remove any numbers listed under<br />
[Installed gateways].<br />
7. Click the [DNS Configuration] tab<br />
and click [Disable DNS].<br />
8. Click [OK].<br />
9. Windows may need your<br />
Windows 95/98/Me CD to<br />
copy some files. After it finishes<br />
copying, it will then prompt<br />
you to restart your<br />
system. Click [Yes] and<br />
your computer will shut<br />
down and restart.<br />
Step 2. Disable HTTP Proxy<br />
You will need to verify that the HTTP Proxy feature of your Web<br />
browser is disabled so that your Web browser is able to view the<br />
configuration pages inside your <strong>SMC7804WBRA</strong>. The following steps<br />
are for Internet Explorer and for Netscape. Determine which<br />
browser you use and follow the appropriate steps.<br />
Internet Explorer<br />
1. Open Internet Explorer and click the [Stop] button.<br />
Click [Tools], then [Internet Options].<br />
12<br />
English
English<br />
13<br />
2. In the [Internet Options]<br />
window click the [Connections]<br />
tab. Next, click the [LAN<br />
Settings…] button.<br />
3. Clear all the checkboxes.<br />
4. Click [OK] and then click [OK]<br />
again to close the [Internet Options] window.<br />
Netscape<br />
1. Open Netscape and click the<br />
[Stop] button. Click [Edit],<br />
then click [Preferences…].<br />
2. In the [Preferences] window, under [Category], double-click<br />
[Advanced], then click [Proxies]. Select [Direct connection<br />
to the Internet]. Click [OK].<br />
3. Repeat these steps<br />
for each Windows<br />
95/98/Me computer<br />
connected to your<br />
<strong>SMC7804WBRA</strong>.<br />
14<br />
English
English<br />
15<br />
Step 3. Obtain IP Settings from <strong>Your</strong> <strong>SMC7804WBRA</strong><br />
Now that you have configured your computer to connect to<br />
your <strong>SMC7804WBRA</strong>, you have to obtain new network settings.<br />
By releasing any old IP settings and renewing them with settings<br />
from your <strong>SMC7804WBRA</strong>, you will also verify that you have<br />
configured your computer correctly.<br />
1. Click [Start], then [Run…].<br />
2. Type WINIPCFG and<br />
click [OK]. It may take<br />
a minute or two for the<br />
[IP Configuration] window<br />
to appear.<br />
3. From the drop-down menu, select your network card. Click<br />
[Release] and then [Renew]. Verify that your IP address is now<br />
192.168.2.xxx, your Subnet Mask is 255.255.255.0 and your<br />
Default Gateway is 192.168. 2.1. These values confirm that<br />
your <strong>SMC7804WBRA</strong> is functioning. Click [OK] to close the<br />
[IP Configuration] window.<br />
Now that your computer is<br />
configured to connect to your<br />
<strong>SMC7804WBRA</strong>, please skip<br />
to <strong>Configuring</strong> <strong>Your</strong><br />
<strong>SMC7804WBRA</strong>.<br />
16<br />
English
English<br />
17<br />
<strong>Configuring</strong> <strong>Your</strong> Computer with Windows 2000<br />
Step 1. Configure TCP/IP Settings<br />
After you have completed the hardware setup, you need to<br />
configure your computer to connect to your <strong>SMC7804WBRA</strong>.<br />
1. From the Windows<br />
desktop, click the [Start]<br />
button. Choose [Settings],<br />
then click [Network and<br />
Dial-Up Connections] icon.<br />
2. Double-click the icon<br />
that corresponds<br />
to the connection<br />
to your<br />
<strong>SMC7804WBRA</strong>.<br />
3. Click [Properties].<br />
4. Double-click [Internet<br />
Protocol (TCP/IP)]. English<br />
18
English<br />
19<br />
If [Obtain an IP address<br />
automatically] and [Obtain DNS<br />
server address automatically]<br />
are already selected, your<br />
computer is already configured<br />
for DHCP. Click [Cancel] to<br />
close each window, and skip<br />
to Step 2 Disable HTTP Proxy.<br />
6. Select [Obtain an IP address<br />
automatically] and then<br />
select [Obtain DNS server<br />
address automatically]. Click<br />
[OK] or [Close] to close each<br />
window.<br />
Step 2. Disable HTTP Proxy<br />
Go back to Step 2 <strong>Configuring</strong> <strong>Your</strong> Computer in Windows<br />
95/98/Me.<br />
Step 3. Obtain IP Settings From <strong>Your</strong> <strong>SMC7804WBRA</strong><br />
Now that you have configured your computer to connect to<br />
your <strong>SMC7804WBRA</strong>, you need to obtain new network settings.<br />
By releasing any old IP settings and renewing them with settings<br />
from your <strong>SMC7804WBRA</strong>, you will also verify that you have<br />
configured your computer correctly.<br />
1. From the Windows<br />
desktop, click the<br />
[Start] button, then<br />
[Programs], then<br />
[Accessories], and<br />
then click [Command<br />
Prompt].<br />
20<br />
English
English<br />
21<br />
2. In the [Command Prompt] window, type IPCONFIG/RELEASE<br />
and press the key.<br />
3. Type IPCONFIG/RENEW and press the key. Verify that<br />
your IP address is now 192.168.2.xxx (2-254), your Subnet<br />
Mask is 255.255.255.0 and your Default Gateway is<br />
192.168.2.1. These values confirm that your <strong>SMC7804WBRA</strong><br />
is functioning.<br />
4. Type EXIT and press to close the [Command Prompt]<br />
window.<br />
Now that your computer is configured to connect to your<br />
<strong>SMC7804WBRA</strong>, please skip to <strong>Configuring</strong> <strong>Your</strong> <strong>SMC7804WBRA</strong>.<br />
<strong>Configuring</strong> <strong>Your</strong> Computer with Windows XP<br />
Step 1. Configure TCP/IP Settings<br />
After you have completed the hardware setup, you need to<br />
configure your computer for connection to your <strong>SMC7804WBRA</strong>.<br />
1. From the Windows desktop, click<br />
the [Start] button. Choose<br />
[Control Panel].<br />
2. Select the [Network and Internet<br />
Connections] icon, then click the<br />
[Network Connections] icon, and<br />
double-click on the adapter you<br />
will use for this connection.<br />
22<br />
English
English<br />
23<br />
3. Click [Properties].<br />
4. Double-click [Internet Protocol<br />
(TCP/IP)].<br />
If [Obtain an IP address automatically] and [Obtain DNS server<br />
address automatically] are already selected, your computer is<br />
already configured for DHCP. Click [Cancel] to close each window,<br />
and skip to Step 2 Disable HTTP Proxy.<br />
6. Select [Obtain an IP address<br />
automatically] and then select<br />
[Obtain DNS server address<br />
automatically]. Click [OK] or<br />
[Close] to close each window.<br />
Step 2. Disable HTTP Proxy<br />
Go back to Step 2 under <strong>Configuring</strong> <strong>Your</strong> Computer in Windows<br />
95/98/Me.<br />
Step 3. Obtain IP Settings From <strong>Your</strong> <strong>SMC7804WBRA</strong><br />
Now that you have configured your computer to connect to<br />
your <strong>SMC7804WBRA</strong>, you need to obtain new network settings.<br />
By releasing any old IP settings and renewing them with settings<br />
from your <strong>SMC7804WBRA</strong>, you will also verify that you have<br />
configured your computer correctly.<br />
1. From the Windows desktop, click the [Start] button, then<br />
[Programs], then [Accessories], and then click [Command<br />
Prompt].<br />
24<br />
English
English<br />
25<br />
2. In the [Command Prompt] window, type IPCONFIG/RELEASE and<br />
press the key.<br />
3. Type IPCONFIG/RENEW and press the key. Verify that<br />
your IP address is now 192.168.2.xxx (2-254), your Subnet<br />
Mask is 255.255.255.0 and your Default Gateway is<br />
192.168.2.1. These values confirm that your <strong>SMC7804WBRA</strong><br />
is functioning.<br />
4. Type EXIT and press to close the [Command Prompt]<br />
window.<br />
Now that your computer is configured to connect to your<br />
<strong>SMC7804WBRA</strong>, please skip to please skip to <strong>Configuring</strong> <strong>Your</strong><br />
<strong>SMC7804WBRA</strong>.<br />
<strong>Configuring</strong> <strong>Your</strong> Computer with Windows NT 4.0<br />
Step 1. Configure TCP/IP Settings<br />
After you have completed the hardware setup, you need to<br />
configure your computer for connection to your <strong>SMC7804WBRA</strong>.<br />
1. From the Windows desktop click [Start], then [Settings],<br />
and click [Control Panel].<br />
26<br />
English
English<br />
27<br />
2. Double-click the<br />
[Network] icon.<br />
3. Select the [Protocols]<br />
tab.<br />
4. Double-click [TCP/IP<br />
Protocol].<br />
5. Select the [IP Address] tab.<br />
6. In the [Adapter] drop-down<br />
list, be sure your Ethernet<br />
adapter is selected.<br />
If [Obtain an IP address automatically] is already selected,<br />
your computer is already configured for DHCP. Click [Cancel]<br />
to close each window, and skip to Step 2 Disable HTTP Proxy.<br />
7. Select [Obtain an IP address automatically]<br />
28<br />
English
English<br />
29<br />
8. Click the [DNS] tab to see the<br />
primary and secondary DNS.<br />
Remove any DNS addresses<br />
listed.<br />
9. Click [OK] then [OK] again to<br />
close the [Network] window.<br />
10. Windows may copy some files, and will then prompt you to<br />
restart your system. Click [Yes] and your computer will shut<br />
down and restart.<br />
Step 2. Disable HTTP Proxy<br />
Go back to Step 2 under <strong>Configuring</strong> <strong>Your</strong> Computer in<br />
Windows 95/98/Me.<br />
Step 3. Obtain IP Settings From <strong>Your</strong> <strong>SMC7804WBRA</strong><br />
Now that you have configured your computer to connect to<br />
your <strong>SMC7804WBRA</strong>, you need to obtain new network settings.<br />
By releasing any old IP settings and renewing them with settings<br />
from your <strong>SMC7804WBRA</strong>, you will also verify that you have<br />
configured your computer correctly.<br />
1. From the Windows desktop, click the [Start] button, then<br />
[Programs], and then select [Command Prompt].<br />
30<br />
English
English<br />
31<br />
2. In the [Command Prompt] window, type IPCONFIG/RELEASE and<br />
press the key.<br />
3. Type IPCONFIG/RENEW and press the key. Verify that<br />
your IP address is now 192.168.2.xxx, your Subnet Mask is<br />
255.255.255.0 and your Default Gateway is 192.168.2.1.<br />
These values confirm that your <strong>SMC7804WBRA</strong> is functioning.<br />
4. Type EXIT and press to close the [Command Prompt]<br />
window.<br />
Now that your computer is configured to connect to your<br />
<strong>SMC7804WBRA</strong>, please continue to <strong>Configuring</strong> <strong>Your</strong><br />
<strong>SMC7804WBRA</strong>.<br />
<strong>Configuring</strong> <strong>Your</strong> Macintosh Computer<br />
You may find that the instructions here do not exactly match your<br />
screen. This is because these steps and screenshots were created<br />
using Mac OS 8.5. Mac OS 7.x and above are all very similar, but<br />
may not be identical to Mac OS 8.5.<br />
Step 1. Configure TCP/IP Settings<br />
After you have completed the hardware setup, you need to<br />
configure your computer for connection to your <strong>SMC7804WBRA</strong>.<br />
1. Pull down the [Apple] Menu. Click [Control Panels] and select<br />
[TCP/IP].<br />
32<br />
English
English<br />
33<br />
2. In the [TCP/IP] dialog box, make sure that [Ethernet] is<br />
selected in the [Connect Via:] field. If [Using DHCP Server]<br />
is already selected in the [Configure:] field, your computer is<br />
already configured for DHCP. Close the [TCP/IP] dialog box,<br />
and skip to Step 2 Disable HTTP Proxy.<br />
3. Select [Using DHCP Server]<br />
in the [Configure] field<br />
and close the window.<br />
4. Another box will appear asking whether you want to save your<br />
TCP/IP settings. Click [Save].<br />
Step 2. Disable HTTP Proxy<br />
You will need to verify that the HTTP Proxy feature of your Web<br />
browser is disabled so that your Web browser is able to view the<br />
configuration pages inside your <strong>SMC7804WBRA</strong>. The following<br />
steps are for Internet Explorer and for Netscape. Determine which<br />
browser you use and follow the appropriate steps.<br />
Internet Explorer<br />
1. Open Internet Explorer and click the [Stop] button. Click [Edit]<br />
and select [Preferences...].<br />
34<br />
English
English<br />
35<br />
2. In the Internet Explorer [Preferences...] window, under<br />
[Network], select [Proxies].<br />
3. Uncheck all checkboxes and click [OK].<br />
Netscape<br />
1. Open Netscape and click the [Stop] button. Click [Edit] and<br />
select [Preferences...].<br />
2. In the [Preferences...] dialog box, in the left-hand column<br />
labeled [Category], select [Advanced]. Under the [Advanced]<br />
category, select [Proxies].<br />
3. Select [Direct Connection to the Internet] and click [OK].<br />
36<br />
English
English<br />
37<br />
Step 3. Obtain IP Settings From <strong>Your</strong> <strong>SMC7804WBRA</strong><br />
Now that you have configured your computer to connect to<br />
your <strong>SMC7804WBRA</strong>, you need to obtain new network settings.<br />
By releasing any old IP settings and renewing them with settings<br />
from your <strong>SMC7804WBRA</strong>, you will also verify that you have<br />
configured your computer correctly.<br />
1. Pull down the [Apple] menu. Click [Control Panels] and select<br />
[TCP/IP].<br />
2. In the [TCP/IP] window, your new settings will be shown. Verify<br />
that your IP address is now 192.168.2.xxx, your Subnet Mask is<br />
255.255.255.0 and your Default Gateway is 192.168.2.1. These<br />
values confirm that your <strong>SMC7804WBRA</strong> is functioning.<br />
3. Close the [TCP/IP] window.<br />
Now that your computer is configured to connect to your<br />
<strong>SMC7804WBRA</strong>, please skip to <strong>Configuring</strong> <strong>Your</strong> <strong>SMC7804WBRA</strong>.<br />
38<br />
English
English<br />
39<br />
<strong>Configuring</strong> <strong>Your</strong> <strong>SMC7804WBRA</strong><br />
Now that you have successfully configured your computer and<br />
retrieved your new network settings from your <strong>SMC7804WBRA</strong>, you<br />
are ready to configure the <strong>SMC7804WBRA</strong>’s settings for your ISP.<br />
1. Open your Web browser (Internet Explorer or Netscape<br />
Navigator) and click the [Stop] button.<br />
2. In the [Address] field type http://192.168.2.1<br />
and press .<br />
Note: For some browsers it may be necessary to include :88<br />
after the management IP address. For example,<br />
http://192.168.2.1:88<br />
3. The <strong>SMC7804WBRA</strong> login screen will appear. Enter the default<br />
password and click on [Login]. The default password is<br />
smcadmin. For security reasons, you should assign a password<br />
as soon as possible. Note that the login password is casesensitive.<br />
4. On the home page of the <strong>SMC7804WBRA</strong> Web console,<br />
click [Setup Wizard]. The automated setup process of the<br />
<strong>SMC7804WBRA</strong> will take you through each step for setting<br />
up your gateway.<br />
40<br />
English
English<br />
41<br />
5. Select your time zone from the list. If you want to<br />
automatically synchronize the ADSL router with a public<br />
timeserver, check the box [Enable Automatic Time Server<br />
Maintenance]. Select the desired server from the drop<br />
down menu.<br />
6. Click [NEXT] to continue and go to the ADSL parameter<br />
settings page.<br />
7. Select your Country and Internet Service provider. This will<br />
automatically configure the <strong>SMC7804WBRA</strong> with the correct<br />
Protocol, Encapsulation and VPI/VCI settings for your ISP.<br />
If your Country or Internet Service Provider is not listed you will<br />
need to manually configure ISP settings. Skip to the section<br />
Country or ISP not listed.<br />
8. Enter your ISP username, password and DNS Server address.<br />
If your ISP uses Protocol RFC1483 Routed or Bridged no<br />
username/password is required. For RFC1483 Routed you will need<br />
to enter the IP address, Subnet Mask, Default Gateway and DNS<br />
Server address supplied by your ISP.<br />
Note: By default 192.168.2.1 is set for DNS Server address, this<br />
need to be changed to reflect your ISP DNS Server address.<br />
42<br />
English
English<br />
43<br />
9. Click [Next] to continue and confirm the settings.<br />
10. If the parameters are correct Click [Apply] to save these<br />
settings.<br />
<strong>Your</strong> <strong>SMC7804WBRA</strong> is now setup. Go to the section<br />
Troubleshooting of the User Guide if you cannot make<br />
a connection to the Internet.<br />
Country or ISP not listed<br />
If you country or ISP is not listed you will need to manually<br />
configure the settings for your ISP.<br />
Select [Others] from the drop down list.<br />
For manual configuration you will need to know the Protocol,<br />
DNS Server, Encapsulation and VPI/VCI settings used by your ISP.<br />
If you have a Static IP address you will also need to know the<br />
IP address, Subnet Mask and default Gateway address. Please<br />
contact your ISP for these details if you do not already<br />
have them.<br />
44<br />
English
English<br />
45<br />
Select what Protocol your ISP uses from the Internet Service<br />
Provider drop down list.<br />
ISP use PPPoA/PPPoE<br />
Enter Username, Password, DNS Server address and VPI/VCI circuit<br />
numbers provided by your ISP.<br />
Click [Next] to continue and confirm the settings.<br />
If the parameters are<br />
correct Click [Apply]<br />
to save these settings.<br />
<strong>Your</strong> <strong>SMC7804WBRA</strong> is now setup. Go to the section<br />
Troubleshooting of the User Guide if you cannot make<br />
a connection to the Internet.<br />
46<br />
English
English<br />
47<br />
ISP use RFC1483 Routing<br />
Enter IP address, subnet mask, default gateway, DNS Server<br />
address and VPI/VCI circuit numbers provided by your ISP.<br />
Click [Next]<br />
to continue and<br />
confirm the settings.<br />
If the parameters are correct Click [Apply] to save these settings.<br />
<strong>Your</strong> <strong>SMC7804WBRA</strong><br />
is now setup.<br />
Go to the section<br />
Troubleshooting of<br />
the User Guide if<br />
you cannot make<br />
a connection to<br />
the Internet.<br />
ISP use RFC1483 Bridging<br />
Enter DNS Server address and VPI/VCI circuit numbers supplied by<br />
your ISP. If you have a Fixed IP address you will also need to<br />
enter IP address, Subnet Mask and default gateway address<br />
supplied by your ISP.<br />
Note: You have 3 different bridging modes to select.<br />
48<br />
English
English<br />
49<br />
[RFC1483 Bridging]<br />
Select this option if you want the <strong>SMC7804WBRA</strong> to be<br />
transparent and pass the public IP address to a single PC,<br />
Server or Firewall.<br />
[RFC1483 Bridging DHCP]<br />
Select this option if you want to share the connection<br />
for multiple PC’s (most common setting).<br />
[RFC1483 Bridging FixIP]<br />
Select this option if your ISP has given you a static IP address.<br />
Click [Next] to continue and confirm the settings.<br />
If the parameters are<br />
correct Click [Apply]<br />
to save these settings.<br />
<strong>Your</strong> <strong>SMC7804WBRA</strong> is now setup. Go to the section<br />
Troubleshooting of the User Guide if you cannot make<br />
a connection to the Internet.<br />
Einführung<br />
Der SMC ADSL Barricade TM g (<strong>SMC7804WBRA</strong>) ist ein Wireless-<br />
Breitband-Router (54 MBit/s) mit eingebautem ADSL-Modem<br />
(Annex A-Standard). Dieses Produkt stellt für eine Vielzahl von<br />
Benutzern gemeinsamen Internet-Zugang, Sicherheitsfunktionen<br />
und Einbindung von Geräten in Netzwerke bereit. Die einfache<br />
Installation und Konfiguration des <strong>SMC7804WBRA</strong> kann auch<br />
von sehr unerfahrenen Benutzern durchgeführt werden,<br />
während Netzwerktechniker leicht konfigurierbare erweiterte<br />
Funktionen vorfinden. Bitte lesen Sie das Benutzerhandbuch,<br />
um Informationen zu den erweiterten Funktionen dieses<br />
Produkts zu erhalten.<br />
50<br />
Deutsch
Deutsch<br />
51<br />
Packungsinhalt<br />
• Ein ADSL BarricadeTM g.<br />
• Ein Netzteil.<br />
• Eine CD mit der kompletten Dokumentation.<br />
• Ein Fast-Ethernet-Kabel (Kat. 5).<br />
• Eine Telefon-Patch-Kabel (RJ-11).<br />
• Der Splitter ist Bestandteil des Lieferumfangs (nur Modelle<br />
für Niederlande, Frankreich und Großbritannien).<br />
• Telefonanschluss-Kit (nur Modelle für Niederlande).<br />
Installationsvoraussetzungen<br />
Bevor Sie mit der Installation Ihres <strong>SMC7804WBRA</strong> fortfahren,<br />
vergewissern Sie sich, dass Folgendes vorhanden ist:<br />
• Eine von Ihrem Internet-Anbieter (ISP) installierte ADSL-<br />
Leitung.<br />
• ADSL-Mikrofilter/-Splitter.<br />
• Ein mit einem 10-/100-Mbit/s-Netzwerkadapter oder einem<br />
IEEE802.11g-Wireless-Netzwerkadapter ausgestatteter Computer.<br />
• Das TCP/IP-Netzwerkprotokoll muss auf jedem PC installiert sein,<br />
der auf das Internet zugreifen soll.<br />
• Ein installierter Java-fähiger Web-Browser wie Microsoft Internet<br />
Explorer 5.0 oder eine spätere Version.<br />
• Ihre Windows-CD, wenn Sie mit Windows 95, 98 oder Me<br />
arbeiten.<br />
52<br />
Deutsch
Deutsch<br />
53<br />
Hardware<br />
Auf der Vorderseite des <strong>SMC7804WBRA</strong> befinden sich LEDs zur<br />
einfachen Geräteüberwachung.<br />
In der folgenden Tabelle werden die Bedeutungen der<br />
verschiedenen LEDs dargestellt:<br />
LED Status Beschreibung<br />
PWR Ein Der Barricade TM wird mit Spannung<br />
versorgt. Normaler Betrieb.<br />
Aus Keine Spannungsversorgung oder<br />
Ausfall.<br />
ADSL Sync Ein ADSL-Verbindung ist synchronisiert.<br />
Blinkt Der Barricade stellt eine ADSL-<br />
Verbindung her.<br />
Aus ADSL- Verbindung wurde nicht<br />
hergestellt.<br />
ADSL Data Blinkt Der entsprechende ADSL-Port<br />
überträgt oder empfängt Daten.<br />
WLAN Aus Es werden keine Daten übertragen.<br />
Blinkt Der WLAN-Port sendet oder empfängt<br />
Daten.<br />
Ethernet Ein Es wurde eine Ethernet-Verbindung<br />
(4LEDs) hergestellt.<br />
Blinkt Der entsprechende LAN-Port sendet<br />
oder empfängt Daten.<br />
Aus Am Port besteht keine LAN-<br />
Verbindung.<br />
Anschließen von Geräten<br />
LAN- Ports Resetschalter WAN-Port<br />
Spannungsversorgungsbuchse<br />
1. Schließen Sie Computer direkt an den Ports 1-4 auf der<br />
Rückseite an den <strong>SMC7804WBRA</strong> an. Wenn Sie mehr als vier<br />
Computer verwenden wollen, schließen Sie einen Hub oder<br />
Switch an und verbinden Sie weitere Computer mit diesem<br />
Gerät. Informationen zur Herstellung einer kabellosen<br />
Verbindung finden Sie in der Dokumentation Ihres<br />
Wireless-Adapters.<br />
2. Verbinden Sie über das im Lieferumfang enthaltene RJ-11-Kabel<br />
den ADSL-Mikrofilter/-Splitter mit dem ADSL-WAN-Port des<br />
<strong>SMC7804WBRA</strong>.<br />
3. Stecken Sie das Netzkabel in eine Stromversorgungsbuchse ein.<br />
54<br />
Deutsch
Deutsch<br />
55<br />
Konfigurieren des Computers<br />
Diese Installationskurzanleitung bietet Konfigurationsanweisungen<br />
für Windows 95, 98, Me, NT 4.0, 2000 und XP sowie für Macintosh<br />
OS 7.x und höhere Versionen. Achten Sie darauf, dass Sie die<br />
korrekte Vorgehensweise für Ihr Betriebssystem verwenden.<br />
• Konfigurieren des Computers mit Windows 95/98/Me.<br />
• Konfigurieren des Computers mit Windows 2000.<br />
• Konfigurieren des Computers mit Windows XP.<br />
• Konfigurieren des Computers mit Windows NT 4.0.<br />
• Konfigurieren des Macintosh-Computers.<br />
Konfigurieren des Computers mit Windows 95/98/Me<br />
Eventuell entsprechen die nachfolgend aufgeführten Schritte nicht<br />
genau den Schritten, die für Ihre Windows-Version erforderlich<br />
sind, da diese Anweisungen und Abbildungen aus Windows 98<br />
erstellt wurden und Windows 95 und Windows Me zwar ähnlich,<br />
aber nicht identisch sind.<br />
Schritt 1. Konfigurieren der TCP/IP-Einstellungen<br />
Nachdem Sie die Hardwareeinrichtung durch Anschließen Ihrer<br />
Geräte abgeschlossen haben, müssen Sie Ihren Computer für die<br />
Verbindung mit dem <strong>SMC7804WBRA</strong> konfigurieren.<br />
1. Klicken Sie auf dem<br />
Windows-Desktop auf<br />
die Schaltfläche [Start].<br />
Wählen Sie [Settings]<br />
(Einstellungen) aus<br />
und klicken Sie auf<br />
[Control Panel]<br />
(Systemsteuerung).<br />
56<br />
Deutsch
Deutsch<br />
57<br />
2. Doppelklicken Sie im Fenster [Control Panel] (Systemsteuerung)<br />
auf das Symbol [Network] (Netzwerk).<br />
3. Doppelklicken Sie im Fenster<br />
[Network] (Netzwerk) auf der<br />
Registerkarte [Configuration]<br />
(Konfiguration) auf den<br />
Eintrag [TCP/IP] für Ihre<br />
Netzwerkkarte.<br />
4. Wählen Sie die Registerkarte<br />
[IP Address] (IP-Adresse) aus.<br />
Wenn [Obtain an IP address automatically] (IP-Adresse<br />
automatisch beziehen) aktiviert ist, ist Ihr Computer bereits<br />
für DHCP konfiguriert. Klicken Sie in diesem Fall auf [Cancel]<br />
(Abbrechen), um die einzelnen Fenster zu schließen, und fahren<br />
Sie dann mit Abschnitt 2, Deaktivieren des HTTP-Proxy, fort.<br />
5. Klicken Sie auf [Obtain an IP address automatically]<br />
(IP-Adresse automatisch beziehen).<br />
58<br />
Deutsch
Deutsch<br />
59<br />
6. Klicken Sie auf die Registerkarte<br />
[Gateway] und löschen Sie die<br />
unter [Installed gateways]<br />
(Installierte Gateways)<br />
aufgelisteten Zahlen.<br />
7. Klicken Sie auf die Registerkarte<br />
[DNS Configuration]<br />
(DNS-Konfiguration)<br />
und dann auf [Disable DNS]<br />
(DNS deaktivieren).<br />
8. Klicken Sie auf [OK].<br />
9. Eventuell muss Windows<br />
einige Dateien von Ihrer<br />
Windows 95/98/Me-CD<br />
kopieren. Nach dem<br />
Kopieren werden<br />
Sie aufgefordert, Ihr System neu zu starten. Klicken Sie<br />
auf [Yes] (Ja). Ihr Computer fährt herunter und startet neu.<br />
Schritt 2. Deaktivieren des HTTP-Proxy<br />
Sie müssen sich vergewissern, dass die HTTP-Proxy-Funktion Ihres<br />
Web-Browsers deaktiviert ist, damit dieser die Konfigurationsseiten<br />
Ihres <strong>SMC7804WBRA</strong> anzeigen kann. Im Folgenden sind die<br />
Vorgehensweisen für Internet Explorer und für Netscape<br />
aufgeführt. Führen Sie die entsprechenden Schritte für Ihren<br />
Browser aus.<br />
Internet Explorer<br />
1. Öffnen Sie den Internet Explorer und klicken Sie auf die<br />
Schaltfläche [Stop] (Abbrechen) . Klicken Sie auf<br />
[Tools] (Extras) und<br />
anschließend auf<br />
[Internet Options]<br />
(Internetoptionen).<br />
60<br />
Deutsch
Deutsch<br />
61<br />
2. Klicken Sie im Fenster [Internet<br />
Options] (Internetoptionen) auf<br />
die Registerkarte [Connections]<br />
(Verbindungen). Klicken Sie<br />
dann auf die Schaltfläche<br />
[LAN Settings...]<br />
(LAN-Einstellungen…).<br />
3. Deaktivieren Sie alle<br />
Kontrollkästchen.<br />
4. Klicken Sie auf [OK] und<br />
erneut auf [OK], um auch das<br />
Fenster [Internet Options]<br />
(Internetoptionen) zu schließen.<br />
Netscape<br />
1. Öffnen Sie Netscape<br />
und klicken Sie auf die<br />
Schaltfläche [Stop]<br />
(Abbrechen). Klicken Sie<br />
auf [Edit] (Bearbeiten)<br />
und anschließend auf<br />
[Preferences…]<br />
(Einstellungen…).<br />
2. Doppelklicken<br />
Sie im Fenster<br />
[Preferences]<br />
(Einstellungen)<br />
unter [Category]<br />
(Kategorie) auf<br />
[Advanced]<br />
(Erweitert) und<br />
anschließend auf<br />
[Proxies]. Wählen<br />
Sie [Direct<br />
connection<br />
to the Internet] (Direkte<br />
Verbindung zum Internet) aus.<br />
Klicken Sie auf [OK].<br />
3. Wiederholen Sie diese Schritte für jeden Windows 95/98/Me-<br />
Computer, der an Ihren <strong>SMC7804WBRA</strong> angeschlossen ist.<br />
62<br />
Deutsch
Deutsch<br />
63<br />
Schritt 3. Beziehen von IP-Einstellungen von Ihrem<br />
<strong>SMC7804WBRA</strong><br />
Nachdem Sie nun Ihren Computer für den Anschluss an<br />
Ihren <strong>SMC7804WBRA</strong> konfiguriert haben, muss er neue<br />
Netzwerkeinstellungen beziehen. Indem Sie alle alten<br />
IP-Einstellungen freigeben und sie durch Einstellungen<br />
von Ihrem <strong>SMC7804WBRA</strong> aktualisieren,<br />
vergewissern Sie sich auch, dass Sie<br />
Ihren Computer korrekt konfiguriert<br />
haben.<br />
1. Klicken Sie auf [Start] und<br />
auf [Run…] (Ausführen…).<br />
2. Geben Sie WINIPCFG ein<br />
und klicken Sie auf [OK].<br />
Es kann ein oder zwei<br />
Minuten dauern, bis das<br />
Fenster [IP Configuration]<br />
(IP-Konfiguration) erscheint.<br />
3. Wählen Sie aus dem Dropdown-Menü Ihre Netzwerkkarte<br />
aus. Klicken Sie auf die Option [Release] (Freigeben) und<br />
anschließend auf die Option [Renew] (Erneuern). Vergewissern<br />
Sie sich, dass jetzt für Ihre IP-Adresse 192.168.2.xxx und<br />
für Ihre Subnetzmaske 255.255.255.0 angegeben wird.<br />
Für Ihr Standard-Gateway<br />
muss Folgendes festgelegt<br />
sein: 192.168.2.1. Diese<br />
Werte bestätigen, dass<br />
Ihr <strong>SMC7804WBRA</strong> korrekt<br />
funktioniert. Klicken Sie<br />
auf [OK], um das Fenster<br />
[IP Configuration] (IP-<br />
Konfiguration) zu schließen.<br />
Ihr Computer ist jetzt für die Verbindung mit dem <strong>SMC7804WBRA</strong><br />
konfiguriert. Fahren Sie nun mit Konfigurieren des<br />
<strong>SMC7804WBRA</strong> fort.<br />
64<br />
Deutsch
Deutsch<br />
65<br />
Konfigurieren des Computers mit Windows 2000<br />
Schritt 1. Konfigurieren der TCP/IP-Einstellungen<br />
Nachdem Sie die Hardwareeinrichtung abgeschlossen haben,<br />
müssen Sie Ihren Computer für die Verbindung mit dem<br />
<strong>SMC7804WBRA</strong> konfigurieren.<br />
1. Klicken Sie auf dem<br />
Windows-Desktop auf die<br />
Schaltfläche [Start].<br />
Wählen Sie [Settings]<br />
(Einstellungen) und<br />
klicken Sie auf das Symbol<br />
[Network and Dial-Up Connections]<br />
(Netzwerk- und DFÜ-Einstellungen).<br />
2. Doppelklicken Sie<br />
auf das Symbol für<br />
die Verbindung zum<br />
<strong>SMC7804WBRA</strong>.<br />
3. Klicken Sie auf<br />
[Properties]<br />
(Eigenschaften).<br />
4. Doppelklicken Sie auf<br />
[Internet Protocol<br />
(TCP/IP)]<br />
(Internetprotokoll<br />
(TCP/IP)).<br />
66<br />
Deutsch
Deutsch<br />
67<br />
Wenn [Obtain an IP address<br />
automatically] (IP-Adresse<br />
automatisch beziehen) und<br />
[Obtain DNS server address<br />
automatically] (DNS-<br />
Serveradresse automatisch<br />
beziehen) aktiviert sind, ist<br />
Ihr Computer bereits für DHCP<br />
konfiguriert. Klicken Sie in<br />
diesem Fall auf [Cancel]<br />
(Abbrechen), um die einzelnen<br />
Fenster zu schließen, und<br />
fahren Sie dann mit Abschnitt<br />
2, Deaktivieren des<br />
HTTP-Proxy, fort.<br />
6. Wählen Sie [Obtain an IP address automatically] (IP-Adresse<br />
automatisch beziehen) und dann [Obtain DNS server address<br />
automatically] (DNS-Serveradresse automatisch beziehen) aus.<br />
Klicken Sie auf [OK] oder [Close] (Schließen), um die einzelnen<br />
Fenster zu schließen.<br />
Schritt 2. Deaktivieren des HTTP-Proxy<br />
Gehen Sie zurück zu Schritt 2, Konfigurieren des Computers<br />
mit Windows 95/98/Me.<br />
Schritt 3. Beziehen von IP-Einstellungen von Ihrem<br />
<strong>SMC7804WBRA</strong><br />
Nachdem Sie nun Ihren Computer für den Anschluss an<br />
Ihren <strong>SMC7804WBRA</strong> konfiguriert haben, muss er neue<br />
Netzwerkeinstellungen beziehen. Indem Sie alle alten IP-<br />
Einstellungen freigeben und sie durch Einstellungen von Ihrem<br />
<strong>SMC7804WBRA</strong> aktualisieren, vergewissern Sie sich auch, dass<br />
Sie Ihren Computer korrekt konfiguriert haben.<br />
1. Klicken Sie auf dem<br />
Windows-Desktop auf<br />
[Start], [Programs]<br />
(Programme) und<br />
[Accessories] (Zubehör)<br />
und klicken Sie dann<br />
auf [Command Prompt]<br />
(Eingabeaufforderung).<br />
68<br />
Deutsch
Deutsch<br />
69<br />
2. Geben Sie im Fenster [Command Prompt] (Eingabeaufforderung)<br />
den Befehl IPCONFIG/RELEASE ein und drücken Sie die<br />
.<br />
3. Geben Sie<br />
IPCONFIG/RENEW ein und drücken Sie die .<br />
Vergewissern Sie sich, dass jetzt für Ihre IP-Adresse<br />
192.168.2.xxx (2-254), für Ihre Subnetzmaske 255.255.255.0<br />
und für Ihr Standard-Gateway 192.168.2.1 angegeben wird.<br />
Diese Werte bestätigen, dass Ihr <strong>SMC7804WBRA</strong> korrekt<br />
funktioniert.<br />
4. Geben Sie EXIT<br />
ein und drücken<br />
Sie die ,<br />
um das<br />
Fenster [Command<br />
Prompt]<br />
(Eingabeaufforderung)<br />
zu schließen.<br />
Ihr Computer ist jetzt für die Verbindung mit dem <strong>SMC7804WBRA</strong><br />
konfiguriert. Fahren Sie nun mit Konfigurieren des<br />
<strong>SMC7804WBRA</strong> fort.<br />
Konfigurieren des Computers mit Windows XP<br />
Schritt 1. Konfigurieren der TCP/IP-Einstellungen<br />
Nachdem Sie die Hardwareeinrichtung abgeschlossen haben,<br />
müssen Sie Ihren Computer für die Verbindung mit dem<br />
<strong>SMC7804WBRA</strong> konfigurieren.<br />
1. Klicken Sie auf dem Windows-<br />
Desktop auf die Schaltfläche<br />
[Start]. Wählen Sie [Control Panel]<br />
(Systemsteuerung).<br />
2. Wählen Sie das Symbol [Network<br />
and Internet Connections]<br />
(Netzwerk- und Internetverbindungen)<br />
aus, klicken Sie auf das Symbol<br />
[Network Connections]<br />
(Netzwerkverbindungen)<br />
und doppelklicken Sie auf<br />
den Adapter, den Sie für<br />
diese Verbindung<br />
verwenden wollen.<br />
70<br />
Deutsch
Deutsch<br />
71<br />
3. Klicken Sie auf [Properties]<br />
(Eigenschaften).<br />
4. Doppelklicken Sie auf<br />
[Internet Protocol (TCP/IP)]<br />
(Internetprotokoll (TCP/IP)).<br />
Wenn [Obtain an IP address automatically] (IP-Adresse<br />
automatisch beziehen) und [Obtain DNS server address<br />
automatically] (DNS-Serveradresse automatisch beziehen) aktiviert<br />
sind, ist Ihr Computer bereits für DHCP konfiguriert. Klicken Sie in<br />
diesem Fall auf [Cancel] (Abbrechen), um die einzelnen Fenster zu<br />
schließen, und fahren Sie dann mit Abschnitt 2, Deaktivieren des<br />
HTTP-Proxy, fort.<br />
6. Wählen Sie [Obtain an<br />
IP address automatically]<br />
(IP-Adresse automatisch<br />
beziehen) und dann<br />
[Obtain DNS server address<br />
automatically] (DNS-<br />
Serveradresse automatisch<br />
beziehen) aus. Klicken Sie auf<br />
[OK] oder [Close] (Schließen),<br />
um die einzelnen Fenster zu<br />
schließen.<br />
Schritt 2. Deaktivieren des HTTP-Proxy<br />
Gehen Sie zurück zu Schritt 2 unter Konfigurieren des Computers<br />
mit Windows 95/98/Me.<br />
Schritt 3. Beziehen von IP-Einstellungen von Ihrem<br />
<strong>SMC7804WBRA</strong><br />
Nachdem Sie nun Ihren Computer für den Anschluss an Ihren<br />
<strong>SMC7804WBRA</strong> konfiguriert haben, muss er neue Netzwerkeinstellungen<br />
beziehen. Indem Sie alle alten IP-Einstellungen<br />
freigeben und sie durch Einstellungen von Ihrem <strong>SMC7804WBRA</strong><br />
aktualisieren, vergewissern Sie sich auch, dass Sie Ihren Computer<br />
korrekt konfiguriert haben.<br />
1. Klicken Sie auf dem<br />
Windows-Desktop auf<br />
[Start], [Programs]<br />
(Programme) und<br />
[Accessories] (Zubehör)<br />
und klicken Sie dann auf<br />
[Command Prompt]<br />
(Eingabeaufforderung).<br />
72<br />
Deutsch
Deutsch<br />
73<br />
2. Geben Sie im Fenster [Command Prompt] (Eingabeaufforderung)<br />
den Befehl IPCONFIG/RELEASE ein und drücken Sie die<br />
.<br />
3. Geben Sie IPCONFIG/RENEW ein und drücken Sie die<br />
. Vergewissern Sie sich, dass jetzt für Ihre<br />
IP-Adresse 192.168.2.xxx (2-254), für Ihre Subnetzmaske<br />
255.255.255.0 und für<br />
Ihr Standard-Gateway<br />
192.168.2.1 angegeben wird.<br />
Diese Werte bestätigen, dass<br />
Ihr <strong>SMC7804WBRA</strong> korrekt<br />
funktioniert.<br />
4. Geben Sie EXIT ein und drücken Sie die ,<br />
um das Fenster [Command Prompt] (Eingabeaufforderung)<br />
zu schließen.<br />
Ihr Computer ist jetzt für die Verbindung mit dem <strong>SMC7804WBRA</strong><br />
konfiguriert. Fahren Sie nun mit Konfigurieren des<br />
<strong>SMC7804WBRA</strong> fort.<br />
Konfigurieren des Computers mit Windows NT 4.0<br />
Schritt 1. Konfigurieren der TCP/IP-Einstellungen<br />
Nachdem Sie die Hardwareeinrichtung abgeschlossen haben,<br />
müssen Sie Ihren Computer für die Verbindung mit dem<br />
<strong>SMC7804WBRA</strong> konfigurieren.<br />
1. Klicken Sie auf dem Windows-Desktop auf [Start], [Settings]<br />
(Einstellungen) und [Control Panel] (Systemsteuerung).<br />
74<br />
Deutsch
Deutsch<br />
75<br />
2. Doppelklicken Sie auf das<br />
Symbol [Network]<br />
(Netzwerk).<br />
3. Wählen Sie die<br />
Registerkarte [Protocols]<br />
(Protokolle) aus.<br />
4. Doppelklicken Sie auf [TCP/IP<br />
Protocol] (TCP/IP-Protokoll).<br />
5. Wählen Sie die<br />
Registerkarte [IP Address]<br />
(IP-Adresse) aus.<br />
6. Vergewissern Sie sich, dass in<br />
der Dropdown-Liste [Adapter]<br />
(Netzwerkkarte) Ihr Ethernet-<br />
Adapter ausgewählt ist.<br />
Wenn [Obtain an IP address automatically] (IP-Adresse<br />
automatisch beziehen) aktiviert ist, ist Ihr Computer bereits<br />
für DHCP konfiguriert. Klicken Sie in diesem Fall auf [Cancel]<br />
(Abbrechen), um die einzelnen Fenster zu schließen, und fahren<br />
Sie dann mit Abschnitt 2, Deaktivieren des HTTP-Proxy, fort.<br />
7. Wählen Sie [Obtain an IP address automatically]<br />
(IP-Adresse automatisch beziehen).<br />
76<br />
Deutsch
Deutsch<br />
77<br />
8. Klicken Sie auf die Registerkarte<br />
[DNS], um die primären und<br />
sekundären DNS-Server<br />
anzuzeigen. Löschen Sie alle<br />
aufgeführten DNS-Adressen.<br />
9. Klicken Sie auf [OK] und erneut<br />
auf [OK], um das Fenster<br />
[Network] (Netzwerk) zu<br />
schließen.<br />
10. Windows kopiert eventuell einige Dateien und fordert Sie dann<br />
auf, das System neu zu starten. Klicken Sie auf [Yes] (Ja).<br />
Ihr Computer fährt herunter und startet neu.<br />
Schritt 2. Deaktivieren des HTTP-Proxy<br />
Gehen Sie zurück zu Schritt 2 unter Konfigurieren des Computers<br />
mit Windows 95/98/Me.<br />
Schritt 3. Beziehen von IP-Einstellungen von Ihrem<br />
<strong>SMC7804WBRA</strong><br />
Nachdem Sie nun Ihren Computer für den Anschluss an Ihren<br />
<strong>SMC7804WBRA</strong> konfiguriert haben, muss er neue Netzwerkeinstellungen<br />
beziehen. Indem Sie alle alten IP-Einstellungen<br />
freigeben und sie durch Einstellungen von Ihrem <strong>SMC7804WBRA</strong><br />
aktualisieren, vergewissern Sie sich auch, dass Sie Ihren Computer<br />
korrekt konfiguriert haben.<br />
1. Klicken Sie auf<br />
dem Windows-<br />
Desktop<br />
auf [Start],<br />
[Programs]<br />
(Programme)<br />
und [Command<br />
Prompt]<br />
(Eingabeaufforderung).<br />
78<br />
Deutsch
Deutsch<br />
79<br />
2. Geben Sie im Fenster [Command<br />
Prompt] (Eingabeaufforderung)<br />
den Befehl<br />
IPCONFIG/RELEASE<br />
ein und drücken Sie<br />
die .<br />
3. Geben Sie IPCONFIG/RENEW ein und drücken Sie die<br />
. Vergewissern<br />
Sie sich, dass jetzt für Ihre<br />
IP-Adresse 192.168.2.xxx, für<br />
Ihre Subnetzmaske<br />
255.255.255.0 und für Ihr<br />
Standard-Gateway 192.168.2.1<br />
angegeben wird. Diese Werte<br />
bestätigen, dass Ihr <strong>SMC7804WBRA</strong> korrekt funktioniert.<br />
4. Geben Sie EXIT ein und drücken Sie die , um das<br />
Fenster [Command Prompt] (Eingabeaufforderung) zu schließen.<br />
Ihr Computer ist jetzt für die Verbindung mit dem <strong>SMC7804WBRA</strong><br />
konfiguriert. Fahren Sie nun mit Konfigurieren des<br />
<strong>SMC7804WBRA</strong> fort.<br />
Konfigurieren Ihres Macintosh-Computers<br />
Eventuell entsprechen die hier aufgeführte Schritte nicht genau<br />
den Schritten, die für Ihr Betriebssystem erforderlich sind, da<br />
diese Anweisungen und Abbildungen mit OS 8.5 erstellt wurden,<br />
Mac OS 7.x und höher jedoch zwar ähnlich, aber unter Umständen<br />
nicht identisch mit Mac OS 8.5 sind.<br />
Schritt 1. Konfigurieren der TCP/IP-Einstellungen<br />
Nachdem Sie die Hardwareeinrichtung abgeschlossen haben,<br />
müssen Sie Ihren Computer für die Verbindung mit dem<br />
<strong>SMC7804WBRA</strong> konfigurieren.<br />
1. Öffnen Sie das Menü [Apple]. Klicken Sie auf [Control Panel]<br />
(Kontrollfelder) und wählen Sie [TCP/IP] aus.<br />
80<br />
Deutsch
Deutsch<br />
81<br />
2. Vergewissern Sie sich, dass im Dialogfenster [TCP/IP] die Option<br />
[Ethernet] im Feld [Connect Via:] (Verbindung) ausgewählt ist.<br />
Wenn die Option [Using DHCP Server] (DHCP Server) bereits im<br />
Feld [Configure:] (Konfigurationsmethode.) ausgewählt ist, ist<br />
Ihr Computer bereits für DHCP konfiguriert. Schließen Sie in<br />
diesem Fall das Dialogfeld<br />
[TCP/IP] und fahren<br />
Sie mit Schritt 2,<br />
Deaktivieren des<br />
HTTP-Proxy, fort.<br />
3. Wählen Sie [Using DHCP Server] (DHCP Server) im Feld<br />
[Configure] (Konfigurationsmethode) aus und schließen<br />
Sie das Fenster.<br />
4. Ein weiteres Fenster<br />
wird geöffnet, in dem<br />
Sie gefragt werden,<br />
ob Ihre TCP/IP-<br />
Einstellungen<br />
gespeichert werden<br />
sollen. Klicken Sie<br />
auf [Save] (Sichern).<br />
Schritt 2. Deaktivieren des HTTP-Proxy<br />
Sie müssen sich vergewissern, dass die HTTP-Proxy-Funktion Ihres<br />
Web-Browsers deaktiviert ist, damit dieser die Konfigurationsseiten<br />
Ihres <strong>SMC7804WBRA</strong> anzeigen kann. Im Folgenden sind die<br />
Vorgehensweisen für Internet Explorer und für Netscape<br />
aufgeführt. Führen Sie die entsprechenden Schritte für Ihren<br />
Browser aus.<br />
Internet Explorer<br />
1. Öffnen Sie den Internet Explorer und<br />
klicken Sie auf die Schaltfläche [Stop]<br />
(Abbrechen). Klicken Sie auf [Edit]<br />
(Bearbeiten) und anschließend auf<br />
[Preferences...] (Einstellungen...).<br />
82<br />
Deutsch
Deutsch<br />
83<br />
2. Wählen Sie im Fenster [Preferences...] (Einstellungen...) unter<br />
[Network] (Netzwerk) die Option [Proxies] (Proxys) aus.<br />
3. Deaktivieren Sie alle Optionen und klicken Sie auf [OK].<br />
Netscape<br />
1. Öffnen Sie Netscape und klicken<br />
Sie auf die Schaltfläche [Stop]<br />
(Abbrechen). Klicken Sie auf [Edit]<br />
(Bearbeiten) und anschließend auf<br />
[Preferences...] (Einstellungen...).<br />
2. Wählen Sie<br />
im Dialogfeld<br />
[Preferences...]<br />
(Einstellungen) in<br />
der linken Spalte<br />
[Category] (Kategorie)<br />
die Option [Advanced]<br />
(Erweitert) aus.<br />
Wählen Sie in der<br />
Kategorie [Advanced]<br />
(Erweitert) die Option<br />
[Proxies] (Proxys) aus.<br />
3. Wählen Sie [Direct Connection to the Internet] (Direkte<br />
Verbindung zum Internet) aus und klicken Sie auf [OK].<br />
84<br />
Deutsch
Deutsch<br />
85<br />
Schritt 3. Beziehen von IP-Einstellungen von Ihrem<br />
<strong>SMC7804WBRA</strong><br />
Nachdem Sie nun Ihren Computer für den Anschluss an Ihren<br />
<strong>SMC7804WBRA</strong> konfiguriert haben, muss er neue Netzwerkeinstellungen<br />
beziehen. Indem Sie alle alten IP-Einstellungen<br />
freigeben und sie durch Einstellungen von Ihrem <strong>SMC7804WBRA</strong><br />
aktualisieren, vergewissern Sie sich auch, dass Sie Ihren Computer<br />
korrekt konfiguriert haben.<br />
1. Öffnen Sie das Menü [Apple].<br />
Klicken Sie auf [Control Panel]<br />
(Kontrollfelder) und wählen Sie<br />
[TCP/IP] aus.<br />
2. Im Fenster [TCP/IP] werden Ihre neuen Einstellungen<br />
angezeigt. Vergewissern Sie sich, dass jetzt für Ihre IP-Adresse<br />
192.168.2.xxx, für Ihre Subnetzmaske 255.255.255.0 und für<br />
Ihr Standard-Gateway 192.168.2.1 angegeben wird. Diese Werte<br />
bestätigen, dass Ihr<br />
<strong>SMC7804WBRA</strong> korrekt<br />
funktioniert.<br />
3. Schließen Sie das Fenster [TCP/IP].<br />
Ihr Computer ist jetzt für die Verbindung mit dem <strong>SMC7804WBRA</strong><br />
konfiguriert. Fahren Sie nun mit Konfigurieren des<br />
<strong>SMC7804WBRA</strong> fort.<br />
86<br />
Deutsch
Deutsch<br />
87<br />
Konfigurieren des <strong>SMC7804WBRA</strong><br />
Nachdem Sie nun Ihren Computer erfolgreich konfiguriert und Ihre<br />
Netzwerkeinstellungen von Ihrem <strong>SMC7804WBRA</strong> bezogen haben,<br />
können Sie die Einstellungen des <strong>SMC7804WBRA</strong> für Ihren<br />
Internet-Anbieter (ISP) konfigurieren.<br />
1. Öffnen Sie Ihren Web-Browser (Internet Explorer oder Netscape<br />
Navigator) und klicken Sie auf die Schaltfläche [Stop]<br />
(Abbrechen).<br />
2. Geben Sie in das Feld<br />
[Address] (Adresse)<br />
http://192.168.2.1<br />
ein und drücken Sie<br />
die .<br />
Hinweis: Bei einigen Browsern kann es erforderlich sein, :88 an<br />
die IP-Adresse anzuhängen. z. B. http://192.168.2.1:88<br />
3. Der Anmeldebildschirm des <strong>SMC7804WBRA</strong> wird angezeigt.<br />
Geben Sie das Standardkennwort ein und klicken Sie auf [Login]<br />
(Anmelden). Das Standardkennwort lautet smcadmin. Aus<br />
Sicherheitsgründen sollten Sie so schnell wie möglich ein<br />
Kennwort zuweisen. Beachten<br />
Sie, dass beim Anmeldekennwort<br />
Groß- und Kleinschreibung<br />
unterschieden werden.<br />
4. Klicken Sie auf der Homepage der <strong>SMC7804WBRA</strong>-Web-Konsole<br />
auf [Setup Wizard] (Installationsassistent). Der automatisierte<br />
Assistent des<br />
<strong>SMC7804WBRA</strong> führt<br />
Sie durch die einzelnen<br />
Schritte zur Einrichtung<br />
Ihres Gateway.<br />
88<br />
Deutsch
Deutsch<br />
89<br />
5. Wählen Sie Ihre Zeitzone aus der Liste aus. Wenn der ADSL-<br />
Router automatisch mit einem öffentlichen Zeit-Server<br />
synchronisiert werden soll, aktivieren Sie das Feld [Enable<br />
Automatic Time Server Maintenance] (Automatische Zeit-Server-<br />
Verwaltung). Wählen Sie den Server im Dropdown-Menü aus.<br />
6. Klicken Sie auf [NEXT] (Weiter), um zur Seite mit den ADSL-<br />
Parametereinstellungen weiterzugehen.<br />
7. Wählen Sie Ihr Land und Ihren Internet-Anbieter (ISP).<br />
Hierdurch wird der <strong>SMC7804WBRA</strong> automatisch mit den<br />
richtigen Werten für Protokoll, Verkapselung und VPI/VCI-<br />
Einstellungen für Ihren ISP konfiguriert.<br />
Wenn Ihr Land oder ISP nicht aufgeführt ist, müssen Sie die<br />
ISP-Einstellungen manuell konfigurieren. Fahren Sie mit dem<br />
Abschnitt Land oder ISP nicht aufgeführt fort.<br />
8. Geben Sie den ISP-Benutzernamen, das Kennwort und die<br />
DNS-Server-Adresse an.<br />
Wenn Ihr ISP das Protokoll RFC1483 Routed oder Bridged<br />
verwendet, muss kein Benutzername/Kennwort angegeben<br />
werden. Für RFC1483 Routed müssen die Angaben für IP-Adresse,<br />
Subnetzmaske, Standard-Gateway und DNS-Server-Adresse<br />
eingegeben werden, die Sie von Ihrem ISP erhalten haben.<br />
Hinweis: Standardmäßig wird 192.168.2.1 als DNS-Server-Adresse<br />
verwendet. Dies muss in die DNS-Server-Adresse Ihres<br />
ISP geändert werden.<br />
90<br />
Deutsch
Deutsch<br />
91<br />
9. Klicken Sie auf [Next] (Weiter), um weiterzugehen und die<br />
Einstellungen zu bestätigen.<br />
10. Wenn die Angaben korrekt sind, klicken Sie auf [Apply]<br />
(Übernehmen), um sie zu speichern.<br />
Der <strong>SMC7804WBRA</strong> ist jetzt eingerichtet. Fahren Sie mit dem<br />
Abschnitt zur Fehlerbehebung im Benutzerhandbuch fort, wenn<br />
Sie keine Verbindung zum Internet herstellen können.<br />
Land oder ISP nicht aufgeführt<br />
Wenn Ihr Land oder ISP nicht aufgeführt ist, müssen Sie die<br />
Einstellungen für Ihren ISP manuell konfigurieren.<br />
Wählen Sie [Others] (Andere) in der Dropdown-Liste.<br />
Für die manuelle Konfiguration benötigen Sie die Werte für<br />
Protokoll, DNS-Server, Verkapselung und VPI/VCI-Einstellungen<br />
für Ihren ISP. Wenn Sie eine statische IP-Adresse haben,<br />
benötigen Sie auch die IP-Adresse, Subnetzmaske und Standard-<br />
Gateway-Adresse. Diese Angaben erhalten Sie von Ihrem ISP.<br />
92<br />
Deutsch
Deutsch<br />
93<br />
Wählen Sie das vom ISP verwendete Protokoll aus der<br />
entsprechenden Dropdown-Liste aus.<br />
ISP use PPPoA/PPPoE<br />
Geben Sie die Werte für Benutzername, Kennwort, DNS-Server-<br />
Adresse und VPI/VCI-Nummern ein, die Sie von Ihrem ISP erhalten<br />
haben.<br />
Klicken Sie auf [Next]<br />
(Weiter), um<br />
weiterzugehen und die<br />
Einstellungen zu<br />
bestätigen.<br />
Wenn die Angaben korrekt sind, klicken Sie auf [Apply]<br />
(Übernehmen), um sie zu speichern.<br />
Der <strong>SMC7804WBRA</strong> ist<br />
jetzt eingerichtet.<br />
Fahren Sie mit dem<br />
Abschnitt zur<br />
Fehlerbehebung im<br />
Benutzerhandbuch<br />
fort, wenn Sie keine<br />
Verbindung zum<br />
Internet herstellen<br />
können.<br />
94<br />
Deutsch
Deutsch<br />
95<br />
ISP use RFC1483 Routing<br />
Geben Sie die Werte für IP-Adresse, Subnetzmaske, Standard-<br />
Gateway, DNS-Server-Adresse und VPI/VCI-Nummern ein,<br />
die Sie von Ihrem ISP erhalten haben.<br />
Klicken Sie auf<br />
[Next] (Weiter),<br />
um weiterzugehen<br />
und die Einstellungen<br />
zu bestätigen.<br />
Wenn die Angaben korrekt sind, klicken Sie auf [Apply]<br />
(Übernehmen), um sie zu speichern.<br />
Der <strong>SMC7804WBRA</strong><br />
ist jetzt eingerichtet.<br />
Fahren Sie mit dem<br />
Abschnitt zur<br />
Fehlerbehebung im<br />
Benutzerhandbuch<br />
fort, wenn Sie keine<br />
Verbindung zum<br />
Internet herstellen<br />
können.<br />
ISP use RFC1483 Bridging<br />
Geben Sie die Werte für DNS-Server-Adresse und VPI/VCI-Nummern<br />
ein, die Sie von Ihrem ISP erhalten haben. Wenn Sie eine<br />
statische IP-Adresse haben, müssen Sie auch die Werte für IP-<br />
Adresse, Subnetzmaske und Standard-Gateway-Adresse eingeben,<br />
die Sie von Ihrem ISP erhalten haben.<br />
Hinweis: Sie können aus drei verschiedenen Bridging-Modi<br />
auswählen.<br />
96<br />
Deutsch
Deutsch<br />
97<br />
[RFC1483 Bridging]<br />
Wählen Sie diese Option, wenn der <strong>SMC7804WBRA</strong> transparent sein<br />
soll und die öffentliche IP-Adresse an einen einzelnen PC oder<br />
Server oder eine einzelne Firewall übergeben soll.<br />
[RFC1483 Bridging DHCP]<br />
Wählen Sie diese Option, wenn Sie die Verbindung für mehrere<br />
PCs verwenden wollen (am häufigsten verwendete Einstellung).<br />
[RFC1483 Bridging FixIP]<br />
Wählen Sie diese Option, wenn Sie vom ISP eine statische<br />
IP-Adresse erhalten haben.<br />
Klicken Sie auf [Next] (Weiter), um weiterzugehen und<br />
die Einstellungen zu bestätigen.<br />
Wenn die Angaben<br />
korrekt sind, klicken<br />
Sie auf [Apply]<br />
(Übernehmen), um<br />
sie zu speichern.<br />
Der <strong>SMC7804WBRA</strong> ist jetzt eingerichtet. Fahren Sie mit dem<br />
Abschnitt zur Fehlerbehebung im Benutzerhandbuch fort, wenn<br />
Sie keine Verbindung zum Internet herstellen können.<br />
Introduction<br />
Le routeur Barricade TM ADSL g <strong>SMC7804WBRA</strong> de SMC est un<br />
routeur sans fil haut débit 54Mbps avec modem ADSL intégré<br />
(Annexe A). Ce produit est conçu pour partager l’accès à Internet,<br />
assurer la sécurité et connecter en réseau plusieurs périphériques<br />
pour divers utilisateurs. Les opérations d’installation et de<br />
configuration particulièrement simples du routeur <strong>SMC7804WBRA</strong><br />
peuvent être effectuées par les utilisateurs les moins expérimentés.<br />
Toutefois, les professionnels réseau disposent eux aussi<br />
de fonctionnalités de configuration avancées simples à utiliser.<br />
Consultez le Manuel d’utilisation pour obtenir des informations<br />
sur les fonctionnalités avancées de ce produit.<br />
98<br />
Français
Français<br />
99<br />
Contenu de l’emballage<br />
• Un routeur BarricadeTM ADSL g.<br />
• Un cordon d’alimentation.<br />
• Un CD-ROM contenant la documentation complète.<br />
• Un câble Fast Ethernet de catégorie 5.<br />
• Un câble téléphonique de raccordement (RJ-11).<br />
• Un périphérique de répartition fourni (modèles NL, FR<br />
et UK uniquement).<br />
• Un kit de connecteurs pour le téléphone (modèle NL<br />
uniquement).<br />
Configuration requise<br />
pour l’installation<br />
Avant d’installer votre routeur <strong>SMC7804WBRA</strong>, assurez-vous<br />
de disposer des éléments mentionnés ci-dessous :<br />
• Ligne ADSL installée par votre Fournisseur d’Accès Internet.<br />
• Séparateur/filtre Micro ADSL.<br />
• Ordinateur équipé d’une carte réseau 10/100Mbps<br />
ou d’une carte réseau sans fil IEEE802.11g.<br />
• Protocole réseau TCP/IP installé sur chaque ordinateur<br />
nécessitant un accès à Internet.<br />
• Navigateur Web supportant Java, tel que Microsoft Internet<br />
Explorer 5.0 ou version ultérieure.<br />
• CD-ROM d’installation de Windows, si votre ordinateur exécute<br />
Windows95, 98 ou Me.<br />
100<br />
Français
Français<br />
101<br />
Matériel<br />
Le panneau avant du <strong>SMC7804WBRA</strong> présente des témoins<br />
lumineux qui permettent de contrôler son activité.<br />
Le tableau suivant explique la fonction de chaque témoin.<br />
Témoin État Description<br />
PWR Allumé Le routeur Barricade TM est sous<br />
(Alimentation) tension. Fonctionnement normal.<br />
Éteint L’appareil n’est plus alimenté en<br />
électricité ou est défaillant.<br />
ADSL Sync Allumé La connexion ADSL est synchronisée.<br />
Clignotant Le routeur Barricade TM est en train<br />
d’établir une liaison ADSL.<br />
Éteint La connexion ADSL n’est pas établie.<br />
ADSL Data Clignotant Der entsprechende ADSL-Port<br />
(Données ADSL) überträgt oder empfängt Daten.<br />
WLAN Éteint Aucun transfert de données.<br />
Clignotant Le port WLAN transmet ou reçoit<br />
des données.<br />
Ethernet Allumé La connexion Ethernet est<br />
(4LEDs) établie.<br />
Clignotant Le port LAN indiqué transmet<br />
ou reçoit des données.<br />
Éteint Il n’y a pas de connexion LAN<br />
sur le port.<br />
Connexion des périphériques<br />
Ports LAN Bouton [Reset] (Réinitialiser) Port WAN<br />
Prise d’alimentation<br />
1. Connectez les ordinateurs directement au routeur<br />
<strong>SMC7804WBRA</strong> aux ports 1 à 4 situés sur le panneau arrière.<br />
Si vous devez brancher plus de 4 ordinateurs, connectez un<br />
concentrateur ou un commutateur et reliez les ordinateurs<br />
supplémentaires à ce périphérique. Pour établir une connexion<br />
sans fil, reportez-vous au Manuel d’utilisation de votre carte<br />
sans fil.<br />
2. Reliez le câble RJ-11 fourni entre le Séparateur/filtre Micro<br />
ADSL et le port WAN ADSL du <strong>SMC7804WBRA</strong>.<br />
3. Branchez le cordon d’alimentation dans la prise prévue<br />
à cet effet.<br />
102<br />
Français
Français<br />
103<br />
Configuration de<br />
votre ordinateur<br />
Ce Guide d’installation rapide fournit des instructions d’installation<br />
pour Windows 95, 98, Me, NT 4.0, 2000 et XP, ainsi que pour<br />
Macintosh OS 7.x et les versions ultérieures. Assurez-vous de<br />
suivre les instructions qui correspondent à votre système<br />
d’exploitation.<br />
• Configuration de votre ordinateur sous Windows 95/98/Me.<br />
• Configuration de votre ordinateur sous Windows 2000.<br />
• Configuration de votre ordinateur sous Windows XP.<br />
• Configuration de votre ordinateur sous Windows NT 4.0.<br />
• Configuration de votre ordinateur Macintosh.<br />
Configuration de votre ordinateur sous Windows 95/98/Me<br />
Il se peut que les instructions communiquées dans le présent<br />
document ne correspondent pas exactement à votre version de<br />
Windows. Cela est dû au fait que les instructions et les écrans ont<br />
été effectués sous Windows 98. Windows 95 et Windows Me sont<br />
très similaires, mais pas totalement identiques à Windows 98.<br />
Étape 1. Configuration des paramètres TCP/IP<br />
Après avoir procédé à l’installation matérielle en connectant<br />
vos périphériques, vous devez configurer votre ordinateur pour<br />
la connexion à votre <strong>SMC7804WBRA</strong>.<br />
1. Depuis le Bureau<br />
Windows, cliquez<br />
sur le bouton [Start]<br />
(Démarrer). Choisissez<br />
[Settings] (Paramètres),<br />
puis cliquez sur [Control<br />
Panel] (Panneau de<br />
configuration).<br />
104<br />
Français
Français<br />
105<br />
2. Dans le Panneau de configuration, double-cliquez sur<br />
l’icône [Network]<br />
(Réseau).<br />
3. Dans la fenêtre [Network],<br />
sous l’onglet [Configuration],<br />
double-cliquez sur l’élément<br />
[TCP/IP] affiché pour votre<br />
carte réseau.<br />
4. Activez l’onglet [IP Address]<br />
(Adresse IP).<br />
Si l’option [Obtain an IP address automatically] (Obtenir<br />
automatiquement une adresse IP) est sélectionnée, votre<br />
ordinateur est déjà configuré pour DHCP. Cliquez sur [Cancel]<br />
(Annuler) pour fermer chaque fenêtre et passez à l’Étape 2<br />
Désactivation du proxy HTTP.<br />
5. Cliquez sur [Obtain an IP address automatically]<br />
(Obtenir une adresse IP automatiquement).<br />
106<br />
Français
Français<br />
107<br />
6. Cliquez sur l’onglet [Gateway]<br />
(Passerelle) et supprimez<br />
les numéros affichés sous<br />
[Installed gateways]<br />
(Passerelles installées).<br />
7. Activez l’onglet [DNS<br />
Configuration] (Configuration<br />
DNS) et cliquez sur [Disable<br />
DNS] (Désactiver DNS).<br />
8. Cliquez sur [OK].<br />
9. Il est possible que votre<br />
système Windows ait<br />
besoin du CD-ROM de<br />
Windows 95/98/Me pour<br />
copier certains fichiers.<br />
Une fois la copie effectuée, vous êtes invité à redémarrer votre<br />
système. Cliquez sur [Yes] (Oui) ; votre ordinateur redémarre.<br />
Étape 2. Désactivation du Proxy HTTP<br />
Vous devez vérifier que la fonctionnalité Proxy HTTP de votre<br />
navigateur Web est désactivée pour que votre navigateur Web<br />
puisse afficher les pages de configuration dans votre<br />
<strong>SMC7804WBRA</strong>. Les étapes ci-dessous concernent Internet Explorer<br />
et Netscape. Déterminez le navigateur utilisé et suivez les étapes<br />
appropriées.<br />
Internet Explorer<br />
1. Ouvrez Internet Explorer et cliquez sur le bouton [Stop]<br />
(Arrêter) .<br />
Cliquez sur [Tools]<br />
(Outils), puis sur<br />
[Internet Options]<br />
(Options Internet).<br />
108<br />
Français
Français<br />
109<br />
2. Dans la fenêtre qui s’affiche,<br />
cliquez sur l’onglet<br />
[Connections] (Connexions).<br />
Cliquez ensuite sur le bouton<br />
[LAN Settings...]<br />
(Paramètres LAN).<br />
3. Désactivez toutes les cases<br />
à cocher.<br />
4. Cliquez sur [OK], puis de<br />
nouveau sur [OK] pour fermer<br />
la fenêtre [Internet Options]<br />
(Options Internet).<br />
Netscape<br />
1. Ouvrez Netscape et cliquez<br />
sur le bouton [Stop]<br />
(Arrêter). Cliquez sur<br />
[Edit] (Edition), puis<br />
sur [Preferences…]<br />
(Préférences).<br />
2. Dans la fenêtre<br />
qui s’affiche,<br />
sous [Category]<br />
(Catégorie),<br />
double-cliquez sur<br />
[Advanced]<br />
(Avancé), puis<br />
cliquez sur [Proxies]<br />
(Serveur proxy).<br />
Sélectionnez<br />
[Direct connection<br />
to the Internet]<br />
(Connexion directe<br />
à Internet). Cliquez sur [OK].<br />
3. Répétez ces étapes pour tous les ordinateurs<br />
Windows 95/98/Me connectés à votre routeur <strong>SMC7804WBRA</strong>.<br />
110<br />
Français
Français<br />
111<br />
Étape 3. Lecture des paramètres IP depuis votre<br />
<strong>SMC7804WBRA</strong><br />
Maintenant que vous avez configuré votre ordinateur pour la<br />
connexion à votre <strong>SMC7804WBRA</strong>, il est nécessaire de lui indiquer<br />
les nouveaux paramètres réseau. En libérant les éventuels anciens<br />
paramètres IP et en les remplaçant par ceux de votre<br />
<strong>SMC7804WBRA</strong>, vous pouvez également<br />
vérifier que vous avez correctement<br />
configuré votre ordinateur.<br />
1. Cliquez sur [Start] (Démarrer),<br />
puis sur [Run] (Exécuter).<br />
2. Tapez WINIPCFG puis cliquez<br />
sur [OK]. L’affichage de la<br />
fenêtre [IP Configuration]<br />
(Configuration IP) peut<br />
nécessiter de une<br />
à deux minutes.<br />
3. Dans la liste déroulante, sélectionnez votre carte réseau,<br />
cliquez sur [Release] (Libérer), puis sur [Renew] (Renouveler).<br />
Vérifiez que votre adresseIP est maintenant 192.168.2.xxx,<br />
votre masque de sous-réseau 255.255.255.0 et votre passerelle<br />
par défaut 192.168. 2.1. Ces valeurs confirment le bon<br />
fonctionnement de votre <strong>SMC7804WBRA</strong>. Cliquez sur [OK]<br />
pour fermer la fenêtre [IP Configuration] (Configuration IP).<br />
Maintenant que votre<br />
ordinateur est configuré<br />
pour se connecter à votre<br />
<strong>SMC7804WBRA</strong>, passez à la<br />
section Configuration de<br />
votre <strong>SMC7804WBRA</strong>.<br />
112<br />
Français
Français<br />
113<br />
Configuration de votre ordinateur sous Windows 2000<br />
Étape 1. Configuration des paramètres TCP/IP<br />
Après avoir procédé à l’installation matérielle, vous devez<br />
configurer votre ordinateur pour la connexion à votre<br />
<strong>SMC7804WBRA</strong>.<br />
1. Depuis le Bureau Windows,<br />
cliquez sur le bouton<br />
[Start] (Démarrer).<br />
Choisissez [Settings]<br />
(Paramètres), puis cliquez<br />
sur l’icône [Network and<br />
Dial-Up Connections]<br />
(Connexions réseau et<br />
accès à distance).<br />
2. Double-cliquez sur<br />
l’icône qui correspond<br />
à la connexion à<br />
votre <strong>SMC7804WBRA</strong>.<br />
3. Cliquez sur [Properties]<br />
(Propriétés).<br />
4. Double-cliquez sur<br />
[Internet Protocol<br />
(TCP/IP)] (Protocole<br />
Internet TCP/IP).<br />
114<br />
Français
Français<br />
115<br />
Si les options [Obtain an<br />
IP address automatically]<br />
(Obtenir une adresse IP<br />
automatiquement) et<br />
[Obtain DNS server address<br />
automatically] (Obtenir les<br />
adresses des serveurs DNS<br />
automatiquement) sont<br />
sélectionnées, votre ordinateur<br />
est déjà configuré pour DHCP.<br />
Cliquez sur [Cancel] (Annuler)<br />
pour fermer chaque fenêtre et<br />
passez à l’Étape 2 Désactivation<br />
du proxy HTTP.<br />
6. Sélectionnez [Obtain an IP address automatically] (Obtenir<br />
une adresse IP automatiquement) puis [Obtain DNS server<br />
address automatically] (Obtenir les adresses des serveurs<br />
DNS automatiquement). Cliquez sur [OK] ou sur [Close]<br />
(Fermer) pour fermer chaque fenêtre.<br />
Étape 2. Désactivation du Proxy HTTP<br />
Passez à l’Étape 2 de la section Configuration de votre ordinateur<br />
sous Windows 95/98/Me.<br />
Étape 3. Lecture des paramètres IP depuis votre<br />
<strong>SMC7804WBRA</strong><br />
Maintenant que vous avez configuré votre ordinateur pour<br />
la connexion à votre <strong>SMC7804WBRA</strong>, il est nécessaire de lui<br />
indiquer les nouveaux paramètres réseau. En libérant les éventuels<br />
anciens paramètres IP et en les remplaçant par ceux de votre<br />
<strong>SMC7804WBRA</strong>, vous pouvez également vérifier que vous avez<br />
correctement configuré votre ordinateur.<br />
1. Depuis le Bureau<br />
Windows, cliquez sur<br />
[Start] (Démarrer),<br />
sur [Programs]<br />
(Programmes),<br />
sur [Accessories]<br />
(Accessoires), puis<br />
sur [Command Prompt]<br />
(Invite de commandes).<br />
116<br />
Français
Français<br />
117<br />
2. Dans la fenêtre qui s’affiche, tapez IPCONFIG/RELEASE et<br />
appuyez sur la touche .<br />
3. Tapez IPCONFIG/RENEW et appuyez sur la touche .<br />
Vérifiez que votre adresse IP est maintenant 192.168.2.xxx<br />
(2 à 254), votre masque de sous-réseau 255.255.255.0 et votre<br />
passerelle par défaut 192.168.2.1. Ces valeurs confirment<br />
le bon fonctionnement de votre <strong>SMC7804WBRA</strong>.<br />
4. Tapez EXIT et appuyez sur pour fermer la fenêtre<br />
[Command Prompt] (Invite de commandes).<br />
Maintenant que votre ordinateur est configuré pour se connecter<br />
à votre <strong>SMC7804WBRA</strong>, passez à la section Configuration de votre<br />
<strong>SMC7804WBRA</strong>.<br />
Configuration de votre ordinateur sous Windows XP<br />
Étape 1. Configuration des paramètres TCP/IP<br />
Après avoir procédé à l’installation matérielle, vous devez<br />
configurer votre ordinateur pour la connexion à votre<br />
<strong>SMC7804WBRA</strong>.<br />
1. Depuis le Bureau Windows, cliquez<br />
sur le bouton [Start] (Démarrer).<br />
Choisissez [Control Panel]<br />
(Panneau de configuration).<br />
2. Sélectionnez l’icône [Network and<br />
Internet Connections] (Réseau et<br />
connexions Internet), puis cliquez<br />
sur l’icône [Network Connections]<br />
(Connexions réseau) et<br />
double-cliquez sur la carte<br />
qui sera utilisée pour cette<br />
connexion.<br />
118<br />
Français
Français<br />
119<br />
3. Cliquez sur [Properties]<br />
(Propriétés).<br />
4. Double-cliquez sur [Internet<br />
Protocol (TCP/IP)] (Protocole<br />
Internet TCP/IP).<br />
Si les options [Obtain an IP address automatically] (Obtenir<br />
une adresse IP automatiquement) et [Obtain DNS server<br />
address automatically] (Obtenir les adresses des serveurs DNS<br />
automatiquement) sont sélectionnées, votre ordinateur est déjà<br />
configuré pour DHCP. Cliquez sur [Cancel] (Annuler) pour fermer<br />
chaque fenêtre et passez à l’Étape 2 Désactivation du proxy HTTP.<br />
6. Sélectionnez [Obtain an<br />
IP address automatically]<br />
(Obtenir une adresse IP<br />
automatiquement) puis<br />
[Obtain DNS server address<br />
automatically] (Obtenir les<br />
adresses des serveurs DNS<br />
automatiquement). Cliquez sur<br />
[OK] ou sur [Close] (Fermer)<br />
pour fermer chaque fenêtre.<br />
Étape 2. Désactivation du Proxy HTTP<br />
Passez à l’Étape2 de la section Configuration de votre ordinateur<br />
sous Windows 95/98/Me.<br />
Étape 3. Lecture des paramètres IP depuis votre<br />
<strong>SMC7804WBRA</strong><br />
Maintenant que vous avez configuré votre ordinateur pour<br />
la connexion à votre <strong>SMC7804WBRA</strong>, il est nécessaire de lui<br />
indiquer les nouveaux paramètres réseau. En libérant les éventuels<br />
anciens paramètres IP et en les remplaçant par ceux de votre<br />
<strong>SMC7804WBRA</strong>, vous pouvez également vérifier que vous avez<br />
correctement configuré votre ordinateur.<br />
1. Depuis le Bureau<br />
Windows, cliquez sur [Start]<br />
(Démarrer), sur [Programs]<br />
(Programmes), sur<br />
[Accessories] (Accessoires),<br />
puis sur [Command Prompt]<br />
(Invite de commandes).<br />
120<br />
Français
Français<br />
121<br />
2. Dans la fenêtre qui s’affiche, tapez IPCONFIG/RELEASE et<br />
appuyez sur la touche .<br />
3. Tapez IPCONFIG/RENEW et appuyez sur la touche .<br />
Vérifiez que votre adresse IP est maintenant 192.168.2.xxx<br />
(2 à 254), votre masque de sous-réseau 255.255.255.0 et votre<br />
passerelle par défaut 192.168.2.1. Ces valeurs confirment le<br />
bon fonctionnement de votre <strong>SMC7804WBRA</strong>.<br />
4. Tapez EXIT et appuyez sur pour fermer la fenêtre<br />
[Command Prompt] (Invite de commandes).<br />
Maintenant que votre ordinateur est configuré pour se connecter<br />
à votre <strong>SMC7804WBRA</strong>, passez à la section Configuration de votre<br />
<strong>SMC7804WBRA</strong>.<br />
Configuration de votre ordinateur sous Windows NT 4.0<br />
Étape 1. Configuration des paramètres TCP/IP<br />
Après avoir procédé à l’installation matérielle, vous devez<br />
configurer votre ordinateur pour la connexion à votre<br />
<strong>SMC7804WBRA</strong>.<br />
1. Depuis le Bureau Windows, cliquez sur [Start/Settings/Control<br />
Panel] (Démarrer/Paramètres/Panneau de configuration).<br />
122<br />
Français
Français<br />
123<br />
2. Double-cliquez sur l’icône<br />
[Network] (Réseau).<br />
3. Sélectionnez l’onglet<br />
[Protocols] (Protocoles).<br />
4. Double-cliquez sur [TCP/IP<br />
Protocol] (Protocole TCP/IP).<br />
5. Activez l’onglet [IP Address]<br />
(Adresse IP).<br />
6. Dans la liste déroulante des<br />
cartes, assurez-vous que<br />
votre carte Ethernet est<br />
sélectionnée.<br />
Si l’option [Obtain an IP address automatically] (Obtenir<br />
automatiquement une adresse IP) est sélectionnée, votre<br />
ordinateur est déjà configuré pour DHCP. Cliquez sur [Cancel]<br />
(Annuler) pour fermer chaque fenêtre et passez à l’Étape 2<br />
Désactivation du proxy HTTP.<br />
7. Cliquez sur [Obtain an IP address automatically]<br />
(Obtenir une adresseIP automatiquement).<br />
124<br />
Français
Français<br />
125<br />
8. Cliquez sur l’onglet [DNS] pour<br />
voir quel est le serveur DNS<br />
principal et secondaire.<br />
Supprimez les éventuelles<br />
adresses DNS présentes.<br />
9. Cliquez de nouveau sur [OK]<br />
pour fermer la fenêtre [Network]<br />
(Réseau).<br />
10. Windows peut alors copier certains fichiers et vous demander<br />
de redémarrer votre système. Cliquez sur [Yes] (Oui) ; votre<br />
ordinateur redémarre.<br />
Étape 2. Désactivation du Proxy HTTP<br />
Passez à l’Étape2 de la section Configuration de votre ordinateur<br />
sous Windows95/98/Me.<br />
Étape 3. Lecture des paramètres IP depuis votre<br />
<strong>SMC7804WBRA</strong><br />
Maintenant que vous avez configuré votre ordinateur pour<br />
la connexion à votre <strong>SMC7804WBRA</strong>, il est nécessaire de lui<br />
indiquer les nouveaux paramètres réseau. En libérant les éventuels<br />
anciens paramètres IP et en les remplaçant par ceux de votre<br />
<strong>SMC7804WBRA</strong>, vous pouvez également vérifier que vous avez<br />
correctement configuré votre ordinateur.<br />
1. Depuis<br />
le Bureau<br />
Windows,<br />
cliquez<br />
sur [Start]<br />
(Démarrer),<br />
sur [Programs]<br />
(Programmes),<br />
puis sur<br />
[Command<br />
Prompt]<br />
(Invite de<br />
commandes).<br />
126<br />
Français
Français<br />
127<br />
2. Dans la fenêtre qui s’affiche, tapez IPCONFIG/RELEASE et<br />
appuyez sur la touche<br />
.<br />
3. Tapez IPCONFIG/RENEW et appuyez sur la touche .<br />
Vérifiez que votre adresse IP est maintenant 192.168.2.xxx,<br />
votre masque de sous-réseau 255.255.255.0 et votre passerelle<br />
par défaut 192.168.2.1. Ces valeurs confirment le bon<br />
fonctionnement de votre <strong>SMC7804WBRA</strong>.<br />
4. Tapez EXIT et appuyez sur pour fermer la fenêtre<br />
[Command Prompt] (Invite de commandes).<br />
Maintenant que votre ordinateur est configuré pour se connecter<br />
à votre <strong>SMC7804WBRA</strong>, passez à la section Configuration de votre<br />
<strong>SMC7804WBRA</strong>.<br />
Configuration de votre ordinateur Macintosh<br />
Vous noterez peut-être que les instructions de ce manuel ne<br />
correspondent pas exactement à votre écran. En effet, ces étapes<br />
et les captures d’écrans ont été effectuées sous Mac OS 8.5.<br />
MacOS 7.x et les systèmes ultérieurs sont tous très similaires,<br />
mais peuvent ne pas être identiques à MacOS 8.5.<br />
Étape 1. Configuration des paramètres TCP/IP<br />
Après avoir procédé à l’installation matérielle, vous devez<br />
configurer votre ordinateur pour la connexion à votre<br />
<strong>SMC7804WBRA</strong>.<br />
1. Déroulez le menu [Apple] (Pomme). Cliquez sur<br />
[Control Panel] (Tableau de bord) et sélectionnez [TCP/IP].<br />
128<br />
Français
Français<br />
129<br />
2. Dans la boîte de dialogue [TCP/IP], vérifiez que l’option<br />
[Ethernet] est sélectionnée dans la zone [Connect Via:]<br />
(Se connecter via). Si l’option [Using DHCP Server] (Utiliser<br />
un serveur DHCP) est sélectionnée dans la zone [Configure]<br />
(Configuration), votre ordinateur est déjà configuré pour DHCP.<br />
Fermez la boîte de<br />
dialogue [TCP/IP]<br />
et passez à l’Étape 2<br />
Désactivation du<br />
proxy HTTP.<br />
3. Sélectionnez [Using DHCP Server] (Utiliser un serveur DHCP)<br />
dans la zone [Configure] (Configuration) et fermez la fenêtre.<br />
4. Un message apparaît<br />
et vous êtes invité<br />
à enregistrer vos<br />
paramètres TCP/IP.<br />
Cliquez sur [Save]<br />
(Enregistrer).<br />
Étape 2. Désactivation du Proxy HTTP<br />
Vous devez vérifier que la fonctionnalité Proxy HTTP de votre<br />
navigateur Web est désactivée pour que votre navigateur Web<br />
puisse afficher les pages de configuration dans votre<br />
<strong>SMC7804WBRA</strong>. Les étapes ci-dessous concernent Internet<br />
Explorer et Netscape. Déterminez le navigateur utilisé<br />
et suivez les étapes appropriées.<br />
Internet Explorer<br />
1. Ouvrez Internet Explorer et cliquez<br />
sur le bouton [Stop] (Arrêter).<br />
Cliquez sur [Edit] (Edition), puis<br />
sur [Preferences…] (Préférences).<br />
130<br />
Français
Français<br />
131<br />
2. Dans la fenêtre [Preferences…] (Préférences), sous [Network]<br />
(Réseau), sélectionnez [Proxys] (Serveur proxy).<br />
3. Désactivez toutes les cases à cocher, puis cliquez sur [OK].<br />
Netscape<br />
1. Ouvrez Netscape et cliquez sur<br />
le bouton [Stop] (Arrêter). Cliquez<br />
sur [Edit] (Edition), puis sur<br />
[Preferences…] (Préférences).<br />
2. Dans la boîte de<br />
dialogue qui s’affiche,<br />
dans la colonne de<br />
gauche [Category]<br />
(Catégorie), sélectionnez<br />
[Advanced]<br />
(Avancé). Dans la zone<br />
[Advanced] (Avancé),<br />
sélectionnez [Proxies]<br />
(Serveur proxy).<br />
3. Activez l’option [Direct Connection to the Internet] (Connexion<br />
directe à Internet), puis cliquez sur [OK].<br />
132<br />
Français
Français<br />
133<br />
Étape 3. Lecture des paramètres IP depuis votre<br />
<strong>SMC7804WBRA</strong><br />
Maintenant que vous avez configuré votre ordinateur pour<br />
la connexion à votre <strong>SMC7804WBRA</strong>, il est nécessaire de lui<br />
indiquer les nouveaux paramètres réseau. En libérant les éventuels<br />
anciens paramètres IP et en les remplaçant par ceux de votre<br />
<strong>SMC7804WBRA</strong>, vous pouvez également vérifier que vous avez<br />
correctement configuré votre ordinateur.<br />
1. Déroulez le menu [Apple]<br />
(Pomme). Cliquez sur [Control<br />
Panel] (Tableau de bord)<br />
et sélectionnez [TCP/IP].<br />
2. Vos nouveaux paramètres apparaissent dans la fenêtre [TCP/IP].<br />
Vérifiez que votre adresse IP est maintenant 192.168.2.xxx,<br />
votre masque de sous-réseau 255.255.255.0 et votre passerelle<br />
par défaut 192.168.2.1. Ces valeurs confirment le bon<br />
fonctionnement de votre <strong>SMC7804WBRA</strong>.<br />
3. Fermez la fenêtre [TCP/IP].<br />
Maintenant que votre ordinateur est configuré pour se connecter<br />
à votre <strong>SMC7804WBRA</strong>, passez à la section Configuration de votre<br />
<strong>SMC7804WBRA</strong>.<br />
134<br />
Français
Français<br />
135<br />
Configuration de<br />
votre <strong>SMC7804WBRA</strong><br />
Maintenant que vous avez correctement configuré votre ordinateur<br />
et récupéré vos nouveaux paramètres réseau à partir de votre<br />
<strong>SMC7804WBRA</strong>, vous êtes prêt à configurer ce dernier pour<br />
votre FAI.<br />
1. Ouvrez votre navigateur Web (par exemple, Internet Explorer<br />
ou Netscape Navigator), puis cliquez sur le bouton [Stop]<br />
(Arrêter).<br />
2. Dans la zone [Address]<br />
(Adresse), tapez<br />
http://192.168.2.1 et<br />
appuyez sur la touche<br />
.<br />
Remarque : Dans certains navigateurs, il peut être nécessaire<br />
d’ajouter :88 après l’adresse IP d’administration.<br />
Par exemple, http://192.168.2.1:88<br />
3. L’écran d’ouverture de session du <strong>SMC7804WBRA</strong> s’affiche.<br />
Entrez le mot de passe par défaut et cliquez sur [LOGIN]<br />
(Se connecter). Le mot de passe par défaut est smcadmin.<br />
Pour des raisons de sécurité, il est conseillé de définir un<br />
mot de passe le plus tôt possible. Notez que le mot de passe<br />
d’ouverture de session respecte<br />
la distinction entre les<br />
minuscules et les majuscules.<br />
4. Sur la page d’accueil de la console Web du <strong>SMC7804WBRA</strong>,<br />
cliquez sur [Setup Wizard] (Assistant de configuration).<br />
Le processus de configuration automatisé du <strong>SMC7804WBRA</strong><br />
vous guidera étape<br />
par étape lors de la<br />
configuration de votre<br />
passerelle.<br />
136<br />
Français
Français<br />
137<br />
5. Sélectionnez votre fuseau horaire dans la liste affichée. Si vous<br />
souhaitez synchroniser le routeur ADSL automatiquement avec<br />
un serveur horaire public, activez la case à cocher [Enable<br />
Automatic Time Server Maintenance]. Sélectionnez le serveur<br />
requis dans le menu déroulant.<br />
6. Cliquez sur [NEXT] pour continuer et passer à la page<br />
de configuration des paramètres ADSL.<br />
7. Sélectionnez votre pays et votre Fournisseur d’Accès Internet.<br />
Cette opération entraîne la configuration automatique du<br />
<strong>SMC7804WBRA</strong> avec le protocole, les paramètres d’encapsulation<br />
et les paramètres VPI/VCI qui conviennent pour<br />
votre FAI.<br />
Si votre pays ou votre Fournisseur d’Accès Internet ne figure pas<br />
dans la liste, vous devez configurer les paramètres relatifs à votre<br />
FAI manuellement. Passez à la section Pays ou FAI non répertorié.<br />
8. Entrez le nom d’utilisateur, le mot de passe et l’adresse<br />
du serveur DNS fournis par votre FAI.<br />
Si votre FAI utilise le protocole RFC1483 sur pont/acheminé,<br />
aucun nom d’utilisateur/mot de passe n’est nécessaire. Pour<br />
le protocole RFC1483 acheminé, vous devez saisir l’adresse IP,<br />
le masque de sous-réseau, la passerelle par défaut et l’adresse<br />
du serveur DNS que votre FAI vous a fournis.<br />
Remarque : L’adresse définie par défaut pour le serveurDNS est :<br />
192.168.2.1. Vous devez la modifier et indiquer<br />
à la place l’adresse du serveurDNS de votre FAI.<br />
138<br />
Français
Français<br />
139<br />
9. Cliquez sur [Next] (Suivant) pour continuer et appliquer<br />
les paramètres.<br />
10. Si les paramètres sont corrects, cliquez sur [Apply] (Appliquer)<br />
pour les enregistrer.<br />
Votre <strong>SMC7804WBRA</strong> est maintenant configuré. Reportez-vous à la<br />
section Dépannage du Manuel d’utilisation si vous ne parvenez pas<br />
à établir de connexion à Internet.<br />
Pays ou FAI non répertorié<br />
Si votre pays ou votre Fournisseur d’Accès Internet ne figure pas<br />
dans la liste, vous devez configurer les paramètres relatifs à votre<br />
FAI manuellement.<br />
Sélectionnez [Others] (Autres) dans la liste déroulante.<br />
Pour pouvoir effectuer cette configuration manuelle, vous devez<br />
connaître le protocole, le serveur DNS, les paramètres d’encapsulation<br />
et les paramètres VPI/VCI utilisés par votre FAI. Si vous<br />
disposez d’une adresse IP statique, vous devez également<br />
connaître l’adresse IP, le masque de sous-réseau et l’adresse<br />
de la passerelle par défaut. Contactez votre FAI pour qu’il<br />
vous communique ces informations si vous n’en disposez pas.<br />
140<br />
Français
Français<br />
141<br />
Sélectionnez le protocole que votre FAI utilise dans la liste<br />
déroulante [Internet Service Provider] (Fournisseur d’Accès<br />
Internet).<br />
Votre FAI utilise le protocole PPPoA/PPPoE<br />
Entrez le nom d’utilisateur, le mot de passe, l’adresse du serveur<br />
DNS et les numéros de circuit VPI/VCI fournis par votre FAI.<br />
Cliquez sur [Next]<br />
(Suivant) pour continuer<br />
et appliquer les<br />
paramètres.<br />
Si les paramètres sont<br />
corrects, cliquez sur<br />
[Apply] (Appliquer) pour<br />
les enregistrer.<br />
Votre <strong>SMC7804WBRA</strong><br />
est maintenant<br />
configuré. Reportezvous<br />
à la section<br />
Dépannage du Manuel<br />
d’utilisation si vous ne<br />
parvenez pas à établir<br />
de connexion<br />
à Internet.<br />
142<br />
Français
Français<br />
143<br />
Votre FAI utilise le protocole RFC1483 (Routing)<br />
Entrez l’adresse IP, le masque de sous-réseau, la passerelle par<br />
défaut, l’adresse du serveur DNS et les numéros de circuit VPI/VCI<br />
fournis par votre FAI.<br />
Cliquez sur [Next]<br />
(Suivant) pour<br />
continuer et<br />
appliquer les<br />
paramètres.<br />
Si les paramètres<br />
sont corrects, cliquez<br />
sur [Apply] (Appliquer)<br />
pour les enregistrer.<br />
Votre <strong>SMC7804WBRA</strong><br />
est maintenant<br />
configuré. Reportezvous<br />
à la section<br />
Dépannage du Manuel<br />
d’utilisation si vous<br />
ne parvenez pas<br />
à établir de<br />
connexion<br />
à Internet.<br />
Votre FAI utilise le protocole RFC1483 (Bridging)<br />
Entrez l’adresse du serveur DNS et les numéros de circuit VPI/VCI<br />
fournis par votre FAI. Si vous disposez d’une adresse IP fixe, vous<br />
devez également saisir l’adresse IP, le masque de sous-réseau et<br />
l’adresse de la passerelle par défaut fournis par votre FAI.<br />
Remarque : Vous avez la possibilité de choisir entre trois modes<br />
de bridging.<br />
144<br />
Français
Français<br />
145<br />
[RFC1483 Bridging]<br />
Sélectionnez cette option si vous voulez que le <strong>SMC7804WBRA</strong><br />
soit transparent et passe l’adresse IP publique<br />
à un seul PC, serveur ou firewall.<br />
[RFC1483 Bridging DHCP]<br />
Sélectionnez cette option si vous voulez partager la connexion<br />
pour plusieurs PC (paramètre le plus courant).<br />
[RFC1483 Bridging DHCP]<br />
Sélectionnez cette option si votre<br />
FAI vous a fourni une adresse IP statique.<br />
Cliquez sur [Next]<br />
(Suivant) pour<br />
continuer et appliquer<br />
les paramètres.<br />
Si les paramètres sont<br />
corrects, cliquez sur<br />
[Apply] (Appliquer)<br />
pour les enregistrer.<br />
Votre <strong>SMC7804WBRA</strong> est maintenant configuré. Reportez-vous à la<br />
section Dépannage du Manuel d’utilisation si vous ne parvenez pas<br />
à établir de connexion à Internet.<br />
Introducción<br />
El ADSL Barricade TM g de SMC, <strong>SMC7804WBRA</strong>, es un router de<br />
banda ancha con acceso inalámbrico de 54 Mbps y módem ADSL<br />
(Anexo A) integrado. Este producto ha sido diseñado para<br />
compartir el acceso a Internet, brindar seguridad e interconectar<br />
varios dispositivos, para un grupo de usuarios. Las tareas de<br />
instalación y configuración del <strong>SMC7804WBRA</strong> son simples y las<br />
puede realizar el usuario menos experimentado, mientras que los<br />
profesionales de redes tienen a su disposición opciones avanzadas<br />
de fácil configuración. Consulte el Manual de instrucciones para<br />
ver las funciones avanzadas de este producto.<br />
146<br />
Español
Español<br />
Contenido del paquete<br />
• Un ADSL BarricadeTM g.<br />
• Un adaptador de corriente.<br />
• Un CD con toda la documentación.<br />
• Un cable de la categoría 5 para Fast Ethernet.<br />
• Un cable de teléfono (RJ-11).<br />
• Se suministra un divisor (sólo para los modelos de Holanda,<br />
Francia y Reino Unido).<br />
• Kit de conexión de teléfono (sólo para el modelo de Holanda).<br />
Requisitos de instalación<br />
Antes de continuar con la instalación del <strong>SMC7804WBRA</strong> asegúrese<br />
de disponer de lo siguiente:<br />
• Una línea ADSL instalada por su proveedor de servicios<br />
de Internet.<br />
• Un microfiltro/divisor de ADSL.<br />
• Un ordenador equipado con un adaptador de red a 10/100Mbps<br />
o un adaptador de red inalámbrico IEEE802.11g.<br />
• Protocolos de red TCP/IP instalados en cada uno de los PC<br />
con los que se vaya a acceder a Internet.<br />
• Un navegador de Internet compatible con Java, como Microsoft<br />
Internet Explorer 5.0 o superior instalado.<br />
• El CD de Windows, si el ordenador utiliza Windows 95, 98 o Me.<br />
147 148<br />
Español
Español<br />
149<br />
Hardware<br />
El panel frontal del <strong>SMC7804WBRA</strong> incluye indicadores LED que<br />
le permiten controlarlo de un vistazo.<br />
La tabla siguiente detalla las funciones de cada LED.<br />
LED Estado Descripción<br />
PWR Encendido El Barricade TM recibe corriente.<br />
Funcionamiento normal.<br />
Apagado Apagado o error.<br />
ADSL Sync Encendido La conexión ADSL está sincronizada.<br />
Intermitente El Barricade está estableciendo un<br />
enlace ADSL.<br />
Apagado No se ha establecido la conexión<br />
ADSL.<br />
ADSL Data Intermitente El puerto ADSL indicado está<br />
enviando o recibiendo datos.<br />
WLAN Apagado No se están transfiriendo los datos.<br />
Intermitente El puerto WLAN está enviando<br />
o recibiendo datos.<br />
Ethernet Encendido Se ha establecido la conexión<br />
(4LEDs) Ethernet.<br />
Intermitente El puerto LAN indicado está<br />
enviando o recibiendo datos.<br />
Apagado No hay ninguna conexión LAN en<br />
el puerto.<br />
Conexión de dispositivos<br />
Puertos LAN Botón [Reset] (Restablecer) Puerto WAN<br />
Toma de corriente<br />
1. Conecte los ordenadores directamente al <strong>SMC7804WBRA</strong> en los<br />
puertos 1 a 4 del panel trasero. Si tiene más de 4 ordenadores<br />
para conectar, conecte un hub o un switch y conecte los<br />
ordenadores adicionales a dicho dispositivo. Para conectar<br />
dispositivos inalámbricos, consulte la Guía del usuario de<br />
su adaptador inalámbrico.<br />
2. Conecte el cable RJ-11 proporcionado desde el microfiltro/<br />
divisor de ADSL al puerto ADSL WAN del <strong>SMC7804WBRA</strong>.<br />
3. Conecte el cable de alimentación al conector correspondiente.<br />
150<br />
Español
Español<br />
Configuración del ordenador<br />
Este Manual de instalación rápida proporciona las instrucciones<br />
de configuración para Windows 95, 98, Me, NT 4.0, 2000 y XP,<br />
y para Macintosh OS 7.x y posteriores. Asegúrese de seguir las<br />
instrucciones que corresponden a su sistema operativo:<br />
• Configuración del ordenador con Windows 95/98/Me.<br />
• Configuración del ordenador con Windows 2000.<br />
• Configuración del ordenador con Windows XP.<br />
• Configuración del ordenador con Windows NT 4.0.<br />
• Configuración de un ordenador Macintosh.<br />
Configuración del ordenador con Windows 95/98/Me<br />
Es posible que las instrucciones siguientes no se correspondan<br />
de forma exacta con su versión de Windows. Ello se debe a que los<br />
pasos y las capturas de pantalla se han creado a partir de Windows<br />
98. Windows 95 y Windows Me son muy parecidos, pero no<br />
idénticos, a Windows 98.<br />
1er paso. Establecer la configuración TCP/IP<br />
Una vez terminada la instalación del hardware mediante la<br />
conexión de los dispositivos hay que configurar el ordenador para<br />
conectarlo con el <strong>SMC7804WBRA</strong>.<br />
1. En el escritorio de<br />
Windows, pulse el botón<br />
[Start] (Inicio).<br />
Seleccione [Settings]<br />
(Configuración) y pulse<br />
[Control Panel] (Panel<br />
de control).<br />
151 152<br />
Español
Español<br />
2. En el [Control Panel] (Panel de control) haga doble clic en el<br />
icono [Network] (Red).<br />
3. En la ventana [Network],<br />
dentro de la ficha [Configuration]<br />
(Configuración),<br />
haga doble clic en [TCP/IP]<br />
(TCP/IP) en la lista de su<br />
tarjeta de red.<br />
4. Seleccione la ficha<br />
[IP Address] (Dirección IP).<br />
Si [Obtain an IP address automatically] (Obtener dirección<br />
IP automáticamente) ya está marcado, el ordenador está ya<br />
configurado para DHCP. Pulse [Cancel] (Cancelar) para cerrar<br />
todas las ventanas y vaya directamente al 2º paso, Desactivar<br />
el proxy HTTP.<br />
5. Pulse [Obtain an IP address automatically]<br />
(Obtener una dirección IP automáticamente).<br />
153 154<br />
Español
Español<br />
155<br />
6. Pulse la ficha [Gateway] (Puerta<br />
de enlace) y elimine los números<br />
que aparecen en [Installed<br />
gateways] (Puertas de enlace<br />
instaladas).<br />
7. Pulse la ficha [DNS<br />
Configuration] (Configuración<br />
DNS) y pulse [Disable DNS]<br />
(Desactivar DNS).<br />
8. Pulse [OK] (Aceptar).<br />
9. Puede que Windows<br />
necesite el CD de<br />
Windows 95/98/Me para<br />
copiar algunos archivos.<br />
Después de copiarlos, le<br />
solicitará que reinicie el<br />
sistema. Pulse [Yes] (Sí)<br />
para reiniciar el ordenador.<br />
2º paso. Desactivar el proxy HTTP<br />
Tendrá que verificar que el proxy HTTP de su navegador esté<br />
desactivado para que su navegador pueda ver las páginas de<br />
configuración de su <strong>SMC7804WBRA</strong>. A continuación, se indican los<br />
pasos a seguir tanto para Internet Explorer como para Netscape.<br />
Determine cuál de estos navegadores utilizará y siga los pasos<br />
correspondientes.<br />
Internet Explorer<br />
1. Abra Internet Explorer y pulse el botón [Stop] (Detener) .<br />
Pulse [Tools] (Herramientas) y, a continuación, [Internet<br />
Options] (Opciones de<br />
Internet).<br />
156<br />
Español
Español<br />
2. En la ventana [Internet Options]<br />
(Opciones de Internet), pulse<br />
la ficha [Connections] (Conexiones).<br />
A continuación, pulse<br />
el botón [LAN Settings…]<br />
(Configuración LAN...).<br />
3. Desactive todas las casillas<br />
de verificación.<br />
4. Pulse [OK] (Aceptar) y, de<br />
nuevo, [OK] (Aceptar) para<br />
cerrar la ventana [Internet<br />
Options] (Opciones de Internet).<br />
Netscape<br />
1. Abra Netscape y pulse<br />
el botón [Stop] (Detener).<br />
Pulse [Edit] (Editar)<br />
y, a continuación,<br />
[Preferences...]<br />
(Preferencias...).<br />
2. En la ventana<br />
[Preferences]<br />
(Preferencias),<br />
en [Category]<br />
(Categoría), pulse dos<br />
veces en [Advanced]<br />
(Avanzada) y luego<br />
pulse [Proxies].<br />
Seleccione [Direct<br />
connection to the<br />
Internet] (Conexión<br />
directa a Internet).<br />
Pulse [OK] (Aceptar).<br />
3. Repita los pasos en cada ordenador con Windows 95/98/Me<br />
conectado al <strong>SMC7804WBRA</strong>.<br />
157 158<br />
Español
Español<br />
3º paso. Obtener la configuración IP de <strong>SMC7804WBRA</strong><br />
Una vez configurado el ordenador para conectarlo al<br />
<strong>SMC7804WBRA</strong>, debe obtener la nueva configuración de red.<br />
Liberando la configuración IP antigua y renovándola con la nueva<br />
de <strong>SMC7804WBRA</strong> también verificará que ha configurado<br />
el ordenador correctamente.<br />
1. Pulse [Start] (Inicio) y, a<br />
continuación, [Run…] (Ejecutar...).<br />
2. Escriba WINIPCFG y pulse<br />
[OK] (Aceptar). La ventana<br />
[IP Configuration]<br />
(Configuración IP) aparece<br />
en uno o dos minutos.<br />
3. En el menú desplegable, seleccione su tarjeta de red. Pulse<br />
[Release] (Liberar) y, a continuación, [Renew] (Renovar).<br />
Compruebe que ahora la dirección IP sea 192.168.2.xxx;<br />
la máscara de subred, 255.255.255.0;<br />
y la puerta de enlace<br />
predeterminada,<br />
192.168. 2.1. Estos<br />
valores confirman que<br />
<strong>SMC7804WBRA</strong> funciona.<br />
Pulse [OK] (Aceptar)<br />
para cerrar la ventana<br />
[IP Configuration]<br />
(Configuración IP).<br />
Ahora que el ordenador ya está configurado para conectarse<br />
con el <strong>SMC7804WBRA</strong>, vaya directamente a Configuración del<br />
<strong>SMC7804WBRA</strong>.<br />
159 160<br />
Español
Español<br />
Configuración del ordenador con Windows 2000<br />
1er paso. Establecer la configuración TCP/IP<br />
Una vez terminada la instalación del hardware, hay que configurar<br />
el ordenador para conectarlo con <strong>SMC7804WBRA</strong>.<br />
1. En el escritorio de<br />
Windows, pulse el botón<br />
[Start] (Inicio).<br />
Seleccione [Settings]<br />
(Configuración) y pulse<br />
el icono [Network and<br />
Dial-Up Connections]<br />
(Conexiones de red y de acceso telefónico).<br />
2. Haga doble clic en el<br />
icono correspondiente<br />
a la conexión con<br />
el <strong>SMC7804WBRA</strong>.<br />
3. Pulse [Properties]<br />
(Propiedades).<br />
4. Haga doble clic en<br />
[Internet Protocol<br />
(TCP/IP)] (Protocolo<br />
de Internet (TCP/IP).<br />
161 162<br />
Español
Español<br />
Si [Obtain an IP address<br />
automatically] (Obtener<br />
dirección IP automáticamente)<br />
y [Obtain DNS server address<br />
automatically] (Obtener la<br />
dirección del servidor DNS<br />
automáticamente) ya están<br />
marcados, el ordenador está<br />
ya configurado para DHCP.<br />
Pulse [Cancel] (Cancelar) para<br />
cerrar todas las ventanas y<br />
vaya directamente al 2º paso,<br />
Desactivar el proxy HTTP.<br />
6. Seleccione [Obtain an IP address automatically] (Obtener<br />
dirección IP automáticamente) y, a continuación, [Obtain DNS<br />
server address automatically] (Obtener la dirección del servidor<br />
DNS automáticamente). Pulse [OK] (Aceptar) o [Close] (Cerrar)<br />
para cerrar todas las ventanas.<br />
2º paso. Desactivar el proxy HTTP<br />
Vuelva al 2º paso de la sección Configuración del ordenador en<br />
Windows 95/98/Me.<br />
3º paso. Obtener la configuración IP de <strong>SMC7804WBRA</strong><br />
Una vez configurado el ordenador para conectarlo con el<br />
<strong>SMC7804WBRA</strong>, debe obtener la nueva configuración de red.<br />
Liberando la configuración IP antigua y renovándola con la<br />
nueva de <strong>SMC7804WBRA</strong> también verificará que ha configurado<br />
el ordenador correctamente.<br />
1. En el escritorio de<br />
Windows, pulse el botón<br />
[Start] (Inicio), luego<br />
[Programs] (Programas)<br />
y, finalmente, [Command<br />
Prompt] (Símbolo del<br />
sistema).<br />
163 164<br />
Español
Español<br />
2. En la ventana del símbolo del sistema, escriba<br />
IPCONFIG/RELEASE y pulse la tecla .<br />
3. Escriba IPCONFIG/RENEW y pulse la tecla . Compruebe<br />
que ahora la dirección IP sea 192.168.2.xxx (2-254); la<br />
máscara de subred, 255.255.255.0; y la puerta de enlace<br />
predeterminada, 192.168.2.1. Estos valores confirman que<br />
<strong>SMC7804WBRA</strong> funciona.<br />
4. Escriba EXIT y pulse para cerrar la ventana del símbolo<br />
del sistema.<br />
Ahora que el ordenador ya está configurado para conectarse con<br />
el <strong>SMC7804WBRA</strong>, vaya directamente a Configuración del<br />
<strong>SMC7804WBRA</strong>.<br />
Configuración del ordenador con Windows XP<br />
1er paso. Establecer la configuración TCP/IP<br />
Una vez terminada la instalación del hardware, hay que configurar<br />
el ordenador para la conexión con <strong>SMC7804WBRA</strong>.<br />
1. En el escritorio de Windows,<br />
pulse el botón [Start] (Inicio).<br />
Seleccione [Control Panel] (Panel<br />
de control).<br />
2. Seleccione el icono<br />
[Network and Internet<br />
Connections] (Conexiones<br />
de red e Internet),<br />
luego pulse el<br />
icono [Network<br />
Connections]<br />
(Conexiones de red) y haga doble clic en el adaptador<br />
que usará para esta conexión.<br />
165 166<br />
Español
Español<br />
3. Pulse [Properties] (Propiedades).<br />
4. Haga doble clic en [Internet<br />
Protocol (TCP/IP)] (Protocolo<br />
de Internet (TCP/IP).<br />
Si [Obtain an IP address automatically] (Obtener dirección<br />
IP automáticamente) y [Obtain DNS server address automatically]<br />
(Obtener la dirección del servidor DNS automáticamente) ya están<br />
marcados, el ordenador está ya configurado para DHCP. Pulse<br />
[Cancel] (Cancelar) para cerrar todas las ventanas y vaya<br />
directamente al 2º paso, Desactivar el proxy HTTP.<br />
6. Seleccione [Obtain an<br />
IP address automatically]<br />
(Obtener dirección<br />
IP automáticamente) y,<br />
a continuación, [Obtain DNS<br />
server address automatically]<br />
(Obtener la dirección del<br />
servidor DNS automáticamente).<br />
Pulse [OK] (Aceptar) o [Close]<br />
(Cerrar) para cerrar todas las<br />
ventanas.<br />
2º paso. Desactivar el proxy HTTP<br />
Vuelva al 2º paso de la sección Configuración del ordenador en<br />
Windows 95/98/Me.<br />
3º paso. Obtener la configuración IP de <strong>SMC7804WBRA</strong><br />
Una vez configurado el ordenador para conectarlo con el<br />
<strong>SMC7804WBRA</strong>, debe obtener la nueva configuración de red.<br />
Liberando la configuración IP antigua y renovándola con la nueva<br />
de <strong>SMC7804WBRA</strong> también verificará que ha configurado el<br />
ordenador correctamente.<br />
1. En el escritorio de<br />
Windows, pulse el botón<br />
[Start] (Inicio), luego<br />
[Programs] (Programas)<br />
y, finalmente, [Command<br />
Prompt] (Símbolo del<br />
sistema).<br />
167 168<br />
Español
Español<br />
2. En la ventana del símbolo del sistema, escriba<br />
IPCONFIG/RELEASE y pulse la tecla .<br />
3. Escriba IPCONFIG/RENEW y pulse la tecla . Compruebe<br />
que ahora la dirección IP sea 192.168.2.xxx (2-254); la<br />
máscara de subred, 255.255.255.0; y la puerta de enlace<br />
predeterminada, 192.168.2.1. Estos valores confirman que<br />
<strong>SMC7804WBRA</strong> funciona.<br />
4. Escriba EXIT y pulse para cerrar la ventana del símbolo<br />
del sistema.<br />
Ahora que el ordenador ya está configurado para conectarse con el<br />
<strong>SMC7804WBRA</strong>, vaya directamente a Configuración del<br />
<strong>SMC7804WBRA</strong>.<br />
Configuración del ordenador con Windows NT 4.0<br />
1er paso. Establecer la configuración TCP/IP<br />
Una vez terminada la instalación del hardware, hay que configurar<br />
el ordenador para la conexión con <strong>SMC7804WBRA</strong>.<br />
1. En el escritorio de Windows pulse [Start] (Inicio), luego<br />
[Settings] (Configuración) y [Control Panel] (Panel de control).<br />
169 170<br />
Español
Español<br />
2. Haga doble clic en el<br />
icono [Network] (Red).<br />
3. Seleccione la ficha<br />
[Protocols] (Protocolos).<br />
4. Haga doble clic en [TCP/IP<br />
Protocol] (Protocolo TCP/IP).<br />
5. Seleccione la ficha [IP<br />
Address] (Dirección IP).<br />
6. En la lista desplegable<br />
de [Adapter] (Adaptador),<br />
compruebe que está<br />
seleccionado su adaptador<br />
Ethernet.<br />
Si [Obtain an IP address automatically] (Obtener dirección<br />
IP automáticamente) ya está marcado, el ordenador está ya<br />
configurado para DHCP. Pulse [Cancel] (Cancelar) para cerrar<br />
todas las ventanas y vaya directamente al 2º paso, Desactivar<br />
el proxy HTTP.<br />
7. Seleccione [Obtain an IP address automatically]<br />
(Obtener una dirección IP automáticamente).<br />
171 172<br />
Español
Español<br />
8. Pulse la ficha [DNS] para ver<br />
los servidores DNS primario<br />
y secundario. Elimine las<br />
direcciones DNS que<br />
aparezcan en la lista.<br />
9. Pulse [OK] (Aceptar) y, de<br />
nuevo, [OK] (Aceptar) para<br />
cerrar la ventana [Network]<br />
(Red).<br />
10. Es posible que Windows copie algunos archivos, y después le<br />
pedirá que reinicie el sistema. Pulse [Yes] (Sí) para reiniciar<br />
el ordenador.<br />
2º paso. Desactivar el proxy HTTP<br />
Vuelva al 2º paso de la sección Configuración del ordenador<br />
en Windows 95/98/Me.<br />
3º paso. Obtener la configuración IP de <strong>SMC7804WBRA</strong><br />
Una vez configurado el ordenador para conectarlo con el<br />
<strong>SMC7804WBRA</strong>, debe obtener la nueva configuración de red.<br />
Liberando la configuración IP antigua y renovándola con la nueva<br />
de <strong>SMC7804WBRA</strong> también verificará que ha configurado el<br />
ordenador correctamente.<br />
1. En el<br />
escritorio<br />
de Windows,<br />
pulse el<br />
botón [Start]<br />
(Inicio),<br />
luego<br />
[Programs]<br />
(Programas)<br />
y, finalmente,<br />
[Command<br />
Prompt]<br />
(Símbolo<br />
del sistema).<br />
173 174<br />
Español
Español<br />
2. En la ventana del símbolo del sistema, escriba<br />
IPCONFIG/RELEASE y pulse la tecla .<br />
3. Escriba IPCONFIG/RENEW<br />
y pulse la tecla . Compruebe que ahora la dirección<br />
IP sea 192.168.2.xxx; la máscara de subred, 255.255.255.0<br />
y la puerta de enlace predeterminada, 192.168.2.1. Estos<br />
valores confirman que <strong>SMC7804WBRA</strong> funciona.<br />
4. Escriba EXIT y pulse para cerrar la ventana del símbolo<br />
del sistema.<br />
Ahora que el ordenador ya está configurado para conectarse con<br />
el <strong>SMC7804WBRA</strong>, continúe con Configuración del <strong>SMC7804WBRA</strong>.<br />
Configuración de un ordenador Macintosh<br />
Puede que las instrucciones siguientes no se correspondan de<br />
forma exacta con su pantalla. Eso se debe a que estos pasos y<br />
capturas de pantalla se han creado usando Mac OS 8.5. Mac OS 7.x<br />
y posteriores son muy parecidos, pero no idénticos a Mac OS 8.5.<br />
1er paso. Establecer la configuración TCP/IP<br />
Una vez terminada la instalación del hardware, hay que configurar<br />
el ordenador para la conexión con <strong>SMC7804WBRA</strong>.<br />
1. Abra el menú [Apple]. Pulse [Control Panels]<br />
(Paneles de control) y seleccione [TCP/IP].<br />
175 176<br />
Español
Español<br />
2. En el cuadro de diálogo [TCP/IP], asegúrese de que esté<br />
seleccionado [Ethernet] en el campo [Connect Via:] (Conectar<br />
a través de:). Si [Using DHCP Server] (Usar servidor DHCP)<br />
ya está seleccionado en el campo [Configure:] (Configurar),<br />
el ordenador ya está configurado para DHCP. Cierre el cuadro<br />
de diálogo [TCP/IP],<br />
y vaya directamente<br />
al 2º paso. Desactivar<br />
el proxy HTTP.<br />
3. Seleccione [Using DHCP Server] (Usar servidor DHCP) en<br />
el campo [Configure] (Configurar) y cierre la ventana.<br />
4. Aparece otro cuadro<br />
en el que se pregunta<br />
si desea guardar la<br />
configuración TCP/IP.<br />
Pulse [Save] (Guardar).<br />
2º paso. Desactivar el proxy HTTP<br />
Tendrá que verificar que el proxy HTTP de su navegador esté<br />
desactivado para que su navegador pueda ver las páginas de<br />
configuración dentro de su <strong>SMC7804WBRA</strong>. A continuación,<br />
se indican los pasos para Internet Explorer y Netscape. Siga<br />
los pasos según el navegador que utilice.<br />
Internet Explorer<br />
1. Abra Internet Explorer y pulse el<br />
botón [Stop] (Detener). Pulse [Edit]<br />
(Edición) y seleccione [Preferences...]<br />
(Preferencias...).<br />
177 178<br />
Español
Español<br />
2. En el apartado [Network] (Red) de la ventana [Preferences...]<br />
(Preferencias...) de Internet Explorer, seleccione [Proxies].<br />
3. Desmarque todas las casillas de verificación y pulse [OK]<br />
(Aceptar).<br />
Netscape<br />
1. Abra Netscape y pulse el botón<br />
[Stop] (Detener). Pulse [Edit]<br />
(Edición) y seleccione<br />
[Preferences...] (Preferencias...).<br />
2. Seleccione [Advanced]<br />
(Avanzada) en la<br />
columna [Category]<br />
(Categoría) situada<br />
a la izquierda del<br />
cuadro de diálogo<br />
[Preferences...]<br />
(Preferencias...).<br />
En la categoría<br />
[Advanced]<br />
(Avanzada),<br />
seleccione [Proxies].<br />
3. Seleccione [Direct Connection to the Internet]<br />
(Conexión directa a Internet) y pulse [OK] (Aceptar).<br />
179 180<br />
Español
Español<br />
3º paso. Obtener la configuración IP de <strong>SMC7804WBRA</strong><br />
Una vez configurado el ordenador para conectarlo con el<br />
<strong>SMC7804WBRA</strong>, debe obtener la nueva configuración de red.<br />
Liberando la configuración IP antigua y renovándola con la nueva<br />
de <strong>SMC7804WBRA</strong> también verificará que ha configurado el<br />
ordenador correctamente.<br />
1. Abra el menú [Apple]. Pulse [Control Panels]<br />
(Paneles de control) y seleccione<br />
[TCP/IP].<br />
2. En la ventana [TCP/IP] aparece la nueva configuración.<br />
Compruebe que ahora la dirección IP sea 192.168.2.xxx;<br />
la máscara de subred, 255.255.255.0 y la puerta de enlace<br />
predeterminada, 192.168.2.1. Estos valores confirman que<br />
<strong>SMC7804WBRA</strong> funciona.<br />
3. Cierre la ventana [TCP/IP].<br />
Ahora que el ordenador ya está configurado para conectarse con<br />
el <strong>SMC7804WBRA</strong>, vaya directamente a Configuración del<br />
<strong>SMC7804WBRA</strong>.<br />
181 182<br />
Español
Español<br />
Configuración del <strong>SMC7804WBRA</strong><br />
Una vez configurado correctamente el ordenador y recuperada<br />
la nueva configuración de red del <strong>SMC7804WBRA</strong>, ya puede<br />
establecer la configuración del <strong>SMC7804WBRA</strong> para su proveedor<br />
de servicios de Internet.<br />
1. Abra su navegador de Internet (p. ej., Internet Explorer<br />
o Netscape Navigator) y pulse el botón [Stop] (Detener).<br />
2. En el campo [Address] (Dirección) escriba http://192.168.2.1<br />
y pulse .<br />
Nota: En algunos navegadores quizá sea necesario incluir :88<br />
después de la dirección IP. Por ejemplo,<br />
http://192.168.2.1:88<br />
3. Aparecerá la pantalla de conexión del <strong>SMC7804WBRA</strong>. Escriba<br />
la contraseña predeterminada y pulse [Login] (Conexión).<br />
La contraseña predeterminada de admin es smcadmin.<br />
Por cuestiones de seguridad debería cambiar esta<br />
contraseña lo antes posible.<br />
Tenga en cuenta que la<br />
contraseña de inicio de sesión<br />
distingue mayúsculas<br />
de minúsculas.<br />
4. En la página principal de la web del <strong>SMC7804WBRA</strong>, pulse<br />
[Setup Wizard] (Asistente de configuración). El proceso<br />
automático de configuración del <strong>SMC7804WBRA</strong><br />
le guiará paso a paso<br />
en la configuración<br />
su puerta de enlace.<br />
183 184<br />
Español
Español<br />
5. Seleccione su zona horaria de la lista. Si quiere sincronizar<br />
automáticamente su router ADSL con un servidor horario<br />
público, marque la casilla [Enable Automatic Time Server<br />
Maintenance] (Activar mantenimiento automático con el<br />
servidor horario). Seleccione el servidor que desee del<br />
menú desplegable.<br />
6. Pulse [NEXT] (Siguiente) para continuar y pasar a la página<br />
de parámetros de ADSL.<br />
7. Seleccione el país y el proveedor de servicios de Internet.<br />
El <strong>SMC7804WBRA</strong> se configurará automáticamente con los<br />
parámetros de protocolo, encapsulación y VPI/VCI correctos<br />
para su proveedor de servicios de Internet.<br />
Si su país o su proveedor no aparecen en la lista, tendrá que<br />
configurar manualmente los parámetros para su proveedor.<br />
Vaya directamente a la sección El país o el proveedor de servicios<br />
de Internet no aparecen en la lista.<br />
8. Escriba su nombre de usuario, su contraseña y la dirección<br />
del servidor DNS de su proveedor de servicios de Internet.<br />
Si su proveedor de servicios de Internet utiliza el protocolo<br />
RFC1483 Routed o Bridged no se requiere nombre de usuario<br />
ni contraseña. Para el protocolo RFC1483 Routed, tendrá que<br />
escribir la dirección IP, la máscara de subred, la puerta de enlace<br />
predeterminada y la dirección del servidor DNS que le haya<br />
proporcionado su proveedor.<br />
Nota: La dirección predeterminada del servidor DNS es<br />
192.168.2.1; debe cambiarla para que refleje la dirección<br />
del servidor DNS de su proveedor de servicios de Internet.<br />
185 186<br />
Español
Español<br />
9. Pulse [Next] (Siguiente) para continuar y confirmar<br />
los parámetros.<br />
10. Si son correctos pulse [Apply] (Aplicar) para guardarlos.<br />
Su <strong>SMC7804WBRA</strong> ya está configurado. Vaya a la sección<br />
Resolución de problemas de la Guía del usuario si no puede<br />
conectarse a Internet.<br />
El país o el proveedor de servicios de Internet no aparecen<br />
en la lista<br />
Si su país o su proveedor no aparecen en la lista, tendrá que<br />
configurar manualmente los parámetros para su proveedor.<br />
Seleccione [Others] (Otros) en la lista desplegable.<br />
Para realizar la configuración manual, debe saber cuales son los<br />
parámetros de protocolo, encapsulación y VPI/VCI que utiliza su<br />
proveedor. Si tiene una dirección de IP estática, también necesita<br />
saber la dirección IP, la submáscara de red y la dirección de<br />
puerta de enlace predeterminada. Póngase en contacto con su<br />
proveedor, para que le proporcione esta información si no la tiene.<br />
187 188<br />
Español
Español<br />
Seleccione el protocolo que utiliza su proveedor de la lista<br />
desplegable de proveedores de servicios de Internet.<br />
El proveedor utiliza PPPoA/PPPoE<br />
Escriba el nombre de usuario, la contraseña, la dirección del<br />
servidor DNS y los números de circuitos VPI/VCI proporcionados<br />
por su proveedor.<br />
Pulse [Next] (Siguiente)<br />
para continuar<br />
y confirmar los<br />
parámetros.<br />
Si son correctos pulse [Apply] (Aplicar) para guardarlos.<br />
Su <strong>SMC7804WBRA</strong> ya<br />
está configurado. Vaya<br />
a la sección Resolución<br />
de problemas de la Guía<br />
del usuario si no puede<br />
conectarse a Internet.<br />
189 190<br />
Español
Español<br />
El proveedor utiliza RFC1483 Routing<br />
Escriba la dirección IP, la submáscara de red, la puerta de enlace<br />
predeterminada, la dirección del servidor DNS y los números<br />
de circuitos VPI/VCI proporcionados por su proveedor.<br />
Pulse [Next]<br />
(Siguiente) para<br />
continuar y confirmar<br />
los parámetros.<br />
Si son correctos pulse [Apply] (Aplicar) para guardarlos.<br />
Su <strong>SMC7804WBRA</strong><br />
ya está configurado.<br />
Vaya a la sección<br />
Resolución de<br />
problemas de la<br />
Guía del usuario si<br />
no puede conectarse<br />
a Internet.<br />
El proveedor utiliza RFC1483 Bridging<br />
Escriba la dirección del servidor DNS y los números de circuitos<br />
VPI/VCI proporcionados por su proveedor. Si tiene una dirección<br />
de IP fija, también tendrá que escribir la dirección de IP,<br />
la submáscara de red y la dirección de puerta de enlace<br />
predeterminada proporcionadas por su proveedor.<br />
Nota: Puede seleccionar 3 modos diferentes de configuración<br />
de bridge.<br />
191 192<br />
Español
Español<br />
193<br />
[RFC1483 Bridging]<br />
Seleccione esta opción si quiere que el <strong>SMC7804WBRA</strong> sea<br />
transparente y pase la dirección IP pública a un sólo PC, servidor<br />
o firewall.<br />
[RFC1483 Bridging DHCP]<br />
Seleccione esta opción si desea compartir la conexión con varios<br />
PC (la configuración más usual).<br />
[RFC1483 Bridging FixIP]<br />
Seleccione esta opción si su proveedor de servicios de Internet<br />
le ha dado una dirección IP estática.<br />
Pulse [Next] (Siguiente) para continuar y confirmar los<br />
parámetros.<br />
Si son correctos pulse<br />
[Apply] (Aplicar) para<br />
guardarlos.<br />
Su <strong>SMC7804WBRA</strong><br />
ya está configurado.<br />
Vaya a la sección<br />
Resolución de<br />
problemas de la<br />
Guía del usuario<br />
si no puede<br />
conectarse a Internet.<br />
Introduzione<br />
Barricade TM g ADSL di SMC, <strong>SMC7804WBRA</strong> è un router a banda<br />
larga wireless 54 Mbps con modem ADSL (Appendice A)<br />
incorporato. Questo prodotto è progettato per la condivisione<br />
dell’accesso Internet e per fornire protezione e periferiche di rete<br />
multiple per svariate tipologie di utenti. La semplicità di<br />
installazione e configurazione di <strong>SMC7804WBRA</strong> consentono<br />
l’esecuzione di queste operazioni anche agli utenti meno esperti,<br />
fornendo al contempo ai professionisti della rete funzioni avanzate<br />
facili da configurare. Consultare il Manuale dell’utente per<br />
informazioni sulle funzioni avanzate del prodotto.<br />
194<br />
Italiano
Italiano<br />
Contenuto della confezione<br />
• Un BarricadeTM g ADSL.<br />
• Un adattatore di corrente.<br />
• Un CD contenente la documentazione completa.<br />
• Un cavo Fast Ethernet di categoria 5.<br />
• Un cavo di collegamento telefonico (RJ-11).<br />
• Un sdoppiatore fornito in dotazione (solo con i modelli destinati<br />
a Paesi Bassi, Francia e Regno Unito).<br />
• Un kit di connessione telefonica (solo con i modelli destinati<br />
ai Paesi Bassi).<br />
Requisiti per l’installazione<br />
Prima di procedere all’installazione di <strong>SMC7804WBRA</strong>, verificare<br />
di disporre dei seguenti elementi:<br />
• Linea ADSL installata dall’ISP.<br />
• Filtro/sdoppiatore ADSL.<br />
• Computer dotato di scheda di rete 10/100 Mbps o scheda di rete<br />
wireless IEEE802.11g.<br />
• Protocolli TCP/IP installati su ciascun computer che accederà<br />
ad Internet.<br />
• Browser Web con supporto Java, ad esempio Microsoft Internet<br />
Explorer 5.0 o versione superiore.<br />
• CD di Windows, qualora il sistema operativo in uso sul computer<br />
fosse Windows 95, 98, o Me.<br />
195 196<br />
Italiano
Italiano<br />
197<br />
Hardware<br />
Il pannello anteriore di <strong>SMC7804WBRA</strong> comprende indicatori LED<br />
che semplificano il monitoraggio.<br />
La tabella riportata di seguito descrive la funzione di ciascun LED.<br />
LED Stato Descrizione<br />
PWR (Alim.) Acceso Barricade TM è alimentato.<br />
Funzionamento normale.<br />
Spento Unità spenta o interruzione<br />
di corrente.<br />
ADSL Sync Acceso La connessione ADSL è sincronizzata.<br />
Lampeggiante Barricade sta stabilendo un<br />
collegamento ADSL.<br />
Spento Connessione ADSL non stabilita.<br />
ADSL Data Lampeggiante La porta ADSL indicata sta inviando<br />
(Dati ADSL) o ricevendo dati.<br />
WLAN Spento Nessun trasferimento dati in corso.<br />
Lampeggiante La porta WLAN indicata sta inviando<br />
o ricevendo dati.<br />
Ethernet Acceso Connessione Ethernet stabilita.<br />
(4LEDs)<br />
Lampeggiante La porta LAN indicata sta inviando<br />
o ricevendo dati.<br />
Spento Nessuna connessione LAN sulla<br />
porta.<br />
Collegamento delle periferiche<br />
Porte LAN Pulsante Reset (Reimposta) Porta WAN<br />
Ingresso alimentazione<br />
1. Collegare i computer direttamente a <strong>SMC7804WBRA</strong> sulle porte<br />
1-4 del pannello posteriore. Se si devono collegare più di 4<br />
computer, collegare un hub o uno switch e collegarvi i computer<br />
aggiuntivi. Per eseguire un collegamento wireless, consultare<br />
il Manuale dell’utente per informazioni sulla scheda wireless.<br />
2. Collegare il cavo RJ-11 fornito dal filtro/sdoppiatore ADSL alla<br />
porta WAN ADSL di <strong>SMC7804WBRA</strong>.<br />
3. Inserire il cavo di alimentazione nel jack di alimentazione.<br />
198<br />
Italiano
Italiano<br />
Configurazione del computer<br />
La presente guida rapida all’installazione fornisce le istruzioni di<br />
configurazione per Windows 95, 98, Me, NT 4.0, 2000 e XP, nonché<br />
per Macintosh OS 7.x e versioni successive. Verificare di seguire<br />
le istruzioni che corrispondono al proprio sistema operativo.<br />
• Configurazione del computer con Windows 95/98/Me.<br />
• Configurazione del computer con Windows 2000.<br />
• Configurazione del computer con Windows XP.<br />
• Configurazione del computer con Windows NT 4.0.<br />
• Configurazione di un computer Macintosh.<br />
Configurazione del computer con Windows 95/98/Me<br />
È possibile che le informazioni fornite in questa sezione non<br />
corrispondano perfettamente alla versione di Windows in uso.<br />
Infatti, le procedure e le schermate di esempio illustrate sono<br />
relative a Windows 98. Windows 95 e Windows Me sono molto<br />
simili, ma non identici a Windows 98.<br />
Passaggio 1. Configurazione delle impostazioni TCP/IP<br />
Dopo aver completato la configurazione dell’hardware collegando<br />
le periferiche, è necessario configurare il computer per il<br />
collegamento a <strong>SMC7804WBRA</strong>.<br />
1. Dal desktop di Windows,<br />
fare clic sul pulsante<br />
[Start]. Scegliere<br />
[Settings] (Impostazioni),<br />
quindi fare<br />
clic su [Control Panel]<br />
(Pannello di controllo).<br />
199 200<br />
Italiano
Italiano<br />
2. Da [Control Panel] (Pannello di controllo), fare doppio clic<br />
sull’icona [Network] (Rete).<br />
3. Nella scheda [Configuration]<br />
(Configurazione) della finestra<br />
[Network] (Rete), fare doppio<br />
clic su [TCP/IP] nell’elenco<br />
relativo alla propria scheda<br />
di rete.<br />
4. Selezionare la scheda<br />
[IP Address] (Indirizzo IP).<br />
Se [Obtain an IP address automatically] (Ottieni automaticamente<br />
un indirizzo IP) è già selezionato, il computer è già configurato<br />
per DHCP. Fare clic su [Cancel] (Annulla) per chiudere ciascuna<br />
finestra, quindi passare al passaggio 2 Disattivazione del<br />
proxy HTTP.<br />
5. Fare clic su [Obtain an IP address] (Ottieni un indirizzo IP).<br />
201 202<br />
Italiano
Italiano<br />
6. Fare clic sulla scheda [Gateway]<br />
ed eliminare i numeri elencati<br />
in [Installed gateways] (Gateway<br />
installati).<br />
7. Fare clic sulla scheda [DNS<br />
Configuration] (Configurazione<br />
DNS) e successivamente su<br />
[Disable DNS] (Disattiva DNS).<br />
8. Fare clic su [OK].<br />
9. Potrebbe essere<br />
necessario il CD di<br />
Windows 95/98/Me per<br />
la copia di alcuni file.<br />
Al termine della copia,<br />
verrà richiesto di riavviare il sistema.<br />
Fare clic su [Yes] (Sì) e il computer verrà spento e riavviato.<br />
Passaggio 2. Disattivazione del proxy HTTP<br />
È necessario verificare che la funzione HTTP Proxy (Proxy HTTP)<br />
del browser sia disattivata, affinché il browser stesso sia in<br />
grado di visualizzare le pagine di configurazione all’interno di<br />
<strong>SMC7804WBRA</strong>. I passaggi descritti di seguito si riferiscono<br />
ad Internet Explorer e Netscape. In base al browser utilizzato,<br />
attenersi alla procedura appropriata.<br />
Internet Explorer<br />
1. Avviare Internet Explorer e fare clic sul pulsante [Stop]<br />
(Termina) . Fare clic su [Tools] (Strumenti)<br />
e successivamente su<br />
[Internet Options]<br />
(Opzioni Internet).<br />
203 204<br />
Italiano
Italiano<br />
2. Nella finestra [Internet Options]<br />
(Opzioni Internet), selezionare<br />
la scheda [Connections]<br />
(Connessioni). Quindi, fare clic<br />
sul pulsante [LAN Settings…]<br />
(Impostazioni LAN...).<br />
3. Deselezionare tutte le caselle<br />
di controllo.<br />
4. Fare clic su [OK], quindi<br />
nuovamente su [OK] per<br />
chiudere la finestra [Internet<br />
Options] (Opzioni Internet).<br />
Netscape<br />
1. Avviare Netscape e fare<br />
clic sul pulsante [Stop]<br />
(Termina). Fare clic su [Edit]<br />
(Modifica) e successivamente<br />
su [Preferences…]<br />
(Preferenze...).<br />
2. Nella finestra<br />
[Preferences]<br />
(Preferenze),<br />
sotto [Category]<br />
(Categoria),<br />
fare doppio clic<br />
su [Advanced]<br />
(Avanzate)<br />
e successivamente<br />
su [Proxies] (Proxy).<br />
Selezionare [Direct<br />
connection to the<br />
Internet] (Connessione diretta a Internet).<br />
Fare clic su [OK].<br />
3. Ripetere questi passaggi per ciascun computer<br />
Windows 95/98/Me collegato a <strong>SMC7804WBRA</strong>.<br />
205 206<br />
Italiano
Italiano<br />
Passaggio 3. Individuazione delle impostazioni IP<br />
da <strong>SMC7804WBRA</strong><br />
A questo punto, dopo aver configurato il computer per il<br />
collegamento a <strong>SMC7804WBRA</strong>, è necessario ottenere nuove<br />
impostazioni di rete. Rilasciando tutte le precedenti impostazioni<br />
IP e rinnovandole con le impostazioni di <strong>SMC7804WBRA</strong>,<br />
sarà anche possibile verificare che il computer sia stato<br />
configurato correttamente.<br />
1. Fare clic su [Start] e successivamente<br />
su [Run…] (Esegui...).<br />
2. Immettere WINIPCFG e fare<br />
clic su [OK]. Entro uno o due<br />
miniti verrà visualizzata la<br />
finestra [IP Configuration]<br />
(Configurazione IP).<br />
3. Selezionare la scheda di rete dal menu a discesa. Fare clic su<br />
[Release] (Rilascia) e quindi su [Renew] (Rinnova). Verificare<br />
che l’indirizzo IP sia ora 192.168.2.xxx, la Subnet mask sia<br />
255.255.255.0 e il Gateway predefinito sia 192.168. 2.1. Questi<br />
valori confermano che <strong>SMC7804WBRA</strong> è in funzione. Fare clic<br />
su [OK] per chiudere la finestra [IP Configuration]<br />
(Configurazione IP).<br />
Ora che il computer<br />
è configurato per il<br />
collegamento a <strong>SMC7804WBRA</strong>,<br />
passare alla sezione<br />
Configurazione di<br />
<strong>SMC7804WBRA</strong>.<br />
207 208<br />
Italiano
Italiano<br />
Configurazione del computer con Windows 2000<br />
Passaggio 1. Configurazione delle impostazioni TCP/IP<br />
Dopo aver completato la configurazione dell’hardware, è necessario<br />
configurare il computer per il collegamento a <strong>SMC7804WBRA</strong>.<br />
1. Dal desktop di Windows,<br />
fare clic sul pulsante<br />
[Start]. Selezionare<br />
[Settings] (Impostazioni),<br />
dopo di che fare clic<br />
sull’icona [Network and<br />
Dial-Up Connections]<br />
(Rete e connessioni remote).<br />
2. Fare doppio clic<br />
sull’icona che<br />
corrisponde al<br />
collegamento<br />
a <strong>SMC7804WBRA</strong>.<br />
3. Fare clic su [Properties]<br />
(Proprietà).<br />
4. Fare doppio clic su<br />
[Internet Protocol<br />
(TCP/IP)] (Protocollo<br />
Internet (TCP/IP)).<br />
209 210<br />
Italiano
Italiano<br />
Se [Obtain an IP address<br />
automatically] (Ottieni<br />
automaticamente un indirizzo<br />
IP) e [Obtain DNS server<br />
address automatically] (Ottieni<br />
un indirizzo server DNS<br />
automaticamente) sono già<br />
selezionati, il computer è già<br />
configurato per DHCP. Fare<br />
clic su [Cancel] (Annulla) per<br />
chiudere ciascuna finestra,<br />
quindi passare al passaggio 2<br />
Disattivazione del proxy HTTP.<br />
6. Selezionare [Obtain an IP address automatically] (Ottieni<br />
automaticamente un indirizzo IP), quindi selezionare [Obtain<br />
DNS server address automatically] (Ottieni un indirizzo server<br />
DNS automaticamente). Fare clic su [OK] o [Close] (Chiudi)<br />
per chiudere ciascuna finestra.<br />
Passaggio 2. Disattivazione del proxy HTTP<br />
Tornare al passaggio 2 Configurazione del computer in<br />
Windows 95/98/Me.<br />
Passaggio 3. Individuazione delle impostazioni IP<br />
da <strong>SMC7804WBRA</strong><br />
A questo punto, dopo aver configurato il computer per il<br />
collegamento a <strong>SMC7804WBRA</strong>, è necessario ottenere nuove<br />
impostazioni di rete. Rilasciando tutte le precedenti impostazioni<br />
IP e rinnovandole con le impostazioni di <strong>SMC7804WBRA</strong>, sarà<br />
anche possibile verificare che il computer sia stato configurato<br />
correttamente.<br />
1. Dal desktop di Windows,<br />
fare clic sul pulsante<br />
[Start], quindi<br />
selezionare [Programs]<br />
(Programmi), [Accessories]<br />
(Accessori) e fare<br />
clic su [Command<br />
Prompt] (Prompt<br />
dei comandi).<br />
211 212<br />
Italiano
Italiano<br />
2. Nella finestra [Command Prompt] (Prompt dei comandi),<br />
immettere IPCONFIG/RELEASE e premere il tasto <br />
(INVIO).<br />
3. Immettere IPCONFIG/RENEW e premere il tasto <br />
(INVIO). Verificare che l’indirizzo IP sia ora 192.168.2.xxx<br />
(2-254), la Subnet Mask sia 255.255.255.0 e il Gateway<br />
predefinito sia 192.168.2.1. Questi valori confermano che<br />
<strong>SMC7804WBRA</strong> è in funzione.<br />
4. Immettere EXIT e premere (INVIO) per chiudere<br />
la finestra [Command Prompt] (Prompt dei comandi).<br />
Ora che il computer è configurato per il collegamento<br />
a <strong>SMC7804WBRA</strong>, passare alla sezione Configurazione<br />
di <strong>SMC7804WBRA</strong>.<br />
Configurazione del computer con Windows XP<br />
Passaggio 1. Configurazione delle impostazioni TCP/IP<br />
Dopo aver completato la configurazione dell’hardware, è necessario<br />
configurare il computer per il collegamento a <strong>SMC7804WBRA</strong>.<br />
1. Dal desktop di Windows, fare clic<br />
sul pulsante [Start]. Scegliere<br />
[Control Panel] (Pannello di<br />
controllo).<br />
2. Selezionare l’icona [Network<br />
and Internet Connections] (Rete<br />
e connessioni Internet), quindi<br />
fare clic sull’icona [Network<br />
Connections] (Connessioni<br />
di rete) e fare doppio clic<br />
sulla scheda in uso per la<br />
connessione.<br />
213 214<br />
Italiano
Italiano<br />
3. Fare clic su [Properties]<br />
(Proprietà).<br />
4. Fare doppio clic su [Internet<br />
Protocol (TCP/IP)] (Protocollo<br />
Internet (TCP/IP)).<br />
Se [Obtain an IP address automatically] (Ottieni automaticamente<br />
un indirizzo IP) e [Obtain DNS server address automatically]<br />
(Ottieni un indirizzo server DNS automaticamente) sono già<br />
selezionati, il computer è già configurato per DHCP. Fare clic<br />
su [Cancel] (Annulla) per chiudere ciascuna finestra, quindi<br />
passare al passaggio 2 Disattivazione del proxy HTTP.<br />
6. Selezionare [Obtain an<br />
IP address automatically]<br />
(Ottieni automaticamente un<br />
indirizzo IP), quindi selezionare<br />
[Obtain DNS server address<br />
automatically] (Ottieni<br />
un indirizzo server DNS<br />
automaticamente). Fare clic<br />
su [OK] o [Close] (Chiudi) per<br />
chiudere ciascuna finestra.<br />
Passaggio 2. Disattivazione del proxy HTTP<br />
Tornare al passaggio 2 della Configurazione del computer<br />
in Windows 95/98/Me.<br />
Passaggio 3. Individuazione delle impostazioni IP<br />
da <strong>SMC7804WBRA</strong><br />
A questo punto, dopo aver configurato il computer per il<br />
collegamento a <strong>SMC7804WBRA</strong>, è necessario ottenere nuove<br />
impostazioni di rete. Rilasciando tutte le precedenti impostazioni<br />
IP e rinnovandole con le impostazioni di <strong>SMC7804WBRA</strong>, sarà<br />
anche possibile verificare che il computer sia stato configurato<br />
correttamente.<br />
1. Dal desktop di Windows,<br />
fare clic sul pulsante<br />
[Start], quindi selezionare<br />
[Programs] (Programmi),<br />
[Accessories]<br />
(Accessori) e fare clic<br />
su [Command Prompt]<br />
(Prompt dei comandi).<br />
215 216<br />
Italiano
Italiano<br />
2. Nella finestra [Command Prompt] (Prompt dei comandi),<br />
immettere IPCONFIG/RELEASE e premere il tasto <br />
(INVIO).<br />
3. Immettere IPCONFIG/RENEW e premere il tasto <br />
(INVIO). Verificare che l’indirizzo IP sia ora 192.168.2.xxx<br />
(2-254), la Subnet Mask sia 255.255.255.0 e il Gateway<br />
predefinito sia 192.168.2.1. Questi valori confermano<br />
che <strong>SMC7804WBRA</strong> è in funzione.<br />
4. Immettere EXIT e premere (INVIO) per chiudere<br />
la finestra [Command Prompt] (Prompt dei comandi).<br />
Ora che il computer è configurato per il collegamento<br />
a <strong>SMC7804WBRA</strong>, passare alla sezione Configurazione<br />
di <strong>SMC7804WBRA</strong>.<br />
Configurazione del computer con Windows NT 4.0<br />
Passaggio 1. Configurazione delle impostazioni TCP/IP<br />
Dopo aver completato la configurazione dell’hardware, è necessario<br />
configurare il computer per il collegamento a <strong>SMC7804WBRA</strong>.<br />
1. Dal desktop di Windows, fare clic su [Start], quindi<br />
su [Settings] (Impostazioni) e infine su [Control Panel]<br />
(Pannello di controllo).<br />
217 218<br />
Italiano
Italiano<br />
2. Fare doppio clic sull’icona<br />
[Network] (Rete).<br />
3. Selezionare la scheda<br />
[Protocols] (Protocolli).<br />
4. Fare doppio clic su [TCP/IP<br />
Protocol] (Protocollo TCP/IP).<br />
5. Selezionare la scheda<br />
[IP Address] (Indirizzo IP).<br />
6. Nell’elenco a discesa<br />
[Adapter] (Schede),<br />
accertarsi che sia selezionata<br />
la scheda Ethernet in uso.<br />
Se [Obtain an IP address automatically] (Ottieni automaticamente<br />
un indirizzo IP) è già selezionato, il computer è già configurato<br />
per DHCP. Fare clic su [Cancel] (Annulla) per chiudere ciascuna<br />
finestra, quindi passare al passaggio 2 Disattivazione del<br />
proxy HTTP.<br />
7. Selezionare [Obtain an IP address] (Ottieni un indirizzo IP).<br />
219 220<br />
Italiano
Italiano<br />
8. Fare clic sulla scheda [DNS]<br />
per visualizzare il DNS primario<br />
e secondario. Eliminare gli<br />
indirizzi DNS presenti in elenco.<br />
9. Fare clic su [OK] e successivamente<br />
di nuovo su [OK]<br />
per chiudere la finestra<br />
[Network] (Rete).<br />
10. Windows potrebbe copiare alcuni file, quindi richiedere il<br />
riavvio del sistema. Fare clic su [Yes] (Sì) e il computer verrà<br />
spento e riavviato.<br />
Passaggio 2. Disattivazione del proxy HTTP<br />
Tornare al passaggio 2 della Configurazione del computer<br />
in Windows 95/98/Me.<br />
Passaggio 3. Individuazione delle impostazioni IP da<br />
<strong>SMC7804WBRA</strong><br />
A questo punto, dopo aver configurato il computer per il<br />
collegamento a <strong>SMC7804WBRA</strong>, è necessario ottenere nuove<br />
impostazioni di rete. Rilasciando tutte le precedenti impostazioni<br />
IP e rinnovandole con le impostazioni di <strong>SMC7804WBRA</strong>, sarà<br />
anche possibile verificare che il computer sia stato configurato<br />
correttamente.<br />
1. Dal desktop<br />
di Windows,<br />
fare clic<br />
sul pulsante<br />
[Start],<br />
quindi su<br />
[Programs]<br />
(Programmi)<br />
e selezionare<br />
[Command<br />
Prompt]<br />
(Prompt dei<br />
comandi).<br />
221 222<br />
Italiano
Italiano<br />
2. Nella finestra [Command Prompt] (Prompt dei comandi),<br />
immettere IPCONFIG/RELEASE e premere il tasto <br />
(INVIO).<br />
3. Immettere IPCONFIG/RENEW e premere il tasto <br />
(INVIO). Verificare che l’indirizzo IP sia ora 192.168.2.xxx,<br />
la subnet mask sia 255.255.255.0 e il gateway predefinito<br />
sia 192.168.2.1. Questi valori confermano che <strong>SMC7804WBRA</strong><br />
è in funzione.<br />
4. Immettere EXIT e premere (INVIO) per chiudere<br />
la finestra [Command Prompt] (Prompt dei comandi).<br />
Ora che il computer è configurato per il collegamento<br />
a <strong>SMC7804WBRA</strong>, passare continuare con la Configurazione<br />
di <strong>SMC7804WBRA</strong>.<br />
Configurazione di un computer Macintosh<br />
È possibile che le informazioni fornite in questa sezione non<br />
corrispondano perfettamente alla schermata visualizzata.<br />
Infatti, questi passaggi e schermate di esempio sono stati creati<br />
utilizzando Mac OS 8.5. Mac OS 7.x e le versioni successive sono<br />
molto simili, ma non identiche a Mac OS 8.5.<br />
Passaggio 1. Configurazione delle impostazioni TCP/IP<br />
Dopo aver completato la configurazione dell’hardware, è necessario<br />
configurare il computer per il collegamento a <strong>SMC7804WBRA</strong>.<br />
1. Visualizzare il menu a discesa [Apple]. Fare clic su [Control<br />
Panels] (Pannelli di controllo) e selezionare [TCP/IP].<br />
223 224<br />
Italiano
Italiano<br />
2. Accertarsi che, nella finestra di dialogo [TCP/IP], sia<br />
selezionato [Ethernet] nel campo [Connect Via:] (Connetti<br />
tramite:). Se nel campo [Configure:] (Configura:) è già<br />
selezionato [Using DHCP Server] (Utilizzo del server DHCP),<br />
il computer è già configurato per DHCP. Chiudere la finestra<br />
di dialogo [TCP/IP]<br />
e passare al passaggio 2<br />
Disattivazione del<br />
proxy HTTP.<br />
3. Selezionare l’opzione [Using DHCP Server] (Utilizzo del server<br />
DHCP) nel campo [Configure] (Configura) e chiudere la finestra.<br />
4. Viene visualizzata<br />
un’altra finestra di<br />
dialogo in cui viene<br />
richiesto di salvare<br />
le impostazioni TCP/IP.<br />
Fare clic su [Save]<br />
(Salva).<br />
Passaggio 2. Disattivazione del proxy HTTP<br />
È necessario verificare che la funzione HTTP Proxy (Proxy HTTP)<br />
del browser sia disattivata, affinché il browser stesso sia in<br />
grado di visualizzare le pagine di configurazione all’interno<br />
di <strong>SMC7804WBRA</strong>. I passaggi descritti di seguito si riferiscono<br />
ad Internet Explorer e Netscape. In base al browser utilizzato,<br />
attenersi alla procedura appropriata.<br />
Internet Explorer<br />
1. Avviare Internet Explorer e fare clic<br />
sul pulsante [Stop] (Termina). Fare<br />
clic su [Edit] (Modifica) e selezionare<br />
[Preferences...] (Preferenze...).<br />
225 226<br />
Italiano
Italiano<br />
2. Nella finestra [Preferences...] (Preferenze...) di Internet<br />
Explorer, in [Network] (Rete), selezionare [Proxies] (Proxy).<br />
3. Deselezionare tutte le caselle di controllo e fare clic su [OK].<br />
Netscape<br />
1. Avviare Netscape e fare clic sul<br />
pulsante [Stop] (Termina). Fare clic<br />
su [Edit] (Modifica) e selezionare<br />
[Preferences...] (Preferenze...).<br />
2. Nella finestra di<br />
dialogo [Preferences...]<br />
(Preferenze...), nella<br />
colonna di sinistra<br />
denominata [Category]<br />
(Categoria), selezionare<br />
l’opzione [Advanced]<br />
(Avanzate). Nella<br />
categoria [Advanced]<br />
(Avanzate), selezionare<br />
”Proxies” (Proxy).<br />
3. Selezionare [Direct Connection to the Internet]<br />
(Connessione diretta a Internet) e fare clic su [OK].<br />
227 228<br />
Italiano
Italiano<br />
Passaggio 3. Individuazione delle impostazioni IP<br />
da <strong>SMC7804WBRA</strong><br />
A questo punto, dopo aver configurato il computer per il<br />
collegamento a <strong>SMC7804WBRA</strong>, è necessario ottenere nuove<br />
impostazioni di rete. Rilasciando tutte le precedenti impostazioni<br />
IP e rinnovandole con le impostazioni di <strong>SMC7804WBRA</strong>, sarà<br />
anche possibile verificare che il computer sia stato configurato<br />
correttamente.<br />
1. Visualizzare il menu a discesa<br />
[Apple]. Fare clic su [Control<br />
Panels] (Pannelli di controllo)<br />
e selezionare [TCP/IP].<br />
2. Nella finestra [TCP/IP], verranno visualizzate le nuove<br />
impostazioni. Verificare che l’indirizzo IP sia ora 192.168.2.xxx,<br />
la subnet mask sia 255.255.255.0 e il gateway predefinito sia<br />
192.168.2.1. Questi valori confermano che <strong>SMC7804WBRA</strong> è in<br />
funzione.<br />
3. Chiudere la finestra [TCP/IP].<br />
Ora che il computer è configurato per il collegamento<br />
a <strong>SMC7804WBRA</strong>, passare alla sezione Configurazione<br />
di <strong>SMC7804WBRA</strong>.<br />
229 230<br />
Italiano
Italiano<br />
Configurazione di <strong>SMC7804WBRA</strong><br />
Ora che la configurazione del computer e il recupero delle nuove<br />
impostazioni di reti da <strong>SMC7804WBRA</strong> sono riusciti, tutto è pronto<br />
per la configurazione delle impostazioni di <strong>SMC7804WBRA</strong> per<br />
l’ISP.<br />
1. Avviare il browser Web (Internet Explorer o Netscape Navigator)<br />
e fare clic sul pulsante [Stop] (Termina).<br />
2. Nel campo [Address] (Indirizzo) digitare http://192.168.2.1<br />
e premere (INVIO).<br />
Nota: Per alcuni browser potrebbe essere necessario includere<br />
:88 dopo l’indirizzo IP di gestione. Ad esempio,<br />
http://192.168.2.1:88<br />
3. Verrà visualizzata la schermata di accesso di <strong>SMC7804WBRA</strong>.<br />
Immettere la password predefinita e fare clic su [Login]<br />
(Accedi). La password predefinita è ”smcadmin”. Per motivi<br />
di sicurezza, è necessario assegnare una password<br />
personalizzata nel più breve<br />
tempo possibile. Si noti che<br />
la password di accesso rileva<br />
la distinzione tra maiuscole<br />
e minuscole.<br />
4. Nella pagina iniziale<br />
della console Web di<br />
<strong>SMC7804WBRA</strong>, fare<br />
clic su [Setup Wizard]<br />
(Configurazione guidata).<br />
La procedura di configurazione<br />
automatica di<br />
<strong>SMC7804WBRA</strong> consente<br />
di configurare il proprio<br />
gateway.<br />
231 232<br />
Italiano
Italiano<br />
5. Selezionare il fuso orario dall’elenco. Se si desidera<br />
sincronizzare automaticamente il router ADSL con un server<br />
pubblico di riferimento orario, selezionare la casella [Enable<br />
Automatic Time Server Maintenance] (Attiva sincronia<br />
automatica con server di riferimento orario). Selezionare<br />
il server desiderato dal menu a discesa.<br />
6. Fare clic su [NEXT] (AVANTI) per continuare e andare<br />
alla pagina delle impostazioni dei parametri ADSL.<br />
7. Selezionare il proprio Paese e ISP. Questa operazione<br />
configurerà automaticamente <strong>SMC7804WBRA</strong> con il protocollo,<br />
l’incapsulamento e le impostazioni VPI/VCI corretti.<br />
Se il proprio Paese o ISP non sono presenti nell’elenco, sarà<br />
necessario configurare manualmente le impostazioni ISP.<br />
Passare alla sezione Paese o ISP non in elenco.<br />
8. Inserire il nome utente, la password e l’indirizzo del server<br />
DNS dell’ISP.<br />
Se l’ISP utilizza il protocollo RFC1483 Routed o Bridged il<br />
nome utente e la password non sono necessari. Per il protocollo<br />
RFC1483 Routed è necessario immettere l’indirizzo IP, la subnet<br />
mask, il gateway predefinito e l’indirizzo del server DNS forniti<br />
dall’ISP.<br />
Nota: Per impostazione definita, l’indirizzo del server DNS<br />
è 192.168.2.1, è necessario modificare questo valore per<br />
farlo corrispondere all’indirizzo del server DNS dell’ISP.<br />
233 234<br />
Italiano
Italiano<br />
9. Fare clic su [Next] (Avanti) per continuare e confermare<br />
le impostazioni.<br />
10. Se i parametri sono corretti, fare clic su [Apply] (Applica)<br />
per salvare le impostazioni.<br />
A questo punto la configurazione di <strong>SMC7804WBRA</strong> è completa.<br />
Andare alla sezione Risoluzione dei problemi del Manuale<br />
dell’utente qualora non si riuscisse a eseguire una connessione<br />
a Internet.<br />
Paese o ISP non in elenco<br />
Se il proprio Paese o ISP non sono presenti nell’elenco,sarà<br />
necessario configurare manualmente le impostazioni relative<br />
all’ISP.<br />
Selezionare [Others] (Altri) dall’elenco a discesa.<br />
Per la configurazione manuale è necessario conoscere il protocollo,<br />
il server DNS, l’incapsulamento e le impostazioni VPI/VCI<br />
utilizzate dall’ISP. Se si dispone di un indirizzo IP statico,<br />
è inoltre necessario conoscere l’indirizzo IP, la subnet mask<br />
e l’indirizzo gateway predefinito. Se non si dispone di queste<br />
informazioni, contattare l’ISP.<br />
235 236<br />
Italiano
Italiano<br />
Selezionare il protocollo utilizzato dall’ISP dall’elenco a discesa<br />
Internet Service Provider (ISP).<br />
L’ISP utilizza PPPoA/PPPoE<br />
Immettere il nome utente, la password, l’indirizzo del server DNS<br />
e i numeri dei circuiti VPI/VCI forniti dall’ISP.<br />
Fare clic su [Next]<br />
(Avanti) per continuare<br />
e confermare<br />
le impostazioni.<br />
Se i parametri sono<br />
corretti, fare clic su<br />
[Apply] (Applica) per<br />
salvare le impostazioni.<br />
A questo punto<br />
la configurazione<br />
di <strong>SMC7804WBRA</strong><br />
è completa. Andare<br />
alla sezione Risoluzione<br />
dei problemi del<br />
Manuale dell’utente<br />
qualora non si riuscisse<br />
a eseguire una<br />
connessione a Internet.<br />
237 238<br />
Italiano
Italiano<br />
L’ISP utilizza il routing RFC1483<br />
Immettere il nome utente, la subnet mask, il gateway predefinito,<br />
l’indirizzo del server DNS e i numeri dei circuiti VPI/VCI forniti<br />
dall’ISP.<br />
Fare clic su [Next]<br />
(Avanti) per<br />
continuare e<br />
confermare le<br />
impostazioni.<br />
Se i parametri sono corretti, fare clic su [Apply] (Applica) per<br />
salvare le impostazioni.<br />
A questo punto<br />
la configurazione<br />
di <strong>SMC7804WBRA</strong><br />
è completa.<br />
Andare alla sezione<br />
Risoluzione dei<br />
problemi del Manuale<br />
dell’utente qualora<br />
non si riuscisse<br />
a eseguire una<br />
connessione a Internet.<br />
L’ISP utilizza il bridging RFC1483<br />
Immettere l’indirizzo del server DNS e i numeri dei circuiti VPI/VCI<br />
forniti dall’ISP. Se si dispone di un indirizzo IP statico, è inoltre<br />
necessario immettere l’indirizzo IP, la subnet mask e l’indirizzo<br />
gateway predefinito forniti dall’ISP.<br />
Nota: Sono disponibili 3 diverse modalità di bridging.<br />
239 240<br />
Italiano
Italiano<br />
241<br />
[RFC1483 Bridging]<br />
Selezionare questa opzione se si desidera rendere <strong>SMC7804WBRA</strong><br />
trasparente e passare l’indirizzo IP pubblico a un unico PC, server<br />
o firewall.<br />
[RFC1483 Bridging DHCP]<br />
Selezionare questa opzione se si desidera condividere<br />
la connessione con più PC (l’impostazione più comune).<br />
[RFC1483 Bridging FixIP]<br />
Selezionare questa opzione se l’ISP ha assegnato un indirizzo<br />
IP statico.<br />
Fare clic su [Next]<br />
(Avanti) per continuare<br />
e confermare<br />
le impostazioni.<br />
Se i parametri sono<br />
corretti, fare clic su<br />
[Apply] (Applica) per<br />
salvare le impostazioni.<br />
A questo punto la configurazione di <strong>SMC7804WBRA</strong> è completa.<br />
Andare alla sezione Risoluzione dei problemi del Manuale<br />
dell’utente qualora non si riuscisse a eseguire una connessione<br />
a Internet.<br />
Inledning<br />
SMC ADSL Barricade TM g, <strong>SMC7804WBRA</strong> är en trådlös<br />
bredbandsrouter på 54 Mbit/s med inbyggt ADSL-modem<br />
(Annex A). Produkten är utformad för att dela Internetåtkomst,<br />
tillhandahålla säkerhet och skapa nätverk för flera enheter och<br />
flera olika användare. Också oerfarna användare kan installera<br />
<strong>SMC7804WBRA</strong> samtidigt som nätverksproffsen får avancerade<br />
funktioner som är enkla att konfigurera. Information om<br />
produktens mer avancerade funktioner finns i användarhandboken.<br />
242<br />
Svenska
Svenska<br />
Innehåll<br />
• En ADSL BarricadeTM g.<br />
• En nätadapter.<br />
• En CD med fullständig dokumentation.<br />
• En Fast Ethernet-kabel kategori 5.<br />
• En telefonkabel (RJ-11).<br />
• Delare tillhandahålls (endast modeller för NL, FR och UK).<br />
• Telefonkontaktsats (endast modell för NL).<br />
Nödvändigt för installationen<br />
Innan du fortsätter med installationen av <strong>SMC7804WBRA</strong> bör<br />
du kontrollera att du har följande:<br />
• ADSL-ledning installerad av Internet-leverantören.<br />
• ADSL-mikrofilter/delare.<br />
• En dator utrustad med ett nätverkskort på 10/100 Mbit/s eller<br />
ett trådlöst nätverkskort för IEEE802.11g.<br />
• Nätverksprotokollet TCP/IP installerat i varje dator som ska ha<br />
tillgång till Internet.<br />
• En installerad webbläsare där Java är aktiverat, som Microsoft<br />
Internet Explorer 5.0 eller senare.<br />
• CD-skivan med Windows, om datorn kör Windows 95, 98 eller Me.<br />
243 244<br />
Svenska
Svenska<br />
245<br />
Maskinvara<br />
I frontpanelen på <strong>SMC7804WBRA</strong> ingår lysdiodsindikatorer som<br />
underlättar övervakningen.<br />
Varje lysdiodsfunktion definieras i nedanstående tabell.<br />
Lysdiod Status Beskrivning<br />
PWR Lyser Barricade TM har ström.<br />
Normal funktion.<br />
Släckt Ingen ström eller inträffat fel.<br />
ADSL Sync Lyser ADSL-anslutningen är synkroniserad.<br />
Blinkar Barricade upprättar en ADSL-länk.<br />
Släckt ADSL -anslutningen har inte<br />
upprättats.<br />
ADSL Data Blinkar Den visade ADSL-porten skickar eller<br />
tar emot data.<br />
WLAN Släckt Inga data överförs.<br />
Blinkar WLAN-porten skickar eller tar<br />
emot data.<br />
Ethernet Lyser Ethernet-anslutningen<br />
(4 lysdioder) har upprättats.<br />
Blinkar Den visade LAN-porten skickar eller<br />
tar emot data.<br />
Släckt LAN-anslutning saknas i porten.<br />
Ansluta enheter<br />
LAN -portar Återställningsknappen WAN-port<br />
1. Anslut datorerna direkt till <strong>SMC7804WBRA</strong> i portarna 1-4 på<br />
den bakre panelen. Har du fler än 4 datorer som ska anslutas,<br />
använder du en hubb (ett nav) eller en switch och ansluter<br />
ytterligare datorer till den. Information om hur du ansluter<br />
den trådlösa adaptern finns i användarhandboken till denna.<br />
2. Anslut den medföljande RJ-11-kabeln från ADSLmikrofiltret/delaren<br />
till ADSL-WAN-porten i <strong>SMC7804WBRA</strong><br />
3. Sätt in nätkabeln i väggkontakten.<br />
Nätkontakt<br />
246<br />
Svenska
Svenska<br />
247<br />
Konfigurera datorn<br />
I denna snabbinstallationshandbok finns konfigurationsanvisningar<br />
för Windows 95, 98, Me, NT 4.0, 2000 och XP samt för Macintosh<br />
OS version 7.x och senare. Var noga med att följa de anvisningar<br />
som gäller för ditt operativsystem:<br />
• Konfigurera en dator med Windows 95/98/Me.<br />
• Konfigurera en dator med Windows 2000.<br />
• Konfigurera en dator med Windows XP.<br />
• Konfigurera en dator med Windows NT 4.0.<br />
• Konfigurera en Macintosh-dator.<br />
Konfigurera en dator med Windows 95/98/Me<br />
Det är inte säkert att dessa anvisningar stämmer helt och hållet<br />
med din Windows-version. Det beror på att de här stegen och<br />
skärmbilderna skapades i Windows 98. Windows 95 och Windows<br />
Me liknar Windows 98 i mångt och mycket, men de är inte<br />
identiska.<br />
Steg 1. Konfigurera inställningar för TCP/IP<br />
När du är klar med maskinvaruinstallationen genom anslutning av<br />
enheterna konfigurerar du datorn för anslutning till <strong>SMC7804WBRA</strong>.<br />
1. Klicka på knappen<br />
[Start] från skrivbordet<br />
i Windows. Välj<br />
[Settings]<br />
(Inställningar)<br />
och klicka sedan<br />
på [Control Panel]<br />
(Kontrollpanelen).<br />
248<br />
Svenska
Svenska<br />
2. Dubbelklicka på ikonen [Network] (Nätverk) i [Control Panel]<br />
(Kontrollpanelen).<br />
3. Dubbelklicka på [TCP/IP]<br />
i listan över nätverkskort<br />
i fönstret [Network] (Nätverk)<br />
på fliken [Configuration]<br />
(Konfiguration).<br />
4. Klicka på fliken [IP Address]<br />
(IP-adress).<br />
Har [Obtain an IP address automatically] (Erhåll IP-adress<br />
automatiskt) redan markerats är datorn redan konfigurerad för<br />
DHCP. Klicka på [Cancel] (Avbryt) för att stänga alla fönster och<br />
gå till Steg 2: Avaktivera HTTP-proxy.<br />
5. Klicka på [Obtain an IP address automatically]<br />
(Erhåll IP-adress automatiskt).<br />
249 250<br />
Svenska
Svenska<br />
251<br />
6. Klicka på fliken [Gateway] och ta<br />
bort siffrorna under [Installed<br />
gateways].<br />
7. Klicka på fliken [DNS<br />
Configuration] (DNSkonfiguration)<br />
och sedan på [Disable DNS]<br />
(Avaktivera DNS).<br />
8. Klicka på [OK].<br />
9. Windows kan behöva<br />
CD-skivan med Windows<br />
95/98/Me för att kopiera<br />
vissa filer. När filerna har<br />
kopierats måste du starta<br />
om datorn. Klicka på [Yes]<br />
(Ja) så att datorn stängs av<br />
och startar om.<br />
Steg 2. Avaktivera HTTP-proxy<br />
Du kan behöva bekräfta att funktionen med HTTP-proxy<br />
i webbläsaren har avaktiverats så att webbläsaren kan visa<br />
konfigurationssidorna i <strong>SMC7804WBRA</strong>. Följande steg gäller<br />
Internet Explorer och Netscape. Kontrollera vilken webbläsare<br />
du använder och följ respektive steg.<br />
Internet Explorer<br />
1. Öppna Internet Explorer och klicka på knappen [Stop]<br />
(Stopp) . Klicka på [Tools] (Verktyg) och sedan på<br />
[Internet Options]<br />
(Internetalternativ).<br />
252<br />
Svenska
Svenska<br />
2. Klicka på fliken [Connections]<br />
(Anslutningar) i fönstret<br />
[Internet Options]<br />
(Internetalternativ). Sedan<br />
klickar du på knappen [LAN<br />
Settings…] (LAN-inställningar).<br />
3. Avmarkera alla kryssrutor.<br />
4. Klicka på [OK] och sedan<br />
på [OK] igen för att stänga<br />
fönstret [Internet Options]<br />
(Internetalternativ).<br />
Netscape<br />
1. Öppna Netscape och klicka<br />
på knappen [Stop] (Stopp).<br />
Klicka på [Edit] (Redigera)<br />
och sedan på<br />
[Preferences…]<br />
(Inställningar).<br />
2. Dubbelklicka<br />
på [Advanced]<br />
(Avancerat) och<br />
klicka sedan på<br />
[Proxies] i fönstret<br />
[Preferences]<br />
(Inställningar) under<br />
[Category] (Kategori).<br />
Välj [Direct<br />
connection to<br />
the Internet]<br />
(Direkt anslutning till<br />
Internet). Klicka på [OK].<br />
3. Upprepa stegen för varje dator med Windows 95/98/Me som<br />
är ansluten till <strong>SMC7804WBRA</strong>.<br />
253 254<br />
Svenska
Svenska<br />
Steg 3. Erhålla IP-inställningar från <strong>SMC7804WBRA</strong><br />
Nu när du har konfigurerat datorn så att den är ansluten till<br />
<strong>SMC7804WBRA</strong> måste du erhålla nya nätverksinställningar. Genom<br />
att förnya de gamla IP-inställningarna med inställningarna från<br />
<strong>SMC7804WBRA</strong> kan du också kontrollera att du har konfigurerat<br />
datorn på rätt sätt.<br />
1. Klicka på [Start] och sedan på<br />
[Run…] (Kör).<br />
2. Skriv WINIPCFG och klicka<br />
på [OK]. Det kan ta en<br />
minut eller två för fönstret<br />
[IP Configuration]<br />
(IP-konfiguration)<br />
att öppnas.<br />
3. Välj nätverkskortet i listmenyn. Klicka på [Release] (Frigör)<br />
och sedan på [Renew] (Förnya). Kontrollera att IP-adressen<br />
är 192.168.2.xxx, delnätmasken 255.255.255.0 och<br />
standardgateway 192.168.2.1. Värdena bekräftar att<br />
<strong>SMC7804WBRA</strong> fungerar. Klicka på [OK] för att stänga<br />
fönstret [IP Configuration] (IP-konfiguration).<br />
När datorn har konfigurerats<br />
för anslutning till<br />
<strong>SMC7804WBRA</strong> går du till<br />
Konfigurera <strong>SMC7804WBRA</strong>.<br />
255 256<br />
Svenska
Svenska<br />
Konfigurera en dator med Windows 2000<br />
Steg 1. Konfigurera inställningar för TCP/IP<br />
När du är klar med maskinvaruinstallationen konfigurerar<br />
du datorn för anslutning till <strong>SMC7804WBRA</strong>.<br />
1. Klicka på knappen [Start]<br />
från skrivbordet i<br />
Windows. Välj [Settings]<br />
(Inställningar) och klicka<br />
sedan på ikonen [Network<br />
and Dial-Up Connections]<br />
(Nätverks- och fjärranslutningar).<br />
2. Dubbelklicka på den<br />
ikon som motsvarar<br />
anslutningen<br />
till <strong>SMC7804WBRA</strong>.<br />
3. Klicka på [Properties]<br />
(Egenskaper).<br />
4. Dubbelklicka på<br />
[Internet Protocol<br />
(TCP/IP)]<br />
(Internetprotokoll<br />
(TCP/IP)).<br />
257 258<br />
Svenska
Svenska<br />
Om [Obtain an IP address<br />
automatically] (Erhåll en<br />
IP-adress automatiskt) och<br />
[Obtain DNS server address<br />
automatically] (Erhåll DNSserveradress<br />
automatiskt) redan<br />
är markerade är datorn redan<br />
konfigurerad för DHCP. Klicka<br />
på [Cancel] (Avbryt) för att<br />
stänga alla fönster och gå till<br />
Steg 2: Avaktivera HTTP-proxy.<br />
6. Välj [Obtain an IP address automatically] (Erhåll en<br />
IP-adress automatiskt) och sedan [Obtain DNS server address<br />
automatically] (Erhåll DNS-serveradress automatiskt). Klicka<br />
på [OK] eller [Close] (Stäng) för att stänga fönstren.<br />
Steg 2. Avaktivera HTTP-proxy<br />
Återgå till Steg 2: Konfigurera en dator med Windows 95/98/Me.<br />
Steg 3. Erhålla IP-inställningar från <strong>SMC7804WBRA</strong><br />
Nu när du har konfigurerat datorn så att den är ansluten till<br />
<strong>SMC7804WBRA</strong> måste du ange nya nätverksinställningar. Genom<br />
att förnya de gamla IP-inställningarna med inställningarna från<br />
<strong>SMC7804WBRA</strong> kan du också kontrollera att du har konfigurerat<br />
datorn på rätt sätt.<br />
1. Klicka på knappen<br />
[Start] från skrivbordet<br />
i Windows, därefter på<br />
[Programs] (Program),<br />
[Accessories] (Tillbehör)<br />
och [Command Prompt]<br />
(Kommandoprompten).<br />
259 260<br />
Svenska
Svenska<br />
2. Skriv IPCONFIG/RELEASE och tryck på i fönstret<br />
i fönstret [Command Prompt] (Kommandoprompten).<br />
3. Skriv IPCONFIG/RENEW och tryck på . Kontrollera att<br />
IP-adressen är 192.168.2.xxx (2-254), delnätmasken<br />
255.255.255.0 och standardgatewayen 192.168.2.1. Värdena<br />
bekräftar att <strong>SMC7804WBRA</strong> fungerar.<br />
4. Skriv EXIT och<br />
tryck på <br />
för att stänga<br />
fönstret [Command<br />
Prompt]<br />
(Kommandoprompten).<br />
När datorn har konfigurerats för anslutning till <strong>SMC7804WBRA</strong><br />
går du till Konfigurera <strong>SMC7804WBRA</strong>.<br />
Konfigurera en dator med Windows XP<br />
Steg 1. Konfigurera inställningar för TCP/IP<br />
När du är klar med maskinvaruinstallationen konfigurerar<br />
du datorn för anslutning till <strong>SMC7804WBRA</strong>.<br />
1. Klicka på knappen [Start] från<br />
skrivbordet i Windows. Välj<br />
[Control Panel] (Kontrollpanelen).<br />
2. Välj ikonen [Network and Internet<br />
Connections] (Nätverks- och<br />
Internetanslutningar), klicka<br />
på ikonen [Network Connections]<br />
(Nätverksanslutningar) och dubbelklicka<br />
på den adapter du ska<br />
använda för anslutningen.<br />
261 262<br />
Svenska
Svenska<br />
3. Klicka på [Properties]<br />
(Egenskaper).<br />
4. Dubbelklicka på [Internet<br />
Protocol (TCP/IP)]<br />
(Internetprotokoll (TCP/IP)).<br />
Om [Obtain an IP address automatically] (Erhåll en IP-adress<br />
automatiskt) och [Obtain DNS server address automatically] (Erhåll<br />
DNS-serveradress automatiskt) redan är markerade är datorn redan<br />
konfigurerad för DHCP. Klicka på [Cancel] (Avbryt) för att stänga<br />
alla fönster och gå till Steg 2: Avaktivera HTTP-proxy.<br />
6. Välj [Obtain an IP address<br />
automatically] (Erhåll en IPadress<br />
automatiskt) och sedan<br />
[Obtain DNS server address<br />
automatically] (Erhåll DNSserveradress<br />
automatiskt).<br />
Klicka på [OK] eller [Close]<br />
(Stäng) för att stänga fönstren.<br />
Steg 2. Avaktivera HTTP-proxy<br />
Återgå till Steg 2 under Konfigurera en dator med Windows<br />
95/98/Me.<br />
Steg 3. Erhålla IP-inställningar från <strong>SMC7804WBRA</strong><br />
Nu när du har konfigurerat datorn så att den är ansluten till<br />
<strong>SMC7804WBRA</strong> måste du ange nya nätverksinställningar. Genom<br />
att förnya de gamla IP-inställningarna med inställningarna från<br />
<strong>SMC7804WBRA</strong> kan du också kontrollera att du har konfigurerat<br />
datorn på rätt sätt.<br />
1. Klicka på knappen<br />
[Start] från skrivbordet<br />
i Windows, därefter på<br />
[Programs] (Program),<br />
[Accessories] (Tillbehör)<br />
och [Command Prompt]<br />
(Kommandoprompten).<br />
263 264<br />
Svenska
Svenska<br />
2. Skriv IPCONFIG/RELEASE och tryck på i fönstret i<br />
fönstret [Command Prompt] (Kommandoprompten).<br />
3. Skriv IPCONFIG/RENEW och tryck på . Kontrollera<br />
att IP-adressen är 192.168.2.xxx (2-254), delnätmasken<br />
255.255.255.0 och standardgatewayen 192.168.2.1.<br />
Värdena bekräftar att <strong>SMC7804WBRA</strong> fungerar.<br />
4. Skriv EXIT och tryck på för att stänga fönstret<br />
[Command Prompt] (Kommandoprompten).<br />
När datorn har konfigurerats för anslutning till <strong>SMC7804WBRA</strong> går<br />
du till Konfigurera <strong>SMC7804WBRA</strong>.<br />
Konfigurera en dator med Windows NT 4.0<br />
Steg 1. Konfigurera inställningar för TCP/IP<br />
När du är klar med maskinvaruinstallationen konfigurerar<br />
du datorn för anslutning till <strong>SMC7804WBRA</strong>.<br />
1. Klicka på [Start] från skrivbordet i Windows och välj sedan<br />
[Settings] (Inställningar) och [Control Panel] (Kontrollpanelen).<br />
265 266<br />
Svenska
Svenska<br />
2. Dubbelklicka på ikonen<br />
[Network] (Nätverk).<br />
3. Välj fliken [Protocols]<br />
(Protokoll).<br />
4. Dubbelklicka på [TCP/IP<br />
Protocol] (TCP/IP-protokoll).<br />
5. Klicka på fliken [IP Address]<br />
(IP-adress).<br />
6. Kontrollera att Ethernetadaptern<br />
är markerad i listan<br />
[Adapter] (Nätverkskort).<br />
Har [Obtain an IP address automatically] (Erhåll IP-adress<br />
automatiskt) redan markerats är datorn redan konfigurerad för<br />
DHCP. Klicka på [Cancel] (Avbryt) för att stänga alla fönster och<br />
gå till Steg 2: Avaktivera HTTP-proxy.<br />
7. Välj [Obtain an IP address automatically] (Erhåll IP-adress<br />
automatiskt).<br />
267 268<br />
Svenska
Svenska<br />
8. Klicka på fliken [DNS] för att<br />
visa primär och sekundär DNS.<br />
Ta bort alla DNS-adresser<br />
i listan.<br />
9. Klicka på [OK] och sedan på<br />
[OK] igen för att stänga fönstret<br />
[Network] (Nätverk).<br />
10. Windows kanske kopierar några filer så att du sedan måste<br />
starta om datorn. Klicka på [Yes] (Ja) så att datorn stängs<br />
av och startar om.<br />
Steg 2. Avaktivera HTTP-proxy<br />
Återgå till Steg 2 under Konfigurera en dator med<br />
Windows 95/98/Me.<br />
Steg 3. Erhålla IP-inställningar från <strong>SMC7804WBRA</strong><br />
Nu när du har konfigurerat datorn så att den är ansluten till<br />
<strong>SMC7804WBRA</strong> måste du ange nya nätverksinställningar. Genom<br />
att förnya de gamla IP-inställningarna med inställningarna från<br />
<strong>SMC7804WBRA</strong> kan du också kontrollera att du har konfigurerat<br />
datorn på rätt sätt.<br />
1. Klicka på<br />
knappen<br />
[Start] från<br />
skrivbordet<br />
i Windows,<br />
därefter på<br />
[Programs]<br />
och välj<br />
sedan<br />
[Command<br />
Prompt]<br />
(Kommandoprompten).<br />
269 270<br />
Svenska
Svenska<br />
2. Skriv IPCONFIG/RELEASE och<br />
tryck på i fönstret<br />
i fönstret [Command Prompt]<br />
(Kommandoprompten).<br />
3. Skriv IPCONFIG/RENEW och tryck på . Kontrollera att<br />
IP-adressen är 192.168.2.xxx, delnätmasken 255.255.255.0 och<br />
standardgatewayen 192.168.2.1. Värdena bekräftar att<br />
<strong>SMC7804WBRA</strong> fungerar.<br />
4. Skriv EXIT och tryck på för att stänga fönstret<br />
[Command Prompt] (Kommandoprompten).<br />
När datorn har konfigurerats för anslutning till <strong>SMC7804WBRA</strong><br />
fortsätter du med Konfigurera <strong>SMC7804WBRA</strong>.<br />
Konfigurera en Macintosh-dator<br />
Det är inte säker att dessa anvisningar stämmer helt och hållet<br />
med din programversion. Det beror på att de här stegen och<br />
skärmbilderna skapades i Mac OS 8.5. Mac OS 7.x och senare<br />
liknar Mac OS 8.5 i mångt och mycket men de är inte identiska.<br />
Steg 1. Konfigurera inställningar för TCP/IP<br />
När du är klar med maskinvaruinstallationen konfigurerar<br />
du datorn för anslutning till <strong>SMC7804WBRA</strong>.<br />
1. Dra ned menyn [Apple]. Klicka på [Control Panels]<br />
(Inställningar) och välj [TCP/IP].<br />
271 272<br />
Svenska
Svenska<br />
2. Kontrollera att [Ethernet] är markerat i fältet [Connect Via:]<br />
(Anslut via:) i dialogrutan TCP/IP. Har [Using DHCP Server]<br />
(Använder DHCP-server) redan markerats i fältet [Configure:]<br />
är datorn redan konfigurerad för DHCP. Stäng dialogrutan<br />
[TCP/IP] och gå till Steg 2 Avaktivera HTTP-proxy.<br />
3. Välj [Using DHCP Server]<br />
(Använder DHCP-server) i<br />
fältet [Configure]<br />
(Konfigurera) och stäng<br />
fönstret.<br />
4. Nu visas en annan ruta där du blir tillfrågad om du vill spara<br />
inställningarna för TCP/IP. Klicka på [Save] (Spara).<br />
Steg 2. Avaktivera HTTP-proxy<br />
Du kan behöva bekräfta att funktionen med HTTP-proxy<br />
i webbläsaren har avaktiverats så att webbläsaren kan visa<br />
konfigurationssidorna i <strong>SMC7804WBRA</strong>. Följande steg gäller<br />
Internet Explorer och Netscape. Kontrollera vilken webbläsare<br />
du använder och följ respektive steg.<br />
Internet Explorer<br />
1. Öppna Internet Explorer och klicka<br />
på knappen [Stop] (Stopp). Klicka<br />
på [Edit] (Redigera) och välj<br />
[Preferences...] (Inställningar).<br />
273 274<br />
Svenska
Svenska<br />
2. I fönstret [Preferences] (Egenskaper) i Internet Explorer väljer<br />
du [Proxies] (Proxyservrar) under [Network] (Nätverk).<br />
3. Avmarkera alla kryssrutor och klicka på [OK].<br />
Netscape<br />
1. Öppna Netscape och klicka på<br />
knappen [Stop] (Stopp). Klicka<br />
på [Edit] (Redigera) och välj<br />
[Preferences...] (Inställningar).<br />
2. Välj [Advanced]<br />
(Avancerat) i den<br />
vänstra kolumnen<br />
[Category] (Kategori)<br />
i dialogrutan<br />
[Preferences...]<br />
(Inställningar).<br />
Välj [Proxies]<br />
(Proxyservrar)<br />
i kategorin [Advanced]<br />
(Avancerat).<br />
3. Välj [Direct Connection to the Internet] (Direktanslutning<br />
till Internet) och klicka på [OK].<br />
275 276<br />
Svenska
Svenska<br />
Steg 3. Erhålla IP-inställningar från <strong>SMC7804WBRA</strong><br />
Nu när du har konfigurerat datorn så att den är ansluten till<br />
<strong>SMC7804WBRA</strong> måste du ange nya nätverksinställningar. Genom<br />
att förnya de gamla IP-inställningarna med inställningarna från<br />
<strong>SMC7804WBRA</strong> kan du också kontrollera att du har konfigurerat<br />
datorn på rätt sätt.<br />
1. Öppna menyn [Apple]. Klicka på [Control Panels] (Inställningar)<br />
och välj [TCP/IP].<br />
2. De nya inställningarna visas i fönstret [TCP/IP]. Kontrollera att<br />
IP-adressen är 192.168.2.xxx, delnätmasken 255.255.255.0 och<br />
standardgatewayen 192.168.2.1. Värdena bekräftar att<br />
<strong>SMC7804WBRA</strong> fungerar.<br />
3. Stäng fönstret [TCP/IP].<br />
När datorn har konfigurerats för anslutning till <strong>SMC7804WBRA</strong><br />
går du till Konfigurera <strong>SMC7804WBRA</strong>.<br />
277 278<br />
Svenska
Svenska<br />
Konfigurera <strong>SMC7804WBRA</strong><br />
När du nu har slutfört konfigurationen av datorn och hämtat<br />
de nya nätverksinställningarna från <strong>SMC7804WBRA</strong> kan du börja<br />
konfigurera inställningarna för <strong>SMC7804WBRA</strong> till din Internetleverantör.<br />
1. Starta webbläsaren (Internet Explorer eller Netscape Navigator)<br />
och klicka på knappen [Stop].<br />
2. Skriv http://192.168.2.1 fältet [Address] (Adress) och tryck<br />
på .<br />
Obs! I vissa webbläsare måste du skriva :88 efter IP-adressen<br />
för hantering. Exempel: http://192.168.2.1:88<br />
3. Inloggningsskärmen för <strong>SMC7804WBRA</strong> öppnas. Ange<br />
standardlösenordet och klicka på [Login] (Logga in).<br />
Standardlösenordet är smcadmin. Av säkerhetsskäl bör<br />
du tilldela ett lösenord så snart som möjligt. Observera<br />
att lösenordet för inloggning<br />
är skiftlägeskänsligt.<br />
4. Klicka på [Setup Wizard] (Installationsguiden) på hemsidan till<br />
webbkonsolen <strong>SMC7804WBRA</strong>. Du leds genom varje steg när<br />
du installerar gatewayen i den automatiska installationen av<br />
<strong>SMC7804WBRA</strong>.<br />
279 280<br />
Svenska
Svenska<br />
5. Välj tidszon i listan. Markera rutan [Enable Automatic Time<br />
Server Maintenance] (Aktivera automatisk tidsjustering) om<br />
du vill att ADSL-routern ska synkroniseras automatiskt med<br />
en klockserver via Internet. Välj önskad server i listmenyn.<br />
6. Klicka på [NEXT] (Nästa) för att fortsätta och gå till<br />
inställningssidan för ADSL-parametrar.<br />
7. Välj land och Internet-leverantör. Då konfigureras<br />
<strong>SMC7804WBRA</strong> automatiskt med korrekta inställningar<br />
för protokoll, inkapsling och VPI/VCI.<br />
Finns landet eller Internet-leverantören inte med i listan måste<br />
du själv konfigurera ISP-inställningarna. Gå till avsnittet med<br />
länder och Internet-leverantörer som inte är med i listan.<br />
8. Ange ISP-användarnamn, lösenord och DNS-serveradress.<br />
Används protokollet RFC1483, dirigerat eller bryggat, av din<br />
Internet-leverantör behövs inget användarnamn/lösenord.<br />
Du måste ange IP-adress, standardgateway och den DNSserveradress<br />
som kommer från Internet-leverantören för<br />
dirigerat (Routed) RFC1483.<br />
Obs! Som standard används 192.168.2.1 som adress för<br />
DNS-servern. Denna måste ändras till Internet-leverantörens<br />
DNS-serveradress.<br />
281 282<br />
Svenska
Svenska<br />
9. Klicka på [Next] (Nästa) för att fortsätta och bekräfta<br />
inställningarna.<br />
10. Är allt korrekt klickar du på [Apply] (Verkställ) för att spara<br />
inställningarna.<br />
Nu är <strong>SMC7804WBRA</strong> installerad. Gå till avsnittet Felsökning om<br />
du inte kan ansluta till Internet.<br />
Land eller Internet-leverantör är inte med i listan<br />
Finns ditt land eller din Internet-leverantör inte med i listan<br />
måste du själv konfigurera inställningarna för Internetleverantören.<br />
Välj [Others] (Andra) i listan.<br />
Du måste känna till de inställningar för protokoll, DNS-server,<br />
inkapsling och VPI/VCI som används av Internet-leverantören för<br />
att du ska kunna utföra konfigurationen. Har du en fast IP-adress<br />
måste du också känna till IP-adressen, delnätmasken och<br />
standardgateway-adressen. Har du inte denna information<br />
kontaktar du din Internet-leverantör.<br />
283 284<br />
Svenska
Svenska<br />
Välj det protokoll som Internet-leverantören använder i listan över<br />
Internet-leverantörer.<br />
Internet-leverantören använder PPPoA/PPPoE<br />
Ange användarnamn, lösenord, DNS-serveradress och VPI/VCIkretsnummer<br />
som tillhandahålls av Internet-leverantören.<br />
Klicka på [Next] (Nästa)<br />
för att fortsätta och<br />
bekräfta inställningarna.<br />
Är allt korrekt klickar du<br />
på [Apply] (Verkställ) för<br />
att spara inställningarna.<br />
Nu är <strong>SMC7804WBRA</strong><br />
installerad. Gå till<br />
avsnittet Felsökning om<br />
du inte kan ansluta till<br />
Internet.<br />
285 286<br />
Svenska
Svenska<br />
Internet-leverantörer använder RFC1483-dirigering<br />
Ange IP-adress, delnätmask, standardgateway, DNS-serveradress<br />
och VPI/VCI-kretsnummer som tillhandahålls av Internetleverantören.<br />
Klicka på [Next]<br />
(Nästa) för att<br />
fortsätta och<br />
bekräfta<br />
inställningarna.<br />
Är allt korrekt klickar du på [Apply] (Verkställ) för att spara<br />
inställningarna.<br />
Nu är <strong>SMC7804WBRA</strong><br />
installerad. Gå till<br />
avsnittet Felsökning<br />
om du inte kan<br />
ansluta till Internet.<br />
Internet-leverantören använder bryggat RFC1483<br />
Ange DNS-serveradress och VPI/VCI-kretsnummer som<br />
tillhandahålls av Internet-leverantören. Har du fast IP-adress<br />
måste du också ange IP-adress, delnätmask och standardgatewayadress<br />
som tillhandahålls av Internet-leverantören.<br />
Obs! Du måste välja bland 3 olika bryggade lägen.<br />
287 288<br />
Svenska
Svenska<br />
289<br />
[RFC1483 Bridging]<br />
Välj alternativet om du vill att <strong>SMC7804WBRA</strong> ska vara transparent<br />
och skicka den allmänna IP-adressen till en enda dator, server<br />
eller brandvägg.<br />
[RFC1483 Bridging DHCP]<br />
Välj alternativet om du vill dela anslutningen för flera datorer<br />
(den vanligaste inställningen).<br />
[RFC1483 Bridging FixIP]<br />
Välj alternativet om du har fått en fast IP-adress av Internetleverantören.<br />
Klicka på [Next]<br />
(Nästa) för att<br />
fortsätta och bekräfta<br />
inställningarna.<br />
Är allt korrekt klickar<br />
du på [Apply]<br />
(Verkställ) för att<br />
spara inställningarna.<br />
Nu är <strong>SMC7804WBRA</strong> installerad. Gå till avsnittet Felsökning om<br />
du inte kan ansluta till Internet.<br />
Inleiding<br />
De SMC ADSL Barricade TM g, <strong>SMC7804WBRA</strong> is een 54Mbps<br />
draadloze breedbandrouter met ingebouwde (Annex A) ADSLmodem.<br />
Dit product is ontworpen voor het delen van internettoegang,<br />
het bieden van beveiliging en het in een netwerk<br />
opnemen van meerdere apparaten voor een groot aantal<br />
gebruikers. De eenvoudige installatie en configuratie van de<br />
<strong>SMC7804WBRA</strong> kan door de meest onervaren gebruikers worden<br />
uitgevoerd, terwijl er bovendien geavanceerde functies beschikbaar<br />
zijn die op eenvoudige wijze kunnen worden geconfigureerd door<br />
netwerkspecialisten. Lees de Gebruikershandleiding voor een<br />
beschrijving van de geavanceerde functies van dit product.<br />
290<br />
Nederlands
Nederlands<br />
Inhoud van de verpakking<br />
• Eén ADSL BarricadeTM g.<br />
• Eén voedingsadapter.<br />
• Eén cd met complete documentatie.<br />
• Eén Fast Ethernet-kabel van categorie 5.<br />
• Eén telefoonpatchkabel (RJ-11).<br />
• Eén splitter wordt meegeleverd (uitsluitend modellen voor NL,<br />
FR en UK).<br />
• Eén telefoonaansluitset (uitsluitend model voor NL).<br />
Installatievereisten<br />
Controleer, voordat u verdergaat met de installatie van<br />
uw <strong>SMC7804WBRA</strong>, of u over het volgende beschikt:<br />
• ADSL-lijn die is geïnstalleerd door uw internetprovider.<br />
• ADSL-microfilter/-splitter.<br />
• Een computer die is uitgerust met een 10/100Mbps<br />
netwerkadapter of een IEEE802.11g draadloze netwerkadapter.<br />
• Geïnstalleerde TCP/IP-netwerkprotocollen op elke pc die toegang<br />
tot internet nodig heeft.<br />
• Een webbrowser met ondersteuning voor Java, zoals<br />
Microsoft Internet Explorer 5.0 of hoger.<br />
• Uw Windows-cd, als uw computer werkt met Windows 95,<br />
98 of Me.<br />
291 292<br />
Nederlands
Nederlands<br />
293<br />
Hardware<br />
Het voorpaneel van de <strong>SMC7804WBRA</strong> bevat LED-indicatoren voor<br />
een eenvoudige bewaking.<br />
In de volgende tabel wordt de functie van elke LED gedefinieerd.<br />
LED Status Beschrijving<br />
PWR Aan Barricade TM ontvangt stroom.<br />
Normale werking.<br />
Uit Stroom uit of storing.<br />
ADSL Sync Aan ADSL-verbinding is gesynchroniseerd.<br />
Knipperend De Barricade TM is bezig met het tot stand<br />
brengen van een ADSL-verbinding.<br />
Uit Geen ADSL-verbinding tot stand<br />
gebracht.<br />
ADSL Data Knipperend De aangegeven ADSL-poort is bezig met<br />
het verzenden of ontvangen van gegevens.<br />
WLAN Uit Er worden geen gegevens verzonden.<br />
Knipperend De WLAN-poort is bezig met het<br />
verzenden of ontvangen van gegevens.<br />
Ethernet Aan Ethernet-verbinding beschikbaar.<br />
(4 LED’s)<br />
Knipperend De aangegeven LAN-poort is bezig met<br />
het verzenden of ontvangen van gegevens.<br />
Uit LAN-anslutning saknas i porten.<br />
Apparaten aansluiten<br />
LAN-poorten Knop [Reset] WAN-poort<br />
1. Sluit computers rechtstreeks op de <strong>SMC7804WBRA</strong> aan op<br />
poorten 1-4 op het achterpaneel. Als u meer dan 4 computers<br />
wilt koppelen, sluit u een hub of switch aan en verbindt u extra<br />
computers met dat apparaat. Als u een draadloze verbinding<br />
wilt maken raadpleegt u de gebruikershandleiding bij uw<br />
draadloze adapter.<br />
2. Sluit de meegeleverde RJ-11-kabel vanaf de ADSL-microfilter<br />
/-splitter aan op de ADSL WAN-poort op de <strong>SMC7804WBRA</strong><br />
3. Steek het netsnoer in het stopcontact.<br />
Voedingsingang<br />
294<br />
Nederlands
Nederlands<br />
Uw computer configureren<br />
Deze Quick Installation Guide bevat configuratie-instructies voor<br />
Windows 95, 98, Me, NT 4.0, 2000 en XP, en voor Macintosh OS 7.x<br />
en hoger. Controleer of u de instructies gebruikt die bij uw<br />
besturingssysteem behoren.<br />
• Uw computer met Windows 95/98/Me configureren.<br />
• Uw computer met Windows 2000 configureren.<br />
• Uw computer met Windows XP configureren.<br />
• Uw computer met Windows NT 4.0 configureren.<br />
• Uw Macintosh-computer configureren.<br />
Uw computer met Windows 95/98/Me configureren<br />
Mogelijk komen de onderstaande instructies niet exact overeen<br />
met uw versie van Windows. Dit komt doordat deze stappen en<br />
schermafbeeldingen zijn gemaakt in Windows 98. Windows 95<br />
en Windows Me lijken heel veel op Windows 98, maar zijn<br />
niet identiek.<br />
Stap 1. TCP/IP-instellingen configureren<br />
Nadat u de hardware hebt ingesteld door al uw apparaten aan<br />
te sluiten, moet u de computer configureren voor het maken van<br />
een verbinding met de <strong>SMC7804WBRA</strong>.<br />
1. Klik op de knop [Start]<br />
op het bureaublad<br />
van Windows. Kies<br />
[Settings] (Instellingen)<br />
en klik vervolgens<br />
op [Control Panel]<br />
(Configuratiescherm).<br />
295 296<br />
Nederlands
Nederlands<br />
297<br />
2. Dubbelklik op het pictogram [Network] (Netwerk)<br />
op het Configuratiescherm.<br />
3. Dubbelklik op het tabblad<br />
[Configuration] (Configuratie)<br />
van het venster [Network]<br />
(Netwerk) op de vermelding<br />
[TCP/IP] voor uw<br />
netwerkkaart.<br />
4. Selecteer het tabblad<br />
[IP Address] (IP-adres).<br />
Als [Obtain an IP address automatically] (Automatisch een<br />
IP-adres laten toewijzen) al is geselecteerd, is de computer<br />
al geconfigureerd voor DHCP. Klik op [Cancel] (Annuleren) om<br />
elk venster te sluiten en naar stap 2, HTTP-proxy uitschakelen,<br />
te gaan.<br />
5. Klik op [Obtain an IP address automatically] (Automatisch<br />
een IP-adres laten toewijzen).<br />
298<br />
Nederlands
Nederlands<br />
299<br />
6. Klik op het tabblad [Gateway]<br />
en verwijder eventuele nummers<br />
in het veld [Installed gateways]<br />
(Geïnstalleerde gateways).<br />
7. Klik op het tabblad<br />
[DNS Configuration]<br />
(DNS-configuratie) en<br />
vervolgens op [Disable DNS]<br />
(DNS uitschakelen).<br />
8. Klik op [OK].<br />
9. Windows heeft mogelijk<br />
de installatie-cd voor<br />
Windows 95/98/Me nodig<br />
om bepaalde bestanden<br />
te kunnen kopiëren. Nadat het kopiëren is voltooid, wordt<br />
u gevraagd om het systeem opnieuw op te starten. Klik op<br />
[Yes] (Ja) om de computer af te sluiten en opnieuw op<br />
te starten.<br />
Stap 2. HTTP-proxy uitschakelen<br />
U moet controleren of de functie HTTP-proxy van uw webbrowser is<br />
uitgeschakeld, zodat uw webbrowser de configuratiepagina’s van<br />
uw <strong>SMC7804WBRA</strong> kan bekijken. De stappen voor Internet Explorer<br />
en voor Netscape worden hieronder beschreven. Bepaal welke<br />
browser u gebruikt en volg de bijbehorende stappen.<br />
Internet Explorer<br />
1. Open Internet Explorer en klik op de knop [Stop] . Klik<br />
op [Tools] (Extra) en selecteer vervolgens [Internet Options]<br />
(Internet-opties).<br />
300<br />
Nederlands
Nederlands<br />
2. Selecteer in het venster<br />
[Internet Options] (Internetopties)<br />
het tabblad<br />
[Connections] (Verbindingen).<br />
Klik vervolgens op de<br />
knop [LAN Settings…]<br />
(LAN-instellingen…).<br />
3. Schakel alle selectievakjes uit.<br />
4. Klik op [OK] en vervolgens<br />
nogmaals op [OK] om het<br />
venster [Internet Options]<br />
(Internet-opties) te sluiten.<br />
Netscape<br />
1. Open Netscape en klik op<br />
de knop [Stop]. Klik op<br />
[Edit] (Bewerken) en<br />
vervolgens op<br />
[Preferences…]<br />
(Voorkeuren…).<br />
2. Dubbelklik in<br />
het venster<br />
[Preferences…]<br />
(Voorkeuren…)<br />
onder [Category]<br />
(Categorie)<br />
op [Advanced]<br />
(Geavanceerd) en<br />
klik vervolgens op<br />
[Proxies] (Proxy’s).<br />
Selecteer [Direct<br />
Connection to the<br />
Internet] (Directe verbinding<br />
met Internet). Klik op [OK].<br />
3. Herhaal deze stappen voor elke computer met<br />
Windows 95/98/Me die is aangesloten op uw <strong>SMC7804WBRA</strong>.<br />
301 302<br />
Nederlands
Nederlands<br />
Stap 3. IP-instellingen verkrijgen van uw <strong>SMC7804WBRA</strong><br />
Nadat u de computer hebt geconfigureerd voor het maken van<br />
een verbinding met de <strong>SMC7804WBRA</strong>, moeten er nieuwe<br />
netwerkinstellingen worden opgehaald. Door oude IP-instellingen<br />
vrij te geven en deze te vervangen door instellingen van uw<br />
<strong>SMC7804WBRA</strong>, kunt u ook controleren of u de computer correct<br />
hebt geconfigureerd.<br />
1. Klik op [Start] en vervolgens<br />
op [Run…] (Uitvoeren…).<br />
2. Typ WINIPCFG en klik op<br />
[OK]. Het duurt mogelijk<br />
enkele minuten voordat het<br />
venster [IP Configuration]<br />
(IP-configuratie) wordt<br />
weergegeven.<br />
3. Selecteer uw netwerkkaart uit het vervolgmenu. Klik op<br />
[Release] (Vrijgeven) en vervolgens op [Renew] (Vernieuwen).<br />
Controleer of uw IP-adres nu 192.168.2.xxx is, uw subnetmasker<br />
255.255.255.0 en uw standaardgateway 192.168. 2.1. Deze<br />
waarden bevestigen dat uw <strong>SMC7804WBRA</strong> correct werkt. Klik<br />
op [OK] om het venster [IP Configuration] (IP-configuratie)<br />
te sluiten.<br />
Nadat u de computer hebt<br />
geconfigureerd voor het maken<br />
van een verbinding met de<br />
<strong>SMC7804WBRA</strong>, gaat u naar<br />
de sectie Uw <strong>SMC7804WBRA</strong><br />
configureren.<br />
303 304<br />
Nederlands
Nederlands<br />
Uw computer met Windows 2000 configureren<br />
Stap 1. TCP/IP-instellingen configureren<br />
Nadat u de hardware hebt ingesteld, moet u de computer gaan<br />
configureren voor het maken van een verbinding met uw<br />
<strong>SMC7804WBRA</strong>.<br />
1. Klik op de knop [Start]<br />
op het bureaublad van<br />
Windows. Kies [Settings]<br />
(Instellingen) en klik<br />
vervolgens op het<br />
pictogram [Network and<br />
Dial-Up Connections] (Netwerk- en inbelverbindingen).<br />
2. Dubbelklik op<br />
het pictogram dat<br />
overeenkomt met<br />
de verbinding met<br />
uw <strong>SMC7804WBRA</strong>.<br />
3. Klik op [Properties]<br />
(Eigenschappen).<br />
4. Dubbelklik op [Internet<br />
Protocol (TCP/IP)]<br />
(Internet-protocol<br />
(TCP/IP)).<br />
305 306<br />
Nederlands
Nederlands<br />
Als [Obtain an IP address<br />
automatically] (Automatisch<br />
een IP-adres laten toewijzen)<br />
en [Obtain DNS server address<br />
automatically] (Automatisch<br />
een DNS-serveradres laten<br />
toewijzen) reeds zijn<br />
ingeschakeld, is uw computer<br />
al geconfigureerd voor DHCP.<br />
Klik op [Cancel] (Annuleren)<br />
om elk venster te sluiten en<br />
naar stap 2, HTTP-proxy<br />
uitschakelen, te gaan.<br />
6. Selecteer [Obtain an IP address automatically] (Automatisch<br />
een IP-adres laten toewijzen) en vervolgens [Obtain DNS server<br />
address automatically] (Automatisch een DNS-serveradres laten<br />
toewijzen). Klik op [OK] of op [Close] (Sluiten) om elk venster<br />
te sluiten.<br />
Stap 2. HTTP-proxy uitschakelen<br />
Ga terug naar stap 2, Uw computer configureren in<br />
Windows 95/98/Me.<br />
Stap 3. IP-instellingen verkrijgen van uw <strong>SMC7804WBRA</strong><br />
Nadat u de computer hebt geconfigureerd voor het maken<br />
van een verbinding met de <strong>SMC7804WBRA</strong>, moeten er nieuwe<br />
netwerkinstellingen worden opgehaald. Door oude IP-instellingen<br />
vrij te geven en deze te vervangen door instellingen van uw<br />
<strong>SMC7804WBRA</strong>, kunt u ook controleren of u de computer correct<br />
hebt geconfigureerd.<br />
1. Klik achtereenvolgens<br />
op [Start], [Programs]<br />
(Programma’s],<br />
[Accessories] (Bureauaccessoires)<br />
en<br />
[Command Prompt]<br />
(Opdracht-prompt)<br />
op het bureaublad<br />
van Windows.<br />
307 308<br />
Nederlands
Nederlands<br />
2. Typ in het venster [Command Prompt] (Opdracht-prompt)<br />
de opdracht IPCONFIG/RELEASE en druk op de toets .<br />
3. Typ IPCONFIG/RENEW en druk op de toets . Controleer<br />
of uw IP-adres nu 192.168.2.xxx (2-254) is, uw subnetmasker<br />
255.255.255.0 en uw standaardgateway 192.168.2.1. Deze<br />
waarden bevestigen dat uw <strong>SMC7804WBRA</strong> correct werkt.<br />
4. Typ EXIT en druk op om het venster<br />
[Command Prompt] (Opdracht-prompt) te sluiten.<br />
Nadat u de computer hebt geconfigureerd voor het maken van<br />
een verbinding met de <strong>SMC7804WBRA</strong>, gaat u naar de sectie<br />
Uw <strong>SMC7804WBRA</strong> configureren.<br />
Uw computer met Windows XP configureren<br />
Stap 1. TCP/IP-instellingen configureren<br />
Nadat u de hardware hebt ingesteld, moet u de computer<br />
configureren voor het maken van een verbinding met uw<br />
<strong>SMC7804WBRA</strong>.<br />
1. Klik op de knop [Start] op<br />
het bureaublad van Windows.<br />
Kies [Control Panel]<br />
(Configuratiescherm).<br />
2. Selecteer het pictogram<br />
[Network and Internet Connections]<br />
(Netwerk- en internetverbindingen),<br />
klik<br />
vervolgens op het pictogram<br />
[Network Connections]<br />
(Netwerkverbindingen) en<br />
dubbelklik op de adapter<br />
die u wilt gebruiken voor<br />
deze verbinding.<br />
309 310<br />
Nederlands
Nederlands<br />
3. Klik op [Properties]<br />
(Eigenschappen).<br />
4. Dubbelklik op [Internet Protocol<br />
(TCP/IP)] (Internet-protocol<br />
(TCP/IP)).<br />
Als [Obtain an IP address automatically] (Automatisch een<br />
IP-adres laten toewijzen) en [Obtain DNS server address<br />
automatically] (Automatisch een DNS-serveradres laten toewijzen)<br />
reeds zijn ingeschakeld, is uw computer al geconfigureerd voor<br />
DHCP. Klik op [Cancel] (Annuleren) om elk venster te sluiten<br />
en naar stap 2, HTTP-proxy uitschakelen, te gaan.<br />
6. Selecteer [Obtain an IP address<br />
automatically] (Automatisch<br />
een IP-adres laten toewijzen)<br />
en vervolgens [Obtain DNS<br />
server address automatically]<br />
(Automatisch een DNSserveradres<br />
laten toewijzen).<br />
Klik op [OK] of op [Close]<br />
(Sluiten) om elk venster te<br />
sluiten.<br />
Stap 2. HTTP-proxy uitschakelen<br />
Ga terug naar stap 2, Uw computer configureren<br />
in Windows 95/98/Me.<br />
Stap 3. IP-instellingen verkrijgen van uw <strong>SMC7804WBRA</strong><br />
Nadat u de computer hebt geconfigureerd voor het maken<br />
van een verbinding met de <strong>SMC7804WBRA</strong>, moeten er nieuwe<br />
netwerkinstellingen worden opgehaald. Door oude IP-instellingen<br />
vrij te geven en deze te vervangen door instellingen van uw<br />
<strong>SMC7804WBRA</strong>, kunt u ook controleren of u de computer correct<br />
hebt geconfigureerd.<br />
1. Klik achtereenvolgens<br />
op [Start], [Programs]<br />
(Programma’s],<br />
[Accessories]<br />
(Bureau-accessoires)<br />
en [Command Prompt]<br />
(Opdracht-prompt) op het<br />
bureaublad van Windows.<br />
311 312<br />
Nederlands
Nederlands<br />
2. Typ in het venster [Command Prompt] (Opdracht-prompt)<br />
de opdracht IPCONFIG/RELEASE en druk op de toets .<br />
3. Typ IPCONFIG/RENEW en druk op de toets . Controleer<br />
of uw IP-adres nu 192.168.2.xxx (2-254) is, uw subnetmasker<br />
255.255.255.0 en uw standaardgateway 192.168.2.1. Deze<br />
waarden bevestigen dat uw <strong>SMC7804WBRA</strong> correct werkt.<br />
4. Typ EXIT en druk op om het venster<br />
[Command Prompt] (Opdracht-prompt) te sluiten.<br />
Nadat u de computer hebt geconfigureerd voor het maken van<br />
een verbinding met uw <strong>SMC7804WBRA</strong>, gaat u naar de sectie<br />
Uw <strong>SMC7804WBRA</strong> configureren.<br />
Uw computer met Windows NT 4.0 configureren<br />
Stap 1. TCP/IP-instellingen configureren<br />
Nadat u de hardware hebt ingesteld, moet u de computer<br />
configureren voor het maken van een verbinding met uw<br />
<strong>SMC7804WBRA</strong>.<br />
1. Klik achtereenvolgens<br />
op [Start], [Settings]<br />
(Instellingen) en<br />
[Control Panel]<br />
(Configuratiescherm)<br />
op het bureaublad<br />
van Windows.<br />
313 314<br />
Nederlands
Nederlands<br />
2. Dubbelklik op het<br />
pictogram [Network]<br />
(Netwerk).<br />
3. Selecteer het tabblad<br />
[Protocols] (Protocollen).<br />
4. Dubbelklik op [TCP/IP<br />
Protocol] (TCP/IP-protocol).<br />
5. Selecteer het tabblad<br />
[IP Address] (IP-adres).<br />
6. Controleer in de keuzelijst<br />
[Adapter] of uw Ethernetadapter<br />
is geselecteerd.<br />
Als [Obtain an IP address automatically] (Automatisch een<br />
IP-adres laten toewijzen) al is geselecteerd, is de computer<br />
reeds geconfigureerd voor DHCP. Klik op [Cancel] (Annuleren)<br />
om elk venster te sluiten en naar stap 2, HTTP-proxy uitschakelen,<br />
te gaan.<br />
7. Selecteer [Obtain an IP address automatically]<br />
(Automatisch een IP-adres laten toewijzen).<br />
315 316<br />
Nederlands
Nederlands<br />
8. Klik op het tabblad [DNS] om<br />
de primaire en secundaire DNS<br />
te bekijken. Verwijder alle<br />
vermelde DNS-adressen.<br />
9. Klik op [OK] en vervolgens<br />
nogmaals op [OK] om het<br />
venster [Network] (Netwerk)<br />
te sluiten.<br />
10. Windows kopieert mogelijk een aantal bestanden en vraagt<br />
u vervolgens om het systeem opnieuw op te starten. Klik<br />
op [Yes] (Ja) om de computer af te sluiten en opnieuw op<br />
te starten.<br />
Stap 2. HTTP-proxy uitschakelen<br />
Ga terug naar stap 2, Uw computer configureren in<br />
Windows 95/98/Me.<br />
Stap 3. IP-instellingen verkrijgen van uw <strong>SMC7804WBRA</strong><br />
Nadat u de computer hebt geconfigureerd voor het maken van<br />
een verbinding met de <strong>SMC7804WBRA</strong>, moeten er nieuwe<br />
netwerkinstellingen worden opgehaald. Door oude IP-instellingen<br />
vrij te geven en deze te vervangen door instellingen van uw<br />
<strong>SMC7804WBRA</strong>, kunt u ook controleren of u de computer correct<br />
hebt geconfigureerd.<br />
1. Klik<br />
achtereenvolgens<br />
op [Start],<br />
[Programs]<br />
(Programma’s]<br />
en [Command<br />
Prompt]<br />
(Opdrachtprompt)<br />
op<br />
het bureaublad<br />
van Windows.<br />
317 318<br />
Nederlands
Nederlands<br />
2. Typ in het venster [Command Prompt] (Opdracht-prompt)<br />
de opdracht IPCONFIG/RELEASE en druk op de toets .<br />
3. Typ IPCONFIG/RENEW en druk op de toets .<br />
Controleer of uw IP-adres nu 192.168.2.xxx is, uw subnetmasker<br />
255.255.255.0 en uw standaardgateway 192.168.2.1. Deze<br />
waarden bevestigen dat uw <strong>SMC7804WBRA</strong> correct werkt.<br />
4. Typ EXIT en druk op om het venster<br />
[Command Prompt] (Opdracht-prompt) te sluiten.<br />
Nadat u de computer hebt geconfigureerd voor het maken van<br />
een verbinding met de <strong>SMC7804WBRA</strong>, gaat u naar de sectie<br />
Uw <strong>SMC7804WBRA</strong> configureren.<br />
Uw Macintosh-computer configureren<br />
Mogelijk komen de onderstaande instructies niet exact overeen<br />
met de informatie op uw scherm. Dit komt doordat deze stappen<br />
en schermafbeeldingen zijn gemaakt met behulp van Mac OS 8.5.<br />
Mac OS 7.x en hoger lijken erg op Mac OS 8.5, maar hoeven niet<br />
identiek te zijn.<br />
Stap 1. TCP/IP-instellingen configureren<br />
Nadat u de hardware hebt ingesteld, moet u de computer gaan<br />
configureren voor het maken van een verbinding met uw<br />
<strong>SMC7804WBRA</strong>.<br />
1. Open het menu [Apple]. Klik op [Control Panels] (Regelpanelen)<br />
en selecteer [TCP/IP].<br />
319 320<br />
Nederlands
Nederlands<br />
2. Controleer in het dialoogvenster [TCP/IP] of [Ethernet] is<br />
geselecteerd in het veld [Connect Via:] (Verbinden via:).<br />
Als [Using DHCP Server] (Via DHCP) reeds is ingeschakeld in het<br />
veld [Configure] (Configuratie) is de computer al geconfigureerd<br />
voor DHCP. Sluit het venster [TCP/IP] en ga naar stap 2, HTTPproxy<br />
uitschakelen.<br />
3. Selecteer [Using DHCP<br />
Server] (Via DHCP) in het<br />
veld [Configure]<br />
(Configuratie) en sluit het<br />
venster.<br />
4. Er wordt een ander<br />
venster weergegeven<br />
waarin u wordt<br />
gevraagd of u uw<br />
TCP/IP-instellingen<br />
wilt opslaan. Klik op<br />
[Save] (Opslaan).<br />
Stap 2. HTTP-proxy uitschakelen<br />
U moet controleren of de functie HTTP-proxy van uw webbrowser<br />
is uitgeschakeld, zodat uw webbrowser de configuratiepagina’s van<br />
uw <strong>SMC7804WBRA</strong> kan bekijken. De stappen voor Internet Explorer<br />
en voor Netscape worden hieronder beschreven. Bepaal welke<br />
browser u gebruikt en volg de bijbehorende stappen.<br />
Internet Explorer<br />
1. Open Internet Explorer en klik op de<br />
knop [Stop]. Klik op [Edit] (Bewerken)<br />
en selecteer [Preferences…]<br />
(Voorkeuren…).<br />
321 322<br />
Nederlands
Nederlands<br />
2. Selecteer de optie [Proxies] (Proxy’s) in het venster<br />
[Preferences…] (Voorkeuren…) van Internet Explorer<br />
onder [Network] (Netwerk).<br />
3. Schakel alle<br />
selectievakjes uit<br />
en klik op [OK].<br />
Netscape<br />
1. Open Netscape en klik op de knop<br />
[Stop]. Klik op [Edit] (Bewerken)<br />
en selecteer [Preferences…]<br />
(Voorkeuren…).<br />
2. Ga naar het<br />
dialoogvenster<br />
[Preferences…]<br />
(Voorkeuren….)<br />
en selecteer de<br />
optie [Advanced]<br />
(Geavanceerd) in<br />
de linkerkolom met<br />
de titel [Category]<br />
(Categorie). Selecteer<br />
[Proxies] (Proxy’s) in<br />
de categorie [Advanced]<br />
(Geavanceerd).<br />
3. Selecteer [Direct Connection to the Internet]<br />
(Directe verbinding met Internet) en klik op [OK].<br />
323 324<br />
Nederlands
Nederlands<br />
Stap 3. IP-instellingen verkrijgen van uw <strong>SMC7804WBRA</strong><br />
Nadat u de computer hebt geconfigureerd voor het maken<br />
van een verbinding met de <strong>SMC7804WBRA</strong>, moeten er nieuwe<br />
netwerkinstellingen worden opgehaald. Door oude IP-instellingen<br />
vrij te geven en deze te vervangen door instellingen van uw<br />
<strong>SMC7804WBRA</strong>, kunt u ook controleren of u de computer correct<br />
hebt geconfigureerd.<br />
1. Open het menu [Apple]. Klik op<br />
[Control Panels] (Regelpanelen)<br />
en selecteer [TCP/IP].<br />
2. In het venster [TCP/IP] worden uw nieuwe instellingen<br />
weergegeven. Controleer of uw IP-adres nu 192.168.2.xxx is,<br />
uw subnetmasker 255.255.255.0 en uw standaardgateway<br />
192.168.2.1. Deze waarden bevestigen dat uw <strong>SMC7804WBRA</strong><br />
correct werkt.<br />
3. Sluit het venster [TCP/IP].<br />
Nadat u de computer hebt geconfigureerd voor het maken van<br />
een verbinding met de <strong>SMC7804WBRA</strong>, gaat u naar de sectie<br />
Uw <strong>SMC7804WBRA</strong> configureren.<br />
325 326<br />
Nederlands
Nederlands<br />
Uw <strong>SMC7804WBRA</strong> configureren<br />
Nadat u de computer hebt geconfigureerd en uw nieuwe<br />
netwerkinstellingen hebt opgehaald van uw <strong>SMC7804WBRA</strong>, kunt<br />
u de instellingen van de <strong>SMC7804WBRA</strong> voor uw internetprovider<br />
configureren.<br />
1. Open uw webbrowser (Internet Explorer of Netscape Navigator)<br />
en klik op de knop [Stop].<br />
2. Typ in het veld [Address] (Adres) de opdracht<br />
http://192.168.2.1 en druk<br />
op .<br />
Opmerking: Voor sommige browsers moet mogelijk :88 worden<br />
ingevoerd na het IP-adres. Bijvoorbeeld<br />
http://192.168.2.1:88<br />
3. Het inlogscherm voor de <strong>SMC7804WBRA</strong> wordt weergegeven.<br />
Voer het standaardwachtwoord in en klik op [Login] (Inloggen).<br />
Het standaardwachtwoord is smcadmin. Om veiligheidsredenen<br />
moet u zo snel mogelijk een wachtwoord toewijzen. Houdt<br />
u er rekening mee dat het<br />
aanmeldingswachtwoord<br />
hoofdlettergevoelig is.<br />
4. Klik op de introductiepagina<br />
van de webconsole<br />
van de <strong>SMC7804WBRA</strong><br />
op [Setup Wizard] (Wizard<br />
Setup). Het automatische<br />
setup-proces van de<br />
<strong>SMC7804WBRA</strong> leidt u door<br />
elke stap voor het instellen<br />
van uw gateway.<br />
327 328<br />
Nederlands
Nederlands<br />
5. Selecteer uw tijdzone uit de lijst. Als u de ADSL-router<br />
automatisch wilt laten synchroniseren met een openbare<br />
tijdserver, schakelt u het selectievakje [Enable Automatic Time<br />
Server Maintenance]. (Onderhoud van automatische tijdserver<br />
inschakelen) in. Selecteer de gewenste server uit de keuzelijst.<br />
6. Klik op [NEXT] (Volgende) om door te gaan naar<br />
de instellingspagina voor ADSL-parameters.<br />
7. Selecteer uw land en uw internetprovider. Hierdoor wordt<br />
de <strong>SMC7804WBRA</strong> automatisch geconfigureerd met de juiste<br />
instellingen voor protocol, inkapseling en VPI/VCI-instellingen<br />
voor uw internetprovider.<br />
Als uw land of internetprovider niet voorkomt in de lijst, moet u<br />
de instellingen voor de internetprovider handmatig configureren.<br />
Ga naar de sectie Land of internetprovider niet in lijst.<br />
8. Voer uw gebruikersnaam, wachtwoord en DNS-serveradres<br />
bij de internetprovider in.<br />
Als uw internetprovider Protocol RFC1483 Routed of Bridged<br />
gebruikt, is geen gebruikersnaam/wachtwoord vereist. Voor<br />
RFC1483 Routed moet u het IP-adres, het subnetmasker, de<br />
standaardgateway en het DNS-serveradres invoeren dat u hebt<br />
ontvangen van uw internetprovider.<br />
Opmerking: Standaard is 192.168.2.1 ingesteld als DNSserveradres.<br />
Dit moet worden vervangen door<br />
het DNS-serveradres van uw internetprovider.<br />
329 330<br />
Nederlands
Nederlands<br />
9. Klik op [Next] (Volgende) om door te gaan en de instellingen<br />
te bevestigen.<br />
10. Klik, als de parameters correct zijn, op [Apply] (Toepassen)<br />
om deze instellingen op te slaan.<br />
Uw <strong>SMC7804WBRA</strong> is nu ingesteld. Ga naar de sectie Problemen<br />
oplossen van de Gebruikershandleiding als u geen verbinding met<br />
internet kunt maken.<br />
Land of internetprovider niet in lijst<br />
Als uw land of internetprovider niet voorkomt in de lijst, moet u<br />
de instellingen voor uw internetprovider handmatig configureren.<br />
Selecteer [Others] (Overige) uit de keuzelijst.<br />
Voor handmatige configuratie moet u het protocol, de DNS-server<br />
en de instellingen voor inkapseling en VPI/VCI weten die worden<br />
gebruikt door uw internetprovider. Als u een statisch IP-adres<br />
hebt, moet u het IP-adres, het subnetmasker en het adres<br />
van de standaardgateway weten. Neem contact op met uw<br />
internetprovider voor deze informatie als u deze nog niet hebt.<br />
331 332<br />
Nederlands
Nederlands<br />
Selecteer welk protocol uw internetprovider gebruikt uit<br />
de keuzelijst met internetproviders.<br />
Internetprovider gebruikt PPPoA/PPPoE<br />
Voer de gebruikersnaam, het wachtwoord, het DNS-serveradres en<br />
de VPI/VCI-circuitnummers in die uw internetprovider aan u heeft<br />
verstrekt.<br />
Klik op [Next]<br />
(Volgende) om door te<br />
gaan en de instellingen<br />
te bevestigen.<br />
Klik, als de parameters<br />
correct zijn, op [Apply]<br />
(Toepassen) om deze<br />
instellingen op te slaan.<br />
Uw <strong>SMC7804WBRA</strong> is<br />
nu ingesteld. Ga naar<br />
de sectie Problemen<br />
oplossen van de<br />
Gebruikershandleiding<br />
als u geen verbinding<br />
met internet kunt<br />
maken.<br />
333 334<br />
Nederlands
Nederlands<br />
Internetprovider gebruikt RFC1483 Routing<br />
Voer het IP-adres, het subnetmasker, de standaardgateway,<br />
het DNS-serveradres en de VPI/VCI-circuitnummers in die<br />
uw internetprovider aan u heeft verstrekt.<br />
Klik op [Next]<br />
(Volgende) om<br />
door te gaan en<br />
de instellingen<br />
te bevestigen.<br />
Klik, als de parameters correct zijn, op [Apply] (Toepassen)<br />
om deze instellingen op te slaan.<br />
Uw <strong>SMC7804WBRA</strong> is<br />
nu ingesteld. Ga naar<br />
de sectie Problemen<br />
oplossen van<br />
de Gebruikershandleiding<br />
als u<br />
geen verbinding met<br />
internet kunt maken.<br />
Internetprovider gebruikt RFC1483 Bridging<br />
Voer het DNS-serveradres en de VPI/VCI-circuitnummers in die<br />
uw internetprovider aan u heeft verstrekt. Als u een vast IP-adres<br />
hebt, moet u ook het IP-adres, het subnetmasker en het adres<br />
van de standaardgateway dat u van uw internetprovider hebt<br />
ontvangen invoeren.<br />
Opmerking: U hebt de keuze uit 3 verschillende modi voor<br />
bridging.<br />
335 336<br />
Nederlands
Nederlands<br />
337<br />
[RFC1483 Bridging]<br />
Selecteer deze optie als u wilt dat de <strong>SMC7804WBRA</strong> transparant<br />
is en het openbare IP-adres doorgeeft aan één enkele pc, server<br />
of firewall.<br />
[RFC1483 Bridging DHCP]<br />
Selecteer deze optie als u de verbinding wilt laten delen<br />
door meerdere pc’s (meest gebruikelijke instelling).<br />
[RFC1483 Bridging FixIP]<br />
Selecteer deze optie als uw internetprovider u een statisch<br />
IP-adres heeft verstrekt.<br />
Klik op [Next] (Volgende) om door te gaan en de instellingen<br />
te bevestigen.<br />
Klik, als de parameters<br />
correct zijn, op [Apply]<br />
(Toepassen) om deze<br />
instellingen op<br />
te slaan.<br />
Uw <strong>SMC7804WBRA</strong> is nu ingesteld. Ga naar de sectie Problemen<br />
oplossen van de Gebruikershandleiding als u geen verbinding met<br />
internet kunt maken.<br />
Introdução<br />
O <strong>SMC7804WBRA</strong> ADSL Barricade g da SMC é um Router de Banda<br />
Larga Sem Fios de 54 Mbps com Modem ADSL integrado (Anexo A).<br />
Este produto foi concebido para permitir a partilha do acesso<br />
à Internet, proporcionar segurança e facultar diversos dispositivos<br />
de rede a vários utilizadores. O <strong>SMC7804WBRA</strong> tem uma instalação<br />
e configuração extremamente simples, que pode ser realizada por<br />
utilizadores pouco experientes, ao mesmo tempo que disponibiliza<br />
aos profissionais de redes funções avançadas de fácil configuração.<br />
Para conhecer as funções avançadas deste produto, consulte<br />
o Manual do Utilizador.<br />
338<br />
Português
Português<br />
Conteúdo da Embalagem<br />
• Um ADSL BarricadeTM g.<br />
• Um adaptador de corrente.<br />
• Um CD com a documentação completa.<br />
• Um cabo Fast Ethernet Categoria 5.<br />
• Um cabo de ligação telefónica (RJ-11).<br />
• Um separador (apenas nos modelos para a Holanda, França<br />
e Reino Unido).<br />
• Um kit de ligação telefónica (apenas no modelo para a Holanda).<br />
Requisitos de Instalação<br />
Antes de prosseguir com a instalação do <strong>SMC7804WBRA</strong>,<br />
certifique-se de que possui o seguinte:<br />
• Linha ADSL instalada pelo seu ISP.<br />
• Micro-filtro/ Separador ADSL.<br />
• Um computador equipado com um adaptador de rede de 10/100<br />
Mbps ou um adaptador de rede sem fios IEEE802.11g.<br />
• Protocolos de rede TCP/IP instalados em cada PC que irá aceder<br />
à Internet.<br />
• Um programa de navegação com Java, como o Microsoft Internet<br />
Explorer 5.0 ou superior.<br />
• O CD do Windows, se o computador tiver o Windows 95, 98<br />
ou Me instalado.<br />
339 340<br />
Português
Português<br />
341<br />
Hardware<br />
O painel frontal do <strong>SMC7804WBRA</strong> possui indicadores LED, para<br />
uma fácil monitorização.<br />
A tabela seguinte descreve a função de cada LED.<br />
LED Estado Descrição<br />
PWR Ligado O Barricade TM está a receber corrente.<br />
Funcionamento normal.<br />
Desligado Alimentação desligada ou falha.<br />
ADSL Sync Ligado Ligação ADSL sincronizada.<br />
Intermitente O Barricade está a estabelecer uma<br />
ligação ADSL.<br />
Desligado Ligação ADSL não estabelecida.<br />
ADSL Data Intermitente A porta ADSL indicada está a enviar<br />
ou a receber dados.<br />
WLAN Desligado Não estão a ser transferidos quaisquer<br />
dados.<br />
Intermitente A porta WLAN está a enviar ou<br />
a receber dados.<br />
Ethernet Ligado Ligação Ethernet estabelecida.<br />
(4 LEDs)<br />
Intermitente A porta LAN indicada está a enviar<br />
ou a receber dados.<br />
Desligado Não existe qualquer ligação LAN<br />
na porta.<br />
Ligar Dispositivos<br />
Portas LAN Botão Reset (Reiniciar) Porta WAN<br />
Entrada de alimentação<br />
1. Ligue os computadores directamente ao <strong>SMC7804WBRA</strong>, através<br />
das portas 1-4, situadas no painel traseiro. Se desejar ligar mais<br />
de 4 computadores, conecte um hub ou um switch e ligue<br />
os computadores adicionais a esse dispositivo. Para efectuar<br />
ligações sem fios, consulte o Manual do Utilizador do seu<br />
adaptador sem fios.<br />
2. Ligue o cabo RJ-11 fornecido, entre o Micro-Filtro/Separador<br />
ADSL e a porta WAN ADSL do <strong>SMC7804WBRA</strong><br />
3. Ligue o cabo de alimentação ao conector de corrente.<br />
342<br />
Português
Português<br />
Configurar o Computador<br />
Este Manual de Instalação Rápida inclui instruções de<br />
configuração para Windows 95, 98, Me, NT 4.0, 2000 e XP,<br />
bem como para Macintosh OS 7.x e superior. Certifique-se de que<br />
segue as instruções correspondentes ao seu sistema operativo:<br />
• Configurar o Computador com o Windows 95/98/Me.<br />
• Configurar o Computador com o Windows 2000.<br />
• Configurar o Computador com o Windows XP.<br />
• Configurar o Computador com o Windows NT 4.0.<br />
• Configurar um Computador Macintosh.<br />
Configurar o Computador com o Windows 95/98/Me<br />
É possível que estas instruções não correspondam exactamente<br />
à sua versão de Windows. Isto deve-se ao facto destes passos<br />
e capturas de ecrã terem sido criados utilizando o Windows 98.<br />
O Windows 95 e Windows Me são muito semelhantes, mas não<br />
são iguais ao Windows 98.<br />
Passo 1. Configurar as Definições TCP/IP<br />
Depois de concluir a instalação do hardware, ligando os<br />
dispositivos, terá de configurar o computador, para ligar<br />
o <strong>SMC7804WBRA</strong>.<br />
1. No ambiente de<br />
trabalho do Windows,<br />
faça clique no botão<br />
[Start] (Iniciar).<br />
Seleccione [Settings]<br />
(Definições) e, em<br />
seguida, faça clique em<br />
[Control Panel] (Painel<br />
de controlo).<br />
343 344<br />
Português
Português<br />
2. No [Control Panel] (Painel de controlo), faça duplo clique<br />
no ícone [Network] (Rede).<br />
3. Na janela [Network] (Rede),<br />
no separador [Configuration]<br />
(Configuração), faça duplo<br />
clique em [TCP/IP], na lista<br />
da sua placa de rede.<br />
4. Seleccione o separador<br />
[IP Address] (Endereço IP).<br />
Se a opção [Obtain an IP address automatically] (Obter<br />
automaticamente um endereço IP) já estiver seleccionada,<br />
o computador já está configurado para DHCP. Faça clique<br />
em [Cancel] (Cancelar), para fechar cada janela, e avance<br />
para o Passo 2 - Desactivar o Proxy HTTP.<br />
5. Faça clique em [Obtain an IP address automatically]<br />
(Obter automaticamente um endereço IP) .<br />
345 346<br />
Português
Português<br />
347<br />
6. Faça clique no separador<br />
[Gateway] (Porta de ligação)<br />
e remova quaisquer números<br />
listados em [Installed gateways]<br />
(Portas de ligação instaladas).<br />
7. Faça clique no separador [DNS<br />
Configuration] (Configuração<br />
de DNS) e, em seguida, em<br />
[Disable DNS] (Desactivar DNS).<br />
8. Faça clique em [OK].<br />
9. O Windows poderá<br />
necessitar do CD de<br />
Windows 95/98/Me para<br />
copiar alguns ficheiros.<br />
Uma vez concluída a cópia, apresentará o pedido para<br />
reinicializar o sistema. Faça clique em [Yes] (Sim);<br />
o computador será desligado e reinicializado.<br />
Passo 2. Desactivar o Proxy HTTP<br />
Terá de verificar se a função Proxy HTTP do seu programa<br />
de navegação está desactivada, de modo a que este possa<br />
visualizar as páginas de configuração dentro do <strong>SMC7804WBRA</strong>.<br />
O passos seguintes aplicam-se ao Internet Explorer e ao Netscape.<br />
Determine qual o programa de navegação utilizado e siga os passos<br />
apropriados.<br />
Internet Explorer<br />
1. Abra o Internet Explorer e faça clique no botão [Stop]<br />
(Parar) . Faça clique<br />
em [Tools] (Ferramentas)<br />
e, em seguida, em<br />
[Internet Options]<br />
(Opções da Internet).<br />
348<br />
Português
Português<br />
2. Na janela [Internet Options]<br />
(Opções da Internet), faça<br />
clique no separador<br />
[Connections] (Ligações).<br />
Em seguida, faça clique no<br />
botão [LAN Settings…]<br />
(Definições de LAN...).<br />
3. Desmarque todas as opções.<br />
4. Faça clique em [OK] e novamente<br />
em [OK], para fechar<br />
a janela [Internet Options]<br />
(Opções da Internet).<br />
Netscape<br />
1. Abra o Netscape e faça<br />
clique no botão [Stop]<br />
(Parar). Faça clique em<br />
[Edit] (Editar) e seleccione<br />
[Preferences...]<br />
(Preferências...).<br />
2. Na janela<br />
[Preferences]<br />
(Preferências),<br />
na opção [Category]<br />
(Categoria), faça<br />
duplo clique em<br />
[Advanced]<br />
(Avançada) e,<br />
em seguida, em<br />
[Proxies]. Seleccione<br />
[Direct connection<br />
to the Internet]<br />
(Ligação directa à Internet).<br />
Faça clique em [OK].<br />
3. Repita estes passos para cada computador Windows 95/98/Me<br />
ligado ao <strong>SMC7804WBRA</strong>.<br />
349 350<br />
Português
Português<br />
Passo 3. Obter as Definições IP do <strong>SMC7804WBRA</strong><br />
Agora que o computador já está configurado para ligar<br />
o <strong>SMC7804WBRA</strong>, terá de obter novas definições de rede.<br />
Ao remover as definições IP antigas e substituí-las pelas<br />
definições do <strong>SMC7804WBRA</strong>, também irá verificar se o<br />
computador está correctamente configurado.<br />
1. Faça clique em [Start] (Iniciar) e, em seguida, em [Run…]<br />
(Executar...).<br />
2. Escreva WINIPCFG e faça<br />
clique em [OK]. A janela<br />
[IP Configuration]<br />
(Configuração IP) pode<br />
demorar um ou dois minutos<br />
até ser apresentada.<br />
3. No menu pendente, seleccione a sua placa de rede. Faça clique<br />
em [Release] (Libertar) e, em seguida, em [Renew] (Renovar).<br />
Verifique se o seu endereço IP é 192.168.2.xxx, a máscara<br />
de sub-red é 255.255.255.0 e a porta de ligação assumida<br />
é 192.168.2.1. Estes valores confirmam que o seu<br />
<strong>SMC7804WBRA</strong> está a funcionar. Faça clique em [OK],<br />
para fechar a janela [IP Configuration] (Configuração IP).<br />
Agora que o computador está<br />
configurado para ligar o<br />
<strong>SMC7804WBRA</strong>, avance para<br />
Configurar o <strong>SMC7804WBRA</strong>.<br />
351 352<br />
Português
Português<br />
Configurar o Computador com o Windows 2000<br />
Passo 1. Configurar as Definições TCP/IP<br />
Depois de concluir a instalação do hardware, terá de configurar<br />
o computador, para ligar o <strong>SMC7804WBRA</strong>.<br />
1. No ambiente de trabalho<br />
do Windows, faça clique<br />
no botão [Start] (Iniciar).<br />
Seleccione [Settings]<br />
(Definições) e faça clique<br />
no ícone [Network and<br />
Dial-Up Connections]<br />
(Ligações de acesso<br />
telefónico e de rede).<br />
2. Faça duplo clique no<br />
ícone correspondente<br />
à ligação ao<br />
<strong>SMC7804WBRA</strong>.<br />
3. Faça clique em<br />
[Properties]<br />
(Propriedades).<br />
4. Faça duplo clique em<br />
[Internet Protocol<br />
(TCP/IP)] (Protocolo<br />
de Internet TCP/IP).<br />
353 354<br />
Português
Português<br />
Se as opções [Obtain an IP<br />
address automatically] (Obter<br />
automaticamente um endereço<br />
IP) e [Obtain DNS server<br />
address automatically] (Obter<br />
automaticamente o endereço<br />
do servidor DNS) já estiverem<br />
seleccionadas, o computador<br />
já está configurado para DHCP.<br />
Faça clique em [Cancel]<br />
(Cancelar), para fechar cada<br />
janela, e avance para o Passo 2<br />
Desactivar o Proxy HTTP.<br />
6. Seleccione [Obtain an IP address automatically] (Obter<br />
automaticamente um endereço IP) e, em seguida, [Obtain<br />
DNS server address automatically] (Obter automaticamente<br />
o endereço do servidor DNS). Faça clique em [OK] ou [Close]<br />
(Fechar), para fechar cada janela.<br />
Passo 2. Desactivar o Proxy HTTP<br />
Regresse ao Passo 2, na secção Configurar o Computador com<br />
o Windows 95/98/Me.<br />
Passo 3. Obter as Definições IP do <strong>SMC7804WBRA</strong><br />
Agora que o computador já está configurado para ligar<br />
o <strong>SMC7804WBRA</strong>, terá de obter novas definições de rede.<br />
Ao remover as definições IP antigas e substituí-las pelas<br />
definições do <strong>SMC7804WBRA</strong>, também irá verificar se<br />
o computador está correctamente configurado.<br />
1. No ambiente de trabalho<br />
do Windows, faça clique<br />
no botão [Start]<br />
(Iniciar) e, em seguida,<br />
em [Programs] (Programas),<br />
[Accessories]<br />
(Acessórios) e [Command<br />
Prompt] (Linha<br />
de comandos).<br />
355 356<br />
Português
Português<br />
2. Na janela [Command Prompt] (Linha de comandos), escreva<br />
IPCONFIG/RELEASE e prima a tecla .<br />
3. Escreva IPCONFIG/RENEW e prima a tecla . Verifique<br />
se o seu endereço IP é 192.168.2.xxx (2-254), a máscara<br />
de sub-rede é 255.255.255.0 e a porta de ligação assumida<br />
é 192.168.2.1. Estes valores confirmam que o seu<br />
<strong>SMC7804WBRA</strong> está<br />
a funcionar.<br />
4. Escreva EXIT e prima , para fechar a janela<br />
[Command Prompt] (Linha de comandos).<br />
Agora que o computador está configurado para ligar<br />
o <strong>SMC7804WBRA</strong>, avance para Configurar o <strong>SMC7804WBRA</strong>.<br />
Configurar o Computador com o Windows XP<br />
Passo 1. Configurar as Definições TCP/IP<br />
Depois de concluir a instalação do hardware, terá de configurar<br />
o computador, para ligar o <strong>SMC7804WBRA</strong>.<br />
1. No ambiente de trabalho do<br />
Windows, faça clique no botão<br />
[Start] (Iniciar). Seleccione<br />
[Control Panel] (Painel<br />
de controlo).<br />
2. Seleccione o ícone [Network<br />
and Internet Connections]<br />
(Ligações de rede e de<br />
Internet), faça clique no<br />
ícone [Network Connections]<br />
(Ligações de rede) e faça<br />
duplo clique no adaptador<br />
que pretende utilizar para<br />
esta ligação.<br />
357 358<br />
Português
Português<br />
3. Faça clique em [Properties]<br />
(Propriedades).<br />
4. Faça duplo clique em [Internet<br />
Protocol (TCP/IP)] (Protocolo<br />
de Internet TCP/IP).<br />
Se as opções [Obtain an IP address automatically] (Obter<br />
automaticamente um endereço IP) e [Obtain DNS server address<br />
automatically] (Obter automaticamente o endereço do servidor<br />
DNS) já estiverem seleccionadas, o computador já está<br />
configurado para DHCP. Faça clique em [Cancel] (Cancelar),<br />
para fechar cada janela, e avance para o Passo 2 -<br />
Desactivar o Proxy HTTP.<br />
6. Seleccione [Obtain an IP<br />
address automatically] (Obter<br />
automaticamente um endereço<br />
IP) e, em seguida, [Obtain DNS<br />
server address automatically]<br />
(Obter automaticamente o<br />
endereço do servidor DNS).<br />
Faça clique em [OK] ou [Close]<br />
(Fechar), para fechar cada<br />
janela.<br />
Passo 2. Desactivar o Proxy HTTP<br />
Regresse ao Passo 2, na secção Configurar o Computador com<br />
o Windows 95/98/Me.<br />
Passo 3. Obter as Definições IP do <strong>SMC7804WBRA</strong><br />
Agora que o computador já está configurado para ligar<br />
o <strong>SMC7804WBRA</strong>, terá de obter novas definições de rede.<br />
Ao remover as definições IP antigas e substituí-las pelas<br />
definições do <strong>SMC7804WBRA</strong>, também irá verificar se<br />
o computador está correctamente configurado.<br />
1. No ambiente de trabalho<br />
do Windows, faça clique<br />
no botão [Start] (Iniciar)<br />
e, em seguida, em<br />
[Programs] (Programas),<br />
[Accessories]<br />
(Acessórios)<br />
e [Command Prompt]<br />
(Linha de comandos).<br />
359 360<br />
Português
Português<br />
2. Na janela [Command Prompt] (Linha de comandos), escreva<br />
IPCONFIG/RELEASE e prima a tecla .<br />
3. Escreva IPCONFIG/RENEW e prima a tecla . Verifique<br />
se o seu endereço IP é 192.168.2.xxx (2-254), a máscara de<br />
sub-rede é 255.255.255.0 e a porta de ligação assumida é<br />
192.168.2.1. Estes valores confirmam que o seu <strong>SMC7804WBRA</strong><br />
está a funcionar.<br />
4. Escreva EXIT e prima , para fechar a janela<br />
[Command Prompt] (Linha de comandos).<br />
Agora que o computador está configurado para ligar o<br />
<strong>SMC7804WBRA</strong>, avance para Configurar o <strong>SMC7804WBRA</strong>.<br />
Configurar o Computador com o Windows NT 4.0<br />
Passo 1. Configurar as Definições TCP/IP<br />
Depois de concluir a instalação do hardware, terá de configurar<br />
o computador, para ligar o <strong>SMC7804WBRA</strong>.<br />
1. No ambiente de<br />
trabalho do Windows,<br />
faça clique em [Start]<br />
(Iniciar) e, em seguida,<br />
em [Settings]<br />
(Definições) e<br />
[Control Panel]<br />
(Painel de controlo).<br />
361 362<br />
Português
Português<br />
2. Faça duplo clique no<br />
ícone [Network] (Rede).<br />
3. Seleccione o separador<br />
[Protocols] (Protocolos).<br />
4. Faça duplo clique em [TCP/IP<br />
Protocol] (Protocolo TCP/IP).<br />
5. Seleccione o separador<br />
[IP Address] (Endereço IP).<br />
6. Na lista pendente [Adapter]<br />
(Adaptador), certifique-se de<br />
que o seu adaptador Ethernet<br />
está seleccionado.<br />
Se a opção [Obtain an IP address automatically] (Obter<br />
automaticamente um endereço IP) já estiver seleccionada,<br />
o computador já está configurado para DHCP. Faça clique em<br />
[Cancel] (Cancelar), para fechar cada janela, e avance para<br />
o Passo 2 Desactivar o Proxy HTTP.<br />
7. Seleccione [Obtain an IP address automatically]<br />
(Obter automaticamente um endereço IP) .<br />
363 364<br />
Português
Português<br />
8. Faça clique no separador [DNS],<br />
para ver o DNS principal e<br />
secundário. Remova quaisquer<br />
endereços DNS listados.<br />
9. Faça clique em [OK] e<br />
novamente em [OK], para fechar<br />
a janela [Internet Options]<br />
(Opções da Internet).<br />
10. O Windows poderá copiar alguns ficheiros e apresentará<br />
o pedido para reinicializar o sistema. Faça clique em [Yes]<br />
(Sim); o computador será desligado e reinicializado.<br />
Passo 2. Desactivar o Proxy HTTP<br />
Regresse ao Passo 2, na secção Configurar o Computador com<br />
o Windows 95/98/Me.<br />
Passo 3. Obter as Definições IP do <strong>SMC7804WBRA</strong><br />
Agora que o computador já está configurado para ligar<br />
o <strong>SMC7804WBRA</strong>, terá de obter novas definições de rede.<br />
Ao remover as definições IP antigas e substituí-las pelas<br />
definições do <strong>SMC7804WBRA</strong>, também irá verificar se<br />
o computador está correctamente configurado.<br />
1. No ambiente<br />
de trabalho<br />
do Windows,<br />
faça clique no<br />
botão [Start]<br />
(Iniciar)<br />
e, em<br />
seguida, em<br />
[Programs]<br />
(Programas)<br />
e [Command<br />
Prompt]<br />
(Linha de comandos).<br />
365 366<br />
Português
Português<br />
2. Na janela [Command Prompt] (Linha de comandos), escreva<br />
IPCONFIG/RELEASE e prima a tecla .<br />
3. Escreva IPCONFIG/RENEW e prima a tecla . Verifique<br />
se o seu endereço IP é 192.168.2.xxx, a máscara de sub-rede<br />
é 255.255.255.0 e a porta de ligação assumida é 192.168.2.1.<br />
Estes valores confirmam que o seu <strong>SMC7804WBRA</strong> está<br />
a funcionar.<br />
4. Escreva EXIT e prima , para fechar a janela<br />
[Command Prompt] (Linha de comandos).<br />
Agora que o computador está configurado para ligar<br />
o <strong>SMC7804WBRA</strong>, avance para Configurar o <strong>SMC7804WBRA</strong>.<br />
Configurar um Computador Macintosh<br />
É possível que estas instruções não correspondam exactamente<br />
às apresentadas no seu ecrã. Isto deve-se ao facto destes passos<br />
e capturas de ecrã terem sido criados utilizando o Mac OS 8.5.<br />
O Mac OS 7.x e versões superiores são muito semelhantes, mas<br />
não são iguais ao Mac OS 8.5.<br />
Passo 1. Configurar as Definições TCP/IP<br />
Depois de concluir a instalação do hardware, terá de configurar<br />
o computador, para ligar o <strong>SMC7804WBRA</strong>.<br />
1. Seleccione o menu [Apple]. Faça clique em [Control Panels]<br />
(Painéis de controlo) e seleccione [TCP/IP].<br />
367 368<br />
Português
Português<br />
2. Na caixa de diálogo [TCP/IP], certifique-se que a opção<br />
[Ethernet] está seleccionada no campo [Connect Via:] (Ligar<br />
via:). Se a opção [Using DHCP Server] (Utilizar servidor DHCP)<br />
já estiver seleccionada no campo [Configure:] (Configurar:),<br />
o computador já está configurado para DHCP. Feche a caixa<br />
de diálogo [TCP/IP]<br />
e avance para o Passo 2<br />
Desactivar o Proxy HTTP.<br />
3. Seleccione [Using DHCP<br />
Server] (Utilizar servidor<br />
DHCP) no campo [Configure]<br />
(Configurar) e feche a janela.<br />
4. É apresentada outra<br />
caixa, perguntando<br />
se pretende guardar<br />
as definições TCP/IP.<br />
Faça clique em [Save]<br />
(Guardar).<br />
Passo 2. Desactivar o Proxy HTTP<br />
Terá de verificar se a função Proxy HTTP do seu programa de<br />
navegação está desactivada, de modo a que este possa visualizar<br />
as páginas de configuração dentro do <strong>SMC7804WBRA</strong>. O passos<br />
seguintes aplicam-se ao Internet Explorer e ao Netscape.<br />
Determine qual o programa de navegação utilizado e siga<br />
os passos apropriados.<br />
Internet Explorer<br />
1. Abra o Internet Explorer e faça clique<br />
no botão [Stop] (Parar). Faça clique<br />
em [Edit] (Editar) e seleccione<br />
[Preferences...] (Preferências...).<br />
369 370<br />
Português
Português<br />
2. Na janela [Preferences...] (Preferências...) do Internet Explorer,<br />
na opção [Network] (Rede), seleccione [Proxies].<br />
3. Desmarque todas as<br />
opções e faça clique<br />
em [OK].<br />
Netscape<br />
1. Abra o Netscape e faça clique no<br />
botão [Stop] (Parar). Faça clique<br />
em [Edit] (Editar) e seleccione<br />
[Preferences...] (Preferências...).<br />
2. Na caixa de diálogo<br />
[Preferences...]<br />
(Preferências...),<br />
na coluna da esquerda,<br />
denominada [Category]<br />
(Categoria), seleccione<br />
[Advanced] (Avançada).<br />
Na categoria<br />
[Advanced] (Avançada),<br />
seleccione<br />
[Proxies].<br />
3. Seleccione [Direct Connection to the Internet]<br />
(Ligação directa à Internet) e faça clique em [OK].<br />
371 372<br />
Português
Português<br />
Passo 3. Obter as Definições IP do <strong>SMC7804WBRA</strong><br />
Agora que o computador já está configurado para ligar o<br />
<strong>SMC7804WBRA</strong>, terá de obter novas definições de rede. Ao<br />
remover as definições IP antigas e substituí-las pelas definições<br />
do <strong>SMC7804WBRA</strong>, também irá verificar se o computador está<br />
correctamente configurado.<br />
1. Seleccione o menu [Apple]. Faça<br />
clique em [Control Panels]<br />
(Painéis de controlo) e seleccione<br />
[TCP/IP].<br />
2. A janela [TCP/IP] apresentará as suas novas definições.<br />
Verifique se o seu endereço IP é 192.168.2.xxx, a máscara de<br />
sub-rede é 255.255.255.0 e a porta de ligação assumida é<br />
192.168.2.1. Estes valores confirmam que o seu <strong>SMC7804WBRA</strong><br />
está a funcionar.<br />
3. Feche a janela [TCP/IP].<br />
Agora que o computador está configurado para ligar o<br />
<strong>SMC7804WBRA</strong>, avance para Configurar o <strong>SMC7804WBRA</strong>.<br />
373 374<br />
Português
Português<br />
Configuración del <strong>SMC7804WBRA</strong><br />
Agora que configurou correctamente o seu computador e obteve as<br />
novas definições de rede do <strong>SMC7804WBRA</strong>, poderá configurar as<br />
definições do <strong>SMC7804WBRA</strong> para o seu ISP (fornecedor de<br />
serviços de Internet).<br />
1. Abra o programa de navegação (Internet Explorer ou Netscape<br />
Navigator) e faça clique no botão [Stop] (Parar).<br />
2. No campo [Address] (Endereço), escreva http://192.168.2.1<br />
e prima .<br />
Nota: Em alguns programas de navegação, poderá ser necessário<br />
inserir :88 a seguir ao endereço IP de gestão. Por exemplo,<br />
http://192.168.2.1:88<br />
3. É apresentado o ecrã de login do <strong>SMC7804WBRA</strong>. Introduza<br />
a palavra-passe assumida e faça clique em [Login]. A palavrapasse<br />
assumida é smcadmin. Por uma questão de segurança,<br />
deverá atribuir uma palavra-passe logo que possível. Note que<br />
a palavra-passe de login<br />
é sensível a maiúsculas<br />
e minúsculas.<br />
4. Na página inicial da consola<br />
de Internet do<br />
<strong>SMC7804WBRA</strong>, faça clique<br />
em [Setup Wizard]<br />
(Assistente de configuração).<br />
O processo<br />
automático de configuração<br />
do <strong>SMC7804WBRA</strong> orientálo-á,<br />
passo a passo, na<br />
definição da sua porta de ligação.<br />
375 376<br />
Português
Português<br />
5. Seleccione o seu fuso horário na lista. Se desejar sincronizar<br />
automaticamente o router ADSL com um servidor de horas<br />
público, seleccione a opção [Enable Automatic Time Server<br />
Maintenance] (Activar manutenção automática de servidor de<br />
horas). Seleccione o servidor pretendido no menu pendente.<br />
6. Faça clique em [NEXT] (Seguinte), para continuar, e aceda<br />
à página de definição de parâmetros ADSL.<br />
7. Seleccione o seu país e ISP. Deste modo, o <strong>SMC7804WBRA</strong> será<br />
automaticamente configurado com as definições correctas de<br />
Protocolo, Encapsulamento e VPI/VCI do ISP.<br />
Se o seu país ou ISP não estiver incluído na lista, deverá<br />
configurar manualmente as definições do ISP. Avance para a<br />
secção País ou ISP não listado.<br />
8. Introduza o nome de utilizador, a palavra-passe e o endereço<br />
do servidor DNS do seu ISP.<br />
Se o seu ISP utilizar o Protocolo RFC1483 Routed ou Bridged, não<br />
é necessário um nome de utilizador/palavra-passe. No caso do<br />
protocolo RFC1483 Routed, terá de introduzir o endereço IP, a<br />
máscara de sub-rede, a porta de ligação assumida e o endereço<br />
do servidor DNS fornecidos pelo seu ISP.<br />
Nota: Como valor assumido, o endereço do servidor DNS está<br />
definido como 192.168.2.1, devendo ser alterado de modo a<br />
reflectir o endereço do servidor DNS do seu ISP.<br />
377 378<br />
Português
Português<br />
9. Faça clique em [Next] (Seguinte), para continuar e confirmar as<br />
definições.<br />
10. Se os parâmetros estiverem correctos, faça clique em [Apply]<br />
(Aplicar), para guardar as definições.<br />
O seu <strong>SMC7804WBRA</strong> está configurado. Se não conseguir<br />
estabelecer ligação com a Internet, consulte a secção Detecção<br />
e Resolução de Problemas, no Manual do Utilizador.<br />
País ou ISP não listado<br />
Se o seu país ou ISP não estiver incluído na lista, terá<br />
de configurar manualmente as definições do seu ISP.<br />
Seleccione [Others] (Outros) na lista pendente.<br />
Para proceder à configuração manual, deverá conhecer as<br />
definições de Protocolo, Servidor DNS, Encapsulamento e VPI/VCI<br />
utilizadas pelo seu ISP. Se possuir um endereço IP estático,<br />
também terá de conhecer o endereço IP, a máscara de sub-rede<br />
e o endereço da porta de ligação assumida. Contacte o seu ISP,<br />
para informações pormenorizadas que não possua.<br />
379 380<br />
Português
Português<br />
Seleccione o protocolo utilizado pelo seu ISP, na lista pendente<br />
de fornecedor de serviços de Internet.<br />
O ISP utiliza PPPoA/PPPoE<br />
Introduza o nome de utilizador, a palavra-passe, o endereço<br />
do servidor DNS e os números de circuito VPI/VCI fornecidos<br />
pelo seu ISP.<br />
Faça clique em [Next]<br />
(Seguinte), para<br />
continuar e confirmar<br />
as definições.<br />
Se os parâmetros<br />
estiverem correctos,<br />
faça clique em [Apply]<br />
(Aplicar), para guardar<br />
as definições.<br />
O seu <strong>SMC7804WBRA</strong><br />
está configurado.<br />
Se não conseguir<br />
estabelecer ligação<br />
com a Internet,<br />
consulte a secção<br />
Detecção e Resolução<br />
de Problemas, no<br />
Manual do Utilizador.<br />
381 382<br />
Português
Português<br />
ISP utiliza Routing RFC1483<br />
Introduza o endereço IP, a máscara de sub-rede, a porta<br />
de ligação assumida, o endereço do servidor DNS e os números<br />
de circuito VPI/VCI fornecidos pelo seu ISP.<br />
Faça clique em<br />
[Next] (Seguinte),<br />
para continuar e<br />
confirmar as<br />
definições.<br />
Se os parâmetros estiverem correctos, faça clique em [Apply]<br />
(Aplicar), para guardar as definições.<br />
O seu <strong>SMC7804WBRA</strong><br />
está configurado.<br />
Se não conseguir<br />
estabelecer ligação<br />
com a Internet,<br />
consulte a secção<br />
Detecção e Resolução<br />
de Problemas, no<br />
Manual do Utilizador.<br />
ISP utiliza Bridging RFC1483<br />
Introduza o endereço do servidor DNS e os números de circuito<br />
VPI/VCI fornecidos pelo seu ISP. Se possuir um endereço IP fixo,<br />
também terá de introduzir o endereço IP, a máscara de sub-rede e<br />
o endereço da porta de ligação assumida fornecidos pelo seu ISP.<br />
Nota: Poderá seleccionar entre 3 modos diferentes de bridging<br />
383 384<br />
Português
Português<br />
385<br />
[RFC1483 Bridging]<br />
Seleccione esta opção se pretender que o <strong>SMC7804WBRA</strong> seja<br />
transparente e passe o endereço IP público para um único PC,<br />
Servidor ou Firewall.<br />
[RFC1483 Bridging DHCP]<br />
Seleccione esta opção se pretender partilhar a ligação com<br />
múltiplos PCs (esta é a definição mais comum).<br />
[RFC1483 Bridging FixIP]<br />
Seleccione esta opção se o seu ISP lhe tiver atribuído um<br />
endereço IP estático.<br />
Faça clique em [Next]<br />
(Seguinte), para<br />
continuar e confirmar<br />
as definições.<br />
Se os parâmetros<br />
estiverem correctos,<br />
faça clique em [Apply]<br />
(Aplicar), para guardar<br />
as definições.<br />
O seu <strong>SMC7804WBRA</strong> está configurado. Se não conseguir<br />
estabelecer ligação com a Internet, consulte a secção Detecção<br />
e Resolução de Problemas, no Manual do Utilizador.<br />
Compliances<br />
EC Conformance Declaration – Class B<br />
SMC contact for these products in Europe is:<br />
SMC Networks Europe,<br />
Edificio Conata II<br />
Calle Fructuos Gelabert 6-8, 2o, 4a<br />
08970 – Sant Joan Despi<br />
Barcelona, Spain<br />
This information technology equipment complies with the<br />
essential requirements of the R&TTE Directive 1999/5/EC and all<br />
other related provisions of this directive.<br />
Notified Countries are:<br />
Australia, Austria, Belgium, Denmark, Finland, France, Germany,<br />
Iceland, Ireland, Italy, Luxembourg, Netherlands, Norway,<br />
Portugal, Spain, Sweden, Switzerland, UK<br />
CE Mark Warning<br />
In a domestic environment this product may cause radio interference in which<br />
case the user may be required to take adequate measures.<br />
Warnung!<br />
Im Wohnbereich kann dieses Produkt Funkstoerungen verursachen. In diesem<br />
Fall kann vom Benutzer verlangt werden, angemessene Massnahmen zu ergreifen.<br />
¡Precaución!<br />
En un entorno doméstico, puede causar interferencias de radio, en cuyo caso,<br />
puede requerirse al usuario para que adopte las medidas adecuadas.<br />
Attention !<br />
Dans un environnement domestique, ce produit pourrait causer des interférences<br />
radio, auquel cas l`utilisateur devrait prendre les mesures adéquates.<br />
Attenzione!<br />
Se utilizzato in ambiente domestico il prodotto può causare interferenze radio,<br />
nel cui caso è possibile che l`utente debba assumere provvedimenti adeguati.<br />
386<br />
Compliances
Compliances<br />
387<br />
Federal Communication Commission Interference Statement<br />
This equipment has been tested and found to comply with the<br />
limits for a Class B digital device, pursuant to Part 15 of the FCC<br />
Rules. These limits are designed to provide reasonable protection<br />
against harmful interference in a residential installation. This<br />
equipment generates, uses and can radiate radio frequency energy<br />
and, if not installed and used in accordance with the instructions,<br />
may cause harmful interference to radio communications. However,<br />
there is no guarantee that interference will not occur<br />
in a particular installation. If this equipment does cause harmful<br />
interference to radio or television reception, which can be<br />
determined by turning the equipment off and on, the user is<br />
encouraged to try to correct the interference by one of the<br />
following measures:<br />
• Reorient or relocate the receiving antenna.<br />
• Increase the separation between the equipment and receiver.<br />
• Connect the equipment into an outlet on a circuit different<br />
from that to which the receiver is connected.<br />
• Consult the dealer or an experienced radio/TV technician<br />
for help.<br />
FCC Caution: Any changes or modifications not expressly approved<br />
by the party responsible for compliance could void<br />
the user's authority to operate this equipment.<br />
This device complies with Part 15 of the FCC Rules. Operation<br />
is subject to the following two conditions: (1) This device may not<br />
cause harmful interference, and (2) this device must accept any<br />
interference received, including interference that may cause<br />
undesired operation.<br />
IMPORTANT NOTE:<br />
FCC Radiation Exposure Statement<br />
This equipment complies with FCC radiation exposure limits set<br />
forth for an uncontrolled environment. This equipment should be<br />
installed and operated with minimum distance 20cm between the<br />
radiator & your body.<br />
This transmitter must not be co-located or operating in<br />
conjunction with any other antenna or transmitter.<br />
Industry Canada - Class B<br />
This digital apparatus does not exceed the Class B limits for<br />
radio noise emissions from digital apparatus as set out in the<br />
interference-causing equipment standard entitled "Digital<br />
Apparatus" ICES-003 of the Department of Communications.<br />
Cet appareil numérique respecte les limites de bruits<br />
radioélectriques applicables aux appareils numériques de<br />
Classe B prescrites dans la norme sur le matérial brouilleur :<br />
« Appareils Numériques » NMB-003 édictée par l’Industrie.<br />
388<br />
Compliances
Information<br />
389<br />
Information<br />
Full Installation Manual<br />
Full installation manuals are provided on the Installation CD-Rom.<br />
Manuals in other languages than those included on the CD-Rom<br />
are provided on www.smc-europe.com (section support).<br />
Firmware and Drivers<br />
For latest driver, technical information and bug-fixes please visit<br />
www.smc-europe.com (section support).<br />
Limited Lifetime Warranty Statement<br />
For detailed information on SMC’s limited lifetime warranty please<br />
check the English full manual on this CD-Rom or visit<br />
www.smc-europe.com (section support, product registration).<br />
Contact SMC<br />
Contact details for your relevant countries are available on<br />
www.smc-europe.com and www.smc.com.<br />
Statement of Conditions<br />
In line with our continued efforts to improve internal design,<br />
operational function, and/or reliability, SMC reserves the right to<br />
make changes to the product(s) described in this document<br />
without notice. SMC does not assume any liability that may occur<br />
due to the use or application of the product(s) described herein.<br />
In order to obtain the most accurate knowledge of installation,<br />
bug-fixes and other product related information we advise to visit<br />
the relevant product support page at www.smc-europe.com before<br />
you start installing the equipment. All information is subject to<br />
change without notice.<br />
Limitation of Liability<br />
In no event, whether based in contract or tort (including<br />
negligence), shall SMC be liable for incidental, consequential,<br />
indirect, special or punitive damages of any kind, or for loss of<br />
revenue, loss of business or other financial loss arising out of<br />
or in connection with the sale, installation, maintenance, use,<br />
performance, failure or interruption of its products, even if SMC<br />
or its authorized reseller has been adviced of the possiblity of<br />
such damages.<br />
Copyright<br />
Information furnished by SMC Networks, Inc. (SMC) is believed to<br />
be accurate and reliable. However, no responsibility is assumed<br />
by SMC for its use, nor for any infringements of patents or other<br />
rights of third parties which may result from its use. No license<br />
is granted by implication or otherwise under any patent or patent<br />
rights of SMC. SMC reserves the right to change specifications at<br />
any time without notice.<br />
Trademarks<br />
SMC is a registered trademark and EZ Connect is a trademark<br />
of SMC Networks, Inc. Other product and company names are<br />
trademarks or registered trademarks of their respective holders.<br />
390<br />
Information