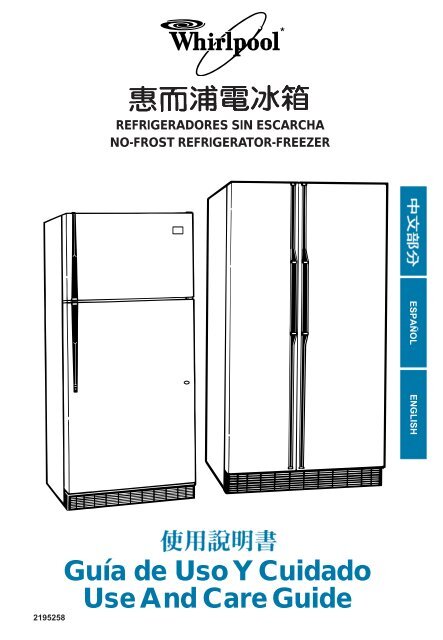
Guía de Uso Y Cuidado Use And Care Guide - Whirlpool Corporation
Guía de Uso Y Cuidado Use And Care Guide - Whirlpool Corporation
Guía de Uso Y Cuidado Use And Care Guide - Whirlpool Corporation

Create successful ePaper yourself
Turn your PDF publications into a flip-book with our unique Google optimized e-Paper software.
2195258<br />
REFRIGERADORES SIN ESCARCHA<br />
NO-FROST REFRIGERATOR-FREEZER<br />
<strong>Guía</strong> <strong>de</strong> <strong>Uso</strong> Y <strong>Cuidado</strong><br />
<strong>Use</strong> <strong>And</strong> <strong>Care</strong> Gui<strong>de</strong><br />
ESPAÑOL ENGLISH
2195258 9/96
Table of Contents<br />
Page<br />
A Note to You .......................................... 2<br />
Refrigerator Safety ................................... 3<br />
Parts and Features .................................. 4<br />
Before Using Your Refrigerator ............. 6<br />
Using Your Refrigerator ......................... 9<br />
Setting the controls ............................... 9<br />
Changing the control settings ............. 10<br />
Removing the drop-in door<br />
trim pieces .......................................... 10<br />
Removing the snap-off door trim ........ 11<br />
Removing the snap-off door trivets ..... 11<br />
Adjusting the door bins ....................... 11<br />
Adjusting the utility compartment<br />
and tray ............................................... 12<br />
Adjusting the refrigerator shelves ....... 12<br />
Adjusting the EZ-TRACK*<br />
refrigerator shelf.................................. 13<br />
Removing the meat drawer<br />
and cover ............................................ 14<br />
Removing the crispers and<br />
crisper cover ....................................... 15<br />
Adjusting the crisper humidity<br />
control ................................................. 16<br />
Page<br />
Adjusting the crisper cover track......... 16<br />
Adjusting the freezer shelf .................. 17<br />
Adjusting the half-width<br />
freezer shelf ........................................ 17<br />
Removing the pull-out freezer floor..... 18<br />
Using the ice cube trays ..................... 18<br />
Using the optional automatic<br />
ice maker ............................................ 19<br />
Attaching the optional ice maker<br />
to a water supply................................. 20<br />
Removing the base grille .................... 22<br />
Changing the light bulbs ..................... 23<br />
Un<strong>de</strong>rstanding the sounds you<br />
may hear ............................................. 24<br />
Saving energy ..................................... 24<br />
Reversing the door swing ................... 25<br />
Caring for Your Refrigerator ................ 29<br />
Food Storage Gui<strong>de</strong> .............................. 32<br />
Troubleshooting .................................... 34<br />
Requesting Service ................................ 34<br />
Warranty.................................................. 35<br />
1
A Note to You<br />
Thank you for buying a WHIRLPOOL* appliance.<br />
Because your life is getting busier and more complicated, WHIRLPOOL Refrigerators are<br />
easy to use, save time, and help you manage your home better. To ensure you enjoy years<br />
of trouble-free operation, we <strong>de</strong>veloped this <strong>Use</strong> and <strong>Care</strong> Gui<strong>de</strong>. It contains valuable information<br />
about how to operate and maintain your appliance properly and safely. Please read<br />
it carefully.<br />
Please record your mo<strong>de</strong>l’s<br />
information.<br />
Whenever you call to request service on<br />
your appliance, you need to know your<br />
complete mo<strong>de</strong>l number and serial number.<br />
You can find this information on the mo<strong>de</strong>l<br />
and serial number label (see diagrams on<br />
pages 4-5 for location of label).<br />
Please also record the purchase date of<br />
your appliance and your <strong>de</strong>aler’s name,<br />
address, and telephone number.<br />
Keep this book and the sales slip together in a safe place for future reference.<br />
2<br />
Mo<strong>de</strong>l Number __________________________<br />
Serial Number __________________________<br />
Purchase Date __________________________<br />
Dealer Name ___________________________<br />
Dealer Phone ___________________________
Refrigerator Safety<br />
Your safety is important to us.<br />
This gui<strong>de</strong> contains safety symbols and<br />
statements. Please pay special attention to<br />
these symbols and follow any instructions<br />
given. Here is a brief explanation of the use<br />
of the symbol.<br />
IMPORTANT SAFETY INSTRUCTIONS<br />
wWARNING<br />
• Read all instructions before using the<br />
refrigerator.<br />
• Never allow children to operate, play<br />
with, or crawl insi<strong>de</strong> the refrigerator.<br />
• Never clean refrigerator parts with<br />
flammable fluids. The fumes can create<br />
a fire hazard or explosion.<br />
To reduce the risk of fire, electrical shock, or<br />
injury when using your refrigerator, follow these<br />
basic precautions:<br />
– SAVE THESE INSTRUCTIONS –<br />
• FOR YOUR SAFETY •<br />
DO NOT STORE OR USE GASOLINE<br />
OR OTHER FLAMMABLE VAPORS AND<br />
LIQUIDS IN THE VICINITY OF THIS OR<br />
ANY OTHER APPLIANCE. THE FUMES<br />
CAN CREATE A FIRE HAZARD OR<br />
EXPLOSION.<br />
Proper disposal of your old refrigerator<br />
wWARNING<br />
Suffocation Hazard<br />
Remove doors from your old refrigerator.<br />
Failure to do so can result in <strong>de</strong>ath or<br />
brain damage.<br />
IMPORTANT: Child entrapment and suffocation<br />
are not problems of the past. Junked<br />
or abandoned refrigerators are still dangerous<br />
... even if they will sit for “just a few<br />
days.” If you are getting rid of your old<br />
refrigerator, please follow the instructions<br />
below to help prevent acci<strong>de</strong>nts.<br />
BEFORE YOU THROW AWAY YOUR OLD<br />
REFRIGERATOR OR FREEZER:<br />
• Take off the doors.<br />
• Leave the shelves in place so that children<br />
may not easily climb insi<strong>de</strong>.<br />
This symbol alerts you<br />
to hazards such as fire,<br />
electrical shock, or other<br />
injuries.<br />
3
Parts and Features<br />
This section contains captioned illustrations of your appliance. <strong>Use</strong> them to become familiar<br />
with where all parts and features are located and what they look like.<br />
Control panels<br />
STYLE 1<br />
STYLE 2<br />
4<br />
Refrigerator<br />
control<br />
REFRIGERATOR WARMER COLDER<br />
Ice cube trays<br />
Freezer shelf<br />
Easy-clean<br />
freezer bottom<br />
Control panel<br />
Mo<strong>de</strong>l<br />
and serial<br />
number label<br />
(on si<strong>de</strong> wall)<br />
Crisper cover<br />
Crispers<br />
1 WARMER<br />
2<br />
3<br />
REFRIGERATOR<br />
RECOMMENDED SETTING<br />
4<br />
5 COOLER<br />
3<br />
1<br />
2<br />
3<br />
4<br />
5<br />
WARMER WARMER<br />
REFRIGERATOR<br />
REFRIGERATOR<br />
RECOMMENDED RECOMMENDED SETTING SETTING<br />
COOLER COOLER<br />
ALLOW ALLOW 24 24 HOURS HOURS BETWEEN BETWEEN ADJUSTMENTS<br />
ADJUSTMENTS<br />
1<br />
2<br />
4<br />
5<br />
WARMER WARMER<br />
FREEZER FREEZER<br />
3<br />
RECOMMENDED RECOMMENDED SETTING SETTING<br />
ALLOW 24 HOURS BETWEEN ADJUSTMENTS<br />
COOLER COOLER<br />
WARMER 1<br />
2<br />
FREEZER<br />
3<br />
RECOMMENDED SETTING<br />
4<br />
COOLER 5<br />
Freezer<br />
control<br />
5 IS COLDEST SETTING<br />
3 IS RECOMMENDED SETTING WARMER COLDER FREEZER<br />
3<br />
Snap-on<br />
shelf trim<br />
Utility<br />
compartment<br />
Utility bin<br />
Meat drawer<br />
Sli<strong>de</strong>-out<br />
wire shelves<br />
Snap-on<br />
shelf trim<br />
Base grille<br />
Leveling rollers<br />
(behind base<br />
grille)
Ice cube<br />
trays<br />
and bin<br />
Freezer shelf<br />
Easy-clean<br />
freezer bottom<br />
Control panel<br />
Mo<strong>de</strong>l and<br />
serial<br />
number label<br />
(on si<strong>de</strong> wall)<br />
Meat drawer<br />
Crisper<br />
cover<br />
Crispers<br />
Leveling rollers<br />
(behind<br />
base grille)<br />
Ice cube trays<br />
and shelf<br />
Ice bin<br />
Freezer shelf<br />
Pull-out<br />
freezer floor<br />
EZ-TRACK*<br />
SPILLGUARD*<br />
glass shelf<br />
Mo<strong>de</strong>l and serial<br />
number label<br />
(on si<strong>de</strong> wall)<br />
Meat drawer<br />
Crisper cover<br />
Crisper with<br />
humidity control<br />
Leveling rollers<br />
(behind base grille)<br />
Meats<br />
HIGH<br />
LOW<br />
1<br />
2<br />
3<br />
4<br />
5<br />
WARMER<br />
COOLER<br />
REFRIGERATOR<br />
RECOMMENDED RECOMMENDED SETTING SETTING<br />
ALLOW ALLOW 24 24 HOURS HOURS BETWEEN BETWEEN ADJUSTMENTS<br />
ADJUSTMENTS<br />
1<br />
2<br />
3<br />
4<br />
5<br />
WARMER WARMER<br />
REFRIGERATOR<br />
REFRIGERATOR<br />
RECOMMENDED RECOMMENDED SETTING SETTING<br />
COOLER COOLER<br />
1<br />
2<br />
4<br />
5<br />
WARMER<br />
COOLER<br />
FREEZER 3<br />
RECOMMENDED RECOMMENDED SETTING SETTING<br />
ALLOW ALLOW 24 24 HOURS HOURS BETWEEN BETWEEN ADJUSTMENTS<br />
ADJUSTMENTS<br />
1<br />
2<br />
4<br />
5<br />
WARMER WARMER<br />
FREEZER FREEZER<br />
3<br />
RECOMMENDED RECOMMENDED SETTING SETTING<br />
COOLER COOLER<br />
HIGH<br />
LOW<br />
Snap-on<br />
door trim<br />
Utility<br />
compartment<br />
Egg bin<br />
Adjustable<br />
wire<br />
shelves<br />
Snap-on<br />
door trim<br />
Base grille<br />
Freezer light<br />
Adjustable<br />
half-width<br />
freezer shelf<br />
Snap-on<br />
door trim<br />
Control panel<br />
Sliding utility<br />
compartment<br />
Sliding tray<br />
Egg bin<br />
SPILLGUARD<br />
glass shelves<br />
Adjustable door<br />
bins with<br />
bin gli<strong>de</strong>s<br />
Snap-on<br />
door trivet<br />
5
Before Using Your<br />
Refrigerator<br />
It is important to prepare your refrigerator for use. This section tells you how to clean it,<br />
install it, connect it to a power source, and level it. For information on how to attach the<br />
optional ice maker to a water supply, see page 20, or for information on how to reverse the<br />
door swing, see page 25.<br />
Cleaning your refrigerator<br />
Removing packaging materials<br />
Remove tape and any insi<strong>de</strong> labels (except<br />
the mo<strong>de</strong>l and serial number label) before<br />
using the refrigerator.<br />
To remove any remaining tape or<br />
label glue:<br />
• Rub briskly with thumb.<br />
OR<br />
• Apply liquid hand-dishwashing <strong>de</strong>tergent to<br />
area before removing glue as <strong>de</strong>scribed<br />
above. Do not use sharp instruments,<br />
rubbing alcohol, flammable fluids, or<br />
abrasive cleaners. These can damage<br />
the material. See “Important Safety<br />
Instructions” on page 3.<br />
Installing it properly<br />
1. Allow 1 ⁄ 2-inch (1.25 cm) space on each<br />
si<strong>de</strong> and at the top of the refrigerator for<br />
ease of installation.<br />
2. If the hinge si<strong>de</strong> of the refrigerator is to<br />
be against a wall, you might want to<br />
leave extra space so the door can be<br />
opened wi<strong>de</strong>r.<br />
3. The refrigerator can be flush against the<br />
back wall.<br />
6<br />
NOTE: Do not remove any permanent<br />
instruction labels insi<strong>de</strong> your refrigerator.<br />
Do not remove the Tech Sheet fastened<br />
un<strong>de</strong>r the refrigerator at the front.<br />
Cleaning it before use<br />
After removing all packaging materials,<br />
clean your refrigerator before<br />
using it, if necessary. See<br />
cleaning instructions on<br />
page 29.
Plugging it in<br />
wWARNING<br />
Electrical Shock Hazard<br />
Plug into a groun<strong>de</strong>d 3 prong outlet.<br />
Do not remove ground prong.<br />
Do not use an adapter.<br />
Do not use an extension cord.<br />
Failure to follow these instructions<br />
can result in <strong>de</strong>ath, fire, or<br />
electrical shock.<br />
Recommen<strong>de</strong>d Grounding Method<br />
A 115 Volt/60 Hz (Plug 1), 220/240 Volt/50 Hz<br />
(Plug 2), 220 Volt/60 Hz (Plug 3) AC only 15<br />
or 20 ampere fused and properly groun<strong>de</strong>d<br />
electrical supply is required. It is recommen<strong>de</strong>d<br />
that a separate circuit serving only this<br />
appliance be provi<strong>de</strong>d. <strong>Use</strong> a receptacle<br />
which cannot be turned off with a switch<br />
or pull chain. Do not use an extension cord.<br />
Plug 1 Plug 2<br />
Plug 3<br />
7
Leveling it<br />
8<br />
wWARNING<br />
Burn Hazard<br />
Do not touch refrigeration tubes near<br />
<strong>de</strong>frost pan.<br />
Doing so can result in burns.<br />
Your refrigerator has 2 front leveling screws<br />
– one on the right and one on the left. To<br />
adjust one or both of these, follow the<br />
directions below.<br />
1. Remove base grille. (See page 22.)<br />
2. To raise front, turn screw clockwise.<br />
3. To lower front, turn screw counterclockwise.<br />
4. Check with level.<br />
5. Replace base grille. (See page 23.)<br />
Front<br />
roller<br />
Leveling<br />
screw<br />
Right to raise;<br />
left to lower<br />
<strong>Use</strong> a screwdriver<br />
to adjust<br />
Lower<br />
Raise
Using Your Refrigerator<br />
To obtain the best possible results from your refrigerator, it is important that you operate it<br />
properly. This section tells you how to set the controls, remove and adjust the features in your<br />
refrigerator, and how to save energy.<br />
Setting the controls<br />
Controls for the refrigerator and freezer are<br />
in the refrigerator. When you plug in the<br />
refrigerator for the first time:<br />
1. Set the Refrigerator Control to 3<br />
(Recommen<strong>de</strong>d Setting). Refrigerator<br />
Control settings range from 1 (warmest)<br />
to 5 (col<strong>de</strong>st).<br />
2. Set the Freezer Control to 3 (Recommen<strong>de</strong>d<br />
Setting). Freezer Control<br />
settings range from 1 (warmest) to 5<br />
(col<strong>de</strong>st).<br />
3. Give the refrigerator time to cool down<br />
completely before adding food. This may<br />
take several hours.<br />
The settings indicated above should be<br />
correct for normal, household refrigerator<br />
usage. The controls are set correctly<br />
when milk or juice is as cold as you like<br />
and when ice cream is firm. If you need to<br />
adjust these settings, see “Changing the<br />
control settings” on page 10.<br />
STYLE 1<br />
STYLE 2<br />
1 WARMER<br />
2<br />
3<br />
REFRIGERATOR<br />
RECOMMENDED SETTING<br />
4<br />
5 COOLER<br />
WARMER 1<br />
2<br />
FREEZER<br />
3<br />
RECOMMENDED SETTING<br />
4<br />
COOLER 5<br />
REFRIGERATOR WARMER COLDER<br />
WARMER 3 3 COLDER FREEZER<br />
9
Changing the control settings<br />
If you need to adjust temperatures in<br />
refrigerator or freezer, use the settings listed<br />
in the chart below as a gui<strong>de</strong>.<br />
CONDITION:<br />
Refrigerator<br />
section<br />
too warm<br />
Freezer<br />
section<br />
too warm<br />
Refrigerator<br />
section<br />
too cold<br />
Ice not<br />
ma<strong>de</strong> fast<br />
enough<br />
Both<br />
sections<br />
too warm<br />
10<br />
REASON:<br />
• Door opened often<br />
• Large amount of food ad<strong>de</strong>d<br />
• Room temperature too warm<br />
• Door opened often<br />
• Large amount of food ad<strong>de</strong>d<br />
• Very cold room temperature<br />
(can’t cycle often enough)<br />
• Controls not set correctly<br />
for your conditions<br />
• Heavy ice usage<br />
• Very cold room temperature<br />
(can’t cycle often enough)<br />
• Door opened often<br />
• Large amount of food ad<strong>de</strong>d<br />
• Very warm or very cold room<br />
temperatures<br />
• Adjust the Refrigerator Control first.<br />
• Wait at least 24 hours between adjustments.<br />
• Then adjust the Freezer Control if nee<strong>de</strong>d.<br />
RECOMMENDED<br />
CONTROL SETTINGS:<br />
Refrigerator Freezer<br />
4 2<br />
3 4<br />
2 4<br />
4 4<br />
4 4<br />
Removing the drop-in door trim pieces<br />
(on some mo<strong>de</strong>ls)<br />
To remove the trim piece:<br />
1. Remove all items from the shelf.<br />
2. Pull straight up on the trim piece at each<br />
end.<br />
To replace the trim piece:<br />
1. Locate each end of the trim piece above<br />
the trim pocket opening.<br />
2. Push the trim piece straight down until it<br />
stops.<br />
3. Replace items on the shelf.
Removing the snap-off door trim<br />
To remove the trim piece:<br />
1. Remove all items from the shelf.<br />
2. Pull out on the insi<strong>de</strong> tab at each end of<br />
the trim piece.<br />
3. Lift trim piece straight out.<br />
To replace the trim piece:<br />
1. Line up ends of the trim piece with the<br />
button on the door liner wall.<br />
2. Push trim piece straight back until it<br />
snaps securely into place.<br />
3. Replace items on the shelf.<br />
Removing the snap-off door trivets<br />
(on some mo<strong>de</strong>ls)<br />
To remove the trivet:<br />
1. Remove all items from the shelf.<br />
2. Pull out on the insi<strong>de</strong> tab at each end of<br />
the trivet.<br />
3. Lift trivet straight out.<br />
To replace the trivet:<br />
1. Line up ends of trivet with the button on<br />
the door liner wall.<br />
2. Push trivet straight back until it snaps<br />
securely into place.<br />
3. Replace items on the shelf.<br />
Adjusting the door bins<br />
(on some mo<strong>de</strong>ls)<br />
To remove door bins:<br />
1. Lift bin up.<br />
2. Pull bin straight out.<br />
To replace door bins:<br />
1. Sli<strong>de</strong> bin in above <strong>de</strong>sired support button.<br />
2. Push down until it stops.<br />
Support button<br />
11
Adjusting the utility compartment and tray<br />
(on some mo<strong>de</strong>ls)<br />
The utility compartment and tray sli<strong>de</strong> from<br />
one si<strong>de</strong> to the other for more flexible<br />
storage. The tray fits on either si<strong>de</strong> of the<br />
utility compartment or partially un<strong>de</strong>rneath it.<br />
Experiment and find the positions that work<br />
best for you.<br />
To adjust the utility compartment or tray:<br />
1. Lift the front slightly.<br />
2. Sli<strong>de</strong> to <strong>de</strong>sired position.<br />
3. Lower front to lock into place.<br />
Adjusting the refrigerator shelves<br />
Adjust the shelves to match the way you use<br />
your refrigerator. Glass shelves are strong<br />
enough to hold bottles, milk, and other<br />
heavy food items.<br />
Cantilever shelves<br />
To remove a shelf:<br />
1. Remove items from shelf.<br />
2. Tilt shelf up at front.<br />
3. Lift shelf at back.<br />
4. Pull shelf straight out.<br />
To replace a shelf:<br />
1. Gui<strong>de</strong> the rear shelf hooks into the<br />
slots in the shelf supports on the back<br />
liner wall.<br />
2. Tilt front of shelf up until hooks drop into<br />
slots.<br />
3. Lower front of shelf to a level position.<br />
Sli<strong>de</strong>-out shelves<br />
To remove the shelves:<br />
1. Remove all items from the shelf.<br />
2. Sli<strong>de</strong> shelf straight out to the stop.<br />
3. Lift the front slightly.<br />
4. Sli<strong>de</strong> shelf out the rest of the way.<br />
To replace the shelves:<br />
1. Fit back of shelf on top of gui<strong>de</strong> with wire<br />
stops on the bottom of the gui<strong>de</strong>.<br />
2. Lift the front.<br />
3. Sli<strong>de</strong> shelf in until it clears all stops.<br />
12<br />
STYLE 1<br />
NOTE: Glass shelves are heavy. Handle<br />
them carefully.<br />
STYLE 2<br />
Wire stop<br />
Gui<strong>de</strong> stop<br />
Shelf gui<strong>de</strong>
Adjusting the EZ-TRACK* refrigerator shelf<br />
(on some mo<strong>de</strong>ls)<br />
The EZ-TRACK shelf sli<strong>de</strong> from si<strong>de</strong> to si<strong>de</strong><br />
for more flexible storage in your refrigerator.<br />
To sli<strong>de</strong> shelf si<strong>de</strong>-to-si<strong>de</strong>:<br />
1. Lift slightly on shelf front.<br />
2. Sli<strong>de</strong> to <strong>de</strong>sired location.<br />
3. Lower shelf front to level position.<br />
NOTE: You do not have to remove small<br />
items from the shelf before moving it si<strong>de</strong>-tosi<strong>de</strong>.<br />
You may need to remove larger items.<br />
To remove the shelf:<br />
1. Remove all items from the shelf.<br />
2. Hold back of shelf with one hand.<br />
3. Lift front of shelf to 45° angle.<br />
4. Lower shelf slightly to release shelf from<br />
upper channel of track. Then pull shelf<br />
straight out.<br />
NOTE: Shelf is heavy. Make sure you use<br />
both hands when removing shelf.<br />
To remove shelf track:<br />
1. Lift both si<strong>de</strong>s of track slightly.<br />
2. Pull track straight out.<br />
To replace shelf track:<br />
1. Gui<strong>de</strong> track hooks into the shelf support<br />
slots on the back wall of the cabinet.<br />
NOTE: Make sure all three track hooks<br />
are in slots and that the slots are parallel<br />
to each other.<br />
2. Push track backward and down.<br />
3. Check that track is completely seated in<br />
the shelf supports.<br />
Make<br />
sure<br />
both<br />
sets of<br />
hooks<br />
are in<br />
support<br />
slots.<br />
Lift front slightly<br />
then sli<strong>de</strong> to new location.<br />
Hold with both hands<br />
and lift front to 45° angle.<br />
Hold both si<strong>de</strong>s and<br />
lift up and out.<br />
Upper channel<br />
Shelf<br />
support<br />
13
To reinstall shelf:<br />
1. Hold shelf at front and back.<br />
2. Tilt front of shelf up to a 45° angle to track.<br />
3. Insert both rear shelf sli<strong>de</strong>s into upper<br />
channel of track.<br />
4. Lower front of shelf to a level position.<br />
NOTE: Make sure both rear shelf sli<strong>de</strong>s are<br />
securely in the track before letting go of<br />
shelf.<br />
Removing the meat drawer and cover<br />
Style 1<br />
To remove the meat drawer:<br />
1. Sli<strong>de</strong> meat drawer out to the stop.<br />
2. Lift front of meat drawer and sli<strong>de</strong> meat<br />
drawer out the rest of the way.<br />
3. Replace in reverse or<strong>de</strong>r.<br />
To adjust the cover position:<br />
1. Tilt front of cover up.<br />
2. Lift back of cover.<br />
3. Pull cover straight out.<br />
To replace the cover:<br />
1. Gui<strong>de</strong> the cover’s rear hooks into the<br />
slots in the shelf supports on cabinet wall.<br />
2. Tilt cover up at front until the hooks<br />
drop into slots.<br />
3. Lower front of cover to a level<br />
position.<br />
14<br />
Insert rear shelf sli<strong>de</strong>s<br />
into upper channel of<br />
track.<br />
STYLE 1<br />
Meats<br />
Upper channel<br />
of track<br />
Pull out to the stop, lift the front, and pull again.
Style 2<br />
Remove the meat drawer and cover for<br />
easier cleaning.<br />
To remove the meat drawer:<br />
1. Sli<strong>de</strong> meat drawer out to the stop.<br />
2. Lift the front of the meat drawer.<br />
3. Sli<strong>de</strong> meat drawer out the rest of the way.<br />
4. Replace in reverse or<strong>de</strong>r.<br />
To remove the cover:<br />
1. Remove meat drawer.<br />
2. Push cover back to release the rear of the<br />
cover from the shelf.<br />
3. Tilt cover up at the front.<br />
4. Pull cover forward and out.<br />
To replace the cover:<br />
1. Fit notches and rear edge of cover over<br />
rear and center crossbars on the shelf.<br />
2. Lower cover into place.<br />
3. Replace the meat drawer.<br />
Removing the crispers and crisper cover<br />
For your convenience, one crisper is slightly<br />
larger than the other. This allows you to<br />
store celery and other longer items in your<br />
crisper.<br />
To remove the crispers:<br />
1. Sli<strong>de</strong> crisper straight out to the stop.<br />
2. Lift the front.<br />
3. Sli<strong>de</strong> out the rest of the way.<br />
4. Replace in reverse or<strong>de</strong>r.<br />
To remove the cover:<br />
1. Push up the cover insert from the bottom,<br />
then sli<strong>de</strong> out with both hands.<br />
2. Lift front of cover frame.<br />
3. Lift cover frame up and out.<br />
To replace the cover:<br />
1. Fit back of cover frame into notch supports<br />
on back wall of refrigerator, then<br />
lower the front into place.<br />
2. Sli<strong>de</strong> back of cover insert into place, then<br />
lower the front.<br />
STYLE 2<br />
Remove meat drawer before cover.<br />
Remove the<br />
cover insert.<br />
Lift the cover<br />
front, then the<br />
back.<br />
NOTE: If<br />
cover insert<br />
is glass,<br />
handle it with<br />
care. It could<br />
be heavy.<br />
Pull out to<br />
the stop,<br />
lift the<br />
front, and<br />
pull again.<br />
15
Adjusting the crisper humidity control<br />
You can control the amount of humidity in<br />
the moisture-sealed crispers. Adjust the<br />
control to any setting between LOW and<br />
HIGH.<br />
• LOW (open) lets moist air out of the crisper<br />
for best storage of fruits and vegetables<br />
with skins.<br />
• HIGH (closed) keeps moist air in the<br />
crisper for best storage of fresh, leafy<br />
vegetables.<br />
Adjusting the crisper cover track<br />
Because your crispers are not the same size,<br />
your crisper cover has an adjustable center<br />
track so you can switch positions of the<br />
crispers. You can adjust the center track with<br />
the cover in the refrigerator by removing the<br />
crispers and the cover insert.<br />
To remove the center track:<br />
2<br />
1. Push up the cover insert from the bottom,<br />
then sli<strong>de</strong> out with both hands.<br />
2. Gently pull up on front end of track.<br />
3. Pull rear end of track out of opening in<br />
cover.<br />
To replace the center track:<br />
1. Insert rear end of track (with hole) into<br />
opening in cover.<br />
2. Lower front end of track into slot.<br />
3. Make sure rear end of track has snapped<br />
into place on un<strong>de</strong>r si<strong>de</strong> of cover.<br />
16<br />
1<br />
2<br />
3
Adjusting the freezer shelf<br />
Adjust the freezer shelf to match the way you<br />
use your freezer.<br />
To remove the shelf:<br />
1. Lift entire shelf slightly.<br />
2. Move shelf all the way to one si<strong>de</strong>.<br />
3. Tilt other si<strong>de</strong> up and out of shelf support<br />
cups.<br />
4. Pull shelf up and out.<br />
To replace the shelf:<br />
1. Tilt the shelf and insert into freezer<br />
compartment.<br />
2. Insert one end of the shelf all the way into<br />
the center of the shelf support cups.<br />
3. Lower other end of shelf and insert into<br />
the shelf support cups.<br />
4. Lower shelf into place.<br />
NOTE: The shelf should lower slightly and<br />
lock into place. If the shelf does not appear<br />
sturdy, make sure both ends of the shelf<br />
are inserted into the shelf support cups.<br />
Adjusting the half-width freezer shelf<br />
(on some mo<strong>de</strong>ls)<br />
Adjust the shelf according to the space you<br />
need in your freezer. <strong>Use</strong> the bottom<br />
position when you don’t need the shelf at all.<br />
To adjust the shelf:<br />
1. Remove items from the shelf.<br />
2. Lift shelf up at front.<br />
3. Pull shelf out to the stop.<br />
4. Lift back of shelf.<br />
5. Pull shelf out the rest of the way.<br />
To replace the shelf:<br />
1. Gui<strong>de</strong> rear of shelf into <strong>de</strong>sired gui<strong>de</strong>.<br />
2. Lift rear of shelf over stop.<br />
3. Sli<strong>de</strong> shelf in all the way.<br />
4. Lower front into place.<br />
2<br />
2<br />
4<br />
1<br />
3<br />
3<br />
17
Removing the pull-out freezer floor<br />
(on some mo<strong>de</strong>ls)<br />
The freezer floor pulls out for easier access to<br />
foods in the back of the freezer and for easier<br />
cleaning.<br />
To remove the freezer floor:<br />
1. Lift both back “fences” up and out.<br />
2. Pull floor out about 1 inch (2.5 cm) with<br />
one hand around the air tower section<br />
(center back) and one hand at center front.<br />
3. Lift floor up at rear until hooks release from<br />
cabinet.<br />
4. Pull floor out the rest of the way.<br />
To replace the freezer floor:<br />
1. Position back of floor into freezer opening.<br />
2. Sli<strong>de</strong> floor straight in until hooks drop into<br />
place at rear of cabinet.<br />
3. Replace “fences” by aligning pins with<br />
sockets in the floor. Push down until they<br />
snap into place.<br />
Using the ice cube trays<br />
If cubes are not used, they may shrink. The<br />
moving cold air starts a slow evaporation.<br />
The longer you store cubes, the smaller<br />
they get.<br />
To remove ice:<br />
1. Hold tray at both ends.<br />
2. Twist slightly.<br />
18
Using the optional automatic ice maker<br />
If your refrigerator has an automatic ice<br />
maker, or if you plan to add one later<br />
(contact the <strong>de</strong>aler for ice maker kit number),<br />
here are a few things you should know.<br />
• The ON/OFF lever is a wire signal arm.<br />
DOWN to make ice automatically<br />
UP to shut off the ice maker<br />
IMPORTANT: Do not turn ice maker on<br />
until you connect it to the water supply.<br />
• If you remove the ice bin, raise the signal<br />
arm to shut off the ice maker. When you<br />
replace the bin, push it in all the way and<br />
lower the ice maker signal arm to the ON<br />
position.<br />
• Good water quality is important for good<br />
ice quality. Try to avoid connecting the ice<br />
maker to a softened water supply. Water<br />
softener chemicals (such as salt from a<br />
malfunctioning softener) can damage the<br />
ice maker mold and lead to poor ice<br />
quality. If you cannot avoid a softened<br />
water supply, make sure the water softener<br />
is operating properly and is well<br />
maintained.<br />
Solving common ice maker problems<br />
PROBLEM<br />
Ice crescents attached<br />
at corners<br />
Ice maker will not<br />
operate or ice is not<br />
ma<strong>de</strong> fast enough<br />
Off-taste or odor in ice<br />
POSSIBLE CAUSE/SOLUTION<br />
• This is normal. They break apart easily. Shake bin occasionally<br />
to keep cubes separated.<br />
• ON/OFF lever is in the OFF (up) position. Lower lever to the<br />
ON (down) position.<br />
• Freezer is not cold enough. Adjust temperature controls and<br />
wait 24 hours. (See “Changing the control settings” on page 10.)<br />
• New plumbing connections can cause discolored or offflavored<br />
ice. Discard the first few batches of ice.<br />
• Cubes are stored too long. Throw them away and make a new<br />
supply.<br />
• Food is not wrapped properly. See page 33.<br />
• Freezer and ice bin need to be cleaned. See page 29.<br />
Off<br />
On<br />
UP<br />
to stop<br />
ice maker.<br />
DOWN<br />
to start<br />
ice maker.<br />
19
Attaching the optional ice maker to a<br />
water supply<br />
Read all directions carefully<br />
before you begin.<br />
20<br />
wWARNING<br />
Electrical Shock Hazard<br />
Unplug the refrigerator before<br />
installing ice maker.<br />
Failure to do so can result in <strong>de</strong>ath<br />
or electrical shock.<br />
IMPORTANT:<br />
• <strong>Use</strong> copper tubing only and check for<br />
leaks.<br />
• Install ice maker tubing in areas where<br />
temperatures are above freezing.<br />
Tools required:<br />
• Standard screwdriver<br />
• 7 ⁄ 16-inch and 1 ⁄ 2-inch open-end wrenches<br />
or two adjustable wrenches<br />
• 1 ⁄ 4-inch nut driver<br />
• 1 ⁄ 4-inch drill bit<br />
• Hand drill or electric drill (properly<br />
groun<strong>de</strong>d)<br />
NOTE: Your appliance <strong>de</strong>aler has a kit<br />
available with a 1 ⁄ 4-inch saddle-type shut-off<br />
valve, a union, and copper tubing. Before<br />
purchasing, make sure a saddle-type valve<br />
complies with your local plumbing co<strong>de</strong>s. Do<br />
not use a piercing-type or 3 ⁄ 16-inch saddle<br />
valve which reduces water flow and clogs<br />
more easily.<br />
Cold water supply<br />
The ice maker water valve contains a flow<br />
washer which is used as a water pressure<br />
regulator. The ice maker needs to be<br />
connected to a cold water line with water<br />
pressure limitations of 20-120 psi. If a<br />
problem occurs, call your utility company.<br />
IMPORTANT:<br />
• It may take up to 24 hours for your ice<br />
maker to begin producing ice.<br />
• If operating the refrigerator before installing<br />
the water connection, turn ice maker to<br />
the OFF position to prevent operation<br />
without water.<br />
• All installations must be in accordance with<br />
local plumbing co<strong>de</strong> requirements.<br />
Installation is not warranted by<br />
refrigerator or ice maker<br />
manufacturer.
Connecting to water line<br />
1. Find a 1 ⁄ 2-inch to 1 1 ⁄ 4-inch vertical COLD<br />
water pipe near the refrigerator.<br />
NOTE: Horizontal pipe will work, but the<br />
following precaution must be taken: Drill<br />
on the top si<strong>de</strong> of the pipe, not the<br />
bottom. This will help keep water away<br />
from the drill. This also keeps normal<br />
sediment from collecting in the valve.<br />
2. Measure from connection on rear of<br />
refrigerator to water pipe. Add 7 feet<br />
(2.1 m) to allow for moving refrigerator<br />
for cleaning. This is the length of 1 ⁄ 4-inch<br />
O.D. copper tubing you will need for the<br />
job (length from connection to water pipe<br />
PLUS 7 feet [2.1 m]). Be sure both ends<br />
of copper tubing are cut square.<br />
3. Turn OFF main water supply. Turn ON<br />
nearest faucet long enough to clear line<br />
of water.<br />
4. Using a groun<strong>de</strong>d drill, drill a 1 ⁄ 4-inch hole<br />
on the cold water pipe you have selected.<br />
5. Fasten shut-off valve to cold water pipe<br />
with pipe clamp. Be sure outlet end is<br />
solidly in the 1 ⁄ 4-inch drilled hole in the<br />
water pipe and that washer is un<strong>de</strong>r the<br />
pipe clamp. Tighten packing nut. Tighten<br />
the pipe clamp screws carefully and<br />
evenly so washer makes a watertight<br />
seal. Do not overtighten or you may crush<br />
the copper tubing, especially if soft<br />
(coiled) copper tubing is used. Now you<br />
are ready to connect the copper tubing.<br />
6. Slip compression sleeve and compression<br />
nut on copper tubing as shown in<br />
diagram. Insert end of tubing into outlet<br />
end squarely as far as it will go. Screw<br />
compression nut onto outlet end with<br />
adjustable wrench. Do not overtighten.<br />
Turn ON main water supply and flush out<br />
tubing until water is clear. Turn OFF shutoff<br />
valve on the water pipe. Coil copper<br />
tubing.<br />
Vertical cold<br />
water pipe<br />
Packing<br />
nut<br />
Water<br />
shut-off<br />
valve<br />
Compression<br />
sleeve<br />
Washer<br />
Pipe clamp<br />
Compression<br />
nut<br />
1 ⁄ 4-inch O.D.<br />
copper tubing<br />
(length from<br />
inlet on rear of<br />
refrigerator to<br />
water pipe plus 7<br />
feet [2.1 m])<br />
Compression<br />
sleeve<br />
TO REFRIGERATOR ➔<br />
† Some mo<strong>de</strong>ls may not feature this second<br />
compression nut and sleeve.<br />
†<br />
†<br />
21
Connecting to refrigerator<br />
1. Disconnect the tube clamp on the back of<br />
the product and insert copper tubing through<br />
the clamp as shown at the right. Attach<br />
the copper tube to the valve inlet using a<br />
compression nut and sleeve as shown.<br />
Tighten the compression nut. Do not overtighten.<br />
Reattach the tube clamp and tube<br />
to the back of the cabinet. Move to step 2.<br />
2. Turn shut-off valve ON. CHECK FOR<br />
LEAKS. TIGHTEN ANY CONNECTIONS<br />
(INCLUDING CONNECTIONS AT THE<br />
VALVE) OR NUTS THAT LEAK.<br />
3. The ice maker is equipped with a built-in<br />
water strainer. If local water conditions<br />
require periodic cleaning or a well is your<br />
source of water supply, a second water<br />
strainer should be installed in the 1 ⁄ 4-inch<br />
water line. Obtain a water strainer from<br />
your nearest appliance <strong>de</strong>aler. Install at<br />
either tube connection.<br />
4. Reconnect electrical supply to refrigerator.<br />
Removing the base grille<br />
22<br />
wWARNING<br />
Burn Hazard<br />
Do not touch refrigeration tubes near<br />
<strong>de</strong>frost pan.<br />
Doing so can result in burns.<br />
To remove the base grille:<br />
1. Open the refrigerator door.<br />
2. Grasp the grille with both hands.<br />
3. Push down on the top edge of the grille to<br />
release the top clips.<br />
4. Roll grille toward you to release top clips.<br />
5. Pull grille away from the refrigerator.<br />
NOTE: Do not remove the Tech Sheet<br />
fastened behind the grille.<br />
Copper<br />
tubing<br />
clamp<br />
Water<br />
valve<br />
Con<strong>de</strong>nser<br />
coils<br />
<strong>Use</strong> only 1 ⁄ 4-inch<br />
copper tubing from<br />
cold water line<br />
Mounting<br />
screw<br />
Copper tubing<br />
1 ⁄ 4-inch<br />
compression<br />
nut and sleeve<br />
Defrost<br />
pan<br />
Water inlet<br />
fitting
To replace the base grille:<br />
1. Line up the edges of the grille with the<br />
outsi<strong>de</strong> edges of the cabinet.<br />
2. Roll the grille toward you.<br />
3. Place the lower clips in the openings in<br />
the metal panel.<br />
4. Roll the grille toward the cabinet until the<br />
top clips snap into place.<br />
5. Close the refrigerator door.<br />
See cleaning instructions for <strong>de</strong>frost pan and<br />
con<strong>de</strong>nser coils on page 30.<br />
Changing the light bulbs<br />
wWARNING<br />
Electrical Shock Hazard<br />
Unplug the refrigerator before<br />
removing a light bulb.<br />
Failure to do so can result in <strong>de</strong>ath<br />
or electrical shock.<br />
To change refrigerator light:<br />
1. Unplug the refrigerator.<br />
2. Reach behind Control Panel to remove<br />
bulb.<br />
3. Replace with a 40-watt appliance bulb.<br />
4. Plug in the refrigerator.<br />
STYLE 1<br />
STYLE 2<br />
1<br />
2<br />
3<br />
4<br />
5<br />
WARMER<br />
REFRIGERATOR<br />
RECOMMENDED RECOMMENDED SETTING SETTING<br />
COOLER<br />
ALLOW ALLOW 24 24 HOURS HOURS BETWEEN BETWEEN ADJUSTMENTS<br />
ADJUSTMENTS<br />
1<br />
2<br />
WARMER WARMER<br />
FREEZER 3<br />
RECOMMENDED RECOMMENDED SETTING SETTING<br />
COOLER<br />
4<br />
5<br />
Clips<br />
23
To change freezer light:<br />
1. Unplug the refrigerator.<br />
2. Reach behind light shield to bulb.<br />
3. Replace bulb with a 40-watt appliance<br />
bulb.<br />
4. Plug in the refrigerator.<br />
NOTE: Not all appliance bulbs will fit your<br />
refrigerator. Be sure to replace a bulb with<br />
one of the same size and shape.<br />
Un<strong>de</strong>rstanding the sounds you may hear<br />
Your new refrigerator may make sounds that<br />
your old one didn’t. Because the sounds are<br />
new to you, you might be concerned about<br />
them. Don’t be. Most of the new sounds are<br />
normal. Hard surfaces like the floor, walls,<br />
and cabinets can make the sounds seem<br />
lou<strong>de</strong>r.<br />
The following <strong>de</strong>scribes the kinds of<br />
sounds that might be new to you, and what<br />
may be making them.<br />
Slight hum, soft hiss<br />
You may hear the refrigerator’s fan motor<br />
and moving air.<br />
Clicking or snapping sounds<br />
The thermostat makes a <strong>de</strong>finite click when<br />
the refrigerator stops running. It also makes<br />
a sound when the refrigerator starts. The<br />
<strong>de</strong>frost timer will click when the <strong>de</strong>frost cycle<br />
starts.<br />
Saving energy<br />
You can help your refrigerator use less<br />
electricity.<br />
• Check door gaskets for a tight seal. Level<br />
the cabinet to be sure of a good seal.<br />
• Clean the con<strong>de</strong>nser coils regularly.<br />
• Open the door as few times as possible.<br />
Think about what you need before you<br />
open the door. Get everything out at one<br />
time. Keep food organized so you won’t<br />
have to search for what you want. Close<br />
door as soon as food is removed.<br />
24<br />
Water sounds<br />
When the refrigerator stops running, you<br />
may hear gurgling in the tubing for a few<br />
minutes after it stops. You may also hear<br />
<strong>de</strong>frost water running into the <strong>de</strong>frost<br />
water pan.<br />
Ice maker sounds<br />
• Trickling water<br />
• Thud (clatter of ice)<br />
You may hear buzzing (from the water<br />
valve), trickling water, and the clatter of ice<br />
dumped into the bin.<br />
Running sounds<br />
Your refrigerator has a high-efficiency<br />
compressor and motor. It will run longer than<br />
ol<strong>de</strong>r <strong>de</strong>signs. It may even seem to run most<br />
of the time.<br />
• Go ahead and fill up the refrigerator, but<br />
don’t overcrowd it so air movement is<br />
blocked.<br />
• It is a waste of electricity to set the refrigerator<br />
and freezer to temperatures col<strong>de</strong>r<br />
than they need to be. If ice cream is firm in<br />
the freezer and drinks are as cold as your<br />
family likes them, that’s cold enough.<br />
• Make sure your refrigerator is not next to a<br />
heat source such as a range, water heater,<br />
furnace, radiator, or in direct sunlight.
Reversing the door swing<br />
TOOLS NEEDED:<br />
Reversing the hinges<br />
5 ⁄ 16-inch hex-head socket wrench, No. 2<br />
Phillips screwdriver, flat-head screwdriver,<br />
1 ⁄ 2-inch open-end wrench.<br />
IMPORTANT INFORMATION:<br />
• Before you begin, turn refrigerator OFF,<br />
unplug it, and remove any food from door<br />
shelves.<br />
• Remove base grille.<br />
• When removing hinges, keep doors closed<br />
until ready to lift free from cabinet.<br />
• To remove doors, start at the top hinge<br />
and work your way down.<br />
• To remove the center hinge screws,<br />
remove the center hinge pin by turning it 1 ⁄ 4<br />
to 1 ⁄ 2 turn. It will pop up.<br />
• To replace doors, start at the bottom hinge<br />
and work your way up.<br />
• Line up doors so they are centered<br />
between the si<strong>de</strong>s of the cabinet and<br />
parallel with each other.<br />
• Seal all unused openings with screws or<br />
plastic plugs. Moisture will enter any<br />
openings.<br />
• Door seal may be adjusted by adding or<br />
removing shims to the center and bottom<br />
hinges.<br />
BOTTOM HINGE<br />
Style 1<br />
Door stop<br />
Spacer<br />
Hinge<br />
Shim<br />
Screws<br />
NOTE:<br />
When replacing the doors, set the door<br />
gap at 11 ⁄ 16" (17 mm).<br />
Cabinet<br />
Coin<br />
TOP HINGE<br />
Cover<br />
Screws<br />
Hinge<br />
Shim<br />
Screws<br />
CENTER HINGE<br />
Door stop<br />
Spacer<br />
Shim<br />
Hinge<br />
Screws<br />
BOTTOM HINGE<br />
Style 2<br />
Magnetic<br />
gasket<br />
11 ⁄ 16 " (17 mm)<br />
Door<br />
Door stop<br />
Spacer<br />
Shim<br />
Hinge<br />
Screws<br />
25
Reversing the handles - Style 1<br />
5 ⁄ 16-inch HEX<br />
HEAD HINGE<br />
SCREW<br />
26<br />
COUNTERSINK<br />
SCREW<br />
OVAL SEALING<br />
SCREW (USE ON<br />
BOTTOM OF DOORS)<br />
HANDLE<br />
SCREW<br />
Plugs<br />
Plug<br />
Spacer<br />
Spacer<br />
Screw<br />
Screw<br />
Spacer<br />
Plug<br />
Shim<br />
Cap<br />
Sealing<br />
screw<br />
OVAL SEALING<br />
SCREW (USE ON<br />
TOP OF DOORS)
Reversing the handles - Style 2<br />
Plugs<br />
Plug<br />
Spacer<br />
Spacer<br />
Screw<br />
Screw<br />
Spacer<br />
Plug<br />
Sealing<br />
screw<br />
27
Reversing the handles - Style 3<br />
28<br />
Plugs<br />
Plug<br />
Spacer<br />
Spacer<br />
Screw<br />
Screw<br />
Spacer<br />
Plug<br />
Shim<br />
Cap<br />
Sealing<br />
screw
Caring for Your Refrigerator<br />
Your refrigerator is built to give you many years of <strong>de</strong>pendable service. However, there are a<br />
few things you can do to help extend its product life. This section tells you how to clean your<br />
refrigerator and what to do when going on vacation, moving, or during a power outage.<br />
Cleaning your refrigerator<br />
Both the refrigerator and freezer sections<br />
<strong>de</strong>frost automatically. However,<br />
clean both about once a<br />
month to help prevent odors<br />
from building up. Wipe up<br />
spills right away.<br />
To clean your refrigerator, unplug it, take<br />
out all removable parts, and clean the<br />
refrigerator according to the following<br />
directions.<br />
PART<br />
WHAT TO USE<br />
Removable parts Sponge or cloth<br />
(shelves, crisper, etc.) with mild <strong>de</strong>tergent<br />
and warm water<br />
Outsi<strong>de</strong><br />
Sponge, cloth, or<br />
paper towel with<br />
mild <strong>de</strong>tergent,<br />
warm water, and a<br />
good appliance<br />
wax (or good auto<br />
paste wax)<br />
Insi<strong>de</strong> walls<br />
(allow freezer to<br />
warm up so cloth<br />
won’t stick)<br />
Door liners<br />
and gaskets<br />
Sponge, soft cloth,<br />
or paper towel with<br />
baking soda or<br />
mild <strong>de</strong>tergent<br />
and warm water<br />
Sponge, soft cloth,<br />
or paper towel with<br />
mild <strong>de</strong>tergent and<br />
warm water<br />
wWARNING<br />
Burn Hazard<br />
Do not touch refrigeration tubes near<br />
<strong>de</strong>frost pan.<br />
Doing so can result in burns.<br />
HOW TO CLEAN<br />
• Hand wash and dry thoroughly.<br />
• Wash outsi<strong>de</strong> of cabinet. Do not use<br />
abrasive or harsh cleaners.<br />
• Wipe and dry thoroughly.<br />
• Wax painted metal surfaces at least<br />
twice a year. Apply wax with a clean, soft<br />
cloth. Waxing painted metal surfaces<br />
provi<strong>de</strong>s rust protection. Do not wax<br />
plastic parts.<br />
• Wash with mixture of warm water and:<br />
– mild <strong>de</strong>tergent, or<br />
– baking soda (2 tbs to 1 qt [26 g to .95 L]<br />
of water).<br />
• Wipe and dry thoroughly.<br />
• Wipe and dry thoroughly.<br />
Do not use cleaning waxes, concentrated<br />
<strong>de</strong>tergents, bleaches, or cleaners<br />
containing petroleum on plastic parts.<br />
continued on next page<br />
29
PART<br />
Plastic parts<br />
(covers and<br />
panels)<br />
Defrost pan<br />
(behind<br />
refrigerator<br />
on top of motor)<br />
Con<strong>de</strong>nser<br />
coils<br />
WHAT TO USE<br />
Soft, clean sponge<br />
or soft, clean cloth<br />
with mild <strong>de</strong>tergent<br />
and warm water<br />
Sponge or cloth<br />
with mild <strong>de</strong>tergent<br />
and warm water<br />
Vacuum cleaner<br />
with exten<strong>de</strong>d<br />
narrow<br />
attachment<br />
Holiday and moving care<br />
Short holidays<br />
No need to shut off the refrigerator if you will<br />
be away for less than four weeks.<br />
1. <strong>Use</strong> up any perishables.<br />
2. Freeze other items.<br />
Long holidays<br />
If you will be gone a month or more:<br />
1. Remove all food from the refrigerator.<br />
2. If your refrigerator has an automatic<br />
ice maker:<br />
• Turn off the water supply to the ice<br />
maker at least one day ahead of time.<br />
• When the last load of ice drops, turn off<br />
the ice maker. Make sure all ice is dispensed<br />
out of the ice maker mechanism.<br />
3. Unplug the refrigerator.<br />
4. Clean it, rinse well, and dry.<br />
5. Tape rubber or wood blocks to the tops of<br />
both doors to prop them open far enough<br />
for air to get in. This stops odor and mold<br />
from building up.<br />
To restart refrigerator, see “Using Your<br />
Refrigerator” on page 9.<br />
30<br />
HOW TO CLEAN<br />
• Wipe, and dry thoroughly.<br />
Do not use paper towels, window sprays,<br />
scouring cleansers, or flammable fluids.<br />
These can scratch or damage material.<br />
See “Important Safety Instructions” on<br />
page 3.<br />
• Remove base grille. (See page 22.)<br />
• Reach into small opening at right edge and<br />
remove the <strong>de</strong>frost pan.<br />
• Wash, rinse, and dry thoroughly.<br />
• Replace <strong>de</strong>frost pan. Make sure to push it<br />
completely into the opening.<br />
• Replace base grille. (See page 23.)<br />
• Remove base grille. (See page 22.)<br />
• Vacuum coils when dusty or dirty. Coils<br />
may need to be cleaned as often as every<br />
other month.<br />
• Replace base grille. (See page 23.)<br />
Moving<br />
When you are moving the refrigerator to a<br />
new home:<br />
1. If your refrigerator has an automatic<br />
ice maker:<br />
• Turn off the water supply to the ice<br />
maker at least one day ahead of time.<br />
• Disconnect the water line.<br />
• After the last load of ice drops, lift the<br />
signal arm to the OFF (up) position.<br />
2. Remove all food from the refrigerator.<br />
3. Pack all frozen food in dry ice.<br />
4. Unplug the refrigerator.<br />
5. Clean it thoroughly. Rinse well and dry.<br />
6. Take out all removable parts, wrap them<br />
well, and tape them together so they don’t<br />
shift and rattle.<br />
7. Screw in the leveling rollers.<br />
8. Tape the doors shut and tape the power<br />
supply cord to the cabinet.<br />
When you get to your new home, put<br />
everything back and refer to page 6. Also,<br />
remember to reconnect the water supply line.
Power interruptions<br />
If electricity goes off, call the power company.<br />
Ask how long power will be off.<br />
1. If service will be interrupted 24 hours or<br />
less, keep both doors closed. This<br />
helps foods stay frozen.<br />
2. If service will be interrupted longer than<br />
24 hours:<br />
(a) Remove all frozen food and store in a<br />
frozen food locker.<br />
OR<br />
(b) Place 32 grams of dry ice in freezer<br />
for every cubic liter (2 lbs. for every<br />
cubic foot) of freezer space. This will<br />
keep food frozen for 2 to 4 days. Wear<br />
gloves to protect your hands from dry<br />
ice burns.<br />
OR<br />
(c) If neither a food locker or dry ice is<br />
available, use or can perishable<br />
food at once.<br />
3. A full freezer stays cold longer than a<br />
partly filled one. A freezer full of meat<br />
stays cold longer than a freezer full of<br />
baked goods. If food contains ice crystals,<br />
it may be safely refrozen, although the<br />
quality and flavor may be affected. If the<br />
condition of the food is poor, or if you feel<br />
it is unsafe, dispose of it.<br />
31
Food Storage Gui<strong>de</strong><br />
There is a correct way to package and store refrigerated or frozen food. To keep food fresher,<br />
longer, take the time to study these recommen<strong>de</strong>d steps.<br />
Storing fresh food<br />
Wrap or store food in the refrigerator in<br />
airtight and moisture-proof material. This<br />
prevents food odor and taste transfer<br />
throughout the refrigerator. For dated<br />
products, check co<strong>de</strong> date to ensure<br />
freshness.<br />
Leafy vegetables<br />
Remove store wrapping and trim or tear off<br />
bruised and discolored areas. Wash in cold<br />
water and drain. Place in plastic bag or<br />
plastic container and store in crisper.<br />
Vegetables with skins<br />
(carrots, peppers)<br />
Store in crisper, plastic bags, or plastic<br />
container.<br />
Fruit<br />
Wash, let dry, and store in refrigerator in<br />
plastic bags or crisper. Do not wash or hull<br />
berries until they are ready to use. Sort and<br />
keep berries in original container in a<br />
crisper, or store in a loosely closed paper<br />
bag on a refrigerator shelf.<br />
Eggs<br />
Store without washing in original carton on<br />
interior shelf. On some mo<strong>de</strong>ls, an egg<br />
storage container is provi<strong>de</strong>d for your<br />
convenience.<br />
Milk<br />
Wipe milk cartons. For best storage, place<br />
milk on interior shelf.<br />
32<br />
Butter or margarine<br />
Keep opened butter in covered dish or<br />
closed compartment. When storing an<br />
extra supply, wrap in freezer packaging<br />
and freeze.<br />
Cheese<br />
Store in the original wrapping until you are<br />
ready to use it. Once opened, rewrap tightly<br />
in plastic wrap or aluminum foil.<br />
Leftovers<br />
Cover leftovers with plastic wrap or aluminum<br />
foil. Plastic containers with tight lids can<br />
also be used.<br />
Meat<br />
Store most meat in original wrapping as long<br />
as it is airtight and moisture-proof. Rewrap if<br />
necessary. See the following for storage<br />
times. When storing meat longer than the<br />
times given, freeze the meat.<br />
Chicken .......................................... 1-2 days<br />
Bacon ............................................. 5-7 days<br />
Ground beef ................................... 1-2 days<br />
Cold cuts ........................................ 3-5 days<br />
Steaks/roasts ................................. 3-5 days<br />
Variety meats ................................. 1-2 days<br />
Cured meats................................. 7-10 days<br />
NOTE: <strong>Use</strong> fresh fish and shellfish the same<br />
day as purchased.
Storing frozen food<br />
The freezer section is <strong>de</strong>signed for storage<br />
of commercially frozen food and for freezing<br />
food at home.<br />
NOTE: For further information about preparing<br />
food for freezing or food storage times,<br />
check a freezer gui<strong>de</strong> or reliable cookbook.<br />
Packaging<br />
The secret of successful freezing is in the<br />
packaging. The way you close and seal the<br />
package must not allow air or moisture in<br />
or out. Packaging done in any other way<br />
could cause food odor and taste transfer<br />
throughout the refrigerator and drying of<br />
frozen food.<br />
Packaging recommen<strong>de</strong>d for use:<br />
• Rigid plastic containers with tight-fitting lids<br />
• Straight-si<strong>de</strong>d canning/freezing jars<br />
• Heavy-duty aluminum foil<br />
• Plastic-coated paper<br />
• Non-permeable plastic wraps (ma<strong>de</strong> from<br />
a saran film)<br />
Follow package or container instructions for<br />
proper freezing methods.<br />
Do not use:<br />
• Bread wrappers<br />
• Non-polyethylene plastic containers<br />
• Containers without tight lids<br />
• Waxed paper<br />
• Wax-coated freezer wrap<br />
• Thin, semi-permeable wrap<br />
The use of these wrappings could cause<br />
food odor, taste transfer, and drying of<br />
frozen food.<br />
FOOD STORAGE GUIDE<br />
Freezing<br />
Do not expect your freezer to quick-freeze<br />
any large quantity of food. Put no more<br />
unfrozen food into the freezer than will<br />
freeze within 24 hours (no more than 32 to<br />
48 grams of food per liter [2 to 3 lbs. per<br />
cubic foot] of freezer space). Leave enough<br />
space for air to circulate around packages.<br />
Be careful to leave enough room at the front<br />
so the door can close tightly.<br />
Storage times will vary according to the<br />
quality of the food, the type of packaging or<br />
wrap used (airtight and moisture-proof), and<br />
the storage temperature, which should be<br />
0°F (-17.8°C).<br />
33
Troubleshooting<br />
Listed in this chart are the most common problems consumers run into with their appliances.<br />
Please read through this and see if it can solve your problem.<br />
PROBLEM<br />
Your refrigerator<br />
will not<br />
operate<br />
The lights do<br />
not work<br />
You hear unfamiliar<br />
sounds<br />
or a rattling/<br />
jingling noise<br />
There is water in<br />
the <strong>de</strong>frost pan<br />
The motor<br />
seems to run<br />
too much<br />
34<br />
CHECK THE FOLLOWING<br />
Is the power supply cord firmly plugged into a live circuit with proper<br />
voltage?<br />
Has a household fuse or circuit breaker blown/tripped?<br />
Is the Refrigerator Control set to the OFF position?<br />
Is the power supply cord firmly plugged into a live circuit with proper<br />
voltage?<br />
Has a household fuse or circuit breaker blown/tripped?<br />
Is a bulb burned out?<br />
Is something on top of or behind the refrigerator?<br />
Some new sounds are normal. See “Un<strong>de</strong>rstanding the sounds you<br />
may hear” on page 24.<br />
This is normal on hot, muggy days. Make sure the refrigerator is level<br />
so the pan does not overflow.<br />
Are the con<strong>de</strong>nser coils dirty?<br />
Has the door been open often? Has a large amount of food been<br />
ad<strong>de</strong>d at one time? The motor naturally runs longer in these cases.<br />
Is the room hot? If the room is too warm, the motor runs longer to<br />
keep the unit cool.<br />
Requesting Service<br />
1. If the problem is not due to<br />
one of the items listed in<br />
Troubleshooting …<br />
Contact the <strong>de</strong>aler from whom you purchased<br />
the unit or an authorized<br />
<strong>Whirlpool</strong> service company.<br />
† When asking for help or service:<br />
Please provi<strong>de</strong> a <strong>de</strong>tailed <strong>de</strong>scription of<br />
the problem, your appliance’s complete<br />
mo<strong>de</strong>l and serial numbers, and the<br />
purchase date. (See page 2.) This<br />
information will help us respond properly<br />
to your request.<br />
2. If you need FSP* replacement<br />
parts † …<br />
FSP is a registered tra<strong>de</strong>mark of <strong>Whirlpool</strong><br />
<strong>Corporation</strong> for quality parts. Look for this<br />
symbol of quality whenever you need a<br />
replacement part for your WHIRLPOOL*<br />
appliance. FSP replacement parts will fit<br />
right and work right because they are ma<strong>de</strong><br />
to the same exacting specifications used to<br />
build every new WHIRLPOOL appliance.<br />
To locate FSP replacement parts in your<br />
area, contact the <strong>de</strong>aler from whom you<br />
purchased the unit or an authorized<br />
<strong>Whirlpool</strong>* service company.
WHIRLPOOL *<br />
Refrigerator Warranty<br />
LENGTH OF WARRANTY<br />
FULL ONE-YEAR<br />
WARRANTY<br />
FROM DATE OF<br />
PURCHASE<br />
FULL FIVE-YEAR<br />
WARRANTY<br />
FROM DATE OF<br />
PURCHASE<br />
WHIRLPOOL WILL PAY FOR<br />
FSP* replacement parts and repair labor to correct <strong>de</strong>fects in<br />
materials or workmanship. Service must be provi<strong>de</strong>d by an<br />
authorized <strong>Whirlpool</strong> service company.<br />
FSP replacement parts and repair labor to correct <strong>de</strong>fects in<br />
materials or workmanship in the sealed refrigeration system.<br />
These parts are:<br />
1. Compressor<br />
2. Evaporator<br />
3. Con<strong>de</strong>nser<br />
4. Drier<br />
5. Connecting tubing<br />
Service must be provi<strong>de</strong>d by an authorized <strong>Whirlpool</strong> service<br />
company.<br />
WHIRLPOOL WILL NOT PAY FOR<br />
A. Service calls to:<br />
1. Correct the installation of your refrigerator.<br />
2. Instruct you how to use your refrigerator.<br />
3. Replace house fuses or correct house wiring or plumbing.<br />
4. Replace light bulbs.<br />
B. Repairs when your refrigerator is used in other than normal, single-family household use.<br />
C. Pickup and <strong>de</strong>livery. Your refrigerator is <strong>de</strong>signed to be repaired in the home.<br />
D. Damage to your refrigerator caused by acci<strong>de</strong>nt, misuse, fire, flood, acts of God, or use<br />
of products not approved by <strong>Whirlpool</strong>.<br />
E. Any food loss due to product failure.<br />
F. Repairs to parts or systems caused by unauthorized modifications ma<strong>de</strong> to<br />
the appliance.<br />
9/96<br />
WHIRLPOOL CORPORATION SHALL NOT BE LIABLE FOR INCIDENTAL OR CONSE-<br />
QUENTIAL DAMAGES. Some states do not allow the exclusion or limitation of inci<strong>de</strong>ntal or<br />
consequential damages, so this exclusion or limitation may not apply to you. This warranty<br />
gives you specific legal rights, and you may also have other rights which vary from state<br />
to state.<br />
Outsi<strong>de</strong> the United States, a different warranty may apply. For <strong>de</strong>tails, please contact<br />
your authorized <strong>Whirlpool</strong> <strong>de</strong>aler.<br />
If you need service, first see the “Troubleshooting” section of this book. After checking<br />
“Troubleshooting,” additional help can be found by checking the “Requesting Assistance<br />
or Service” section.<br />
* Registered Tra<strong>de</strong>mark/TM Tra<strong>de</strong>mark of <strong>Whirlpool</strong>, U.S.A.<br />
9/96<br />
Printed in U.S.A.<br />
35
Notes<br />
36
Contenido<br />
Page<br />
Un Mensaje para Usted ........................... 2<br />
Seguridad ........................................... 3 y 4<br />
Piezas y Características ......................... 5<br />
Antes <strong>de</strong> Usar el Refrigerador ............... 7<br />
Cómo Usar el Refrigerador .................. 10<br />
Controles ............................................ 10<br />
Ajuste <strong>de</strong> los controles........................ 11<br />
Cómo sacar los bor<strong>de</strong>s <strong>de</strong>corativos<br />
<strong>de</strong>slizables <strong>de</strong> la puerta ...................... 12<br />
Cómo sacar los bor<strong>de</strong>s <strong>de</strong>corativos<br />
removibles <strong>de</strong> la puerta ...................... 12<br />
Cómo sacar los anaqueles<br />
removibles <strong>de</strong> la puerta ...................... 13<br />
Cómo ajustar los anaqueles <strong>de</strong><br />
la puerta .............................................. 13<br />
Cómo ajustar el compartimiento<br />
multiusos y la ban<strong>de</strong>ja ........................ 13<br />
Cómo quitar los anaqueles<br />
<strong>de</strong>l refrigerador ................................... 14<br />
Como ajustar el anaquel EZ-TRACK*<br />
<strong>de</strong>l refrigerador ................................... 15<br />
Cómo sacar la gaveta para carnes y<br />
la cubierta ........................................... 16<br />
Cómo sacar las gavetas para<br />
verduras y la cubierta ......................... 18<br />
Cómo ajustar el control <strong>de</strong> humedad<br />
<strong>de</strong> las gavetas para verduras ............. 18<br />
Cómo ajustar el riel <strong>de</strong> la cubierta<br />
<strong>de</strong> la gaveta para verduras ................. 19<br />
Page<br />
Cómo ajustar el anaquel<br />
<strong>de</strong>l congelador .................................... 20<br />
Cómo ajustar el anaquel <strong>de</strong><br />
dimensiones pequeñas <strong>de</strong>l<br />
congelador .......................................... 20<br />
Cómo quitar la base removible<br />
<strong>de</strong>l congelador .................................... 21<br />
Cómo usar las cubetas para hielo ...... 21<br />
Cómo usar la máquina <strong>de</strong> hacer<br />
hielo (opcional) ................................... 22<br />
Conexión <strong>de</strong> la máquina <strong>de</strong> hacer<br />
hielo (opcional) al suministro<br />
<strong>de</strong> agua ............................................... 23<br />
Cómo sacar la rejilla <strong>de</strong> la base.......... 26<br />
Cómo cambiar las bombillas............... 27<br />
Cómo interpretar los sonidos que<br />
se escuchen ........................................ 28<br />
Cómo ahorrar energía ........................ 28<br />
Cómo invertir el lado <strong>de</strong> abertura <strong>de</strong><br />
las puertas .......................................... 29<br />
<strong>Cuidado</strong>s con el Refrigerador .............. 33<br />
<strong>Guía</strong> <strong>de</strong> Almacenamiento<br />
<strong>de</strong> Alimentos .......................................... 36<br />
Cómo Solucionar Problemas ............... 38<br />
Si Necesita Ayuda .................................. 39<br />
Garantía .................................................. 40<br />
1<br />
ESPAÑOL
Un Mensaje para Usted<br />
Gracias por comprar este producto WHIRLPOOL*.<br />
Usted acaba <strong>de</strong> comprar un aparato electrodoméstico reconocido internacionalmente, en el<br />
cual años <strong>de</strong> experiencia se han puesto en su fabricación. Para aseguramos <strong>de</strong> que usted<br />
pueda disfrutar muchos años <strong>de</strong> servicio, hemos incluido este manual <strong>de</strong> uso y cuidado, el<br />
cual está lleno <strong>de</strong> valiosa información acerca <strong>de</strong> como operar y mantener su electrodoméstico<br />
<strong>de</strong> la forma más apropiada y segura. Léalo cuidadosamente.<br />
Ayuda cuando usted la necesita.<br />
Si usted tiene alguna pregunta acerca <strong>de</strong> la<br />
operación <strong>de</strong> su electrodoméstico, o si<br />
necesita mantenimiento vea primero “Si<br />
Necesita Ayuda” en la página 39. Si necesita<br />
contactar al concesionario o a una compañía<br />
<strong>de</strong> mantenimiento <strong>Whirlpool</strong> usted <strong>de</strong>be<br />
tener a mano el mo<strong>de</strong>lo y el número <strong>de</strong><br />
serie. Esta información pue<strong>de</strong> encontrarse<br />
en el rótulo con el mo<strong>de</strong>lo y número <strong>de</strong> serie<br />
(ver el diagrama <strong>de</strong> las páginas 5 y 6).<br />
Para su conveniencia, se ha incluido un<br />
espacio don<strong>de</strong> pue<strong>de</strong> anotar estos números,<br />
la fecha <strong>de</strong> compra y el nombre y el número<br />
<strong>de</strong> teléfono <strong>de</strong> su concesionario. Mantenga<br />
juntos este manual y el recibo <strong>de</strong> compra.<br />
2<br />
Mo<strong>de</strong>lo número _________________________<br />
Nombre <strong>de</strong>l concesionario ________________<br />
Número <strong>de</strong> serie ________________________<br />
Número <strong>de</strong> teléfono <strong>de</strong>l<br />
concesionario __________________________<br />
Fecha <strong>de</strong> compra________________________
Seguridad<br />
Su seguridad es importante<br />
para nosotros.<br />
Este manual contiene avisos y símbolos<br />
<strong>de</strong> seguridad. Por favor dé una atención<br />
especial a estos símbolos y siga todas las<br />
instrucciones. Aquí es una breve explicación<br />
<strong>de</strong>l uso <strong>de</strong>l símbolo.<br />
INSTRUCCIONES IMPORTANTES DE<br />
SEGURIDAD<br />
wADVERTENCIA<br />
• Lea todas las instrucciones antes <strong>de</strong><br />
usar el refrigerador.<br />
• Nunca permita que los niños hagan<br />
funcionar, jueguen o se escondan en el<br />
interior <strong>de</strong>l refrigerador.<br />
• Nunca limpie las piezas <strong>de</strong>l refrigerador<br />
con líquidos inflamables. Los vapores<br />
pue<strong>de</strong>n causar incendios o<br />
explosiones.<br />
Para reducir el riesgo <strong>de</strong> incendio, choque<br />
eléctrico o lesión cuando use su refrigerador,<br />
siga estas precauciones básicas:<br />
• PARA SU SEGURIDAD •<br />
NO ALMACENE O USE GASOLINA NI<br />
LIQUIDOS INFLAMABLES EN LA<br />
PROXIMIDAD DE ESTE O DE CUALQUIER<br />
OTRO APARATO. EXISTE EL PELIGRO<br />
DE QUE LOS VAPORES CAUSEN UN<br />
INCENDIO O UNA EXPLOSION.<br />
– CONSERVE ESTAS INSTRUCCIONES –<br />
Este símbolo le llamará la<br />
atención para evitar peligros<br />
como incendio,<br />
choque eléctrico u otras<br />
lesiones.<br />
3<br />
ESPAÑOL
Cómo <strong>de</strong>shacerse <strong>de</strong>bidamente <strong>de</strong> su<br />
refrigerador viejo<br />
4<br />
wADVERTENCIA<br />
Peligro <strong>de</strong> Sofocación<br />
Remueva las puertas <strong>de</strong> su<br />
refrigerador viejo.<br />
No seguir esta instrucción<br />
pue<strong>de</strong> ocasionar la muerte<br />
o daño al cerebro.<br />
IMPORTANTE: El problema <strong>de</strong> los niños<br />
que se quedan atrapados <strong>de</strong>ntro <strong>de</strong> un<br />
refrigerador y se asfixian no es cosa <strong>de</strong>l<br />
pasado. Los refrigeradores abandonados<br />
siguen siendo un peligro ... aunque estén<br />
allí “sólo por unos días”. Si <strong>de</strong>sea<br />
<strong>de</strong>shacerse <strong>de</strong> su refrigerador viejo, siga por<br />
favor las siguientes instrucciones para<br />
ayudar a evitar acci<strong>de</strong>ntes.<br />
ANTES DE DESHACERSE DE SU VIEJO<br />
REFRIGERADOR O CONGELADOR:<br />
• Quite las puertas.<br />
• Deje los anaqueles a<strong>de</strong>ntro para evitar que<br />
los niños se introduzcan con facilidad.
Piezas y Características<br />
Esta sección contiene la ilustración <strong>de</strong> su electrodoméstico con los nombres <strong>de</strong> sus<br />
diferentes piezas. Familiarícese con ellas para saber ubicarlas y reconocerlas.<br />
Paneles <strong>de</strong> control<br />
MODELO 1<br />
MODELO 2<br />
REFRIGERATOR WARMER COLDER<br />
Cubetas para<br />
hielo<br />
Anaquel <strong>de</strong>l<br />
congelador<br />
Base <strong>de</strong>l<br />
congelador <strong>de</strong><br />
limpieza fácil<br />
Panel <strong>de</strong> control<br />
Etiqueta <strong>de</strong>l<br />
mo<strong>de</strong>lo y<br />
número <strong>de</strong> serie<br />
(en la pared<br />
lateral)<br />
Cubierta <strong>de</strong> la<br />
gaveta para<br />
verduras<br />
Gavetas para<br />
verduras<br />
Control <strong>de</strong>l<br />
refrigerador<br />
1 WARMER<br />
2<br />
3<br />
REFRIGERATOR<br />
RECOMMENDED SETTING<br />
4<br />
5 COOLER<br />
3<br />
1<br />
2<br />
3<br />
4<br />
5<br />
WARMER WARMER<br />
REFRIGERATOR<br />
REFRIGERATOR<br />
RECOMMENDED RECOMMENDED SETTING SETTING<br />
COOLER COOLER<br />
ALLOW 24 HOURS BETWEEN ADJUSTMENTS<br />
ALLOW ALLOW 24 24 HOURS HOURS BETWEEN BETWEEN ADJUSTMENTS<br />
ADJUSTMENTS<br />
5 IS COLDEST SETTING<br />
3 IS RECOMMENDED SETTING WARMER COLDER FREEZER<br />
1<br />
2<br />
4<br />
5<br />
WARMER WARMER<br />
FREEZER FREEZER<br />
3<br />
RECOMMENDED RECOMMENDED SETTING SETTING<br />
COOLER COOLER<br />
WARMER 1<br />
2<br />
FREEZER<br />
3<br />
RECOMMENDED SETTING<br />
4<br />
COOLER 5<br />
Control <strong>de</strong>l<br />
congelador<br />
3<br />
Bor<strong>de</strong>s<br />
<strong>de</strong>corativos<br />
<strong>de</strong>slizables<br />
Compartimiento<br />
multiusos<br />
Recipiente<br />
multiusos<br />
Gaveta<br />
para carne<br />
Anaqueles<br />
<strong>de</strong>slizables<br />
Bor<strong>de</strong>s<br />
<strong>de</strong>corativos<br />
<strong>de</strong>slizables<br />
Rejilla <strong>de</strong><br />
la base<br />
Rodillos <strong>de</strong><br />
nivelación<br />
(<strong>de</strong>trás <strong>de</strong><br />
la rejilla <strong>de</strong><br />
la base)<br />
5<br />
ESPAÑOL
Cubetas y<br />
recipiente para<br />
hielo<br />
Anaquel <strong>de</strong>l<br />
congelador<br />
Base <strong>de</strong>l<br />
congelador <strong>de</strong><br />
limpieza fácil<br />
Panel <strong>de</strong> control<br />
Etiqueta <strong>de</strong>l<br />
mo<strong>de</strong>lo y<br />
número <strong>de</strong> serie<br />
(en la pared<br />
lateral)<br />
Gaveta<br />
para carne<br />
Cubierta <strong>de</strong> la<br />
gaveta para<br />
verduras<br />
Rodillos <strong>de</strong><br />
nivelación<br />
(<strong>de</strong>trás <strong>de</strong> la<br />
rejilla <strong>de</strong> la base)<br />
Cubetas y estante<br />
para hielo<br />
Recipiente para<br />
hielo<br />
Anaquel <strong>de</strong>l<br />
congelador<br />
Fondo removible<br />
<strong>de</strong>l congelador<br />
Anaquel <strong>de</strong><br />
vidrio EZ-TRACK*<br />
SPILLGUARD*<br />
Etiqueta <strong>de</strong>l<br />
mo<strong>de</strong>lo y<br />
número <strong>de</strong> serie<br />
Gaveta para carne<br />
Cubierta <strong>de</strong> la<br />
gaveta para<br />
verduras<br />
Gaveta para<br />
verduras con<br />
control <strong>de</strong><br />
humedad<br />
Rodillos <strong>de</strong><br />
nivelación<br />
(<strong>de</strong>trás <strong>de</strong> la rejilla<br />
<strong>de</strong> la base)<br />
6<br />
Meats<br />
HIGH<br />
LOW<br />
1<br />
2<br />
3<br />
4<br />
5<br />
WARMER<br />
COOLER<br />
REFRIGERATOR<br />
RECOMMENDED RECOMMENDED SETTING SETTING<br />
ALLOW ALLOW 24 24 HOURS HOURS BETWEEN BETWEEN ADJUSTMENTS<br />
ADJUSTMENTS<br />
1<br />
2<br />
3<br />
4<br />
5<br />
WARMER WARMER<br />
REFRIGERATOR<br />
REFRIGERATOR<br />
RECOMMENDED RECOMMENDED SETTING SETTING<br />
COOLER COOLER<br />
1<br />
2<br />
4<br />
5<br />
WARMER<br />
COOLER<br />
FREEZER 3<br />
RECOMMENDED RECOMMENDED SETTING SETTING<br />
ALLOW ALLOW 24 24 HOURS HOURS BETWEEN BETWEEN ADJUSTMENTS<br />
ADJUSTMENTS<br />
1<br />
2<br />
4<br />
5<br />
WARMER WARMER<br />
FREEZER FREEZER<br />
3<br />
RECOMMENDED RECOMMENDED SETTING SETTING<br />
COOLER COOLER<br />
HIGH<br />
LOW<br />
Anaquel no ajustable<br />
Bor<strong>de</strong>s<br />
<strong>de</strong>corativos<br />
<strong>de</strong>slizables<br />
Compartimiento<br />
multiusos<br />
Bor<strong>de</strong>s<br />
<strong>de</strong>corativos<br />
<strong>de</strong>slizables<br />
Recipiente<br />
para huevos<br />
Parrillas<br />
ajustables<br />
Gavetas para<br />
verduras<br />
Rejilla <strong>de</strong><br />
la base<br />
Bombilla <strong>de</strong>l<br />
congelador<br />
Anaquel <strong>de</strong><br />
medio ancho<br />
ajustable <strong>de</strong>l<br />
congelador<br />
Bor<strong>de</strong>s<br />
<strong>de</strong>corativos<br />
<strong>de</strong>slizables<br />
Panel <strong>de</strong> control<br />
Compartimiento<br />
multiusos<br />
<strong>de</strong>slizable<br />
Ban<strong>de</strong>ja<br />
<strong>de</strong>slizable<br />
Recipiente<br />
para huevos<br />
Anaqueles<br />
ajustables<br />
en la puerta<br />
Anaqueles<br />
<strong>de</strong> vidrio<br />
SPILLGUARD
Antes <strong>de</strong> Usar el Refrigerador<br />
Es importante preparar el refrigerador antes <strong>de</strong> usarlo. Esta sección le explica cómo limpiarlo,<br />
conectarlo, instalarlo y nivelarlo. Para información acerca <strong>de</strong> cómo conectar el fabricador <strong>de</strong><br />
hielo al suministro <strong>de</strong> agua, vea la página 23, o para información acerca <strong>de</strong> cómo cambiar la<br />
abertura <strong>de</strong> la puerta, vea la página 29.<br />
Limpieza<br />
Remueva los materiales <strong>de</strong>l<br />
paquete<br />
Remueva la cinta adhesiva y las etiquetas<br />
(excepto el rótulo con el mo<strong>de</strong>lo y el número<br />
<strong>de</strong> serie) antes <strong>de</strong> usar el refrigerador.<br />
Para remover la goma que que<strong>de</strong> en la<br />
superficie:<br />
• Frote fuertemente con el pulgar para<br />
recogerla y luego remuévala.<br />
O<br />
• Remoje el área con agua y jabón para<br />
lavar platos antes <strong>de</strong> remover la goma<br />
como se <strong>de</strong>scribió anteriormente. No use<br />
instrumentos punzantes, alcohol, líquidos<br />
inflamables, o limpiadores abrasivos pues<br />
puedan dañar el acabado. Ver arriba<br />
“Instrucciones Importantes <strong>de</strong> Seguridad”<br />
en la página 3.<br />
Instalación<br />
1. Deje 1,25 cm (media pulgada) <strong>de</strong> espacio<br />
a cada lado y en la pieza <strong>de</strong> arriba <strong>de</strong>l<br />
refrigerador para facilitar la instalación.<br />
2. Si la bisagra <strong>de</strong>l refrigerador queda contra<br />
la pared, <strong>de</strong>je espacio extra entre la<br />
bisagra y la pared para que la puerta<br />
pueda abrirse más.<br />
3. El refrigerador pue<strong>de</strong> estar directamente<br />
contra la pared.<br />
NOTA: No saque los rótulos con<br />
instrucciones que estén adheridos al<br />
refrigerador; ni tampoco saque el folleto<br />
técnico que se encuentra asegurado a la<br />
parte inferior <strong>de</strong>l frente <strong>de</strong>l refrigerador.<br />
Limpieza antes <strong>de</strong> usarlo<br />
Si es necesario, limpie el refrigerador antes<br />
<strong>de</strong> usarlo. Ver instrucciones<br />
páginas 33 y 34.<br />
7<br />
ESPAÑOL
Enchufe<br />
Método recomendado <strong>de</strong> conexión a<br />
tierra<br />
Enchufe a 115 Voltios/60 Hertz<br />
(Tomacorriente 1) 220/240 Voltios/50 Hertz<br />
(Tomacorriente 2) o 220 Voltios/60 Hertz<br />
(Tomacorriente 3) AC con fusibles<br />
<strong>de</strong> 15 ó 20 amperios con conexión a tierra.<br />
Se recomienda el uso <strong>de</strong> un disyuntor<br />
separado para este electrodoméstico. <strong>Use</strong><br />
un enchufe que no pue<strong>de</strong> ser activado o<br />
<strong>de</strong>sactivado por medio <strong>de</strong> un interruptor. No<br />
use cables <strong>de</strong> extensión eléctrica. Verifique<br />
que la instalación eléctrica <strong>de</strong>l refrigerador<br />
llene los requisitos y códigos <strong>de</strong> su<br />
localidad.<br />
8<br />
wADVERTENCIA<br />
Peligro <strong>de</strong> Choque Eléctrico<br />
Conecte a un enchufe <strong>de</strong> pared <strong>de</strong><br />
conexión a tierra <strong>de</strong> tres terminales.<br />
No retire el terminal <strong>de</strong> conexión<br />
a tierra.<br />
No utilice un adaptador.<br />
No utilice un cable eléctrico <strong>de</strong><br />
extensión.<br />
No seguir estas instrucciones pue<strong>de</strong><br />
ocasionar la muerte, incendio, o<br />
choque eléctrico.<br />
Tomacorriente 1 Tomacorriente 2<br />
Tomacorriente 3
Nivelación<br />
wADVERTENCIA<br />
Peligro <strong>de</strong> Quemaduras<br />
No toque los tubos <strong>de</strong> refrigeracíon<br />
cerca <strong>de</strong> la ban<strong>de</strong>ja <strong>de</strong><br />
<strong>de</strong>scongelación.<br />
No seguir esta instrucción pue<strong>de</strong><br />
ocasionar quemaduras.<br />
Su refrigerador tiene 2 tornillos <strong>de</strong>lanteros<br />
<strong>de</strong> nivelación; uno a la <strong>de</strong>recha y uno a la<br />
izquierda. Para ajustar uno o ambos siga<br />
estas instrucciones.<br />
1. Saque la rejilla. (Ver página 26.)<br />
2. Para subir el frente gire el tornillo en la<br />
dirección <strong>de</strong> las manecillas <strong>de</strong> un reloj.<br />
3. Para bajar el frente gire el tornillo en<br />
dirección opuesta a las manecillas <strong>de</strong><br />
un reloj.<br />
4. Verifique con un nivelador.<br />
5. Ponga la rejilla en su lugar. (Ver<br />
página 26.)<br />
Rueda<br />
<strong>de</strong>l<br />
frente<br />
Tornillo<br />
<strong>de</strong><br />
nivelación<br />
Para<br />
bajar<br />
A la <strong>de</strong>recha<br />
para subir; A<br />
la izquierda<br />
para bajar<br />
<strong>Use</strong> un<br />
<strong>de</strong>stornillador<br />
para ajustar<br />
Para<br />
subir<br />
9<br />
ESPAÑOL
Cómo Usar el Refrigerador<br />
Para obtener los mejores resultados <strong>de</strong> su refrigerador, es indispensable que lo opere <strong>de</strong> la<br />
manera indicada. Esta sección le explicará como ajustar los controles, como sacar y ajustar<br />
las piezas <strong>de</strong>l refrigerador y como ahorrar energía.<br />
Controles<br />
Los controles <strong>de</strong>l refrigerador y el<br />
congelador están en el refrigerador. Cuando<br />
se conecte el refrigerador por primera vez:<br />
1. Ponga el control <strong>de</strong>l refrigerador en 3<br />
(puesta recomendada). Los controles<br />
<strong>de</strong>l refrigerador van <strong>de</strong>l 1 (menos frío) al<br />
5 (más frío).<br />
2. Ponga el control <strong>de</strong>l congelador en 3<br />
(puesta recomendada). Los controles<br />
<strong>de</strong>l refrigerador van <strong>de</strong>l 1 (menos frío) al<br />
5 (más frío).<br />
3. Déle tiempo al refrigerador para enfriarse<br />
completamente antes <strong>de</strong> poner alimentos<br />
en él. Su enfriamiento pue<strong>de</strong> tomar varias<br />
horas.<br />
Las graduaciones sugeridas<br />
anteriormente, son para uso normal<br />
casero. Los controles están ajustados<br />
correctamente cuando la leche y los<br />
jugos estén tan fríos como a usted le<br />
gusten y cuando el helado se ponga<br />
firme. Si usted tiene que ajustar los<br />
controles, ver “Ajuste <strong>de</strong> los controles”<br />
página 11.<br />
10<br />
MODELO 1<br />
MODELO 2<br />
1 WARMER<br />
2<br />
3<br />
REFRIGERATOR<br />
RECOMMENDED SETTING<br />
4<br />
5 COOLER<br />
WARMER 1<br />
2<br />
FREEZER<br />
3<br />
RECOMMENDED SETTING<br />
4<br />
COOLER 5<br />
REFRIGERATOR WARMER COLDER<br />
WARMER 3 3 COLDER FREEZER
Ajuste <strong>de</strong> los controles<br />
Si tiene que ajustar la temperatura <strong>de</strong>l • Primero ajuste el control <strong>de</strong>l refrigerador.<br />
refrigerador o el congelador use como guía • Espere por lo menos 24 horas antes <strong>de</strong><br />
las graduaciones <strong>de</strong>l siguiente esquema. ajustar la temperatura nuevamente.<br />
• Luego, si es necesario, ajuste el control<br />
<strong>de</strong>l congelador.<br />
GRADUACIONES<br />
RECOMENDADAS:<br />
CONDICIONES: RAZONES:<br />
Refrigerador Congelador<br />
Sección <strong>de</strong>l<br />
• Las puertas se abren<br />
refrigerador no está lo frecuentemente<br />
suficientemente fría • Se agregó <strong>de</strong>masiada comida<br />
• La temperatura <strong>de</strong> la habitación<br />
está <strong>de</strong>masiado alta.<br />
4 2<br />
Sección <strong>de</strong>l<br />
• Las puertas se abren<br />
congelador no está lo frecuentemente<br />
suficientemente fría • Se agregó <strong>de</strong>masiada comida<br />
• La temperatura <strong>de</strong> la habitación<br />
está bastante baja (impi<strong>de</strong> el<br />
cambio apropiado <strong>de</strong> ciclo)<br />
3 4<br />
Sección <strong>de</strong>l<br />
• La graduación está incorrecta para<br />
refrigerador está<br />
<strong>de</strong>masiado fría<br />
las condiciones<br />
2 4<br />
El hielo no se • La temperatura <strong>de</strong> la habitación<br />
forma rápidamente está <strong>de</strong>masiado baja (impi<strong>de</strong> el<br />
cambio apropiado <strong>de</strong> ciclo)<br />
• Continuo uso <strong>de</strong> hielo<br />
4 4<br />
Ambas secciones • Las puertas se abren<br />
no están lo<br />
frecuentemente<br />
suficientemente frías • Se agregó <strong>de</strong>masiada comida<br />
• La temperatura <strong>de</strong> la habitación está<br />
<strong>de</strong>masiado alta o <strong>de</strong>masiado baja<br />
4 4<br />
11<br />
ESPAÑOL
Cómo sacar los bor<strong>de</strong>s <strong>de</strong>corativos<br />
<strong>de</strong>slizables <strong>de</strong> la puerta<br />
(en algunos mo<strong>de</strong>los)<br />
Para sacar el bor<strong>de</strong> <strong>de</strong>corativo:<br />
1. Saque todos los artículos <strong>de</strong>l anaquel.<br />
2. Tire hacia arriba el bor<strong>de</strong> <strong>de</strong>corativo en<br />
cada extremo.<br />
Para volver a colocar el bor<strong>de</strong> <strong>de</strong>corativo:<br />
1. Ubique cada extremo <strong>de</strong>l bor<strong>de</strong> <strong>de</strong>corativo<br />
sobre la abertura en la cavidad.<br />
2. Presione el bor<strong>de</strong> hacia abajo hasta que<br />
se <strong>de</strong>tenga.<br />
3. Vuelva a colocar los artículos en el anaquel.<br />
Cómo sacar los bor<strong>de</strong>s <strong>de</strong>corativos<br />
removibles <strong>de</strong> la puerta<br />
Para sacar el bor<strong>de</strong> <strong>de</strong>corativo:<br />
1. Saque todos los artículos <strong>de</strong>l anaquel.<br />
2. Tire <strong>de</strong> la aleta interior en cada extremo<br />
<strong>de</strong>l bor<strong>de</strong> <strong>de</strong>corativo.<br />
3. Levante el bor<strong>de</strong> hacia afuera.<br />
Para volver a colocar el bor<strong>de</strong> <strong>de</strong>corativa:<br />
1. Alinee los extremos <strong>de</strong>l bor<strong>de</strong> <strong>de</strong>corativo<br />
con el botón en la pared <strong>de</strong>l revestimiento<br />
<strong>de</strong> la puerta.<br />
2. Empuje el bor<strong>de</strong> directamente hacia altrás<br />
hasta que encaje firmemente en su lugar.<br />
3. Vuelva a colocar los artículos en el anaquel.<br />
12
Cómo sacar los anaqueles removibles <strong>de</strong> la<br />
puerta<br />
(en mo<strong>de</strong>los seleccionados)<br />
Para sacar el anaquel:<br />
1. Saque todos los artículos <strong>de</strong>l anaquel.<br />
2. Tire <strong>de</strong> la aleta interior en cada extremo<br />
<strong>de</strong>l anaquel.<br />
3. Levante el anaquel hacia afuera.<br />
Para volver a colocar la pieza <strong>de</strong> apoyo:<br />
1. Alinee los extremos <strong>de</strong>l anaquel con el<br />
botón en la pared <strong>de</strong>l revestimiento <strong>de</strong><br />
la puerta.<br />
2. Empuje el anaquel directamente<br />
hacia atrás hasta que encaje firmemente<br />
en su lugar.<br />
3. Vuelva a colocar los artículos en el anaquel.<br />
Cómo ajustar los anaqueles <strong>de</strong> la puerta<br />
(en mo<strong>de</strong>los seleccionados)<br />
Cómo sacar los anaqueles <strong>de</strong> la puerta:<br />
1. Levante el anaquel.<br />
2. Retire el anaquel tirando en dirección suya.<br />
Cómo colocar los anaqueles en la puerta:<br />
1. Deslice el anaquel sobre el botón <strong>de</strong><br />
apoyo <strong>de</strong>seado.<br />
2. Presione hacia abajo hasta que se <strong>de</strong>tenga.<br />
Cómo ajustar el compartimiento multiusos<br />
y la ban<strong>de</strong>ja<br />
(en mo<strong>de</strong>los seleccionados)<br />
El compartimiento multiusos y la ban<strong>de</strong>ja se<br />
<strong>de</strong>slizan <strong>de</strong> un lado al otro dando<br />
flexibilidad <strong>de</strong> almacenamiento. La ban<strong>de</strong>ja<br />
cabe en ambos lados <strong>de</strong>l compartimiento<br />
multiusos o parcialmente bajo <strong>de</strong> él. Pruebe<br />
varios lugares y elija el que más le<br />
convenga.<br />
Cómo ajustar el compartimiento<br />
multiusos o la ban<strong>de</strong>ja:<br />
1. Levante el frente levemente.<br />
2. Deslice a la posición <strong>de</strong>seada.<br />
3. Baje el frente para fijarlo en su lugar.<br />
Botón <strong>de</strong> apoyo<br />
13<br />
ESPAÑOL
Cómo quitar los anaqueles <strong>de</strong>l refrigerador<br />
Ajuste los anaqueles para que que<strong>de</strong>n <strong>de</strong><br />
acuerdo al uso que le dará al refrigerador.<br />
Los anaqueles <strong>de</strong> vidrio son lo<br />
suficientemente fuertes para soportar<br />
botellas, leche y otros artículos alimenticios<br />
pesados.<br />
Anaqueles <strong>de</strong> ménsula<br />
Cómo sacar el anaquel:<br />
1. Retire los artículos sobre el anaquel.<br />
2. Incline el frente <strong>de</strong>l anaquel hacia arriba.<br />
3. Levante la parte posterior <strong>de</strong>l anaquel.<br />
4. Retire el anaquel tirando hacia usted.<br />
Cómo volver a colocar el anaquel:<br />
1. Dirija los ganchos posteriores hasta<br />
colocarlos en las ranuras en los soportes<br />
para anaqueles que se encuentran en la<br />
pared posterior.<br />
2. Incline la parte <strong>de</strong>lantera <strong>de</strong>l anaquel<br />
hacia arriba hasta que los ganchos entren<br />
en las ranuras.<br />
3. Vuelva a poner la parte <strong>de</strong>lantera <strong>de</strong>l<br />
anaquel a nivel.<br />
Anaqueles que se <strong>de</strong>slizan<br />
Para sacar los anaqueles:<br />
1. Saque todos los artículos <strong>de</strong>l anaquel.<br />
2. Deslice el anaquel hacia afuera hasta<br />
el tope.<br />
3. Levante el frente levemente.<br />
4. Deslice el anaquel hacia afuera el resto<br />
<strong>de</strong>l recorrido.<br />
Para volver a colocar los anaqueles:<br />
1. Coloque el anaquel encima <strong>de</strong> la guía con<br />
los topes <strong>de</strong> alambre <strong>de</strong>bajo <strong>de</strong> la guía.<br />
2. Levante el frente.<br />
3. Deslice el anaquel hacia a<strong>de</strong>ntro hasta<br />
salvar todos los topes.<br />
14<br />
MODELO 1<br />
NOTA: Los anaqueles <strong>de</strong> vidrio son<br />
pesados. Manéjelos con cuidado.<br />
MODELO 2<br />
Tope <strong>de</strong><br />
alambre<br />
Tope <strong>de</strong><br />
la guía<br />
<strong>Guía</strong> <strong>de</strong>l<br />
anaquel
Cómo ajustar el anaquel EZ-TRACK* <strong>de</strong>l<br />
refrigerador<br />
(en mo<strong>de</strong>los seleccionados)<br />
El anaquel EZ-TRACK se <strong>de</strong>sliza <strong>de</strong> un lado<br />
al otro dando flexibilidad <strong>de</strong> almacenamiento<br />
en su refrigerador.<br />
Cómo <strong>de</strong>slizar el anaquel <strong>de</strong> un lado a otro:<br />
1. Levante ligeramente la parte <strong>de</strong>lantera<br />
<strong>de</strong>l anaquel.<br />
2. Deslice a la ubicacion <strong>de</strong>seada.<br />
3. Vuelva a colocar la parte <strong>de</strong>lantera <strong>de</strong>l<br />
anaquel a nivel.<br />
NOTA: No tendrá que retirar los artículos<br />
pequeños que estén sobre el anaquel antes<br />
<strong>de</strong> moverlo <strong>de</strong> un lado al otro. Tal vez<br />
convenga quitar artículos más gran<strong>de</strong>s.<br />
Cómo sacar el anaquel:<br />
1. Retire todos los artículos que estén sobre<br />
el anaquel.<br />
2. Soporte la parte posterior <strong>de</strong>l anaquel<br />
con una mano.<br />
3. Incline la parte <strong>de</strong>lantera <strong>de</strong>l anaquel a<br />
un ángulo <strong>de</strong> 45°.<br />
4. Haga <strong>de</strong>scen<strong>de</strong>r ligeramente el anaquel<br />
para soltarlo <strong>de</strong>l canal superior <strong>de</strong> la<br />
guía. Luego retire el anaquel hacia afuera<br />
manteniéndolo a nivel.<br />
NOTA: El anaquel es muy pesado. Asegúrese<br />
<strong>de</strong> utilizar ambas manos cuando lo saque.<br />
Cómo quitar la guía <strong>de</strong>l anaquel:<br />
1. Levante ligeramente ambos lados <strong>de</strong><br />
la guía.<br />
2. Saque la guía hacia afuera manteniéndola<br />
a nivel.<br />
Levante la parte <strong>de</strong>lantera<br />
ligeramente y <strong>de</strong>slice a la<br />
nueva posición.<br />
Sopórtelo con ambas manos y<br />
levante la parte <strong>de</strong>lantera hasta<br />
un ángulo <strong>de</strong> 45°<br />
Detenga ambos lados y levante<br />
hacia arriba y hacia afuera.<br />
Canal superior<br />
15<br />
ESPAÑOL
Cómo volver a colocar la guía <strong>de</strong>l anaquel:<br />
1. Dirija los ganchos <strong>de</strong> la guía hasta<br />
colocarlos en las ranuras <strong>de</strong> soporte <strong>de</strong>l<br />
anaquel en la pared posterior <strong>de</strong>l aparato.<br />
NOTA: Asegúrese <strong>de</strong> que los tres<br />
ganchos <strong>de</strong> la guía entren en las ranuras<br />
y que éstas estén paralelas.<br />
2. Empuje la guía hacia atrás y hacia abajo.<br />
3. Asegúrese <strong>de</strong> que la guía esté totalmente<br />
asentada en los soportes <strong>de</strong>l anaquel.<br />
Cómo volver a instalar el anaquel:<br />
1. Soporte las partes <strong>de</strong>lantera y trasera <strong>de</strong>l<br />
anaquel.<br />
2. Incline la parte <strong>de</strong>lantera <strong>de</strong>l anaquel<br />
hasta un ángulo <strong>de</strong> 45° a la guía.<br />
3. Coloque las dos <strong>de</strong>sliza<strong>de</strong>ras posteriores<br />
<strong>de</strong>l anaquel en el canal superior <strong>de</strong> la guía.<br />
4. Vuelva a poner la parte <strong>de</strong>lantera <strong>de</strong>l<br />
anaquel a nivel.<br />
NOTA: Asegúrese <strong>de</strong> que las dos<br />
<strong>de</strong>sliza<strong>de</strong>ras posteriores <strong>de</strong>l anaquel se<br />
encuentren bien colocadas en la guía antes<br />
<strong>de</strong> soltar el anaquel.<br />
Cómo sacar la gaveta para carnes y la<br />
cubierta<br />
Mo<strong>de</strong>lo 1<br />
Cómo sacar la gaveta para carnes:<br />
1. Deslice la gaveta para carnes hasta el tope.<br />
2. Levante la parte <strong>de</strong>lantera <strong>de</strong> la gaveta<br />
para carnes y <strong>de</strong>slice la gaveta hacia el<br />
frente hasta el final.<br />
3. Vuelva a colocarla siguiendo el or<strong>de</strong>n inverso.<br />
Cómo ajustar la posición <strong>de</strong> la cubierta:<br />
1. Levante el frente <strong>de</strong> la cubierta.<br />
2. Levante la parte trasera <strong>de</strong> la cubierta.<br />
3. Retire la cubierta tirando en dirección suya.<br />
Cómo colocar la cubierta:<br />
1. Dirija los ganchos posteriores <strong>de</strong> la cubierta<br />
hasta que entren en las ranuras <strong>de</strong> los<br />
soportes <strong>de</strong>l anaquel en la pared <strong>de</strong>l aparato.<br />
2. Incline la parte <strong>de</strong>lantera <strong>de</strong> la cubierta hasta<br />
que los ganchos entren en las ranuras.<br />
3. Vuelva a colocar la cubierta a nivel.<br />
16<br />
Asegúrese<br />
que<br />
ambos<br />
ganchos<br />
estén en<br />
las<br />
ranuras <strong>de</strong><br />
soporte.<br />
Coloque las <strong>de</strong>sliza<strong>de</strong>ras<br />
posteriores <strong>de</strong>l anaquel en<br />
el canal superior <strong>de</strong> la guía.<br />
MODELO 1<br />
Meats<br />
Soporte <strong>de</strong>l<br />
anaquel<br />
Canal superior<br />
<strong>de</strong> la guía<br />
Tire hacia fuera hasta llegar al tope, levante la<br />
parte <strong>de</strong>lantera y vuelva a tirar <strong>de</strong> la gaveta.
Mo<strong>de</strong>lo 2<br />
Saque la gaveta para carnes y la cubierta<br />
para facilitar la limpieza.<br />
Para sacar la gaveta para carnes:<br />
1. Deslice la gaveta para carnes hacia<br />
afuera hasta el tope.<br />
2. Levante el frente <strong>de</strong> la gaveta.<br />
3. Deslice la gaveta hacia afuera el resto<br />
<strong>de</strong>l recorrido.<br />
4. Colóquela nuevamente invirtiendo<br />
el or<strong>de</strong>n.<br />
Para sacar la cubierta:<br />
1. Saque la gaveta para carnes.<br />
2. Empuje la cubierta hacia atrás para<br />
soltar la parte posterior <strong>de</strong> la cubierta<br />
<strong>de</strong>l anaquel.<br />
3. Incline el frente <strong>de</strong> la cubierta hacia arriba.<br />
4. Tire <strong>de</strong> la cubierta hacia afuera.<br />
Para volver a colocar la cubierta:<br />
1. Coloque las ranuras y la orilla posterior<br />
<strong>de</strong> la cubierta sobre los travesaños<br />
posterior y central <strong>de</strong>l anaquel.<br />
2. Deje caer la cubierta en su lugar.<br />
3. Vuelva a colocar la gaveta para carnes.<br />
MODELO 2<br />
Saque la gaveta para carnes antes <strong>de</strong> la<br />
cubierta.<br />
17<br />
ESPAÑOL
Cómo sacar las gavetas para verduras y la<br />
cubierta<br />
Para su conveniencia una gaveta es un<br />
poco más gran<strong>de</strong> que la otra. Esto le<br />
permite guardar apio y otros vegetales más<br />
largos en la gaveta.<br />
Para sacar las gavetas para verduras:<br />
1. Deslice la gaveta hacia afuera hasta<br />
el tope.<br />
2. Levante el frente.<br />
3. Deslice la misma hacia afuera el resto <strong>de</strong>l<br />
recorrido.<br />
4. Colóquela nuevamente invirtiendo el<br />
or<strong>de</strong>n.<br />
Para sacar la cubierta:<br />
1. Empuje el inserto <strong>de</strong> la cubierta <strong>de</strong>s<strong>de</strong><br />
abajo hacia arriba, luego con las dos<br />
manos <strong>de</strong>slícela hacia afuera.<br />
2. Levante el frente <strong>de</strong>l marco <strong>de</strong> la<br />
cubierta.<br />
3. Levante el marco <strong>de</strong> la cubierta hacia<br />
arriba y afuera.<br />
Para volver a colocar la cubierta:<br />
1. Coloque la parte posterior <strong>de</strong>l marco <strong>de</strong><br />
la cubierta en los apoyos ranurados en la<br />
pared posterior <strong>de</strong>l refrigerador y baje el<br />
frente a su lugar.<br />
2. Deslice la parte <strong>de</strong> atrás <strong>de</strong> la cubierta a<br />
su lugar y baje el frente.<br />
Cómo ajustar el control <strong>de</strong> humedad <strong>de</strong> las<br />
gavetas para verduras<br />
Usted pue<strong>de</strong> controlar el nivel <strong>de</strong> humedad<br />
en las gavetas sellados para retención <strong>de</strong><br />
humedad. Ajuste el control al valor <strong>de</strong>seado<br />
entre LOW y HIGH.<br />
• LOW (abierto) permite que el aire<br />
hume<strong>de</strong>cido salga <strong>de</strong> la gaveta para el<br />
buen almacenamiento <strong>de</strong> frutas y verduras<br />
con cáscara.<br />
• HIGH (cerrado) retiene el aire hume<strong>de</strong>cido<br />
<strong>de</strong>ntro <strong>de</strong> la gaveta para el buen<br />
almacenamiento <strong>de</strong> verduras <strong>de</strong> hoja.<br />
18<br />
Saque el<br />
inserto <strong>de</strong> la<br />
cubierta.<br />
Levante el<br />
frente <strong>de</strong> la<br />
cubierta y<br />
luego la parte<br />
trasera.<br />
NOTA: Si la<br />
cubierta es <strong>de</strong><br />
vidrio, tenga<br />
cuidado. Pue<strong>de</strong><br />
ser pesada.<br />
Tire hacia<br />
afuera hasta<br />
el tope,<br />
levante el<br />
frente y<br />
vuelva a tirar.
Cómo ajustar el riel <strong>de</strong> la cubierta <strong>de</strong> la<br />
gaveta para verduras<br />
Debido a que las gavetas no son <strong>de</strong>l mismo<br />
tamaño, la cubierta <strong>de</strong> las gavetas tiene un<br />
riel central ajustable el cual permite cambiar<br />
la ubicación <strong>de</strong> las gavetas. Se pue<strong>de</strong><br />
ajustar el riel central sin sacar la cubierta <strong>de</strong>l<br />
refrigerador. Saque solamente las gavetas y<br />
el inserto <strong>de</strong> la cubierta.<br />
Para sacar el riel central:<br />
2<br />
1. Empuje el inserto <strong>de</strong> la cubierta <strong>de</strong>s<strong>de</strong><br />
abajo hacia arriba, luego con las dos<br />
manos <strong>de</strong>slícelo hacia afuera.<br />
3<br />
2. Tire <strong>de</strong>l frente <strong>de</strong>l marco suavemente<br />
hacia arriba.<br />
3. Tire <strong>de</strong> la parte posterior <strong>de</strong>l riel fuera <strong>de</strong><br />
la abertura <strong>de</strong> la cubierta.<br />
Para volver a colocar el riel central:<br />
2<br />
1. Introduzca el extremo posterior <strong>de</strong>l riel<br />
(con agujero) en la abertura en la parte<br />
posterior <strong>de</strong> la cubierta.<br />
1<br />
2. Baje el extremo inferior <strong>de</strong>l riel a la<br />
ranura.<br />
3. Asegúrese que el extremo posterior esté<br />
bien asegurado en la parte inferior <strong>de</strong> la<br />
cubierta.<br />
19<br />
ESPAÑOL
Cómo ajustar el anaquel <strong>de</strong>l congelador<br />
Ajuste el anaquel <strong>de</strong>l congelador <strong>de</strong> acuerdo<br />
al uso.<br />
Para sacar el anaquel:<br />
1. Levante levemente todo el anaquel.<br />
2. Mueva el anaquel a un lado.<br />
3. Incline el otro extremo hacia arriba<br />
quitándolo <strong>de</strong> las copas <strong>de</strong> apoyo.<br />
4. Tire <strong>de</strong>l anaquel hacia arriba y hacia afuera.<br />
2 3<br />
Para volver a colocar el anaquel:<br />
1. Incline el anaquel e introdúzcalo en el<br />
compartimiento <strong>de</strong>l congelador.<br />
2. Introduzca un extremo <strong>de</strong>l anaquel hasta<br />
el centro <strong>de</strong> las copas <strong>de</strong> apoyo <strong>de</strong>l anaquel.<br />
3. Baje el otro extremo <strong>de</strong>l anaquel e<br />
introdúzcalo en las copas <strong>de</strong> apoyo.<br />
4. Baje el anaquel a su lugar.<br />
NOTA: El anaquel <strong>de</strong>be bajar levemente<br />
y cerrarse en su lugar. Si el anaquel parece<br />
estar inseguro, asegúrese <strong>de</strong> que esté<br />
bien colocado en las copas <strong>de</strong> apoyo <strong>de</strong>l<br />
anaquel.<br />
Cómo ajustar el anaquel <strong>de</strong> dimensiones<br />
pequeñas <strong>de</strong>l congelador<br />
(en mo<strong>de</strong>los seleccionados)<br />
Ajuste el anaquel <strong>de</strong> acuerdo con el espacio<br />
que necesita en su congelador. <strong>Use</strong> la posición<br />
más baja cuando no <strong>de</strong>see usar el anaquel.<br />
Cómo ajustar el anaquel:<br />
1. Retire los artículos que estén sobre el anaquel.<br />
2. Levante la parte <strong>de</strong>lantera <strong>de</strong>l anaquel.<br />
3. Tire <strong>de</strong>l anaquel hasta que llegue al tope.<br />
4. Levante la parte posterior <strong>de</strong>l anaquel.<br />
5. Tire <strong>de</strong>l anaquel hasta sacarlo.<br />
Cómo volver a colocar el anaquel:<br />
1. Dirija la parte posterior <strong>de</strong>l anaquel hasta<br />
que entre en la guía <strong>de</strong>seada.<br />
2. Levante la parte posterior <strong>de</strong>l anaquel<br />
sobre el tope.<br />
3. Deslice el anaquel hasta a<strong>de</strong>ntro.<br />
4. Baje la parte <strong>de</strong>lantera hasta que que<strong>de</strong><br />
en su lugar.<br />
20<br />
2<br />
4<br />
1<br />
3
Cómo quitar la base removible <strong>de</strong>l<br />
congelador<br />
(en mo<strong>de</strong>los seleccionados)<br />
La base removible <strong>de</strong>l congelador se pue<strong>de</strong><br />
sacar para tener acceso fácil a alimentos al<br />
fondo <strong>de</strong>l congelador y para facilitar la<br />
limpieza.<br />
Cómo sacar la base removible <strong>de</strong>l<br />
congelador:<br />
1. Levante las dos “rejillas” hacia arriba y<br />
hacia afuera.<br />
2. Saque la base aproximadamente 2,5 cm<br />
(1 pulgada) colocando una mano<br />
alre<strong>de</strong>dor <strong>de</strong> la torre <strong>de</strong> aire (centro,<br />
atrás) y la otra en la parte central<br />
<strong>de</strong>lantera.<br />
3. Levante la base en la parte <strong>de</strong> atrás hasta<br />
que los ganchos se suelten <strong>de</strong>l aparato.<br />
4. Saque la base hasta afuera.<br />
Cómo volver a colocar la base removible<br />
<strong>de</strong>l congelador<br />
1. Coloque la parte posterior <strong>de</strong> la base en<br />
la abertura <strong>de</strong>l congelador.<br />
2. Deslice la base hacia atrás hasta que los<br />
ganchos entren en su lugar en la parte<br />
posterior <strong>de</strong>l gabinete.<br />
3. Vuelva a colocar las “rejillas” alineando<br />
las clavijas con las entradas en la base.<br />
Empuje hacia abajo hasta que que<strong>de</strong>n en<br />
su lugar.<br />
Cómo usar las cubetas para hielo<br />
Si los cubitos <strong>de</strong> hielo no se usan, pue<strong>de</strong>n<br />
reducirse <strong>de</strong> tamaño. El aire frío circulante<br />
empieza una evaporación lenta. Mientras<br />
más tiempo guar<strong>de</strong> usted los cubitos <strong>de</strong><br />
hielo, más pequeños se volverán.<br />
Para extraer el hielo:<br />
1. Detenga la cubeta por ambos extremos.<br />
2. Dóblela haciendo una ligera torsión.<br />
21<br />
ESPAÑOL
Cómo usar la máquina <strong>de</strong> hacer hielo<br />
(opcional)<br />
Si su refrigerador cuenta con una máquina<br />
<strong>de</strong> hacer hielo, o si <strong>de</strong>sea agregar uno más<br />
tar<strong>de</strong> (llame a su distribuidor para obtener el<br />
número <strong>de</strong> parte para la máquina <strong>de</strong> hacer<br />
hielo), la siguiente información le será <strong>de</strong><br />
utilidad:<br />
• La palanca <strong>de</strong> ON/OFF es un brazo <strong>de</strong><br />
alambre.<br />
Abajo (DOWN) para hacer hielo<br />
automáticamente<br />
Arriba (UP) para apagar la producción<br />
<strong>de</strong> hielo<br />
IMPORTANTE: No encienda la máquina<br />
<strong>de</strong> hacer <strong>de</strong> hielo hasta que esté<br />
conectado al suministro <strong>de</strong> agua.<br />
• Si retira usted el recipiente para hielo,<br />
suba la palanca para apagar el<br />
mecanismo <strong>de</strong> producción <strong>de</strong> hielo.<br />
Cuando vuelva a colocar el recipiente,<br />
empújela hasta el fondo y baje la palanca a<br />
la posición <strong>de</strong> ON.<br />
• La calidad <strong>de</strong>l agua <strong>de</strong>terminará la calidad<br />
<strong>de</strong>l hielo. Es preferible no conectar la<br />
máquina <strong>de</strong> hacer <strong>de</strong> hielo a un suministro<br />
Cómo resolver los problemas <strong>de</strong> la máquina <strong>de</strong> hacer hielo<br />
22<br />
Off<br />
On<br />
Levante la<br />
palanca para<br />
<strong>de</strong>tener la<br />
máquina <strong>de</strong><br />
hacer hielo<br />
Baje la<br />
palanca para<br />
encen<strong>de</strong>r la<br />
máquina <strong>de</strong><br />
hacer hielo<br />
<strong>de</strong> agua blanda. Las sustancias químicas<br />
para suavizar el agua (tal como sal <strong>de</strong> un<br />
suavizador que no está funcionando bien)<br />
pue<strong>de</strong>n dañar el mol<strong>de</strong> para hacer hielo y<br />
producir hielo <strong>de</strong> mala calidad. Si no<br />
pue<strong>de</strong> evitar usar un suministro <strong>de</strong> agua<br />
blanda, asegúrese <strong>de</strong> que el suavizador<br />
<strong>de</strong> agua esté funcionando correctamente y<br />
esté bien mantenido.<br />
PROBLEMA<br />
POSIBLE CAUSA/SOLUCIÓN<br />
Las medias lunas <strong>de</strong> • Esto es normal. Se separan con facilidad. Sacuda el recipiente<br />
hielo están pegadas en ocasionalmente para que los cubos que<strong>de</strong>n separados.<br />
las esquinas<br />
La máquina <strong>de</strong> hacer<br />
hielo no funciona o el<br />
hielo no se hace con la<br />
rapi<strong>de</strong>z suficiente<br />
Mal sabor o olor en<br />
el hielo<br />
• La palanca <strong>de</strong> ON/OFF está en la posición <strong>de</strong> OFF (hacia<br />
arriba). Baje la palanca a la posición <strong>de</strong> ON (hacia abajo).<br />
• El congelador no está los suficientemente frío. Ajuste los<br />
controles <strong>de</strong> temperatura y espere 24 horas. (Refiérase a<br />
“Ajuste <strong>de</strong> los controles” en la página 11.)<br />
• Las nuevas conexiones <strong>de</strong> plomería pue<strong>de</strong>n causar hielo<br />
<strong>de</strong>scolorido o <strong>de</strong> mal sabor. Deseche las primeras tandas<br />
<strong>de</strong> hielo.<br />
• Los cubos <strong>de</strong> hielo han estado almacenados <strong>de</strong>masiado<br />
tiempo. Deséchelos y haga una nueva tanda.<br />
• Los alimentos no están <strong>de</strong>bidamente envueltos. Refiérase a la<br />
página 37.<br />
• Necesita limpiar el congelador y el recipiente para hielo.<br />
Refiérase a la página 33.
Conexión <strong>de</strong> la máquina <strong>de</strong> hacer hielo<br />
(opcional) al suministro <strong>de</strong> agua<br />
Lea cuidadosamente todas las<br />
instrucciones antes <strong>de</strong><br />
comenzar.<br />
wADVERTENCIA<br />
Peligro <strong>de</strong> Choque Eléctrico<br />
Desenchufe el refrigerador antes<br />
<strong>de</strong> la instalación <strong>de</strong> la máquina <strong>de</strong><br />
hacer hielo.<br />
No seguir esta instrucción<br />
pue<strong>de</strong> ocasionar la muerte<br />
o choque eléctrico.<br />
IMPORTANTE:<br />
• <strong>Use</strong> tubería <strong>de</strong> cobre solamente y verifique<br />
si hay escapes.<br />
• Instale la tubería <strong>de</strong> la máquina hacer hielo<br />
en lugares don<strong>de</strong> las temperaturas serán<br />
superiores a la temperatura <strong>de</strong><br />
congelación.<br />
Herramientas necesarias:<br />
• Destornillador estándar<br />
• Llaves <strong>de</strong> boca <strong>de</strong> 1,11 cm ( 7 ⁄ 16") y 1,27 cm<br />
( 1 ⁄ 2") 2 llaves ajustables<br />
• Llave <strong>de</strong> tuerca <strong>de</strong> 0,635 cm ( 1 ⁄ 4")<br />
• Broca <strong>de</strong> taladro <strong>de</strong> 0,635 cm ( 1 ⁄ 4")<br />
• Taladro manual o taladro eléctrico<br />
(<strong>de</strong>bidamente puesto a tierra)<br />
NOTA: Su distribuidor <strong>de</strong> aparatos eléctricos<br />
tiene disponible un conjunto con una válvula<br />
tipo collarín <strong>de</strong> 0,635 cm ( 1 ⁄ 4"), una unión<br />
y tubería <strong>de</strong> cobre. Antes <strong>de</strong> adquirirla<br />
asegúrese <strong>de</strong> que la válvula <strong>de</strong> tipo collarín<br />
cumple con los códigos <strong>de</strong> plomería locales.<br />
No utilice una válvula <strong>de</strong> tipo perforante o<br />
una válvula <strong>de</strong> tipo collarín <strong>de</strong> 0,45 cm ( 3 ⁄ 16")<br />
pues reduce el flujo <strong>de</strong> agua y se obstruye<br />
más fácilmente.<br />
Suministro <strong>de</strong> agua fría<br />
La válvula <strong>de</strong>l agua <strong>de</strong> la máquina <strong>de</strong> hacer<br />
hielo está provista <strong>de</strong> una aran<strong>de</strong>la <strong>de</strong> flujo<br />
que se usa como un regulador <strong>de</strong> la presión<br />
<strong>de</strong>l agua. La máquina <strong>de</strong> hacer hielo <strong>de</strong>be ser<br />
conectado a una tubería <strong>de</strong> agua fría con<br />
límites <strong>de</strong> presión <strong>de</strong>l agua <strong>de</strong> 138 a 827<br />
kPa (20 a 120 lbs/pulg. 2 ). Si se produce<br />
algún problema llame a su compañía <strong>de</strong><br />
agua potable.<br />
IMPORTANTE:<br />
• Su fábrica <strong>de</strong> hielo pue<strong>de</strong> <strong>de</strong>morar hasta<br />
24 horas en comenzar a producir hielo.<br />
• Si se usa el refrigerador antes <strong>de</strong> instalar<br />
la conexión <strong>de</strong>l agua, coloque la máquina<br />
<strong>de</strong> hacer <strong>de</strong> hielo en la posición OFF<br />
(apagado) para evitar que funcione sin agua.<br />
• Todas las instalaciones <strong>de</strong>ben ser hechas<br />
<strong>de</strong> acuerdo con los códigos <strong>de</strong> plomería<br />
local.<br />
La instalación no es garantizada por<br />
el fabricante <strong>de</strong>l refrigerador o <strong>de</strong> la<br />
máquina <strong>de</strong> hacer heilo<br />
23<br />
ESPAÑOL
Conexión <strong>de</strong> la tubería <strong>de</strong>l agua<br />
1. Busque una tubería vertical <strong>de</strong> agua<br />
FRIA <strong>de</strong> 1,27 cm ( 1 ⁄ 2") a 3,17 cm (1 1 ⁄ 4")<br />
cerca <strong>de</strong>l refrigerador.<br />
NOTA: Una tubería horizontal pue<strong>de</strong><br />
servir, pero se <strong>de</strong>be tomar las siguientes<br />
precauciónes: Taladre en el lado superior<br />
<strong>de</strong> la tubería, no en la parte inferior. Esto<br />
ayudará a mantener el agua alejada <strong>de</strong>l<br />
taladro. Esto a<strong>de</strong>más evita que se<br />
acumule sedimento normal en la válvula.<br />
2. Mida <strong>de</strong>s<strong>de</strong> la conexión en la parte<br />
trasera <strong>de</strong>l refrigerador hasta la tubería<br />
<strong>de</strong>l agua. Agregue 2,1 m (7 pies) más<br />
para permitir que el refrigerador pueda<br />
moverse cuando se hace la limpieza.<br />
Este es el largo <strong>de</strong> la tubería <strong>de</strong> cobre <strong>de</strong><br />
0,635 cm ( 1 ⁄ 4") diámetro exterior que<br />
necesitará para el trabajo (medido <strong>de</strong>s<strong>de</strong><br />
la conexión a la tubería <strong>de</strong>l agua MAS<br />
2,1 m [7 pies]). Asegúrese <strong>de</strong> que ambos<br />
extremos <strong>de</strong> la tubería <strong>de</strong> cobre estén<br />
cortados <strong>de</strong>rechos.<br />
3. CORTE el suministro <strong>de</strong> agua principal.<br />
ABRA la llave <strong>de</strong> agua más cercana<br />
durante un tiempo suficiente para que la<br />
tubería que<strong>de</strong> totalmente sin agua.<br />
4. Usando un taladro puesto a tierra, taladre<br />
un orificio <strong>de</strong> 0,635 cm ( 1 ⁄ 4") en la tubería<br />
<strong>de</strong>l agua fría que usted haya seleccionado.<br />
5. Instale la válvula <strong>de</strong> cierre en la tubería<br />
<strong>de</strong> agua fría con la abraza<strong>de</strong>ra.<br />
Asegúrese <strong>de</strong> que el extremo <strong>de</strong> la salida<br />
esté firmemente insertado en el orificio<br />
<strong>de</strong> 0,635 cm ( 1 ⁄ 4") taladrado en la tubería<br />
<strong>de</strong>l agua y que la aran<strong>de</strong>la esté <strong>de</strong>bajo<br />
<strong>de</strong> la abraza<strong>de</strong>ra <strong>de</strong> la tubería. Apriete la<br />
tuerca <strong>de</strong> presión. Apriete los tornillos <strong>de</strong><br />
la abraza<strong>de</strong>ra <strong>de</strong> la tubería cuidadosa e<br />
uniformemente <strong>de</strong> modo que la aran<strong>de</strong>la<br />
provea un cierre hermético. No apriete<br />
<strong>de</strong>masiado pues pue<strong>de</strong> doblar la tubería<br />
<strong>de</strong> cobre, especialmente si se usa tubería<br />
<strong>de</strong> cobre recocido. Ahora usted pue<strong>de</strong><br />
conectar la tubería <strong>de</strong> cobre.<br />
24<br />
Tubería vertical<br />
<strong>de</strong>l agua fría<br />
Aran<strong>de</strong>la<br />
Tuerca<br />
<strong>de</strong><br />
presión<br />
Válvula <strong>de</strong><br />
cierre <strong>de</strong><br />
agua<br />
Anillo <strong>de</strong><br />
compresión<br />
Abraza<strong>de</strong>ra<br />
<strong>de</strong> la tubería<br />
Tuerca <strong>de</strong><br />
compresión<br />
Tubería <strong>de</strong> cobre<br />
<strong>de</strong> 0,635 cm ( 1 ⁄ 4")<br />
diám. ext.<br />
(medida <strong>de</strong>s<strong>de</strong> la<br />
entrada en la<br />
parte trasera<br />
<strong>de</strong>l refrigerador<br />
hasta la tubería<br />
<strong>de</strong>l agua más<br />
2,1 m [7 pies])<br />
Anillo <strong>de</strong><br />
compresión<br />
HACIA EL REFRIGERADOR ➔<br />
† Algunas mo<strong>de</strong>los pue<strong>de</strong>n no tener este<br />
segundo anillo <strong>de</strong> compresión y tuerca<br />
<strong>de</strong> compresión.<br />
6. Deslice el anillo <strong>de</strong> compresión y la<br />
tuerca <strong>de</strong> compresión en la tubería <strong>de</strong><br />
cobre como se muestra en la ilustración.<br />
Inserte el extremo <strong>de</strong> la tubería en el<br />
extremo <strong>de</strong> la salida firmemente hasta<br />
don<strong>de</strong> sea posible. Atornille la tuerca <strong>de</strong><br />
compresión en el extremo <strong>de</strong> la salida<br />
con una llave ajustable. No apriete<br />
<strong>de</strong>masiado. ABRA el suministro <strong>de</strong> agua<br />
principal y <strong>de</strong>je correr el agua hasta que<br />
salga clara. CIERRE la válvula <strong>de</strong> cierre<br />
en la tubería <strong>de</strong>l agua. Haga un espiral<br />
con la tubería <strong>de</strong> cobre.<br />
†<br />
†
Conexión al refrigerador<br />
1. Desconecte la abraza<strong>de</strong>ra para tubos en<br />
la parte trasera <strong>de</strong>l refrigerador y inserte<br />
la tubería <strong>de</strong> cobre a través <strong>de</strong> la<br />
abraza<strong>de</strong>ra como se muestra en el<br />
diagrama a la <strong>de</strong>recha. Fije la tubería <strong>de</strong><br />
cobre a la entrada <strong>de</strong> la válvula usando<br />
un anillo <strong>de</strong> compresíon y una tuerca <strong>de</strong><br />
compresión como se muestra. Apriete la<br />
tuerca <strong>de</strong> compresión. No la apriete<br />
<strong>de</strong>masiado. Fije <strong>de</strong> nuevo la abraza<strong>de</strong>ra<br />
<strong>de</strong> tubos y el tubo a la parte trasera <strong>de</strong>l<br />
gabinete. Continue al Paso 2.<br />
2. ABRA la válvula <strong>de</strong> cierre. VERIFIQUE<br />
SI HAY FUGAS. APRIETE TODAS LAS<br />
CONEXIONES (INCLUYENDO LAS<br />
CONEXIONES EN LA VALVULA) O<br />
TUERCAS QUE TENGAN ESCAPES.<br />
3. La máquina <strong>de</strong> hacer hielo está equipado<br />
con un filtro <strong>de</strong> agua incorporado. Si las<br />
condiciones <strong>de</strong> agua locales requieren<br />
limpieza periódica o su fuente <strong>de</strong><br />
suministro <strong>de</strong> agua es un pozo, se <strong>de</strong>be<br />
instalar un segundo filtro <strong>de</strong>l agua en la<br />
tubería <strong>de</strong> agua <strong>de</strong> 0,635 cm ( 1 ⁄ 4").<br />
Adquiera un filtro <strong>de</strong> agua <strong>de</strong> su<br />
distribuidor <strong>de</strong> aparatos eléctricos más<br />
cercano. Instálelo en cualquiera <strong>de</strong> las<br />
conexiones <strong>de</strong> la tubería.<br />
4. Vuelva a conectar la corriente eléctrica al<br />
refrigerador.<br />
Abraza<strong>de</strong>ra<br />
para tubos<br />
<strong>de</strong> cobre<br />
Válvula<br />
<strong>de</strong> agua<br />
<strong>Use</strong> solamente<br />
tubería <strong>de</strong><br />
cobre <strong>de</strong><br />
0,635 cm ( 1 ⁄ 4")<br />
<strong>de</strong>s<strong>de</strong> la<br />
tubería <strong>de</strong>l<br />
agua fría<br />
Tornillo <strong>de</strong><br />
montura<br />
Tubo <strong>de</strong><br />
cobre<br />
Montaje <strong>de</strong><br />
entrada <strong>de</strong><br />
agua<br />
25<br />
ESPAÑOL
Cómo sacar la rejilla <strong>de</strong> la base<br />
26<br />
wADVERTENCIA<br />
Peligro <strong>de</strong> Quemaduras<br />
No toque los tubos <strong>de</strong> refrigeracíon<br />
cerca <strong>de</strong> la ban<strong>de</strong>ja <strong>de</strong><br />
<strong>de</strong>scongelación.<br />
No seguir esta instrucción pue<strong>de</strong><br />
ocasionar quemaduras.<br />
Cómo sacar la rejilla:<br />
1. Abra la puerta <strong>de</strong>l refrigerador.<br />
2. Tome la rejilla con ambas manos.<br />
3. Empuje hacia abajo sobre la parte<br />
superior <strong>de</strong> la rejilla para soltar los<br />
sujetadores superiores.<br />
4. Gire la rejilla hacia usted para liberarla <strong>de</strong><br />
los sujetadores superiores.<br />
5. Retire la rejilla <strong>de</strong>l refrigerador.<br />
NOTA: No saque la Hoja Técnica que se<br />
halla fijada <strong>de</strong>trás <strong>de</strong> la rejilla.<br />
Para volver a colocar la rejilla:<br />
1. Alinee las orillas <strong>de</strong> la rejilla con las orillas<br />
<strong>de</strong>l gabinete.<br />
2. Gire la rejilla hacia usted.<br />
3. Coloque los sujetadores inferiores en las<br />
aberturas <strong>de</strong>l panel <strong>de</strong> metal.<br />
4. Gire la rejilla hacia el gabinete hasta que<br />
los sujetadores superiores enganchen.<br />
5. Cierre la puerta <strong>de</strong>l refrigerador.<br />
Ver las instrucciones <strong>de</strong> limpieza para la<br />
ban<strong>de</strong>ja que recoge el agua y el serpentín<br />
<strong>de</strong>l con<strong>de</strong>nsador en la página 34.<br />
Serpentín <strong>de</strong>l<br />
con<strong>de</strong>nsador<br />
Ban<strong>de</strong>ja que<br />
recoge el agua<br />
Sujetadores
Cómo cambiar las bombillas<br />
wADVERTENCIA<br />
Peligro <strong>de</strong> Choque Eléctrico<br />
Desenchufe el refrigerador antes <strong>de</strong><br />
quitar la bombilla.<br />
No seguir esta instrucción<br />
pue<strong>de</strong> ocasionar la muerte<br />
o choque eléctrico.<br />
Cómo cambiar la bombilla <strong>de</strong>l refrigerador:<br />
1. Desconecte el refrigerador.<br />
2. Saque la bombilla ubicada <strong>de</strong>trás <strong>de</strong>l<br />
panel <strong>de</strong> controles.<br />
3. Reemplácela con una bombilla <strong>de</strong><br />
40-watts para electrodomésticos.<br />
4. Conecte el refrigerador nuevamente.<br />
Cómo cambiar la bombilla <strong>de</strong>l congelador:<br />
1. Desconecte el refrigerador <strong>de</strong>l<br />
suministro eléctrico.<br />
2. Llegue hasta la bombilla que se<br />
encuentra atrás <strong>de</strong>l protector.<br />
3. Quite la bombilla y ponga una nueva<br />
<strong>de</strong> 40 watts para aparatos<br />
electrodomésticos.<br />
4. Vuelva a conectar el refrigerador al<br />
suministro eléctrico.<br />
NOTA: No todas las bombillas para<br />
aparatos electrodomésticos serán <strong>de</strong>l<br />
tamaño a<strong>de</strong>cuado para su refrigerador.<br />
Asegúrese <strong>de</strong> reemplazar la bombilla con<br />
otra bombilla <strong>de</strong>l mismo tamaño.<br />
MODELO 1<br />
MODELO 2<br />
1<br />
2<br />
3<br />
4<br />
5<br />
WARMER<br />
REFRIGERATOR<br />
RECOMMENDED RECOMMENDED SETTING SETTING<br />
COOLER<br />
ALLOW ALLOW 24 24 HOURS HOURS BETWEEN BETWEEN ADJUSTMENTS<br />
ADJUSTMENTS<br />
1<br />
2<br />
WARMER WARMER<br />
FREEZER 3<br />
RECOMMENDED RECOMMENDED SETTING SETTING<br />
4<br />
5<br />
COOLER COOLER<br />
27<br />
ESPAÑOL
Cómo interpretar los sonidos que se<br />
escuchen<br />
Su nuevo refrigerador pue<strong>de</strong> emitir sonidos<br />
que el anterior no emitía. Como que los<br />
sonidos son nuevos usted podría<br />
preocuparse, pero no hay motivo para ello.<br />
La mayoría <strong>de</strong> los sonidos son normales,<br />
pero las superficies duras como el piso, las<br />
pare<strong>de</strong>s y los gabinetes pue<strong>de</strong>n hacerlos<br />
más audibles.<br />
Abajo encontrará una <strong>de</strong>scripción con el<br />
tipo <strong>de</strong> sonidos que pueda escuchar, y su<br />
causa.<br />
Murmullo suave, silbido suave<br />
Pue<strong>de</strong>n ser el ventilador <strong>de</strong>l motor y el aire<br />
en movimiento.<br />
Golpecitos secos o cascabeleo<br />
El termostato emite un golpecito seco bien<br />
<strong>de</strong>finido cuando el refrigerador para;<br />
igualmente cuando empieza a funcionar<br />
<strong>de</strong> nuevo. El reloj <strong>de</strong>l control <strong>de</strong><br />
<strong>de</strong>scongelación también emite el mismo<br />
tipo <strong>de</strong> sonido cuando el ciclo <strong>de</strong><br />
<strong>de</strong>scongelación comienza.<br />
Cómo ahorrar energía<br />
Usted pue<strong>de</strong> ayudar a su refrigerador a<br />
utilizar menos energía.<br />
• Asegúrese <strong>de</strong> que los empaques <strong>de</strong>l<br />
refrigerador sellen bien.<br />
• Limpie el serpentín <strong>de</strong>l con<strong>de</strong>nsador<br />
regularmente.<br />
• Abra el refrigerador lo menos posible.<br />
Piense qué necesita antes <strong>de</strong> abrir el<br />
refrigerador. Saque todo lo que necesite al<br />
mismo tiempo. Mantenga la comida<br />
organizada en el refrigerador, para que<br />
pueda encontrarla fácilmente y no tenga<br />
que buscarla mucho. Cierre el refrigerador<br />
tan pronto saque lo que necesite.<br />
28<br />
Sonidos <strong>de</strong> agua<br />
Después <strong>de</strong> que el refrigerador pare, se<br />
pue<strong>de</strong> oír por algunos minutos un gorgoteo<br />
en la tubería. Pue<strong>de</strong> oírse también agua que<br />
corre a la ban<strong>de</strong>ja recogedora <strong>de</strong> agua y un<br />
tipo <strong>de</strong> chisporroteo en los ciclos <strong>de</strong><br />
<strong>de</strong>scongelación.<br />
Sonidos <strong>de</strong> la máquina hacer<br />
hielo<br />
• Goteo<br />
• Golpe (<strong>de</strong> la caída <strong>de</strong>l hielo)<br />
Pue<strong>de</strong> oírse un zumbido (<strong>de</strong> la válvula <strong>de</strong>l<br />
agua), gotas <strong>de</strong> agua y la caída <strong>de</strong>l hielo en<br />
el recipiente para hielo.<br />
Sonidos <strong>de</strong> funcionamiento<br />
Su refrigerador tiene un compresor y motor<br />
<strong>de</strong> alta eficiencia. Funciona por períodos<br />
más largos que los mo<strong>de</strong>los anteriores.<br />
Parece que funcionara la mayoría <strong>de</strong>l<br />
tiempo.<br />
• Pue<strong>de</strong> llenar el refrigerador, pero no lo<br />
llene tanto que el aire no pueda circular<br />
libremente.<br />
• Es una pérdida <strong>de</strong> electricidad el mantener<br />
el refrigerador y el congelador en<br />
temperaturas más bajas <strong>de</strong> las necesarias.<br />
Si el helado está firme en el congelador y<br />
las bebidas están tan frías como a su<br />
familia le gustan, el refrigerador está lo<br />
suficientemente frío.<br />
• Asegúrese <strong>de</strong> que el refrigerador no esté<br />
al lado <strong>de</strong> una fuente <strong>de</strong> calor, tal como<br />
una estufa, calentador <strong>de</strong> agua, horno,<br />
calefacción, o luz directa <strong>de</strong>l sol.
Cómo invertir el lado <strong>de</strong> abertura <strong>de</strong> las<br />
puertas<br />
HERRAMIENTAS NECESARIAS:<br />
Llave <strong>de</strong> tubo <strong>de</strong> cabeza hexagonal <strong>de</strong> 5 ⁄ 16",<br />
<strong>de</strong>stornillador <strong>de</strong> estrella “Phillips” No. 2,<br />
<strong>de</strong>stornillador para tornillos <strong>de</strong> cabeza<br />
plana, 1 ⁄ 2" llave abierta <strong>de</strong> 1 ⁄ 2 pulgada.<br />
INFORMACION IMPORTANTE:<br />
• Antes <strong>de</strong> comenzar, APAGUE el refrigerador,<br />
<strong>de</strong>senchúfelo y saque todos los<br />
alimentos <strong>de</strong> los anaqueles <strong>de</strong> la puerta.<br />
• Quite la rejilla <strong>de</strong> la base.<br />
• Cuando saque las bisagras, mantenga las<br />
puertas cerradas hasta que estén listas<br />
para sacarlas <strong>de</strong> la caja <strong>de</strong>l refrigerador.<br />
• Para sacar las puertas, comience con la<br />
bisagra superior y continúe sacando<br />
bisagras hacia abajo.<br />
• Para sacar los tornillos <strong>de</strong> la bisagra central,<br />
saque el pasador <strong>de</strong> la bisagra central girándolo<br />
1 ⁄ 4 a 1 ⁄ 2 vuelta. Saldrá hacia afuera.<br />
• Para volver a colocar las puertas, comience<br />
con la bisagra inferior y continúe colocando<br />
las bisagras hacia arriba.<br />
• Alinee las puertas <strong>de</strong> modo que que<strong>de</strong>n<br />
centradas en relación a la caja y paralelas<br />
entre ellas.<br />
• Tape todos los orificios que no utilice con<br />
tornillos o tapones plásticos. La humedad<br />
pue<strong>de</strong> penetrar por cualquier orificio.<br />
• La hermeticidad <strong>de</strong> la puerta pue<strong>de</strong> ser<br />
regulada moviendo la bisagra superior y<br />
agregando o quitando láminas en la<br />
bisagra <strong>de</strong>l centro y en la bisagra inferior.<br />
BISAGRA INFERIOR<br />
Mo<strong>de</strong>lo 1<br />
Tope <strong>de</strong><br />
la puerta<br />
Espaciador<br />
Bisagra<br />
Lámina<br />
Tornillos<br />
Para cambiar el lado <strong>de</strong> las<br />
bisagras<br />
NOTA:<br />
Cuando coloque las puertas nuevamente,<br />
el espacio entre las puertas <strong>de</strong>be ser<br />
17 mm ( 11 ⁄ 16").<br />
Gabinete<br />
Moneda<br />
BISAGRA<br />
SUPERIOR<br />
Tapa<br />
Tornillos<br />
Bisagra<br />
Lámina<br />
Tornillos<br />
BISAGRA<br />
CENTRAL<br />
Tope <strong>de</strong><br />
la puerta<br />
Espaciador<br />
Lámina<br />
Bisagra<br />
Tornillos<br />
BISAGRA INFERIOR<br />
Mo<strong>de</strong>lo 2<br />
17 mm ( 11 ⁄ 16").<br />
Puerta<br />
Empaquetadura<br />
magnética<br />
Tope <strong>de</strong><br />
la puerta<br />
Espaciador<br />
Lámina<br />
Bisagra<br />
Tornillos<br />
29<br />
ESPAÑOL
Para cambiar las manijas <strong>de</strong><br />
la puerta - Estilo 1<br />
TORNILLO DE<br />
CABEZA HEXAGONAL<br />
DE 5 ⁄ 16" PARA<br />
BISAGRAS<br />
30<br />
TORNILLO DE<br />
CABEZA<br />
AVELLANADA<br />
TORNILLO DE<br />
OBTURACION<br />
OVALADO (PARA<br />
USAR EN LA PARTE<br />
INFERIOR DE LAS<br />
PUERTAS)<br />
TORNILLO<br />
DE MANIJA<br />
Tapones<br />
Tapón<br />
Espaciador<br />
Espaciador<br />
Tornillo<br />
Tornillo<br />
Espaciador<br />
Tapón<br />
Lámina<br />
Tapa<br />
Tornillo<br />
obturador<br />
TORNILLO DE<br />
OBTURACION<br />
OVALADO (PARA<br />
USAR EN LA<br />
PARTE SUPERIOR<br />
DE LAS PUERTAS)
Para cambiar las manijas <strong>de</strong> la<br />
puerta - Estilo 2<br />
Tapones<br />
Tapón<br />
Espaciador<br />
Espaciador<br />
Tornillo<br />
Tornillo<br />
Espaciador<br />
Tapón<br />
Tornillo<br />
obturador<br />
31<br />
ESPAÑOL
Para cambiar las manijas <strong>de</strong><br />
la puerta - Estilo 3<br />
32<br />
Tapones<br />
Tapón<br />
Espaciador<br />
Espaciador<br />
Tornillo<br />
Tornillo<br />
Espaciador<br />
Tapón<br />
Lámina<br />
Tapa<br />
Tornillo<br />
obturador
<strong>Cuidado</strong>s con el Refrigerador<br />
Este refrigerador está diseñado para ofrecerle muchos años <strong>de</strong> servicio; no obstante hay<br />
algunas sugerencias que usted pue<strong>de</strong> seguir para exten<strong>de</strong>r la vida <strong>de</strong>l refrigerador. En esta<br />
sección se le indicará como limpiarlo y que hacer en caso <strong>de</strong> vacaciones, mudanza o falla<br />
eléctrica.<br />
Cómo limpiar el refrigerador<br />
wADVERTENCIA<br />
Las secciones <strong>de</strong> refrigeración y congelado<br />
se <strong>de</strong>scongelan automáticamente<br />
pero <strong>de</strong>ben ser limpiadas una<br />
vez al mes para evitar que se<br />
produzcan olores. Lo que se<br />
<strong>de</strong>rrame <strong>de</strong>be ser limpiado<br />
inmediatamente.<br />
Para limpiar el refrigerador, <strong>de</strong>be poner el<br />
control en “OFF” apagado, <strong>de</strong>sconectarlo,<br />
sacar todas las piezas removibles y hacer la<br />
limpieza <strong>de</strong> acuerdo a las siguientes<br />
instrucciones.<br />
PARTES<br />
QUE USAR<br />
Piezas removibles Una esponja o paño,<br />
(anaquel, gaveta para <strong>de</strong>tergente suave y<br />
verduras, etc.) agua tibia<br />
Pare<strong>de</strong>s exteriores Esponja, paño o papel<br />
toalla, <strong>de</strong>tergente<br />
suave y cera para<br />
electrodomésticos<br />
(o cera <strong>de</strong> buena<br />
calidad para<br />
automóviles)<br />
Pare<strong>de</strong>s interiores<br />
(<strong>de</strong>spués <strong>de</strong><br />
<strong>de</strong>sconectar el<br />
refrigerador, espere<br />
que las pare<strong>de</strong>s<br />
estén a temperatura<br />
ambiente para<br />
que los paños <strong>de</strong><br />
limpieza no se<br />
adhieran)<br />
Una esponja, paño<br />
o papel toalla,<br />
bicarbonato <strong>de</strong> soda<br />
o <strong>de</strong>tergente suave<br />
y agua tibia<br />
Peligro <strong>de</strong> Quemaduras<br />
No toque los tubos <strong>de</strong> refrigeracíon<br />
cerca <strong>de</strong> la ban<strong>de</strong>ja <strong>de</strong><br />
<strong>de</strong>scongelación.<br />
No seguir esta instrucción pue<strong>de</strong><br />
ocasionar quemaduras.<br />
COMO HACER LA LIMPIEZA<br />
• A mano, enjuague y seque bien.<br />
• Lave la parte exterior; no utilice<br />
limpiadores fuertes o abrasivos.<br />
• Enjuague y seque bien.<br />
• Encere las superficies <strong>de</strong> metal pintadas,<br />
al menos dos veces al año. Aplique la<br />
cera con un paño <strong>de</strong>licado y limpio. El<br />
encerar superficies <strong>de</strong> metal pintadas,<br />
previene la corrosión. No encere las<br />
piezas plásticas.<br />
• Lave con una mezcla <strong>de</strong> <strong>de</strong>tergente<br />
suave y agua tibia o bicarbonato <strong>de</strong> soda<br />
(26 g [dos cucharadas] por .95 L [cuarto<br />
<strong>de</strong> galón] <strong>de</strong> agua).<br />
• Enjuague y seque bien.<br />
continúa en la próxima página<br />
33<br />
ESPAÑOL
PARTES<br />
Revestimientos y<br />
empaques <strong>de</strong> las<br />
puertas<br />
Piezas plásticas<br />
(cubiertas y<br />
paneles)<br />
Ban<strong>de</strong>ja <strong>de</strong><br />
<strong>de</strong>sagüe <strong>de</strong><br />
<strong>de</strong>scongelación<br />
Serpentín <strong>de</strong>l<br />
con<strong>de</strong>nsador<br />
34<br />
QUE USAR<br />
Una esponja, paño<br />
o papel toalla y<br />
agua tibia<br />
Una esponja o paño<br />
<strong>de</strong>licado con<br />
<strong>de</strong>tergente suave y<br />
agua tibia<br />
Una esponja, paño y<br />
agua tibia<br />
Máquina aspiradora<br />
con accesorios <strong>de</strong><br />
extensión <strong>de</strong>lgados<br />
COMO HACER LA LIMPIEZA<br />
• Lave, enjuague y seque bien.<br />
No use en las piezas plásticas ceras<br />
para limpieza, <strong>de</strong>tergentes<br />
concentrados, blanqueadores o<br />
limpiadores que contengan petróleo.<br />
• Lave, enjuague y seque bien.<br />
No use papel toalla, aerosoles para<br />
ventana, limpiadores para fregar o<br />
líquidos inflamables. Estos pue<strong>de</strong>n<br />
rayar o dañar el material. Ver<br />
“Instrucciones Importantes <strong>de</strong><br />
Seguridad” página 3.<br />
• Saque la rejilla <strong>de</strong> la base.<br />
(Ver página 26.)<br />
• Saque la ban<strong>de</strong>ja <strong>de</strong> la abertura<br />
pequeña al lado <strong>de</strong>rercho.<br />
• Lávela, enjuáguela y séquela bien.<br />
• Devuélvala a su lugar. Asegúrese que<br />
asiente bien.<br />
• Devuelva la rejilla a su lugar.<br />
• Saque la rejilla <strong>de</strong> la base.<br />
(Ver página 26.)<br />
• Aspire el serpentín <strong>de</strong>l con<strong>de</strong>nsador<br />
cuando esté sucio o con polvo. El<br />
serpentín pue<strong>de</strong> necesitar limpieza cada<br />
dos meses.<br />
• Devuelva la rejilla a su lugar.
<strong>Cuidado</strong>s durante vacaciones y mudanzas<br />
En caso <strong>de</strong> vacaciones cortas<br />
No hay necesidad <strong>de</strong> apagar el refrigerador<br />
si las vacaciones son <strong>de</strong> menos <strong>de</strong> cuatro<br />
semanas.<br />
1. <strong>Use</strong> la comida que pueda dañarse.<br />
2. Congele lo <strong>de</strong>más.<br />
En caso <strong>de</strong> vacaciones largas<br />
Si va a estar lejos por un mes o más:<br />
1. Saque los alimentos.<br />
2. Si su refrigerador tiene un fabricador<br />
automático <strong>de</strong> hielo:<br />
• Suspenda el suministro <strong>de</strong> agua al fabricador,<br />
por lo menos un día antes <strong>de</strong> partir.<br />
• Cuando caiga la última producción <strong>de</strong><br />
hielo, apague el fabricador <strong>de</strong> hielo.<br />
Asegúrese <strong>de</strong> que todo el hielo esté<br />
fuera <strong>de</strong>l mecanismo.<br />
3. Desconecte el refrigerador.<br />
4. Lávelo, enjuáguelo y séquelo bien.<br />
5. Usando cinta adhesiva o bloques <strong>de</strong><br />
ma<strong>de</strong>ra en la pieza superior <strong>de</strong> las<br />
puertas, déjelas abiertas para que así<br />
pueda entrarle ventilación y evitar la<br />
formación <strong>de</strong> moho.<br />
Para iniciar el funcionamiento <strong>de</strong>l refrigerador<br />
<strong>de</strong> nuevo, ver “Como Usar el Refrigerador”<br />
página 10.<br />
Fallas eléctricas<br />
Si hay una falla eléctrica, llame a la<br />
compañía eléctrica y pregunte cuanto<br />
tiempo tardarán en restablecer la energía.<br />
1. Si la falta <strong>de</strong> electricidad será <strong>de</strong> 24<br />
horas o menos, mantenga ambas<br />
puertas cerradas, esto ayuda a que la<br />
comida se mantenga congelada.<br />
2. Si la falta <strong>de</strong> electricidad va a ser <strong>de</strong> más<br />
<strong>de</strong> 24 horas:<br />
(a) Saque la comida <strong>de</strong>l congelador y<br />
almacénela en un almacenador <strong>de</strong><br />
congelados.<br />
O<br />
(b) Coloque 32 g <strong>de</strong> hielo seco, por cada<br />
litro (2 lbs. por cada pie cúbico) <strong>de</strong>l<br />
congelador, esto mantendrá la<br />
comida congelada <strong>de</strong> 2 a 4 días.<br />
En caso <strong>de</strong> mudanza<br />
Si usted va a llevar el refrigerador a la casa<br />
nuevo:<br />
1. Si su refrigerador tiene un fabricador<br />
automático <strong>de</strong> hielo:<br />
• Suspenda el suministro <strong>de</strong> agua al<br />
fabricador, por lo menos un día antes<br />
<strong>de</strong> la mudanza.<br />
• Desconecte la conexión <strong>de</strong>l agua.<br />
• Después <strong>de</strong> la última producción <strong>de</strong><br />
hielo suba la palanca para apagar el<br />
fabricador.<br />
2. Saque toda la comida.<br />
3. Empaque la comida congelada con<br />
hielo seco.<br />
4. Desconecte el refrigerador.<br />
5. Límpielo bien, enjuáguelo y séquelo bien.<br />
6. Saque todas las piezas removibles,<br />
envuelva cada pieza muy bien y póngales<br />
cinta adhesiva para mantenerlas juntas.<br />
7. Atornille los niveladores.<br />
8. Cierre las puertas y asegúrelas con cinta<br />
adhesiva y adhiera el cable eléctrico al<br />
refrigerador con cinta adhesiva.<br />
Cuando llegue a la nueva casa <strong>de</strong>vuelva<br />
todo a su lugar, ver página 7. No olvi<strong>de</strong><br />
conectar la conexión <strong>de</strong>l agua.<br />
<strong>Use</strong> guantes para evitar quemaduras<br />
con el hielo seco.<br />
O<br />
(c) Si no es posible conseguir el almacenador<br />
<strong>de</strong> congelados o el hielo seco,<br />
use o ponga en conservas la comida<br />
que se pueda <strong>de</strong>scomponer.<br />
3. Un congelador lleno conserva más el frío<br />
que un parcialmente lleno. Un congelador<br />
lleno <strong>de</strong> carne se conserva frío más tiempo<br />
que uno lleno <strong>de</strong> panes y pasteles horneados.<br />
Si la comida contiene cristales <strong>de</strong> hielo,<br />
se pue<strong>de</strong> recongelar aunque su calidad y<br />
sabor pueda ser afectados. Si la condición<br />
<strong>de</strong> la comida no es muy buena, o si hay<br />
dudas en cuanto a su toxicidad, <strong>de</strong>séchela.<br />
35<br />
ESPAÑOL
<strong>Guía</strong> <strong>de</strong> Almacenamiento<br />
<strong>de</strong> Alimentos<br />
Hay una forma correcta <strong>de</strong> empacar y almacenar comida en el refrigerador o en el<br />
congelador. Para mantener la comida fresca más tiempo, tómese el tiempo y lea las<br />
siguientes recomendaciones.<br />
Almacenamiento <strong>de</strong> alimentos frescos<br />
La comida que se guar<strong>de</strong> en el refrigerador<br />
<strong>de</strong>be estar envuelta o guardada en materiales<br />
a prueba <strong>de</strong> aire y humedad; esto evita la<br />
contaminación <strong>de</strong> olores y sabores por todo<br />
el refrigerador. Verifique las fechas para<br />
asegurarse <strong>de</strong> la frescura <strong>de</strong> los productos.<br />
Vegetales <strong>de</strong> hoja<br />
Sáquelos <strong>de</strong> la envoltura <strong>de</strong>l supermercado y<br />
corte las piezas <strong>de</strong>scoloridas o moreteadas.<br />
Lávelos en agua fría y escúrralos, colóquelos<br />
en bolsa o recipiente <strong>de</strong> plástico y guár<strong>de</strong>los<br />
en la gaveta para verduras.<br />
Vegetales con cáscara<br />
(zanahorias, pimientos)<br />
Guár<strong>de</strong>los en la gaveta para verduras, bolsa<br />
o recipiente <strong>de</strong> plástico.<br />
Fruta<br />
Lávela, déjela secar y póngala en bolsas<br />
plásticas o en la gaveta para verduras. No<br />
lave o divida las ballas hasta el momento <strong>de</strong><br />
usarlas. Mantenga las ballas en la envoltura<br />
<strong>de</strong>l supermercado y en la gaveta para<br />
vegetales, o en una bolsa amplia <strong>de</strong> papel a<br />
medio cerrar, en uno <strong>de</strong> los anaqueles.<br />
Huevos<br />
Almacénelos sin lavarlos en su empaque<br />
original o en el compartimiento para huevos.<br />
Leche<br />
Limpie los cartones. Para mejor almacenamiento<br />
colóquela en un anaquel interior.<br />
36<br />
Mantequilla o margarina<br />
Mantenga la mantequilla ya abierta en un<br />
recipiente cubierto o en un compartimiento<br />
cerrado. Cuando almacene una cantidad<br />
gran<strong>de</strong>, envuélvala en material <strong>de</strong><br />
congelados y congélela.<br />
Queso<br />
Almacénelo en la envoltura original hasta el<br />
momento <strong>de</strong> usarlo; una vez que se abra,<br />
envuélvalo bien en plástico o aluminio.<br />
Sobras<br />
Cubra las sobras con envoltura <strong>de</strong> plástico<br />
o aluminio, pue<strong>de</strong>n también usarse recipientes<br />
<strong>de</strong> plástico con cubiertas ajustadas.<br />
Carnes<br />
La carne pue<strong>de</strong> almacenarse en la envoltura<br />
original siempre y cuando sea a prueba <strong>de</strong><br />
aire y humedad. Envuélvalas <strong>de</strong> nuevo si es<br />
necesario. Ver el siguiente cuadro con<br />
tiempos <strong>de</strong> almacenamiento. Si las carnes<br />
se van a almacenar por más tiempo <strong>de</strong> los<br />
anteriormente dados, siga las instrucciones<br />
para congelar.<br />
Pollo ..............................................1 a 2 días<br />
Carne <strong>de</strong> res molida ...................... 1 a 2 días<br />
Bistecs y carnes<br />
para hornear..................................3 a 5 días<br />
Carnes curadas ........................... 7 a 10 días<br />
Tocino ...........................................5 a 7 días<br />
Carnes frías...................................3 a 5 días<br />
Carnes variadas ............................1 a 2 días<br />
NOTA: El pescado fresco y los moluscos<br />
<strong>de</strong>ben usarse el mismo día que se compran.
Almacenamiento <strong>de</strong> comidas congeladas<br />
El congelador ha sido diseñado para<br />
almacenar comidas precongeladas y para<br />
congelar comida casera.<br />
NOTA: Para conseguir más información<br />
acerca <strong>de</strong> como preparar comida para<br />
congelarla, consulte una guía <strong>de</strong> congelador<br />
o un libro <strong>de</strong> cocina.<br />
Envolturas<br />
El secreto <strong>de</strong> congelar bien está en la<br />
envoltura. La forma como se cierre y selle el<br />
paquete no <strong>de</strong>be <strong>de</strong>jar que el aire o la<br />
humedad entre o salga. Si la comida se<br />
empaca <strong>de</strong> alguna otra manera, pue<strong>de</strong><br />
haber transferencia <strong>de</strong> olor y sabor en el<br />
refrigerador y resecamiento <strong>de</strong> los<br />
alimentos en el congelador.<br />
Envolturas recomendadas:<br />
• Recipientes <strong>de</strong> plástico rigido, con<br />
cubiertas ajustadas<br />
• Recipientes para conservas <strong>de</strong> lado plano/<br />
frascos para congelados<br />
• Envoltura <strong>de</strong> aluminio gruesa<br />
• Papel con recubrimiento <strong>de</strong> plástico<br />
• Envoltura <strong>de</strong> plástico impermeable<br />
Siga las indicaciones para el método<br />
apropiado <strong>de</strong> congelación.<br />
No usar:<br />
• Bolsas para pan<br />
• Recipientes que no sean <strong>de</strong> polietileno<br />
• Recipientes que no tengan cubiertas<br />
ajustadas<br />
• Papel encerado<br />
• Envoltura encerada para congelados<br />
• Envoltura semipermeable <strong>de</strong>lgada<br />
El uso <strong>de</strong> los anteriores pue<strong>de</strong> causar<br />
transferencia <strong>de</strong> olor y sabor en el<br />
refrigerador y resecamiento <strong>de</strong> los<br />
alimentos en el congelador.<br />
FOOD STORAGE GUIDE<br />
Congelador<br />
No espere que el congelador congele<br />
gran<strong>de</strong>s cantida<strong>de</strong>s <strong>de</strong> comida<br />
rápidamente. No ponga en el congelador<br />
comida en exceso <strong>de</strong> lo que se congelará<br />
en 24 horas (no más <strong>de</strong> 32 a 48 g <strong>de</strong><br />
comida por litro [2 o 3 lbs. por pie cúbico]<br />
<strong>de</strong>l congelador). Deje suficiente espacio<br />
para que el aire circule alre<strong>de</strong>dor <strong>de</strong> los<br />
paquetes. Asegúrese <strong>de</strong> <strong>de</strong>jar suficiente<br />
espacio en el frente <strong>de</strong>l congelador para<br />
que la puerta pueda cerrar bien. El tiempo<br />
<strong>de</strong> almacenamiento pue<strong>de</strong> variar <strong>de</strong><br />
acuerdo a la calidad <strong>de</strong> la comida.<br />
El almacenamiento varía <strong>de</strong> acuerdo a la<br />
calidad <strong>de</strong> la comida, el tipo <strong>de</strong> empaquetamiento<br />
o envoltura usado (a prueba <strong>de</strong> aire<br />
y humedad) y <strong>de</strong> la temperatura <strong>de</strong><br />
almacenamiento, que <strong>de</strong>bería ser<br />
-17°C (0°F).<br />
37<br />
ESPAÑOL
Cómo Solucionar Problemas<br />
En este cuadro están algunos problemas posibles con los refrigeradores. Por favor lea los<br />
problemas para ver si pue<strong>de</strong> resolver el problema.<br />
PROBLEMA<br />
El refrigerador<br />
no funciona<br />
La luz no<br />
funciona<br />
Ruidos no<br />
familiares o<br />
cascabeleo o<br />
tintineo<br />
Hay agua en la<br />
ban<strong>de</strong>ja que<br />
recoge el agua<br />
Parece que el<br />
motor<br />
funcionara<br />
<strong>de</strong>masiado<br />
38<br />
VERIFICAR<br />
¿Está el cable <strong>de</strong> electricidad conectado al enchufe apropiado?<br />
¿Está uno <strong>de</strong> los fusibles quemado o el disyuntor caído?<br />
¿Está el control <strong>de</strong> la temperatura <strong>de</strong>l refrigerador mal ajustado?<br />
¿Está el cable <strong>de</strong> electricidad conectado al enchufe apropiado?<br />
¿Está uno <strong>de</strong> los fusibles quemado o el disyuntor caído?<br />
¿Está la bombilla quemada?<br />
¿Hay algo encima o <strong>de</strong>trás <strong>de</strong>l refrigerador?<br />
Algunos sonidos son normales. Ver “Como interpretar los sonidos<br />
que se escuchen” en la página 28.<br />
Es lo normal en climas cálidos y húmedos. Asegúrese <strong>de</strong> que la<br />
ban<strong>de</strong>ja esté nivelada para que el agua no se <strong>de</strong>rrame.<br />
¿Está el serpentín <strong>de</strong>l con<strong>de</strong>nsador sucio?<br />
¿Está la puerta abierta frecuentemente? ¿Se ha puesto una gran<br />
cantidad <strong>de</strong> comida? El motor tiene que funcionar más.<br />
¿Está la habitación muy caliente? Si estuviera, el motor funcionaría<br />
más tiempo para enfriar el interior.
Si Necesita Ayuda<br />
1. Si necesita<br />
mantenimiento † …<br />
Póngase en contacto con la agencia don<strong>de</strong><br />
compró la unidad, o con una compañía<br />
autorizada <strong>de</strong> mantenimiento <strong>Whirlpool</strong>.<br />
† Cuando necesite mantenimiento:<br />
Favor proporcione una <strong>de</strong>scripción<br />
completa <strong>de</strong>l problema, el mo<strong>de</strong>lo y el<br />
número <strong>de</strong> serie <strong>de</strong> su refrigerador. (Ver<br />
página 2.) Esta información nos ayuda<br />
para ayudarle a usted.<br />
2. Si usted necesita repuestos<br />
FSP* † …<br />
La FSP es una marca registrada <strong>de</strong><br />
repuestos con la calidad <strong>de</strong> la Corporación<br />
<strong>Whirlpool</strong>. Busque este símbolo <strong>de</strong> calidad<br />
cuando busque un repuesto para su<br />
electrodoméstico WHIRLPOOL. Los<br />
repuestos FSP trabajan y se ajustan<br />
perfectamente porque son hechos con<br />
exactamente las mismas especificaciones<br />
<strong>de</strong> las piezas que son usadas para<br />
construir los aparatos electrodomésticos<br />
WHIRLPOOL. Para encontrar repuestos<br />
FSP en su área, contacte a la agencia<br />
don<strong>de</strong> compró la unidad o a una compañía<br />
autorizada <strong>de</strong> mantenimiento <strong>Whirlpool</strong>.<br />
39<br />
ESPAÑOL
TERMINO DE LA GARANTIA<br />
GARANTIA DE UN AÑO<br />
DESDE EL DÍA DE LA<br />
COMPRA<br />
GARANTIA DE CINCO<br />
AÑOS<br />
DESDE EL DÍA DE LA<br />
COMPRA<br />
40<br />
WHIRLPOOL *<br />
Refrigerador-Garantía<br />
WHIRLPOOL PAGARA POR<br />
Los repuestos FSP* y las reparaciones para corregir<br />
<strong>de</strong>fectos <strong>de</strong> material o fábrica. El mantenimiento <strong>de</strong>be ser<br />
hecho por una compañía <strong>de</strong> servicio autorizada <strong>Whirlpool</strong>.<br />
Los repuestos FSP y las reparaciones para corregir<br />
<strong>de</strong>fectos <strong>de</strong> material o fábrica en el sistema sellado <strong>de</strong><br />
refrigeración. Estas piezas son:<br />
1. El compresor<br />
2. El evaporador<br />
3. El con<strong>de</strong>nsador<br />
4. El filtro <strong>de</strong> secado<br />
5. Los conductos <strong>de</strong> conexión<br />
El mantenimiento <strong>de</strong>be ser hecho por una compañía <strong>de</strong><br />
servicio autorizada <strong>Whirlpool</strong>.<br />
WHIRLPOOL NO PAGARA POR<br />
A. Llamadas a domicilio para:<br />
1. Corregir la instalación <strong>de</strong>l refrigerador.<br />
2. Enseñar como usar el refrigerador.<br />
3. Cambiar los fusibles o corregir el sistema eléctrico o <strong>de</strong> cañería <strong>de</strong> la casa.<br />
4. Cambiar las bombillas.<br />
B. Reparaciones a un refrigerador que haya sido usado en forma otra que la normal en un<br />
hogar <strong>de</strong> una sola familia.<br />
C. Transporte para recoger y <strong>de</strong>volver el producto, pues ha sido diseñado para que se<br />
repare en casa.<br />
D. Corregir daños al refrigerador causados por acci<strong>de</strong>nte, mal uso, incendio, inundación,<br />
fuerzas mayores o uso <strong>de</strong> productos no aprobados por <strong>Whirlpool</strong>.<br />
E. Cobertura por alimentos perdidos por falla <strong>de</strong>l producto.<br />
F. Reparar repuestos o sistemas, <strong>de</strong>bido a modificaciones no autorizadas, llevadas a cabo<br />
en el aparato electrodoméstico. 9/96<br />
CORPORACION WHIRLPOOL NO SERA RESPONSABLE POR DAÑOS IMPREVISTOS O<br />
DE CONSECUENCIA.<br />
Fuera <strong>de</strong> los Estados Unidos la garantía pue<strong>de</strong> ser diferente. Para obtener más <strong>de</strong>talles por<br />
favor contacte a su distribuidor autorizado <strong>de</strong> <strong>Whirlpool</strong> o al centro militar.<br />
© 1996 <strong>Whirlpool</strong> E.U.A. Marca Registrada <strong>de</strong> <strong>Whirlpool</strong> E.U.A. Impreso en los E.U.A.<br />
*