Interchangeable Lens Digital HD Video Camera Recorder - Sony
Interchangeable Lens Digital HD Video Camera Recorder - Sony
Interchangeable Lens Digital HD Video Camera Recorder - Sony

You also want an ePaper? Increase the reach of your titles
YUMPU automatically turns print PDFs into web optimized ePapers that Google loves.
Additional information on this product and<br />
answers to frequently asked questions can be<br />
found at our Customer Support Website.<br />
Puede encontrar más información sobre este<br />
producto y respuestas a las preguntas más<br />
frecuentes en nuestro sitio Web de atención al<br />
cliente.<br />
http://www.sony.net/<br />
Impreso en papel reciclado en un 70% o<br />
más utilizando tinta hecha con aceite<br />
vegetal exento de compuesto orgánico<br />
volátil (COV).<br />
2012 <strong>Sony</strong> Corporation Printed in Japan<br />
US/ES<br />
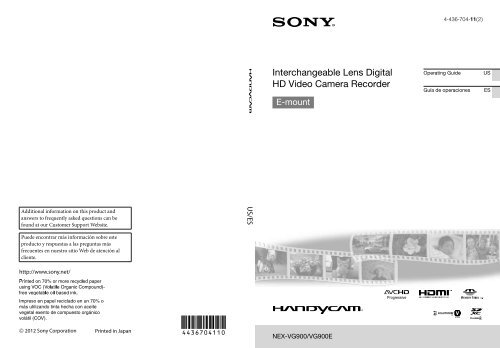
<strong>Interchangeable</strong> <strong>Lens</strong> <strong>Digital</strong><br />
<strong>HD</strong> <strong>Video</strong> <strong>Camera</strong> <strong>Recorder</strong><br />
E-mount<br />
NEX-VG900/VG900E<br />
4-436-704-11(2)<br />
Operating Guide US<br />
Guía de operaciones ES
US<br />
Owner’s Record<br />
The model and serial numbers are located<br />
on the bottom. Record the serial number<br />
in the space provided below. Refer to these<br />
numbers whenever you call your <strong>Sony</strong><br />
dealer regarding this product.<br />
Model No. NEX-<br />
Serial No.<br />
Model No. AC-<br />
Serial No.<br />
WARNING<br />
To reduce the risk of fire or electric<br />
shock,<br />
1) do not expose the unit to rain or<br />
moisture.<br />
2) do not place objects filled with<br />
liquids, such as vases, on the<br />
apparatus.<br />
Do not expose the batteries to<br />
excessive heat such as sunshine, fire or<br />
the like.<br />
This symbol is intended<br />
to alert the user to the<br />
presence of uninsulated<br />
“dangerous voltage” within<br />
the product’s enclosure<br />
that may be of sufficient<br />
magnitude to constitute<br />
a risk of electric shock to<br />
persons.<br />
This symbol is intended<br />
to alert the user to the<br />
presence of important<br />
operating and maintenance<br />
(servicing) instructions in<br />
the literature accompanying<br />
the appliance.
IMPORTANT SAFETY INSTRUCTIONS<br />
SAVE THESE INSTRUCTIONS.<br />
DANGER - TO REDUCE THE RISK OF FIRE<br />
OR ELECTRIC SHOCK,<br />
CAREFULLY FOLLOW THESE<br />
INSTRUCTIONS.<br />
Read these instructions.<br />
Keep these instructions.<br />
Heed all warnings.<br />
Follow all instructions.<br />
Do not use this apparatus near water.<br />
Clean only with dry cloth.<br />
Do not block any ventilation openings. Install in accordance with the manufacturer’s<br />
instructions.<br />
Do not install near any heat sources such as radiators, heat registers, stoves, or other<br />
apparatus (including amplifiers) that produce heat.<br />
Do not defeat the safety purpose of the polarized or grounding-type plug. A polarized plug<br />
has two blades with one wider than the other. A grounding type plug has two blades and a<br />
third grounding prong. The wide blade or the third prong are provided for your safety. If<br />
the provided plug does not fit into your outlet, consult an electrician for replacement of the<br />
obsolete outlet.<br />
Protect the power cord from being walked on or pinched particularly at plugs, convenience<br />
receptacles, and the point where they exit from the apparatus.<br />
Only use attachments/accessories specified by the manufacturer.<br />
Use only with the cart, stand, tripod, bracket, or table specified by the manufacturer, or<br />
sold with the apparatus. When a cart is used, use caution when moving the cart/apparatus<br />
combination to avoid injury from tip-over.<br />
Unplug this apparatus during lightning storms or when unused for long periods of time.<br />
Refer all servicing to qualified service personnel. Servicing is required when the apparatus<br />
has been damaged in any way, such as power-supply cord or plug is damaged, liquid has<br />
been spilled or objects have fallen into the apparatus, the apparatus has been exposed to<br />
rain or moisture, does not operate normally, or has been dropped.<br />
<br />
If the shape of the plug does not fit the power outlet, use an attachment plug adaptor of the<br />
proper configuration for the power outlet.<br />
US<br />
US
US<br />
Representative plug of power supply cord of countries/regions around the world.<br />
A Type<br />
(American<br />
Type)<br />
B Type<br />
(British Type)<br />
BF Type<br />
(British Type)<br />
B3 Type<br />
(British Type)<br />
C Type<br />
(CEE Type)<br />
SE Type<br />
(CEE Type)<br />
O Type<br />
(Ocean Type)<br />
The representative supply voltage and plug type are described in this chart.<br />
Depend on an area, Different type of plug and supply voltage are used.<br />
Attention: Power cord meeting demands from each country shall be used.<br />
For only the United States<br />
Use a UL Listed, 1.5-3 m (5-10 ft.), Type SPT-2 or NISPT-2, AWG no. 18 power supply<br />
cord, rated for 125 V 7 A, with a NEMA 1-15P plug rated for 125 V 15 A.”<br />
Europe<br />
Countries/regions Voltage Frequency (Hz) Plug type<br />
Austria 230 50 C<br />
Belgium 230 50 C<br />
Czech 220 50 C<br />
Denmark 230 50 C<br />
Finland 230 50 C<br />
France 230 50 C<br />
Germany 230 50 C<br />
Greece 220 50 C<br />
Hungary 220 50 C<br />
Iceland 230 50 C<br />
Ireland 230 50 C/BF<br />
Italy 220 50 C<br />
Luxemburg 230 50 C<br />
Netherlands 230 50 C<br />
Norway 230 50 C<br />
Poland 220 50 C<br />
Portugal 230 50 C<br />
Romania 220 50 C<br />
Russia 220 50 C<br />
Slovak 220 50 C<br />
Spain 127/230 50 C<br />
Sweden 230 50 C<br />
Switzerland 230 50 C<br />
UK<br />
Asia<br />
240 50 BF<br />
Countries/regions Voltage Frequency (Hz) Plug type<br />
China 220 50 A<br />
Hong Kong 200/220 50 BF<br />
India 230/240 50 C<br />
Indonesia 127/230 50 C<br />
Japan 100 50/60 A<br />
Korea (rep) 220 60 C<br />
Malaysia 240 50 BF<br />
Philippines 220/230 60 A/C<br />
Singapore 230 50 BF<br />
Taiwan 110 60 A<br />
Thailand 220 50 C/BF
Countries/regions Voltage Frequency (Hz) Plug type<br />
Vietnam 220 50 A/C<br />
Oceania<br />
Countries/regions Voltage Frequency (Hz) Plug type<br />
Australia 240 50 O<br />
New Zealand 230/240 50 O<br />
North America<br />
Countries/regions Voltage Frequency (Hz) Plug type<br />
Canada 120 60 A<br />
USA 120 60 A<br />
Central America<br />
Countries/regions Voltage Frequency (Hz) Plug type<br />
Bahamas 120/240 60 A<br />
Costa Rica 110 60 A<br />
Cuba 110/220 60 A/C<br />
Dominican (rep) 110 60 A<br />
El Salvador 110 60 A<br />
Guatemala 120 60 A<br />
Honduras 110 60 A<br />
Jamaica 110 50 A<br />
Mexico 120/127 60 A<br />
Nicaragua 120/240 60 A<br />
Panama 110/220 60 A<br />
South America<br />
Countries/regions Voltage Frequency (Hz) Plug type<br />
Argentina 220 50 C/BF/O<br />
Brazil 127/220 60 A/C<br />
Chile 220 50 C<br />
Colombia 120 60 A<br />
Peru 220 60 A/C<br />
Venezuela 120 60 A<br />
Middle East<br />
Countries/regions Voltage Frequency (Hz) Plug type<br />
Iran 220 50 C/BF<br />
Iraq 220 50 C/BF<br />
Israel 230 50 C<br />
Saudi Arabia 127/220 50 A/C/BF<br />
Turkey 220 50 C<br />
UAE 240 50 C/BF<br />
Africa<br />
Countries/regions Voltage Frequency (Hz) Plug type<br />
Algeria 127/220 50 C<br />
Congo (dem) 220 50 C<br />
Egypt 220 50 C<br />
Ethiopia 220 50 C<br />
Kenya 240 50 C/BF<br />
Nigeria 230 50 C/BF<br />
South Africa 220/230 50 C/BF<br />
Tanzania 230 50 C/BF<br />
Tunisia 220 50 C<br />
US
US<br />
Read this first<br />
Before operating the unit, please read this<br />
manual thoroughly, and retain it for future<br />
reference.<br />
CAUTION<br />
Battery pack<br />
If the battery pack is mishandled, the<br />
battery pack can burst, cause a fire or even<br />
chemical burns. Observe the following<br />
cautions.<br />
Do not disassemble.<br />
Do not crush and do not expose the battery<br />
pack to any shock or force such as hammering,<br />
dropping or stepping on it.<br />
Do not short circuit and do not allow metal<br />
objects to come into contact with the battery<br />
terminals.<br />
Do not expose to high temperature above 60°C<br />
(140°F) such as in direct sunlight or in a car<br />
parked in the sun.<br />
Do not incinerate or dispose of in fire.<br />
Do not handle damaged or leaking lithium ion<br />
batteries.<br />
Be sure to charge the battery pack using a<br />
genuine <strong>Sony</strong> battery charger or a device that<br />
can charge the battery pack.<br />
Keep the battery pack out of the reach of small<br />
children.<br />
Keep the battery pack dry.<br />
Replace only with the same or equivalent type<br />
recommended by <strong>Sony</strong>.<br />
Dispose of used battery packs promptly as<br />
described in the instructions.<br />
Replace the battery with the specified type<br />
only. Otherwise, fire or injury may result.<br />
AC Adaptor<br />
Do not use the AC Adaptor placed in a<br />
narrow space, such as between a wall and<br />
furniture.<br />
Use the nearby wall outlet (wall socket)<br />
when using the AC Adaptor. Disconnect<br />
the AC Adaptor from the wall outlet (wall<br />
socket) immediately if any malfunction<br />
occurs while using the apparatus.<br />
Note on the power cord (mains lead)<br />
The power cord (mains lead) is designed<br />
specifically for use with this camcorder<br />
only, and should not be used with other<br />
electrical equipment.<br />
Even if your camcorder is turned off, AC<br />
power source (mains) is still supplied to<br />
it while connected to the wall outlet (wall<br />
socket) via the AC Adaptor.<br />
Excessive sound pressure from earphones<br />
and headphones cause hearing loss.<br />
For customers in the U.S.A. and CANADA<br />
RECYCLING LITHIUM-ION BATTERIES<br />
Lithium-Ion batteries are<br />
recyclable.<br />
You can help preserve our<br />
environment by returning<br />
your used rechargeable<br />
batteries to the collection and<br />
recycling location nearest you.<br />
For more information<br />
regarding recycling of<br />
rechargeable batteries, call toll<br />
free 1-800-822- 8837, or visit<br />
http://www.rbrc.org/<br />
Caution: Do not handle<br />
damaged or leaking Lithium-<br />
Ion batteries.<br />
Battery pack and mount adaptor<br />
This device complies with Part 15 of the<br />
FCC Rules. Operation is subject to the<br />
following two conditions: (1) This device<br />
may not cause harmful interference, and<br />
(2) this device must accept any interference<br />
received, including interference that may<br />
cause undesired operation.
This Class B digital apparatus complies<br />
with Canadian ICES-003.<br />
For the customers in the U.S.A.<br />
UL is an internationally recognized safety<br />
organization.<br />
The UL Mark on the product means it has<br />
been UL Listed.<br />
If you have any questions about this<br />
product, you may call:<br />
<strong>Sony</strong> Customer Information Center 1-800-<br />
222-SONY (7669).<br />
The number below is for the FCC related<br />
matters only.<br />
Regulatory Information<br />
Declaration of Conformity<br />
Trade Name: SONY<br />
Model No.: NEX-VG900<br />
Responsible Party: <strong>Sony</strong> Electronics Inc.<br />
Address: 16530 Via Esprillo, San Diego,<br />
CA 92127 U.S.A.<br />
Telephone No.: 858-942-2230<br />
This device complies with Part 15 of the<br />
FCC Rules. Operation is subject to the<br />
following two conditions: (1) This device<br />
may not cause harmful interference,<br />
and (2) this device must accept any<br />
interference received, including<br />
interference that may cause undesired<br />
operation.<br />
Declaration of Conformity<br />
Trade Name: SONY<br />
Model No.: NEX-VG900E<br />
Responsible Party: <strong>Sony</strong> Electronics Inc.<br />
Address: 16530 Via Esprillo, San Diego,<br />
CA 92127 U.S.A.<br />
Telephone No.: 858-942-2230<br />
This device complies with Part 15 of the<br />
FCC Rules. Operation is subject to the<br />
following two conditions: (1) This device<br />
may not cause harmful interference,<br />
and (2) this device must accept any<br />
interference received, including<br />
interference that may cause undesired<br />
operation.<br />
CAUTION<br />
You are cautioned that any changes or<br />
modifications not expressly approved in<br />
this manual could void your authority to<br />
operate this equipment.<br />
Note<br />
This equipment has been tested and found<br />
to comply with the limits for a Class B<br />
digital device, pursuant to Part 15 of the<br />
FCC Rules.<br />
These limits are designed to provide<br />
reasonable protection against harmful<br />
interference in a residential installation.<br />
This equipment generates, uses, and<br />
can radiate radio frequency energy and,<br />
if not installed and used in accordance<br />
with the instructions, may cause harmful<br />
interference to radio communications.<br />
However, there is no guarantee that<br />
interference will not occur in a particular<br />
installation. If this equipment does cause<br />
harmful interference to radio or television<br />
reception, which can be determined by<br />
turning the equipment off and on, the<br />
user is encouraged to try to correct the<br />
interference by one or more of the following<br />
measures:<br />
Reorient or relocate the receiving antenna.<br />
<br />
Increase the separation between the<br />
US
US<br />
equipment and receiver.<br />
Connect the equipment into an outlet on<br />
a circuit different from that to which the<br />
receiver is connected.<br />
<br />
Consult the dealer or an experienced radio/<br />
TV technician for help.<br />
The supplied interface cable must be used<br />
with the equipment in order to comply with<br />
the limits for a digital device pursuant to<br />
Subpart B of Part 15 of FCC Rules.<br />
For the State of California , USA only<br />
Perchlorate Material – special handling,<br />
may apply,<br />
See<br />
www.dtsc.ca.gov/hazardouswaste/<br />
perchlorate<br />
Perchlorate Material: Lithium battery<br />
contains perchlorate.
Using the camcorder<br />
Do not hold the camcorder by the following<br />
parts, and also do not hold the camcorder by<br />
the jack covers.<br />
Viewfinder LCD Screen<br />
<strong>Lens</strong> Built-in microphone<br />
<br />
The camcorder is not dustproofed, dripproofed<br />
or waterproofed. See “Precautions” (p. 66).<br />
Menu items, LCD panel, viewfinder and<br />
lens<br />
A menu item that is grayed out is not available<br />
under the current recording or playback<br />
conditions.<br />
The LCD screen and viewfinder are<br />
manufactured using extremely high-precision<br />
technology, so over 99.99% of the pixels are<br />
operational for effective use. However, there<br />
may be some tiny black points and/or bright<br />
points (white, red, blue, or green in color) that<br />
appear constantly on the LCD screen. These<br />
points are normal results of the manufacturing<br />
process and do not affect the recording in any<br />
way.<br />
Black points<br />
White, red, blue or green points<br />
<br />
<br />
<br />
<br />
Do not record the sun or leave the camcorder<br />
under the sun for a long time. The inside of<br />
the camcorder may be damaged. If sunlight is<br />
focused on a nearby object, it may cause a fire.<br />
When you must place the camcorder under<br />
direct sunlight, attach the lens cap.<br />
Exposing the LCD screen, the viewfinder or the<br />
lens to direct sunlight for long periods of time<br />
may cause malfunctions.<br />
Do not aim at the sun. Doing so might cause<br />
your camcorder to malfunction. Take images<br />
of the sun only in low light conditions, such as<br />
at dusk.<br />
Do not look at the sun or a strong light through<br />
a removed lens. This may cause irrecoverable<br />
damage to your eyes.<br />
About language setting<br />
The on-screen displays in each local language<br />
are used for illustrating the operating<br />
procedures. Change the screen language before<br />
using the camcorder if necessary (p. 26).<br />
On recording<br />
To ensure stable operation of the memory<br />
card, it is recommended to format the memory<br />
card with your camcorder before the first<br />
use. Formatting the memory card will erase<br />
all the data stored on it and the data will be<br />
irrecoverable. Save your important data on your<br />
PC etc.<br />
Before starting to record, test the recording<br />
function to make sure the image and sound are<br />
recorded without any problems.<br />
Compensation for the contents of recordings<br />
cannot be provided, even if recording or<br />
playback is not possible due to a malfunction of<br />
the camcorder, memory card, etc.<br />
To view recordings made on the camcorder on<br />
a TV, an NTSC-based TV is required for the<br />
NEX-VG900, and a PAL-based TV is required<br />
for the NEX-VG900E.<br />
Television programs, films, video tapes,<br />
and other materials may be copyrighted.<br />
Unauthorized recording of such materials may<br />
be contrary to the copyright laws.<br />
Use the camcorder in accordance with local<br />
regulations.<br />
US
10 US<br />
Notes on playing back<br />
<br />
<br />
You may not be able to play back normally<br />
images recorded on your camcorder with other<br />
devices. Also, you may not be able to play back<br />
images recorded on other devices with your<br />
camcorder.<br />
Standard (STD) image quality movies recorded<br />
on SD memory cards cannot be played on AV<br />
equipment of other manufacturers.<br />
DVD media recorded with <strong>HD</strong> image<br />
quality (high definition)<br />
DVD media recorded with high definition<br />
image quality (<strong>HD</strong>) can be played back with<br />
devices that are compatible with the AVC<strong>HD</strong><br />
standard. You cannot play discs recorded with<br />
high definition image quality (<strong>HD</strong>) with DVD<br />
players/recorders as they are not compatible<br />
with the AVC<strong>HD</strong> format. If you insert a disc<br />
recorded with the AVC<strong>HD</strong> format (high<br />
definition image quality (<strong>HD</strong>)) into a DVD<br />
player/recorder, you may not be able to eject<br />
the disc.<br />
Save all your recorded image data<br />
To prevent your image data from being lost,<br />
save all your recorded images on external media<br />
periodically. To save images on your computer,<br />
see page 45, and to save images on external<br />
devices, see page 52.<br />
The type of discs or media on which the images<br />
can be saved depend on the [ REC Mode]<br />
selected when the images were recorded.<br />
Movies recorded in [60p Quality ] (NEX-<br />
VG900), [50p Quality ] (NEX-VG900E) or<br />
[Highest Quality ] can be saved on external<br />
media or on Blu-ray discs (p. 52).<br />
Notes on battery pack/AC Adaptor<br />
Be sure to remove the battery pack or the AC<br />
Adaptor after turning off the camcorder.<br />
Disconnect the AC Adaptor from the<br />
camcorder, holding both the camcorder and the<br />
DC plug.<br />
Note on the camcorder/battery pack<br />
temperature<br />
When the temperature of the camcorder<br />
or battery pack becomes extremely high or<br />
extremely low, you may not be able to record<br />
or play back on the camcorder, due to the<br />
protection features of the camcorder being<br />
activated in such situations. In this case, an<br />
indicator appears on the LCD screen or on the<br />
viewfinder.<br />
When the camcorder is connected to a<br />
computer or accessories<br />
Do not try to format the memory card of the<br />
camcorder using a computer. If you do so, your<br />
camcorder may not operate correctly.<br />
When connecting the camcorder to another<br />
device with communication cables, be sure to<br />
insert the connector plug in the correct way.<br />
Pushing the plug forcibly into the terminal<br />
will damage the terminal and may result in a<br />
malfunction of the camcorder.<br />
If you cannot record/play back images,<br />
perform [Format]<br />
If you repeat recording/deleting images for<br />
a long time, fragmentation of data occurs on<br />
the memory card. Images cannot be saved or<br />
recorded. In such a case, first save your images<br />
onto a PC, etc., then perform [Format] by<br />
touching (MENU) [Setup] <br />
[ ( Media Settings)] [Format] <br />
.<br />
Notes on optional accessories<br />
We recommend using genuine <strong>Sony</strong> accessories.<br />
Genuine <strong>Sony</strong> accessories may not be available<br />
in some countries/regions.<br />
About this manual, illustrations and<br />
on-screen displays<br />
<br />
The example images used in this manual for<br />
illustration purposes are captured using a<br />
digital still camera, and therefore may appear<br />
different from images and screen indicators that<br />
actually appear on your camcorder. And, the
illustrations of your camcorder and its screen<br />
indication are exaggerated or simplified for<br />
understandability.<br />
In this manual, the DVD disc recorded with<br />
high definition image quality (<strong>HD</strong>) is called<br />
AVC<strong>HD</strong> recording disc.<br />
Design and specifications of your camcorder<br />
and accessories are subject to change without<br />
notice.<br />
The screen indicators in this manual are those<br />
of NEX-VG900.<br />
Notes on use<br />
Do not do any of the following. Otherwise,<br />
the memory card may be damaged, recorded<br />
images may be impossible to play back or may<br />
be lost, or other malfunctions could occur.<br />
ejecting the memory card when the access<br />
lamp (p. 30) is lit or flashing<br />
removing the battery pack or AC Adaptor<br />
from the camcorder, or applying mechanical<br />
shock or vibration to the camcorder when the<br />
(Movie)/ (Photo) lamps (p. 33) or the<br />
access lamp (p. 30) are lit or flashing<br />
<br />
When using a shoulder belt (sold separately), do<br />
not crash the camcorder against an object.<br />
11<br />
US
1 US<br />
Table of contents<br />
IMPORTANT SAFETY INSTRUCTIONS.. . . . . . . . . . . . . . . . . . . . . . . . . . . . . . . . . . . . . . . . . . . . . . . . . . . . . . . . . . . 3<br />
Read this first.. . . . . . . . . . . . . . . . . . . . . . . . . . . . . . . . . . . . . . . . . . . . . . . . . . . . . . . . . . . . . . . . . . . . . . . . . . . . . . . . . . . . . . . 6<br />
Getting Started<br />
Step 1: Checking supplied items. . . . . . . . . . . . . . . . . . . . . . . . . . . . . . . . . . . . . . . . . . . . . . . . . . . . . . . . . . . . . . 14<br />
Step 2: Attaching the supplied accessories.. . . . . . . . . . . . . . . . . . . . . . . . . . . . . . . . . . . . . . . . . . . . . . . . . 16<br />
Step 3: Charging the battery pack.. . . . . . . . . . . . . . . . . . . . . . . . . . . . . . . . . . . . . . . . . . . . . . . . . . . . . . . . . . . . 17<br />
Charging the battery pack abroad.. . . . . . . . . . . . . . . . . . . . . . . . . . . . . . . . . . . . . . . . . . . . . . . . . . 19<br />
Step 4: Attaching the lens.. . . . . . . . . . . . . . . . . . . . . . . . . . . . . . . . . . . . . . . . . . . . . . . . . . . . . . . . . . . . . . . . . . . . . . 20<br />
Step 5: Turning the power on, and setting the date and time.. . . . . . . . . . . . . . . . . . . . . . . . . . 24<br />
Changing the language setting. . . . . . . . . . . . . . . . . . . . . . . . . . . . . . . . . . . . . . . . . . . . . . . . . . . . . . 26<br />
Step 6: Making setting adjustments before recording.. . . . . . . . . . . . . . . . . . . . . . . . . . . . . . . . . . . 27<br />
Step 7: Inserting a memory card.. . . . . . . . . . . . . . . . . . . . . . . . . . . . . . . . . . . . . . . . . . . . . . . . . . . . . . . . . . . . . . 30<br />
Recording/Playback<br />
Recording. . . . . . . . . . . . . . . . . . . . . . . . . . . . . . . . . . . . . . . . . . . . . . . . . . . . . . . . . . . . . . . . . . . . . . . . . . . . . . . . . . . . . . . . . . 32<br />
Selecting the recording mode.. . . . . . . . . . . . . . . . . . . . . . . . . . . . . . . . . . . . . . . . . . . . . . . . . . . . . . . 35<br />
Adjusting for shooting conditions. . . . . . . . . . . . . . . . . . . . . . . . . . . . . . . . . . . . . . . . . . . . . . . . . . . . . . . . . . . . 36<br />
Playback on the camcorder.. . . . . . . . . . . . . . . . . . . . . . . . . . . . . . . . . . . . . . . . . . . . . . . . . . . . . . . . . . . . . . . . . . . . 37<br />
Playing images on a TV.. . . . . . . . . . . . . . . . . . . . . . . . . . . . . . . . . . . . . . . . . . . . . . . . . . . . . . . . . . . . . . . . . . . . . . . . . 41<br />
Advanced operations<br />
Deleting movies and photos. . . . . . . . . . . . . . . . . . . . . . . . . . . . . . . . . . . . . . . . . . . . . . . . . . . . . . . . . . . . . . . . . . . 44<br />
Saving movies and photos with a computer<br />
Useful functions available if you connect the camcorder to a computer. . . . . . . . . . . . . 45<br />
Preparing a computer. . . . . . . . . . . . . . . . . . . . . . . . . . . . . . . . . . . . . . . . . . . . . . . . . . . . . . . . . . . . . . . . . . . . . . . . . . . 46<br />
Starting PlayMemories Home.. . . . . . . . . . . . . . . . . . . . . . . . . . . . . . . . . . . . . . . . . . . . . . . . . . . . . . . . . . . . . . . . . 49<br />
Using “Image Data Converter”. . . . . . . . . . . . . . . . . . . . . . . . . . . . . . . . . . . . . . . . . . . . . . . . . . . . . . . . . . . . . . . . . 50<br />
Saving images with an external device<br />
Dubbing guide.. . . . . . . . . . . . . . . . . . . . . . . . . . . . . . . . . . . . . . . . . . . . . . . . . . . . . . . . . . . . . . . . . . . . . . . . . . . . . . . . . . . 51<br />
Saving images on an external media device.. . . . . . . . . . . . . . . . . . . . . . . . . . . . . . . . . . . . . . . . . . . . . . . 52<br />
Creating a standard definition image quality (STD) disc with a recorder, etc... . . . . . . 55
Customizing your camcorder<br />
Using menus.. . . . . . . . . . . . . . . . . . . . . . . . . . . . . . . . . . . . . . . . . . . . . . . . . . . . . . . . . . . . . . . . . . . . . . . . . . . . . . . . . . . . . . 57<br />
Getting detailed information from the “Handycam” Handbook.. . . . . . . . . . . . . . . . . . . . . . . . 61<br />
Additional information<br />
Troubleshooting. . . . . . . . . . . . . . . . . . . . . . . . . . . . . . . . . . . . . . . . . . . . . . . . . . . . . . . . . . . . . . . . . . . . . . . . . . . . . . 62<br />
Recording time of movies/number of recordable photos.. . . . . . . . . . . . . . . . . . . . . . . . . . . . . . . 64<br />
Precautions. . . . . . . . . . . . . . . . . . . . . . . . . . . . . . . . . . . . . . . . . . . . . . . . . . . . . . . . . . . . . . . . . . . . . . . . . . . . . . . . . . . . . . . . 66<br />
Specifications.. . . . . . . . . . . . . . . . . . . . . . . . . . . . . . . . . . . . . . . . . . . . . . . . . . . . . . . . . . . . . . . . . . . . . . . . . . . . . . . . . . . . . 68<br />
Quick reference<br />
Screen indicators. . . . . . . . . . . . . . . . . . . . . . . . . . . . . . . . . . . . . . . . . . . . . . . . . . . . . . . . . . . . . . . . . . . . . . . . . . . . . . . . . 71<br />
Parts and controls. . . . . . . . . . . . . . . . . . . . . . . . . . . . . . . . . . . . . . . . . . . . . . . . . . . . . . . . . . . . . . . . . . . . . . . . . . . . . . . . 73<br />
Index. . . . . . . . . . . . . . . . . . . . . . . . . . . . . . . . . . . . . . . . . . . . . . . . . . . . . . . . . . . . . . . . . . . . . . . . . . . . . . . . . . . . . . . . . . . . . . . . 76<br />
US<br />
1<br />
Table of contents
1 US<br />
Getting Started<br />
Step 1: Checking<br />
supplied items<br />
Make sure that you have following items<br />
supplied with your camcorder.<br />
The numbers in ( ) are the supplied<br />
quantity.<br />
This camcorder (1)<br />
Body cap (attached to the camcorder)<br />
(1) (p. 20)<br />
AC Adaptor (1) (p. 17)<br />
Power cord (mains lead) (1) (p. 17)<br />
Component A/V Cable (1) (p. 41)<br />
A/V connecting cable (1) (p. 41)<br />
USB cable (1) (p. 52)<br />
Wireless Remote Commander (RMT-<br />
835) (1)<br />
A button-type lithium battery is already<br />
installed.<br />
Rechargeable battery pack (NP-FV70)<br />
(1) (p. 17)<br />
Wind Screen (1) (p. 16)<br />
<br />
Large eyecup (1) (p. 29)
Mount adaptor (LA-EA3) (1) (p. 23)<br />
CD-ROM “Handycam” Application<br />
Software (1) (p. 46)<br />
“PlayMemories Home” (software, including<br />
“PlayMemories Home Help Guide”)<br />
Image Data Converter (RAW development<br />
software)<br />
“Handycam” Handbook (PDF)<br />
<br />
Operating Guide (This manual) (1)<br />
1 US<br />
Getting Started
1 US<br />
Step 2: Attaching the<br />
supplied accessories<br />
Attaching the Wind Screen<br />
Use the Wind Screen when you want to<br />
reduce the wind noise recorded by the<br />
microphone. Attach the Wind Screen with<br />
the <strong>Sony</strong> logo facing down.
Step 3: Charging the battery pack<br />
Battery pack<br />
CHG (charge) lamp<br />
AC Adaptor<br />
DC plug<br />
Align the mark on the DC plug<br />
with that on the DC IN jack.<br />
DC IN jack<br />
You can charge the “InfoLITHIUM” battery pack (V series) after attaching it to your<br />
camcorder.<br />
Power cord<br />
(Mains lead)<br />
To the wall outlet<br />
(wall socket)<br />
Notes<br />
You cannot attach any “InfoLITHIUM” battery pack other than the V series to your camcorder.<br />
You cannot attach the “InfoLITHIUM” battery pack NP-FV30/FV50, even though they are V series.<br />
1 Slide the POWER switch to OFF (the default setting).<br />
2<br />
Attach the battery pack by sliding it in the direction of the arrow until it<br />
clicks.<br />
3 Connect the AC Adaptor and the power cord (mains lead) to your<br />
camcorder and the wall outlet (wall socket).<br />
The CHG (charge) lamp lights up and charging starts. The CHG (charge) lamp turns off<br />
when the battery pack is fully charged.<br />
1 US<br />
Getting Started
1 US<br />
4<br />
When the battery is charged, disconnect the AC Adaptor from the DC IN<br />
jack of your camcorder.<br />
Charging time<br />
Approximate time (min.) required when you fully charge a fully discharged battery pack.<br />
Battery pack Charging time<br />
NP-FV70 (supplied) 195<br />
NP-FV100 390<br />
<br />
The charging times shown in the table above are measured when charging the camcorder at a<br />
temperature of 25 C (77 °F). It is recommended that you charge the battery in a temperature range of<br />
10 C to 30 C (50 °F to 86 °F).<br />
Tips<br />
See page 64 on recording and playing time.<br />
When your camcorder is on, you can check the approximate amount of remaining battery power with the<br />
remaining battery indicator at the upper right on the LCD screen.<br />
To remove the battery pack<br />
Slide the POWER switch to OFF. Slide the BATT (battery) release lever () and remove the<br />
battery pack ().<br />
BATT (battery) release lever<br />
To use a wall outlet (wall socket) as a power source<br />
Make the same connections as “Step 3: Charging the battery pack” (p. 17). Even if the battery<br />
pack is attached, the battery pack is not discharged.
Notes on attaching/detaching of the power source<br />
When you remove the battery pack or disconnect the AC Adaptor, turn the camcorder off and make sure<br />
that the (Movie)/ (Photo) lamps (p. 33), the access lamp (p. 30) are turned off.<br />
The CHG (charge) lamp flashes during charging under the following conditions:<br />
The battery pack is not attached correctly.<br />
The battery pack is damaged.<br />
The temperature of the battery pack is low.<br />
Remove the battery pack from your camcorder and put it in a warm place.<br />
The temperature of the battery pack is high.<br />
Remove the battery pack from your camcorder and put it in a cool place.<br />
In the default setting, the power turns off automatically if you leave your camcorder without any<br />
operation for about 5 minutes, to save battery power ([A. Shut Off]).<br />
Notes on the AC Adaptor<br />
Use the nearby wall outlet (wall socket) when using the AC Adaptor. Disconnect the AC Adaptor from<br />
the wall outlet (wall socket) immediately if any malfunction occurs while using your camcorder.<br />
Do not use the AC Adaptor placed in a narrow space, such as between a wall and furniture.<br />
<br />
Do not short-circuit the DC plug of the AC Adaptor or battery terminal with any metallic objects. This<br />
may cause a malfunction.<br />
Note on the power cord (Mains lead)<br />
The power cord (Mains lead) is designed specifically for use with this camcorder only, and should not be<br />
used with other electrical equipment.<br />
Charging the battery pack abroad<br />
You can charge the battery pack in any countries/regions using the AC Adaptor supplied with<br />
your camcorder within the AC 100 V - 240 V, 50 Hz/60 Hz range.<br />
Do not use an electronic voltage transformer.<br />
1 US<br />
Getting Started
US<br />
0<br />
Step 4: Attaching the lens<br />
This manual explains how to attach the supplied mount adaptor and a lens (SAL2470Z lens<br />
(sold separately) is used for example purposes).<br />
When you use an E-mount lens, refer to the instruction manual supplied with your lens.<br />
<strong>Lens</strong> contacts*<br />
Mounting mark (orange)<br />
<strong>Lens</strong> release<br />
Mounting mark (white)<br />
* Do not touch or dirty the lens contacts.<br />
To attach the supplied mount adaptor<br />
Remove the body cap from the camcorder body, and the mount adaptor’s front and rear<br />
caps.<br />
Turn the mount adaptor’s caps counterclockwise to remove them.<br />
Align the mounting mark on the mount adaptor with the mounting index (white) on<br />
the camcorder. Insert the mount adaptor into the camcorder’s mount and turn it clockwise<br />
until it locks in place.<br />
Do not press the lens release button on the camcorder while mounting the mount adaptor as the mount<br />
adaptor will not couple properly.<br />
Do not insert the mount adaptor at an angle.<br />
Mounting index<br />
(white)
To attach the lens<br />
Align the mounting index (orange) on the lens barrel with the mounting mark on the<br />
mount adaptor. Insert the lens into the mount adaptor’s mount and turn it clockwise until it<br />
locks in place.<br />
Do not press the lens release on the mount adaptor while mounting the lens as it will not couple<br />
properly.<br />
Do not insert the lens at an angle.<br />
Removing the lens<br />
Mounting index<br />
(orange)<br />
To remove the lens<br />
Hold down the lens release on the mount adaptor and turn the lens counterclockwise until<br />
it stops. Carefully lift the lens out of the mount adaptor’s mount.<br />
US<br />
1<br />
Getting Started
US<br />
To remove the mount adaptor<br />
Hold down the lens release button on the camcorder body and turn the mount adaptor<br />
counterclockwise until it stops. Carefully lift the mount adaptor out of the camcorder’s mount.<br />
<strong>Lens</strong> release button<br />
If dust or debris adheres on the image sensor<br />
Turn off the camcorder and detach the lens. Clean the image sensor and the surrounding area<br />
using a blower (sold separately), and then reattach the lens.<br />
Notes<br />
Do not use a spray blower because it may scatter water droplets inside the camcorder body.<br />
Do not put the tip of a blower into the cavity beyond the mount, so that the tip of the blower does not<br />
touch the image sensor.<br />
Hold the camcorder’s face downward to prevent the dust from resettling in the camcorder.<br />
Do not apply a mechanical shock to the camcorder during cleaning.<br />
If you cannot clean the image sensor by the above procedure, consult your <strong>Sony</strong> dealer or local authorized<br />
<strong>Sony</strong> service facility.
Mount Adaptor<br />
The available functions differ depending on the Mount Adaptor type.<br />
Functions LA-EA1** LA-EA2** LA-EA3<br />
Autofocus Available with SAM/<br />
SSM lens only*<br />
Available Available with SAM/<br />
SSM lens only*<br />
AF system Contrast AF Phase-detection AF Contrast AF<br />
AF/MF Select Switchable on the lens SAM/SSM lenses:<br />
switchable on the lens<br />
Other lenses:<br />
switchable on the<br />
FOCUS button<br />
Switchable on the lens<br />
Autofocus Mode (Only<br />
photo mode)<br />
Single Single/Continuous Single<br />
* With LA-EA1, LA-EA3, autofocus speed with an A-mount lens attached will be slower compared to<br />
an E-mount lens. (When an A-mount lens is attached, the autofocus speed will be about 2 seconds to<br />
7 seconds, when shooting under <strong>Sony</strong> measurement condition. The speed may vary depending on the<br />
subject, ambient light, etc.)<br />
** LA-EA1 and LA-EA2 are sold separately.<br />
Notes<br />
Some lenses may not be usable or may have limited functionality. Check the dedicated support web site or<br />
consult your local authorized <strong>Sony</strong> service facility on compatible lenses.<br />
The sound of the lens and the camera in operation may be recorded during movie recording. You can<br />
avoid this by setting Audio Rec Level to minimum. Touch (MENU) [<strong>Camera</strong>/Mic] <br />
[ ( Microphone)] [Audio Rec Level].<br />
<br />
It may take a long time or may be difficult for the camera to focus, depending on the lens used or the<br />
subject.<br />
To attach the lens hood<br />
Refer to the instruction manual supplied with your lens.<br />
US<br />
Getting Started
US<br />
Step 5: Turning the power on, and setting the<br />
date and time<br />
1<br />
2<br />
3<br />
Slide the POWER switch to ON while pressing the green button.<br />
Select the desired language, then touch [Next].<br />
Touch the button on the<br />
LCD screen<br />
POWER switch<br />
Select the desired geographical area with / , then touch [Next].<br />
To set the date and time again, touch (MENU) [Setup] [ ( Clock Settings)] <br />
[Date & Time Setting] [Date & Time]. When an item is not on the screen, touch<br />
until the item appears.<br />
/
4 <br />
5<br />
6<br />
Set [Daylight Savings] or [Summer Time], then touch [Next].<br />
If you set [Daylight Savings] or [Summer Time] to [On], the clock advances 1 hour.<br />
Select the date format, then touch [Next].<br />
Select the date and time, touch / to set the value, then touch<br />
[Next] *.<br />
* The confirmation screen appears only when you set the clock for the first time.<br />
The clock starts.<br />
Notes<br />
The date and time does not appear during recording, but they are automatically recorded on the memory<br />
card, and can be displayed during playback. To display the date and time, touch (MENU) <br />
[Setup] [ ( Playback Settings)] [Data Code] [Date/Time] .<br />
You can turn off the operation beeps by touching (MENU) [Setup] [ ( General<br />
Settings)] [Beep] [Off] .<br />
<br />
If the button you touch does not react correctly, calibrate the touch panel.<br />
US<br />
Getting Started
US<br />
To turn off the power<br />
Slide the POWER switch to OFF.<br />
The (Movie) lamp flashes for a few seconds and the camcorder is turned off.<br />
Changing the language setting<br />
You can change the on-screen displays to show messages in a specified language.<br />
Touch (MENU) [Setup] [ ( General Settings)] [Language Setting] a<br />
desired language .
Step 6: Making setting adjustments before<br />
recording<br />
The LCD panel<br />
Open the LCD panel 90 degrees to the camcorder (), and then adjust the angle ().<br />
Max. 90 degrees<br />
Max. 180 degrees<br />
Tips<br />
Images are displayed on the viewfinder or the LCD screen.<br />
As your eye moves closer to the viewfinder when the LCD screen is closed, the screen display changes to<br />
the viewfinder. You can set the camcorder so that the screen display changes to the viewfinder as your eye<br />
moves closer to the viewfinder, even though the LCD screen is open.<br />
You can adjust the brightness of the LCD screen with [LCD Brightness ].<br />
Changing the display on the LCD screen<br />
Press DISPLAY to cycle the screen display in the following order:<br />
Recording: Detailed display simple display minimum display<br />
Playing: Detailed display minimum display<br />
DISPLAY button<br />
Eye sensor<br />
Max. 90 degrees<br />
US<br />
Getting Started
US<br />
Tips<br />
In the default setting, the screen display changes to the simple display after about 4 seconds ([Display<br />
Setting]). The display changes to the detailed display when you touch anywhere on the screen except the<br />
buttons on the LCD screen so that you can use items.<br />
The viewfinder<br />
about 4 sec<br />
after<br />
The display becomes dark after a certain period when you use the<br />
viewfinder.<br />
When you record while viewing through the viewfinder, keep your eye close to the viewfinder,<br />
while the LCD screen is closed. If the indications in the viewfinder appear blurred, adjust the<br />
viewfinder lens adjustment lever located beneath the viewfinder. If [VF/Panel] is set to [Auto],<br />
as your eye moves closer to the viewfinder, the eye sensor detects it and the display changes<br />
to the viewfinder even though the LCD screen is open. If the eye sensor cannot detect it, the<br />
display remains on the LCD screen.
If the image is not clear in the viewfinder<br />
If you cannot see the picture in the viewfinder clearly under bright circumstances, use the<br />
supplied large eyecup. To attach the large eyecup, stretch it slightly and align it with the<br />
eyecup groove in the viewfinder. You can attach the large eyecup facing either the right or left<br />
side.<br />
Notes<br />
Do not remove the pre-attached eyecup.<br />
Large eyecup (supplied)<br />
Attach the projection to be<br />
straight.<br />
US<br />
Getting Started
US<br />
0<br />
Step 7: Inserting a memory card<br />
1<br />
Access lamp<br />
Note the direction of notched corner.<br />
Open the cover, and insert the memory card with the notched edge in the<br />
direction as illustrated until it clicks.<br />
The [Preparing image database file. Please wait.] screen appears if you insert a new<br />
memory card. Wait until the screen disappears.<br />
2 Close the cover.<br />
Notes<br />
If [Failed to create a new Image Database File. It may be possible that there is not enough free space.] is<br />
displayed, format the memory card.<br />
Confirm the direction of the memory card. If you forcibly insert the memory card in the wrong direction,<br />
the memory card, memory card slot, or image data may be damaged.<br />
Do not open the cover during recording.<br />
When inserting or ejecting the memory card, be careful so that the memory card does not pop out and<br />
drop.<br />
To eject the memory card<br />
Open the cover and lightly push the memory card in once.
Types of memory card you can use with your camcorder<br />
“Memory Stick PRO<br />
Duo” media (Mark2)<br />
“Memory Stick PRO-<br />
HG Duo” media<br />
“Memory Stick XC-<br />
HG Duo” media<br />
SD memory card<br />
SDHC memory card<br />
SDXC memory card<br />
<br />
<br />
<br />
SD Speed Class Capacity (operation<br />
verified)<br />
—<br />
32 GB<br />
64 GB<br />
Class 4 or faster SD card<br />
Described in this<br />
manual<br />
“Memory Stick PRO<br />
Duo” media<br />
Operation with all memory cards is not assured.<br />
“Memory Stick PRO Duo” media, half the size of “Memory Stick”, or standard size SD cards can be used<br />
for this camcorder.<br />
Do not attach a label or the like on memory card or memory card adaptor. Doing so may cause a<br />
malfunction.<br />
Notes<br />
A MultiMediaCard cannot be used with this camcorder.<br />
<br />
Movies recorded on “Memory Stick XC-HG Duo” media or SDXC memory cards cannot be imported<br />
to or played back on computers or AV devices not supporting the exFAT* file system by connecting the<br />
camcorder to these devices with the USB cable. Confirm in advance that the connecting equipment is<br />
supporting the exFAT system. If you connect an equipment not supporting the exFAT system and the<br />
format screen appears, do not perform the format. All the data recorded will be lost.<br />
* The exFAT is a file system that is used for “Memory Stick XC-HG Duo” media and SDXC memory<br />
cards.<br />
US<br />
1<br />
Getting Started
US<br />
Recording/Playback<br />
Recording<br />
In the default setting, movies are recorded with high definition image quality (<strong>HD</strong>).<br />
1 Fasten the grip belt.<br />
2<br />
To remove the lens cap, push the sliders on both sides of the cap.<br />
3 Your camcorder is turned on.<br />
Slide the POWER switch to ON while pressing the green button.
Recording movies<br />
<br />
<br />
(Movie): When recording a movie<br />
(Photo): When recording a photo<br />
MODE button<br />
Press MODE to turn on the (Movie) lamp.<br />
Press START/STOP to start recording.<br />
START/STOP<br />
button<br />
The recording lamp lights up during recording (p. 75).<br />
To stop recording, press START/STOP again.<br />
[STBY] [REC]<br />
Notes<br />
The maximum continuous recordable time of movies is about 13 hours.<br />
When a movie file exceeds 2 GB, the next movie file is created automatically.<br />
It will take several seconds until you can start recording after you turn on the camcorder. You cannot<br />
operate your camcorder during this time.<br />
The following states will be indicated if data is still being written onto the recording media after recording<br />
has finished. During this time, do not apply shock or vibration to the camcorder, or remove the battery or<br />
AC Adaptor.<br />
Access lamp (p. 30) is lit or flashing<br />
The media icon in the upper right of the LCD screen is flashing<br />
Hold the lens with your left hand to support the camera during recording (when you do not use a tripod).<br />
Make sure that your fingers are not touching the microphone.<br />
Tips<br />
See page 65 on the recordable time of movies.<br />
The IRIS, Shutter Speed, Gain and Exposure are set to automatic adjustment when PROGRAM AE is<br />
pressed.<br />
[ SteadyShot] is set to [Standard] in the default setting. Note that if the attached lens does not have an<br />
Recording/Playback<br />
US
US<br />
<br />
<br />
<br />
image stabilizing feature, SteadyShot will not be usable.<br />
You can capture photos from recorded movies (NEX-VG900).<br />
You can check the recordable time, estimated remaining capacity, etc., by touching (MENU) <br />
[Setup] [ ( Media Settings)] [Media Info].<br />
The LCD screen of your camcorder can display recording images across the entire screen (full pixel<br />
display). However, this may cause slight trimming of the top, bottom, right and left edges of images when<br />
played back on a TV which is not compatible with full pixel display. In this case, set [Guide Frame] to<br />
[On], and record images using the outer frame displayed on the screen as a guide.<br />
Data code during recording<br />
The recording date, time and condition are recorded automatically on the memory card. They<br />
are not displayed during recording. However, you can check them as [Data Code] during<br />
playback. To display them, touch (MENU) [Setup] [ ( Playback Settings)]<br />
[Data Code] a desired setting .<br />
Shooting photos<br />
<br />
<br />
(Movie): When recording a movie<br />
(Photo): When recording a photo<br />
MODE button<br />
PHOTO<br />
button<br />
Press MODE to turn on the (Photo) lamp.<br />
The LCD screen display switches for photo recording mode.<br />
Press PHOTO lightly to adjust the focus, then press it fully.<br />
Flashes Lights up<br />
When disappears, the photo is recorded.
Focus indicator<br />
The focus indicator shows the focusing status by lighting/flashing.<br />
lit<br />
: Focus locked.<br />
flashing : The camcorder cannot focus on the subject automatically. Either recompose<br />
the shot or change the focus setting.<br />
Tips<br />
See page 65 on the recordable number of photos.<br />
The IRIS, Shutter Speed, ISO and Exposure are set to automatic adjustment when PROGRAM AE is<br />
pressed.<br />
To change the image size, touch (MENU) [Image Quality/Size] [ Image Size] a<br />
desired setting .<br />
When [APS-C Size Capture] is set to [Auto], the recordable image size depends on the lens you use.<br />
<br />
You cannot record photos while is displayed.<br />
Selecting the recording mode<br />
You can change the quality of the image that you record by touching (MENU) <br />
[Image Quality/Size] [ REC Mode].<br />
The types of media that images can be saved on will depend on the recording mode<br />
selected.<br />
For details on a save operation using the external devices, see page 52.<br />
Types of media<br />
On this camcorder<br />
Memory card<br />
On external devices<br />
External media (USB storage devices)<br />
Blu-ray discs<br />
AVC<strong>HD</strong> recording discs — —<br />
Recording mode<br />
PS* FX FH/HQ/LP<br />
* [PS] can be set only when [ Frame Rate] is set to [60p] (NEX-VG900), [50p] (NEX-VG900E).<br />
Recording/Playback<br />
US
US<br />
Adjusting for shooting<br />
conditions<br />
Adjusting Exposure, etc., manually<br />
(MANUAL dial)<br />
It is convenient to make manual<br />
adjustments using the MANUAL dial, by<br />
assigning a menu item ([Exposure] in the<br />
default setting) to the MANUAL button.<br />
MANUAL button<br />
MANUAL dial<br />
How to use the MANUAL dial<br />
Adjust with MANUAL dial to make the<br />
adjustment also when pressing IRIS or<br />
SHUTTER SPEED.<br />
To assign a menu item<br />
Press and hold MANUAL for a few seconds<br />
to display the [MANUAL Button] screen.<br />
Rotate the MANUAL dial to assign an item.<br />
You can assign [Exposure], [AE Shift], [WB<br />
Color Temp.], [WB B-A], or [WB G-M].<br />
Using a tripod<br />
Attach a tripod (sold separately) to the<br />
tripod receptacle using a tripod screw (sold<br />
separately, the length of the screw must be<br />
less than 5.5 mm (7/32 in.)).<br />
Tripod<br />
receptacle
Playback.on.the.camcorder<br />
Tips<br />
The camcorder displays recorded images as an event automatically based on the date and time.<br />
1 Slide the POWER switch to ON while pressing the green button.<br />
Your camcorder is turned on.<br />
2 Press (View Images).<br />
The Event View screen appears after some seconds.<br />
3 Touch / to select the desired event ().<br />
To the MENU screen<br />
Events<br />
/ : To the previous/next event<br />
Event name<br />
Change to the movie/photo recording mode<br />
Time-line bar<br />
Change Event Scale button<br />
The Event Index screen appears when you touch the event that is displayed on the center.<br />
<br />
Touch ( Change Event Scale) on the bottom right of the screen so that you can change the<br />
time range of the time-line bar from one and a half years to three months, which changes the<br />
number of the events that can be displayed on the time-line bar.<br />
Recording/Playback<br />
US
US<br />
4<br />
Touch an image you want to view.<br />
Touch to select the image type to be displayed in the index from [ MOVIE]<br />
(movies only), [ PHOTO] (photos only), or [ MOVIE/PHOTO] (movies and<br />
photos mixed).<br />
To go back to the Event View screen<br />
/ : Displays the previous/next page (Touching and holding the button<br />
scrolls the index screen.)<br />
Change to the movie/photo recording mode<br />
Event title<br />
Total time of movies in the Event (The total number of still images is displayed when<br />
there are still images only)<br />
Switch Image Type button<br />
Movie<br />
Photo<br />
<br />
appears with the movie or photo that was most recently played or recorded. If you touch the<br />
movie or photo with , you can continue playback from the previous time.
Operating the camcorder while playing a movie<br />
You can use the functions shown in the figure below while the camcorder is playing a movie.<br />
The figure below will be displayed when you select [ MOVIE/PHOTO] (the default<br />
setting) or [ MOVIE] by touching the Switch Image Type button on the Event Index<br />
screen.<br />
Volume adjustment<br />
Delete<br />
Context<br />
To stop*<br />
Previous<br />
To fast-reverse*<br />
* These buttons can be used only when the camcorder is playing a movie.<br />
Notes<br />
You may not be able to play back the images with other devices than camcorder.<br />
Tips<br />
Touching the button on the playback screen displays functions you can currently use, and allows you<br />
to use those functions easily.<br />
When playback from the selected image reaches the last image, the screen returns to the INDEX screen.<br />
Touch / during pause to play back movies slowly.<br />
As you repeat touching / during playback, movies are played as fast as about 5 times <br />
about 10 times about 30 times about 60 times.<br />
The recording date, time, and shooting conditions are recorded automatically during recording. This<br />
information is not displayed during recording, but you can display it during playback by touching<br />
(MENU) [Setup] [<br />
.<br />
( Playback Settings)] [Data Code] a desired setting <br />
Next<br />
To adjust the sound volume of movies<br />
While playing back movies, touch adjust with / .<br />
To fast-forward*<br />
To pause*/play<br />
Recording/Playback<br />
US
US<br />
0<br />
Viewing photos<br />
You can use the functions shown in the figure below while you are viewing photos. The figure<br />
below will be displayed when you select [ PHOTO] by touching the Switch Image Type<br />
button on the Event Index screen.<br />
Playback zoom<br />
Delete<br />
Context<br />
Previous<br />
Tips<br />
To repeat Slideshow, touch [Slideshow Set].<br />
To start/stop slide show<br />
To see enlarged images<br />
Touch (Playback zoom) during still image playback. You can adjust the zoom by / . You<br />
can also operate this with the zoom lever.<br />
Next<br />
Tips<br />
You cannot use the playback zoom if you have not selected [ PHOTO] on the index screen.
Playing images on a TV<br />
Connection methods and the image<br />
quality (high definition (<strong>HD</strong>) or standard<br />
definition (STD)) viewed on the TV screen<br />
differ depending on what type of TV is<br />
connected, and the connectors used.<br />
You can watch images on your TV screen<br />
even while they are being recorded.<br />
Output connectors on the camcorder<br />
1<br />
2<br />
3<br />
A/V Remote<br />
Connector<br />
<strong>HD</strong>MI OUT jack<br />
Switch the input on the TV to the<br />
connected jack.<br />
Refer to the instruction manuals of the TV.<br />
Connect the camcorder to a TV.<br />
Use the supplied AC Adaptor as the power<br />
source (p. 18).<br />
Play a movie or a photo on the<br />
camcorder (p. 37).<br />
List of connection<br />
Connecting to a high definition TV<br />
When the recording quality is high<br />
definition image quality (<strong>HD</strong>), the movies<br />
are played back in high definition image<br />
quality (<strong>HD</strong>). When the recording quality<br />
is standard image quality (STD), the movies<br />
are played back in standard definition<br />
image quality (STD).<br />
Component A/V Cable<br />
(supplied)<br />
(Green) Y<br />
(Blue)PB/CB<br />
(Red)PR/CR<br />
<strong>HD</strong>MI Cable<br />
(sold separately)<br />
(White)<br />
(Red)<br />
Connecting to a non-high-definition<br />
16:9 (wide) or 4:3 TV<br />
When movies are recorded with high<br />
definition image quality (<strong>HD</strong>), they are<br />
played back in standard definition image<br />
quality (STD). When movies are recorded<br />
with standard image quality (STD), they are<br />
played back in standard definition image<br />
quality (STD).<br />
Recording/Playback<br />
US<br />
1
US<br />
Component A/V Cable<br />
(supplied)<br />
A/V connecting cable with<br />
S VIDEO (sold separately)<br />
(Yellow)<br />
A/V connecting cable<br />
(supplied)<br />
(Green) Y<br />
(Blue)PB/CB<br />
(Red)PR/CR<br />
(White)<br />
(Red)<br />
(White)<br />
(Red)<br />
(Yellow)<br />
(White)<br />
(Red)<br />
When you connect with component<br />
A/V cable<br />
If you connect only component video plugs,<br />
audio signals are not output. Connect the white<br />
and red plugs to output audio signals.<br />
Select the [Component] setting for the<br />
component input jack you are using. Touch<br />
(MENU) [Setup] <br />
[ ( Connection)] [Component] a<br />
desired setting to make the setting.<br />
When you connect with <strong>HD</strong>MI cable<br />
Use an <strong>HD</strong>MI cable with the <strong>HD</strong>MI logo.<br />
Use an <strong>HD</strong>MI mini connector on one end<br />
(for the camcorder), and a plug suitable for<br />
connecting your TV on the other end.<br />
Copyright-protected images are not output<br />
from the <strong>HD</strong>MI OUT jack of your camcorder.<br />
<br />
<br />
<br />
Some TVs may not function correctly (e.g., no<br />
sound or image) with this connection.<br />
Do not connect the camcorder <strong>HD</strong>MI OUT<br />
jack to an external device <strong>HD</strong>MI OUT jack, as<br />
malfunction may result.<br />
When the connected device is compatible<br />
with 5.1ch surround sound, high definition<br />
image quality (<strong>HD</strong>) movies are output in<br />
5.1ch surround sound automatically. Standard<br />
definition image quality (STD) movies are<br />
converted to 2ch sound.<br />
To set the aspect ratio according to the<br />
connected TV (16:9/4:3)<br />
Set [TV Type] to [16:9] or [4:3] according to<br />
your TV.<br />
When you connect with A/V<br />
connecting cable with S VIDEO<br />
When the S VIDEO plug (S VIDEO channel)<br />
is connected, audio signals are not output. To<br />
output audio signals, connect the white and red<br />
plugs to the audio input jack of your TV.<br />
This connection produces higher resolution<br />
images compared with the A/V connecting<br />
cable.<br />
When your TV is monaural (When your<br />
TV has only one audio input jack)<br />
Connect the yellow plug of the A/V connecting<br />
cable to the video input jack and connect the<br />
white (left channel) or red (right channel) plug<br />
to the audio input jack of your TV or VCR.<br />
When connecting to your TV via a VCR<br />
Connect your camcorder to the LINE IN input<br />
on the VCR using the A/V connecting cable. Set<br />
the input selector on the VCR to LINE (VIDEO<br />
1, VIDEO 2, etc.).<br />
On “Photo TV <strong>HD</strong>”<br />
This camcorder is compatible with the<br />
“Photo TV <strong>HD</strong>” standard. “Photo TV<br />
<strong>HD</strong>” allows for highly-detailed, photo-like<br />
depiction of subtle textures and colors.<br />
By connecting <strong>Sony</strong>’s Photo TV <strong>HD</strong>-
compatible devices using an <strong>HD</strong>MI cable*<br />
or the component AV cable**, a whole<br />
new world of photos can be enjoyed in<br />
breathtaking high image quality.<br />
* The TV will automatically switch to the<br />
appropriate mode when displaying photos.<br />
** Setup of the TV will be necessary. Please refer<br />
to the instructions of your Photo TV <strong>HD</strong>compatible<br />
TV for details.<br />
Notes<br />
When you play back standard definition image<br />
quality (STD) movies on a 4:3 TV that is not<br />
compatible with the 16:9 signal, record movies<br />
with 4:3 aspect ratio. Touch (MENU) <br />
[Image Quality/Size] [ Wide Mode] <br />
[4:3] .<br />
When the A/V connecting cable is used to<br />
output movies, movies are output with standard<br />
definition image quality (STD).<br />
Tips<br />
If you connect your camcorder to the TV using<br />
more than one type of cable to output images,<br />
the order of priority of the TV input jacks is as<br />
follows:<br />
<strong>HD</strong>MI component S VIDEO video<br />
<br />
<strong>HD</strong>MI (High Definition Multimedia Interface)<br />
is an interface to send both video/audio signals.<br />
The <strong>HD</strong>MI OUT jack outputs high quality<br />
images and digital audio.<br />
Recording/Playback<br />
US
US<br />
Advanced operations<br />
Deleting movies and<br />
photos<br />
You can free media space by deleting<br />
movies and photos from memory card.<br />
Notes<br />
You cannot restore images once they are<br />
deleted. Save important movies and photos in<br />
advance.<br />
Do not remove the battery pack or the AC<br />
Adaptor from your camcorder while deleting<br />
the images. It may damage the memory card.<br />
Do not eject the memory card while deleting<br />
images from the memory card.<br />
You cannot delete protected movies and photos.<br />
Undo the protection of the movies and photos<br />
to delete them, before you try to delete them.<br />
Tips<br />
You can delete the image using on the<br />
playback screen.<br />
To delete all images recorded in the memory<br />
card, and recover all the recordable space of the<br />
media, format the media.<br />
Reduced-size images which enable you to view<br />
many images at the same time on an index<br />
screen are called “thumbnails.”<br />
1<br />
2<br />
3<br />
Press (View Images) button<br />
(p. 37).<br />
Touch (MENU) [Edit/<br />
Copy] [Delete].<br />
To select and delete movies,<br />
touch [Multiple Images] <br />
[ MOVIE]/[ PHOTO]/<br />
[ MOVIE/PHOTO].<br />
When [ / Setting] is set to<br />
[ STD Quality], appears instead<br />
of .<br />
4<br />
5<br />
Touch and display the mark<br />
on the movies or photos to be<br />
deleted.<br />
<br />
Touch and hold the desired thumbnail so<br />
that you can confirm the image. Touch<br />
to return to the previous screen.<br />
Touch .<br />
To delete all movies/photos in an event<br />
at one time<br />
In step 3, touch [All In Event].<br />
Touch / to select the desired<br />
event, then touch .<br />
<br />
Touch and hold the desired thumbnail so<br />
that you can confirm the image. Touch<br />
to return to the previous screen.<br />
Touch .
Saving movies and photos with a computer<br />
Useful functions available if you connect the<br />
camcorder to a computer<br />
For Windows<br />
The software “PlayMemories Home” stored in the CD-ROM (supplied) includes functions<br />
that enable you to do more with the images recorded with the camcorder.<br />
For Mac<br />
View<br />
Save on a disc Upload<br />
DVD/Blu-ray<br />
Edit<br />
Calendar<br />
Joining image files<br />
Network services<br />
“PlayMemories Home” is not compatible with Mac OS. If you play back images on a Mac, use<br />
the applications that are installed on your Mac.<br />
For details, visit the following website.<br />
http://www.sony.co.jp/imsoft/Mac/<br />
US<br />
Saving movies and photos with a computer
US<br />
Preparing a computer<br />
Step 1 Checking the computer<br />
system<br />
Windows<br />
OS* 1<br />
Microsoft Windows XP SP3* 2 /Windows Vista<br />
SP2* 3 /Windows 7 SP1<br />
CPU<br />
PlayMemories Home: Intel Core Duo 1.66<br />
GHz or faster, or Intel Core 2 Duo 1.66<br />
GHz or faster (Intel Core 2 Duo 2.26 GHz<br />
or faster is required when processing FX or<br />
FH movies, and Intel Core 2 Duo 2.40 GHz<br />
or faster is required when processing PS<br />
movies.)<br />
However, Intel Pentium III 1 GHz or faster is<br />
sufficient for the following operations:<br />
Importing<br />
the movies and photos to the<br />
computer<br />
Creating<br />
a Blu-ray disc/AVC<strong>HD</strong> recording<br />
disc/DVD-video (Intel Core Duo 1.66 GHz<br />
or faster is required when creating a DVD<br />
video by converting high definition image<br />
quality (<strong>HD</strong>) to standard definition image<br />
quality (STD).)<br />
Processing<br />
only the movies with standard<br />
definition image quality (STD)<br />
Image Data Converter: Pentium 4 or faster<br />
Memory<br />
PlayMemories Home:<br />
For Windows XP: 512 MB or more (1 GB or<br />
more is recommended.)<br />
However, 256 MB or more is sufficient for<br />
processing only the movies with standard<br />
definition image quality (STD).<br />
For Windows Vista/Windows 7: 1 GB or<br />
more<br />
Image Data Converter:<br />
1GB or more<br />
Hard disk<br />
Disk volume required for installation:<br />
Approximately 500 MB (10 GB or more<br />
may be necessary when creating AVC<strong>HD</strong><br />
recording discs. 50 GB maximum may be<br />
necessary when creating Blu-ray discs.)<br />
Display<br />
Minimum 1,024 dots × 768 dots<br />
Others<br />
USB port (this must be provided as standard,<br />
Hi-Speed USB (USB 2.0 compatible)), Bluray<br />
disc/DVD burner (CD-ROM drive is<br />
necessary for installation) Either NTFS or<br />
exFAT file system is recommended as the<br />
hard disk file system.<br />
Mac<br />
OS* 1<br />
USB Connection: Mac OS X (v10.3, v10.4,<br />
v10.5, v10.6, v10.7, v10.8) “Image Data<br />
Converter Ver.4.2”: Mac OS X (v10.5,<br />
v10.6 (Snow Leopard), v10.7 (Lion), v10.8<br />
(Mountain Lion))<br />
Image Data Converter Ver.4<br />
CPU: Intel Core Solo/Core Duo/Core 2 Duo<br />
or faster<br />
Memory: 1 GB or more is recommended.<br />
Display: 1,024 dots × 768 dots or more<br />
* 1 Standard installation is required. Operation is<br />
not assured if the OS has been upgraded or in a<br />
multi-boot environment.<br />
* 2 64-bit editions and Starter (Edition) are not<br />
supported. Windows Image Mastering API<br />
(IMAPI) Ver.2.0 or newer is required to use disc<br />
creation function, etc.<br />
* 3 Starter (Edition) is not supported.<br />
Notes<br />
<br />
Operation with all computer environments is<br />
not assured.<br />
Step 2 Installing the supplied<br />
software “PlayMemories Home”<br />
Install “PlayMemories Home” before<br />
connecting your camcorder to a computer.<br />
When you purchase this camcorder, install<br />
the supplied PlayMemories Home to the<br />
newest state.
Notes<br />
Install the supplied “PlayMemories Home”<br />
software, even if “PlayMemories Home”<br />
software has already been installed on your<br />
computer.<br />
If “PlayMemories Home” has already been<br />
installed on your computer, “PlayMemories<br />
Home” will overwrite it and will be installed.<br />
Some functions of “PlayMemories Home” may<br />
become unavailable.<br />
<br />
Confirm that your camcorder is<br />
not connected to the computer.<br />
Turn on the computer.<br />
Log on as an Administrator for<br />
installation.<br />
Close all applications running on the<br />
computer before installing the software.<br />
<br />
Place the supplied CD-ROM in<br />
the disc drive of your computer.<br />
The installation screen appears.<br />
If the screen does not appear, double-click<br />
[Start] [Computer] (in Windows XP,<br />
[My Computer]) (PMHOME) <br />
[Install.exe].<br />
Click [Install].<br />
<br />
Check that “PlayMemories<br />
Home” and “Image Data<br />
Converter” are selected, then<br />
follow the instructions on the<br />
computer screen to continue the<br />
installation.<br />
Select the country or region.<br />
<br />
<br />
<br />
<br />
Select the language for the<br />
application to be installed, then<br />
proceed to the next screen.<br />
Read the terms of the license<br />
agreement carefully. If you agree<br />
to the terms, change to , and<br />
then click [Next] [Install].<br />
Follow the instructions that<br />
appear on the computer screen<br />
to continue the installation.<br />
You may be required to install some<br />
other applications included on the disc at<br />
the same time. If the installation display<br />
appears, follow the instructions that appear<br />
on the screen.<br />
When you are required to restart the<br />
computer, follow the instructions that<br />
appear on the screen and restart it.<br />
<br />
Connect the camcorder to the computer<br />
when you are instructed to do so.<br />
Connect the camcorder to the<br />
computer using the USB cable,<br />
then touch [USB Connect] on the<br />
LCD screen of the camcorder.<br />
US<br />
Saving movies and photos with a computer
US<br />
<br />
When the installation is<br />
completed, remove the CD-ROM<br />
from the computer.<br />
Click (PlayMemories Home icon) that<br />
appears on the desktop of the computer to<br />
start up the software.<br />
Notes<br />
To create discs or use other functions on<br />
Windows XP, Image Mastering API v2.0 for<br />
Windows XP should be installed. If Image<br />
Mastering API v2.0 for Windows XP has not<br />
been installed yet, select it from required<br />
programs on the installation screen and install<br />
it following the procedures displayed. (The<br />
computer must be connected to the internet<br />
for the installation.) You may install Image<br />
Mastering API v2.0 for Windows XP in<br />
response to the message displayed when you try<br />
to start those functions.<br />
Operation is not guaranteed if you read or<br />
write video data from or to the camcorder<br />
using software other than the supplied<br />
“PlayMemories Home.” For the information on<br />
the compatibility of the software you are using,<br />
consult the manufacturer of the software.<br />
To disconnect your camcorder from the<br />
computer<br />
Click the icon at the bottom right of the<br />
desktop of the computer [Safely remove<br />
USB Mass Storage Device].<br />
Touch [Cancel] [Yes] on the camcorder<br />
screen.<br />
Disconnect the USB cable.<br />
If you are using Windows 7, the icon may<br />
not appear on the desktop of the computer. In<br />
this case, you can disconnect the camcorder<br />
from your computer without following the<br />
procedures described above.<br />
Notes<br />
Do not format the memory card of the<br />
camcorder using a computer. If you do this, the<br />
camcorder will not operate correctly.<br />
Do not insert AVC<strong>HD</strong> recording discs that have<br />
been created using the “PlayMemories Home”<br />
software to DVD players or recorders, as these<br />
devices do not support the AVC<strong>HD</strong> standard. If<br />
you do, you may not be able to remove the disc<br />
from these devices.<br />
This camcorder captures high definition footage<br />
in the AVC<strong>HD</strong> format. Using the enclosed<br />
PC software, high definition footage can be<br />
copied onto DVD media. However, DVD media<br />
containing AVC<strong>HD</strong> footage should not be used<br />
with DVD based players or recorders, as the<br />
DVD player/recorder may fail to eject the media<br />
and may erase its contents without warning.<br />
When you access the camcorder from<br />
the computer, use the supplied software<br />
“PlayMemories Home.” Do not modify the files<br />
or folders on the camcorder from the computer.<br />
The image files may be damaged or may not be<br />
played back.<br />
Operation is not guaranteed, if you operate the<br />
data on the camcorder from the computer.<br />
The camcorder automatically divides an image<br />
file that exceeds 2 GB or larger and saves the<br />
parts as separate files. All image files may<br />
be shown as separate files on a computer,<br />
however, the files will be handled properly by<br />
the import function of the camcorder or the<br />
“PlayMemories Home” software.<br />
Use the supplied “PlayMemories Home”<br />
software when you import long movies<br />
or edited images from the camcorder to a<br />
computer. If you use other software, the images<br />
may not be imported correctly.<br />
When you delete image files, follow the steps<br />
on page 44.<br />
<br />
You can create a Blu-ray disc by using a<br />
computer with a Blu-ray disc burner. Install<br />
the BD Add-on Software for “PlayMemories<br />
Home.”
The devices on which the created disc<br />
can be played back<br />
Blu-ray discs<br />
Blu-ray disc players such as a <strong>Sony</strong> Blu-ray<br />
disc player or a PlayStation3 DVDs with high definition image quality<br />
(<strong>HD</strong>)<br />
AVC<strong>HD</strong> format playback devices, such as a<br />
<strong>Sony</strong> Blu-ray disc player or a PlayStation3 Notes<br />
<br />
<br />
<br />
The AVC<strong>HD</strong> recording disc can be played back<br />
only on AVC<strong>HD</strong> format compatible devices.<br />
Discs with high definition image quality (<strong>HD</strong>)<br />
images recorded should not be used in DVD<br />
players/recorders. Because DVD players/<br />
recorders are not compatible with the AVC<strong>HD</strong><br />
format, DVD players/recorders may fail to eject<br />
the disc.<br />
Always maintain your PlayStation 3 to use<br />
the latest version of the PlayStation 3 system<br />
software. The PlayStation 3 may not be<br />
available in some countries/regions.<br />
Starting PlayMemories<br />
Home<br />
1<br />
2<br />
Double-click the “PlayMemories<br />
Home” short-cut icon on the<br />
computer screen.<br />
The PlayMemories Home software<br />
starts up.<br />
Double-click the “PlayMemories<br />
Home Help Guide” short-cut icon<br />
on the computer screen to see<br />
how to use “PlayMemories Home.”<br />
Notes<br />
<br />
If the icon is not displayed on the computer<br />
screen, click [Start] [All Programs] <br />
[PlayMemories Home] the desired item.<br />
US<br />
Saving movies and photos with a computer
US<br />
0<br />
Using “Image Data<br />
Converter”<br />
With “Image Data Converter” you can do<br />
the following:<br />
To edit images recorded in RAW format with<br />
various corrections, such as tone curve, and<br />
sharpness.<br />
To adjust images with white balance, exposure,<br />
and creative style, etc.<br />
To save the images displayed and edited on a<br />
computer.<br />
You can either save the image as RAW format or<br />
save it in the general file format.<br />
To display and compare RAW/JPEG images<br />
recorded with this camera.<br />
To rate the images on a scale of five.<br />
<br />
To set color labels.<br />
To use “Image Data Converter,” refer to<br />
Help.<br />
Click [Start] [All Programs] [Image<br />
Data Converter] [Help] [Image Data<br />
Converter Ver.4.2].<br />
“Image Data Converter” support page<br />
(English only)<br />
http://www.sony.co.jp/ids-se/
Saving images with an external device<br />
Dubbing guide<br />
You can select the method for saving high definition image quality (<strong>HD</strong>) movies using an<br />
external device.<br />
External devices Connecting cable Page<br />
External media device<br />
Saving images on an external<br />
media device with high<br />
definition image quality (<strong>HD</strong>).<br />
Hard disk recorder, etc.<br />
Saving images on a DVD disc<br />
with standard definition image<br />
quality (STD).<br />
USB Adaptor Cable<br />
VMC-UAM1 (sold<br />
separately)<br />
A/V connecting cable<br />
(supplied)<br />
Movies that are recorded with standard definition image quality (STD)<br />
Use the A/V connecting cable to connect the camcorder to an external device in which images<br />
are saved.<br />
The types of media on which images are saved<br />
Refer to “Selecting the recording mode” on page 35.<br />
52<br />
55<br />
US<br />
1<br />
Saving images with an external device
Saving images on an<br />
external media device<br />
You can save movies and photos on an<br />
external media device (USB storage<br />
devices), such as an external hard disk<br />
drive. You can also play back images on the<br />
camcorder or another playback device.<br />
Notes<br />
For this operation, you need the USB Adaptor<br />
Cable VMC-UAM1 (sold separately).<br />
The USB Adaptor Cable VMC-UAM1 may not<br />
be available in some countries/regions.<br />
Connect your camcorder to the wall outlet (wall<br />
socket) using the supplied AC Adaptor (p. 18).<br />
Refer to the instruction manual supplied with<br />
the external media device.<br />
Tips<br />
You can import images saved on the external<br />
media device to your computer by using the<br />
supplied software “PlayMemories Home.”<br />
Functions available after saving images<br />
on an external media device<br />
playback of images through the camcorder<br />
(p. 54)<br />
importing images to “PlayMemories Home”<br />
Devices that cannot be used as an<br />
external media device<br />
You cannot use the following devices as an<br />
external media device.<br />
media devices with a capacity exceeding 2 TB<br />
ordinary disc drive such as CD or DVD drive<br />
media devices connected via a USB hub<br />
media devices with built-in USB hub<br />
card reader<br />
Notes<br />
You may not be able to use external media<br />
devices with a code function.<br />
The FAT file system is available for your<br />
camcorder. If the storage medium of the<br />
external device was formatted for the NTFS file<br />
system, etc., format the external media device<br />
using the camcorder before use. The format<br />
screen appears when an external media device<br />
is connected to your camcorder. Make sure that<br />
US<br />
important data has not previously been saved<br />
on the external media device before you format<br />
it using the camcorder.<br />
Operation is not assured with every device<br />
satisfying requirements for operating.<br />
<br />
For details on available external media devices,<br />
go to the <strong>Sony</strong> support website in your<br />
country/region.<br />
1<br />
2<br />
3<br />
4<br />
Connect the AC Adaptor and the<br />
power cord (mains lead) to the<br />
DC IN jack of your camcorder and<br />
the wall outlet (wall socket).<br />
If the external medium device<br />
has the AC power cable, connect<br />
it to the wall outlet (wall socket).<br />
Connect the USB Adaptor Cable<br />
to the external media device.<br />
Connect the USB Adaptor Cable<br />
to the (USB) jack of your<br />
camcorder.<br />
Make sure not to disconnect the USB<br />
cable while [Preparing image database<br />
file. Please wait.] is displayed on the<br />
LCD screen. If [Repair Img. DB F.] is<br />
displayed on the camcorder screen,<br />
touch .
5<br />
6<br />
USB Adaptor<br />
Cable<br />
VMC-UAM1<br />
(sold separately)<br />
Connect the external media<br />
device to the camcorder and<br />
touch [Copy.] on the camcorder<br />
screen.<br />
Movies and photos that are stored in<br />
the memory card and that have not yet<br />
been saved on external media device<br />
can be saved on the connected media<br />
device at this time.<br />
This operation is available only when there<br />
are newly recorded images.<br />
After operation is completed,<br />
touch on the camcorder<br />
screen.<br />
When connecting an external media<br />
device<br />
The images saved in the external media<br />
device are displayed on the LCD screen.<br />
When an external media device is<br />
connected, the USB icon will appear on the<br />
Event View screen, etc.<br />
You can make menu settings of the external<br />
media device such as deleting images.<br />
Touch (MENU) [Edit/Copy] on<br />
Event View.<br />
To disconnect the external media<br />
device<br />
Touch while the camcorder is in<br />
the playback standby mode ([Event<br />
View] or Event Index is displayed) of the<br />
external media device.<br />
Disconnect the USB Adaptor Cable.<br />
Notes<br />
The number of scenes you can save on the<br />
external media device are as follows. However,<br />
even if the external media device has free space,<br />
you cannot save scenes exceeding the following<br />
number.<br />
High definition image quality (<strong>HD</strong>) movies:<br />
Max. 3,999<br />
Standard definition image quality (STD)<br />
movies: Max. 9,999<br />
Photos: Max. 40,000<br />
The number of scenes may be smaller<br />
depending on the type of images recorded.<br />
Saving desired movies and photos<br />
You can save desired images in the<br />
camcorder to the external media device.<br />
<br />
Connect the camcorder to the<br />
external media device and touch<br />
[Play without copying.].<br />
Event View of the external medium is<br />
displayed.<br />
US<br />
Saving images with an external device
US<br />
<br />
<br />
<br />
<br />
Touch (MENU) [Edit/<br />
Copy] [Copy].<br />
Follow the instructions that<br />
appear on the screen to select<br />
image selection methods and<br />
type of the image.<br />
You cannot copy images from an<br />
external media device to the internal<br />
recording medium on the camcorder.<br />
When you selected [Multiple<br />
Images], touch the image to be<br />
saved.<br />
appears.<br />
<br />
<br />
Press and hold the image down on the<br />
LCD screen to confirm the image. Touch<br />
to return to the previous screen.<br />
If you select [All In Event], select the event<br />
to copy with / . You cannot<br />
select multiple events.<br />
Touch <br />
on the camcorder screen.<br />
Playing back images in the external<br />
media device on the camcorder<br />
Connect the camcorder to the<br />
<br />
external media device and touch<br />
[Play without copying.].<br />
Event View of the external media<br />
device is displayed.<br />
Select the image you want to<br />
view and play back the image<br />
(p. 37).<br />
You can also view images on a TV<br />
connected to your camcorder (p. 41).<br />
You can play back the high definition<br />
image quality (<strong>HD</strong>) movies on your<br />
computer using [Player for AVC<strong>HD</strong>].<br />
Start [Player for AVC<strong>HD</strong>], and select the<br />
drive where the external media device is<br />
connected with [Settings].<br />
To perform [Direct Copy] manually<br />
You can perform [Direct Copy] manually<br />
while the camcorder is connected to an<br />
external media device.<br />
Touch (MENU) [Edit/Copy]<br />
[Direct Copy] on the [Event View]<br />
screen of the external media device.<br />
Touch [Copy images that have not been<br />
copied.].<br />
Touch .<br />
Notes<br />
If your camcorder does not recognize the<br />
external media device, try the following<br />
operations.<br />
Reconnect the USB Adaptor Cable to your<br />
camcorder.<br />
<br />
If the external media device has the AC power<br />
cord (mains lead), connect it to the wall outlet<br />
(wall socket).
Creating a standard<br />
definition image<br />
quality (STD) disc with<br />
a recorder, etc.<br />
You can copy images played back on your<br />
camcorder to a disc or video cassette,<br />
by connecting your camcorder to a disc<br />
recorder, etc., with the A/V connecting<br />
cable. Connect the device in either way<br />
of or . Refer also to the instruction<br />
manuals supplied with the devices to be<br />
connected.<br />
Notes<br />
Connect your camcorder to the wall outlet (wall<br />
socket) using the supplied AC Adaptor for this<br />
operation (p. 18).<br />
High definition image quality (<strong>HD</strong>) movies<br />
will be copied with standard definition image<br />
quality (STD).<br />
(Yellow)<br />
Signal flow<br />
A/V Remote Connector<br />
Input<br />
S VIDEO<br />
VIDEO<br />
(Yellow)<br />
(White)<br />
AUDIO<br />
(Red)<br />
A/V connecting cable (supplied)<br />
A/V connecting cable with S VIDEO<br />
(sold separately)<br />
By using this cable, higher quality<br />
images can be produced than with an A/<br />
V connecting cable. Connect the white<br />
and red plug (left/right audio) and the S<br />
VIDEO plug (S VIDEO channel) of the<br />
A/V connecting cable with an S VIDEO<br />
cable. If you connect the S VIDEO<br />
plug only, you will hear no sound. The<br />
yellow plug (video) connection is not<br />
necessary.<br />
US<br />
Saving images with an external device
US<br />
1<br />
2<br />
3<br />
4<br />
Insert the recording media in the<br />
recording device.<br />
If your recording device has an input<br />
selector, set it to the input mode.<br />
Connect your camcorder to the<br />
recording device (a disc recorder,<br />
etc.) with the A/V connecting<br />
cable (supplied) or an A/V<br />
connecting cable with S VIDEO<br />
(sold separately).<br />
Connect your camcorder to the input jacks<br />
of the recording device.<br />
Start playback on your<br />
camcorder, and record it on the<br />
recording device.<br />
Refer to the instruction manuals supplied<br />
with your recording device for details.<br />
When dubbing is finished, stop<br />
the recording device, and then<br />
your camcorder.<br />
Notes<br />
Since copying is performed via analog data<br />
transfer, the image quality may deteriorate.<br />
You cannot copy images to recorders connected<br />
with an <strong>HD</strong>MI cable.<br />
To copy date/time information and camera<br />
data, touch (MENU) [Setup] <br />
[ ( Playback Settings)] [Data Code]<br />
a desired setting .<br />
<br />
When the screen size of display devices (TV,<br />
etc.) is 4:3, touch (MENU) [Setup]<br />
[ ( Connection)] [TV Type] <br />
[4:3] .<br />
When you connect a monaural device, connect<br />
the yellow plug of the A/V connecting cable<br />
to the video input jack, and the white (left<br />
channel) or the red (right channel) plug to the<br />
audio input jack on the device.
Customizing your camcorder<br />
Using menus<br />
You can enjoy using your camcorder more by making good use of menu operations.<br />
The camcorder has various menu items under each of 6 menu categories.<br />
Shooting Mode (Items for selecting a shooting mode) p. 58<br />
<strong>Camera</strong>/Mic (Items for customized shooting) p. 58<br />
Image Quality/Size (Items for setting up image quality or size) p. 59<br />
Playback Function (Items for playback) p. 37<br />
Edit/Copy (Items for editing) p. 59<br />
Setup (Other setup items) p. 59<br />
Operating menus<br />
Follow the procedures explained below to set the menu items.<br />
The [<strong>Camera</strong>/Mic] and [Setup] menus have sub-categories. Touch the sub-category icon, and<br />
the screen changes to other sub-category menus.<br />
Grayed out menu items or settings are not available.<br />
Notes<br />
You may not be able to set some menu items, depending on the recording or playback conditions.<br />
<br />
Touch to finish setting the menu or to return to the previous menu screen.<br />
US<br />
Customizing your camcorder
US<br />
Menu lists<br />
Shooting Mode<br />
Movie .......................................... Records movies.<br />
Photo ........................................... Shoots photos.<br />
<strong>Camera</strong>/Mic<br />
( Manual Settings)<br />
Spot Meter/Fcs ............... Adjusts the brightness and focus for the selected subject simultaneously.<br />
Spot Meter ....................... Adjusts the brightness of images to a subject you touch on the screen.<br />
Spot Focus ....................... Focuses on a subject you touch on the screen.<br />
Exposure ........................... Adjusts the brightness of movies and photos.<br />
AE Shift.............................. Adjusts the exposure. Touch if the subject is white or the backlight<br />
is bright, or touch if the subject is black or the light is dim.<br />
( <strong>Camera</strong> Settings)<br />
Picture Effect ................... Selects the desired effect filter for a more impressive and artistic effect.<br />
Cinematone............. Adjusts the color of the movie to resemble the atmosphere of films when<br />
recording.<br />
Self-Timer ................. Sets the self-timer when your camcorder is in photo recording mode.<br />
Drive Mode .............. Sets continuous or bracket shooting, etc.<br />
AF Mode ................... Selects the focus method.<br />
SteadyShot .............. Sets the SteadyShot function when recording movies.<br />
SteadyShot .............. Sets the SteadyShot function when shooting photos.<br />
Auto Back Light .............. Adjusts the exposure for backlit subjects automatically.<br />
MANUAL Button ............ Assigns a function to the MANUAL button.<br />
APS-C Size Capture ....... Changes the image size according to the attached lens.<br />
Phase Detection AF ...... Speeds up autofocus automatically when a compatible lens is attached.<br />
( Face)<br />
Face Detection ............... Adjusts the image quality of the face(s) automatically.<br />
( Flash)<br />
Flash ................................... Sets how the flash is activated.<br />
Flash Level ....................... Sets the brightness of flash.<br />
Red Eye Reduction ........ Prevents redeye when shooting with flash.<br />
( Microphone)<br />
Wind Noise Reduct. ...... Reduces the wind noise.<br />
Audio Mode .................... Sets the recording sound format (5.1ch surround/2ch stereo).<br />
Audio Rec Level ............. Adjusts the audio level when recording.<br />
( Shooting Assist)<br />
Guide Frame.................... Displays the frame to make sure the subject is horizontal or vertical.<br />
Zebra ................................. Displays a zebra pattern as a guide for adjusting brightness.<br />
Peaking ............................. Displays an image on the LCD screen with its outlines enhanced.<br />
Histogram ........................ Displays the Histogram.<br />
<strong>Camera</strong> Data Display.... Displays the value of iris, gain (ISO) and shutter speed.
Audio Level Display ...... Displays the audio level meter on the LCD screen.<br />
AF Micro Adjustment ... Adjusts the focus for the attached lens.<br />
<strong>Digital</strong> Zoom ................... Sets the digital zoom.<br />
Zoom Lever ..................... Sets the function assigned to the zoom lever.<br />
Zoom Speed ................... Changes the zoom speed when the zoom lever is pressed.<br />
Image Quality/Size<br />
REC Mode .......................... Sets the mode to record movies. When recording fast moving subject, a<br />
high image quality is recommended.<br />
Frame Rate ........................ Sets the frame rate to record movies.<br />
/ Setting................. Sets image quality for recording, playback, or editing movies.<br />
Wide Mode ........................ Sets the horizontal to vertical ratio when recording movies with standard<br />
definition image quality (STD).<br />
Image Size ......................... Sets the photo size.<br />
RAW/JPEG .......................... Selects the compression format of still images.<br />
Playback Function ............. Enables you to view recorded movies/photos (p. 37).<br />
Edit/Copy<br />
Delete.......................................... Deletes movies or photos.<br />
Protect ........................................ Protects movies or photos to avoid deleting.<br />
Copy ............................................ Selects and copies movies or photos to external media.<br />
Direct Copy ............................... Copies images stored on the recording medium to some type of external<br />
media.<br />
Setup<br />
( Media Settings)<br />
Media Info ........................ Displays information on the recording media, such as free space.<br />
Format ............................... Deletes all data on the recording media.<br />
Repair Img. DB F. ............ Repairs the image database file on the recording media (p. 63).<br />
File Number ..................... Sets how to assign the file number.<br />
( Playback Settings)<br />
Data Code ........................ Sets the date and time.<br />
Volume .............................. Adjusts the volume of playback sound (p. 39).<br />
( Connection)<br />
TV Type ............................. Converts the signal depending on the TV connected (p. 41).<br />
Component Output ..... Select this option when you connect your camcorder to a TV with the<br />
component input jack (p. 42).<br />
<strong>HD</strong>MI Resolution ........... Selects the output image resolution when connecting your camcorder to a<br />
TV with an <strong>HD</strong>MI cable (sold separately).<br />
USB Connect ................... Selects which type of media on the camcorder is to be used when the<br />
camcorder is connected to an external device via USB.<br />
USB Connect Setting ... Sets the connection mode when the camcorder is connected to a computer<br />
or a USB device.<br />
Disc Burn .......................... Saves images that have not yet been saved onto a disc.<br />
US<br />
Customizing your camcorder
US<br />
0<br />
( General Settings)<br />
Beep ................................... Sets whether the camcorder sounds operation beeps or not.<br />
LCD Brightness .............. Adjusts the brightness of the LCD screen.<br />
VF Color Temp. ............... Sets the color temperature of the viewfinder.<br />
VF/Panel ........................... Changes the display between the viewfinder and LCD screen.<br />
Display Setting ............... Sets the duration that icons or indicators are displayed on the LCD screen.<br />
REC Lamp ......................... Turns off the recording lamp on the front of your camcorder.<br />
Shooting w/o <strong>Lens</strong>........ Sets whether or not the recording can be started when no lens is attached.<br />
Remote Ctrl ..................... Sets whether the Wireless Remote Commander is to be used or not.<br />
A. Shut Off ........................ Sets your camcorder to turn off automatically (p. 19).<br />
Language Setting ......... Sets the display language (p. 26).<br />
24p Mode* ....................... Shoots 24p movies on a PAL-based system.<br />
Calibration ....................... Calibrates the touch panel.<br />
Battery Info ...................... Displays the battery information.<br />
Version .............................. Displays the version of your camcorder and the lens.<br />
( Clock Settings)<br />
Date & Time Setting ..... Sets the [Date & Time], [Daylight Savings], [Summer Time], or [Date &<br />
Time Format] (p. 24).<br />
Area Setting .................... Adjusts for a time difference without stopping the clock (p. 24).<br />
* NEX-VG900E only
Getting detailed<br />
information from the<br />
“Handycam” Handbook<br />
The “Handycam” Handbook is a user guide<br />
designed to be read on a computer screen.<br />
The “Handycam” Handbook is intended to<br />
be read when you want to know more about<br />
operating your camcorder.<br />
1<br />
2<br />
3<br />
To install the “Handycam”<br />
Handbook on a Windows<br />
computer, place the supplied<br />
CD-ROM in the disc drive of your<br />
computer.<br />
The installation screen appears.<br />
If the screen does not appear, double- click<br />
[Start] [Computer] (in Windows XP,<br />
[My Computer]) (PMHOME) <br />
[install.exe].<br />
Click [Handbook].<br />
Click the desired language<br />
and the model name of your<br />
camcorder [Install], and follow<br />
the on- screen instructions to<br />
install “Handycam” Handbook.<br />
The model name of your camcorder is<br />
printed on the bottom surface.<br />
To view the “Handycam” Handbook,<br />
double-click the short-cut icon on the<br />
computer screen.<br />
When using a Mac, open the [Handbook]<br />
– [US] folder in the CD-ROM, then copy<br />
[Handbook.pdf].<br />
You need Adobe Reader to read “Handycam”<br />
Handbook. If it is not installed on your<br />
computer, you can download it from the Adobe<br />
Systems web page:<br />
http://www.adobe.com/<br />
<br />
Refer to “PlayMemories Home Help Guide” for<br />
details on the supplied software “PlayMemories<br />
Home” (p. 46).<br />
US<br />
1<br />
Customizing your camcorder
US<br />
Additional information<br />
Troubleshooting<br />
If you run into any problems using your<br />
camcorder, follow the steps below.<br />
<br />
Check the list (p. 62 to 64), and<br />
inspect your camcorder.<br />
Remove the power source, attach<br />
the power source again after about 1<br />
minute, and turn the camcorder on.<br />
Press RESET (p. 74) using a pointed<br />
object, and turn the camcorder on.<br />
If you press RESET, all settings,<br />
including the clock setting, are reset.<br />
Contact your <strong>Sony</strong> dealer or local<br />
authorized <strong>Sony</strong> service facility.<br />
See the “Handycam” Handbook (p. 61) for<br />
details on the symptoms of your camcorder, and<br />
“PlayMemories Home Help Guide” (p. 49) on<br />
connecting your camcorder to a computer.<br />
The power does not turn on.<br />
Attach a charged battery pack to the<br />
camcorder (p. 17).<br />
Connect the plug of the AC Adaptor to the<br />
wall outlet (wall socket) (p. 17).<br />
The camcorder does not operate even<br />
when the power is set to on.<br />
It takes a few seconds for your camcorder to<br />
be ready to shoot after the power is turned on.<br />
This is not a malfunction.<br />
Disconnect the AC Adaptor from the wall<br />
outlet (wall socket) or remove the battery<br />
pack, then reconnect it after about 1 minute.<br />
If your camcorder still does not work, press<br />
RESET (p. 74) using a pointed object. (If you<br />
press RESET, all settings, including the clock<br />
setting, are reset.)<br />
The temperature of your camcorder is<br />
<br />
extremely high. Turn off the camcorder and<br />
leave it for a while in a cool place.<br />
The temperature of your camcorder is<br />
extremely low. Leave the camcorder with the<br />
power turned on. If you still cannot operate<br />
your camcorder, turn off the camcorder and<br />
take it to a warm place. Leave the camcorder<br />
there for a while, then turn on the camcorder.<br />
Your camcorder gets warm.<br />
Your camcorder may become warm during<br />
operation. This is not a malfunction.<br />
The power abruptly turns off.<br />
Use the AC Adaptor (p. 18).<br />
Turn on the power again.<br />
Charge the battery pack (p. 17).<br />
Pressing START/STOP or PHOTO does not<br />
record images.<br />
Press MODE to turn on the (Movie) or<br />
(Photo) lamp.<br />
Your camcorder is recording the image you<br />
have just shot on the memory card. You<br />
cannot make any new recordings during this<br />
period.<br />
The recording media is full. Delete<br />
unnecessary images (p. 44).<br />
Total number of movie scenes or photos has<br />
exceeded the recordable capacity of your<br />
camcorder (p. 65). Delete unnecessary images<br />
(p. 44).<br />
The recording stops.<br />
The temperature of your camcorder is<br />
extremely high/low. Turn off your camcorder<br />
and leave it for a while in a cool/warm place.<br />
“PlayMemories Home” cannot be installed.<br />
<br />
Check the computer environment or<br />
installation procedure required to install<br />
“PlayMemories Home” (p. 46).
“PlayMemories Home” does not work<br />
correctly.<br />
Quit “PlayMemories Home” and restart your<br />
computer.<br />
The camcorder is not recognized by the<br />
computer.<br />
Disconnect devices from the USB jack of the<br />
computer other than the keyboard, mouse,<br />
and your camcorder.<br />
Disconnect the USB cable from the computer<br />
and your camcorder, and restart the computer,<br />
then connect the computer and your<br />
camcorder again in an orderly manner.<br />
Self-diagnosis display/Warning<br />
indicators<br />
If indicators appear on the LCD screen or<br />
viewfinder, check the following.<br />
If the problem persists even after you<br />
have tried to fix a couple of times, contact<br />
your <strong>Sony</strong> dealer or local authorized <strong>Sony</strong><br />
service facility. In this case, when you<br />
contact them, give them all the numbers of<br />
the error code beginning with C or E.<br />
C:04:<br />
The battery pack is not an “InfoLITHIUM”<br />
battery pack V series. Use an “InfoLITHIUM”<br />
battery pack (V series) (p. 17).<br />
Connect the DC plug of the AC Adaptor to<br />
your camcorder securely (p. 17).<br />
C:06:<br />
The battery pack temperature is high. Change<br />
the battery pack or place it in a cool place.<br />
C:13: / C:32:<br />
Remove the power source. Reconnect it and<br />
operate your camcorder again.<br />
E::<br />
Follow the steps from on page 62.<br />
<br />
Battery power is low.<br />
<br />
<br />
<br />
<br />
<br />
The battery pack temperature is high. Change<br />
the battery pack or place it in a cool place.<br />
No memory card is inserted (p. 30).<br />
When the indicator flashes, there is not<br />
enough free space for recording images. Delete<br />
unnecessary images (p. 44), or format the<br />
memory card after storing the images on other<br />
media.<br />
The Image Database File is damaged. Check<br />
the data base file by touching (MENU)<br />
[Setup] [Repair Img. DB F.].<br />
The memory card is damaged. Format the<br />
memory card with your camcorder (p. 59).<br />
Incompatible memory card is inserted (p. 31).<br />
<br />
<br />
<br />
The memory card is write-protected.<br />
Access to the memory card was restricted on<br />
another device.<br />
(Warning indicator pertaining to the<br />
external media device)<br />
The image database file may be damaged.<br />
Check the database file by touching<br />
(MENU) [Setup] [Repair Img.<br />
DB F.]<br />
<br />
The external media device is damaged.<br />
US<br />
Additional information
US<br />
(Warning indicator pertaining to<br />
formatting of the external media device)<br />
<br />
<br />
<br />
<br />
<br />
The external media device is damaged.<br />
The external media device is not formatted<br />
correctly.<br />
The camcorder is unsteady. Hold the camcorder<br />
steady with both hands. However, note that<br />
the camera-shake warning indicator does not<br />
disappear.<br />
The memory card is full. Delete unnecessary<br />
images (p. 44).<br />
Photos cannot be recorded during processing.<br />
Wait for a while, then record.<br />
Recording time of<br />
movies/number of<br />
recordable photos<br />
“<strong>HD</strong>” stands for high definition image<br />
quality, and “STD” stands for standard<br />
image quality.<br />
Expected time of recording and<br />
playback with each battery pack<br />
Recording time<br />
Approximate time available when you use a<br />
fully charged battery pack.<br />
Battery pack Continuous<br />
(unit: minute)<br />
Typical recording<br />
recording time<br />
time<br />
Image quality <strong>HD</strong> STD <strong>HD</strong> STD<br />
NP-FV70 160 170 90 95<br />
(supplied) 145 150 80 80<br />
NP-FV100 325 340 180 185<br />
295 305 160 165<br />
Top: When recording with the LCD screen<br />
Bottom: When recording with viewfinder<br />
Each recording time is measured under the<br />
following conditions.<br />
[ REC Mode]: Standard (default<br />
setting)<br />
Using the mount adaptor LA-EA3 (supplied)<br />
and the SAL-2470Z lens (sold separately)<br />
Typical recording time shows the time when<br />
you repeat recording start/stop, switching the<br />
MODE lamp, and zooming.<br />
Times measured when using the camcorder at<br />
25 C (77 °F). 10 C to 30 C (50 °F to 86 °F) is<br />
recommended.<br />
The recording and playback time will be<br />
shorter when you use your camcorder in low<br />
temperatures.<br />
<br />
The recording and playback time will be shorter<br />
depending on the conditions under which you<br />
use your camcorder.<br />
Playing time<br />
Approximate time available when you use a
fully charged battery pack.<br />
(unit: minute)<br />
Battery pack<br />
Image quality <strong>HD</strong> STD<br />
NP-FV70<br />
375 415<br />
(supplied)<br />
315 345<br />
NP-FV100 745 830<br />
625 680<br />
<br />
Top: When recording with the LCD screen<br />
Bottom: When recording with viewfinder<br />
Expected recording time of movies<br />
High definition image quality (<strong>HD</strong>)<br />
16 GB 32 GB<br />
(unit: minute)<br />
64 GB<br />
75 150 305<br />
(75) (150) (305)<br />
85 180 360<br />
(85) (180) (360)<br />
120 245 490<br />
(120) (245) (490)<br />
210 430 865<br />
(160) (325) (655)<br />
370 740 1490<br />
(300) (610) (1225)<br />
Standard definition image quality (STD)<br />
(unit: minute)<br />
16 GB 32 GB 64 GB<br />
220 445 895<br />
(200) (410) (825)<br />
Notes<br />
When using <strong>Sony</strong> memory card.<br />
The recordable time may vary depending on the<br />
recording and subject conditions and [ REC<br />
Mode] and [ Frame Rate] (p. 59).<br />
<br />
The number in ( ) is the minimum recordable<br />
time.<br />
Tips<br />
Your camcorder uses the VBR (Variable Bit<br />
Rate) format to automatically adjust image<br />
quality to suit the recording scene. This<br />
technology causes fluctuations in the recording<br />
time of the media. Movies containing quickly<br />
moving and complex images are recorded at<br />
a higher bit-rate, and this reduces the overall<br />
recording time.<br />
Expected number of recordable<br />
photos<br />
Full size<br />
JPEG RAW RAW & JPEG<br />
16 GB 1600 600 435<br />
32 GB 3200 1200 870<br />
64 GB 6400 2400 1750<br />
APS-C size<br />
JPEG RAW RAW & JPEG<br />
16 GB 3250 1300 950<br />
32 GB 6600 2600 1900<br />
64 GB 13000 5200 3750<br />
<br />
<br />
<br />
<br />
<br />
When [ Image Size] is set to [ 24.0M]<br />
(full size), [ 10.3M] (APS-C size).<br />
When using <strong>Sony</strong> memory card.<br />
The selected image size is effective when the<br />
(Photo) lamp is lit.<br />
The number of recordable photos of memory<br />
card shown is for the maximum image size<br />
of your camcorder. The actual number of<br />
recordable photos is displayed on the LCD<br />
screen during recording (p. 71).<br />
The number of recordable photos of memory<br />
card may vary depending on the recording<br />
conditions.<br />
Tips<br />
You can also use memory card with a capacity<br />
of under 1 GB for recording photos.<br />
The following list shows the bit-rate, pixels and<br />
aspect ratio of each recording mode (movie +<br />
audio, etc.).<br />
US<br />
Additional information
US<br />
High definition image quality (<strong>HD</strong>):<br />
PS: Max. 28 Mbps 1,920 pixels 1,080<br />
pixels/16:9<br />
FX: Max. 24 Mbps 1,920 pixels 1,080<br />
pixels/16:9<br />
FH: Approx. 17 Mbps (average) 1,920 pixels<br />
1,080 pixels/16:9<br />
HQ: Approx. 9 Mbps (average) 1,440 pixels <br />
1,080 pixels/16:9<br />
LP: Approx. 5 Mbps (average) 1,440 pixels <br />
1,080 pixels/16:9<br />
Standard definition image quality (STD):<br />
HQ: Approx. 9 Mbps (average) 720 pixels <br />
480 pixels (NEX-VG900), 720 pixels 576<br />
pixels (NEX-VG900E)/16:9, 4:3<br />
The photo recording pixels and the aspect ratio.<br />
Photo recording mode<br />
Full size:<br />
6,000 dots 4,000 dots/3:2<br />
6,000 dots 3,376 dots/16:9<br />
3,936 dots 2,624 dots/3:2<br />
3,936 dots 2,216 dots/16:9<br />
2,640 dots 1,760 dots/3:2<br />
2,640 dots 1,488 dots/16:9<br />
APS-C size:<br />
3,936 dots 2,624 dots/3:2<br />
3,936 dots 2,216 dots/16:9<br />
2,640 dots 1,760 dots/3:2<br />
2,640 dots 1,488 dots/16:9<br />
1,728 dots 1,152 dots/3:2<br />
1,728 dots 976 dots/16:9<br />
Capturing a photo from a movie<br />
(NEX-VG900):<br />
1,920 dots 1,080 dots/16:9<br />
640 dots 360 dots/16:9<br />
640 dots 480 dots/4:3<br />
Precautions<br />
On use and care<br />
Do not use or store the camcorder and<br />
accessories in the following locations:<br />
Anywhere extremely hot, cold or humid.<br />
Never leave them exposed to temperatures<br />
above 60 C (140 °F), such as under direct<br />
sunlight, near heaters or in a car parked in<br />
the sun. They may malfunction or become<br />
deformed.<br />
Near strong magnetic fields or mechanical<br />
vibration. The camcorder may malfunction.<br />
Near strong radio waves or radiation. The<br />
camcorder may not be able to record properly.<br />
Near AM receivers and video equipment.<br />
Noise may occur.<br />
On a sandy beach or anywhere dusty. If<br />
sand or dust gets in your camcorder, it may<br />
malfunction. Sometimes this malfunction<br />
cannot be repaired.<br />
Near windows or outdoors, where the LCD<br />
screen, the viewfinder or the lens may be<br />
exposed to direct sunlight. This damages the<br />
inside of the viewfinder or the LCD screen.<br />
Operate your camcorder on DC 6.8 V/7.2 V<br />
(battery pack) or DC 8.4 V (AC Adaptor).<br />
For DC or AC operation, use the accessories<br />
recommended in these operating instructions.<br />
Do not let your camcorder get wet, for example,<br />
from rain or sea water. If your camcorder<br />
gets wet, it may malfunction. Sometimes this<br />
malfunction cannot be repaired.<br />
If any solid object or liquid gets inside the<br />
casing, unplug your camcorder and have it<br />
checked by a <strong>Sony</strong> dealer before operating it<br />
any further.<br />
Avoid rough handling, disassembling,<br />
modifying, physical shock, or impact such<br />
as hammering, dropping or stepping on the<br />
product. Be particularly careful of the lens.<br />
Keep the camcorder turning off when you are<br />
not using your camcorder.<br />
Do not wrap your camcorder with a towel, for<br />
example, and operate it. Doing so might cause<br />
heat to build up inside.<br />
When disconnecting the power cord (mains<br />
lead), pull it by the plug and not the cord (lead).<br />
<br />
Do not damage the power cord (mains lead)
such as by placing anything heavy on it.<br />
Do not use a deformed or damaged battery<br />
pack.<br />
Keep metal contacts clean.<br />
If the battery electrolytic liquid has leaked:<br />
Consult your local authorized <strong>Sony</strong> service<br />
facility.<br />
Wash off any liquid that may have contacted<br />
your skin.<br />
If any liquid gets in your eyes, wash with<br />
plenty of water and consult a doctor.<br />
When not using your camcorder for a<br />
long time<br />
To keep your camcorder in optimum state for a<br />
long time, turn it on and let it run by recording<br />
and playing back images about once a month.<br />
Use up the battery pack completely before<br />
storing it.<br />
LCD screen<br />
Do not exert excessive pressure on the LCD<br />
screen, as it may cause damage.<br />
If your camcorder is used in a cold place, a<br />
residual image may appear on the LCD screen.<br />
This is not a malfunction.<br />
While using your camcorder, the back of<br />
the LCD screen may heat up. This is not a<br />
malfunction.<br />
To clean the LCD screen<br />
If hand grease or hand cream remains on the<br />
screen, the coating comes off more easily. Wipe<br />
it early.<br />
The coating may be scratched if you wipe the<br />
screen with a tissue, etc.<br />
If fingerprints and dust get on the screen, it is<br />
recommended that you first remove the dust<br />
with a blower, etc., then use a soft cloth to<br />
remove the fingerprints.<br />
On handling the casing<br />
If the casing is soiled, clean the camcorder body<br />
with a soft cloth lightly moistened with water,<br />
and then wipe the casing with a dry soft cloth.<br />
<br />
Avoid the following to avoid damage to the<br />
finish:<br />
Using chemicals such as thinner, benzine,<br />
alcohol, chemical cloths, repellent, insecticide<br />
and sunscreen<br />
Handling the camcorder with above<br />
substances on your hands<br />
Leaving the casing in contact with rubber or<br />
vinyl objects for a long period of time<br />
About care and storage of the lens<br />
Wipe the surface of the lens clean with a soft<br />
cloth in the following instances:<br />
When there are fingerprints on the lens<br />
surface<br />
In hot or humid locations<br />
When the lens is exposed to salty air such as<br />
at the seaside<br />
Store in a well-ventilated location subject to<br />
little dirt or dust.<br />
To prevent mold, periodically clean the lens as<br />
described above.<br />
On charging the pre-installed<br />
rechargeable battery<br />
Your camcorder has a pre-installed rechargeable<br />
battery to retain the date, time, and other settings<br />
even when the camcorder is turned off. The preinstalled<br />
rechargeable battery is always charged<br />
while your camcorder is connected to the wall<br />
outlet (wall socket) via the AC Adaptor or while<br />
the battery pack is attached. The rechargeable<br />
battery will be fully discharged in about 3 months<br />
if you do not use your camcorder at all. Use<br />
your camcorder after charging the pre-installed<br />
rechargeable battery. However, even if the preinstalled<br />
rechargeable battery is not charged, the<br />
camcorder operation will not be affected as long<br />
as you are not recording the date.<br />
Procedures<br />
Connect your camcorder to a wall outlet (wall<br />
socket) using the supplied AC Adaptor, and leave<br />
it for more than 24 hours.<br />
Note on disposal/transfer of memory<br />
card<br />
Even if you delete data in the memory card or<br />
format the memory card on your camcorder or<br />
a computer, you may not delete data from the<br />
US<br />
Additional information
US<br />
memory card completely. When you give the<br />
memory card to somebody, it is recommended<br />
that you delete data completely using data<br />
deletion software on a computer. Also, when you<br />
dispose of the memory card, it is recommended<br />
that you destroy the actual body of the memory<br />
card.<br />
To change the battery of the Wireless<br />
Remote Commander<br />
While pressing on the tab, inset your fingernail<br />
into the slit to pull out the battery case.<br />
Place a new battery with the + side facing up.<br />
Insert the battery case back into the Wireless<br />
Remote Commander until it clicks.<br />
Tab<br />
WARNING<br />
Battery may explode if mistreated. Do not<br />
recharge, disassemble or dispose of in fire.<br />
When the lithium battery becomes weak, the<br />
operating distance of the Wireless Remote<br />
Commander may shorten, or the Wireless<br />
Remote Commander may not function<br />
properly. In this case, replace the battery with<br />
a <strong>Sony</strong> CR2025 lithium battery. Use of another<br />
battery may present a risk of fire or explosion.<br />
Specifications<br />
System<br />
Signal format:<br />
NEX-VG900:<br />
NTSC color, EIA standards<br />
<strong>HD</strong>TV 1080/60i, 1080/60p specification<br />
NEX-VG900E:<br />
PAL color, CCIR standards<br />
<strong>HD</strong>TV 1080/50i, 1080/50p specification<br />
NTSC color, EIA standards <strong>HD</strong>TV 1080/60i<br />
specification (24p recording mode only)<br />
Movie recording format:<br />
<strong>HD</strong>: MPEG-4 AVC/H.264 AVC<strong>HD</strong> format<br />
Ver.2.0 compatible<br />
STD: MPEG2-PS<br />
Audio recording system:<br />
Dolby <strong>Digital</strong> 2ch/5.1ch<br />
Dolby <strong>Digital</strong> 5.1 Creator<br />
Photo file format<br />
DCF Ver.2.0 Compatible<br />
Exif Ver.2.3 Compatible<br />
MPF Baseline Compatible<br />
Recording media (Movie/Photo)<br />
“Memory Stick PRO Duo” media<br />
SD card (Class 4 or faster)<br />
Viewfinder:<br />
Electronic viewfinder: Color<br />
Screen size: 1.3 cm (0.5 type)<br />
Effective pixel number: 2 359 296 dots<br />
(3 072 768)<br />
Image device: 36.1 mm 24.3 mm (35 mm full<br />
size) CMOS sensor<br />
Recording pixels (still 3:2 JPEG):<br />
Max. 24.0 mega (6 000 4 000) pixels<br />
Gross: Approx. 24 660 000 pixels<br />
Effective (movie, 16:9):<br />
Approx. 20 300 000 pixels<br />
Effective (photo, 16:9):<br />
Approx. 20 300 000 pixels<br />
Effective (photo, 3:2):<br />
Approx. 24 300 000 pixels<br />
Color temperature: [Auto], [One Push], [Indoor]<br />
(3 200 K), [Outdoor] (5 600 K), manual<br />
(2 500 K - 9 900 K)<br />
Minimum illumination<br />
8 lx (lux) (in default setting, shutter speed<br />
1/60 second (NEX-VG900) / 1/50 second<br />
(NEX-VG900E), gain: 30 dB, aperture F3.5)<br />
Input/Output connectors<br />
A/V Remote Connector: Component/video and<br />
audio output jack<br />
<strong>HD</strong>MI OUT jack: <strong>HD</strong>MI mini connector
USB jack: mini-AB<br />
NEX-VG900E: output only<br />
Headphone jack: Stereo minijack ( 3.5 mm)<br />
MIC input jack: Stereo minijack ( 3.5 mm)<br />
LCD screen<br />
Picture: 7.5 cm (3.0 type, aspect ratio 16:9)<br />
Total number of pixels: 921 600 (1 920 480)<br />
General<br />
Power requirements: DC 6.8 V/7.2 V (battery<br />
pack) DC 8.4 V (AC Adaptor)<br />
Average power consumption:<br />
During camera recording using viewfinder at<br />
normal brightness:<br />
<strong>HD</strong>: 5.2 W STD: 5.0 W<br />
During camera recording using LCD screen<br />
at normal brightness:<br />
<strong>HD</strong>: 4.7 W STD: 4.5 W<br />
Operating temperature: 0 C to 40 C (32 °F to<br />
104 °F)<br />
Storage temperature: –20 C to + 60 C (‒4 °F to<br />
+140 °F)<br />
Dimensions (approx.):<br />
105 mm 130 mm 223 mm (4 1/4 in. ×<br />
5 1/8 in. × 8 7/8 in.) (w/h/d) including the<br />
projecting parts<br />
105 mm 130 mm 227 mm (4 1/4 in. ×<br />
5 1/8 in. × 9 in.) (w/h/d) including the<br />
projecting parts, supplied battery pack<br />
(NP-FV70) and mount adaptor (LA-EA3)<br />
Mass (approx.)<br />
Camcorder body only:<br />
Approx. 825 g (1 lb 13 oz)<br />
When recording:<br />
Approx. 1 030 g (2 lb 4 oz)<br />
(With supplied battery pack (NP-FV70) and<br />
mount adaptor LA-EA3)<br />
AC Adaptor AC-L200D<br />
Power requirements: AC 100 V - 240 V,<br />
50 Hz/60 Hz<br />
Current consumption: 0.35 A - 0.18 A<br />
Power consumption: 18 W<br />
Output voltage: DC 8.4 V<br />
Output current: 1.7 A<br />
Operating temperature: 0 C to 40 C (32 °F to<br />
104 °F)<br />
Storage temperature: –20 C to + 60 C (‒4 °F to<br />
+140 °F)<br />
Dimensions (approx.): 48 mm 29 mm 81 mm<br />
(1 15/16 in. × 1 3/16 in. × 3 1/4 in.) (w/h/d)<br />
excluding the projecting parts<br />
Mass (approx.): 150 g (5.0 oz) excluding the<br />
power cord (mains lead)<br />
Rechargeable battery pack NP-FV70<br />
Maximum output voltage: DC 8.4 V<br />
Output voltage: DC 6.8 V<br />
Maximum charge voltage: DC 8.4 V<br />
Maximum charge current: 3.0 A<br />
Capacity<br />
Typical: 14.0 Wh (2 060 mAh)<br />
Minimum: 13.0 Wh (1 960 mAh)<br />
Type: Li-ion<br />
Mount adaptor (LA-EA3)<br />
Dimensions (approx.):<br />
76 mm 69 mm 35 mm (3 in. 2 3/4 in. <br />
1 7/16 in.) (w/h/d)<br />
Mass (approx.)<br />
105 g (3.7 oz)<br />
Design and specifications of your camcorder and<br />
accessories are subject to change without notice.<br />
Manufactured under license from Dolby<br />
Laboratories.<br />
US<br />
Additional information
US<br />
0<br />
On trademarks<br />
“Handycam” and are<br />
registered trademarks of <strong>Sony</strong> Corporation.<br />
“AVC<strong>HD</strong> Progressive” and “AVC<strong>HD</strong><br />
Progressive” logotype are trademarks of<br />
Panasonic Corporation and <strong>Sony</strong> Corporation.<br />
“Memory Stick,” “ ,” “Memory Stick Duo,”<br />
“ ,” “Memory Stick PRO<br />
Duo,” “ ,” “Memory<br />
Stick PRO-HG Duo,”<br />
“ ,” “Memory Stick<br />
XC-HG Duo,” “ ,”<br />
“MagicGate,” “ ,” “MagicGate<br />
Memory Stick” and “MagicGate Memory Stick<br />
Duo” are trademarks or registered trademarks of<br />
<strong>Sony</strong> Corporation.<br />
“InfoLITHIUM” is a trademark of <strong>Sony</strong><br />
Corporation.<br />
“BRAVIA” is a registered trademark of <strong>Sony</strong><br />
Corporation.<br />
Blu-ray Disc and Blu-ray are trademarks<br />
of the Blu-ray Disc Association.<br />
Dolby and the double-D symbol are trademarks<br />
of Dolby Laboratories.<br />
<strong>HD</strong>MI, the <strong>HD</strong>MI logo and High-Definition<br />
Multimedia Interface are trademarks or<br />
registered trademarks of <strong>HD</strong>MI Licensing LLC<br />
in the United States and other countries.<br />
Microsoft, Windows, Windows Vista, and<br />
DirectX are either registered trademarks or<br />
trademarks of Microsoft Corporation in the<br />
United States and/or other countries.<br />
Mac and Mac OS are registered trademarks of<br />
Apple Inc. in the U.S. and other countries.<br />
Intel, Intel Core, and Pentium are trademarks<br />
or registered trademarks of Intel Corporation<br />
or its subsidiaries in the United States and other<br />
countries.<br />
“ ” and “PlayStation” are registered<br />
trademarks of <strong>Sony</strong> Computer Entertainment<br />
Inc..<br />
Adobe, the Adobe logo, and Adobe Acrobat<br />
are either registered trademarks or trademarks<br />
of Adobe Systems Incorporated in the United<br />
States and/or other countries.<br />
SDXC logo is a trademark of SD-3C, LLC.<br />
MultiMediaCard is a trademark of<br />
MultiMediaCard Association.<br />
All other product names mentioned herein may<br />
be the trademarks or registered trademarks of<br />
their respective companies. Furthermore, and<br />
are not mentioned in each case in this manual.<br />
Add further enjoyment with your PlayStation 3<br />
by downloading the application for PlayStation 3<br />
from PlayStation Store (where available.)<br />
The application for PlayStation 3 requires<br />
PlayStation Network account and application<br />
download.<br />
Accessible in areas where the PlayStation Store is<br />
available.
Quick reference<br />
Screen indicators<br />
Bottom<br />
Left<br />
Indicator Meaning<br />
MENU button<br />
Self-timer recording<br />
Wide Mode<br />
<br />
[Face Detection] set to<br />
[Off]<br />
Manual focus<br />
/<br />
/<br />
/<br />
Focus Mode<br />
SteadyShot off<br />
Zebra<br />
Peaking<br />
Cinematone<br />
Destination<br />
Picture Effect<br />
Center<br />
Indicator Meaning<br />
[STBY]/[REC] Recording status<br />
Processing<br />
Slide show set<br />
Warning<br />
<br />
Center<br />
Left Right<br />
Playback mode<br />
Right<br />
Indicator Meaning<br />
60i<br />
50i<br />
Recording image quality<br />
(<strong>HD</strong>/STD), frame rate<br />
(60p/60i/24p), (50p/50i/<br />
25p) and recording mode<br />
(PS/FX/FH/HQ/LP)<br />
60% Remaining battery<br />
2.0 <strong>Digital</strong> Zoom<br />
Optical zoom<br />
0:00:00<br />
00Min<br />
9999<br />
100/112<br />
Drive Mode<br />
RAW/JPEG<br />
Recording/playback/<br />
editing media<br />
Counter (hour:minute:<br />
second)<br />
Estimated recording<br />
remaining time<br />
Photo size<br />
Approximate number of<br />
recordable photos and<br />
photo size<br />
Playback folder<br />
Current playing movie or<br />
photo/Number of total<br />
recorded movies or photos<br />
An external media device<br />
is connected<br />
APS-C Size Capture<br />
US<br />
1<br />
Quick reference
US<br />
Bottom<br />
Indicator Meaning<br />
View Images button<br />
Wind Noise Reduct.<br />
Audio Mode<br />
Audio Rec Level<br />
EV AE Shift<br />
Audio Level Display<br />
Exposure Auto/ Exposure<br />
Manual<br />
IRIS<br />
12dB Gain<br />
ISO200 ISO<br />
4000 Shutter Speed<br />
Slide show button<br />
101-0005 Data file name<br />
<br />
Protected image<br />
<br />
5500K A3 G3<br />
Flash<br />
Flash Level<br />
Red Eye Reduction<br />
White Balance<br />
Indicators and their positions are approximate<br />
and may differ from what you actually see.<br />
<br />
Some indicators may not appear, depending on<br />
your camcorder model.
Parts and controls<br />
Viewfinder (p. 28)<br />
Eye sensor<br />
Viewfinder lens adjustment lever (p. 28)<br />
PHOTO button (p. 34)<br />
(Movie)/ (Photo) lamps (p. 33)<br />
Hook for shoulder strap<br />
MODE button (p. 33)<br />
ON/OFF (power) switch (p. 24)<br />
START/STOP button (p. 33)<br />
BATT (battery) release lever (p. 18)<br />
Accessory shoe<br />
Attach a gun microphone (sold separately),<br />
etc. If you attach accessories to the accessory<br />
shoe and multi interface shoe simultaneously,<br />
the accessories may collide with each other<br />
and be damaged.<br />
Multi interface shoe<br />
For details on compatible accessories of the<br />
multi interface shoe, visit the <strong>Sony</strong> web site<br />
in your area, or consult your <strong>Sony</strong> dealer or<br />
localauthorized <strong>Sony</strong> service facility.<br />
Operations with other manufacture’s<br />
accessories are not guaranteed.<br />
MIC (PLUG IN POWER) jack<br />
When an external microphone (sold<br />
separately) is connected, it takes precedence<br />
over the built in microphone, or a microphone<br />
attached to the multi interface shoe.<br />
START/STOP button on the grip<br />
Use this button when recording at a different<br />
angle.<br />
EXPANDED FOCUS button<br />
The EXPANDED FOCUS button has a tactile<br />
dot. Use as a guide for the operation.<br />
<strong>HD</strong>MI OUT jack (p. 41)<br />
(USB) jack (p. 52)<br />
NEX-VG900E: output only<br />
Zoom lever<br />
CHG (charge) lamp (p. 17)<br />
US<br />
Quick reference
US<br />
Microphone<br />
Hook for shoulder strap<br />
IRIS button<br />
GAIN/ISO button<br />
SHUTTER SPEED button<br />
MANUAL button (p. 36)<br />
MANUAL dial (p. 36)<br />
LCD screen/Touch panel<br />
If you rotate the LCD panel 180 degrees, you<br />
can close the LCD panel with the LCD screen<br />
facing out. This is convenient during playback<br />
operations.<br />
RESET button<br />
Press RESET using a pointed object.<br />
Press RESET to initialize all the settings<br />
including the clock setting.<br />
Speaker<br />
ZEBRA button<br />
(View Images) button (p. 37)<br />
DISPLAY button (p. 27)<br />
PEAKING button<br />
PROGRAM AE button<br />
WHITE BALANCE button<br />
Memory card access lamp (p. 30)<br />
While the lamp is lit or flashing, the<br />
camcorder is reading or writing data.<br />
Memory card slot (p. 30)<br />
FOCUS button<br />
Battery terminal (p. 17)
DC IN jack (p. 17)<br />
(headphones) jack<br />
Use stereo minijack headphones.<br />
A/V Remote Connector (p. 41)<br />
This terminal is to interface your camcorder<br />
to another device. You can output still images,<br />
movies and sound to a connected TV, or<br />
control your camcorder when it is mounted<br />
on a remote control video tripod.<br />
Grip belt (p. 32)<br />
Tripod receptacle (p. 36)<br />
Mount<br />
Image sensor<br />
Do not touch or dirty the image sensor.<br />
<strong>Lens</strong> contacts<br />
Do not touch or dirty the lens contacts.<br />
<strong>Lens</strong> lock pin<br />
<strong>Lens</strong> release button<br />
<strong>Camera</strong> recording lamp<br />
The lamp flashes when the remaining<br />
recording media capacity or battery power<br />
is low.<br />
Remote sensor (p. 60)<br />
US<br />
Quick reference
US<br />
Index<br />
A<br />
A/V connecting cable...........42, 55<br />
B<br />
Battery pack .................................17<br />
C<br />
Care ..............................................66<br />
Charging the battery pack .........17<br />
Charging the battery pack abroad<br />
.......................................................19<br />
Clock Set ......................................24<br />
Computer.....................................46<br />
Computer system ........................46<br />
Connection ..................................41<br />
Copy .............................................52<br />
D<br />
Data Code ....................................25<br />
Date/Time ....................................25<br />
Delete ...........................................44<br />
Disc recorder ...............................55<br />
E<br />
Event Index ..................................37<br />
External media ............................52<br />
F<br />
Fully charged ...............................17<br />
H<br />
“Handycam” Handbook .............61<br />
I<br />
Image Data Converter ................50<br />
Install ............................................46<br />
L<br />
Language Setting ........................26<br />
<strong>Lens</strong> ..............................................20<br />
M<br />
Maintenance ................................66<br />
MANUAL dial.............................36<br />
Media Settings .............................30<br />
“Memory Stick” media ...............31<br />
“Memory Stick PRO-HG Duo”<br />
media ............................................31<br />
“Memory Stick PRO Duo” media<br />
.......................................................31<br />
“Memory Stick XC-HG Duo”<br />
media ............................................31<br />
Menus ...........................................58<br />
Movies ....................................33, 39<br />
P<br />
Photos ....................................34, 40<br />
Playing..........................................37<br />
PlayMemories Home..................49<br />
Power on ......................................24<br />
Precautions ..................................66<br />
R<br />
Recording ....................................32<br />
Recording and playback time ...64<br />
Recording media.........................30<br />
Recording time of movies/<br />
number of recordable photos ....64<br />
RESET ..........................................74<br />
S<br />
Saving images in external media<br />
.......................................................52<br />
Screen indicators ........................71<br />
Self-diagnosis display .................63<br />
Setting the date and time ...........24<br />
Software .......................................46<br />
Specifications ..............................68<br />
T<br />
Thumbnail ...................................44<br />
Tripod.....................................36, 75<br />
Troubleshooting ..........................62<br />
Turning the power on ................24<br />
TV .................................................41<br />
V<br />
VBR ..............................................65<br />
W<br />
Wall outlet (wall socket) ............17<br />
Warning indicators .....................63<br />
Windows ......................................46<br />
You will find the menu lists<br />
on pages 58 to 60.
ES<br />
Lea esto antes de<br />
empezar<br />
Antes de utilizar la unidad, lea<br />
detenidamente este manual y consérvelo<br />
para consultarlo en el futuro.<br />
Nombre del producto: <strong>Video</strong>cámara<br />
<strong>Digital</strong><br />
Modelo: NEX-VG900/VG900E<br />
AVISO<br />
Para reducir el riesgo de incendios o<br />
descargas eléctricas,<br />
1) no exponga la unidad a la lluvia o la<br />
humedad.<br />
2) no coloque sobre el aparato objetos<br />
que contengan líquidos, como, por<br />
ejemplo, jarrones.<br />
No exponga las pilas a fuentes de calor<br />
excesivo, como la luz solar directa, el<br />
fuego o similares.<br />
PRECAUCIÓN<br />
Batería<br />
Si la batería se manipula indebidamente,<br />
puede explotar y causar un incendio o<br />
provocarle quemaduras químicas. Tenga en<br />
cuenta las siguientes precauciones.<br />
No desmonte el producto.<br />
No aplaste ni exponga la batería a impactos tales<br />
como golpes o caídas, ni la deje caer o la pise.<br />
No provoque un cortocircuito en la batería<br />
ni permita que objetos metálicos entren en<br />
contacto con sus terminales.<br />
No exponga la batería a temperaturas superiores<br />
a 60 °C como a la luz solar directa, o en el<br />
interior de un automóvil estacionado al sol.<br />
No la incinere ni la arroje al fuego.<br />
No manipule baterías de iones de litio dañadas<br />
o con fugas.<br />
Asegúrese de cargar la batería con un<br />
cargador de baterías original de <strong>Sony</strong> o con un<br />
dispositivo que pueda cargarla.<br />
Mantenga la batería fuera del alcance de niños<br />
pequeños.<br />
Mantenga la batería seca.<br />
Sustitúyala únicamente por otra del mismo tipo<br />
o equivalente recomendada por <strong>Sony</strong>.<br />
<br />
Deshágase de la baterías usada lo antes posible<br />
según el procedimiento que se describe en las<br />
instrucciones.<br />
Sustituya la batería únicamente por otra del<br />
tipo especificado. De lo contrario, es posible<br />
que se produzcan incendios o lesiones.<br />
Adaptador de ca<br />
No utilice el adaptador de ca en un lugar<br />
estrecho (por ejemplo, entre la pared y un<br />
mueble).<br />
Utilice una toma de pared cercana al usar el<br />
adaptador de ca. Desconecte el adaptador<br />
de ca de la toma de pared inmediatamente<br />
si se produce algún fallo al utilizar la<br />
videocámara.<br />
Incluso con la videocámara desconectada,<br />
ésta seguirá recibiendo alimentación de<br />
ca (corriente) mientras esté conectada a la<br />
toma de pared mediante el adaptador de ca.<br />
Nota sobre el cable de alimentación<br />
El cable de alimentación está diseñado para<br />
utilizarlo única y exclusivamente con esta<br />
videocámara, y no debe utilizarse con otros<br />
aparatos eléctricos.<br />
Un exceso de presión sonora de los<br />
auriculares puede ocasionar la pérdida de la<br />
capacidad auditiva.
PARA USUARIOS EN EUROPA<br />
Aviso para los clientes de países en los<br />
que se aplican las directivas de la UE<br />
El fabricante de este producto es <strong>Sony</strong><br />
Corporation, 1-7-1 Konan Minato-ku Tokyo,<br />
108-0075, Japón. El representante autorizado<br />
en lo referente al cumplimiento de la directiva<br />
EMC y a la seguridad de los productos es<br />
<strong>Sony</strong> Deutschland GmbH, Hedelfinger<br />
Strasse 61, 70327 Stuttgart, Alemania. Para<br />
resolver cualquier asunto relacionado con<br />
el soporte técnico o la garantía, consulte las<br />
direcciones que se indican en los documentos<br />
de soporte técnico y garantía suministrados<br />
por separado.<br />
Este producto se ha probado y cumple con<br />
la normativa que establece la Directiva<br />
EMC si se utiliza un cable de conexión de<br />
menos de 3 metros de longitud.<br />
ATENCIÓN<br />
Los campos electromagnéticos a<br />
frecuencias específicas podrán influir en la<br />
imagen y el sonido de esta unidad.<br />
Aviso<br />
Si la electricidad estática o el<br />
electromagnetismo interrumpen la<br />
transmisión de datos (fallo), reinicie<br />
la aplicación o desconecte el cable de<br />
comunicación (USB, etc.) y vuelva a<br />
conectarlo.<br />
Tratamiento de los equipos<br />
eléctricos y electrónicos al<br />
final de su vida útil (aplicable<br />
en la Unión Europea y en<br />
países europeos con sistemas<br />
de tratamiento selectivo de<br />
residuos)<br />
Este símbolo en el equipo o en su<br />
embalaje indica que el presente producto<br />
no puede ser tratado como residuos<br />
doméstico normal. Debe entregarse en<br />
el correspondiente punto de recogida<br />
de equipos eléctricos y electrónicos. Al<br />
asegurarse de que este producto se desecha<br />
correctamente, usted ayuda a prevenir las<br />
consecuencias potencialmente negativas<br />
para el medio ambiente y la salud humana<br />
que podrían derivarse de la incorrecta<br />
manipulación en el momento de deshacerse<br />
de este producto. El reciclaje de materiales<br />
ayuda a conservar los recursos naturales.<br />
Para recibir información detallada sobre<br />
el reciclaje de este producto, póngase en<br />
contacto con el ayuntamiento, el punto de<br />
recogida más cercano o el establecimiento<br />
donde ha adquirido el producto.<br />
Tratamiento de las baterías al<br />
final de su vida útil (aplicable<br />
en la Unión Europea y en<br />
países europeos con sistemas<br />
de tratamiento selectivo de<br />
residuos)<br />
Este símbolo en la batería o en el embalaje<br />
indica que la batería proporcionada con<br />
este producto no puede ser tratada como<br />
un residuo doméstico normal.<br />
En algunas baterías este símbolo puede<br />
utilizarse en combinación con un símbolo<br />
químico. El símbolo químico del mercurio<br />
(Hg) o del plomo (Pb) se añadirá si la<br />
batería contiene más del 0,0005% de<br />
mercurio o del 0,004% de plomo.<br />
Al asegurarse de que estas baterías se<br />
desechan correctamente, usted ayuda a<br />
prevenir las consecuencias potencialmente<br />
negativas para el medio ambiente y la<br />
salud humana que podrían derivarse de la<br />
incorrecta manipulación en el momento<br />
de deshacerse de la batería. El reciclaje de<br />
materiales ayuda a conservar los recursos<br />
naturales.<br />
En el caso de productos que por razones de<br />
seguridad, rendimiento o mantenimiento<br />
de datos, sea necesaria una conexión<br />
permanente con la batería incorporada, esta<br />
batería solo deberá ser reemplazada por<br />
personal técnico cualificado para ello.<br />
Para asegurarse de que la batería será<br />
tratada correctamente, entregue el producto<br />
al final de su vida útil en un punto de<br />
ES<br />
ES
ES<br />
recogida para el reciclado de aparatos<br />
eléctricos y electrónicos.<br />
Para las demás baterías, consulte la sección<br />
donde se indica cómo extraer la batería<br />
del producto de forma segura. Deposite<br />
la batería en el correspondiente punto de<br />
recogida para el reciclado de baterías.<br />
Para recibir información detallada sobre el<br />
reciclaje de este producto o de la batería,<br />
póngase en contacto con el ayuntamiento,<br />
el punto de recogida más cercano o el<br />
establecimiento donde ha adquirido el<br />
producto.<br />
Utilización de la videocámara<br />
No sostenga la videocámara por las siguientes<br />
partes ni por las tapas de las tomas.<br />
Visor Pantalla de cristal líquido<br />
Objetivo Micrófono incorporado<br />
<br />
La videocámara no está protegida contra el<br />
polvo, las salpicaduras ni la humedad. Consulte<br />
“Precauciones” (pág. 63).<br />
Elementos de menú, panel de cristal<br />
líquido, visor y objetivo<br />
Los elementos de menú que aparezcan<br />
atenuados no estarán disponibles en las<br />
condiciones de grabación o reproducción<br />
actuales.<br />
<br />
<br />
<br />
<br />
<br />
La pantalla de cristal líquido y el visor se han<br />
fabricado con tecnología de muy alta precisión,<br />
lo que hace que más del 99,99% de los píxeles<br />
sean operativos para uso efectivo. Sin embargo,<br />
es posible que aparezcan constantemente<br />
algunos pequeños puntos negros o brillantes<br />
(blancos, rojos, azules o verdes) en la pantalla<br />
de cristal líquido. Estos puntos son el resultado<br />
normal del proceso de fabricación y no afectan<br />
en modo alguno a la grabación.<br />
Puntos negros<br />
Puntos blancos, rojos, azules o verdes<br />
No grabe el sol directamente ni deje la<br />
videocámara al sol durante un período<br />
de tiempo prolongado. El interior de la<br />
videocámara podría dañarse. Si se enfoca la<br />
luz del sol hacia un objeto cercano se puede<br />
provocar un incendio. Cuando tenga que dejar<br />
la videocámara expuesta a la luz solar directa,<br />
coloque la tapa del objetivo.<br />
La exposición de la pantalla de cristal líquido,<br />
el visor o el objetivo a la luz solar directa<br />
durante períodos de tiempo prolongados puede<br />
provocar fallos de funcionamiento.<br />
No enfoque directamente hacia el sol. Si lo<br />
hace, puede ocasionar fallos de funcionamiento<br />
en la videocámara. Tome fotografías del sol<br />
solamente en condiciones de baja intensidad,<br />
como al atardecer.<br />
No mire hacia el sol o hacia una luz intensa a<br />
través de un objetivo desinstalado. Si lo hace<br />
podría causarle daños irreparables a los ojos.<br />
Acerca del ajuste del idioma<br />
Para ilustrar los procedimientos operativos<br />
se utilizan indicaciones en pantalla en cada<br />
idioma local. Si es necesario, cambie el idioma<br />
de la pantalla antes de utilizar la videocámara<br />
(pág. 21).
Acerca de la grabación<br />
<br />
<br />
<br />
<br />
<br />
<br />
Para asegurar un funcionamiento estable de la<br />
tarjeta de memoria, se recomienda formatearla<br />
con la videocámara antes del primer uso. Al<br />
formatear la tarjeta de memoria se eliminarán<br />
todos los datos que contiene de forma<br />
irrecuperable. Guarde los datos importantes en<br />
su PC, etc.<br />
Antes de comenzar a grabar, pruebe las<br />
funciones de grabación para asegurarse de que<br />
la imagen y el sonido se graben sin problemas.<br />
No es posible compensar el contenido de las<br />
grabaciones, ni siquiera aunque no sea posible<br />
grabar o reproducir a causa de un fallo de<br />
funcionamiento de la videocámara, de la tarjeta<br />
de memoria, etc.<br />
Para ver grabaciones realizadas con la<br />
videocámara en un televisor, necesita un<br />
televisor con sistema NTSC para el modelo<br />
NEX-VG900, y un televisor con sistema PAL<br />
para el modelo NEX-VG900E.<br />
Los programas de televisión, películas, cintas de<br />
vídeo y demás materiales pueden estar sujetos a<br />
derechos de autor. La grabación no autorizada<br />
de tales materiales puede ir en contra de las<br />
leyes sobre los derechos de autor.<br />
Respete las normas locales cuando use la<br />
videocámara.<br />
Notas sobre la reproducción<br />
Es posible que las imágenes grabadas con<br />
la videocámara no se puedan reproducir<br />
normalmente en otros dispositivos. Asimismo,<br />
es posible que las imágenes grabadas con otros<br />
dispositivos no se puedan reproducir en la<br />
videocámara.<br />
Las películas con calidad de imagen estándar<br />
(STD) grabadas en tarjetas de memoria SD no<br />
se pueden reproducir en equipos AV de otros<br />
fabricantes.<br />
DVD grabados con calidad de imagen<br />
<strong>HD</strong> (alta definición)<br />
Los DVD grabados con calidad de imagen<br />
de alta definición (<strong>HD</strong>) pueden reproducirse<br />
en dispositivos compatibles con la norma<br />
AVC<strong>HD</strong>. Los discos grabados con calidad de<br />
imagen de alta definición (<strong>HD</strong>) no se pueden<br />
reproducir en los reproductores/grabadoras de<br />
DVD, puesto que no son compatibles con el<br />
formato AVC<strong>HD</strong>. Si inserta un disco grabado<br />
con formato AVC<strong>HD</strong> (calidad de imagen de alta<br />
definición (<strong>HD</strong>)) en un reproductor/grabadora<br />
de DVD, es posible que no pueda expulsarlo.<br />
Guarde todos los datos de imagen<br />
grabados<br />
Para evitar que se pierdan sus datos de imagen,<br />
guarde todas las imágenes grabadas en soportes<br />
externos periódicamente. Consulte la página<br />
40 para guardar imágenes en un ordenador,<br />
y la página 47 para guardar imágenes en<br />
dispositivos externos.<br />
Los tipos de discos y soportes en los que pueden<br />
grabarse imágenes dependen del [ Modo<br />
Grabación] que estaba seleccionado cuando se<br />
grabaron las imágenes. Las películas grabadas<br />
con [Calidad 60p ] (NEX-VG900),<br />
[Calidad 50p ] (NEX-VG900E) o<br />
[Calidad superior ] pueden guardarse en un<br />
soporte externo o en discos Blu-ray (pág. 47).<br />
Notas referentes a la batería/adaptador<br />
de alimentación de ca<br />
Asegúrese de extraer la batería o el adaptador<br />
de alimentación de ca después de apagar la<br />
videocámara.<br />
<br />
Sujete la videocámara y la clavija de cc para<br />
desconectar el adaptador de alimentación de ca<br />
de la videocámara.<br />
ES
ES<br />
Nota acerca de la temperatura de la<br />
videocámara o la batería<br />
Si la temperatura de la videocámara o de la<br />
batería aumenta o desciende excesivamente,<br />
es posible que no se puedan grabar o<br />
reproducir datos en la videocámara, ya que en<br />
tales situaciones se activan las funciones de<br />
protección. En tal caso, aparece un indicador en<br />
la pantalla de cristal líquido o en el visor.<br />
Cuando la videocámara se encuentra<br />
conectada a un ordenador o un<br />
accesorio<br />
No intente formatear la tarjeta de memoria de<br />
la videocámara en un ordenador. Si lo hace,<br />
es posible que la videocámara no funcione<br />
correctamente.<br />
Cuando conecte la videocámara a otro<br />
dispositivo mediante un cable de comunicación,<br />
asegúrese de insertar la clavija del conector en la<br />
dirección correcta. Si se introduce la clavija del<br />
conector a la fuerza en la dirección incorrecta,<br />
podría dañar el terminal y provocar un fallo de<br />
funcionamiento en la videocámara.<br />
Si no puede grabar o reproducir<br />
imágenes, ejecute [Formatear]<br />
Si graba o elimina imágenes repetidamente<br />
durante mucho tiempo, los datos de la tarjeta<br />
de memoria se fragmentarán. No se pueden<br />
guardar ni grabar imágenes. En tal caso, guarde<br />
primero las imágenes en un PC o similar y,<br />
a continuación, toque (MENU) <br />
[Configuración] [ ( Ajustes de<br />
soporte)] [Formatear] <br />
para ejecutar [Formatear].<br />
Notas con respecto a los accesorios<br />
opcionales<br />
Se recomienda utilizar accesorios <strong>Sony</strong> originales.<br />
Es posible que en algunos países o regiones no<br />
estén disponibles accesorios originales de <strong>Sony</strong>.<br />
Acerca de este manual, sus ilustraciones y<br />
las imágenes en pantalla<br />
Las imágenes de ejemplo que se utilizan en este<br />
manual con carácter ilustrativo se han tomado<br />
con una cámara digital de imágenes fijas, por lo<br />
que pueden parecer diferentes a las imágenes y<br />
los indicadores de pantalla que aparecen en la<br />
videocámara. Asimismo, las ilustraciones de la<br />
videocámara y su indicación en la pantalla se<br />
han exagerado o simplificado para facilitar su<br />
comprensión.<br />
En este manual, el disco DVD grabado con calidad<br />
de imagen de alta definición (<strong>HD</strong>) se llama disco<br />
AVC<strong>HD</strong>.<br />
El diseño y las especificaciones de la videocámara<br />
y sus accesorios están sujetos a cambios sin previo<br />
aviso.<br />
Los indicadores de pantalla de este manual<br />
pertenecen al modelo NEX-VG900.<br />
Notas respecto al uso<br />
No realice ninguna de las operaciones<br />
siguientes. Si lo hace, podría dañar la tarjeta de<br />
memoria, imposibilitar la reproducción de las<br />
imágenes grabadas o provocar otros fallos de<br />
funcionamiento.<br />
Expulsar la tarjeta de memoria cuando el<br />
indicador de acceso (pág. 25) está encendido o<br />
parpadeando<br />
Extraer la batería o el adaptador de alimentación<br />
de ca de la videocámara o aplicar vibraciones<br />
o golpes mecánicos a la videocámara cuando<br />
los indicadores (película)/ (fotografía)<br />
(pág. 28) o el indicador de acceso (pág. 25) están<br />
encendidos o parpadeando<br />
<br />
Cuando utilice una bandolera (se vende por<br />
separado), no golpee la videocámara contra otros<br />
objetos.
Índice de contenido<br />
Lea esto antes de empezar. . . . . . . . . . . . . . . . . . . . . . . . . . . . . . . . . . . . . . . . . . . . . . . . . . . . . . . . . . . . . . . . . . . . . . . 2<br />
Introducción<br />
Paso 1: Comprobación de los elementos suministrados.. . . . . . . . . . . . . . . . . . . . . . . . . . . . . . . . . . . 9<br />
Paso 2: Instalación de los accesorios suministrados.. . . . . . . . . . . . . . . . . . . . . . . . . . . . . . . . . . . . . . 11<br />
Paso 3: Carga de la batería.. . . . . . . . . . . . . . . . . . . . . . . . . . . . . . . . . . . . . . . . . . . . . . . . . . . . . . . . . . . . . . . . . . . . . 12<br />
Carga de la batería en el extranjero. . . . . . . . . . . . . . . . . . . . . . . . . . . . . . . . . . . . . . . . . . . . . . . . . 14<br />
Paso 4: Colocación del objetivo.. . . . . . . . . . . . . . . . . . . . . . . . . . . . . . . . . . . . . . . . . . . . . . . . . . . . . . . . . . . . . . . 15<br />
Paso 5: Encendido de la videocámara y ajuste de la fecha y la hora.. . . . . . . . . . . . . . . . . . . 19<br />
Cambio del ajuste de idioma.. . . . . . . . . . . . . . . . . . . . . . . . . . . . . . . . . . . . . . . . . . . . . . . . . . . . . . . . . 21<br />
Paso 6: Realización de ajustes de configuración antes de la grabación. . . . . . . . . . . . . . . 22<br />
Paso 7: Inserción de una tarjeta de memoria. . . . . . . . . . . . . . . . . . . . . . . . . . . . . . . . . . . . . . . . . . . . . . . 25<br />
Grabación/reproducción<br />
Grabación. . . . . . . . . . . . . . . . . . . . . . . . . . . . . . . . . . . . . . . . . . . . . . . . . . . . . . . . . . . . . . . . . . . . . . . . . . . . . . . . . . . . . . . . . . 27<br />
Selección del modo de grabación. . . . . . . . . . . . . . . . . . . . . . . . . . . . . . . . . . . . . . . . . . . . . . . . . . . 30<br />
Ajuste para las condiciones de disparo. . . . . . . . . . . . . . . . . . . . . . . . . . . . . . . . . . . . . . . . . . . . . . . . . . . . . . 31<br />
Reproducción en la videocámara. . . . . . . . . . . . . . . . . . . . . . . . . . . . . . . . . . . . . . . . . . . . . . . . . . . . . . . . . . . . . 32<br />
Reproducción de imágenes en un televisor.. . . . . . . . . . . . . . . . . . . . . . . . . . . . . . . . . . . . . . . . . . . . . . . . 36<br />
Operaciones avanzadas<br />
Eliminación de películas y fotografías.. . . . . . . . . . . . . . . . . . . . . . . . . . . . . . . . . . . . . . . . . . . . . . . . . . . . . . . 39<br />
Guardar las películas y fotografías en un ordenador<br />
Funciones útiles disponibles si se conecta la videocámara a un ordenador.. . . . . . . . . 40<br />
Preparación de un ordenador.. . . . . . . . . . . . . . . . . . . . . . . . . . . . . . . . . . . . . . . . . . . . . . . . . . . . . . . . . . . . . . . . . 41<br />
Inicio de PlayMemories Home. . . . . . . . . . . . . . . . . . . . . . . . . . . . . . . . . . . . . . . . . . . . . . . . . . . . . . . . . . . . . . . . . 45<br />
Uso de “Image Data Converter”.. . . . . . . . . . . . . . . . . . . . . . . . . . . . . . . . . . . . . . . . . . . . . . . . . . . . . . . . . . . . . . . 45<br />
Guardar imágenes en un dispositivo externo<br />
Guía de copia.. . . . . . . . . . . . . . . . . . . . . . . . . . . . . . . . . . . . . . . . . . . . . . . . . . . . . . . . . . . . . . . . . . . . . . . . . . . . . . . . . . . . . 46<br />
Almacenamiento de imágenes en un dispositivo de soporte externo. . . . . . . . . . . . . . . . 47<br />
Creación de un disco con calidad de imagen de definición estándar (STD) con una<br />
grabadora, etc.. . . . . . . . . . . . . . . . . . . . . . . . . . . . . . . . . . . . . . . . . . . . . . . . . . . . . . . . . . . . . . . . . . . . . . . . . . . . . . . . . . . . 50<br />
ES<br />
Índice de contenido
ES<br />
Personalización de la videocámara<br />
Uso de los menús.. . . . . . . . . . . . . . . . . . . . . . . . . . . . . . . . . . . . . . . . . . . . . . . . . . . . . . . . . . . . . . . . . . . . . . . . . . . . . . . . 53<br />
Obtención de información detallada de la Guía práctica de “Handycam”. . . . . . . . . . . . 57<br />
Información complementaria<br />
Solución de problemas.. . . . . . . . . . . . . . . . . . . . . . . . . . . . . . . . . . . . . . . . . . . . . . . . . . . . . . . . . . . . . . . . . . . . . 58<br />
Tiempo de grabación de películas/número de fotografías que se pueden<br />
grabar.. . . . . . . . . . . . . . . . . . . . . . . . . . . . . . . . . . . . . . . . . . . . . . . . . . . . . . . . . . . . . . . . . . . . . . . . . . . . . . . . . . . . . . . . . . . . . . 61<br />
Precauciones. . . . . . . . . . . . . . . . . . . . . . . . . . . . . . . . . . . . . . . . . . . . . . . . . . . . . . . . . . . . . . . . . . . . . . . . . . . . . . . . . . . . . . 63<br />
Especificaciones. . . . . . . . . . . . . . . . . . . . . . . . . . . . . . . . . . . . . . . . . . . . . . . . . . . . . . . . . . . . . . . . . . . . . . . . . . . . . . . . . . 66<br />
Referencia rápida<br />
Indicadores de la pantalla.. . . . . . . . . . . . . . . . . . . . . . . . . . . . . . . . . . . . . . . . . . . . . . . . . . . . . . . . . . . . . . . . . . . . . . 69<br />
Componentes y controles. . . . . . . . . . . . . . . . . . . . . . . . . . . . . . . . . . . . . . . . . . . . . . . . . . . . . . . . . . . . . . . . . . . . . . 71<br />
Índice.. . . . . . . . . . . . . . . . . . . . . . . . . . . . . . . . . . . . . . . . . . . . . . . . . . . . . . . . . . . . . . . . . . . . . . . . . . . . . . . . . . . . . . . . . . . . . . . 75
Introducción<br />
Paso 1: Comprobación<br />
de los elementos<br />
suministrados<br />
Compruebe que la videocámara dispone de<br />
los siguientes elementos suministrados.<br />
Los números entre ( ) corresponden a la<br />
cantidad suministrada.<br />
Esta videocámara (1)<br />
Tapa del cuerpo (acoplada a la<br />
videocámara) (1) (pág. 15)<br />
Adaptador de alimentación de ca (1)<br />
(pág. 12)<br />
Cable de alimentación (1) (pág. 12)<br />
Cable de A/V de componente (1)<br />
(pág. 36)<br />
Cable de conexión de A/V (1) (pág. 37)<br />
Cable USB (1) (pág. 47)<br />
Mando a distancia inalámbrico<br />
(RMT-835) (1)<br />
Se suministra con una batería de litio de tipo<br />
botón instalada.<br />
Batería recargable (NP-FV70) (1)<br />
(pág. 12)<br />
Paravientos (1) (pág. 11)<br />
<br />
Ocular grande (1) (pág. 24)<br />
ES<br />
Introducción
10 ES<br />
Adaptador de montura (LA-EA3) (1)<br />
(pág. 18)<br />
CD-ROM “Handycam” Application<br />
Software (1) (pág. 41)<br />
“PlayMemories Home” (software, incluye la<br />
“Guía de ayuda de PlayMemories Home”)<br />
Image Data Converter (software de desarrollo<br />
RAW)<br />
Guía práctica de “Handycam” (PDF)<br />
<br />
Manual de instrucciones (este manual)<br />
(1)
Paso 2: Instalación<br />
de los accesorios<br />
suministrados<br />
Colocación del paravientos<br />
Utilice el paravientos para reducir el ruido<br />
del viento que graba el micrófono. Coloque<br />
el paravientos con el logotipo de <strong>Sony</strong><br />
orientado hacia abajo.<br />
11<br />
ES<br />
Introducción
1 ES<br />
Paso 3: Carga de la batería<br />
Batería<br />
Indicador CHG (carga)<br />
Alinee la marca de la clavija de cc<br />
con la de la toma de entrada de cc<br />
Toma de entrada<br />
de cc<br />
Adaptador de alimentación de ca<br />
A la toma de corriente<br />
Clavija de cc<br />
de pared<br />
Puede cargar la batería “InfoLITHIUM” (serie V) después de instalarla en la videocámara.<br />
Notas<br />
Sólo se puede instalar en la videocámara una batería “InfoLITHIUM” de la serie V.<br />
No se puede instalar la batería “InfoLITHIUM” de los modelos NP-FV30/FV50, ni aunque sean de la<br />
serie V.<br />
1<br />
Deslice el interruptor POWER hasta la posición OFF (la configuración<br />
predeterminada).<br />
2 Para colocar la batería, deslícela en la dirección que indica la flecha hasta<br />
que encaje.<br />
3 Conecte el adaptador de alimentación de ca y el cable de alimentación a<br />
la videocámara y a la toma de corriente de pared.<br />
El indicador CHG (carga) se ilumina y se inicia el proceso de carga. El indicador<br />
CHG (carga) se apaga cuando la batería está totalmente cargada.<br />
Cable de<br />
alimentación
4<br />
Cuando la batería esté cargada, desconecte el adaptador de alimentación<br />
de ca de la toma de entrada de cc de la videocámara.<br />
Tiempo de carga<br />
Tiempo aproximado (minuto) necesario para cargar completamente una batería totalmente<br />
descargada.<br />
Batería Tiempo de carga<br />
NP-FV70 (suministrada) 195<br />
NP-FV100 390<br />
<br />
Los tiempos de carga indicados en la tabla anterior están medidos durante la carga de la videocámara a<br />
una temperatura de 25 C Se recomienda cargar la batería a una temperatura comprendida entre 10 C<br />
y 30 C<br />
Sugerencias<br />
Consulte la página 61 sobre los tiempos de grabación y reproducción.<br />
Cuando la videocámara está encendida, es posible comprobar la cantidad restante de batería aproximada,<br />
gracias al indicador de batería restante situado en la parte superior derecha de la pantalla de cristal<br />
líquido.<br />
Para extraer la batería<br />
Deslice el interruptor POWER hasta la posición OFF. Deslice la palanca de liberación BATT<br />
(batería) () y extraiga la batería ().<br />
Palanca de liberación BATT<br />
(batería)<br />
Para utilizar una toma de corriente de pared como fuente de alimentación<br />
Realice las mismas conexiones que se indican en “Paso 3: Carga de la batería” (pág. 12). La<br />
batería no se descargará aunque esté instalada.<br />
1 ES<br />
Introducción
1 ES<br />
Notas acerca de la colocación/extracción de la fuente de alimentación<br />
Cuando extraiga la batería o desconecte el adaptador de alimentación de ca apague la videocámara y<br />
asegúrese de que los indicadores (película)/ (fotografía) (pág. 28) y el indicador de acceso (pág. 25)<br />
estén apagados.<br />
El indicador CHG (carga) parpadea durante el proceso de carga en las siguientes condiciones:<br />
La batería no está instalada correctamente.<br />
La batería está dañada.<br />
La temperatura de la batería es baja.<br />
Extraiga la batería de la videocámara y colóquela en un lugar templado.<br />
La temperatura de la batería es alta.<br />
Extraiga la batería de la videocámara y colóquela en un lugar fresco.<br />
De manera predeterminada, la alimentación se desconecta automáticamente para ahorrar energía de la<br />
batería si no se lleva a cabo ninguna operación en la videocámara durante aproximadamente 5 minuto<br />
([Apagado auto]).<br />
Notas referentes al adaptador de alimentación de ca<br />
Utilice una toma de corriente de pared cercana cuando emplee el adaptador de alimentación de ca<br />
Desconecte el adaptador de alimentación de ca de la toma de corriente de pared inmediatamente si se<br />
produce algún fallo de funcionamiento al utilizar la videocámara.<br />
No coloque el adaptador de alimentación de ca en lugares estrechos, como por ejemplo entre una pared<br />
y un mueble.<br />
<br />
No provoque un cortocircuito en la clavija de cc del adaptador de alimentación de ca ni en el terminal de<br />
la batería con ningún objeto metálico. Si lo hace, puede ocasionar un fallo de funcionamiento.<br />
Nota sobre el cable de alimentación<br />
El cable de alimentación se ha diseñado de manera específica para utilizarse únicamente con esta<br />
videocámara y no debe utilizarse con ningún otro equipo eléctrico.<br />
Carga de la batería en el extranjero<br />
Puede cargar la batería en cualquier país o región con el adaptador de alimentación de<br />
ca suministrado con la videocámara, siempre que utilice una corriente alterna entre<br />
100 V a 240 V 50 Hz/60 Hz<br />
No utilice un transformador de tensión electrónico.
Paso 4: Colocación del objetivo<br />
En este manual se explica cómo colocar el adaptador de montura suministrado y un objetivo<br />
(el objetivo SAL2470Z (se vende por separado) se usa a modo de ejemplo).<br />
Si utiliza un objetivo de montura E, consulte el manual de instrucciones suministrado con él.<br />
Contactos del objetivo*<br />
Marca de montaje (naranja)<br />
Liberación del objetivo<br />
Marca de montaje (blanca)<br />
* No toque ni ensucie los contactos del objetivo.<br />
Para colocar el adaptador de montura suministrado<br />
Extraiga la tapa del cuerpo del cuerpo de la videocámara y las tapas delantera y posterior<br />
del adaptador de montura.<br />
Gire las tapas del adaptador de montura en el sentido de las agujas del reloj para extraerlas.<br />
Alinee la marca de montaje del adaptador de montura con el índice de montaje<br />
(blanco) de la videocámara. Inserte el adaptador de montura en la montura de la<br />
videocámara y gírelo en el sentido de las agujas del reloj hasta que encaje.<br />
No pulse el botón de liberación del objetivo de la videocámara mientras coloca el adaptador de<br />
montura, ya que es posible que este no encaje adecuadamente.<br />
No inserte el adaptador de montura inclinado.<br />
Índice de montaje<br />
(blanco)<br />
1 ES<br />
Introducción
1 ES<br />
Para colocar el objetivo<br />
Alinee el índice de montaje (naranja) del tambor del objetivo con la marca de montaje del<br />
adaptador de montura. Inserte el objetivo en la montura del adaptador de montura y gírelo en<br />
el sentido de las agujas del reloj hasta que encaje.<br />
No presione la liberación del objetivo del adaptador de montura mientras coloca el objetivo, ya que es<br />
posible que este no encaje adecuadamente.<br />
No inserte el objetivo inclinado.<br />
Extracción del objetivo<br />
Índice de montaje<br />
(naranja)<br />
Para extraer el objetivo<br />
Mantenga pulsada la liberación del objetivo del adaptador de montura y gire el objetivo<br />
en sentido contrario al de las agujas del reloj hasta que se detenga. Extraiga con cuidado el<br />
objetivo de la montura del adaptador de montura.
Para extraer el adaptador de montura<br />
Mantenga pulsado el botón de liberación del objetivo del cuerpo de la videocámara y gire<br />
el adaptador de montura en sentido contrario al de las agujas del reloj hasta que se detenga.<br />
Extraiga con cuidado el adaptador de montura de la montura de la videocámara.<br />
Botón de liberación del<br />
objetivo<br />
Si el polvo o la suciedad se adhieren al sensor de imagen<br />
Apague la videocámara y retire el objetivo. Limpie el sensor de imagen y la zona de su<br />
alrededor con un soplador (se vende por separado) y, a continuación, vuelva a colocar el<br />
objetivo.<br />
Notas<br />
No utilice un soplador pulverizador, ya que podría salpicar gotas de agua en el interior del cuerpo de la<br />
videocámara.<br />
No ponga la punta del soplador en la cavidad que está fuera de la montura, de manera que la punta del<br />
soplador no toque el sensor de imagen.<br />
Sujete la cara de la videocámara hacia abajo para evitar que el polvo se reasiente en la videocámara.<br />
No aplique golpes mecánicos a la videocámara durante la limpieza.<br />
Si no puede limpiar el sensor de imagen mediante el procedimiento anterior, consulte a un distribuidor<br />
de <strong>Sony</strong> o a un centro de servicio técnico local autorizado de <strong>Sony</strong>.<br />
1 ES<br />
Introducción
1 ES<br />
Adaptador de montura<br />
Las funciones disponibles variarán en función del tipo de Adaptador de montura.<br />
Funciones LA-EA1** LA-EA2** LA-EA3<br />
Enfoque automático Disponible<br />
únicamente con<br />
objetivos SAM/SSM*<br />
Sistema AF AF de contraste AF de detección de<br />
fase<br />
Selección AF/MF Conmutable en el<br />
objetivo<br />
Disponible Disponible<br />
únicamente con<br />
objetivos SAM/SSM*<br />
Objetivos SAM/SSM:<br />
conmutables en el<br />
objetivo<br />
Otros objetivos:<br />
conmutables con el<br />
botón FOCUS<br />
AF de contraste<br />
Conmutable en el<br />
objetivo<br />
Modo de enfoque Sencillo Sencillo/Continuo Sencillo<br />
automático (sólo en<br />
modo de fotografías)<br />
* Con LA-EA1 y LA-EA3, la velocidad de enfoque automático con un objetivo de montura A acoplado<br />
será más lenta que con un objetivo de montura E. (Con un objetivo de montura A acoplado, la velocidad<br />
de enfoque automático será de entre 2 y 7 segundo, si las fotografías se toman con las condiciones de<br />
medición de <strong>Sony</strong>. La velocidad puede variar en función del sujeto, la luz ambiente, etc.).<br />
** LA-EA1 y LA-EA2 se venden por separado.<br />
Notas<br />
Es posible que algunos objetivos no se puedan utilizar o que tengan una funcionalidad limitada.<br />
Consulte el sitio web de soporte específico o póngase en contacto con un centro de servicio técnico local<br />
autorizado de <strong>Sony</strong> para obtener información acerca de objetivos compatibles.<br />
Durante la grabación de vídeo, puede que se grabe el sonido del objetivo y la cámara en funcionamiento.<br />
Esto se puede evitar ajustando el Nivel grabac. audio al mínimo. Toque (MENU) [Cámara/<br />
Micrófono] [ ( Micrófono)] [Nivel grabac. audio].<br />
<br />
En función del objetivo utilizado y del sujeto, puede que no sea fácil enfocar con la cámara o que se tarde<br />
bastante tiempo.<br />
Para instalar el parasol<br />
Consulte el manual de instrucciones suministrado con su objetivo.
Paso 5: Encendido de la videocámara y ajuste de<br />
la fecha y la hora<br />
1<br />
2<br />
3<br />
Deslice el interruptor POWER a la posición ON mientras presiona el botón<br />
verde.<br />
Seleccione el idioma que desee y después toque [Sig.].<br />
Toque el botón que<br />
aparece en la pantalla<br />
de cristal líquido<br />
Interruptor POWER<br />
Seleccione una zona geográfica con / y después toque [Sig.].<br />
Para volver a ajustar la fecha y la hora, toque (MENU) [Configuración] <br />
[ ( Ajustes del reloj)] [Config.fecha y hora] [Fecha y hora]. Si un elemento no se<br />
muestra en la pantalla, toque / hasta que aparezca.<br />
1 ES<br />
Introducción
0 ES<br />
4 <br />
5<br />
6<br />
Ajuste [Hora verano] y, a continuación, toque [Sig.].<br />
Al ajustar [Hora verano] en [Activar], el reloj se adelanta 1 hora.<br />
Seleccione el formato de fecha y después toque [Sig.].<br />
Seleccione la fecha y la hora, toque / para ajustar el valor y<br />
después toque [Sig.] *.<br />
* La pantalla de confirmación aparece solamente cuando se ajusta el reloj por primera vez.<br />
El reloj empezará a funcionar.<br />
Notas<br />
La fecha y la hora no aparecen durante la grabación, aunque se graban automáticamente en la tarjeta<br />
de memoria y se pueden mostrar durante la reproducción. Para mostrar la fecha y la hora, toque<br />
(MENU) [Configuración] [ ( Ajustes reproducción)] [Código datos] [Fecha/<br />
hora] .<br />
Para desactivar los pitidos de funcionamiento, toque (MENU) [Configuración] <br />
[ ( Ajustes generales)] [Pitido] [Desactivar] .<br />
<br />
Si el botón que toca no responde correctamente, calibre el panel táctil.
Para apagar la videocámara<br />
Deslice el interruptor POWER hasta la posición OFF.<br />
El indicador (película) parpadea unos segundo y se apaga la videocámara.<br />
Cambio del ajuste de idioma<br />
Puede modificar las indicaciones en pantalla para que se muestren los mensajes en un idioma<br />
determinado.<br />
Toque (MENU) [Configuración] [ ( Ajustes generales)] [Language<br />
Setting] el idioma que desee .<br />
ES<br />
1<br />
Introducción
ES<br />
Paso 6: Realización de ajustes de configuración<br />
antes de la grabación<br />
El panel de cristal líquido<br />
Abra el panel de cristal líquido 90 grados con respecto a la videocámara () y ajuste el ángulo<br />
().<br />
Máx. 90 grados<br />
Máx. 180 grados<br />
Sugerencias<br />
Las imágenes se visualizan en el visor o en la pantalla de cristal líquido.<br />
En cuanto el ojo se acerca al visor cuando la pantalla LCD está cerrada, la visualización de la pantalla<br />
cambia al visor. Puede ajustar la cámara de modo que la visualización de la pantalla cambie al visor en<br />
cuanto el ojo se acerque al visor, aunque la pantalla LCD esté abierta.<br />
Puede ajustar el brillo de la pantalla de cristal líquido con [Luminosidad LCD].<br />
Cambio de la visualización en la pantalla de cristal líquido<br />
Pulse DISPLAY para disponer el ciclo de visualización en pantalla en el siguiente orden:<br />
Grabación: visualización detallada visualización sencilla visualización mínima<br />
Reproducción: visualización detallada visualización mínima<br />
Botón DISPLAY<br />
Sensor ocular<br />
Máx. 90 grados
Sugerencias<br />
En el ajuste predeterminado, la visualización de la pantalla cambia al formato sencillo transcurridos unos<br />
4 segundo ([Ajuste pantalla]). La visualización cambia al formato detallado al tocar en cualquier parte<br />
de la pantalla, excepto en los botones de la pantalla de cristal líquido, de manera que se puedan usar los<br />
elementos.<br />
El visor<br />
unos<br />
4 segundo<br />
después<br />
La pantalla se oscurece tras determinado periodo de tiempo si utiliza<br />
el visor.<br />
Si graba mientras visualiza mediante el visor, mantenga el ojo cerca del visor cuando la<br />
pantalla LCD esté cerrada. Si las indicaciones del visor aparecen borrosas, coloque de forma<br />
adecuada la palanca de ajuste de la lente del visor, que está situada debajo del visor. Si<br />
[Visor/Panel] está ajustado en [Auto], en cuanto el ojo se acerque al visor, el sensor ocular lo<br />
detectará y la visualización cambiará al visor aunque la pantalla LCD esté abierta. Si el sensor<br />
ocular no puede detectarlo, la visualización continuará en la pantalla LCD.<br />
ES<br />
Introducción
ES<br />
Si la imagen no aparece clara en el visor<br />
Si no puede ver la imagen claramente en el visor en situaciones de mucha luminosidad, utilice<br />
el ocular grande suministrado. Para colocar el ocular grande, estírelo ligeramente y alinéelo<br />
con la ranura del ocular del visor. Puede colocar el ocular grande orientado hacia la derecha o<br />
hacia la izquierda.<br />
Notas<br />
No extraiga el ocular preinstalado.<br />
Ocular grande<br />
(suministrado)<br />
Coloque la proyección de<br />
modo que quede recta.
Paso 7: Inserción de una tarjeta de memoria<br />
1<br />
Indicador de acceso<br />
Observe la dirección de la esquina con la muesca.<br />
Abra la tapa e inserte la tarjeta de memoria con el borde que tiene una<br />
muesca en la dirección ilustrada hasta que suene un clic.<br />
Al insertar una tarjeta de memoria nueva aparece la pantalla [Preparando archivo base<br />
datos imagen. Espere por favor.]. Espere hasta que desaparezca la pantalla.<br />
2 Cierre la tapa.<br />
Notas<br />
Si aparece [Error al crear un nuevo archivo de base de datos de imágenes. Es posible que no exista<br />
suficiente espacio libre.], formatee la tarjeta de memoria.<br />
Confirme la dirección de la tarjeta de memoria. Si inserta la tarjeta de memoria a la fuerza en la dirección<br />
incorrecta, podría dañar la tarjeta, la ranura de la tarjeta o los datos de imágenes.<br />
No abra la tapa durante la grabación.<br />
Al insertar o expulsar la tarjeta de memoria, procure que ésta no salga disparada y se caiga.<br />
Para expulsar la tarjeta de memoria<br />
Abra la tapa y presione ligeramente la tarjeta de memoria una vez.<br />
ES<br />
Introducción
ES<br />
Tipos de tarjetas de memoria que pueden utilizarse con la videocámara<br />
“Memory Stick PRO<br />
Duo” (Mark2)<br />
“Memory Stick PRO-<br />
HG Duo”<br />
“Memory Stick XC-<br />
HG Duo”<br />
Tarjeta de memoria<br />
SD<br />
Tarjeta de memoria<br />
SDHC<br />
Tarjeta de memoria<br />
SDXC<br />
<br />
<br />
<br />
Clase de<br />
velocidad de SD<br />
—<br />
Class 4 o más<br />
rápida<br />
32 GB<br />
64 GB<br />
Capacidad<br />
(operación<br />
verificada)<br />
Descripción en este<br />
manual<br />
“Memory Stick PRO<br />
Duo”<br />
Tarjeta SD<br />
No se puede garantizar el funcionamiento con todas las tarjetas de memoria.<br />
Con esta videocámara pueden utilizarse “Memory Stick PRO Duo”, “Memory Stick” de mitad de tamaño<br />
o tarjetas SD de tamaño estándar.<br />
No fije etiquetas u objetos similares en una tarjeta de memoria o un adaptador de tarjetas. De lo<br />
contrario, puede ocasionar un fallo de funcionamiento.<br />
Notas<br />
Con esta videocámara no puede utilizarse una MultiMediaCard.<br />
<br />
Las películas grabadas en tarjetas de memoria “Memory Stick XC-HG Duo” o SDXC no pueden<br />
importarse ni reproducirse en ordenadores o dispositivos AV que no sean compatibles con el sistema de<br />
archivos exFAT* mediante la conexión de la videocámara a estos dispositivos con el cable USB. Confirme<br />
de antemano que el equipo conectado es compatible con el sistema de archivos exFAT. Si conecta un<br />
equipo no compatible con el sistema exFAT y aparece la pantalla de formateo, no intente formatear, ya<br />
que se perderán todos los datos grabados.<br />
* exFAT es un sistema de archivos que utilizan las tarjetas de memoria “Memory Stick XC-HG Duo” y<br />
SDXC.
Grabación/reproducción<br />
Grabación<br />
En el ajuste predeterminado, las películas se graban con calidad de imagen de alta definición<br />
(<strong>HD</strong>).<br />
1 Ajuste la correa de sujeción.<br />
2<br />
3<br />
Para extraer la tapa del objetivo, presione los controles deslizantes<br />
situados en ambos lados de la tapa.<br />
Deslice el interruptor POWER a la posición ON mientras presiona el botón<br />
verde.<br />
La videocámara está encendida.<br />
Grabación/reproducción<br />
ES
ES<br />
Grabación de películas<br />
<br />
<br />
(Película): durante la grabación de una película<br />
(Foto): durante la toma de una foto<br />
Botón START/<br />
STOP<br />
Botón MODE<br />
Pulse MODE para encender el indicador (película).<br />
Pulse START/STOP para iniciar la grabación.<br />
El indicador de grabación se ilumina durante la grabación (pág. 74).<br />
Para detener la grabación, pulse START/STOP de nuevo.<br />
[ESPERA] [GRAB.]<br />
Notas<br />
El tiempo máximo de grabación continua de películas es de unas 13 hora.<br />
Cuando un archivo de película supera los 2 GB se crea automáticamente el siguiente archivo de película.<br />
Tras encender la videocámara, transcurrirán varios segundo hasta poder empezar la grabación. No es<br />
posible utilizar la videocámara durante este período.<br />
Se indican los estados siguientes si todavía se están grabando datos en el soporte de grabación cuando ha<br />
finalizado la grabación. Durante este tiempo, no someta la videocámara a golpes o vibraciones ni extraiga<br />
la batería o desconecte el adaptador de alimentación de ca<br />
El indicador de acceso (pág. 25) está encendido o parpadea<br />
El icono del soporte en la parte superior derecha de la pantalla de cristal líquido parpadea<br />
Sujete el objetivo con la mano izquierda para sostener la cámara durante la grabación (si no utiliza un<br />
trípode). Asegúrese de que los dedos no tocan el micrófono.<br />
Sugerencias<br />
Consulte la página 61 para obtener información sobre el tiempo de grabación de películas.<br />
Los modos IRIS, Velocidad obturador, Ganancia y Exposición se configuran como ajustes automáticos<br />
cuando se pulsa PROGRAM AE.
[ SteadyShot] de forma predeterminada está ajustado en [Estándar]. Tenga en cuenta que si el<br />
objetivo instalado no tiene ninguna función de estabilización de imagen, no se podrá utilizar la función<br />
SteadyShot.<br />
Es posible capturar fotografías a partir de películas (NEX-VG900) grabadas.<br />
Puede comprobar el tiempo restante de grabación, la capacidad restante calculada, etc., tocando<br />
(MENU) [Configuración] [ ( Ajustes de soporte)] [Info soporte].<br />
La pantalla de cristal líquido de la videocámara puede mostrar imágenes grabadas a pantalla completa<br />
(visualización de píxeles totales). Sin embargo, es posible que se produzca un leve recorte en los márgenes<br />
superior, inferior, derecho e izquierdo de las imágenes cuando se reproduzcan en un televisor no<br />
compatible con la visualización de píxeles totales. En tal caso, ajuste [Guía encuadre] en [Activar] y utilice<br />
el marco exterior que aparece en la pantalla como guía para grabar imágenes.<br />
Código de datos durante la grabación<br />
La fecha, la hora y las condiciones de grabación se registran automáticamente en la tarjeta<br />
de memoria, pero no se muestran durante la grabación. No obstante, se pueden consultar<br />
como [Código datos] durante la reproducción. Para mostrarlas, toque (MENU) <br />
[Configuración] [ ( Ajustes reproducción)] [Código datos] el ajuste deseado<br />
.<br />
Captura de fotografías<br />
<br />
(Película): durante la grabación de una película<br />
(Foto): durante la toma de una foto<br />
Botón MODE<br />
Botón<br />
PHOTO<br />
Cuando desaparece, significa que se ha grabado la fotografía.<br />
Pulse MODE para encender el indicador (fotografía).<br />
La pantalla de cristal líquido cambia al modo de grabación de fotografías.<br />
Parpadea Se<br />
enciende<br />
Grabación/reproducción<br />
ES
0 ES<br />
<br />
Pulse PHOTO ligeramente para enfocar y, a continuación, púlselo<br />
completamente.<br />
Indicador de enfoque<br />
El indicador de enfoque muestra el estado del enfoque iluminándose o parpadeando.<br />
encendido : enfoque bloqueado.<br />
parpadeando : la videocámara no puede enfocar al sujeto automáticamente. Recomponga la<br />
toma o cambie el ajuste del enfoque.<br />
Sugerencias<br />
Consulte la página 62 para obtener información sobre el número de fotos que se pueden grabar.<br />
Los modos IRIS, Velocidad obturador, ISO y Exposición se configuran como ajustes automáticos cuando<br />
se pulsa PROGRAM AE.<br />
Para cambiar el tamaño de la imagen, toque (MENU) [Calidad img/Tamaño] [ Tam<br />
imagen] el ajuste deseado .<br />
Si [Capt. tamaño APS-C] está ajustado en [Auto], el tamaño de la imagen que se va a grabar dependerá<br />
del objetivo que utilice.<br />
<br />
No se pueden grabar fotografías mientras se muestra .<br />
Selección del modo de grabación<br />
Toque (MENU) [Calidad img/Tamaño] [ Modo Grabación] para cambiar<br />
la calidad de la imagen que se está grabando.<br />
Los tipos de soportes en los que pueden guardarse las imágenes dependen del modo de<br />
grabación que está seleccionado.<br />
Si desea información sobre la operación de guardar en un dispositivo externo, consulte la<br />
página 47.<br />
Tipos de soportes<br />
En esta videocámara<br />
Tarjeta de memoria<br />
En dispositivos externos<br />
Soporte externo (dispositivos de<br />
almacenamiento USB)<br />
Discos Blu-ray<br />
Discos de grabación AVC<strong>HD</strong> — —<br />
Modo de grabación<br />
PS* FX FH/HQ/LP<br />
* [PS] sólo puede ajustarse si [ Imág. p. segundo] está ajustado en [60p] (NEX-VG900), [50p]<br />
(NEX-VG900E).
Ajuste para las<br />
condiciones de disparo<br />
Ajuste de Exposición, etc.,<br />
manualmente (dial MANUAL)<br />
Es recomendable realizar ajustes manuales<br />
con el uso del dial MANUAL, mediante<br />
la asignación de un elemento de menú<br />
([Exposición] en la configuración<br />
predeterminada) en el botón MANUAL.<br />
Botón MANUAL<br />
Dial MANUAL<br />
Cómo utilizar el dial MANUAL<br />
Realice el ajuste con el dial MANUAL para<br />
llevar a cabo la configuración también<br />
cuando pulse IRIS o SHUTTER SPEED.<br />
Para asignar un elemento de menú<br />
Mantenga pulsado MANUAL durante unos<br />
segundo para visualizar la pantalla [Botón<br />
MANUAL]. Gire el dial MANUAL para<br />
asignar un elemento. Es posible asignar<br />
[Exposición], [Desplazamiento AE],<br />
[Temper. color BB], [BB B-A] o [BB G-M].<br />
Uso de un trípode<br />
Monte un trípode (se vende por separado)<br />
en el receptáculo correspondiente mediante<br />
un tornillo para trípode (se vende por<br />
separado, la longitud del tornillo deberá ser<br />
inferior a 5,5 mm)<br />
Receptáculo<br />
del trípode<br />
Grabación/reproducción<br />
ES<br />
1
ES<br />
Reproducción.en.la.videocámara<br />
Sugerencias<br />
<br />
La videocámara muestra automáticamente las imágenes grabadas como un evento, basándose en su fecha<br />
y hora.<br />
1<br />
Deslice el interruptor POWER a la posición ON mientras presiona el botón<br />
verde.<br />
La videocámara está encendida.<br />
2 Pulse (Ver Imágenes).<br />
Aparece la pantalla de Visualización eventos al cabo de unos segundo.<br />
3 Toque / para seleccionar el evento deseado ().<br />
A la pantalla MENU<br />
Eventos<br />
/ : al evento anterior/siguiente<br />
Nombre de evento<br />
Cambiar al modo de grabación de películas/fotografías<br />
Barra de cronología<br />
Botón de cambio de escala de evento
4<br />
Al tocar el evento presentado en el centro de la pantalla, aparece la pantalla Índice de<br />
eventos.<br />
Toque ( Cambiar escala de evento), en la parte inferior derecha de la pantalla, para poder<br />
cambiar el intervalo de tiempo de la barra de cronología desde un año y medio hasta tres meses,<br />
que cambia el número de eventos que pueden mostrarse en la barra de cronología.<br />
Toque una imagen que desee ver.<br />
Toque para seleccionar el tipo de imágenes que desee presentar en el índice entre<br />
[ PELÍCULA] (sólo películas), [ FOTO] (sólo fotografías) o [ PELÍC./FOTO]<br />
(películas y fotografías).<br />
Para regresar a la pantalla de Visualización eventos<br />
/ : muestra la página anterior/siguiente (mantenga presionado el botón para<br />
desplazar la pantalla de índice).<br />
Cambiar al modo de grabación de películas/fotografías<br />
Título de evento<br />
Tiempo total para películas en el evento (el número total de imágenes fijas se muestra<br />
cuando hay imágenes fijas solamente)<br />
Botón de cambio de tipo de imagen<br />
Película<br />
Foto<br />
<br />
aparece con la última película o fotografía reproducida o grabada. Toque la película o<br />
fotografía con para reanudar la reproducción desde el momento en que se detuvo.<br />
Grabación/reproducción<br />
ES
ES<br />
Utilización de la videocámara mientras se reproduce una película<br />
Puede usar las funciones mostradas en la figura siguiente mientras se reproduce una película<br />
en la videocámara. Aparecerá la figura siguiente al seleccionar [ PELÍC./FOTO] (el ajuste<br />
predeterminado) o [ PELÍCULA] tocando el botón de cambio de tipo de imagen en la<br />
pantalla del índice de eventos.<br />
Ajuste de volumen<br />
Borrar<br />
Contexto<br />
Para detener*<br />
Anterior<br />
Para rebobinar*<br />
Siguiente<br />
Para pausa*/<br />
reproducción<br />
* Estos botones sólo pueden utilizarse mientras se reproduce una película en la videocámara.<br />
Para avanzar rápido*<br />
Notas<br />
Es posible que no se puedan reproducir las imágenes con otros dispositivos que no sean la videocámara.<br />
Sugerencias<br />
Al tocar el botón en la pantalla de reproducción aparecen las funciones que puede utilizar<br />
actualmente y puede seleccionarlas fácilmente.<br />
Cuando la reproducción desde la imagen seleccionada llega a la última imagen, la pantalla regresa a la<br />
pantalla INDEX.<br />
Toque / durante la pausa para reproducir películas a cámara lenta.<br />
Si toca / repetidamente durante la reproducción, las películas se reproducirán a una<br />
velocidad 5 veces mayor 10 veces mayor 30 veces mayor 60 veces mayor.<br />
La fecha, la hora y las condiciones de grabación se registran automáticamente durante la grabación. Esta<br />
información no se muestra durante la grabación, pero es posible visualizarla durante la reproducción si<br />
toca (MENU) [Configuración] [ ( Ajustes reproducción)] [Código datos] el<br />
ajuste deseado .<br />
Para ajustar el volumen del sonido de las películas<br />
Mientras reproduce una película, toque realice el ajuste con / .
Visualización de fotografías<br />
Puede usar las funciones mostradas en la figura siguiente mientras visualiza fotografías.<br />
Aparecerá la figura siguiente al seleccionar [ FOTO] si toca el botón de cambio de tipo de<br />
imagen en la pantalla del índice de eventos.<br />
Zoom de reproducción<br />
Borrar<br />
Contexto<br />
Anterior<br />
Sugerencias<br />
Para repetir Diapositivas, toque [Ajus. pase diapo.].<br />
Siguiente<br />
Para iniciar o detener<br />
una presentación de<br />
diapositivas<br />
Para ver imágenes ampliadas<br />
Toque (zoom de reproducción) durante la reproducción de imágenes estáticas. Puede<br />
ajustar el zoom mediante / . También puede utilizarlo con la palanca del zoom.<br />
Sugerencias<br />
No puede utilizar el zoom de reproducción si no ha seleccionado [ FOTO] en la pantalla de índice.<br />
Grabación/reproducción<br />
ES
ES<br />
Reproducción de<br />
imágenes en un<br />
televisor<br />
Los métodos de conexión y la calidad de<br />
las imágenes de alta definición (<strong>HD</strong>) o de<br />
definición estándar (STD) que se visualizan<br />
en la pantalla del televisor dependen<br />
del tipo de televisor conectado y de los<br />
conectores utilizados.<br />
Puede ver imágenes en la pantalla del<br />
televisor mientras se están grabando.<br />
Conectores de salida de la videocámara<br />
Conector remoto<br />
de A/V<br />
1<br />
2<br />
Toma <strong>HD</strong>MI OUT<br />
Cambie la entrada del televisor a<br />
la toma conectada.<br />
Consulte los manuales de instrucciones<br />
del televisor.<br />
Conecte la videocámara a un<br />
televisor.<br />
Utilice el adaptador de alimentación de ca<br />
suministrado como fuente de alimentación<br />
(pág. 13).<br />
3<br />
Reproduzca una película o una<br />
foto en la videocámara (pág. 32).<br />
Lista de conexiones<br />
Conexión a un televisor de alta<br />
definición<br />
Si la grabación se ha realizado en<br />
alta definición (<strong>HD</strong>), las películas se<br />
reproducirán con la misma calidad<br />
(<strong>HD</strong>). Si la grabación tiene calidad de<br />
imagen estándar (STD), las películas se<br />
reproducirán con esta misma definición<br />
(STD).<br />
Cable de A/V de<br />
componente (suministrado)<br />
(verde) Y<br />
(azul)PB/CB<br />
(rojo)PR/CR<br />
Cable <strong>HD</strong>MI<br />
(se vende por separado)<br />
(blanco)<br />
(rojo)
Conexión a un televisor que no sea de<br />
alta definición 16:9 (panorámico) o 4:3<br />
Si las películas están grabadas con calidad<br />
de imagen de alta definición (<strong>HD</strong>), se<br />
reproducirán con definición estándar<br />
(STD). Si las películas están grabadas con<br />
calidad de imagen de definición estándar<br />
(STD), se reproducirán con la misma<br />
calidad de imagen (STD).<br />
Cable de A/V de<br />
componente (suministrado)<br />
Cable de conexión de A/V<br />
con S VIDEO (se vende por<br />
separado)<br />
(amarillo)<br />
(verde) Y<br />
(azul)PB/CB<br />
(rojo)PR/CR<br />
(blanco)<br />
(rojo)<br />
(blanco)<br />
(rojo)<br />
Cable de conexión de A/V<br />
(suministrado)<br />
(amarillo)<br />
(blanco)<br />
(rojo)<br />
Si conecta con el cable de A/V de<br />
componente<br />
Si conecta únicamente las clavijas de vídeo<br />
de componente, no se emitirán las señales de<br />
audio. Conecte las clavijas blanca y roja para<br />
que se emitan las señales de audio.<br />
Seleccione el ajuste de [Componente]<br />
correspondiente a la toma de entrada del<br />
componente que utilice. Para efectuar el ajuste,<br />
toque (MENU) [Configuración] <br />
[ ( Conexión)] [Componente] el<br />
ajuste deseado .<br />
Si conecta con el cable <strong>HD</strong>MI<br />
Utilice un cable <strong>HD</strong>MI con el logotipo <strong>HD</strong>MI.<br />
Utilice un miniconector <strong>HD</strong>MI en un extremo<br />
(para la videocámara) y un enchufe adecuado<br />
para conectar el televisor en el otro extremo.<br />
Las imágenes protegidas por derechos de autor<br />
no se emiten a través de la toma <strong>HD</strong>MI OUT de<br />
la videocámara.<br />
Es posible que algunos televisores no funcionen<br />
correctamente (por ejemplo, que no se emita el<br />
sonido o la imagen) con este tipo de conexión.<br />
No conecte la toma <strong>HD</strong>MI OUT de la<br />
videocámara a la toma <strong>HD</strong>MI OUT de un<br />
dispositivo externo, ya que podría ocasionar un<br />
fallo de funcionamiento.<br />
Si el dispositivo conectado es compatible con<br />
sonido envolvente de 5,1 canales, las películas<br />
con calidad de imagen de alta definición (<strong>HD</strong>)<br />
se emiten con sonido envolvente de 5,1 canales<br />
automáticamente. Las películas con calidad<br />
de imagen de definición estándar (STD) se<br />
convierten al formato de 2 canales.<br />
Para ajustar el formato según el<br />
televisor conectado (16:9/4:3)<br />
Ajuste [Tipo de TV] en [16:9] o [4:3] en función<br />
del televisor que vaya a utilizar.<br />
Grabación/reproducción<br />
ES
ES<br />
Si hace la conexión con el cable de<br />
conexión de A/V con S VIDEO<br />
Cuando la clavija S VIDEO (canal S VIDEO) se<br />
encuentra conectada, no se emiten las señales<br />
de audio. Para emitir las señales de audio,<br />
conecte las clavijas blanca y roja a la toma de<br />
entrada de audio del televisor.<br />
Esta conexión produce imágenes de mayor<br />
resolución que las que se obtienen con el cable<br />
de conexión de A/V.<br />
Si el televisor es monoaural (si el<br />
televisor solamente dispone de una<br />
toma de entrada de audio)<br />
Conecte la clavija amarilla del cable de conexión<br />
de A/V a la toma de entrada de vídeo y conecte<br />
la clavija blanca (canal izquierdo) o la clavija<br />
roja (canal derecho) a la toma de entrada de<br />
audio del televisor o la videograbadora.<br />
Al conectar el televisor a través de una<br />
videograbadora<br />
Conecte la videocámara a la toma de entrada de<br />
línea de la videograbadora mediante el cable de<br />
conexión de A/V. Ajuste el selector de entrada<br />
de la videograbadora en LINE (VIDEO 1,<br />
VIDEO 2, etc.).<br />
Acerca de “Photo TV <strong>HD</strong>”<br />
Esta videocámara es compatible con el<br />
estándar “Photo TV <strong>HD</strong>”. “Photo TV<br />
<strong>HD</strong>” permite realizar una representación<br />
muy detallada, tipo foto, de texturas y<br />
colores sutiles. Al conectar dispositivos<br />
de <strong>Sony</strong> compatibles con Photo TV <strong>HD</strong><br />
mediante un cable <strong>HD</strong>MI* o el cable de AV<br />
de componente**, podrá disfrutar de un<br />
universo completamente nuevo de fotos<br />
con imágenes de tan alta calidad que le<br />
dejarán sin aliento.<br />
* El televisor cambiará automáticamente al<br />
modo adecuado cuando se visualicen fotos.<br />
** Será necesario configurar el televisor. Para<br />
obtener más información, consulte el manual<br />
de instrucciones del televisor compatible con<br />
Photo TV <strong>HD</strong>.<br />
Notas<br />
Si reproduce películas con calidad de imagen de<br />
definición estándar (STD) en un televisor 4:3<br />
que no es compatible con la señal 16:9, grabe las<br />
películas en formato 4:3. Toque (MENU)<br />
[Calidad img/Tamaño] [ Modo<br />
panorámico] [4:3] .<br />
Cuando se utiliza el cable de conexión de<br />
A/V para emitir películas, éstas se emiten<br />
con calidad de imagen de definición estándar<br />
(STD).<br />
Sugerencias<br />
Si conecta la videocámara al televisor con más<br />
de un tipo de cable para emitir imágenes, el<br />
orden de prioridad de las tomas de entrada del<br />
televisor será el siguiente:<br />
<strong>HD</strong>MI componente S VIDEO vídeo<br />
<br />
<strong>HD</strong>MI (High Definition Multimedia Interface,<br />
Interfaz multimedia de alta definición) es una<br />
interfaz que permite enviar señales de audio y<br />
de vídeo. La toma <strong>HD</strong>MI OUT emite imágenes<br />
y sonido digital de alta calidad.
Operaciones avanzadas<br />
Eliminación de<br />
películas y fotografías<br />
Puede borrar películas y fotografías de la<br />
tarjeta de memoria para disponer de más<br />
espacio libre.<br />
Notas<br />
Una vez borradas, las imágenes no se pueden<br />
restaurar. Guarde las películas y fotografías<br />
importantes de antemano.<br />
No extraiga la batería ni el adaptador de<br />
alimentación de ca de la videocámara mientras<br />
borra las imágenes. Si lo hace, es posible que se<br />
produzcan daños en la tarjeta de memoria.<br />
No expulse la tarjeta de memoria mientras se<br />
están borrando las imágenes que contiene.<br />
No es posible eliminar películas y fotografías<br />
protegidas. Es necesario desproteger<br />
previamente las películas y fotografías para<br />
borrarlas.<br />
Sugerencias<br />
Puede borrar la imagen utilizando en la<br />
pantalla de reproducción.<br />
Para borrar todas las imágenes grabadas en la<br />
tarjeta de memoria y recuperar todo el espacio<br />
grabable del soporte de grabación, formatee<br />
dicho soporte.<br />
Las imágenes de tamaño reducido que permiten<br />
visualizar muchas imágenes al mismo tiempo<br />
en una pantalla de índice se denominan<br />
“imágenes en miniatura”.<br />
1<br />
2<br />
3<br />
Pulse el botón (Ver Imágenes)<br />
(pág. 32).<br />
Toque (MENU) [Editar/<br />
Copiar] [Borrar].<br />
Para seleccionar y borrar<br />
películas, toque [Múltiples<br />
imágenes] [ PELÍCULA]/<br />
[ FOTO]/[ PELÍC./FOTO].<br />
4<br />
5<br />
<br />
Cuando [Ajuste / ] está ajustado<br />
en [ Calidad STD], aparece en<br />
lugar de .<br />
Toque y muestre la marca en<br />
las películas o fotografías que<br />
desee borrar.<br />
<br />
Para confirmar una imagen, mantenga<br />
presionada la miniatura. Toque para<br />
volver a la pantalla anterior.<br />
Toque .<br />
Para borrar todas las películas o<br />
fotografías de un evento a la vez<br />
En el paso 3, toque [Todo en evento].<br />
Toque / para seleccionar el<br />
evento deseado y después toque<br />
<br />
Para confirmar una imagen, mantenga<br />
.<br />
presionada la miniatura. Toque<br />
volver a la pantalla anterior.<br />
para<br />
Toque .<br />
ES<br />
Operaciones avanzadas
0 ES<br />
Guardar las películas y fotografías en un ordenador<br />
Funciones útiles disponibles si se conecta la<br />
videocámara a un ordenador<br />
Para Windows<br />
El software “PlayMemories Home” almacenado en el CD-ROM (suministrado) incluye funciones<br />
que permiten hacer muchas más cosas con las imágenes grabadas en la videocámara.<br />
Para Mac<br />
Ver<br />
Guardar en un<br />
disco<br />
DVD/Blu-ray<br />
Editar<br />
Calendario<br />
Unión de archivos de imágenes<br />
Cargar<br />
Servicios de red<br />
“PlayMemories Home” no es compatible con Mac OS. Si reproduce imágenes en un Mac, utilice las<br />
aplicaciones instaladas en el Mac.<br />
Si desea obtener más información, visite el siguiente sitio web:<br />
http://www.sony.co.jp/imsoft/Mac/
Preparación de un<br />
ordenador<br />
Paso 1 Comprobación del sistema<br />
informático<br />
Windows<br />
SO* 1<br />
Microsoft Windows XP SP3* 2 /Windows Vista<br />
SP2* 3 /Windows 7 SP1<br />
CPU<br />
PlayMemories Home: Intel Core Duo de<br />
1,66 GHz o superior, o Intel Core 2 Duo de<br />
1,66 GHz o superior (se necesita un Intel<br />
Core 2 Duo de 2,26 GHz o superior para<br />
procesar películas FX o FH, y un Intel Core<br />
2 Duo de 2,40 GHz o superior para procesar<br />
películas PS).<br />
Sin embargo, es suficiente con un procesador<br />
Intel Pentium III de 1 GHz o superior para<br />
realizar las siguientes operaciones:<br />
Importación<br />
de películas y fotografías al<br />
ordenador<br />
Creación<br />
de un disco Blu-ray/disco de<br />
grabación AVC<strong>HD</strong>/vídeo en DVD (se<br />
requiere un Intel Core Duo de 1,66 GHz<br />
o superior para crear un vídeo en DVD<br />
mediante la conversión de la calidad de<br />
imagen de alta definición (<strong>HD</strong>) a calidad de<br />
imagen de definición estándar (STD)).<br />
Procesamiento<br />
sólo de las películas con<br />
calidad de imagen de definición estándar<br />
(STD)<br />
Image Data Converter: Pentium 4 o superior<br />
Memoria<br />
PlayMemories Home:<br />
Para Windows XP: 512 MB o más (se<br />
recomienda 1 GB o más).<br />
Sin embargo, 256 MB o más son suficientes<br />
para procesar únicamente las películas con<br />
calidad de imagen de definición estándar<br />
(STD).<br />
Para Windows Vista/Windows 7: 1 GB o más<br />
Image Data Converter:<br />
1 GB o más<br />
Disco duro<br />
Espacio en disco necesario para la<br />
instalación: aproximadamente 500 MB<br />
(Pueden necesitarse 10 GB o más para<br />
crear discos de grabación AVC<strong>HD</strong>. Pueden<br />
necesitarse 50 GB como máximo para crear<br />
discos Blu-ray).<br />
Pantalla<br />
1 024 puntos × 768 puntos como mínimo<br />
Otros<br />
Puerto USB (debe proporcionarse de serie,<br />
Hi-Speed USB (compatible con USB 2.0)),<br />
grabadora de discos Blu-ray/DVD (se<br />
necesita una unidad de CD-ROM para la<br />
instalación). Se recomienda un sistema de<br />
archivos NTFS o exFAT como sistema de<br />
archivos del disco duro.<br />
Mac<br />
SO* 1<br />
Conexión USB: Mac OS X (v10,3, v10,4,<br />
v10,5, v10,6, v10,7, v10,8) “Image Data<br />
Converter Ver.4.2”: Mac OS X (v10,5,<br />
v10,6 (Snow Leopard), v10,7 (Lion), v10,8<br />
(Mountain Lion))<br />
Image Data Converter Ver.4<br />
CPU: Intel Core Solo/Core Duo/Core 2 Duo<br />
o superior<br />
Memoria: se recomienda 1 GB o más.<br />
Pantalla: 1 024 puntos × 768 puntos o más<br />
* 1 Se necesita una instalación estándar. No se<br />
asegura el funcionamiento si se ha actualizado<br />
el SO o en un entorno de arranque de varios SO.<br />
* 2 Las ediciones de 64 bits y Starter (Edition) no<br />
son compatibles. Se necesita la versión 2.0 o<br />
más reciente de Windows Image Mastering API<br />
(IMAPI) para utilizar la función de creación de<br />
discos, etc.<br />
* 3 Starter (Edition) no es compatible.<br />
Notas<br />
<br />
No se puede garantizar el funcionamiento con<br />
todos los entornos informáticos.<br />
ES<br />
1<br />
Guardar las películas y fotografías en un ordenador
ES<br />
Paso 2 Instalación del software<br />
“PlayMemories Home”<br />
suministrado<br />
Instale “PlayMemories Home” antes de<br />
conectar la videocámara a un ordenador.<br />
Cuando compre esta videocámara, instale<br />
el PlayMemories Home suministrado con la<br />
actualización más reciente.<br />
Notas<br />
Instale el software “PlayMemories Home”<br />
suministrado, incluso si el software<br />
“PlayMemories Home” ya está instalado en el<br />
equipo.<br />
Si “PlayMemories Home” ya está instalado<br />
en su ordenador, se sobrescribirá y se<br />
instalará. Es posible que algunas funciones de<br />
“PlayMemories Home” no estén disponibles.<br />
<br />
Confirme que la videocámara no<br />
está conectada al ordenador.<br />
Encienda el ordenador.<br />
Inicie la sesión como Administrador para<br />
realizar la instalación.<br />
Cierre todas las aplicaciones que se estén<br />
ejecutando en el ordenador antes de<br />
instalar el software.<br />
<br />
Coloque el CD-ROM suministrado<br />
en la unidad de disco del<br />
ordenador.<br />
Aparecerá la pantalla de instalación.<br />
Si la pantalla no aparece, haga doble clic en<br />
[Inicio] [Equipo] (en Windows XP, [Mi<br />
PC]) (PMHOME) [Install.exe].<br />
Haga clic en [Instalación].<br />
<br />
Compruebe que están<br />
seleccionadas las opciones<br />
“PlayMemories Home” e “Image<br />
Data Converter” y, a continuación,<br />
siga las instrucciones que<br />
aparecen en la pantalla del<br />
ordenador para seguir con la<br />
instalación.<br />
Seleccione el país o la región.<br />
<br />
<br />
<br />
Seleccione el idioma de la<br />
aplicación que vaya a instalar y<br />
pase a la pantalla siguiente.<br />
Lea detenidamente los términos<br />
del contrato de licencia. Si está<br />
de acuerdo con las condiciones,<br />
cambie a y haga clic en<br />
[Siguiente] [Instalar].<br />
Siga las instrucciones que<br />
aparecen en la pantalla del<br />
ordenador para continuar con la<br />
instalación.<br />
Tal vez tenga que instalar alguna<br />
otra aplicación incluida en el disco al<br />
mismo tiempo. Si aparece la pantalla de<br />
instalación, siga las instrucciones que<br />
aparecen en ella.<br />
Cuando el sistema le indique que reinicie<br />
el ordenador, siga las instrucciones que<br />
aparecen en la pantalla y reinícielo.<br />
<br />
Conecte la videocámara al ordenador<br />
cuando se lo indique el sistema.
Conecte la videocámara<br />
al ordenador utilizando el<br />
cable USB incorporado y, a<br />
continuación, toque [Conexión<br />
USB] en la pantalla de cristal<br />
líquido de la videocámara.<br />
Una vez completada la<br />
instalación, retire el CD-ROM del<br />
ordenador.<br />
Haga clic en (icono PlayMemories<br />
Home) que aparece en el escritorio del<br />
ordenador para iniciar el software.<br />
Notas<br />
Para crear discos o usar otras funciones en<br />
Windows XP, debería estar instalada la versión<br />
2.0 de Image Mastering API para Windows<br />
XP. Si aún no se ha instalado la versión 2.0<br />
de Image Mastering API para Windows XP,<br />
selecciónela de los programas requeridos en la<br />
pantalla de instalación e instálela siguiendo los<br />
procedimientos que se muestran. (El ordenador<br />
debe estar conectado a Internet para realizar<br />
la instalación). Puede instalar la versión 2.0 de<br />
Image Mastering API para Windows XP como<br />
respuesta al mensaje que se muestra cuando<br />
intenta iniciar dichas funciones.<br />
<br />
No se garantiza el funcionamiento si ejecuta<br />
funciones de lectura o escritura de datos<br />
de vídeo con la videocámara utilizando un<br />
software distinto del “PlayMemories Home”<br />
suministrado. Para obtener información sobre<br />
la compatibilidad del software que utilice,<br />
consulte al fabricante de dicho software.<br />
Para desconectar la videocámara del<br />
ordenador<br />
Haga clic en el icono situado en la parte<br />
inferior derecha del escritorio del ordenador<br />
[Extracción segura de Dispositivo de<br />
almacenamiento masivo USB].<br />
Toque [Cancelar] [Sí] en la pantalla de la<br />
videocámara.<br />
Desconecte el cable USB.<br />
Si utiliza Windows 7, es posible que el<br />
icono no aparezca en el escritorio del<br />
ordenador. En ese caso, puede desconectar<br />
la videocámara del ordenador sin necesidad<br />
de seguir el procedimiento descrito<br />
anteriormente.<br />
Notas<br />
No formatee la tarjeta de memoria de la<br />
videocámara en un ordenador. Si lo hace, la<br />
videocámara no funcionará correctamente.<br />
<br />
No inserte discos de grabación AVC<strong>HD</strong><br />
que se hayan creado utilizando el software<br />
“PlayMemories Home” para reproductores o<br />
grabadoras de DVD, ya que estos dispositivos<br />
no son compatibles con el estándar AVC<strong>HD</strong>. Si<br />
lo hace, tal vez no pueda extraer el disco de tales<br />
dispositivos.<br />
ES<br />
Guardar las películas y fotografías en un ordenador
ES<br />
<br />
<br />
<br />
<br />
<br />
<br />
<br />
Esta videocámara captura material de metraje<br />
en alta definición en formato AVC<strong>HD</strong>. Con el<br />
software para PC que se incluye, el material de<br />
metraje en alta definición se puede copiar en<br />
soportes de DVD. Sin embargo, los soportes<br />
de DVD que contienen material de metraje<br />
en formato AVC<strong>HD</strong> no deben utilizarse con<br />
reproductores o grabadoras basados en DVD,<br />
ya que el reproductor o la grabadora de DVD<br />
podría fallar al expulsar el soporte de grabación<br />
y podría borrar su contenido sin previo aviso.<br />
Cuando acceda a la videocámara desde el<br />
ordenador, utilice el software “PlayMemories<br />
Home” suministrado. No modifique los<br />
archivos ni las carpetas de la videocámara<br />
desde el ordenador. Es posible que los archivos<br />
de imágenes se dañen o que no se puedan<br />
reproducir.<br />
Si manipula los datos de la videocámara desde<br />
el ordenador, no se garantiza que funcione.<br />
La videocámara divide automáticamente<br />
los archivos de imágenes de más de 2 GB y<br />
guarda las partes en archivos separados. Todos<br />
los archivos de imágenes se pueden mostrar<br />
como archivos separados en un ordenador,<br />
sin embargo, la función de importación de<br />
la videocámara y el software “PlayMemories<br />
Home” los manejarán correctamente.<br />
Utilice el software “PlayMemories Home”<br />
suministrado para importar películas de<br />
larga duración o imágenes editadas desde la<br />
videocámara a un ordenador. Si utiliza otro<br />
software, es posible que las imágenes no se<br />
importen correctamente.<br />
Cuando borre archivos de imágenes, siga los<br />
pasos de la página 39.<br />
Puede crear un disco Blu-ray utilizando un<br />
ordenador con una grabadora de discos Blu-ray.<br />
Instale el Software Complementario de BD para<br />
“PlayMemories Home”.<br />
Los dispositivos en los que puede<br />
reproducirse el disco creado<br />
Discos Blu-ray<br />
Reproductores de discos Blu-ray como un<br />
reproductor de discos Blu-ray de <strong>Sony</strong> o<br />
una PlayStation3 Discos DVD con calidad de imagen de<br />
alta definición (<strong>HD</strong>)<br />
Dispositivos de reproducción de formato<br />
AVC<strong>HD</strong> , como un reproductor de discos<br />
Blu-ray de <strong>Sony</strong> o una PlayStation3 Notas<br />
<br />
Un disco de grabación AVC<strong>HD</strong> solamente<br />
puede reproducirse en dispositivos compatibles<br />
con el formato AVC<strong>HD</strong>.<br />
Los discos que contienen imágenes grabadas<br />
con calidad de alta definición (<strong>HD</strong>) no deben<br />
utilizarse en los reproductores/grabadoras<br />
de DVD. Puesto que los reproductores o<br />
grabadoras de DVD no son compatibles con<br />
el formato AVC<strong>HD</strong>, es posible que dichos<br />
dispositivos de DVD no puedan expulsar el<br />
disco.<br />
Mantenga siempre la PlayStation3 actualizada<br />
con la última versión del software del sistema<br />
para PlayStation3. La PlayStation <br />
<br />
3 podría<br />
no estar disponible en algunos países y regiones.
Inicio de PlayMemories<br />
Home<br />
1<br />
2<br />
Haga doble clic en el icono de<br />
acceso directo de “PlayMemories<br />
Home” en la pantalla del<br />
ordenador.<br />
Se iniciará el software de PlayMemories<br />
Home.<br />
Haga doble clic en el icono de<br />
acceso directo de la “Guía de<br />
ayuda de PlayMemories Home”<br />
en la pantalla del ordenador para<br />
ver cómo utilizar “PlayMemories<br />
Home”.<br />
Notas<br />
<br />
Si el icono no aparece en la pantalla del<br />
ordenador, haga clic en [Inicio] [Todos los<br />
programas] [PlayMemories Home] el<br />
elemento deseado.<br />
Uso de “Image Data<br />
Converter”<br />
Con “Image Data Converter” puede hacer<br />
lo siguiente:<br />
Editar imágenes grabadas en formato RAW con<br />
varias correcciones, como la curva de tonos y<br />
la nitidez.<br />
Ajustar las imágenes con las funciones de<br />
balance de blancos, exposición y estilo creativo,<br />
etc.<br />
Guardar las imágenes mostradas y editadas en<br />
un ordenador.<br />
También podrá guardar la imagen en formato<br />
RAW o en un formato de archivo general.<br />
Para mostrar y comparar imágenes RAW/JPEG<br />
grabadas con esta cámara.<br />
Puntuar las imágenes en una escala del uno al<br />
cinco.<br />
Ajustar las etiquetas de color.<br />
Para utilizar “Image Data Converter”,<br />
consulte la Ayuda.<br />
Haga clic en [Inicio] [Todos los<br />
programas] [Image Data Converter]<br />
[Ayuda] [Image Data Converter<br />
Ver.4.2].<br />
Página de soporte del “Image Data<br />
Converter” (sólo en inglés)<br />
http://www.sony.co.jp/ids-se/<br />
ES<br />
Guardar las películas y fotografías en un ordenador
ES<br />
Guardar imágenes en un dispositivo externo<br />
Guía de copia<br />
Puede seleccionar el método para guardar películas con calidad de imagen de alta definición<br />
(<strong>HD</strong>) en un dispositivo externo.<br />
Dispositivos externos Cable de conexión Página<br />
Dispositivo de soporte<br />
externo<br />
Guardar imágenes en un<br />
dispositivo de soporte externo<br />
con calidad de alta definición<br />
(<strong>HD</strong>).<br />
Grabadora de disco duro,<br />
etc.<br />
Guardar imágenes en un disco<br />
DVD con calidad de imagen de<br />
definición estándar (STD).<br />
Cable adaptador de<br />
USB VMC-UAM1 (se<br />
vende por separado)<br />
Cable de conexión de<br />
A/V (suministrado)<br />
Películas grabadas con calidad imagen de definición estándar (STD)<br />
Use el cable de conexión de A/V para conectar la videocámara a un dispositivo externo que<br />
contiene las imágenes grabadas.<br />
Los tipos de soportes en los que se guardan las imágenes<br />
Consulte “Selección del modo de grabación” en la página 30.<br />
47<br />
50
Almacenamiento<br />
de imágenes en un<br />
dispositivo de soporte<br />
externo<br />
Puede guardar fotografías y películas<br />
en un soporte externo (dispositivos de<br />
almacenamiento USB), como una unidad<br />
de disco duro externo. También puede<br />
reproducir las imágenes en la videocámara<br />
o en otro dispositivo de reproducción.<br />
Notas<br />
Para esta operación necesita un cable adaptador<br />
de USB VMC-UAM1 (se vende por separado).<br />
Es posible que el cable adaptador de USB VMC-<br />
UAM1 no esté disponible en algunos países o<br />
regiones.<br />
Conecte la videocámara a una toma de corriente<br />
de pared con el adaptador de alimentación de ca<br />
suministrado (pág. 13).<br />
Consulte el manual de instrucciones<br />
suministrado con el dispositivo de soporte<br />
externo.<br />
Sugerencias<br />
El software “PlayMemories Home”<br />
suministrado le permite importar en un<br />
ordenador las imágenes guardadas en el<br />
dispositivo de soporte externo.<br />
Funciones disponibles después de<br />
guardar imágenes en un dispositivo de<br />
soporte externo<br />
Reproducción de imágenes en la videocámara<br />
(pág. 49)<br />
Importación de imágenes en “PlayMemories<br />
Home”<br />
Dispositivos que no pueden utilizarse<br />
como dispositivo de soporte externo<br />
No se pueden utilizar los siguientes dispositivos<br />
como dispositivo de soporte externo:<br />
dispositivos de soporte de una capacidad<br />
superior a 2 TB<br />
unidades de disco normales, como una<br />
unidad de CD o de DVD<br />
dispositivos de soporte conectados mediante<br />
un concentrador USB<br />
dispositivos de soporte con un concentrador<br />
USB integrado<br />
lector de tarjetas<br />
Notas<br />
Es posible que no pueda utilizar un dispositivo<br />
de soporte externo con una función de código.<br />
La videocámara puede utilizar el sistema de<br />
archivos FAT. Si el soporte de almacenamiento<br />
del dispositivo externo está formateado<br />
con el sistema de archivos NTFS, etc., dé<br />
formato al dispositivo de soporte externo en<br />
la videocámara antes de utilizarlo. Aparece<br />
la pantalla de formato cuando se conecta el<br />
dispositivo de soporte externo a la videocámara.<br />
Antes de formatear un dispositivo de soporte<br />
externo en la videocámara, asegúrese de que no<br />
contenga información importante.<br />
No se garantiza el funcionamiento con todos<br />
los dispositivos que cumplan los requisitos de<br />
funcionamiento.<br />
<br />
Si desea más información sobre los dispositivos<br />
de soporte externos disponibles, visite la página<br />
web de asistencia de <strong>Sony</strong> de su país o región.<br />
1<br />
2<br />
3<br />
Conecte el adaptador de<br />
alimentación de ca y el cable<br />
de alimentación a la toma de<br />
entrada de cc de la videocámara<br />
y a la toma mural de corriente.<br />
Si el dispositivo de soporte<br />
externo tiene un cable de<br />
alimentación de ca conéctelo a la<br />
toma de corriente de pared.<br />
Conecte el cable adaptador de<br />
USB al dispositivo de soporte<br />
externo.<br />
ES<br />
Guardar imágenes en un dispositivo externo
ES<br />
4<br />
5<br />
Conecte el cable adaptador<br />
de USB a la toma (USB) de la<br />
videocámara.<br />
Asegúrese de no desconectar el cable<br />
USB mientras aparezca [Preparando<br />
archivo base datos imagen. Espere por<br />
favor.] en la pantalla de cristal líquido.<br />
Si aparece [Rep.arch.b.dat.im.] en la<br />
pantalla de la videocámara, toque<br />
.<br />
Cable adaptador<br />
de USB<br />
VMC-UAM1<br />
(se vende por<br />
separado)<br />
Conecte el dispositivo de soporte<br />
externo a la videocámara y toque<br />
[Copiar.] en la pantalla de la<br />
videocámara.<br />
Las películas y fotografías almacenadas<br />
en la tarjeta de memoria y que<br />
todavía no se hayan guardado en un<br />
dispositivo de soporte externo, pueden<br />
guardarse en este momento en dicho<br />
dispositivo.<br />
Esta operación solamente estará disponible<br />
si hay imágenes grabadas recientemente.<br />
6<br />
Cuando finalice la operación,<br />
toque en la pantalla de la<br />
videocámara.<br />
Cuando se conecta un dispositivo de<br />
soporte externo<br />
Las imágenes guardadas en el dispositivo<br />
de soporte externo aparecen en la pantalla<br />
de cristal líquido. Cuando se conecta<br />
un dispositivo de soporte externo,<br />
aparece el icono de USB en la pantalla de<br />
Visualización eventos, etc.<br />
Puede seleccionar opciones de menú del<br />
dispositivo de soporte externo como,<br />
por ejemplo, eliminar imágenes. Toque<br />
(MENU) [Editar/Copiar] en<br />
Visualización eventos.<br />
Para desconectar el dispositivo de<br />
soporte externo<br />
Toque mientras la videocámara<br />
se encuentra en el modo de espera de<br />
reproducción ([Visualización eventos]<br />
o se muestra la pantalla de índice de<br />
eventos) del dispositivo de soporte<br />
externo.<br />
Desconecte el cable adaptador de USB.
Notas<br />
El número de escenas que pueden guardarse<br />
en un dispositivo de soporte externo es el<br />
siguiente. No obstante, aunque el dispositivo de<br />
soporte externo tenga suficiente espacio libre,<br />
el número máximo de escenas que pueden<br />
guardarse no puede ser mayor que el siguiente.<br />
Películas con calidad de imagen de alta<br />
definición (<strong>HD</strong>): máx. 3 999<br />
Películas con calidad de imagen de definición<br />
estándar (STD): máx. 9 999<br />
Fotos: máx. 40 000<br />
El número de escenas puede ser inferior, según<br />
el tipo de imágenes que se graben.<br />
Guardar las fotografías y películas<br />
que desee<br />
Puede guardar en el dispositivo de soporte<br />
externo las imágenes de la videocámara<br />
que desee.<br />
<br />
<br />
<br />
Conecte la videocámara al<br />
dispositivo de soporte externo y<br />
toque [Reproducir sin copiar.].<br />
Se muestra Visualización eventos del<br />
soporte externo.<br />
Toque (MENU) [Editar/<br />
Copiar] [Copiar].<br />
Siga las instrucciones que<br />
aparecen en pantalla para elegir<br />
los métodos de selección de<br />
imágenes y el tipo de imagen.<br />
No se pueden copiar imágenes desde<br />
un dispositivo de soporte externo al<br />
soporte de grabación interno de la<br />
videocámara.<br />
<br />
<br />
Si ha seleccionado [Múltiples<br />
imágenes], toque la imagen que<br />
desea guardar.<br />
Aparece .<br />
Mantenga pulsada la imagen en la pantalla<br />
de cristal líquido para confirmarla. Toque<br />
para volver a la pantalla anterior.<br />
Si selecciona [Todo en evento], seleccione<br />
el evento que desea copiar con /<br />
. No se pueden seleccionar varios<br />
eventos.<br />
Toque <br />
en la pantalla de la videocámara.<br />
Reproducción de imágenes del<br />
dispositivo de soporte externo en<br />
la videocámara<br />
<br />
<br />
<br />
<br />
Conecte la videocámara al<br />
dispositivo de soporte externo y<br />
toque [Reproducir sin copiar.].<br />
Se muestra Visualización eventos del<br />
dispositivo de soporte externo.<br />
Seleccione la imagen que desee<br />
ver y reprodúzcala (pág. 32).<br />
<br />
También puede ver las imágenes en un<br />
televisor conectado a la videocámara<br />
(pág. 36).<br />
ES<br />
Guardar imágenes en un dispositivo externo
0 ES<br />
<br />
Puede reproducir las películas con calidad<br />
imagen de alta definición (<strong>HD</strong>) en el<br />
ordenador utilizando [Player for AVC<strong>HD</strong>].<br />
Inicie [Player for AVC<strong>HD</strong>] y seleccione<br />
la unidad a la que esté conectado el<br />
dispositivo de soporte externo con<br />
[Configuración].<br />
Para ejecutar [Copia directa]<br />
manualmente<br />
Puede ejecutar [Copia directa]<br />
manualmente mientras la videocámara<br />
está conectada a un dispositivo de soporte<br />
externo.<br />
Toque (MENU) [Editar/<br />
Copiar] [Copia directa] en la<br />
pantalla [Visualización eventos] del<br />
dispositivo de soporte externo.<br />
Toque [Copiar imágenes que no se han<br />
copiado.].<br />
Toque .<br />
Notas<br />
Si la videocámara no reconoce el dispositivo<br />
de soporte externo, pruebe las operaciones<br />
siguientes.<br />
Vuelva a conectar el cable adaptador de USB a<br />
la videocámara.<br />
<br />
Si el dispositivo de soporte externo tiene un<br />
cable de alimentación de ca conéctelo a la<br />
toma de corriente de pared.<br />
Creación de un<br />
disco con calidad de<br />
imagen de definición<br />
estándar (STD) con una<br />
grabadora, etc.<br />
Puede copiar las imágenes que se<br />
reproducen en la videocámara en un disco<br />
o videocasete, conectando la videocámara<br />
a una grabadora de discos o similar con<br />
el cable de conexión de A/V. Conecte<br />
el dispositivo de una de las maneras<br />
ilustradas, o . Consulte asimismo el<br />
manual de instrucciones suministrado de<br />
los dispositivos que conecte.<br />
Notas<br />
Para esta operación, utilice el adaptador de<br />
alimentación de ca suministrado para conectar<br />
la videocámara a una toma de corriente de<br />
pared (pág. 13).<br />
Las películas con calidad de imagen de alta<br />
definición (<strong>HD</strong>) se copian con calidad de<br />
imagen de definición estándar (STD).
(amarillo)<br />
Cable de conexión de A/V<br />
(suministrado)<br />
Conector remoto de A/V<br />
Entrada<br />
Flujo de señales<br />
S VIDEO<br />
VIDEO<br />
(amarillo)<br />
(blanco)<br />
AUDIO<br />
(rojo)<br />
Cable de conexión de A/V con S VIDEO<br />
(se vende por separado)<br />
Con este cable se obtienen imágenes<br />
de mayor calidad que con un cable de<br />
conexión de A/V. Conecte las clavijas<br />
blanca y roja (canal de audio izquierdo/<br />
derecho) y la clavija de S VIDEO (canal<br />
de S VIDEO) del cable de conexión<br />
de A/V con un cable de S VIDEO.<br />
Si solamente conecta la clavija de<br />
S VIDEO, no se oirá el sonido. No es<br />
necesario conectar la clavija amarilla<br />
(vídeo).<br />
1<br />
2<br />
3<br />
4<br />
Introduzca el soporte de<br />
grabación en el dispositivo de<br />
grabación.<br />
Si el dispositivo de grabación tiene un<br />
selector de entrada, ajústelo en el modo<br />
de entrada.<br />
Conecte la videocámara al<br />
dispositivo de grabación<br />
(grabadora de discos, etc.) con<br />
el cable de conexión de A/V <br />
(suministrado) o con un cable de<br />
conexión de A/V con S VIDEO <br />
(se vende por separado).<br />
Conecte la videocámara a las tomas de<br />
entrada del dispositivo de grabación.<br />
Inicie la reproducción en la<br />
videocámara y grabe en el<br />
dispositivo de grabación.<br />
Para obtener más información, consulte los<br />
manuales de instrucciones suministrados<br />
con el dispositivo de grabación.<br />
Cuando finalice la copia, detenga<br />
el dispositivo de grabación<br />
y, a continuación, detenga la<br />
videocámara.<br />
Notas<br />
Debido a que la copia se realiza mediante una<br />
transferencia de datos analógica, es posible que<br />
la calidad de imagen se deteriore.<br />
No es posible copiar imágenes en grabadoras<br />
conectadas con un cable <strong>HD</strong>MI.<br />
ES<br />
1<br />
Guardar imágenes en un dispositivo externo
ES<br />
Para copiar la información de fecha/hora y<br />
los datos de la cámara, toque (MENU)<br />
[Configuración] [ ( Ajustes<br />
reproducción)] [Código datos] el ajuste<br />
deseado .<br />
Si el tamaño de pantalla de los dispositivos<br />
de visualización (televisor, etc.) es 4:3, toque<br />
(MENU) [Configuración] <br />
[ ( Conexión)] [Tipo de TV] [4:3]<br />
.<br />
<br />
Si conecta un dispositivo monoaural,<br />
introduzca la clavija amarilla del cable de<br />
conexión de A/V en la toma de entrada de<br />
vídeo, y la clavija blanca (canal izquierdo) o roja<br />
(canal derecho) en la toma de entrada de audio<br />
del dispositivo.
Personalización de la videocámara<br />
Uso de los menús<br />
El dominio de las operaciones que puede realizar con los menús le ayudará a disfrutar más de su<br />
videocámara.<br />
La videocámara ofrece varios elementos de menú en cada una de las 6 categorías de menú.<br />
Modo toma (Elementos para seleccionar un modo para tomar fotografías) pág. 54<br />
Cámara/Micrófono (Elementos para realizar tomas personalizadas) pág. 54<br />
Calidad img/Tamaño (Elementos para configurar el tamaño o la calidad de la imagen)<br />
pág. 55<br />
Función reproducc. (Elementos para la reproducción) pág. 32<br />
Editar/Copiar (Elementos para la edición) pág. 55<br />
Configuración (Otros elementos de ajuste) pág. 55<br />
Utilización de los menús<br />
Para ajustar los elementos de menú, realice los procedimientos explicados a continuación.<br />
Los menús [Cámara/Micrófono] y [Configuración] tienen subcategorías. Al tocar un icono de<br />
subcategoría, se muestran los menús de otras subcategorías.<br />
Los elementos de menú o ajustes que aparecen atenuados no se encuentran disponibles.<br />
Notas<br />
Es posible que no pueda ajustar algunos elementos de menú, según las condiciones de grabación o<br />
reproducción.<br />
<br />
Toque para terminar de ajustar el menú o para regresar a la pantalla del menú anterior.<br />
ES<br />
Personalización de la videocámara
ES<br />
Listas de menús<br />
Modo toma<br />
Película ....................................... Graba películas.<br />
Foto .............................................. Captura fotografías.<br />
Cámara/Micrófono<br />
( Ajustes manuales)<br />
Medidor/Enfoq punt. ... Ajusta el brillo y el enfoque del motivo seleccionado simultáneamente.<br />
Medición puntual.......... Ajusta el brillo de las imágenes al motivo que toque en la pantalla.<br />
Enfoque puntual ........... Enfoca sobre un motivo que toque en la pantalla.<br />
Exposición ....................... Ajusta el brillo de las películas y las fotografías.<br />
Desplazamiento AE ...... Ajusta la exposición. Toque si el motivo es blanco o el contraste<br />
es brillante, o bien toque si el motivo es negro o la iluminación es<br />
tenue.<br />
( Ajustes de cámara)<br />
Efecto de foto ................. Selecciona el filtro de efecto deseado para obtener un efecto más<br />
impresionante y artístico.<br />
Efecto cine ............... Ajusta el color de la película para que simule la atmósfera cinematográfica<br />
cuando grabe.<br />
Contador automát ... Establece el disparador automático cuando la videocámara se encuentra<br />
en modo de grabación de fotos.<br />
Modo manejo ......... Establece la toma de imágenes en modo continuo o por tramos, etc.<br />
Modo AF ................... Selecciona el método de enfoque.<br />
SteadyShot .............. Establece la función SteadyShot cuando se graban películas.<br />
SteadyShot .............. Establece la función SteadyShot cuando se toman fotografías.<br />
Contraluz automática ... Ajusta la exposición para motivos a contraluz automáticamente.<br />
Botón MANUAL .............. Asigna una función al botón MANUAL.<br />
Capt. tamaño APS-C ..... Cambia el tamaño de la imagen en función del objetivo acoplado.<br />
Detección de fase AF.... Acelera automáticamente el enfoque automático cuando se acopla un<br />
objetivo compatible.<br />
( Cara)<br />
Detección de cara ......... Ajusta la calidad de la imagen de las caras automáticamente.<br />
( Flash)<br />
Flash ................................... Establece el modo de activación del flash.<br />
Nivel de flash .................. Establece el brillo del flash.<br />
Reduc. ojos rojos ........... Evita el efecto de ojos rojos cuando se capturan imágenes con flash.<br />
( Micrófono)<br />
Reducc. ruido viento .... Reduce el ruido del viento.<br />
Modo audio ..................... Establece el formato de sonido de la grabación (sonido envolvente de<br />
5,1 canales/sonido estéreo de 2 canales).<br />
Nivel grabac. audio ....... Ajusta el nivel de audio durante la grabación.
( Asistencia de toma)<br />
Guía encuadre ................ Muestra el marco para asegurarse de que el motivo está en un encuadre<br />
horizontal o vertical.<br />
Cebra ................................. Muestra un patrón de cebra que sirve de guía para ajustar el brillo.<br />
Atenuación ...................... Muestra una imagen en la pantalla de cristal líquido con el contorno<br />
realzado.<br />
Histograma ...................... Muestra el Histograma.<br />
Vis. datos cám. ................ Muestra el valor del iris, ganancia (ISO) y velocidad de obturación.<br />
Visual. nivel aud. ............ Muestra el medidor del nivel de audio en la pantalla de cristal líquido.<br />
Micro ajuste AF .............. Ajusta el enfoque del objetivo instalado.<br />
Zoom digital ................... Establece el zoom digital.<br />
Palanca del zoom .......... Establece la función asignada a la palanca del zoom.<br />
Velocidad del zoom ...... Cambia la velocidad del zoom cuando se presiona la palanca del zoom.<br />
Calidad img/Tamaño<br />
Modo Grabación ............. Establece el modo de grabación de películas. Para grabar un sujeto que se<br />
mueve rápidamente, es aconsejable utilizar una calidad de imagen alta.<br />
Imág. p. segundo ............ Establece la velocidad de fotogramas para grabar películas.<br />
Ajuste / .................. Establece la calidad de la imagen para grabar, reproducir o editar películas.<br />
Modo panorámico.......... Establece la relación de formato horizontal-vertical al grabar películas con<br />
una calidad de imagen de definición estándar (STD).<br />
Tam imagen ...................... Establece el tamaño de la fotografía.<br />
RAW/JPEG .......................... Selecciona el formato de compresión de las imágenes fijas.<br />
Función reproducc. ........... Permite ver fotografías/vídeos grabados (pág. 32).<br />
Editar/Copiar<br />
Borrar .......................................... Borra películas o fotografías.<br />
Proteger ..................................... Protege las películas o fotografías para impedir que se borren.<br />
Copiar.......................................... Selecciona y copia películas o fotografías a un soporte externo.<br />
Copia directa ............................ Copia imágenes almacenadas en el soporte de grabación a algún tipo de<br />
soporte externo.<br />
Configuración<br />
( Ajustes de soporte)<br />
Info soporte ..................... Muestra información sobre el soporte de grabación, como el espacio libre.<br />
Formatear ........................ Elimina todos los datos del soporte de grabación.<br />
Rep.arch.b.dat.im. ......... Repara el archivo de base de datos de imagen en el soporte de grabación<br />
(pág. 60).<br />
Número Archivo ............ Establece la forma de asignar el número de archivo.<br />
( Ajustes reproducción)<br />
Código datos .................. Establece la fecha y la hora.<br />
Volumen ........................... Ajusta el volumen del sonido de reproducción (pág. 34).<br />
ES<br />
Personalización de la videocámara
ES<br />
( Conexión)<br />
Tipo de TV ........................ Convierte la señal en función del televisor conectado (pág. 36).<br />
Salida componente ...... Seleccione esta opción cuando conecte la videocámara a un televisor<br />
mediante la toma de entrada de componente (pág. 37).<br />
Resolución <strong>HD</strong>MI ........... Selecciona la resolución de salida de la imagen al conectar la videocámara<br />
a un televisor con un cable <strong>HD</strong>MI (se vende por separado).<br />
Conexión USB ................. Selecciona el tipo de soporte de grabación que se va a utilizar en la<br />
videocámara cuando esté conectada a un dispositivo externo mediante<br />
USB.<br />
Ajuste conexión USB .... Establece el modo de conexión cuando la videocámara está conectada a un<br />
ordenador o a un dispositivo USB.<br />
Grabar en disco .............. Guarda imágenes que aún no se han grabado en un disco.<br />
( Ajustes generales)<br />
Pitido ................................. Establece si se emiten o no pitidos durante el funcionamiento de la<br />
videocámara.<br />
Luminosidad LCD .......... Ajusta el brillo de la pantalla de cristal líquido.<br />
Temper. color visor ....... Establece la temperatura de color del visor.<br />
Visor/Panel ....................... Cambia la visualización entre el visor y la pantalla LCD.<br />
Ajuste pantalla ............... Establece el período de tiempo que se muestran los iconos o indicadores<br />
en la pantalla de cristal líquido.<br />
Indicador grabación ..... Apaga el indicador de grabación de la parte frontal de la videocámara.<br />
Captura sin objetivo ..... Establece si se puede o no iniciar la grabación cuando no hay ningún<br />
objetivo instalado.<br />
Mando a distancia ........ Establece si debe utilizarse o no el mando a distancia inalámbrico.<br />
Apagado auto ................ Establece que la videocámara se apague automáticamente (pág. 14).<br />
Language Setting ......... Establece el idioma de la pantalla (pág. 21).<br />
Modo 24p* ...................... Graba películas 24p en un sistema PAL.<br />
Calibración....................... Calibra el panel táctil.<br />
Información batería...... Muestra la información de la batería.<br />
Versión .............................. Muestra la versión de la videocámara y del objetivo.<br />
( Ajustes del reloj)<br />
Config.fecha y hora ...... Establece los ajustes de [Fecha y hora], [Hora verano] o [Format fecha y<br />
hora] (pág. 19).<br />
Configuración área ....... Ajusta una diferencia horaria sin detener el reloj (pág. 19).<br />
* Solo en el modelo NEX-VG900E
Obtención de<br />
información detallada<br />
de la Guía práctica de<br />
“Handycam”<br />
La Guía práctica de “Handycam” es una<br />
guía de usuario diseñada para leerla en la<br />
pantalla de un ordenador. La Guía práctica<br />
de “Handycam” se ha diseñado para<br />
leerla cuando desee saber más acerca del<br />
funcionamiento de la videocámara.<br />
1<br />
2<br />
3<br />
Para instalar la Guía práctica de<br />
“Handycam” en un ordenador con<br />
SO Windows, coloque el CD-ROM<br />
suministrado en la unidad de<br />
disco del ordenador.<br />
Aparecerá la pantalla de instalación.<br />
Si la pantalla no aparece, haga clic en<br />
[Inicio] [Equipo] (en Windows XP, [Mi<br />
PC]) (PMHOME) [install.exe].<br />
Haga clic en [Guía práctica].<br />
Haga clic en el idioma que desee<br />
y en el nombre del modelo de<br />
la videocámara [Instalación],<br />
y siga las instrucciones que<br />
aparecen en pantalla para instalar<br />
la Guía práctica de “Handycam”.<br />
El nombre del modelo de la videocámara<br />
está impreso en la superficie inferior.<br />
Para ver la Guía práctica de “Handycam”,<br />
haga doble clic en el icono de acceso directo<br />
de la pantalla del ordenador.<br />
Si utiliza un Mac, abra la carpeta [Handbook]<br />
– [ESUS] del CD-ROM y copie<br />
[Handbook.pdf].<br />
Necesitará Adobe Reader para leer la Guía<br />
práctica de “Handycam”. Si no está instalado en<br />
el ordenador, puede descargarlo desde la página<br />
web de Adobe Systems:<br />
http://www.adobe.com/<br />
<br />
Consulte la “Guía de ayuda de PlayMemories<br />
Home” para obtener más información sobre el<br />
software “PlayMemories Home” suministrado<br />
(pág. 42).<br />
ES<br />
Personalización de la videocámara
ES<br />
Información complementaria<br />
Solución de<br />
problemas<br />
Si surge algún problema al utilizar la<br />
videocámara, siga los pasos que se indican a<br />
continuación.<br />
<br />
Compruebe la lista (pág. 58 a 60) e<br />
inspeccione la videocámara.<br />
Retire la fuente de alimentación,<br />
conéctela otra vez después de<br />
1 minuto aproximadamente y<br />
encienda la videocámara.<br />
Pulse RESET (pág. 73) con un<br />
objeto puntiagudo y encienda la<br />
videocámara.<br />
Si pulsa RESET, se restablecerán todos<br />
los ajustes, incluido el del reloj.<br />
Póngase en contacto con su<br />
distribuidor de <strong>Sony</strong> o con un centro<br />
de servicio técnico local autorizado<br />
de <strong>Sony</strong>.<br />
Consulte la Guía práctica de “Handycam”<br />
(pág. 57) para obtener más información sobre<br />
los problemas de la videocámara y consulte<br />
“Guía de ayuda de PlayMemories Home”<br />
(pág. 45) para saber cómo conectarla a un<br />
ordenador.<br />
La videocámara no se enciende.<br />
Instale una batería cargada en la videocámara<br />
(pág. 12).<br />
Conecte la clavija del adaptador de<br />
alimentación de ca a la toma de corriente de<br />
pared (pág. 12).<br />
La videocámara no funciona aun cuando<br />
la alimentación está activada.<br />
Después de encender la videocámara, ésta<br />
tarda unos segundo en estar lista para<br />
tomar imágenes. No se trata de un fallo de<br />
funcionamiento.<br />
Desconecte el adaptador de alimentación de<br />
ca de la toma de corriente de pared o extraiga<br />
la batería y vuelva a realizar la conexión<br />
transcurrido aproximadamente 1 minuto.<br />
Si la videocámara sigue sin funcionar, pulse<br />
RESET (pág. 73) con un objeto puntiagudo.<br />
(Tras pulsar RESET, se restablecerán todos los<br />
ajustes, incluido el reloj).<br />
La temperatura de la videocámara es muy alta.<br />
Apague la videocámara y déjela durante un<br />
momento en un lugar fresco.<br />
La temperatura de la videocámara es muy<br />
baja. Deje la videocámara con la alimentación<br />
encendida. Si todavía no puede utilizar la<br />
videocámara, apáguela y llévela a un lugar<br />
cálido. Deje allí la videocámara unos minuto y<br />
después enciéndala.<br />
La videocámara se calienta.<br />
Puede que la videocámara se caliente durante<br />
el funcionamiento. No se trata de un fallo de<br />
funcionamiento.<br />
La alimentación se desconecta de<br />
repente.<br />
Utilice el adaptador de alimentación de ca<br />
(pág. 13).<br />
Vuelva a encenderla.<br />
<br />
Cargue la batería (pág. 12).
Al pulsar START/STOP o PHOTO no se<br />
graban las imágenes.<br />
Pulse MODE para encender el indicador<br />
(película) o (fotografía).<br />
La videocámara está grabando en la tarjeta de<br />
memoria la imagen que acaba de tomar. No<br />
se puede realizar ninguna grabación nueva<br />
durante este período.<br />
El soporte de grabación está lleno. Elimine las<br />
imágenes que no necesite (pág. 39).<br />
El número total de escenas de película o<br />
fotografías ha superado la capacidad de<br />
grabación de la videocámara (pág. 61).<br />
Elimine las imágenes que no necesite<br />
(pág. 39).<br />
La grabación se detiene.<br />
La temperatura de la videocámara es muy alta<br />
o muy baja. Apague la videocámara y déjela<br />
durante un tiempo en un lugar fresco o cálido.<br />
“PlayMemories Home” no puede<br />
instalarse.<br />
Compruebe el entorno del ordenador o el<br />
procedimiento necesario para la instalación de<br />
“PlayMemories Home” (pág. 41).<br />
“PlayMemories Home” no funciona<br />
correctamente.<br />
Salga de “PlayMemories Home” y reinicie el<br />
ordenador.<br />
El ordenador no reconoce la videocámara.<br />
Desconecte cualquier dispositivo conectado<br />
a la toma USB del ordenador que no sea el<br />
teclado, el ratón y la videocámara.<br />
Desconecte el cable USB del ordenador y la<br />
videocámara, reinicie el ordenador y conecte<br />
otra vez el ordenador y la videocámara de<br />
manera ordenada.<br />
Visualización de autodiagnóstico/<br />
Indicadores de advertencia<br />
Si aparecen indicadores en la pantalla de<br />
cristal líquido o el visor, compruebe lo<br />
siguiente.<br />
Si el problema persiste aun después de<br />
intentar solucionarlo varias veces, póngase<br />
en contacto con su distribuidor de <strong>Sony</strong><br />
o con un centro de servicio técnico local<br />
autorizado de <strong>Sony</strong>. En ese caso, cuando<br />
se ponga en contacto con ellos, indíqueles<br />
todos los números del código de error que<br />
empiece con C o E.<br />
C:04:<br />
La batería no es una batería “InfoLITHIUM”<br />
de serie V. Utilice una batería “InfoLITHIUM”<br />
(serie V) (pág. 12).<br />
Conecte firmemente la clavija de cc del<br />
adaptador de alimentación de ca a la<br />
videocámara (pág. 12).<br />
C:06:<br />
La temperatura de la batería es elevada.<br />
Cambie la batería o colóquela en un lugar<br />
fresco.<br />
C:13: / C:32:<br />
Desconecte la fuente de alimentación.<br />
Conéctela de nuevo y vuelva a poner en<br />
funcionamiento la videocámara.<br />
E::<br />
Siga los pasos a partir del en la página 58.<br />
<br />
<br />
El nivel de carga de la batería es bajo.<br />
ES<br />
Información complementaria
0 ES<br />
<br />
<br />
<br />
<br />
<br />
<br />
<br />
<br />
La temperatura de la batería es elevada.<br />
Cambie la batería o colóquela en un lugar<br />
fresco.<br />
No se ha insertado ninguna tarjeta de<br />
memoria (pág. 25).<br />
Cuando el indicador parpadea quiere decir<br />
que no hay espacio libre suficiente para grabar<br />
imágenes. Borre las imágenes que no necesite<br />
(pág. 39) o formatee la tarjeta de memoria<br />
después de guardar las imágenes en otro<br />
soporte de almacenamiento.<br />
El archivo de base de datos de imágenes<br />
está dañado. Compruebe el archivo de<br />
base de datos, tocando (MENU) <br />
[Configuración] [Rep.arch.b.dat.im.].<br />
La tarjeta de memoria está dañada. Formatee la<br />
tarjeta de memoria con la videocámara (pág. 55).<br />
La tarjeta de memoria que se ha insertado no es<br />
compatible (pág. 26).<br />
<br />
La tarjeta de memoria está protegida contra<br />
escritura.<br />
Se ha restringido el acceso a la tarjeta de<br />
memoria en otro dispositivo.<br />
(indicador de advertencia referente al<br />
dispositivo de soporte externo)<br />
El archivo de base de datos de imágenes<br />
puede estar dañado. Compruebe el archivo<br />
de base de datos, tocando (MENU) <br />
[Configuración] [Rep.arch.b.dat.im.]<br />
El dispositivo de soporte externo está dañado.<br />
(indicador de advertencia referente<br />
al formateo del dispositivo de soporte<br />
externo)<br />
El dispositivo de soporte externo está dañado.<br />
El dispositivo de soporte externo no está<br />
formateado correctamente.<br />
<br />
La videocámara está en posición inestable.<br />
Mantenga la videocámara en una posición estable<br />
sujetándola con ambas manos. No obstante, tenga<br />
en cuenta que el indicador de advertencia de<br />
sacudidas de la cámara no desaparecerá.<br />
La tarjeta de memoria está llena. Elimine las<br />
imágenes que no necesite (pág. 39).<br />
<br />
No se pueden grabar fotografías durante el<br />
procesamiento. Espere unos minuto y grábelas a<br />
continuación.
Tiempo de grabación<br />
de películas/número<br />
de fotografías que se<br />
pueden grabar<br />
“<strong>HD</strong>” significa calidad de imagen de alta<br />
definición y “STD” significa calidad de<br />
imagen estándar.<br />
Tiempo previsto de grabación y<br />
reproducción con cada batería<br />
Tiempo de grabación<br />
Tiempo disponible aproximado cuando se<br />
utiliza una batería completamente cargada.<br />
Batería Tiempo de<br />
grabación continuo<br />
Calidad de<br />
imagen<br />
NP-FV70<br />
(suministrada)<br />
(unidad: minuto)<br />
Tiempo de<br />
grabación normal<br />
<strong>HD</strong> STD <strong>HD</strong> STD<br />
160<br />
145<br />
NP-FV100 325<br />
295<br />
170<br />
150<br />
340<br />
305<br />
90<br />
80<br />
180<br />
160<br />
95<br />
80<br />
185<br />
165<br />
Arriba: cuando se graba con la pantalla de<br />
cristal líquido<br />
Abajo: cuando se graba con el visor<br />
Cada tiempo de grabación se mide en las<br />
siguientes condiciones.<br />
[ Modo Grabación]: Estándar (ajuste<br />
predeterminado)<br />
Al utilizar el adaptador de montura LA-EA3<br />
(suministrado) y el objetivo SAL-2470Z (se<br />
vende por separado)<br />
El tiempo de grabación normal muestra el<br />
tiempo disponible cuando se inicia/detiene la<br />
grabación varias veces, cambiando el indicador<br />
MODE y utilizando el zoom.<br />
Tiempos medidos cuando se utiliza la<br />
videocámara a 25 C Se recomiendan de 10 C<br />
a 30 C<br />
El tiempo de grabación y reproducción será más<br />
corto cuando se utilice la videocámara a bajas<br />
temperaturas.<br />
<br />
El tiempo de grabación y reproducción será más<br />
corto en función de las condiciones bajo las que<br />
utilice la videocámara.<br />
Tiempo de reproducción<br />
Tiempo disponible aproximado cuando se<br />
utiliza una batería completamente cargada.<br />
(unidad: minuto)<br />
Batería<br />
Calidad de imagen <strong>HD</strong> STD<br />
NP-FV70<br />
375 415<br />
(suministrada) 315 345<br />
NP-FV100 745 830<br />
625 680<br />
<br />
Arriba: cuando se graba con la pantalla de<br />
cristal líquido<br />
Abajo: cuando se graba con el visor<br />
Tiempo de grabación previsto para<br />
las películas<br />
Calidad de imagen de alta definición (<strong>HD</strong>)<br />
(unidad: minuto)<br />
16 GB 32 GB 64 GB<br />
75 150 305<br />
(75) (150) (305)<br />
85 180 360<br />
(85) (180) (360)<br />
120 245 490<br />
(120) (245) (490)<br />
210 430 865<br />
(160) (325) (655)<br />
370 740 1490<br />
(300) (610) (1225)<br />
ES<br />
1<br />
Información complementaria
ES<br />
Calidad de imagen de definición estándar (STD)<br />
(unidad: minuto)<br />
16 GB 32 GB 64 GB<br />
220<br />
(200)<br />
445<br />
(410)<br />
895<br />
(825)<br />
Notas<br />
Cuando se utilizan tarjetas de memoria <strong>Sony</strong>.<br />
El tiempo de grabación puede variar en función<br />
de las condiciones de la grabación y del motivo,<br />
así como de las opciones [ Modo Grabación]<br />
y [ Imág. p. segundo] (pág. 55).<br />
El número entre paréntesis ( ) corresponde al<br />
tiempo de grabación mínimo.<br />
Sugerencias<br />
<br />
La videocámara utiliza el formato VBR<br />
(velocidad de bits variable) para ajustar<br />
automáticamente la calidad de la imagen para<br />
que se ajuste a la escena que se está grabando.<br />
Esta tecnología causa fluctuaciones en los<br />
tiempos de grabación del soporte. Las películas<br />
que contienen imágenes complejas y que se<br />
mueven rápidamente se graban a una velocidad<br />
de bits mayor, lo que reduce el tiempo de<br />
grabación total.<br />
Número previsto de fotografías<br />
que se pueden grabar<br />
Tamaño completo<br />
JPEG RAW RAW & JPEG<br />
16 GB 1600 600 435<br />
32 GB 3200 1200 870<br />
64 GB 6400 2400 1750<br />
Tamaño APS-C<br />
JPEG RAW RAW & JPEG<br />
16 GB 3250 1300 950<br />
32 GB 6600 2600 1900<br />
64 GB 13000 5200 3750<br />
<br />
<br />
<br />
<br />
<br />
Cuando [ Tam imagen] está ajustado en<br />
[ 24,0M] (tamaño completo), [ 10,3M]<br />
(tamaño APS-C).<br />
Cuando se utilizan tarjetas de memoria <strong>Sony</strong>.<br />
El tamaño de imagen seleccionado se activa<br />
cuando el indicador (fotografía) está<br />
encendido.<br />
El número indicado de fotografías que se<br />
pueden grabar en la tarjeta de memoria<br />
corresponde al tamaño de imagen máximo de la<br />
videocámara. El número real de fotografías que<br />
se pueden grabar se muestra en la pantalla de<br />
cristal líquido durante la grabación (pág. 69).<br />
El número de fotografías que se pueden grabar<br />
en la tarjeta de memoria puede variar en<br />
función de las condiciones de grabación.<br />
Sugerencias<br />
También se puede utilizar una tarjeta de<br />
memoria con una capacidad inferior a 1 GB<br />
para grabar fotografías.<br />
La lista siguiente muestra la velocidad de<br />
bits, los píxeles y el formato de cada modo de<br />
grabación (película + audio, etc.).<br />
Calidad de imagen de alta definición (<strong>HD</strong>):<br />
PS: máx. 28 Mbps; 1 920 píxeles 1 080<br />
píxeles/16:9<br />
FX: máx. 24 Mbps; 1 920 píxeles 1 080<br />
píxeles/16:9<br />
FH: aprox. 17 Mbps (promedio); 1 920 píxeles<br />
1 080 píxeles/16:9<br />
HQ: aprox. 9 Mbps (promedio); 1 440 píxeles<br />
1 080 píxeles/16:9<br />
LP: aprox. 5 Mbps (promedio); 1 440 píxeles<br />
1 080 píxeles/16:9<br />
Calidad de imagen de definición estándar<br />
(STD):<br />
HQ: aprox. 9 Mbps (promedio) 720 píxeles <br />
480 píxeles (NEX-VG900), 720 píxeles <br />
576 píxeles (NEX-VG900E)/16:9, 4:3
Píxeles de grabación de fotografías y formato.<br />
Modo de grabación de fotografías<br />
Tamaño completo:<br />
6 000 puntos 4 000 puntos/3:2<br />
6 000 puntos 3 376 puntos/16:9<br />
3 936 puntos 2 624 puntos/3:2<br />
3 936 puntos 2 216 puntos/16:9<br />
2 640 puntos 1 760 puntos/3:2<br />
2 640 puntos 1 488 puntos/16:9<br />
Tamaño APS-C:<br />
3 936 puntos 2 624 puntos/3:2<br />
3 936 puntos 2 216 puntos/16:9<br />
2 640 puntos 1 760 puntos/3:2<br />
2 640 puntos 1 488 puntos/16:9<br />
1 728 puntos 1 152 puntos/3:2<br />
1 728 puntos 976 puntos/16:9<br />
Captura de fotografías de una película<br />
(NEX-VG900):<br />
1 920 puntos 1 080 puntos/16:9<br />
640 puntos 360 puntos/16:9<br />
640 puntos 480 puntos/4:3<br />
Precauciones<br />
Uso y cuidados<br />
No utilice ni almacene la videocámara y los<br />
accesorios en los siguientes lugares:<br />
En lugares extremadamente cálidos, fríos<br />
o húmedos. Nunca los deje expuestos a<br />
temperaturas superiores a 60 C como, por<br />
ejemplo, bajo la luz solar directa, cerca de<br />
calefactores o en un automóvil estacionado al<br />
sol, ya que podrían deformarse o sufrir fallos<br />
de funcionamiento.<br />
Cerca de campos magnéticos intensos o<br />
vibraciones mecánicas. La videocámara<br />
podría sufrir fallos de funcionamiento.<br />
Cerca de ondas radiofónicas fuertes o<br />
radiaciones. Es posible que la videocámara no<br />
pueda grabar correctamente.<br />
Cerca de receptores de AM y de equipos de<br />
vídeo. Es posible que se produzcan ruidos.<br />
En una playa o cualquier lugar con<br />
mucho polvo. Si entra arena o polvo en la<br />
videocámara, pueden causar un fallo de<br />
funcionamiento. En ocasiones, estos fallos de<br />
funcionamiento pueden resultar irreparables.<br />
Cerca de ventanas o al aire libre, donde<br />
la pantalla de cristal líquido, el visor o el<br />
objetivo pueden quedar expuestos a la luz<br />
solar directa. Esto dañaría el interior del visor<br />
o la pantalla de cristal líquido.<br />
Alimente la videocámara con cc de 6,8 V/<br />
7,2 V (batería) o cc de 8,4 V (adaptador de<br />
alimentación de ca)<br />
Para alimentarla con cc o ca utilice los<br />
accesorios recomendados en este manual de<br />
instrucciones.<br />
No permita que la videocámara se moje; por<br />
ejemplo, bajo la lluvia o por el agua del mar. Si<br />
la videocámara se moja, podría sufrir fallos de<br />
funcionamiento. En ocasiones, estos fallos de<br />
funcionamiento pueden resultar irreparables.<br />
Si dentro de la videocámara entra algún objeto<br />
o líquido, desconéctela y haga que la revise un<br />
distribuidor de <strong>Sony</strong> antes de volver a utilizarla.<br />
<br />
Evite manipular, desmontar o modificar la<br />
videocámara bruscamente y exponerla a<br />
golpes o impactos como martillazos, caídas o<br />
pisotones. Sea especialmente cuidadoso con el<br />
objetivo.<br />
ES<br />
Información complementaria
ES<br />
Cuando no utilice la videocámara, manténgala<br />
apagada.<br />
No utilice la videocámara envuelta en<br />
una toalla, por ejemplo. Si lo hace, puede<br />
recalentarse internamente.<br />
Cuando desconecte el cable de alimentación,<br />
tire siempre de la clavija, nunca del cable.<br />
Procure no dañar el cable de alimentación al<br />
colocar algún objeto pesado sobre él.<br />
No utilice una batería que esté deformada o<br />
dañada.<br />
Mantenga limpios los contactos metálicos.<br />
Si se producen fugas del líquido electrolítico<br />
de la pila:<br />
Póngase en contacto con un centro de servicio<br />
técnico local autorizado de <strong>Sony</strong>.<br />
Límpiese con agua cualquier líquido que haya<br />
estado en contacto con su piel.<br />
Si le cae líquido en los ojos, láveselos con agua<br />
abundante y acuda a un médico.<br />
Cuando no utilice la videocámara<br />
durante un tiempo prolongado<br />
Para mantener la videocámara en un estado<br />
óptimo durante un tiempo máximo, utilícela<br />
aproximadamente una vez al mes para grabar y<br />
reproducir imágenes.<br />
Agote la batería completamente antes de<br />
guardarla.<br />
Pantalla de cristal líquido<br />
No ejerza excesiva presión sobre la pantalla de<br />
cristal líquido, ya que podría dañarla.<br />
Cuando utilice la videocámara en un lugar frío,<br />
es posible que en la pantalla de cristal líquido<br />
aparezca una imagen residual. No se trata de un<br />
fallo de funcionamiento.<br />
<br />
Mientras utiliza la videocámara, la parte<br />
posterior de la pantalla de cristal líquido se<br />
puede calentar. No se trata de un fallo de<br />
funcionamiento.<br />
Para limpiar la pantalla de cristal líquido<br />
<br />
<br />
<br />
Si hay grasa o crema de manos en la pantalla, el<br />
revestimiento desaparece con mayor facilidad.<br />
Límpiela inmediatamente.<br />
El revestimiento se puede arañar si limpia la<br />
pantalla con un pañuelo o similar.<br />
Si la pantalla se mancha con huellas dactilares y<br />
polvo, se recomienda eliminar el polvo primero<br />
con un soplador o similar y, a continuación,<br />
utilizar un paño suave para eliminar las huellas<br />
dactilares.<br />
Manipulación de la unidad<br />
Si la carcasa está sucia, lave el cuerpo de la<br />
videocámara con un paño suave ligeramente<br />
humedecido con agua y, a continuación, séquela<br />
con un paño suave y seco.<br />
No realice ninguna de las acciones siguientes<br />
para evitar dañar el acabado:<br />
Usar productos químicos como disolventes,<br />
bencina, alcohol, paños con productos<br />
químicos, repelentes, insecticidas y pantallas<br />
solares<br />
Utilizar la videocámara con las sustancias<br />
mencionadas en las manos<br />
Dejar la unidad en contacto con objetos de<br />
goma o vinilo durante un tiempo prolongado<br />
Cuidado y almacenamiento del<br />
objetivo<br />
Frote la superficie del objetivo con un paño<br />
suave en los casos siguientes:<br />
Cuando haya huellas dactilares en la<br />
superficie del objetivo<br />
En lugares cálidos o húmedos<br />
Cuando el objetivo esté expuesto al aire salado<br />
como, por ejemplo, a orillas del mar<br />
Guárdelo en un lugar bien ventilado donde no<br />
haya suciedad ni mucho polvo.<br />
Para evitar la aparición de moho, limpie el<br />
objetivo periódicamente como se ha descrito<br />
anteriormente.
Carga de la batería recargable<br />
preinstalada<br />
La videocámara contiene una batería recargable<br />
preinstalada para conservar la fecha, la hora y<br />
otros ajustes aunque la videocámara esté apagada.<br />
La batería recargable preinstalada siempre se<br />
carga mientras la videocámara está conectada a la<br />
toma de corriente de pared mediante el adaptador<br />
de alimentación de ca o cuando la batería está<br />
instalada. La batería recargable se descargará<br />
completamente transcurridos aproximadamente<br />
3 meses si no utiliza la videocámara en absoluto.<br />
Utilice la videocámara después de cargar la<br />
batería recargable preinstalada. Sin embargo,<br />
aunque no esté cargada, el funcionamiento de la<br />
videocámara no se verá afectado, siempre que no<br />
se esté grabando la fecha.<br />
Procedimientos<br />
Conecte la videocámara a una toma de corriente<br />
de pared con el adaptador de alimentación de ca<br />
suministrado, y déjela así durante más de 24 hora.<br />
Nota sobre la eliminación o el traspaso<br />
de una tarjeta de memoria<br />
Aunque borre los datos de la tarjeta de memoria<br />
o la formatee en la videocámara o un ordenador,<br />
es posible que los datos que contiene la tarjeta<br />
no se borren por completo. Si cede la tarjeta<br />
de memoria a otra persona, se recomienda que<br />
elimine completamente la información que<br />
contiene con un software de eliminación de<br />
datos en un ordenador. Asimismo, cuando se<br />
disponga a deshacerse de la tarjeta de memoria, se<br />
recomienda destruirla físicamente.<br />
Para cambiar la pila del mando a<br />
distancia inalámbrico<br />
Mientras presiona la pestaña, introduzca la<br />
uña en la hendidura y tire del compartimiento<br />
de la batería.<br />
Coloque una pila nueva con la cara + orientada<br />
hacia arriba.<br />
Inserte el compartimiento de la batería en<br />
el mando a distancia inalámbrico hasta que<br />
encaje.<br />
Pestaña<br />
ADVERTENCIA<br />
La pila puede explotar si no se manipula<br />
correctamente. No la recargue o la desarme, ni<br />
la arroje al fuego.<br />
Cuando la pila de litio comience a agotarse, es<br />
posible que el mando a distancia inalámbrico<br />
no funcione correctamente o que su distancia<br />
de funcionamiento se acorte. En este caso,<br />
sustitúyala por una pila de litio de <strong>Sony</strong><br />
CR2025. Si utiliza otra pila, podría producirse<br />
un incendio o una explosión.<br />
ES<br />
Información complementaria
ES<br />
Especificaciones<br />
Sistema<br />
Formato de la señal:<br />
NEX-VG900:<br />
color NTSC, estándares EIA<br />
Especificación de <strong>HD</strong>TV 1080/60i, 1080/60p<br />
NEX-VG900E:<br />
color PAL, estándares CCIR<br />
Especificación de <strong>HD</strong>TV 1080/50i, 1080/50p<br />
color NTSC, estándares EIA, especificación<br />
de <strong>HD</strong>TV 1080/60i (solo en modo de<br />
grabación 24p)<br />
Formato de grabación de películas:<br />
<strong>HD</strong>: compatible con el formato MPEG-4<br />
AVC/H.264 AVC<strong>HD</strong> versión 2,0<br />
STD: MPEG2-PS<br />
Sistema de grabación de audio:<br />
Dolby <strong>Digital</strong> de 2 canales/5,1 canales<br />
Dolby <strong>Digital</strong> 5.1 Creator<br />
Formato de archivo de fotografía<br />
Compatible con DCF Ver.2,0<br />
Compatible con Exif Ver.2,3<br />
Compatible con MPF Baseline<br />
Soporte de grabación (película/fotografía)<br />
“Memory Stick PRO Duo”<br />
Tarjeta SD (Clase 4 o más rápida)<br />
Visor:<br />
Visor electrónico: color<br />
Tamaño de la pantalla: 1,3 cm (tipo 0,5)<br />
Número de píxeles efectivo: 2 359 296 puntos<br />
(3 072 768)<br />
Dispositivo de imagen: sensor CMOS de 36,1 mm<br />
24,3 mm (35 mm a tamaño completo)<br />
Píxeles de grabación (imágenes fijas de 3:2<br />
JPEG):<br />
máx. 24,0 mega (6 000 4 000) píxeles<br />
Bruto: aprox. 24 660 000 píxeles<br />
Efectivo (película, 16:9):<br />
aprox. 20 300 000 píxeles<br />
Efectivo (fotografía, 16:9):<br />
aprox. 20 300 000 píxeles<br />
Efectivo (fotografía, 3:2):<br />
aprox. 24 300 000 píxeles<br />
Temperatura de color: [Auto], [Una pulsación],<br />
[Interior] (3 200 K), [Exterior] (5 600 K),<br />
manual (2 500 K – 9 900 K)<br />
Iluminación mínima<br />
8 lx (lux) (de manera predeterminada,<br />
velocidad de obturación de 1/60 de segundo<br />
(NEX-VG900) / 1/50 de segundo<br />
(NEX-VG900E), ganancia: 30 dB, apertura<br />
F3,5)<br />
Conectores de entrada y salida<br />
Conector remoto de A/V: toma de componente/<br />
salida de vídeo y audio<br />
Toma <strong>HD</strong>MI OUT: conector <strong>HD</strong>MI mini<br />
Toma USB: mini-AB<br />
NEX-VG900E: solo salida<br />
Toma de auriculares: minitoma estéreo<br />
( 3,5 mm)<br />
Toma de entrada de MIC: minitoma estéreo<br />
( 3,5 mm)<br />
Pantalla de cristal líquido<br />
Imagen: 7,5 cm (tipo 3,0, formato 16:9)<br />
Número total de píxeles: 921 600 (1 920 480)<br />
General<br />
Requisitos de alimentación: cc de 6,8 V/7,2 V<br />
(batería); cc de 8,4 V (adaptador de<br />
alimentación de ca)<br />
Promedio del consumo de energía:<br />
Con la cámara en modo de grabación<br />
utilizando el visor en un nivel de brillo<br />
normal:<br />
<strong>HD</strong>: 5,2 W STD: 5,0 W<br />
Con la cámara en modo de grabación<br />
utilizando la pantalla LCD en un nivel de<br />
brillo normal:<br />
<strong>HD</strong>: 4,7 W STD: 4,5 W<br />
Temperatura de funcionamiento: de 0 C a 40 C<br />
Temperatura de almacenamiento: de –20 C a<br />
+60 C<br />
Dimensiones (aprox.):<br />
105 mm 130 mm 223 mm (an/al/prf),<br />
incluidas las partes salientes<br />
105 mm 130 mm 227 mm (an/al/prf),<br />
incluidas las partes salientes, la batería<br />
suministrada (NP-FV70) y el adaptador de<br />
montaje (LA-EA3)<br />
Peso (aprox.)<br />
Solo el cuerpo de la cámara:<br />
aprox. 825 g<br />
Al grabar:<br />
aprox. 1 030 g<br />
(Con la batería suministrada (NP-FV70) y el<br />
adaptador de montaje LA-EA3)
Adaptador de alimentación de ca<br />
AC-L200D<br />
Requisitos de alimentación: ca de 100 V a 240 V<br />
50 Hz/60 Hz<br />
Consumo de corriente: 0,35 A - 0,18 A<br />
Consumo de energía: 18 W<br />
Tensión de salida: cc de 8,4 V<br />
Corriente de salida: 1,7 A<br />
Temperatura de funcionamiento: de 0 C a 40 C<br />
Temperatura de almacenamiento: de –20 C a<br />
+60 C<br />
Dimensiones (aprox.): 48 mm 29 mm 81 mm<br />
(an/al/prf), sin las partes salientes<br />
Peso (aprox.): 150 g sin el cable de alimentación<br />
Batería recargable NP-FV70<br />
Tensión de salida máxima: cc de 8,4 V<br />
Tensión de salida: cc de 6,8 V<br />
Tensión de carga máxima: cc de 8,4 V<br />
Corriente de carga máxima: 3,0 A<br />
Capacidad<br />
Normal: 14,0 Wh (2 060 mAh)<br />
Mínima: 13,0 Wh (1 960 mAh)<br />
Tipo: iones de litio<br />
Adaptador de montura (LA-EA3)<br />
Dimensiones (aprox.):<br />
76 mm 69 mm 35 mm (an/al/prf)<br />
Peso (aprox.)<br />
105 g<br />
El diseño y las especificaciones de la videocámara<br />
y sus accesorios están sujetos a cambios sin previo<br />
aviso.<br />
Fabricado bajo licencia de Dolby Laboratories.<br />
Marcas comerciales<br />
“Handycam” y son marcas<br />
comerciales registradas de <strong>Sony</strong> Corporation.<br />
“AVC<strong>HD</strong> Progressive” y el logotipo de “AVC<strong>HD</strong><br />
Progressive” son marcas comerciales de<br />
Panasonic Corporation y <strong>Sony</strong> Corporation.<br />
“Memory Stick”, “ ”, “Memory Stick Duo”,<br />
“ ”, “Memory Stick PRO Duo”,<br />
“ ”, “Memory Stick PRO-<br />
HG Duo”, “ ”, “Memory<br />
Stick XC-HG Duo”, “ ”,<br />
“MagicGate”, “ ”, “MagicGate<br />
Memory Stick” y “MagicGate Memory Stick<br />
Duo” son marcas comerciales o marcas<br />
comerciales registradas de <strong>Sony</strong> Corporation.<br />
“InfoLITHIUM” es una marca comercial de<br />
<strong>Sony</strong> Corporation.<br />
“BRAVIA” es una marca comercial registrada de<br />
<strong>Sony</strong> Corporation.<br />
Los discos Blu-ray Disc y Blu-ray son<br />
marcas comerciales de Blu-ray Disc Association.<br />
Dolby y el símbolo de double-D son marcas<br />
comerciales de Dolby Laboratories.<br />
<strong>HD</strong>MI, el logotipo de <strong>HD</strong>MI y High-Definition<br />
Multimedia Interface son marcas comerciales<br />
o marcas comerciales registradas de <strong>HD</strong>MI<br />
Licensing LLC en los Estados Unidos y en otros<br />
países.<br />
Microsoft, Windows, Windows Vista y DirectX<br />
son marcas comerciales registradas o marcas<br />
comerciales de Microsoft Corporation en los<br />
Estados Unidos y/o en otros países.<br />
Mac y Mac OS son marcas comerciales<br />
registradas de Apple Inc. en los EE. UU. y en<br />
otros países.<br />
Intel, Intel Core y Pentium son marcas<br />
comerciales o marcas comerciales registradas<br />
de Intel Corporation o de sus subsidiarias en<br />
Estados Unidos y en otros países.<br />
“ ” y “PlayStation” son marcas comerciales<br />
registradas de <strong>Sony</strong> Computer Entertainment<br />
Inc..<br />
Adobe, el logotipo de Adobe y Adobe Acrobat<br />
son marcas comerciales registradas o marcas<br />
comerciales de Adobe Systems Incorporated en<br />
los Estados Unidos y/o en otros países.<br />
El logotipo de SDXC es una marca comercial de<br />
SD-3C, LLC.<br />
<br />
MultiMediaCard es una marca comercial de<br />
MultiMediaCard Association.<br />
ES<br />
Información complementaria
ES<br />
Todos los demás nombres de productos<br />
mencionados en este manual pueden ser marcas<br />
comerciales o marcas comerciales registradas de<br />
sus respectivas compañías. Además, y en<br />
este manual no se mencionan de forma expresa en<br />
todos los casos.<br />
Disfrute aún más de la PlayStation 3 descargando<br />
la aplicación para PlayStation 3 desde PlayStation<br />
Store (donde esté disponible).<br />
La aplicación para PlayStation 3 requiere una<br />
cuenta de PlayStation Network y la descarga de<br />
la aplicación.<br />
Accesible en las zonas donde la PlayStation Store<br />
esté disponible.
Referencia rápida<br />
Indicadores de la<br />
pantalla<br />
Central<br />
Izquierda Derecha<br />
Parte inferior<br />
Izquierda<br />
Indicador Significado<br />
Botón MENU<br />
Grabación con disparador<br />
automático<br />
Modo panorámico<br />
[Detección de cara]<br />
ajustado en [Desactivar]<br />
Enfoque manual<br />
/<br />
/<br />
/<br />
Modo de enfoque<br />
SteadyShot desactivado<br />
Cebra<br />
Atenuación<br />
Efecto cine<br />
Destino<br />
Efecto foto<br />
Central<br />
Indicador Significado<br />
[ESPERA]/<br />
[GRAB.]<br />
Estado de la grabación<br />
Procesando<br />
Presentación de<br />
diapositivas ajustada<br />
<br />
Advertencia<br />
<br />
Derecha<br />
Indicador Significado<br />
60%<br />
60i<br />
50i<br />
2,0<br />
0:00:00<br />
00Min<br />
9999<br />
Modo de reproducción<br />
Calidad de grabación de<br />
imágenes (<strong>HD</strong>/STD),<br />
velocidad de fotogramas<br />
(60p/60i/24p), (50p/50i/<br />
25p) y modo de grabación<br />
(PS/FX/FH/HQ/LP)<br />
Carga restante de la<br />
batería<br />
Zoom digital<br />
Zoom óptico<br />
Modo manejo<br />
RAW/JPEG<br />
Soporte de grabación/<br />
reproducción/edición<br />
Contador (hora:minuto:<br />
segundo)<br />
Tiempo de grabación<br />
restante estimado<br />
Tamaño de fotografía<br />
Número aproximado de<br />
fotografías que se pueden<br />
grabar y tamaño de<br />
fotografía<br />
ES<br />
Referencia rápida
0 ES<br />
Indicador Significado<br />
100/112<br />
Carpeta de reproducción<br />
Película o fotografía actual<br />
en reproducción/número<br />
total de películas o<br />
fotografías grabadas<br />
Hay un dispositivo de<br />
soporte externo conectado<br />
Capt. tamaño APS-C<br />
Parte inferior<br />
Indicador Significado<br />
Botón Ver Imágenes<br />
Reducc. ruido viento<br />
Modo audio<br />
Nivel grabac. audio<br />
Visual. nivel aud.<br />
EV Desplazamiento AE<br />
Exposición Automática/<br />
Exposición Manual<br />
IRIS<br />
12dB Ganancia<br />
ISO200 ISO<br />
4000 Velocidad obturador<br />
Botón de presentación de<br />
diapositivas<br />
Nombre del archivo de<br />
101-0005<br />
datos<br />
<br />
Imagen protegida<br />
Flash<br />
Nivel de flash<br />
Reduc. ojos rojos<br />
<br />
Balance blancos<br />
5500K A3 G3<br />
Los indicadores y sus posiciones son<br />
aproximados y pueden ser distintos de los que<br />
se visualizan en realidad.<br />
<br />
Es posible que no aparezcan algunos<br />
indicadores, en función del modelo de la<br />
videocámara.
Componentes y controles<br />
Visor (pág. 23)<br />
Sensor ocular<br />
Palanca de ajuste de la lente del visor<br />
(pág. 23)<br />
Botón PHOTO (pág. 30)<br />
Indicadores (película)/ (fotografía)<br />
(pág. 28)<br />
Gancho para la correa de la bandolera<br />
Botón MODE (pág. 28)<br />
Interruptor ON/OFF (alimentación)<br />
(pág. 19)<br />
Botón START/STOP (pág. 28)<br />
Palanca BATT (liberación de la batería)<br />
(pág. 13)<br />
Zapata de accesorios<br />
Puede acoplar un micrófono de pistola (se<br />
vende por separado) o similar. Si acopla<br />
accesorios a la zapata de accesorios y a<br />
la zapata de interfaz múltiple a la vez, los<br />
accesorios podrían colisionar entre sí y<br />
resultar dañados.<br />
Zapata de interfaz múltiple<br />
Si desea obtener información acerca de<br />
accesorios compatibles con la zapata de<br />
interfaz múltiple, visite el sitio web de <strong>Sony</strong><br />
en su zona o consulte con su distribuidor de<br />
<strong>Sony</strong> o con un centro de servicio técnico local<br />
autorizado de <strong>Sony</strong>.<br />
No se garantiza el funcionamiento con<br />
accesorios de otros fabricantes.<br />
Toma MIC (PLUG IN POWER)<br />
Si se conecta un micrófono externo (se vende<br />
por separado), este tendrá prioridad ante<br />
el micrófono incorporado o un micrófono<br />
acoplado a la zapata de interfaz múltiple.<br />
Botón START/STOP en la empuñadura<br />
Utilice este botón para grabar desde un ángulo<br />
distinto.<br />
Botón EXPANDED FOCUS<br />
El botón EXPANDED FOCUS tiene un punto<br />
táctil. Utilícelo como guía para usar la cámara.<br />
Toma <strong>HD</strong>MI OUT (pág. 36)<br />
ES<br />
1<br />
Referencia rápida
ES<br />
Toma (USB) (pág. 48)<br />
NEX-VG900E: solo salida<br />
Palanca del zoom<br />
Indicador CHG (carga) (pág. 12)
Micrófono<br />
Gancho para la correa de la bandolera<br />
Botón IRIS<br />
Botón GAIN/ISO<br />
Botón SHUTTER SPEED<br />
Botón MANUAL (pág. 31)<br />
Dial MANUAL (pág. 31)<br />
Pantalla de cristal líquido/panel táctil<br />
Si gira el panel de cristal líquido 180<br />
grados, podrá cerrarlo con la pantalla de<br />
cristal líquido mirando hacia fuera. Este<br />
procedimiento resulta conveniente para las<br />
operaciones de reproducción.<br />
Botón RESET<br />
Pulse RESET con un objeto puntiagudo.<br />
Pulse RESET para inicializar todos los ajustes,<br />
incluido el reloj.<br />
Altavoz<br />
Botón ZEBRA<br />
Botón (Ver Imágenes) (pág. 32)<br />
Botón DISPLAY (pág. 22)<br />
Botón PEAKING<br />
Botón PROGRAM AE<br />
Botón WHITE BALANCE<br />
Indicador de acceso de tarjeta de<br />
memoria (pág. 25)<br />
Cuando el indicador está encendido o<br />
parpadea, la videocámara está grabando o<br />
leyendo datos.<br />
Ranura para tarjeta de memoria<br />
(pág. 25)<br />
Botón FOCUS<br />
Terminal de la batería (pág. 12)<br />
ES<br />
Referencia rápida
ES<br />
Toma de entrada de cc (pág. 12)<br />
Toma (auriculares)<br />
Utilice auriculares con minitoma estéreo.<br />
Conector remoto de A/V (pág. 36)<br />
Este terminal sirve de interfaz para conectar<br />
la videocámara con otro dispositivo. Puede<br />
emitir imágenes fijas, películas y sonido<br />
hacia un televisor conectado, o controlar la<br />
videocámara cuando esté montada en un<br />
trípode de vídeo con mando a distancia.<br />
Correa de sujeción (pág. 27)<br />
Receptáculo del trípode (pág. 31)<br />
Montura<br />
Sensor de imagen<br />
No toque ni ensucie el sensor de imagen.<br />
Contactos del objetivo<br />
No toque ni ensucie los contactos del objetivo.<br />
Pin de bloqueo del objetivo<br />
Botón de liberación del objetivo<br />
Indicador de grabación de la cámara<br />
El indicador parpadea cuando la capacidad<br />
restante del soporte de grabación o la energía<br />
de la batería son bajos.<br />
Sensor remoto (pág. 56)
Índice<br />
A<br />
Ajuste de la fecha y la hora ........19<br />
Ajuste del reloj ............................19<br />
Ajustes de soporte .......................25<br />
B<br />
Batería ..........................................12<br />
Borrar ...........................................39<br />
C<br />
Cable de conexión de A/V<br />
.................................................37, 51<br />
Carga de la batería ......................12<br />
Carga de la batería en el<br />
extranjero .....................................14<br />
Código datos ...............................20<br />
Conexión .....................................36<br />
Copiar ..........................................47<br />
Cuidados ......................................63<br />
D<br />
Dial MANUAL ............................31<br />
E<br />
Encendido....................................19<br />
Encendido de la videocámara<br />
.......................................................19<br />
Equipo ..........................................41<br />
Especificaciones ..........................66<br />
F<br />
Fecha/hora ...................................20<br />
Fotografías .............................29, 35<br />
G<br />
Grabación ....................................27<br />
Grabadora de discos ...................50<br />
Guardar imágenes en un soporte<br />
externo .........................................47<br />
Guía práctica de “Handycam”<br />
.......................................................57<br />
I<br />
Image Data Converter ................45<br />
Indicadores de advertencia .......59<br />
Indicadores de la pantalla ..........69<br />
Índice de eventos ........................32<br />
Instalar .........................................42<br />
L<br />
Language Setting ........................21<br />
M<br />
Mantenimiento ...........................63<br />
“Memory Stick” ...........................26<br />
“Memory Stick PRO Duo”.........26<br />
“Memory Stick PRO-HG Duo”<br />
.......................................................26<br />
“Memory Stick XC-HG Duo”<br />
.......................................................26<br />
Menús ...........................................54<br />
Miniatura .....................................39<br />
O<br />
Objetivo .......................................15<br />
P<br />
Películas .................................28, 34<br />
PlayMemories Home..................45<br />
Precauciones ................................63<br />
R<br />
Reproducción ..............................32<br />
RESET ..........................................73<br />
S<br />
Sistema informático ...................41<br />
Software .......................................42<br />
Solución de problemas ...............58<br />
Soporte de grabación .................25<br />
Soporte externo ..........................47<br />
T<br />
Televisor .......................................36<br />
Tiempo de grabación de<br />
películas/número de fotografías<br />
que se pueden grabar .................61<br />
Tiempo de grabación y<br />
reproducción ...............................61<br />
Toma de corriente de pared ......12<br />
Totalmente cargada ....................12<br />
Trípode ...................................31, 74<br />
V<br />
VBR ..............................................61<br />
Visualización de autodiagnóstico<br />
.......................................................59<br />
W<br />
Windows ......................................41<br />
Encontrará las listas de<br />
menús en las páginas de la<br />
54 a la 56.<br />
ES<br />
Referencia rápida